Embed Size (px)
Citation preview
FABRICATION
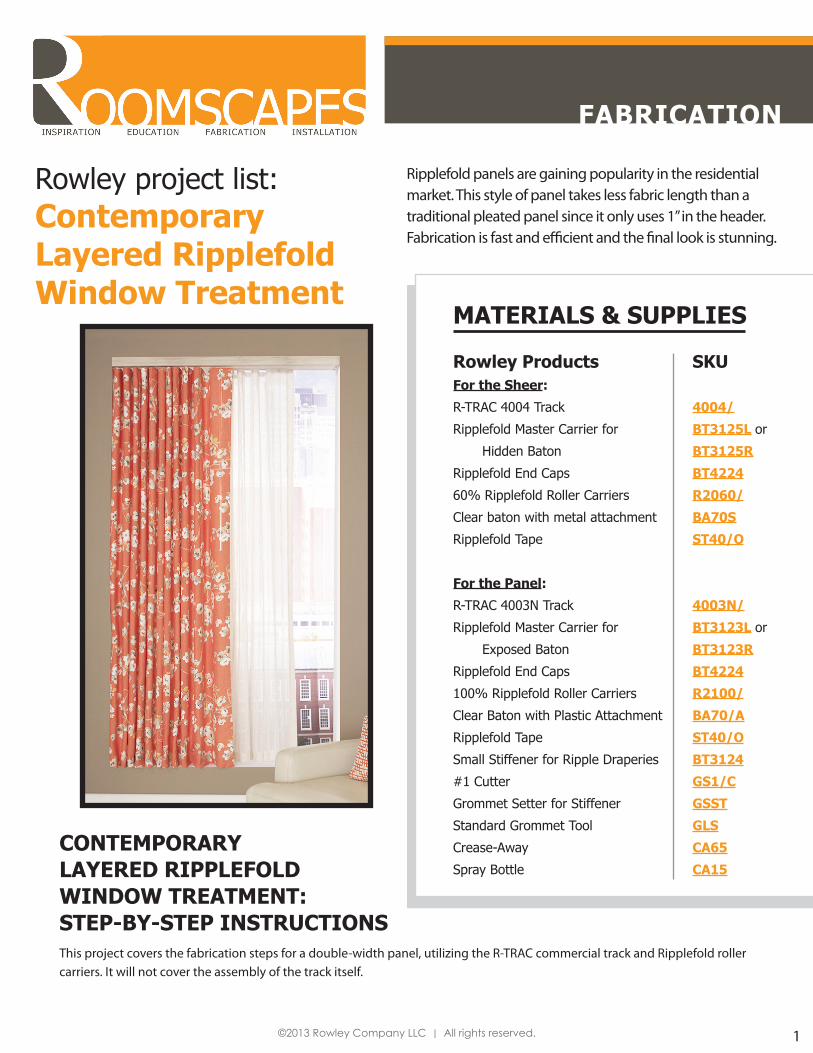
Rowley project list: Contemporary Layered Ripplefold Window Treatment
Ripplefold panels are gaining popularity in the residential market. This style of panel takes less fabric length than a traditional pleated panel since it only uses 1” in the header. Fabrication is fast and efficient and the final look is stunning.
CONTEMPORARY LAYERED RIPPLEFOLD WINDOW TREATMENT: STEP-BY-STEP INSTRUCTIONS
©2013 Rowley Company LLC | All rights reserved. 1
MATERIALS & SUPPLIES
Rowley Products SKUFor the Sheer: R-TRAC 4004 Track 4004/
Ripplefold Master Carrier for BT3125L or
Hidden Baton BT3125R
Ripplefold End Caps BT4224
60% Ripplefold Roller Carriers R2060/
Clear baton with metal attachment BA70S
Ripplefold Tape ST40/O
For the Panel:
R-TRAC 4003N Track 4003N/
Ripplefold Master Carrier for BT3123L or
Exposed Baton BT3123R
Ripplefold End Caps BT4224
100% Ripplefold Roller Carriers R2100/
Clear Baton with Plastic Attachment BA70/A
Ripplefold Tape ST40/O
Small Stiffener for Ripple Draperies BT3124
#1 Cutter GS1/C
Grommet Setter for Stiffener GSST
Standard Grommet Tool GLS
Crease-Away CA65
Spray Bottle CA15
This project covers the fabrication steps for a double-width panel, utilizing the R-TRAC commercial track and Ripplefold roller carriers. It will not cover the assembly of the track itself.
FABRICATION
Rowley project list:layered ripplefold treatment
©2013 Rowley Company LLC | All rights reserved. 2
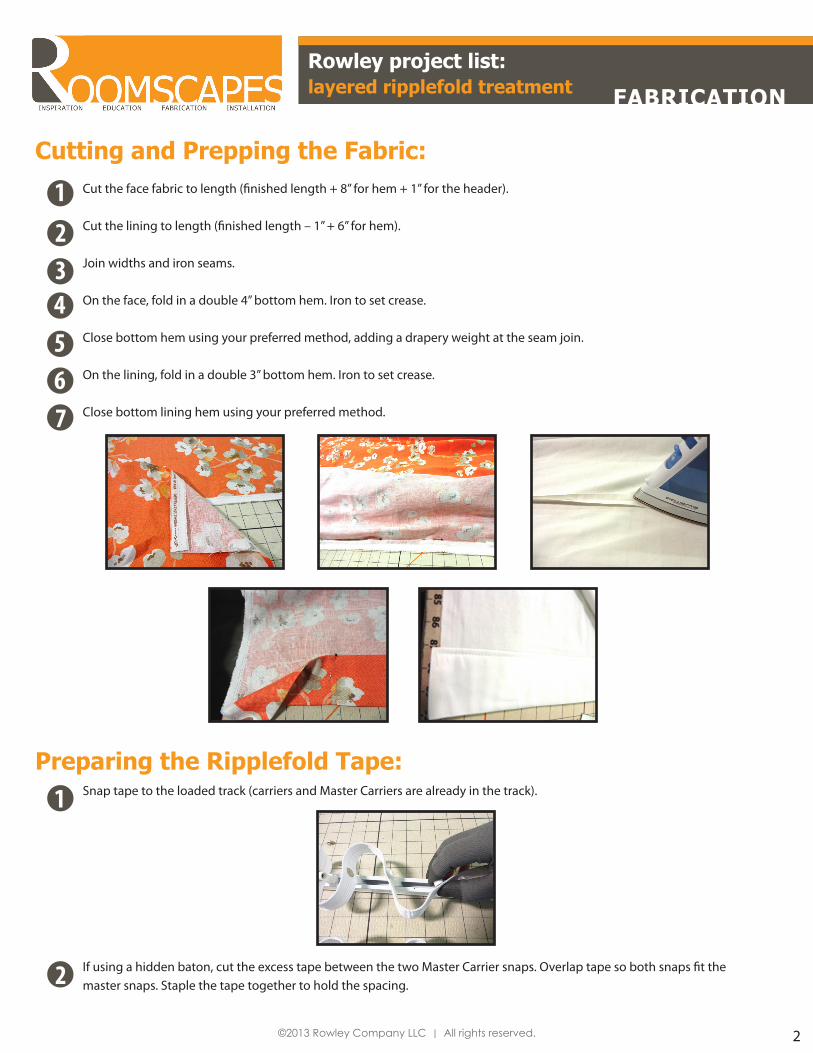
If using a hidden baton, cut the excess tape between the two Master Carrier snaps. Overlap tape so both snaps fit the master snaps. Staple the tape together to hold the spacing.
2
Cut the face fabric to length (finished length + 8” for hem + 1” for the header).
Cut the lining to length (finished length – 1” + 6” for hem).
Join widths and iron seams.
On the face, fold in a double 4” bottom hem. Iron to set crease.
Close bottom hem using your preferred method, adding a drapery weight at the seam join.
On the lining, fold in a double 3” bottom hem. Iron to set crease.
Close bottom lining hem using your preferred method.
1
3
2
1
4
6
Cutting and Prepping the Fabric:
7
5
Preparing the Ripplefold Tape:Snap tape to the loaded track (carriers and Master Carriers are already in the track).
©2013 Rowley Company LLC | All rights reserved.
FABRICATION
3
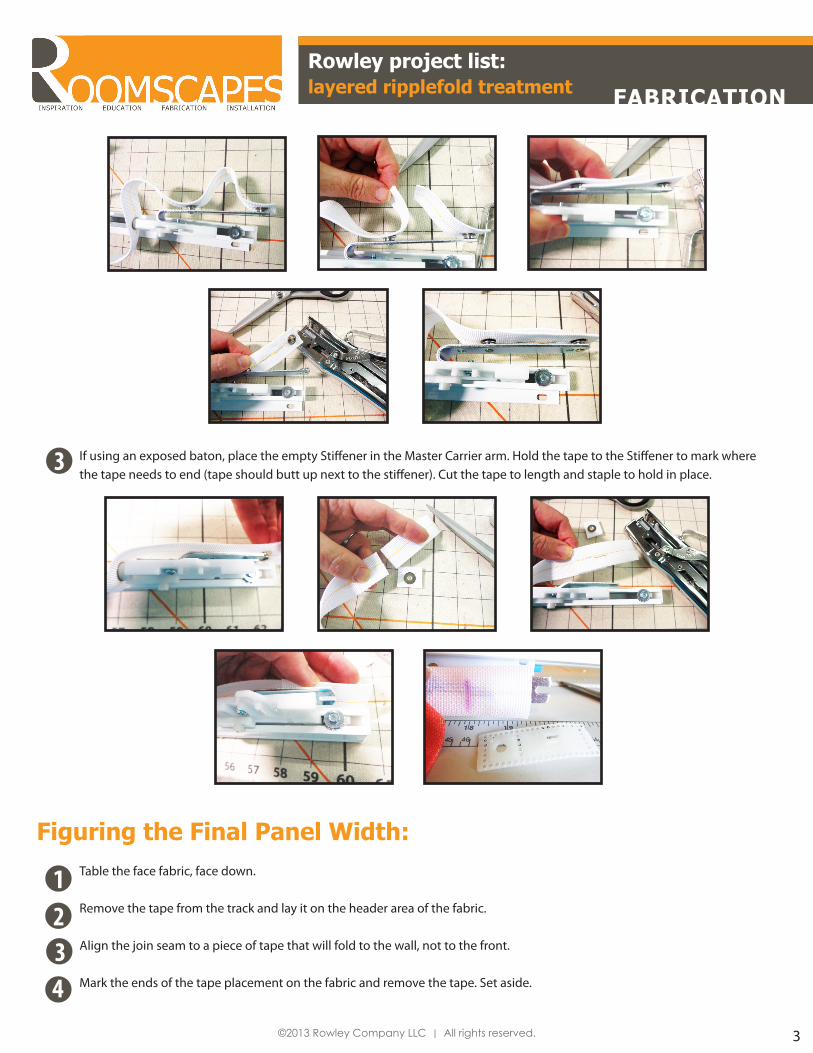
If using an exposed baton, place the empty Stiffener in the Master Carrier arm. Hold the tape to the Stiffener to mark where the tape needs to end (tape should butt up next to the stiffener). Cut the tape to length and staple to hold in place.
3
Table the face fabric, face down.
Remove the tape from the track and lay it on the header area of the fabric.
Align the join seam to a piece of tape that will fold to the wall, not to the front.
Mark the ends of the tape placement on the fabric and remove the tape. Set aside.
Rowley project list:layered ripplefold treatment
3
12
4
Figuring the Final Panel Width:
©2013 Rowley Company LLC | All rights reserved.
FABRICATION
4
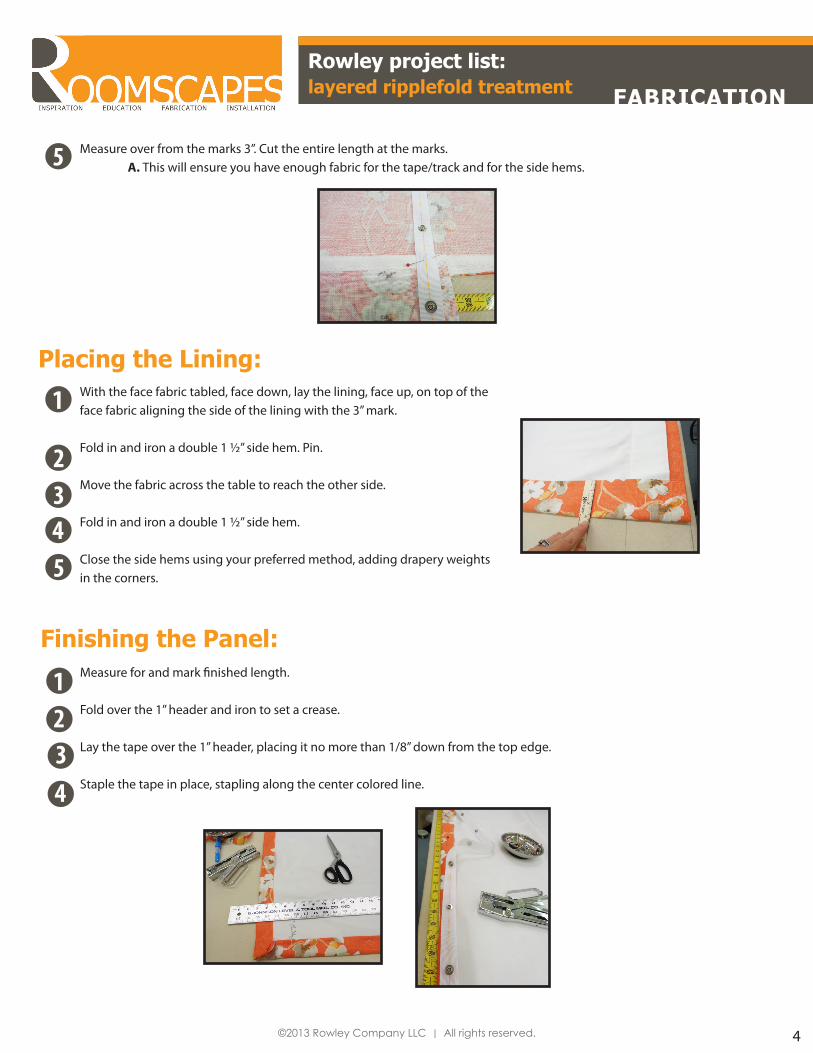
5 Measure over from the marks 3”. Cut the entire length at the marks. A. This will ensure you have enough fabric for the tape/track and for the side hems.
With the face fabric tabled, face down, lay the lining, face up, on top of the face fabric aligning the side of the lining with the 3” mark.
Fold in and iron a double 1 ½” side hem. Pin.
Move the fabric across the table to reach the other side.
Fold in and iron a double 1 ½” side hem.
Close the side hems using your preferred method, adding drapery weights in the corners.
Rowley project list:layered ripplefold treatment
1
23
Measure for and mark finished length.
Fold over the 1” header and iron to set a crease.
Lay the tape over the 1” header, placing it no more than 1/8” down from the top edge.
Staple the tape in place, stapling along the center colored line.
Finishing the Panel:
1234
Placing the Lining:
45
©2013 Rowley Company LLC | All rights reserved.
FABRICATION
5
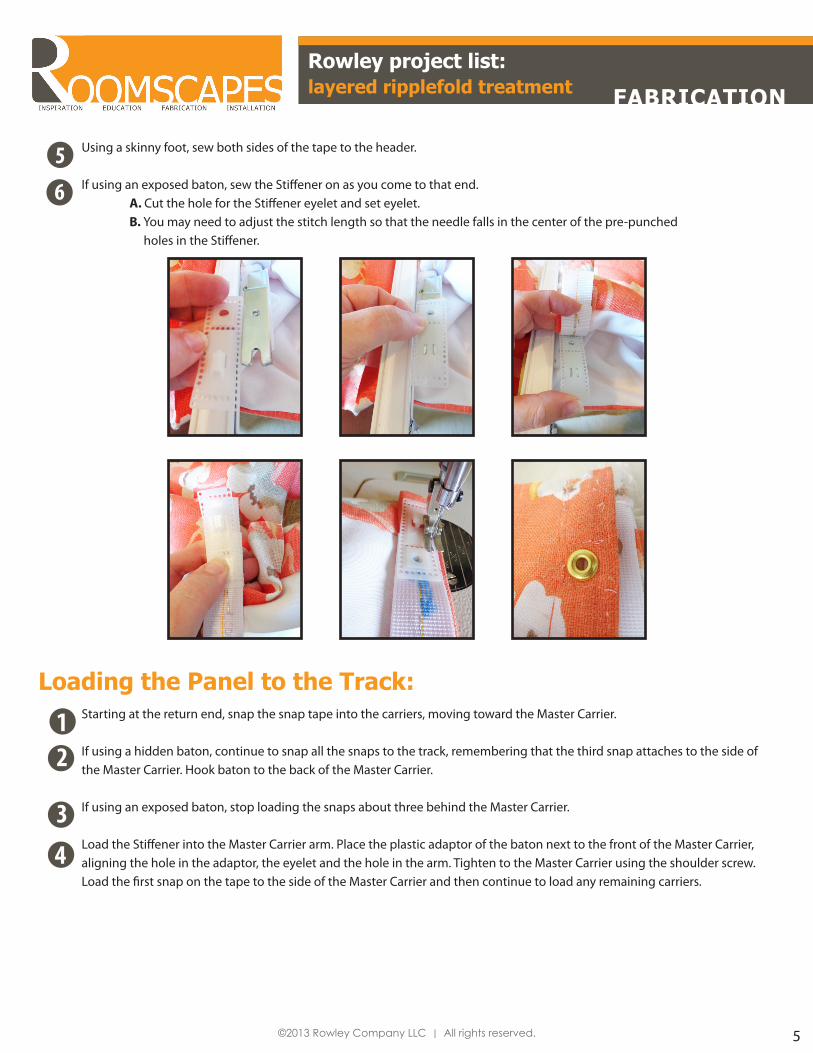
Using a skinny foot, sew both sides of the tape to the header.
If using an exposed baton, sew the Stiffener on as you come to that end. A. Cut the hole for the Stiffener eyelet and set eyelet. B. You may need to adjust the stitch length so that the needle falls in the center of the pre-punched holes in the Stiffener.
Rowley project list:layered ripplefold treatment
5
6
Starting at the return end, snap the snap tape into the carriers, moving toward the Master Carrier.
If using a hidden baton, continue to snap all the snaps to the track, remembering that the third snap attaches to the side of the Master Carrier. Hook baton to the back of the Master Carrier.
If using an exposed baton, stop loading the snaps about three behind the Master Carrier.
Load the Stiffener into the Master Carrier arm. Place the plastic adaptor of the baton next to the front of the Master Carrier, aligning the hole in the adaptor, the eyelet and the hole in the arm. Tighten to the Master Carrier using the shoulder screw. Load the first snap on the tape to the side of the Master Carrier and then continue to load any remaining carriers.
1
Loading the Panel to the Track:
2
3
4

©2013 Rowley Company LLC | All rights reserved.
FABRICATION
6
Rowley project list:layered ripplefold treatment
1 If using a wall mount track, install the brackets, load the track in to the brackets and turn the cam to tighten the track to the brackets.
If using a ceiling mount track, screw straight up through the pre-drilled holes in the track.
Dress the ripples from top to bottom. A. Spritz the face with Crease-Away to release any wrinkles and help train the fabric. B. Steam, if needed.
2
Installing the Tracks and Dressing the Panel:
3