Embed Size (px)
Citation preview
Safety
Activity
Checkpoints
Revised October 2011

Table of Contents Water Sports Alphabetical List
Canoeing 4 Archery 52
Fishing 8 Arts and Crafts 130
Ice Fishing 12 Backpacking 106
Kayaking 15 Bicycling 55
Rowboating 19 Canoeing 4
Sailing 22 Caving 59
Scuba Diving 25 Challenge Courses 62
Snorkeling 28 Climbing and Rappelling 65
Surfing 31 Computer/Online Use 134
Swimming 34 Cross Country Skiing 69
Tubing 39 Downhill Skiing and Snowboarding 72
Waterskiing and Wakeboarding 42 Fencing 75
White-Water Rafting 45 Fishing 8
Windsurfing 49 Geocaching 78
Land Sports Girl Scout Cookie/Council-Sponsored Product Sale 139
Archery 52 Group Camping 110
Bicycling 55 Hayrides 142
Caving 59 Hiking 114
Challenge Courses 62 Horseback Riding 81
Climbing and Rappelling 65 Ice Fishing 12
Cross Country Skiing 69 Ice skating 85
Downhill Skiing and Snowboarding 72 In-line Skating and Roller Skating 88
Fencing 75 Internet Safety Pledge 138
Geocaching 78 Kayaking 15
Horseback Riding 81 Orienteering 117
Ice Skating 85 Other Land Sports 91
In-Line Skating and Roller Skating 88 Outdoor Cooking 120
Other Land Sports 91 Parades and Other Large Group Gatherings 144
Segway 94 Playgrounds 147
Skateboarding 97 Rowboating 19
Sledding, Tobogganing, and Snow Tubing 100 Sailing 22
Snowshoeing 103 Scuba Diving 25
Camping Activities Segway 94
Backpacking 106 Skateboarding 97
Group Camping 110 Sledding, Tobogganing, and Snow Tubing 100
Hiking 114 Snorkeling 28
Orienteering 117 Snowshoeing 103
Outdoor Cooking 120 STEM (Science, Technology, Engineering, and Math) 150
Trip/Travel Camping 125 Surfing 31
Other Activities Swimming 34
Arts and Crafts 130 Theme Parks 153
Computer/Online Use 134 Trip/Travel Camping 125
Internet Safety Pledge 138 Tubing 39
Girl Scout Cookie/Council-Sponsored Product Sale 139 Waterskiing and Wakeboarding 42
Hayrides 142 White-Water Rafting 45
Parades and Other Large Group Gatherings 144 Windsurfing 49
Playgrounds 147
STEM (Science, Technology, Engineering, and Math) 150
Theme Parks 153
3
Introduction to Safety Activity Checkpoints When preparing for any activity with girls, always begin with the Safety Activity Checkpoints written specifically for that particular activity. This introduction provides an overview of the format of each set of checkpoints. Note: In addition to reading these checkpoints yourself, you can also e-mail to or print them for co-volunteers, parents/guardians, and girls.
Know where to do the activity. Quick list of the most common places girls carry out the activity
Include girls with disabilities. Tips and special Web sites for information on including girls with disabilities
Gear
Basic Gear includes clothing and equipment girls are likely to already have in their possession.
Specialized Gear includes clothing and equipment girls may need to purchase, rent, or borrow.
Prepare for the Activity
These checkpoints discuss steps to take in advance of the activity. Not every category is listed here, and not every activity includes these categories.
Communicate with council and parents. Tips for following council guidelines and keeping parents informed
Ensure prerequisites. Ranges from an ability to swim to knowledge of primitive camping
Arrange for transportation and adult supervision. Recommended adult-to-girl ratios for this activity
Verify instructor knowledge and experience. Ensuring the volunteers or on-site instructors possess the proper skill set, knowledge, experience, and/or training/certification
Select a safe site. A game plan for ensuring the safest experience possible
Compile key contacts. Information on itineraries, phone trees, and other contact information
Respect the environment. Tips for ensuring environmental responsibility
Prepare for emergencies. First-aider requirements and other emergency precautions
On the Day of the Activity
These checkpoints include important final reminders on the day of the activity. Not every category is listed here, and not every activity includes these categories.
Get a weather report. Ways to monitor the weather for any outdoor activity and/or activity requiring transportation
Review rescue tips. Activity-specific rescue tips
Use the buddy system. The best way to ensure no one is separated from the group or unable to get help
Be prepared in the event of a storm with lightning. Special details for outdoor warm-weather activities
Links guide you to the best-known and best-respected Web sites.
Know-How for Girls offers games, mini-lessons, and other fun ways to expand girls’ knowledge.
Jargon helps you and the girls master activity-specific terminology.
4
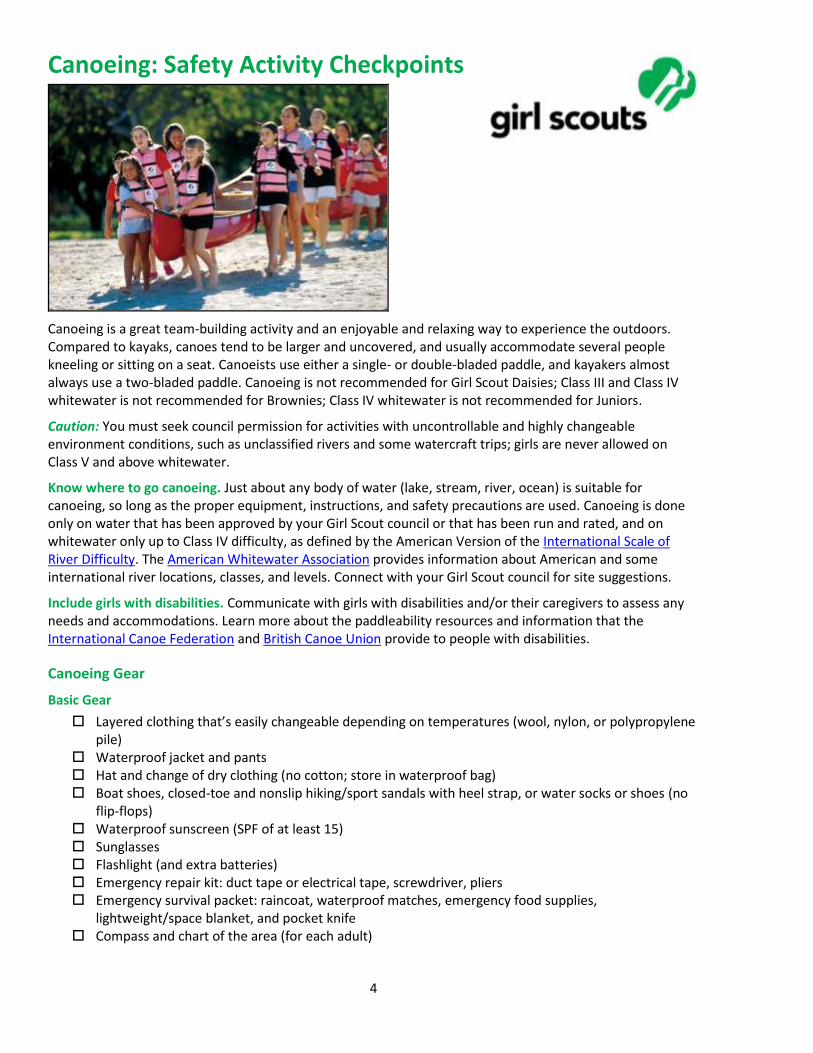
Canoeing: Safety Activity Checkpoints
Canoeing is a great team-building activity and an enjoyable and relaxing way to experience the outdoors. Compared to kayaks, canoes tend to be larger and uncovered, and usually accommodate several people kneeling or sitting on a seat. Canoeists use either a single- or double-bladed paddle, and kayakers almost always use a two-bladed paddle. Canoeing is not recommended for Girl Scout Daisies; Class III and Class IV whitewater is not recommended for Brownies; Class IV whitewater is not recommended for Juniors.
Caution: You must seek council permission for activities with uncontrollable and highly changeable environment conditions, such as unclassified rivers and some watercraft trips; girls are never allowed on Class V and above whitewater.
Know where to go canoeing. Just about any body of water (lake, stream, river, ocean) is suitable for canoeing, so long as the proper equipment, instructions, and safety precautions are used. Canoeing is done only on water that has been approved by your Girl Scout council or that has been run and rated, and on whitewater only up to Class IV difficulty, as defined by the American Version of the International Scale of River Difficulty. The American Whitewater Association provides information about American and some international river locations, classes, and levels. Connect with your Girl Scout council for site suggestions.
Include girls with disabilities. Communicate with girls with disabilities and/or their caregivers to assess any needs and accommodations. Learn more about the paddleability resources and information that the International Canoe Federation and British Canoe Union provide to people with disabilities.
Canoeing Gear
Basic Gear
Layered clothing that’s easily changeable depending on temperatures (wool, nylon, or polypropylene pile)
Waterproof jacket and pants Hat and change of dry clothing (no cotton; store in waterproof bag) Boat shoes, closed-toe and nonslip hiking/sport sandals with heel strap, or water socks or shoes (no
flip-flops) Waterproof sunscreen (SPF of at least 15) Sunglasses Flashlight (and extra batteries) Emergency repair kit: duct tape or electrical tape, screwdriver, pliers Emergency survival packet: raincoat, waterproof matches, emergency food supplies,
lightweight/space blanket, and pocket knife Compass and chart of the area (for each adult)
5
Specialized Gear
Participants wear a U.S. Coast Guard–approved life jacket (Type III recommended) that fits according to weight and height specifications. Inspect life jackets to ensure that they are in good condition and contain no tears. Read about Coast Guard life jackets here.
Wetsuit or drysuit recommended when water is colder than 70 degrees Fahrenheit (should be worn when the combined air and water temperature is less than 100 degrees Fahrenheit or when the combination of cool air, wind chill, and evaporative cooling may lead to hypothermia)
Safety helmet (with flexible, strong, plastic shell with a chin strap and openings for drainage) when canoeing in waters that are Class II and higher
Throw bag Paddles (select appropriate size and style for the canoeists and the activity); have extras on hand; on
longer trips or trips involving whitewater, one extra paddle per canoe is carried; on trips of 48 hours or less on flatwater, each group carries two to three extra paddles
Bailer (a bucket used to remove water from a boat) or sponge Emergency sound device, such as a fog horn or sounding flares At least one graspable and throwable portable-flotation device (Type IV buoyant cushion or ring buoy
or equivalent) is immediately available for each group on the water Painter (see “Canoeing Jargon” for definition) is secured to each end of the canoe
Prepare for Canoeing
Communicate with council and parents. Inform your Girl Scout council and girls’ parents/guardians about the activity, including details about safety precautions and any appropriate clothing or supplies that may be necessary. Follow council procedures for activity approval, certificates of insurance, and council guidelines about girls’ general health examinations. Make arrangements in advance for all transportation and confirm plans before departure.
Girls plan the activity. Keeping their grade-level abilities in mind, encourage girls to take proactive leadership roles in organizing details of the activity.
Ensure participants are able to swim. Participants’ swimming abilities are classified and clearly identified (for instance, with colored headbands to signify beginners, advanced swimmers, etc.) at council-approved sites, or participants provide proof of swimming-test certification. In the absence of swimming-test certification, a swim test is conducted on the day of the activity. Consult with your Girl Scout council for additional guidance.
Arrange for transportation and adult supervision. Ensure that the skill level of the adults is higher than the difficulty of the intended activity and that they have firsthand knowledge of the hazards and rapids on the river to be run. The recommended adult-to-girl ratios are two non-related adults (at least one of whom is female) to every:
12 Girl Scout Brownies
16 Girl Scout Juniors
20 Girl Scout Cadettes
24 Girl Scout Seniors
24 Girl Scout Ambassadors
Plus one adult to each additional:
6 Girl Scout Brownies
8 Girl Scout Juniors
10 Girl Scout Cadettes
12 Girl Scout Seniors
12 Girl Scout Ambassadors
Verify instructor knowledge and experience. For each of the following types of canoeing, one instructor or qualified adult is currently certified with the following certification(s) appropriate for
6
the activity, or equivalent certification, or documented experience and skill in teaching and/or supervision specific to canoeing:
Flatwater canoeing: Flatwater, Moving, Paddling, or River Paddling Instructor Certification from the American Canoe Association, and the certification must include Swiftwater Safety & Rescue and Advanced Swiftwater Safety & Rescue or certification of Waterfront lifeguarding from the American Red Cross; the ratio of instructor to participant is 1 to 12.
Whitewater canoeing: Whitewater Instructor Certification from the American Canoe Association or Small Craft Safety Instructor from the American Red Cross; the ratio of instructor to participant is 1 to 8.
Tripping—flatwater and whitewater canoeing: Moving Water Instructor or White-Water Instructor from the American Canoe Association or Small Craft Safety Instructor from the American Red Cross; the ratio of adult to participant is 1 to 8.
Compile key contacts. Give an itinerary to a contact person at home; call the contact person upon departure and return. Create a list of girls’ parents/guardian contact information, telephone numbers for emergency services and police, and council contacts—keep on hand or post in an easily accessible location.
Research river condition and select canoes appropriate to skill level. Consider weather and water conditions, weight of passengers, and equipment. Also make sure of the following: Craft weight and capacity are not exceeded (some crafts clearly display maximum capacity).
Canoes that are 15 feet or shorter hold no more than two people.
Each canoe is sized for the number of people using it.
You are knowledgeable of the difficulty of the water run and the International Scale of River Difficulty.
You are aware of possible changes in river level and weather and their effects on the run’s level of difficulty.
Prepare for emergencies. If a lifeguard is not on duty, an adult with rescue and resuscitation experience and/or certification is present; at least one adult has small-craft safety certification or equivalent experience (both of these qualifications can be held by one person). Ensure the presence of a waterproof first-aid kit and a first-aider with a current certificate in First Aid, including Adult and Child CPR or CPR/AED, who is prepared to handle cases of near-drowning, immersion hypothermia, and sunburn. If any part of the activity is located 60 minutes or more from emergency medical services, ensure the presence of a first-aider (level 2) with Wilderness and Remote First Aid. See Volunteer Essentials for information about first-aid standards and training.
Respect the environment. Make sure canoeing on whitewater or semi-protected waters meets the Safety Code of American Whitewater.
File a float plan. If participating in a long-distance canoe trip, file a float plan with local authorities that includes names of people on board, destination, craft description, times of departure and return, and additional details about routes and marine communications. The Coast Guard provides an electronic, printable form.
Know the Universal River Signals. The qualified adult and/or canoe instructor understands the American Whitewater codes. Also, a set of whistle and visual signals is established that allows messages to pass between canoes.
Take river-rescue precautions. Instructor/qualified adult attaches a locking blade knife to life jacket or secures it inside the canoe in an easily accessible place.
Transport canoes safely. Canoes are transported on car-top racks or trailers designed to haul canoes. Canoes are secured with two lines across the top and a line at the bow and the stern.
Encourage girls to pack wisely. Additional gear (clothing, sleeping, cooking) is stored in waterproof containers or packages and secured in the canoe. Do not overload the canoe.
7
On the Day of Canoeing
Get a weather report. Never canoe on a stormy day. On the day of the activity, visit weather.com, www.intellicast, or other reliable sources to assess weather conditions, water temperature, and river/wave conditions. If weather conditions prevent the trip, be prepared with a backup plan or alternative activity.
Conduct a swimming test. A test that determines a person’s ability to handle herself when pitched into the water is conducted.
Review rescue tips. Know how to right a tipped canoe and other river-rescue techniques.
Use the buddy system. Girls are divided into teams of two. Each girl chooses a buddy and is responsible for staying with her buddy at all times, warning her buddy of danger, giving her buddy immediate assistance if safe to do so, and seeking help when the situation warrants it. If someone in the group is injured, one person cares for the patient while two others seek help.
Be prepared in the event of a storm with lightning. Exit water immediately and take shelter away from tall objects (including trees, buildings, and electrical poles). Find the lowest point in an open flat area. Squat low to the ground on the balls of the feet, and place hands on knees with head between them. During storms, if shore cannot be reached, secure all loose gear, keep a sharp lookout for other boats and obstructions, and stay low.
Canoeing Links
American Canoe Association: www.americancanoe.org
American Whitewater: www.americanwhitewater.org
Beginner’s Guide to Canoeing: http://canoeing.com/beginner
International Canoe Federation: www.canoeicf.com
National Organization for River Sports: www.nationalrivers.org
U.S. Coast Guard’s Boating Safety Division: www.uscgboating.org
Whitewater Rescue Institute: www.whitewaterrescue.com
Canoeing Know-How for Girls
Master canoeing strokes. The more you know about strokes, the better the canoeist you’ll be. Learn about basic paddle strokes and the single-blade power stroke.
Canoeing Jargon
Painter: A strong line that floats and is used for securing or towing a canoe; recommended to be at least half the length of the canoe
Thwart: Canoe seat

8
Fishing: Safety Activity Checkpoints
Fishing (also referred to as “angling”) is a sport, a leisurely activity, and a major food industry, depending on who you’re talking to. In the United States, freshwater fishing is more popular than saltwater fishing, and varieties include fly fishing, ice fishing (see the “Ice Fishing” Safety Activity Checkpoints), and match fishing (the most popular form of competitive fishing). The best times of day to fish rely on a variety of factors, such as amount of sunlight, temperature, and depths of water, and winds. In general, however, the best times to fish are early in the morning or in the mid-evening.
Know where to fish. Lakes, rivers, ponds, creeks, and the ocean are great places to fish. Connect with your Girl Scout council for site suggestions. Also, Takemefishing.com provides an online tool to select fishing locations in the United States.
Include girls with disabilities. Communicate with girls with disabilities and/or their caregivers to assess any needs and accommodations. Learn more about the resources and information that Global Explorers and Colorado Division of Wildlife provide to people with disabilities.
Fishing Gear
Basic Gear
Layered, non-cotton clothing that’s easily changeable depending on temperatures (waterproof jacket recommended)
Boat shoes, closed-toe and nonslip hiking/sport sandals with heel strap, water socks or shoes (no flip-flops)
Waterproof sunscreen (SPF of at least 15) Sunglasses or sunhat Flashlight Insect repellant If fishing from a boat, reference the “Rowboating” or “Sailing” Safety Activity Checkpoints
Specialized Gear
If girls are wading in water more than knee-deep or fishing from a boat, ensure that they wear a U.S. Coast Guard–approved life jacket (Type III recommended) that fits according to weight and height specifications. Inspect life jackets to ensure that they are in good condition and contain no tears. Read about Coast Guard life jackets here.
Fishing rod appropriate to the type of fishing Fishing tackle (and tackle box) appropriate for the size and skill level of the participants and the type
of fish to be caught Tools for removing hooks and cutting lines Fishing net Cooler and ice for keeping fish cool and avoiding spoilage (if intended for consumption)
9
If fishing from a boat, at least one graspable and throwable personal flotation device (Type IV buoyant cushion or ring buoy or equivalent) is immediately available for each group on the water
Prepare for Fishing
Communicate with council and parents. Inform your Girl Scout council and girls’ parents/guardians about the activity, including details about safety precautions and any appropriate clothing or supplies that may be necessary. Follow council procedures for activity approval, certificates of insurance, and council guidelines about girls’ general health examinations. Make arrangements in advance for all transportation and confirm plans before departure.
Girls plan the activity. Keeping their grade-level abilities in mind, encourage girls to take proactive leadership roles in organizing details of the activity.
Ensure participants are able to swim. Participants’ swimming abilities are classified and clearly identified (for instance, with colored headbands to signify beginners, advanced swimmers, etc.) at council-approved sites, or participants provide proof of swimming-test certification. In the absence of swimming-test certification, a swim test is conducted on the day of the activity. Consult with your Girl Scout council for additional guidance.
Arrange for transportation and adult supervision. The recommended adult-to-girl ratios are two non-related adults (at least one of whom is female) to every:
6 Girl Scout Daisies
12 Girl Scout Brownies
16 Girl Scout Juniors
20 Girl Scout Cadettes
24 Girl Scout Seniors
24 Girl Scout Ambassadors
Plus one adult to each additional:
4 Girl Scout Daisies
6 Girl Scout Brownies
8 Girl Scout Juniors
10 Girl Scout Cadettes
12 Girl Scout Seniors
12 Girl Scout Ambassadors
Verify instructor knowledge and experience. Ensure that the adult or fishing instructor holds the following certification or possesses equivalent certification or documented experience and skill in teaching and/or supervision specific to the activity:
Fishing from a shoreline or dock: American Red Cross Basic Water Rescue certification; the ratio of adult watcher to participant is 1 to 10. Additional adult watchers are necessary for groups that are spread out or out of direct sight.
Fishing while wading: American Red Cross Basic Water Rescue certification; the ratio of adult watcher to participant is 1 to 10. Additional adult watchers are necessary for groups that are spread out or out of direct sight.
Fishing from small craft: American Red Cross Small Craft Safety certification; the ratio of adult watcher to participant is 1 to 10. Additional adult watchers are necessary for groups that are spread out or out of direct sight.
Contact your Girl Scout council about council-conducted learning opportunities.
Compile key contacts. Give an itinerary to a contact person at home; call the contact person upon departure and return. Create a list of girls’ parents/guardian contact information, telephone
10
numbers for emergency services and police, and council contacts—keep on hand or post in an easily accessible location.
Observe fishing and environmental regulations. When selecting a fishing location, following local, state, and federal fishing regulations, and obtain fishing licenses, where required. Use the correct type of bait and fishing gear permitted in that area, and learn about limits on the number, size, and kind of fish that you can keep. Also select a fishing location that is separate from swimming areas.
Select appropriate boats for water and passengers. Make sure craft weight and capacity are not exceeded (some crafts clearly display maximum capacity). Consider weather and water conditions, weight of passengers, and equipment.
File a float plan for extensive boat trips. If going on an extended boat fishing trip, file a float plan with local authorities that includes names of people on board, destination, craft description, times of departure and return, additional details about routes and marine communications, and so on. The Coast Guard provides an electronic, printable form.
Prepare for emergencies. Ensure the presence of a waterproof first-aid kit and a first-aider with a current certificate in First Aid, including Adult and Child CPR or CPR/AED, who is prepared to handle cases of near-drowning, immersion hypothermia, and sunburn. If any part of the activity is located 60 minutes or more from emergency medical services, ensure the presence of a first-aider (level 2) with Wilderness and Remote First Aid. See Volunteer Essentials for information about first-aid standards and training.
On the Day of Fishing
Get a weather and wind report. Never fish on a stormy or extremely windy day. On the day of the fishing activity, visit weather.com or other reliable sources to determine if conditions are appropriate. If weather conditions prevent the fishing trip, be prepared with a backup plan or alternative activity.
Use the buddy system. Girls are divided into teams of two. Each girl chooses a buddy and is responsible for staying with her buddy at all times, warning her buddy of danger, giving her buddy immediate assistance if safe to do so, and seeking help when the situation warrants it. If someone in the group is injured, one person cares for the patient while two others seek help.
Be prepared in the event of a storm with lightning. Exit water immediately and take shelter away from tall objects (including trees, buildings, and electrical poles). Find the lowest point in an open flat area. Squat low to the ground on the balls of the feet, and place hands on knees with head between them. During storms, if shore cannot be reached, secure all loose gear, keep a sharp lookout for other boats and obstructions, head into the wind at a 45-degree angle, and stay low.
Respect fish and wildlife. Whenever possible, use barbless hooks, and return live fish to the water. Remove fishing gear, bait, and dead fish at the end of the fishing activity.
Fishing Links
American Sportfishing Association: www.asafishing.org
Association of Fish and Wildlife Agencies: www.fishwildlife.org
International Game Fish Association: www.igfa.org
Leave No Trace: www.lnt.org
Take Me Fishing: www.takemefishing.org
U.S. Coast Guard’s Boating Safety Division: www.uscgboating.org
Fishing Know-How for Girls
Lure them in. Learn all about the vast variety of artificial and live fish bait on this fishing site.
Learn about rods and reels. Spincast, spinning, baitcast, and fly are the four reel types on the Take Me Fishing site.

11
Fishing Jargon
Daisy chain: A “chain” of plastic, hookless lures, the main purpose of which is to attract a school of fish closer to the lures with hooks
Jig: A weighted hook with a lead head opposite the sharp tip. Jigs are often covered with a minnow, crawfish, or worm to get a fish’s attention
12
Ice Fishing: Safety Activity Checkpoints
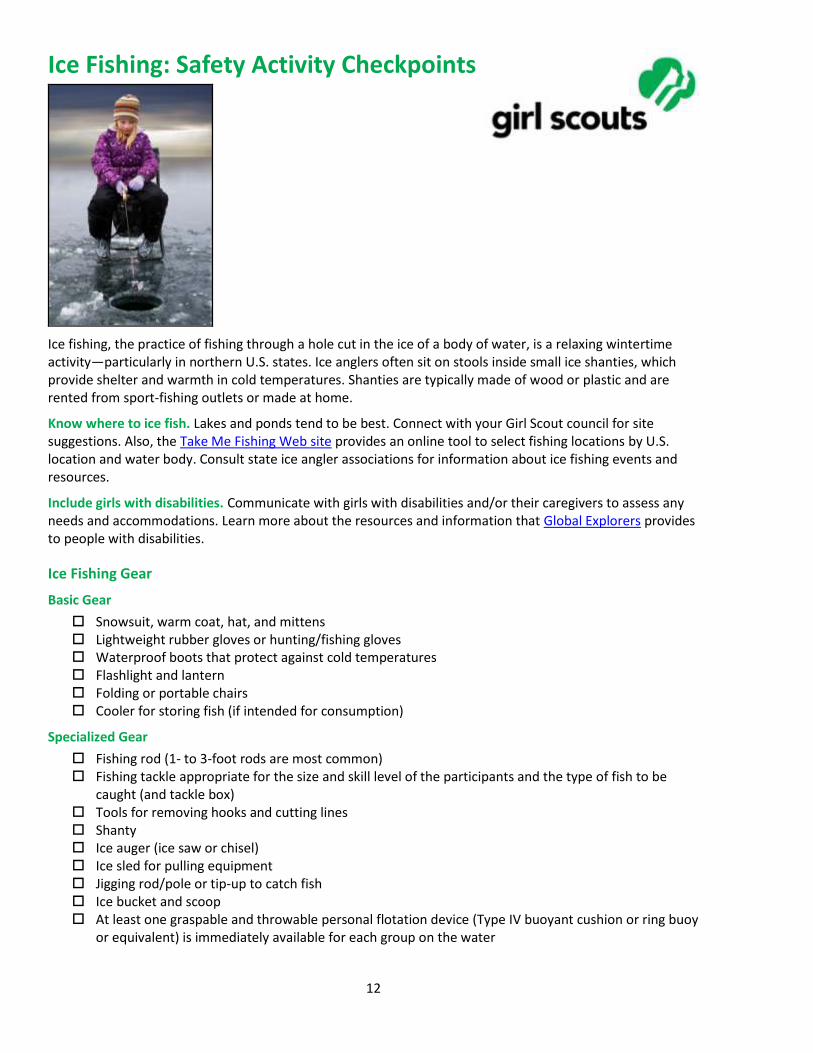
Ice fishing, the practice of fishing through a hole cut in the ice of a body of water, is a relaxing wintertime activity—particularly in northern U.S. states. Ice anglers often sit on stools inside small ice shanties, which provide shelter and warmth in cold temperatures. Shanties are typically made of wood or plastic and are rented from sport-fishing outlets or made at home.
Know where to ice fish. Lakes and ponds tend to be best. Connect with your Girl Scout council for site suggestions. Also, the Take Me Fishing Web site provides an online tool to select fishing locations by U.S. location and water body. Consult state ice angler associations for information about ice fishing events and resources.
Include girls with disabilities. Communicate with girls with disabilities and/or their caregivers to assess any needs and accommodations. Learn more about the resources and information that Global Explorers provides to people with disabilities.
Ice Fishing Gear
Basic Gear
Snowsuit, warm coat, hat, and mittens Lightweight rubber gloves or hunting/fishing gloves Waterproof boots that protect against cold temperatures Flashlight and lantern Folding or portable chairs Cooler for storing fish (if intended for consumption)
Specialized Gear
Fishing rod (1- to 3-foot rods are most common) Fishing tackle appropriate for the size and skill level of the participants and the type of fish to be
caught (and tackle box) Tools for removing hooks and cutting lines Shanty Ice auger (ice saw or chisel) Ice sled for pulling equipment Jigging rod/pole or tip-up to catch fish Ice bucket and scoop At least one graspable and throwable personal flotation device (Type IV buoyant cushion or ring buoy
or equivalent) is immediately available for each group on the water
13
Prepare for Ice Fishing
Communicate with council and parents. Inform your Girl Scout council and girls’ parents/guardians about the activity, including details about safety precautions and any appropriate clothing or supplies that may be necessary. Follow council procedures for activity approval, certificates of insurance, and council guidelines about girls’ general health examinations. Make arrangements in advance for all transportation and confirm plans before departure.
Girls plan the activity. Keeping their grade-level abilities in mind, encourage girls to take proactive leadership roles in organizing details of the activity.
Arrange for transportation and adult supervision. The recommended adult-to-girl ratios are two non-related adults (at least one of whom is female) to every:
6 Girl Scout Daisies
12 Girl Scout Brownies
16 Girl Scout Juniors
20 Girl Scout Cadettes
24 Girl Scout Seniors
24 Girl Scout Ambassadors
Plus one adult to each additional:
4 Girl Scout Daisies
6 Girl Scout Brownies
8 Girl Scout Juniors
10 Girl Scout Cadettes
12 Girl Scout Seniors
12 Girl Scout Ambassadors
Verify instructor knowledge and experience. Ensure that the adult or ice-fishing instructor holds American Red Cross Basic Water Rescue certification or possesses equivalent certification; the ratio of instructor to participant is 1 to 10. Additional adult watchers are necessary for groups that are spread out or out of direct sight.
Compile key contacts. Give an itinerary to a contact person at home; call the contact person upon departure and return. Create a list of girls’ parents/guardian contact information, telephone numbers for emergency services and police, and council contacts—keep on hand or post in an easily accessible location.
Observe fishing and environmental regulations. When selecting an ice-fishing location, follow local, state, and federal fishing regulations, and obtain fishing licenses, where required. Use the correct type of bait and fishing gear permitted in that area, and learn about limits on the number, size, and kind of fish that you can keep.
Verify safety of ice-fishing location. Ensure that ice is solid and thick enough to support the ice fishers’ weight. Opinions vary about the appropriate thickness of ice; some ice anglers fish in ice that is a minimum of 4 inches, while others fish in ice that is 5 to 6 inches.
Prepare for emergencies. Ensure the presence of a waterproof first-aid kit and a first-aider with a current certificate in First Aid, including Adult and Child CPR or CPR/AED, who is prepared to handle cases of near-drowning, immersion hypothermia, and sunburn. If any part of the activity is located 60 minutes or more from emergency medical services, ensure the presence of a first-aider (level 2) with Wilderness and Remote First Aid. Basic ice rescue techniques are understood and practiced. Appropriate rescue equipment is on hand (for example, ring buoy, rope, throw bag, pole, ladder, boat, where necessary). See Volunteer Essentials for information about first-aid standards and training.
14
On the Day of Ice Fishing
Get a weather report. Never fish on a stormy or extremely cold day. On the day of the ice fishing activity, visit weather.com or other reliable sources to determine if conditions are appropriate. If weather conditions prevent the ice-fishing trip, be prepared with a backup plan or alternate activity.
Use the buddy system. Girls are divided into teams of two. Each girl chooses a buddy and is responsible for staying with her buddy at all times, warning her buddy of danger, giving her buddy immediate assistance if safe to do so, and seeking help when the situation warrants it. If someone in the group is injured, one person cares for the patient while two others seek help.
Be prepared in the event of a storm with lightning. Exit the ice-fishing location immediately and take shelter away from tall objects (including trees, buildings, and electrical poles). Find the lowest point in an open flat area. Squat low to the ground on the balls of the feet, and place hands on knees with head between them.
Respect fish and wildlife. Whenever possible, use barbless hooks, and return live fish to the water. Remove fishing gear, bait, and dead fish at the end of the fishing activity.
Ice Fishing Links
American Sportfishing Association: www.asafishing.org
Association of Fish and Wildlife Agencies: www.fishwildlife.org
International Game Fish Association: www.igfa.org
Leave No Trace: www.lnt.org
Take Me Fishing: www.takemefishing.org
IceLeaders.com: www.iceleaders.com
Ice Fishing Know-How for Girls
Learn the basics of ice fishing. Know before you go! Watch an instructional Wisconsin Department of Natural Resources video.
Learn how to set up an ice-fishing tip-up. A tip-up is a device that holds a fishing line attached to a flag that tips up when a fish bites the attached bait. Watch an instructional video on YouTube.
Ice Fishing Jargon
Skimmer: Tool that looks like a long-handled soup ladle and is used for scooping out slush and ice chips from a fishing hole
Gaff hook: Large, heavy, special-purpose hook to help hoist a slippery fish through a hole in the ice
15
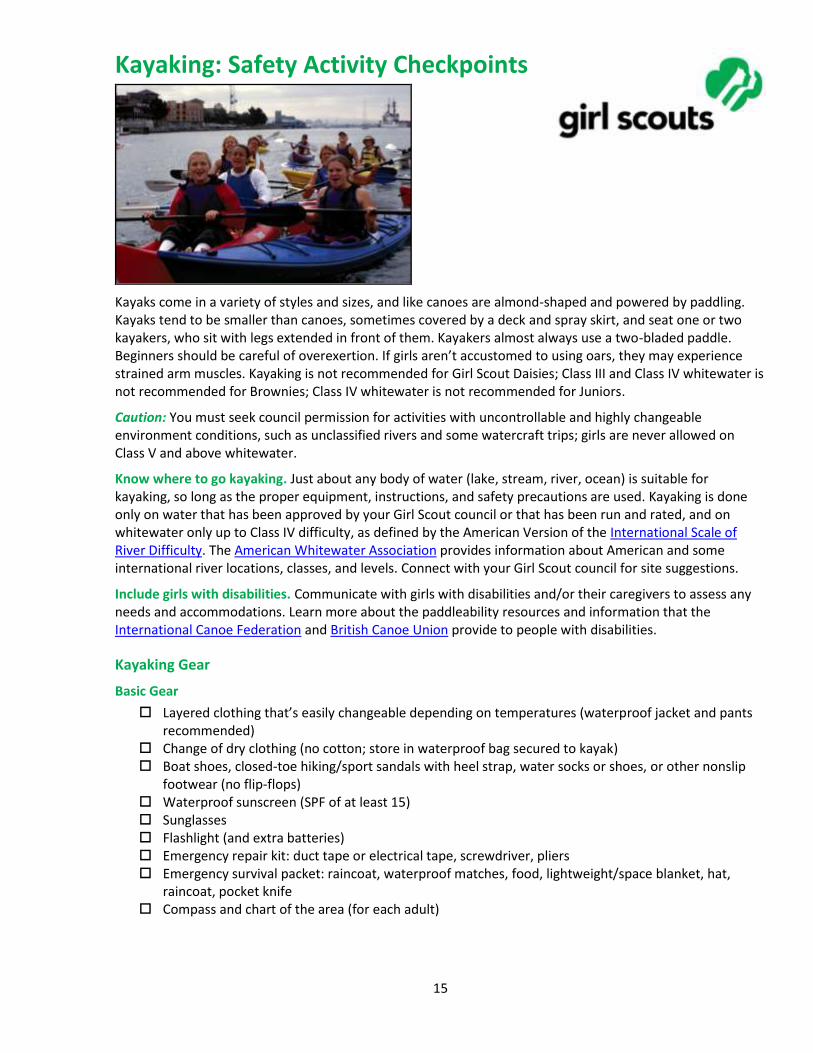
Kayaking: Safety Activity Checkpoints
Kayaks come in a variety of styles and sizes, and like canoes are almond-shaped and powered by paddling. Kayaks tend to be smaller than canoes, sometimes covered by a deck and spray skirt, and seat one or two kayakers, who sit with legs extended in front of them. Kayakers almost always use a two-bladed paddle. Beginners should be careful of overexertion. If girls aren’t accustomed to using oars, they may experience strained arm muscles. Kayaking is not recommended for Girl Scout Daisies; Class III and Class IV whitewater is not recommended for Brownies; Class IV whitewater is not recommended for Juniors.
Caution: You must seek council permission for activities with uncontrollable and highly changeable environment conditions, such as unclassified rivers and some watercraft trips; girls are never allowed on Class V and above whitewater.
Know where to go kayaking. Just about any body of water (lake, stream, river, ocean) is suitable for kayaking, so long as the proper equipment, instructions, and safety precautions are used. Kayaking is done only on water that has been approved by your Girl Scout council or that has been run and rated, and on whitewater only up to Class IV difficulty, as defined by the American Version of the International Scale of River Difficulty. The American Whitewater Association provides information about American and some international river locations, classes, and levels. Connect with your Girl Scout council for site suggestions.
Include girls with disabilities. Communicate with girls with disabilities and/or their caregivers to assess any needs and accommodations. Learn more about the paddleability resources and information that the International Canoe Federation and British Canoe Union provide to people with disabilities.
Kayaking Gear
Basic Gear
Layered clothing that’s easily changeable depending on temperatures (waterproof jacket and pants recommended)
Change of dry clothing (no cotton; store in waterproof bag secured to kayak) Boat shoes, closed-toe hiking/sport sandals with heel strap, water socks or shoes, or other nonslip
footwear (no flip-flops) Waterproof sunscreen (SPF of at least 15) Sunglasses Flashlight (and extra batteries) Emergency repair kit: duct tape or electrical tape, screwdriver, pliers Emergency survival packet: raincoat, waterproof matches, food, lightweight/space blanket, hat,
raincoat, pocket knife Compass and chart of the area (for each adult)
16
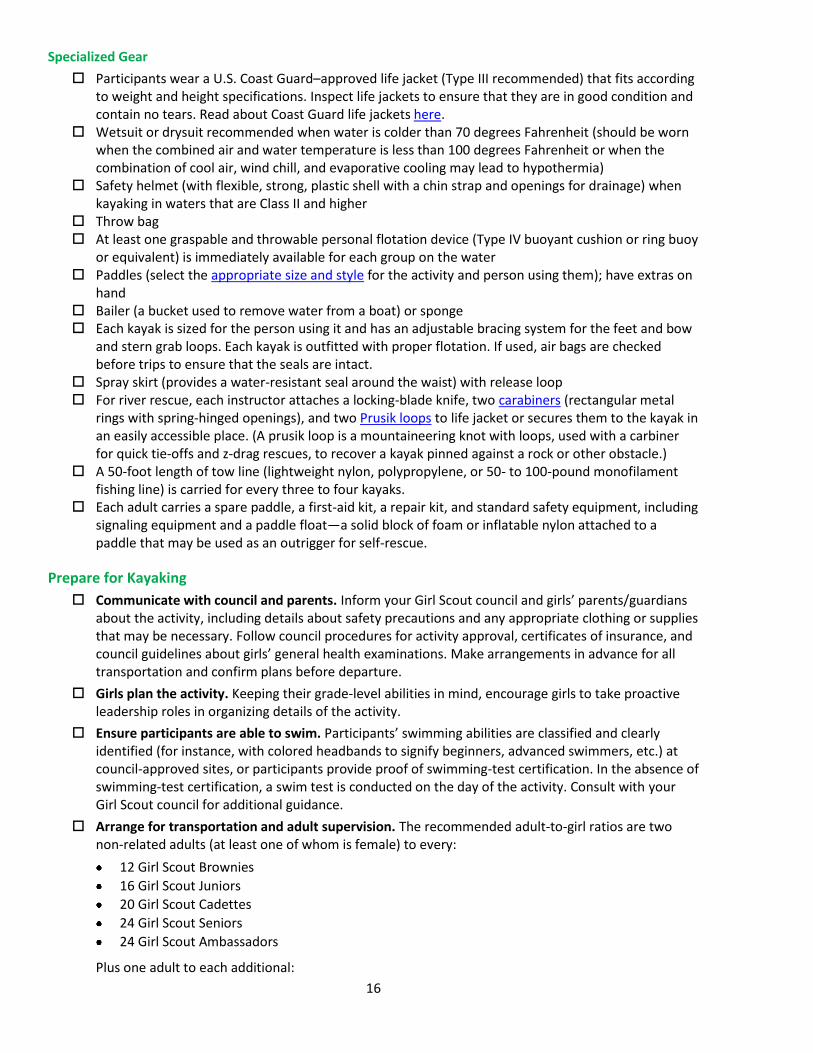
Specialized Gear
Participants wear a U.S. Coast Guard–approved life jacket (Type III recommended) that fits according to weight and height specifications. Inspect life jackets to ensure that they are in good condition and contain no tears. Read about Coast Guard life jackets here.
Wetsuit or drysuit recommended when water is colder than 70 degrees Fahrenheit (should be worn when the combined air and water temperature is less than 100 degrees Fahrenheit or when the combination of cool air, wind chill, and evaporative cooling may lead to hypothermia)
Safety helmet (with flexible, strong, plastic shell with a chin strap and openings for drainage) when kayaking in waters that are Class II and higher
Throw bag At least one graspable and throwable personal flotation device (Type IV buoyant cushion or ring buoy
or equivalent) is immediately available for each group on the water Paddles (select the appropriate size and style for the activity and person using them); have extras on
hand Bailer (a bucket used to remove water from a boat) or sponge Each kayak is sized for the person using it and has an adjustable bracing system for the feet and bow
and stern grab loops. Each kayak is outfitted with proper flotation. If used, air bags are checked before trips to ensure that the seals are intact.
Spray skirt (provides a water-resistant seal around the waist) with release loop For river rescue, each instructor attaches a locking-blade knife, two carabiners (rectangular metal
rings with spring-hinged openings), and two Prusik loops to life jacket or secures them to the kayak in an easily accessible place. (A prusik loop is a mountaineering knot with loops, used with a carbiner for quick tie-offs and z-drag rescues, to recover a kayak pinned against a rock or other obstacle.)
A 50-foot length of tow line (lightweight nylon, polypropylene, or 50- to 100-pound monofilament fishing line) is carried for every three to four kayaks.
Each adult carries a spare paddle, a first-aid kit, a repair kit, and standard safety equipment, including signaling equipment and a paddle float—a solid block of foam or inflatable nylon attached to a paddle that may be used as an outrigger for self-rescue.
Prepare for Kayaking
Communicate with council and parents. Inform your Girl Scout council and girls’ parents/guardians about the activity, including details about safety precautions and any appropriate clothing or supplies that may be necessary. Follow council procedures for activity approval, certificates of insurance, and council guidelines about girls’ general health examinations. Make arrangements in advance for all transportation and confirm plans before departure.
Girls plan the activity. Keeping their grade-level abilities in mind, encourage girls to take proactive leadership roles in organizing details of the activity.
Ensure participants are able to swim. Participants’ swimming abilities are classified and clearly identified (for instance, with colored headbands to signify beginners, advanced swimmers, etc.) at council-approved sites, or participants provide proof of swimming-test certification. In the absence of swimming-test certification, a swim test is conducted on the day of the activity. Consult with your Girl Scout council for additional guidance.
Arrange for transportation and adult supervision. The recommended adult-to-girl ratios are two non-related adults (at least one of whom is female) to every:
12 Girl Scout Brownies
16 Girl Scout Juniors
20 Girl Scout Cadettes
24 Girl Scout Seniors
24 Girl Scout Ambassadors
Plus one adult to each additional:
17
6 Girl Scout Brownies
8 Girl Scout Juniors
10 Girl Scout Cadettes
12 Girl Scout Seniors
12 Girl Scout Ambassadors
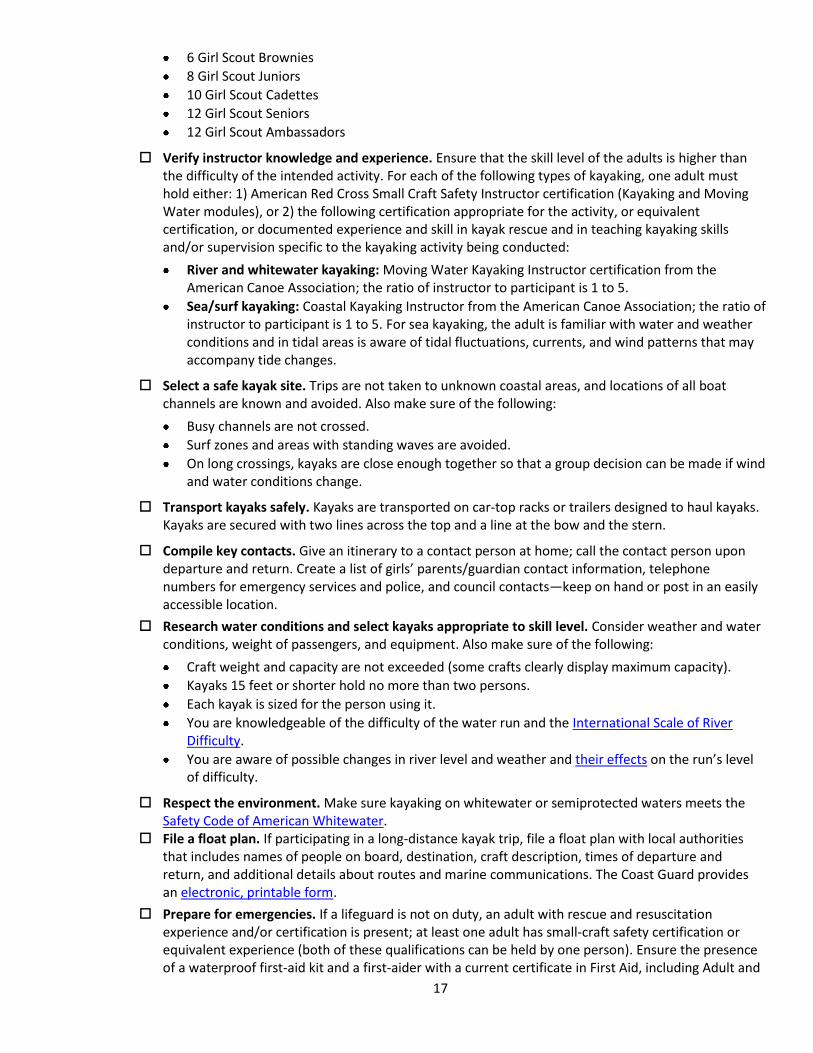
Verify instructor knowledge and experience. Ensure that the skill level of the adults is higher than the difficulty of the intended activity. For each of the following types of kayaking, one adult must hold either: 1) American Red Cross Small Craft Safety Instructor certification (Kayaking and Moving Water modules), or 2) the following certification appropriate for the activity, or equivalent certification, or documented experience and skill in kayak rescue and in teaching kayaking skills and/or supervision specific to the kayaking activity being conducted:
River and whitewater kayaking: Moving Water Kayaking Instructor certification from the American Canoe Association; the ratio of instructor to participant is 1 to 5.
Sea/surf kayaking: Coastal Kayaking Instructor from the American Canoe Association; the ratio of instructor to participant is 1 to 5. For sea kayaking, the adult is familiar with water and weather conditions and in tidal areas is aware of tidal fluctuations, currents, and wind patterns that may accompany tide changes.
Select a safe kayak site. Trips are not taken to unknown coastal areas, and locations of all boat channels are known and avoided. Also make sure of the following:
Busy channels are not crossed.
Surf zones and areas with standing waves are avoided.
On long crossings, kayaks are close enough together so that a group decision can be made if wind and water conditions change.
Transport kayaks safely. Kayaks are transported on car-top racks or trailers designed to haul kayaks. Kayaks are secured with two lines across the top and a line at the bow and the stern.
Compile key contacts. Give an itinerary to a contact person at home; call the contact person upon departure and return. Create a list of girls’ parents/guardian contact information, telephone numbers for emergency services and police, and council contacts—keep on hand or post in an easily accessible location.
Research water conditions and select kayaks appropriate to skill level. Consider weather and water conditions, weight of passengers, and equipment. Also make sure of the following:
Craft weight and capacity are not exceeded (some crafts clearly display maximum capacity).
Kayaks 15 feet or shorter hold no more than two persons.
Each kayak is sized for the person using it.
You are knowledgeable of the difficulty of the water run and the International Scale of River Difficulty.
You are aware of possible changes in river level and weather and their effects on the run’s level of difficulty.
Respect the environment. Make sure kayaking on whitewater or semiprotected waters meets the Safety Code of American Whitewater.
File a float plan. If participating in a long-distance kayak trip, file a float plan with local authorities that includes names of people on board, destination, craft description, times of departure and return, and additional details about routes and marine communications. The Coast Guard provides an electronic, printable form.
Prepare for emergencies. If a lifeguard is not on duty, an adult with rescue and resuscitation experience and/or certification is present; at least one adult has small-craft safety certification or equivalent experience (both of these qualifications can be held by one person). Ensure the presence of a waterproof first-aid kit and a first-aider with a current certificate in First Aid, including Adult and
18
Child CPR or CPR/AED, who is prepared to handle cases of near-drowning, immersion hypothermia, and sunburn. If participating in whitewater kayaking or an overnight trip, or if any part of the activity is located 60 minutes or more from emergency medical services, ensure the presence of a first-aider (level 2) with Wilderness and Remote First Aid. See Volunteer Essentials for information about first-aid standards and training.
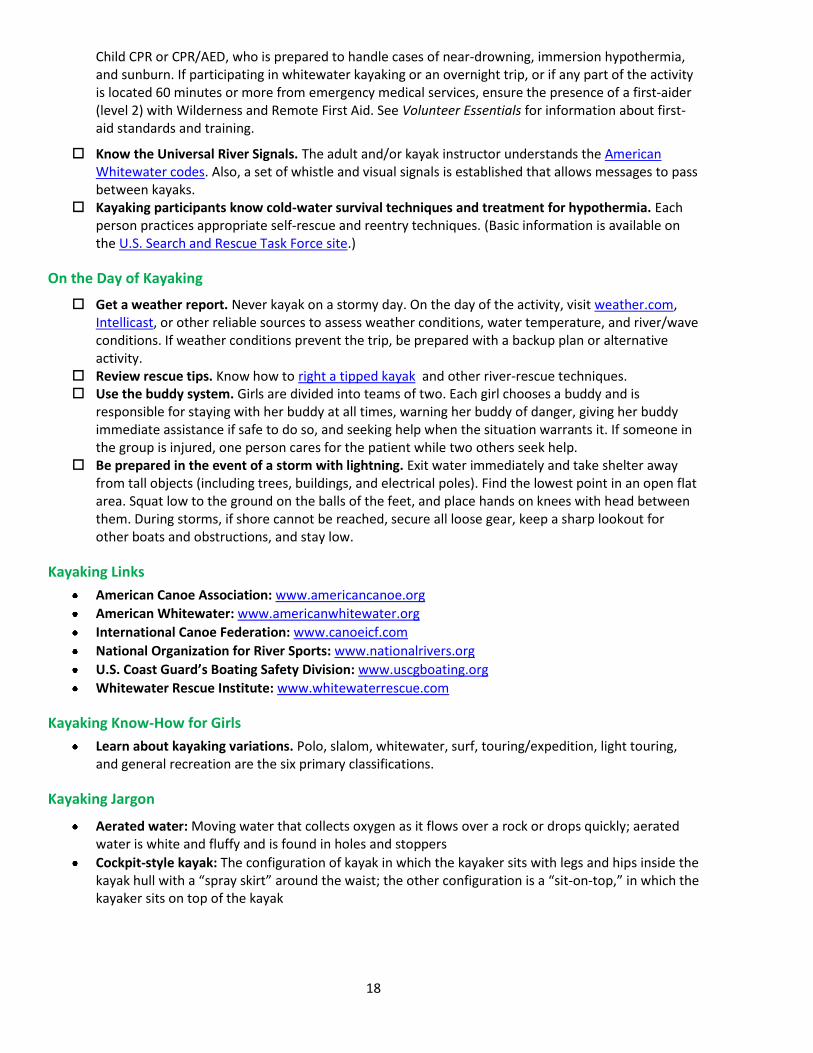
Know the Universal River Signals. The adult and/or kayak instructor understands the American Whitewater codes. Also, a set of whistle and visual signals is established that allows messages to pass between kayaks.
Kayaking participants know cold-water survival techniques and treatment for hypothermia. Each person practices appropriate self-rescue and reentry techniques. (Basic information is available on the U.S. Search and Rescue Task Force site.)
On the Day of Kayaking
Get a weather report. Never kayak on a stormy day. On the day of the activity, visit weather.com, Intellicast, or other reliable sources to assess weather conditions, water temperature, and river/wave conditions. If weather conditions prevent the trip, be prepared with a backup plan or alternative activity.
Review rescue tips. Know how to right a tipped kayak and other river-rescue techniques. Use the buddy system. Girls are divided into teams of two. Each girl chooses a buddy and is
responsible for staying with her buddy at all times, warning her buddy of danger, giving her buddy immediate assistance if safe to do so, and seeking help when the situation warrants it. If someone in the group is injured, one person cares for the patient while two others seek help.
Be prepared in the event of a storm with lightning. Exit water immediately and take shelter away from tall objects (including trees, buildings, and electrical poles). Find the lowest point in an open flat area. Squat low to the ground on the balls of the feet, and place hands on knees with head between them. During storms, if shore cannot be reached, secure all loose gear, keep a sharp lookout for other boats and obstructions, and stay low.
Kayaking Links
American Canoe Association: www.americancanoe.org
American Whitewater: www.americanwhitewater.org
International Canoe Federation: www.canoeicf.com
National Organization for River Sports: www.nationalrivers.org
U.S. Coast Guard’s Boating Safety Division: www.uscgboating.org
Whitewater Rescue Institute: www.whitewaterrescue.com
Kayaking Know-How for Girls
Learn about kayaking variations. Polo, slalom, whitewater, surf, touring/expedition, light touring, and general recreation are the six primary classifications.
Kayaking Jargon
Aerated water: Moving water that collects oxygen as it flows over a rock or drops quickly; aerated water is white and fluffy and is found in holes and stoppers
Cockpit-style kayak: The configuration of kayak in which the kayaker sits with legs and hips inside the kayak hull with a “spray skirt” around the waist; the other configuration is a “sit-on-top,” in which the kayaker sits on top of the kayak

19
Rowboating: Safety Activity Checkpoints
One of the most historic means of transportation, rowboating has evolved to become a leisurely activity and competitive sport. Ocean rowing, competitive rowing, and Venetian are just a handful of rowing styles; in racing rowboats, an eight-oared shell can hit speeds of up to 16 miles per hour.
An excellent form of relaxation and exercise as a group or individual activity, beginners should be careful of overexertion. If girls aren’t accustomed to using oars, they may experience strained arm muscles.
Know where to rowboat. Lakes, rivers, and ponds are most common for rowing, but the ocean can be suitable so long as waves are manageable. Connect with your Girl Scout council for site suggestions.
Include girls with disabilities. Communicate with girls with disabilities and/or their caregivers to assess any needs and accommodations. Learn more about the resources and information that Global Explorers and Wilderness Inquiry provide to people with disabilities.
Rowboating Gear
Basic Gear
Layered clothing that’s easily changeable depending on temperatures (waterproof jacket recommended)
Boat shoes, closed-toe and nonslip hiking/sport sandals with heel strap, or water socks or shoes (no flip-flops)
Waterproof sunscreen (SPF of at least 15) Sunglasses or sunhat Emergency sound-producing device, such as a horn or whistle Flashlight Insect repellant
Specialized Gear
Participants wear a U.S. Coast Guard–approved life jacket (Type III recommended) that fits according to weight and height specifications. Inspect life jackets to ensure that they are in good condition and contain no tears. Read about Coast Guard life jackets here.
Emergency repair kit containing quick-repair items such as duct tape, rope, aluminum or fiberglass repair shields
Oars Bow and stern lines to secure each end of the boat to the pier or dock Anchor that is appropriate for the water bottom (if necessary) Bailer (a bucket used to remove water from a boat) At least one graspable and throwable personal flotation device (Type IV buoyant cushion or ring buoy
or equivalent) is immediately available for each group on the water.
20
Prepare for Rowboating
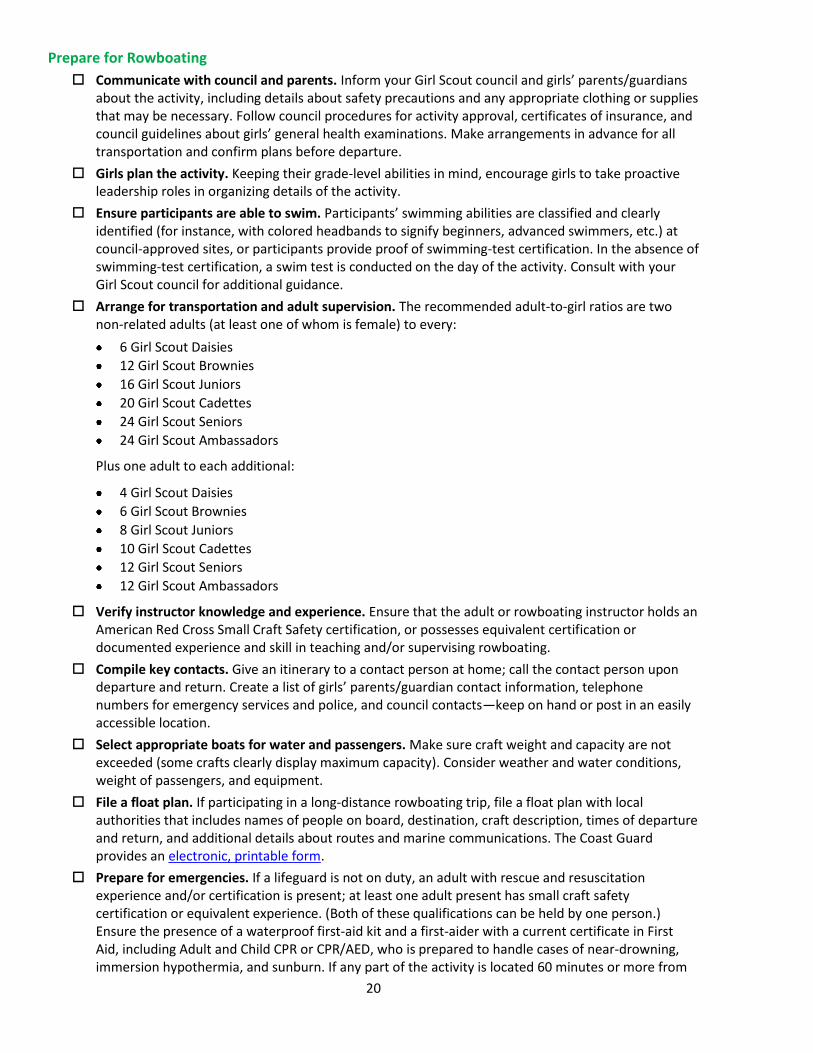
Communicate with council and parents. Inform your Girl Scout council and girls’ parents/guardians about the activity, including details about safety precautions and any appropriate clothing or supplies that may be necessary. Follow council procedures for activity approval, certificates of insurance, and council guidelines about girls’ general health examinations. Make arrangements in advance for all transportation and confirm plans before departure.
Girls plan the activity. Keeping their grade-level abilities in mind, encourage girls to take proactive leadership roles in organizing details of the activity.
Ensure participants are able to swim. Participants’ swimming abilities are classified and clearly identified (for instance, with colored headbands to signify beginners, advanced swimmers, etc.) at council-approved sites, or participants provide proof of swimming-test certification. In the absence of swimming-test certification, a swim test is conducted on the day of the activity. Consult with your Girl Scout council for additional guidance.
Arrange for transportation and adult supervision. The recommended adult-to-girl ratios are two non-related adults (at least one of whom is female) to every:
6 Girl Scout Daisies
12 Girl Scout Brownies
16 Girl Scout Juniors
20 Girl Scout Cadettes
24 Girl Scout Seniors
24 Girl Scout Ambassadors
Plus one adult to each additional:
4 Girl Scout Daisies
6 Girl Scout Brownies
8 Girl Scout Juniors
10 Girl Scout Cadettes
12 Girl Scout Seniors
12 Girl Scout Ambassadors
Verify instructor knowledge and experience. Ensure that the adult or rowboating instructor holds an American Red Cross Small Craft Safety certification, or possesses equivalent certification or documented experience and skill in teaching and/or supervising rowboating.
Compile key contacts. Give an itinerary to a contact person at home; call the contact person upon departure and return. Create a list of girls’ parents/guardian contact information, telephone numbers for emergency services and police, and council contacts—keep on hand or post in an easily accessible location.
Select appropriate boats for water and passengers. Make sure craft weight and capacity are not exceeded (some crafts clearly display maximum capacity). Consider weather and water conditions, weight of passengers, and equipment.
File a float plan. If participating in a long-distance rowboating trip, file a float plan with local authorities that includes names of people on board, destination, craft description, times of departure and return, and additional details about routes and marine communications. The Coast Guard provides an electronic, printable form.
Prepare for emergencies. If a lifeguard is not on duty, an adult with rescue and resuscitation experience and/or certification is present; at least one adult present has small craft safety certification or equivalent experience. (Both of these qualifications can be held by one person.) Ensure the presence of a waterproof first-aid kit and a first-aider with a current certificate in First Aid, including Adult and Child CPR or CPR/AED, who is prepared to handle cases of near-drowning, immersion hypothermia, and sunburn. If any part of the activity is located 60 minutes or more from
21
Emergency Medical Services response time, ensure the presence of a first-aider (level 2) with Wilderness and Remote First Aid. See Volunteer Essentials for information about first-aid standards and training.
On the Day of Rowboating
Get a weather and wind report. Never rowboat on a stormy or extremely windy day. On the day of the rowboating trip or lesson, visit weather.com or other reliable sources to determine if conditions are appropriate. If weather conditions prevent the rowboat trip, be prepared with a backup plan or alternate activity.
Use the buddy system. Girls are divided into teams of two. Each girl chooses a buddy and is responsible for staying with her buddy at all times, warning her buddy of danger, giving her buddy immediate assistance if safe to do so, and seeking help when the situation warrants it. If someone in the group is injured, one person cares for the patient while two others seek help.
Be prepared in the event of a storm with lightning. Exit water immediately and take shelter away from tall objects (including trees, buildings, and electrical poles). Find the lowest point in an open flat area. Squat low to the ground on the balls of the feet, and place hands on knees with head between them. During storms, if shore cannot be reached, secure all loose gear, keep a sharp lookout for other boats and obstructions, head into the wind at a 45-degree angle, and stay low.
Rowboating Links
Boatsafe.com (docking, undocking, anchoring basics, rescue methods, and so on): www.boatsafe.com
U.S. Coast Guard’s Boating Safety Division: www.uscgboating.org
U.S. Power Squadrons: www.usps.org
U.S. Rowing Association: www.usrowing.org
Rowboating Know-How for Girls
Know the currents. On rivers, row upstream to avoid any uncomfortable rapids or over falls.
Keep weight evenly distributed. Never stand in a boat; the shift in weight can cause the boat to overturn. Never sit on the side of a rowboat; sit on the boat floor or seat. If places need to be changed while rowing, be sure the boat is stable enough. Try to keep weight low and centered in the boat as much as possible.
Host a rowing event. In sculls, each rower uses two oars—one in each hand. In sweeps, each rower uses only one oar, extending out one side of the boat.
Rowboating Jargon
Bow: The front of the boat
Catching a crab: When a rower fails to push the oar back to its starting position properly after a stroke, the water catches the edge of the oar and yanks it down; the effect feels like a large crab has grabbed the oar
Outrigger: A bracket extending outward from the side of a racing boat, to support an oarlock
Stern: The back of the boat
22
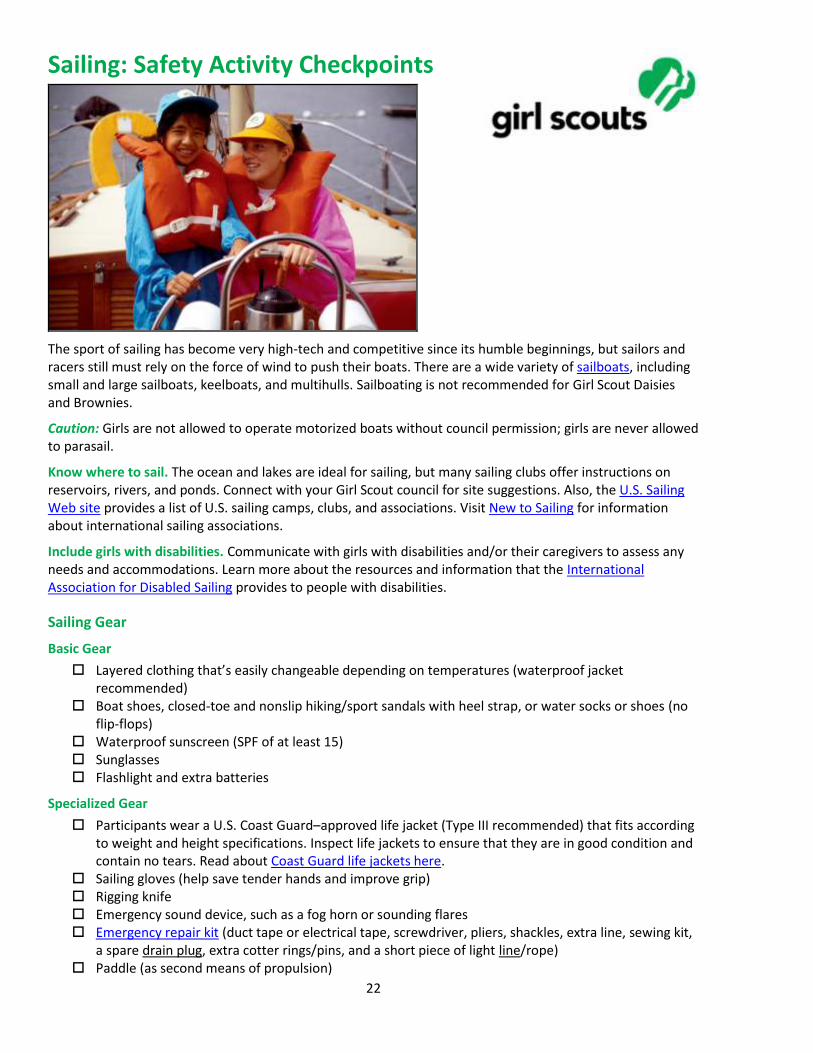
Sailing: Safety Activity Checkpoints
The sport of sailing has become very high-tech and competitive since its humble beginnings, but sailors and racers still must rely on the force of wind to push their boats. There are a wide variety of sailboats, including small and large sailboats, keelboats, and multihulls. Sailboating is not recommended for Girl Scout Daisies and Brownies.
Caution: Girls are not allowed to operate motorized boats without council permission; girls are never allowed to parasail.
Know where to sail. The ocean and lakes are ideal for sailing, but many sailing clubs offer instructions on reservoirs, rivers, and ponds. Connect with your Girl Scout council for site suggestions. Also, the U.S. Sailing Web site provides a list of U.S. sailing camps, clubs, and associations. Visit New to Sailing for information about international sailing associations.
Include girls with disabilities. Communicate with girls with disabilities and/or their caregivers to assess any needs and accommodations. Learn more about the resources and information that the International Association for Disabled Sailing provides to people with disabilities.
Sailing Gear
Basic Gear
Layered clothing that’s easily changeable depending on temperatures (waterproof jacket recommended)
Boat shoes, closed-toe and nonslip hiking/sport sandals with heel strap, or water socks or shoes (no flip-flops)
Waterproof sunscreen (SPF of at least 15) Sunglasses Flashlight and extra batteries
Specialized Gear
Participants wear a U.S. Coast Guard–approved life jacket (Type III recommended) that fits according to weight and height specifications. Inspect life jackets to ensure that they are in good condition and contain no tears. Read about Coast Guard life jackets here.
Sailing gloves (help save tender hands and improve grip) Rigging knife Emergency sound device, such as a fog horn or sounding flares Emergency repair kit (duct tape or electrical tape, screwdriver, pliers, shackles, extra line, sewing kit,
a spare drain plug, extra cotter rings/pins, and a short piece of light line/rope) Paddle (as second means of propulsion)

23
Bailer (a bucket used to remove water from a boat) At least one graspable and throwable personal flotation device (Type IV buoyant cushion or ring buoy
or equivalent) is immediately available for each group on the water
Prepare for Sailing
Communicate with council and parents. Inform your Girl Scout council and girls’ parents/guardians about the activity, including details about safety precautions and any appropriate clothing or supplies that may be necessary. Follow council procedures for activity approval, certificates of insurance, and council guidelines about girls’ general health examinations. Make arrangements in advance for all transportation and confirm plans before departure.
Girls plan the activity. Keeping their grade-level abilities in mind, encourage girls to take proactive leadership roles in organizing details of the activity.
Ensure participants are able to swim. Participants’ swimming abilities are classified and clearly identified (for instance, with colored headbands to signify beginners, advanced swimmers, etc.) at council-approved sites, or participants provide proof of swimming-test certification. In the absence of a swimming-test certification, a swim test is conducted on the day of the activity. Consult with your Girl Scout council for additional guidance.
Arrange for transportation and adult supervision. The recommended adult-to-girl ratios are two non-related adults (at least one of whom is female) to every:
16 Girl Scout Juniors
20 Girl Scout Cadettes
24 Girl Scout Seniors
24 Girl Scout Ambassadors
Plus one adult to each additional:
8 Girl Scout Juniors
10 Girl Scout Cadettes
12 Girl Scout Seniors
12 Girl Scout Ambassadors
Verify instructor knowledge and experience. Ensure that the adult or sailing instructor is certified as a Sailing Instructor by U.S. Sailing, holds an American Red Cross Small Craft Safety certification, or possesses equivalent certification or documented experience and skill in teaching and/or supervising sailing. Also ensure that at least two adults supervise sailing.
Compile key contacts. Give an itinerary to a contact person at home; call the contact person upon departure and return. Create a list of girls’ parents/guardian contact information, telephone numbers for emergency services and police, and council contacts—keep on hand or post in an easily accessible location.
Select appropriate sailboats for water and passengers. Make sure craft weight and capacity are not exceeded (some crafts clearly display maximum capacity). Consider weather and water conditions, weight of passengers, and equipment.
File a float plan. If participating in a long-distance sailing trip, file a float plan with local authorities that includes names of people on board, destination, craft description, times of departure and return, and additional details about routes and marine communications, and so on. The Coast Guard provides an electronic, printable form.
Prepare for emergencies. Ensure the presence of a waterproof first-aid kit and a first-aider with a current certificate in First Aid, including Adult and Child CPR or CPR/AED, who is prepared to handle cases of near-drowning, immersion hypothermia, and sunburn. If any part of the activity is located 60 minutes or more from Emergency Medical Services response time, ensure the presence of a first-
24
aider (level 2) with Wilderness and Remote First Aid. See Volunteer Essentials for information about first-aid standards and training.
On the Day of Sailing
Get a weather and wind report. Never sail on a stormy or excessively windy day. On the day of the sailing trip or lesson, visit weather.com (which includes marine forecasts, including water temperature and wave height) to determine if conditions are appropriate. Intellicast also reports on sailing conditions. If weather conditions prevent the sailing activity, be prepared with a backup plan or alternate activity.
Review rescue tips. U.S. Sailing provides instructions on small-boat capsize recovery.
Use the buddy system. Girls are divided into teams of two. Each girl chooses a buddy and is responsible for staying with her buddy at all times, warning her buddy of danger, giving her buddy immediate assistance if safe to do so, and seeking help when the situation warrants it. If someone in the group is injured, one person cares for the patient while two others seek help.
Be prepared in the event of a storm with lightning. Exit water immediately and take shelter away from tall objects (including trees, buildings, and electrical poles). Find the lowest point in an open flat area. Squat low to the ground on the balls of the feet, and place hands on knees with head between them. During storms, if shore cannot be reached, secure all loose gear, keep a sharp lookout for other boats and obstructions, head into the wind at a 45-degree angle, and stay low.
Ensure docking safety. Ensure that docking lines are in good condition. Follow general safety guidelines provided by boating facility for docking the craft, and ensure the boat is securely connected to the dock before participants exit.
Sailing Links
American Sail Training Association: www.tallships.sailtraining.org
International Sailing Federation: www.sailing.org
U.S. Sailing: www.ussailing.org
U.S. Coast Guard’s Boating Safety Division: www.uscgboating.org
Sailing Know-How for Girls
Get ready to race. Read racing rules set by U.S. Sailing and International Sailing Federation.
Know the ropes. Sailing uses a number of special line-handling and knot-tying techniques.
Sailing Jargon
Helm: The mechanism (or wheel) for steering the boat
Mast: The large pole to which the sail is attached
Regatta: A boat race that traditionally is held at a distance of 2,000 meters (1.25 miles)
Spinnaker: A large, lightweight sail
25
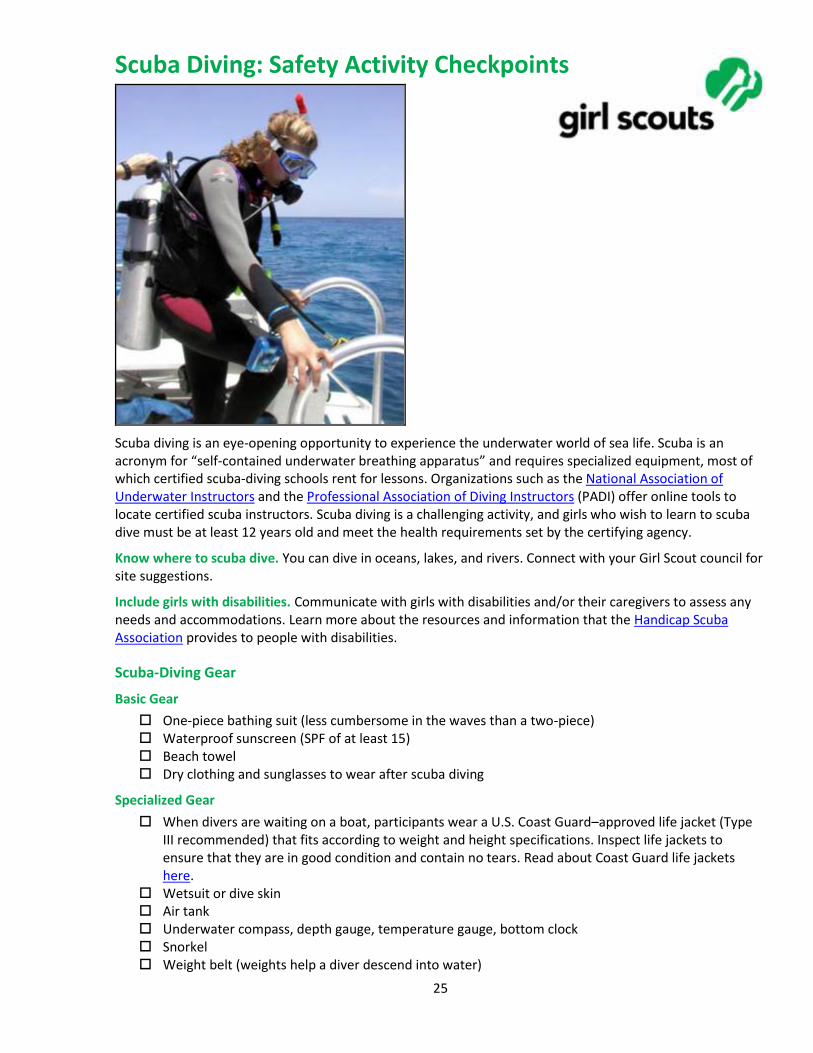
Scuba Diving: Safety Activity Checkpoints
Scuba diving is an eye-opening opportunity to experience the underwater world of sea life. Scuba is an acronym for “self-contained underwater breathing apparatus” and requires specialized equipment, most of which certified scuba-diving schools rent for lessons. Organizations such as the National Association of Underwater Instructors and the Professional Association of Diving Instructors (PADI) offer online tools to locate certified scuba instructors. Scuba diving is a challenging activity, and girls who wish to learn to scuba dive must be at least 12 years old and meet the health requirements set by the certifying agency.
Know where to scuba dive. You can dive in oceans, lakes, and rivers. Connect with your Girl Scout council for site suggestions.
Include girls with disabilities. Communicate with girls with disabilities and/or their caregivers to assess any needs and accommodations. Learn more about the resources and information that the Handicap Scuba Association provides to people with disabilities.
Scuba-Diving Gear
Basic Gear
One-piece bathing suit (less cumbersome in the waves than a two-piece) Waterproof sunscreen (SPF of at least 15) Beach towel Dry clothing and sunglasses to wear after scuba diving
Specialized Gear
When divers are waiting on a boat, participants wear a U.S. Coast Guard–approved life jacket (Type III recommended) that fits according to weight and height specifications. Inspect life jackets to ensure that they are in good condition and contain no tears. Read about Coast Guard life jackets here.
Wetsuit or dive skin Air tank Underwater compass, depth gauge, temperature gauge, bottom clock Snorkel Weight belt (weights help a diver descend into water)
26
Floating dive flag Mask Mask defogger solution Fins Gloves Regulator Writing slate and pencil Lights At least one graspable and personal flotation device (Type IV buoyant cushion or ring buoy or
equivalent) is immediately available for each group on the water
Prepare for Scuba Diving
Communicate with council and parents. Inform Girl Scout council and parents/guardians about the activity, including details about safety precautions and any appropriate clothing or supplies that may be necessary. Follow council procedures for activity approval, certificates of insurance, and council guidelines about girls’ general health examinations. Make arrangements in advance for all transportation and confirm plans before departure.
Girls plan the activity. Keeping their grade-level abilities in mind, encourage girls to take proactive leadership roles in organizing details of the activity.
Ensure participants are able to swim. Participants’ swimming abilities are classified and clearly identified (for instance, with colored headbands to signify beginners, advanced swimmers, etc.) at council-approved sites, or participants provide proof of swimming-test certification. In the absence of swimming-test certification, a swim test is conducted on the day of the activity. Consult with your Girl Scout council for additional guidance.
Arrange for transportation and adult supervision. The recommended adult-to-girl ratios are two non-related adults (at least one of whom is female) to every:
20 Girl Scout Cadettes
24 Girl Scout Seniors
24 Girl Scout Ambassadors
Plus one adult to each additional:
10 Girl Scout Cadettes
12 Girl Scout Seniors
12 Girl Scout Ambassadors
Verify instructor knowledge and experience. Ensure that the scuba-diving teacher holds instructional certification from Scuba Schools International (SSI), PADI, the National Association of Underwater Instructors (NAUI), or the YMCA. The instructor-to-girl ratio is one to four.
Compile key contacts. Give an itinerary to a contact person at home; call the contact person upon departure and return. Create a list of girls’ parents/guardian contact information, telephone numbers for emergency services and police, and council contacts—keep on hand or post in an easily accessible location.
Size up scuba gear. Communicate girls’ ages, heights, and weights to instructors and equipment providers to ensure the appropriate size of scuba gear is available. Be sure that the instructor and participants check equipment before use.
Safeguard valuables. Don’t leave personal belongings and valuables unattended in a public place. If working with a scuba-diving school or camp, inquire about the organization’s storage amenities.
Prepare for emergencies. Ensure the presence of a waterproof first-aid kit and a first-aider with a current certificate in First Aid, including Adult and Child CPR or CPR/AED, who is prepared to handle cases of near-drowning, immersion hypothermia, and sunburn. If any part of the activity is located 60
27
minutes or more from emergency medical services, ensure the presence of a first-aider (level 2) with Wilderness and Remote First Aid. See Volunteer Essentials for information about first-aid standards and training.
On the Day of Scuba Diving
Get a weather and wind report. Never scuba dive on a stormy or extremely windy day. On the day of the scuba-diving trip or lesson, check weather.com, www.scubabyte.com, or other reliable weather sources to determine if conditions are appropriate. If weather conditions prevent the scuba-diving trip, be prepared with a backup plan or alternate activity.
Use the buddy system. Girls are divided into teams of two. Each girl chooses a buddy and is responsible for staying with her buddy at all times, warning her buddy of danger, giving her buddy immediate assistance if safe to do so, and seeking help when the situation warrants it. If someone in the group is injured, one person cares for the patient while two others seek help.
Be prepared in the event of a storm with lightning. Exit water immediately, and take shelter away from tall objects (including trees, buildings, and electrical poles). Find the lowest point in an open flat area. Squat low to the ground on the balls of the feet, and place hands on knees with head between them.
Scuba-Diving Links
National Association of Underwater Instructors (NAUI): www.naui.org
Professional Association of Diving Instructors (PADI): www.padi.com
Scuba Schools International: www.divessi.com
Scuba Diving Magazine: www.scubadiving.com
Scuba-Diving Know-How for Girls
Learn how to conserve oxygen while diving. Learning about energy-saving techniques that may help extend your diving experience.
Protect ears. Underwater pressure can irritate ears; learn how to prevent discomfort.
Scuba-Diving Jargon
Backward roll entry: Entering water from a sitting position from the edge of a boat, whereby the diver leans backward and rolls into the water onto the tank and shoulders
Giant stride entry: Entering water by stepping off of a secure platform; the safest and most common method for divers to enter water
Undertow: Current beneath surface of water that sweeps seaward or along a beach when waves are breaking on shore
28
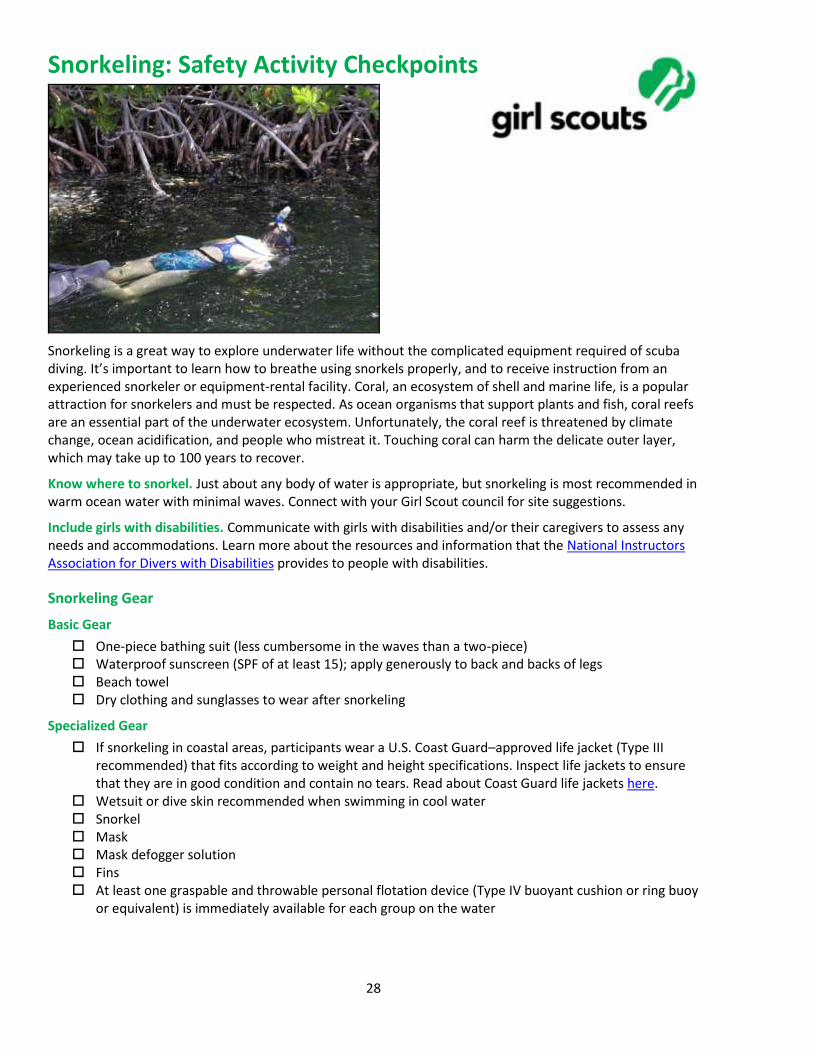
Snorkeling: Safety Activity Checkpoints
Snorkeling is a great way to explore underwater life without the complicated equipment required of scuba diving. It’s important to learn how to breathe using snorkels properly, and to receive instruction from an experienced snorkeler or equipment-rental facility. Coral, an ecosystem of shell and marine life, is a popular attraction for snorkelers and must be respected. As ocean organisms that support plants and fish, coral reefs are an essential part of the underwater ecosystem. Unfortunately, the coral reef is threatened by climate change, ocean acidification, and people who mistreat it. Touching coral can harm the delicate outer layer, which may take up to 100 years to recover.
Know where to snorkel. Just about any body of water is appropriate, but snorkeling is most recommended in warm ocean water with minimal waves. Connect with your Girl Scout council for site suggestions.
Include girls with disabilities. Communicate with girls with disabilities and/or their caregivers to assess any needs and accommodations. Learn more about the resources and information that the National Instructors Association for Divers with Disabilities provides to people with disabilities.
Snorkeling Gear
Basic Gear
One-piece bathing suit (less cumbersome in the waves than a two-piece) Waterproof sunscreen (SPF of at least 15); apply generously to back and backs of legs Beach towel Dry clothing and sunglasses to wear after snorkeling
Specialized Gear
If snorkeling in coastal areas, participants wear a U.S. Coast Guard–approved life jacket (Type III recommended) that fits according to weight and height specifications. Inspect life jackets to ensure that they are in good condition and contain no tears. Read about Coast Guard life jackets here.
Wetsuit or dive skin recommended when swimming in cool water Snorkel Mask Mask defogger solution Fins At least one graspable and throwable personal flotation device (Type IV buoyant cushion or ring buoy
or equivalent) is immediately available for each group on the water
29
Prepare for Snorkeling
Communicate with council and parents. Inform your Girl Scout council and girls’ parents/guardians about the activity, including details about safety precautions and any appropriate clothing or supplies that may be necessary. Follow council procedures for activity approval, certificates of insurance, and council guidelines about girls’ general health examinations. Make arrangements in advance for all transportation and confirm plans before departure.
Girls plan the activity. Keeping their grade-level abilities in mind, encourage girls to take proactive leadership roles in organizing details of the activity.
Ensure participants are able to swim. Participants’ swimming abilities are classified and clearly identified (for instance, with colored headbands to signify beginners, advanced swimmers, etc.) at council-approved sites, or participants provide proof of swimming-test certification. In the absence of swimming-test certification, a swim test is conducted on the day of the activity. Consult with your Girl Scout council for additional guidance.
Arrange for transportation and adult supervision. The recommended adult-to-girl ratios are two non-related adults (at least one of whom is female) to every:
6 Girl Scout Daisies
12 Girl Scout Brownies
16 Girl Scout Juniors
20 Girl Scout Cadettes
24 Girl Scout Seniors
24 Girl Scout Ambassadors
Plus one adult to each additional:
4 Girl Scout Daisies
6 Girl Scout Brownies
8 Girl Scout Juniors
10 Girl Scout Cadettes
12 Girl Scout Seniors
12 Girl Scout Ambassadors
Verify instructor knowledge and experience. Ensure that the snorkeling instructor holds instructional certification from Scuba Schools International (SSI), Professional Association of Diving Instructors (PADI), or has equivalent certification or documented experience and skill in teaching and/or supervising snorkeling.
Compile key contacts. Give an itinerary to a contact person at home; call the contact person upon departure and return. Create a list of girls’ parents/guardian contact information, telephone numbers for emergency services and police, and council contacts—keep on hand or post in an easily accessible location.
Size up snorkeling gear. Ensure the appropriate sizes of masks, snorkels, and fins are available, and make sure that masks fit girls’ faces securely and comfortably. An air space is needed in front of the eyes in order to see properly underwater. Also keep in mind that objects viewed underwater while wearing a mask appear about 25 percent larger and closer than objects seen through a mask out of water.
Safeguard valuables. Don’t leave personal belongings and valuables unattended in a public place. If working with a snorkeling school, inquire about the company’s storage amenities.
Prepare for emergencies. If a lifeguard is not on duty, an adult with rescue experience and/or certification is present; if snorkeling from a boat, at least one adult has small-craft safety certification or equivalent experience. (Both of these qualifications can be held by one person.) Ensure the presence of a waterproof first-aid kit and a first-aider with a current certificate in First Aid, including Adult and Child CPR or CPR/AED, who is prepared to handle cases of near-drowning, immersion
30
hypothermia, and sunburn. If any part of the activity is located 60 minutes or more from emergency medical services, ensure the presence of a first-aider (level 2) with Wilderness and Remote First Aid. See Volunteer Essentials for information about first-aid standards and training.
On the Day of Snorkeling
Get a weather and wind report. Never snorkel on a stormy or extremely windy day; strong winds and large waves decrease visibility and make swimming difficult. On the day of the snorkeling trip or lesson, check weather.com, www.scubabyte.com, or other reliable weather sources to determine if conditions are appropriate. If weather conditions prevent the snorkeling activity, be prepared with a backup plan or alternate activity.
Use the buddy system. Girls are divided into teams of two. Each girl chooses a buddy and is responsible for staying with her buddy at all times, warning her buddy of danger, giving her buddy immediate assistance if safe to do so, and seeking help when the situation warrants it. If someone in the group is injured, one person cares for the patient while two others seek help.
Be prepared in the event of a storm with lightning. Exit water immediately, and take shelter away from tall objects (including trees, buildings, and electrical poles). Find the lowest point in an open flat area. Squat low to the ground on the balls of the feet, and place hands on knees with head between them.
Snorkeling Links
National Association of Underwater Instructors (NAUI): www.naui.org
Professional Association of Diving Instructors (PADI): www.padi.com
Snorkeling.info: www.snorkeling.info
Snorkeling Know-How for Girls
Kick things up a notch. There are several styles of kicks in snorkeling. The flutter kick is the most common and involves moving legs up and down while positioned horizontally in the water. The dolphin kick involves motioning fins in unison on downward and upward strokes. With the frog kick, fins are kept together with toes pointed as the snorkeler brings them closer to the torso by bending the knees.
Learn about underwater photography. Borrow or rent a waterproof camera (appropriate for the depth of water you’re diving in) and take photos of sea life and fellow divers.
Snorkeling Jargon
Blast clearing: Method of clearing water out of a snorkel by quick and forceful exhalation
Bore: The diameter of the opening of the barrel portion of a snorkel; snorkels are either large bore or small bore
31
Surfing: Safety Activity Checkpoints
Surfing (also referred to as “surfboarding”) is one of the most challenging water sports, but if a new surfer is well prepared, it can be a safe, rewarding experience that develops balance, agility, strength, and confidence. With proper instruction from an experienced surfing teacher, many first-timers are able to stand up on their boards during the initial two- to four-hour session. Of course, people learn at different paces, but three to four lessons are recommended. Enrolling girls in a surf camp or daylong surfboarding lesson is highly recommended for beginners; be sure to inform the surf school of girls’ ages, heights, and sizes to reserve appropriate surfboards and wetsuits. Surfing is not recommended for Girl Scout Daisies and Brownies.
Know where to surf. The ocean is best, but some rivers and regions along the Great Lakes also can be suitable for surfing so long as the weather is warm. Connect with your Girl Scout council for site suggestions.
Include girls with disabilities. Communicate with girls with disabilities and/or their caregivers to assess any needs and accommodations. Learn more about the resources and information that the Association of Amputee Surfers and International Surfing Association Adapted Surfing provide to people with disabilities.
Surfing Gear
Basic Gear
One-piece bathing suit (less cumbersome in the waves than a two-piece) Waterproof sunscreen (SPF of at least 15) Goggles for girls who require glasses or contact lenses (available at sporting-goods stores; if
prescription goggles are too expensive for girls to purchase, make sure girls test non-prescription goggles to assure proper fit over prescriptive eyewear)
Beach towel Dry clothing and sunglasses to wear after surfing
Specialized Gear
Wetsuit is recommended for warmth and skin protection, especially when water temperature is below 70 degrees Fahrenheit (most surf schools rent full-body or partial suits)
Surfboard (soft-deck longboards are generally recommended for beginners) Leash (also referred to as a leg rope; a cord that attaches the surfboard to the surfer’s ankle, so that
she doesn’t have to swim too far to catch up to the board after a wipeout; a leash is usually included with a rental surfboard)
Wax, which is applied to the top or deck of a surfboard for traction (most rental surfboards will be pre-waxed)
At least one graspable and throwable personal flotation device (Type IV buoyant cushion or ring buoy or equivalent) is immediately available for each group on the water
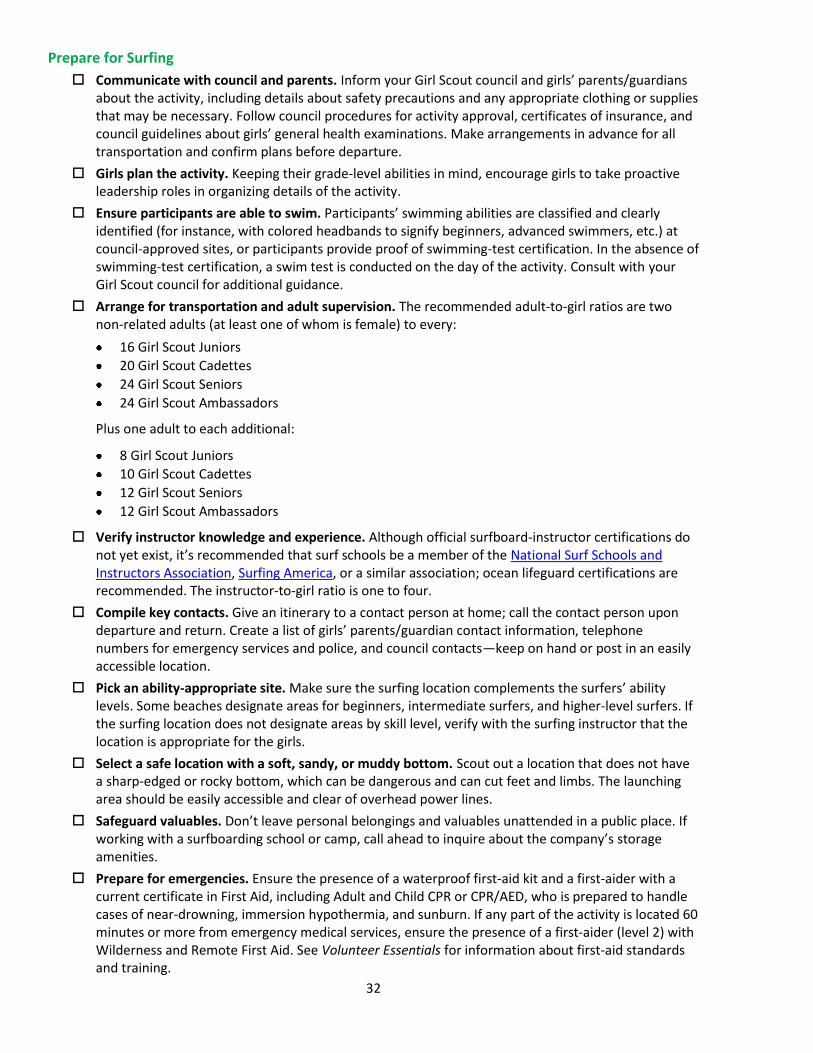
32
Prepare for Surfing
Communicate with council and parents. Inform your Girl Scout council and girls’ parents/guardians about the activity, including details about safety precautions and any appropriate clothing or supplies that may be necessary. Follow council procedures for activity approval, certificates of insurance, and council guidelines about girls’ general health examinations. Make arrangements in advance for all transportation and confirm plans before departure.
Girls plan the activity. Keeping their grade-level abilities in mind, encourage girls to take proactive leadership roles in organizing details of the activity.
Ensure participants are able to swim. Participants’ swimming abilities are classified and clearly identified (for instance, with colored headbands to signify beginners, advanced swimmers, etc.) at council-approved sites, or participants provide proof of swimming-test certification. In the absence of swimming-test certification, a swim test is conducted on the day of the activity. Consult with your Girl Scout council for additional guidance.
Arrange for transportation and adult supervision. The recommended adult-to-girl ratios are two non-related adults (at least one of whom is female) to every:
16 Girl Scout Juniors
20 Girl Scout Cadettes
24 Girl Scout Seniors
24 Girl Scout Ambassadors
Plus one adult to each additional:
8 Girl Scout Juniors
10 Girl Scout Cadettes
12 Girl Scout Seniors
12 Girl Scout Ambassadors
Verify instructor knowledge and experience. Although official surfboard-instructor certifications do not yet exist, it’s recommended that surf schools be a member of the National Surf Schools and Instructors Association, Surfing America, or a similar association; ocean lifeguard certifications are recommended. The instructor-to-girl ratio is one to four.
Compile key contacts. Give an itinerary to a contact person at home; call the contact person upon departure and return. Create a list of girls’ parents/guardian contact information, telephone numbers for emergency services and police, and council contacts—keep on hand or post in an easily accessible location.
Pick an ability-appropriate site. Make sure the surfing location complements the surfers’ ability levels. Some beaches designate areas for beginners, intermediate surfers, and higher-level surfers. If the surfing location does not designate areas by skill level, verify with the surfing instructor that the location is appropriate for the girls.
Select a safe location with a soft, sandy, or muddy bottom. Scout out a location that does not have a sharp-edged or rocky bottom, which can be dangerous and can cut feet and limbs. The launching area should be easily accessible and clear of overhead power lines.
Safeguard valuables. Don’t leave personal belongings and valuables unattended in a public place. If working with a surfboarding school or camp, call ahead to inquire about the company’s storage amenities.
Prepare for emergencies. Ensure the presence of a waterproof first-aid kit and a first-aider with a current certificate in First Aid, including Adult and Child CPR or CPR/AED, who is prepared to handle cases of near-drowning, immersion hypothermia, and sunburn. If any part of the activity is located 60 minutes or more from emergency medical services, ensure the presence of a first-aider (level 2) with Wilderness and Remote First Aid. See Volunteer Essentials for information about first-aid standards and training.
33
On the Day of Surfing
Get a weather and tide report. Never surf on a stormy day. On the morning of the surf trip, determine whether conditions will be appropriate for surfing by searching for regional surf reports on www.surfline.com, www.freetidetables.com, www.17ft.com, and weather.com. If weather conditions prevent the surf trip, be prepared with a backup plan or alternate activity.
Assess wave heights. Call the surf instructor on the day of the trip to confirm that wave heights are appropriate for girls. Wave heights rely heavily on wind strengths; two- to three-foot waves are recommended for beginners. When waves surpass five feet, it can be difficult to paddle out from the shore.
Be prepared in the event of a storm with lightning. Exit water immediately and take shelter away from tall objects (including trees, buildings, and electrical poles). Find the lowest point in an open flat area. Squat low to the ground on the balls of the feet, and place hands on knees with head between them.
Use the buddy system. Girls are divided into teams of two. Each girl chooses a buddy and is responsible for staying with her buddy at all times, warning her buddy of danger, giving her buddy immediate assistance if safe to do so, and seeking help when the situation warrants it. If someone in the group is injured, one person cares for the patient while two others seek help.
Surfing Links
Surf Safety from Outdoor Safety USA: www.outdoorsafetyusa.com/safety/beach-safety/surf-safety
Groundswell Society Surf Safety Alliance: www.groundswellsociety.org/surfsafetyalliance
Surfline Glossary of Terms: www.surfline.com/surfology/surfology_glossary_index.cfm
Surfing Handbook (tips for beginners and intermediate surfers, plus overviews on ocean safety and gear): www.surfinghandbook.com
Surfcamp.com: http://surfcamp.com/surfcamps
Surfing Know-How for Girls
Know how to steer out from the shore. When lying on boards and paddling from the shore and deeper into the water, keep the nose of the surfboard pointed toward the surf, in order to cut through the waves. Being positioned sideways opens up the possibility of getting caught by a wave and tumbled around, like clothing in a washing machine.
Know the break line. When paddling out from the shore, go around the break line (the point at which waves begin to break) and not through it. This allows other surfers plenty of space.
Share the waves. Stay out of the way of other surfers, and never take off on a wave in front of another surfer (called “snaking”).
Hold on to the surfboard. It’s dangerous to other surfers and swimmers to let go of surfboards (all the more reason to use a leash).
Surfing Jargon
Goofy-footer: A person who surfs with her right foot toward the front of the board, instead of the usual left foot forward, as in, “She surfs goofy”
Lineup: The area of the water where surfers sit on their boards and wait for waves
Offshore: Winds that blow from land toward the water and often create good surfing conditions; offshore winds hold up waves so that they break in shallower water
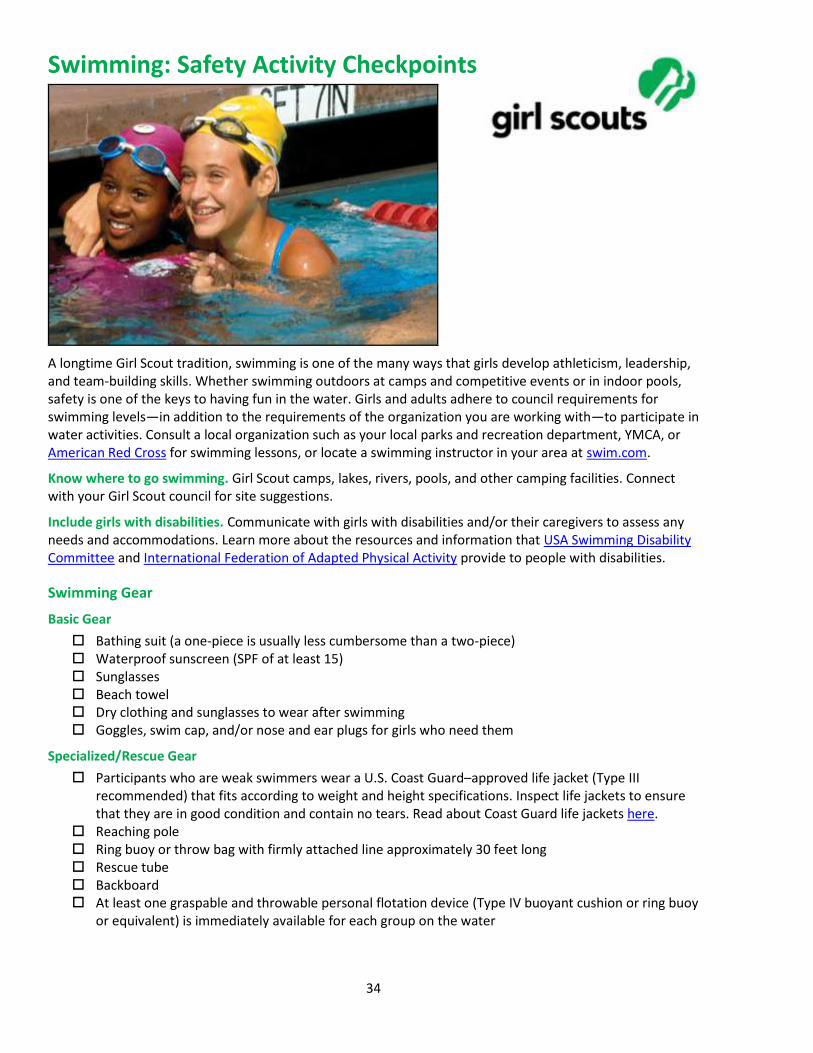
34
Swimming: Safety Activity Checkpoints
A longtime Girl Scout tradition, swimming is one of the many ways that girls develop athleticism, leadership, and team-building skills. Whether swimming outdoors at camps and competitive events or in indoor pools, safety is one of the keys to having fun in the water. Girls and adults adhere to council requirements for swimming levels—in addition to the requirements of the organization you are working with—to participate in water activities. Consult a local organization such as your local parks and recreation department, YMCA, or American Red Cross for swimming lessons, or locate a swimming instructor in your area at swim.com.
Know where to go swimming. Girl Scout camps, lakes, rivers, pools, and other camping facilities. Connect with your Girl Scout council for site suggestions.
Include girls with disabilities. Communicate with girls with disabilities and/or their caregivers to assess any needs and accommodations. Learn more about the resources and information that USA Swimming Disability Committee and International Federation of Adapted Physical Activity provide to people with disabilities.
Swimming Gear
Basic Gear
Bathing suit (a one-piece is usually less cumbersome than a two-piece) Waterproof sunscreen (SPF of at least 15) Sunglasses Beach towel Dry clothing and sunglasses to wear after swimming Goggles, swim cap, and/or nose and ear plugs for girls who need them
Specialized/Rescue Gear
Participants who are weak swimmers wear a U.S. Coast Guard–approved life jacket (Type III recommended) that fits according to weight and height specifications. Inspect life jackets to ensure that they are in good condition and contain no tears. Read about Coast Guard life jackets here.
Reaching pole Ring buoy or throw bag with firmly attached line approximately 30 feet long Rescue tube Backboard At least one graspable and throwable personal flotation device (Type IV buoyant cushion or ring buoy
or equivalent) is immediately available for each group on the water
35
Prepare for Swimming
Communicate with council and parents. Inform your Girl Scout council and girls’ parents/guardians about the activity, including details about safety precautions and any clothing or supplies that may be necessary. Follow council procedures for activity approval, certificates of insurance, and council guidelines about girls’ general health examinations. Make arrangements in advance for all transportation and confirm plans before departure.
Girls plan the activity. Keeping their grade-level abilities in mind, encourage girls to take proactive leadership roles in organizing details of the activity.
Arrange for transportation and adult supervision. The recommended adult-to-girl ratios are two non-related adults (at least one of whom is female) to every:
6 Girl Scout Daisies
12 Girl Scout Brownies
16 Girl Scout Juniors
20 Girl Scout Cadettes
24 Girl Scout Seniors
24 Girl Scout Ambassadors
Plus one adult to each additional:
4 Girl Scout Daisies
6 Girl Scout Brownies
8 Girl Scout Juniors
10 Girl Scout Cadettes
12 Girl Scout Seniors
12 Girl Scout Ambassadors
Ensure the presence of watchers. A watcher is a person trained in the use of basic water-rescue equipment and procedures who works under the direction of the lifeguard. American Red Cross Basic Water Rescue certification or equivalent is appropriate. Lifeguards and watchers are stationed at separate posts and stay out of the water, except in emergencies. An American Red Cross Lifeguarding Instructor or American Red Cross Water Safety Instructor (WSI) can provide training in Basic Water Rescue.
Swimming Lifeguards and Watchers Ratios
Number of Swimmers
Lifeguards Watchers
1–10 1 adult 1*
11–25 1 adult 2*
26–35 2 persons, at least 1 is an adult; others may be 16 years of age or older.
3*
36–50 2 persons, at least 1 is an adult; others may be 16 years of age or older.
4*
*Some states allow watchers to be under the age of 18, but in all states, they must be at least 16 years of age.
These numbers are a minimum. The ratio of lifeguards and watchers to swimmers may need to be increased depending on the number of girls in one area, swimming level and ability, girls with disabilities, age level and ability to follow instructions, type of swimming activity (instruction,
36
recreation), type of swimming area, weather and water conditions, and rescue equipment available. If you are unsure whether your swimming lifeguards and watchers ratios are sufficient, be sure to contact your council.
Ensure participants are able to swim. Participants’ swimming abilities are classified and clearly identified (for instance, with colored headbands to signify beginners, advanced swimmers, etc.) at council-approved sites, or participants provide proof of swimming-test certification. In the absence of swimming-test certification, a swim test is conducted on the day of the activity. Consult with your Girl Scout council for additional guidance.
Ensure the presence of lifeguards. For swimming activities in public pools, hotel and cruise-ship pools, and backyard pools, the lifeguards are at least 16 years old and have American Red Cross Lifeguard Training certification or the equivalent. For swimming activities in lakes, slow-moving streams, and rivers, one adult lifeguard (certified in American Red Cross Lifeguard Training plus Waterfront Lifeguard course or the equivalent) is present for every 10 swimmers, plus one watcher. When girls are wading in water more than knee-deep, an adult with American Red Cross Basic Water Rescue certification or with documented experience in basic water rescue skills is present. For swimming and wading activities, consult the “Swimming Lifeguards and Watchers Ratios” chart for standards.
Assess safety of swimming site. Whether using council-owned or -operated swimming sites or using public, loaned, or donated facilities, the swimming site posts that its water quality passes the local health-department tests and sanitation regulations. In addition:
For pools:
Pool water depths are clearly marked, and shallow areas are marked “no diving.” Diving areas are separate from other swimming areas.
The facility makes periodic maintenance checks. Maintenance requests are repairs are documented, and records are retained.
Water pH and chlorine are tested and maintained at safe levels. Tests are documented, and records are retained.
The decks around the pool are kept clean and clutter-free.
The surrounding fence and gate or doors are locked when the pool is unsupervised.
For beach and other waterfront areas:
Hazards are eliminated or clearly marked.
Girls are instructed to avoid strong currents, sharp drop-offs, quicksand bottoms, rough surf, and other potentially dangerous conditions.
As best as can be determined, the water is free of dangerous marine life.
The bottom is relatively free of debris, sharp stones, and shells.
Swimming, diving, and small-craft areas are separate. They are clearly marked or roped off or both.
Follow sliding safety standards. The following rules are respected for activities that include slides:
A watcher signals that the next person may slide when the landing area is clear.
Only one person may be on the slide at a time.
Girls slide in a sitting position, never headfirst.
The landing area is off-limits to other swimmers.
The water in the slide landing area is at least 4 feet deep.
Follow diving-area safety standards. The following rules are respected for activities that include diving:
The diving area is divided from the swimming area by a buoyed line.
37
The water in the landing area is a minimum of 10 feet deep for recreational diving boards. The boards are usually 12 to 14 feet long and less than 3 feet above the water’s surface.
The water in the landing area is a minimum of 12 feet deep for competitive diving boards. The boards are usually 16 feet long and 3 to 10 feet above the water’s surface.
Diving is restricted to water of sufficient depth and checked in advance for submerged obstructions. Diving is prohibited in waters of unknown depth and conditions.
Recreational divers do not manipulate the adjustable fulcrum on the springboards. During recreational swimming periods, the adjustable fulcrum is locked in a fixed position, preferably in its most forward position, to reduce the spring of the board.
The maximum water depth extends 10 feet on each side of the center line of the board. If tides, drought, and similar forces affect the water depth, it is checked each time before diving is permitted.
Girls do not dive off the side of the board.
Follow water-park safety standards. When participating in water activities at water parks, adults and girls must:
Read and follow all park rules and the instructions of lifeguards.
Know their physical limits. Observe a water ride before going on.
Not dive. Always know the depth of the water before wading in.
Not run. Most minor injuries at water parks are caused by slips and falls.
Use extra care on water slides. They cause a significant number of injuries. See “Follow sliding safety standards.”
In wave pools, stay away from the walls.
Prepare for emergencies. Ensure the presence of a waterproof first-aid kit and a first-aider, who is prepared to handle cases of near-drowning and immersion hypothermia. See Volunteer Essentials for information about first-aid standards and training.
Compile key contacts. Give an itinerary to a contact person at home; call the contact person upon departure and return. Create a list of girls’ parents/guardian contact information, telephone numbers for emergency services and police, and council contacts—keep on hand or post in an easily accessible location.
On the Day of Swimming
Get a weather report. If swimming outdoors, never swim on a stormy day. On the day of the activity, consult weather.com or other reliable sources to assess temperature and weather and water conditions. If weather conditions prevent the trip, be prepared with a backup plan or alternative activity.
Safeguard valuables. Don’t leave personal belongings and valuables unattended in a public place.
Use the buddy system. Girls are divided into teams of two. Each person chooses a buddy and is responsible for staying with her buddy at all times, warning her buddy of danger, giving her buddy immediate assistance if safe to do so, and seeking help when the situation warrants it.
Be prepared in the event of a storm with lightning. Exit water immediately, and take shelter away from tall objects (including trees, buildings, and electrical poles). Find the lowest point in an open flat area. Squat low to the ground on the balls of the feet, and place hands on knees with heads between them. During storms, if shore cannot be reached, keep a sharp lookout for boats and other obstructions.
Keep track of girls’ whereabouts. In a controlled waterfront, a checkboard system is used to indicate which girls are in the water and in which swimming area. In crowded areas, a color system is used for identification (for example, non-swimmers, novice swimmers, and skilled swimmers each have a wristband, hair band, or other marker of a different color).
38
Monitor time in water. The length of a swimming period is determined by the swimmer’s condition and comfort, weather conditions, and water temperature. Generally, 30-minute swimming periods are sufficient.
Respect basic swimming rules and safety precautions.
Girls do not dive into above-ground pools, shallow areas, etc.
Girls swim in supervised areas only.
Girls swim only during daylight hours or in a well-lit pool at night.
Girls do not swim immediately after eating, when overheated, or when tired.
Girls swim at a safe distance from any diving board.
Electrical appliances are not used in or near swimming areas.
Bottles, glass, and sharp objects are not allowed in swimming area.
An emergency telephone is available, whenever possible.
Drink water to avoid dehydration.
Swimming Links
American Red Cross Swimming and Water Safety program: www.redcross.org/portalPreparing and Getting TrainedGet TrainedSwimming and Water SafetyLearn to Swim
Swim America: www.swimamerica.org
USA Swimming: www.usaswimming.org
YMCA Programs for Aquatics: www.ymca.net/programs/programs_for_aquatics.html
State and national parks and forests (may certify swimmers): www.llbean.com/parksearch/us_search.html
Swimming Know-How for Girls
Learn swimming strokes. Before you hit the water, read up about the five basic strokes: freestyle, backstroke, breast-stroke, butterfly, and sidestroke.
Create swimming games. Marco Polo and Find the Penny are popular swimming games. What games can you create?
Swimming Jargon
Flip turn: A tumbling turn in which the swimmer somersaults and twists her body as she approaches the pool wall, and then pushes off the wall with her feet
Leg: One-fourth of a relay swum by four swimmers
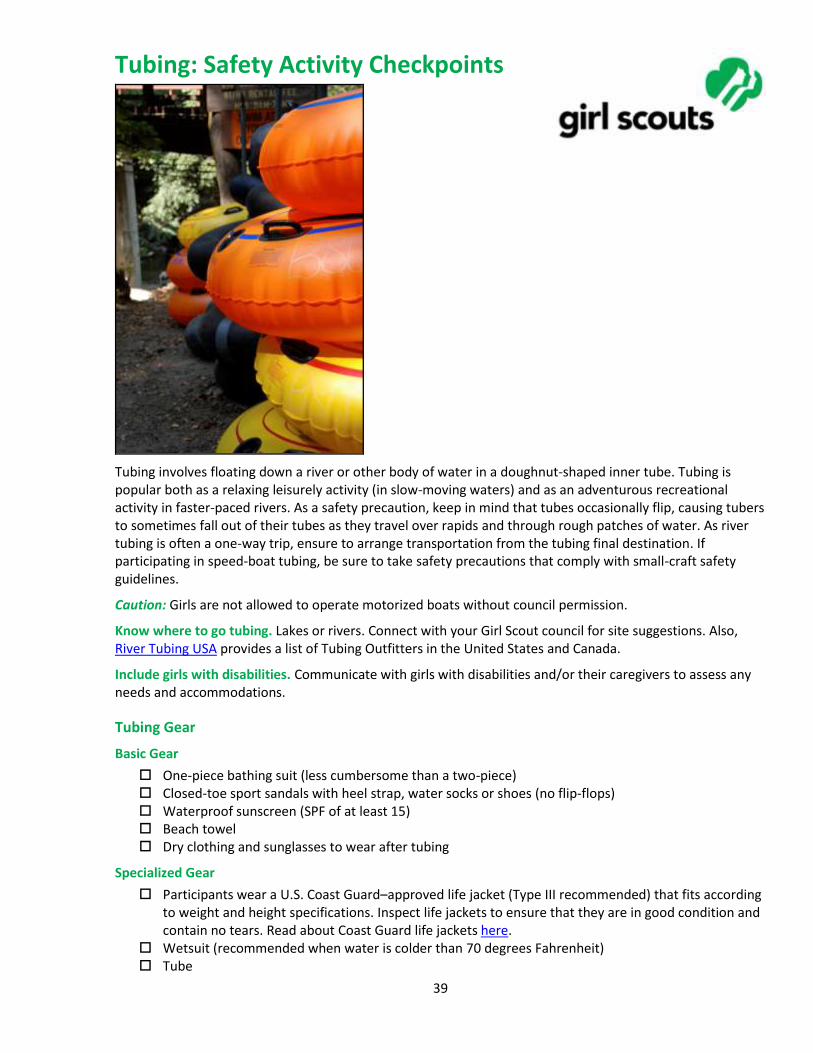
39
Tubing: Safety Activity Checkpoints
Tubing involves floating down a river or other body of water in a doughnut-shaped inner tube. Tubing is popular both as a relaxing leisurely activity (in slow-moving waters) and as an adventurous recreational activity in faster-paced rivers. As a safety precaution, keep in mind that tubes occasionally flip, causing tubers to sometimes fall out of their tubes as they travel over rapids and through rough patches of water. As river tubing is often a one-way trip, ensure to arrange transportation from the tubing final destination. If participating in speed-boat tubing, be sure to take safety precautions that comply with small-craft safety guidelines.
Caution: Girls are not allowed to operate motorized boats without council permission.
Know where to go tubing. Lakes or rivers. Connect with your Girl Scout council for site suggestions. Also, River Tubing USA provides a list of Tubing Outfitters in the United States and Canada.
Include girls with disabilities. Communicate with girls with disabilities and/or their caregivers to assess any needs and accommodations.
Tubing Gear
Basic Gear
One-piece bathing suit (less cumbersome than a two-piece) Closed-toe sport sandals with heel strap, water socks or shoes (no flip-flops) Waterproof sunscreen (SPF of at least 15) Beach towel Dry clothing and sunglasses to wear after tubing
Specialized Gear
Participants wear a U.S. Coast Guard–approved life jacket (Type III recommended) that fits according to weight and height specifications. Inspect life jackets to ensure that they are in good condition and contain no tears. Read about Coast Guard life jackets here.
Wetsuit (recommended when water is colder than 70 degrees Fahrenheit) Tube
40
Tube cover or skin (optional) At least one graspable and throwable personal flotation device (Type IV buoyant cushion or ring buoy
or equivalent) is immediately available for each group on the water.
Prepare for Tubing
Communicate with council and parents. Inform your Girl Scout council and girls’ parents/guardians about the activity, including details about safety precautions and any appropriate clothing or supplies that may be necessary. Follow council procedures for activity approval, certificates of insurance, and council guidelines about girls’ general health examinations. Make arrangements in advance for all transportation and confirm plans before departure.
Girls plan the activity. Keeping their grade-level abilities in mind, encourage girls to take proactive leadership roles in organizing details of the activity.
Arrange for transportation and adult supervision. One adult will be the lead tuber; another adult will be the sweep tuber. The lead adult knows firsthand the hazards and rapids on any river to be tubed. The recommended adult-to-girl ratios are two non-related adults (at least one of whom is female) to every:
6 Girl Scout Daisies
12 Girl Scout Brownies
16 Girl Scout Juniors
20 Girl Scout Cadettes
24 Girl Scout Seniors
24 Girl Scout Ambassadors
Plus one adult to each additional:
4 Girl Scout Daisies
6 Girl Scout Brownies
8 Girl Scout Juniors
10 Girl Scout Cadettes
12 Girl Scout Seniors
12 Girl Scout Ambassadors
Verify instructor knowledge and experience. One adult must be certified in American Red Cross Small Craft Safety, Moving Water module from the American Red Cross, or have experience in teaching and/or supervising tubing activities.
Ensure participants are able to swim. Participants’ swimming abilities are classified and clearly identified (for instance, with colored headbands to signify beginners, advanced swimmers, etc.) at council-approved sites, or participants provide proof of swimming-test certification. In the absence of swimming-test certification, a swim test is conducted on the day of the activity. Consult with your Girl Scout council for additional guidance.
All participants are instructed before beginning to tube. Girls receive instruction on how to float through rapids, how to breathe while swimming in rapids, and how to swim to shore. There is only one person to a tube, and tubes that are tied together are secured very snugly, with no slack between the tubes. Avoid long, dangling ropes that can get snagged on various obstructions.
Research river condition. Never go whitewater tubing on water that has not been run and rated. No tubing is taken on whitewater more difficult than Class II, as defined by the American Version of the International Scale of River Difficulty. Be aware of possible changes in river level and its effects on the run’s level of difficulty; American Whitewater provides a National Whitewater Inventory.
Respect the environment. Make sure tubing on whitewater or semi-protected waters meets the Safety Code of American Whitewater.
41
Prepare for emergencies. If a lifeguard is not on duty, an adult with rescue and resuscitation experience and/or certification is present. Ensure the presence of a waterproof first-aid kit and a first-aider, who is prepared to handle cases of near-drowning and immersion hypothermia. See Volunteer Essentials for information about first-aid standards and training.
Compile key contacts. Give an itinerary to a contact person at home; call the contact person upon departure and return. Create a list of girls’ parents/guardian contact information, telephone numbers for emergency services and police, and council contacts—keep on hand or post in an easily accessible location.
On the Day of Tubing
Get a weather report. Never go tubing on a stormy day. On the day of the activity, consult weather.com or other reliable sources to assess weather and river conditions and water and air temperature. If weather conditions prevent the trip, be prepared with a backup plan or alternative activity.
Safeguard valuables. Don’t leave personal belongings and valuables unattended in a public place.
Use the buddy system. Girls are divided into teams of two. Each person chooses a buddy and is responsible for staying with her buddy at all times, warning her buddy of danger, giving her buddy immediate assistance if safe to do so, and seeking help when the situation warrants it.
Be prepared in the event of a storm with lightning. Exit water immediately, and take shelter away from tall objects (including trees, buildings, and electrical poles). Find the lowest point in an open flat area. Squat low to the ground on the balls of the feet, and place hands on knees with heads between them. During storms, if shore cannot be reached, keep a sharp lookout for boats and other obstructions.
Tubing Links
American Whitewater: www.americanwhitewater.org
River Tubing USA: www.rivertubing.info
Whitewater Rescue Institute: www.whitewaterrescue.com
Tubing Know-How for Girls
Know the river flow. Be careful about where you roll out of a tube. If tubing in fast-moving water, the under-surface current may catch you off guard. Do not get out of a tube where the flow of water is fastest—just above the riverbed, where there is little resistance to flow.
Put on your “explorers’ cap.” Create exploration games to see who can locate the most interesting nature gems, such as caves and peculiar plants.
Tubing Jargon
Aquifer: A layer of underground rock or sand that stores and transports water
Swallet hole: A hole in land through which a stream delivers surface water to aquifer (considered the opposite of a spring)
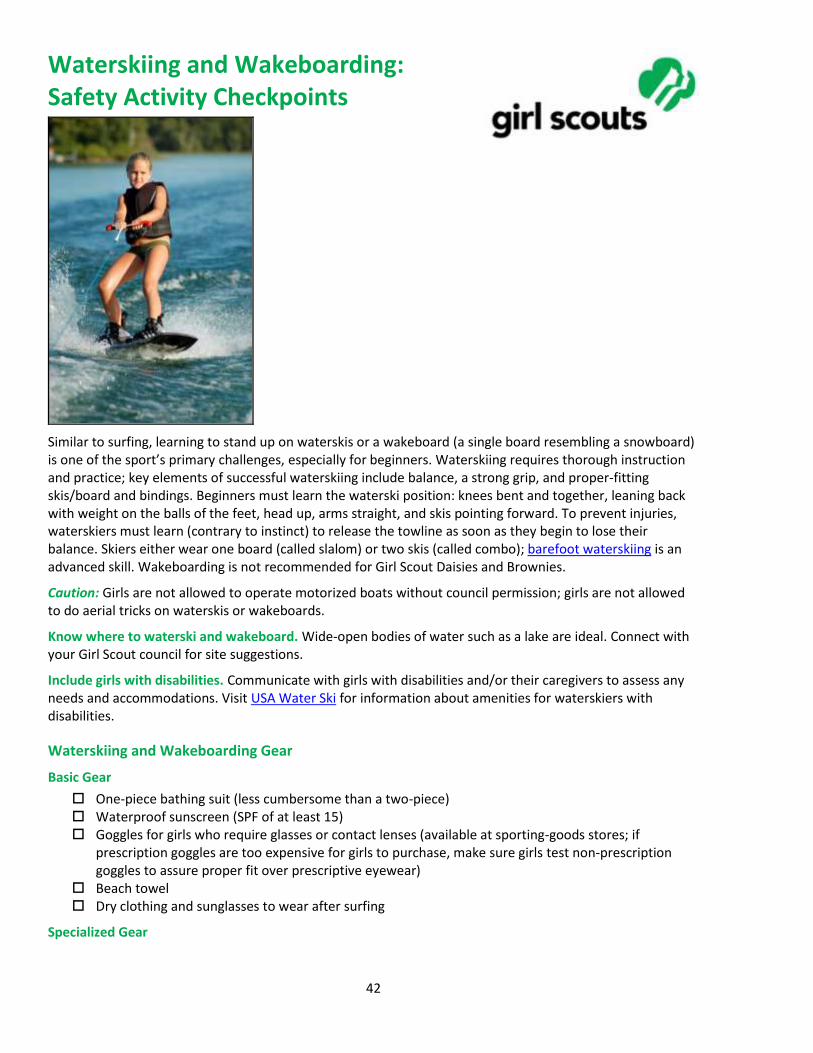
42
Waterskiing and Wakeboarding: Safety Activity Checkpoints
Similar to surfing, learning to stand up on waterskis or a wakeboard (a single board resembling a snowboard) is one of the sport’s primary challenges, especially for beginners. Waterskiing requires thorough instruction and practice; key elements of successful waterskiing include balance, a strong grip, and proper-fitting skis/board and bindings. Beginners must learn the waterski position: knees bent and together, leaning back with weight on the balls of the feet, head up, arms straight, and skis pointing forward. To prevent injuries, waterskiers must learn (contrary to instinct) to release the towline as soon as they begin to lose their balance. Skiers either wear one board (called slalom) or two skis (called combo); barefoot waterskiing is an advanced skill. Wakeboarding is not recommended for Girl Scout Daisies and Brownies.
Caution: Girls are not allowed to operate motorized boats without council permission; girls are not allowed to do aerial tricks on waterskis or wakeboards.
Know where to waterski and wakeboard. Wide-open bodies of water such as a lake are ideal. Connect with your Girl Scout council for site suggestions.
Include girls with disabilities. Communicate with girls with disabilities and/or their caregivers to assess any needs and accommodations. Visit USA Water Ski for information about amenities for waterskiers with disabilities.
Waterskiing and Wakeboarding Gear
Basic Gear
One-piece bathing suit (less cumbersome than a two-piece) Waterproof sunscreen (SPF of at least 15) Goggles for girls who require glasses or contact lenses (available at sporting-goods stores; if
prescription goggles are too expensive for girls to purchase, make sure girls test non-prescription goggles to assure proper fit over prescriptive eyewear)
Beach towel Dry clothing and sunglasses to wear after surfing
Specialized Gear
43
Participants wear a U.S. Coast Guard–approved life jacket (Type III recommended) that fits according to weight and height specifications. Inspect life jackets to ensure that they are in good condition and contain no tears. Read about Coast Guard life jackets here.
Wetsuit is recommended for warmth and skin protection, especially when water temperature is below 70 degrees Fahrenheit
Ski lines (tow lines) are at least 75 feet long; a single handle is used on the ski line Wakeboard or rounded (not pointed) skis that are appropriate to the skill and size of the skier Foot bindings appropriate for skier’s weight and skiing speed At least one graspable and throwable personal flotation device (Type IV buoyant cushion or ring buoy
or equivalent) is immediately available for each group on the water Lifeboat
Prepare for Waterskiing or Wakeboarding
Communicate with council and parents. Inform your Girl Scout council and girls’ parents/guardians about the activity, including details about safety precautions and any appropriate clothing or supplies that may be necessary. Follow council procedures for activity approval, certificates of insurance, and council guidelines about girls’ general health examinations. Make arrangements in advance for all transportation and confirm plans before departure.
Girls plan the activity. Keeping their grade-level abilities in mind, encourage girls to take proactive leadership roles in organizing details of the activity.
Arrange for transportation and adult supervision. In addition to the boat driver, ensure that a boat has at least one more adult observing the skier(s), and that another adult is on shore to help supervise girls waiting to ski. The recommended adult-to-girl ratios are two non-related adults (at least one of whom is female) to every:
16 Girl Scout Juniors
20 Girl Scout Cadettes
24 Girl Scout Seniors
24 Girl Scout Ambassadors
Plus one adult to each additional:
8 Girl Scout Juniors
10 Girl Scout Cadettes
12 Girl Scout Seniors
12 Girl Scout Ambassadors
Verify instructor and boat-driver knowledge and experience. Ensure that the adult or instructor is certified by USA Water Ski, or possesses equivalent certification or documented experience and skill in teaching and/or supervising waterskiing. Confirm that the boat driver has an appropriate license, and is skilled in operating the craft; USA Water Ski offers a Trained Boat Driver course.
Ensure participants are able to swim. Participants’ swimming abilities are classified and clearly identified (for instance, with colored headbands to signify beginners, advanced swimmers, etc.) at council-approved sites, or participants provide proof of swimming-test certification. In the absence of swimming-test certification, a swim test is conducted on the day of the activity. Consult with your Girl Scout council for additional guidance.
Check the boat safety features. Make sure the boat has sufficient power to tow the skier(s), and is equipped with a side-angle rearview mirror, fire extinguisher, paddle, horn, bailing device, two gas tanks (for outboard motors), mooring ropes (extra line), boarding ladder, and throw bag.
Prepare for emergencies. If a lifeguard is not on duty, an adult with rescue and resuscitation experience and/or certification is present. Ensure the presence of a waterproof first-aid kit and a first-aider with a current certificate in First Aid, including Adult and Child CPR or CPR/AED, and is
44
prepared to handle cases of near-drowning, immersion hypothermia, and sunburn. If any part of the activity is located 60 minutes or more from emergency medical services, ensure the presence of a first-aider (level 2) with Wilderness and Remote First Aid. See Volunteer Essentials for information about first-aid standards and training.
Compile key contacts. Give an itinerary to a contact person at home; call the contact person upon departure and return. Create a list of girls’ parents/guardian contact information, telephone numbers for emergency services and police, and council contacts—keep on hand or post in an easily accessible location.
On the Day of Waterskiing or Wakeboarding
Get weather and wind report. Never waterski on a stormy, foggy, or excessively windy day. On the day of the waterskiing trip or lesson, visit weather.com to determine if weather conditions are appropriate. If weather conditions prevent the waterskiing activity, be prepared with a backup plan or alternative activity.
Review rescue tips. U.S. Sailing provides instructions on small-boat capsize recovery.
Keep track of waterskiers. Use a list or checkboard system to stay aware of waterskiers’ whereabouts.
Use the buddy system. Girls are divided into teams of two. Each person chooses a buddy and is responsible for staying with her buddy at all times, warning her buddy of danger, giving her buddy immediate assistance if safe to do so, and seeking help when the situation warrants it.
Be prepared in the event of a storm with lightning. Exit water immediately, and take shelter away from tall objects (including trees, buildings, and electrical poles). Find the lowest point in an open flat area. Squat low to the ground on the balls of the feet, and place hands on knees with heads between them. During storms, if shore cannot be reached, keep a sharp lookout for other boats and obstructions.
Waterskiing and Wakeboarding Links
USA Water Ski: www.usawaterski.org
U.S. Coast Guard’s Boating Safety Division: www.uscgboating.org
Waterskiing and Wakeboarding Know-How for Girls
Start the learning process on land. Before entering the water, simulate the waterskiing process on a sandy beach. Wearing the skis and holding onto a water-ski handle, ask a partner to pull you around.
Stay behind the boat. It’s dangerous to curve around to the side of the boat. Also, skiing outside the wake is an advanced technique.
Communicate with hand signals. Learn how to communicate while waterskiing on adventure.howstuffworks.com.
Learn by watching. Videotape other Girl Scouts who are learning how to waterski, and watch the footage to learn how to improve performance.
Prevent hand blisters. Some waterskiers get blisters from the pressure of holding onto the rope handle; wearing gloves or taping hands can help. Learn how on waterskimag.com.
Waterskiing and Wakeboarding Jargon
Boom: A pole, used as a training device for beginners, that extends horizontally from the center of the boat to out and over the side of the boat
Cannonball: The starting waterski position—in the water, tuck up as small as possible, with hands and towline handle around legs (bend knees and shift weight to the back of skis, so the front tips of the skis poke out of the water)
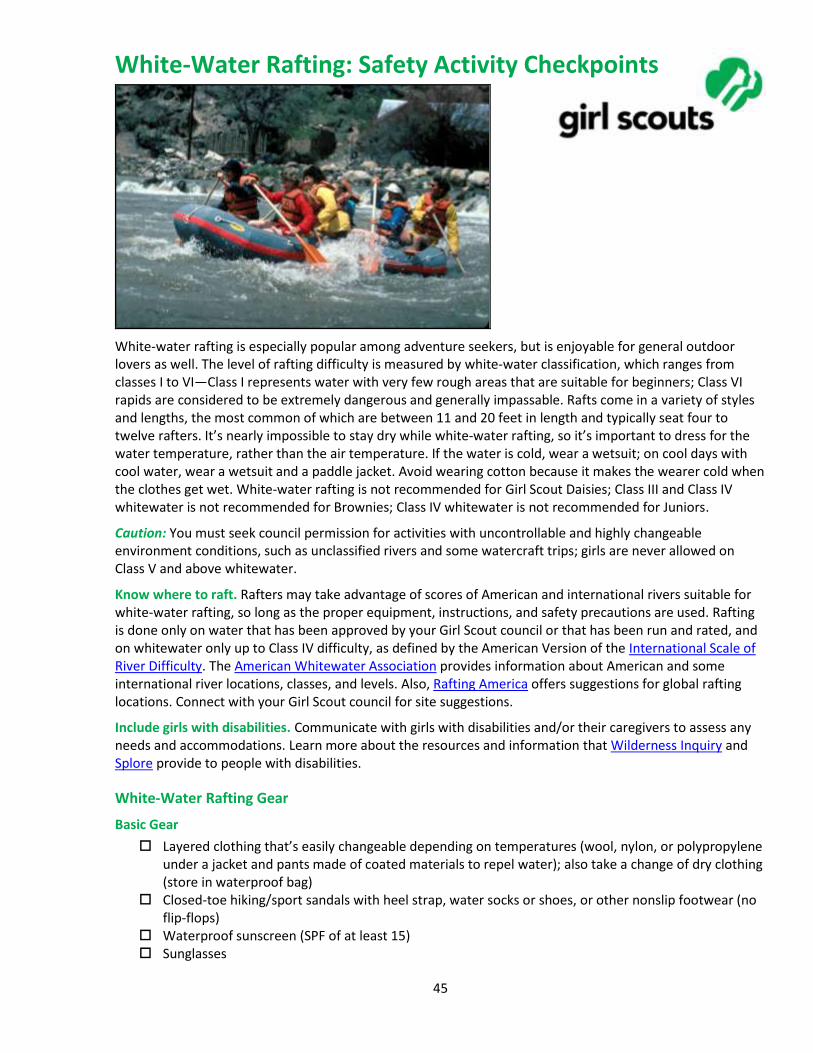
45
White-Water Rafting: Safety Activity Checkpoints
White-water rafting is especially popular among adventure seekers, but is enjoyable for general outdoor lovers as well. The level of rafting difficulty is measured by white-water classification, which ranges from classes I to VI—Class I represents water with very few rough areas that are suitable for beginners; Class VI rapids are considered to be extremely dangerous and generally impassable. Rafts come in a variety of styles and lengths, the most common of which are between 11 and 20 feet in length and typically seat four to twelve rafters. It’s nearly impossible to stay dry while white-water rafting, so it’s important to dress for the water temperature, rather than the air temperature. If the water is cold, wear a wetsuit; on cool days with cool water, wear a wetsuit and a paddle jacket. Avoid wearing cotton because it makes the wearer cold when the clothes get wet. White-water rafting is not recommended for Girl Scout Daisies; Class III and Class IV whitewater is not recommended for Brownies; Class IV whitewater is not recommended for Juniors.
Caution: You must seek council permission for activities with uncontrollable and highly changeable environment conditions, such as unclassified rivers and some watercraft trips; girls are never allowed on Class V and above whitewater.
Know where to raft. Rafters may take advantage of scores of American and international rivers suitable for white-water rafting, so long as the proper equipment, instructions, and safety precautions are used. Rafting is done only on water that has been approved by your Girl Scout council or that has been run and rated, and on whitewater only up to Class IV difficulty, as defined by the American Version of the International Scale of River Difficulty. The American Whitewater Association provides information about American and some international river locations, classes, and levels. Also, Rafting America offers suggestions for global rafting locations. Connect with your Girl Scout council for site suggestions.
Include girls with disabilities. Communicate with girls with disabilities and/or their caregivers to assess any needs and accommodations. Learn more about the resources and information that Wilderness Inquiry and Splore provide to people with disabilities.
White-Water Rafting Gear
Basic Gear
Layered clothing that’s easily changeable depending on temperatures (wool, nylon, or polypropylene under a jacket and pants made of coated materials to repel water); also take a change of dry clothing (store in waterproof bag)
Closed-toe hiking/sport sandals with heel strap, water socks or shoes, or other nonslip footwear (no flip-flops)
Waterproof sunscreen (SPF of at least 15) Sunglasses
46
Flashlight (and extra batteries) Whistle Emergency repair kit: duct tape or electrical tape, screwdriver, pliers Emergency survival packet: waterproof matches, emergency food supplies, lightweight blanket Throw bag, throw line Compass Knife Dry (waterproof) bag (to keep personal belongings dry)
Specialized Gear
Participants wear a U.S. Coast Guard–approved life jacket (Types III and V) that fits according to weight and height specifications. Inspect life jackets to ensure that they are in good condition and contain no tears. Read about Coast Guard life jackets here.
Safety helmet (with flexible, plastic shell, chin strap, and openings for drainage) when white-water rafting in Class II waters or higher
Wetsuit when water is colder than 70 degrees Fahrenheit Paddles (Select the appropriate size and style for the activity) Bailer (a bucket used to remove water from a boat) Foot pump Emergency sound device, such as a fog horn or sounding flares At least one graspable and throwable personal flotation device (Type IV buoyant cushion or ring buoy
or equivalent) is immediately available for each group on the water
Prepare for White-Water Rafting
Communicate with council and parents. Inform your Girl Scout council and girls’ parents/guardians about the activity, including details about safety precautions and any appropriate clothing or supplies that may be necessary. Follow council procedures for activity approval, certificates of insurance, and council guidelines about girls’ general health examinations. Make arrangements in advance for all transportation and confirm plans before departure.
Girls plan the activity. Keeping their grade-level abilities in mind, encourage girls to take proactive leadership roles in organizing details of the activity.
Ensure participants are able to swim. Participants’ swimming abilities are classified and clearly identified (for instance, with colored headbands to signify beginners, advanced swimmers, etc.) at council-approved sites, or participants provide proof of swimming-test certification. In the absence of swimming-test certification, a swim test is conducted on the day of the activity. Consult with your Girl Scout council for additional guidance.
Arrange for transportation and adult supervision. Ensure that at least two adults are in each raft. The recommended adult-to-girl ratios are two non-related adults (at least one of whom is female) to every:
12 Girl Scout Brownies
16 Girl Scout Juniors
20 Girl Scout Cadettes
24 Girl Scout Seniors
24 Girl Scout Ambassadors
Plus one adult to each additional:
6 Girl Scout Brownies
8 Girl Scout Juniors
10 Girl Scout Cadettes
12 Girl Scout Seniors
12 Girl Scout Ambassadors
47
Verify instructor knowledge and experience. At least one guide with documented experience and skill in teaching and/or supervising rafting is present in each raft. Ensure that the guide knows the American Whitewater International Scale of River Difficulty, Universal River Signals, and Safety Code. All rafters are instructed in how to float through rapids, breathe while swimming in rapids, and swim to shore.
Compile key contacts. Give an itinerary to a contact person at home; call the contact person upon departure and return. Create a list of girls’ parents/guardian contact information, telephone numbers for emergency services and police, and council contacts—keep on hand or post in an easily accessible location.
Select durable rafts that are appropriate size for rafting group. Make sure each raft is of heavy-duty construction and has at least four air compartments, an adequate number of large D-rings securely attached to the sides, and snug hand lines along the sides. Ensure that weight and capacity are not exceeded.
Research water conditions. Consider weather and water conditions, weight of passengers, and equipment. Also make sure of the following:
Craft weight and capacity are not exceeded (some crafts clearly display maximum capacity).
You are knowledgeable of the difficulty of the water run and the International Scale of River Difficulty.
You are aware of possible changes in river level and weather and their effects on the run’s level of difficulty.
Respect the environment. Make sure rafting on white-water or semiprotected waters meets the Safety Code of American Whitewater.
File a float plan. If participating in an extensive rafting trip, file a float plan with local authorities that includes names of people on board, destination, raft description, times of departure and return, and additional details about routes and marine communications. The Coast Guard provides an electronic, printable form.
Prepare for emergencies. If a lifeguard is not on duty, an adult with rescue and resuscitation experience and/or certification is present; at least one adult has small-craft safety certification or equivalent experience. (Both of these qualifications can be held by one person.) Ensure the presence of a waterproof first-aid kit and a first-aider with a current certificate in First Aid, including Adult and Child CPR or CPR/AED, who is prepared to handle cases of near-drowning, immersion hypothermia, and sunburn. If any part of the activity is located 60 minutes or more from Emergency Medical Services response time, ensure the presence of a first-aider (level 2) with Wilderness and Remote First Aid. See Volunteer Essentials for information about first-aid standards and training.
On the Day of White-Water Rafting
Get a weather report. Never go white-water rafting on a stormy day. On the day of the activity, consult weather.com or other reliable sources of weather reporting to determine if outdoor conditions, water temperature, and river conditions are appropriate. If weather conditions prevent the trip, be prepared with a backup plan or alternate activity.
Use the buddy system. Girls are divided into teams of two. Each girl chooses a buddy and is responsible for staying with her buddy at all times, warning her buddy of danger, giving her buddy immediate assistance if safe to do so, and seeking help when the situation warrants it. If someone in the group is injured, one person cares for the patient while two others seek help.
Be prepared in the event of a storm with lightning. Exit water immediately and take shelter away from tall objects (including trees, buildings, and electrical poles). Find the lowest point in an open flat area. Squat low to the ground on the balls of the feet, and place hands on knees with head between them. During storms, if shore cannot be reached, secure all loose gear, keep a sharp lookout for other rafts and obstructions, and stay low.
48
White-Water Rafting Links
American Canoe Association: www.americancanoe.org
American Whitewater: www.americanwhitewater.org
International Rafting Federation: www.intraftfed.com
Rafting America: www.raftingamerica.com
Whitewater Rescue Institute: www.whitewaterrescue.com
White-Water Rafting Know-How for Girls
Build arm strength and stamina. White-water rafting can be a tiring sport, especially if participants are doing the bulk of the paddling. Before going rafting, make sure that your body (especially your arms) is in good physical condition. To build stamina, do push-ups and briskly walk or run.
Learn paddling techniques. Before a rafting activity, learn about various paddling maneuvers, such as punching and high siding. Watch an ehow video to see how they’re done.
White-Water Rafting Jargon
Eddie: Water flowing upstream behind a rock or other obstacle; eddies often provide a safe place to get out of a current
Strainer: An opening where water is able to flow through, but a solid object such as a raft cannot; a strainer is considered highly dangerous and is usually formed by rocks piled atop each other, or trees on banks, with water flowing through them
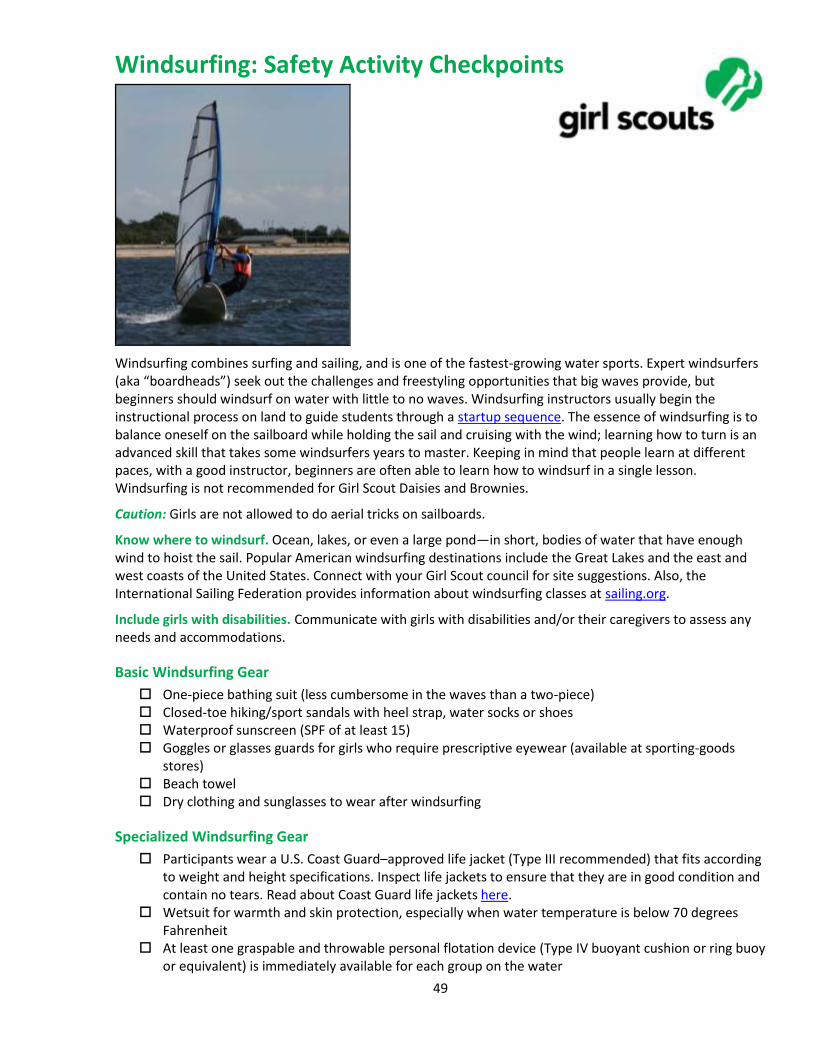
49
Windsurfing: Safety Activity Checkpoints
Windsurfing combines surfing and sailing, and is one of the fastest-growing water sports. Expert windsurfers (aka “boardheads”) seek out the challenges and freestyling opportunities that big waves provide, but beginners should windsurf on water with little to no waves. Windsurfing instructors usually begin the instructional process on land to guide students through a startup sequence. The essence of windsurfing is to balance oneself on the sailboard while holding the sail and cruising with the wind; learning how to turn is an advanced skill that takes some windsurfers years to master. Keeping in mind that people learn at different paces, with a good instructor, beginners are often able to learn how to windsurf in a single lesson. Windsurfing is not recommended for Girl Scout Daisies and Brownies.
Caution: Girls are not allowed to do aerial tricks on sailboards.
Know where to windsurf. Ocean, lakes, or even a large pond—in short, bodies of water that have enough wind to hoist the sail. Popular American windsurfing destinations include the Great Lakes and the east and west coasts of the United States. Connect with your Girl Scout council for site suggestions. Also, the International Sailing Federation provides information about windsurfing classes at sailing.org.
Include girls with disabilities. Communicate with girls with disabilities and/or their caregivers to assess any needs and accommodations.
Basic Windsurfing Gear
One-piece bathing suit (less cumbersome in the waves than a two-piece) Closed-toe hiking/sport sandals with heel strap, water socks or shoes Waterproof sunscreen (SPF of at least 15) Goggles or glasses guards for girls who require prescriptive eyewear (available at sporting-goods
stores) Beach towel Dry clothing and sunglasses to wear after windsurfing
Specialized Windsurfing Gear
Participants wear a U.S. Coast Guard–approved life jacket (Type III recommended) that fits according to weight and height specifications. Inspect life jackets to ensure that they are in good condition and contain no tears. Read about Coast Guard life jackets here.
Wetsuit for warmth and skin protection, especially when water temperature is below 70 degrees Fahrenheit
At least one graspable and throwable personal flotation device (Type IV buoyant cushion or ring buoy or equivalent) is immediately available for each group on the water
50
Sailboards
Prepare for Windsurfing
Communicate with council and parents. Inform your Girl Scout council and girls’ parents/guardians about the activity, including details about safety precautions and any appropriate clothing or supplies that may be necessary. Follow council procedures for activity approval, certificates of insurance, and council guidelines about girls’ general health examinations. Make arrangements in advance for all transportation and confirm plans before departure.
Girls plan the activity. Keeping their grade-level abilities in mind, encourage girls to take proactive leadership roles in organizing details of the activity.
Arrange for transportation and adult supervision. The recommended adult-to-girl ratios are two non-related adults (at least one of whom is female) to every:
16 Girl Scout Juniors
20 Girl Scout Cadettes
24 Girl Scout Seniors
24 Girl Scout Ambassadors
Plus one adult to each additional:
8 Girl Scout Juniors
10 Girl Scout Cadettes
12 Girl Scout Seniors
12 Girl Scout Ambassadors
Verify instructor knowledge and experience. Ensure that teacher holds a Windsurfing Instructor Certification from U.S. Sailing Association, or has equivalent certification or documented experience and skill in teaching and/or supervising windsurfing; the instructor-to-girl ratio is one to four.
Ensure participants are able to swim. Participants’ swimming abilities are classified and clearly identified (for instance, with colored headbands to signify beginners, advanced swimmers, etc.) at council-approved sites, or participants provide proof of swimming-test certification. In the absence of swimming-test certification, a swim test is conducted on the day of the activity. Consult with your Girl Scout council for additional guidance.
Compile key contacts. Give an itinerary to a contact person at home; call the contact person upon departure and return. Create a list of girls’ parents/guardian contact information, telephone numbers for emergency services and police, and council contacts—keep on hand or post in an easily accessible location.
Size up sailboards. Communicate girls’ ages, heights, and weights with windsurfing instructors to ensure the appropriate size equipment is available. Request that sails be the appropriate size (according to weight, height, and ability level) for windsurfers; the larger the sail, the more powerful the sailing capacity. Sailboard decks should be textured (not smooth) to provide traction.
Select a safe location with a soft, sandy, or muddy bottom. Choose a location that does not have a sharp-edged or rocky bottom, which can be dangerous and cut feet and limbs. The launching area should be easily accessible and clear of overhead power lines.
Safeguard valuables. Don’t leave personal belongings and valuables unattended in a public place. If working with a windsurfing school or camp, call to inquire about the organization’s storage amenities.
Prepare for emergencies. If a lifeguard is not on duty, an adult with rescue and resuscitation experience and/or certification is present; at least one adult present has small craft safety certification or equivalent experience. (Both of these qualifications can be held by one person.) Ensure the presence of a waterproof first-aid kit and a first-aider with a current certificate in First Aid, including Adult and Child CPR or CPR/AED, and is prepared to handle cases of near-drowning,

51
immersion hypothermia, and sunburn. If any part of the activity is located 60 minutes or more from Emergency Medical Services response time, ensure the presence of a first-aider (level 2) with Wilderness and Remote First Aid. See Volunteer Essentials for information about first-aid standards and training.
On the Day of Windsurfing
Get a weather and wind report. Never windsurf on a stormy or extremely windy day. On the day of the windsurf trip or lesson, visit weather.com to determine if weather conditions are appropriate. Windsurfing should be taught in a light breeze (in general, winds should be between 1 to 6 knots, or 1 to 7 miles per hour). Do not windsurf in offshore winds because windsurfers will drift away, making it nearly impossible to steer back to shore; the wind direction should be onshore or sideshore. If weather conditions prevent the windsurfing trip, be prepared with a backup plan or alternative activity.
Use the buddy system. Divide girls into teams of two. Each person is responsible for staying with her buddy at all times, warning her buddy of danger, giving her buddy immediate assistance if safe to do so, and seeking help when the situation warrants it. If someone in the group is injured, one person cares for the patient while two others seek help.
Be prepared in the event of a storm with lightning. Exit water immediately, and take shelter away from tall objects (including trees, buildings, and electrical poles). Find the lowest point in an open flat area. Squat low to the ground on the balls of the feet, and place hands on knees with head between them.
Windsurfing Links
International Sailing Federation: www.sailing.org
U.S. Sailing Windsurfing Course, how-to information, and safety tips: www.windsurfing.sailingcourse.com/safety.htm
U.S. Windsurfing Association: www.uswindsurfing.org
U.S. Windsurfing directory of windsurfing schools: www.uswindsurfing.org/shop_main.php
Windsurfing Know-How for Girls
Stay with the board. If remaining in the water while taking a break from windsurfing, stay near the board. Lifeguards become concerned if they see a windsurf board “missing” a windsurfer.
Troubleshoot exhaustion. In the case of fatigue while in the water (and in light winds), raise the sail down over the back of the board, position leg on top of the sail to prevent it from falling off the board, and paddle (or walk, if water is shallow enough) back to shore. U.S. Sailing provides instructions.
A heads-up on head protection. In the instance of losing balance on the board, before falling into the water, push the sail away from your body, so that the sail doesn’t strike your head. If unable to push the sail away from the body, make a fist and use your arm as a shield to protect your head.
Windsurfing Jargon
Centerboard: A retractable device on entry-level sailboards that, when down, keeps the board steady and from going sideways to aid with balancing and sailing upwind
Jibe: To change direction so that the sail is flown on the opposite side by turning away from the wind
Mast: The straight pole that holds the sail up from the deck of a sailboard (the height of which can be tuned for different body weights)
Skeg (aka fin): The small plastic or wood appendage attached to the underside rear of the sailboard that keeps it going straight
Starboard: The right-hand side of the sailboard
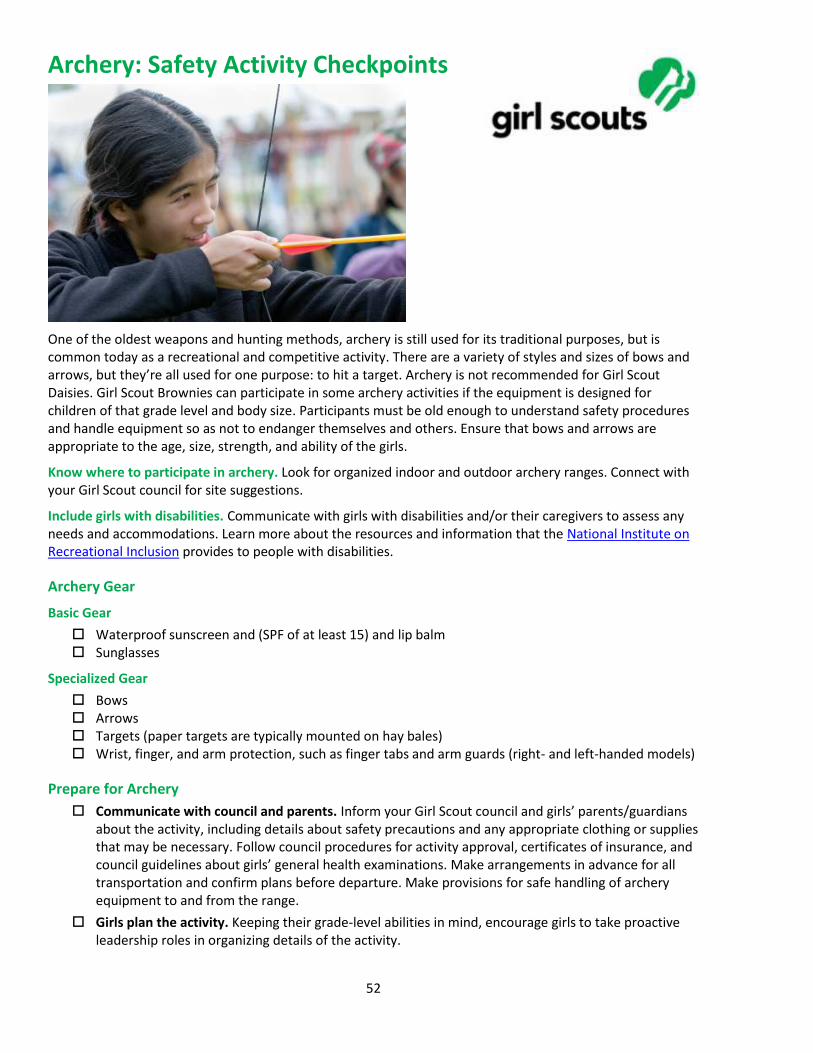
52
Archery: Safety Activity Checkpoints
One of the oldest weapons and hunting methods, archery is still used for its traditional purposes, but is common today as a recreational and competitive activity. There are a variety of styles and sizes of bows and arrows, but they’re all used for one purpose: to hit a target. Archery is not recommended for Girl Scout Daisies. Girl Scout Brownies can participate in some archery activities if the equipment is designed for children of that grade level and body size. Participants must be old enough to understand safety procedures and handle equipment so as not to endanger themselves and others. Ensure that bows and arrows are appropriate to the age, size, strength, and ability of the girls.
Know where to participate in archery. Look for organized indoor and outdoor archery ranges. Connect with your Girl Scout council for site suggestions.
Include girls with disabilities. Communicate with girls with disabilities and/or their caregivers to assess any needs and accommodations. Learn more about the resources and information that the National Institute on Recreational Inclusion provides to people with disabilities.
Archery Gear
Basic Gear
Waterproof sunscreen and (SPF of at least 15) and lip balm Sunglasses
Specialized Gear
Bows Arrows Targets (paper targets are typically mounted on hay bales) Wrist, finger, and arm protection, such as finger tabs and arm guards (right- and left-handed models)
Prepare for Archery
Communicate with council and parents. Inform your Girl Scout council and girls’ parents/guardians about the activity, including details about safety precautions and any appropriate clothing or supplies that may be necessary. Follow council procedures for activity approval, certificates of insurance, and council guidelines about girls’ general health examinations. Make arrangements in advance for all transportation and confirm plans before departure. Make provisions for safe handling of archery equipment to and from the range.
Girls plan the activity. Keeping their grade-level abilities in mind, encourage girls to take proactive leadership roles in organizing details of the activity.
53
Arrange for adult supervision. The recommended adult-to-girl ratios are two non-related adults (at least one of whom is female) to every:
12 Girl Scout Brownies
16 Girl Scout Juniors
20 Girl Scout Cadettes
24 Girl Scout Seniors
24 Girl Scout Ambassadors
Plus one adult to each additional:
6 Girl Scout Brownies
8 Girl Scout Juniors
10 Girl Scout Cadettes
12 Girl Scout Seniors
12 Girl Scout Ambassadors
Verify instructor knowledge and experience. One adult is a certified National Archery Association instructor or has equivalent certification or documented experience and skill in teaching/supervising archery. The instructor reviews the rules and operating procedures with girls beforehand, and posts safety rules at the site. Ensure that there is a ratio of 1 instructor for every 10 girls. Archery games away from a regular course are well supervised and appropriate to age, skill level, and location of shooting.
Compile key contacts. Give an itinerary to a contact person at home; call the contact person upon departure and return. Create a list of girls’ parents/guardian contact information, telephone numbers for emergency services and police, and council contacts—keep on hand or post in an easily accessible location.
Girls learn about archery. Girls develop skills based on proper procedures and form, such as stringing the bow, nocking the arrow, getting the right stance, sighting, and observing safety practices. Before archery activity, girls learn the following:
Archers straddle the shooting line to shoot.
Girls waiting to shoot stay well behind the archery line.A quiver for holding arrows is provided for each line of shooters. Never point a bow and arrow at a person, even when not drawn.
Arrows are not picked up until the “load” command is given.
Never shoot an arrow until the “fire when ready” command is given.
Never draw the string and let go without an arrow; this is called dry firing and can break the bow.
When aiming arrow, keep tip pointed toward the target. Shoot only at target and never at anything else, including trees, animals, etc. Never shoot an arrow straight up into the air.
Wait until the all-clear command is given before retrieving arrows.
Dress appropriately for the activity. Make sure girls and adults avoid wearing dangling earrings, bracelets, and necklaces that may become entangled in equipment. Also have girls tie back long hair.
Ensure that equipment is in good condition. Make sure that arrows are not warped and do not have cracked nocks or loose or missing feathers; bowstrings do not have broken or loose strands, and bows do not have loose or broken arrow rests; backstops for targets are in good repair. A beginner uses arrows that extend one to two inches in front of the bow when the bow is at full draw. Only target tip arrows are used, never broadhead/hunting tips.
Prepare for emergencies. Ensure the presence of a first-aid kit and a first-aider with certificates in First Aid, including Adult and Child CPR or CPR/AED, who is prepared to handle cases of puncture wounds and sunburn. If any part of the activity is located 60 minutes or more from emergency medical services, ensure the presence of a first-aider (level 2) with Wilderness and Remote First Aid. See Volunteer Essentials for information about first-aid standards and training.
54
On the Day of the Archery Activity
Get a weather report. On the morning of an outdoor archery activity, check weather.com or other reliable weather sources to determine if conditions are appropriate. If severe weather conditions prevent the archery activity, be prepared with a backup plan or alternate activity. Write, review, and practice evacuation and emergency plans for severe weather with girls.
Use the buddy system. Girls are divided into teams of two. Each girl chooses a buddy and is responsible for staying with her buddy at all times, warning her buddy of danger, giving her buddy immediate assistance if safe to do so, and seeking help when the situation warrants it. If someone in the group is injured, one person cares for the patient while two others seek help.
Safeguard valuables. Secure equipment in a dry, locked storage area. Archery equipment is stored in its proper storage container and locked when not in use.
Be prepared in the event of a storm with lightning. Take shelter away from tall objects (including trees, buildings, and electrical poles). Find the lowest point in an open flat area. Squat low to the ground on the balls of the feet, and place hands on knees with head between them.
Practice safe archery.
At an outdoor range:
Targets are not placed in front of houses, roads, trails, or tents.
Avoid areas with pedestrian traffic.
Clear areas of brush; a hillside backstop is recommended.
Be sure the shooting area and the spectator area behind the shooting area are clearly marked.
In the shooting area, ensure a distance of at least 50 yards behind the targets and 20 yards on each side of the range. An outdoor range is not used after nightfall.
Archery equipment is stored in the box and locked when not in use.
At an indoor range:
Targets are well-lit, and doors or entries onto the range are locked or blocked from the inside.
Do not block fire exits.
Archery Links
National Field Archery Association: www.nfaa-archery.org
USA Archery: www.usarchery.org
World Archery Center Instructor Courses: C:\Documents and Settings\mloyd\Local Settings\Local Settings\Temporary Internet Files\Content.Outlook\P8DETXM8\www.worldarcherycenter.com\instructor_courses
Archery Know-How for Girls
Learn how to string a bow. Read a step-by-step guide at Archery World U.K. Web site.
Learn archery safety basics. Learn tips such as “Never put an arrow into a bow unless you are on the shooting line” on the Colorado Division of Wildlife Web site.
Archery Jargon
AMO length: A standardized length for measuring bow strings
Anchor point: Part of the bow to rest lightly as the string is pulled toward the face, usually the corner of the archer’s mouth or chin
Dry fire: Shooting a bow without an arrow, which can damage the bow
55
Bicycling: Safety Activity Checkpoints
Whether you’re riding a mountain, racing, or hybrid bike, it’s important to assure that bikes are the proper size and in good condition. Make sure that the seat height is adjusted properly; when seated, girls should have a slight bend in the knee—in other words, the legs should never be fully extended. A too-low seat is a common problem and causes significant discomfort. The helmet should fit comfortably but snugly, be worn level on the head, and not move in any direction when the chin strap is securely fastened.
Bike races, mountain-biking, and long-distance cycling trips can be strenuous, and it’s essential for girls to condition themselves beforehand. Also, long-distance touring involves many hours of cycling, sometimes in difficult terrain, and requires girls to carry more gear and supplies than on short day trips. When training for lengthy bicycle trips, set realistic goals for mileage, and gradually increase the distance; for instance, one week, aim to ride 10 miles, and the next, strive for 12.
Caution: Girls are not allowed to do aerial tricks on bicycles.
Know where to bike. Learn about American road bike trails at adventurecycling.org. Connect with your Girl Scout council for site suggestions.
Include girls with disabilities. Communicate with girls with disabilities and/or their caregivers to assess any needs and accommodations. Learn more about the resources and information that the National Institute on Recreational Inclusion and the National Center of Physical Activities and Disabilities provide to people with disabilities.
Bicycling Gear
Basic Gear
Waterproof sunscreen and (SPF of at least 15) and lip balm Sunglasses Nonperishable, high-energy foods such as fruits and nuts Daypack to carry personal belongings
56
Specialized Gear
Bicycle (padded handlebars and gel-padded seat recommended) Reflectors Headlamp and taillight if bicycling at dusk Horn or bell Bicycle clothing: Wear comfortable, close-fitting clothing (such as bicycle shorts or aerobic exercise
tights when cycling in temperatures below 68 degrees) that cannot catch in bicycle gears or chain; avoid cotton and use synthetic fabrics that wick perspiration away from skin more comfortably; reflective or light-colored clothing is recommended when cycling at dusk; wear bright-colored or fluorescent clothing during day; on extended trips in cooler weather, wear layers and carry extra clothing and rain gear
Pant clips or bands if necessary Protective bicycle helmet with properly fitting safety harness that meets the American Society for
Testing and Materials (ASTM) F1163-88 requirements, displaying the Safety Equipment Institute (SEI) seal
Biker pack Cycling gloves Cycling shoes, or stiff-soled athletic shoes such as court shoes General map and/or bike-route map Compass Cycling repair kit: Each group carries a tire pump, tire patch kit, tire irons, screwdriver, adjustable
wrench, pliers, hex-head (Allen) wrenches, lubricating fluids Two water bottles per person
Prepare for Bicycling
Communicate with council and parents. Inform your Girl Scout council and girls’ parents/guardians about the activity, including details about safety precautions and any appropriate clothing or supplies that may be necessary. Follow council procedures for activity approval, certificates of insurance, and council guidelines about girls’ general health examinations. Make arrangements in advance for all transportation and confirm plans before departure.
Girls plan the activity. Keeping their grade-level abilities in mind, encourage girls to take proactive leadership roles in organizing details of the activity. The length and terrain of a trip, day or extended, are appropriate to the girls’ skill levels, their experience, and their physical condition, as well as the time of day, the weather, and the equipment available. Review the route and practice map-reading skills. Make careful plans for the type of road to be traveled. For example, secondary roads are quiet, but may have trees, curves, and hills that obstruct visibility. Ride only during daylight hours.
Organize cycling groups and arrange for adult supervision. Except when riding on bicycle paths, participants travel in groups of five or six, allowing at least 150 feet between groups so that vehicles may pass. Participants ride one to a bicycle except when riding tandem. In tandem riding, each girl has her own seat and the number of riders doesn’t exceed the intended limits of the bicycle. For every two groups, there is an adult at the head and another at the rear. The recommended adult-to-girl ratios are two non-related adults (at least one of whom is female) to every:
6 Girl Scout Daisies
12 Girl Scout Brownies
16 Girl Scout Juniors
20 Girl Scout Cadettes
24 Girl Scout Seniors
24 Girl Scout Ambassadors
Plus one adult to each additional:
57
4 Girl Scout Daisies
6 Girl Scout Brownies
8 Girl Scout Juniors
10 Girl Scout Cadettes
12 Girl Scout Seniors
12 Girl Scout Ambassadors
Compile key contacts. Give an itinerary to a contact person at home; call the contact person upon departure and return. Create a list of girls’ parents/guardian contact information, telephone numbers for emergency services and police, and council contacts—keep on hand or post in an easily accessible location.
Select safe cycling site or route. Observe all state and local regulations, and notify jurisdictional authorities about the group’s trip, when necessary. Use designated bicycle trails whenever possible, select bicycle trails with even surfaces, and avoid routes involving heavily trafficked streets and highways. Know in advance the location of emergency and medical services along the route.
Cyclists learn road safety. Girls learn to recognize and avoid common roadway hazards, including drainage grates and manhole covers, sand, gravel, glass, wet leaves, and litter on road shoulders, and other road-surface hazards; to communicate and cooperate with other road users; and to ride defensively. Motor-vehicle traffic presents the greatest danger to cyclists; hazards such as oil, wet leaves, parked cars, and rocks cause the majority of cycling accidents. Girls practice bicycling with a load comparable in weight to the load on the trip and learn to brake before they have to, especially on curves and down hills. Girls are instructed in and practice bicycle-riding skills in traffic, including signaling, scanning ahead and behind (especially before moving left), yielding to oncoming traffic, and making left turns. Emergency braking techniques are taught. Girls cycle single file with traffic; it is acceptable to ride briefly two abreast when passing a slower bicyclist.
Dress appropriately for the activity. Make sure girls and adults avoid wearing dangling earrings, bracelets, and necklaces that may become entangled in equipment.
Prepare for emergencies. Ensure the presence of a first-aid kit and a first-aider with a current certificate in First Aid, including Adult and Child CPR or CPR/AED, who is prepared to handle cases of soft tissue and bone injuries, and sunburn. If any part of the activity is located 60 minutes or more from emergency medical services, ensure the presence of a first-aider (level 2) with Wilderness and Remote First Aid. See Volunteer Essentials for information about first-aid standards and training.
On the Day of Bicycling
Get a weather report. On the morning of the bicycling activity, check weather.com or other reliable weather sources to determine if conditions are appropriate. If severe weather conditions prevent the bicycling activity, be prepared with a backup plan or alternate activity, and/or postpone the cycling activity. Write, review, and practice evacuation and emergency plans for severe weather with girls. In the event of a storm, take shelter away from tall objects (including trees, buildings, and electrical poles). Find the lowest point in an open flat area. Squat low to the ground on the balls of the feet, and place hands on knees with head between them.
Use the buddy system. Girls are divided into teams of two. Each girl chooses a buddy and is responsible for staying with her buddy at all times, warning her buddy of danger, giving her buddy immediate assistance if safe to do so, and seeking help when the situation warrants it. If someone in the group is injured, one person cares for the patient while two others seek help.
Be prepared in the case of an emergency. Provide a detailed itinerary and an established call-in schedule for each day. Carry identification and a list of emergency phone numbers and contact information for bike-repair shops.
Prepare for the long haul. Adjust bicycles frequently for comfort, and check handlebars after adjusting the seat for proper leg extension. Girls should not stop cycling abruptly; instead, after
58
stopping, make sure they cool down gradually by walking around for a few minutes. Girls do not push past their endurance levels.
Ride safely. Cyclists ride with the flow of traffic and obey applicable traffic regulations, signals, lane markings, and local ordinances pertaining to bicycle operation. Bicyclists do not weave in and out of traffic or between parked cars. Light gear is stored in bicycle panniers (foldable carriers) or packs on the back of the bike. Bicyclists make a full stop and look left, right, and left again, especially at the end of a driveway and before entering a street or roadway. Cyclists walk their bikes across busy intersections. Bicyclists use hand signals to indicate turning or stopping. Bicyclists keep a safe distance between themselves and the vehicle ahead. Bicycles have lights and reflectors. When bicycles are not on segregated paths, lights are on to increase visibility.
Bicycling Links
Adventure Cycling Association: www.adventurecycling.org
USA Cycling: www.usacycling.org
Tread Lightly: www.treadlightly.org
Bicycling Know-How for Girls
Stretch your muscles. Before cycling, gently stretch your hamstrings, quads (against a wall), and calves. Learn how at www.grouptrails.com/Stretches.htm.
Learn emergency maneuvers. Read about and practice the quick stop, rock dodge, and instant turn on the League of American Bicyclists site, which also provides tips for beginners.
Bicycling Jargon
Bully: To ride uphill without slowing down
Brain bucket: Bicycle helmet
Century: A 100-mile bike ride
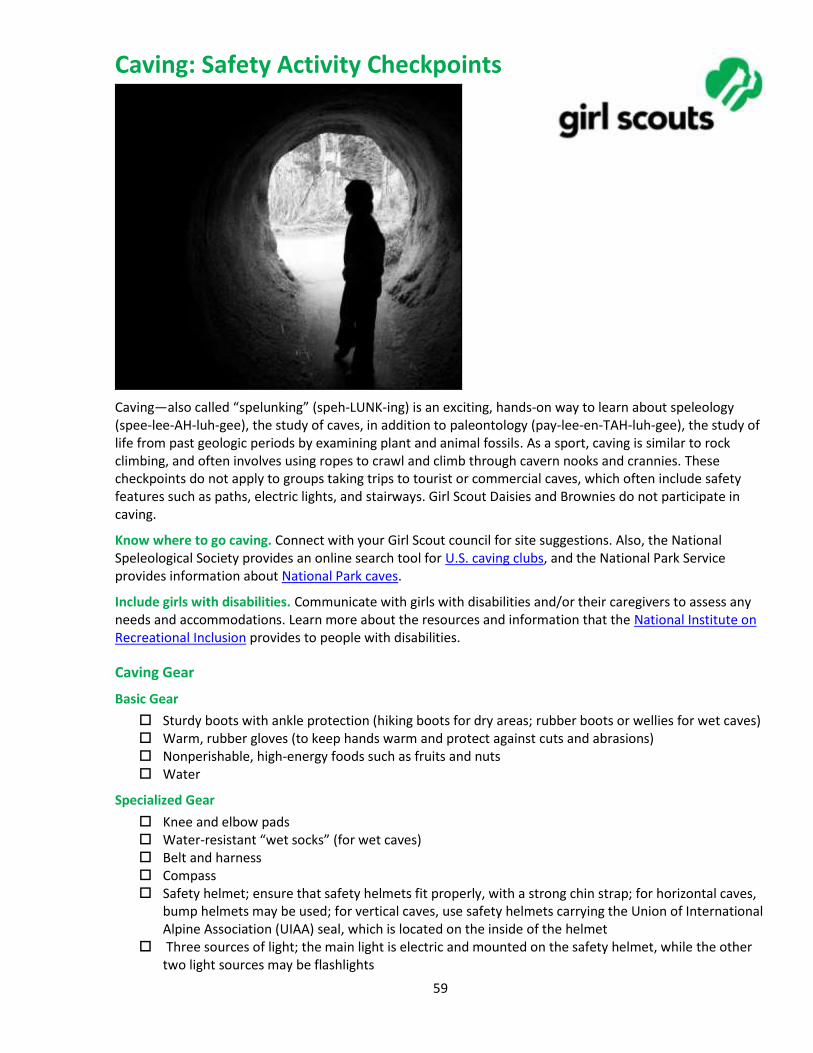
59
Caving: Safety Activity Checkpoints
Caving—also called “spelunking” (speh-LUNK-ing) is an exciting, hands-on way to learn about speleology (spee-lee-AH-luh-gee), the study of caves, in addition to paleontology (pay-lee-en-TAH-luh-gee), the study of life from past geologic periods by examining plant and animal fossils. As a sport, caving is similar to rock climbing, and often involves using ropes to crawl and climb through cavern nooks and crannies. These checkpoints do not apply to groups taking trips to tourist or commercial caves, which often include safety features such as paths, electric lights, and stairways. Girl Scout Daisies and Brownies do not participate in caving.
Know where to go caving. Connect with your Girl Scout council for site suggestions. Also, the National Speleological Society provides an online search tool for U.S. caving clubs, and the National Park Service provides information about National Park caves.
Include girls with disabilities. Communicate with girls with disabilities and/or their caregivers to assess any needs and accommodations. Learn more about the resources and information that the National Institute on Recreational Inclusion provides to people with disabilities.
Caving Gear
Basic Gear
Sturdy boots with ankle protection (hiking boots for dry areas; rubber boots or wellies for wet caves) Warm, rubber gloves (to keep hands warm and protect against cuts and abrasions) Nonperishable, high-energy foods such as fruits and nuts Water
Specialized Gear
Knee and elbow pads Water-resistant “wet socks” (for wet caves) Belt and harness Compass Safety helmet; ensure that safety helmets fit properly, with a strong chin strap; for horizontal caves,
bump helmets may be used; for vertical caves, use safety helmets carrying the Union of International Alpine Association (UIAA) seal, which is located on the inside of the helmet
Three sources of light; the main light is electric and mounted on the safety helmet, while the other two light sources may be flashlights
60
Spare bulbs and batteries Trash bag (use as a poncho or for covering dirty equipment after the caving activity; cavers keep an
empty trash bag in their safety helmets)
Prepare for Caving
Communicate with council and parents. Inform your Girl Scout council and girls’ parents/guardians about the activity, including details about safety precautions and any appropriate clothing or supplies that may be necessary. Follow council procedures for activity approval, certificates of insurance, and council guidelines about girls’ general health examinations. Make arrangements in advance for all transportation and confirm plans before departure.
Girls plan the activity. Keeping their grade-level abilities in mind, encourage girls to take proactive leadership roles in organizing details of the activity.
Arrange for transportation and adult supervision. Ensure that at least one adult is an experienced caver. The recommended adult-to-girl ratios are two non-related adults (at least one of whom is female) to every:
16 Girl Scout Juniors
20 Girl Scout Cadettes
24 Girl Scout Seniors
24 Girl Scout Ambassadors
Plus one adult to each additional:
8 Girl Scout Juniors
10 Girl Scout Cadettes
12 Girl Scout Seniors
12 Girl Scout Ambassadors
Verify instructor knowledge and experience. A guide with documented experience in cave exploration accompanies the group into the cave. A guide can also help decide which caves are suitable. Pre-trip instruction is given by an adult with documented experience and skill in teaching and/or supervising caving.
Select a safe site. Obtain guidance from a local chapter of the National Speleological Society to select a cave to explore. Never explore a cave without a guide and without written permission from the site owner/operator.
Compile key contacts. Give an itinerary to a contact person at home; call the contact person upon departure and return. Create a list of girls’ parents/guardian contact information, telephone numbers for emergency services and police, and council contacts—keep on hand or post in an easily accessible location.
Girls learn about caving. Girls learn about basic caving guidelines before planning a caving trip, and they must understand safety procedures and know how to handle equipment.
Dress appropriately for the activity. Make sure girls and adults avoid wearing dangling earrings, bracelets, and necklaces that may become entangled in equipment.
Prepare for emergencies. Ensure the presence of a waterproof first-aid kit and a first-aider with a current certificate in First Aid, including Adult and Child CPR or CPR/AED, who is prepared to handle cases of soft tissue and bone injury, and hypothermia. If any part of the activity is located 60 minutes or more from Emergency Medical Services response time, ensure the presence of a first-aider (level 2) with Wilderness and Remote First Aid. See Volunteer Essentials for information about first-aid standards and training.
61
On the Day of Caving
Get a weather report. On the morning of the caving activity, check weather.com or other reliable weather sources to determine if conditions are appropriate. If severe weather conditions prevent the caving activity, be prepared with a backup plan or alternate activity. Write, review, and practice evacuation and emergency plans for severe weather with girls. In the event of a storm, take shelter away from tall objects (including trees, buildings, and electrical poles). Find the lowest point in an open flat area. Squat low to the ground on the balls of the feet, and place hands on knees with head between them. Also, in wet weather, avoid caves with stream passages, as some caves can flood.
Use the buddy system. Girls are divided into teams of two. Each girl chooses a buddy and is responsible for staying with her buddy at all times, warning her buddy of danger, giving her buddy immediate assistance if safe to do so, and seeking help when the situation warrants it. If someone in the group is injured, one person cares for the patient while two others seek help.
Caving Links
American Cave Conservation Association: www.cavern.org
National Caves Association: http://cavern.com
National Speleological Society: www.caves.org
Caving Know-How for Girls
Leave No Trace in caving. Learn about threats to cave and karst systems, which are underground drainage systems, from the National Park Service.
Get into archaeology. Read up about the archaeological explorations in caving at caverinfo.com.
Caving Jargon
Calcite: One of the most common minerals that is a major component of limestone, marble, and chalk
Scallops: Spoon-shaped hollows dissolved in cave walls, ceilings, and floors by flowing water
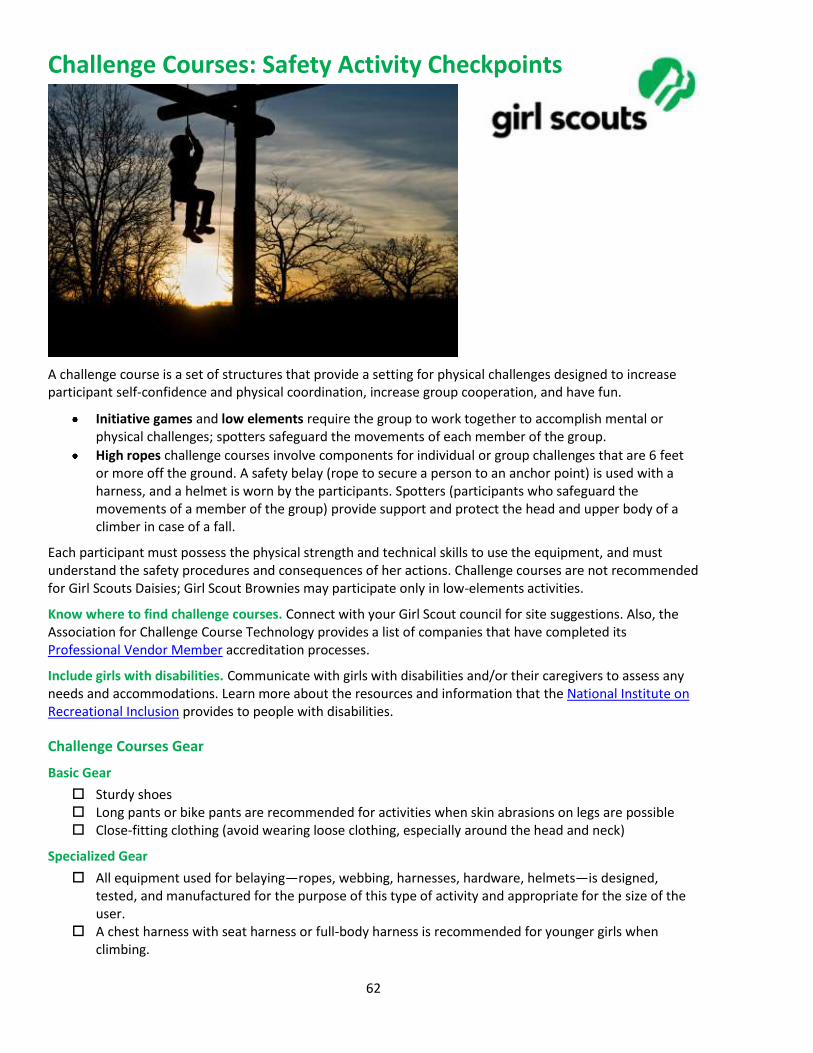
62
Challenge Courses: Safety Activity Checkpoints
A challenge course is a set of structures that provide a setting for physical challenges designed to increase participant self-confidence and physical coordination, increase group cooperation, and have fun.
Initiative games and low elements require the group to work together to accomplish mental or physical challenges; spotters safeguard the movements of each member of the group.
High ropes challenge courses involve components for individual or group challenges that are 6 feet or more off the ground. A safety belay (rope to secure a person to an anchor point) is used with a harness, and a helmet is worn by the participants. Spotters (participants who safeguard the movements of a member of the group) provide support and protect the head and upper body of a climber in case of a fall.
Each participant must possess the physical strength and technical skills to use the equipment, and must understand the safety procedures and consequences of her actions. Challenge courses are not recommended for Girl Scouts Daisies; Girl Scout Brownies may participate only in low-elements activities.
Know where to find challenge courses. Connect with your Girl Scout council for site suggestions. Also, the Association for Challenge Course Technology provides a list of companies that have completed its Professional Vendor Member accreditation processes.
Include girls with disabilities. Communicate with girls with disabilities and/or their caregivers to assess any needs and accommodations. Learn more about the resources and information that the National Institute on Recreational Inclusion provides to people with disabilities.
Challenge Courses Gear
Basic Gear
Sturdy shoes Long pants or bike pants are recommended for activities when skin abrasions on legs are possible Close-fitting clothing (avoid wearing loose clothing, especially around the head and neck)
Specialized Gear
All equipment used for belaying—ropes, webbing, harnesses, hardware, helmets—is designed, tested, and manufactured for the purpose of this type of activity and appropriate for the size of the user.
A chest harness with seat harness or full-body harness is recommended for younger girls when climbing.
63
Climbing helmets are worn in climbing activities in which the participant is more than 6 feet off the ground and/or on belay. In addition, participants standing in the “fall zone” beneath a climbing element wear helmets. Climbing helmets that have the UIAA-approved label (Union of International Alpine Association) must be worn for all climbing situations where the participant is more than 6 feet off the ground and/or on belay. It is recommended that a disposable liner, such as a shower cap or surgical cap, be worn underneath the helmet to protect against the spread of head lice.
Prepare for Challenge Courses
Communicate with council and parents. Inform your Girl Scout council and girls’ parents/guardians about the activity, including details about safety precautions and any appropriate clothing or supplies that may be necessary. Follow council procedures for activity approval, certificates of insurance, and council guidelines about girls’ general health examinations. Make arrangements in advance for all transportation and confirm plans before departure.
Girls plan the activity. Keeping their grade-level abilities in mind, encourage girls to take proactive leadership roles in organizing details of the activity.
Arrange for transportation and adult supervision. The recommended adult-to-girl ratios are two non-related adults (at least one of whom is female) to every:
12 Girl Scout Brownies (low-elements only)
16 Girl Scout Juniors
20 Girl Scout Cadettes
24 Girl Scout Seniors
24 Girl Scout Ambassadors
Plus one adult to each additional:
6 Girl Scout Brownies (low-elements only)
8 Girl Scout Juniors
10 Girl Scout Cadettes
12 Girl Scout Seniors
12 Girl Scout Ambassadors
Verify instructor knowledge and experience. An instructor with documented experience, indicating competence in equipment maintenance, safety and rescue techniques, proper use of the course and hands-on training directly supervises the group. Ensure that the instructor-to-participant ration meets or exceeds minimum standards, as identified by the original manufacturer or installer of the challenge course and/or is in compliance with current industry standards. Ensure that the instructor has provided written documentation of the completed training, there is a regular process of review and update for all instructors, and a minimum of two instructors are present. Instructors are skilled in selecting appropriate activities, teaching and supervising spotting and belaying techniques, and modifying tasks to provide an appropriate experience for the ages and skill levels in the group. Before use, instructors inspect all equipment, course components, and landing areas in the activity area.
Compile key contacts. Give an itinerary to a contact person at home; call the contact person upon departure and return. Create a list of girls’ parents/guardian contact information, telephone numbers for emergency services and police, and council contacts—keep on hand or post in an easily accessible location.
Prepare for emergencies. Ensure the presence of a waterproof first-aid kit and a first-aider (level 1) with a current certificate in First Aid, including Adult and Child CPR or CPR/AED; who is prepared to handle cases of injury from falls as well as abrasions and sunburn. A first-aider (level 2) is present for high-ropes courses. A sharp knife, hardware, and extra rope of appropriate length for rescue are available at the site. Emergency transportation is available; if any part of the activity is located 60 minutes or more from emergency medical services, ensure the presence of a first-aider (level 2) with Wilderness and Remote First Aid. Specialized safety and rescue procedures are planned and
64
practiced to ensure the ability to remove a participant from a high-ropes, rappelling, or climbing situation. See Volunteer Essentials for information about first-aid standards and training.
Dress appropriately for the activity. Sharp objects, jewelry, and watches are removed and pockets emptied. Long hair is pulled back from the face and fastened under the helmet to prevent tangling.
On the Day of the Challenge Course Activity
Get a weather report. On the morning of the activity, check weather.com or other reliable weather sources to determine if conditions are appropriate. Be prepared to alter the activity plan or have an alternate activity prepared if weather conditions change. Write, review, and practice evacuation and emergency plans for severe weather with girls. In the event of a storm, take shelter away from tall objects (including trees, buildings, and electrical poles). Find the lowest point in an open flat area. Squat low to the ground on the balls of the feet, and place hands on knees with head between them.
Use the buddy system. Girls are divided into teams of two. Each girl chooses a buddy and is responsible for staying with her buddy at all times, warning her buddy of danger, giving her buddy immediate assistance if safe to do so, and seeking help when the situation warrants it. If someone in the group is injured, one person cares for the patient while two others seek help.
Ensure that equipment is well-maintained. There is a documented maintenance schedule and periodic inspection by instructors and outside professionals of all artificial structures and equipment used in the activities. A use log is kept on all equipment subject to stress, wear, and deterioration. A written equipment monitoring and retirement process is established and followed.
Girls learn about and prepare for challenge courses. Instructors teach a set of readiness and action commands to all participants for climbing, spotting, and belaying. All participants utilize gentle muscle warm-up and stretching activities before beginning physical activities. Instructors describe the objectives, safety procedures, and hazards to the participants before beginning an activity.
Girls practice safe challenge-course techniques. Spotting techniques are taught, demonstrated, and practiced by participants prior to any challenge-course activity. All activities are appropriately spotted. For activities where partners are needed, instructors match participants according to size and skill level, if appropriate. Instructors supervise all tie-ins, belays, and climbs on high ropes courses and spotting on low elements courses. Participants are not stacked more than three levels high vertically (in a pyramid, for example) on each other at any time. No one should stand on the middle of someone else’s back.
Challenge Courses Links
Association for Experiential Education: www.aee.org
Association for Challenge Course Technology: www.acctinfo.org
International Mountaineering and Climbing Federation: www.theuiaa.org
Project Adventure: www.pa.org
Challenge Courses Know-How for Girls
Focus on team-building. Challenge courses rely on strong communication and trust. Is your team ready for the challenge?
Challenge Courses Jargon
Zip line: A wire or cable to which a pulley and harness are attached for a rider
Belay: To secure a person or object at the end of a rope
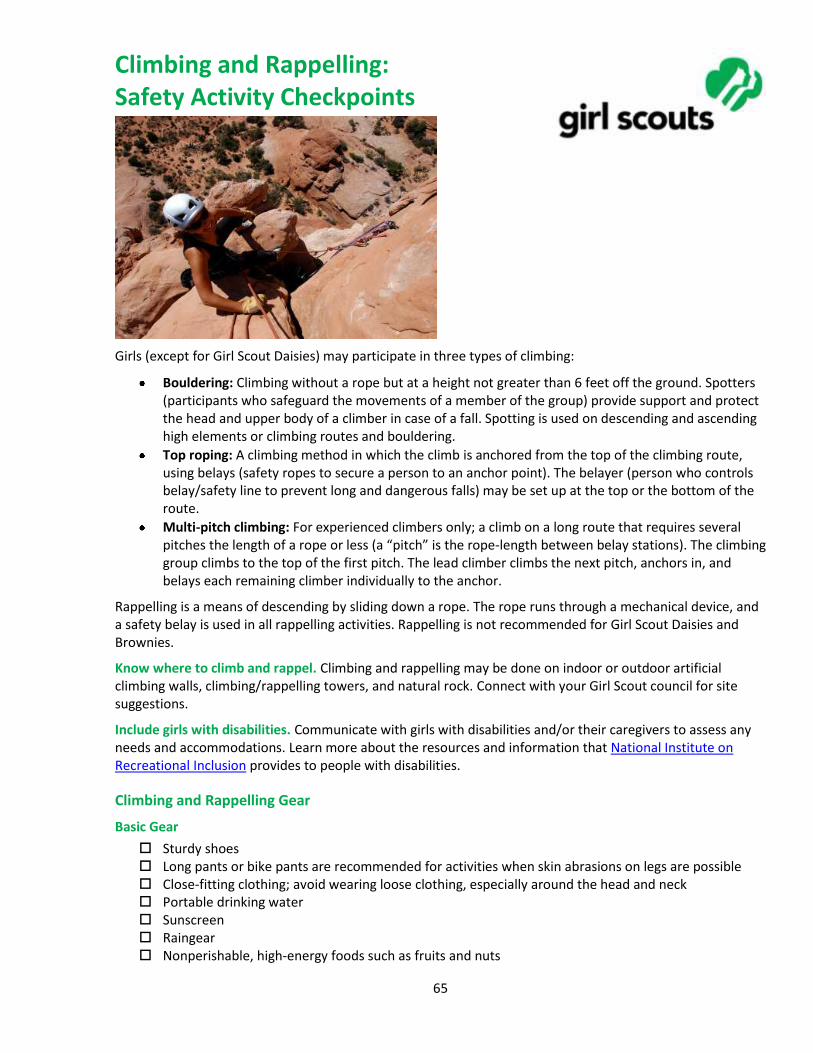
65
Climbing and Rappelling: Safety Activity Checkpoints
Girls (except for Girl Scout Daisies) may participate in three types of climbing:
Bouldering: Climbing without a rope but at a height not greater than 6 feet off the ground. Spotters (participants who safeguard the movements of a member of the group) provide support and protect the head and upper body of a climber in case of a fall. Spotting is used on descending and ascending high elements or climbing routes and bouldering.
Top roping: A climbing method in which the climb is anchored from the top of the climbing route, using belays (safety ropes to secure a person to an anchor point). The belayer (person who controls belay/safety line to prevent long and dangerous falls) may be set up at the top or the bottom of the route.
Multi-pitch climbing: For experienced climbers only; a climb on a long route that requires several pitches the length of a rope or less (a “pitch” is the rope-length between belay stations). The climbing group climbs to the top of the first pitch. The lead climber climbs the next pitch, anchors in, and belays each remaining climber individually to the anchor.
Rappelling is a means of descending by sliding down a rope. The rope runs through a mechanical device, and a safety belay is used in all rappelling activities. Rappelling is not recommended for Girl Scout Daisies and Brownies.
Know where to climb and rappel. Climbing and rappelling may be done on indoor or outdoor artificial climbing walls, climbing/rappelling towers, and natural rock. Connect with your Girl Scout council for site suggestions.
Include girls with disabilities. Communicate with girls with disabilities and/or their caregivers to assess any needs and accommodations. Learn more about the resources and information that National Institute on Recreational Inclusion provides to people with disabilities.
Climbing and Rappelling Gear
Basic Gear
Sturdy shoes Long pants or bike pants are recommended for activities when skin abrasions on legs are possible Close-fitting clothing; avoid wearing loose clothing, especially around the head and neck Portable drinking water Sunscreen Raingear Nonperishable, high-energy foods such as fruits and nuts
66
Specialized Gear
All equipment used for belaying—ropes, webbing, harnesses, hardware, helmets—is designed, tested, and manufactured for the purpose of this type of activity and appropriate for the size of the user.
A chest harness with seat harness or full-body harness is recommended for younger girls when climbing.
Climbing helmets that have the UIAA-approved label (Union of International Alpine Association) must be worn for all climbing situations where the participant is more than 6 feet off the ground or on belay. It is recommended that a disposable liner, such as a shower cap or surgical cap, be worn underneath the helmet to protect against the spread of head lice.
Prepare for Climbing and Rappelling
Communicate with council and parents. Inform your Girl Scout council and girls’ parents/guardians about the activity, including details about safety precautions and any appropriate clothing or supplies that may be necessary. Follow council procedures for activity approval, certificates of insurance, and council guidelines about girls’ general health examinations. Make arrangements in advance for all transportation and confirm plans before departure.
Girls plan the activity. Keeping their grade-level abilities in mind, encourage girls to take proactive leadership roles in organizing details of the activity.
Arrange for transportation and adult supervision. The recommended adult-to-girl ratios are two non-related adults (at least one of whom is female) to every:
12 Girl Scout Brownies (climbing only)
16 Girl Scout Juniors
20 Girl Scout Cadettes
24 Girl Scout Seniors
24 Girl Scout Ambassadors
Plus one adult to each additional:
6 Girl Scout Brownies (climbing only)
8 Girl Scout Juniors
10 Girl Scout Cadettes
12 Girl Scout Seniors
12 Girl Scout Ambassadors
Verify instructor knowledge and experience. An instructor with documented experience, indicating competence in equipment maintenance, safety and rescue techniques, proper use of the course and hands-on training directly supervises the group. The instructor has provided written documentation of the completed training. Ensure that there is a regular process of review and update for all instructors. A minimum of two instructors are present, and instructors are skilled in selecting appropriate activities, teaching and supervising spotting and belaying techniques, and modifying tasks to provide an appropriate experience for the ages and skill levels in the group. Before use, instructors inspect all equipment, course components, and landing areas in the activity area.
The instructor/participant ratios are as follows.
Bouldering and top roping: 1 instructor to 10 participants
Multi-pitch climbing: 1 instructor (qualified lead climber) to 3 participants
Select a safe site. Permits and permission requests are filed as required for climbing sites and facilities. All permanent structures and the belaying system are planned and constructed by experienced individuals. Plans and procedures are established to avoid unauthorized use of the site, structures, and equipment. The artificial climbing site must be posted to warn against unauthorized use.
67
Compile key contacts. Give an itinerary to a contact person at home; call the contact person upon departure and return. Create a list of girls’ parents/guardian contact information, telephone numbers for emergency services and police, and council contacts—keep on hand or post in an easily accessible location.
Prepare for emergencies. Ensure the presence of a waterproof first-aid kit and a first-aider (level 1) with current certificate in First Aid, including Adult and Child CPR or CPR/AED, who is prepared to handle cases of injury from falls as well as abrasions and sunburn. A sharp knife, hardware, and extra rope of appropriate length for rescue are available at the site. Emergency transportation is available; if any part of the activity is located 60 minutes or more from emergency medical services, ensure the presence of a first-aider (level 2) with Wilderness and Remote First Aid. Specialized safety and rescue procedures are planned and practiced to ensure the ability to remove a participant from a rappelling or climbing situation. See Volunteer Essentials for information about first-aid standards and training.
Dress appropriately for the activity. Sharp objects, jewelry, and watches are removed and pockets emptied. Long hair is pulled back from the face and fastened under the helmet to prevent tangling.
On the Day of Climbing or Rappelling
Get a weather report. If climbing and rappelling outdoors, on the morning of the activity, check weather.com or other reliable weather sources to determine if conditions are appropriate. Be prepared to alter the activity plan or have an alternate activity prepared if weather conditions change. Write, review, and practice evacuation and emergency plans for severe weather with girls. In the event of a storm, take shelter away from tall objects (including trees, buildings, and electrical poles). Find the lowest point in an open flat area. Squat low to the ground on the balls of the feet, and place hands on knees with head between them.
Use the buddy system. Girls are divided into teams of two. Each girl chooses a buddy and is responsible for staying with her buddy at all times, warning her buddy of danger, giving her buddy immediate assistance if safe to do so, and seeking help when the situation warrants it. If someone in the group is injured, one person cares for the patient while two others seek help.
Ensure that equipment is well-maintained. There is a documented maintenance schedule and periodic inspection by instructors and outside professionals of all artificial structures and equipment used in the activities. A use log is kept on all equipment subject to stress, wear, and deterioration. A written equipment monitoring and retirement process is established and followed.
Participants learn about and prepare for climbing and rappelling. Instructors teach a set of readiness and action commands to all participants for climbing, spotting, and belaying. All participants utilize muscle warm-up and stretching activities before beginning physical activities. Instructors describe the objectives, safety procedures, and hazards to the participants before beginning an activity.
Participants practice safe climbing and rappelling techniques. Spotting techniques are taught, demonstrated, and practiced by participants prior to any climbing or rappelling activity. All activities are appropriately spotted. For activities where partners are needed, instructors match participants according to size and skill level, if appropriate. Instructors supervise all tie-ins, belays, and climbs on climbing sites and spotting on bouldering sites.
Climbing and Rappelling Links
International Mountaineering and Climbing Federation: www.theuiaa.org
Rockclimbing.com: www.rockclimbing.com
Climbing and Rappelling Know-How for Girls
Leave no trace. When climbing and rappelling in natural areas, it’s important to respect rocks and the environment. Read tips from the U.S. National Park Service Web site.

68
Climbing and Rappelling Jargon
Carabiner: A metal ring with a spring-hinged side that is used as a connector and to hold a freely running rope
Anchor: An arrangement of one or several pieces of gear set up to support the weight of a belay or top rope
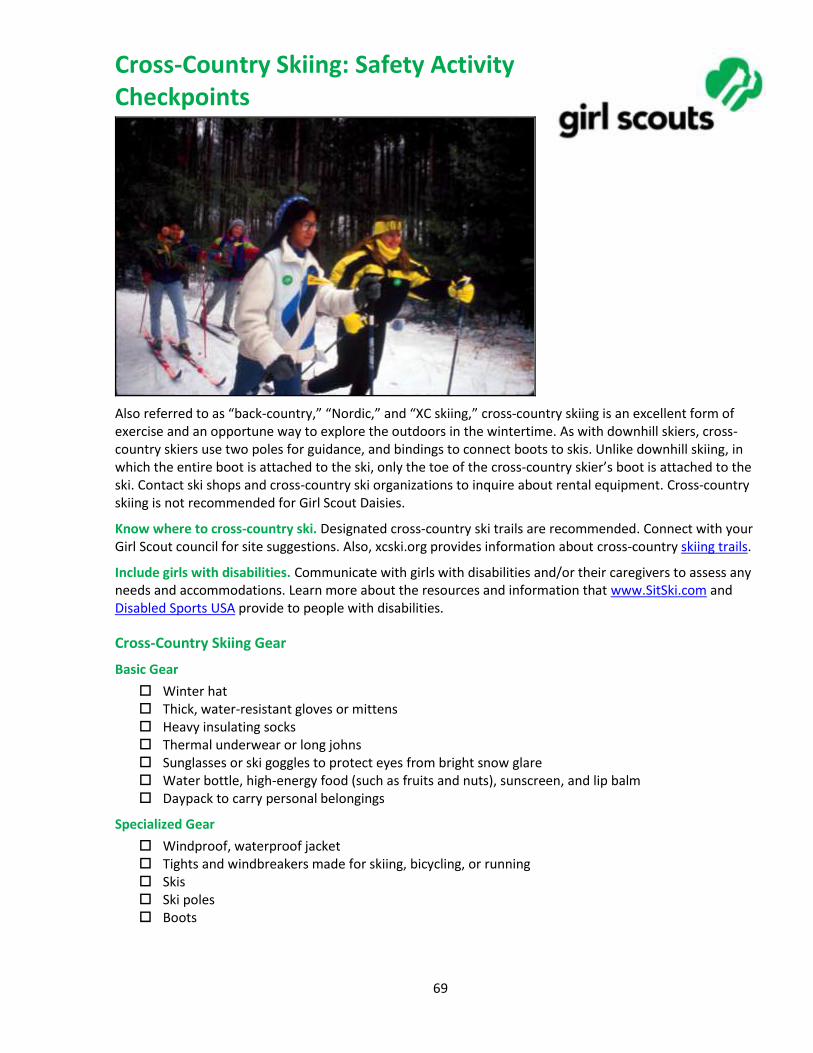
69
Cross-Country Skiing: Safety Activity Checkpoints
Also referred to as “back-country,” “Nordic,” and “XC skiing,” cross-country skiing is an excellent form of exercise and an opportune way to explore the outdoors in the wintertime. As with downhill skiers, cross-country skiers use two poles for guidance, and bindings to connect boots to skis. Unlike downhill skiing, in which the entire boot is attached to the ski, only the toe of the cross-country skier’s boot is attached to the ski. Contact ski shops and cross-country ski organizations to inquire about rental equipment. Cross-country skiing is not recommended for Girl Scout Daisies.
Know where to cross-country ski. Designated cross-country ski trails are recommended. Connect with your Girl Scout council for site suggestions. Also, xcski.org provides information about cross-country skiing trails.
Include girls with disabilities. Communicate with girls with disabilities and/or their caregivers to assess any needs and accommodations. Learn more about the resources and information that www.SitSki.com and Disabled Sports USA provide to people with disabilities.
Cross-Country Skiing Gear
Basic Gear
Winter hat Thick, water-resistant gloves or mittens Heavy insulating socks Thermal underwear or long johns Sunglasses or ski goggles to protect eyes from bright snow glare Water bottle, high-energy food (such as fruits and nuts), sunscreen, and lip balm Daypack to carry personal belongings
Specialized Gear
Windproof, waterproof jacket Tights and windbreakers made for skiing, bicycling, or running Skis Ski poles Boots
70
Prepare for Cross-Country Skiing
Communicate with council and parents. Inform your Girl Scout council and girls’ parents/guardians about the activity, including details about safety precautions and any appropriate clothing or supplies that may be necessary. Follow council procedures for activity approval, certificates of insurance, and council guidelines about girls’ general health examinations. Make arrangements in advance for all transportation and confirm plans before departure.
Girls plan the activity. Keeping their grade-level abilities in mind, encourage girls to take proactive leadership roles in organizing details of the activity.
Arrange for transportation and adult supervision. Ensure that one adult leads and another adult brings up the rear of the group. The recommended adult-to-girl ratios are two non-related adults (at least one of whom is female) to every:
12 Girl Scout Brownies
16 Girl Scout Juniors
20 Girl Scout Cadettes
24 Girl Scout Seniors
24 Girl Scout Ambassadors
Plus one adult to each additional:
6 Girl Scout Brownies
8 Girl Scout Juniors
10 Girl Scout Cadettes
12 Girl Scout Seniors
12 Girl Scout Ambassadors
Verify instructor knowledge and experience. Instruction is given by an adult with experience teaching and/or supervising cross-country skiing for the age group(s) involved.
Compile key contacts. Give an itinerary to a contact person at home; call the contact person upon departure and return. Create a list of girls’ parents/guardian contact information, telephone numbers for emergency services and police, and council contacts—keep on hand or post in an easily accessible location.
Select a safe cross-country skiing site. Girls are encouraged to plan trip details and include adequate rest periods with opportunities to replenish fluids and eat high-energy foods (such as fruits and nuts). The nature of the terrain, potential hazards (such as an avalanche or frozen lake), mileage, and approximate cross-country skiing time are known to all group members. When a latrine is not available, individual cat holes at least 200 feet away from water sources are used to dispose of human waste (visit www.lnt.org for more information).
Map the course. Before skiing, designate a meeting place where girls can contact a supervising adult. The itinerary, with planned departure and return times and names of the cross-country skiers, is left with a contact person. The route is marked on a map. The contact person is advised before the group’s departure and upon its return.
Prepare for emergencies. Ensure the presence of a waterproof first-aid kit and a first-aider with a current certificate in First Aid, including Adult and Child CPR or CPR/AED, who is prepared to handle cases of frostbite, cold exposure, hypothermia, sprains, fractures, and altitude sickness. Emergency transportation is available; if any part of the activity is located 60 minutes or more from emergency medical services, ensure the presence of a first-aider (level 2) with Wilderness and Remote First Aid. Girls are trained in winter survival (such as snow-cave building, whiteouts, and avalanche avoidance), as needed. Search-and-rescue procedures are written out in advance; arrangements are made for medical emergencies and evacuation procedures. See Volunteer Essentials for information about first-aid standards and training.
71
On the Day of Cross-Country Skiing
Get a weather report. On the morning of the activity, check weather.com or other reliable weather sources to determine if conditions are appropriate. Xcski.org provides reports about snow conditions by region. If severe weather conditions prevent the activity, be prepared with a backup plan or alternate activity, or postpone the activity. Write, review, and practice evacuation and emergency plans for severe weather with girls.
Use the buddy system. Girls are divided into teams of two. Each girl chooses a buddy and is responsible for staying with her buddy at all times, warning her buddy of danger, giving her buddy immediate assistance if safe to do so, and seeking help when the situation warrants it. If someone in the group is injured, one person cares for the patient while two others seek help.
Follow cross-country safety standards. Ski area rules are explained and observed:
Girls ski under control to avoid other skiers and objects.
Girls yield the right-of-way to those already on the trail. They step to the side to let faster skiers pass. A descending skier has the right of way.
A faster skier indicates her desire to pass by calling “Track, please.”
Girls do not ski close to the edge of an embankment or a cliff.
Girls do not walk on ski trails.
Cross-Country Skiing Links
Cross Country Ski Areas Association: www.xcski.org
National Ski Patrol: www.nsp.org
The World of Cross Country Skiing: www.xcskiworld.com
Cross-Country Skiing Know-How for Girls
Get in shape. Before cross-country skiing, run and/or participate in other aerobic exercises to build endurance.
Recover from a fall. The act of hoisting back up while wearing skis can be a cumbersome process. Learn how to get back up on your skis at the XCskiworld Web site.
Cross-Country Skiing Jargon
Basket: Plastic “foot” on the end of a ski pole that acts as a pushing platform
Classic technique (“diagonal stride”): A technique in which the skier uses an opposite-leg and opposite-arm motion in a straight-ahead direction
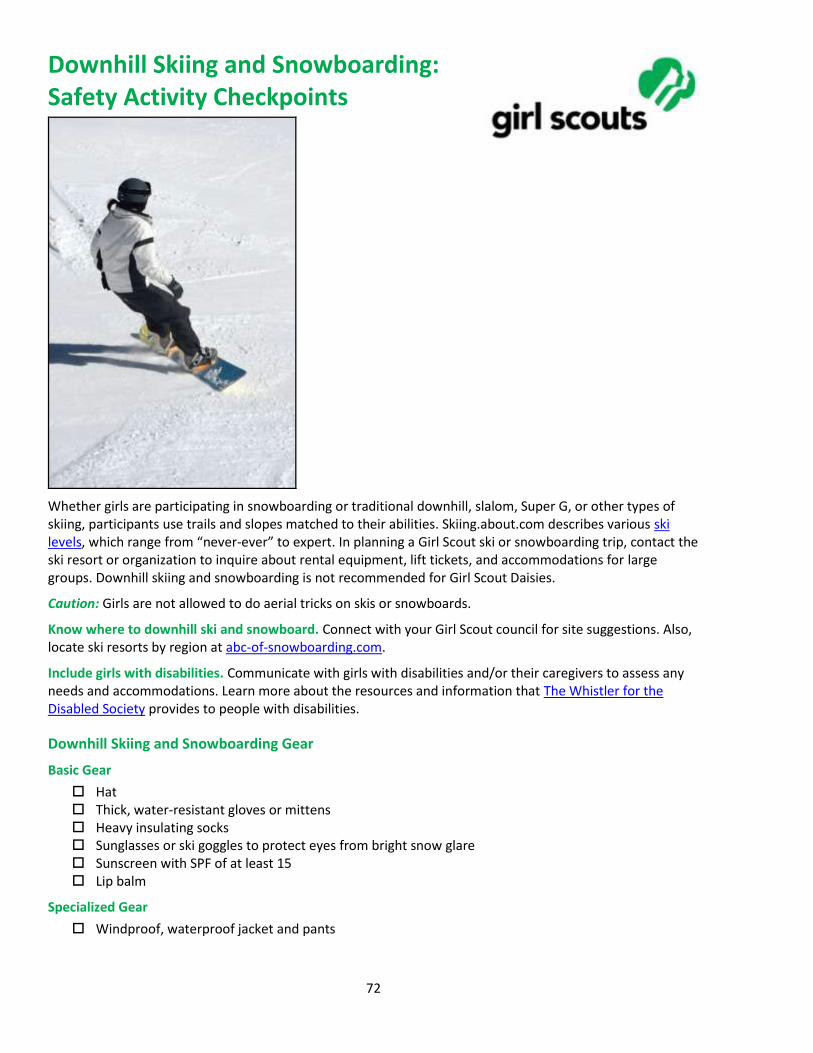
72
Downhill Skiing and Snowboarding: Safety Activity Checkpoints
Whether girls are participating in snowboarding or traditional downhill, slalom, Super G, or other types of skiing, participants use trails and slopes matched to their abilities. Skiing.about.com describes various ski levels, which range from “never-ever” to expert. In planning a Girl Scout ski or snowboarding trip, contact the ski resort or organization to inquire about rental equipment, lift tickets, and accommodations for large groups. Downhill skiing and snowboarding is not recommended for Girl Scout Daisies.
Caution: Girls are not allowed to do aerial tricks on skis or snowboards.
Know where to downhill ski and snowboard. Connect with your Girl Scout council for site suggestions. Also, locate ski resorts by region at abc-of-snowboarding.com.
Include girls with disabilities. Communicate with girls with disabilities and/or their caregivers to assess any needs and accommodations. Learn more about the resources and information that The Whistler for the Disabled Society provides to people with disabilities.
Downhill Skiing and Snowboarding Gear
Basic Gear
Hat Thick, water-resistant gloves or mittens Heavy insulating socks Sunglasses or ski goggles to protect eyes from bright snow glare Sunscreen with SPF of at least 15 Lip balm
Specialized Gear
Windproof, waterproof jacket and pants
73
Protective helmet with properly fitting safety harness that meets the Snell Memorial Foundation’s RS-98 or S-98 standards or the American Society for Testing and Materials (ASTM) F2040 requirements (or both) and displays the Safety Equipment Institute (SEI) seal
Ski or snowboarding boots Skis or snowboards with bindings Ski poles (not needed for snowboarding)
Prepare for Downhill Skiing and Snowboarding
Communicate with council and parents. Inform your Girl Scout council and girls’ parents/guardians about the activity, including details about safety precautions and any appropriate clothing or supplies that may be necessary. Follow council procedures for activity approval, certificates of insurance, and council guidelines about girls’ general health examinations. Make arrangements in advance for all transportation and confirm plans before departure.
Girls plan the activity. Keeping their grade-level abilities in mind, encourage girls to take proactive leadership roles in organizing details of the activity.
Arrange for transportation and adult supervision. The recommended adult-to-girl ratios are two non-related adults (at least one of whom is female) to every:
12 Girl Scout Brownies
16 Girl Scout Juniors
20 Girl Scout Cadettes
24 Girl Scout Seniors
24 Girl Scout Ambassadors
Plus one adult to each additional:
6 Girl Scout Brownies
8 Girl Scout Juniors
10 Girl Scout Cadettes
12 Girl Scout Seniors
12 Girl Scout Ambassadors
Verify instructor knowledge and experience. Instruction is given by a person with experience teaching and/or supervising downhill skiing/snowboarding for the age group(s) involved. Instructors are certified by the Professional Ski Instructors of America (PSIA) and the American Association of Snowboard Instructors (AASI) or possess equivalent certification or documented experience and skill in teaching and/or supervising downhill skiing and/or snowboarding.
Compile key contacts. Give an itinerary to a contact person at home; call the contact person upon departure and return. Create a list of girls’ parents/guardian contact information, telephone numbers for emergency services and police, and council contacts—keep on hand or post in an easily accessible location.
Select a safe downhill skiing and/or snowboarding site. Girls are encouraged to plan trip details and include adequate rest periods with opportunities to replenish fluids and eat high-energy foods (such as fruits and nuts). A nutritious, high-energy snack is planned, with beverages provided to prevent dehydration. Ensure that terrain and potential hazards are known to all participants.
Prepare for emergencies. Ensure the presence of a waterproof first-aid kit and a first-aider with a current certificate in First Aid, including Adult and Child CPR or CPR/AED, who is prepared to handle cases of frostbite, cold exposure, hypothermia, sprains, fractures, and altitude sickness. Emergency transportation is available; if any part of the activity is located 60 minutes or more from Emergency Medical Services response time, ensure the presence of a first-aider (level 2) with Wilderness and Remote First Aid. See Volunteer Essentials for information about first-aid standards and training.
74
Get in shape. Participants get in condition by exercising before the skiing or snowboarding trip. Safesnowboarding.com covers preparatory exercises.
On the Day of Downhill Skiing or Snowboarding
Get a weather report. On the morning of the activity, check weather.com or other reliable weather sources to determine if conditions are appropriate. If severe weather conditions prevent the activity, be prepared with a backup plan or alternate activity, or postpone the activity. Write, review, and practice evacuation and emergency plans for severe weather with girls.
Use the buddy system. Girls are divided into teams of two. Each girl chooses a buddy and is responsible for staying with her buddy at all times, warning her buddy of danger, giving her buddy immediate assistance if safe to do so, and seeking help when the situation warrants it. If someone in the group is injured, one person cares for the patient while two others seek help.
Safeguard valuables. Secure equipment in a dry, locked storage area.
Learn the basics of skiing and snowboarding. Participants learn how to ride ski lifts, including line courtesy, loading and unloading, and emergency procedures. Skiers and snowboarders ski and snowboard under control. Participants ski responsibly, and the rules of the ski area are explained and observed.
Follow downhill skiing and snowboarding safety standards. Skiers and snowboarders follow these guidelines:
Do not ski off-trail or in an unmarked or closed area.
Make others aware before you turn.
Yield the right-of-way to those already on the slope.
Do not cross the path of skiers.
Avoid objects and obstacles, such as trees and rocks.
To rest or adjust equipment, stop on the sides of the slope or trail.
Move quickly to the side of the trail or slope after falling, unless injured.
Summon the ski patrol if a skier is injured.
Downhill Skiing and Snowboarding Links
American Association of Snowboard Instructors: www.aasi.org01/home/copyright.asp
National Ski Patrol: www.nsp.org
U.S. Ski Team: www.usskiteam.com
U.S. Snowboarding: www.ussnowboarding.com
Downhill Skiing and Snowboarding Know-How for Girls
Know the slopes. Skiing.about.com details trail ratings, which include green circle as the easiest, blue square as intermediate, and black diamond for expert skiers and snowboarders.
Prepare for snowboarding. Learn about the snowboard stance, using a snowboard, and how to avoid injuries at safesnowboarding.com.
Downhill Skiing and Snowboarding Jargon
Bowling pins: Skiers and snowboarders who obstruct a ski or snowboarding hill by grouping together and blocking the track
Moguls: Bumps in the snow created by skiers turning in the same place and pushing the snow into humps; moguls also are constructed by ski resorts to serve as a large ski obstacle course
Snowplow: Skiing maneuver used to stop or slow down; ski tips are pointed at each other in the form of an inverted V
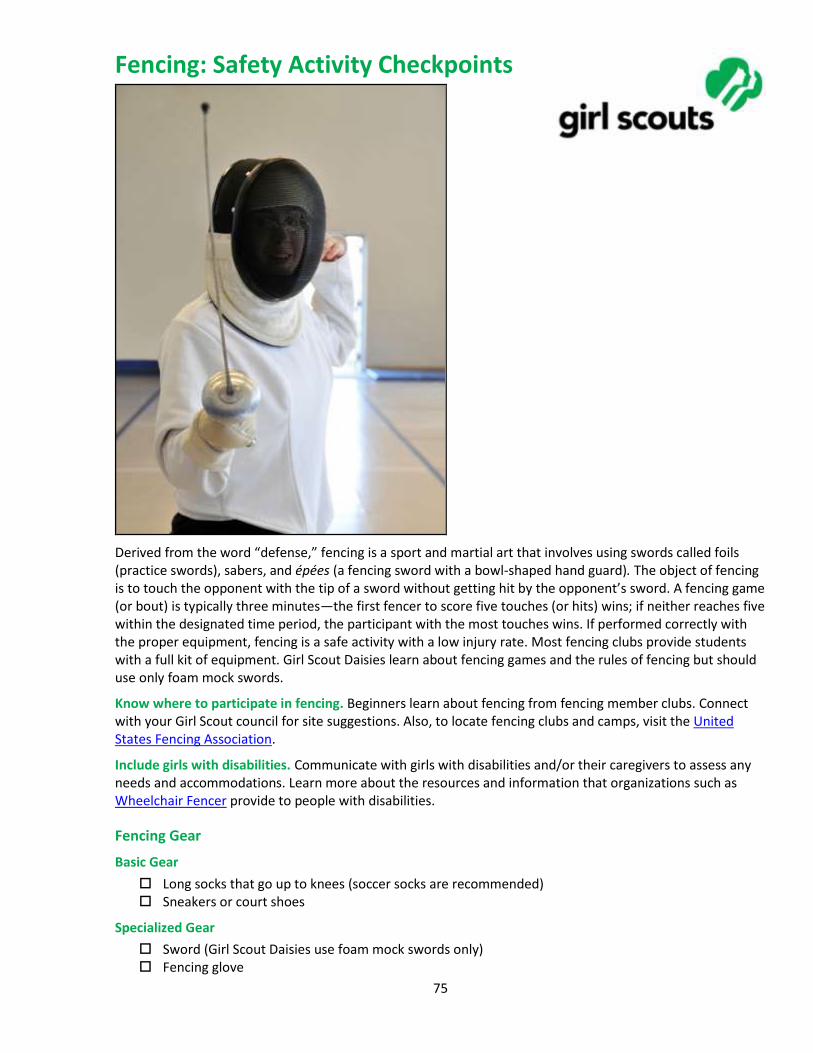
75
Fencing: Safety Activity Checkpoints
Derived from the word “defense,” fencing is a sport and martial art that involves using swords called foils (practice swords), sabers, and épées (a fencing sword with a bowl-shaped hand guard). The object of fencing is to touch the opponent with the tip of a sword without getting hit by the opponent’s sword. A fencing game (or bout) is typically three minutes—the first fencer to score five touches (or hits) wins; if neither reaches five within the designated time period, the participant with the most touches wins. If performed correctly with the proper equipment, fencing is a safe activity with a low injury rate. Most fencing clubs provide students with a full kit of equipment. Girl Scout Daisies learn about fencing games and the rules of fencing but should use only foam mock swords.
Know where to participate in fencing. Beginners learn about fencing from fencing member clubs. Connect with your Girl Scout council for site suggestions. Also, to locate fencing clubs and camps, visit the United States Fencing Association.
Include girls with disabilities. Communicate with girls with disabilities and/or their caregivers to assess any needs and accommodations. Learn more about the resources and information that organizations such as Wheelchair Fencer provide to people with disabilities.
Fencing Gear
Basic Gear
Long socks that go up to knees (soccer socks are recommended) Sneakers or court shoes
Specialized Gear
Sword (Girl Scout Daisies use foam mock swords only) Fencing glove

76
Fencing mask Chest protector Plastron (underarm protector worn on fencing arm) Fencing jacket Fencing knickers or pants that cover knees Fencing mask made of wire mesh, with a thick protective bib Fencing sword (typically a foil, epée, or saber)
Prepare for Fencing
Communicate with council and parents. Inform your Girl Scout council and girls’parents/guardians about the activity, including details about safety precautions and any appropriate clothing or supplies that may be necessary. Follow council procedures for activity approval, certificates of insurance, and council guidelines about girls’ general health examinations. Make arrangements in advance for all transportation and confirm plans before departure.
Girls plan the activity. Keeping their grade-level abilities in mind, encourage girls to take proactive leadership roles in organizing details of the activity.
Arrange for transportation and adult supervision. The recommended adult-to-girl ratios are two non-related adults (at least one of whom is female) to every:
6 Girl Scout Daisies (using foam mock swords only)
12 Girl Scout Brownies
16 Girl Scout Juniors
20 Girl Scout Cadettes
24 Girl Scout Seniors
24 Girl Scout Ambassadors
Plus one adult to each additional:
4 Girl Scout Daisies (using foam mock swords only)
6 Girl Scout Brownies
8 Girl Scout Juniors
10 Girl Scout Cadettes
12 Girl Scout Seniors
12 Girl Scout Ambassadors
Verify instructor knowledge and experience. Ensure that the fencing instructor is certified by the U.S. Fencing Coaches Association or equivalent international fencing association.
Select a safe fencing location. Ensure that the location of fencing instruction or event is an open space free of obstructions. The fencing floor is even and non-slippery; a wood floor or sport court is recommended.
Compile key contacts. Give an itinerary to a contact person at home; call the contact person upon departure and return. Create a list of girls’ parents/guardian contact information, telephone numbers for emergency services and police, and council contacts—keep on hand or post in an easily accessible location.
Dress appropriately for the activity. Make sure girls and adults avoid wearing dangling earrings, bracelets, and necklaces that may become entangled in equipment.
Prepare for emergencies. Ensure the presence of a first-aid kit and a first-aider with a current certificate in First Aid, including Adult and Child CPR or CPR/AED. See Volunteer Essentials for information about first-aid standards and training.
77
On the Day of Fencing
Use the buddy system. Girls are divided into teams of two. Each girl chooses a buddy and is responsible for staying with her buddy at all times, warning her buddy of danger, giving her buddy immediate assistance if safe to do so, and seeking help when the situation warrants it. If someone in the group is injured, one person cares for the patient while two others seek help.
Safeguard valuables. Secure equipment in a dry, locked storage area.
Fencing Links
U.S. Fencing Association: www.usfencing.org
U.S. Fencing Coaches Association: www.usfca.org
International Fencing Federation: www.fie.ch
Fencing.net: www.fencing.net
Fencing Know-how for Girls
Learn basics of fencing. Before fencing, learn about tactical theory, footwork, and stretching at fencing.net.
Go for the gold. Mariel Zagunis, who won gold medals in the individual saber at the 2004 and 2008 Summer Olympics, is only the second American ever to have won a gold medal in Olympic fencing. Read about other Olympic fencing athletes.
Fencing Jargon
En garde: French for “on guard;” the term for assuming the fencing stance
Lunge: Rapid forward movement in fencing
Retreat: To move backward quickly
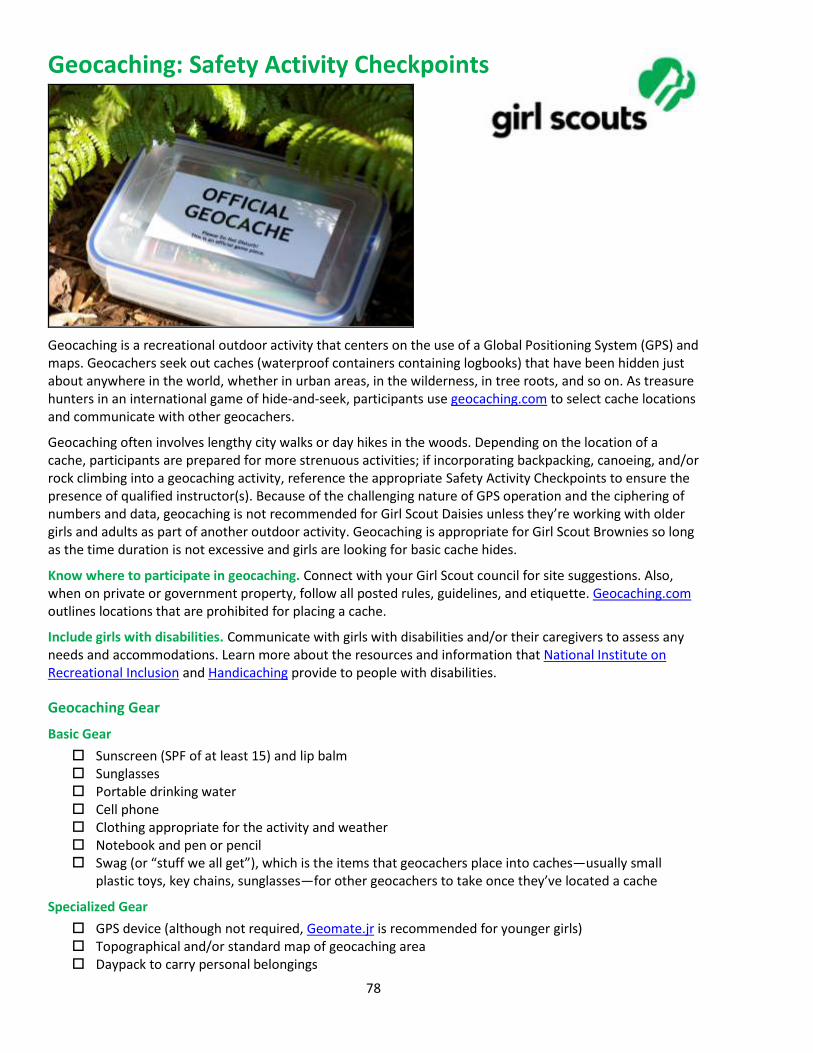
78
Geocaching: Safety Activity Checkpoints
Geocaching is a recreational outdoor activity that centers on the use of a Global Positioning System (GPS) and maps. Geocachers seek out caches (waterproof containers containing logbooks) that have been hidden just about anywhere in the world, whether in urban areas, in the wilderness, in tree roots, and so on. As treasure hunters in an international game of hide-and-seek, participants use geocaching.com to select cache locations and communicate with other geocachers.
Geocaching often involves lengthy city walks or day hikes in the woods. Depending on the location of a cache, participants are prepared for more strenuous activities; if incorporating backpacking, canoeing, and/or rock climbing into a geocaching activity, reference the appropriate Safety Activity Checkpoints to ensure the presence of qualified instructor(s). Because of the challenging nature of GPS operation and the ciphering of numbers and data, geocaching is not recommended for Girl Scout Daisies unless they’re working with older girls and adults as part of another outdoor activity. Geocaching is appropriate for Girl Scout Brownies so long as the time duration is not excessive and girls are looking for basic cache hides.
Know where to participate in geocaching. Connect with your Girl Scout council for site suggestions. Also, when on private or government property, follow all posted rules, guidelines, and etiquette. Geocaching.com outlines locations that are prohibited for placing a cache.
Include girls with disabilities. Communicate with girls with disabilities and/or their caregivers to assess any needs and accommodations. Learn more about the resources and information that National Institute on Recreational Inclusion and Handicaching provide to people with disabilities.
Geocaching Gear
Basic Gear
Sunscreen (SPF of at least 15) and lip balm Sunglasses Portable drinking water Cell phone Clothing appropriate for the activity and weather Notebook and pen or pencil Swag (or “stuff we all get”), which is the items that geocachers place into caches—usually small
plastic toys, key chains, sunglasses—for other geocachers to take once they’ve located a cache
Specialized Gear
GPS device (although not required, Geomate.jr is recommended for younger girls) Topographical and/or standard map of geocaching area Daypack to carry personal belongings

79
Hiking boots for wilderness areas, or comfortable and sturdy walking shoes for urban environments Whistle
Prepare for Geocaching
Communicate with council and parents. Inform your Girl Scout council and girls’ parents/guardians about the activity, including details about safety precautions and any appropriate clothing or supplies that may be necessary. Follow council procedures for activity approval, certificates of insurance, and council guidelines about girls’ general health examinations. Make arrangements in advance for all transportation and confirm plans before departure.
Girls plan the activity. Keeping their grade-level abilities in mind, encourage girls to take proactive leadership roles in organizing details of the activity.
Arrange for transportation and adult supervision. For a large group of girls participating in geocaching, it is recommended that girls organize themselves into small groups. The recommended adult-to-girl ratios are two non-related adults (at least one of whom is female) to every:
6 Girl Scout Daisies (only when working with older girls and adults as part of another outdoor activity)
12 Girl Scout Brownies
16 Girl Scout Juniors
20 Girl Scout Cadettes
24 Girl Scout Seniors
24 Girl Scout Ambassadors
Plus one adult to each additional:
4 Girl Scout Daisies (only when working with older girls and adults as part of another outdoor activity)
6 Girl Scout Brownies
8 Girl Scout Juniors
10 Girl Scout Cadettes
12 Girl Scout Seniors
12 Girl Scout Ambassadors
Verify instructor knowledge and experience. The geocaching instructor has experience and skill in teaching/supervising geocaching, topographical-map reading, and proper usage of GPS devices. For geocaching activities that involve caving, rock climbing, and similar activities, refer to the appropriate Safety Activity Checkpoints for details about instructor credentials and/or skill sets. The instructor reviews the rules and operating procedures with girls before geocaching.
Compile key contacts. Give an itinerary to a contact person at home; call the contact person upon departure and return. Create a list of girls’ parents/guardian contact information, telephone numbers for emergency services and police, and council contacts—keep on hand or post in an easily accessible location.
Select a safe geocaching location. Learn about the terrain of a geocaching site by learning about the Difficulty/Terrain rating (D/T) on the cache page of geocaching.com. The ratings, which range from 1/1 to 5/5, measure the level of difficulty for finding a cache at a designated location. A terrain rating of 1 typically means the cache is accessible for people with disabilities. Keep in mind that a GPS device provides a direct line measurement from the starting point to a destination; a GPS does not include the distance around path obstructions such as bodies of water.
Dress appropriately for the activity. Make sure girls and adults avoid wearing dangling earrings, bracelets, and necklaces that may become entangled in equipment.
Develop a geocaching curriculum. Encourage girls to plan the details of a geocaching trip, and develop a geocaching curriculum that includes lesson plans that cover elements such as the purpose
80
of the activity, skills necessary, safety considerations, diagrams to aid with comprehension, and navigational resources.
Prepare for emergencies. Ensure the presence of a waterproof first-aid kit and a first-aider with a current certificate in First Aid, including Adult and Child CPR or CPR/AED. See Volunteer Essentials for information about first-aid standards and training.
On the Day of Geocaching
Get a weather report. On the morning of the geocaching activity, check weather.com or other reliable weather sources to determine if weather conditions are appropriate. If severe weather conditions prevent the activity, be prepared with a backup plan or alternative activity. Write, review, and practice evacuation and emergency plans for severe weather with girls. In the event of a storm, take shelter away from tall objects (including trees, buildings, and electrical poles). Find the lowest point in an open, flat area. Squat low to the ground on the balls of the feet, and place hands on knees with heads between them.
Use the buddy system. Girls are divided into teams of two. Each girl chooses a buddy and is responsible for staying with her buddy at all times, warning her buddy of danger, giving her buddy immediate assistance if safe to do so, and seeking help when the situation warrants it. If someone in the group is injured, one person cares for the patient while two others seek help.
Girls learn about geocaching. Girls develop skills about GPS use, latitude and longitude, and reading maps. Ideally, each girl is able to use her own GPS, or two girls share a GPS; when more than three participants share a GPS device, it becomes more difficult for girls to actively participate in the geocaching activity.
Practice safe geocaching. To prevent injury when searching for caches, inspect areas with care before trekking into potentially dangerous locations or placing hands into unknown nooks and crannies such as ground holes, ponds, creeks, or urban buildings and structures. Be on lookout for sharp edges, animals, insects, and garbage.
Geocaching Links
Geocaching—The Official Global GPS Cache Hunt Site: www.geocaching.com
Geocaching with NaviCache: www.navicache.com
TerraCaching—For Love of the Hunt: www.terracaching.com
Geocaching Know-How for Girls
Cache in, trash out. Like the Leave No Trace initiative, geocachers are encouraged to leave caching sites cleaner than they found them. Geocachers are invited to participate in International Cache In Trash Out events, which are worldwide clean-up efforts.
Find a benchmark. Using a GPS or directions provided by the National Oceanic and Atmospheric Administration's National Geodetic Survey, you can seek out NGS survey markers and other items that have been marked in the United States. Visit www.geocaching.com/mark to learn more.
Geocaching Jargon
FTF: Acronym used in geocaching logbooks and sites that stands for “first to find” a new geocache
TNLNSL: Geocaching acronym that stands for “took nothing, left nothing, signed log”
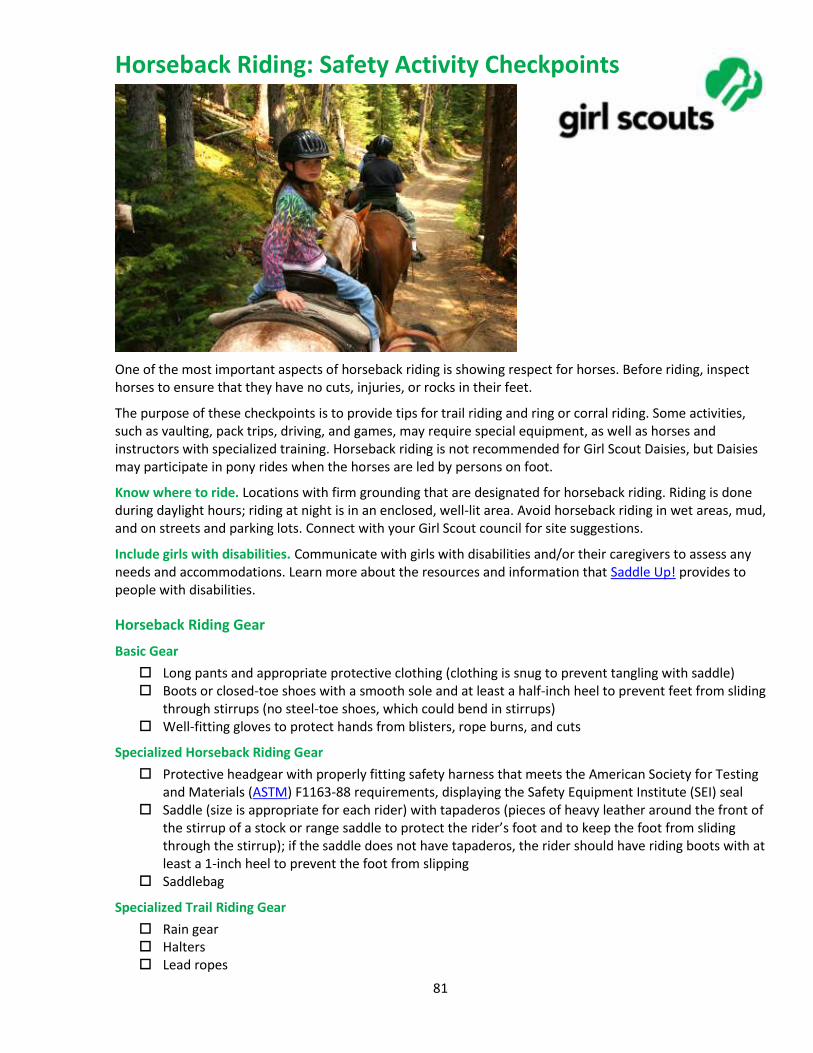
81
Horseback Riding: Safety Activity Checkpoints
One of the most important aspects of horseback riding is showing respect for horses. Before riding, inspect horses to ensure that they have no cuts, injuries, or rocks in their feet.
The purpose of these checkpoints is to provide tips for trail riding and ring or corral riding. Some activities, such as vaulting, pack trips, driving, and games, may require special equipment, as well as horses and instructors with specialized training. Horseback riding is not recommended for Girl Scout Daisies, but Daisies may participate in pony rides when the horses are led by persons on foot.
Know where to ride. Locations with firm grounding that are designated for horseback riding. Riding is done during daylight hours; riding at night is in an enclosed, well-lit area. Avoid horseback riding in wet areas, mud, and on streets and parking lots. Connect with your Girl Scout council for site suggestions.
Include girls with disabilities. Communicate with girls with disabilities and/or their caregivers to assess any needs and accommodations. Learn more about the resources and information that Saddle Up! provides to people with disabilities.
Horseback Riding Gear
Basic Gear
Long pants and appropriate protective clothing (clothing is snug to prevent tangling with saddle) Boots or closed-toe shoes with a smooth sole and at least a half-inch heel to prevent feet from sliding
through stirrups (no steel-toe shoes, which could bend in stirrups) Well-fitting gloves to protect hands from blisters, rope burns, and cuts
Specialized Horseback Riding Gear
Protective headgear with properly fitting safety harness that meets the American Society for Testing and Materials (ASTM) F1163-88 requirements, displaying the Safety Equipment Institute (SEI) seal
Saddle (size is appropriate for each rider) with tapaderos (pieces of heavy leather around the front of the stirrup of a stock or range saddle to protect the rider’s foot and to keep the foot from sliding through the stirrup); if the saddle does not have tapaderos, the rider should have riding boots with at least a 1-inch heel to prevent the foot from slipping
Saddlebag
Specialized Trail Riding Gear
Rain gear Halters Lead ropes
82
Prepare for Horseback Riding
Communicate with council and parents. Inform your Girl Scout council and girls’ parents/guardians about the activity, including details about safety precautions and any appropriate clothing or supplies that may be necessary. Follow council procedures for activity approval, certificates of insurance, and council guidelines about girls’ general health examinations. Make arrangements in advance for all transportation and confirm plans before departure.
Girls plan the activity. Keeping their grade-level abilities in mind, encourage girls to take proactive leadership roles in organizing details of the activity.
Organize groups and arrange for adult supervision. The recommended adult-to-girl ratios are two non-related adults (at least one of whom is female) to every:
6 Girl Scout Daisies (pony rides only—when the ponies are led by persons on foot)
12 Girl Scout Brownies
16 Girl Scout Juniors
20 Girl Scout Cadettes
24 Girl Scout Seniors
24 Girl Scout Ambassadors
Plus one adult to each additional:
4 Girl Scout Daisies (pony rides only—when the ponies are led by persons on foot)
6 Girl Scout Brownies
8 Girl Scout Juniors
10 Girl Scout Cadettes
12 Girl Scout Seniors
12 Girl Scout Ambassadors
Verify instructor knowledge and experience. Riding instructors are adults (at least 18 years old) who have current certification from an accredited horsemanship instructor training organization, such as the Certified Horsemanship Association and American Association for Horsemanship Safety, or documented proof of a minimum of three years’ experience successfully instructing in a general horseback riding program. Assistant riding instructors are at least 16 years old and are certified by an accredited horsemanship instructor training organization or have documented proof of at least one year’s experience successfully instructing in a general horseback riding program. Riders are supervised by instructors or assistant instructors at all times when in the proximity of horses, whether mounted or not. For ring or corral riding and trail riding, at least one instructor and one assistant instructor supervise a group of 10 or fewer riders. For ring and corral riding, one additional instructor is required for every five additional riders. For beginners and younger girls, or for difficult trails, in trail riding, increased instructors may be needed.
Compile key contacts. Give an itinerary to a contact person at home; call the contact person upon departure and return. Create a list of girls’ parents/guardian contact information, telephone numbers for emergency services and police, and council contacts—keep on hand or post in an easily accessible location.
Assess participants’ maturity level. Girls must possess sufficient physical coordination and balance to participate in riding. They are old enough to understand and practice safety procedures, to use good judgment in reacting to situations, and to take responsibility for themselves and their horses. (Some stables have weight limits for rider eligibility. Check when making reservations.)
Select a safe site. Obtain permission and any necessary permits before riding on public or private lands; records of maintenance checks, requests, and repairs must be kept. The stable operator provides evidence of liability insurance and instructor certification and references from other youth-group users of the stable. For both Girl Scout council–owned and non–Girl Scout riding facilities, the riding area is away from outside distractions and free of debris; the barn and riding areas do not have
83
exposed barbed wire fencing; the instructional rings, corrals, paddocks, and stables have clearly posted rules and regulations; the horses are properly cared for, and the stables, corrals, and barns are clean and uncluttered. Tack (saddles, bridles, and so on) is clean and in good condition. Communicate with the horseback-riding organization about any rider weight limitations; in some cases, heavier riders can cause a horse pain, which, in turn, may cause horses to exhibit dangerous behavior.
Dress appropriately for the activity. Make sure girls and adults avoid wearing dangling earrings, bracelets, and necklaces. Riders may not ride barefoot, in sandals, or in hiking boots with lug soles. Riders do not wear backpacks, day packs, or fanny packs.
Take safety precautions. An emergency vehicle is readily available. Plans for communication with emergency services and fire officials are arranged in advance and known by each instructor. Plans for response in an emergency—such as a fire, severe weather, an injured rider, or an injured or loose horse—are known by all participants and instructors. At Girl Scout facilities, communication between the riding area and the site director or healthcare personnel is possible. In stable and ring areas, telephone numbers for the fire department, local hospital or emergency ambulance service, and veterinarian are conspicuously posted, and the location of the fire alarm is known to all girls and adults.
Prepare for emergencies. Ensure the presence of a waterproof first-aid kit and a first-aider with a current certificate in First Aid, including Adult and Child CPR or CPR/AED, who is prepared to handle cases of injury from falls as well as abrasions and sunburn. If any part of the activity is located 60 minutes or more from emergency medical services, ensure the presence of a first-aider (level 2) with Wilderness and Remote First Aid. See Volunteer Essentials for information about first-aid standards and training.
On the Day of Horseback Riding
Get a weather report. On the morning of horseback riding, check weather.com or other reliable weather sources to determine if conditions are appropriate. If severe weather conditions prevent the activity, be prepared with a backup plan or alternate activity, or postpone the activity. Write, review, and practice evacuation and emergency plans for severe weather with girls. In the event of a storm, take shelter away from tall objects (including trees, buildings, and electrical poles). Find the lowest point in an open flat area. Squat low to the ground on the balls of the feet, and place hands on knees with head between them.
Use the buddy system. Girls are divided into teams of two. Each girl chooses a buddy and is responsible for staying with her buddy at all times, warning her buddy of danger, giving her buddy immediate assistance if safe to do so, and seeking help when the situation warrants it. If someone in the group is injured, one person cares for the patient while two others seek help.
Safeguard valuables. Secure equipment in a dry, locked storage area.
Girls learn about safe horseback riding. A pre-ride demonstration is given to first-time riders, including mounting, dismounting, starting, stopping, steering, and maintaining a balanced body position. Avoid changing clothing, such as putting on raingear, while mounted on the horse, because it may scare the horse; instead, dismount for clothing changes or adjustments.
Test and classify riders according to riding ability. The horse and the riding area are assigned according to the rider’s ability. Beginning riders attend an introductory safety lesson, including information on horse psychology and behavior and approaching, handling, and leading a horse. Before trail riding, all riders warm up in a ring or corral to ensure that they are well suited to their horses and can control all the gaits and functions required during the trail ride. Ensure that riders feel confident and demonstrate basic skills in controlling the horse (stop, start, and steer) and maintaining proper distance.
Follow basic horseback safety standards. To ensure that equipment fits properly and/or is properly adjusted, an instructor makes a safety check of each rider’s clothing, footwear, helmet, and saddle.
84
He or she checks stirrup length by ensuring that riders are able to raise their behinds off the saddle about one hand’s depth. Front and rear cinches are checked for tightness, twigs, folds, and bends. The instructor also checks the safety of the riding area before each session. Only one rider is allowed on a horse at any time, and there is no eating or drinking while riding. Riders should dismount before going through small gates.
Respect ring- or corral-riding standards. Each horse and rider is under the observation of an instructor at all times, and the riding ring has good footing for the horses and is free of dangerous obstructions. The fencing is at least 42 inches high, visible, and well maintained. Gates to the ring are shut.
Inspect and don’t spook horses. Horses displaying uncomfortable or abnormal behaviors should be dismounted and checked for injuries and poor equipment fitting, and may need to be walked back to the stable on foot. If a horse gets loose, do not chase it; instead, one person calmly attempts to retrieve the horse.
Respect trail-riding standards. The length of the trail ride and the gait of the horses are geared to the ability of the least experienced rider. Riding trails have good footing and are free of dangerous obstructions such as low-hanging branches. Trails are marked, mapped, regularly inspected, and maintained. The participants ride single file, one full horse length apart, with an instructor at the head and at the rear of the group. Riders have control of horses, maintain the spacing between horses, and increase distances between horses when the horses’ speed increases. Horses are walked (not ridden) up and down hills, and are walked for the final 10 minutes of any riding period in order to cool down.
Avoid public roads and highways whenever possible. If a group must cross a road, the instructor first halts the group in a line well before the road, checks for traffic, and then signals the group to cross. At the signal, all horses are turned to face the highway and all cross at the same time.
Horseback Riding Links
Certified Horsemanship Association: www.cha-ahse.org
International Federation for Equestrian Sports: www.fei.org
United States Pony Clubs: www.ponyclub.org
Horseback Riding Know-How for Girls
Get to know your horse. Did you know there are more than 50 colors of horses? Thoroughbreds are identified by their colors, which include bay, black, chestnut, dark bay or brown, gray, and roan. Visit www.horseguide.com and www.thinklikeahorse.org to learn more about horses.
Hold your horses. Before horseback riding, learn how to mount, dismount, rein, and other horseback riding procedures at www.mahalo.com/how-to-ride-a-horse.
Respect the horse. Did you know that horses feel less comfortable when they can’t see the rider’s eyes? For that reason, avoid wearing sunglasses.
Horseback Riding Jargon
Breaking (or breaking in): The education of the young horse, in which it is taught the skills necessary for its future as a riding or driving horse
Nearside: The left-hand side of the horse; offside is the right-hand side of the horse
Leg up: Method of mounting in which an assistant stands behind the rider, supports the lower part of his left leg, and gives a boost as necessary as the rider springs up off the ground
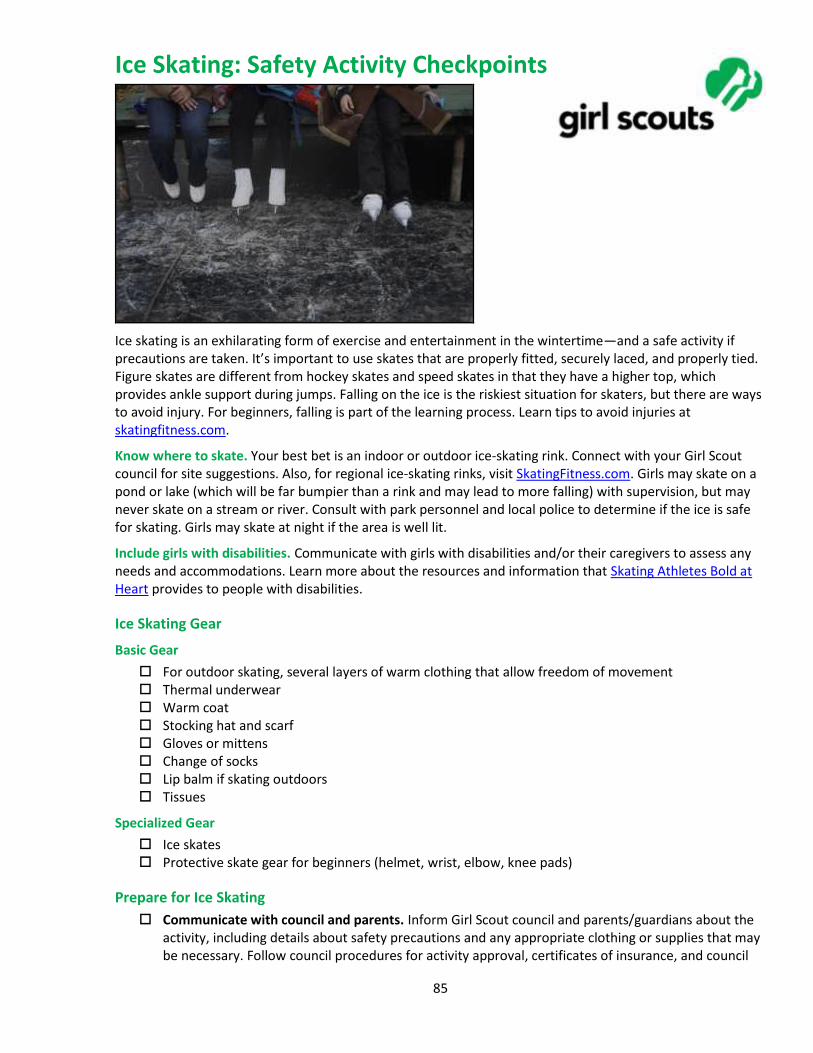
85
Ice Skating: Safety Activity Checkpoints
Ice skating is an exhilarating form of exercise and entertainment in the wintertime—and a safe activity if precautions are taken. It’s important to use skates that are properly fitted, securely laced, and properly tied. Figure skates are different from hockey skates and speed skates in that they have a higher top, which provides ankle support during jumps. Falling on the ice is the riskiest situation for skaters, but there are ways to avoid injury. For beginners, falling is part of the learning process. Learn tips to avoid injuries at skatingfitness.com.
Know where to skate. Your best bet is an indoor or outdoor ice-skating rink. Connect with your Girl Scout council for site suggestions. Also, for regional ice-skating rinks, visit SkatingFitness.com. Girls may skate on a pond or lake (which will be far bumpier than a rink and may lead to more falling) with supervision, but may never skate on a stream or river. Consult with park personnel and local police to determine if the ice is safe for skating. Girls may skate at night if the area is well lit.
Include girls with disabilities. Communicate with girls with disabilities and/or their caregivers to assess any needs and accommodations. Learn more about the resources and information that Skating Athletes Bold at Heart provides to people with disabilities.
Ice Skating Gear
Basic Gear
For outdoor skating, several layers of warm clothing that allow freedom of movement Thermal underwear Warm coat Stocking hat and scarf Gloves or mittens Change of socks Lip balm if skating outdoors Tissues
Specialized Gear
Ice skates Protective skate gear for beginners (helmet, wrist, elbow, knee pads)
Prepare for Ice Skating
Communicate with council and parents. Inform Girl Scout council and parents/guardians about the activity, including details about safety precautions and any appropriate clothing or supplies that may be necessary. Follow council procedures for activity approval, certificates of insurance, and council
86
guidelines about girls’ general health examinations. Make arrangements in advance for all transportation and confirm plans before departure.
Girls plan the activity. Keeping their grade-level abilities in mind, encourage girls to take proactive leadership roles in organizing details of the activity.
Organize transportation and arrange for adult supervision. Adults keep a close watch on skaters from outside the main skating area. The recommended adult-to-girl ratios are two non-related adults (at least one of whom is female) to every:
6 Girl Scout Daisies
12 Girl Scout Brownies
16 Girl Scout Juniors
20 Girl Scout Cadettes
24 Girl Scout Seniors
24 Girl Scout Ambassadors
Plus one adult to each additional:
4 Girl Scout Daisies
6 Girl Scout Brownies
8 Girl Scout Juniors
10 Girl Scout Cadettes
12 Girl Scout Seniors
12 Girl Scout Ambassadors
Verify instructor knowledge and experience. An experienced ice-skating instructor instructs girls in basic ice skating skills, safety, and conduct rules. Practice sessions are scheduled for beginners.
Select a safe ice-skating site. Obtain council guidance in selecting the ice-skating site; established ice-skating rinks are safest. Ensure that the rink has a smooth skating surface free of debris. Skating surfaces are checked in advance for thickness, and to ensure there are no patches of grass, rocks, and cracks. The rink supervisor is called in advance to arrange for large groups or for practice sessions. (Check with the rink supervisor in advance to learn how many adults, in addition to the rink staff, are needed to supervise the group.)
Compile key contacts. Give an itinerary to a contact person at home; call the contact person upon departure and return. Create a list of girls’ parents/guardian contact information, telephone numbers for emergency services and police, and council contacts—keep on hand or post in an easily accessible location.
Prepare for emergencies. Ensure the presence of a waterproof first-aid kit and a first-aider (level 1) with a current certificate in First Aid, including Adult and Child CPR or CPR/AED, who is prepared to handle cases of injury from falls as well as abrasions, near drowning, and immersion hypothermia. Emergency transportation is available; if any part of the activity is located 60 minutes or more from emergency medical services, ensure the presence of a first-aider (level 2) with Wilderness and Remote First Aid. Basic ice rescue techniques are understood and practiced. Appropriate rescue equipment is on hand (for example, ring buoy, rope, throw bag, pole, ladder, boat, where necessary; indoor rinks do not require such equipment). See Volunteer Essentials for information about first-aid standards and training.
On the Day of Ice Skating
Get a weather report. If skating outdoors, on the morning of the activity, check weather.com or other reliable weather sources to determine if conditions are appropriate. If severe weather conditions prevent the activity, be prepared with a backup plan or alternate activity, or postpone the activity. Write, review, and practice evacuation and emergency plans for severe weather with girls. In the event of a storm, take shelter away from tall objects (including trees, buildings, and electrical
87
poles). Find the lowest point in an open flat area. Squat low to the ground on the balls of the feet, and place hands on knees with head between them.
Use the buddy system. Girls are divided into teams of two. Each girl chooses a buddy and is responsible for staying with her buddy at all times, warning her buddy of danger, giving her buddy immediate assistance if safe to do so, and seeking help when the situation warrants it. If someone in the group is injured, one person cares for the patient while two others seek help.
Safeguard valuables. Secure equipment in a dry, locked storage area.
Warm up for ice skating. Girls learn to perform basic skating skills, including how to fall and get up, before attempting more advanced skills. Gentle warm-up exercises are done before any strenuous ice skating; cool-down exercises end the sessions.
Follow basic ice-skating safety standards. Follow rink rules, such as:
Everyone skates in the same direction.
Girls do not stop in the main skating area.
Skaters yield the right-of-way to those already in the rink.
Skaters do not cut across the paths of other skaters.
Skaters do not push, shove, or race on the ice.
A falling skater does not grab hold of another skater.
A fallen skater rises quickly, unless injured.
Loose or sharp articles, such as handbags, combs, and keys are not carried in pockets, hands, hair, or anyplace where they might cause injury to the skater in the event of a fall, or injure another skater by falling to the floor.
Ice Skating Links
Ice Skating Institute: www.skateisi.com
Professional Skaters Association: www.skatepsa.com
U.S. Figure Skating: www.usfigureskating.org
Ice Skating Know-How for Girls
Learn ice-skating techniques. Learn about dozens of ice-skating turns, spins, and jumps at iceskate.net (www.iceskate.net/term_turn.php). Learn how to fall and stop at www.skatingfitness.com.
Ice Skating Jargon
Toe pick: The metal “teeth” on the fronts of figure skates that help skaters perform jumps and spins
Tracings: Marks left on the ice by a skater’s blades
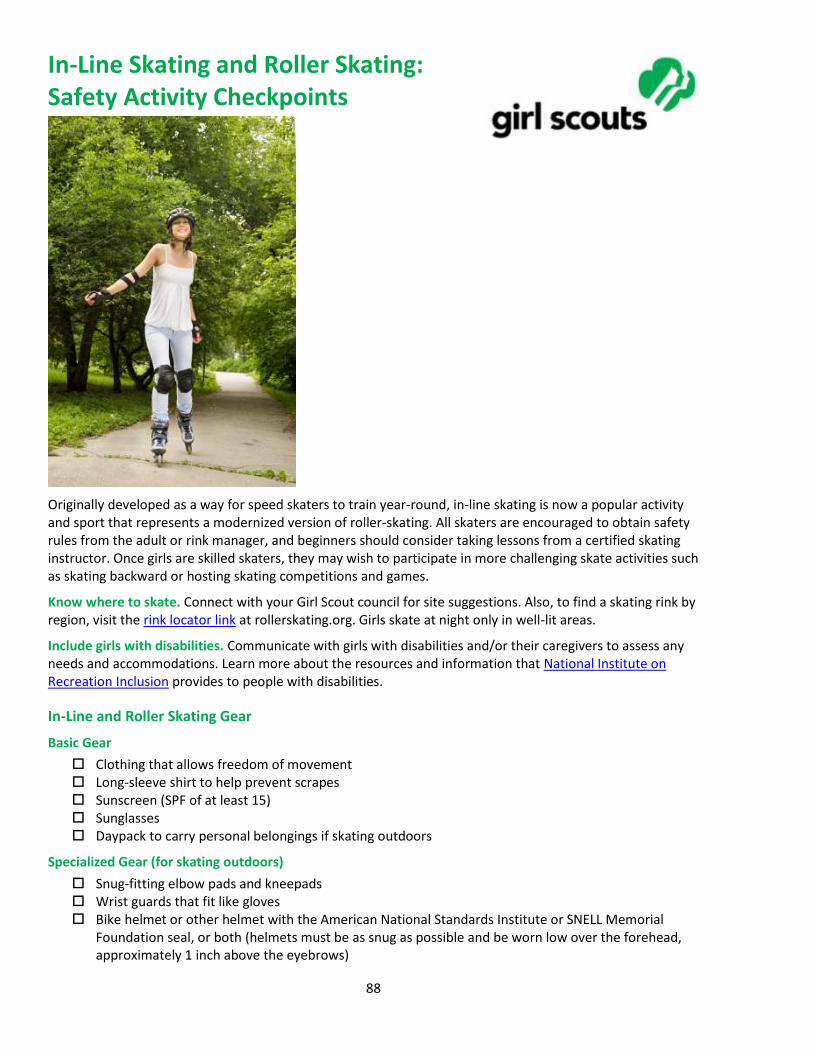
88
In-Line Skating and Roller Skating: Safety Activity Checkpoints
Originally developed as a way for speed skaters to train year-round, in-line skating is now a popular activity and sport that represents a modernized version of roller-skating. All skaters are encouraged to obtain safety rules from the adult or rink manager, and beginners should consider taking lessons from a certified skating instructor. Once girls are skilled skaters, they may wish to participate in more challenging skate activities such as skating backward or hosting skating competitions and games.
Know where to skate. Connect with your Girl Scout council for site suggestions. Also, to find a skating rink by region, visit the rink locator link at rollerskating.org. Girls skate at night only in well-lit areas.
Include girls with disabilities. Communicate with girls with disabilities and/or their caregivers to assess any needs and accommodations. Learn more about the resources and information that National Institute on Recreation Inclusion provides to people with disabilities.
In-Line and Roller Skating Gear
Basic Gear
Clothing that allows freedom of movement Long-sleeve shirt to help prevent scrapes Sunscreen (SPF of at least 15) Sunglasses Daypack to carry personal belongings if skating outdoors
Specialized Gear (for skating outdoors)
Snug-fitting elbow pads and kneepads Wrist guards that fit like gloves Bike helmet or other helmet with the American National Standards Institute or SNELL Memorial
Foundation seal, or both (helmets must be as snug as possible and be worn low over the forehead, approximately 1 inch above the eyebrows)
89
Prepare for In-Line and Roller Skating
Communicate with council and parents. Inform your Girl Scout council and girls’ parents/guardians about the activity, including details about safety precautions and any appropriate clothing or supplies that may be necessary. Follow council procedures for activity approval, certificates of insurance, and council guidelines about girls’ general health examinations. Make arrangements in advance for all transportation and confirm plans before departure.
Girls plan the activity. Keeping their grade-level abilities in mind, encourage girls to take proactive leadership roles in organizing details of the activity.
Organize transportation and arrange for adult supervision. Adults keep a close watch on skaters from outside the main skating floor. The recommended adult-to-girl ratios are two non-related adults (at least one of whom is female) to every:
6 Girl Scout Daisies
12 Girl Scout Brownies
16 Girl Scout Juniors
20 Girl Scout Cadettes
24 Girl Scout Seniors
24 Girl Scout Ambassadors
Plus one adult to each additional:
4 Girl Scout Daisies
6 Girl Scout Brownies
8 Girl Scout Juniors
10 Girl Scout Cadettes
12 Girl Scout Seniors
12 Girl Scout Ambassadors
Select a safe in-line and roller-skating site. Obtain council guidance in selecting the skating site; rinks are considered safest, but ensure that the rink has a smooth skating surface free of debris. The rink manager is called in advance to arrange for large groups or for practice sessions. The rink is adequately staffed to monitor the size of the crowd. (Check with the rink supervisor in advance to learn how many adults, in addition to the rink staff, are needed to supervise the group.) Local ordinances or parks offices are checked to see whether skating is permitted on bike paths or in city parks.
Compile key contacts. Give an itinerary to a contact person at home; call the contact person upon departure and return. Create a list of girls’ parents/guardian contact information, telephone numbers for emergency services and police, and council contacts—keep on hand or post in an easily accessible location.
Select proper-fitting skates. Girls receive instruction in selecting the proper skate size. Skates are properly fitted, securely laced, and properly tied. Skate wheels, boots, and plates are kept clean and in good condition and are inspected. Girls never skate with broken or missing laces. No dangling decorations are attached to the laces.
Prepare for emergencies. Ensure the presence of a first-aid kit and a first-aider with a current certificate in First Aid, including Adult and Child CPR or CPR/AED, who is prepared to handle cases of injury from falls, especially abrasions. If any part of the activity is located 60 minutes or more from emergency medical services, ensure the presence of a first-aider (level 2) with Wilderness and Remote First Aid. See Volunteer Essentials for information about first-aid standards and training.
On the Day of In-Line Skating or Roller Skating
Get a weather report. If skating outdoors, on the morning of the activity, check weather.com or other reliable weather sources to determine if conditions are appropriate, and if skating outside,
90
make sure that the ground is free of ice. If severe weather conditions prevent the activity, be prepared with a backup plan or alternate activity, or postpone the activity. Write, review, and practice evacuation and emergency plans for severe weather with girls. In the event of a storm, take shelter away from tall objects (including trees, buildings, and electrical poles). Find the lowest point in an open flat area. Squat low to the ground on the balls of the feet, and place hands on knees with head between them.
Use the buddy system. Girls are divided into teams of two. Each girl chooses a buddy and is responsible for staying with her buddy at all times, warning her buddy of danger, giving her buddy immediate assistance if safe to do so, and seeking help when the situation warrants it. If someone in the group is injured, one person cares for the patient while two others seek help.
Safeguard valuables. Secure equipment in a dry, locked storage area if skating indoors.
Girls learn basic skating skills. Girls receive basic instruction in skating skills, including how to fall and get up. Practice sessions are scheduled for beginners. Girls learn to perform basic skating skills before attempting more advanced skills. Gentle warm-up exercises are done before any strenuous skating; cool-down exercises end the sessions.
Follow basic in-line and roller-skating safety standards. Respect safety rules, such as:
Everyone skates in the same direction.
Girls do not stop in the main skating area (when skating in a rink).
Skaters yield the right-of-way to those already in the rink.
Skaters do not cut across the paths of other skaters.
Skaters do not push, shove, or race.
A falling skater does not grab hold of another skater.
A fallen skater rises quickly, unless injured.
Girls do not skate faster than their ability to stop, and skaters do not wear headphones while skating.
Loose or sharp articles, such as handbags, combs, and keys are not carried in pockets, hands, hair, or anyplace where they might cause injury to the skater in the event of a fall, or injure another skater by falling to the floor.
Practice safe outdoor skating. Outdoors, girls skate in areas where traffic or pedestrians will not interfere. Check local ordinances for any restrictions. Girls skate in the street or in a parking lot only if it is closed to traffic. When skating on a walkway, yield to pedestrians. Skate on the right side, pass on the left.
In-Line and Roller-Skating Links
Roller Skating Association International: www.rollerskating.org
International Inline Skate Association: www.inlineonline.co.uk/iisa.htm
In-Line and Roller-Skating Know-How for Girls
Keep skates in top shape. Avoid water, sand, and debris, which damage wheel bearings.
Learn how to brake and stop. Before skating, read up on the safest ways to stop, based on skating ability level, at skatefaq.com. Moves include the wall stop, the brake-pad, and the snowplow.
In-Line and Roller-Skating Jargon
Fakie: The slang term for doing a skating trick backward
Shoot-the-duck: A skating move in which the skater bends one knee all the way down and glides on one foot while the other leg is extended completely forward
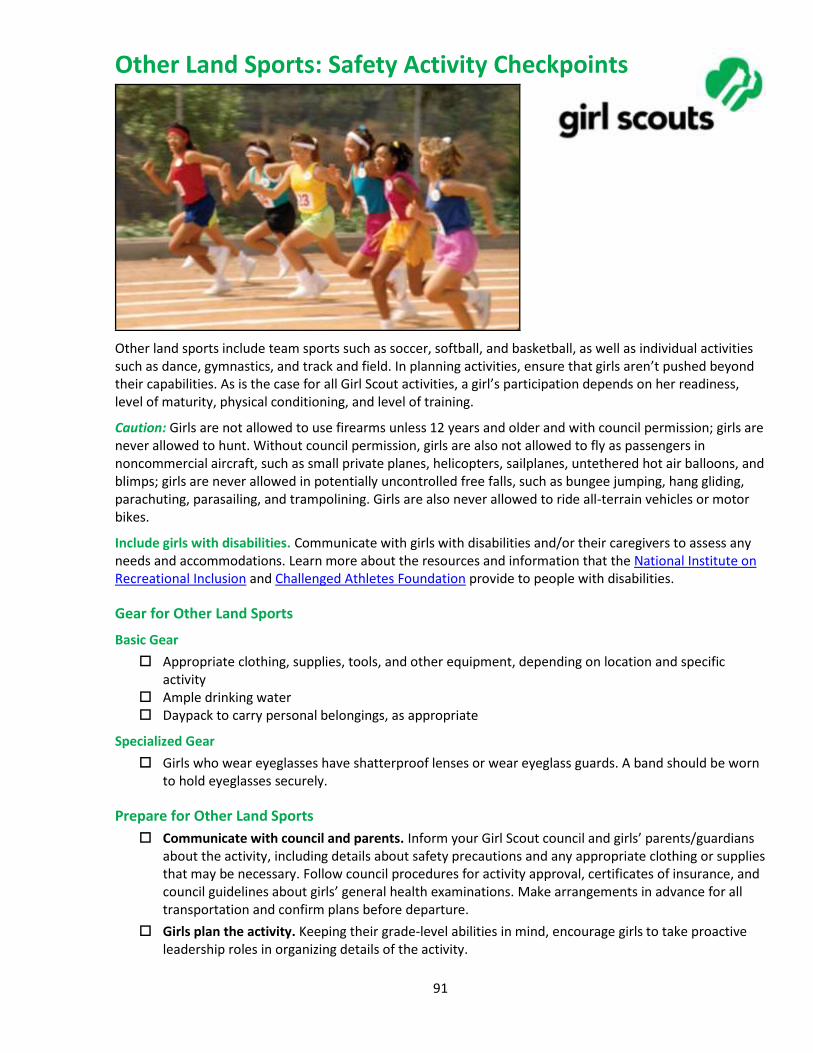
91
Other Land Sports: Safety Activity Checkpoints
Other land sports include team sports such as soccer, softball, and basketball, as well as individual activities such as dance, gymnastics, and track and field. In planning activities, ensure that girls aren’t pushed beyond their capabilities. As is the case for all Girl Scout activities, a girl’s participation depends on her readiness, level of maturity, physical conditioning, and level of training.
Caution: Girls are not allowed to use firearms unless 12 years and older and with council permission; girls are never allowed to hunt. Without council permission, girls are also not allowed to fly as passengers in noncommercial aircraft, such as small private planes, helicopters, sailplanes, untethered hot air balloons, and blimps; girls are never allowed in potentially uncontrolled free falls, such as bungee jumping, hang gliding, parachuting, parasailing, and trampolining. Girls are also never allowed to ride all-terrain vehicles or motor bikes.
Include girls with disabilities. Communicate with girls with disabilities and/or their caregivers to assess any needs and accommodations. Learn more about the resources and information that the National Institute on Recreational Inclusion and Challenged Athletes Foundation provide to people with disabilities.
Gear for Other Land Sports
Basic Gear
Appropriate clothing, supplies, tools, and other equipment, depending on location and specific activity
Ample drinking water Daypack to carry personal belongings, as appropriate
Specialized Gear
Girls who wear eyeglasses have shatterproof lenses or wear eyeglass guards. A band should be worn to hold eyeglasses securely.
Prepare for Other Land Sports
Communicate with council and parents. Inform your Girl Scout council and girls’ parents/guardians about the activity, including details about safety precautions and any appropriate clothing or supplies that may be necessary. Follow council procedures for activity approval, certificates of insurance, and council guidelines about girls’ general health examinations. Make arrangements in advance for all transportation and confirm plans before departure.
Girls plan the activity. Keeping their grade-level abilities in mind, encourage girls to take proactive leadership roles in organizing details of the activity.

92
Arrange for transportation and adult supervision. The recommended adult-to-girl ratios are two non-related adults (at least one of whom is female) to every:
6 Girl Scout Daisies
12 Girl Scout Brownies
16 Girl Scout Juniors
20 Girl Scout Cadettes
24 Girl Scout Seniors
24 Girl Scout Ambassadors
Plus one adult to each additional:
4 Girl Scout Daisies
6 Girl Scout Brownies
8 Girl Scout Juniors
10 Girl Scout Cadettes
12 Girl Scout Seniors
12 Girl Scout Ambassadors
Verify instructor knowledge and experience. In cases where instruction is necessary, ensure that instructors have adequate experience and knowledge of the activity. Where necessary, trained officials or referees administer rules of the sport, and girls are instructed in the rules of the sport, safety guidelines, expected behaviors, and issues of fair play. Trained spotters and/or instructors’ assistants are used for individual sports such as gymnastics.
Select a safe site. Playing surfaces for the activity are smooth and clear of obstructions, broken glass, and so on. Playing areas have clearly marked boundaries and adequate space for girls to move around freely. Where necessary, there is adequate protection for spectators.
Compile key contacts. Give an itinerary to a contact person at home; call the contact person upon departure and return. Create a list of girls’ parents/guardian contact information, telephone numbers for emergency services and police, and council contacts to keep on hand or post in an easily accessible location.
Girls prepare for and practice the activity. Girls do conditioning exercises and practice basic skills. Girls do a gentle warm-up, cool-down, and stretching exercises to reduce sprains, strains, and other injuries. In competition, girls are matched in age, weight, height, skill, and physical maturity. In team sports, positions and sides are rotated to prevent domination of the game and to allow for full, fun participation. Practice sessions and games are properly supervised and of reasonable length. Practice or competition occurs only when an instructor and/or supervisor is present at the site of play.
Prepare for emergencies. Ensure the presence of a first-aid kit and a first-aider with a current certificate in First Aid, including Adult and Child CPR or CPR/AED, who is prepared to handle cases of abrasions, sprains, and fractures. Emergency transportation is available; if any part of the activity is located 60 minutes or more from emergency medical services, ensure the presence of a first-aider (level 2) with Wilderness and Remote First Aid. See Volunteer Essentials for information about first-aid standards and training.
On the Day of Other Land Sports
Get a weather report. If participating in an outdoor activity, check weather.com or other reliable weather source to determine if conditions are appropriate. Be prepared to alter the activity plan or have an alternate activity prepared if weather conditions change. Write, review, and practice evacuation and emergency plans for severe weather with girls. If outdoors, in the event of a storm, take shelter away from tall objects (including trees, buildings, and electrical poles). Find the lowest point in an open flat area. Squat low to the ground on the balls of the feet, and place hands on knees

93
with head between them. Outdoor activities are suspended during an electrical storm or in very hot, humid weather.
Use the buddy system. Girls are divided into teams of two. Each girl chooses a buddy and is responsible for staying with her buddy at all times, warning her buddy of danger, giving her buddy immediate assistance if safe to do so, and seeking help when the situation warrants it. If someone in the group is injured, one person cares for the patient while two others seek help.
Safeguard valuables. Secure equipment in a dry, locked storage area or have girls wear a daypack to carry personal belongings.
Ensure that equipment is well-maintained. There are sufficient floor mats for gymnastics, tumbling, and similar activities. Inspect rented or borrowed equipment carefully before using it.
Dress appropriately for the activity and take breaks. Sharp objects, jewelry, and watches are removed and pockets emptied. Long hair is pulled back from the face and fastened to prevent tangling. Sufficient rest periods are given to avoid overexertion and to replenish fluids.
Take safety precautions. Fatigued or injured girls are removed from competition and cared for promptly. A seriously injured girl is moved only by trained rescue personnel. An injured girl is not returned to practice or competition without the written approval of a physician.
Other Land Sports Links
American Alliance for Health, Physical Education, Recreation, and Dance: www.aahperd.org
National Association for Girls and Women in Sport: www.aahperd.org/nagws
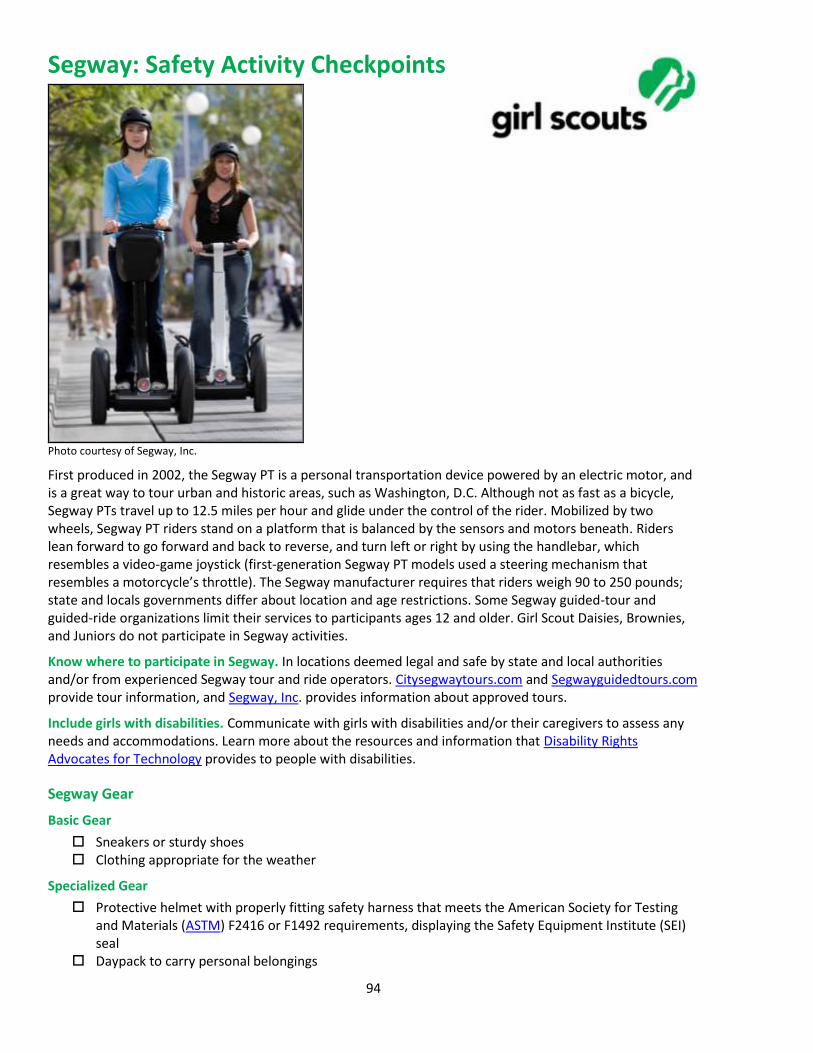
94
Segway: Safety Activity Checkpoints
Photo courtesy of Segway, Inc.
First produced in 2002, the Segway PT is a personal transportation device powered by an electric motor, and is a great way to tour urban and historic areas, such as Washington, D.C. Although not as fast as a bicycle, Segway PTs travel up to 12.5 miles per hour and glide under the control of the rider. Mobilized by two wheels, Segway PT riders stand on a platform that is balanced by the sensors and motors beneath. Riders lean forward to go forward and back to reverse, and turn left or right by using the handlebar, which resembles a video-game joystick (first-generation Segway PT models used a steering mechanism that resembles a motorcycle’s throttle). The Segway manufacturer requires that riders weigh 90 to 250 pounds; state and locals governments differ about location and age restrictions. Some Segway guided-tour and guided-ride organizations limit their services to participants ages 12 and older. Girl Scout Daisies, Brownies, and Juniors do not participate in Segway activities.
Know where to participate in Segway. In locations deemed legal and safe by state and local authorities and/or from experienced Segway tour and ride operators. Citysegwaytours.com and Segwayguidedtours.com provide tour information, and Segway, Inc. provides information about approved tours.
Include girls with disabilities. Communicate with girls with disabilities and/or their caregivers to assess any needs and accommodations. Learn more about the resources and information that Disability Rights Advocates for Technology provides to people with disabilities.
Segway Gear
Basic Gear
Sneakers or sturdy shoes Clothing appropriate for the weather
Specialized Gear
Protective helmet with properly fitting safety harness that meets the American Society for Testing and Materials (ASTM) F2416 or F1492 requirements, displaying the Safety Equipment Institute (SEI) seal
Daypack to carry personal belongings
95
Prepare for Segway
Communicate with council and parents. Inform your Girl Scout council and girls’ parents/guardians about the activity, including details about safety precautions and any appropriate clothing or supplies that may be necessary. Follow council procedures for activity approval, certificates of insurance, and council guidelines about girls’ general health examinations. Make arrangements in advance for all transportation and confirm plans before departure.
Girls plan the activity. Keeping their grade-level abilities in mind, encourage girls to take proactive leadership roles in organizing details of the activity.
Arrange for transportation and adult supervision. The recommended adult-to-girl ratios are two non-related adults (at least one of whom is female) to every:
20 Girl Scout Cadettes
24 Girl Scout Seniors
24 Girl Scout Ambassadors
Plus one adult to each additional:
10 Girl Scout Cadettes
12 Girl Scout Seniors
12 Girl Scout Ambassadors
Verify instructor knowledge and experience. Ensure that:
The Segway instructor has experience and skill in teaching and supervising Segway PT.
The instructor reviews the operating procedures with girls before riding a Segway.
The experienced Segway instructor teaches participants how to ride, turn, and stop in a controlled, safe location free of obstructions and traffic.
Segway PTs are ridden in pedestrian environments and not on streets.
The instructor supports and spots participants when they step on and off of a Segway, and ensures that riders are comfortable riding a Segway before participating in a Segway tour or ride.
Compile key contacts. Give an itinerary to a contact person at home; call the contact person upon departure and return. Create a list of girls’ parents/guardian contact information, telephone numbers for emergency services and police, and council contacts—keep on hand or post in an easily accessible location.
Select a safe Segway location, and encourage girls to plan the activity.
Ensure that the practice of riding the Segway PT is legal in the planned location of activity.
Remember that, although most states allow Segway PTs on sidewalks, town and city laws may differ.
Ensure the Segway riding location is safe; do not ride in traffic, on steep slopes or hills, on slippery surfaces, or on gravel, sand, or other loose surfaces.
Girls are encouraged to plan details of their Segway trips.
Dress appropriately for the activity. Make sure girls and adults avoid wearing dangling earrings, bracelets, and necklaces that may become entangled in equipment.
Prepare for emergencies. Ensure the presence of a first-aid kit and a first-aider with a current certificate in First Aid, including Adult and Child CPR or CPR/AED, who is prepared to handle cases of abrasions, sprains, and fractures. See Volunteer Essentials for information about first-aid standards and training.
On the Day of the Segway Activity
Get a weather report. On the morning of the Segway activity, check weather.com or other reliable weather sources to determine if weather conditions are appropriate. Do not ride Segways in rain or strong winds. If severe weather conditions prevent the activity, be prepared with a backup plan or
96
alternate activity, or postpone the activity. Write, review, and practice evacuation and emergency plans for severe weather with girls. In the event of a storm, take shelter away from tall objects (including trees, buildings, and electrical poles). Find the lowest point in an open flat area. Squat low to the ground on the balls of the feet, and place hands on knees with heads between them.
Use the buddy system. Girls are divided into teams of two. Each girl chooses a buddy and is responsible for staying with her buddy at all times, warning her buddy of danger, giving her buddy immediate assistance if safe to do so, and seeking help when the situation warrants it. If someone in the group is injured, one person cares for the patient while two others seek help.
Practice safe Segway procedures.
Beginners start by riding in Segway’s slowest mode.
Riders do not misuse or “push” a Segway past its limits; for instance, riders do not lean forward when the Speed Limiter Alert is on, nor do they continue to ride when the Stick Shake Warning is on.
Take care when turning left and right and when stopping and parking a Segway.
When riding on sidewalks in urban areas, be on alert for pedestrians, doors opening, and low overhead obstructions.
Give right-of-way to pedestrians, and ride Segway on right-hand side of sidewalks and paths.
Do not ride a Segway over curbs; use the cutout of a curb instead.
When riding a Segway, keep at least two Segway tires’ distance from another rider.
Segway Links
Segway: www.segway.com
Segway Online: www.segwayonline.com
Segway Know-How for Girls
Learn about the mechanics of the Segway PT. Computers and motors in a Segway PT’s base keep the vehicle upright when powered on. Learn about the mechanics.
Charge up the battery. The battery life of Segway PTs differs, depending on the model. For instance, the Segway i-Series’s maximum speed is 12.5 mph and is capable of covering 15 to 25 miles on a fully charged battery. Batteries also recharge while riding downhill. Visit Segway for information about Segway batteries.
Segway Jargon
Glide (or Seg): A term for the forward movement of riding a Segway
Dynamic Stabilization: A term for balancing on a Segway
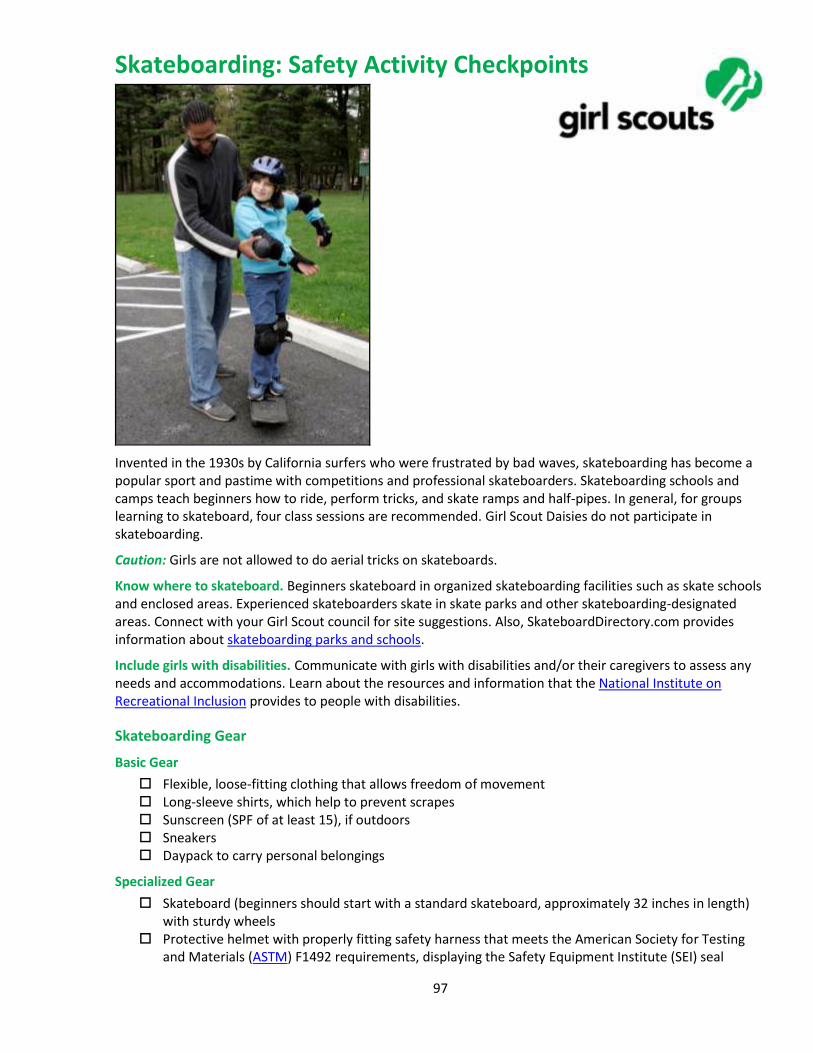
97
Skateboarding: Safety Activity Checkpoints
Invented in the 1930s by California surfers who were frustrated by bad waves, skateboarding has become a popular sport and pastime with competitions and professional skateboarders. Skateboarding schools and camps teach beginners how to ride, perform tricks, and skate ramps and half-pipes. In general, for groups learning to skateboard, four class sessions are recommended. Girl Scout Daisies do not participate in skateboarding.
Caution: Girls are not allowed to do aerial tricks on skateboards.
Know where to skateboard. Beginners skateboard in organized skateboarding facilities such as skate schools and enclosed areas. Experienced skateboarders skate in skate parks and other skateboarding-designated areas. Connect with your Girl Scout council for site suggestions. Also, SkateboardDirectory.com provides information about skateboarding parks and schools.
Include girls with disabilities. Communicate with girls with disabilities and/or their caregivers to assess any needs and accommodations. Learn about the resources and information that the National Institute on Recreational Inclusion provides to people with disabilities.
Skateboarding Gear
Basic Gear
Flexible, loose-fitting clothing that allows freedom of movement Long-sleeve shirts, which help to prevent scrapes Sunscreen (SPF of at least 15), if outdoors Sneakers Daypack to carry personal belongings
Specialized Gear
Skateboard (beginners should start with a standard skateboard, approximately 32 inches in length) with sturdy wheels
Protective helmet with properly fitting safety harness that meets the American Society for Testing and Materials (ASTM) F1492 requirements, displaying the Safety Equipment Institute (SEI) seal
98
Snug-fitting elbow pads and kneepads Skateboarding/in-line skating wrist guards
Prepare for Skateboarding
Communicate with council and parents. Inform your Girl Scout council and girls’ parents/guardians about the activity, including details about safety precautions and any appropriate clothing or supplies that may be necessary. Follow council procedures for activity approval, certificates of insurance, and council guidelines about girls’ general health examinations. Make arrangements in advance for all transportation and confirm plans before departure.
Girls plan the activity. Keeping their grade-level abilities in mind, encourage girls to take proactive leadership roles in organizing details of the activity.
Arrange transportation and adult supervision. The recommended adult-to-girl ratios are two non-related adults (at least one of whom is female) to every:
12 Girl Scout Brownies
16 Girl Scout Juniors
20 Girl Scout Cadettes
24 Girl Scout Seniors
24 Girl Scout Ambassadors
Plus one adult to each additional:
6 Girl Scout Brownies
8 Girl Scout Juniors
10 Girl Scout Cadettes
12 Girl Scout Seniors
12 Girl Scout Ambassadors
Verify instructor knowledge and experience. Instruction is given by a person with experience teaching and/or supervising skateboarding or has equivalent certification or documented experience and skill in teaching and/or supervising skateboarding. Check the instructor’s references to ensure reliability and skill level.
Compile key contacts. Give an itinerary to a contact person at home; call the contact person upon departure and return. Create a list of girls’ parents/guardian contact information, telephone numbers for emergency services and police, and council contacts—keep on hand or post in an easily accessible location.
Select a safe skateboarding site. Obtain council guidance in selecting the skating site. Ensure that the site has a smooth skating surface free of debris. Beginners start on a flat, painted surface such as an outdoor basketball court. Avoid skate parks until girls are ready to skateboard at a higher level. When skateboarding at skate parks, the manager is called in advance to arrange for large groups or for practice sessions. The skate park is adequately staffed to monitor the size of the crowd. (Check with the skate park supervisor in advance to learn how many adults, in addition to the park staff, are needed to supervise the group.) Local ordinances or parks offices are checked to see whether skateboarding is permitted on bike paths or in city parks. Do not skateboard in back alleys, in the street, or on private property.
Prepare for emergencies. Ensure the presence of a first-aid kit and a first-aider with a current certificate in First Aid, including Adult and Child CPR or CPR/AED, who is prepared to handle cases of injury from falls, especially abrasions. If any part of the activity is located 60 minutes or more from emergency medical services, ensure the presence of a first-aider (level 2) with Wilderness and Remote First Aid. See Volunteer Essentials for information about first-aid standards and training.
99
On the Day of Skateboarding
Get a weather report. For outdoor skateboarding, on the morning of the activity, check weather.com or other reliable weather sources to determine if conditions are appropriate, and make sure, if skateboarding outside, that the ground is free of ice. If severe weather conditions prevent the activity, be prepared with a backup plan or alternate activity, or postpone the activity. Write, review, and practice evacuation and emergency plans for severe weather with girls. In the event of a storm, take shelter away from tall objects (including trees, buildings, and electrical poles). Find the lowest point in an open flat area. Squat low to the ground on the balls of the feet, and place hands on knees with head between them.
Use the buddy system. Girls are divided into teams of two. Each girl chooses a buddy and is responsible for staying with her buddy at all times, warning her buddy of danger, giving her buddy immediate assistance if safe to do so, and seeking help when the situation warrants it. If someone in the group is injured, one person cares for the patient while two others seek help.
Safeguard valuables. Secure equipment in a dry, locked storage area if skateboarding in an indoor skatepark.
Girls learn basic skating skills. Girls receive basic instruction in skateboarding skills. Girls learn to perform basic skateboarding skills before attempting more advanced skills. Gentle warm-up exercises are done before any strenuous skating; cool-down exercises end the sessions.
Follow basic skateboarding safety standards. Be aware of surroundings and stay out of the way of other skateboarders. Follow skate park or facility rules. Loose or sharp articles, such as handbags, combs, and keys, are not carried in pockets, hands, hair, or anyplace where they might injure a skater in the event of a fall, fall to the floor, or injure another skater. Girls do not skate faster than their ability to stop, and skaters do not wear headphones while skating. To help avoid injuries, instruct girls to discontinue skateboarding if they’re experiencing exhaustion or pain.
Practice safe outdoor skateboarding. Outdoors, girls skate in areas where traffic or pedestrians will not interfere. Check local ordinances for any restrictions. Girls skate in the street or in a parking lot only if it is closed to traffic. When skating on a walkway, yield to pedestrians.
Skateboarding Links
International Skateboarding Federation: www.internationalskateboardingfederation.com
USA Skateboarding: http://usaskateboarding.org
Skateboarding Know-How for Girls
Learn about tricks. Before trying them out in skate camp or school, learn about the ollie, kick flip, pop shuv-it, and other skateboarding moves at www.skateboard.com/howtoskate.
Start a skateboard club. Don’t have a skateboarding school, park, or club in your area? Consider starting one. This Skateboard About Web site provides tips.
Skateboarding Jargon
ABEC: A unit of measurement for rating the manufacturing tolerances of skateboard bearings; the bearings range from ABEC 1, the least precise, to ABEC 7, the most precise
Bowl: A concave skateboarding ramp that is 360 degrees, forming a bowl shape
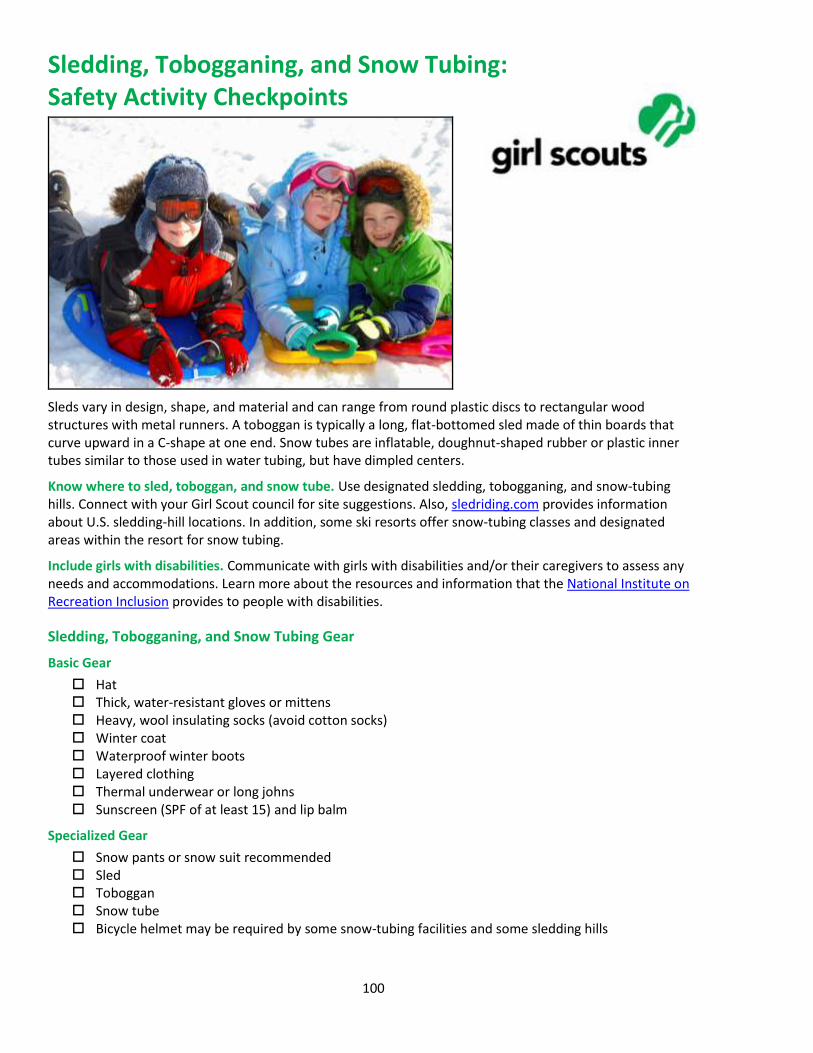
100
Sledding, Tobogganing, and Snow Tubing: Safety Activity Checkpoints
Sleds vary in design, shape, and material and can range from round plastic discs to rectangular wood structures with metal runners. A toboggan is typically a long, flat-bottomed sled made of thin boards that curve upward in a C-shape at one end. Snow tubes are inflatable, doughnut-shaped rubber or plastic inner tubes similar to those used in water tubing, but have dimpled centers.
Know where to sled, toboggan, and snow tube. Use designated sledding, tobogganing, and snow-tubing hills. Connect with your Girl Scout council for site suggestions. Also, sledriding.com provides information about U.S. sledding-hill locations. In addition, some ski resorts offer snow-tubing classes and designated areas within the resort for snow tubing.
Include girls with disabilities. Communicate with girls with disabilities and/or their caregivers to assess any needs and accommodations. Learn more about the resources and information that the National Institute on Recreation Inclusion provides to people with disabilities.
Sledding, Tobogganing, and Snow Tubing Gear
Basic Gear
Hat Thick, water-resistant gloves or mittens Heavy, wool insulating socks (avoid cotton socks) Winter coat Waterproof winter boots Layered clothing Thermal underwear or long johns Sunscreen (SPF of at least 15) and lip balm
Specialized Gear
Snow pants or snow suit recommended Sled Toboggan Snow tube Bicycle helmet may be required by some snow-tubing facilities and some sledding hills

101
Prepare for Sledding, Tobogganing, and Snow Tubing
Communicate with council and parents. Inform your Girl Scout council and girls’ parents/guardians about the activity, including details about safety precautions and any appropriate clothing or supplies that may be necessary. Follow council procedures for activity approval, certificates of insurance, and council guidelines about girls’ general health examinations. Make arrangements in advance for all transportation and confirm plans before departure.
Girls plan the activity. Keeping their grade-level abilities in mind, encourage girls to take proactive leadership roles in organizing details of the activity.
Arrange for transportation and adult supervision. The recommended adult-to-girl ratios are two non-related adults (at least one of whom is female) to every:
6 Girl Scout Daisies
12 Girl Scout Brownies
16 Girl Scout Juniors
20 Girl Scout Cadettes
24 Girl Scout Seniors
24 Girl Scout Ambassadors
Plus one adult to each additional:
4 Girl Scout Daisies
6 Girl Scout Brownies
8 Girl Scout Juniors
10 Girl Scout Cadettes
12 Girl Scout Seniors
12 Girl Scout Ambassadors
Select a safe site. Ensure that sledding is conducted in an area free of vehicles and that the site has no obstructions such as rocks, trees, or signposts. The nature of the terrain, potential hazards (such as an avalanche or frozen lake), mileage, and approximate activity time are known to all group members in advance. When a latrine is not available, individual cat holes at least 200 feet away from water sources are used to dispose of and bury human waste; tampons, sanitary supplies, and toilet paper are packed out (visit www.lnt.org for more information).
Prepare for emergencies. Ensure the presence of a waterproof first-aid kit and a first-aider with a current certificate in First Aid, including Adult and Child CPR or CPR/AED, who is prepared to handle cases of frostbite, cold exposure, hypothermia, sprains, fractures, and altitude sickness. Emergency transportation is available; if any part of the activity is located 60 minutes or more from emergency medical services, ensure the presence of a first-aider (level 2) with Wilderness and Remote First Aid. See Volunteer Essentials for information about first-aid standards and training.
Compile key contacts. Give an itinerary to a contact person at home; call the contact person upon departure and return. Create a list of girls’ parents/guardian contact information, telephone numbers for emergency services and police, and council contacts—keep on hand or post in an easily accessible location. Before a sledding, tobogganing, or snow-tubing trip, a meeting place is designated where girls can contact an adult.
Girls learn about sledding, tobogganing, and snow tubing. Girls receive basic instruction in sledding safety and conduct rules. Girls learn to perform basic steering skills, including how to slow down and stop.
On the Day of Sledding, Tobogganing, or Snow Tubing
Get a weather report. On the morning of the activity, check weather.com or other reliable weather sources to determine if conditions are appropriate. Xcski.org provides reports about snow conditions by region. If weather conditions prevent the activity, be prepared with a backup plan or alternate
102
activity, or postpone the activity. Write, review, and practice evacuation and emergency plans for severe weather with girls.
Use the buddy system. Girls are divided into teams of two. Each girl chooses a buddy and is responsible for staying with her buddy at all times, warning her buddy of danger, giving her buddy immediate assistance if safe to do so, and seeking help when the situation warrants it. If someone in the group is injured, one person cares for the patient while two others seek help.
Safeguard valuables. Secure equipment in a dry, locked storage area.
Practice safe sledding, tobogganing, and snow tubing. Conditions are monitored, and breaks are taken to prevent hypothermia and frostbite. Girls slide downhill feet-first to reduce the potential for head injuries from collisions. Girls and adults agree on the portion of slope to be used for sledding and the portion to be used for walking uphill.
Sledding, Tobogganing, and Snow-Tubing Links
Sled Riding: www.sledriding.com
Sledding, Tobogganing, and Snow Tubing Know-How for Girls
Learn about competitive and Olympic sledding. Find out about the sport of sled racing on the USA Bobsled and Skeleton Federation site.
Know the history of sledding. Traditionally sleds were used to transport goods and people in places where wheels couldn’t operate. Toboggans made of poles tied together with leather were used by Native Americans to carry food, clothing, and other items through snow.
Sledding, Tobogganing, and Snow Tubing Jargon
Aerodynamics: The science of studying how objects move through air; an aerodynamically designed sled or toboggan is made smooth to cut through wind faster
Luge: A competitive sport that uses a luge (pronounced LOOzh) or small sled; luge users ride with their backs on the sled and faces up
Skeleton: A small, flat sled with no steering or braking mechanisms that is used competitively; the rider faces down
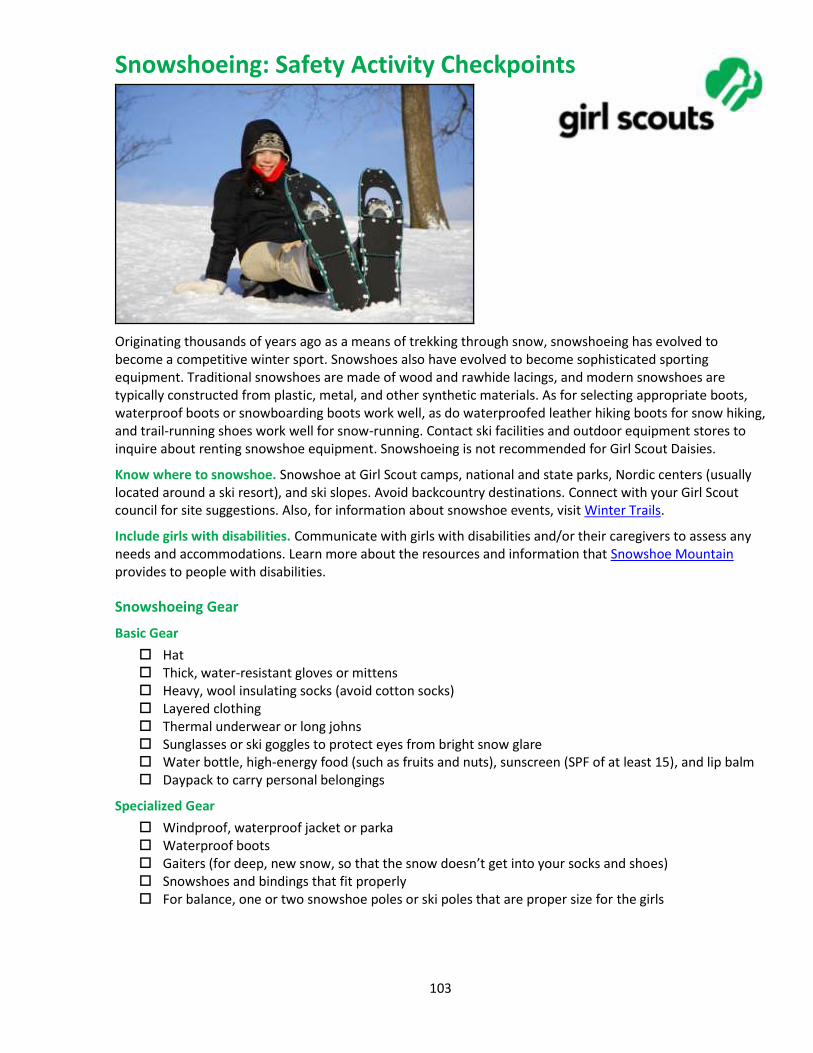
103
Snowshoeing: Safety Activity Checkpoints
Originating thousands of years ago as a means of trekking through snow, snowshoeing has evolved to become a competitive winter sport. Snowshoes also have evolved to become sophisticated sporting equipment. Traditional snowshoes are made of wood and rawhide lacings, and modern snowshoes are typically constructed from plastic, metal, and other synthetic materials. As for selecting appropriate boots, waterproof boots or snowboarding boots work well, as do waterproofed leather hiking boots for snow hiking, and trail-running shoes work well for snow-running. Contact ski facilities and outdoor equipment stores to inquire about renting snowshoe equipment. Snowshoeing is not recommended for Girl Scout Daisies.
Know where to snowshoe. Snowshoe at Girl Scout camps, national and state parks, Nordic centers (usually located around a ski resort), and ski slopes. Avoid backcountry destinations. Connect with your Girl Scout council for site suggestions. Also, for information about snowshoe events, visit Winter Trails.
Include girls with disabilities. Communicate with girls with disabilities and/or their caregivers to assess any needs and accommodations. Learn more about the resources and information that Snowshoe Mountain provides to people with disabilities.
Snowshoeing Gear
Basic Gear
Hat Thick, water-resistant gloves or mittens Heavy, wool insulating socks (avoid cotton socks) Layered clothing Thermal underwear or long johns Sunglasses or ski goggles to protect eyes from bright snow glare Water bottle, high-energy food (such as fruits and nuts), sunscreen (SPF of at least 15), and lip balm Daypack to carry personal belongings
Specialized Gear
Windproof, waterproof jacket or parka Waterproof boots Gaiters (for deep, new snow, so that the snow doesn’t get into your socks and shoes) Snowshoes and bindings that fit properly For balance, one or two snowshoe poles or ski poles that are proper size for the girls
104
Prepare for Snowshoeing
Communicate with council and parents. Inform your Girl Scout council and girls’ parents/guardians about the activity, including details about safety precautions and any appropriate clothing or supplies that may be necessary. Follow council procedures for activity approval, certificates of insurance, and council guidelines about girls’ general health examinations. Make arrangements in advance for all transportation and confirm plans before departure.
Girls plan the activity. Keeping their grade-level abilities in mind, encourage girls to take proactive leadership roles in organizing details of the activity.
Arrange for transportation and adult supervision. Ensure that one adult leads and another adult brings up the rear of the group. The recommended adult-to-girl ratios are two non-related adults (at least one of whom is female) to every:
12 Girl Scout Brownies
16 Girl Scout Juniors
20 Girl Scout Cadettes
24 Girl Scout Seniors
24 Girl Scout Ambassadors
Plus one adult to each additional:
6 Girl Scout Brownies
8 Girl Scout Juniors
10 Girl Scout Cadettes
12 Girl Scout Seniors
12 Girl Scout Ambassadors
Verify instructor knowledge and experience. Instruction is given by an adult with experience teaching and/or supervising snowshoeing.
Compile key contacts. Give an itinerary to a contact person at home; call the contact person upon departure and return. Create a list of girls’ parents/guardian contact information, telephone numbers for emergency services and police, and council contacts—keep on hand or post in an easily accessible location.
Select a safe snowshoeing site. Girls are encouraged to plan trip details and include adequate rest periods with opportunities to replenish fluids and eat high-energy foods (such as fruits and nuts). The nature of the terrain, potential hazards (such as an avalanche or frozen lake), mileage, and approximate snowshoeing time are known to all group members in advance. When a latrine is not available, individual cat holes at least 200 feet away from water sources are used to dispose of and bury human waste; tampons, sanitary supplies, and toilet paper are packed out (visit www.lnt.org for more information).
Map the course. Before snowshoeing, designate a meeting place where girls can contact a supervising adult. The itinerary, with planned departure and return times and names of participants, is left with a contact person. The route is marked on a map. The contact person is advised before the group’s departure and upon its return.
Ensure girls are prepared for snowshoeing. Girls get in condition by exercising before snowshoeing. Ensure that equipment is appropriate for the type of terrain, the participants’ body weight, and the weight of any backpack.
Prepare for emergencies. Ensure the presence of a waterproof first-aid kit and a first-aider with a current certificate in First Aid, including Adult and Child CPR or CPR/AED, who is prepared to handle cases of frostbite, cold exposure, hypothermia, sprains, fractures, and altitude sickness. Search-and-rescue procedures are written out in advance. Emergency transportation is available; if any part of the activity is located 60 minutes or more from emergency medical services, ensure the presence of a
105
first-aider (level 2) with Wilderness and Remote First Aid. See Volunteer Essentials for information about first-aid standards and training.
On the Day of Snowshoeing
Get a weather report. On the morning of the activity, check weather.com or other reliable weather sources to determine if conditions are appropriate. Xcski.org provides reports about snow conditions by region. If severe weather conditions prevent the activity, be prepared with a backup plan or alternate activity, or postpone the activity. Write, review, and practice evacuation and emergency plans for severe weather with girls.
Use the buddy system. Girls are divided into teams of two. Each girl chooses a buddy and is responsible for staying with her buddy at all times, warning her buddy of danger, giving her buddy immediate assistance if safe to do so, and seeking help when the situation warrants it. If someone in the group is injured, one person cares for the patient while two others seek help.
Girls are instructed in basic snowshoeing techniques. Adults are aware of each girl’s ability. Practice sessions are scheduled for beginners.
Be prepared in the case of an emergency. Girls are trained in winter survival (such as snow-cave building, whiteouts, and avalanche avoidance), as needed. Advance arrangements are made for medical emergencies and evacuation procedures.
Snowshoeing Links
National Ski Patrol: www.nsp.org
Snowshoe Magazine: www.snowshoemag.com
The United States Snowshoe Association: www.snowshoeracing.com
Leave No Trace: www.lnt.org
Snowshoeing Know-How for Girls
Learn about types of snowshoes. Aerobic/running snowshoes are the smallest and lightest; recreational are mid-size snowshoes designed for moderate walks; and mountaineering snowshoes are the largest snowshoes that are meant for intense, long-distance hikes.
Snowshoeing Jargon
Pivot point: The point under the ball of the foot at which the binding is attached to the snowshoe
Self-belay: Preventing a slip or fall by using a ski pole while walking
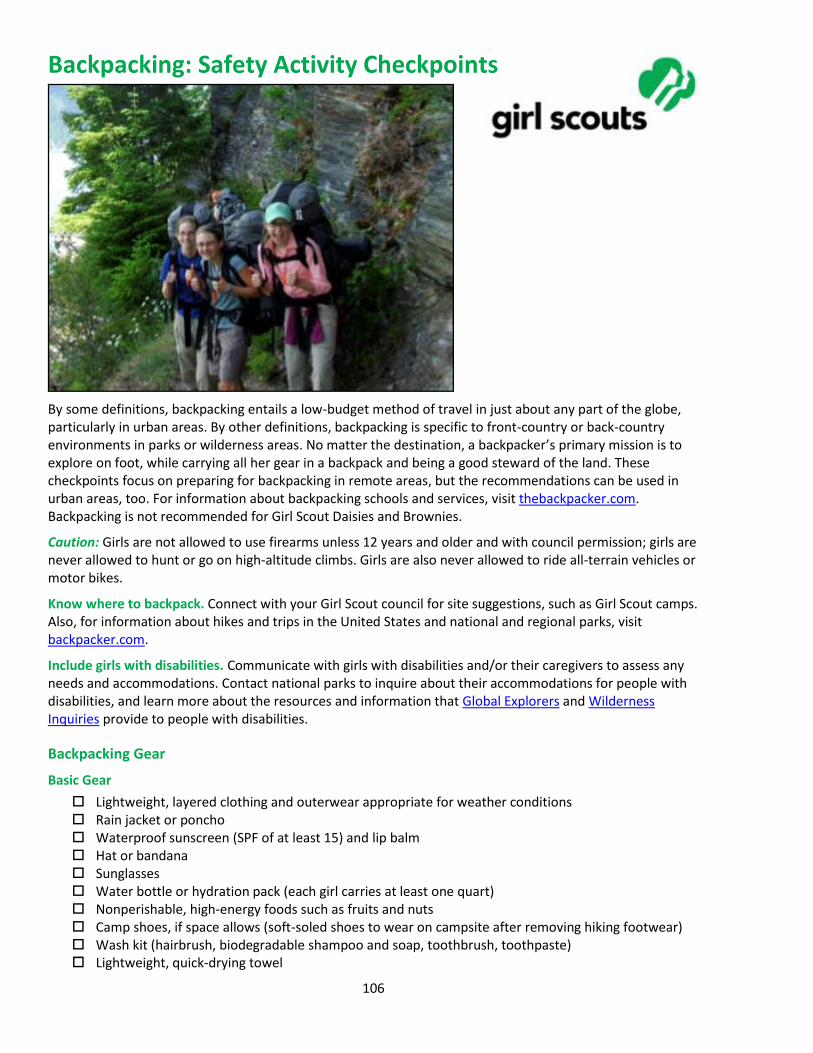
106
Backpacking: Safety Activity Checkpoints
By some definitions, backpacking entails a low-budget method of travel in just about any part of the globe, particularly in urban areas. By other definitions, backpacking is specific to front-country or back-country environments in parks or wilderness areas. No matter the destination, a backpacker’s primary mission is to explore on foot, while carrying all her gear in a backpack and being a good steward of the land. These checkpoints focus on preparing for backpacking in remote areas, but the recommendations can be used in urban areas, too. For information about backpacking schools and services, visit thebackpacker.com. Backpacking is not recommended for Girl Scout Daisies and Brownies.
Caution: Girls are not allowed to use firearms unless 12 years and older and with council permission; girls are never allowed to hunt or go on high-altitude climbs. Girls are also never allowed to ride all-terrain vehicles or motor bikes.
Know where to backpack. Connect with your Girl Scout council for site suggestions, such as Girl Scout camps. Also, for information about hikes and trips in the United States and national and regional parks, visit backpacker.com.
Include girls with disabilities. Communicate with girls with disabilities and/or their caregivers to assess any needs and accommodations. Contact national parks to inquire about their accommodations for people with disabilities, and learn more about the resources and information that Global Explorers and Wilderness Inquiries provide to people with disabilities.
Backpacking Gear
Basic Gear
Lightweight, layered clothing and outerwear appropriate for weather conditions Rain jacket or poncho Waterproof sunscreen (SPF of at least 15) and lip balm Hat or bandana Sunglasses Water bottle or hydration pack (each girl carries at least one quart) Nonperishable, high-energy foods such as fruits and nuts Camp shoes, if space allows (soft-soled shoes to wear on campsite after removing hiking footwear) Wash kit (hairbrush, biodegradable shampoo and soap, toothbrush, toothpaste) Lightweight, quick-drying towel
107
Insect repellent Flashlight Whistle
Specialized Gear
Backpack appropriate for size and experience of user Sturdy hiking/trail footwear with thick soles Moisture-wicking long underwear, if appropriate Map and compass or compass and global positioning system (GPS) Sleeping bag and sleeping pad Portable water and water purification supplies to remove potential contaminations from natural
water sources; use water filter designed to remove Giardia lamblia (see the “Outdoor Cooking” Safety Activity Checkpoints for purification tips).
Unbreakable, lightweight knife/fork/spoon combo and bowl and cup Pocket knife Flame-resistant tent or tarp (no plastic tent) Portable cook stove and fuel, whenever possible (to reduce the use of firewood) Waste-management supplies (toilet paper, garbage bag, plastic trowel to dig cat hole, hand sanitizer) Food storage (rope and waterproof bag; check local regulations to find out if a bear-proof canister is
required)
Prepare for Backpacking
Communicate with council and parents. Inform your Girl Scout council and girls’ parents/guardians about the activity, including details about safety precautions and any appropriate clothing or supplies that may be necessary. Follow council procedures for activity approval, certificates of insurance, and council guidelines about girls’ general health examinations. Make arrangements in advance for all transportation and confirm plans before departure.
Girls plan the activity. Keeping their grade-level abilities in mind, encourage girls to take proactive leadership roles in organizing details of the activity. Encourage girls to plan routes, activities, rules for group living, and guidelines for dealing with problems that may arise with other groups of backpackers.
Obtain backpacking training and arrange for adult supervision. The backpacking adult volunteer has taken council-approved training in backpacking. One adult is in front of the group of backpackers, and the other is in the rear of each group. The recommended adult-to-girl ratios are two non-related adults (at least one of whom is female) to every:
16 Girl Scout Juniors
20 Girl Scout Cadettes
24 Girl Scout Seniors
24 Girl Scout Ambassadors
Plus one adult to each additional:
8 Girl Scout Juniors
10 Girl Scout Cadettes
12 Girl Scout Seniors
12 Girl Scout Ambassadors
Compile key contacts. Give an itinerary to a contact person at home; call the contact person upon departure and return. Create a list of girls’ parents/guardian contact information, telephone numbers for emergency services and police, and council contacts—keep on hand or post in an easily accessible location.
108
Girls share resources. Encourage girls to make a list of gear and supplies, and determine what items can be shared.
Choose an appropriate backpacking route. The route chosen is within the ability of every girl in the group; the pace accommodates the slowest backpacker. Determine the length of the trip by the backpackers’ ages, level of experience and ability, physical condition, nature of the terrain, weight of the load to be carried, the season and weather conditions, the water quantity and quality, and the activities planned along the way.
Be prepared for primitive campsites. If backpacking in primitive areas with little to no modern conveniences, observe these standards:
Choose and set up campsite well before dark.
Use a previously established campsite if available.
Make sure the campsite is level and located at least 200 feet from all water sources and below tree line.
Avoid fragile mountain meadows and areas of wet soil.
Avoid camping under dead tree limbs.
Use existing fire rings, if a fire is necessary.
If a latrine is not available, use individual cat holes—holes for human waste that are at least 200 feet away from the trail and known water sources—to dispose of human waste (visit www.lnt.org for more information).
Do dishwashing and personal bathing at least 200 feet away from water sources.
Store food well away from tents and out of reach of animals. Where necessary, hang food at least 10 feet high from a rope stretched between two trees. If the site is in bear country, check with local authorities on precautions to take.
See that garbage, tampons, sanitary supplies, and toilet paper are carried out.
Assess the safety of backpacking sites. The route is known to at least one of the adults or a report is obtained in advance to assess potential hazards. Ensure that a land-management or similar agency is contacted during the trip-planning stage to help with available routes and campsites, recommended group size, water quantity and quality, and permits (if needed).
Assess backpack quality and do a trial run. Ensure that backpacks and all equipment (including food and water) weigh no more than 20 percent of each person’s ideal (not actual) body weight. Guide girls in choosing backpacks, adjusting straps, and taking them on and off. Have the girls plan and conduct a series of conditioning hikes before the backpacking trip.
Ensure that backpackers have a comprehensive understanding of the trip. Group members are trained to be observant of the route, the surroundings, and the fatigue of individuals. Instruction is given on the safety rules for backpacking, such as staying together in a group, recognizing poisonous plants and biting or stinging insects and ticks, respecting wild animals, and behaving effectively in emergencies. Ensure that girls know how to read maps, use a compass, navigate a route, and estimate distance.
Prepare for emergencies. Ensure the presence of a waterproof first-aid kit and a first-aider with a current certificate in First Aid, including Adult and Child CPR or CPR/AED, who is prepared to handle cases from extremes of temperature, such as heat exhaustion, heat stroke, frostbite, cold exposure, and hypothermia, as well as sprains, fractures, and altitude sickness. Emergency transportation is available, if possible; if any part of the activity is located 60 minutes or more from emergency medical services, ensure the presence of a first-aider (level 2) with Wilderness and Remote First Aid. See Volunteer Essentials for information about first-aid standards and training.
Take safety precautions. Search-and-rescue procedures for missing persons are written out in advance, reviewed, and practiced by girls and adults. Methods of communication with sources of emergency care, such as police, hospitals, and park and fire officials, are known and arranged in advance.
109
On the Day of Backpacking
Get a weather report. On the morning of the trip, check weather.com or other reliable weather sources to determine if conditions are appropriate. If severe weather conditions prevent the backpacking trip, be prepared with a backup plan or alternate activity. Write, review, and practice evacuation and emergency plans for severe weather.
Use the buddy system. Girls are divided into teams of two. Each girl chooses a buddy and is responsible for staying with her buddy at all times, warning her buddy of danger, giving her buddy immediate assistance if safe to do so, and seeking help when the situation warrants it. If someone in the group is injured, one person cares for the patient while two others seek help.
Respect the environment and keep trails clean. Use principles of minimal-impact camping, a philosophy of respect for the natural environment that involves minimizing environmental and sociological impacts. Store garbage in insect- and animal-proof containers with plastic inner linings, and cover it securely when there is a campsite garbage-pickup service. When there is no garbage-pickup service, remove garbage from campsite in plastic bags and discard, as appropriate. Recycle whenever possible. Do not bury food; carry out all garbage.
Practice safe backpacking. Hiking off-trail and after dusk is not permitted. The group must hike away from the edges of waterfalls, rock ledges, and slopes with loose rocks.
Backpacking Links
Backpacker magazine: www.backpacker.com
The backpacker.com: www.thebackpacker.com
Leave No Trace: www.lnt.org
Backpacking Know-How for Girls
Maximize available backpack space. What are the absolute necessities? What backpacking gear can girls share? For tips, read thebackpacker.com. Select ideal energy sources. Backpackers take rest breaks to drink water and refuel with nutritious, easily digestible, and lightweight foods that don’t take up too much space in backpacks. Consider packing nuts, dried fruits, and energy bars.
Backpacking Jargon
Acclimation: Getting used to a higher altitude than you are accustomed to; pace yourself to avoid altitude sickness, which may occur when your body hasn’t adjusted to a new altitude
Backsighting: Looking back over the compass toward the point from which a person came to determine whether she is on course
Cat hole: Personal toilet hole that is 6 to 8 inches deep and is dug 200 feet from water sources, trails, and campsites; bury human waste and cover with natural materials such as dirt, leaves, and sand
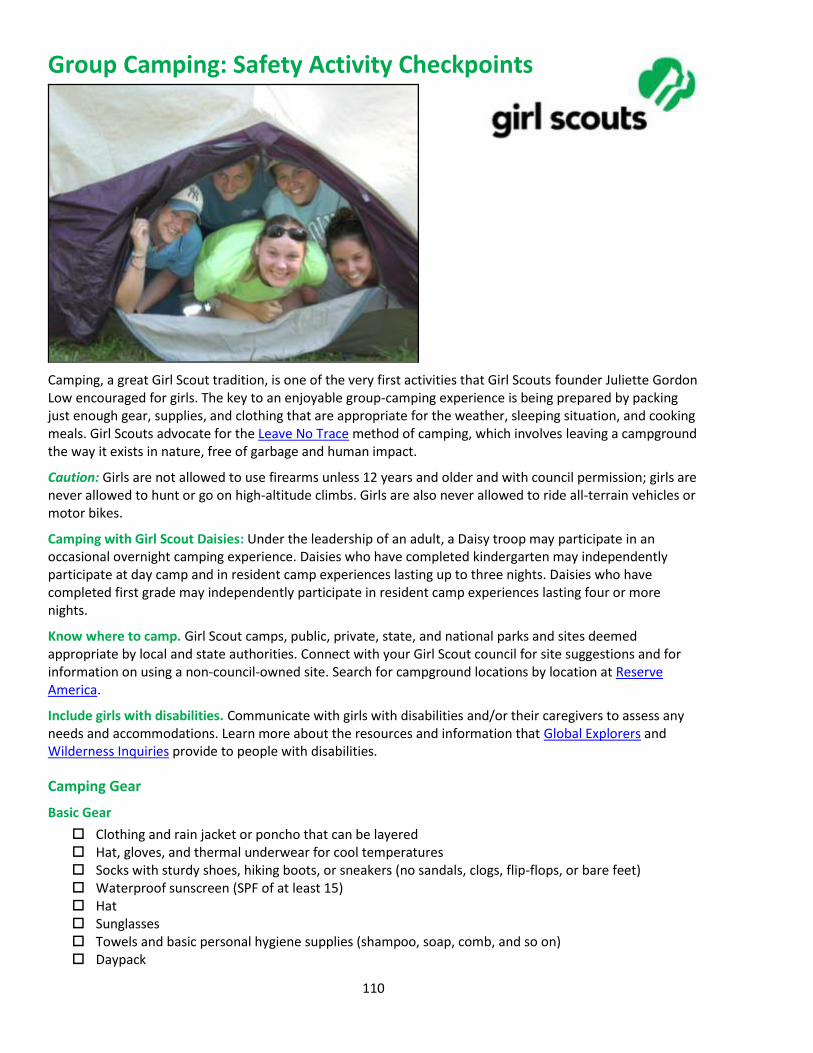
110
Group Camping: Safety Activity Checkpoints
Camping, a great Girl Scout tradition, is one of the very first activities that Girl Scouts founder Juliette Gordon Low encouraged for girls. The key to an enjoyable group-camping experience is being prepared by packing just enough gear, supplies, and clothing that are appropriate for the weather, sleeping situation, and cooking meals. Girl Scouts advocate for the Leave No Trace method of camping, which involves leaving a campground the way it exists in nature, free of garbage and human impact.
Caution: Girls are not allowed to use firearms unless 12 years and older and with council permission; girls are never allowed to hunt or go on high-altitude climbs. Girls are also never allowed to ride all-terrain vehicles or motor bikes.
Camping with Girl Scout Daisies: Under the leadership of an adult, a Daisy troop may participate in an occasional overnight camping experience. Daisies who have completed kindergarten may independently participate at day camp and in resident camp experiences lasting up to three nights. Daisies who have completed first grade may independently participate in resident camp experiences lasting four or more nights.
Know where to camp. Girl Scout camps, public, private, state, and national parks and sites deemed appropriate by local and state authorities. Connect with your Girl Scout council for site suggestions and for information on using a non-council-owned site. Search for campground locations by location at Reserve America.
Include girls with disabilities. Communicate with girls with disabilities and/or their caregivers to assess any needs and accommodations. Learn more about the resources and information that Global Explorers and Wilderness Inquiries provide to people with disabilities.
Camping Gear
Basic Gear
Clothing and rain jacket or poncho that can be layered Hat, gloves, and thermal underwear for cool temperatures Socks with sturdy shoes, hiking boots, or sneakers (no sandals, clogs, flip-flops, or bare feet) Waterproof sunscreen (SPF of at least 15) Hat Sunglasses Towels and basic personal hygiene supplies (shampoo, soap, comb, and so on) Daypack
111
Insect repellent
Specialized Gear
Flame-resistant tents or tarp (no plastic tents) Compass and map or map and global positioning system (GPS) Sleeping bag (rated for the anticipated temperature) Mosquito netting where necessary Cooking supplies (pots, pans, utensils, mess kit and dunk bag, and so on) Cooler for food storage Portable cook stoves and fuel whenever possible (to reduce the use of firewood) Flashlight and other battery-powered lights (no candles, kerosene lamps, portable cook stoves,
heaters, or other open-flame devices are used inside tents) Lantern fueled by propane, butane, kerosene, or gas (for outdoor use) Water-purification kit
Prepare for Group Camping
Communicate with council and parents. Inform your Girl Scout council and girls’ parents/guardians about the activity, including details about safety precautions and any appropriate clothing or supplies that may be necessary. Follow council procedures for activity approval, certificates of insurance, and council guidelines about girls’ general health examinations. Make arrangements in advance for all transportation and confirm plans before departure.
Girls plan the activity. Keeping their grade-level abilities in mind, encourage girls to take proactive leadership roles in organizing details of the activity and to plan menus, rules for group living, and on-site activities.
Obtain camping credentials. Ensure that the adult has been a part of council group or troop-camp learning on supervising group camping. Group camp education generally covers outdoor program activities, minimal-impact camping skills, safety procedures and standards, and methods of dealing with homesickness.
Arrange for transportation and adult supervision. The recommended adult-to-girl ratios are two non-related adults (at least one of whom is female) to every:
6 Girl Scout Daisies (See “Camping With Girl Scout Daisies” details in this checkpoint’s introduction)
12 Girl Scout Brownies
16 Girl Scout Juniors
20 Girl Scout Cadettes
24 Girl Scout Seniors
24 Girl Scout Ambassadors
Plus one adult to each additional:
4 Girl Scout Daisies (See “Camping With Girl Scout Daisies” details in this checkpoint’s introduction)
6 Girl Scout Brownies
8 Girl Scout Juniors
10 Girl Scout Cadettes
12 Girl Scout Seniors
12 Girl Scout Ambassadors
Compile key contacts. Give an itinerary to a contact person at home; call the contact person upon departure and return. Create a list of girls’ parents/guardian contact information, telephone numbers for emergency services and police, and council contacts—keep on hand or post in an easily
112
accessible location. Also know the location of the nearest landline telephone in case cellular phones do not receive reception.
Ensure the safety of sleeping areas. Separate sleeping and bathroom facilities are provided for adult males; many councils make exceptions for girls’ fathers. Ensure the following:
Each participant has her own bed. Parent/guardian permission must be obtained if girls are to share a bed.
Adults and girls never share a bed.
It is not mandatory that an adult sleep in the sleeping area (tent, cabin, or designated area) with the girls. If an adult female does share the sleeping area, there should always be two unrelated adult females present.
During family or “He and Me” events (in which girls share sleeping accommodations with males), ensure the details are clearly explained in parent/guardian permission slip.
Girls share resources. Encourage girls to make a list of the gear and supplies, and determine what can be shared. Support girls in creating a checklist of group and personal equipment and distribute to group members.
Prepare for emergencies. Ensure the presence of a waterproof first-aid kit and a first-aider with a current certificate in First Aid, including Adult and Child CPR or CPR/AED, who is prepared to handle cases from extremes of temperature, such as heat exhaustion, heat stroke, frostbite, cold exposure, hypothermia, as well as sprains, fractures, and altitude sickness. If any part of the activity is located 60 minutes or more from emergency medical services, ensure the presence of a first-aider (level 2) with Wilderness and Remote First Aid. A vehicle is available or an ambulance is on call at all times to transport an injured or sick person. See Volunteer Essentials for information about first-aid standards and training.
On the Day of Group Camping
Get a weather report. On the morning of the camping trip, check weather.com or other reliable weather sources to determine if conditions are appropriate. If severe weather conditions prevent the camping trip, be prepared with a backup plan or alternate activity. Write, review, and practice evacuation and emergency plans for severe weather with girls.
Use the buddy system. Girls are divided into teams of two. Each girl chooses a buddy and is responsible for staying with her buddy at all times, warning her buddy of danger, giving her buddy immediate assistance if safe to do so, and seeking help when the situation warrants it. If someone in the group is injured, one person cares for the patient while two others seek help.
Respect the environment and keep campsite clean. Use the principles of minimal-impact camping described by Leave No Trace. Store garbage in insect- and animal-proof containers with plastic inner linings, and cover it securely when there is a campsite garbage-pickup service. When there is no garbage-pickup service, remove garbage from campsite in plastic bags and discard, as appropriate. Recycle whenever possible. Do not bury food; carry out garbage, grease, and fuel canisters. Do not remove natural materials such as leaves or branches.
Be prepared for primitive campsites. For sites that don’t have electric lights and toilet facilities, observe these standards:
Choose and set up campsite well before dark.
Use a previously established campsite if available.
Make sure the campsite is level and located at least 200 feet from all water sources and below tree line.
Avoid fragile mountain meadows and areas of wet soil.
Avoid camping under dead tree limbs.
Use existing fire rings if a fire is necessary.
113
If a latrine is not available, use individual cat holes—holes for human waste that are at least 200 feet away from the trail and known water sources—to dispose of human waste (visit www.lnt.org for more information).
Do dishwashing and personal bathing at least 200 feet away from water sources.
Store food well away from tents and out of reach of animals. Where necessary, hang food at least 10 feet high from a rope stretched between two trees. If the site is in bear country, check with local authorities on precautions to take.
See that garbage, tampons, sanitary supplies, and toilet paper are carried out.
Group Camping Links
American Camp Association: www.acacamps.org
Go Camping America: www.gocampingamerica.com
Leave No Trace: http://www.lnt.org
National Camp Association: www.summercamp.org
Group Camping Know-How for Girls
Create a camp kaper chart. Divvy up cooking duties and get creative about pre-planning outdoor meals.
Be ready with camp entertainment. Before you go camping, read about camping stories, songs, activities, and games.
Group Camping Jargon
Kindling: Small pieces of dry wood used to start a campfire
Mummy bag: A sleeping bag that is tapered at the ends to reduce air space and to conserve heat
114
Hiking: Safety Activity Checkpoints
Unlike short walks, hiking involves lengthy, cross-country walking trips and often requires sturdy boots to provide traction on rocks and unruly earth floors. With respect to the Leave No Trace philosophy, it’s important for hikers to leave trails as (or better than) they found them. Although the action of one hiker may not strongly affect the environment, the effects of large groups of hikers can degrade trails.
Caution: Girls are not allowed to use firearms unless 12 years and older and with council permission; girls are never allowed to hunt or go on high-altitude climbs. Girls are also never allowed to ride all-terrain vehicles or motor bikes.
Know where to hike. Connect with your Girl Scout council for site suggestions. Also, to locate hiking areas near U.S. metropolitan areas, visit localhikes.com.
Include girls with disabilities. Communicate with girls with disabilities and/or their caregivers to assess any needs and accommodations. Contact national parks to inquire about their accommodations for people with disabilities, and learn more about the resources and information that Global Explorers and Wilderness Inquiries provide to people with disabilities.
Hiking Gear
Basic Gear
Lightweight, layered clothing and outerwear appropriate for weather conditions Rain jacket or poncho Waterproof sunscreen (SPF of at least 15) and lip balm Hat or bandana Sunglasses Water bottle or hydration pack (each girl carries at least one quart) Nonperishable, high-energy foods such as fruits and nuts Insect repellent Flashlight Whistle
Specialized Gear
Day pack Hiking/trail boots or footwear Map and compass or map and global positioning system (GPS) Pocket knife
115
Prepare for Hiking
Communicate with council and parents. Inform your Girl Scout council and girls’ parents/guardians about the activity, including details about safety precautions and any appropriate clothing or supplies that may be necessary. Follow council procedures for activity approval, certificates of insurance, and council guidelines about girls’ general health examinations. Make arrangements in advance for all transportation and confirm plans before departure.
Girls plan the activity. Keeping their grade-level abilities in mind, encourage girls to take proactive leadership roles in organizing details of the activity. Encourage girls to plan routes, activities, rules for group living, and guidelines for dealing with problems that may arise with other groups of hikers.
Arrange for transportation and adult supervision. Ensure that the hiking adult or instructor has experience in teaching hiking techniques and trip planning. Ensure that one adult is in front of the group of hikers, and the other is in the rear of each group, and that both are familiar with the area. The recommended adult-to-girl ratios are two non-related adults (at least one of whom is female) to every:
6 Girl Scout Daisies
12 Girl Scout Brownies
16 Girl Scout Juniors
20 Girl Scout Cadettes
24 Girl Scout Seniors
24 Girl Scout Ambassadors
Plus one adult to each additional:
4 Girl Scout Daisies
6 Girl Scout Brownies
8 Girl Scout Juniors
10 Girl Scout Cadettes
12 Girl Scout Seniors
12 Girl Scout Ambassadors
Compile key contacts. Give an itinerary to a contact person at home; call the contact person upon departure and return. Create a list of girls’ parents/guardian contact information, telephone numbers for emergency services and police, and council contacts—keep on hand or post in an easily accessible location. Also know the location of the nearest landline telephone in case cellular phones do not receive reception.
Girls share resources. Encourage girls to distribute a list of hiking gear and supplies, and to determine which resources can be shared.
Choose an appropriate hiking route. Terrain, mileage, and hiking time are known to the hikers in advance. Hikes are restricted to a reasonable length as determined by age, level of experience, nature of the terrain, physical condition of the hikers, disabilities, weather conditions, and time of day. The hiking pace always accommodates the slowest hiker.
Assess safety of hiking routes. The route is known to at least one of the adults or a report is obtained in advance to assess potential hazards such as poisonous plants, dangerous animals, unsafe drinking water, cliffs, and drop-offs. Ensure that a land-management or similar agency is contacted during the trip-planning stage to determine available routes and campsites, recommended group size, water quantity and quality, and permits needed.
Ensure that hikers have a comprehensive understanding of the trip. Group members are trained to be observant of the route, surroundings, and fatigue of individuals. Instruction is given on the safety rules for hiking, such as staying together in a group, recognizing poisonous plants and biting or stinging insects and ticks, respecting wild animals, and behaving effectively in emergencies. Ensure that girls know how to read maps, use a compass, navigate a route, and estimate distance.
116
Take safety precautions. Search-and-rescue procedures for missing persons are written out in advance, reviewed, and practiced by girls and adults. Methods of communication with sources of emergency care, such as hospitals, and park and fire officials, are known and arranged in advance.
Prepare for emergencies. Ensure the presence of a waterproof first-aid kit and a first-aider with a current certificate in First Aid, including Adult and Child CPR or CPR/AED, who is prepared to handle cases from extremes of temperature, such as heat exhaustion, heat stroke, frostbite, cold exposure, hypothermia, as well as sprains, fractures, insect stings, tick bites, snake bites, sunburn, and altitude sickness; a first-aider (level 2) with Wilderness and Remote First Aid is present for hikes of 10 miles or more and away from emergency assistance. If feasible, a vehicle is available to transport an injured or sick person. See Volunteer Essentials for information about first-aid standards and training.
On the Day of Hiking
Get a weather report. On the morning of the camping trip, check weather.com or other reliable weather sources to determine if conditions are appropriate. If severe weather conditions prevent the hiking activity, be prepared with a backup plan or alternate activity. Write, review, and practice evacuation and emergency plans for severe weather with girls.
Use the buddy system. Girls are divided into teams of two. Each girl chooses a buddy and is responsible for staying with her buddy at all times, warning her buddy of danger, giving her buddy immediate assistance if safe to do so, and seeking help when the situation warrants it. If someone in the group is injured, one person cares for the patient while two others seek help.
Respect the environment and keep trails clean. Use the principles of minimal-impact camping. Store garbage in insect- and animal-proof containers with plastic inner linings, and cover it securely when there is a campsite garbage-pickup service. When there is no garbage-pickup service, remove garbage from campsite in plastic bags and discard, as appropriate. Recycle whenever possible. Do not bury food; carry out grease and fuel canisters. Do not remove natural materials such as leaves or branches. In addition, avoid eating wild foods, walking on or uprooting plants, interfering with or feeding wild animals, and littering.
Practice safe hiking. Instructions are given on the safety rules for hiking, which include forbidding hiking off-trail and after dusk. Girls stay on the pathway to avoid trampling trailside plants and causing erosion. In addition, take adequate rest periods, with time to replenish fluids and eat high-energy food (such as fruits and nuts).
Hiking Links
American Hiking Society: www.americanhiking.org
Appalachian Mountain Club: www.outdoors.org
Appalachian Trail Conference: www.atconf.org
Leave No Trace: www.lnt.org
Hiking Know-How for Girls
Practice with maps and a compass. Before heading out on a lengthy hike, learn how to read a map and use a compass. Look at a map to understand where you started, and where you plan to finish. What do you anticipate you’ll see during your hike?
Learn about regional nature. What flowers, trees, insects are unique to the area you’re hiking in?
Hiking Jargon
Blaze: A mark, often on a tree, that indicates a trail’s route; most often, the blaze is painted with a bright color
Hot spot: A place on the foot that is sore as a result of a shoe’s rubbing and irritation, and where a blister will form; use moleskin to make a doughnut shape around the hot spot to prevent blisters
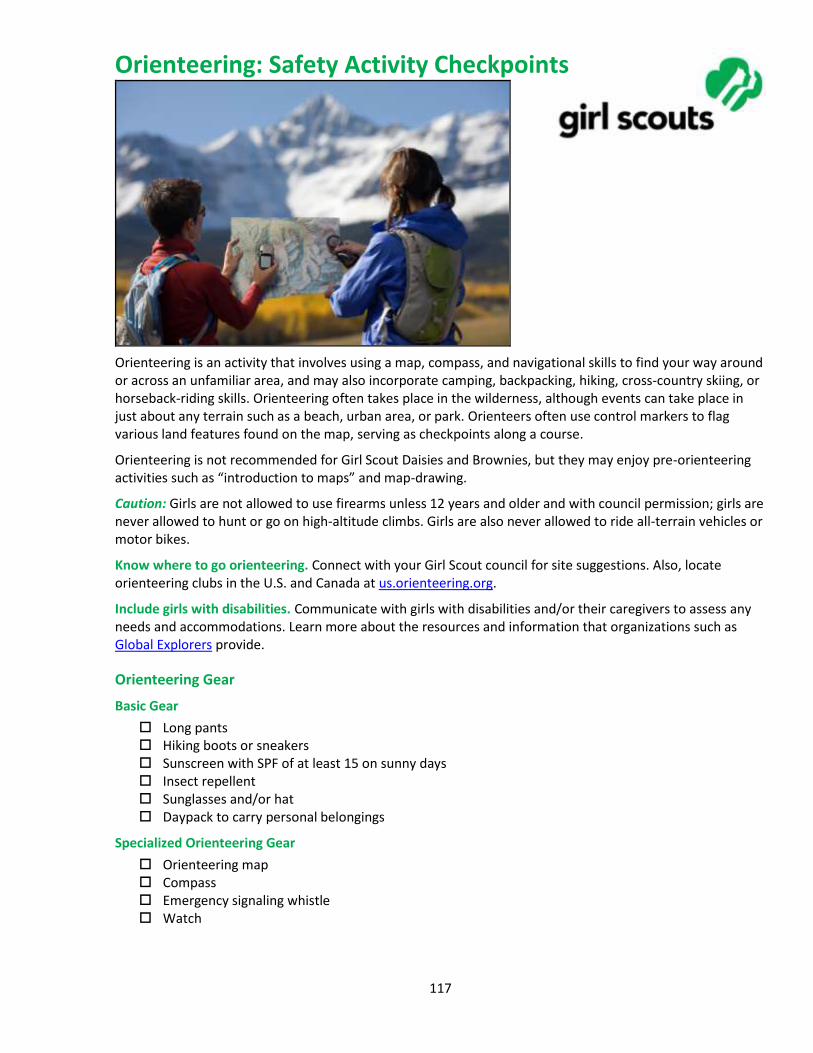
117
Orienteering: Safety Activity Checkpoints
Orienteering is an activity that involves using a map, compass, and navigational skills to find your way around or across an unfamiliar area, and may also incorporate camping, backpacking, hiking, cross-country skiing, or horseback-riding skills. Orienteering often takes place in the wilderness, although events can take place in just about any terrain such as a beach, urban area, or park. Orienteers often use control markers to flag various land features found on the map, serving as checkpoints along a course.
Orienteering is not recommended for Girl Scout Daisies and Brownies, but they may enjoy pre-orienteering activities such as “introduction to maps” and map-drawing.
Caution: Girls are not allowed to use firearms unless 12 years and older and with council permission; girls are never allowed to hunt or go on high-altitude climbs. Girls are also never allowed to ride all-terrain vehicles or motor bikes.
Know where to go orienteering. Connect with your Girl Scout council for site suggestions. Also, locate orienteering clubs in the U.S. and Canada at us.orienteering.org.
Include girls with disabilities. Communicate with girls with disabilities and/or their caregivers to assess any needs and accommodations. Learn more about the resources and information that organizations such as Global Explorers provide.
Orienteering Gear
Basic Gear
Long pants Hiking boots or sneakers Sunscreen with SPF of at least 15 on sunny days Insect repellent Sunglasses and/or hat Daypack to carry personal belongings
Specialized Orienteering Gear
Orienteering map Compass Emergency signaling whistle Watch
118
Prepare for Orienteering
Coordinate age-appropriate activity. Girl Scout Juniors in small groups are accompanied on a course by an adult with basic instruction in orienteering. Girl Scouts Cadettes, Seniors, and Ambassadors who have received training may orienteer in groups of at least two. Competitive Orienteering Courses often require participants to operate independently; solo competition is not recommended for inexperienced girls or Girl Scout Juniors. However, Girl Scout Cadettes, Seniors, and Ambassadors whose skills match or exceed the demands of the course may participate in such competitions. As with all orienteering sites, there should be a clear area of safety (a safety lane), a specific finish time and location, and a search-and-rescue procedure designed by the competition’s host and the Girl Scout adult volunteer.
Communicate with council and parents. Inform your Girl Scout council and girls’ parents/guardians about the activity, including details about safety precautions and any appropriate clothing or supplies that may be necessary. Follow council procedures for activity approval, certificates of insurance, and council guidelines about girls’ general health examinations. Make arrangements in advance for all transportation and confirm plans before departure.
Girls plan the activity. Keeping their grade-level abilities in mind, encourage girls to take proactive leadership roles in organizing details of the activity.
Arrange for transportation and adult supervision. The recommended adult-to-girl ratios are two non-related adults (at least one of whom is female) to every:
6 Girl Scout Daisies (pre-orienteering activities only)
12 Girl Scout Brownies (pre-orienteering activities only)
16 Girl Scout Juniors
20 Girl Scout Cadettes
24 Girl Scout Seniors
24 Girl Scout Ambassadors
Plus one adult to each additional:
4 Girl Scout Daisies (pre-orienteering activities only)
8 Girl Scout Juniors
10 Girl Scout Cadettes
12 Girl Scout Seniors
12 Girl Scout Ambassadors
Verify instructor knowledge and experience. Participants receive instruction from a person experienced in orienteering before navigating an orienteering course. First-timers participate on a beginner-level course. Girls with previous topographic map-reading experience may be eligible to attempt an advanced beginners’ course.
Compile key contacts. Give an itinerary to a contact person at home; call the contact person upon departure and return. Create a list of girls’ parents/guardian contact information, telephone numbers for emergency services and police, and council contacts—keep on hand or post in an easily accessible location. Before the activity starts, make a list of all participants’ cell-phone numbers, and give every orienteer a copy of the list.
Select a safe orienteering site. Whenever possible, girls take part in a meet organized by an orienteering club. When other areas are used, check for the following: the site selected is a park, camp, or other area with a good trail network; proper landowner permission is secured to use the site; during hunting season, the orienteering site is in a “no hunting” area with sufficient separation from hunting activity to ensure no accidental contact between hunters and orienteers; out-of-bounds and dangerous areas are marked on the map; hazardous obstacles are marked on the ground—they are surrounded by surveyor’s tape or a similar marking; the orienteering map is sufficiently accurate so that the participants are not navigationally misled.
119
Prepare for emergencies. Ensure the presence of a waterproof first-aid kit and a first-aider with a current certificate in First Aid, including Adult and Child CPR or CPR/AED; if any part of the activity is located 60 minutes or more from emergency medical services, ensure the presence of a first-aider (level 2) with Wilderness and Remote First Aid. See Volunteer Essentials for information about first-aid standards and training.
On the Day of Orienteering
Get a weather report. On the morning of the activity, check weather.com or other reliable weather sources to determine if weather conditions are appropriate, and make sure that the ground is free of ice. If severe weather conditions prevent the activity, be prepared with a backup plan, alternative activity, or postpone the activity. Write, review, and practice evacuation and emergency plans for severe weather with girls. In the event of a storm with lightning, take shelter away from tall objects (including trees, buildings, and electrical poles). Find the lowest point in an open flat area. Squat low to the ground on the balls of the feet, and place hands on knees with heads between them.
Use the buddy system. Divide girls into teams of two. Each person is responsible for staying with her buddy at all times, warning her buddy of danger, giving her buddy immediate assistance if safe to do so, and seeking help when the situation warrants it. If someone in the group is injured, one person cares for the patient while two others seek help.
Follow basic orienteering safety standards. Each participant is given a specific time limit to complete the course and must check in at the finish area whether or not she completed the course. Beginning and finishing course times of each participant are carefully noted to ensure that all participants have returned. Girls take proper precautions in areas where poisonous plants or snakes or ticks are prevalent.
Orienteering Link
U.S. Orienteering Federation: www.us.orienteering.org
Orienteering Know-how for Girls
Map your course. Get to know map symbols and how elements such as elevation and relief are communicated on maps at 4orienteering.com.
Learn about orienteering techniques. Before participating in orienteering, get to know strategies such as pacing, thumbing, and handrails at 4orienteering.com.
Orienteering Jargon
Control: A point on an orienteering course that participants have to visit, and is marked on a map with a circle; controls are typically flagged with a marker or flag
Elephant track: A path created by trampling of orienteers using the same route
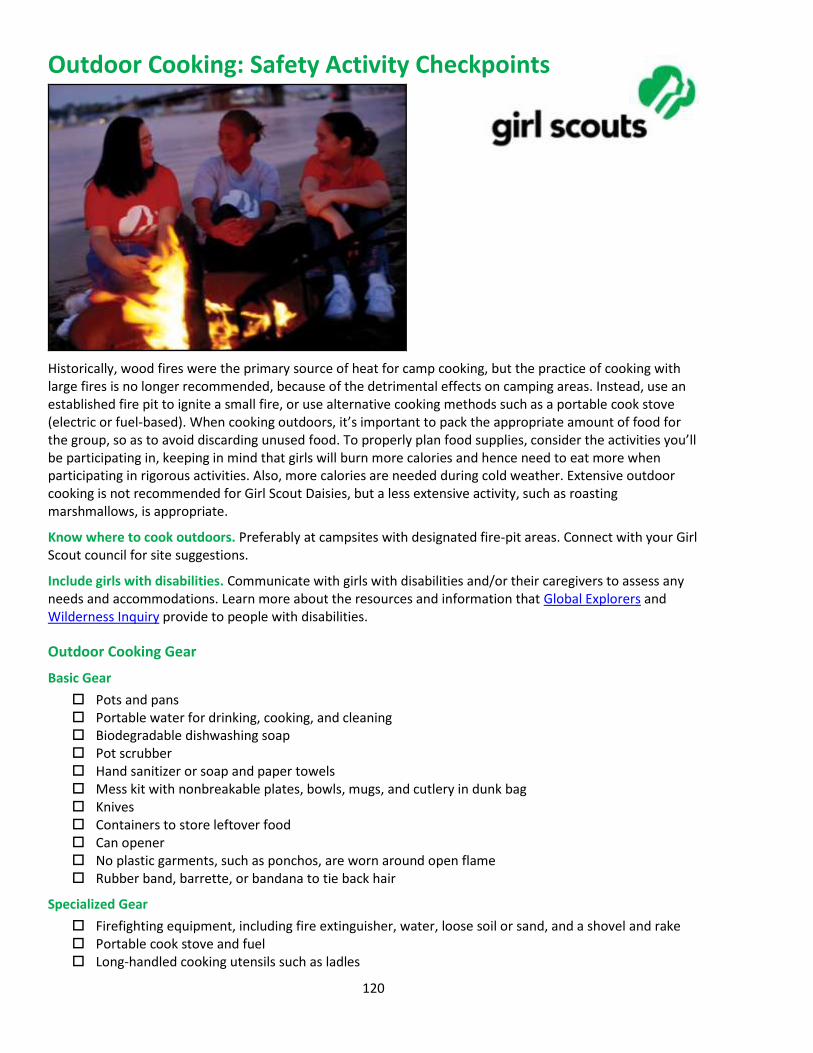
120
Outdoor Cooking: Safety Activity Checkpoints
Historically, wood fires were the primary source of heat for camp cooking, but the practice of cooking with large fires is no longer recommended, because of the detrimental effects on camping areas. Instead, use an established fire pit to ignite a small fire, or use alternative cooking methods such as a portable cook stove (electric or fuel-based). When cooking outdoors, it’s important to pack the appropriate amount of food for the group, so as to avoid discarding unused food. To properly plan food supplies, consider the activities you’ll be participating in, keeping in mind that girls will burn more calories and hence need to eat more when participating in rigorous activities. Also, more calories are needed during cold weather. Extensive outdoor cooking is not recommended for Girl Scout Daisies, but a less extensive activity, such as roasting marshmallows, is appropriate.
Know where to cook outdoors. Preferably at campsites with designated fire-pit areas. Connect with your Girl Scout council for site suggestions.
Include girls with disabilities. Communicate with girls with disabilities and/or their caregivers to assess any needs and accommodations. Learn more about the resources and information that Global Explorers and Wilderness Inquiry provide to people with disabilities.
Outdoor Cooking Gear
Basic Gear
Pots and pans Portable water for drinking, cooking, and cleaning Biodegradable dishwashing soap Pot scrubber Hand sanitizer or soap and paper towels Mess kit with nonbreakable plates, bowls, mugs, and cutlery in dunk bag Knives Containers to store leftover food Can opener No plastic garments, such as ponchos, are worn around open flame Rubber band, barrette, or bandana to tie back hair
Specialized Gear
Firefighting equipment, including fire extinguisher, water, loose soil or sand, and a shovel and rake Portable cook stove and fuel Long-handled cooking utensils such as ladles
121
Pot holders and/or insulated gloves Insulated cooler and ice for food storage Water purification method (tablets or filter), if needed
Prepare for Outdoor Cooking
Communicate with council and parents. Inform your Girl Scout council and girls’ parents/guardians about the activity, including details about safety precautions and any appropriate clothing or supplies that may be necessary. Follow council procedures for activity approval, certificates of insurance, and council guidelines about girls’ general health examinations. Make arrangements in advance for all transportation and confirm plans before departure.
Girls plan the activity. Keeping their grade-level abilities in mind, encourage girls to take proactive leadership roles in organizing details of the activity.
Arrange for transportation and adult supervision. The adult supervising the outdoor cooking has taken council learning opportunities. The recommended adult-to-girl ratios are two non-related adults (at least one of whom is female) to every:
6 Girl Scout Daisies (non-extensive cooking activities only)
12 Girl Scout Brownies
16 Girl Scout Juniors
20 Girl Scout Cadettes
24 Girl Scout Seniors
24 Girl Scout Ambassadors
Plus one adult to each additional:
4 Girl Scout Daisies (non-extensive cooking activities only)
6 Girl Scout Brownies
8 Girl Scout Juniors
10 Girl Scout Cadettes
12 Girl Scout Seniors
12 Girl Scout Ambassadors
Compile key contacts. Give an itinerary to a contact person at home; call the contact person upon departure and return. Create a list of girls’ parents/guardian contact information, telephone numbers for emergency services and police, and council contacts—keep on hand or post in an easily accessible location.
Consult with council about permits where necessary, and prepare for fire safety. Connect with your Girl Scout council to inquire about permits with the local fire district, land-management agency, or conservation office. Fires are not permitted when there is excessive dryness or wind. The adult volunteer also checks the fire index with local authorities. Local air-pollution regulations are followed.
Girls share resources. Support girls in creating a checklist of group and personal equipment and distribute to group members. Girls learn to use a variety of cooking methods, including use of wood fire, propane, butane, and gas stoves, charcoal, canned heat, and solar energy. Repackage all food to minimize waste and the amount of garbage that needs to be removed from the campsite.
Be prepared for primitive campsites. If cooking in primitive areas with little to no modern conveniences, observe these standards:
Choose and set up campsite well before dark.
Use a previously established campsite if available.
Make sure the campsite is level and located at least 200 feet from all water sources and below tree line.
Avoid fragile mountain meadows and areas of wet soil.
122
Avoid camping under dead tree limbs.
Use existing fire rings if a fire is necessary.
If a latrine is not available, use individual cat holes—holes for human waste that are at least 200 feet away from the trail and known water sources—to dispose of human waste (visit www.lnt.org for more information).
Do dishwashing and personal bathing at least 200 feet away from water sources.
Store food well away from tents and out of reach of animals. Where necessary, hang food at least 10 feet high from a rope stretched between two trees. If the site is in bear country, check with local authorities on precautions to take.
See that garbage, tampons, sanitary supplies, and toilet paper are carried out.
Take safety precautions. Fire-safety rules, emergency procedures, and first aid for burns are reviewed with the group and understood. Procedures are established and known in advance for notifying the fire department or land-management agency officials in case of a fire. Fire drills are practiced at each site.
Prepare for emergencies. Ensure the presence of a waterproof first-aid kit and a first-aider with a current certificate in First Aid, including Adult and Child CPR or CPR/AED, who is prepared to handle burns and other injuries related to the location, including extremes of temperature, such as heat exhaustion, heat stroke, frostbite, cold exposure, hypothermia, as well as sprains, fractures, and sunburn. If any part of the activity is located 60 minutes or more from emergency medical services, ensure the presence of a first-aider (level 2) with Wilderness and Remote First Aid. If feasible, a vehicle is available to transport an injured or sick person. See Volunteer Essentials for information about first-aid standards and training.
On the Day of Outdoor Cooking
Get a weather report. On the morning of the outdoor cooking activity, check weather.com or other reliable weather sources to determine if conditions are appropriate. If severe weather conditions prevent the cooking activity, be prepared with a backup plan or alternate activity. Write, review, and practice evacuation and emergency plans for severe weather with girls.
Use the buddy system. Girls are divided into teams of two. Each girl chooses a buddy and is responsible for staying with her buddy at all times, warning her buddy of danger, giving her buddy immediate assistance if safe to do so, and seeking help when the situation warrants it. If someone in the group is injured, one person cares for the patient while two others seek help.
Respect the environment and keep site clean. Use the principles of minimal-impact camping. Store garbage in insect- and animal-proof containers with plastic inner linings, and cover it securely when there is a campsite garbage-pickup service. When there is no garbage-pickup service, remove garbage from campsite in plastic bags and discard, as appropriate. Recycle whenever possible. Do not bury food; carry out grease and fuel canisters. Do not remove natural materials, such as leaves or branches.
Tips for Cooking with Cook Stoves and Open Fires
Prepare for safe usage of portable cook stoves. Portable cook stoves differ in size and in fuel use. Follow the manufacturer’s instructions carefully, and closely supervise the girls when using any stove. Take an adequate amount of fuel, and store the extra fuel supply away from the cooking flame. Never use portable cook stoves inside a tent. Keep all stove parts clean. Check that lines and burners are not clogged. Do not refuel the cook stove or change canisters near an open flame. Take care not to spill fuel; if fuel does spill, relocate the stove before lighting it. Place portable cook stoves in safe, level, and stable positions, shielded from the wind and away from foot traffic. Do not pile rocks or other items around the cook stove for stability. Do not overheat the fuel tank. Use pots of appropriate size, so that the stove is not top-heavy. Do not dispose of pressurized cans in a fire, leave them in direct sunlight, or keep them in enclosed areas where the temperature is high. See the
123
manufacturer’s instructions on the label. Store and dispose of fuel canisters in the recommended manner. Be sure to check with local authorities to make sure cook stoves are permitted during times of extreme fire danger.
Cook safely with solar stoves. If using solar cookware, remember that pots and food inside a solar oven are hot even if the stove does not feel hot. Use insulated gloves when removing pots and opening the lid.
Practice safe cooking with open fire. If cooking over open flames, build fires in designated areas, and avoid establishing new fire sites. An established fire site is clear of overhanging branches, steep slopes, rotted stumps or logs, dry grass and leaves, and cleared of any burnable material, such as litter, duff, or pine needles. Where wood gathering is permitted, use only dead, fallen wood, and keep the cooking fires small. Store wood away from the fire area. Watch for flying sparks and put them out immediately. Before leaving the site, check that the fire is completely out by sprinkling the fire with water or smothering it with earth or sand, stirring, and then sprinkling or smothering again; finally, hold hands on coals, ashes, partially burned wood, or charcoal for one minute to ensure it is cool to the touch. Make a plan for disposing of cold ashes and partially burned wood. You may scatter ashes and burned wood throughout the woods away from the campsite. Do not put ashes and burned wood in a plastic pail; do not leave a pail with ashes or burned wood against the side of a building or on a wood deck. Obtain wood from local sources to avoid bringing pests and diseases from one location to another.
Practice safe cooking with charcoal fires. If using charcoal, fires are started with fuels explicitly labeled as “charcoal starters”—never use gasoline as a fire starter. Never add charcoal lighter fluid to a fire once it has started.
Tips for Food Preparation and Storage
Prepare nutritious meals. Meals are prepared with consideration of food allergies, religious beliefs, and dietary restrictions (such as vegetarianism and veganism) of group members. Whenever possible, buy food and supplies that avoid excess packaging, and buy in bulk. Review health considerations, including the importance of keeping utensils and food preparation surfaces sanitized, cleaning hands, cooking meats thoroughly, refrigerating perishables, and using clean water when preparing food. Do not use chipped or cracked cups and plates.
Cook with caution. Girls learn about the safe use of kitchen tools and equipment, including knives. Maintain discipline in the cooking area to prevent accidents with hot food and sharp utensils. Do not overfill cooking pots, and do not use pressurized cans, soda-can stoves, or plastic basins, bottles, and cooking utensils near an open flame.
Avoid spreading germs. Each person has an individual drinking cup. Cooks roll up long sleeves and tie back long hair. Wash hands before food preparation and eating. No person with a skin infection, a cold, or a communicable disease participates in food preparation.
Keep perishables cool. Store perishables such as creamed dishes, dairy products, meats, and salads at or below 45 degrees Fahrenheit in a refrigerator or insulated cooler with ice. If this will not be possible, use powdered, dehydrated, freeze-dried, or canned foods. On extended trips, do not use foods requiring refrigeration. Use safe drinking water (see the “Water Purification Tips”) to reconstitute powdered, dehydrated, or freeze-dried food. Once reconstituted, eat perishable items within one hour or refrigerate them.
Water Purification Tips
Access a safe drinking water supply for cooking, drinking, and personal use. Safe drinking water is defined as tap water tested and approved by the local health department. All other sources are considered potentially contaminated and must be purified before use. Giardia lamblia (a parasite) is suspected in all surface water supplies.
124
Use one of the three water-purification methods. First, strain water through a clean cloth into a clean container to remove sediment, and then choose one of the following methods:
Boil water rapidly for a full minute and let cool.
Disinfect water with water-purification tablets, following the manufacturer’s instructions. Check the product’s shelf life to make sure it has not expired.
Pour water through a water purifier or specially designed water-filtration device that removes Giardia. These filters will also remove many other contaminants. Follow the manufacturer’s instructions carefully.
Important note: These methods will not remove chemical pollutants. In addition, only boiling the water or pouring it through a specially designed filter will remove Giardia lamblia.
Dishwashing Tips
Wash dishes in a prescribed area according to this procedure:
Remove food particles from utensils and dishes.
Wash dishes in warm, soapy water.
Rinse dishes in hot, clear water.
Sanitize dishes by dipping in clear, boiling water or immersing for at least two minutes in a sanitizing solution approved by the local health department. Use long-handled utensil, tongs, or tool to remove sanitized dishes.
Air-dry and store dishes in a clean, covered area.
Dispose of dishwashing and rinse water according to the campsite regulations. In backcountry areas, scatter wastewater on the ground at least 200 feet beyond any water source or trail.
Outdoor Cooking Links
OutdoorCook.com: www.outdoorcook.com
Leave No Trace: www.lnt.org
Outdoor Cooking Know-How for Girls
Learn how to start a fire without matches. What are the ways that you can get a fire going without using matches or a lighter? Read camping how-to books or online sources to learn how.
Plan outdoor recipes. Vote for your favorite meals and plan how to cook them outdoors. For additional outdoor recipe ideas, read Discover the Outdoors, netwoods.com, and outdoorcook.com.
Outdoor Cooking Jargon
Dunk kit: A mesh bag used to hold dirty dishes; the bag is dunked into hot water or chlorine solution and then hung to dry with clean, sterilized dishes inside
Dutch oven: A cooking kettle used for baking in an open fire (do not use soap on cast iron)
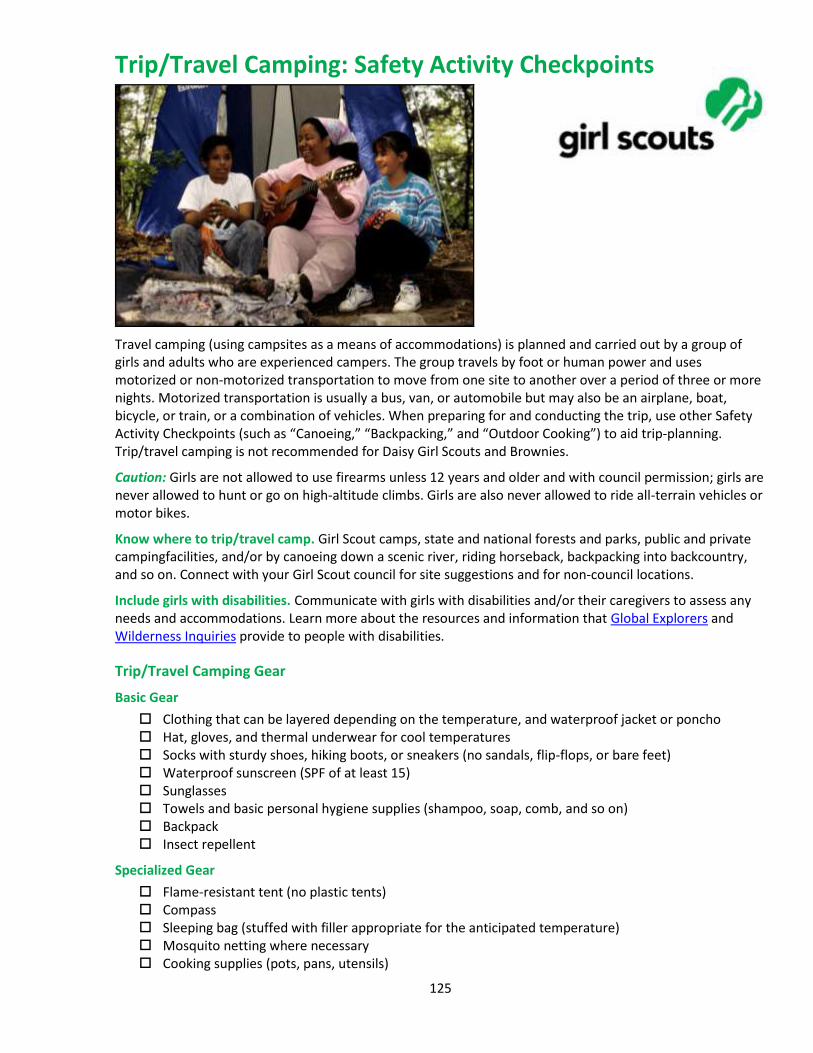
125
Trip/Travel Camping: Safety Activity Checkpoints
Travel camping (using campsites as a means of accommodations) is planned and carried out by a group of girls and adults who are experienced campers. The group travels by foot or human power and uses motorized or non-motorized transportation to move from one site to another over a period of three or more nights. Motorized transportation is usually a bus, van, or automobile but may also be an airplane, boat, bicycle, or train, or a combination of vehicles. When preparing for and conducting the trip, use other Safety Activity Checkpoints (such as “Canoeing,” “Backpacking,” and “Outdoor Cooking”) to aid trip-planning. Trip/travel camping is not recommended for Daisy Girl Scouts and Brownies.
Caution: Girls are not allowed to use firearms unless 12 years and older and with council permission; girls are never allowed to hunt or go on high-altitude climbs. Girls are also never allowed to ride all-terrain vehicles or motor bikes.
Know where to trip/travel camp. Girl Scout camps, state and national forests and parks, public and private campingfacilities, and/or by canoeing down a scenic river, riding horseback, backpacking into backcountry, and so on. Connect with your Girl Scout council for site suggestions and for non-council locations.
Include girls with disabilities. Communicate with girls with disabilities and/or their caregivers to assess any needs and accommodations. Learn more about the resources and information that Global Explorers and Wilderness Inquiries provide to people with disabilities.
Trip/Travel Camping Gear
Basic Gear
Clothing that can be layered depending on the temperature, and waterproof jacket or poncho Hat, gloves, and thermal underwear for cool temperatures Socks with sturdy shoes, hiking boots, or sneakers (no sandals, flip-flops, or bare feet) Waterproof sunscreen (SPF of at least 15) Sunglasses Towels and basic personal hygiene supplies (shampoo, soap, comb, and so on) Backpack Insect repellent
Specialized Gear
Flame-resistant tent (no plastic tents) Compass Sleeping bag (stuffed with filler appropriate for the anticipated temperature) Mosquito netting where necessary Cooking supplies (pots, pans, utensils)
126
Cooler for food storage Portable cook stoves whenever possible (to reduce the use of firewood) Flashlight and other battery-powered lights (no candles, kerosene lamps, portable cook stoves,
heaters, or other open-flame devices are used inside tents) Lantern fueled by propane, butane, kerosene, or gas (for outdoor use) Water purifier
Prepare for Trip/Travel Camping
Communicate with council and parents. Inform Girl Scout council and parents/guardians about the activity, including details about safety precautions and any appropriate clothing or supplies that may be necessary. Follow council procedures for activity approval, certificates of insurance, and council guidelines about girls’ general health examinations. Make arrangements in advance for all transportation and confirm plans before departure.
Girls plan the activity. Keeping their grade-level abilities in mind, encourage girls to take proactive leadership roles in organizing details of the activity. Encourage girls to plan routes, activities, and rules for group living.
Arrange for transportation and adult supervision. The recommended adult-to-girl ratios are a minimum of two non-related adults (at least one of whom is female) to every:
16 Girl Scout Juniors
20 Girl Scout Cadettes
24 Girl Scout Seniors
24 Girl Scout Ambassadors
Plus one adult to each additional:
8 Girl Scout Juniors
10 Girl Scout Cadettes
12 Girl Scout Seniors
12 Girl Scout Ambassadors
Verify instructor knowledge and experience. The lead trip/travel adult or instructor possesses knowledge, skills, and experience in the following areas:
Outdoor leadership
Progression and readiness
Trip planning in a girl-led environment
Safety management
First aid, CPR, safety, handling emergency situations
Judgment and maturity
Program activities specific to the trip
Group dynamics and management
Supervision of girls and adults
Participation in similar trips
Familiarity with the area in which the trip is conducted
Physical fitness and skills necessary to lead the group
Adults selected as chaperones for the trip are trained or have documented experience in the following areas:
Travel or trip camping skills
Group management and group dynamics
Mode of transportation
Site orientation
127
First aid and CPR
Emergency procedures
Minor maintenance for equipment and vehicles, as appropriate
Compile key contacts. Give an itinerary to a contact person at home; call the contact person upon departure and return. Create a list of girls’ parents/guardian contact information, telephone numbers for emergency services and police, and council contacts—keep on hand or post in an easily accessible location. Also know the location of the nearest landline telephone in case cellular phones do not receive reception. In addition, girls and adult participants carry a card and wear an identifying bracelet or similar device that contains name, council name, and emergency-contact phone number.
Ensure the safety of sleeping areas. Separate sleeping and bathroom facilities are provided for adult males; many councils make exceptions for girls’ fathers. Ensure the following:
Each participant has her own bed. Parent/guardian permission must be obtained if girls are to share a bed.
Adults and girls never share a bed.
It is not mandatory that an adult sleep in the sleeping area (tent, cabin, or designated area) with the girls. If an adult female does share the sleeping area, there should always be two unrelated adult females present.
Verify adults’ transportation credentials. Verify the following adult certifications and standards:
For trips by small craft, the lead adult is currently certified as an instructor as specified in the Safety Activity Checkpoints for the particular mode of transportation, is certified in Small Craft Safety from the American Red Cross, or has equivalent certification or documented experience and skill in the supervision of similar trips.
For trips that involve swimming, an adult currently certified in basic lifeguarding or the equivalent is present.
Each driver of motorized transportation is at least 21 years old and holds a valid operator’s license appropriate to the vehicle. The Girl Scout council checks the operator’s driving record.
Any adult drives no more than six hours in one day, with rest breaks every two hours. There is a relief driver for trips of more than six hours. The relief driver holds a valid operator’s license for the vehicle operated, and her or his driving record is checked. Plan to drive only in daylight hours.
If a trailer is used, it is in compliance with all state, local, and federal regulations for the areas of travel. The assigned driver is experienced in pulling a trailer. No girls or adult leaders ride in the trailer.
No caravanning is allowed. Each driver must have information about route and destination in addition to cell-phone numbers of other drivers.
Arrange a pre-trip orientation. Ensure that girl and adult participants receive information about first-aid procedures, emergency and rescue procedures, environmental awareness, program plans for mode of travel and geographic area, and operational procedures (water purification, food preparation, camping equipment, sanitation, and food-storage procedures).
Girls share resources. Encourage girls to make a list of the gear and supplies, and then determine which can be shared. Support girls in creating a checklist of group and personal equipment and distribute to group members.
Be prepared for primitive campsites. If camping in primitive areas with little to no modern conveniences, observe these standards:
Choose and set up campsite well before dark.
Use a previously established campsite if available.
Make sure the campsite is level and located at least 200 feet from all water sources and below tree line.
128
Avoid fragile mountain meadows and areas of wet soil.
Avoid camping under dead tree limbs.
Use existing fire rings if a fire is necessary.
If a latrine is not available, use individual cat holes—holes for human waste that are at least 200 feet away from the trail and known water sources—to dispose of human waste (visit www.lnt.org for more information).
Do dishwashing and personal bathing at least 200 feet away from water sources.
Store food well away from tents and out of reach of animals. Where necessary, hang food at least 10 feet high from a rope stretched between two trees. If the site is in bear country, check with local authorities on precautions to take.
See that garbage, tampons, sanitary supplies, and toilet paper are carried out.
Compile contact information. In addition to a list of girls’ parents’ and guardian contact information, compile list of telephone numbers for all emergency care and council contacts to post in easily accessible location.
Take safety precautions. Search-and-rescue procedures for missing persons are written out in advance, reviewed, and practiced by girls and adults. A fire drill is practiced on the site, particularly from the sleeping area. Methods of communication with sources of emergency care, such as hospitals, and park and fire officials, are known and arranged in advance. Ensure that there are written procedures to follow if a group member needs to be removed from the trip. The group communicates with the contact person at home or the council office about the progress of the trip. Phone numbers and exact locations of medical assistance and emergency help are carried on the trip. File a copy of the complete trip plan with the council office.
Prepare for emergencies. Ensure the presence of a waterproof first-aid kit and a first-aider with a current certificate in First Aid, including Adult and Child CPR or CPR/AED, who is prepared to handle cases from extremes of temperature, such as heat exhaustion, heat stroke, frostbite, cold exposure, and hypothermia, as well as sprains, fractures, and altitude sickness. If any part of the activity is located 60 minutes or more from emergency medical services, ensure the presence of a first-aider (level 2) with Wilderness and Remote First Aid. A vehicle is available or an ambulance is on call at all times to transport an injured or sick person. See Volunteer Essentials for information about first-aid standards and training.
On the Day of the Trip/Travel Camping
Get a weather report. On the morning of the camping trip, check weather.com or other reliable weather sources to determine if conditions are appropriate. If severe weather conditions prevent the camping trip, be prepared with a backup plan or alternate activity. Write, review, and practice evacuation and emergency plans for severe weather with girls.
Use the buddy system. Girls are divided into teams of two. Each girl chooses a buddy and is responsible for staying with her buddy at all times, warning her buddy of danger, giving her buddy immediate assistance if safe to do so, and seeking help when the situation warrants it. If someone in the group is injured, one person cares for the patient while two others seek help.
Respect the environment and keep the campsite clean. Use the principles of minimal-impact camping. Store garbage in insect- and animal-proof containers with plastic inner linings, and cover it securely when there is a campsite garbage-pickup service. When there is no garbage-pickup service, remove garbage from campsite in plastic bags and discard, as appropriate. Recycle whenever possible. Do not bury food; carry out grease and fuel canisters. Do not remove natural materials such as leaves or branches.
Trip/Travel Camping Links
American Camp Association: www.acacamps.org
Go Camping America: www.gocampingamerica.com
129
Leave No Trace: www.lnt.org
National Camp Association: www.summercamp.org
Automobile Association of America (AAA): http://www.aaa.com
Trip/Travel Camping Know-How for Girls
Map your course. What can you explore on your camping trip? Research region histories, maps, and nearby attractions.
Document your trip. Before going on the camping trip, divvy up travel-log and documentation duties among girls. Who could be in charge of photography, video, and writing about your shared journeys?
Trip/Travel Camping Jargon
Bear- or animal-proof campsite: A site that doesn’t attract animals and involves hanging food and toiletries at least 15 feet off the ground and 10 feet from a tree trunk to keep food away from animals when no building or vehicle is available for storage
Minimal-impact camping: A philosophy of respect for the natural environment that involves reducing environmental impacts, which affect all indigenous members of the land community, and sociological impacts, which affect recreational users of the area
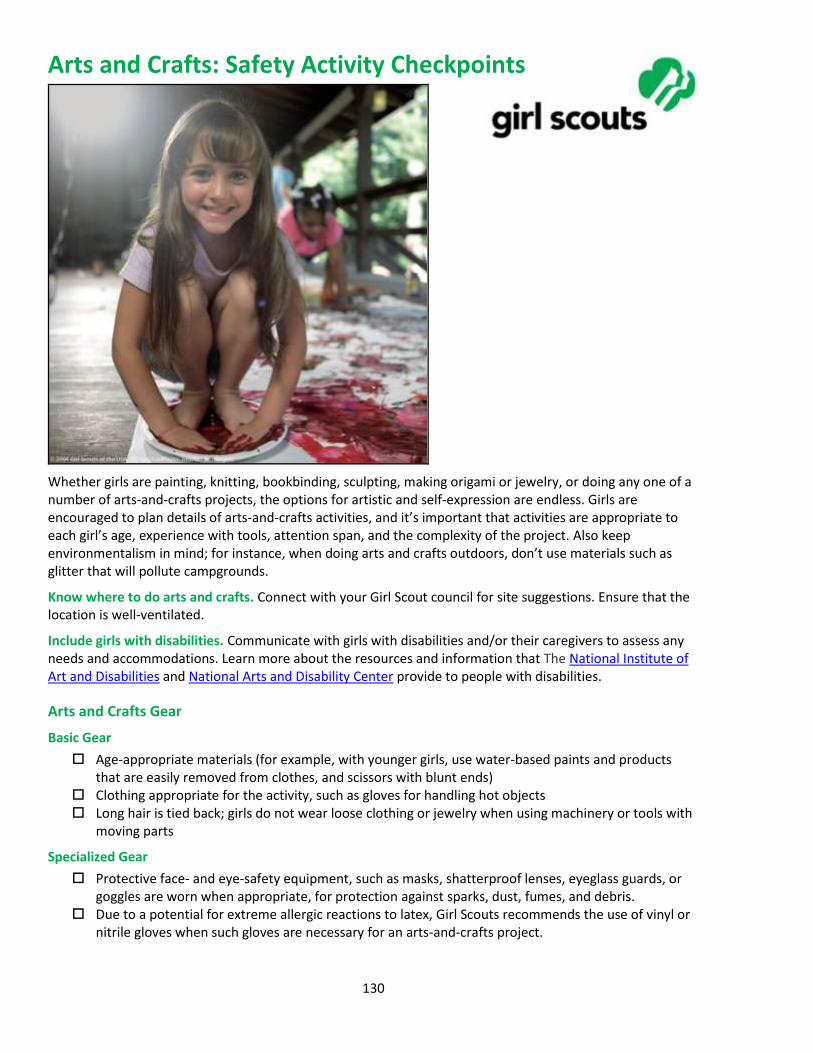
130
Arts and Crafts: Safety Activity Checkpoints
Whether girls are painting, knitting, bookbinding, sculpting, making origami or jewelry, or doing any one of a number of arts-and-crafts projects, the options for artistic and self-expression are endless. Girls are encouraged to plan details of arts-and-crafts activities, and it’s important that activities are appropriate to each girl’s age, experience with tools, attention span, and the complexity of the project. Also keep environmentalism in mind; for instance, when doing arts and crafts outdoors, don’t use materials such as glitter that will pollute campgrounds.
Know where to do arts and crafts. Connect with your Girl Scout council for site suggestions. Ensure that the location is well-ventilated.
Include girls with disabilities. Communicate with girls with disabilities and/or their caregivers to assess any needs and accommodations. Learn more about the resources and information that The National Institute of Art and Disabilities and National Arts and Disability Center provide to people with disabilities.
Arts and Crafts Gear
Basic Gear
Age-appropriate materials (for example, with younger girls, use water-based paints and products that are easily removed from clothes, and scissors with blunt ends)
Clothing appropriate for the activity, such as gloves for handling hot objects Long hair is tied back; girls do not wear loose clothing or jewelry when using machinery or tools with
moving parts
Specialized Gear
Protective face- and eye-safety equipment, such as masks, shatterproof lenses, eyeglass guards, or goggles are worn when appropriate, for protection against sparks, dust, fumes, and debris.
Due to a potential for extreme allergic reactions to latex, Girl Scouts recommends the use of vinyl or nitrile gloves when such gloves are necessary for an arts-and-crafts project.
131
Prepare for Arts and Crafts
Communicate with council and parents. Inform your Girl Scout council and girls’ parents/guardians about the activity, including details about safety precautions and any appropriate clothing or supplies that may be necessary. Follow council procedures for activity approval, certificates of insurance, and council guidelines about girls’ general health examinations. Make arrangements in advance for all transportation and confirm plans before departure.
Girls plan the activity. Keeping their grade-level abilities in mind, encourage girls to take proactive leadership roles in organizing details of the activity.
Arrange for transportation and adult supervision. The adult-to-girl ratios are two non-related adults (at least one of whom is female) to every:
12 Girl Scout Daisies
20 Girl Scout Brownies
25 Girl Scout Juniors
25 Girl Scout Cadettes
30 Girl Scout Seniors
30 Girl Scout Ambassadors
Plus one adult to each additional:
6 Girl Scout Daisies
8 Girl Scout Brownies
10 Girl Scout Juniors
12 Girl Scout Cadettes
15 Girl Scout Seniors
15 Girl Scout Ambassadors
Supervision is increased when advanced equipment, such as soldering irons, burners, or power saws, is used. Use of cutting tools, hammers, and spray paints is carefully supervised.
Verify instructor knowledge and experience. For activities beyond those described in Girl Scout publications, the instructor must have documented experience and skill in teaching arts and crafts. The instructor teaches girls the basic skills and demonstrates the safe use and care of equipment—for example, cutting tools are used with the blade away from the body.
Compile key contacts. Give an itinerary to a contact person at home; call the contact person upon departure and return. Create a list of girls’ parents/guardian contact information, telephone numbers for emergency services and police, and council contacts—keep on hand or post in an easily accessible location.
Select a safe arts-and-craft site. Ensure that girls have sufficient space to move around while working; there is space for table work for each girl, when appropriate. Work sites are well ventilated for activities involving hazardous materials and spray paints (for example, turpentine, spray fixatives, varnishes) or ceramic dust. Flammable material is used only in work spaces away from ignition sources such as open flames, heaters, and candles. Provision is made for proper and safe disposal of all waste materials. Fire exits are clearly marked, and fire safety equipment is on hand. Food and beverages are not consumed in activity areas.
Prepare for emergencies. When specialized equipment, power machinery, or chemicals are being used, ensure the presence of a first-aider with a current certificate in First Aid, including Adult and Child CPR or CPR/AED; also ensure a first-aid kit is available. Emergency procedures are clearly posted for swallowing a chemical, getting a chemical in the eyes, skin contact with a chemical, and so on. See Volunteer Essentials for information about first-aid standards and training.
Use safe equipment and materials. Art materials are purchased from reputable sources, such as school-supply houses. Product labels clearly indicate what the material is and how to write or call the
132
manufacturer. Girls never use donated or discarded material whose ingredients are not known; very old or unlabeled materials may be toxic and are not used. Care is taken to protect children from dyes, pigments, preservatives, and other chemicals that may provoke allergies. Children who are physically or psychologically disabled, or who are on medication, may be at greater risk from toxic materials. Kilns are ventilated, and children using them are directly supervised.
Educate about potentially hazardous materials. The following materials may be used only after girls have received adequate safety instruction:
Dusts or powders that can be inhaled or that can get in the eyes
Organic solvents, volatile glues, or solvent-containing products such as aerosol sprays
Anything that stains the skin or clothing (or that cannot be washed out of clothing)
Acids, alkalis, bleaches, or other irritating or corrosive chemicals
Also be sure that girls wash their hands after using supplies that are labeled as hazardous. If transferring hazardous materials to another container, ensure this container is labeled “hazardous.”
On the Day of the Arts-and-Crafts Activity
Get a weather report. If the arts-and-crafts activity takes place outdoors, on the morning of the activity, check weather.com or other reliable weather sources to determine if conditions are appropriate. If weather conditions prevent the activity, be prepared with a backup plan or alternate activity, or postpone the activity. Write, review, and practice evacuation and emergency plans for severe weather with girls. In the event of a storm, take shelter away from tall objects (including trees, buildings, and electrical poles). Find the lowest point in an open flat area. Squat low to the ground on the balls of the feet, and place hands on knees with head between them.
Use the buddy system. Girls are divided into teams of two. Each girl chooses a buddy and is responsible for staying with her buddy at all times, warning her buddy of danger, giving her buddy immediate assistance if safe to do so, and seeking help when the situation warrants it. If someone in the group is injured, one person cares for the patient while two others seek help.
Safeguard valuables. Secure equipment in a dry, locked storage area.
Exercise caution when handling and storing equipment and supplies. Equipment and supplies are locked in a storage area whenever possible. Safety and operating instructions for dangerous equipment (for example, power tools and kilns) are reviewed and posted. Scissors, knives, and other cutting tools are cleaned, oiled, and sharpened, as needed. Flammable materials, such as paints and solvents, are labeled and stored in a dry, well-ventilated area out of the reach of young children. Equipment and supplies are used for their intended purpose only. Turpentine or paint thinner may be used as a paint solvent with adequate ventilation. Gasoline is never used as a paint solvent. Solvent- or oil-soaked rags are kept in waste cans that meet fire safety codes and are emptied daily. Containers of solvents are covered. They evaporate quickly, and inhalation can be hazardous. Manufacturers’ labels on paints, chemicals, and aerosol cans are read before product use; use these substances in well-ventilated areas only and do not expose to a flame. When transferring substances into other containers, label each container as to content and procedures for use and disposal. When girls gather natural materials (such as leaves), conservation principles are taught and practiced.
Arts-and-Crafts Links
National Safety Council: www.usc.org
Arts-and-Crafts Know-How for Girls
Select cool craft projects. What kinds of projects have you never participated in, but have always wanted to try? After discussing themes, available supplies, and techniques, create a list of potential projects and begin researching how to create the project. Perform keyword searches for the craft projects. These sites (among others) provide arts-and-craft projects: Girl Scout council of the

133
Catawba Valley Area (www.cvgirlscouts.org/adults/crafts/index.htm), http://familyfun.go.com/crafts, and www.enchantedlearning.com/crafts.
Arts-and-Crafts Jargon
Assemblage: An artistic process in which a three-dimensional piece of art is made from assembling found objects
Mosaic: Artistic images and designs created by putting together small pieces of glass, stone, and other materials
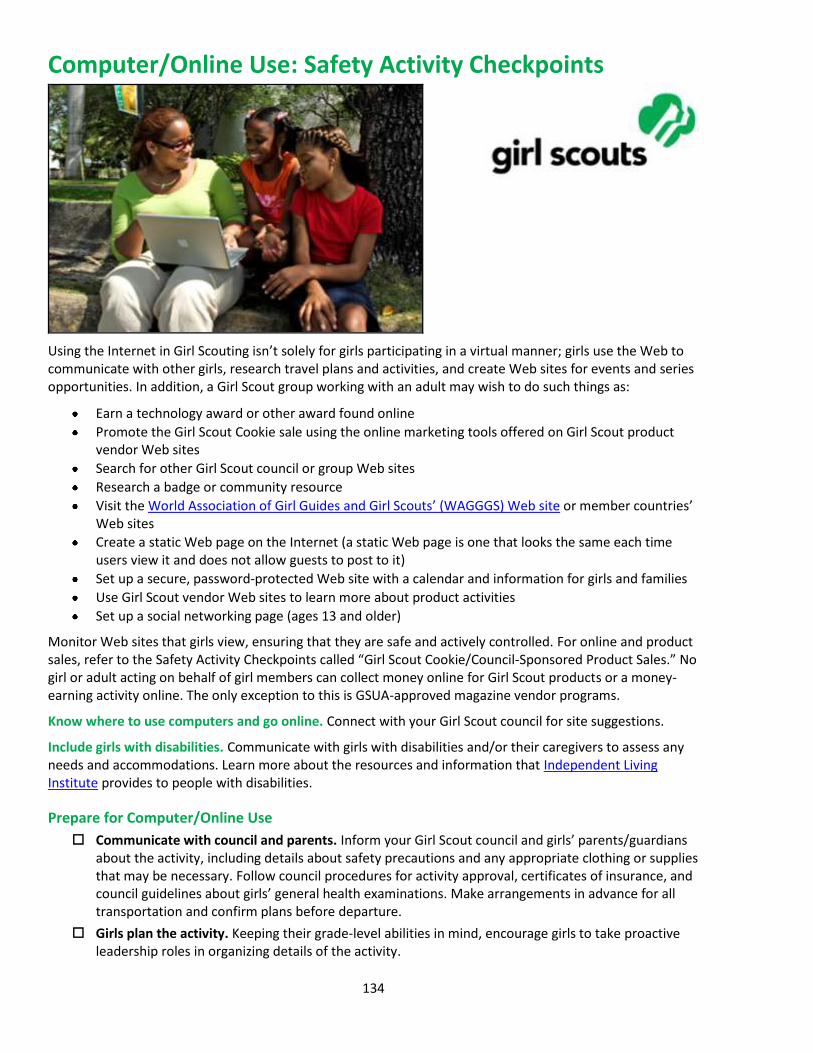
134
Computer/Online Use: Safety Activity Checkpoints
Using the Internet in Girl Scouting isn’t solely for girls participating in a virtual manner; girls use the Web to communicate with other girls, research travel plans and activities, and create Web sites for events and series opportunities. In addition, a Girl Scout group working with an adult may wish to do such things as:
Earn a technology award or other award found online
Promote the Girl Scout Cookie sale using the online marketing tools offered on Girl Scout product vendor Web sites
Search for other Girl Scout council or group Web sites
Research a badge or community resource
Visit the World Association of Girl Guides and Girl Scouts’ (WAGGGS) Web site or member countries’ Web sites
Create a static Web page on the Internet (a static Web page is one that looks the same each time users view it and does not allow guests to post to it)
Set up a secure, password-protected Web site with a calendar and information for girls and families
Use Girl Scout vendor Web sites to learn more about product activities
Set up a social networking page (ages 13 and older)
Monitor Web sites that girls view, ensuring that they are safe and actively controlled. For online and product sales, refer to the Safety Activity Checkpoints called “Girl Scout Cookie/Council-Sponsored Product Sales.” No girl or adult acting on behalf of girl members can collect money online for Girl Scout products or a money-earning activity online. The only exception to this is GSUA-approved magazine vendor programs.
Know where to use computers and go online. Connect with your Girl Scout council for site suggestions.
Include girls with disabilities. Communicate with girls with disabilities and/or their caregivers to assess any needs and accommodations. Learn more about the resources and information that Independent Living Institute provides to people with disabilities.
Prepare for Computer/Online Use
Communicate with council and parents. Inform your Girl Scout council and girls’ parents/guardians about the activity, including details about safety precautions and any appropriate clothing or supplies that may be necessary. Follow council procedures for activity approval, certificates of insurance, and council guidelines about girls’ general health examinations. Make arrangements in advance for all transportation and confirm plans before departure.
Girls plan the activity. Keeping their grade-level abilities in mind, encourage girls to take proactive leadership roles in organizing details of the activity.
135
Arrange for transportation and adult supervision. The adult-to-girl ratios are two non-related adults (at least one of whom is female) to every:
12 Girl Scout Daisies
20 Girl Scout Brownies
25 Girl Scout Juniors
25 Girl Scout Cadettes
30 Girl Scout Seniors
30 Girl Scout Ambassadors
Plus one adult to each additional:
6 Girl Scout Daisies
8 Girl Scout Brownies
10 Girl Scout Juniors
12 Girl Scout Cadettes
15 Girl Scout Seniors
15 Girl Scout Ambassadors
Verify instructor knowledge and experience. Recruit a consultant with knowledge of computers if adults or girls need assistance with activities related to computers or the Internet.
Select a safe location to use computers and the Web. Identify a location that provides group members with opportunities to use computers and access the Internet. Look for computers available for group use at a library, Girl Scout program center, school or college computer lab, computer rental store with training facility, or museum. Make sure that there are enough computers for each girl to learn by doing, even if there is some sharing (cooperative learning) taking place.
Understand the Girl Scout Internet Safety Pledge. Before girls use the Internet, copy and distribute the safety pledge, which is available at the end of this document and in the footer of www.girlscouts.org. Discuss online safety issues with girls, so they know how to conduct themselves safely on the Internet. All girls must read, agree to, and sign the Girl Scout Internet Safety Pledge before going online; a parent/guardian also must sign.
On the Day of the Computer/Online Activity
Ensure girls’ safety in Web site design. A group that wants to design a Web site must understand that the Web is an open medium for anyone. An open site will attract more than the intended users. Documented instances of cyberstalkers make it imperative that any information that could jeopardize the safety and security of girls and adults is not disclosed on a Web site. The following measures ensure girls’ safety:
Use only girls’ first names online.
Never post girls’ last names, addresses, phone numbers, or e-mail addresses.
Always have a parent’s or guardian’s permission when using pictures of girls on a Web site.
Do not post addresses of group meeting places or dates and times of meetings, events, or trips.
Do not allow automatic posting of messages to a Web site; all postings (such as message boards or guest books) should have adult oversight and be screened prior to posting live; ensure that the site does not show personal e-mail addresses (use a troop or group e-mail, or use an adult’s e-mail).
An adult who wishes to communicate upcoming events with families of girls should use e-mail instead of posting details on a Web site, unless that site is password-protected.
Take care in posting links. Be careful when selecting links to other Web sites that show on your site. The contents of potential links should be in keeping with Girl Scout principles and activities. Avoid linking to commercial sites selling merchandise to avoid implied Girl Scout endorsement of the products they offer. Seek out sites that enhance girls’ participation in Girl Scouting; are tasteful; are
136
grade-level–appropriate; show diversity; are beneficial for girls, adults, and families; and are in keeping with the Girl Scout organization’s purpose. Fully explore each Web site link to determine that its content is appropriate to a Girl Scout audience. As a courtesy, e-mail the site’s Webmaster, requesting permission to link to the site. Use similar criteria to determine what sites link to your group’s Web site.
Respect copyrighted material. A group Web site may not use copyrighted designs, text, graphics, or trademarked symbols without specific permission from the copyright or trademark holder. The basic principle is that, if it is not yours, don’t use it. Girls may use trademarks owned by GSUSA, which include the trefoil shape; Girl Scout Daisy Pin and Girl Scout Brownie Pin; contemporary and traditional Girl Scout pins; the words Girl Scout Daisy, Girl Scout Brownie, Girl Scout Junior, Girl Scout Cadette, Girl Scout Senior, Girl Scout Ambassador, Girl Scouting, Girl Scouts, and Girl Scout Cookies; Girl Scout Brownie Try-its, Girl Scout Junior Badges, and all Girl Scout Cadette-Ambassador Interest Project awards, their names and symbols, as well as all Girl Scout journey insignia. Information on use of GSUSA graphics and trademarks can be found at www.girlscouts.org under Girl Scout Central: Graphics Gallery, and under the link for Terms and Conditions on each www.girlscouts.org footer. Girl Scout trademarks can be used only in accordance with guidelines for their use. The Girl Scout trefoil, for example, may not be animated or used as wallpaper for a Web site. Check with your council’s Web site for complete graphics guidelines and approvals. Some names (such as commercial products and cartoon characters) are also trademarked and cannot be incorporated into Web site addresses. Permission is also required from the author or publisher for Web use of videos and music. Do not post words to copyrighted songs, poems, or book content, as permission must be granted from the record label, publisher, artist, poet, or author, and is nearly impossible to obtain.
Choose social-networking sites with care. Groups whose girls are at least 13 years old and obtain parental permission may set up a troop or group social-networking site. This site must be approved by the council. Any Girl Scout use of a social networking site (such as Facebook, Twitter, and MySpace) for communication must have parental permission and must meet age limits set by the provider, which is 13 and older in most cases, as per the United States Child Online Privacy and Protection Act (COPPA) and the Child Online Protection Act (COPA). Reference www.lmk.girlscouts.org for guidance around social network safety. Any online marketing using social networking tools must follow guidelines outlined in the “Managing Group Finances” chapter of Volunteer Essentials. Any appearance in a Girl Scout–related video or picture online must have permission from each girl’s parent or guardian, using the GSUSA girl/adult permission form. These forms should be held by the adult and/or council.
Computer and Online Safety Links
Girl Scouts of the USA: www.girlscouts.org
Go Girls Only (for girls grades 1–6): www.gogirlsonly.org
Let Me Know or LMK (about Internet safety for teens; girls can earn an online award for completing activities on this site): www.lmk.girlscouts.org
The Juliette Gordon Low Birthplace in Savannah, Georgia: www.juliettegordonlowbirthplace.org
Girl Scout Cookies (for information on Girl Scout Cookies): www.girlscoutcookies.org
Girl Scout council Finder: www.girlscouts.org/councilfinder
Computer and Online Safety Know-How for Girls
Blog about Girl Scouting. Planning a take-action project, road trip, or camping adventure? Consider documenting your plans and experiences on a council or national blog and divvy up the documentation duties (photography, writing, editing, and so on) among the group.

137
Computer and Internet Jargon
HTML: The acronym for HyperText Markup Language, the language or code used to create Web pages; learn HTML basics at www.htmlgoodies.com
Search engine optimization (SEO): The practice of designing Web pages so that they rank as high as possible in search results from search engines, such as Google and Yahoo!; this process often involves incorporating commonly searched keywords into static text, headlines, and body text
138
Girl Scout Internet Safety Pledge for All Girl Scouts
I will not give out personal information such as my address, telephone number(s), parents’ or guardians’ work address/telephone number(s), and the name and location of my school without the permission of my parent or guardian.
I will tell an adult right away if I come across or receive any information that makes me feel uncomfortable.
I will always follow the rules of Internet sites, including those rules that are based on age of use, parental approval and knowledge, and public laws.
I will never agree to get together with someone I “meet” online without first checking with my parents or guardians. If my parents or guardian agree to a meeting, I will arrange it in a public place and bring a parent or guardian along.
I will never send a person my picture or anything else without first checking with my parent or guardian.
I will talk with my parent or guardian so that we can set up rules for going online. We will decide on the time of day that I can be online, the length of time that I can be online, and appropriate areas for me to visit. I will not access other areas or break these rules without their permission.
I will not use the Internet to collect money for Girl Scout products, and I will follow all safety guidelines related to Girl Scout product sales.
I will practice online “netiquette” (good manners) at all times when online.
I won’t spam others.
I will not bully nor will I tolerate bullying (and I will always tell a trusted adult if this is a problem).
I won’t use bad language.
I will be guided by the Girl Scout Promise and Law in all that I do online.
Signed,
Girl Scout ___________________________________________ Date ________________________________
Parent/guardian _____________________________________ Date ________________________________
The GSUSA Online Safety Pledge is based upon the Online Safety Pledge developed by the National Center for Missing and Exploited Children (www.missingkids.com).
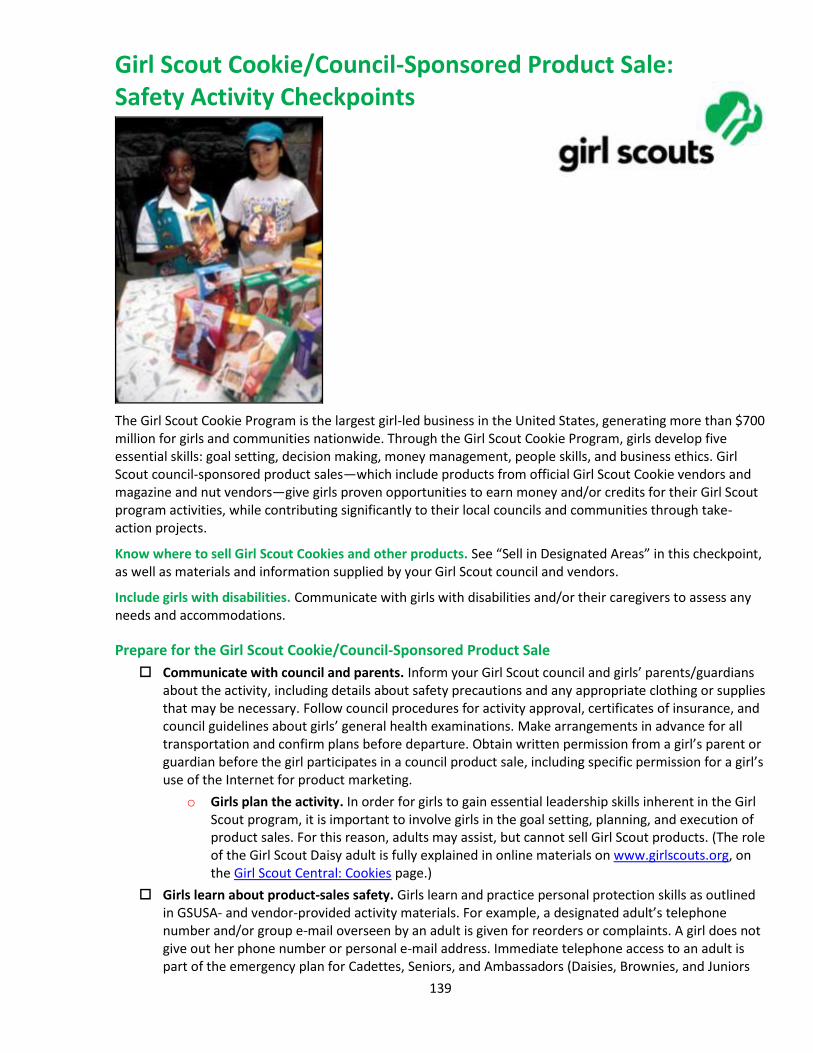
139
Girl Scout Cookie/Council-Sponsored Product Sale: Safety Activity Checkpoints
The Girl Scout Cookie Program is the largest girl-led business in the United States, generating more than $700 million for girls and communities nationwide. Through the Girl Scout Cookie Program, girls develop five essential skills: goal setting, decision making, money management, people skills, and business ethics. Girl Scout council-sponsored product sales—which include products from official Girl Scout Cookie vendors and magazine and nut vendors—give girls proven opportunities to earn money and/or credits for their Girl Scout program activities, while contributing significantly to their local councils and communities through take-action projects.
Know where to sell Girl Scout Cookies and other products. See “Sell in Designated Areas” in this checkpoint, as well as materials and information supplied by your Girl Scout council and vendors.
Include girls with disabilities. Communicate with girls with disabilities and/or their caregivers to assess any needs and accommodations.
Prepare for the Girl Scout Cookie/Council-Sponsored Product Sale
Communicate with council and parents. Inform your Girl Scout council and girls’ parents/guardians about the activity, including details about safety precautions and any appropriate clothing or supplies that may be necessary. Follow council procedures for activity approval, certificates of insurance, and council guidelines about girls’ general health examinations. Make arrangements in advance for all transportation and confirm plans before departure. Obtain written permission from a girl’s parent or guardian before the girl participates in a council product sale, including specific permission for a girl’s use of the Internet for product marketing.
o Girls plan the activity. In order for girls to gain essential leadership skills inherent in the Girl Scout program, it is important to involve girls in the goal setting, planning, and execution of product sales. For this reason, adults may assist, but cannot sell Girl Scout products. (The role of the Girl Scout Daisy adult is fully explained in online materials on www.girlscouts.org, on the Girl Scout Central: Cookies page.)
Girls learn about product-sales safety. Girls learn and practice personal protection skills as outlined in GSUSA- and vendor-provided activity materials. For example, a designated adult’s telephone number and/or group e-mail overseen by an adult is given for reorders or complaints. A girl does not give out her phone number or personal e-mail address. Immediate telephone access to an adult is part of the emergency plan for Cadettes, Seniors, and Ambassadors (Daisies, Brownies, and Juniors
140
are always accompanied by an adult). Ensure that a first-aid kit is available at a booth sale or product sale “walk-about.”
Arrange for adult supervision. Adults provide supervision and guidance for all grade levels. Adults must accompany Girl Scout Daisies, Brownies, and Juniors when they are selling, taking orders for, or delivering products. Adults oversee Girl Scout Cadettes, Seniors, and Ambassadors; they must be aware of how, when, and where the girls are selling products; be on call when girls are participating in product sales and be able to contact girls in a timely manner; be in an automobile in the area; or be present with the girls. Supervision extends to any online activity. Consult the “Computer/Online Use” Safety Activity Checkpoints for information about safe online sales and to obtain the Girl Scout Internet Safety Pledge for All Girl Scouts. Adults are present at booth activities with girls at any grade level.
Prepare for cookie and product sales with Girl Scout Daisies. Materials provided by GSUSA for Girl Scout Daisies focus on engaging girls in selling to friends (including neighbors and social groups) and family. This approach is based on:
The attention span and physical abilities of the girls
The need for one-on-one supervision when handling money (the adult should hold all money)
The involvement of parents or trusted adults in goal-setting and ensuring that goals are appropriate for the group or individuals
The importance of providing girls with a foundation in the basics of product-related activities
It is not appropriate for Girl Scout Daisies to be marketing online through their group site, parent or guardian Web sites, or social networking sites. Girl Scout Daisies may send e-mails only if working with an adult, and should use blind e-mails or the online marketing tools provided by GSUSA product vendors on their Web sites.
Sell in a designated area. Girl Scouts should observe council jurisdiction (by zip codes) when marketing products in person or online, with exceptions made for close family members. Prospects that come from outside council jurisdiction should be referred to the council finder at www.girlscoutcookies.org. Girl Scouts should observe council jurisdictions when selling cookies in a parent’s or guardian’s workplace, unless other arrangements are made to accommodate all Girl Scout families connected to that workplace.
Respect Girl Scout trademarks. Girl Scout Cookies and Girl Scouts are trademarked by Girl Scouts of the USA and cannot be used to endorse others’ products or services. Any questions regarding the use of Girl Scout Cookies or the name Girl Scouts must be addressed to the Girl Scout council or [email protected]. The Girl Scout name, Girl Scout Cookies and Girl Scout marks, as well as pictures of Girl Scout Cookie boxes or cookies themselves, can be used only by Girl Scout councils and by girls in conjunction with a Girl Scout product program. These rights are not transferable to customers or businesses purchasing cookies for use with gifting or promotional activities.
On the Day of the Girl Scout Cookie/Council-Sponsored Product Sale
Use the buddy system. Girls are divided into teams of two. Each girl chooses a buddy and is responsible for staying with her buddy at all times, warning her buddy of danger, giving her buddy immediate assistance if safe to do so, and seeking help when the situation warrants it. If someone in the group is injured, one person cares for the patient while two others seek help. Note that if an individual Girl Scout Cadette, Senior, or Ambassador is selling or delivering products or making a presentation to a group, she must be accompanied by an adult if she is not accompanied by a buddy.
Practice safety in selling and delivering products.
Girls wear a membership pin, uniform, or Girl Scout clothing (e.g., Girl Scout T-shirt) to clearly identify themselves as Girl Scouts.
Girls and accompanying adults are familiar with the areas and neighborhoods where product sales take place.
141
Girls participate in door-to-door sales only during daylight hours.
When Girl Scouts operate a booth in a store, mall, or other public place, adults must be present at all times. When planning sales booths, follow council guidelines for additional information about setting up a booth and safety and security suggestions and assistance.
Use safe pedestrian practices, especially when crossing at busy intersections. Do not enter the home of a stranger.
Do not carry large amounts of money. Provision for safeguarding the money is made in advance.
Practice safe booth sales. When setting up booth sales, ensure that:
You have adequate space at the booth (table, products, and girls) to allow safe passage by pedestrians, bikes, and cars.
Girls are a safe distance from cars. If possible, set up a safety barrier between cars and the booth—perhaps a few volunteers could park their cars in spaces near the booth location.
The booth is not blocking a store entrance or exit.
Keep cash safe, by keeping the cash box against a wall or behind a barrier of cookie boxes, in the safety of an adult volunteer, or by having an adult volunteer keep the money safe in a front-facing pouch tied around her waist. Girls can receive cash from buyers and make change, but should hand the money to the adult for safekeeping.
Practice safe online marketing. Girls may use phones and e-mail messages to alert friends and relatives to product sales and accept customer commitments as mail or callbacks for the Girl Scout Cookie sale. Girl Scout cookie product partners are providing secure sites for girl use. Girls who are 13 or older may use social networking sites to market product; however, they must follow council and GSUSA guidelines. Girls writing notes for recipients of product e-mails or announcements online should sign with their first names only, their troop/group number or name, and their council name. Personal e-mails or street addresses of girls should never be used. Instead, use one of the following:
A blind return address account where the girls’ name or personal e-mail is not revealed to the customer and is instead hosted on a secure site (such as provided by our product sales partners)
A group account monitored by an adult
An adult e-mail account supervised by an adult
Girl Scout Cookie/Council-Sponsored Product Sale Links
Girl Scout Cookies official site: www.girlscoutcookies.org
Girl Scout Cookie/Council-Sponsored Product Sale Jargon
GSUSA official product sale vendors: Companies licensed by Girl Scouts of the USA to produce official Girl Scout products for girls to sell. The companies are selected by councils and contracted for one, two, and/or three years.
Little Brownie Bakers and ABC Bakers produce Girl Scout cookies. Their Web sites have general information as well as activities and management tools.
Ashdon Farms and Trophy Nut are approved GSUSA nut vendors and provide online information, activities, and management tools.
QSP and American Publishers offer magazine subscription programs approved by GSUSA. Each provides online tools and activities for download and use. Magazine selection and sales may take place online. Check with your council for more details.
Nutritional and packaging information: Read nutritional and health information on product description sheets provided by the vendors annually or check their Web sites. Girls should be able to discuss serving size, nutritional values, and fat and allergy information. Read additional nutrition information at www.girlscoutcookies.org. Recycling information is provided on product containers.
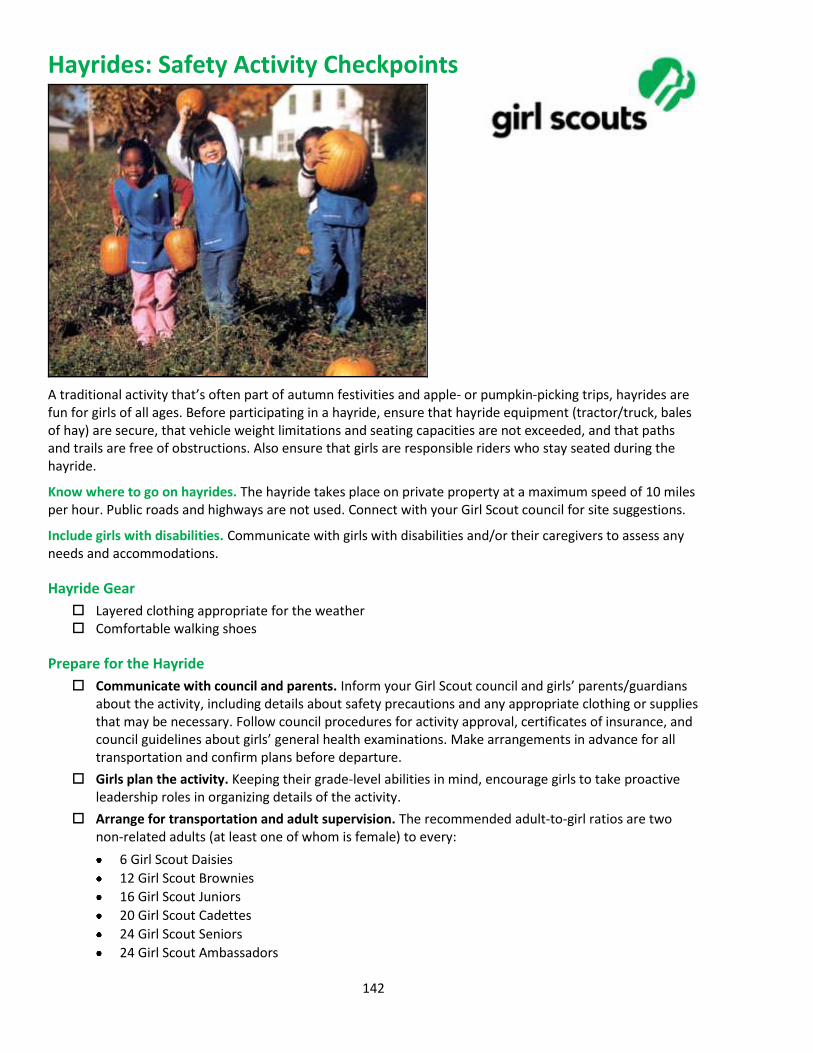
142
Hayrides: Safety Activity Checkpoints
A traditional activity that’s often part of autumn festivities and apple- or pumpkin-picking trips, hayrides are fun for girls of all ages. Before participating in a hayride, ensure that hayride equipment (tractor/truck, bales of hay) are secure, that vehicle weight limitations and seating capacities are not exceeded, and that paths and trails are free of obstructions. Also ensure that girls are responsible riders who stay seated during the hayride.
Know where to go on hayrides. The hayride takes place on private property at a maximum speed of 10 miles per hour. Public roads and highways are not used. Connect with your Girl Scout council for site suggestions.
Include girls with disabilities. Communicate with girls with disabilities and/or their caregivers to assess any needs and accommodations.
Hayride Gear
Layered clothing appropriate for the weather Comfortable walking shoes
Prepare for the Hayride
Communicate with council and parents. Inform your Girl Scout council and girls’ parents/guardians about the activity, including details about safety precautions and any appropriate clothing or supplies that may be necessary. Follow council procedures for activity approval, certificates of insurance, and council guidelines about girls’ general health examinations. Make arrangements in advance for all transportation and confirm plans before departure.
Girls plan the activity. Keeping their grade-level abilities in mind, encourage girls to take proactive leadership roles in organizing details of the activity.
Arrange for transportation and adult supervision. The recommended adult-to-girl ratios are two non-related adults (at least one of whom is female) to every:
6 Girl Scout Daisies
12 Girl Scout Brownies
16 Girl Scout Juniors
20 Girl Scout Cadettes
24 Girl Scout Seniors
24 Girl Scout Ambassadors
143
Plus one adult to each additional:
4 Girl Scout Daisies
6 Girl Scout Brownies
8 Girl Scout Juniors
10 Girl Scout Cadettes
12 Girl Scout Seniors
12 Girl Scout Ambassadors
Compile key contacts. Give an itinerary to a contact person at home; call the contact person upon departure and return. Create a list of girls’ parents/guardian contact information, telephone numbers for emergency services and police, and council contacts—keep on hand or post in an easily accessible location.
Select a safe hayride location. Inspect the site to be sure it is free of potential hazards, and make sure emergency medical care is accessible. Ensure that the hayride route is clear of debris and hazards that may cause a jolt or jarring ride for participants.
Dress appropriately for the activity. Make sure girls and adults avoid wearing dangling earrings, bracelets, and necklaces that may become entangled in equipment.
Prepare for emergencies. Ensure the presence of a first-aid kit and a first-aider with a current certificate in First Aid, including Adult and Child CPR or CPR/AED. See Volunteer Essentials for information about first-aid standards and training.
On the Day of the Hayride
Get a weather report. On the morning of the hayride trip, check weather.com or other reliable weather sources to determine if conditions are appropriate, and make sure that the ground is free of ice. If severe weather conditions prevent the activity, be prepared with a backup plan or alternate activity, or postpone the activity. Write, review, and practice evacuation and emergency plans for severe weather with girls. In the event of a storm, take shelter away from tall objects (including trees, buildings, and electrical poles). Find the lowest point in an open flat area. Squat low to the ground on the balls of the feet, and place hands on knees with head between them.
Use the buddy system. Girls are divided into teams of two. Each girl chooses a buddy and is responsible for staying with her buddy at all times, warning her buddy of danger, giving her buddy immediate assistance if safe to do so, and seeking help when the situation warrants it. If someone in the group is injured, one person cares for the patient while two others seek help.
Girls learn about and practice safe hayrides. Girls do not ride in the hauling vehicle. The driver of the hauling vehicle is licensed to drive a vehicle in the jurisdiction and is at least 21 years of age. The hauled vehicle meets all state and local safety requirements and displays proper identification showing these conditions have been met. The hauled vehicle has protective sides and rear fencing or gates, as well as rear lights in working order. The hay or straw is properly stacked to prevent slipping. Sufficient seating space is allowed for each person. Girls and adults remain seated during the ride.
Hayride Links
National Safety Council: www.nsc.org
Haunted House Association: www.hauntedhouseassociation.org/safety/hayride_safety_and_common_sense.php

144
Parades and Other Large Group Gatherings: Safety Activity Checkpoints
Whether you’re participating in a parade or planning a Girl Scout event, series, or other large group gathering, it’s important to represent Girl Scouts in the best possible way and encourage girls to plan the festivities.
Include girls with disabilities. Communicate with girls with disabilities and/or their caregivers to assess any needs and accommodations.
Gear for Parades and Other Large Group Gatherings
Basic Gear
Girl Scout uniform, pin, or some other means of group identification Comfortable walking shoes Sunscreen (SPF of at least 15) and sunglasses on sunny or hazy days
Prepare for the Parade and Other Large Group Gathering
Communicate with council and parents. Inform your Girl Scout council and girls’ parents/guardians about the activity, including details about safety precautions and any appropriate clothing or supplies that may be necessary. Follow council procedures for activity approval, certificates of insurance, and council guidelines about girls’ general health examinations. Make arrangements in advance for all transportation and confirm plans before departure.
Girls plan the activity. Keeping their grade-level abilities in mind, encourage girls to take proactive leadership roles in organizing details of the activity.
Arrange for transportation and adult supervision. The recommended adult-to-girl ratios are two non-related adults (at least one of whom is female) to every:
6 Girl Scout Daisies
12 Girl Scout Brownies
16 Girl Scout Juniors
20 Girl Scout Cadettes
24 Girl Scout Seniors
24 Girl Scout Ambassadors
145
Plus one adult to each additional:
4 Girl Scout Daisies
6 Girl Scout Brownies
8 Girl Scout Juniors
10 Girl Scout Cadettes
12 Girl Scout Seniors
12 Girl Scout Ambassadors
Compile key contacts. Give an itinerary to a contact person at home; call the contact person upon departure and return. Create a list of girls’ parents/guardian contact information, telephone numbers for emergency services and police, and council contacts—keep on hand or post in an easily accessible location.
Consider the appropriateness of the activity or event. When planning parades or large group gatherings, think about the needs, interests, and readiness of the girls; the sponsor; the needs of the community to be served; scheduling concerns; GSUSA and council guidelines on fund-raising, endorsements, collaborating with other organizations, and maintaining nonprofit status.
Respect parade and large-group gathering standards. Local regulations and permit procedures are observed for public gatherings, facility use, food handling, certificates of insurance, and sales or excise tax. Guidelines for personal protection are observed. Local authorities are contacted for safety and security suggestions and assistance applicable to the parade or event. For safety reasons, name tags or other personal identification are not worn in public places. GSUSA and council guidelines on publicity, photo releases, and interviews are observed.
Select a safe location. The location for any community event, large group gathering, or parade is inspected in advance, with consideration for the following, as they apply: Accessibility to the group and to the public; suitability to event size, age groups, and kinds of activities; parking availability; availability of restrooms; security arrangements; lighting for evening and indoor events; vulnerability to inclement weather; proximity to medical facilities; availability of police protection; fire safety. Also ensure that occupancy limits are not exceeded for indoor gatherings and events. Emergency exits are sufficient, well marked, and operational, and an emergency evacuation plan is in place. A food-preparation area used for large groups of people meets state and local standards. Sufficient portable water and restrooms are available to participants. Provisions are made for garbage removal and site cleanup.
Make appropriate plans for parade floats. Floats drawn by trucks and automobiles are covered by automobile insurance in the name of the vehicle owners. Float construction is safe, using no toxic or highly flammable materials, and secured to the body of the float and the vehicle. Floats are equipped with portable ABC fire extinguishers. Riders on floats have secure seating, or a secure handhold or safety harness if standing. Floats are not overcrowded. Participants do not walk close to moving floats. An adult accompanies girls on any moving float. Any coupling of a trailer to a vehicle is appropriate to the load and has a safety chain. Nothing is distributed to onlookers from a moving vehicle or a float.
Prepare for emergencies. Ensure the presence of a first-aid kit and a first-aider with a current certificate in First Aid, including Adult and Child CPR or CPR/AED. An emergency vehicle is available at large group gatherings. Location of the nearest telephone is known at all times, and the adult carries emergency-contact phone numbers. An evacuation plan is part of written and oral communication with participants for any large indoor or outdoor gathering. See Volunteer Essentials for information about first-aid standards and training.
On the Day of the Parade or Other Large Group Gathering
Get a weather report. On the morning of the activity, check weather.com or other reliable weather sources to determine if conditions are appropriate, and make sure that the ground is free of ice. If
146
severe weather conditions prevent the activity, be prepared with a backup plan or alternate activity, or postpone the activity. Write, review, and practice evacuation and emergency plans for severe weather with girls. In the event of a storm, take shelter away from tall objects (including trees, buildings, and electrical poles). Find the lowest point in an open flat area. Squat low to the ground on the balls of the feet, and place hands on knees with head between them.
Use the buddy system. Girls are divided into teams of two. Each girl chooses a buddy and is responsible for staying with her buddy at all times, warning her buddy of danger, giving her buddy immediate assistance if safe to do so, and seeking help when the situation warrants it. If someone in the group is injured, one person cares for the patient while two others seek help.
Take safety precautions. Instruction is given on safe pedestrian practices, when applicable. Adults know girls’ location at all times. Advance arrangements are made for picking up the girls after the event and parents and girls understand the arrangements. Adults and girls pick a place to meet in case of separation from the supervising adult or the group.
Parades and Other Large Group Gatherings Link
National Safety Council: www.nsc.org
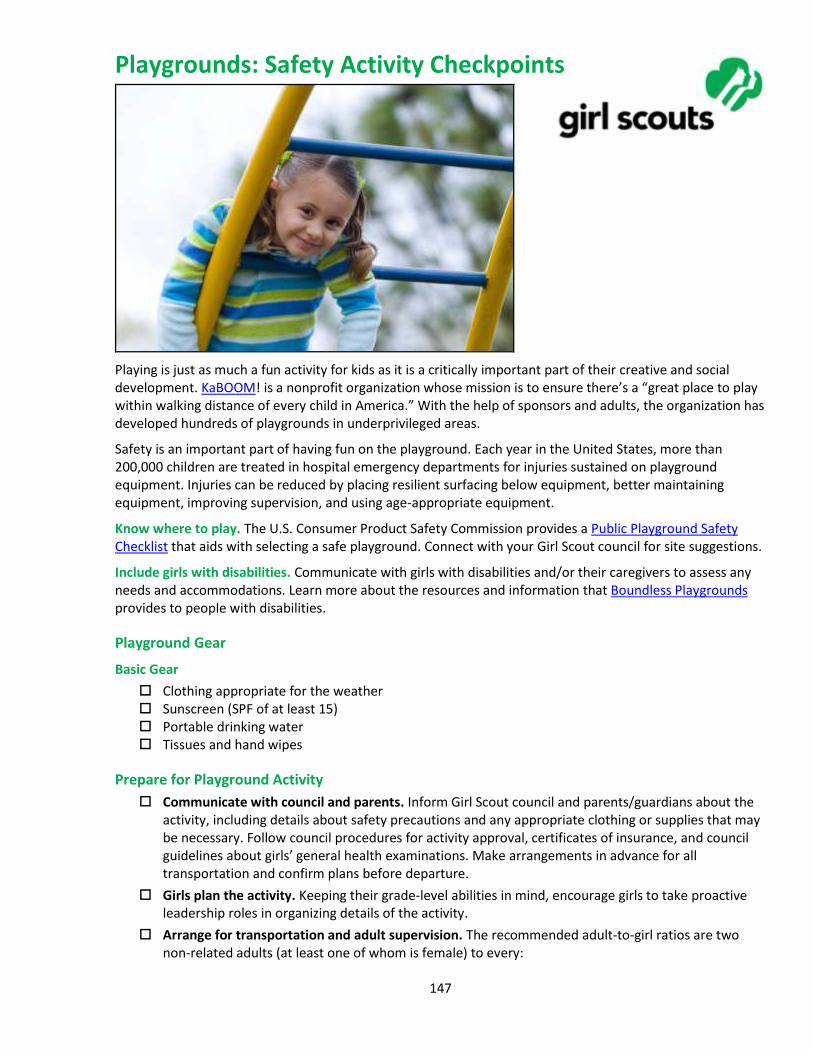
147
Playgrounds: Safety Activity Checkpoints
Playing is just as much a fun activity for kids as it is a critically important part of their creative and social development. KaBOOM! is a nonprofit organization whose mission is to ensure there’s a “great place to play within walking distance of every child in America.” With the help of sponsors and adults, the organization has developed hundreds of playgrounds in underprivileged areas.
Safety is an important part of having fun on the playground. Each year in the United States, more than 200,000 children are treated in hospital emergency departments for injuries sustained on playground equipment. Injuries can be reduced by placing resilient surfacing below equipment, better maintaining equipment, improving supervision, and using age-appropriate equipment.
Know where to play. The U.S. Consumer Product Safety Commission provides a Public Playground Safety Checklist that aids with selecting a safe playground. Connect with your Girl Scout council for site suggestions.
Include girls with disabilities. Communicate with girls with disabilities and/or their caregivers to assess any needs and accommodations. Learn more about the resources and information that Boundless Playgrounds provides to people with disabilities.
Playground Gear
Basic Gear
Clothing appropriate for the weather Sunscreen (SPF of at least 15) Portable drinking water Tissues and hand wipes
Prepare for Playground Activity
Communicate with council and parents. Inform Girl Scout council and parents/guardians about the activity, including details about safety precautions and any appropriate clothing or supplies that may be necessary. Follow council procedures for activity approval, certificates of insurance, and council guidelines about girls’ general health examinations. Make arrangements in advance for all transportation and confirm plans before departure.
Girls plan the activity. Keeping their grade-level abilities in mind, encourage girls to take proactive leadership roles in organizing details of the activity.
Arrange for transportation and adult supervision. The recommended adult-to-girl ratios are two non-related adults (at least one of whom is female) to every:

148
6 Girl Scout Daisies
12 Girl Scout Brownies
16 Girl Scout Juniors
20 Girl Scout Cadettes
Plus one adult to each additional:
4 Girl Scout Daisies
6 Girl Scout Brownies
8 Girl Scout Juniors
10 Girl Scout Cadettes
Compile key contacts. Give an itinerary to a contact person at home; call the contact person upon departure and return. Create a list of girls’ parents/guardian contact information, telephone numbers for emergency services and police, and council contacts—keep on hand or post in an easily accessible location.
Select a safe playground. Inspect the site to be sure it is free of potential hazards, and make sure emergency medical care is accessible. Physical activities are separate from more passive or quiet activities; areas for play equipment, open fields, and sandboxes are in different sections of the playground. Equipment and activity areas are without visual barriers; there are clear sightlines everywhere on the playground to facilitate supervision. Traffic patterns are clearly separate for individual pieces of equipment. Moving equipment, such as swings or merry-go-rounds, is located toward a corner of the playground. The playground does not have rocks, roots, and other protrusions from the ground that may cause girls to trip.
Ensure that playground equipment is safe. Equipment is anchored so that it does not tip, slide, or move in an unintended manner. All wood parts are smooth and free of splinters. Wet or damaged equipment is not used. All metal edges are rolled or have rounded capping. There are no sharp points, corners, or edges on any components of playground equipment. There are no accessible pinch, crush, or tearing points on individual pieces of equipment. Protrusions or projections of playground equipment cannot entangle girls’ clothing.
Assess safety of playground surface. Hard-surfaced materials, such as asphalt or concrete, are unsuitable under and around playground equipment of any height, unless they serve as a base for shock-absorbing materials, such as a rubber mat. Acceptable playground surfacing materials are rubberlike materials, sand, gravel, and shredded wood products.
Dress appropriately for the activity. Make sure girls and adults avoid wearing dangling earrings, bracelets, and necklaces that may become entangled in equipment. Clothing is snug-fitting or tucked in to avoid snagging or tangling in any of the playground equipment. Wearing clothing with drawstrings on a hood or around the neck is not permitted.
Be prepared for emergencies. Ensure the presence of a first-aid kit and a first-aider with a current certificate in First Aid, including Adult and Child CPR or CPR/AED. See Volunteer Essentials for information about first-aid standards and training.
On the Day of the Playground Activity
Get a weather report. On the morning of the playground activity, check weather.com or other reliable weather sources to determine if conditions are appropriate, and make sure that the ground is free of ice. If severe weather conditions prevent the activity, be prepared with a backup plan or alternate activity, or postpone the activity. Write, review, and practice evacuation and emergency plans for severe weather with girls. In the event of a storm, take shelter away from tall objects (including trees, buildings, and electrical poles). Find the lowest point in an open flat area. Squat low to the ground on the balls of the feet, and place hands on knees with head between them.
149
Use the buddy system. Girls are divided into teams of two. Each girl chooses a buddy and is responsible for staying with her buddy at all times, warning her buddy of danger, giving her buddy immediate assistance if safe to do so, and seeking help when the situation warrants it. If someone in the group is injured, one person cares for the patient while two others seek help.
Girls learn about and practice safe playground activities. Adults teach girls to use equipment properly, safely, and as intended. Girls should not run, push, or shove on the playground. Girls should not stand close to a moving swing or other moving apparatus. Girls wait their turns to use equipment such as slides. Girls must not tease or play with neighborhood pets.
Keep track of girls’ whereabouts. Conduct a head count before and after playground activities. Ensure that girls know where to go and how to act when confronted by strangers or intruders and are able to sound an agreed-upon alarm.
Playgrounds Link
Safe Kids: www.usa.safekids.org
Playground Know-How for Girls
Create your own games. You’ve probably played capture the flag, hide-and-seek, and four square (www.squarefour.org/rules). What games can you create as a group?
Play it safe on the playground. The Children’s Hospital of Pittsburgh provides a playground safety checklist and a cartoon that covers important items such as keeping shoes tied and holding onto ladder rails.
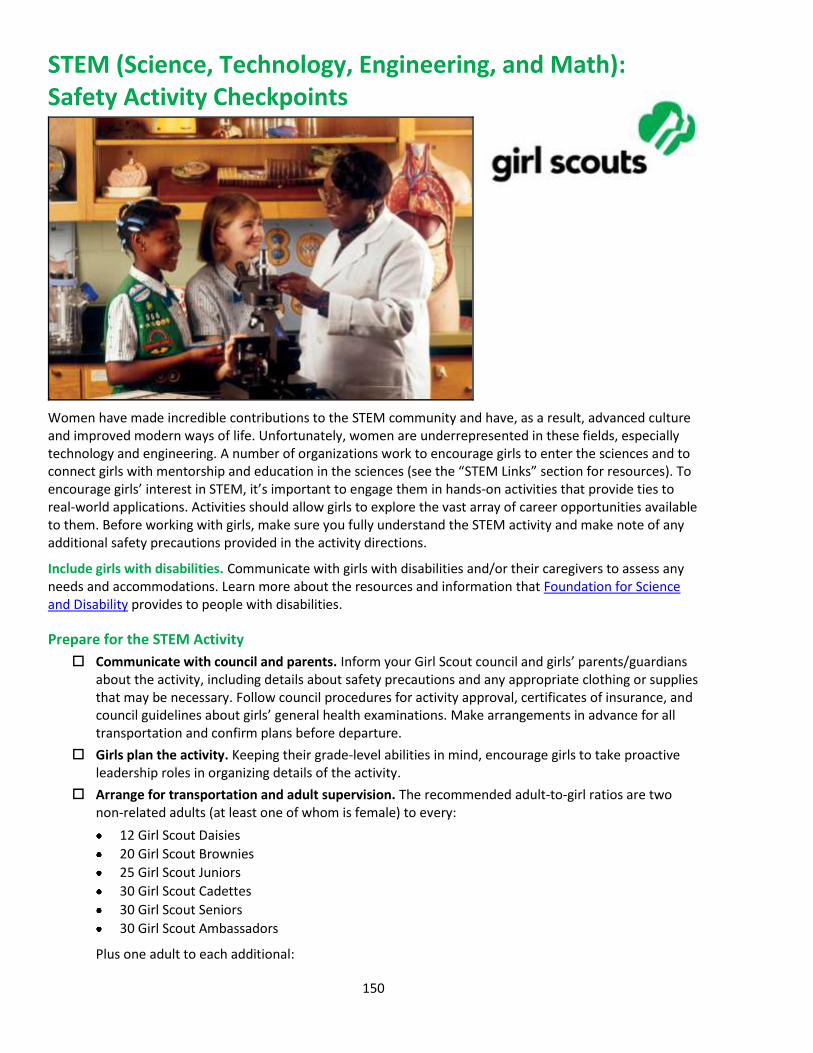
150
STEM (Science, Technology, Engineering, and Math): Safety Activity Checkpoints
Women have made incredible contributions to the STEM community and have, as a result, advanced culture and improved modern ways of life. Unfortunately, women are underrepresented in these fields, especially technology and engineering. A number of organizations work to encourage girls to enter the sciences and to connect girls with mentorship and education in the sciences (see the “STEM Links” section for resources). To encourage girls’ interest in STEM, it’s important to engage them in hands-on activities that provide ties to real-world applications. Activities should allow girls to explore the vast array of career opportunities available to them. Before working with girls, make sure you fully understand the STEM activity and make note of any additional safety precautions provided in the activity directions.
Include girls with disabilities. Communicate with girls with disabilities and/or their caregivers to assess any needs and accommodations. Learn more about the resources and information that Foundation for Science and Disability provides to people with disabilities.
Prepare for the STEM Activity
Communicate with council and parents. Inform your Girl Scout council and girls’ parents/guardians about the activity, including details about safety precautions and any appropriate clothing or supplies that may be necessary. Follow council procedures for activity approval, certificates of insurance, and council guidelines about girls’ general health examinations. Make arrangements in advance for all transportation and confirm plans before departure.
Girls plan the activity. Keeping their grade-level abilities in mind, encourage girls to take proactive leadership roles in organizing details of the activity.
Arrange for transportation and adult supervision. The recommended adult-to-girl ratios are two non-related adults (at least one of whom is female) to every:
12 Girl Scout Daisies
20 Girl Scout Brownies
25 Girl Scout Juniors
30 Girl Scout Cadettes
30 Girl Scout Seniors
30 Girl Scout Ambassadors
Plus one adult to each additional:
151
6 Girl Scout Daisies
8 Girl Scout Brownies
10 Girl Scout Juniors
12 Girl Scout Cadettes
15 Girl Scout Seniors
15 Girl Scout Ambassadors
Prepare for informative learning experiences. Research STEM activity and encourage girls to take active roles in preparing educational and safety aspects. If using chemicals, prior to the activity, adults and instructors should be familiar with safety procedures and possible side effects of contact with the chemical as listed on the chemicals’ corresponding Material Safety Data Sheet.
Select a safe location. Inspect the site to be sure it is free of potential hazards, and make sure emergency medical care is accessible. There are well-ventilated areas for the use of vaporous materials such as chemicals. Flammable materials are kept in fireproof containers and in an area away from ignition sources. Food or beverages are not consumed in an activity area. Hands are washed before eating.
Ensure safety of equipment and materials. The work area is ample and appropriate for the science activity. When working with any chemical, plant, or animal, the following are observed:
Hands do not touch the mouth or face during the activity.
Facilities for washing hands and eyes are available at the site.
Hands are washed thoroughly after the activity.
Equipment is thoroughly cleaned.
Used materials are disposed of properly.
Chemical substances are used or mixed only when the adult in charge specifically knows the outcome.
When chemicals are used, goggles stamped ANSI Z87 on the frame and lens must be worn. Even the simplest experiment can be an eye hazard.
Ensure use of gloves when necessary. Non-latex gloves made of nitrile or neoprene are worn when working with chemicals and unknown plants and substances. Vinyl gloves generally do not provide appropriate protection. The American Chemical Society provides additional information about chemical safety.
Compile key contacts. Give an itinerary to a contact person at home; call the contact person upon departure and return. Create a list of girls’ parents/guardian contact information, telephone numbers for emergency services and police, and council contacts—keep on hand or post in an easily accessible location.
Dress appropriately for the activity. Make sure girls and adults avoid wearing dangling earrings, bracelets, and necklaces that may become entangled in equipment.
Be prepared in the case of an emergency. Ensure the presence of a waterproof first-aid kit and a first-aider with a current certificate in First Aid, including Adult and Child CPR or CPR/AED, who is prepared to handle burns. Emergency procedures are clearly posted for swallowing a chemical, getting a chemical in the eyes, skin contact with a chemical, and so on. See Volunteer Essentials for information about first-aid standards and training.
On the Day of the STEM Activity
Get a weather report. If the activity is outdoors, on the morning of the science activity, check weather.com or other reliable weather sources to determine if conditions are appropriate, and make sure that the ground is free of ice. If severe weather conditions prevent the activity, be prepared with a backup plan or alternate activity, or postpone the activity. Write, review, and practice evacuation and emergency plans for severe weather with girls. In the event of a storm, take shelter away from tall objects (including trees, buildings, and electrical poles). Find the lowest point in an
152
open flat area. Squat low to the ground on the balls of the feet, and place hands on knees with head between them.
Use the buddy system. Girls are divided into teams of two. Each girl chooses a buddy and is responsible for staying with her buddy at all times, warning her buddy of danger, giving her buddy immediate assistance if safe to do so, and seeking help when the situation warrants it. If someone in the group is injured, one person cares for the patient while two others seek help.
Communicate with girls about STEM safety. Before beginning a STEM activity, talk with girls about safety and point out potential dangers and appropriate safety precautions to take.
Take care with animals. Whenever animals or objects they use—such as food bowls, water dishes, toys—are handled, hands must be thoroughly washed with soap under running water. Iguanas, turtles, and other reptiles, as well as pet ducklings and chicks, can harbor salmonella bacteria, which can be passed on to humans. Contact with these animals should be avoided. Activities with animals are carried out with sensitivity and concern for the needs of the animals. Aquariums and terrariums are kept in areas where proper care, temperature regulation, and maintenance are always possible. Girls are aware of the proper care, feeding, and maintenance of animals and take responsibility for meeting these needs.
STEM Links
FIRST (For Inspiration and Recognition of Science and Technology): www.usfirst.org
NASA: www.nasa.gov
National Girls Collaborative Project: www.pugetsoundcenter.org/ngcp
Society of Women Engineers: http://aspire.swe.org
Women in Science: www.womeninscience.org
STEM Know-How for Girls
Learn about careers in the sciences. Aerospace engineer, meteorologist, cryptographer—these are just some of the jobs in science, technology, engineering, and technology. Learn more about more career options at Engineer Your Life and BrainCake.
Pick cool STEM projects. What do you want to learn about in science, technology, engineering, and math? Visit Girl Scout partner site pbskids.org to watch shows such as Curious George, FETCH!, Design Squad, Cyberchase, and SciGirls.
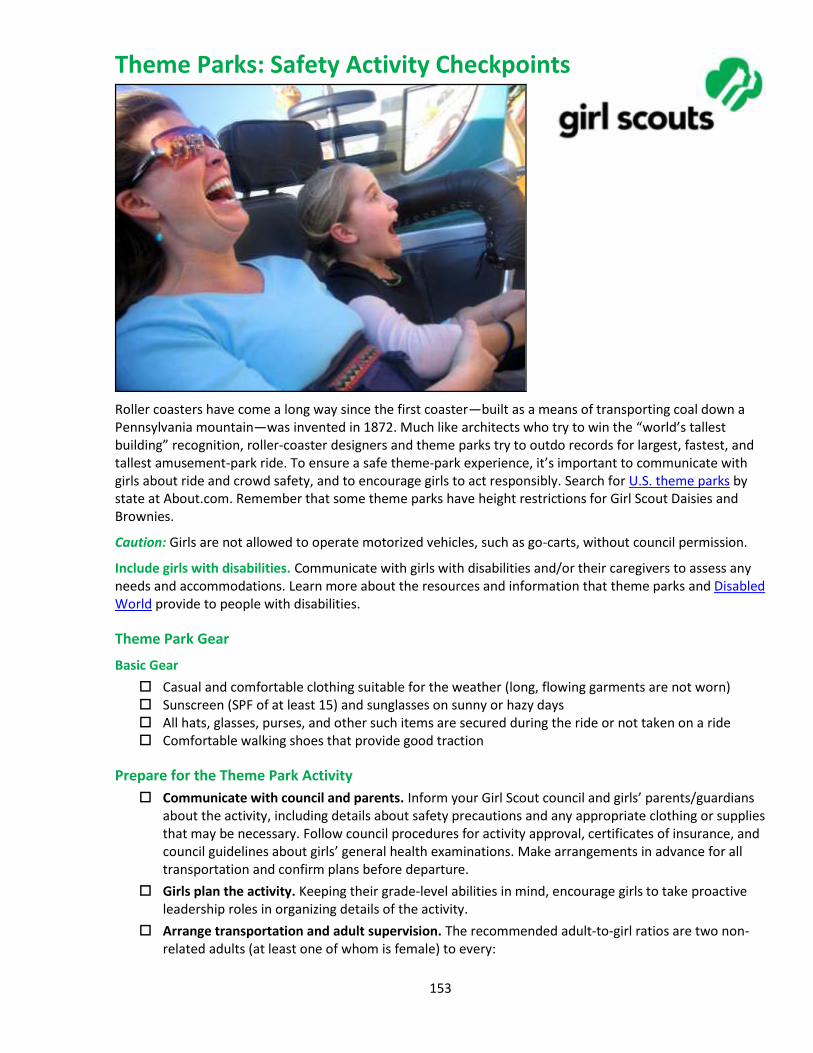
153
Theme Parks: Safety Activity Checkpoints
Roller coasters have come a long way since the first coaster—built as a means of transporting coal down a Pennsylvania mountain—was invented in 1872. Much like architects who try to win the “world’s tallest building” recognition, roller-coaster designers and theme parks try to outdo records for largest, fastest, and tallest amusement-park ride. To ensure a safe theme-park experience, it’s important to communicate with girls about ride and crowd safety, and to encourage girls to act responsibly. Search for U.S. theme parks by state at About.com. Remember that some theme parks have height restrictions for Girl Scout Daisies and Brownies.
Caution: Girls are not allowed to operate motorized vehicles, such as go-carts, without council permission.
Include girls with disabilities. Communicate with girls with disabilities and/or their caregivers to assess any needs and accommodations. Learn more about the resources and information that theme parks and Disabled World provide to people with disabilities.
Theme Park Gear
Basic Gear
Casual and comfortable clothing suitable for the weather (long, flowing garments are not worn) Sunscreen (SPF of at least 15) and sunglasses on sunny or hazy days All hats, glasses, purses, and other such items are secured during the ride or not taken on a ride Comfortable walking shoes that provide good traction
Prepare for the Theme Park Activity
Communicate with council and parents. Inform your Girl Scout council and girls’ parents/guardians about the activity, including details about safety precautions and any appropriate clothing or supplies that may be necessary. Follow council procedures for activity approval, certificates of insurance, and council guidelines about girls’ general health examinations. Make arrangements in advance for all transportation and confirm plans before departure.
Girls plan the activity. Keeping their grade-level abilities in mind, encourage girls to take proactive leadership roles in organizing details of the activity.
Arrange transportation and adult supervision. The recommended adult-to-girl ratios are two non-related adults (at least one of whom is female) to every:
154
6 Girl Scout Daisies
12 Girl Scout Brownies
16 Girl Scout Juniors
20 Girl Scout Cadettes
24 Girl Scout Seniors
24 Girl Scout Ambassadors
Plus one adult to each additional:
4 Girl Scout Daisies
6 Girl Scout Brownies
8 Girl Scout Juniors
10 Girl Scout Cadettes
12 Girl Scout Seniors
12 Girl Scout Ambassadors
Ensure safety of theme-park rides. Obtain full information about the rides and other activities and evaluate them for safety. Discuss with the park manager or safety officer safety procedures, maintenance programs, insurance coverage, and other matters of concern. Verify in advance that the park carries liability insurance.
Select a safe location. Inspect the site to be sure it is free of potential hazards, and make sure emergency medical care, first-aid equipment and supplies are easily accessible. In the event of illness or accident, notify the nearest park attendant.
Encourage girls to plan the trip. Girls and adults determine the appropriate time of day and length of the visit to the theme park.
Compile key contacts. Give an itinerary to a contact person at home; call the contact person upon departure and return. Create a list of girls’ parents/guardian contact information, telephone numbers for emergency services and police, and council contacts—keep on hand or post in an easily accessible location.
Dress appropriately for the activity. Make sure girls and adults avoid wearing dangling earrings, bracelets, and necklaces that may become entangled in rides.
Be prepared in the case of an emergency. Ensure the presence of a first-aid kit and a first-aider with a current certificate in First Aid, including Adult and Child CPR or CPR/AED. See Volunteer Essentials for information about first-aid standards and training.
On the Day of the Theme Park Activity
Get a weather report. On the morning of the activity, check weather.com or other reliable weather sources to determine if conditions are appropriate, and make sure that the ground is free of ice. If severe weather conditions prevent the activity, be prepared with a backup plan or alternate activity, or postpone the activity. Write, review, and practice evacuation and emergency plans for severe weather with girls. In the event of a storm, take shelter away from tall objects (including trees, buildings, and electrical poles). Find the lowest point in an open flat area. Squat low to the ground on the balls of the feet, and place hands on knees with head between them.
Use the buddy system. Girls are divided into teams of two. Each girl chooses a buddy and is responsible for staying with her buddy at all times, warning her buddy of danger, giving her buddy immediate assistance if safe to do so, and seeking help when the situation warrants it. If someone in the group is injured, one person cares for the patient while two others seek help.
Review plans upon arrival. Adults obtain a copy of the park guide—to facilitate the visit and gain important information on park policies and the location of restrooms and the first-aid station. Adults pay special attention to any safety tips or warnings and share this information with the girls. Adults discuss plans for the visit with girls, and set a place to meet in case of separation from the group.
155
Girls respect theme-park rules and take general safety precautions. Each girl is instructed to consider her own personal limitations with regard to rides: how she is affected by height, speed, movement, flashing lights. Theme parks have policies and signs restricting access to certain rides because of height, weight, or other criteria. Adults instruct girls to look for and comply with all safety-related signs and instructions given by ride operators. In extremely hot weather, girls go on rides and do other outdoor activities in the morning and late afternoon hours, and go inside for meals, stage shows, and so on during the warmest time of the day. On rides, girls and adults remain seated and always keep their arms and legs inside the car at all times. Seat belts or restraint bars are always used and are never removed during rides. Any unsafe conditions, such as slippery floors, broken seat belts, and nonfunctioning exit signs are reported to the nearest park attendant.
Keep track of girls’ whereabouts. Conduct a head count before and after activities. Ensure that girls know where to go and how to act when confronted by strangers or intruders.
Theme Park Link
International Association of Amusement Parks and Attractions: www.iaapa.org