Embed Size (px)
Citation preview
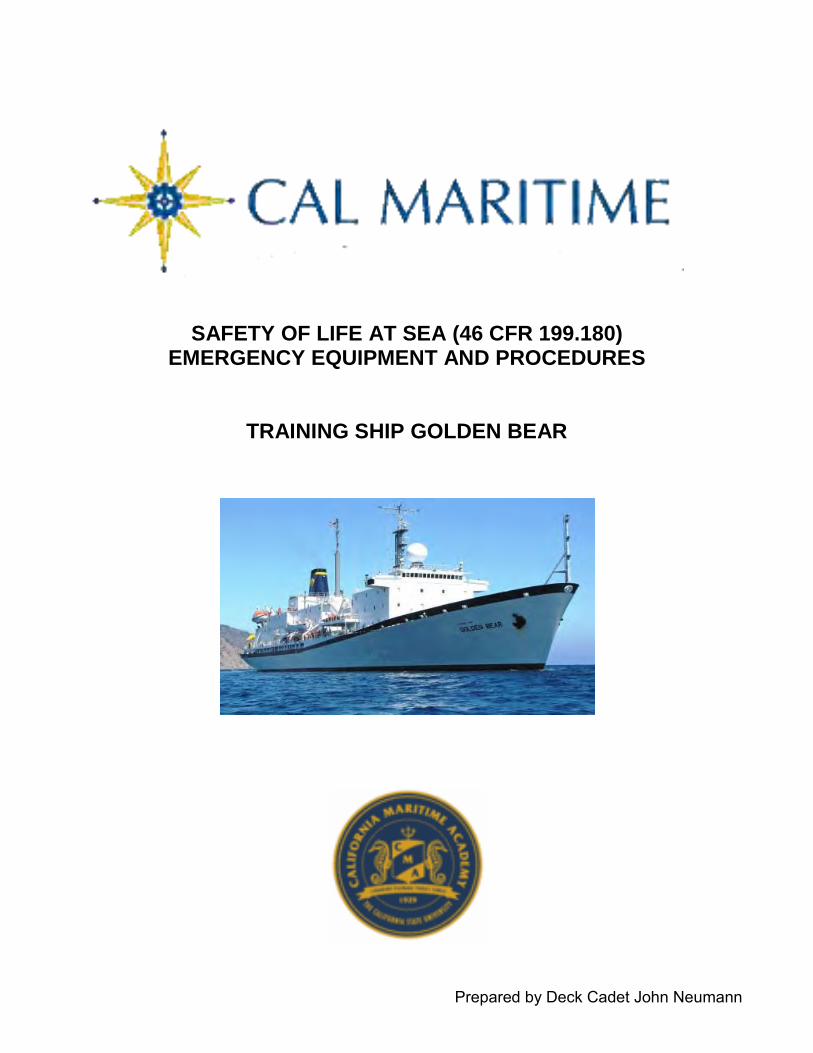
Prepared by Deck Cadet John Neumann
SAFETY OF LIFE AT SEA (46 CFR 199.180) EMERGENCY EQUIPMENT AND PROCEDURES
TRAINING SHIP GOLDEN BEAR
TSGB Emergency Equipment and Procedures
Contents
Station Bill and Mustering Procedure 3 Hazards of Exposure 3 Life Jackets, Immersion Suits, and Anti-exposure Suits 4 Life Buoys 5 Radio Lifesaving Appliances 6 Pyrotechnics and Line Throwing Apparatus 8 Lifeboats 1-4 Launching and Operating Procedures 9 Lifeboats 5-6 Launching and Operating Procedures 13 Lifeboat Survival Equipment Inventory 16 Liferafts 18 Lifeboat and Liferaft Equipment 19 Rigid Hull Inflatable Boat Launching and Operation Procedures 20 Illumination of Survival Craft Launching Areas 21 Self-Contained Breathing Apparatus 22 Emergency Escape Breathing Devices 23 Portable Fire Extinguishers 24 Methods of Retrieval 25

TSGB Emergency Equipment and Procedures
3
Station Bill and Mustering Procedure
All crewmembers and passengers are to report immediately to their emergency or boat station dressed and ready to perform the tasks specified by the ship’s Station Bill. Emergency muster will be taken by the station’s Person in Charge or his/her designate, and will be brought to the ship’s muster team stationed in the chart room aft of the bridge. In the event of a fire, emergency, or abandon ship situation, personnel are to transit as much as possible via the ship’s exterior to their specified station. Attention should be given to emergency signage is posted in various places around the vessel, designating muster areas, escape routes, medical facilities, and stair tower traffic directions.
The vessel’s station bill designates specific alarm signals, muster stations, and emergency duties to all
personnel. All aboard are assigned billet numbers, which organize fire and emergency response, abandon ship procedures, and man overboard situations. Upon arriving to the Training Ship Golden Bear, all persons must familiarize themselves with the Station Bill and their assignments. Station Bills are located in the bridge, mess rooms, and outside the Chief Mate’s Office.
Emergency Signals:
1. Fire and Emergency: Continuous sounding of the general alarm bells and ship’s whistle for a period of at least 10 seconds.
2. Abandon Ship: More than six short blasts and one prolonged blast on the whistle and same signal on the
general alarm bells.
3. Man Overboard: Hail and pass the works “Man Overboard” to the bridge. The bridge will sound three prolonged blasts on the whistle and general alarm bells.
Signals for handling boats:
1. Lower Boats: One short blast on whistle.
2. Stop lowering Boats: Two short blasts on whistle.
3. Dismissal from stations: three short blasts on whistle. Hazards of Exposure One of the greatest concerns when abandoning ship is exposure to the environment, especially in cold water. Hypothermia is the decrease in a person’s core temperature, and can occur within minutes of entering water or suffering from exposure to extreme cold. Symptoms include violent shivering, muscle stiffness, difficulty breathing, loss of manual dexterity, mental confusion, and loss of consciousness. Death will follow severe hypothermia without treatment and warming of the victim. Hazardous environments are not always obvious. Water temperatures of 70°F can result in hypothermia as the body cannot generate heat as quickly as it is lost to the water. Hypothermia can set in when out of water as well, especially when wet and exposed to wind for extended periods. The best method in preparation for exposure to cold is the use of warm clothing. This includes wool and synthetic materials, personal floatation devices, wet suits, dry suits, immersion suits, thermal protective aids, etc. It is also important to shed wet clothing such as cotton when in cold weather as it greatly increases the rate of heat loss to the environment.

TSGB Emergency Equipment and Procedures
4
Immersion Suits
Immersion suits are designed to temporarily insulate the wearer from temperature hazards posed by the water in abandon ship situations. SOLAS 74-83 regulations require these suits to be designed so as to be donned in less than one minute and to offer the same level of buoyancy and visibility to the wearer as would a personal floatation device. Additional items fitted to immersion suits include a buoyancy bladder with a one way fill tube and valve, a whistle on a lanyard, retroreflective tape, and a water activated light. The adult universal size fits body weights between 110 to 330lbs.
Personal Floatation Devices
Personal Floatation devices (PFDs) are issued to every person upon boarding, and
are maintained in the crewman’s or passenger’s berthing while underway. Type 1 Off-Shore PFDs are designed to provide approximately 20-25 pounds of buoyant force to the wearer when submerged, and are fitted with retroreflective tape, a whistle on a lanyard, and a water activated light. The vessel’s name and PDF size is printed on the fabric, with child sizes worn by persons weighing less than 90 pounds. An additional 10 percent of the vessel’s required carriage must be of Child size. PFDs may be worn beneath Thermal Protective Aids, and should be worn at all times after abandoning ship.
Donning Instructions: 1. If provided time, remove shoes or cover with plastic
bags for easier entry. 2. Don the suit as you would a pair of coveralls. 3. Pull hood over head. 4. Close zipper fully. 5. Adjust wrist and ankle bands. 6. Close face flap. 7. Once in water, depress mouthpiece and blow through
air bladder tube to inflate for additional buoyancy.
Donning Instructions: 1. Make certain body strap is on outside of preserver.
Put arms into openings and tie neck tapes. 2. Pull lower tie tapes tight and tie securely. Attach
body strap with snap and D-ring assembly and pull tight.
3. If necessary to jump overboard, hold PFD securely at upper front chest opening until in the water.

TSGB Emergency Equipment and Procedures
5
Thermal Protective Aid (TPA)
Thermal protective aids are constructed from light weight, reflective material and designed to reduce the amount of body heat wearers loose to the environment. The donning of TPAs will delay the ill effects of cold weather such as hypothermia.
Life Buoys
Life buoys aid in survival and the rapid response to man overboard situations and are readily available at multiple locations along the ship’s side and exterior locations. The assistance of a life buoy increases the buoyancy and visibility of a victim fallen overboard, thus greatly increasing chances of successful recovery. Life buoys must be accessible and unsecured by line or any mechanical fastenings to ensure easy deployment. Many possess additional equipment to further assist in locating overboard victims:
Orange Smoke Canisters: One life buoy on each side of the vessel must be fitted with 15 minute orange smoke canisters to assist in survivor location during daylight. These additions, along with water lights, are fitted to both bridge wing life buoys and are activated upon release. Buoyant Line: One life buoy on each side of the vessel must be fitted with buoyant line, required to be twice as long as the distance between the water to its stowed position when the vessel is in her lightest condition, but not less than 100 feet. These lines are black and have a breaking strength of at least 1,124 pounds. Water Lights: Battery operated self-igniting water lights are required to be secured to half of the vessel’s life buoys. These lights produce a white strobe lite and are stored upside-down in non-restricting brackets. Testing of the water lights is done by removing the unit from its bracket and turning right-side-up.
Donning instructions: 1. Don lifejacket and as much clothes as possible. 2. Remove TPA from plastic vacuum bag and unfold onto deck. 2. Step into TPA and place arms in sleeves. Pull hood over head. 3. Zip TPA and tighten hood drawstring.
NOTE: If entering water, discard TPA and swim away.

TSGB Emergency Equipment and Procedures
6
Electronic Position Indicating Radio Beacon (EPIRB)
Electronic Position-Indicating Radio Beacons operate on the 406MHz frequency in conjunction with the international COSPAS-SARSAT system. Once activated, the vessel’s information contained in a 16-digit hexadecimal code, and approximate position will be relayed to shore side Rescue Coordination Centers where the search and rescue effort is organized. Some EPIRBS, like the Jotron Tron 40GPS, are built with GPS receivers and will transmit the beacon’s exact position attached to the hexadecimal code. EPIRBs are designed to release and activate automatically in the event of submersion. They are housed in protective hydrostatically releasing cases and should never be tied or secured to the vessel itself. In addition to the 406MHz transmission, EPIRB also transmits a homing signal on the 121.5MHz frequency to assist search and rescue operations in locating victims. In an emergency, the unit must remain ON after activation to properly alert search and rescue efforts.
Automatic Operation:
1. EPIRB will release automatically from the bracket when submerged to a depth of 2-4 meters. EPIRBs are buoyant, and will float to the surface before automatically transmitting a distress signal.
2. EPIRB will begin transmitting if removed from bracket manually and put into water. 3. EPIRB will cease transmission if removed from water and dried off, or if placed
back in bracket.
Manual Operation: 1. Release EPIRB from bracket by removing locking pin and washer. 2. Break the seal and remove the locking pin that activates the unit’s main activation
switch. 3. Push the sliding switch to the ON/EMERGENCY position. 4. The LED indicator, located at the top of the EPIRB, will start flashing, indicating
that the EPIRB is operating. In addition, the strobe light will start to operate. The LED indicator will turn off after a few seconds.
5. If possible keep the EPIRB in an open area, away from metal objects (ship construction etc.) that may limit the satellite coverage.
6. Transmission can be stopped by moving switch to the READY position.
Manual Testing of EPIRB:
1. Release EPIRB from bracket by removing locking pin and washer. 2. Press spring loaded switch on top of the EPIRB to the test position. Keep
hands away from the upper part of the EPIRB (away from the antenna). 3. A successful test will consist of a series of blinks on the LED test-indicator,
followed by a continuous light and a strobe flash after approximately 15 seconds.
4. If the EPIRB fails to show a continuous light, this indicates a malfunction. 5. Following a successful test, release switch and place the EPIRB back into
the bracket for stowage.

TSGB Emergency Equipment and Procedures
7
Survival Craft Radios
Survival Craft Radios are used in abandon ship situations as means of communication between multiple survival craft, the ship, and rescue operations in the vicinity. The radios can operate on many different VHF channels, including channel 16 and 6. Radios are assigned to each lifeboat, and are maintained in the vessels chart room.
Search and Rescue Transponders (SART)
Search and Rescue Transponders aid in the detection of survival craft and are
essential items to be taken aboard lifeboats when abandoning ship. A SART will detect X-Band radar signals of nearby vessels and will respond with a series of pulses on the same frequency. This results in distinctive arcs on the X-Band radar display, and direct search and rescue efforts towards the source. The effective range of a SART is approximately 12 nautical miles, but will increase depending on the unit’s height above the water. Two different types of SARTS maintained aboard the T.S. Golden Bear: Jotron X-96960 and McMurdo RT9-3 9GHz Transponders
Operating Instructions:
1. Initiate communication on Channel 16 2. Push arrows to switch between channels. 3. Push “CALL” to select the call channel, which can be pre-programmed and may be used
to store your most often used channels. 4. Push “CH” to return to the condition before selecting the call channel, and to select other
operating channels. NOTE: This radio possesses both volume and squelch settings that must be adjusted for effective communication.
Jotron: Starting Instructions:
1. Break the seal. 2. Pull the locking pin and check that the switch is in the “ON”
position. An audible “beep” will be heard and the LED indicator starts flashing.
3. Place (hold) the transponder in a vertical position as high as possible. If the electronic unit is separated from the battery unit, the battery unit must be placed such that the light or audio signals may be observed. When the Tron-SART is interrogated by a radar station, the light and audio indicators will be activated.
McMurdo: Starting Instructions:
1. To activate, pull ring and press black button located on SART side.
2. Mount 1 meter high with attached mast.
TSGB Emergency Equipment and Procedures
8
Pyrotechnics
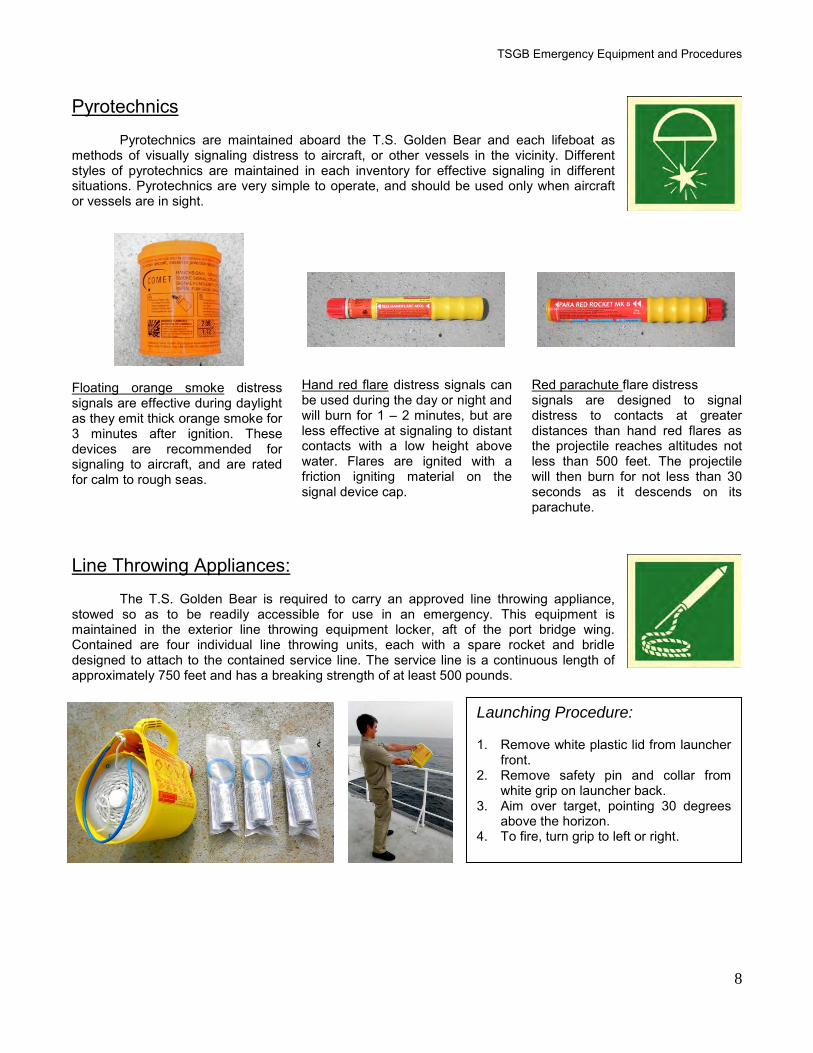
Pyrotechnics are maintained aboard the T.S. Golden Bear and each lifeboat as methods of visually signaling distress to aircraft, or other vessels in the vicinity. Different styles of pyrotechnics are maintained in each inventory for effective signaling in different situations. Pyrotechnics are very simple to operate, and should be used only when aircraft or vessels are in sight.
Floating orange smoke distress signals are effective during daylight as they emit thick orange smoke for 3 minutes after ignition. These devices are recommended for signaling to aircraft, and are rated for calm to rough seas.
Hand red flare distress signals can be used during the day or night and will burn for 1 – 2 minutes, but are less effective at signaling to distant contacts with a low height above water. Flares are ignited with a friction igniting material on the signal device cap.
Red parachute flare distress signals are designed to signal distress to contacts at greater distances than hand red flares as the projectile reaches altitudes not less than 500 feet. The projectile will then burn for not less than 30 seconds as it descends on its parachute.
Line Throwing Appliances: The T.S. Golden Bear is required to carry an approved line throwing appliance, stowed so as to be readily accessible for use in an emergency. This equipment is maintained in the exterior line throwing equipment locker, aft of the port bridge wing. Contained are four individual line throwing units, each with a spare rocket and bridle designed to attach to the contained service line. The service line is a continuous length of approximately 750 feet and has a breaking strength of at least 500 pounds.
Launching Procedure: 1. Remove white plastic lid from launcher
front. 2. Remove safety pin and collar from
white grip on launcher back. 3. Aim over target, pointing 30 degrees
above the horizon. 4. To fire, turn grip to left or right.

TSGB Emergency Equipment and Procedures
9
Open Lifeboats (No.1 – 4)
Lifeboats 1, 2, 3 and 4 are mounted on gravity launching track davits with embarkation on the 01 deck. Lifeboats 1 and 2 have 53 person capacities, while 3 and 4 have 55 person capacities as they do not possess motors. Each open lifeboat is secured in identical davit types and procedures used for launch and recovery are the same. The finall stage of launching cannot be conducted solely by passengers within the lifeboat, as lowering the lifeboat requires a person to remain on the embarkation deck to operate the davit brake. Once fully lowered, the lifeboat can be accessed by the Jacobs Ladder, stowed and lowered from the embarkation deck.
Launching Lifeboats 1, 2, 3, and 4:
1. Cap lifeboat drain plug. Free manropes. 2. Ensure tricing pendants are correctly secured. 3. Secure sea painter forward to designated cleat,
outboard of any obstructions. 4. Release lifeboat gripes, clear stopper bars of
track ways 5. Release hand brake by raising brake handle,
controlling speed with hand brake and easing lifeboat to embarkation deck.
6. Embark passengers 7. Secure frapping lines from davit track ways to
lifeboat falls. 8. Release tricing pennants.
9. Lower lifeboat to water
WARNING: Do not throw release gear handle until lifeboat is on water’s surface. Releasing prematurely causes boat to drop. This can lead to serious injury or death.
10. Once lifeboat reaches water, release Rottmer securing pin and turn Rottmer release handle 180 degrees in boat. Both hooks will release simultaneously, freeing lifeboat.
TSGB Emergency Equipment and Procedures
10
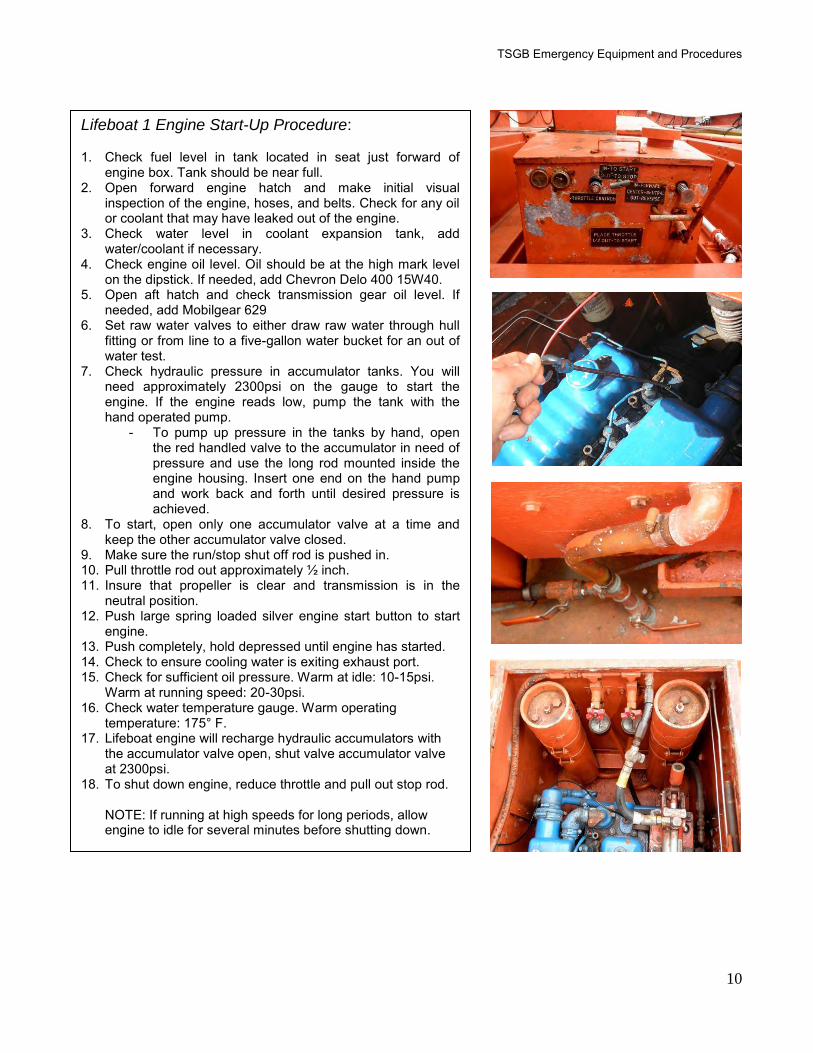
Lifeboat 1 Engine Start-Up Procedure: 1. Check fuel level in tank located in seat just forward of
engine box. Tank should be near full. 2. Open forward engine hatch and make initial visual
inspection of the engine, hoses, and belts. Check for any oil or coolant that may have leaked out of the engine.
3. Check water level in coolant expansion tank, add water/coolant if necessary.
4. Check engine oil level. Oil should be at the high mark level on the dipstick. If needed, add Chevron Delo 400 15W40.
5. Open aft hatch and check transmission gear oil level. If needed, add Mobilgear 629
6. Set raw water valves to either draw raw water through hull fitting or from line to a five-gallon water bucket for an out of water test.
7. Check hydraulic pressure in accumulator tanks. You will need approximately 2300psi on the gauge to start the engine. If the engine reads low, pump the tank with the hand operated pump.
- To pump up pressure in the tanks by hand, open the red handled valve to the accumulator in need of pressure and use the long rod mounted inside the engine housing. Insert one end on the hand pump and work back and forth until desired pressure is achieved.
8. To start, open only one accumulator valve at a time and keep the other accumulator valve closed.
9. Make sure the run/stop shut off rod is pushed in. 10. Pull throttle rod out approximately ½ inch. 11. Insure that propeller is clear and transmission is in the
neutral position. 12. Push large spring loaded silver engine start button to start
engine. 13. Push completely, hold depressed until engine has started. 14. Check to ensure cooling water is exiting exhaust port. 15. Check for sufficient oil pressure. Warm at idle: 10-15psi.
Warm at running speed: 20-30psi. 16. Check water temperature gauge. Warm operating
temperature: 175° F. 17. Lifeboat engine will recharge hydraulic accumulators with
the accumulator valve open, shut valve accumulator valve at 2300psi.
18. To shut down engine, reduce throttle and pull out stop rod. NOTE: If running at high speeds for long periods, allow engine to idle for several minutes before shutting down.
TSGB Emergency Equipment and Procedures
11
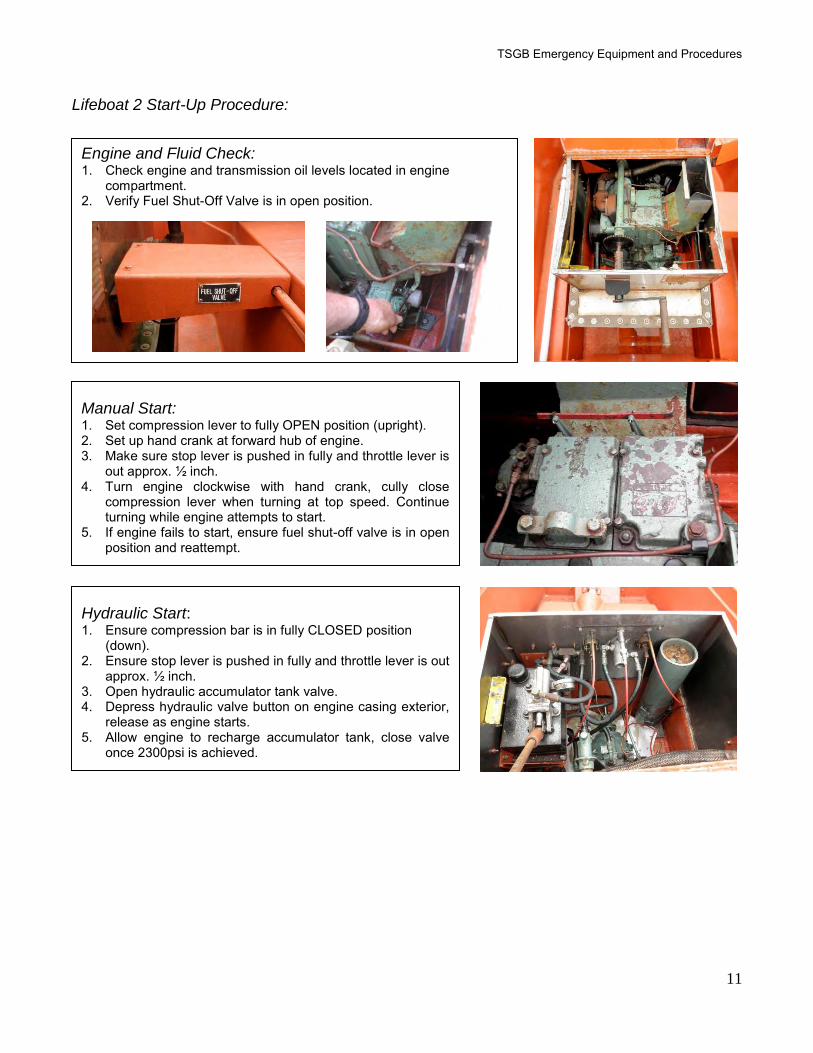
Lifeboat 2 Start-Up Procedure:
Manual Start: 1. Set compression lever to fully OPEN position (upright). 2. Set up hand crank at forward hub of engine. 3. Make sure stop lever is pushed in fully and throttle lever is
out approx. ½ inch. 4. Turn engine clockwise with hand crank, cully close
compression lever when turning at top speed. Continue turning while engine attempts to start.
5. If engine fails to start, ensure fuel shut-off valve is in open position and reattempt.
Hydraulic Start: 1. Ensure compression bar is in fully CLOSED position
(down). 2. Ensure stop lever is pushed in fully and throttle lever is out
approx. ½ inch. 3. Open hydraulic accumulator tank valve. 4. Depress hydraulic valve button on engine casing exterior,
release as engine starts. 5. Allow engine to recharge accumulator tank, close valve
once 2300psi is achieved.
Engine and Fluid Check: 1. Check engine and transmission oil levels located in engine
compartment. 2. Verify Fuel Shut-Off Valve is in open position.

TSGB Emergency Equipment and Procedures
12
Hoisting Lifeboats 1, 2, 3, 4: 1. Reset Lifting hooks and Rottmer release lever before
approaching the falls. Fully secure, by throwing release handle 180 degrees. Be sure handle is held in place by securing toggle pin.
2. Engage fall blocks into lifting hooks. Slack falls if required.
3. Throw emergency disconnect switch to “ON”. Hoist by operating winch controls. Hoist to davit head and reset tricing pendants.
4. Lower boat to embarkation deck and disembark passengers, then clear away frapping lines
5. Test limit switches before bringing boat home. Hoist boat up track ways. Stop just before limit switch.
WARNING: Do not use limit switch as an automatic stop. If equipment continues to run with control in the “OFF” position or if a limit switch fails to function, immediately switch main disconnect switch to “OFF”.
NOTE: Always switch main disconnect switch to “OFF” before engaging hand crank.
6. Throw emergency disconnect switch to “OFF”. 7. Secure stopper bars and gripes,
TSGB Emergency Equipment and Procedures
13
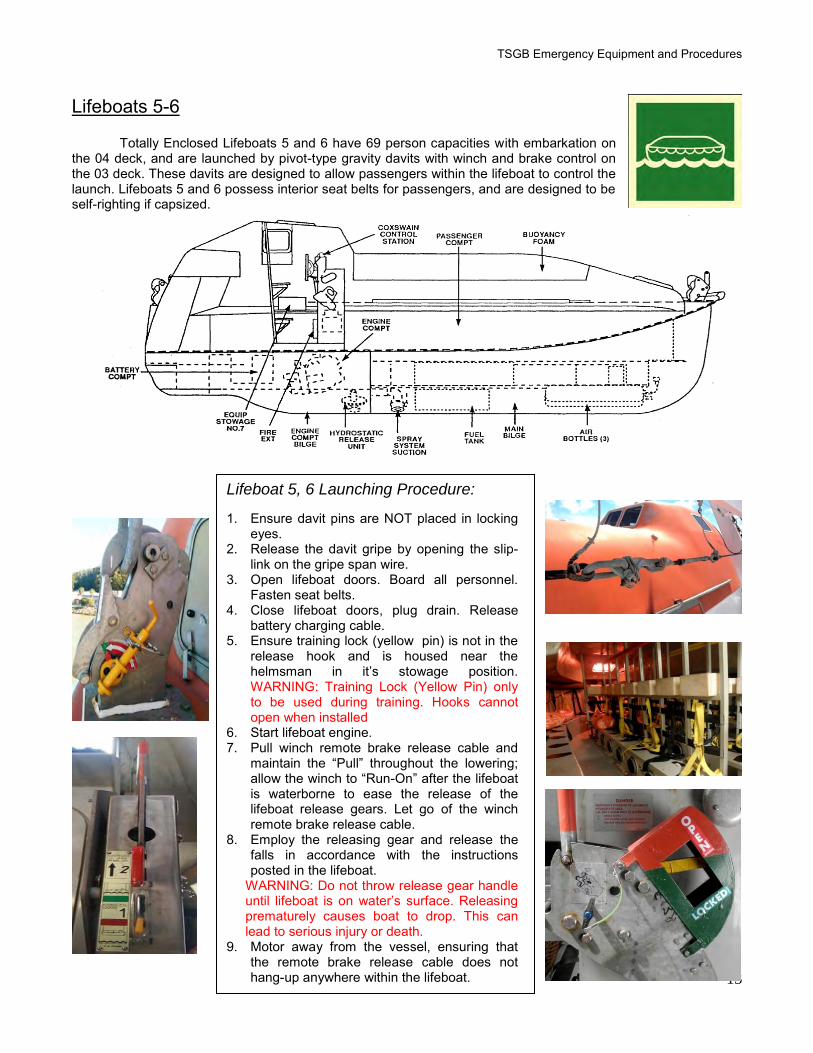
Lifeboats 5-6 Totally Enclosed Lifeboats 5 and 6 have 69 person capacities with embarkation on the 04 deck, and are launched by pivot-type gravity davits with winch and brake control on the 03 deck. These davits are designed to allow passengers within the lifeboat to control the launch. Lifeboats 5 and 6 possess interior seat belts for passengers, and are designed to be self-righting if capsized.
Lifeboat 5, 6 Launching Procedure: 1. Ensure davit pins are NOT placed in locking
eyes. 2. Release the davit gripe by opening the slip-
link on the gripe span wire. 3. Open lifeboat doors. Board all personnel.
Fasten seat belts. 4. Close lifeboat doors, plug drain. Release
battery charging cable. 5. Ensure training lock (yellow pin) is not in the
release hook and is housed near the helmsman in it’s stowage position. WARNING: Training Lock (Yellow Pin) only to be used during training. Hooks cannot open when installed
6. Start lifeboat engine. 7. Pull winch remote brake release cable and
maintain the “Pull” throughout the lowering; allow the winch to “Run-On” after the lifeboat is waterborne to ease the release of the lifeboat release gears. Let go of the winch remote brake release cable.
8. Employ the releasing gear and release the falls in accordance with the instructions posted in the lifeboat.
WARNING: Do not throw release gear handle until lifeboat is on water’s surface. Releasing prematurely causes boat to drop. This can lead to serious injury or death.
9. Motor away from the vessel, ensuring that the remote brake release cable does not hang-up anywhere within the lifeboat.

TSGB Emergency Equipment and Procedures
14
Lifeboat 5, 6 Start-Up Procedure:
NOTE: The engine may be started in the stowed position. The lifeboat’s keel-mounted heat exchanger will provide sufficient coolant heat transfer for the engine to run approximately five minutes while running the engine at idle out of water.
1. Push the engine shutdown knob to the full-in “RUN” position. This action opens the fuel supply valve to the engine fuel pump.
2. Verify both fuel valves between tank and injector pump is in the open position. 3. Ensure the transmission is in the neutral position. 4. Pull the engine control lever out from the control head and advance the lever slightly. 5. Switch the engine power supply switch from “OFF” to “ON”. The low oil pressure and the alternator
charging lights should come on. The electric starter can now be used to start the engine. 6. Depress the starter pushbutton to start the engine.
NOTE: Do not depress starter pushbutton for more than 20 seconds at a time. If the engine fails to start, perform the following:
(a) Ensure the engine shutdown knob and the throttle are in the correct positions, and that the power supply to the starting circuit is on. (b) If the engine does not fire, ensure the throttle is fully opened and reattempt to start the engine. (c) If the starter does not turn the engine, immediately turn the battery disconnect switch to battery bank position 2. Reattempt to start the engine. (d) If the starter still fails to turn the engine, move the battery disconnect switch to the “BOTH” position. This will place the two battery banks in parallel circuit. Re-attempt to start the engine.
NOTE: In an emergency, the fully enclosed lifeboat engines can be started by an auxiliary spring starter unit mounted to the after portion of the engine. Using the crank located in the lifeboat, the force necessary to start the engine will be achieved when the starter unit’s indicator glass displays red. With the transmission in neutral and engine shutdown knob in the “RUN” position, engage the auxiliary starter to start the engine.
TSGB Emergency Equipment and Procedures
15
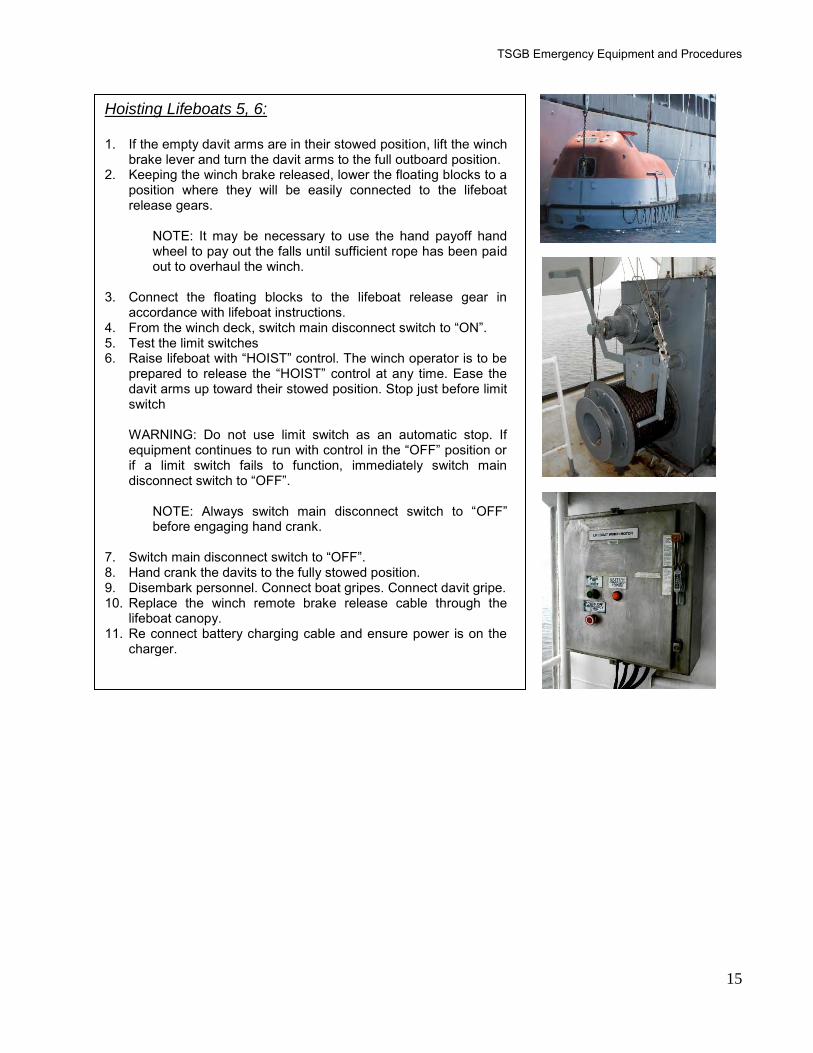
Hoisting Lifeboats 5, 6: 1. If the empty davit arms are in their stowed position, lift the winch
brake lever and turn the davit arms to the full outboard position. 2. Keeping the winch brake released, lower the floating blocks to a
position where they will be easily connected to the lifeboat release gears.
NOTE: It may be necessary to use the hand payoff hand wheel to pay out the falls until sufficient rope has been paid out to overhaul the winch.
3. Connect the floating blocks to the lifeboat release gear in
accordance with lifeboat instructions. 4. From the winch deck, switch main disconnect switch to “ON”. 5. Test the limit switches 6. Raise lifeboat with “HOIST” control. The winch operator is to be
prepared to release the “HOIST” control at any time. Ease the davit arms up toward their stowed position. Stop just before limit switch
WARNING: Do not use limit switch as an automatic stop. If equipment continues to run with control in the “OFF” position or if a limit switch fails to function, immediately switch main disconnect switch to “OFF”.
NOTE: Always switch main disconnect switch to “OFF” before engaging hand crank.
7. Switch main disconnect switch to “OFF”. 8. Hand crank the davits to the fully stowed position. 9. Disembark personnel. Connect boat gripes. Connect davit gripe. 10. Replace the winch remote brake release cable through the
lifeboat canopy. 11. Re connect battery charging cable and ensure power is on the
charger.
TSGB Emergency Equipment and Procedures
16
Lifeboat Survival Equipment Both the T.S. Golden Bear’s open and totally enclosed lifeboats are equipped in accordance with 46 CFR 199.175 for vessels on international voyages. Monthly inventories and general inspections of the following required lifeboat equipment is performed:
1. Bailer – Buoyant, designed for manual bailing of collected water from lifeboat bilge.
2. Bilge Pump – Hand operated reciprocating pump for emptying collected water from lifeboat bilge.
3. Boat Hook (2) – Multipurpose hook and pole for retrieving and fending.
4. Bucket (2) – Multipurpose container of corrosion-resistant material, either buoyant or attached by lanyard.
5. Can opener (3) – May be attached to the required jackknife.
6. Compass – The compass and its mounting arrangement must be permanently fitted at the steering position in totally enclosed lifeboats, and provided with a suitable mounting arrangement in open lifeboats so as to protect it from weather.
7. Dipper – Rustproof container on 3 foot lanyard, designed for multipurpose use.
8. Drinking Cup – Rustproof, graduated, and of breakage resistant-material.
9. Fire Extinguisher – Type B-C (flammable liquid and electrical), size II or larger.
10. First Aid Kit – Contains basic medical supplies, including instructions, sterile compression bandages, polyethylene gloves, scissors, antiseptic wipes, anti-diarrheal medicines, and analgesic medication.
11. Fishing kit – Includes various tackle, such as hooks, swivels, weights, and line.
12. Flashlight – Suitable for morse signaling. One set of spare batteries and bulb in a waterproof container are provided.
13. Hatchet (2) – Stowed in brackets near the release mechanisms at opposite ends of the boat.
14. Heaving line (2) – Buoyant line at least 99 feet in length, with a buoyant rescue quoit attached to one end.
15. Instruction card – Waterproof and contains instructions for immediate action upon embarking the lifeboat or liferaft.
16. Jackknife – Folding general purpose knife attached to the lifeboat by lanyard.
17. Knife – Non-folding knife with a buoyant handle. For knives equipped on liferafts, they must be designed to minimize the possibility of damage to the fabric portions of the hull.
18. Ladder – Entrance ladder capable of being used at either side or the stern of the boat to allow persons in the water to board.
19. Mirror, signaling – Designed to reflect the sun’s rays to attract attention from passing vessels or aircraft.
20. Oars, units paddles – Buoyant, designed and supplied to fit the lifeboat or liferaft. Must possess an oarlock or equivalent device permanently attached to the boat or by lanyard. Each oar should possess the vessel’s name.
21. Painter (2) – One painter on a lifeboat must be attached by a painter release device at the forward end of the lifeboat, and to be maintained aboard the lifeboat after releasing from the ship. The second painter is secured towards the forward portion of the boat, is used as a method of launching and securing the lifeboat, and remains with the ship after the lifeboat is released.
22. Provisions – Lifeboats are provisioned with 10,000 kilojoules (2,390 calories) of food rations per person.
23. Pump – The pump or bellows are operated manually and arranged so it is capable of inflating any part of the inflatable structure of the rescue boat.
24. Radar reflector – The radar reflector provides a radar target to assist rescuers locate the survival craft. It is comprised of multiple interlocking plates, and should be

TSGB Emergency Equipment and Procedures
17
erected on the mounting provided as soon as possible.
25. Rainwater collection device – Item is arranged to collect falling rain and direct it into the water tanks in the lifeboat.
26. Repair kit – Required for inflated or rigid-inflated rescue boats, including sealing clamps, patches, and cement compatible with the tube fabric.
27. Sea anchor – A sea anchor is designed to slow the lifeboat’s speed of drift from her original position, and to keep the lifeboat’s bow directed into the wind and sea.
28. Searchlight – Waterproof and battery operated, must be able to provide three hours of continuous operation. Must possess two spare bulbs.
29. Seasickness kit – Seasickness medication should be taken immediately upon entering the lifeboat. Kits provide enough medication for every passenger for 48 hours.
30. Smoke signal (2) – Buoyant smoke signal cartridges are particularly effective for signaling aircraft are primarily are for use during daylight. They emit dense orange smoke for not less than 3 minutes.
31. Hand flare signal (6) – Red hand flares, designed for use during day or night, provide greater effectiveness with height above water.
32. Parachute flare signal (4) – Red parachute flares, designed for use during day or night. Primarily designed to signal to vessels as the rocket propelled cartridge will exceed an altitude of not less than 300 meters, and burn for not less than 40 seconds.
33. Skates and fenders – Such appliances are designed to facilitate launching by preventing damage to the lifeboats from contact with the side of the vessel.
34. Sponge – The sponge is used to soak up water, either from the ship’s bilge, or to collect condensation for drinking.
35. Survival instructions – These documents are printed on waterproof carding, and describe vital actions to be taken aboard survival crafts and ashore, including initial actions once embarking, information on first aid treatment, equipment use, rationing, etc.
36. Table of lifesaving signals – This document is printed on a waterproof card, and describes internationally recognized signals used to signal distress.
37. Thermal protective aids – TPAs are constructed of thin, reflective material designed to reduce body heat lost to the environment. Vessels are required to provide TPAs for 10 percent of the lifeboat’s capacity.
38. Tool kit – Contains sufficient tools for minor adjustments to the engine ant its accessories. This will include a set of screw drivers, adjustable wrench, hammer, etc.
39. Towline – Lifeboats that also serve as the vessel’s rescue boat are required to carry a buoyant towline at least 50 meters in length with a breaking strength of not less than 3,000 pounds.
40. Water – Each lifeboat is required to carry enough water in sealed containers or pouches to supply all passengers with 3 liters per person. One third of this requirement may be met if the lifeboat possesses an approved manually-powered reverse osmosis desalinator.
41. Whistle – Corrosion resistant, ball-type or multi-tone whistle attached to a lanyard.
TSGB Emergency Equipment and Procedures
18
Liferafts
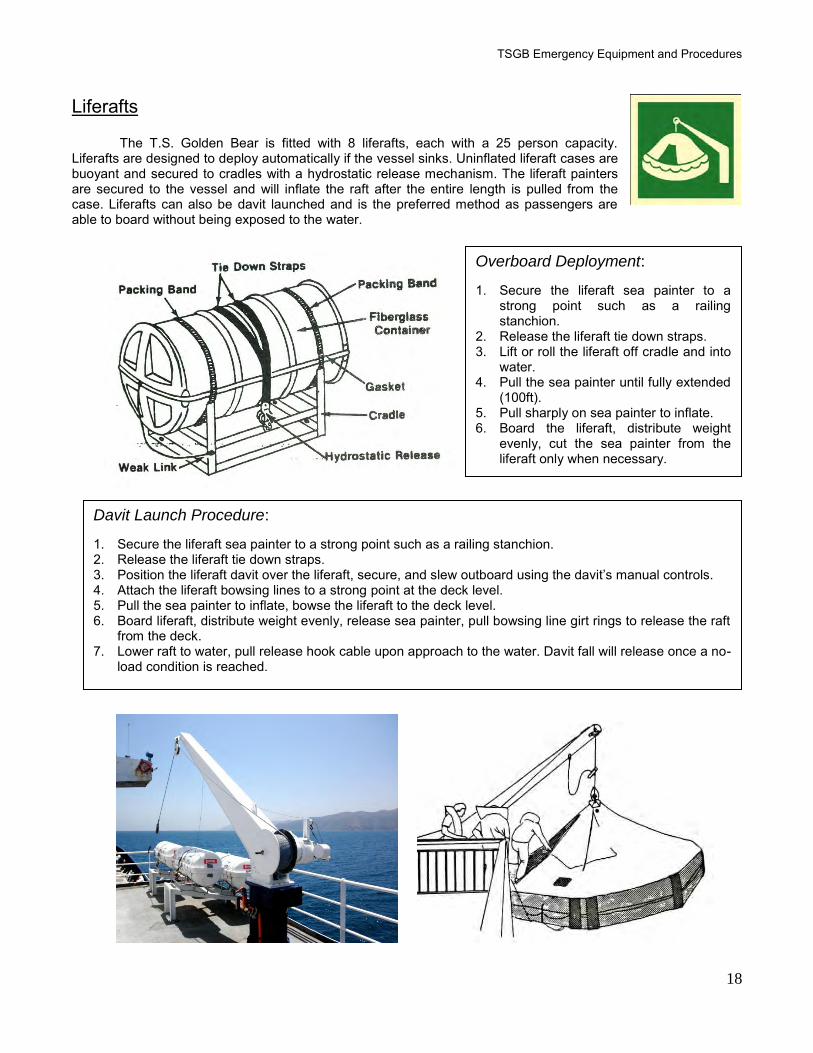
The T.S. Golden Bear is fitted with 8 liferafts, each with a 25 person capacity. Liferafts are designed to deploy automatically if the vessel sinks. Uninflated liferaft cases are buoyant and secured to cradles with a hydrostatic release mechanism. The liferaft painters are secured to the vessel and will inflate the raft after the entire length is pulled from the case. Liferafts can also be davit launched and is the preferred method as passengers are able to board without being exposed to the water.
Overboard Deployment: 1. Secure the liferaft sea painter to a
strong point such as a railing stanchion.
2. Release the liferaft tie down straps. 3. Lift or roll the liferaft off cradle and into
water. 4. Pull the sea painter until fully extended
(100ft). 5. Pull sharply on sea painter to inflate. 6. Board the liferaft, distribute weight
evenly, cut the sea painter from the liferaft only when necessary.
Davit Launch Procedure: 1. Secure the liferaft sea painter to a strong point such as a railing stanchion. 2. Release the liferaft tie down straps. 3. Position the liferaft davit over the liferaft, secure, and slew outboard using the davit’s manual controls. 4. Attach the liferaft bowsing lines to a strong point at the deck level. 5. Pull the sea painter to inflate, bowse the liferaft to the deck level. 6. Board liferaft, distribute weight evenly, release sea painter, pull bowsing line girt rings to release the raft
from the deck. 7. Lower raft to water, pull release hook cable upon approach to the water. Davit fall will release once a no-
load condition is reached.

TSGB Emergency Equipment and Procedures
19
Sea Anchors (Drogue)
Sea anchors are equipped on all lifeboats and liferafts. They are designed to stabilize survival craft in heavy sea by keeping the boat’s bow into the weather and by increasing the craft’s drag in rough waters. Additionally, a sea anchor will slow the boat’s speed of drift away from the vessel’s last known position. Some types of sea anchors (as represented in the diagram) will possess storm oil reservoirs at the cone apex, which when released will keep the sea surrounding the survival craft from breaking, and allow lifeboat passengers to stay drier. The TSGB sea anchors do not have a storm oil container.
Sea anchors are deployed by attaching the sea anchor to the lifeboat or liferaft, then trailing the sea
anchor out from the bow so as to keep it directed into the weather, and ensure that the drag line maintains the strain while the trip line remains slack. To recover, the sea anchor can be collapsed by pulling the trip line and hauling aboard. Radar Reflectors
Radar reflectors are maintained in lifeboat inventories as such boats do not serve
as quality reflectors themselves. Flat metal surfaces of these reflectors are detected at much greater ranges than the rounded fiberglass of the lifeboats, and are therefore important items with regards to detection. A radar reflector is comprised of three mutually perpendicular metallic plates, designed to provide reflecting pockets for incoming radar pulses from vessels in the vicinity. These items are to be constructed and rigged as high as possible soon after embarking the lifeboat. A boat hook may be employed as a mast to mount the radar reflector on, to ensure it’s visibility.
Liferaft Repair
Liferaft equipment inventories include repair kits if damage to the raft fabric should occur. The kit contains cement and fabric patches for damage to dry areas, and sealing clamps for damage in wet areas. To patch a hole in the liferaft, apply cement to the patch and damaged fabric. Allow cement to dry before applying a second coat. When the second coats are tacky, press the patch onto the cemented area and wait 24 hours to inflate the raft. Clamps are applied by inserting the bottom plate through the damaged fabric, and tightened against the top plate to form an air tight seal. If necessary, the hole can be cut larger to accommodate the clamp.

TSGB Emergency Equipment and Procedures
20
Rigid Hull Inflatable Boat
The T.S. Golden Bear is equipped with two rigid hull inflatable boats (RIHBs), No.10 and No.11, fitted with outboard engines and stowed above the quarter deck. The open lifeboat No.2 is officially recognized as the vessel’s Rescue Boat as the davit is gravity operated, but the RIHBs require minimal time to launch, are specifically built for water rescue, and therefore serve as the primary method for recovery of life from the water. The two RIHBs have different manufacturers, Ambar Marine and Alsafe, and while possessing some differences in design, they share the same principle characteristics and functions. RIHBs have a length overall of approximately 19 feet, a beam of 7.7 feet, and a dry weight of 1,500 pounds. The boats are designed for a capacity of 6 persons, and can operate at speeds over 28 knots.
Launching Procedure:
1. Remove boat cover, detach boat securing lines and wires. 2. Turn ON battery power. 3. Fully trim motor to upright position, verify sea painter clearance and attachment at RIHB and forward cleat. 4. Position respective stores crane whip above RHIB safety release hook with wire lifting sling. 5. Verify safety release hook lever is in LOCKED position (forward), attach crane whip with lifting pear to
safety release hook. 6. Maintain control with tag lines, hoist RHIB till clear of outboard railing. 7. Slew RIHB outboard. Position outboard of stores crane at deck edge and in contact with ship’s hull,
secure at bow and stern for embarkation. 8. Trim motor to operating position. 9. After embarkation, cast off bow and stern lines. Lower until RIHB is close to water’s edge. 10. Arm safety release hook by pulling back on handle. Turn wheel slightly so as to direct the boat’s bow
gently outboard upon entering water. 11. Once no-load condition is achieved, safety release hook will disengage. Control crane whip until clear. 12. Ride painter away from ship and release painter toggle.
Engine Starting Instructions:
1. Squeeze fuel primer bulb until it is firm. 2. Place control handle in NEUTRAL.
NOTE: Check that the lanyard stop switch is in the RUN position. 3. Turn the Key Switch to the ON position.
NOTE: A warning horn built into the system indicates Overheating, No Oil, or Low Oil conditions. 4. Turn toggle switch to START.
TSGB Emergency Equipment and Procedures
21
Embarkation Lighting
RHIB, lifeboat and liferaft embarkation areas aboard the T.S. Golden Bear are illuminated by flood lights controlled from the vessel’s bridge. Individual circuit breakers for these flood lights are contained in electrical panel EL-101, located on the starboard side just aft of the cadet chart table.
RHIB:
Breaker: Light Location: Illuminates: 19 03-77-1, 03-77-2 Liferaft Embarkation Areas
Liferafts:
Breaker: Light Location: Illuminates: 3 01-65-1, 01-65-2 Liferaft Launching Areas Port, Stbd 19 01-77-1, 01-77-2 Liferaft Embarkation Areas
Lifeboats:
Breaker: Light Location: Illuminates: 4 01-150-1, 01-150-2 Lifeboats 5, 6 Launching Areas 5 01-95-2, 01-125-1 Lifeboats 2, 3 6 01-125-2, 01-95-1 Lifeboats 1, 4 18 04-150-2, 04-160-2 Lifeboat 6 Embarkation Area 20 04-150-1, 04-160-1 Lifeboat 5 Embarkation Area
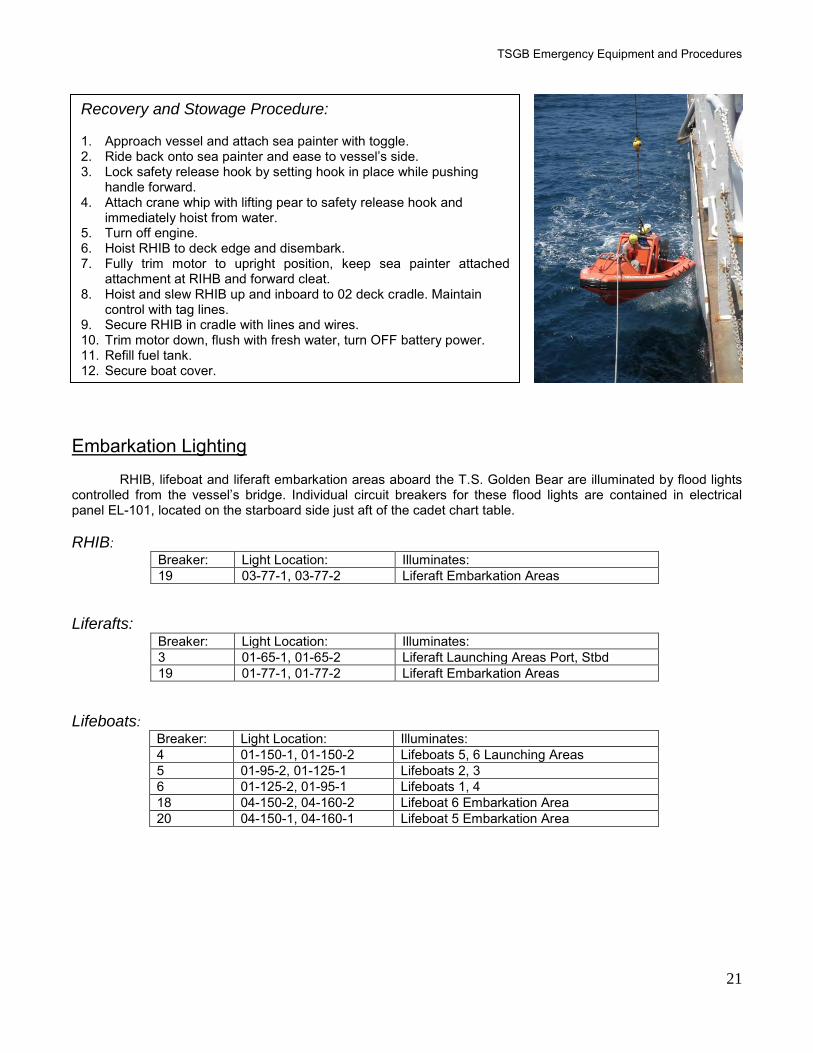
Recovery and Stowage Procedure: 1. Approach vessel and attach sea painter with toggle. 2. Ride back onto sea painter and ease to vessel’s side. 3. Lock safety release hook by setting hook in place while pushing
handle forward. 4. Attach crane whip with lifting pear to safety release hook and
immediately hoist from water. 5. Turn off engine. 6. Hoist RHIB to deck edge and disembark. 7. Fully trim motor to upright position, keep sea painter attached
attachment at RIHB and forward cleat. 8. Hoist and slew RHIB up and inboard to 02 deck cradle. Maintain
control with tag lines. 9. Secure RHIB in cradle with lines and wires. 10. Trim motor down, flush with fresh water, turn OFF battery power. 11. Refill fuel tank. 12. Secure boat cover.

TSGB Emergency Equipment and Procedures
22
Self-Contained Breathing Apparatus
SCBAs are designed to provide breathable air in atmospheres that post immediate danger to life and health. It is the responsibility of each fire squad member to check their equipment for form and function.
Donning the Apparatus:
1. Check cylinder contents gauge to ensure full charge 40 Bar.
2. Fully loosen shoulder straps and waist belt check for
twisting.
3. Take the weight of apparatus on shoulder straps.
4. Pull shoulder tabs away from body and straighten body
upright until apparatus rests comfortably on the hips.
5. Close the waist belt buckle and pull the ends of waste belt
until it fits securely, position regulator to reach controls.
Regulator Air Flow Test
1. Press the blue reset button.
2. Slowly and fully open the cylinder valve
(Counterclockwise). Whistle will sound momentarily.
3. Fully close the cylinder valve
4. After 60 seconds, check contents gauge and reopen the
cylinder valve. The gauge must not show more than a 145
psi increase in pressure (one radial mark on gauge face).
5. Fully Close the Cylinder valve.
6. Observe the contents gauge and;
a. Use the palm of your hand to cover outlet port.
b. Press the rubber cover to switch on the positive
pressure.
c. Vent the system by slowly lifting the palm of the
hand from the outlet port to maintain slow pressure
decrease.
7. Whistle must start to sound in the 870-725 psi range.
8. Fully vent the system. Press the reset button.
Donning the Face Mask:
1. Fully loosen the head straps.
2. Put chin in first and place the neck strap over the back of the
neck.
3. Tighten straps by pulling straight back.
4. Test positive pressure by blocking breathing line and
inhaling gently. Hold breath at least 10 seconds. Face mask
must stay collapsed against face.
5. Test exhalation valve by blocking breathing line and gently
exhale. If valve does not open, you will feel a rush of air on
your face. A first sharp exhalation may be needed to crack
the valve.
Pre Entry:
1. Open cylinder valve fully.
2. Connect breathing line to regulator and open main line valve.
3. Test by-pass valve. Crack valve and close quickly.
TSGB Emergency Equipment and Procedures
23
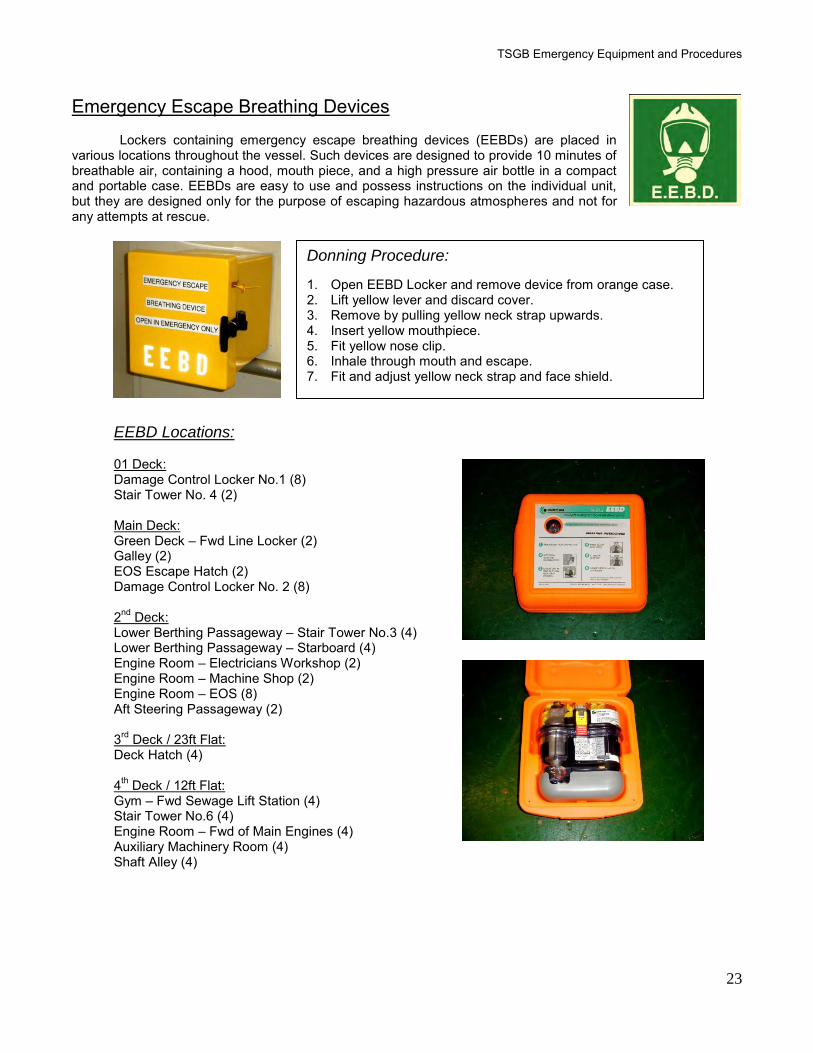
Emergency Escape Breathing Devices Lockers containing emergency escape breathing devices (EEBDs) are placed in various locations throughout the vessel. Such devices are designed to provide 10 minutes of breathable air, containing a hood, mouth piece, and a high pressure air bottle in a compact and portable case. EEBDs are easy to use and possess instructions on the individual unit, but they are designed only for the purpose of escaping hazardous atmospheres and not for any attempts at rescue.
EEBD Locations: 01 Deck: Damage Control Locker No.1 (8) Stair Tower No. 4 (2) Main Deck: Green Deck – Fwd Line Locker (2) Galley (2) EOS Escape Hatch (2) Damage Control Locker No. 2 (8) 2nd Deck: Lower Berthing Passageway – Stair Tower No.3 (4) Lower Berthing Passageway – Starboard (4) Engine Room – Electricians Workshop (2) Engine Room – Machine Shop (2) Engine Room – EOS (8) Aft Steering Passageway (2) 3rd Deck / 23ft Flat: Deck Hatch (4) 4th Deck / 12ft Flat: Gym – Fwd Sewage Lift Station (4) Stair Tower No.6 (4) Engine Room – Fwd of Main Engines (4) Auxiliary Machinery Room (4) Shaft Alley (4)
Donning Procedure:
1. Open EEBD Locker and remove device from orange case. 2. Lift yellow lever and discard cover. 3. Remove by pulling yellow neck strap upwards. 4. Insert yellow mouthpiece. 5. Fit yellow nose clip. 6. Inhale through mouth and escape. 7. Fit and adjust yellow neck strap and face shield.

TSGB Emergency Equipment and Procedures
24
Portable Fire Extinguishers
Fire extinguishers offer the first line of defense against fires, and are very effective in combating fires in the incipient stage. There are three primary extinguishing agents used in portable extinguishers aboard the T.S. Golden Bear, each designed to combat common shipboard categories of fire:
Water Extinguishers: Class A Fires – Ordinary Combustibles
Water fire extinguishers have a silver appearance and contain water under pressure. Small fires of ordinary combustibles, such as trash or wood, can be extinguished by aiming towards the base of the flame when discharging water extinguishers. Due to the high heat capacity of water, the fuel will cool to a temperature below that which it can continue to burn. But while water is an effective cooling agent, it is ineffective at containing flammable liquid fires and should NEVER be used on electrical equipment due to water’s conductivity.
CO2 Extinguishers: Class B Fires – Flammable Liquids Class C Fires – Electrical Fires
CO2 is an inert gas, and extinguishes fire through displacement of surrounding oxygen. CO2 fire extinguishers are best identified by the large nozzle. Such extinguishers aboard the T.S. Golden Bear are filled with 15 pounds of CO2, and are effective at extinguishing small to moderate sized flammable liquid fires depending on wind and ventilation. CO2 is the preferred agent to be used on electrical equipment as it leaves no residue or further damage. CO2 is not a cooling agent, and electrical equipment must be de-energized to prevent re-flash.
Dry Chemical Extinguishers: Class A Fires – Ordinary Combustibles Class B Fires – Flammable Liquids Class C Fires – Electrical Fires
Dry chemical fire extinguishers are effective at combating all fire types normally seen aboard ships. The extinguishing agent, commonly ammonium phosphate, inhibits combustion without the need of cooling the combustibles or displacing the surrounding oxygen. The extinguisher’s appearance is similar to the CO2 extinguisher, but can be differentiated by the significantly smaller nozzle. Bottle sizes are also smaller as they contain only 10 pounds of extinguishing agent.
TSGB Emergency Equipment and Procedures
25
Methods of Retrieval:
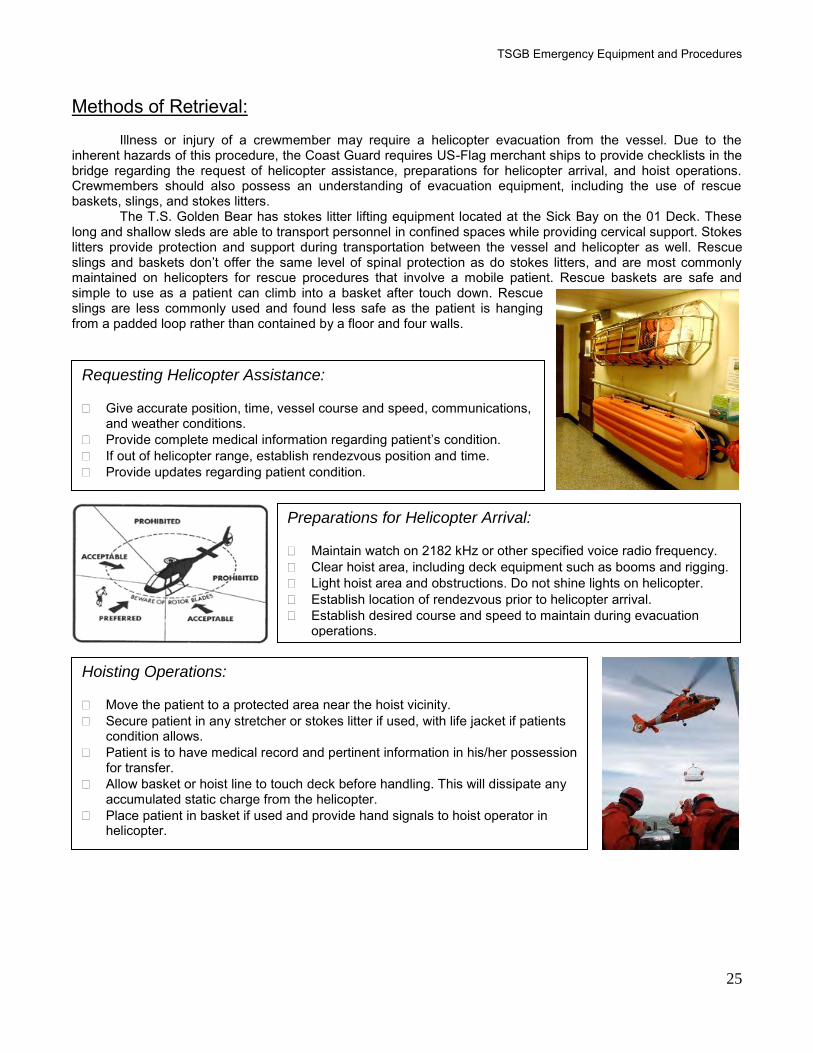
Illness or injury of a crewmember may require a helicopter evacuation from the vessel. Due to the inherent hazards of this procedure, the Coast Guard requires US-Flag merchant ships to provide checklists in the bridge regarding the request of helicopter assistance, preparations for helicopter arrival, and hoist operations. Crewmembers should also possess an understanding of evacuation equipment, including the use of rescue baskets, slings, and stokes litters.
The T.S. Golden Bear has stokes litter lifting equipment located at the Sick Bay on the 01 Deck. These long and shallow sleds are able to transport personnel in confined spaces while providing cervical support. Stokes litters provide protection and support during transportation between the vessel and helicopter as well. Rescue slings and baskets don’t offer the same level of spinal protection as do stokes litters, and are most commonly maintained on helicopters for rescue procedures that involve a mobile patient. Rescue baskets are safe and simple to use as a patient can climb into a basket after touch down. Rescue slings are less commonly used and found less safe as the patient is hanging from a padded loop rather than contained by a floor and four walls.
Requesting Helicopter Assistance: Give accurate position, time, vessel course and speed, communications,
and weather conditions. Provide complete medical information regarding patient’s condition. If out of helicopter range, establish rendezvous position and time. Provide updates regarding patient condition.
Preparations for Helicopter Arrival: Maintain watch on 2182 kHz or other specified voice radio frequency. Clear hoist area, including deck equipment such as booms and rigging. Light hoist area and obstructions. Do not shine lights on helicopter. Establish location of rendezvous prior to helicopter arrival. Establish desired course and speed to maintain during evacuation
operations.
Hoisting Operations: Move the patient to a protected area near the hoist vicinity. Secure patient in any stretcher or stokes litter if used, with life jacket if patients
condition allows. Patient is to have medical record and pertinent information in his/her possession
for transfer. Allow basket or hoist line to touch deck before handling. This will dissipate any
accumulated static charge from the helicopter. Place patient in basket if used and provide hand signals to hoist operator in
helicopter.