Embed Size (px)
Citation preview
Sage MAS 200 ERP
Installation andSystem Administrator's Guide
42NIN940-0110
This ve
rsion
of th
e soft
ware ha
s bee
n reti
red
© 1998-2010 Sage Software, Inc. All rights reserved. Sage, the Sage logos, and the Sage product and service names mentioned herein are registered trademarks or trademarks of Sage Software, Inc., or its affiliated entities. Crystal Reports is the registered trademark and technology of Business Objects SA. All other trademarks are the property of their respective owners.
Rev 01
Contents
Chapter 1 — Introduction 1Overview of Sage MAS 200 1How to Use This Manual 3Graphic Conventions 3Text Conventions 4
Chapter 2 — Installing Sage MAS 200 5TCP/IP Protocol 5
Basic Configuration 5Server Installation 7
Installation Process 7Installing Sage MAS 200 9Running the Sage MAS 200 Server Setup Program 11
Reinstalling the Server 20Selecting Installation Options 21
Workstation Setup 23Running Workstation Setup 23
Reinstalling the Workstation 34Selecting Installation Options 35
Multiple Installations 36Selecting a Server 36
Editing, Adding, and Removing Servers 37Aliasing a Server 38Setting a Default Server 38
Chapter 3 — Using the Application Server 39Application Server Overview 39
Configuring the Application Server 40Turning Off the Application Server 42Configuring as a Service 42
Advanced Features 46Session Tracking 46SSL Encryption 46Generating an SSL Certificate 48
Sage MAS 200 Installation and System Administrator's Guide i

Contents.......................................................................................................................................................................................
Chapter 4 — Configuring the Client/Server ODBC Driver 49Client/Server ODBC Overview 49Server-Side Configuration 49
Running as an Application or Service 49Configuring the Server 50
Workstation Configuration 53Configuring the Workstation 53Sharing Permissions 54
Chapter 5 — Installing Crystal Reports 55Crystal Reports Overview 55
Installing the Design Environment 55Installing Crystal Reports to the Workstation 56
Installing and Configuring Crystal Reports Server 60Installing Crystal Reports Server 61Configuring Crystal Server 67Configuring the Virtual Directory 68Configuring Sage MAS 200 69Modifying and Printing Forms 70
Chapter 6 — Installing Federal and State eFiling and Reporting 71Federal and State eFiling and Reporting Overview 71
Installation Considerations 71Installing to the Workstation 72Share and NT File System (NTFS) Permissions 74
Chapter 7 — Setting Up Credit Card Processing 75Overview of Credit Card Processing 75Sage Payment Solutions 75PCCharge Payment Server 75
Installing the PCCharge Payment Server 76Accessing the Payment Server Manual 78Support and Upgrades 78
ii Sage MAS 200 Installation and System Administrator's Guide
Contents.......................................................................................................................................................................................
Chapter 8 — Advanced Features and Troubleshooting 79Remote Access 79
Remote Access Server (RAS) 79Wide Area Networks (WAN) 81Performance Over RAS/WAN 81Virtual Private Network (VPN) 82
Pinging to a Server or Workstation 82Configuring the Workstation for the ODBC Driver Service 82Uninstalling Sage MAS 200 83
Uninstalling the Server Component 83Uninstalling the Workstation Component 85
Hanging Processes 86Detecting Existing Processes 86Ending Tasks 87
Increasing Default Limits Set by Windows Server 88
Chapter 9 — Performing System Startup 89Starting the Software with No Security 90
Edit Default User Settings 91Starting the Software with Standard Security 92
Performing Administrative Tasks 93Creating and Activating Companies 94
Company Activation 94Copying a Company 97
Pre-Migration 99Verifying and Correcting General Ledger Data 99Balancing Inventory Data 100
Parallel Migration 101Migrating Level 3.x Data 101Migrating Version 4.x Data 112
Converting Data Files to the Current Level 123Converting Data Files 123Sales Order Report History Printing Utility 125
Setting Up Roles and Users for Security 126Defining Roles 127Creating Users and Assigning Roles 131Copying a User 134
Sage MAS 200 Installation and System Administrator's Guide iii

Contents.......................................................................................................................................................................................
Setting Additional User Preferences for Security 136Setting a Workstation to Automatically Log Off 136Locking Users Out 138Setting the Default Report Preview Zoom Setting 139
Setting System Preferences 140Requiring a Logon and Password 140
Setting Accounting Date Preferences 144Setting a Prompt for the Accounting Date 144Setting the Accounting Date from the System Date 145Restricting the Accounting Date to Current and One Future Period 146
Chapter 10 — System Administrator Tasks 147Determining Who is Accessing the System/Modules 147Creating Public Tasks 148Modifying Company Preferences 150Uninstalling Modules 152Changing Your Administrator Password 153
Appendix A — Checklists 155Pre-Installation Checklist 155Post-Installation Checklist 158
Appendix B — Sage MAS 200 Security Permissions 159Setting NTFS and Share Permissions 159Sage MAS 200 Server Minimum Permission Settings 160
Permissions for the Local User Running the Application Server 160Permissions for Other Users on the Application Server 162
Sage MAS 200 Workstation Permission Settings 164Installation and Report Security for Workstations 164NTFS Permissions for Workstations 165
Appendix C — Running in a Terminal Services/Citrix Environment 167Sage MAS 200 and Terminal Services/Citrix 167
Installing the Sage MAS 200 Application Server 167Installing Workstation Setup 168Terminal Services Considerations 170
iv Sage MAS 200 Installation and System Administrator's Guide
Contents.......................................................................................................................................................................................
Appendix D — Converting Sage MAS 200 Crystal Reports from a Prior Version 171Using the Crystal Report Conversion Wizard 171
Appendix E — Overview of Module Startup 177Accounts Payable 178
Accounts Payable Setup Wizard 178Data You Need 178Conversion Process 179
Accounts Receivable 181Accounts Receivable Setup Wizard 181Data You Need 181Conversion Process 182
Bank Reconciliation 184Conversion Process 184
Bar Code 185Bill of Materials 185
Bill of Materials Setup Wizard 185Data You Need 186Conversion Process 186
e-Business Manager 187e-Business Manager Setup Wizard 187Data You Need 187
Electronic Reporting for W2 & 1099s 188General Ledger 188
General Ledger Setup Wizard 188Data You Need 188Conversion Process 189
Inventory Management 189Inventory Management Setup Wizard 189Data You Need 190Conversion Process 190
Job Cost 192Data You Need 192Conversion Process 192
Material Requirements Planning 194
Sage MAS 200 Installation and System Administrator's Guide v
Contents.......................................................................................................................................................................................
Payroll 195Data You Need 195Converting at the Beginning of the Calendar Year 195Converting in the Middle of the Calendar Year 196
Purchase Order 198Purchase Order Setup Wizard 198Data You Need 198Conversion Process 199
Sales Order 200Sales Order Setup Wizard 200Data You Need 200Conversion Process 201
Work Order 202Data You Need 202Conversion Process 203
vi Sage MAS 200 Installation and System Administrator's Guide
Chapter 1
IntroductionChapter 1Overview of Sage MAS 200Sage MAS 200 ERP is designed to take advantage of the Windows Server operating systems and provides significant performance improvement by separating the user interface and the underlying processing code.
Sage MAS 200 uses an architecture that is optimized for network environments and supports a large number of concurrent network users. This architecture also allows Sage MAS 200 to operate effectively in remote access environments.
In this installation guide, you will notice references to MAS90 when dealing with installation paths or system file names. These paths and file names are not in error, but are for ease of upgrades.
NOTE For operating system requirements, see the Supported Platform Matrix in the Support area of the Sage Online Web site at: www.sagesoftwareonline.com
Sage MAS 200 Installation and System Administrator's Guide 1

.......................................................................................................................................................................................
Chapter 1 Introduction
......
......
..
The following chart illustrates a possible configuration of Sage MAS 200 using a number of different components that integrate with the software. Your configuration may not have all these components.
2 Sage MAS 200 Installation and System Administrator's Guide
.......................................................................................................................................................................................
HOW TO USE THIS MANUAL
......
......
.
How to Use This ManualThis manual provides the information necessary for installing Sage MAS 200. This manual also contains information and troubleshooting tips on the configuration of the various operating systems and environments in which the Sage MAS 200 software is supported. It is designed to function as a self-teaching guide. The instructions contain detailed technical information on the configuration of operating systems and environments.
For a complete listing of operating system requirements, see the Supported Platform Matrix in the Support area of the Sage Online Web site at: www.sagesoftwareonline.com
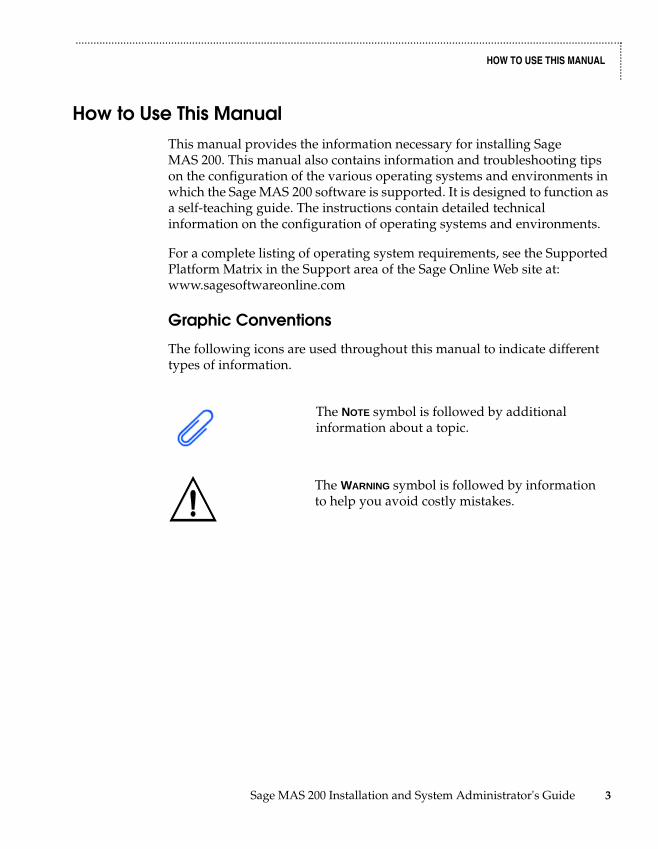
Graphic Conventions
The following icons are used throughout this manual to indicate different types of information.
The NOTE symbol is followed by additional information about a topic.
The WARNING symbol is followed by information to help you avoid costly mistakes.
Sage MAS 200 Installation and System Administrator's Guide 3
.......................................................................................................................................................................................
Chapter 1 Introduction
......
......
..
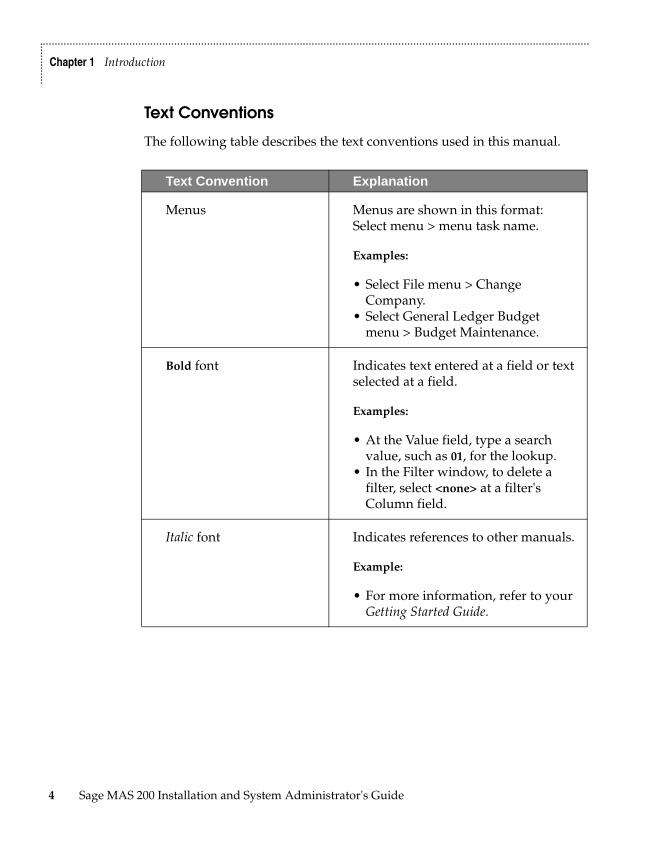
Text Conventions
The following table describes the text conventions used in this manual.
Text Convention Explanation
Menus Menus are shown in this format: Select menu > menu task name.
Examples:
• Select File menu > Change Company.
• Select General Ledger Budget menu > Budget Maintenance.
Bold font Indicates text entered at a field or text selected at a field.
Examples:
• At the Value field, type a search value, such as 01, for the lookup.
• In the Filter window, to delete a filter, select <none> at a filter's Column field.
Italic font Indicates references to other manuals.
Example:
• For more information, refer to your Getting Started Guide.
4 Sage MAS 200 Installation and System Administrator's Guide
Chapter 2
Installing Sage MAS 200Chapter 2Sage MAS 200 is delivered on a CD-ROM that contains both the Workstation and Server Setup programs. This chapter covers the basic procedures of the installation process.
Read this entire guide before installing Sage MAS 200 on your Windows Server. Incorrect configurations of protocols and services running on the server can cause major delays in the implementation of Sage MAS 200 on your system.
TCP/IP ProtocolThe TCP/IP protocol is the communication standard used today. Microsoft has made this protocol available to most Windows operating systems as a standard part of the operating system. Sage MAS 200 uses this protocol for all communications between the workstation and server. To run Sage MAS 200, TCP/IP must be properly configured on both the Windows Server and all workstations that will run Sage MAS 200 on the server.
Although this section discusses configuration settings and options available in configuring a TCP/IP network, it is not a guide for installing TCP/IP on your server or workstation. Contact your Windows systems consultant for specific information regarding the installation and configuration of TCP/IP on your network.
Basic Configuration
There are no specific requirements for Sage MAS 200 with regard to the configuration of TCP/IP. To determine if a workstation is communicating with a server or vice versa, ping the server or workstation.
NOTE Prior to beginning the installation process, see Pre-Installation Checklist on page 155.
NOTE Both the server and clients must have the TCP/IP protocol enabled.
WARNING Do not make changes to the TCP/IP configuration without consulting your system administrator.
WARNING If an Internet connection is used in your Sage MAS 200 infrastructure, make sure adequate precautions are taken to secure the data traveling through those connections.
Sage MAS 200 Installation and System Administrator's Guide 5
.......................................................................................................................................................................................
Chapter 2 Installing Sage MAS 200
......
......
..
To ping a server or workstation
1 Select Windows Start menu > All Programs > Accessories > Command Prompt.
2 In the Command Prompt window, type PING MACHINE_NAME, where MACHINE_NAME is the name of the server or workstation with which you are attempting to communicate.
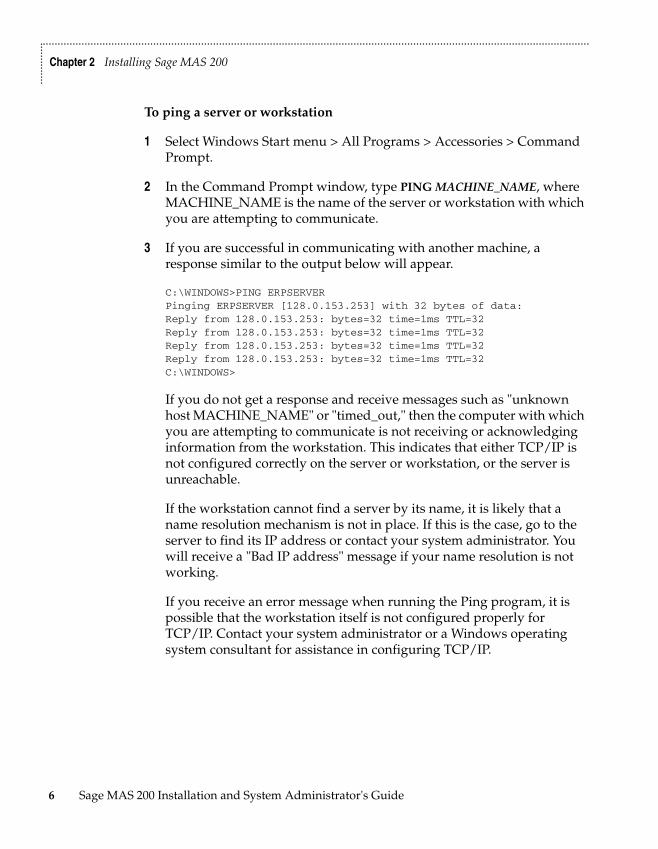
3 If you are successful in communicating with another machine, a response similar to the output below will appear.
C:\WINDOWS>PING ERPSERVERPinging ERPSERVER [128.0.153.253] with 32 bytes of data:Reply from 128.0.153.253: bytes=32 time=1ms TTL=32Reply from 128.0.153.253: bytes=32 time=1ms TTL=32Reply from 128.0.153.253: bytes=32 time=1ms TTL=32Reply from 128.0.153.253: bytes=32 time=1ms TTL=32C:\WINDOWS>
If you do not get a response and receive messages such as "unknown host MACHINE_NAME" or "timed_out," then the computer with which you are attempting to communicate is not receiving or acknowledging information from the workstation. This indicates that either TCP/IP is not configured correctly on the server or workstation, or the server is unreachable.
If the workstation cannot find a server by its name, it is likely that a name resolution mechanism is not in place. If this is the case, go to the server to find its IP address or contact your system administrator. You will receive a "Bad IP address" message if your name resolution is not working.
If you receive an error message when running the Ping program, it is possible that the workstation itself is not configured properly for TCP/IP. Contact your system administrator or a Windows operating system consultant for assistance in configuring TCP/IP.
6 Sage MAS 200 Installation and System Administrator's Guide
.......................................................................................................................................................................................
SERVER INSTALLATIONInstallation Process ...
......
....
4 After the Sage MAS 200 installation is complete, at the server, use the built-in NETSTAT utility or equivalent software to verify that the Application Server is running on its configured port. The default port is 10000.
5 From each workstation, ping the Application Server on its configured port. The TCP/IP built-in ping.exe utility does not provide a way for pinging a specific port. The network administrator should use port scanning software or equivalent to ping the specific port the Application Server is listening on.
Server InstallationSage MAS 200 must be installed on the server before any workstation can access Sage MAS 200. If you are installing Sage MAS 200 on a Windows Server with Terminal Services enabled, see Terminal Services Considerations on page 170.
Installation Process
Read this guide completely before installing and setting up a new installation of Sage MAS 200. Each module has a setup options window that allows you to customize Sage MAS 200 for your specific needs. Taking the time to understand all the options available before you install and set up your modules allows you to use your accounting software to its fullest potential.
You must run the Sage MAS 200 Setup program to perform a new Sage MAS 200 installation or to upgrade your system from a prior version. The InstallShield wizard guides you through the installation. The options on the wizard may vary depending on your installation option.
A series of procedures must be completed for new installations. If you are upgrading your system, you must follow additional procedures after installing Sage MAS 200 to migrate your existing data and convert it to the current version.
NOTE If you encounter problems pinging to the server or workstation, see Pinging to a Server or Workstation on page 82.
NOTE You must run Server Setup from the Windows Server, not from a workstation connected to the server. The user performing the installation must have administrative rights.
Sage MAS 200 Installation and System Administrator's Guide 7
.......................................................................................................................................................................................
Chapter 2 Installing Sage MAS 200
......
......
..
Follow these procedures to perform a new installation or to upgrade your system.
1 Run the Sage MAS 200 Setup program (see Installing Sage MAS 200 on page 9).
2 Set up and run the Sage MAS 200 Application Server (see Running the Sage MAS 200 Server Setup Program on page 11).
3 Run the Workstation Setup program (see Workstation Setup on page 23).
4 If you are upgrading your system, review the following:
• Verifying and Correcting General Ledger Data on page 99
• Parallel Migration on page 101
5 Install Crystal Reports; this is optional (see Installing Crystal Reports on page 55).
6 Set up and activate the module files for your companies, create roles, create user codes, and set up system preferences (see Performing System Startup on page 89).
7 If you are converting your existing business management system to Sage MAS 200, assemble the data you need to set up each module (see Overview of Module Startup on page 177).
NOTE If you do not install Crystal Reports, you cannot create new reports or modify existing reports and forms.
8 Sage MAS 200 Installation and System Administrator's Guide
.......................................................................................................................................................................................
SERVER INSTALLATIONInstalling Sage MAS 200 ...
......
....
Installing Sage MAS 200
To begin the Sage MAS 200 installation
1 Close all other programs on the server.
2 Log onto the Windows Server machine and place the Sage MAS 200 CD-ROM in the CD-ROM drive.
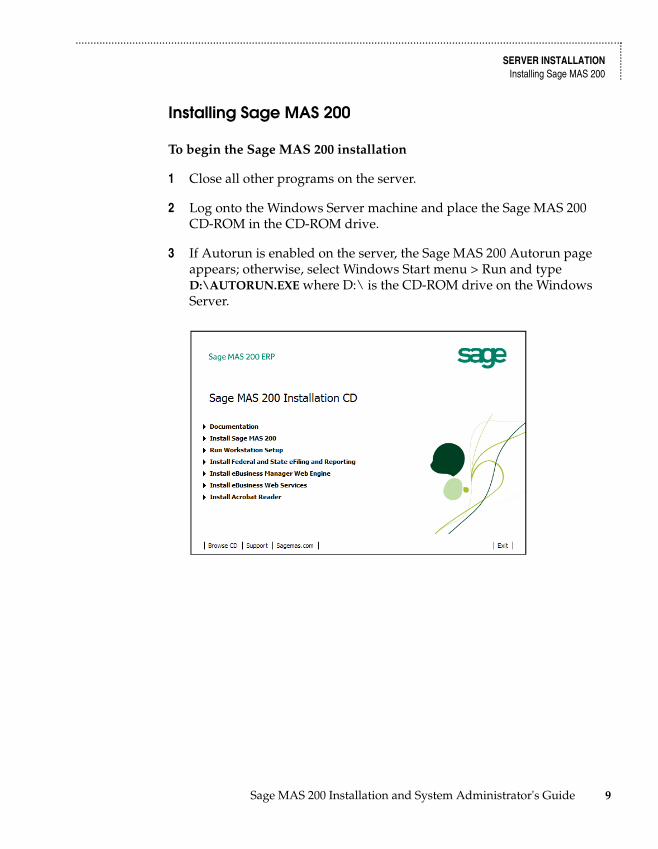
3 If Autorun is enabled on the server, the Sage MAS 200 Autorun page appears; otherwise, select Windows Start menu > Run and type D:\AUTORUN.EXE where D:\ is the CD-ROM drive on the Windows Server.
Sage MAS 200 Installation and System Administrator's Guide 9
.......................................................................................................................................................................................
Chapter 2 Installing Sage MAS 200
......
......
..
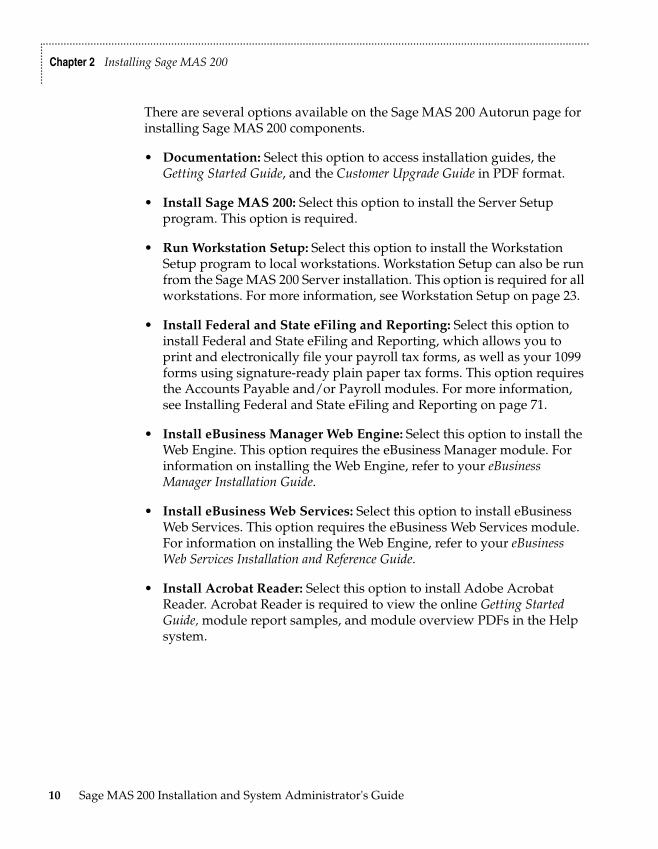
There are several options available on the Sage MAS 200 Autorun page for installing Sage MAS 200 components.
• Documentation: Select this option to access installation guides, the Getting Started Guide, and the Customer Upgrade Guide in PDF format.
• Install Sage MAS 200: Select this option to install the Server Setup program. This option is required.
• Run Workstation Setup: Select this option to install the Workstation Setup program to local workstations. Workstation Setup can also be run from the Sage MAS 200 Server installation. This option is required for all workstations. For more information, see Workstation Setup on page 23.
• Install Federal and State eFiling and Reporting: Select this option to install Federal and State eFiling and Reporting, which allows you to print and electronically file your payroll tax forms, as well as your 1099 forms using signature-ready plain paper tax forms. This option requires the Accounts Payable and/or Payroll modules. For more information, see Installing Federal and State eFiling and Reporting on page 71.
• Install eBusiness Manager Web Engine: Select this option to install the Web Engine. This option requires the eBusiness Manager module. For information on installing the Web Engine, refer to your eBusiness Manager Installation Guide.
• Install eBusiness Web Services: Select this option to install eBusiness Web Services. This option requires the eBusiness Web Services module. For information on installing the Web Engine, refer to your eBusiness Web Services Installation and Reference Guide.
• Install Acrobat Reader: Select this option to install Adobe Acrobat Reader. Acrobat Reader is required to view the online Getting Started Guide, module report samples, and module overview PDFs in the Help system.
10 Sage MAS 200 Installation and System Administrator's Guide
.......................................................................................................................................................................................
SERVER INSTALLATIONRunning the Sage MAS 200 Server Setup Program ...
......
....
Running the Sage MAS 200 Server Setup Program
To run the Sage MAS 200 Server Setup program
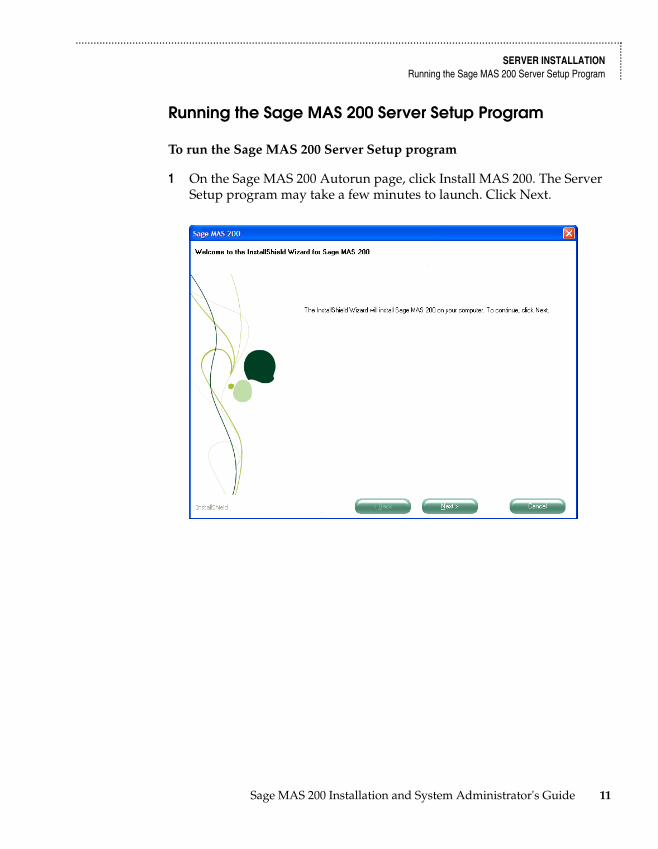
1 On the Sage MAS 200 Autorun page, click Install MAS 200. The Server Setup program may take a few minutes to launch. Click Next.
Sage MAS 200 Installation and System Administrator's Guide 11
.......................................................................................................................................................................................
Chapter 2 Installing Sage MAS 200
......
......
..
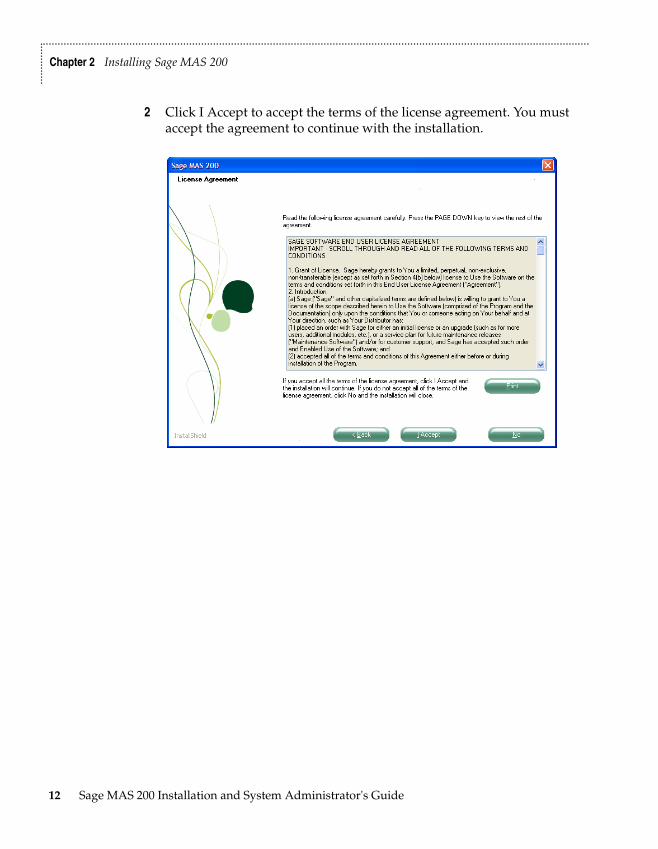
2 Click I Accept to accept the terms of the license agreement. You must accept the agreement to continue with the installation.
12 Sage MAS 200 Installation and System Administrator's Guide
.......................................................................................................................................................................................
SERVER INSTALLATIONRunning the Sage MAS 200 Server Setup Program ...
......
....
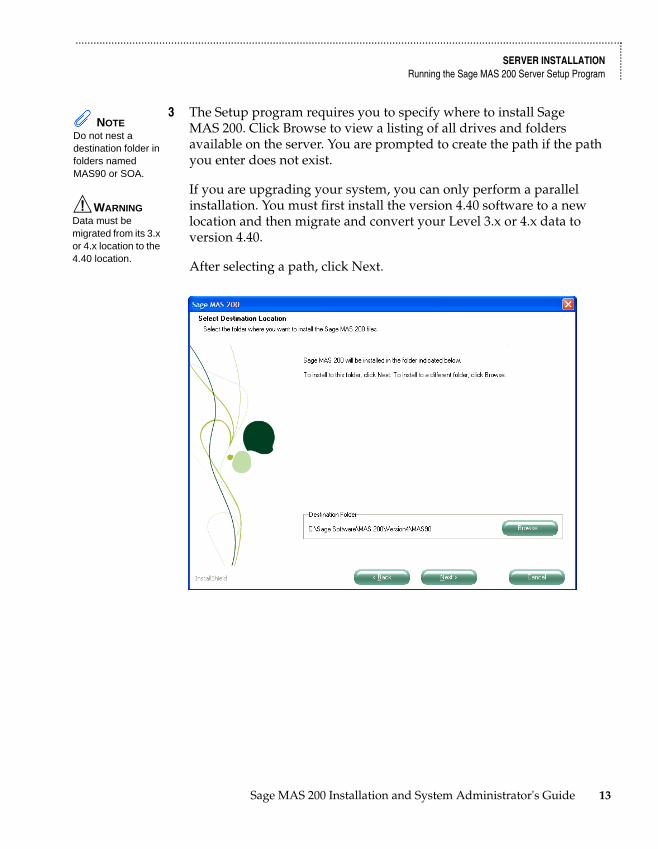
3 The Setup program requires you to specify where to install Sage MAS 200. Click Browse to view a listing of all drives and folders available on the server. You are prompted to create the path if the path you enter does not exist.
If you are upgrading your system, you can only perform a parallel installation. You must first install the version 4.40 software to a new location and then migrate and convert your Level 3.x or 4.x data to version 4.40.
After selecting a path, click Next.
NOTE Do not nest a destination folder in folders named MAS90 or SOA.
WARNING Data must be migrated from its 3.x or 4.x location to the 4.40 location.
Sage MAS 200 Installation and System Administrator's Guide 13

.......................................................................................................................................................................................
Chapter 2 Installing Sage MAS 200
......
......
..
4 Type the company and registration information found on your packing list to register your software.
You can access most modules for 45 days before you must register them; however, the e-Business Manager, Custom Office, Electronic Reporting, and Visual Integrator modules must be registered before they can be accessed.
NOTE If your serial number includes leading zeros, make sure to enter all zeros.
The serial number, user key, customer number, and product key are required.
14 Sage MAS 200 Installation and System Administrator's Guide
.......................................................................................................................................................................................
SERVER INSTALLATIONRunning the Sage MAS 200 Server Setup Program ...
......
....
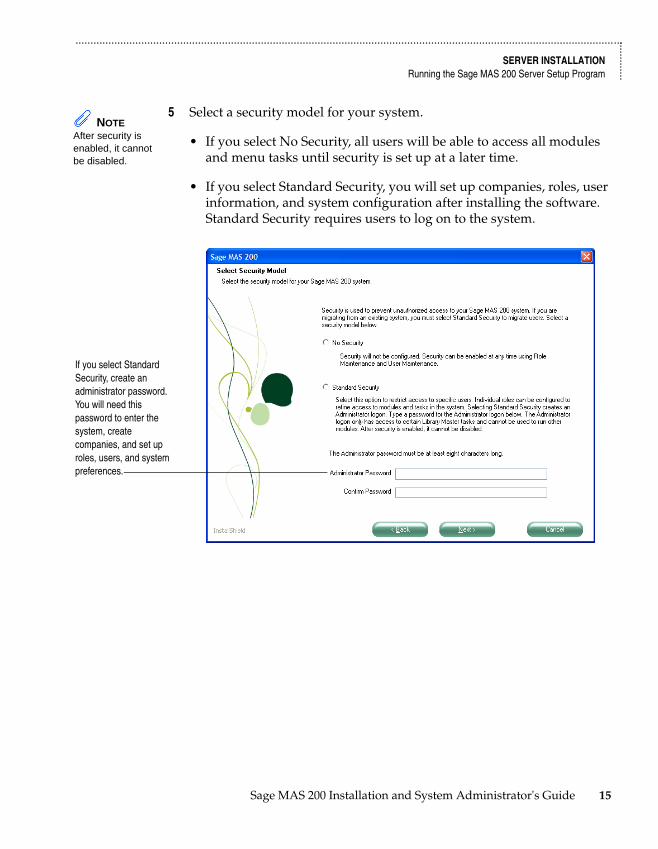
5 Select a security model for your system.
• If you select No Security, all users will be able to access all modules and menu tasks until security is set up at a later time.
• If you select Standard Security, you will set up companies, roles, user information, and system configuration after installing the software. Standard Security requires users to log on to the system.
NOTE After security is enabled, it cannot be disabled.
If you select Standard Security, create an administrator password. You will need this password to enter the system, create companies, and set up roles, users, and system preferences.
Sage MAS 200 Installation and System Administrator's Guide 15
.......................................................................................................................................................................................
Chapter 2 Installing Sage MAS 200
......
......
..
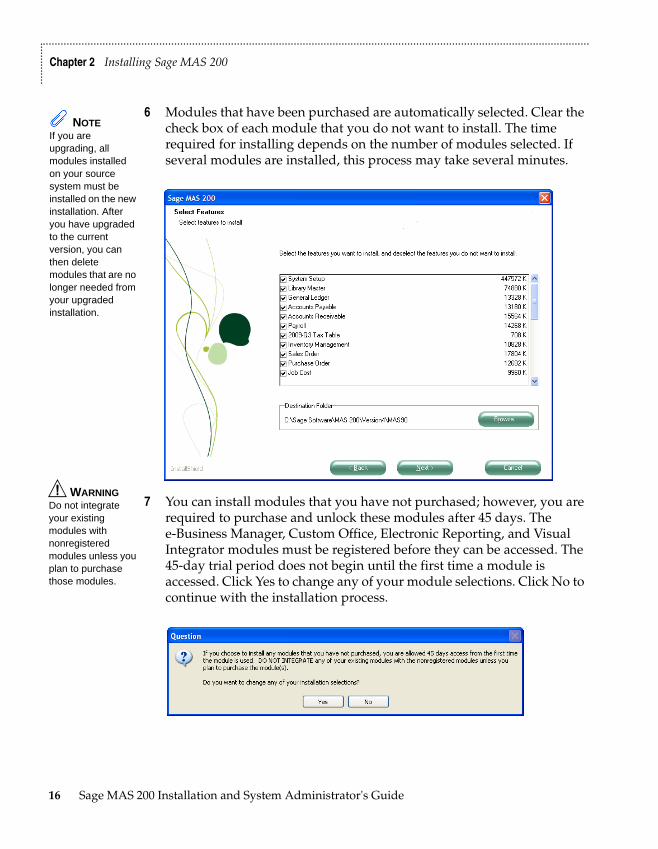
6 Modules that have been purchased are automatically selected. Clear the check box of each module that you do not want to install. The time required for installing depends on the number of modules selected. If several modules are installed, this process may take several minutes.
7 You can install modules that you have not purchased; however, you are required to purchase and unlock these modules after 45 days. The e-Business Manager, Custom Office, Electronic Reporting, and Visual Integrator modules must be registered before they can be accessed. The 45-day trial period does not begin until the first time a module is accessed. Click Yes to change any of your module selections. Click No to continue with the installation process.
NOTE If you are upgrading, all modules installed on your source system must be installed on the new installation. After you have upgraded to the current version, you can then delete modules that are no longer needed from your upgraded installation.
WARNING Do not integrate your existing modules with nonregistered modules unless you plan to purchase those modules.
16 Sage MAS 200 Installation and System Administrator's Guide
.......................................................................................................................................................................................
SERVER INSTALLATIONRunning the Sage MAS 200 Server Setup Program ...
......
....
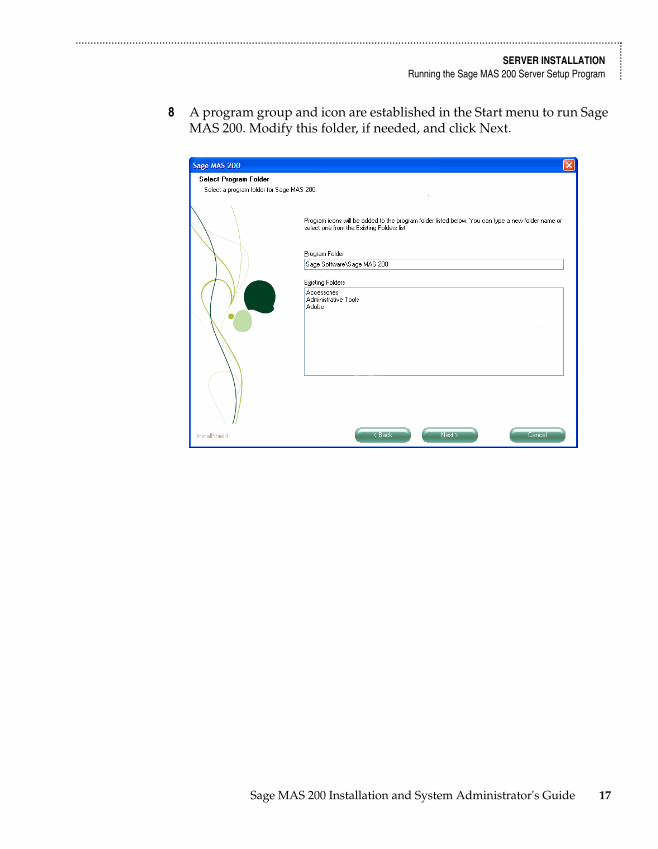
8 A program group and icon are established in the Start menu to run Sage MAS 200. Modify this folder, if needed, and click Next.
Sage MAS 200 Installation and System Administrator's Guide 17
.......................................................................................................................................................................................
Chapter 2 Installing Sage MAS 200
......
......
..
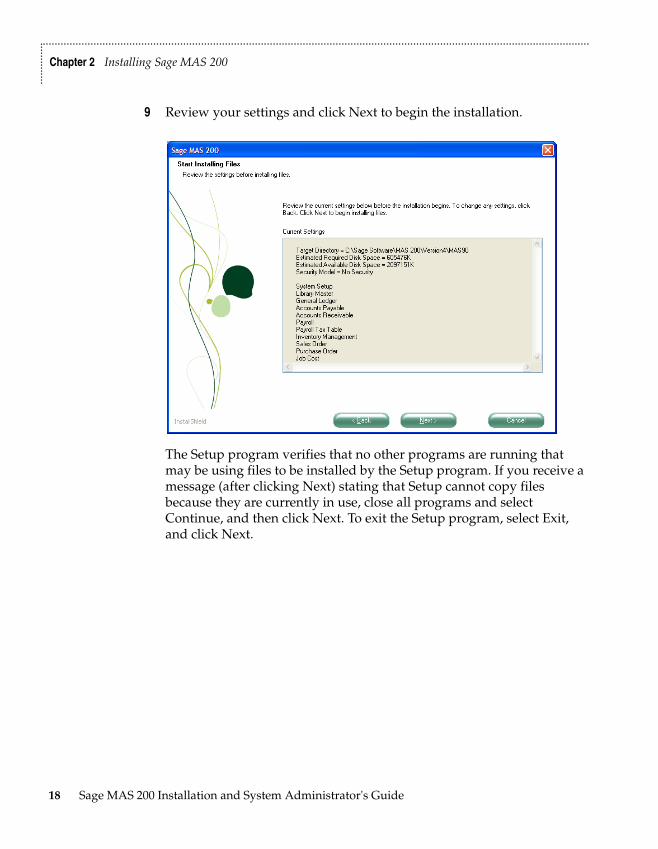
9 Review your settings and click Next to begin the installation.
The Setup program verifies that no other programs are running that may be using files to be installed by the Setup program. If you receive a message (after clicking Next) stating that Setup cannot copy files because they are currently in use, close all programs and select Continue, and then click Next. To exit the Setup program, select Exit, and click Next.
18 Sage MAS 200 Installation and System Administrator's Guide
.......................................................................................................................................................................................
SERVER INSTALLATIONRunning the Sage MAS 200 Server Setup Program ...
......
....
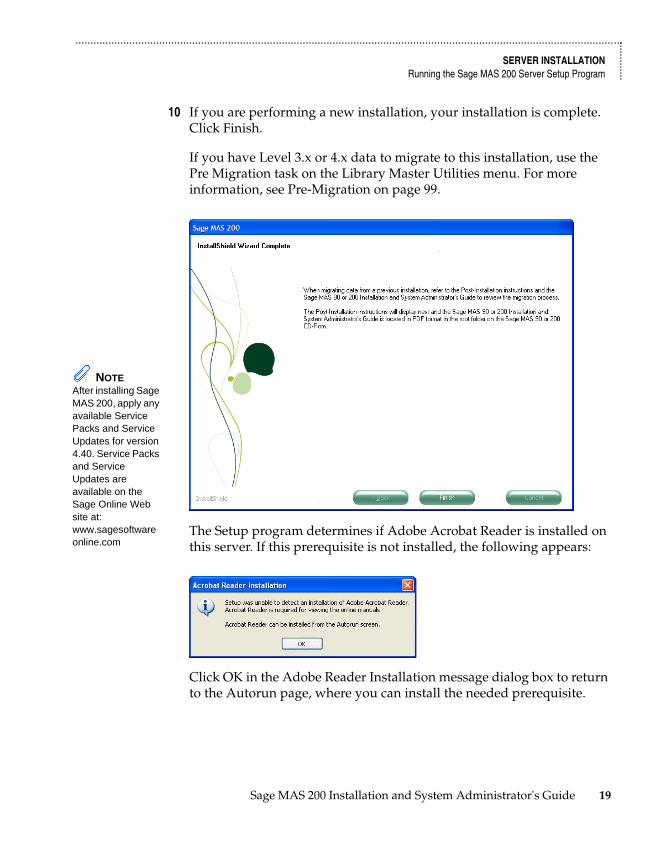
10 If you are performing a new installation, your installation is complete. Click Finish.
If you have Level 3.x or 4.x data to migrate to this installation, use the Pre Migration task on the Library Master Utilities menu. For more information, see Pre-Migration on page 99.
The Setup program determines if Adobe Acrobat Reader is installed on this server. If this prerequisite is not installed, the following appears:
Click OK in the Adobe Reader Installation message dialog box to return to the Autorun page, where you can install the needed prerequisite.
NOTE After installing Sage MAS 200, apply any available Service Packs and Service Updates for version 4.40. Service Packs and Service Updates are available on the Sage Online Web site at: www.sagesoftwareonline.com
Sage MAS 200 Installation and System Administrator's Guide 19
.......................................................................................................................................................................................
Chapter 2 Installing Sage MAS 200
......
......
..
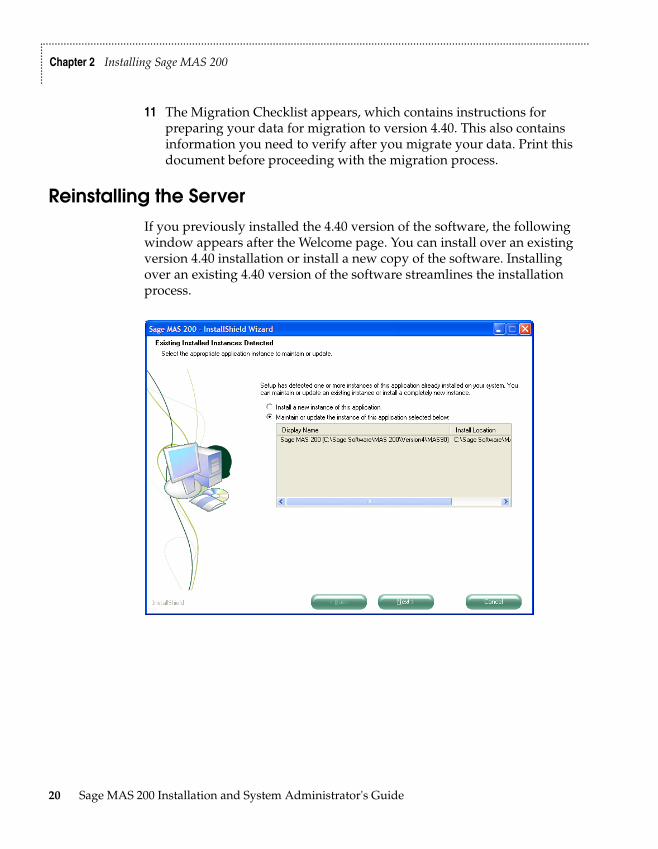
11 The Migration Checklist appears, which contains instructions for preparing your data for migration to version 4.40. This also contains information you need to verify after you migrate your data. Print this document before proceeding with the migration process.
Reinstalling the ServerIf you previously installed the 4.40 version of the software, the following window appears after the Welcome page. You can install over an existing version 4.40 installation or install a new copy of the software. Installing over an existing 4.40 version of the software streamlines the installation process.
20 Sage MAS 200 Installation and System Administrator's Guide
.......................................................................................................................................................................................
REINSTALLING THE SERVERSelecting Installation Options ...
......
....
Selecting Installation Options
1 Select an installation option
• If you are installing over an existing version 4.40 installation, select Maintain or update the instance of this application selected below, and then select the previously installed version of the software that you will install over and click Next. Proceed to Step 2 on this page.
• If you are installing a new copy of the software, select Install a new instance of this application, and then click Next. Proceed to Step 1 on page 11.
2 After selecting an existing version 4.40 installation to install over, select the type of installation to perform.
• Select Add if you purchased additional modules and are adding them. You will be required to enter a new product key.
• Select Reinstall to reinstall previously installed modules. The product key information from the selected installation is used unless the information is invalid or has expired. You will not be able to enter new product key information using this option.
• Select Uninstall to completely uninstall Sage MAS 200. To uninstall modules individually, use the System Configuration task on the Library Master Setup menu.
NOTE If Sage MAS 200 is uninstalled and then reinstalled, Paperless Office must be set up again.
Sage MAS 200 Installation and System Administrator's Guide 21
.......................................................................................................................................................................................
Chapter 2 Installing Sage MAS 200
......
......
..
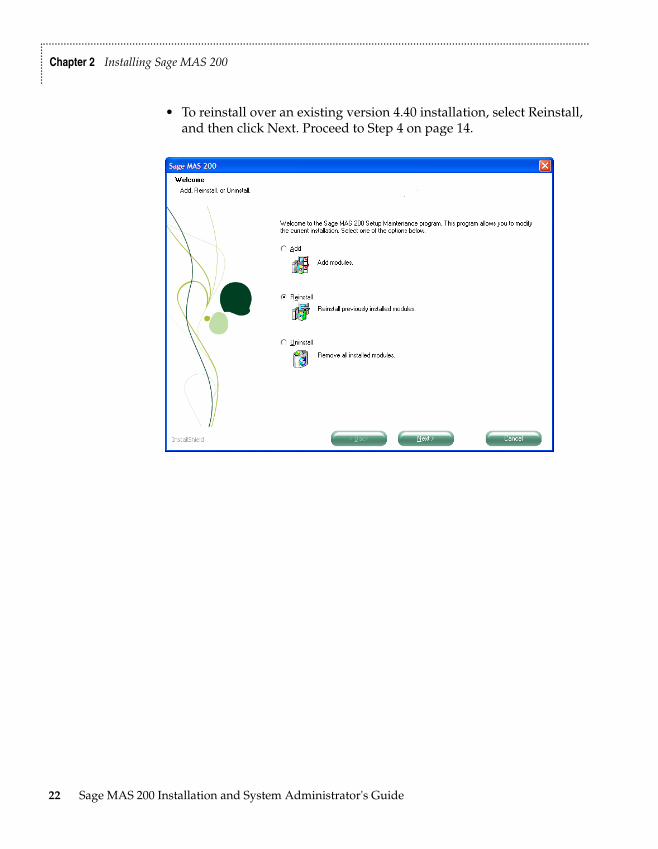
• To reinstall over an existing version 4.40 installation, select Reinstall, and then click Next. Proceed to Step 4 on page 14.
22 Sage MAS 200 Installation and System Administrator's Guide
.......................................................................................................................................................................................
WORKSTATION SETUPRunning Workstation Setup ...
......
....
Workstation SetupThe Workstation Setup program is used to install the client-side application software and common programs to the workstation that will be accessing Sage MAS 200. This program must be run in order to use Sage MAS 200 software on the client workstation. The Workstation Setup program copies all the necessary Dynamic Link Libraries, ActiveX controls, and other components to the local Windows\System folder and also sets up the initialization files for this particular workstation.
For workstation operating system requirements, see the Supported Platform Matrix in the Support area of the Sage Online Web site at: www.sagesoftwareonline.com
If you are running Sage MAS 200 through Terminal Services or Citrix, do not run Workstation Setup directly at the Terminal Services or Citrix server. Instead, you must run Workstation Setup only once through a remote session. Running Workstation Setup from a Terminal Services session will set up the proper registry entries for Crystal forms and reports access, and will copy the multi-user activation file from the Application Server to the Terminal or Citrix server. For more information, see Running in a Terminal Services/Citrix Environment on page 167.
Running Workstation Setup
The Workstation Setup program can be run from the Sage MAS 200 CD-ROM or from the server where Sage MAS 200 is installed.
To run Workstation Setup
1 Close all programs before beginning the installation process. In addition, temporarily shut down antivirus, antispyware, and script blocking applications before running Workstation Setup.
2 Place the Sage MAS 200 CD-ROM or the Workstation Setup CD-ROM in the CD-ROM drive.
Sage MAS 200 Installation and System Administrator's Guide 23
.......................................................................................................................................................................................
Chapter 2 Installing Sage MAS 200
......
......
..
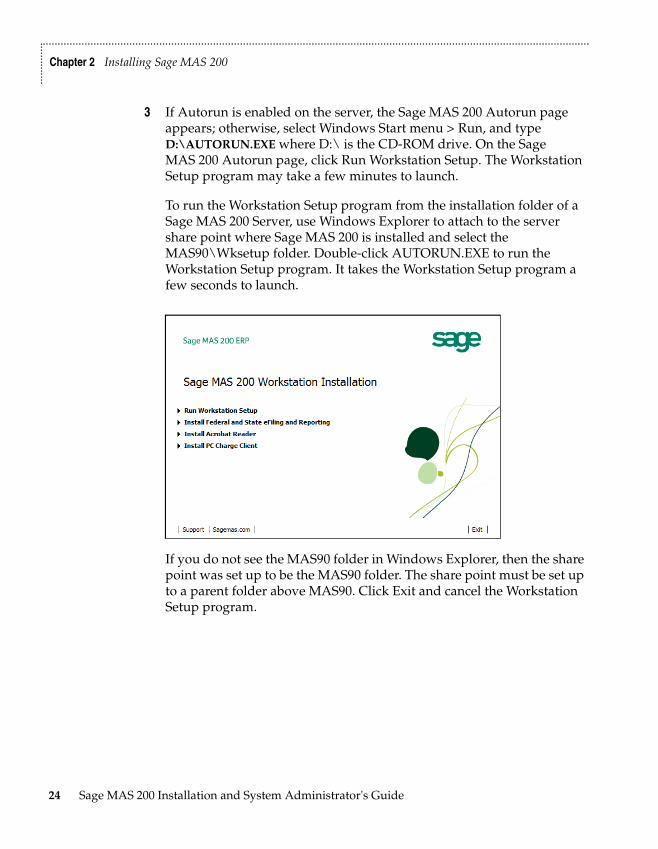
3 If Autorun is enabled on the server, the Sage MAS 200 Autorun page appears; otherwise, select Windows Start menu > Run, and type D:\AUTORUN.EXE where D:\ is the CD-ROM drive. On the Sage MAS 200 Autorun page, click Run Workstation Setup. The Workstation Setup program may take a few minutes to launch.
To run the Workstation Setup program from the installation folder of a Sage MAS 200 Server, use Windows Explorer to attach to the server share point where Sage MAS 200 is installed and select the MAS90\Wksetup folder. Double-click AUTORUN.EXE to run the Workstation Setup program. It takes the Workstation Setup program a few seconds to launch.
If you do not see the MAS90 folder in Windows Explorer, then the share point was set up to be the MAS90 folder. The share point must be set up to a parent folder above MAS90. Click Exit and cancel the Workstation Setup program.
24 Sage MAS 200 Installation and System Administrator's Guide
.......................................................................................................................................................................................
WORKSTATION SETUPRunning Workstation Setup ...
......
....
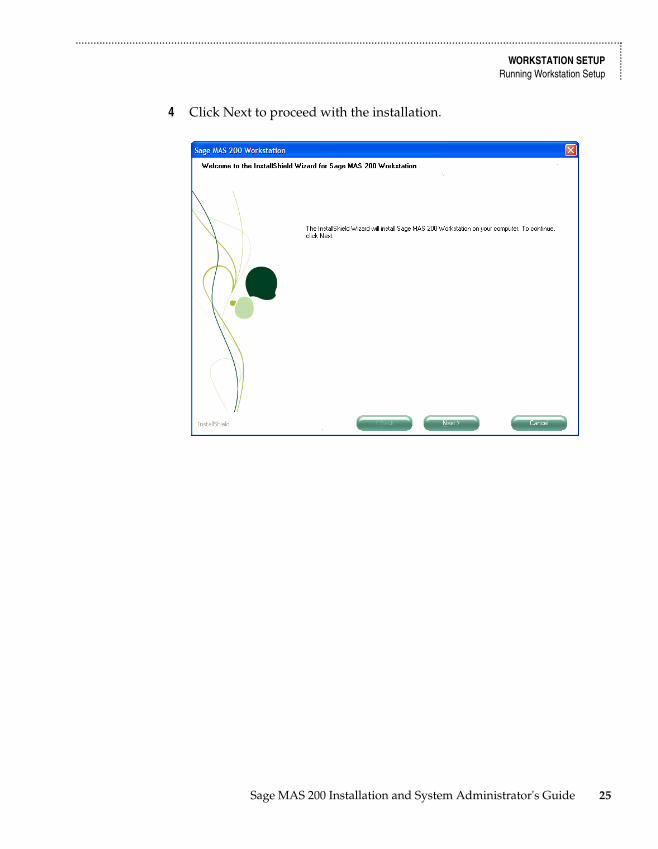
4 Click Next to proceed with the installation.
Sage MAS 200 Installation and System Administrator's Guide 25
.......................................................................................................................................................................................
Chapter 2 Installing Sage MAS 200
......
......
..
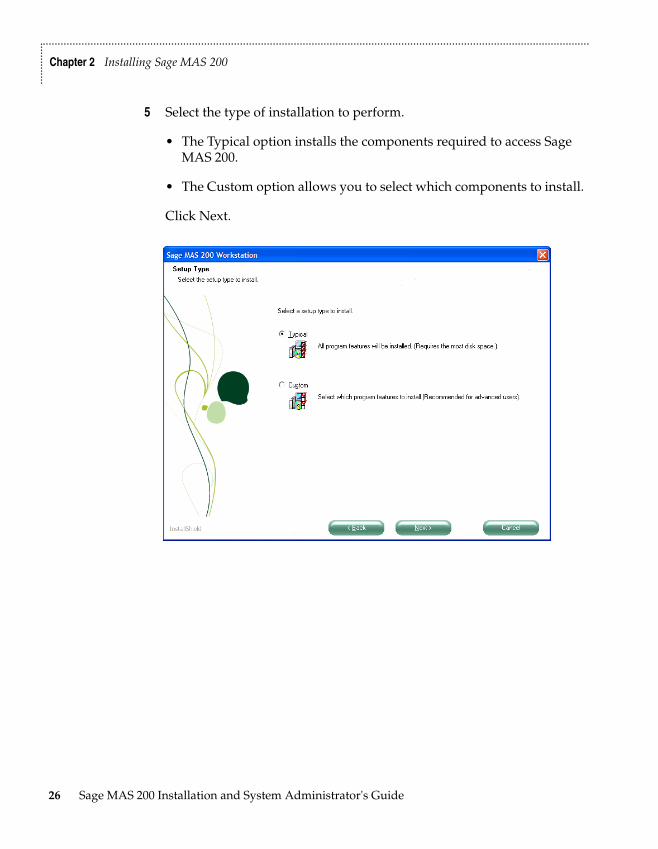
5 Select the type of installation to perform.
• The Typical option installs the components required to access Sage MAS 200.
• The Custom option allows you to select which components to install.
Click Next.
26 Sage MAS 200 Installation and System Administrator's Guide
.......................................................................................................................................................................................
WORKSTATION SETUPRunning Workstation Setup ...
......
....
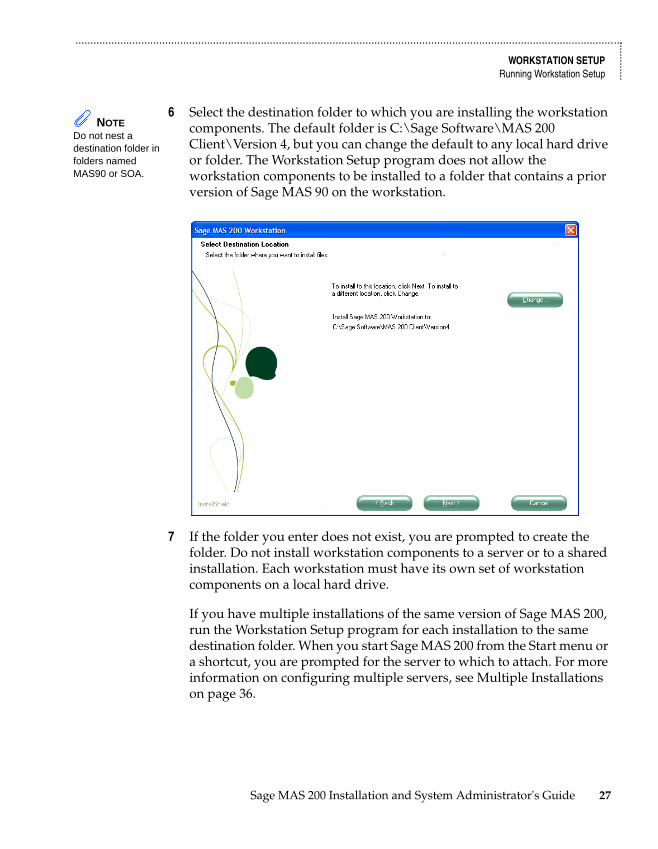
6 Select the destination folder to which you are installing the workstation components. The default folder is C:\Sage Software\MAS 200 Client\Version 4, but you can change the default to any local hard drive or folder. The Workstation Setup program does not allow the workstation components to be installed to a folder that contains a prior version of Sage MAS 90 on the workstation.
7 If the folder you enter does not exist, you are prompted to create the folder. Do not install workstation components to a server or to a shared installation. Each workstation must have its own set of workstation components on a local hard drive.
If you have multiple installations of the same version of Sage MAS 200, run the Workstation Setup program for each installation to the same destination folder. When you start Sage MAS 200 from the Start menu or a shortcut, you are prompted for the server to which to attach. For more information on configuring multiple servers, see Multiple Installations on page 36.
NOTE Do not nest a destination folder in folders named MAS90 or SOA.
Sage MAS 200 Installation and System Administrator's Guide 27
.......................................................................................................................................................................................
Chapter 2 Installing Sage MAS 200
......
......
..
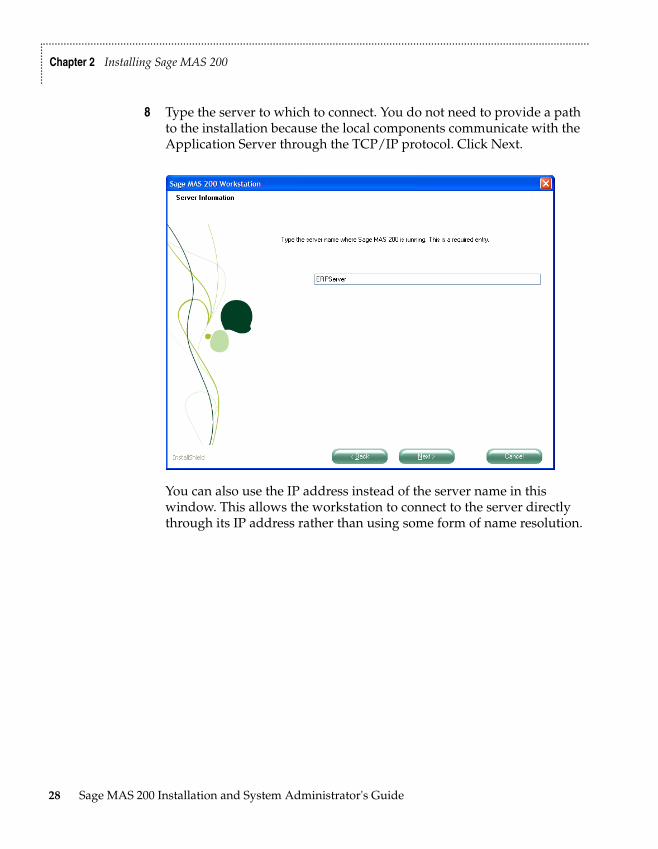
8 Type the server to which to connect. You do not need to provide a path to the installation because the local components communicate with the Application Server through the TCP/IP protocol. Click Next.
You can also use the IP address instead of the server name in this window. This allows the workstation to connect to the server directly through its IP address rather than using some form of name resolution.
28 Sage MAS 200 Installation and System Administrator's Guide
.......................................................................................................................................................................................
WORKSTATION SETUPRunning Workstation Setup ...
......
....
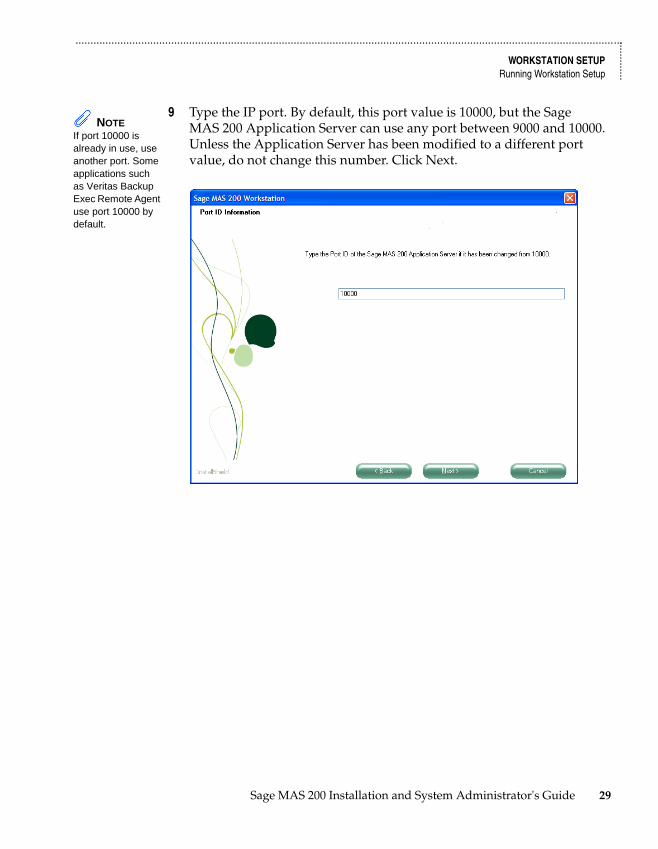
9 Type the IP port. By default, this port value is 10000, but the Sage MAS 200 Application Server can use any port between 9000 and 10000. Unless the Application Server has been modified to a different port value, do not change this number. Click Next.
NOTE If port 10000 is already in use, use another port. Some applications such as Veritas Backup Exec Remote Agent use port 10000 by default.
Sage MAS 200 Installation and System Administrator's Guide 29
.......................................................................................................................................................................................
Chapter 2 Installing Sage MAS 200
......
......
..
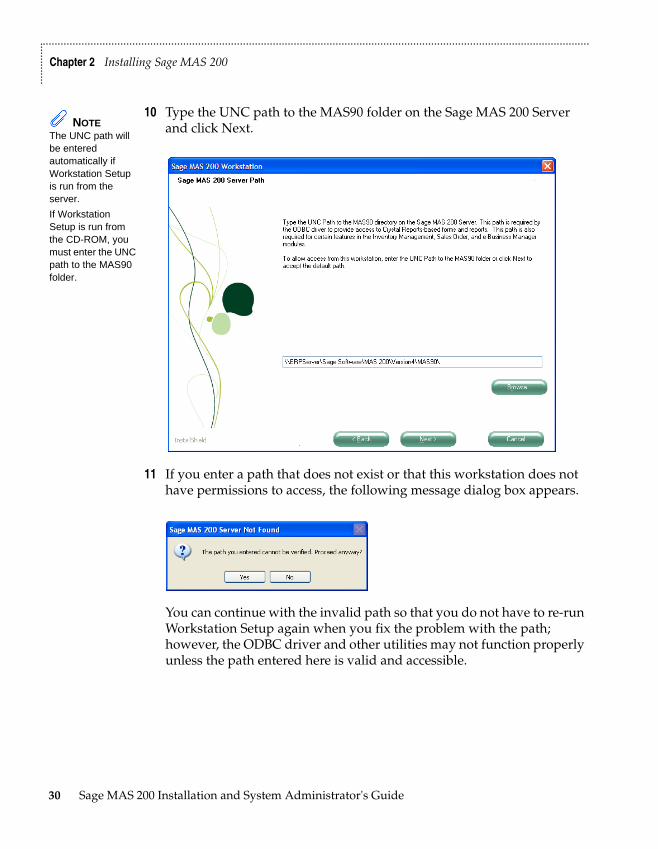
10 Type the UNC path to the MAS90 folder on the Sage MAS 200 Server and click Next.
11 If you enter a path that does not exist or that this workstation does not have permissions to access, the following message dialog box appears.
You can continue with the invalid path so that you do not have to re-run Workstation Setup again when you fix the problem with the path; however, the ODBC driver and other utilities may not function properly unless the path entered here is valid and accessible.
NOTE The UNC path will be entered automatically if Workstation Setup is run from the server.
If Workstation Setup is run from the CD-ROM, you must enter the UNC path to the MAS90 folder.
30 Sage MAS 200 Installation and System Administrator's Guide
.......................................................................................................................................................................................
WORKSTATION SETUPRunning Workstation Setup ...
......
....
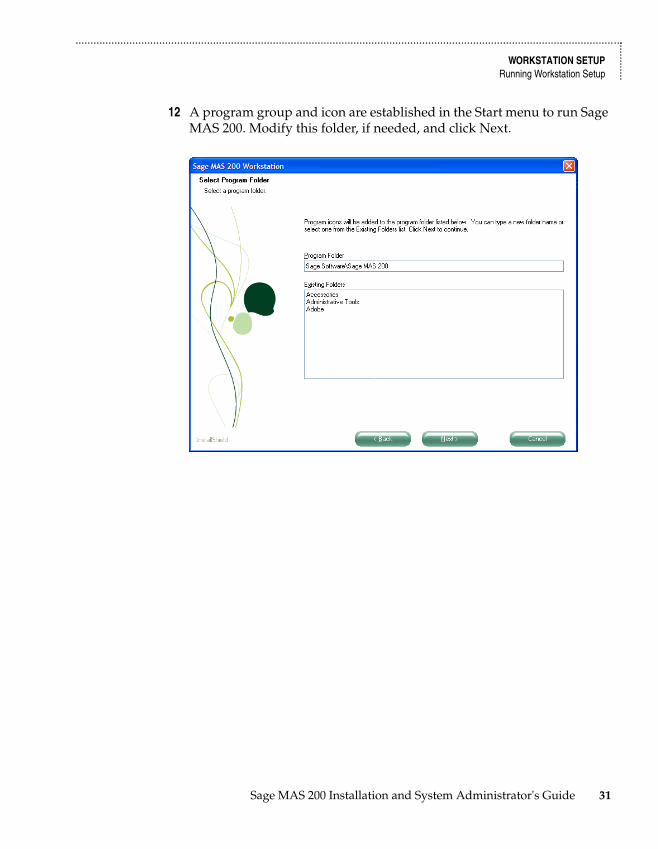
12 A program group and icon are established in the Start menu to run Sage MAS 200. Modify this folder, if needed, and click Next.
Sage MAS 200 Installation and System Administrator's Guide 31

.......................................................................................................................................................................................
Chapter 2 Installing Sage MAS 200
......
......
..
13 Review your settings and click Next to begin installing Sage MAS 200 files.
The Workstation Setup program verifies that no other programs are running that may be using files to be installed by Server Setup. If you receive a message stating that Workstation Setup cannot copy files because they are currently in use, close all programs running on the workstation, (this includes resident programs and screen savers such as PointCast™), select Continue, and click Next. To exit Workstation Setup, select Exit, and click Next.
NOTE Some DLLs or programs may be resident in memory even though the application has been terminated. If you continue to receive the Programs Currently In Use message, exit the installation and restart the computer.
32 Sage MAS 200 Installation and System Administrator's Guide

.......................................................................................................................................................................................
WORKSTATION SETUPRunning Workstation Setup ...
......
....
If you are running through Terminal Services/Citrix, the following message dialog box appears, unless you typed NO ACCESS at the Server field in the Sage MAS 200 Server Path window.
Click Yes to copy the activation key file. This allows multiple Terminal Services/Citrix sessions to access Sage MAS 200 at the same time. Click No to leave the activation set for a single user.
14 Your installation is complete. Click Finish.
NOTE After installing Sage MAS 200, apply any available Service Packs and Service Updates for version 4.40. Service Packs and Service Updates are available on the Sage Online Web site at: www. sagesoftwareonline.com
Sage MAS 200 Installation and System Administrator's Guide 33
.......................................................................................................................................................................................
Chapter 2 Installing Sage MAS 200
......
......
..
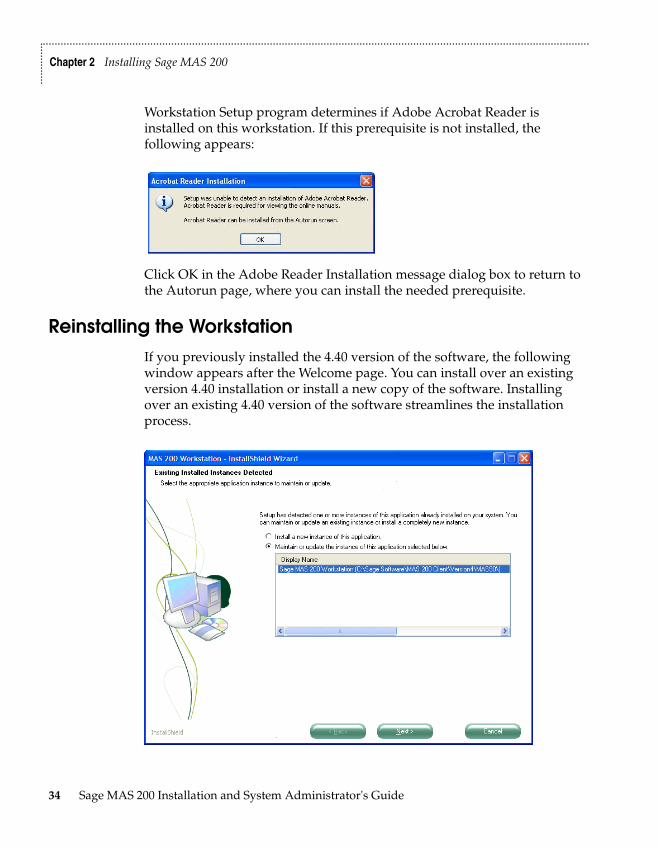
Workstation Setup program determines if Adobe Acrobat Reader is installed on this workstation. If this prerequisite is not installed, the following appears:
Click OK in the Adobe Reader Installation message dialog box to return to the Autorun page, where you can install the needed prerequisite.
Reinstalling the WorkstationIf you previously installed the 4.40 version of the software, the following window appears after the Welcome page. You can install over an existing version 4.40 installation or install a new copy of the software. Installing over an existing 4.40 version of the software streamlines the installation process.
34 Sage MAS 200 Installation and System Administrator's Guide

.......................................................................................................................................................................................
REINSTALLING THE WORKSTATIONSelecting Installation Options ...
......
....
Selecting Installation Options
1 Select an installation option.
• If you are installing over an existing version 4.40 installation, select Maintain or update the instance of this application selected below, and then select the previously installed version of the software that you will install over and click Next. Proceed to Step 2 on this page.
• If you are installing a new copy of the software, select Install a new instance of this application and click Next. Proceed to Step 4 on page 25.
2 After selecting an existing version 4.40 installation to install over, select the type of installation to perform.
Sage MAS 200 Installation and System Administrator's Guide 35
.......................................................................................................................................................................................
Chapter 2 Installing Sage MAS 200
......
......
..
Multiple InstallationsSage MAS 200 can attach to different servers from the same local workstation setup. For example, if your site has three servers and Sage MAS 200 is installed on each server, you can connect to the appropriate server by clicking a single icon rather than having a separate icon for each installation.
Selecting a Server
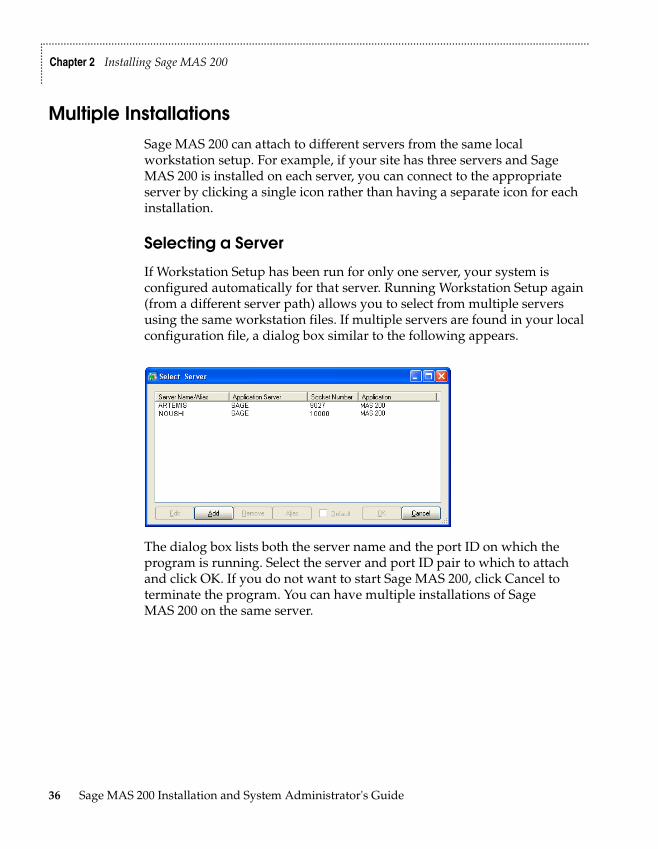
If Workstation Setup has been run for only one server, your system is configured automatically for that server. Running Workstation Setup again (from a different server path) allows you to select from multiple servers using the same workstation files. If multiple servers are found in your local configuration file, a dialog box similar to the following appears.
The dialog box lists both the server name and the port ID on which the program is running. Select the server and port ID pair to which to attach and click OK. If you do not want to start Sage MAS 200, click Cancel to terminate the program. You can have multiple installations of Sage MAS 200 on the same server.
36 Sage MAS 200 Installation and System Administrator's Guide
.......................................................................................................................................................................................
MULTIPLE INSTALLATIONSSelecting a Server ...
......
....
Editing, Adding, and Removing Servers
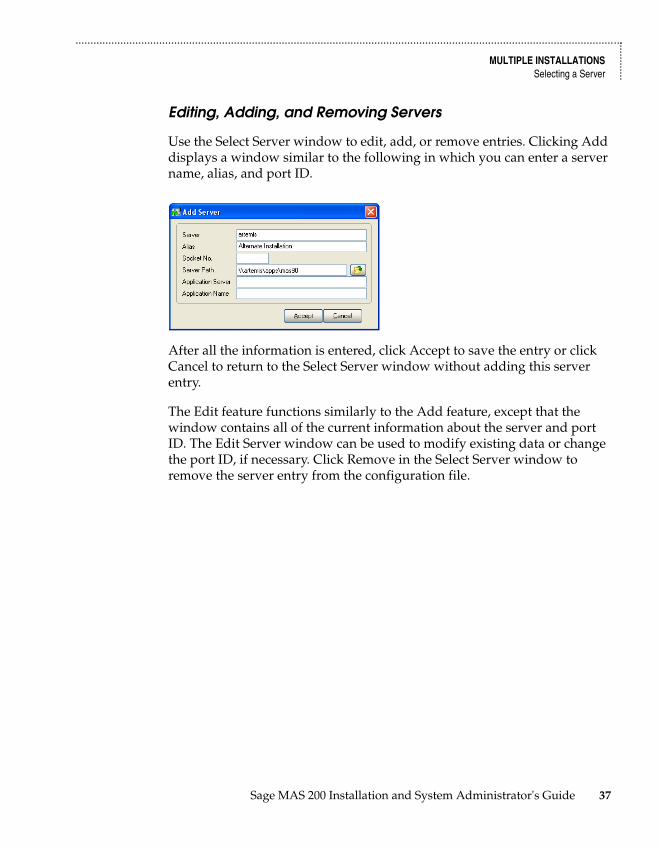
Use the Select Server window to edit, add, or remove entries. Clicking Add displays a window similar to the following in which you can enter a server name, alias, and port ID.
After all the information is entered, click Accept to save the entry or click Cancel to return to the Select Server window without adding this server entry.
The Edit feature functions similarly to the Add feature, except that the window contains all of the current information about the server and port ID. The Edit Server window can be used to modify existing data or change the port ID, if necessary. Click Remove in the Select Server window to remove the server entry from the configuration file.
Sage MAS 200 Installation and System Administrator's Guide 37
.......................................................................................................................................................................................
Chapter 2 Installing Sage MAS 200
......
......
..
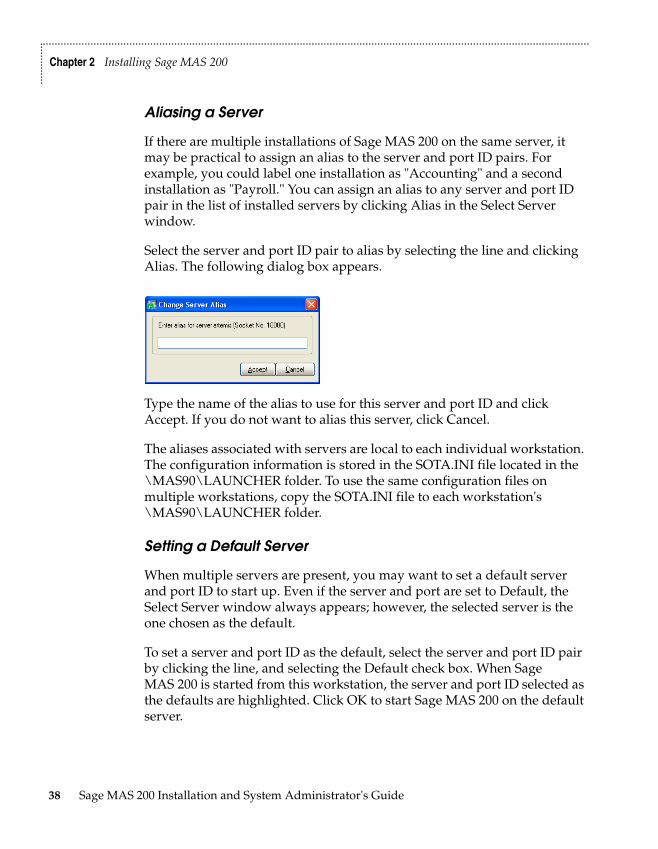
Aliasing a Server
If there are multiple installations of Sage MAS 200 on the same server, it may be practical to assign an alias to the server and port ID pairs. For example, you could label one installation as "Accounting" and a second installation as "Payroll." You can assign an alias to any server and port ID pair in the list of installed servers by clicking Alias in the Select Server window.
Select the server and port ID pair to alias by selecting the line and clicking Alias. The following dialog box appears.
Type the name of the alias to use for this server and port ID and click Accept. If you do not want to alias this server, click Cancel.
The aliases associated with servers are local to each individual workstation. The configuration information is stored in the SOTA.INI file located in the \MAS90\LAUNCHER folder. To use the same configuration files on multiple workstations, copy the SOTA.INI file to each workstation's \MAS90\LAUNCHER folder.
Setting a Default Server
When multiple servers are present, you may want to set a default server and port ID to start up. Even if the server and port are set to Default, the Select Server window always appears; however, the selected server is the one chosen as the default.
To set a server and port ID as the default, select the server and port ID pair by clicking the line, and selecting the Default check box. When Sage MAS 200 is started from this workstation, the server and port ID selected as the defaults are highlighted. Click OK to start Sage MAS 200 on the default server.
38 Sage MAS 200 Installation and System Administrator's Guide
Chapter 3
Using the Application ServerChapter 3Application Server OverviewSage MAS 200 is powered by an Application Server, a powerful program that allows multiple users to remotely access a Sage MAS 200 server using TCP/IP. Users can be connected on an internal LAN or externally through an intranet or WAN. The Application Server also allows for encryption using SSL to protect your data if operating in an environment that is not secure, such as over the Internet.
Before you can run Sage MAS 200, you must first configure the Application Server. The Application Server can be configured to run as a service under Windows 2003/2008, but it must be configured using the following steps before users will be able to access the Sage MAS 200 server.
Sage MAS 200 Installation and System Administrator's Guide 39
.......................................................................................................................................................................................
Chapter 3 Using the Application Server
......
......
..
Configuring the Application Server
To configure the Application Server
1 On the server where Sage MAS 200 is installed, from the Start menu, run the Application Server Configuration program (this program should be a shortcut in the Sage Software Program Group, unless you installed to a different location).
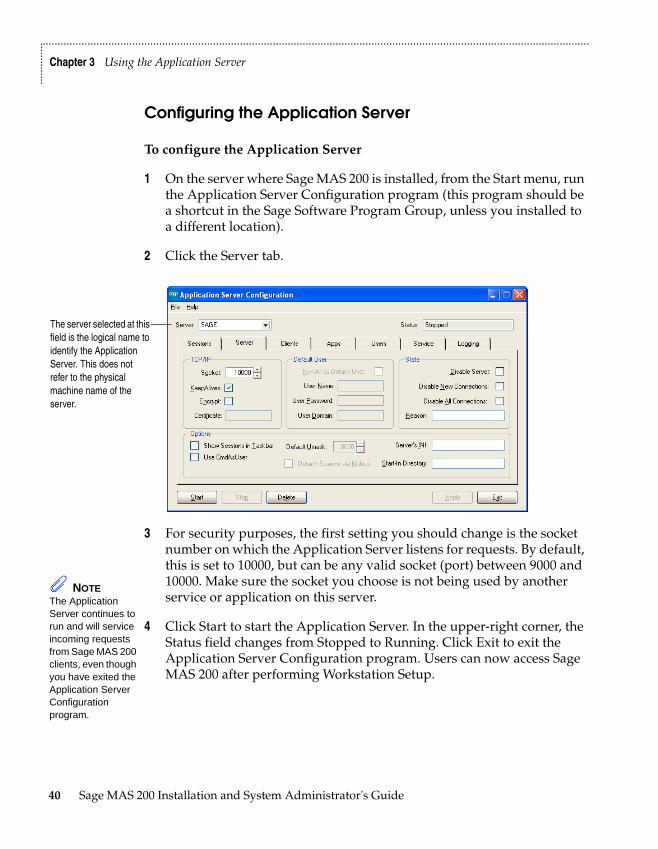
2 Click the Server tab.
3 For security purposes, the first setting you should change is the socket number on which the Application Server listens for requests. By default, this is set to 10000, but can be any valid socket (port) between 9000 and 10000. Make sure the socket you choose is not being used by another service or application on this server.
4 Click Start to start the Application Server. In the upper-right corner, the Status field changes from Stopped to Running. Click Exit to exit the Application Server Configuration program. Users can now access Sage MAS 200 after performing Workstation Setup.
The server selected at this field is the logical name to identify the Application Server. This does not refer to the physical machine name of the server.
NOTE The Application Server continues to run and will service incoming requests from Sage MAS 200 clients, even though you have exited the Application Server Configuration program.
40 Sage MAS 200 Installation and System Administrator's Guide
.......................................................................................................................................................................................
APPLICATION SERVER OVERVIEWConfiguring the Application Server ...
......
....
5 In this current configuration, a user must remain logged onto the server where the Sage MAS 200 Application Server is running. The user logged onto this server must have access to all resources required by Sage MAS 200 (all rights to all program and data folders in Sage MAS 200).
6 After the Application Server has been configured once, you do not need to re-run the Application Server Configuration program to start the Application Server. You can start the Application Server by selecting the Application Server Startup menu item from the Start menu. This starts the Application Server which will continue to run until the user is logged off or the server is shut down.
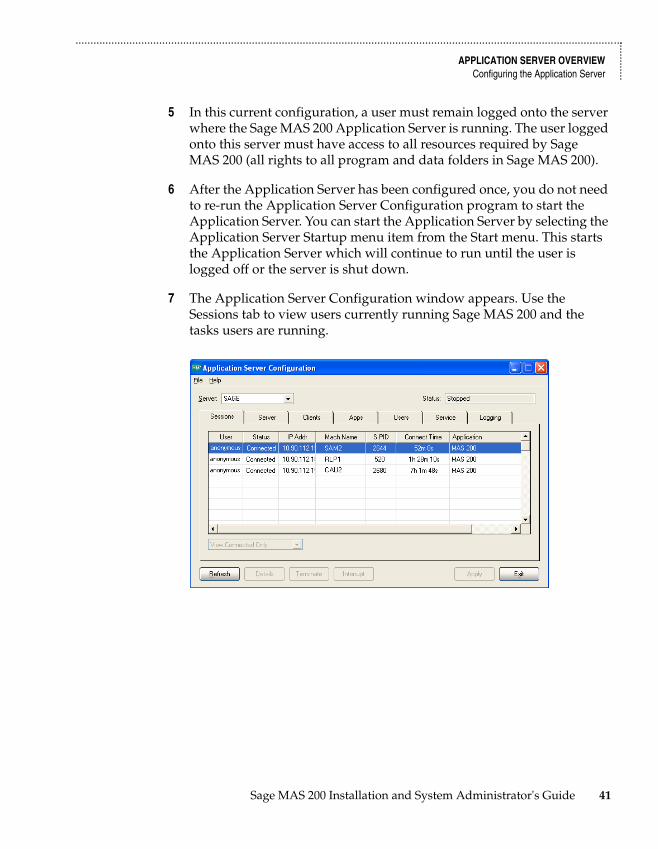
7 The Application Server Configuration window appears. Use the Sessions tab to view users currently running Sage MAS 200 and the tasks users are running.
Sage MAS 200 Installation and System Administrator's Guide 41
.......................................................................................................................................................................................
Chapter 3 Using the Application Server
......
......
..
Turning Off the Application Server
To turn off the Application Server
1 Run the Application Server Configuration program.
2 Click the Servers tab and then click Stop. The Status field changes from Running to Stopped.
You can also turn off the Application Server by closing the Application Server task that appears on the Task Bar of the server. To do this, right-click the task and click Close from the pop-up menu. The Application Server will shut down after a few seconds.
Configuring as a Service
Depending on your needs, you may want to start the Application Server as a service of the operating system. Running as a service has a number of advantages: The Application Server can be configured to start automatically so that if the server is rebooted, you do not have to restart the Application Server. It is also more secure because someone does not need to be logged onto the server in order for the Application Server to run.
To configure the Application Server as a service
1 Configure the Application Server. For instructions, see Configuring the Application Server on page 40.
2 Exit the Application Server Configuration program after the Application Server has been configured.
3 If you already have a Windows domain user account set up to run the Application Server, skip this step; otherwise, create a new domain user on your server that has appropriate access rights to run all the functions and features of Sage MAS 200. This should include the Modify permission to the application folder, any folders where Sage MAS 200 data is located, the Windows folder, and access to the Registry. This account must also be granted the Log On as a Service right.
42 Sage MAS 200 Installation and System Administrator's Guide
.......................................................................................................................................................................................
APPLICATION SERVER OVERVIEWConfiguring as a Service ...
......
....
If you are not running in a domain environment, create and use a local machine account for your workgroup; however, you must ensure this account can execute a UNC path to the ..\MAS90 folder. Test this by entering the UNC path in Windows Explorer. If you are prompted for a user name and password, the account is not set up properly.
4 After a user is created, click the Application Server Service Setup shortcut from the Sage Software Program Group from the Start menu.
5 In the window that appears, select the path of the Sage MAS 200 installation, if it is different than the default Sage MAS 200 installation path. The Application Server Service Setup program installs the service components necessary to run the Application Server as a service.
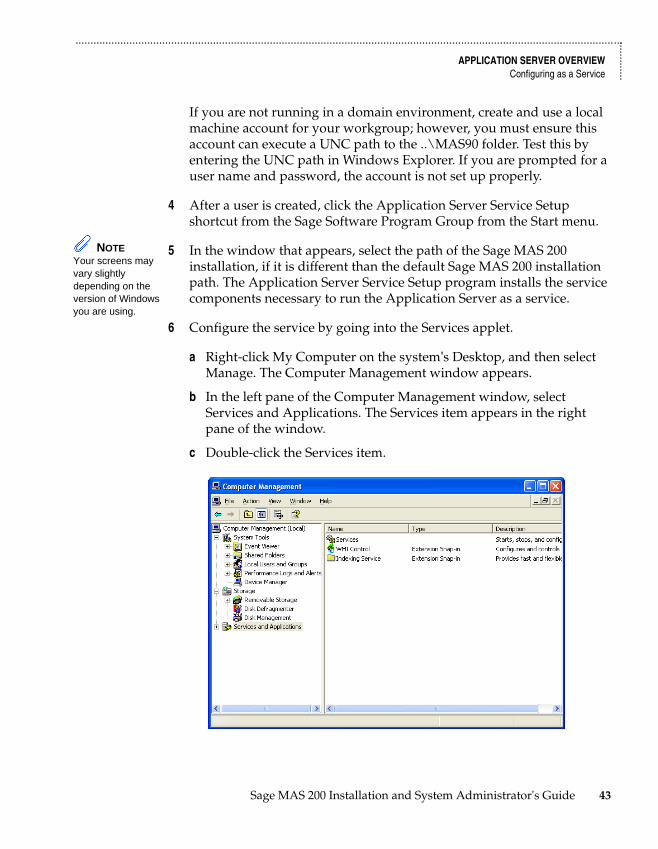
6 Configure the service by going into the Services applet.
a Right-click My Computer on the system's Desktop, and then select Manage. The Computer Management window appears.
b In the left pane of the Computer Management window, select Services and Applications. The Services item appears in the right pane of the window.
c Double-click the Services item.
NOTE Your screens may vary slightly depending on the version of Windows you are using.
Sage MAS 200 Installation and System Administrator's Guide 43
.......................................................................................................................................................................................
Chapter 3 Using the Application Server
......
......
..
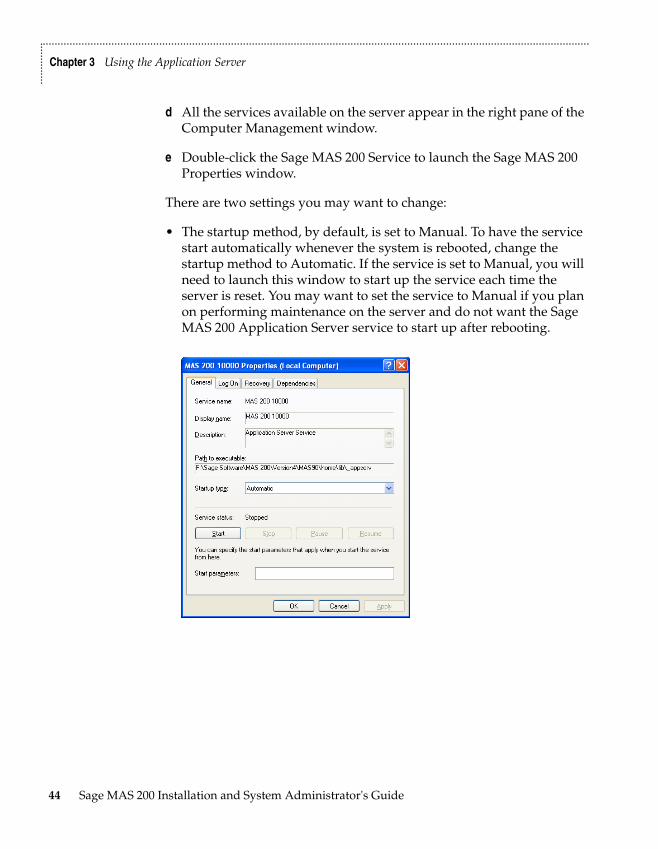
d All the services available on the server appear in the right pane of the Computer Management window.
e Double-click the Sage MAS 200 Service to launch the Sage MAS 200 Properties window.
There are two settings you may want to change:
• The startup method, by default, is set to Manual. To have the service start automatically whenever the system is rebooted, change the startup method to Automatic. If the service is set to Manual, you will need to launch this window to start up the service each time the server is reset. You may want to set the service to Manual if you plan on performing maintenance on the server and do not want the Sage MAS 200 Application Server service to start up after rebooting.
44 Sage MAS 200 Installation and System Administrator's Guide
.......................................................................................................................................................................................
APPLICATION SERVER OVERVIEWConfiguring as a Service ...
......
....
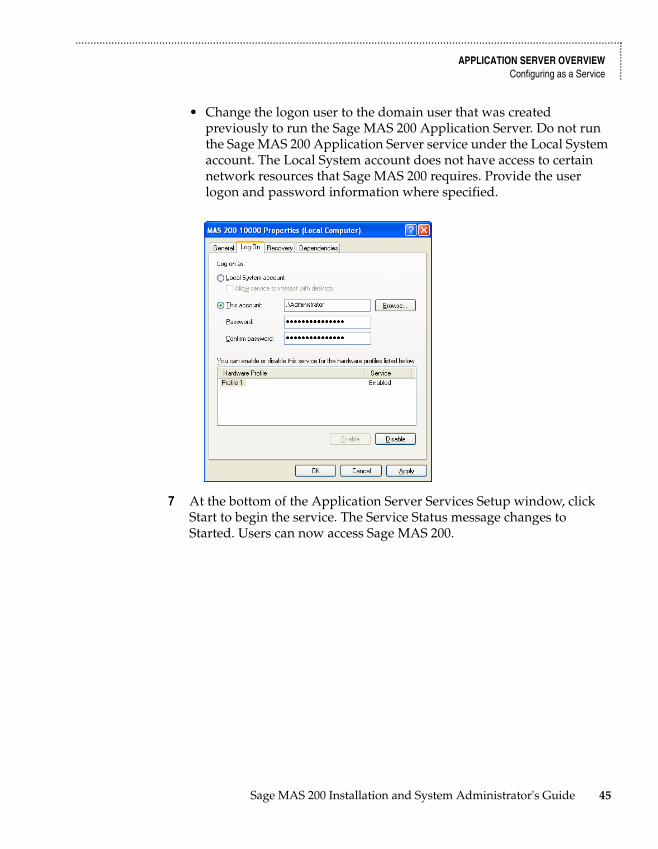
• Change the logon user to the domain user that was created previously to run the Sage MAS 200 Application Server. Do not run the Sage MAS 200 Application Server service under the Local System account. The Local System account does not have access to certain network resources that Sage MAS 200 requires. Provide the user logon and password information where specified.
7 At the bottom of the Application Server Services Setup window, click Start to begin the service. The Service Status message changes to Started. Users can now access Sage MAS 200.
Sage MAS 200 Installation and System Administrator's Guide 45
.......................................................................................................................................................................................
Chapter 3 Using the Application Server
......
......
..
Advanced FeaturesThe Application Server has a number of additional features that can be useful for System Administrators. You can enable some of these features for added security or logging purposes; however, these are not required to run Sage MAS 200. To enable these features, you must log on to the server and start the Sage MAS 200 Application Server Configuration program.
Session Tracking
In the Application Server Configuration window, on the Sessions tab, you can view a list of all the users who are currently in the system and which program they are running. This window also provides you with more detailed information about the machine name, IP address, and connection time for each process. This is useful when trying to find users on the system or people in a particular application. Master Console in Sage MAS 200 can also be used for this purpose.
Individual sessions can also be terminated if they appear to be locked up or become unresponsive. Terminating a process in this manner can cause data corruption issues and should only be done as a last resort. To terminate a session, select the session from the list and then click Terminate.
SSL Encryption
The Sage MAS 200 Application Server can be configured to use SSL to encrypt data being sent to and from the Application Server. This can be extremely useful when using the Internet or any other un-secure medium to connect workstations to the server; however, SSL does add some extra overhead in terms of performance. This feature should only be enabled if it is necessary. Using SSL in a secured, intranet environment or over an already protected tunneling protocol (like VPN) is not recommended due to the potential performance impact.
The SSL component of the Sage MAS 200 Application Server uses the OpenSSL protocol and drivers. To use SSL, you must first configure the Sage MAS 200 Application Server to use SSL and then generate an SSL certificate. For more information, see Generating an SSL Certificate on page 48.
46 Sage MAS 200 Installation and System Administrator's Guide
.......................................................................................................................................................................................
ADVANCED FEATURESSSL Encryption ...
......
....
To configure the Sage MAS 200 Application Server to use SSL
1 Make sure all users are out of Sage MAS 200. After SSL is enabled, a different connection string is required for each of the workstations connecting to the server. Workstations that do not have this additional information will not be allowed to connect to Sage MAS 200.
2 Run the Application Server Configuration program.
3 In the Sage MAS 200 Application Server Configuration window, click the Server tab and select the Encrypt check box. The Certificate field becomes enabled and allows you to type the path to the SSL certificate.
4 Provide the full path to the certificate relative to the server where Sage MAS 200 is installed. After the certificate is entered and validated, the server automatically updates its configuration.
5 On each workstation that will be connecting to Sage MAS 200, make the following change to the Sage MAS 200 shortcut. In the Target command line, add -SSL to the end of the parameter list. If you receive an error trying to connect to the server after configuring SSL, verify that the workstation startup shortcut was modified.
6 Verify which startup icon the user used when trying to connect to the server and verify the -SSL argument is in the target command line. Users may have more than one shortcut connecting them to the server that may need to be modified.
Sage MAS 200 Installation and System Administrator's Guide 47
.......................................................................................................................................................................................
Chapter 3 Using the Application Server
......
......
..
Generating an SSL Certificate
To use the SSL capabilities of the Web Engine, create a .pem file that contains both the certificate and your private key in X509 format.
The instructions for generating an SSL certificate are available on the ProvideX Web site. Go to www.pvx.com and search for "certificates", "pem", or "CSR."
NOTE If you are unfamiliar with generating a certificate for secure transactions, consult a network consultant or Sage business partner.
48 Sage MAS 200 Installation and System Administrator's Guide
Chapter 4
Configuring the Client/Server ODBC DriverChapter 4Client/Server ODBC OverviewThe Sage MAS 200 server installs client/server ODBC driver components, which allow remote workstations to process Crystal form and report worktables using server-side ODBC processing. Report rendering is completed using a locally cached copy of the form or report and a local Crystal Reports print engine.
Server-Side Configuration
Running as an Application or Service
The client/server ODBC driver can be run as an application or as a service. Perform one of the following:
• To run the client/server ODBC driver as an application, in Windows Explorer, locate and double-click the pviosrv.exe file in the following location:
..\MAS90\Home\pviosrv.exe
• To run the client/server ODBC driver as a service, in Windows Explorer, locate and double-click the CSODBCService.exe file in the following location:
..\MAS90\Home\Lib\_appserv\CSODBCService.exe
NOTE Server-side ODBC processing is available only in Sage MAS 200 version 4.10 or higher.
Sage MAS 200 Installation and System Administrator's Guide 49
.......................................................................................................................................................................................
Chapter 4 Configuring the Client/Server ODBC Driver
......
......
..
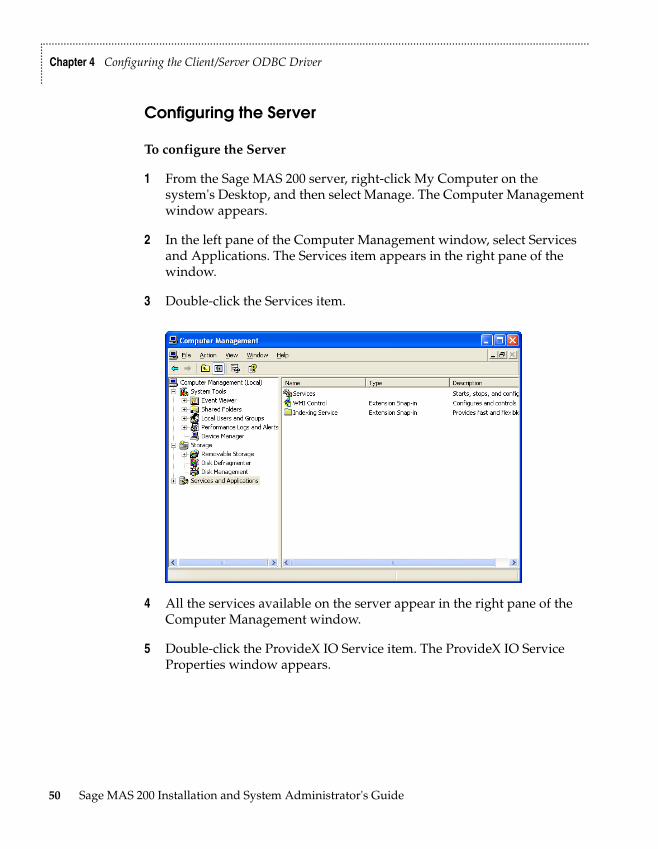
Configuring the Server
To configure the Server
1 From the Sage MAS 200 server, right-click My Computer on the system's Desktop, and then select Manage. The Computer Management window appears.
2 In the left pane of the Computer Management window, select Services and Applications. The Services item appears in the right pane of the window.
3 Double-click the Services item.
4 All the services available on the server appear in the right pane of the Computer Management window.
5 Double-click the ProvideX IO Service item. The ProvideX IO Service Properties window appears.
50 Sage MAS 200 Installation and System Administrator's Guide
.......................................................................................................................................................................................
SERVER-SIDE CONFIGURATIONConfiguring the Server ...
......
....
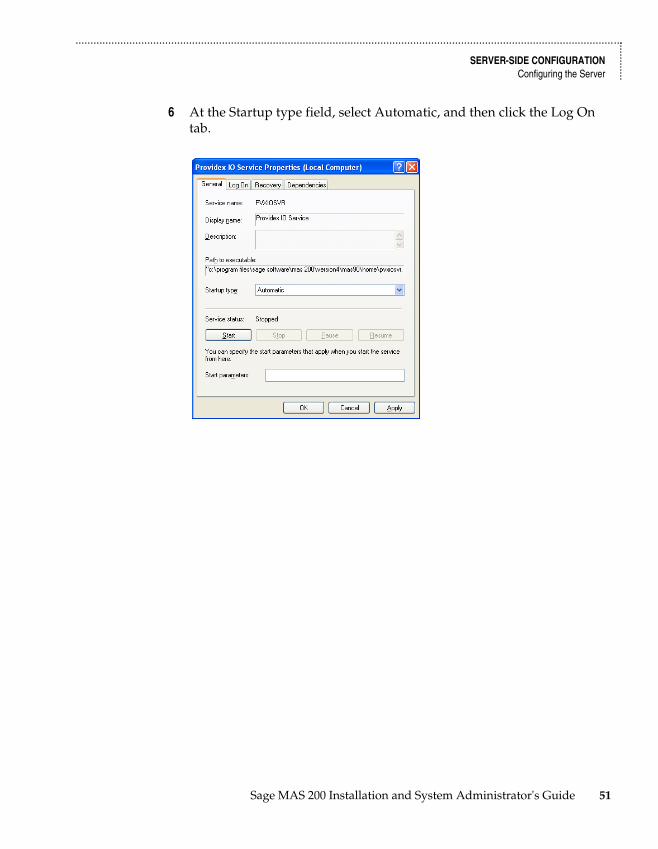
6 At the Startup type field, select Automatic, and then click the Log On tab.
Sage MAS 200 Installation and System Administrator's Guide 51
.......................................................................................................................................................................................
Chapter 4 Configuring the Client/Server ODBC Driver
......
......
..
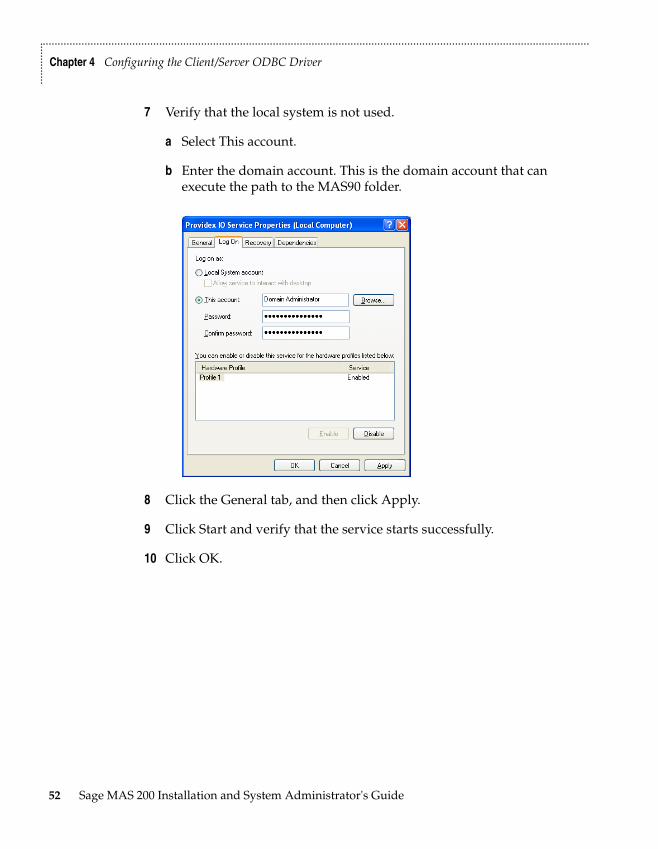
7 Verify that the local system is not used.
a Select This account.
b Enter the domain account. This is the domain account that can execute the path to the MAS90 folder.
8 Click the General tab, and then click Apply.
9 Click Start and verify that the service starts successfully.
10 Click OK.
52 Sage MAS 200 Installation and System Administrator's Guide

.......................................................................................................................................................................................
WORKSTATION CONFIGURATIONConfiguring the Workstation ...
......
....
Workstation Configuration
Configuring the Workstation
To configure the workstation
1 From the Sage MAS 200 workstation, select Library Master Setup menu > System Configuration. The System Configuration window appears.
2 Click the ODBC tab, and then select the Enable C/S ODBC Driver check box.
3 At the ODBC Server Name field, enter the server name or IP address where the client/server ODBC application or service is running.
4 At the ODBC Server Port field, enter an accessible server port or leave the field blank to use the default port, 20222.
5 Select the Enable for All Users check box on the User Maintenance Preferences tab only if all users (both LAN and remote) will be using the client/server ODBC driver.
6 Close and restart the workstation client.
7 Access and test the ODBC Data source.
a Select Start menu > Control Panel.
b Double-click the Administrative Tools item.
c Double-click Data Sources (ODBC). The ODBC Data Source Administrator window appears.
Sage MAS 200 Installation and System Administrator's Guide 53
.......................................................................................................................................................................................
Chapter 4 Configuring the Client/Server ODBC Driver
......
......
..
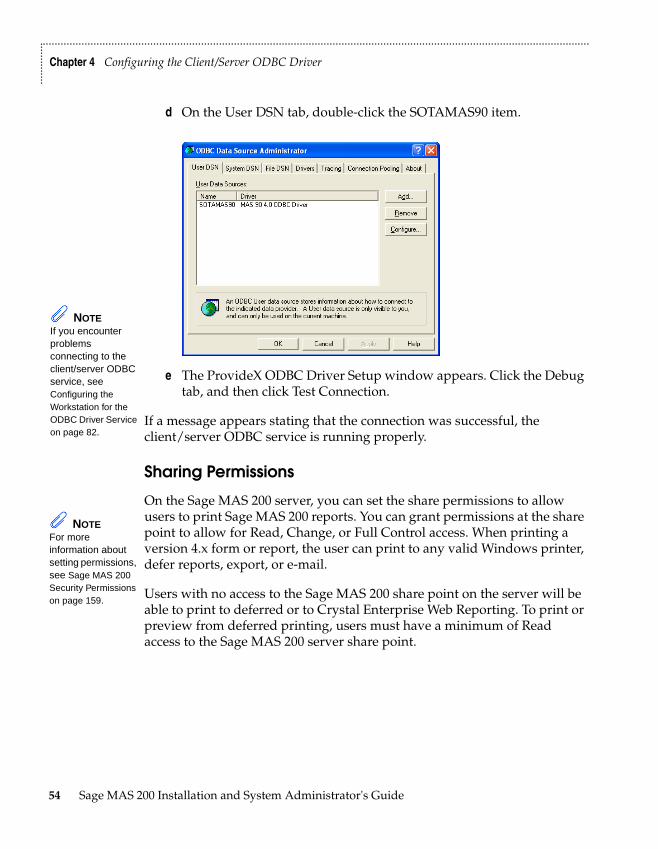
d On the User DSN tab, double-click the SOTAMAS90 item.
e The ProvideX ODBC Driver Setup window appears. Click the Debug tab, and then click Test Connection.
If a message appears stating that the connection was successful, the client/server ODBC service is running properly.
Sharing Permissions
On the Sage MAS 200 server, you can set the share permissions to allow users to print Sage MAS 200 reports. You can grant permissions at the share point to allow for Read, Change, or Full Control access. When printing a version 4.x form or report, the user can print to any valid Windows printer, defer reports, export, or e-mail.
Users with no access to the Sage MAS 200 share point on the server will be able to print to deferred or to Crystal Enterprise Web Reporting. To print or preview from deferred printing, users must have a minimum of Read access to the Sage MAS 200 server share point.
NOTE If you encounter problems connecting to the client/server ODBC service, see Configuring the Workstation for the ODBC Driver Service on page 82.
NOTE For more information about setting permissions, see Sage MAS 200 Security Permissions on page 159.
54 Sage MAS 200 Installation and System Administrator's Guide
Chapter 5
Installing Crystal ReportsChapter 5Chapter 5Crystal Reports OverviewCrystal Reports is a powerful, graphics-oriented reporting program that allows users to customize their graphical forms. Crystal Reports is fully integrated with Sage MAS 200. Sage MAS 200 provides a number of customizable Crystal Reports forms as part of the standard installation. The Workstation Setup program for Sage MAS 200 installs the standard Crystal Reports Run-Time Engine on each workstation allowing all users to view and print reports created through Crystal; however, to modify or customize the standard forms included with Sage MAS 200, or to create your own reports, you must install the Crystal Reports Design Environment. This is provided on a separate Crystal Reports CD-ROM.
You can also install Crystal Server, which allows you to generate reports and publish them over the Internet or through an intranet to remote users who do not have direct or fast access to the physical data files. Crystal Server is provided on a separate CD-ROM.
Crystal Reports will run with the Sage MAS 200 ODBC driver as well as the standard Microsoft SQL Server ODBC driver.
Installing the Design Environment
You can install Crystal Reports in a number of different configurations. For information on the various options and configurations available, refer to the Crystal Reports user's manuals and online documentation. This chapter discusses the relevant options required to run in the Sage MAS 200 environment.
Each user that will be designing, customizing, or modifying Crystal Reports will need to install Crystal Reports on their local system.
Sage MAS 200 Installation and System Administrator's Guide 55
.......................................................................................................................................................................................
Chapter 5 Installing Crystal Reports
......
......
..
If you are installing to the workstation for the purpose of modifying or creating Crystal reports, you will need to install Crystal Reports and perform a Typical installation. The Typical installation uses pre-assigned settings. For more information, see Installing Crystal Reports to the Workstation on this page.
If you are installing to a server to do Web reporting, you will need to install Crystal Reports and perform a Complete installation, then install Crystal Server. For more information, see Installing and Configuring Crystal Reports Server on page 60.
If you are installing Crystal Reports to a network server, refer to the Install PDF file located at the root Crystal Reports CD-ROM.
Installing Crystal Reports to the Workstation
To install Crystal Reports to the workstation
1 Place the Crystal Reports for Sage CD-ROM in the CD-ROM drive.
2 If Autorun is enabled on the workstation, the Autorun page appears; otherwise, select Start menu > Run and type D:\Setup.exe, where D:\ is the CD-ROM drive. Click Install Crystal Reports.
56 Sage MAS 200 Installation and System Administrator's Guide
.......................................................................................................................................................................................
CRYSTAL REPORTS OVERVIEWInstalling Crystal Reports to the Workstation ...
......
....
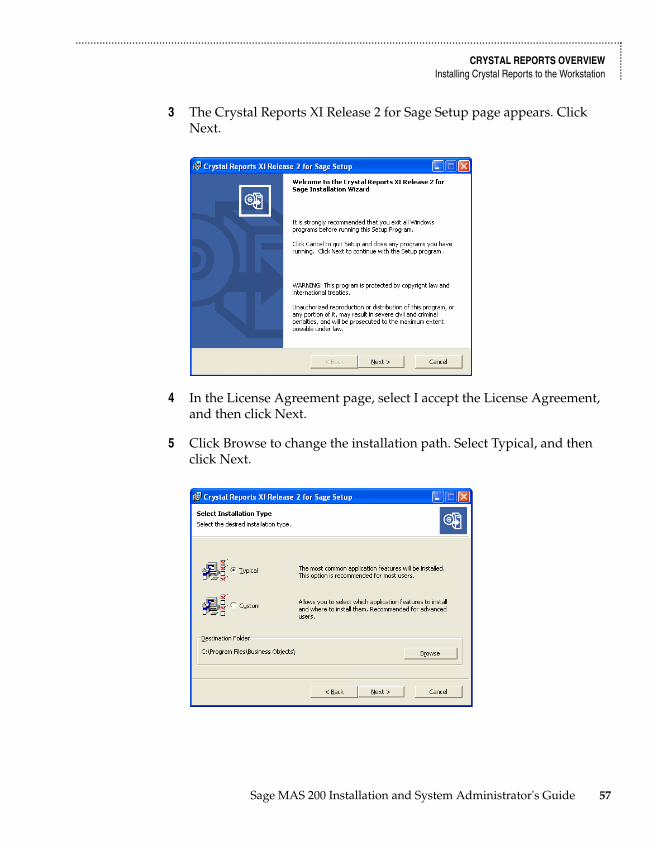
3 The Crystal Reports XI Release 2 for Sage Setup page appears. Click Next.
4 In the License Agreement page, select I accept the License Agreement, and then click Next.
5 Click Browse to change the installation path. Select Typical, and then click Next.
Sage MAS 200 Installation and System Administrator's Guide 57
.......................................................................................................................................................................................
Chapter 5 Installing Crystal Reports
......
......
..
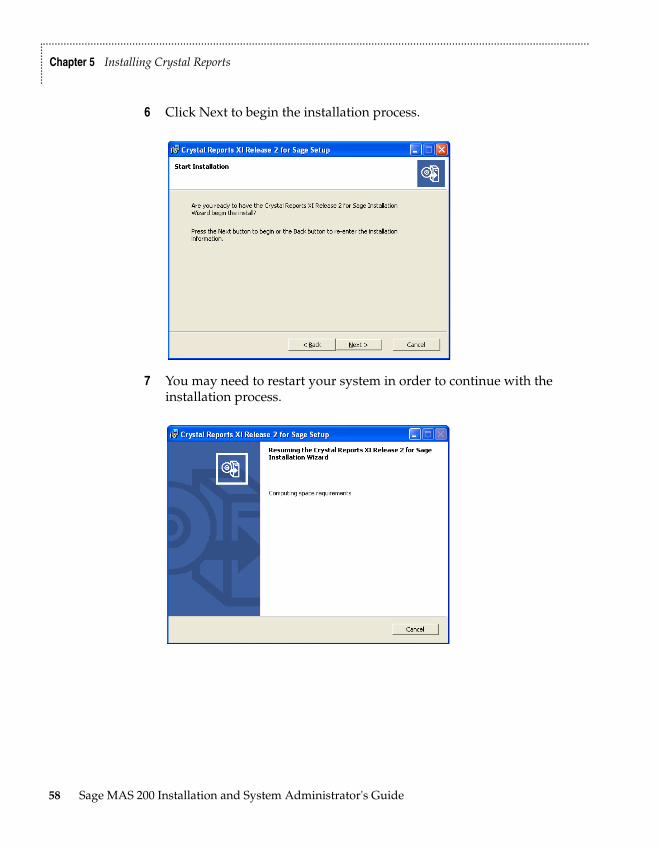
6 Click Next to begin the installation process.
7 You may need to restart your system in order to continue with the installation process.
58 Sage MAS 200 Installation and System Administrator's Guide
.......................................................................................................................................................................................
CRYSTAL REPORTS OVERVIEWInstalling Crystal Reports to the Workstation ...
......
....
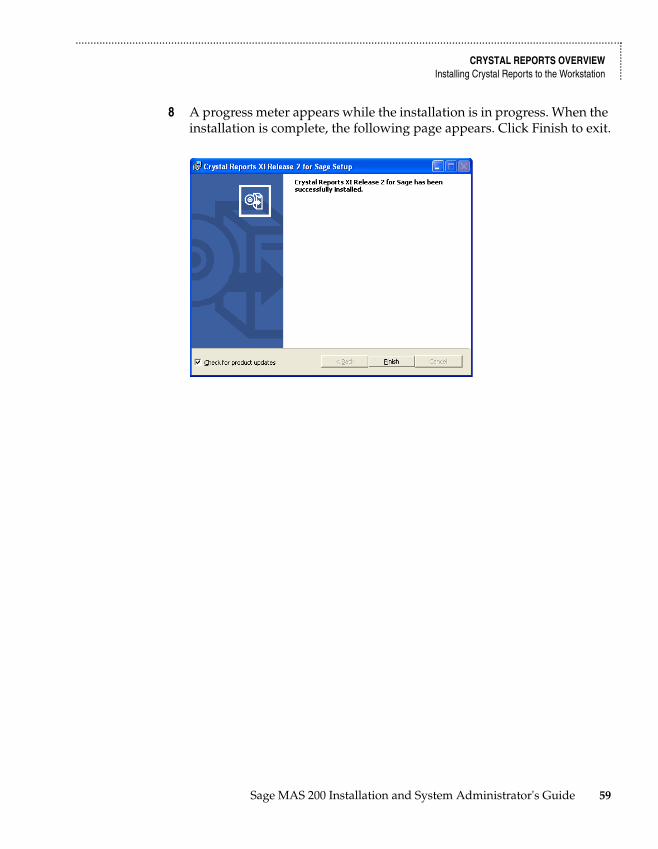
8 A progress meter appears while the installation is in progress. When the installation is complete, the following page appears. Click Finish to exit.
Sage MAS 200 Installation and System Administrator's Guide 59
.......................................................................................................................................................................................
Chapter 5 Installing Crystal Reports
......
......
..
Installing and Configuring Crystal Reports Server Sage MAS 200 Crystal Web Reports allows thin-client Web Reporting through Sage MAS 200. Crystal Reports Server (previously known as Crystal Enterprise) is designed to service Crystal Reports through a web service using Microsoft® Internet Information Server and an ActiveX plug-in. Sage MAS 200 uses Crystal Reports Server to provide Crystal Reports forms across the Internet or through an intranet to users who are running Sage MAS 200 remotely or through a low-speed connection. The Sage MAS 200 server will perform all the calculations, data gathering, and manipulation on its own server. Crystal Reports Server will send the final, compiled report to the user for viewing.
There are many features of Crystal Reports Server that are not directly supported by Sage MAS 200. For details on how to install and configure Crystal Reports Server in different environments to suit your own needs, refer to the Crystal Reports Server XI Release 2 Getting Started Guide or Crystal Reports Server XI Release 2 Installation Guide for Windows on the Crystal Server CD. For information on system requirements, see the Supported Platform Matrix in the Support area of the Sage Online Web site at: www.sagesoftwareonline.com
WARNING If you are using Crystal Reports parameter fields, the parameter field prompt appears on the Sage MAS 200 server. For this reason, we do not recommend the use of parameters with Crystal Web Reports.
60 Sage MAS 200 Installation and System Administrator's Guide
.......................................................................................................................................................................................
INSTALLING AND CONFIGURING CRYSTAL REPORTS SERVERInstalling Crystal Reports Server ...
......
....
Installing Crystal Reports Server
To install Crystal Reports Server XI R2
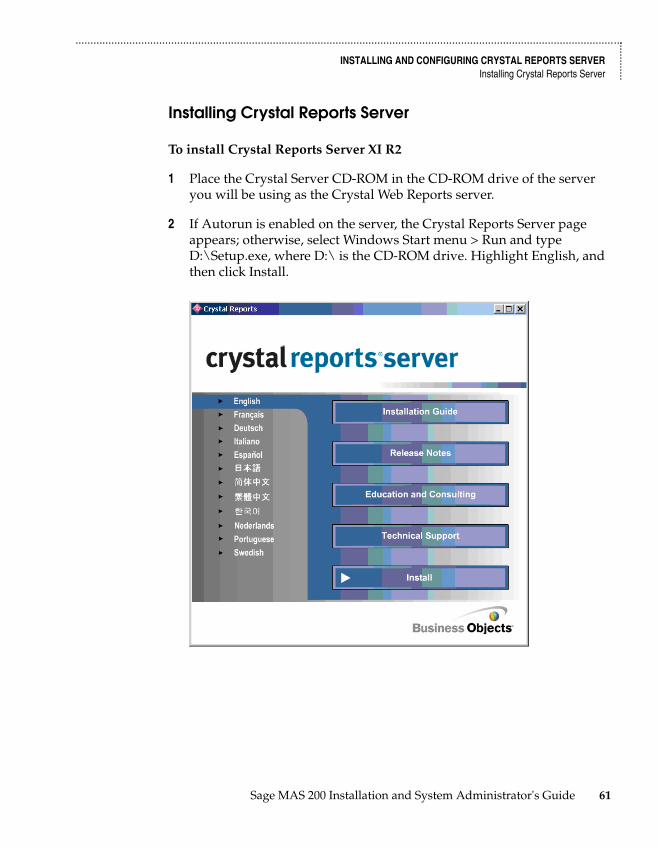
1 Place the Crystal Server CD-ROM in the CD-ROM drive of the server you will be using as the Crystal Web Reports server.
2 If Autorun is enabled on the server, the Crystal Reports Server page appears; otherwise, select Windows Start menu > Run and type D:\Setup.exe, where D:\ is the CD-ROM drive. Highlight English, and then click Install.
Sage MAS 200 Installation and System Administrator's Guide 61
.......................................................................................................................................................................................
Chapter 5 Installing Crystal Reports
......
......
..
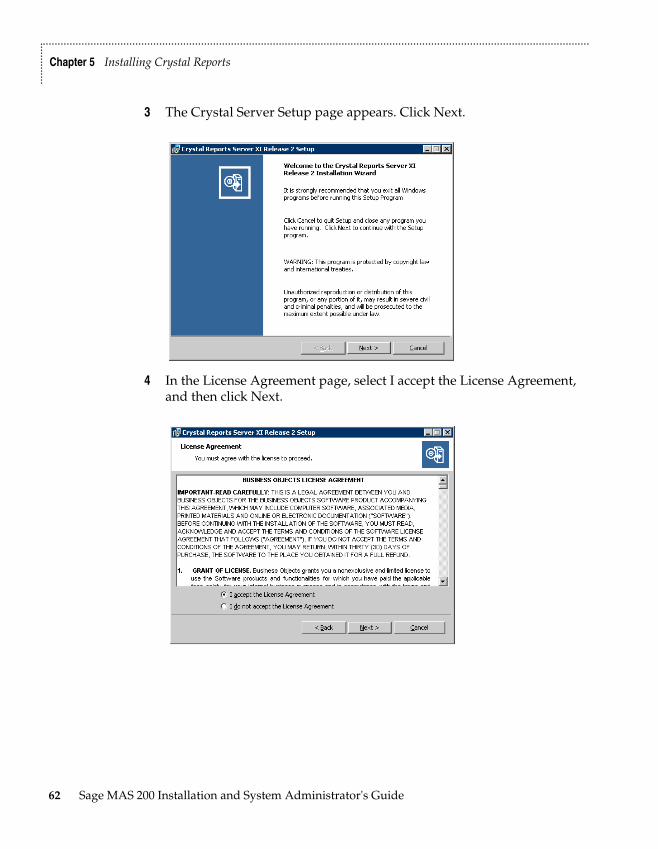
3 The Crystal Server Setup page appears. Click Next.
4 In the License Agreement page, select I accept the License Agreement, and then click Next.
62 Sage MAS 200 Installation and System Administrator's Guide
.......................................................................................................................................................................................
INSTALLING AND CONFIGURING CRYSTAL REPORTS SERVERInstalling Crystal Reports Server ...
......
....
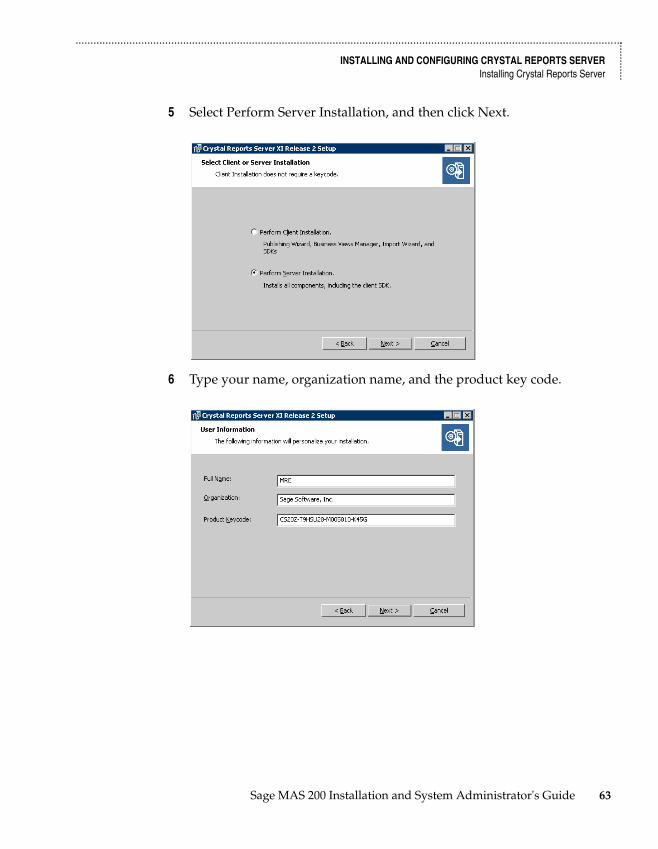
5 Select Perform Server Installation, and then click Next.
6 Type your name, organization name, and the product key code.
Sage MAS 200 Installation and System Administrator's Guide 63
.......................................................................................................................................................................................
Chapter 5 Installing Crystal Reports
......
......
..
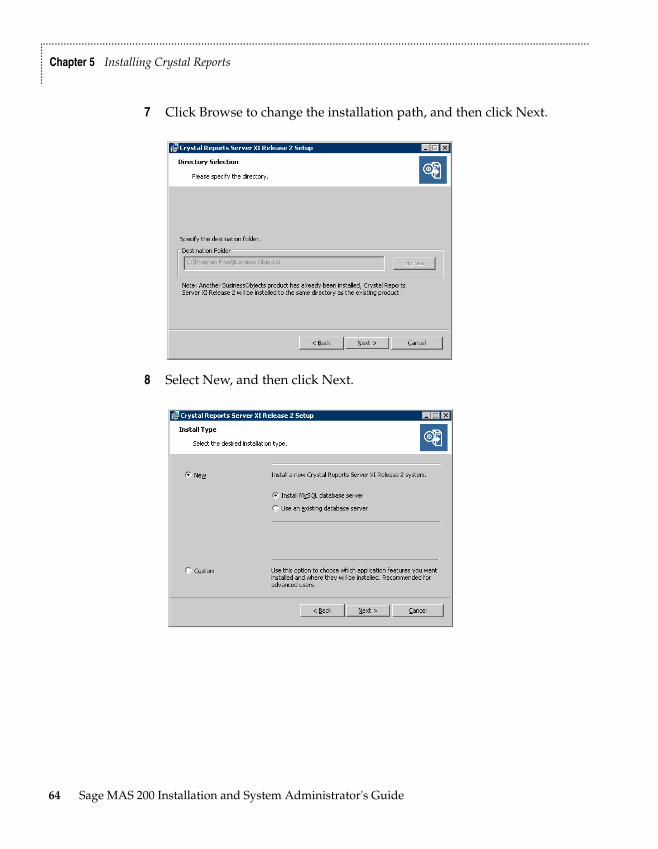
7 Click Browse to change the installation path, and then click Next.
8 Select New, and then click Next.
64 Sage MAS 200 Installation and System Administrator's Guide
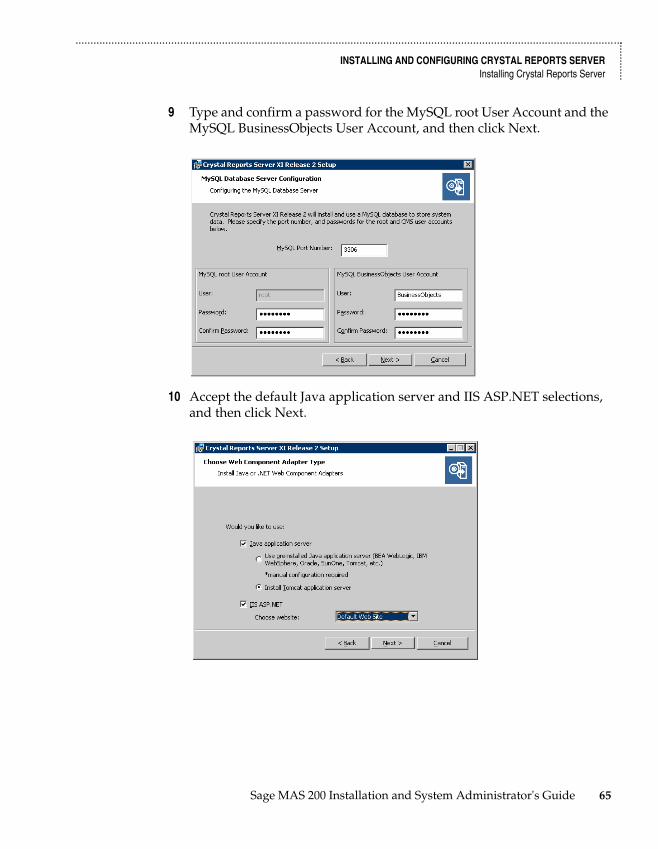
.......................................................................................................................................................................................
INSTALLING AND CONFIGURING CRYSTAL REPORTS SERVERInstalling Crystal Reports Server ...
......
....
9 Type and confirm a password for the MySQL root User Account and the MySQL BusinessObjects User Account, and then click Next.
10 Accept the default Java application server and IIS ASP.NET selections, and then click Next.
Sage MAS 200 Installation and System Administrator's Guide 65
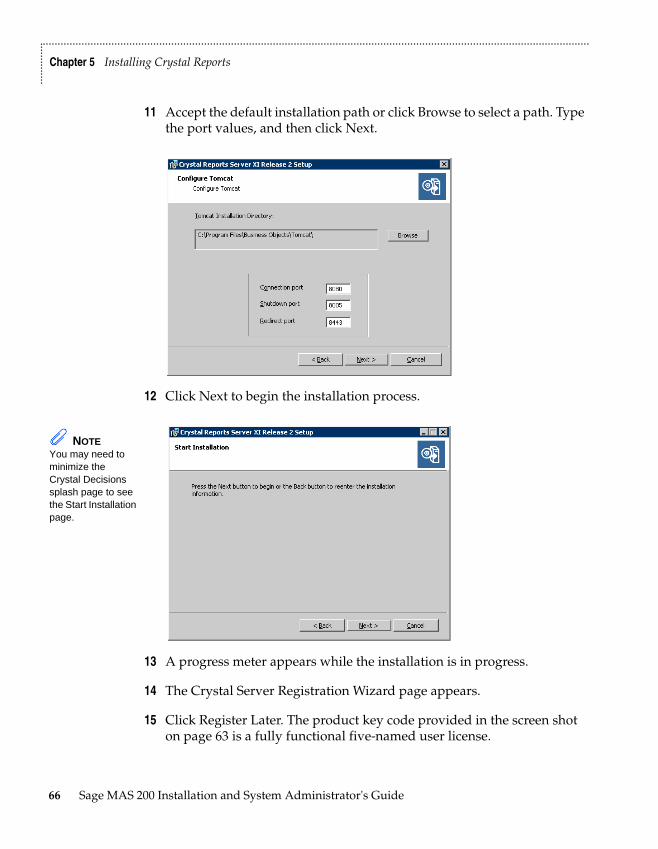
.......................................................................................................................................................................................
Chapter 5 Installing Crystal Reports
......
......
..
11 Accept the default installation path or click Browse to select a path. Type the port values, and then click Next.
12 Click Next to begin the installation process.
13 A progress meter appears while the installation is in progress.
14 The Crystal Server Registration Wizard page appears.
15 Click Register Later. The product key code provided in the screen shot on page 63 is a fully functional five-named user license.
NOTE You may need to minimize the Crystal Decisions splash page to see the Start Installation page.
66 Sage MAS 200 Installation and System Administrator's Guide
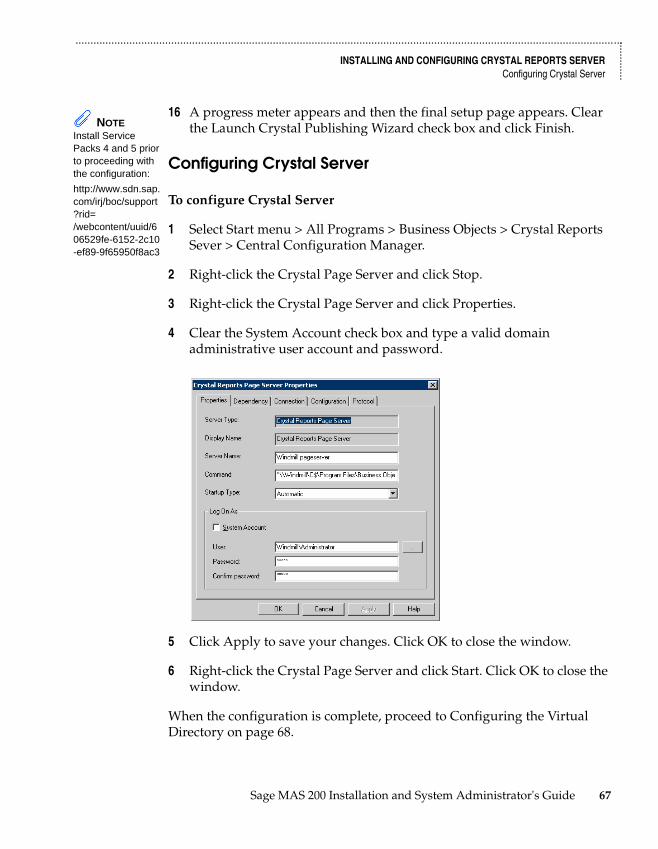
.......................................................................................................................................................................................
INSTALLING AND CONFIGURING CRYSTAL REPORTS SERVERConfiguring Crystal Server ...
......
....
16 A progress meter appears and then the final setup page appears. Clear the Launch Crystal Publishing Wizard check box and click Finish.
Configuring Crystal Server
To configure Crystal Server
1 Select Start menu > All Programs > Business Objects > Crystal Reports Sever > Central Configuration Manager.
2 Right-click the Crystal Page Server and click Stop.
3 Right-click the Crystal Page Server and click Properties.
4 Clear the System Account check box and type a valid domain administrative user account and password.
5 Click Apply to save your changes. Click OK to close the window.
6 Right-click the Crystal Page Server and click Start. Click OK to close the window.
When the configuration is complete, proceed to Configuring the Virtual Directory on page 68.
NOTE Install Service Packs 4 and 5 prior to proceeding with the configuration:
http://www.sdn.sap.com/irj/boc/support?rid=/webcontent/uuid/606529fe-6152-2c10-ef89-9f65950f8ac3
Sage MAS 200 Installation and System Administrator's Guide 67
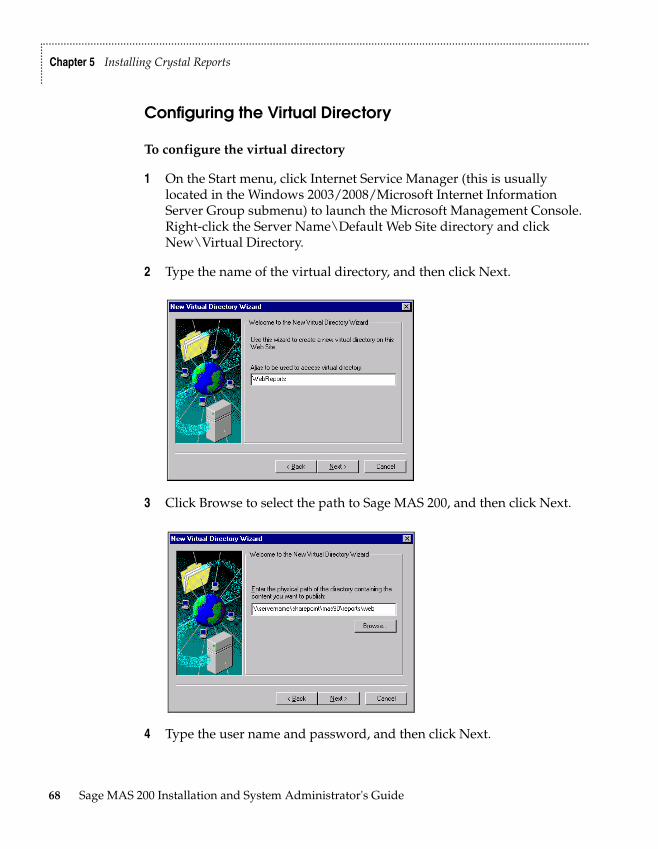
.......................................................................................................................................................................................
Chapter 5 Installing Crystal Reports
......
......
..
Configuring the Virtual Directory
To configure the virtual directory
1 On the Start menu, click Internet Service Manager (this is usually located in the Windows 2003/2008/Microsoft Internet Information Server Group submenu) to launch the Microsoft Management Console. Right-click the Server Name\Default Web Site directory and click New\Virtual Directory.
2 Type the name of the virtual directory, and then click Next.
3 Click Browse to select the path to Sage MAS 200, and then click Next.
4 Type the user name and password, and then click Next.
68 Sage MAS 200 Installation and System Administrator's Guide

.......................................................................................................................................................................................
INSTALLING AND CONFIGURING CRYSTAL REPORTS SERVERConfiguring Sage MAS 200 ...
......
....
5 Select the Allow Read Access, Allow Script Access, and Allow Execute Access check boxes, and then click Finish.
Configuring Sage MAS 200
This section contains the steps for configuring Sage MAS 200 to ensure that Crystal Web Reports works properly.
To configure Sage MAS 200
1 At a user workstation, start Sage MAS 200 and select Library Master Main menu > User Maintenance. Select a user logon.
2 On the Preferences tab, select the Use Crystal Web Reports check box. Repeat this for each user that will use Crystal Web Reports.
3 Select Library Master Main menu > Company Maintenance. Select a company code.
4 On the Servers tab, at the Web Reports Server Name field, type the name of the server on which you installed Crystal Server. You can also use the IP address instead of the server name. At the Web Reports Virtual Directory field, type the name of the virtual directory you configured in Internet Service Manager. Click Accept.
5 Select a graphical form or report in the Job Cost, Material Requirements Planning, Payroll, or Work Order module (for example, Work Order on the Custom Reports menu), and click Preview.
NOTE Test your configuration on an in-house workstation to ensure that Crystal Web Reports is working properly before any remote users attempt to use it.
Sage MAS 200 Installation and System Administrator's Guide 69
.......................................................................................................................................................................................
Chapter 5 Installing Crystal Reports
......
......
..
6 After the progress meter indicates that the form or report has been generated, your default browser will launch. The first time you attempt to view a report through Crystal Web Reports, the Security Warning dialog box may appear. Click Yes to install and run the Report Parameter Dialog Control.
7 When the installation is complete, restart the computer.
After the control is installed, the report appears in the Crystal Report Viewer in your browser.
Modifying and Printing Forms
After a workstation is configured to run Crystal Web Reports, that workstation cannot modify Crystal Reports forms by clicking the Design button on any form or report printing task window or the Maintain window in Report Manager.
To print the Crystal Reports form or report to a local printer, you must first click Preview in the form or report dialog box, and then print the form or report from your browser. Clicking either the Print or Preview button launches your browser and displays the intended form or report.
When printing Sage MAS 200 forms using Crystal Web Reports, Sage MAS 200 will not perform the associated update following the forms printing (for example, invoice updates), even if you click Print. Form tasks with update features can only be previewed remotely and must be printed while connected to the main network to be updated. The multi-part feature of Crystal Reports forms (for example, Sales Order Printing) does not support using Crystal Enterprise.
NOTE Check Printing tasks (from the Accounts Payable or Payroll module) cannot be used when the Use Crystal Web Reports check box is selected in the User Maintenance window for your workstation.
WARNING Do not use parameter fields on reports running through Crystal Web Reports.
70 Sage MAS 200 Installation and System Administrator's Guide

Chapter 6
Installing Federal and State eFiling and ReportingChapter 6Chapter 6Federal and State eFiling and Reporting OverviewFederal and State eFiling and Reporting allows you to print and electronically file your payroll tax forms, as well as your 1099 forms using signature-ready plain paper tax forms. Every report is saved in its own history or draft file for easy retrieval.
Installation Considerations
The following are special considerations to be aware of before installing Federal and State eFiling and Reporting.
• To use Federal and State eFiling and Reporting with data created in Sage MAS 200 version 4.20 or prior or from another business management system, perform the conversion to version 4.40 after the quarter end and before the first payroll in the current quarter to avoid values being placed in the wrong boxes on some forms. If conversion is performed mid-quarter, some eFiling and Reporting forms will require editing.
• If you are upgrading from version 4.20 or prior, and a tax limit type other than Annual is selected in Payroll Tax Table Maintenance, your limit values will not be calculated correctly on eFiling and Reporting forms until the first payroll run after conversion to version 4.40.
Sage MAS 200 Installation and System Administrator's Guide 71
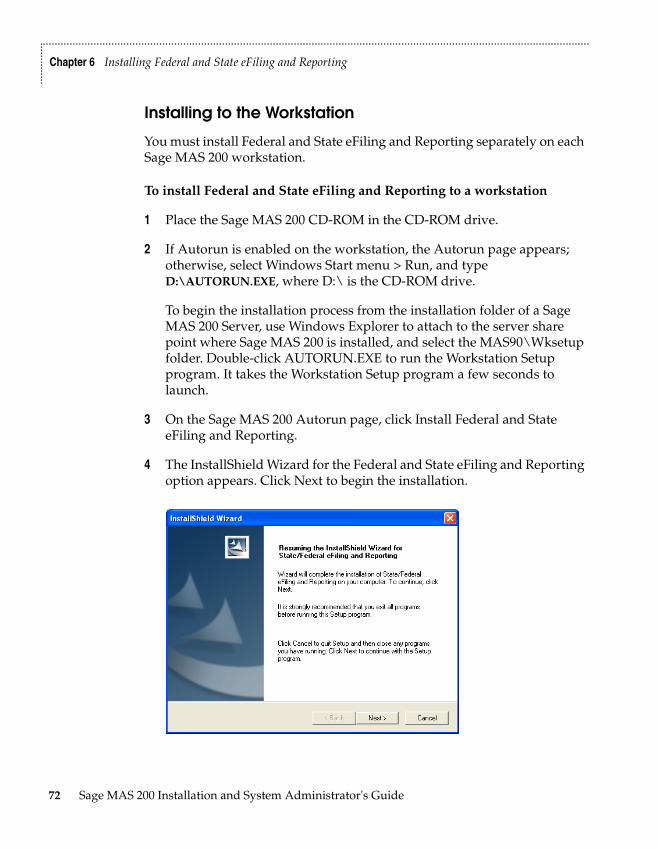
.......................................................................................................................................................................................
Chapter 6 Installing Federal and State eFiling and Reporting
......
......
..
Installing to the Workstation
You must install Federal and State eFiling and Reporting separately on each Sage MAS 200 workstation.
To install Federal and State eFiling and Reporting to a workstation
1 Place the Sage MAS 200 CD-ROM in the CD-ROM drive.
2 If Autorun is enabled on the workstation, the Autorun page appears; otherwise, select Windows Start menu > Run, and type D:\AUTORUN.EXE, where D:\ is the CD-ROM drive.
To begin the installation process from the installation folder of a Sage MAS 200 Server, use Windows Explorer to attach to the server share point where Sage MAS 200 is installed, and select the MAS90\Wksetup folder. Double-click AUTORUN.EXE to run the Workstation Setup program. It takes the Workstation Setup program a few seconds to launch.
3 On the Sage MAS 200 Autorun page, click Install Federal and State eFiling and Reporting.
4 The InstallShield Wizard for the Federal and State eFiling and Reporting option appears. Click Next to begin the installation.
72 Sage MAS 200 Installation and System Administrator's Guide
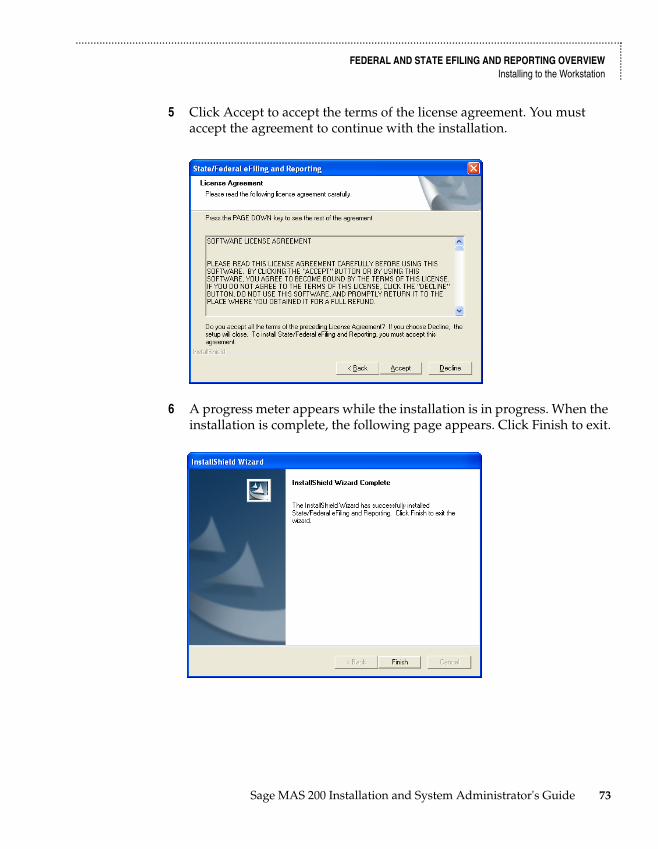
.......................................................................................................................................................................................
FEDERAL AND STATE EFILING AND REPORTING OVERVIEWInstalling to the Workstation ...
......
....
5 Click Accept to accept the terms of the license agreement. You must accept the agreement to continue with the installation.
6 A progress meter appears while the installation is in progress. When the installation is complete, the following page appears. Click Finish to exit.
Sage MAS 200 Installation and System Administrator's Guide 73
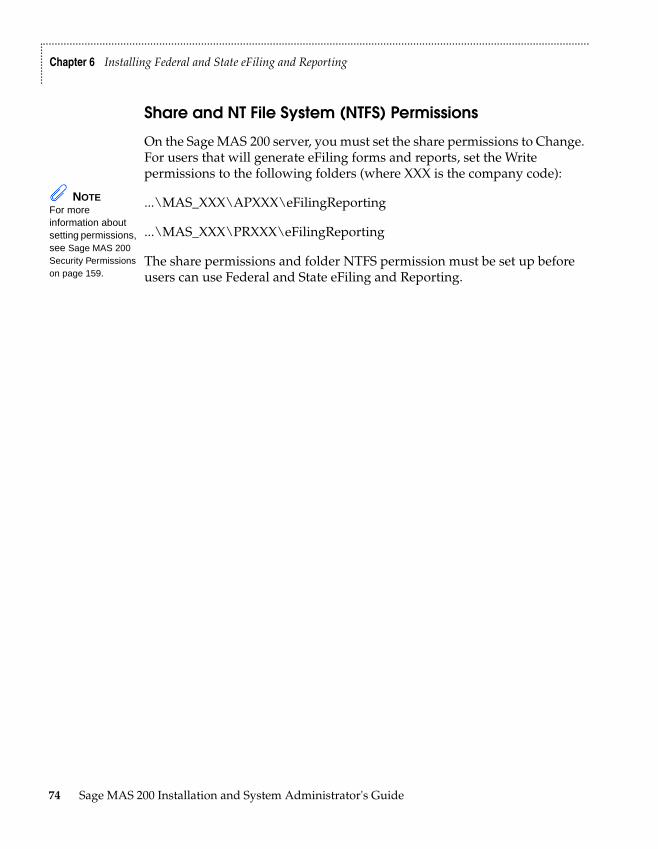
.......................................................................................................................................................................................
Chapter 6 Installing Federal and State eFiling and Reporting
......
......
..
Share and NT File System (NTFS) Permissions
On the Sage MAS 200 server, you must set the share permissions to Change. For users that will generate eFiling forms and reports, set the Write permissions to the following folders (where XXX is the company code):
...\MAS_XXX\APXXX\eFilingReporting
...\MAS_XXX\PRXXX\eFilingReporting
The share permissions and folder NTFS permission must be set up before users can use Federal and State eFiling and Reporting.
NOTE For more information about setting permissions, see Sage MAS 200 Security Permissions on page 159.
74 Sage MAS 200 Installation and System Administrator's Guide
Chapter 7
Setting Up Credit Card ProcessingChapter 7Overview of Credit Card ProcessingYou can use the Credit Card Processing module powered by either Sage Payment Solutions or PCCharge Payment Server for validation and authorization of credit cards through modules such as Accounts Receivable, Sales Order, and e-Business Manager. Both Sage Payment Solutions and PCCharge Payment Server work with a number of popular merchant accounts.
Sage Payment SolutionsThe Credit Card Processing module powered by Sage Payment Solutions is installed with Sage MAS 200 and requires the Accounts Receivable and Sales Order modules to be installed. For more information, see Set Up the Credit Card Processing Module for Sage Payment Solutions in the Help system.
PCCharge Payment ServerThe Credit Card Processing module powered by PCCharge Payment Server is installed with Sage MAS 200 and requires the PCCharge Payment Server and the Accounts Receivable and Sales Order modules to be installed.
Sage MAS 200 Installation and System Administrator's Guide 75
.......................................................................................................................................................................................
Chapter 7 Setting Up Credit Card Processing
......
......
..
Installing the PCCharge Payment Server
Installation of the PCCharge Payment Server is a multi-phase process.
To install the PCCharge Payment Server
1 Make sure you have all the information required to configure your PCCharge Payment Server before running the installation. Follow the instructions included in the PCCharge Payment Server online documentation.
2 Review the PCCharge Payment Server manual available on the PCCharge Payment Server CD-ROM. The manual is provided as a PDF file.
3 Install the PCCharge Payment Server. Select a server on your network that has a modem connection or access to the Internet. You will need to determine your hardware requirements based on which merchant you are using.
4 Contact VeriFone Technical Support to activate your PCCharge Payment Server software (this information is also included in the PCCharge Payment Server online documentation).
5 Sage MAS 200 communicates with the PCCharge Payment Server using TCP/IP. This is not the default configuration. If you did not configure TCP/IP, perform steps 6 through 7. If TCP/IP is configured, proceed to step 8.
6 To enable this configuration, you must enable TCP/IP support and establish a port on which the PCCharge Payment Server will be listening. Start the PCCharge Payment Server and select Setup menu > Preferences. In the Preferences window, click Advanced.
NOTE Most merchant accounts support modem connections, but only a few support SSL through the Internet.
76 Sage MAS 200 Installation and System Administrator's Guide
.......................................................................................................................................................................................
PCCHARGE PAYMENT SERVERInstalling the PCCharge Payment Server ...
......
....
7 The Advanced Configuration Setup window appears. Select the Use TCP/IP Connection check box in the TCP/IP Communications section.
The Local Port Number defaults to 31419. You can change this to any port number that is not currently in use on this workstation by another application. Do no use ports under 1024. These ports are reserved for common services (such as HTTP, SSL, and SMTP).
Consult your system administrator to verify there are no port conflicts occurring on the machine to which you are installing the PCCharge Payment Server. Write down the port number if you change it so that it can be recorded in Sage MAS 200.
8 Configure the Sage MAS 200 component so the applications can communicate with the PCCharge Payment Server.
9 The PCCharge Payment Server is not accessible from within Sage MAS 200 until the Credit Card Processing module is registered. To enable the Credit Card Processing module for PCCharge Payment Server, perform the following:
a Select Library Master Main menu > Company Maintenance.
b Click the Servers tab. At the Enable Credit Card Payment Server field, select PCCharge.
NOTE If the Credit Card Processing module is not registered, the fields on the Servers tab are not available.
Sage MAS 200 Installation and System Administrator's Guide 77
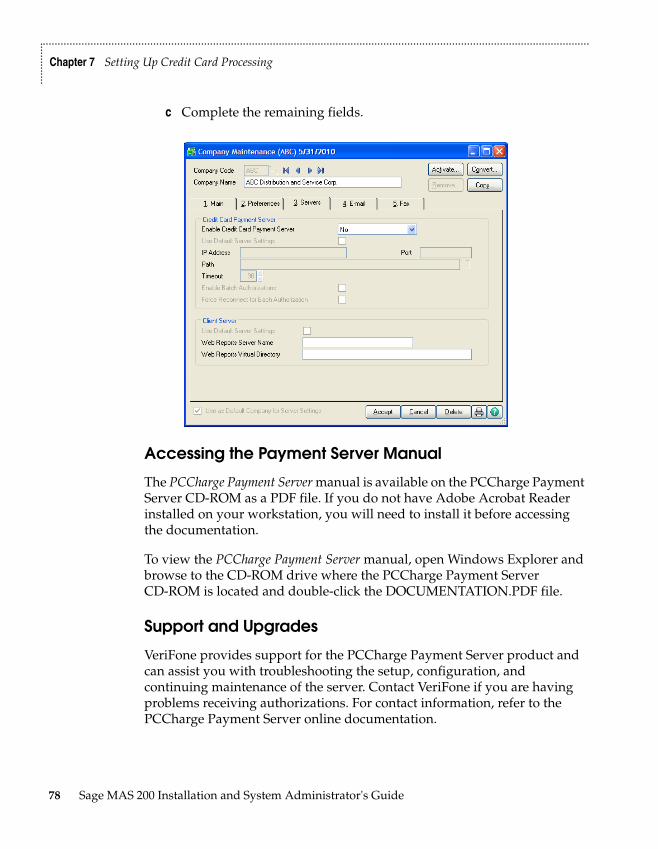
.......................................................................................................................................................................................
Chapter 7 Setting Up Credit Card Processing
......
......
..
c Complete the remaining fields.
Accessing the Payment Server Manual
The PCCharge Payment Server manual is available on the PCCharge Payment Server CD-ROM as a PDF file. If you do not have Adobe Acrobat Reader installed on your workstation, you will need to install it before accessing the documentation.
To view the PCCharge Payment Server manual, open Windows Explorer and browse to the CD-ROM drive where the PCCharge Payment Server CD-ROM is located and double-click the DOCUMENTATION.PDF file.
Support and Upgrades
VeriFone provides support for the PCCharge Payment Server product and can assist you with troubleshooting the setup, configuration, and continuing maintenance of the server. Contact VeriFone if you are having problems receiving authorizations. For contact information, refer to the PCCharge Payment Server online documentation.
78 Sage MAS 200 Installation and System Administrator's Guide
Chapter 8
Advanced Features and TroubleshootingChapter 8This chapter explains some of the advanced features of the Sage MAS 200 product, including Remote Access using Windows Remote Access Server (RAS), push-down installation through Microsoft's Systems Management Server (SMS), and some basic troubleshooting techniques. Detailed technical information required by some IT professionals is also provided; some of the content in this chapter may not be applicable to every Sage MAS 200 user.
Remote AccessSage MAS 200 is ideally suited for remote access and wide-area networks (WANs) by virtue of its architecture. Communication across phone lines is limited to data displayed on the window and user interface commands from the server. The local workstation handles the actual user interface and leaves the processing to the server. Sage MAS 200 supports RAS for dial-up connectivity. Other dial-up packages supported by Windows Servers may also be compatible with Sage MAS 200 if they provide Point-to-Point Protocol (PPP) or Serial Line Internet Protocol (SLIP) connectivity to the Windows Server.
Remote Access Server (RAS)
Performance through RAS is slower than the performance of a computer attached directly to the network because the transfer rate is limited by the phone line. The minimum workstation requirements are the same for a remote workstation as they are for a local workstation. For operating system requirements, see the Supported Platform Matrix in the Support area of the Sage Online Web site (www.sagesoftwareonline.com). If there are a number of users dialing into the system, you may want to dedicate a server specifically for telephony services (for example, RAS, FAX, or Dial-Up Networking) to "free up" the server on which Sage MAS 200 is running.
NOTE You should limit the initial number of records displayed in a lookup by setting the Lookup Limit for Initial Display field in Library Master User Maintenance.
Sage MAS 200 Installation and System Administrator's Guide 79
.......................................................................................................................................................................................
Chapter 8 Advanced Features and Troubleshooting
......
......
..
The server must be configured with RAS provided by Microsoft on the appropriate Windows Server CD-ROM. For more information on installing and configuring RAS on your server system, consult a Microsoft Windows Server engineer or consultant. The minimum bandwidth is 33.6 Kbps per user.
After RAS is configured, remote users should be able to dial into the network and log on. Before attempting to start Sage MAS 200, perform the following tasks.
1 Verify that you can access Windows Explorer and see all appropriate network resources.
2 Verify that there are no firewalls between the remote dial-in and the server.
3 Verify that the IP addresses are unique.
4 Verify that you can ping to the server to which Sage MAS 200 is installed.
If these tasks are successful, Sage MAS 200 will start. Run the Workstation Setup program from either the CD-ROM or the server. Installing from the server may take several minutes, depending on the speed of the network and the modem connecting the workstation to the server. It takes less time to run Workstation Setup from the CD-ROM rather than across the network.
Sage MAS 200 does not require a logical drive connection; however, if you intend to use Crystal Reports or other third-party software that accesses Sage MAS 200 data files, these programs will require a drive mapping. When accessing a system remotely, if possible, install the applications on the local hard drive rather than accessing them from the server. This minimizes the amount of data transferred across the phone line and significantly improves performance.
80 Sage MAS 200 Installation and System Administrator's Guide
.......................................................................................................................................................................................
REMOTE ACCESSWide Area Networks (WAN) ...
......
....
Wide Area Networks (WAN)
Sage MAS 200 runs on any TCP/IP-based WAN and has been tested using ISDN, Frame Relays, and T1 connections. The configuration and setup of Sage MAS 200 on a WAN are the same as those for remote access, and the same tests should be performed to make sure the remote workstation can access all network resources (including the ability to ping to the Sage MAS 200 server). Individual requirements vary from site to site, based on the amount of data being transferred and the number of users on the system. Sage cannot support the various hardware configurations possible in TCP/IP WANs. To set up and configure TCP/IP WANs using Windows Servers (including routers, gateways, and DNS servers), consult with a Windows Server WAN specialist or a Sage business partner qualified to support WAN configurations.
Performance Over RAS/WAN
When running Sage MAS 200 over a WAN or Remote Access Server (RAS), you will experience slower system performance, specifically with screen displays. Slower system performance is caused by actions that travel from the remote workstation through the phone lines or dedicated cabling to the server, which processes the request and sends the response back to the remote workstation. Clicking action controls (such as buttons) may require you to click the control more than once before the action begins. To make sure the command executes, hold the mouse button down until you see the button change to its depressed mode. When you release the mouse button, the control returns to its normal mode. Additionally, do not click controls before the screen loads completely.
The Low Speed Connection check box in the Library Master User Maintenance window will turn off the screen display while the panel is loading. Otherwise, if you click controls before they are loaded completely, you may receive some error conditions if certain controls are not loaded or are not properly initialized. Similar conditions may also be experienced when running through Windows 2003/2008 with Terminal Services, especially if you are dialing in to the Windows 2003/2008 Server.
NOTE Verify routers and other network services do not re-map IP addresses for the server or workstation when packets are transferred through the WAN.
NOTE Selecting the Low Speed Connection check box is recommended in environments with low bandwidth.
Sage MAS 200 Installation and System Administrator's Guide 81
.......................................................................................................................................................................................
Chapter 8 Advanced Features and Troubleshooting
......
......
..
Virtual Private Network (VPN)
Sage MAS 200 has been successfully tested with Virtual Private Networking. If you are implementing VPN, you should consider that software-based solutions, such as VPN bundled with Windows Servers on low speed connections, may slow performance because of the security overhead.
Pinging to a Server or WorkstationIf you are having problems pinging to a server or workstation, for each LAN workstation, use the built-in TELNET utility to ping the specific socket and port the Application Server is listening on. For remote workstations, you can use ping and TELNET if the server’s router or firewall does not block Internet Control Message Protocol (ICMP) commands. If the router or firewall does block ICMP commands, use a port scanning utility instead.
Configuring the Workstation for the ODBC Driver ServiceWhen configuring the workstation to use the client/server ODBC driver, if a failure occurs when testing the connection from the workstation to the client/server ODBC service, use the built-in TELNET utility or a port scanning utility to verify the workstation can connect to the server on port 20222.
82 Sage MAS 200 Installation and System Administrator's Guide
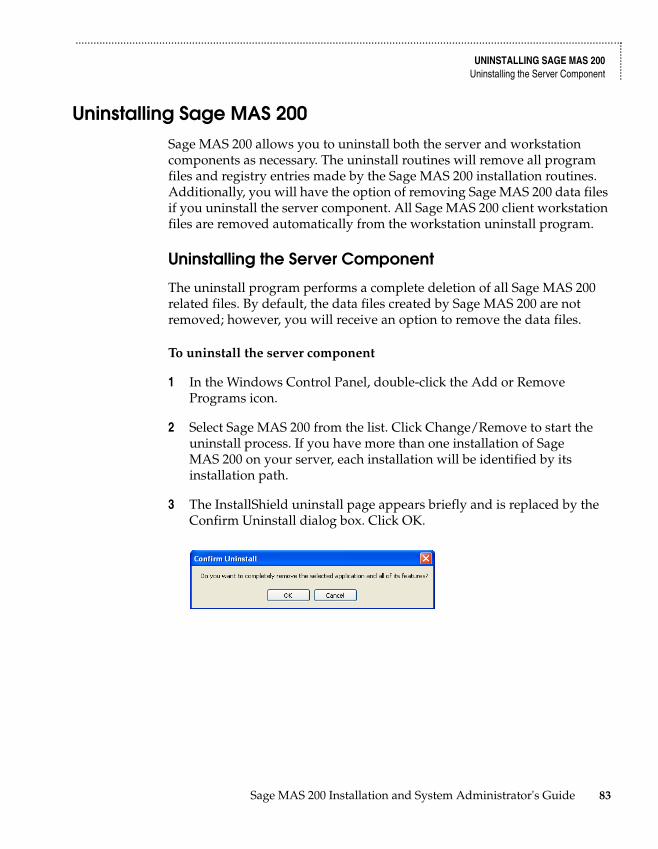
.......................................................................................................................................................................................
UNINSTALLING SAGE MAS 200Uninstalling the Server Component ...
......
....
Uninstalling Sage MAS 200Sage MAS 200 allows you to uninstall both the server and workstation components as necessary. The uninstall routines will remove all program files and registry entries made by the Sage MAS 200 installation routines. Additionally, you will have the option of removing Sage MAS 200 data files if you uninstall the server component. All Sage MAS 200 client workstation files are removed automatically from the workstation uninstall program.
Uninstalling the Server Component
The uninstall program performs a complete deletion of all Sage MAS 200 related files. By default, the data files created by Sage MAS 200 are not removed; however, you will receive an option to remove the data files.
To uninstall the server component
1 In the Windows Control Panel, double-click the Add or Remove Programs icon.
2 Select Sage MAS 200 from the list. Click Change/Remove to start the uninstall process. If you have more than one installation of Sage MAS 200 on your server, each installation will be identified by its installation path.
3 The InstallShield uninstall page appears briefly and is replaced by the Confirm Uninstall dialog box. Click OK.
Sage MAS 200 Installation and System Administrator's Guide 83
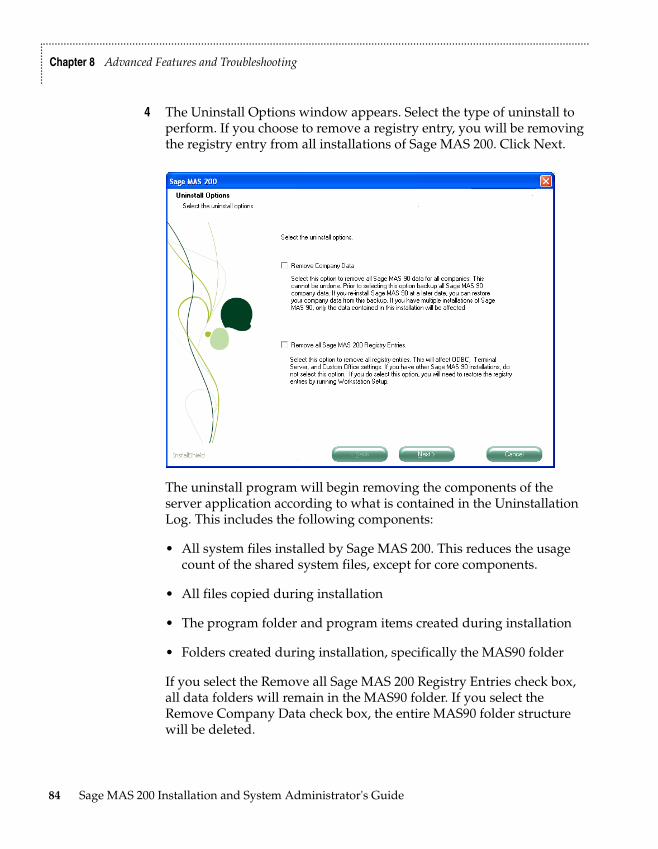
.......................................................................................................................................................................................
Chapter 8 Advanced Features and Troubleshooting
......
......
..
4 The Uninstall Options window appears. Select the type of uninstall to perform. If you choose to remove a registry entry, you will be removing the registry entry from all installations of Sage MAS 200. Click Next.
The uninstall program will begin removing the components of the server application according to what is contained in the Uninstallation Log. This includes the following components:
• All system files installed by Sage MAS 200. This reduces the usage count of the shared system files, except for core components.
• All files copied during installation
• The program folder and program items created during installation
• Folders created during installation, specifically the MAS90 folder
If you select the Remove all Sage MAS 200 Registry Entries check box, all data folders will remain in the MAS90 folder. If you select the Remove Company Data check box, the entire MAS90 folder structure will be deleted.
84 Sage MAS 200 Installation and System Administrator's Guide
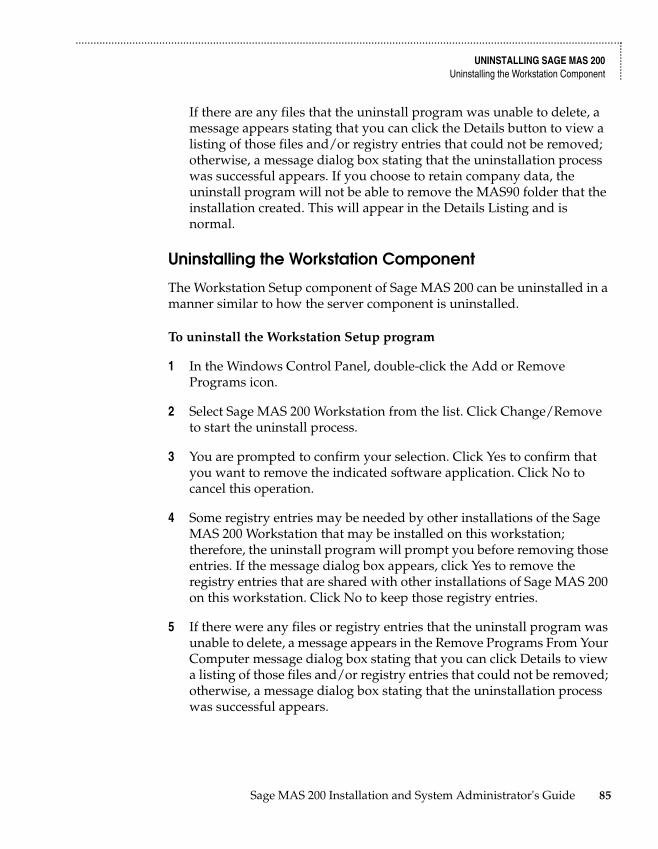
.......................................................................................................................................................................................
UNINSTALLING SAGE MAS 200Uninstalling the Workstation Component ...
......
....
If there are any files that the uninstall program was unable to delete, a message appears stating that you can click the Details button to view a listing of those files and/or registry entries that could not be removed; otherwise, a message dialog box stating that the uninstallation process was successful appears. If you choose to retain company data, the uninstall program will not be able to remove the MAS90 folder that the installation created. This will appear in the Details Listing and is normal.
Uninstalling the Workstation Component
The Workstation Setup component of Sage MAS 200 can be uninstalled in a manner similar to how the server component is uninstalled.
To uninstall the Workstation Setup program
1 In the Windows Control Panel, double-click the Add or Remove Programs icon.
2 Select Sage MAS 200 Workstation from the list. Click Change/Remove to start the uninstall process.
3 You are prompted to confirm your selection. Click Yes to confirm that you want to remove the indicated software application. Click No to cancel this operation.
4 Some registry entries may be needed by other installations of the Sage MAS 200 Workstation that may be installed on this workstation; therefore, the uninstall program will prompt you before removing those entries. If the message dialog box appears, click Yes to remove the registry entries that are shared with other installations of Sage MAS 200 on this workstation. Click No to keep those registry entries.
5 If there were any files or registry entries that the uninstall program was unable to delete, a message appears in the Remove Programs From Your Computer message dialog box stating that you can click Details to view a listing of those files and/or registry entries that could not be removed; otherwise, a message dialog box stating that the uninstallation process was successful appears.
Sage MAS 200 Installation and System Administrator's Guide 85
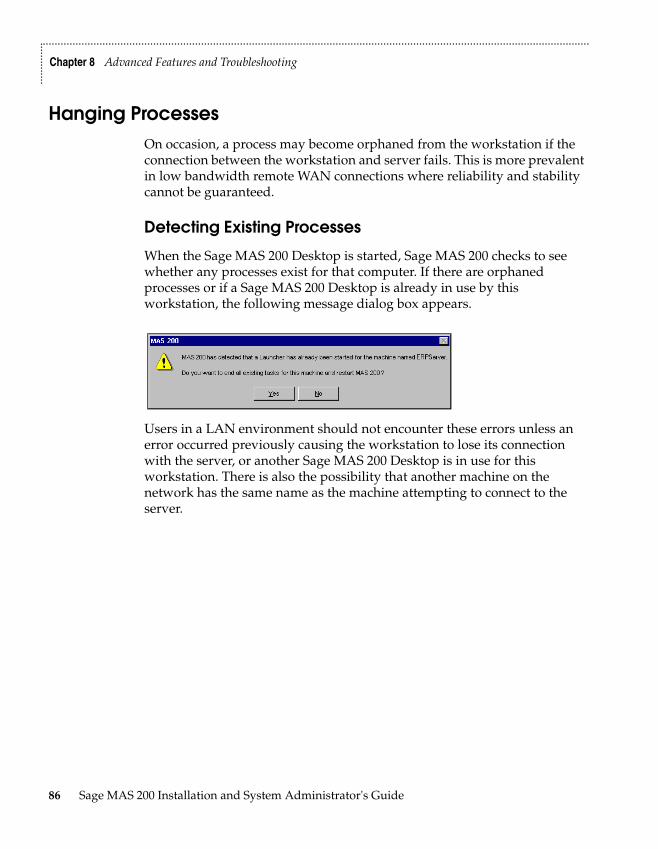
.......................................................................................................................................................................................
Chapter 8 Advanced Features and Troubleshooting
......
......
..
Hanging ProcessesOn occasion, a process may become orphaned from the workstation if the connection between the workstation and server fails. This is more prevalent in low bandwidth remote WAN connections where reliability and stability cannot be guaranteed.
Detecting Existing Processes
When the Sage MAS 200 Desktop is started, Sage MAS 200 checks to see whether any processes exist for that computer. If there are orphaned processes or if a Sage MAS 200 Desktop is already in use by this workstation, the following message dialog box appears.
Users in a LAN environment should not encounter these errors unless an error occurred previously causing the workstation to lose its connection with the server, or another Sage MAS 200 Desktop is in use for this workstation. There is also the possibility that another machine on the network has the same name as the machine attempting to connect to the server.
86 Sage MAS 200 Installation and System Administrator's Guide

.......................................................................................................................................................................................
HANGING PROCESSESEnding Tasks ...
......
....
Ending Tasks
Rather than requiring someone to be at the server or in Sage MAS 200 to "kill" the orphaned process, Sage MAS 200 closes these processes on startup, if desired. If you clicked Yes in the previous message dialog box, the following confirmation message dialog box appears.
You should use this option only when you are certain that the tasks left on the server are, in fact, orphaned and not processing any information. Tasks that are interrupted in the middle of an update can continue to update, even though the connection has been severed. If an update process has started and the connection is lost, let the task complete and end rather than "kill" the task using the option mentioned on this page. Unless a remote connection is extremely stable (such as a dedicated ISDN line), do not run update or register programs from a remote workstation. This reduces the chances of data corruption and allows the files to be updated and closed properly.
Click Yes in this message dialog box to close all sessions for the workstation and restart Sage MAS 200. Tasks associated with other users are not affected. Ending tasks in this manner should be used only as a last resort. Ending live tasks may cause data to become corrupted or lost.
WARNING Use the End Task function only when the tasks for this machine are known to be "dead." Killing "live" tasks in this manner may cause data corruption or loss.
Sage MAS 200 Installation and System Administrator's Guide 87
.......................................................................................................................................................................................
Chapter 8 Advanced Features and Troubleshooting
......
......
..
Increasing Default Limits Set by Windows ServerWindows servers may limit the number of Sage MAS 200 processes that can run simultaneously, especially when the Application Server has been configured to run as a service. This can create an issue when a significant number of users are using Sage MAS 200 at the same time. Blank, white screens may appear when any user tries to start a new task. If a user closes down an existing screen and then tries to open the original task, it then opens successfully. This issue is described in the Knowledge Base Article "Cannot Create a New Session with a Large Number of Users," located on the Sage Online Web site at: www.sagesoftwareonline.com
88 Sage MAS 200 Installation and System Administrator's Guide
Chapter 9
Performing System StartupChapter 9After installing Sage MAS 200, you are ready to set up companies, security, and system preferences. Enabling security is not required; however, one company must be created before anyone can access the system.
Sage MAS 200 offers a flexible security system that can be used to provide appropriate access to the system and to meet your company's specific requirements. The security system can be simple, or it can be elaborate, protecting various combinations of companies, modules, menus, tasks, and security permissions by creating multiple roles, and assigning these roles to users. Roles are assigned to users to restrict their access to only those tasks associated with their assigned roles. If the user attempts to access a secured area, access is denied.
When you installed the software, you either selected a standard security model for your system or no security. The standard security model requires users to log on to the software and allows you to define user roles that allow or restrict access to modules, tasks, and security events (such as creating a one-sided journal entry).
If you elected not to enable security during installation, you can do so at any time after installing the software. After security is enabled it cannot be disabled, although you can modify security preferences at any time from the Library Master module.
After installing the software, a program group is created (or a Start menu item is added under the Programs submenu). Click the Sage MAS 200 Desktop icon in this program group to start the software.
Sage MAS 200 Installation and System Administrator's Guide 89
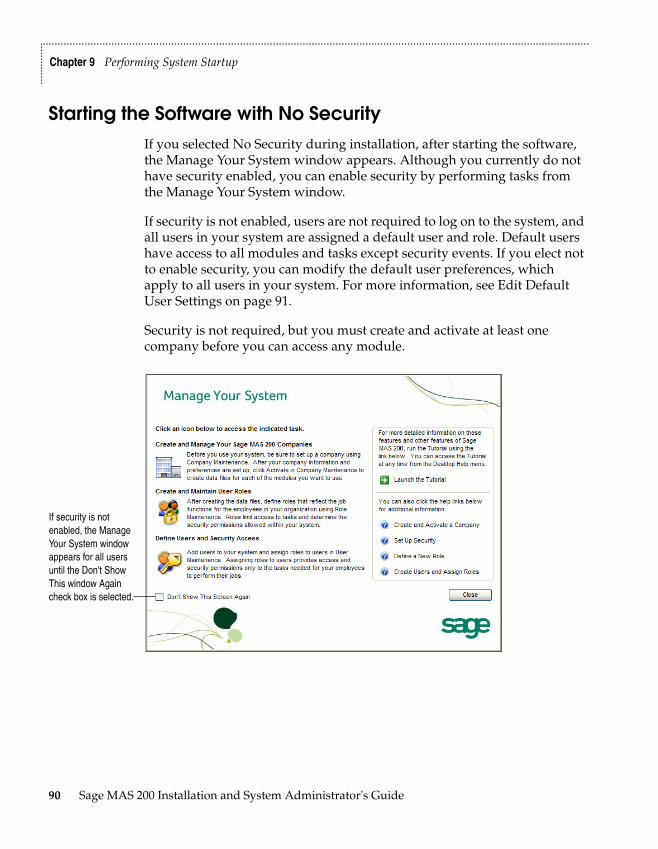
.......................................................................................................................................................................................
Chapter 9 Performing System Startup
......
......
..
Starting the Software with No SecurityIf you selected No Security during installation, after starting the software, the Manage Your System window appears. Although you currently do not have security enabled, you can enable security by performing tasks from the Manage Your System window.
If security is not enabled, users are not required to log on to the system, and all users in your system are assigned a default user and role. Default users have access to all modules and tasks except security events. If you elect not to enable security, you can modify the default user preferences, which apply to all users in your system. For more information, see Edit Default User Settings on page 91.
Security is not required, but you must create and activate at least one company before you can access any module.
If security is not enabled, the Manage Your System window appears for all users until the Don't Show This window Again check box is selected.
90 Sage MAS 200 Installation and System Administrator's Guide
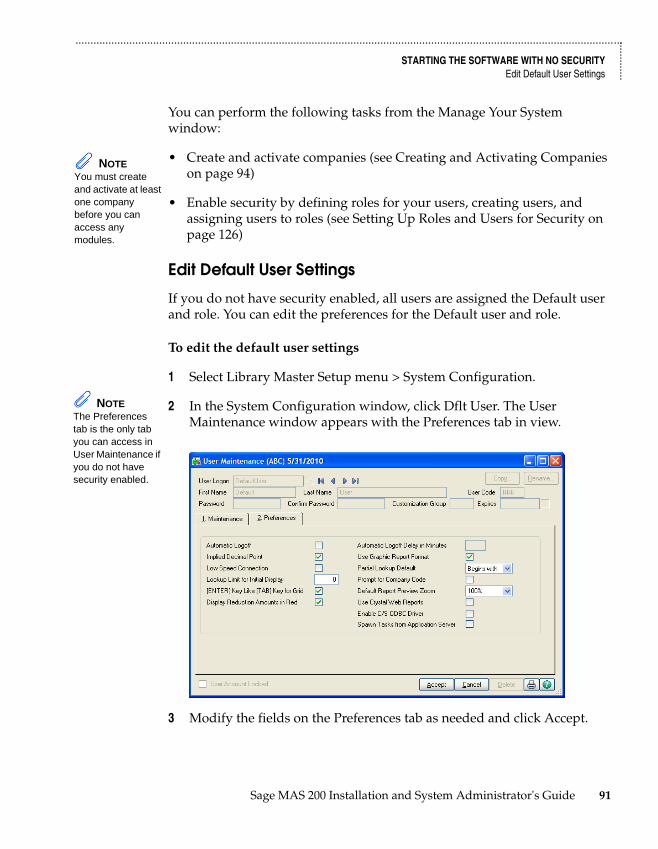
.......................................................................................................................................................................................
STARTING THE SOFTWARE WITH NO SECURITYEdit Default User Settings ...
......
....
You can perform the following tasks from the Manage Your System window:
• Create and activate companies (see Creating and Activating Companies on page 94)
• Enable security by defining roles for your users, creating users, and assigning users to roles (see Setting Up Roles and Users for Security on page 126)
Edit Default User Settings
If you do not have security enabled, all users are assigned the Default user and role. You can edit the preferences for the Default user and role.
To edit the default user settings
1 Select Library Master Setup menu > System Configuration.
2 In the System Configuration window, click Dflt User. The User Maintenance window appears with the Preferences tab in view.
3 Modify the fields on the Preferences tab as needed and click Accept.
NOTE You must create and activate at least one company before you can access any modules.
NOTE The Preferences tab is the only tab you can access in User Maintenance if you do not have security enabled.
Sage MAS 200 Installation and System Administrator's Guide 91
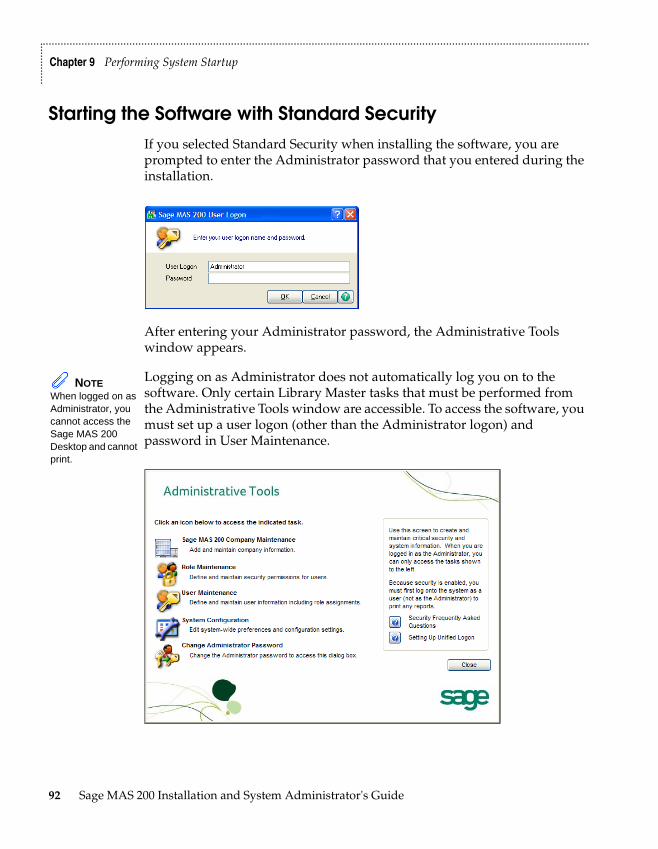
.......................................................................................................................................................................................
Chapter 9 Performing System Startup
......
......
..
Starting the Software with Standard Security If you selected Standard Security when installing the software, you are prompted to enter the Administrator password that you entered during the installation.
After entering your Administrator password, the Administrative Tools window appears.
Logging on as Administrator does not automatically log you on to the software. Only certain Library Master tasks that must be performed from the Administrative Tools window are accessible. To access the software, you must set up a user logon (other than the Administrator logon) and password in User Maintenance.
NOTE When logged on as Administrator, you cannot access the Sage MAS 200 Desktop and cannot print.
92 Sage MAS 200 Installation and System Administrator's Guide
.......................................................................................................................................................................................
STARTING THE SOFTWARE WITH STANDARD SECURITYPerforming Administrative Tasks ...
......
....
Performing Administrative Tasks
You can perform the following tasks from the Administrative Tools window:
• Create and activate companies for new installations (see Creating and Activating Companies on page 94)
• Enable security by defining roles for your users, creating users, and assigning roles to users (see Setting Up Roles and Users for Security on page 126)
• Set up system preferences (see Setting System Preferences on page 140)
• Change your Administrator password (see Changing Your Administrator Password on page 153)
If security is enabled, at least one company and one user must be created before you can access the system.
NOTE You must create and activate companies and then create roles for users before creating users.
Sage MAS 200 Installation and System Administrator's Guide 93
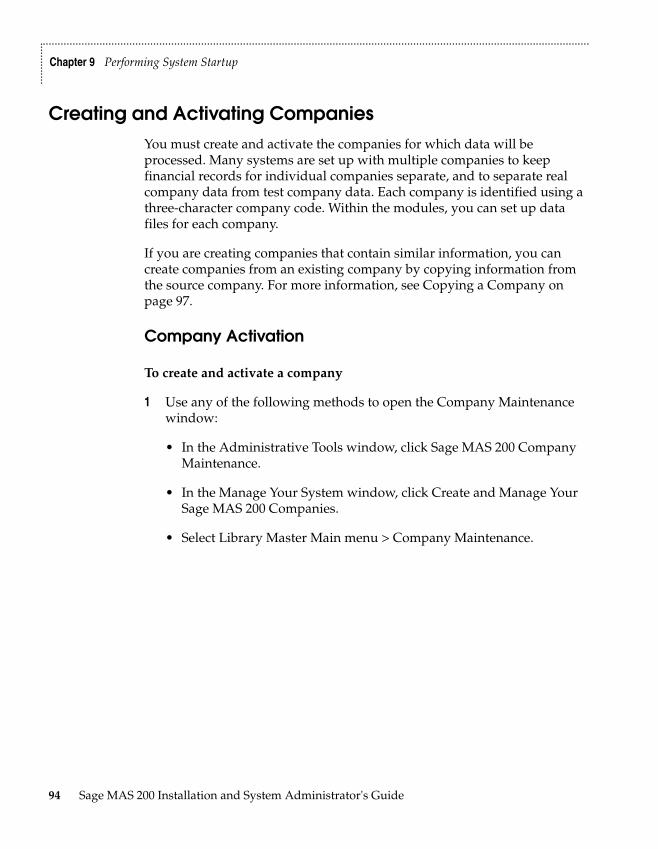
.......................................................................................................................................................................................
Chapter 9 Performing System Startup
......
......
..
Creating and Activating CompaniesYou must create and activate the companies for which data will be processed. Many systems are set up with multiple companies to keep financial records for individual companies separate, and to separate real company data from test company data. Each company is identified using a three-character company code. Within the modules, you can set up data files for each company.
If you are creating companies that contain similar information, you can create companies from an existing company by copying information from the source company. For more information, see Copying a Company on page 97.
Company Activation
To create and activate a company
1 Use any of the following methods to open the Company Maintenance window:
• In the Administrative Tools window, click Sage MAS 200 Company Maintenance.
• In the Manage Your System window, click Create and Manage Your Sage MAS 200 Companies.
• Select Library Master Main menu > Company Maintenance.
94 Sage MAS 200 Installation and System Administrator's Guide
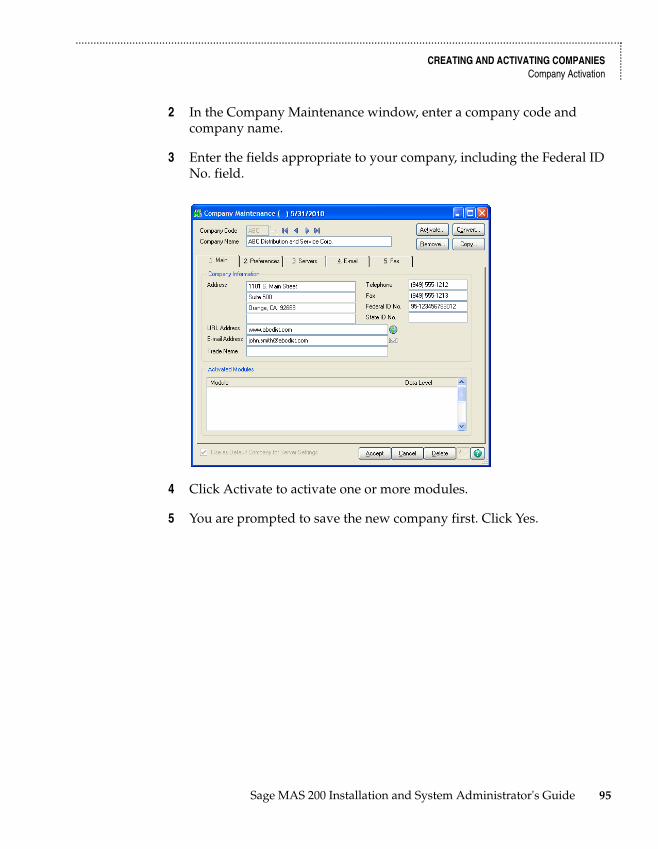
.......................................................................................................................................................................................
CREATING AND ACTIVATING COMPANIESCompany Activation ...
......
....
2 In the Company Maintenance window, enter a company code and company name.
3 Enter the fields appropriate to your company, including the Federal ID No. field.
4 Click Activate to activate one or more modules.
5 You are prompted to save the new company first. Click Yes.
Sage MAS 200 Installation and System Administrator's Guide 95
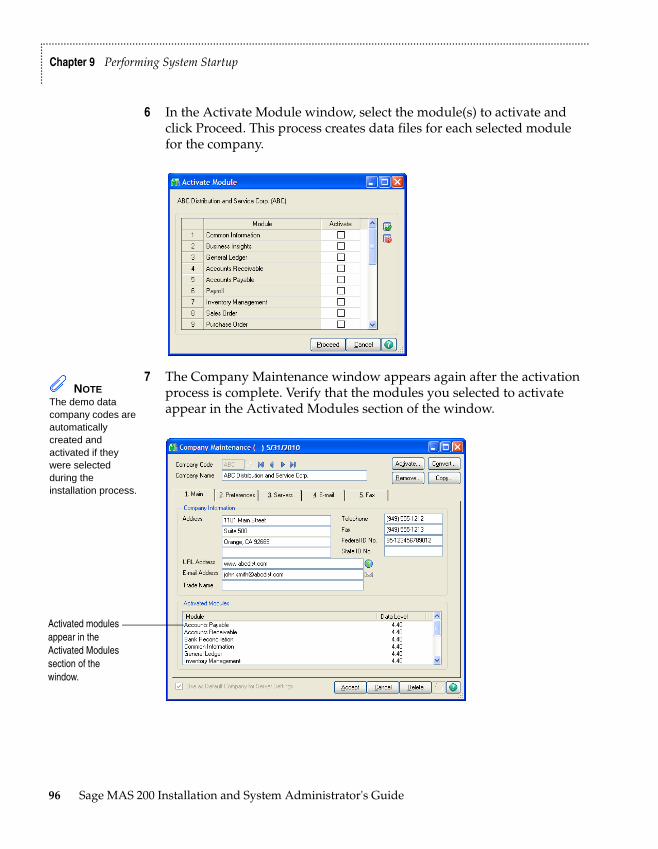
.......................................................................................................................................................................................
Chapter 9 Performing System Startup
......
......
..
6 In the Activate Module window, select the module(s) to activate and click Proceed. This process creates data files for each selected module for the company.
7 The Company Maintenance window appears again after the activation process is complete. Verify that the modules you selected to activate appear in the Activated Modules section of the window.
NOTE The demo data company codes are automatically created and activated if they were selected during the installation process.
Activated modules appear in the Activated Modules section of the window.
96 Sage MAS 200 Installation and System Administrator's Guide
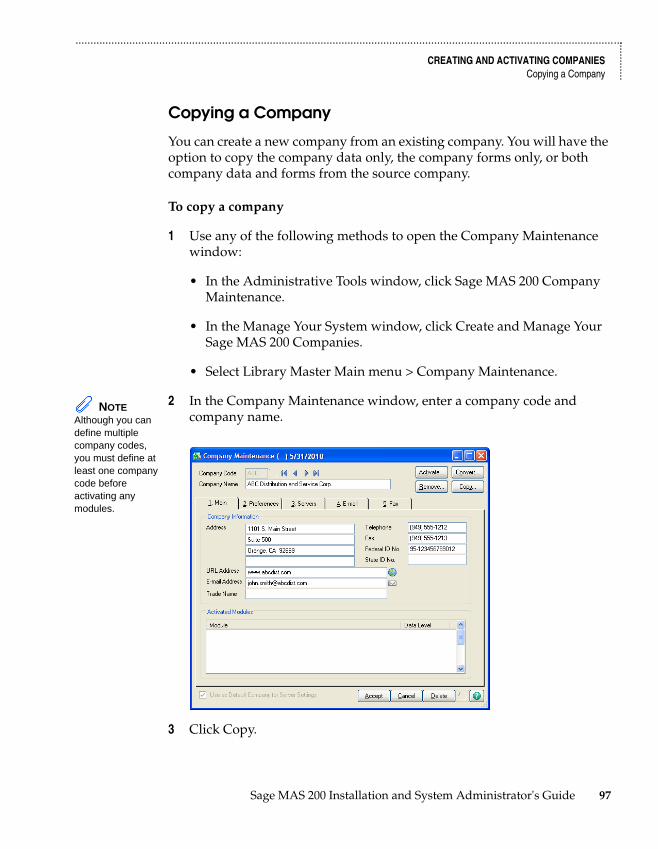
.......................................................................................................................................................................................
CREATING AND ACTIVATING COMPANIESCopying a Company ...
......
....
Copying a Company
You can create a new company from an existing company. You will have the option to copy the company data only, the company forms only, or both company data and forms from the source company.
To copy a company
1 Use any of the following methods to open the Company Maintenance window:
• In the Administrative Tools window, click Sage MAS 200 Company Maintenance.
• In the Manage Your System window, click Create and Manage Your Sage MAS 200 Companies.
• Select Library Master Main menu > Company Maintenance.
2 In the Company Maintenance window, enter a company code and company name.
3 Click Copy.
NOTE Although you can define multiple company codes, you must define at least one company code before activating any modules.
Sage MAS 200 Installation and System Administrator's Guide 97
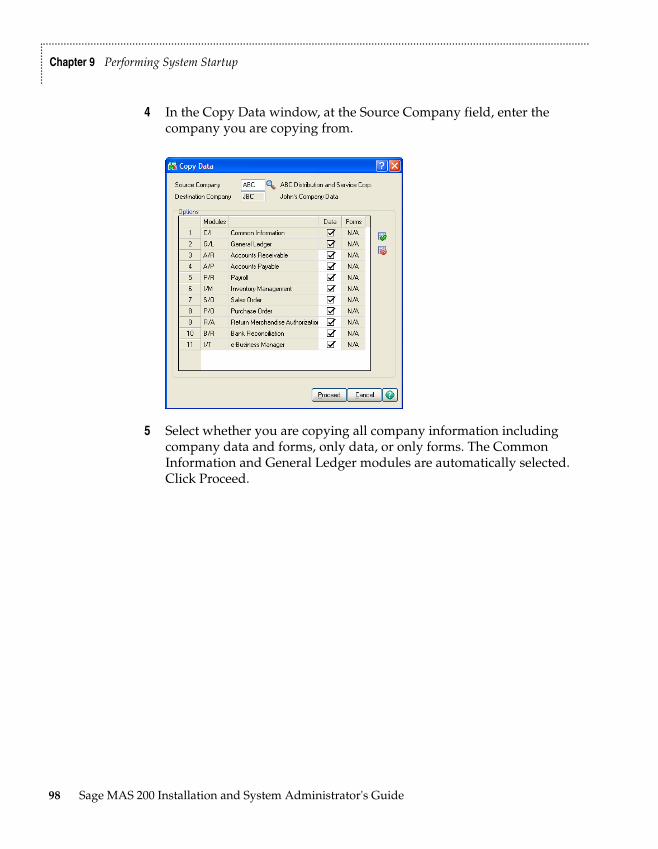
.......................................................................................................................................................................................
Chapter 9 Performing System Startup
......
......
..
4 In the Copy Data window, at the Source Company field, enter the company you are copying from.
5 Select whether you are copying all company information including company data and forms, only data, or only forms. The Common Information and General Ledger modules are automatically selected. Click Proceed.
98 Sage MAS 200 Installation and System Administrator's Guide
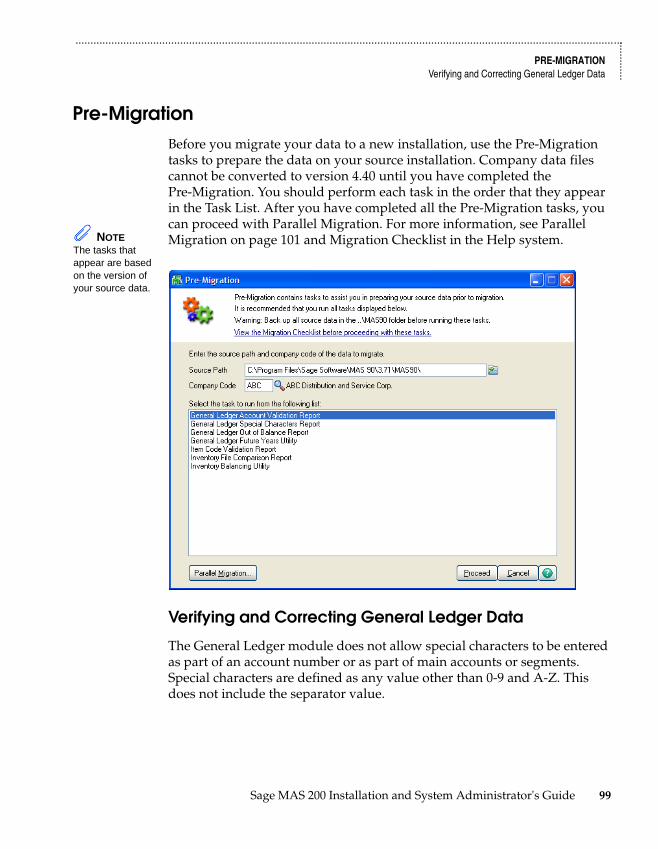
.......................................................................................................................................................................................
PRE-MIGRATIONVerifying and Correcting General Ledger Data ...
......
....
Pre-Migration Before you migrate your data to a new installation, use the Pre-Migration tasks to prepare the data on your source installation. Company data files cannot be converted to version 4.40 until you have completed the Pre-Migration. You should perform each task in the order that they appear in the Task List. After you have completed all the Pre-Migration tasks, you can proceed with Parallel Migration. For more information, see Parallel Migration on page 101 and Migration Checklist in the Help system.
Verifying and Correcting General Ledger Data
The General Ledger module does not allow special characters to be entered as part of an account number or as part of main accounts or segments. Special characters are defined as any value other than 0-9 and A-Z. This does not include the separator value.
NOTE The tasks that appear are based on the version of your source data.
Sage MAS 200 Installation and System Administrator's Guide 99
.......................................................................................................................................................................................
Chapter 9 Performing System Startup
......
......
..
Use the following tasks to prepare your General Ledger source data:
• The General Ledger Account Validation Report and General Ledger Special Characters Report identify if there are missing records in Account Maintenance or special characters in general ledger accounts.
• The General Ledger Out of Balance Report prints a report of out of balance source journals.
• The General Ledger Future Years Utility deletes detail transactions, periodic summary totals, and future fiscal years.
For more information on how to prepare your data prior to migrating, see Migration Checklist in the Help system.
Balancing Inventory Data
The quantities in your warehouse, tier, and transaction inventory data files must be balanced before you can migrate your data. From Library Master Utilities menu > Pre Migration task, print the Inventory File Comparison Report, then use the Inventory Balancing Utility task to correct out-of-balance quantities in your inventory files.
Use the Inventory Item Code Report to display missing item codes from your Warehouse Detail, Item Costing, and Transaction Detail files.
NOTE The General Ledger tasks are available only if your source data is version 3.x.
100 Sage MAS 200 Installation and System Administrator's Guide

.......................................................................................................................................................................................
PARALLEL MIGRATIONMigrating Level 3.x Data ...
......
....
Parallel MigrationIf you are upgrading your system, after you install the Sage MAS 90 Setup program, you must migrate your source data to the location of your version 4.40 installation before it can be converted and ready to use.
Migrating Level 3.x Data
To migrate your Level 3.x user logons, before running the Parallel Migration wizard, you must have security enabled with one user set up. If security is enabled, you must have security access to the File Utilities security event in order to run the Parallel Migration Wizard.
To perform a parallel migration
1 Select Library Master Utilities menu > Parallel Migration.
2 In the Parallel Migration Wizard Welcome window, click Next.
NOTE Prior to beginning the installation process, see Pre-Installation Checklist on page 155.
NOTE Contact your Development Partner if you have segmented files prior to version 4.40. Sage does not support the conversion of those segmented files.
Sage MAS 200 Installation and System Administrator's Guide 101
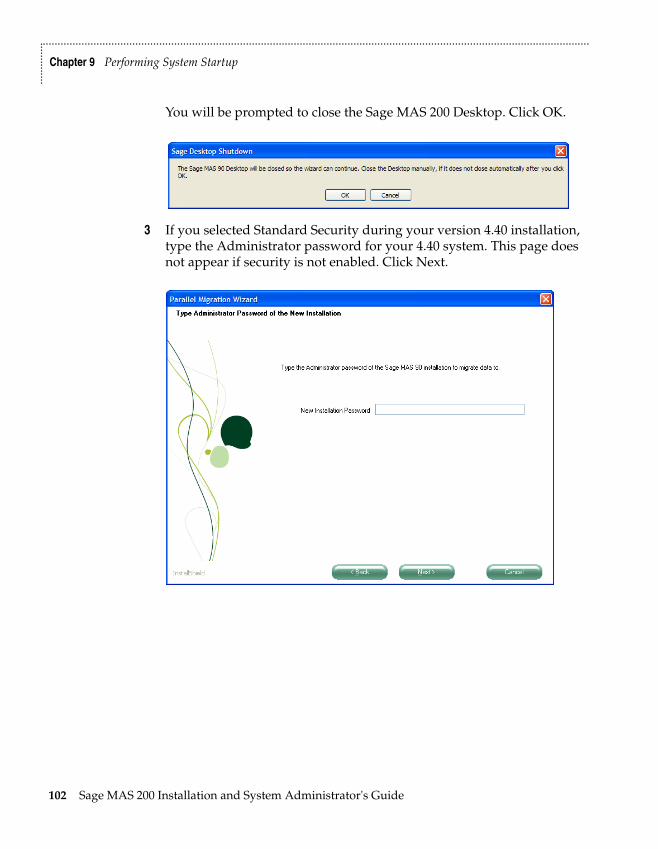
.......................................................................................................................................................................................
Chapter 9 Performing System Startup
......
......
..
You will be prompted to close the Sage MAS 200 Desktop. Click OK.
3 If you selected Standard Security during your version 4.40 installation, type the Administrator password for your 4.40 system. This page does not appear if security is not enabled. Click Next.
102 Sage MAS 200 Installation and System Administrator's Guide
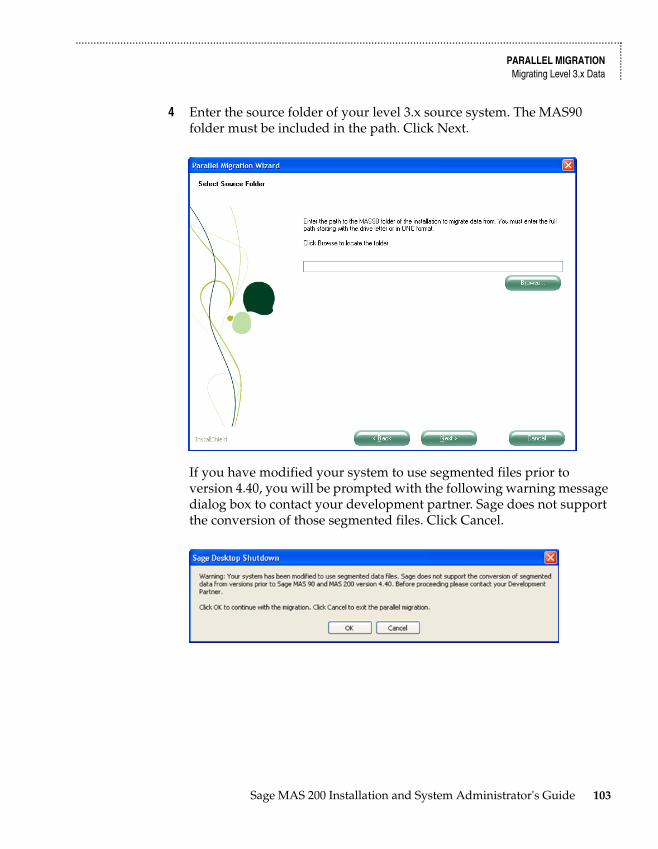
.......................................................................................................................................................................................
PARALLEL MIGRATIONMigrating Level 3.x Data ...
......
....
4 Enter the source folder of your level 3.x source system. The MAS90 folder must be included in the path. Click Next.
If you have modified your system to use segmented files prior to version 4.40, you will be prompted with the following warning message dialog box to contact your development partner. Sage does not support the conversion of those segmented files. Click Cancel.
Sage MAS 200 Installation and System Administrator's Guide 103
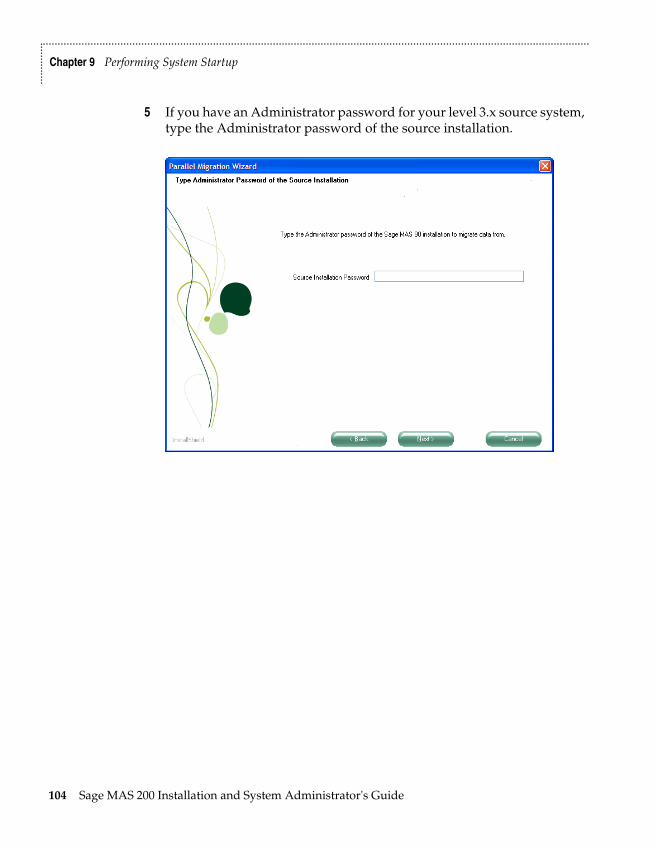
.......................................................................................................................................................................................
Chapter 9 Performing System Startup
......
......
..
5 If you have an Administrator password for your level 3.x source system, type the Administrator password of the source installation.
104 Sage MAS 200 Installation and System Administrator's Guide
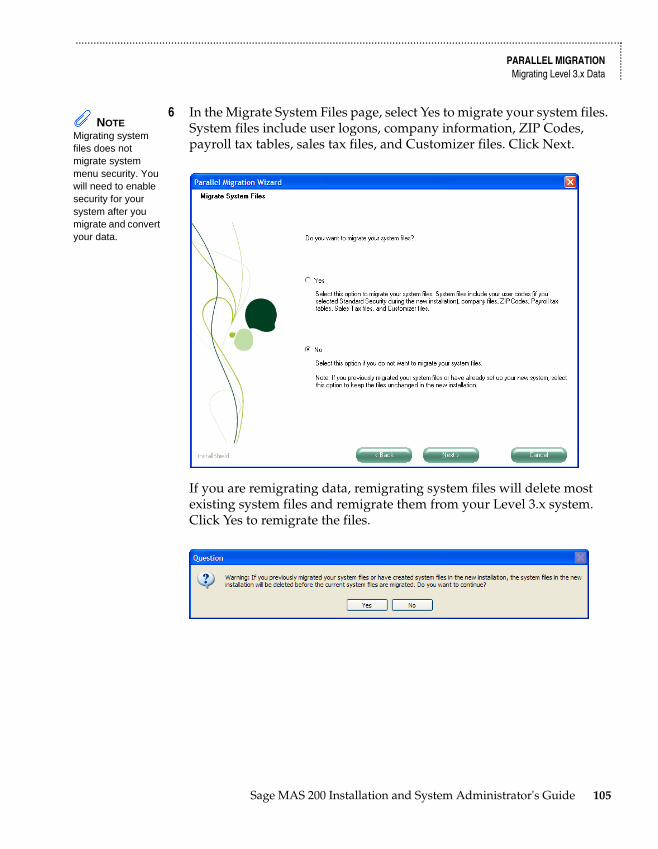
.......................................................................................................................................................................................
PARALLEL MIGRATIONMigrating Level 3.x Data ...
......
....
6 In the Migrate System Files page, select Yes to migrate your system files. System files include user logons, company information, ZIP Codes, payroll tax tables, sales tax files, and Customizer files. Click Next.
If you are remigrating data, remigrating system files will delete most existing system files and remigrate them from your Level 3.x system. Click Yes to remigrate the files.
NOTE Migrating system files does not migrate system menu security. You will need to enable security for your system after you migrate and convert your data.
Sage MAS 200 Installation and System Administrator's Guide 105
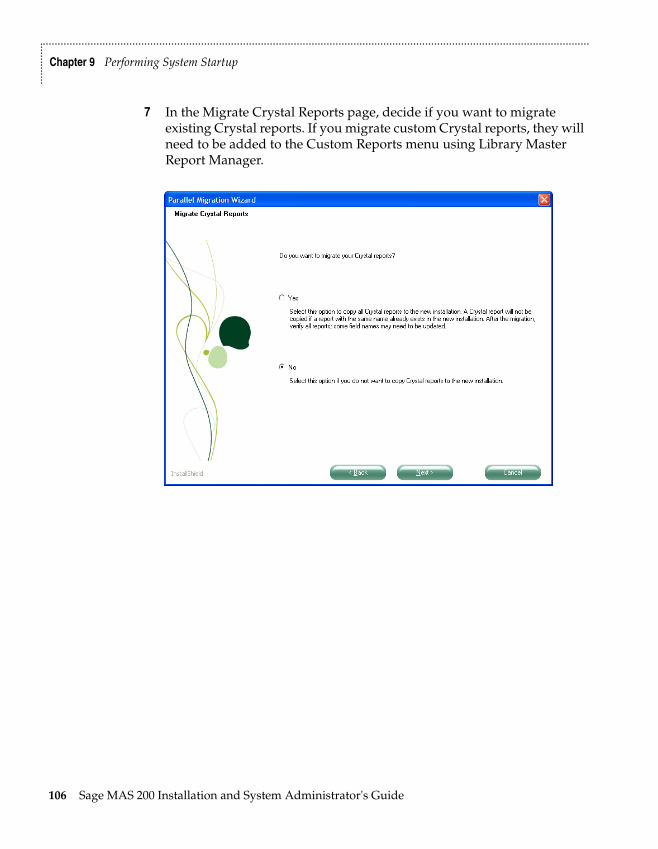
.......................................................................................................................................................................................
Chapter 9 Performing System Startup
......
......
..
7 In the Migrate Crystal Reports page, decide if you want to migrate existing Crystal reports. If you migrate custom Crystal reports, they will need to be added to the Custom Reports menu using Library Master Report Manager.
106 Sage MAS 200 Installation and System Administrator's Guide
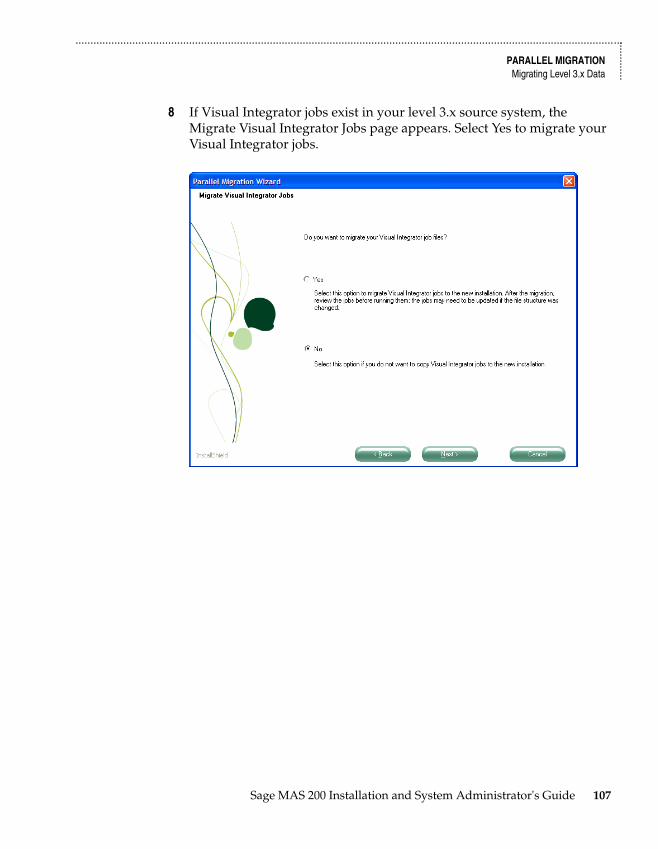
.......................................................................................................................................................................................
PARALLEL MIGRATIONMigrating Level 3.x Data ...
......
....
8 If Visual Integrator jobs exist in your level 3.x source system, the Migrate Visual Integrator Jobs page appears. Select Yes to migrate your Visual Integrator jobs.
Sage MAS 200 Installation and System Administrator's Guide 107
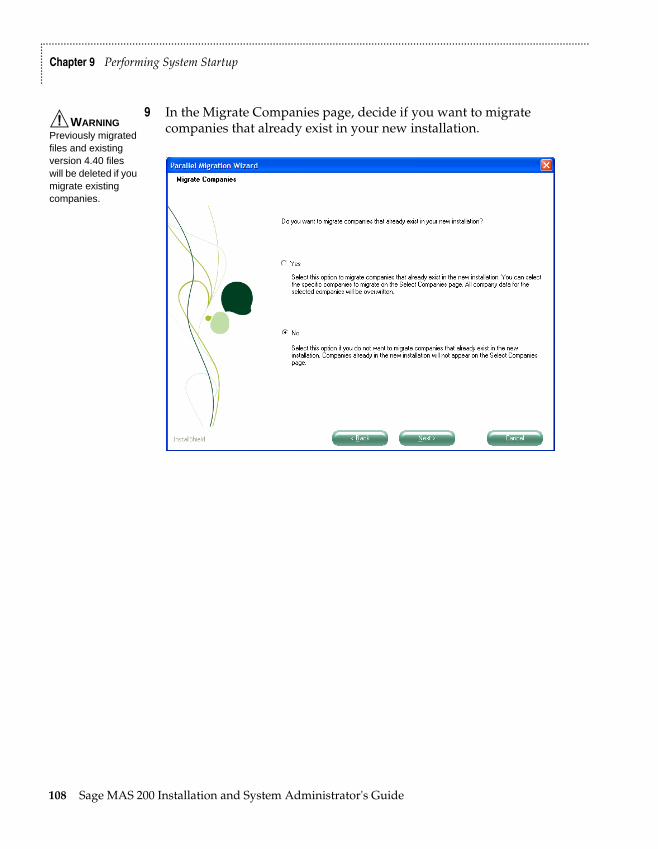
.......................................................................................................................................................................................
Chapter 9 Performing System Startup
......
......
..
9 In the Migrate Companies page, decide if you want to migrate companies that already exist in your new installation.WARNING
Previously migrated files and existing version 4.40 files will be deleted if you migrate existing companies.
108 Sage MAS 200 Installation and System Administrator's Guide
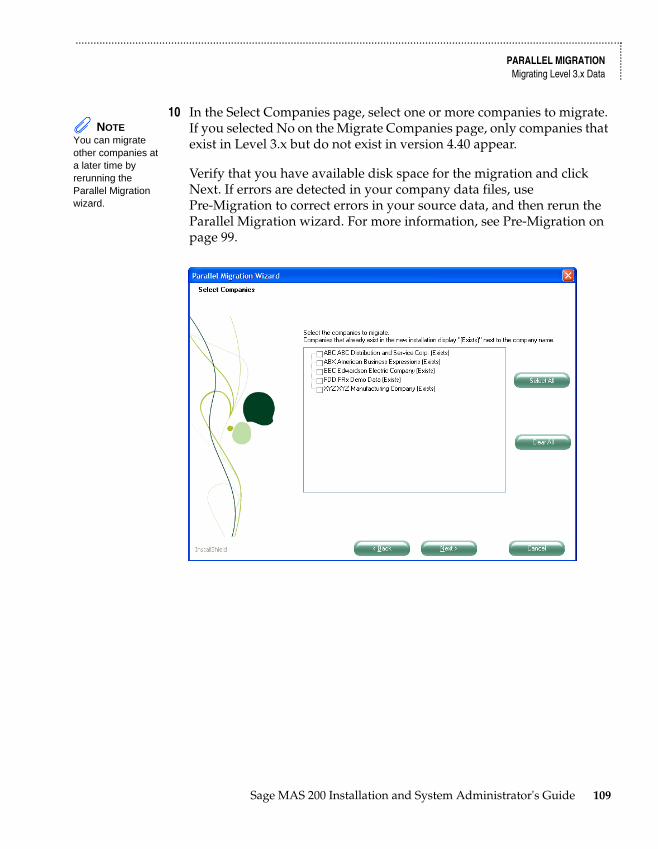
.......................................................................................................................................................................................
PARALLEL MIGRATIONMigrating Level 3.x Data ...
......
....
10 In the Select Companies page, select one or more companies to migrate. If you selected No on the Migrate Companies page, only companies that exist in Level 3.x but do not exist in version 4.40 appear.
Verify that you have available disk space for the migration and click Next. If errors are detected in your company data files, use Pre-Migration to correct errors in your source data, and then rerun the Parallel Migration wizard. For more information, see Pre-Migration on page 99.
NOTE You can migrate other companies at a later time by rerunning the Parallel Migration wizard.
Sage MAS 200 Installation and System Administrator's Guide 109
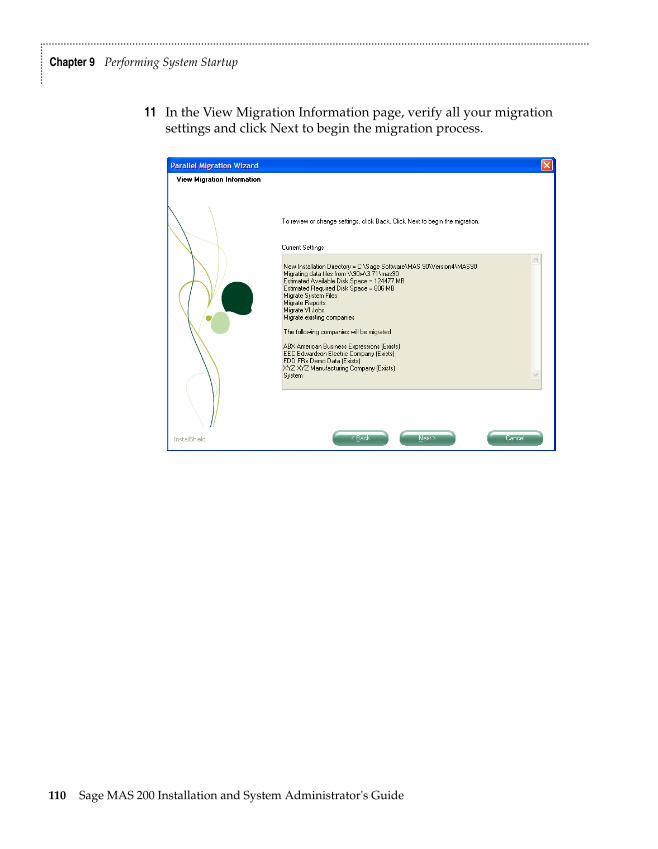
.......................................................................................................................................................................................
Chapter 9 Performing System Startup
......
......
..
11 In the View Migration Information page, verify all your migration settings and click Next to begin the migration process.
110 Sage MAS 200 Installation and System Administrator's Guide

.......................................................................................................................................................................................
PARALLEL MIGRATIONMigrating Level 3.x Data ...
......
....
12 Select the Display Parallel Migration Log and Display System Conversion Log check boxes to display a log of the files that are migrated. The logs appear in your default text editor (such as Notepad) after clicking Finish. The Parallel Migration Log is located in the Migration folder under the MAS90 folder. Click Finish.
The Parallel Migration wizard has copied your source data to your version 4.40 installation folder. Now you must convert your data to the current level. For more information, see Converting Data Files to the Current Level on page 123.
NOTE For security purposes, you can move your Payroll folder after you convert your data files to the current level.
Sage MAS 200 Installation and System Administrator's Guide 111
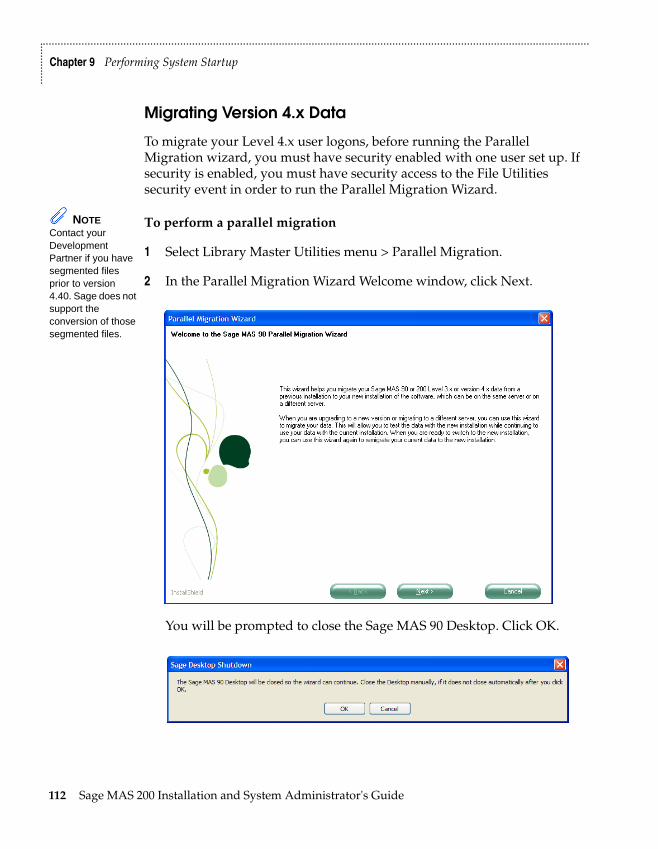
.......................................................................................................................................................................................
Chapter 9 Performing System Startup
......
......
..
Migrating Version 4.x Data
To migrate your Level 4.x user logons, before running the Parallel Migration wizard, you must have security enabled with one user set up. If security is enabled, you must have security access to the File Utilities security event in order to run the Parallel Migration Wizard.
To perform a parallel migration
1 Select Library Master Utilities menu > Parallel Migration.
2 In the Parallel Migration Wizard Welcome window, click Next.
You will be prompted to close the Sage MAS 90 Desktop. Click OK.
NOTE Contact your Development Partner if you have segmented files prior to version 4.40. Sage does not support the conversion of those segmented files.
112 Sage MAS 200 Installation and System Administrator's Guide
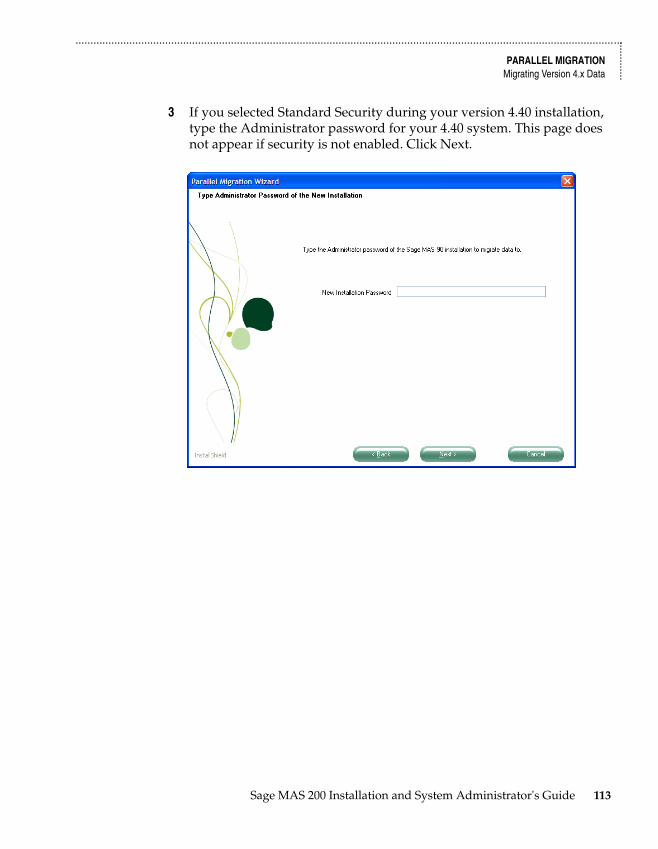
.......................................................................................................................................................................................
PARALLEL MIGRATIONMigrating Version 4.x Data ...
......
....
3 If you selected Standard Security during your version 4.40 installation, type the Administrator password for your 4.40 system. This page does not appear if security is not enabled. Click Next.
Sage MAS 200 Installation and System Administrator's Guide 113
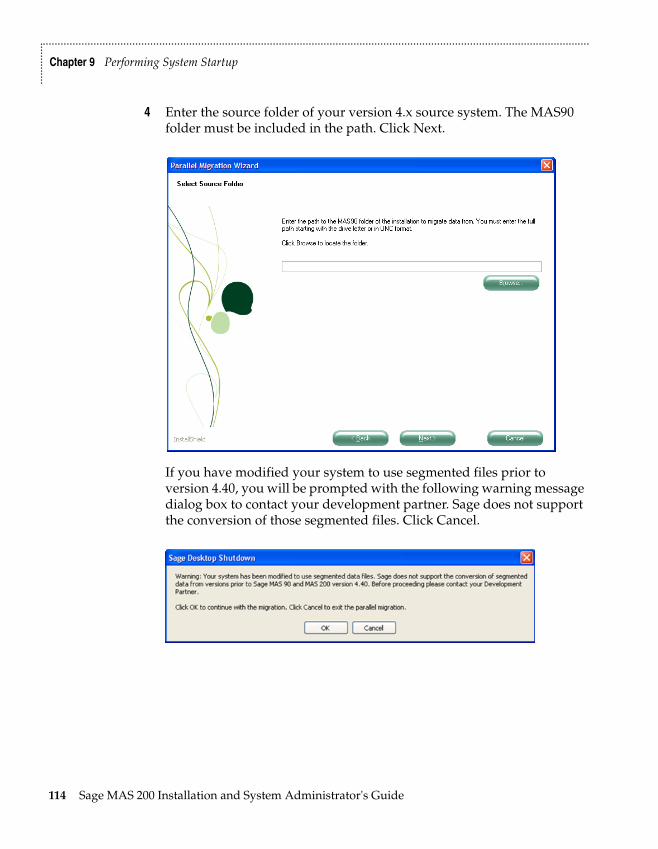
.......................................................................................................................................................................................
Chapter 9 Performing System Startup
......
......
..
4 Enter the source folder of your version 4.x source system. The MAS90 folder must be included in the path. Click Next.
If you have modified your system to use segmented files prior to version 4.40, you will be prompted with the following warning message dialog box to contact your development partner. Sage does not support the conversion of those segmented files. Click Cancel.
114 Sage MAS 200 Installation and System Administrator's Guide
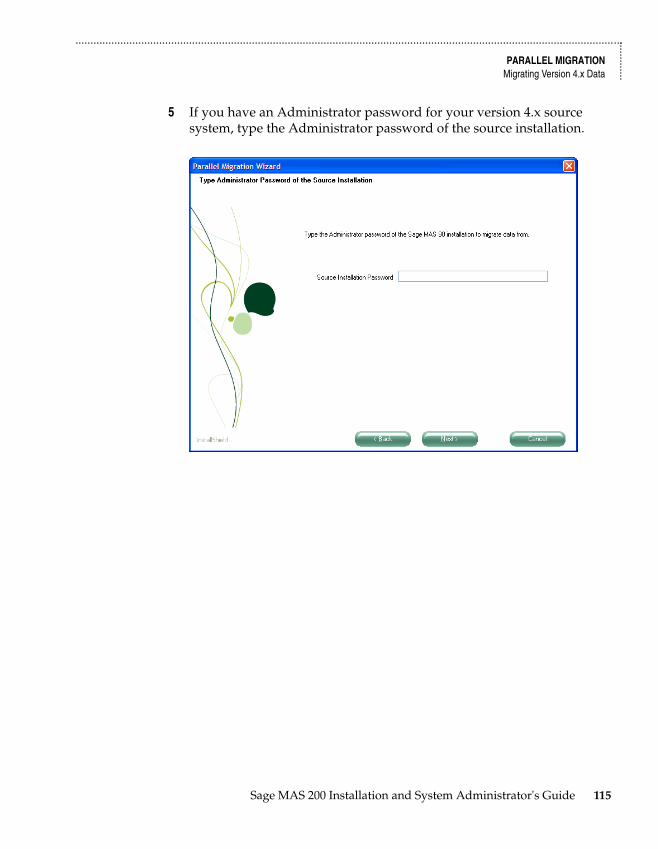
.......................................................................................................................................................................................
PARALLEL MIGRATIONMigrating Version 4.x Data ...
......
....
5 If you have an Administrator password for your version 4.x source system, type the Administrator password of the source installation.
Sage MAS 200 Installation and System Administrator's Guide 115
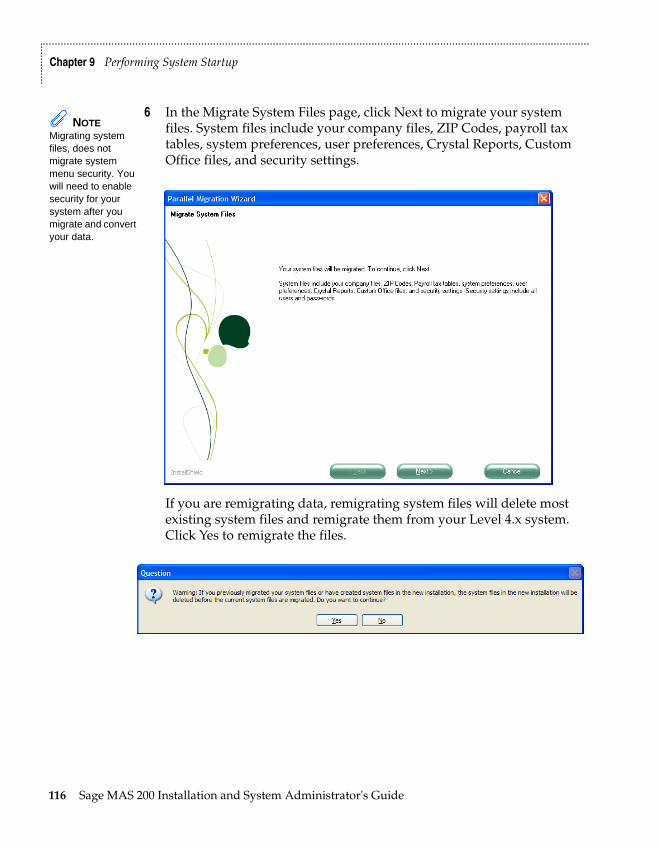
.......................................................................................................................................................................................
Chapter 9 Performing System Startup
......
......
..
6 In the Migrate System Files page, click Next to migrate your system files. System files include your company files, ZIP Codes, payroll tax tables, system preferences, user preferences, Crystal Reports, Custom Office files, and security settings.
If you are remigrating data, remigrating system files will delete most existing system files and remigrate them from your Level 4.x system. Click Yes to remigrate the files.
NOTE Migrating system files, does not migrate system menu security. You will need to enable security for your system after you migrate and convert your data.
116 Sage MAS 200 Installation and System Administrator's Guide
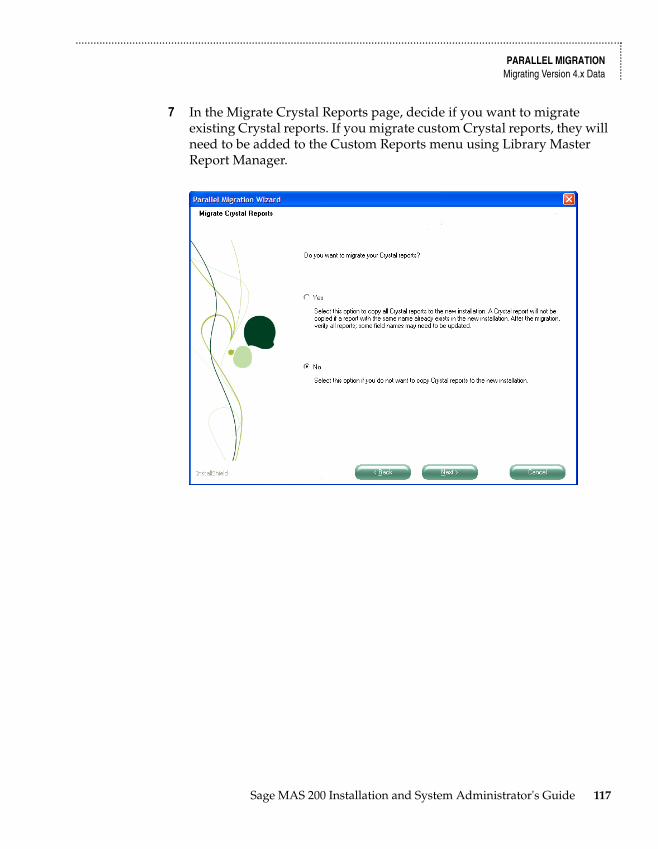
.......................................................................................................................................................................................
PARALLEL MIGRATIONMigrating Version 4.x Data ...
......
....
7 In the Migrate Crystal Reports page, decide if you want to migrate existing Crystal reports. If you migrate custom Crystal reports, they will need to be added to the Custom Reports menu using Library Master Report Manager.
Sage MAS 200 Installation and System Administrator's Guide 117

.......................................................................................................................................................................................
Chapter 9 Performing System Startup
......
......
..
8 If Visual Integrator jobs exist in your version 4.x source system, the Migrate Visual Integrator Jobs page appears. Select Yes to migrate your Visual Integrator jobs.
118 Sage MAS 200 Installation and System Administrator's Guide
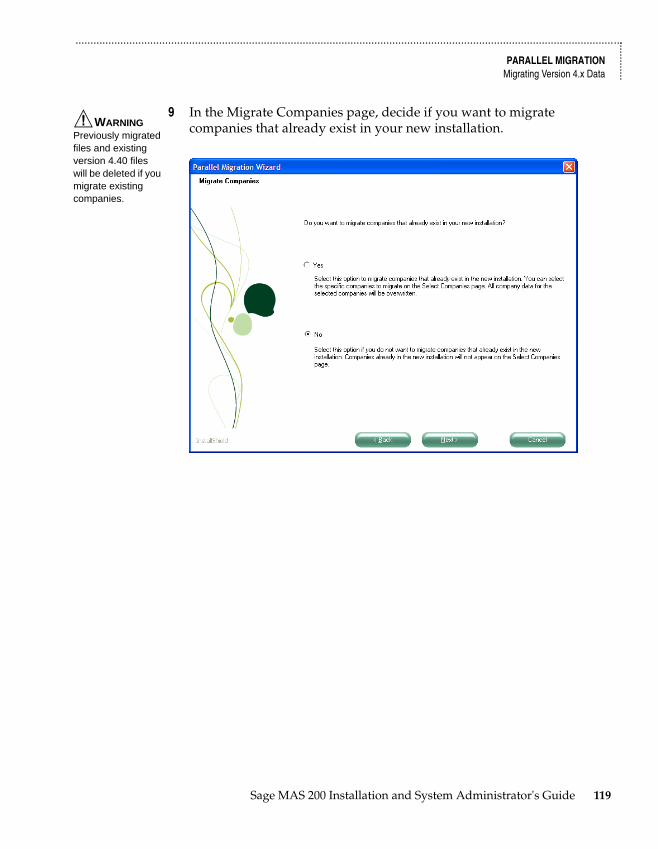
.......................................................................................................................................................................................
PARALLEL MIGRATIONMigrating Version 4.x Data ...
......
....
9 In the Migrate Companies page, decide if you want to migrate companies that already exist in your new installation.WARNING
Previously migrated files and existing version 4.40 files will be deleted if you migrate existing companies.
Sage MAS 200 Installation and System Administrator's Guide 119
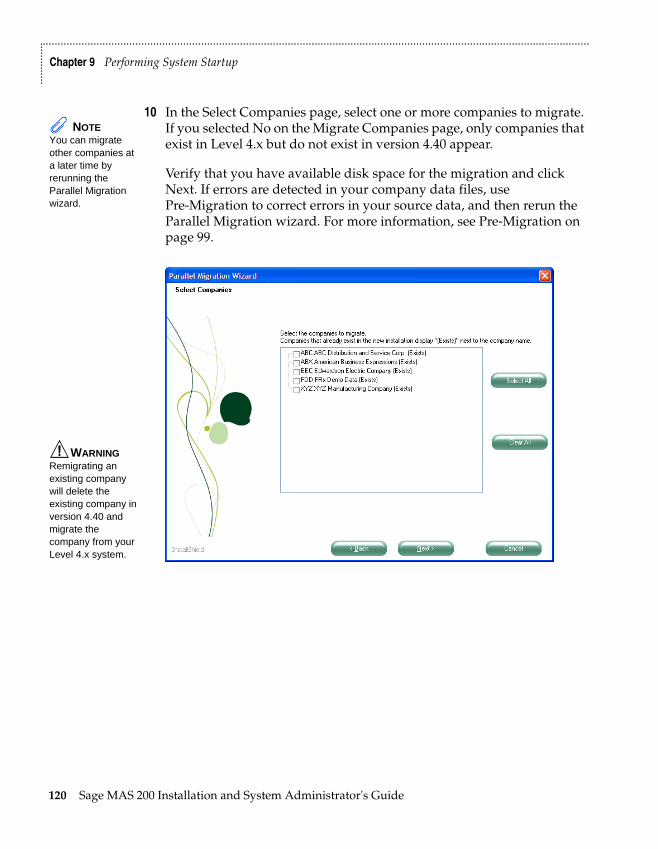
.......................................................................................................................................................................................
Chapter 9 Performing System Startup
......
......
..
10 In the Select Companies page, select one or more companies to migrate. If you selected No on the Migrate Companies page, only companies that exist in Level 4.x but do not exist in version 4.40 appear.
Verify that you have available disk space for the migration and click Next. If errors are detected in your company data files, use Pre-Migration to correct errors in your source data, and then rerun the Parallel Migration wizard. For more information, see Pre-Migration on page 99.
NOTE You can migrate other companies at a later time by rerunning the Parallel Migration wizard.
WARNING Remigrating an existing company will delete the existing company in version 4.40 and migrate the company from your Level 4.x system.
120 Sage MAS 200 Installation and System Administrator's Guide
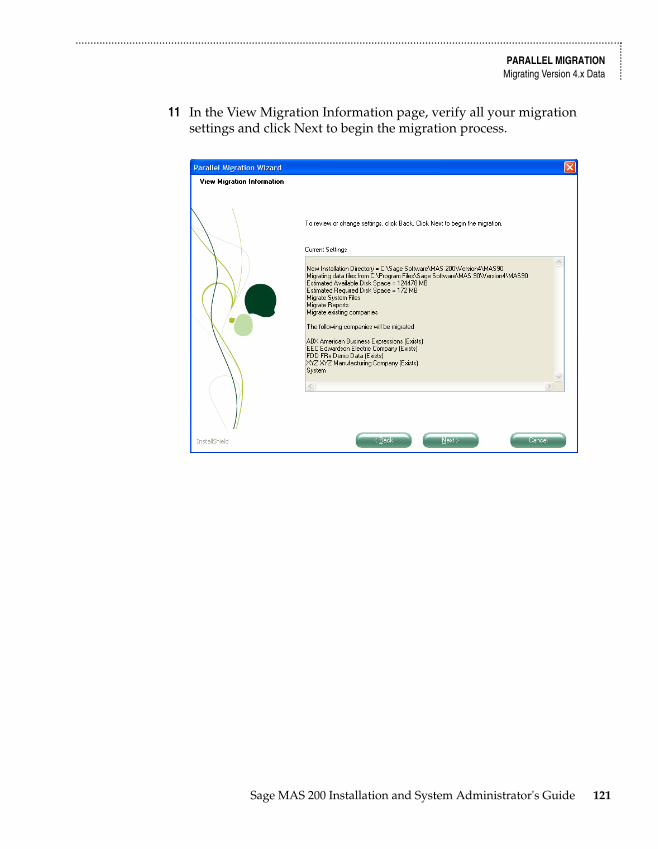
.......................................................................................................................................................................................
PARALLEL MIGRATIONMigrating Version 4.x Data ...
......
....
11 In the View Migration Information page, verify all your migration settings and click Next to begin the migration process.
Sage MAS 200 Installation and System Administrator's Guide 121
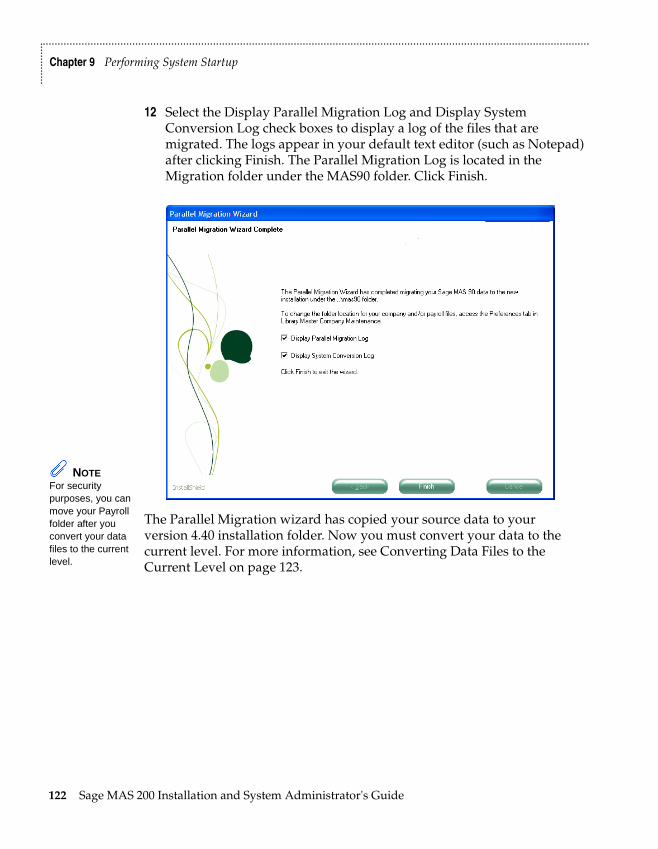
.......................................................................................................................................................................................
Chapter 9 Performing System Startup
......
......
..
12 Select the Display Parallel Migration Log and Display System Conversion Log check boxes to display a log of the files that are migrated. The logs appear in your default text editor (such as Notepad) after clicking Finish. The Parallel Migration Log is located in the Migration folder under the MAS90 folder. Click Finish.
The Parallel Migration wizard has copied your source data to your version 4.40 installation folder. Now you must convert your data to the current level. For more information, see Converting Data Files to the Current Level on page 123.
NOTE For security purposes, you can move your Payroll folder after you convert your data files to the current level.
122 Sage MAS 200 Installation and System Administrator's Guide
.......................................................................................................................................................................................
CONVERTING DATA FILES TO THE CURRENT LEVELConverting Data Files ...
......
....
Converting Data Files to the Current LevelIf you are upgrading your system from a source installation and have migrated your system files using the Parallel Migration wizard, you must convert the migrated data to the current level using Library Master Company Maintenance.
Data files for all modules are converted for the selected company and are placed in the following folder:
F:\Sage Software\MAS 200\Version4\MAS90\MAS_XXX
(where XXX is the company code)
Converting Data Files
To convert data files to the current level
1 Use any of the following methods to open the Company Maintenance window:
• In the Administrative Tools window, click Sage MAS 200 Company Maintenance.
• In the Manage Your System window, click Create and Manage Your Sage MAS 200 Companies.
• Select Library Master Main menu > Company Maintenance.
2 In the Company Maintenance window, at the Company Code field, enter a company code, or click the Lookup button to select a company for data file conversion. Only companies that have been migrated appear in the Company List window.
NOTE You can include Payroll files in a separate folder for security. For more information, see Modifying Company Preferences on page 150.
Sage MAS 200 Installation and System Administrator's Guide 123
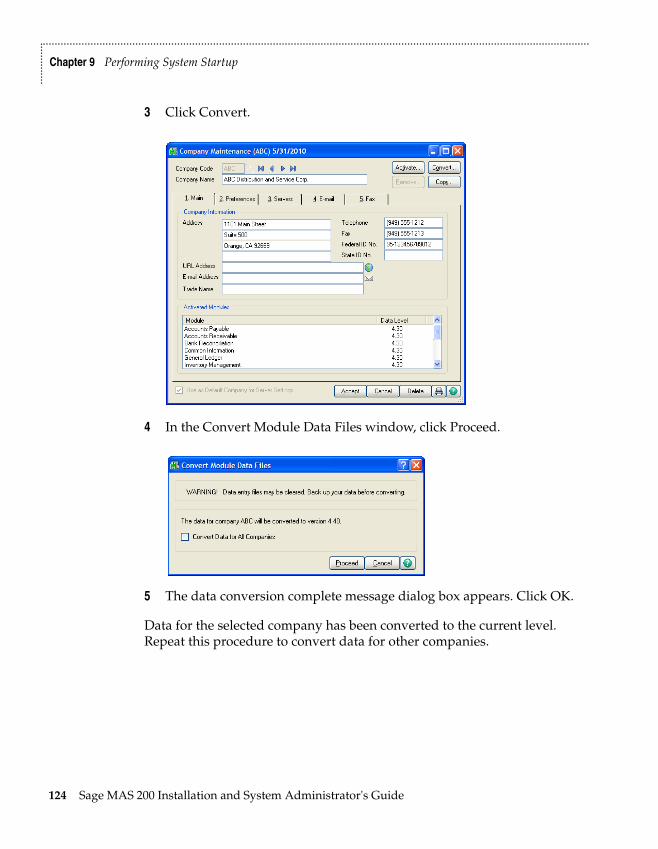
.......................................................................................................................................................................................
Chapter 9 Performing System Startup
......
......
..
3 Click Convert.
4 In the Convert Module Data Files window, click Proceed.
5 The data conversion complete message dialog box appears. Click OK.
Data for the selected company has been converted to the current level. Repeat this procedure to convert data for other companies.
124 Sage MAS 200 Installation and System Administrator's Guide
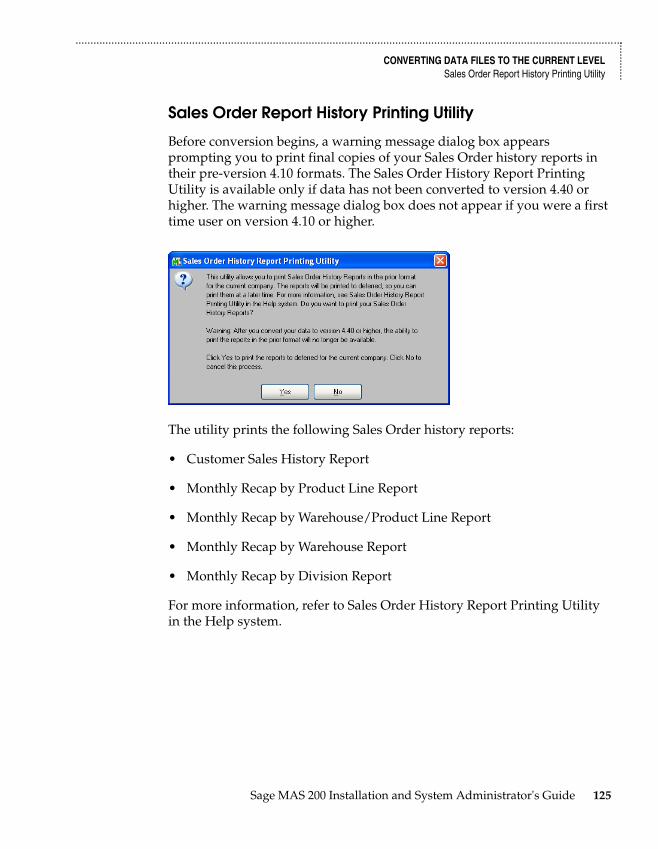
.......................................................................................................................................................................................
CONVERTING DATA FILES TO THE CURRENT LEVELSales Order Report History Printing Utility ...
......
....
Sales Order Report History Printing Utility
Before conversion begins, a warning message dialog box appears prompting you to print final copies of your Sales Order history reports in their pre-version 4.10 formats. The Sales Order History Report Printing Utility is available only if data has not been converted to version 4.40 or higher. The warning message dialog box does not appear if you were a first time user on version 4.10 or higher.
The utility prints the following Sales Order history reports:
• Customer Sales History Report
• Monthly Recap by Product Line Report
• Monthly Recap by Warehouse/Product Line Report
• Monthly Recap by Warehouse Report
• Monthly Recap by Division Report
For more information, refer to Sales Order History Report Printing Utility in the Help system.
Sage MAS 200 Installation and System Administrator's Guide 125
.......................................................................................................................................................................................
Chapter 9 Performing System Startup
......
......
..
Setting Up Roles and Users for SecurityTo implement effective security, you must define roles for your system, and then create user codes and assign users to specific roles.
The security for Sage MAS 200 is role-based. Roles should be set up to reflect the functional roles of your organization. You should define roles with access to certain modules, tasks, and security events that allow users to perform tasks related to their jobs. Roles are company independent, though you can assign roles to users who are restricted from entering certain companies.
Security is not required; however, a Default role is included in Sage MAS 200 for all users. Users assigned to the Default role have access to all modules except security events. The Default role cannot be modified.
When establishing your system's security, use the concept of roles to identify the specific tasks and options you want users to be able to access. Users can be assigned to multiple roles so design your roles to be as granular as you like. Role permissions are cumulative, which means if a user is assigned to two roles where one role gives the user access to a program while another role does not, the user will be granted access to this program.
You must determine the requirements for your security system. In most cases, it is better to start with a simple arrangement. As more sophistication is needed, this flexible system can be refined easily.
NOTE If you upgraded your system from Level 3.x, previous security is not migrated.
NOTE After security is enabled, it cannot be disabled.
126 Sage MAS 200 Installation and System Administrator's Guide
.......................................................................................................................................................................................
SETTING UP ROLES AND USERS FOR SECURITYDefining Roles ...
......
....
Defining Roles
Roles are set up to reflect the functional roles within an organization. These roles are global to the software and are company independent. Permissions assigned to roles allow assigned users access to the areas of the software they need to perform their job functions.
For modules other than Job Cost, Material Requirements Planning, Payroll, and Work Order, security can be further refined by assigning Create, Modify, Remove, or View permissions to maintenance tasks, or by setting Update or Print Only permissions to update tasks. For setup tasks, permissions can be set to Modify or View. Additionally, some module options, such as allowing batches to be merged, can be allowed or restricted.
Defining roles is considered the first step in enabling security for your system. Before you define roles in your system, determine the functional roles needed for your organization.
To define roles
1 Use any of the following methods to open the Role Maintenance window:
• In the Administrative Tools window, click Role Maintenance.
• In the Manage Your System window, click Create and Maintain User Roles.
• Select Library Master Main menu > Role Maintenance.
2 In the Role Maintenance window, at the Role field, type the name of the role (for example, AP Clerk) and press ENTER or TAB.
NOTE To access Role Maintenance, you must be logged on as Administrator, or have a role assigned to you that allows access to Role Maintenance.
NOTE Library Master tasks are not company-specific.
Sage MAS 200 Installation and System Administrator's Guide 127
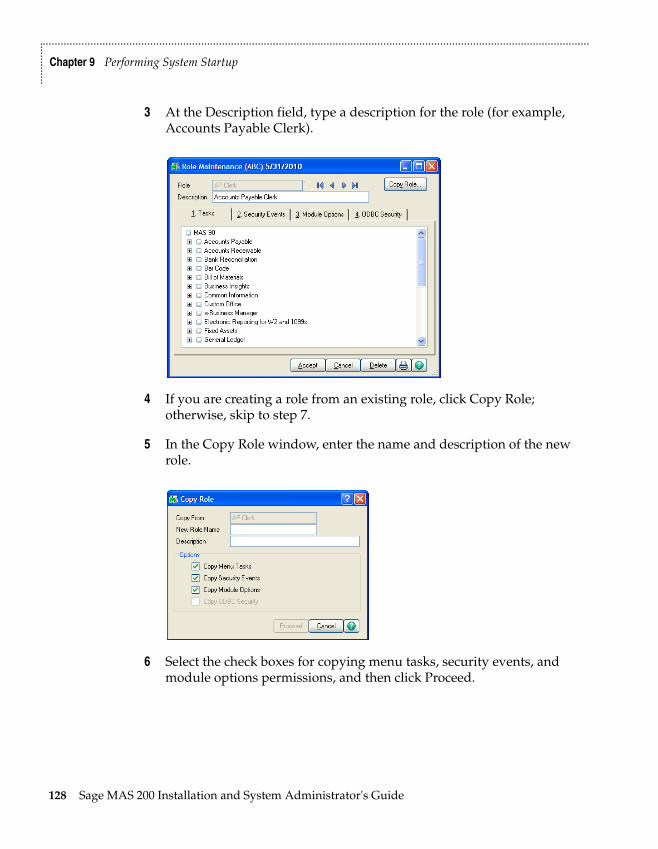
.......................................................................................................................................................................................
Chapter 9 Performing System Startup
......
......
..
3 At the Description field, type a description for the role (for example, Accounts Payable Clerk).
4 If you are creating a role from an existing role, click Copy Role; otherwise, skip to step 7.
5 In the Copy Role window, enter the name and description of the new role.
6 Select the check boxes for copying menu tasks, security events, and module options permissions, and then click Proceed.
128 Sage MAS 200 Installation and System Administrator's Guide
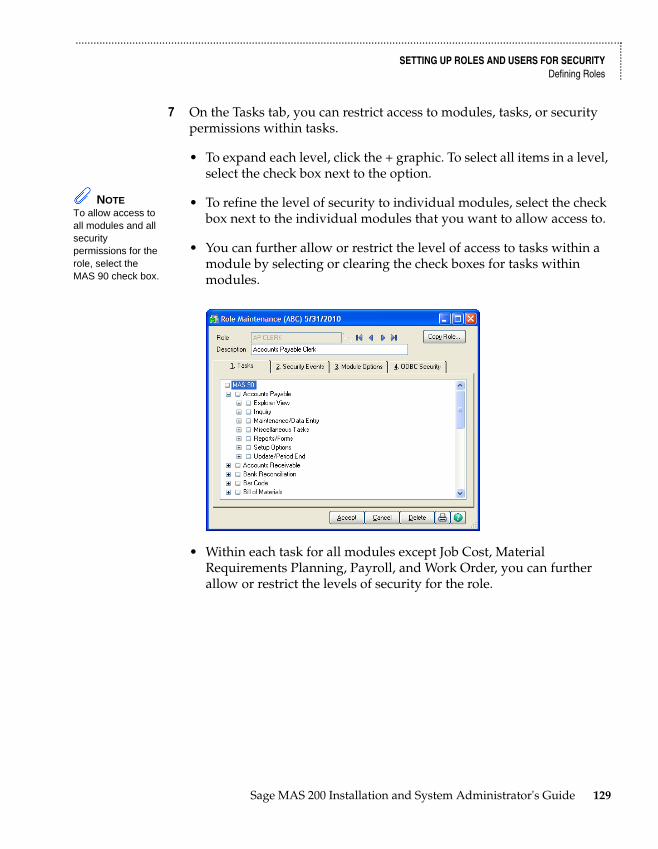
.......................................................................................................................................................................................
SETTING UP ROLES AND USERS FOR SECURITYDefining Roles ...
......
....
7 On the Tasks tab, you can restrict access to modules, tasks, or security permissions within tasks.
• To expand each level, click the + graphic. To select all items in a level, select the check box next to the option.
• To refine the level of security to individual modules, select the check box next to the individual modules that you want to allow access to.
• You can further allow or restrict the level of access to tasks within a module by selecting or clearing the check boxes for tasks within modules.
• Within each task for all modules except Job Cost, Material Requirements Planning, Payroll, and Work Order, you can further allow or restrict the levels of security for the role.
NOTE To allow access to all modules and all security permissions for the role, select the MAS 90 check box.
Sage MAS 200 Installation and System Administrator's Guide 129
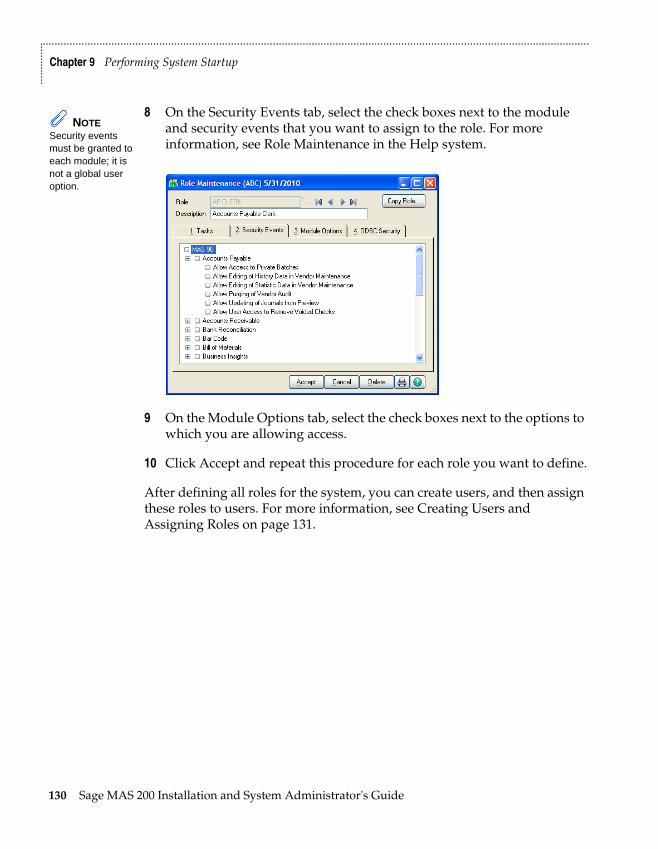
.......................................................................................................................................................................................
Chapter 9 Performing System Startup
......
......
..
8 On the Security Events tab, select the check boxes next to the module and security events that you want to assign to the role. For more information, see Role Maintenance in the Help system.
9 On the Module Options tab, select the check boxes next to the options to which you are allowing access.
10 Click Accept and repeat this procedure for each role you want to define.
After defining all roles for the system, you can create users, and then assign these roles to users. For more information, see Creating Users and Assigning Roles on page 131.
NOTE Security events must be granted to each module; it is not a global user option.
130 Sage MAS 200 Installation and System Administrator's Guide
.......................................................................................................................................................................................
SETTING UP ROLES AND USERS FOR SECURITYCreating Users and Assigning Roles ...
......
....
Creating Users and Assigning Roles
Defining a user includes setting up a logon and password, assigning access to specific companies, and assigning a role or multiple roles to the user. Creating the first user logon and password restricts the entire system to only that individual who has a user logon and password.
A user account can be defined with an expiration date to lock the user out of the system after a certain amount of time. You can also define start and end dates for any role assigned to the user. This feature allows a user access to certain areas of the system and security events for the limited period of time.
Before you create user logons and passwords, decide whether your system will require a unified logon, or a Sage MAS 200 logon for all users. For more information, see Requiring a Logon and Password on page 140.
To create a user and assign a role
1 Use any of the following methods to open the User Maintenance window:
• In the Administrative Tools window, click User Maintenance.
• In the Manage Your System window, click Define Users and Security Access.
• Select Library Master Main menu > User Maintenance.
NOTE You can only access User Maintenance if you are logged on as Administrator, or if you have a role assigned to you that allows access to User Maintenance.
Sage MAS 200 Installation and System Administrator's Guide 131
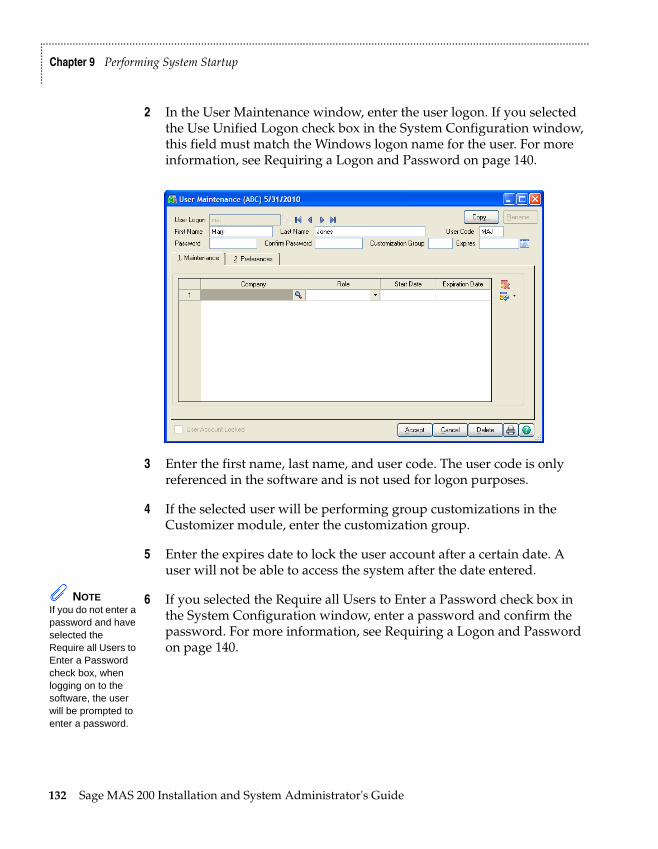
.......................................................................................................................................................................................
Chapter 9 Performing System Startup
......
......
..
2 In the User Maintenance window, enter the user logon. If you selected the Use Unified Logon check box in the System Configuration window, this field must match the Windows logon name for the user. For more information, see Requiring a Logon and Password on page 140.
3 Enter the first name, last name, and user code. The user code is only referenced in the software and is not used for logon purposes.
4 If the selected user will be performing group customizations in the Customizer module, enter the customization group.
5 Enter the expires date to lock the user account after a certain date. A user will not be able to access the system after the date entered.
6 If you selected the Require all Users to Enter a Password check box in the System Configuration window, enter a password and confirm the password. For more information, see Requiring a Logon and Password on page 140.
NOTE If you do not enter a password and have selected the Require all Users to Enter a Password check box, when logging on to the software, the user will be prompted to enter a password.
132 Sage MAS 200 Installation and System Administrator's Guide
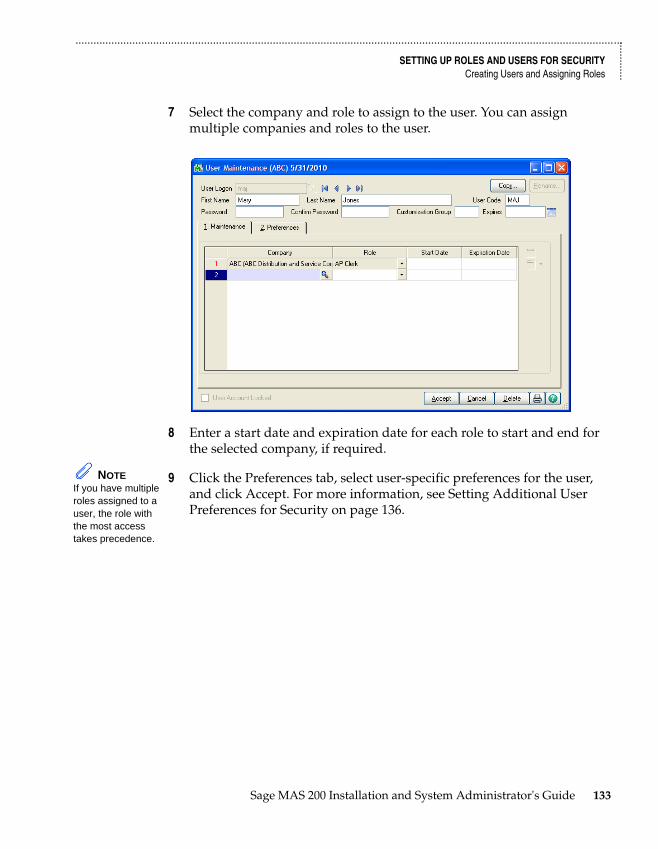
.......................................................................................................................................................................................
SETTING UP ROLES AND USERS FOR SECURITYCreating Users and Assigning Roles ...
......
....
7 Select the company and role to assign to the user. You can assign multiple companies and roles to the user.
8 Enter a start date and expiration date for each role to start and end for the selected company, if required.
9 Click the Preferences tab, select user-specific preferences for the user, and click Accept. For more information, see Setting Additional User Preferences for Security on page 136.
NOTEIf you have multiple roles assigned to a user, the role with the most access takes precedence.
Sage MAS 200 Installation and System Administrator's Guide 133
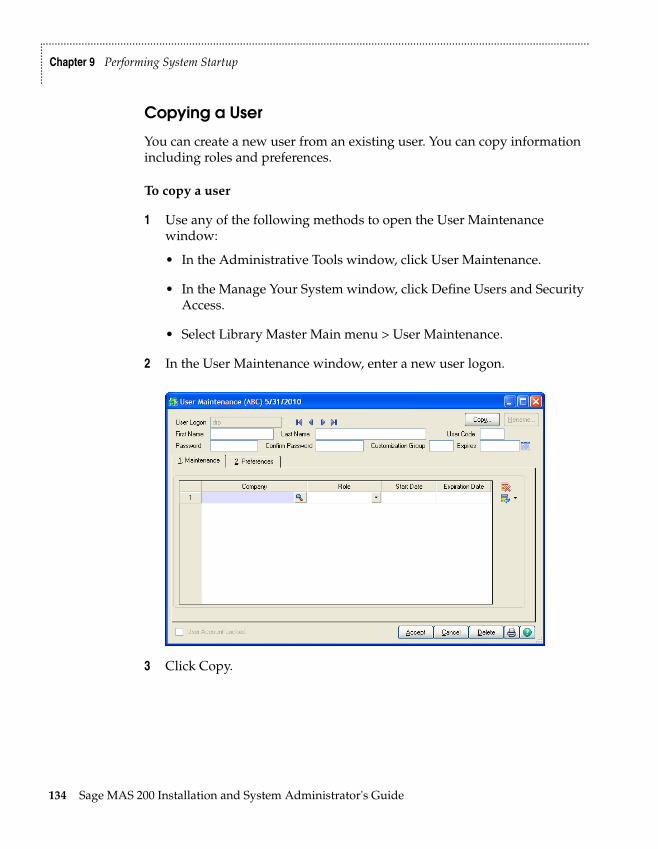
.......................................................................................................................................................................................
Chapter 9 Performing System Startup
......
......
..
Copying a User
You can create a new user from an existing user. You can copy information including roles and preferences.
To copy a user
1 Use any of the following methods to open the User Maintenance window:
• In the Administrative Tools window, click User Maintenance.
• In the Manage Your System window, click Define Users and Security Access.
• Select Library Master Main menu > User Maintenance.
2 In the User Maintenance window, enter a new user logon.
3 Click Copy.
134 Sage MAS 200 Installation and System Administrator's Guide
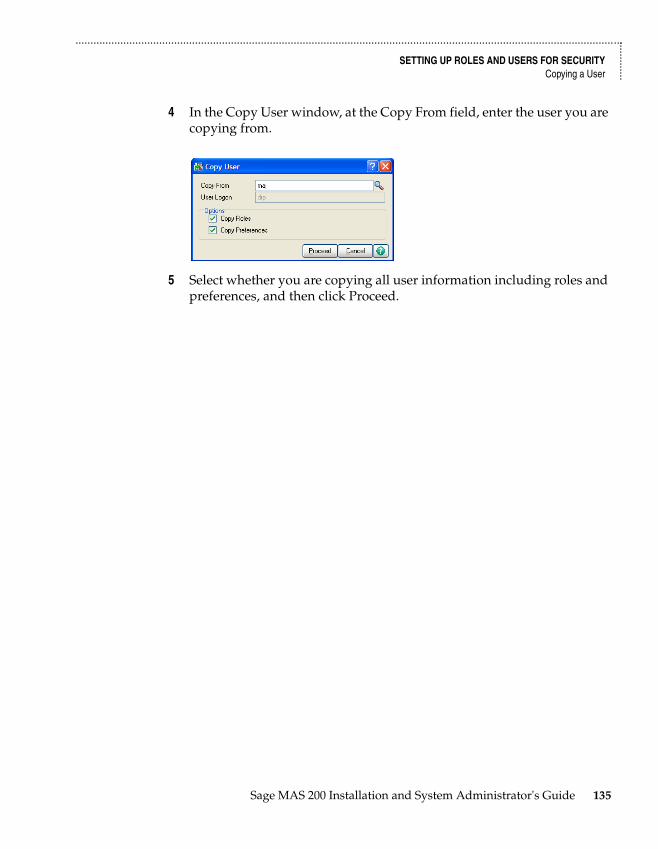
.......................................................................................................................................................................................
SETTING UP ROLES AND USERS FOR SECURITYCopying a User ...
......
....
4 In the Copy User window, at the Copy From field, enter the user you are copying from.
5 Select whether you are copying all user information including roles and preferences, and then click Proceed.
Sage MAS 200 Installation and System Administrator's Guide 135
.......................................................................................................................................................................................
Chapter 9 Performing System Startup
......
......
..
Setting Additional User Preferences for SecurityUser preferences are preferences that apply to each user. You can set up additional security measures for individual users such as setting a workstation to automatically log off, and manually locking certain users out of the system.
For security purposes, a workstation can automatically log off if it is left unattended for a specified period of time. This feature ensures that workstations are not accidently left with the software running, allowing unauthorized users access to sensitive information.
The Automatic Logoff feature is not activated if the Sage MAS 200 Desktop is the active window on the workstation. In addition, the Sage MAS 200 Desktop does not automatically shut down any activity in process, such as an update or report, that is currently processing, or if the Sage MAS 200 Desktop is idle within an option's window, such as a data entry or inquiry window.
Setting a Workstation to Automatically Log Off
To automatically log off a workstation
1 Use any of the following methods to open the User Maintenance window:
• In the Administrative Tools window, click User Maintenance.
• In the Manage Your System window, click Define Users and Security Access.
• Select Library Master Main menu > User Maintenance.
2 Select a user at the User Logon field.
NOTETo access the User Maintenance Preferences tab, you must have the correct security permissions set up for your role. For more information, see Setting Up Roles and Users for Security on page 126.
136 Sage MAS 200 Installation and System Administrator's Guide
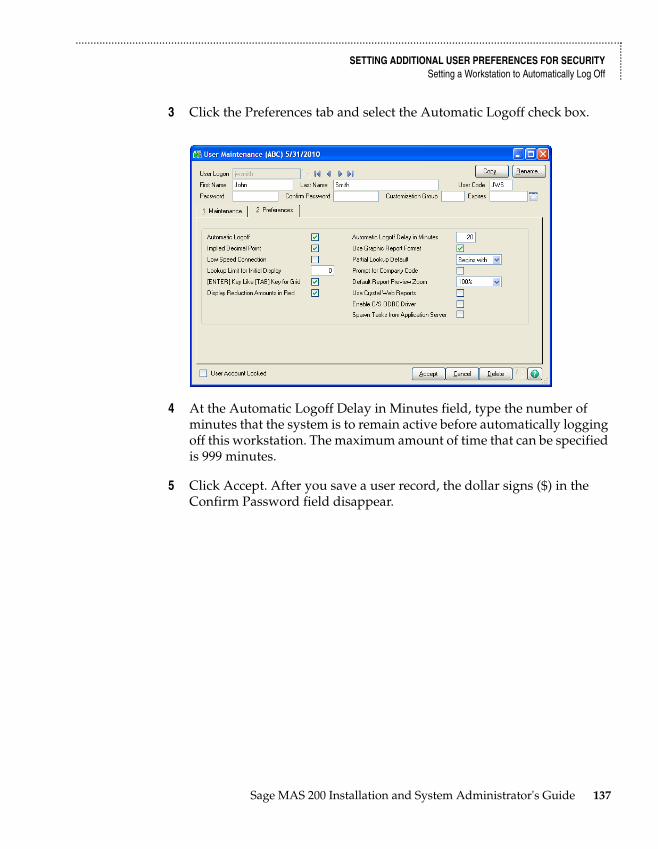
.......................................................................................................................................................................................
SETTING ADDITIONAL USER PREFERENCES FOR SECURITYSetting a Workstation to Automatically Log Off ...
......
....
3 Click the Preferences tab and select the Automatic Logoff check box.
4 At the Automatic Logoff Delay in Minutes field, type the number of minutes that the system is to remain active before automatically logging off this workstation. The maximum amount of time that can be specified is 999 minutes.
5 Click Accept. After you save a user record, the dollar signs ($) in the Confirm Password field disappear.
Sage MAS 200 Installation and System Administrator's Guide 137
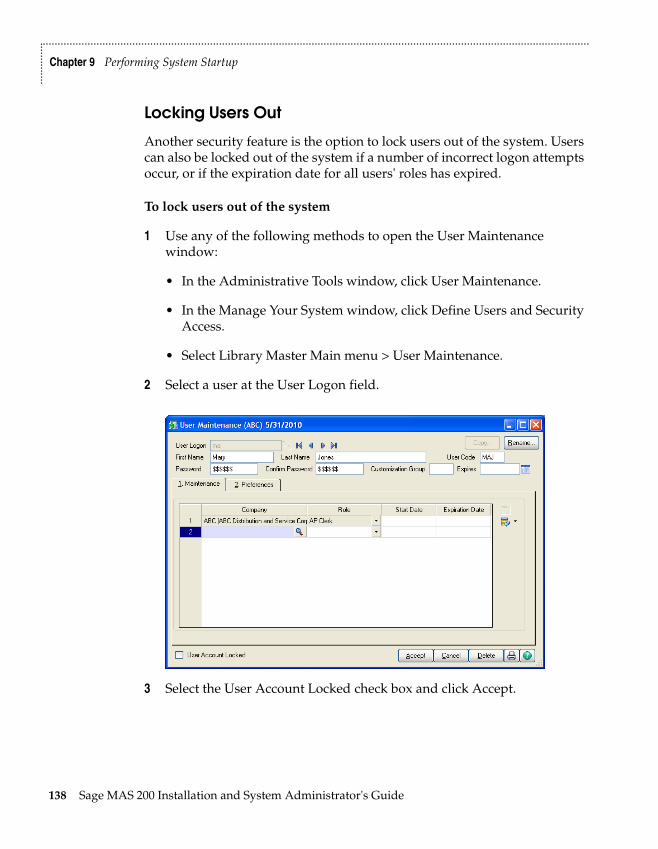
.......................................................................................................................................................................................
Chapter 9 Performing System Startup
......
......
..
Locking Users Out
Another security feature is the option to lock users out of the system. Users can also be locked out of the system if a number of incorrect logon attempts occur, or if the expiration date for all users' roles has expired.
To lock users out of the system
1 Use any of the following methods to open the User Maintenance window:
• In the Administrative Tools window, click User Maintenance.
• In the Manage Your System window, click Define Users and Security Access.
• Select Library Master Main menu > User Maintenance.
2 Select a user at the User Logon field.
3 Select the User Account Locked check box and click Accept.
138 Sage MAS 200 Installation and System Administrator's Guide
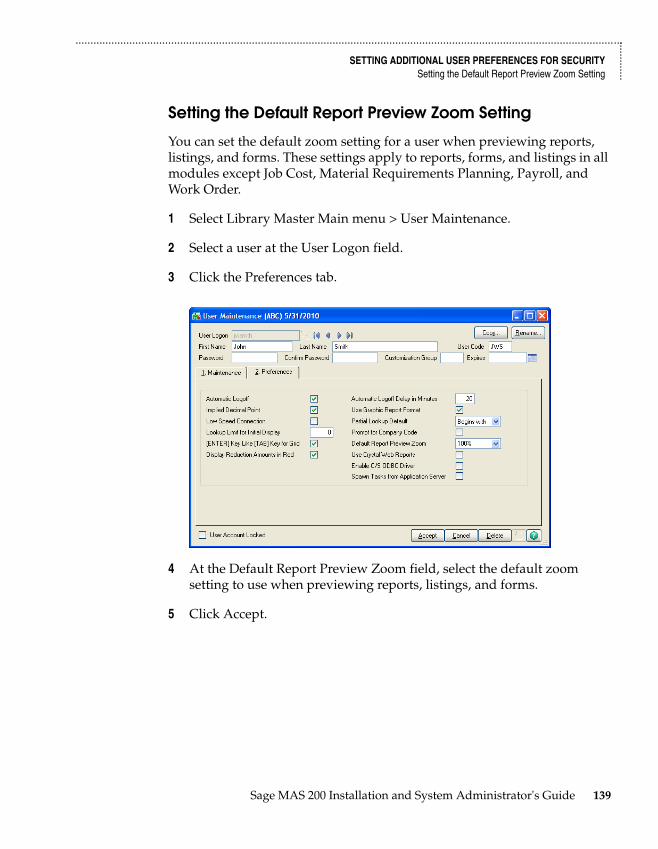
.......................................................................................................................................................................................
SETTING ADDITIONAL USER PREFERENCES FOR SECURITYSetting the Default Report Preview Zoom Setting ...
......
....
Setting the Default Report Preview Zoom Setting
You can set the default zoom setting for a user when previewing reports, listings, and forms. These settings apply to reports, forms, and listings in all modules except Job Cost, Material Requirements Planning, Payroll, and Work Order.
1 Select Library Master Main menu > User Maintenance.
2 Select a user at the User Logon field.
3 Click the Preferences tab.
4 At the Default Report Preview Zoom field, select the default zoom setting to use when previewing reports, listings, and forms.
5 Click Accept.
Sage MAS 200 Installation and System Administrator's Guide 139
.......................................................................................................................................................................................
Chapter 9 Performing System Startup
......
......
..
Setting System PreferencesThe software is equipped with a number of features that can effectively keep unauthorized users from accessing programs and files. In addition to basic security features, additional measures can be taken to further secure your data. These additional measures include requiring a logon and password, enabling intruder detection, and specifying lockout duration.
Requiring a Logon and Password
To further protect your system, you can require all users to have a logon and password. First decide if you will set up your users with a unified logon, or a Sage MAS 200 logon. A unified logon allows Sage MAS 200 to authenticate and use the Windows logon. If you implement a unified logon, users do not need to reenter a logon and password when accessing the software. You can, however, require that users enter their password before accessing the software. A Sage MAS 200 logon is independent of the Windows logon, and will be required to enter the software.
When you set up a Sage MAS 200 logon, you can enable intruder detection. Intruder detection locks a user out of the system when a certain number of logon attempts fail. This prevents unauthorized users from trying numerous passwords while attempting to access your system.
140 Sage MAS 200 Installation and System Administrator's Guide
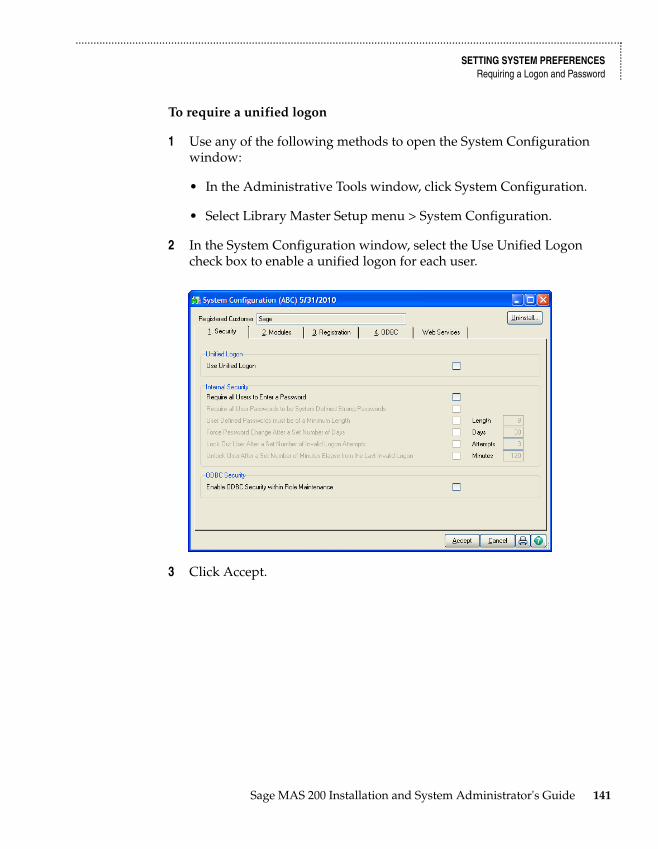
.......................................................................................................................................................................................
SETTING SYSTEM PREFERENCESRequiring a Logon and Password ...
......
....
To require a unified logon
1 Use any of the following methods to open the System Configuration window:
• In the Administrative Tools window, click System Configuration.
• Select Library Master Setup menu > System Configuration.
2 In the System Configuration window, select the Use Unified Logon check box to enable a unified logon for each user.
3 Click Accept.
Sage MAS 200 Installation and System Administrator's Guide 141
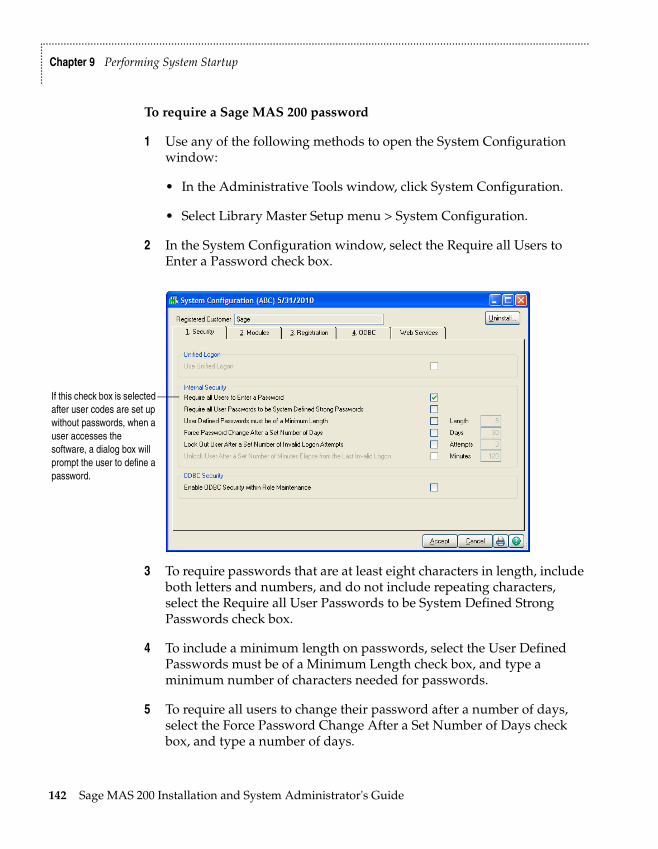
.......................................................................................................................................................................................
Chapter 9 Performing System Startup
......
......
..
To require a Sage MAS 200 password
1 Use any of the following methods to open the System Configuration window:
• In the Administrative Tools window, click System Configuration.
• Select Library Master Setup menu > System Configuration.
2 In the System Configuration window, select the Require all Users to Enter a Password check box.
3 To require passwords that are at least eight characters in length, include both letters and numbers, and do not include repeating characters, select the Require all User Passwords to be System Defined Strong Passwords check box.
4 To include a minimum length on passwords, select the User Defined Passwords must be of a Minimum Length check box, and type a minimum number of characters needed for passwords.
5 To require all users to change their password after a number of days, select the Force Password Change After a Set Number of Days check box, and type a number of days.
If this check box is selected after user codes are set up without passwords, when a user accesses the software, a dialog box will prompt the user to define a password.
142 Sage MAS 200 Installation and System Administrator's Guide

.......................................................................................................................................................................................
SETTING SYSTEM PREFERENCESRequiring a Logon and Password ...
......
....
6 To enable intruder detection, select the Lock Out User After a Set Number of Invalid Logon Attempts check box, and then type the number of attempts you will allow before a user is locked out of the system (cannot attempt to log on anymore).
7 To specify an optional lockout duration, select the Unlock User After a Set Number of Minutes Elapse from the Last Invalid Logon check box, and type the amount of time you want the lockout to be in effect. After the amount of time has passed, the user can attempt to access the system.
8 Click Accept.
NOTEIf you do not specify a lockout duration, a user locked out by intruder detection can attempt to log back onto the system only if the User Account Locked check box is cleared in the User Maintenance window.
Sage MAS 200 Installation and System Administrator's Guide 143
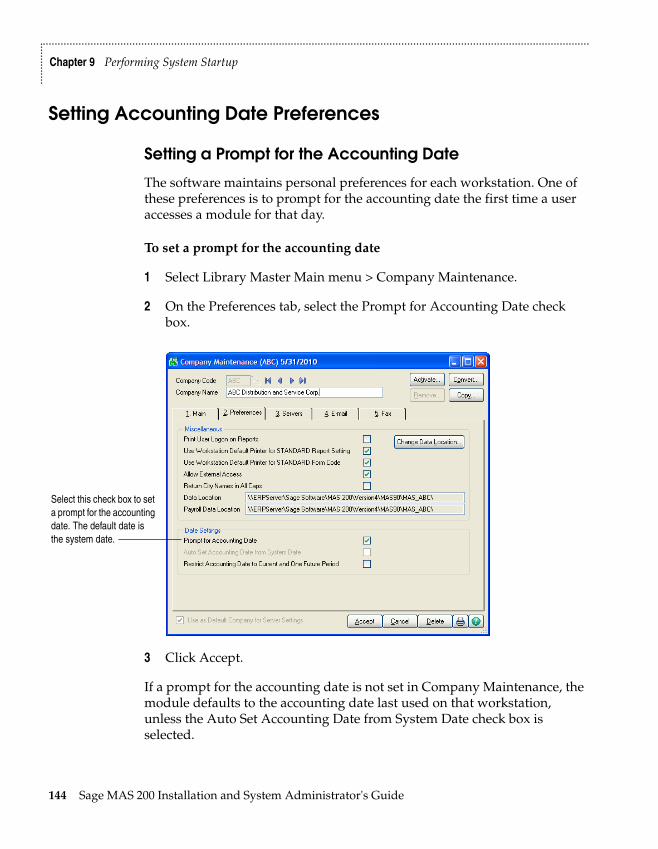
.......................................................................................................................................................................................
Chapter 9 Performing System Startup
......
......
..
Setting Accounting Date Preferences
Setting a Prompt for the Accounting Date
The software maintains personal preferences for each workstation. One of these preferences is to prompt for the accounting date the first time a user accesses a module for that day.
To set a prompt for the accounting date
1 Select Library Master Main menu > Company Maintenance.
2 On the Preferences tab, select the Prompt for Accounting Date check box.
3 Click Accept.
If a prompt for the accounting date is not set in Company Maintenance, the module defaults to the accounting date last used on that workstation, unless the Auto Set Accounting Date from System Date check box is selected.
Select this check box to set a prompt for the accounting date. The default date is the system date.
144 Sage MAS 200 Installation and System Administrator's Guide
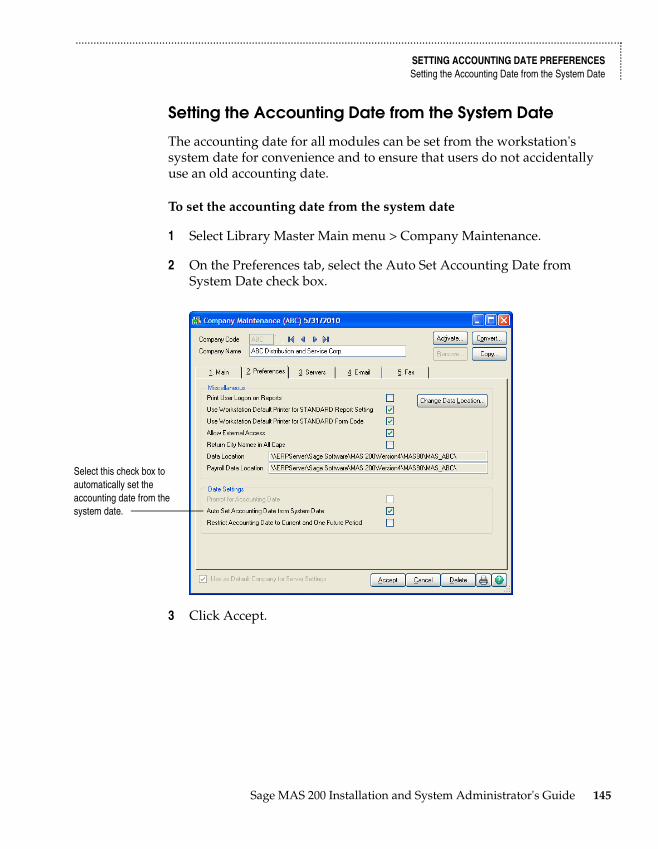
.......................................................................................................................................................................................
SETTING ACCOUNTING DATE PREFERENCESSetting the Accounting Date from the System Date ...
......
....
Setting the Accounting Date from the System Date
The accounting date for all modules can be set from the workstation's system date for convenience and to ensure that users do not accidentally use an old accounting date.
To set the accounting date from the system date
1 Select Library Master Main menu > Company Maintenance.
2 On the Preferences tab, select the Auto Set Accounting Date from System Date check box.
3 Click Accept.
Select this check box to automatically set the accounting date from the system date.
Sage MAS 200 Installation and System Administrator's Guide 145
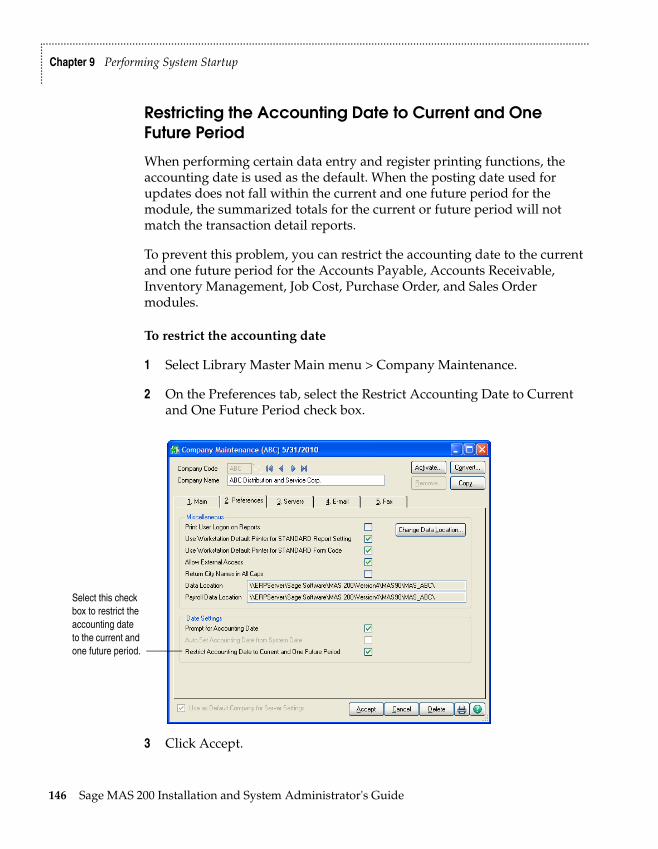
.......................................................................................................................................................................................
Chapter 9 Performing System Startup
......
......
..
Restricting the Accounting Date to Current and One Future Period
When performing certain data entry and register printing functions, the accounting date is used as the default. When the posting date used for updates does not fall within the current and one future period for the module, the summarized totals for the current or future period will not match the transaction detail reports.
To prevent this problem, you can restrict the accounting date to the current and one future period for the Accounts Payable, Accounts Receivable, Inventory Management, Job Cost, Purchase Order, and Sales Order modules.
To restrict the accounting date
1 Select Library Master Main menu > Company Maintenance.
2 On the Preferences tab, select the Restrict Accounting Date to Current and One Future Period check box.
3 Click Accept.
Select this check box to restrict the accounting date to the current and one future period.
146 Sage MAS 200 Installation and System Administrator's Guide
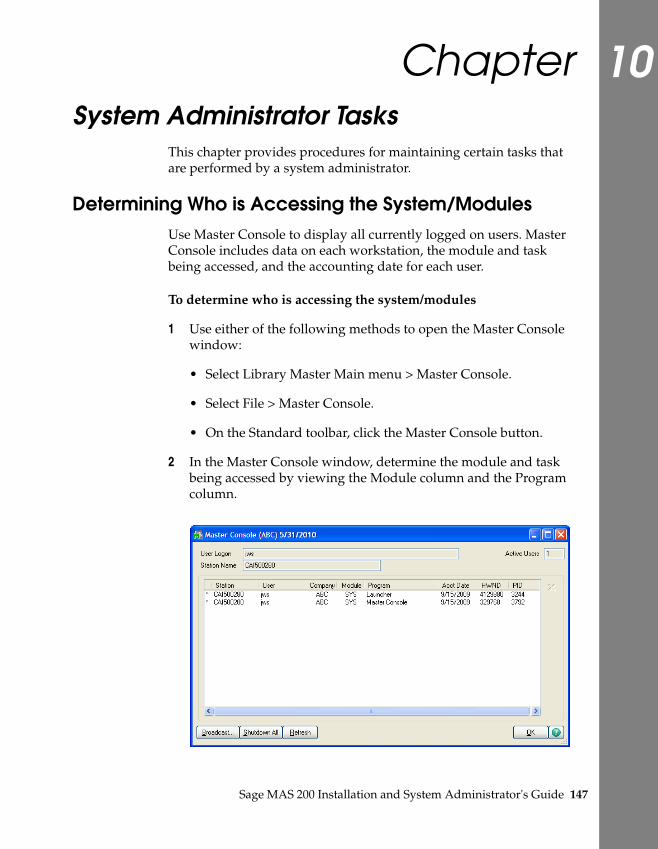
Chapter 10
System Administrator TasksChapter 10This chapter provides procedures for maintaining certain tasks that are performed by a system administrator.
Determining Who is Accessing the System/ModulesUse Master Console to display all currently logged on users. Master Console includes data on each workstation, the module and task being accessed, and the accounting date for each user.
To determine who is accessing the system/modules
1 Use either of the following methods to open the Master Console window:
• Select Library Master Main menu > Master Console.
• Select File > Master Console.
• On the Standard toolbar, click the Master Console button.
2 In the Master Console window, determine the module and task being accessed by viewing the Module column and the Program column.
Sage MAS 200 Installation and System Administrator's Guide 147
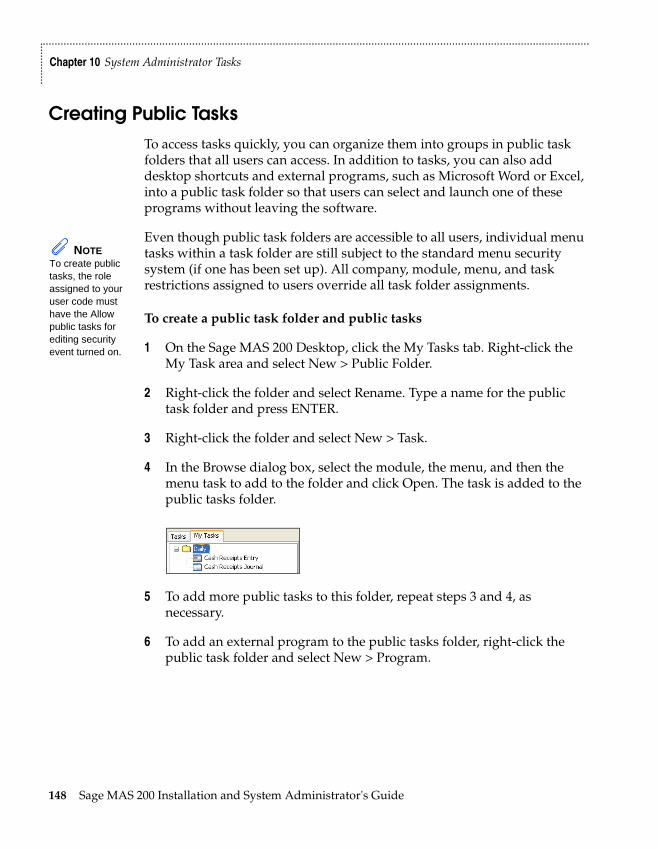
.......................................................................................................................................................................................
Chapter 10 System Administrator Tasks
......
......
..
Creating Public TasksTo access tasks quickly, you can organize them into groups in public task folders that all users can access. In addition to tasks, you can also add desktop shortcuts and external programs, such as Microsoft Word or Excel, into a public task folder so that users can select and launch one of these programs without leaving the software.
Even though public task folders are accessible to all users, individual menu tasks within a task folder are still subject to the standard menu security system (if one has been set up). All company, module, menu, and task restrictions assigned to users override all task folder assignments.
To create a public task folder and public tasks
1 On the Sage MAS 200 Desktop, click the My Tasks tab. Right-click the My Task area and select New > Public Folder.
2 Right-click the folder and select Rename. Type a name for the public task folder and press ENTER.
3 Right-click the folder and select New > Task.
4 In the Browse dialog box, select the module, the menu, and then the menu task to add to the folder and click Open. The task is added to the public tasks folder.
5 To add more public tasks to this folder, repeat steps 3 and 4, as necessary.
6 To add an external program to the public tasks folder, right-click the public task folder and select New > Program.
NOTETo create public tasks, the role assigned to your user code must have the Allow public tasks for editing security event turned on.
148 Sage MAS 200 Installation and System Administrator's Guide
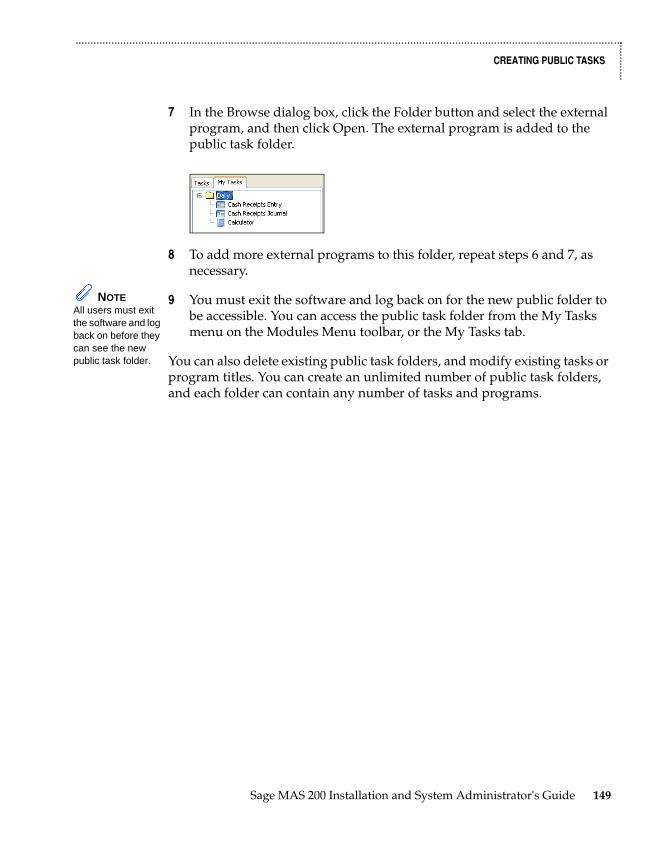
.......................................................................................................................................................................................
CREATING PUBLIC TASKS
......
......
.
7 In the Browse dialog box, click the Folder button and select the external program, and then click Open. The external program is added to the public task folder.
8 To add more external programs to this folder, repeat steps 6 and 7, as necessary.
9 You must exit the software and log back on for the new public folder to be accessible. You can access the public task folder from the My Tasks menu on the Modules Menu toolbar, or the My Tasks tab.
You can also delete existing public task folders, and modify existing tasks or program titles. You can create an unlimited number of public task folders, and each folder can contain any number of tasks and programs.
NOTE All users must exit the software and log back on before they can see the new public task folder.
Sage MAS 200 Installation and System Administrator's Guide 149
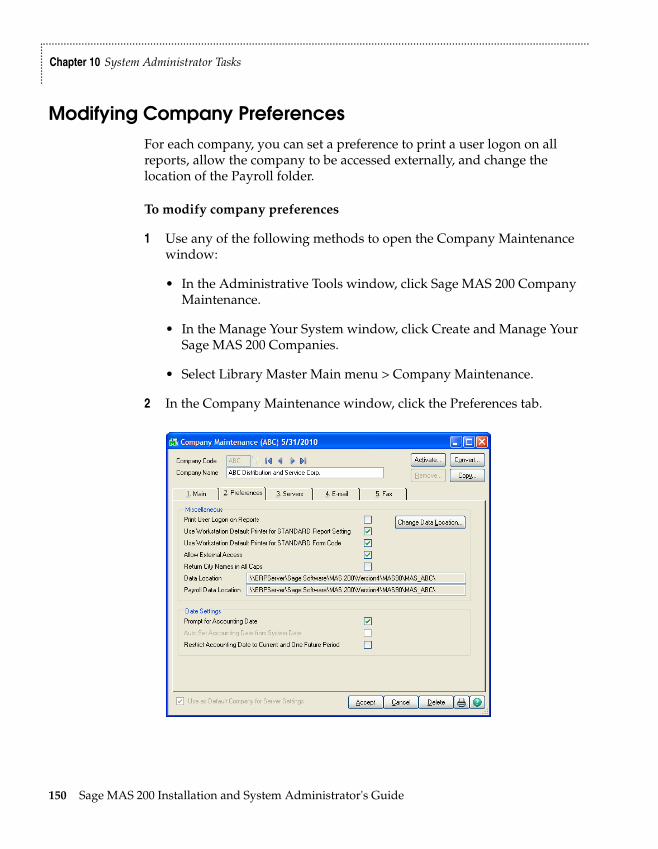
.......................................................................................................................................................................................
Chapter 10 System Administrator Tasks
......
......
..
Modifying Company PreferencesFor each company, you can set a preference to print a user logon on all reports, allow the company to be accessed externally, and change the location of the Payroll folder.
To modify company preferences
1 Use any of the following methods to open the Company Maintenance window:
• In the Administrative Tools window, click Sage MAS 200 Company Maintenance.
• In the Manage Your System window, click Create and Manage Your Sage MAS 200 Companies.
• Select Library Master Main menu > Company Maintenance.
2 In the Company Maintenance window, click the Preferences tab.
150 Sage MAS 200 Installation and System Administrator's Guide
.......................................................................................................................................................................................
MODIFYING COMPANY PREFERENCES
......
......
.
3 To display the user logon of the user generating a report or listing on all reports, select the Print User Logon on Reports check box.
4 To default to the workstation's default printer when printing reports (such as the General Ledger Detail Report) with the STANDARD report setting, select the Use Workstation Default Printer for STANDARD Report Setting check box. Clear this check box to save a specific printer as the default for the STANDARD report setting in the report windows.
5 To default to the workstation's default printer when printing forms (such as sales orders) with the STANDARD form code, select the Use Workstation Default Printer for STANDARD Form Code check box. Clear this check box to save a specific printer as the default for the STANDARD form code in the form windows.
6 To allow the company to be accessed externally through the company's objects, such as VBScript, JavaScript, or other programs that are not based on Sage MAS 200, select the Allow External Access check box.
7 To change the location of the Payroll folder for security reasons, click Change Data Location, and type the path of the new location. The data location is company-specific and not module-specific. The path must be appended with MAS_XXX, where XXX represents the company code.
8 Click Accept.
Sage MAS 200 Installation and System Administrator's Guide 151
.......................................................................................................................................................................................
Chapter 10 System Administrator Tasks
......
......
..
Uninstalling ModulesYou can remove menu records and programs from the software for a specific module. Prior to removing modules, the system will check to ensure there are no data files for that module. If data files exist, they can be deleted using the Delete feature in Company Maintenance.
The Custom Office module cannot be removed using Uninstall Modules. Removing this module will impact access to customized forms and user-defined fields (UDFs).
Removing the Visual Integrator (VI) module will remove the module from the Modules menu; however, the VI folder and two associated files, VI0PER and VI0XRF, will remain in the file structure. The VI0XRF file contains the definitions for the default VI perform logic and is a cross-referenced file that provides shared UDF access between Visual Integrator and Custom Office.
To uninstall a module
1 Use either of the following methods to open the System Configuration window:
• In the Administrator Tools window, click System Configuration.
• Select Library Master Setup menu > System Configuration.
2 In the System Configuration window, click Uninstall.
152 Sage MAS 200 Installation and System Administrator's Guide
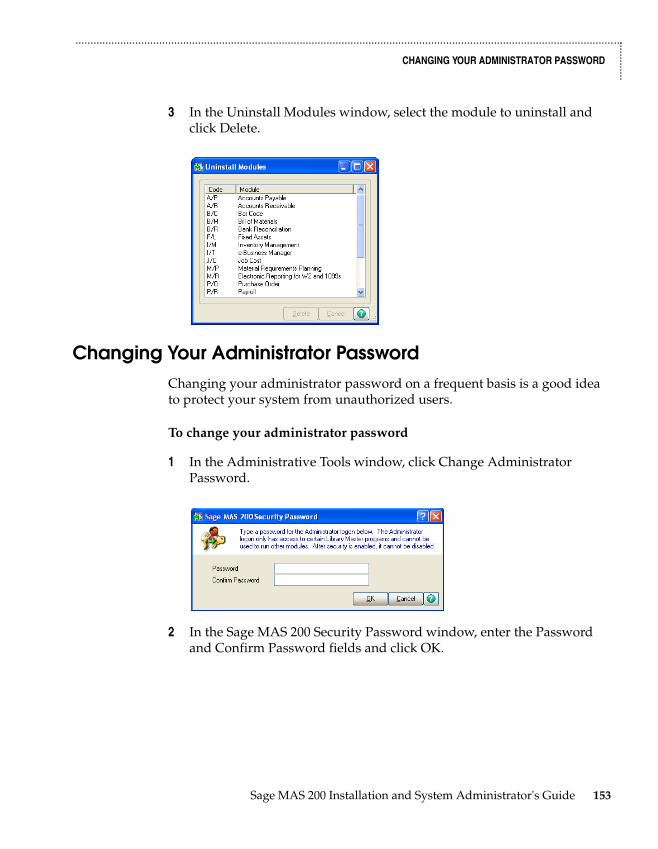
.......................................................................................................................................................................................
CHANGING YOUR ADMINISTRATOR PASSWORD
......
......
.
3 In the Uninstall Modules window, select the module to uninstall and click Delete.
Changing Your Administrator PasswordChanging your administrator password on a frequent basis is a good idea to protect your system from unauthorized users.
To change your administrator password
1 In the Administrative Tools window, click Change Administrator Password.
2 In the Sage MAS 200 Security Password window, enter the Password and Confirm Password fields and click OK.
Sage MAS 200 Installation and System Administrator's Guide 153

.......................................................................................................................................................................................
Chapter 10 System Administrator Tasks
......
......
..
154 Sage MAS 200 Installation and System Administrator's Guide
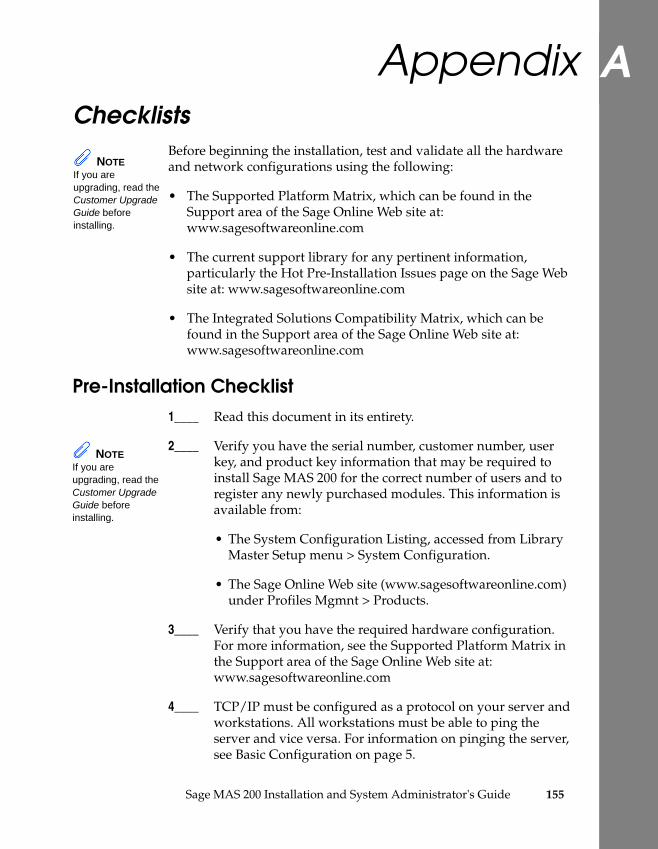
Appendix A
ChecklistsAppendix ABefore beginning the installation, test and validate all the hardware and network configurations using the following:
• The Supported Platform Matrix, which can be found in the Support area of the Sage Online Web site at: www.sagesoftwareonline.com
• The current support library for any pertinent information, particularly the Hot Pre-Installation Issues page on the Sage Web site at: www.sagesoftwareonline.com
• The Integrated Solutions Compatibility Matrix, which can be found in the Support area of the Sage Online Web site at: www.sagesoftwareonline.com
Pre-Installation Checklist1____ Read this document in its entirety.
2____ Verify you have the serial number, customer number, user key, and product key information that may be required to install Sage MAS 200 for the correct number of users and to register any newly purchased modules. This information is available from:
• The System Configuration Listing, accessed from Library Master Setup menu > System Configuration.
• The Sage Online Web site (www.sagesoftwareonline.com) under Profiles Mgmnt > Products.
3____ Verify that you have the required hardware configuration. For more information, see the Supported Platform Matrix in the Support area of the Sage Online Web site at: www.sagesoftwareonline.com
4____ TCP/IP must be configured as a protocol on your server and workstations. All workstations must be able to ping the server and vice versa. For information on pinging the server, see Basic Configuration on page 5.
NOTE If you are upgrading, read the Customer Upgrade Guide before installing.
NOTE If you are upgrading, read the Customer Upgrade Guide before installing.
Sage MAS 200 Installation and System Administrator's Guide 155
.......................................................................................................................................................................................
Appendix A Checklists
......
......
..
5____ Check the hard drive space on the server. The drive on which Sage MAS 200 will be installed must have approximately 250 MB of free disk space, depending on the number of applications to be installed. Verify you have 150 MB of disk space available for System Setup and Library Master, plus an additional 15 to 25 MB for each module. An additional 400 MB of disk space is required to install the Crystal Reports Designer. You will need approximately 1 GB of hard drive space before beginning the installation.
6____ You must install from the same workstation or server that you originally installed version 4.x.
7____ If the Web Engine is installed for the e-Business Manager module, back up any customized templates in the IW folder to another location, and then uninstall the Web Engine. After the 4.40 Web Engine is installed, place the backed up templates back in the IW folder.
8____ FRx Financial Reporting and other third-party applications may require a drive mapping or UNC to the server where the data files are located. This drive must be mapped to a share point on the server above the MAS90 folder. Although Sage MAS 200 itself does not require a logical drive mapping, any application written to access the data files (including third-party or Master Developer applications) must have a valid logon to the server and may require a logical drive mapping or UNC.
9____ If you are installing the StarShip Link module, refer to the following PDF documents on the StarShip CD-ROM: MAS90_200.pdf and User's_Guide.pdf, for detailed instructions including how to set up the StarShip Server.
10____ Crystal Reports must be installed on the computer from which modifications to forms and reports will be made. You can install Crystal Reports on up to two workstations. Review the Install.pdf document, which can be found on the Crystal Reports CD-ROM, prior to installing the software.
156 Sage MAS 200 Installation and System Administrator's Guide

.......................................................................................................................................................................................
PRE-INSTALLATION CHECKLIST
......
......
.
11____ When installing the Payroll module, you must also install the Tax Table Update (TTU). Failure to install the TTU will cause a FILE PRU.SOA NOT FOUND message to appear when Payroll is first set up for a company. If this condition is encountered, you must install the TTU.
If you are migrating data from Level 3.x of Sage MAS 90 or 200
All previous Sage MAS 200 data must be accessible from the Windows Server. If the prior version of Sage MAS 200 is on a different server, a connection must exist from the new Windows Server to the old server to access and convert the data files.
Sage MAS 200 Installation and System Administrator's Guide 157

.......................................................................................................................................................................................
Appendix A Checklists
......
......
..
Post-Installation Checklist1____ If you are installing the software on a network, you must run the
Workstation Setup program on each workstation.
2____ To run MS Script links, you must have the Microsoft Windows Script Host processor on your system. For information on installing the MS Windows Script Host processor, refer to the Microsoft Download Center Web site.
3____ If security is enabled, do not modify or enhance your security model until after you have migrated your system files to your new installation.
4____ After migrating your system files, if security is enabled, you should create a role for all tasks you would like to secure (for example, Master Console and the Library Master Utilities menu).
5____ If you are using Crystal Web Reports, you must run the Crystal Conversion Wizard on all reports.
6____ If you are installing Federal and State eFiling and Reporting, you must install it on each Sage MAS 200 workstation. For more information, see Installing Federal and State eFiling and Reporting on page 71.
158 Sage MAS 200 Installation and System Administrator's Guide
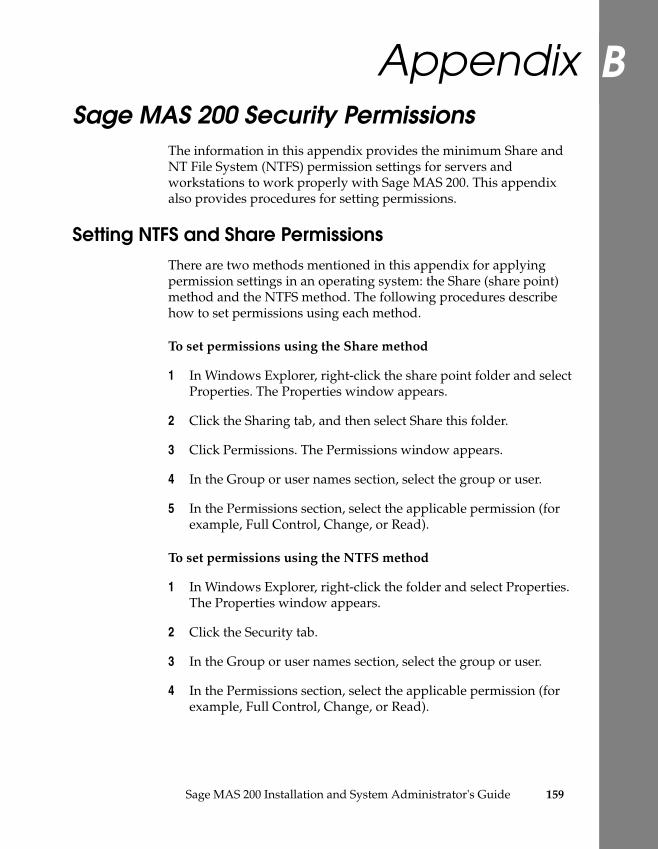
Appendix B
Sage MAS 200 Security Permissions Appendix BThe information in this appendix provides the minimum Share and NT File System (NTFS) permission settings for servers and workstations to work properly with Sage MAS 200. This appendix also provides procedures for setting permissions.
Setting NTFS and Share PermissionsThere are two methods mentioned in this appendix for applying permission settings in an operating system: the Share (share point) method and the NTFS method. The following procedures describe how to set permissions using each method.
To set permissions using the Share method
1 In Windows Explorer, right-click the share point folder and select Properties. The Properties window appears.
2 Click the Sharing tab, and then select Share this folder.
3 Click Permissions. The Permissions window appears.
4 In the Group or user names section, select the group or user.
5 In the Permissions section, select the applicable permission (for example, Full Control, Change, or Read).
To set permissions using the NTFS method
1 In Windows Explorer, right-click the folder and select Properties. The Properties window appears.
2 Click the Security tab.
3 In the Group or user names section, select the group or user.
4 In the Permissions section, select the applicable permission (for example, Full Control, Change, or Read).
Sage MAS 200 Installation and System Administrator's Guide 159
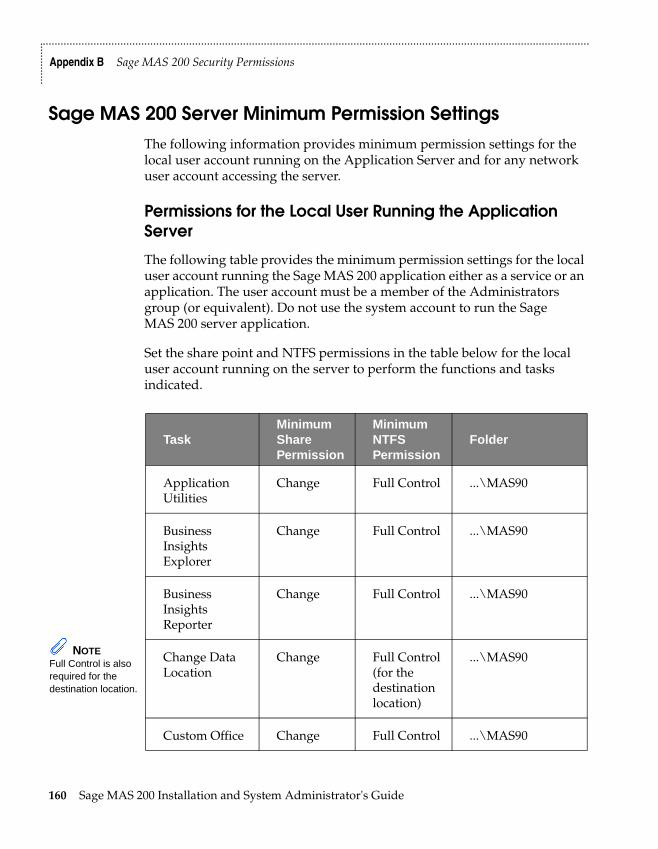
.......................................................................................................................................................................................
Appendix B Sage MAS 200 Security Permissions
......
......
..
Sage MAS 200 Server Minimum Permission SettingsThe following information provides minimum permission settings for the local user account running on the Application Server and for any network user account accessing the server.
Permissions for the Local User Running the Application Server
The following table provides the minimum permission settings for the local user account running the Sage MAS 200 application either as a service or an application. The user account must be a member of the Administrators group (or equivalent). Do not use the system account to run the Sage MAS 200 server application.
Set the share point and NTFS permissions in the table below for the local user account running on the server to perform the functions and tasks indicated.
TaskMinimum Share Permission
Minimum NTFS Permission
Folder
Application Utilities
Change Full Control ...\MAS90
Business Insights Explorer
Change Full Control ...\MAS90
Business Insights Reporter
Change Full Control ...\MAS90
Change Data Location
Change Full Control (for the destination location)
...\MAS90
Custom Office Change Full Control ...\MAS90
NOTE Full Control is also required for the destination location.
160 Sage MAS 200 Installation and System Administrator's Guide
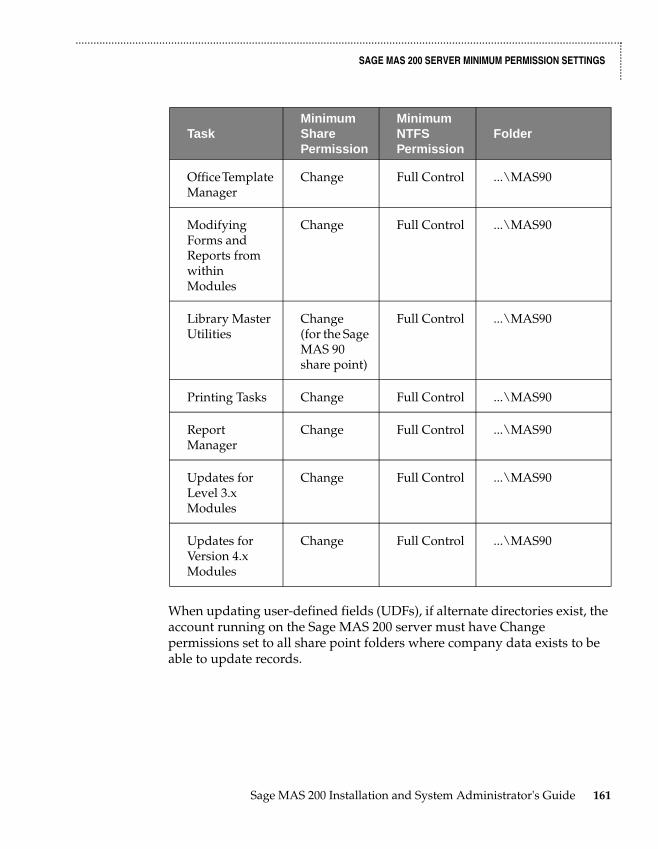
.......................................................................................................................................................................................
SAGE MAS 200 SERVER MINIMUM PERMISSION SETTINGS
......
......
.
When updating user-defined fields (UDFs), if alternate directories exist, the account running on the Sage MAS 200 server must have Change permissions set to all share point folders where company data exists to be able to update records.TaskMinimum Share Permission
Minimum NTFS Permission
Folder
Office Template Manager
Change Full Control ...\MAS90
Modifying Forms and Reports from within Modules
Change Full Control ...\MAS90
Library Master Utilities
Change (for the Sage MAS 90 share point)
Full Control ...\MAS90
Printing Tasks Change Full Control ...\MAS90
Report Manager
Change Full Control ...\MAS90
Updates for Level 3.x Modules
Change Full Control ...\MAS90
Updates for Version 4.x Modules
Change Full Control ...\MAS90
Sage MAS 200 Installation and System Administrator's Guide 161
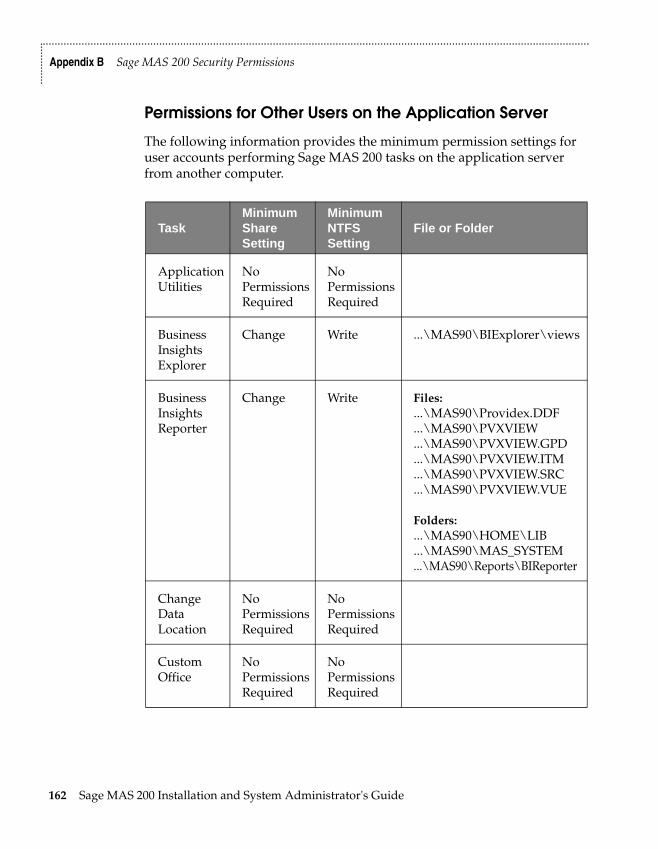
.......................................................................................................................................................................................
Appendix B Sage MAS 200 Security Permissions
......
......
..
Permissions for Other Users on the Application Server
The following information provides the minimum permission settings for user accounts performing Sage MAS 200 tasks on the application server from another computer.
TaskMinimum Share Setting
Minimum NTFS Setting
File or Folder
Application Utilities
No Permissions Required
No Permissions Required
Business Insights Explorer
Change Write ...\MAS90\BIExplorer\views
Business Insights Reporter
Change Write Files:...\MAS90\Providex.DDF...\MAS90\PVXVIEW...\MAS90\PVXVIEW.GPD...\MAS90\PVXVIEW.ITM...\MAS90\PVXVIEW.SRC...\MAS90\PVXVIEW.VUE
Folders:...\MAS90\HOME\LIB...\MAS90\MAS_SYSTEM...\MAS90\Reports\BIReporter
Change Data Location
No Permissions Required
No Permissions Required
Custom Office
No Permissions Required
No Permissions Required
162 Sage MAS 200 Installation and System Administrator's Guide

.......................................................................................................................................................................................
SAGE MAS 200 SERVER MINIMUM PERMISSION SETTINGS
......
......
.
TaskMinimum Share Setting
Minimum NTFS Setting
File or Folder
Office Template Manager
Change No Permissions Required
...\MAS90\OfficeTemplates
Modifying Forms and Reports from within Modules
Change Write ...\MAS90\MAS_XXX\Reports ...\MAS90\Reports\###-### ...\MAS90\###-XXX ...\MAS90\MAS_System\Reports
(where XXX is the company code)
Federal and State eFiling and Reporting
Change Write ...\MAS90\MAS_XXX\APXXX\eFilingReporting
...\MAS90\MAS_XXX\PRXXX\eFilingReporting
(where XXX is the company code)
Library Master Utilities
No Permissions Required
No Permissions Required
Printing Tasks
None/Read/Change/Full
No Permissions Required
Report Manager (for modifying forms)
Change Write ...\MAS90\MAS_XXX\Reports ...\MAS90\Reports\###-### ...\MAS90\###-XXX ...\MAS90\MAS_System\Reports
NOTE For printing tasks, a Read, Change, or Full permission is required to print to local and network printers. If no share permission is defined, printing is restricted to deferred reports and Crystal Web Reports. Access to the Deferred Printing task is based on security settings in Role Maintenance.
Sage MAS 200 Installation and System Administrator's Guide 163
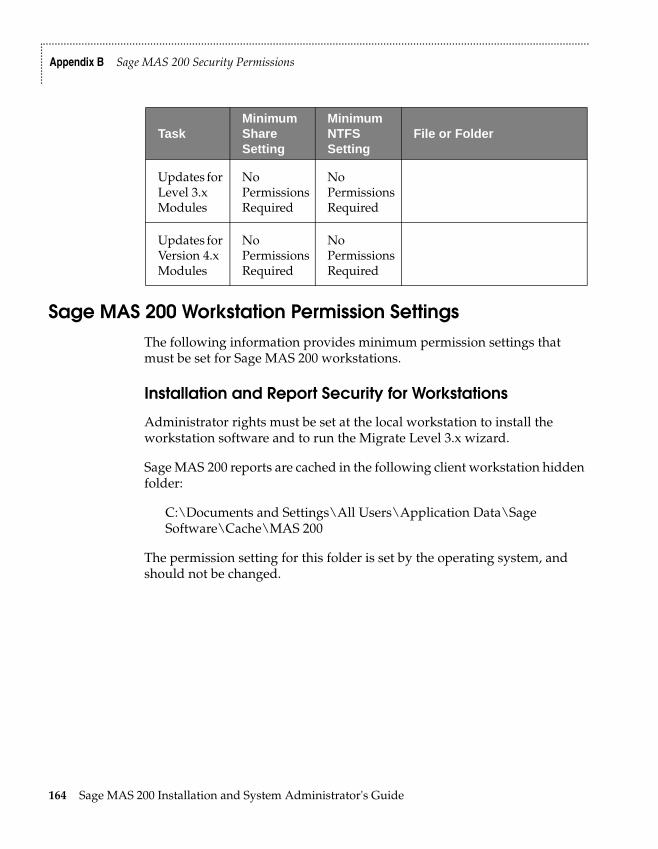
.......................................................................................................................................................................................
Appendix B Sage MAS 200 Security Permissions
......
......
..
Sage MAS 200 Workstation Permission SettingsThe following information provides minimum permission settings that must be set for Sage MAS 200 workstations.
Installation and Report Security for Workstations
Administrator rights must be set at the local workstation to install the workstation software and to run the Migrate Level 3.x wizard.
Sage MAS 200 reports are cached in the following client workstation hidden folder:
C:\Documents and Settings\All Users\Application Data\Sage Software\Cache\MAS 200
The permission setting for this folder is set by the operating system, and should not be changed.
TaskMinimum Share Setting
Minimum NTFS Setting
File or Folder
Updates for Level 3.x Modules
No Permissions Required
No Permissions Required
Updates for Version 4.x Modules
No Permissions Required
No Permissions Required
164 Sage MAS 200 Installation and System Administrator's Guide
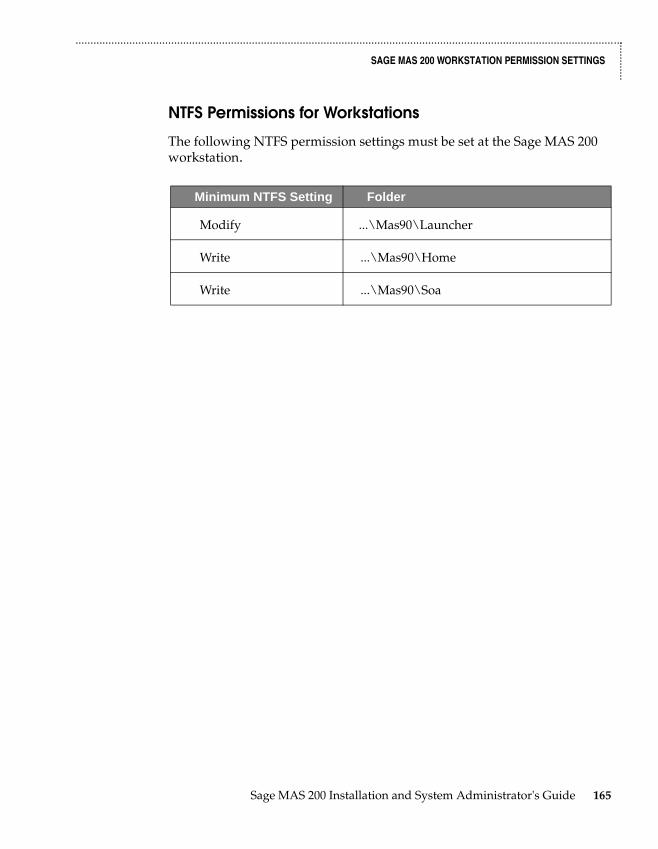
.......................................................................................................................................................................................
SAGE MAS 200 WORKSTATION PERMISSION SETTINGS
......
......
.
NTFS Permissions for Workstations
The following NTFS permission settings must be set at the Sage MAS 200 workstation.
Minimum NTFS Setting Folder
Modify ...\Mas90\Launcher
Write ...\Mas90\Home
Write ...\Mas90\Soa
Sage MAS 200 Installation and System Administrator's Guide 165
.......................................................................................................................................................................................
Appendix B Sage MAS 200 Security Permissions
......
......
..
166 Sage MAS 200 Installation and System Administrator's Guide
Appendix C
Running in a Terminal Services/Citrix EnvironmentAppendix CSage MAS 200 and Terminal Services/CitrixSage MAS 200 supports running on a Windows 2000 Terminal Services. For a list of supported operating systems, refer to the Supported Platform Matrix, which can be found in the Support area of the Sage Online Web site at: www.sagesoftwareonline.com
Because of the complexities and resource requirements necessary to run Sage MAS 200 in the terminal-services environment, a change was needed in the overall architecture of the Sage MAS 200 software. The Sage MAS 200 application should be installed on a server within the LAN that is not running Terminal Services/Citrix. Remote users connect up to a Windows Server running Terminal Services. From there, they run the workstation component and connect to the Sage MAS 200 application server. This limits the amount of processing and resources required by the Terminal Server computer. Separating out the workstation and server components allows users coming through Terminal Services to take advantage of the client-server architecture of Sage MAS 200.
Installing the Sage MAS 200 Application Server
Install Sage MAS 200 as you would any other installation. This server should not have Terminal Services running on it. Because the Sage MAS 200 server is doing all the processing for each of the clients attaching to the server, having the additional burden of running Terminal Services will slow down the server significantly. The Application Server can be a Windows Server that meets the minimum system requirements for Sage MAS 200.
Users can connect to the Sage MAS 200 server from anywhere on the network; they do not have to come in through the Terminal Server. This flexibility allows some users who are running through a corporate intranet to connect directly to Sage MAS 200 while remote users can run Sage MAS 200 through the Terminal Server.
Sage MAS 200 Installation and System Administrator's Guide 167
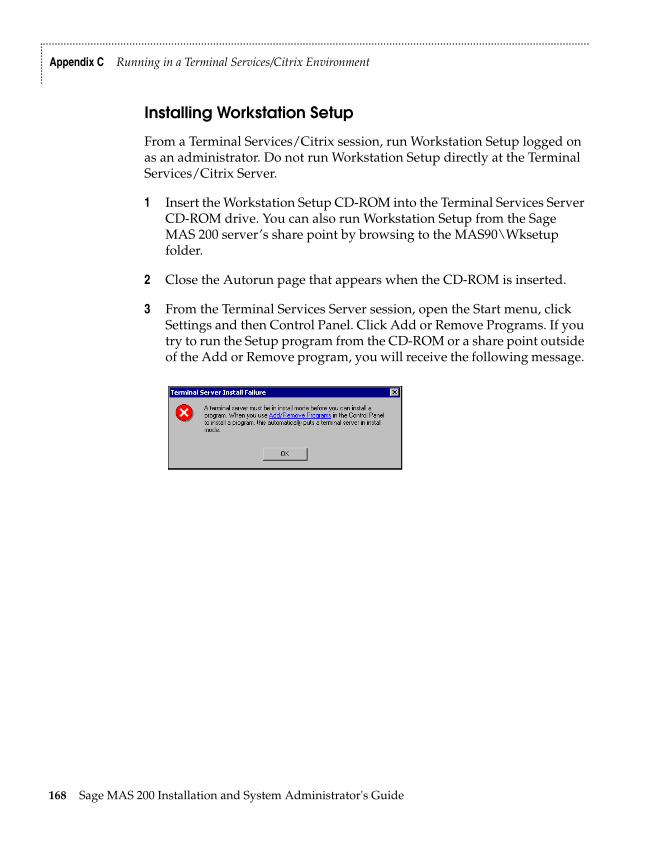
.......................................................................................................................................................................................
Appendix C Running in a Terminal Services/Citrix Environment
......
......
..
Installing Workstation Setup
From a Terminal Services/Citrix session, run Workstation Setup logged on as an administrator. Do not run Workstation Setup directly at the Terminal Services/Citrix Server.
1 Insert the Workstation Setup CD-ROM into the Terminal Services Server CD-ROM drive. You can also run Workstation Setup from the Sage MAS 200 server’s share point by browsing to the MAS90\Wksetup folder.
2 Close the Autorun page that appears when the CD-ROM is inserted.
3 From the Terminal Services Server session, open the Start menu, click Settings and then Control Panel. Click Add or Remove Programs. If you try to run the Setup program from the CD-ROM or a share point outside of the Add or Remove program, you will receive the following message.
168 Sage MAS 200 Installation and System Administrator's Guide
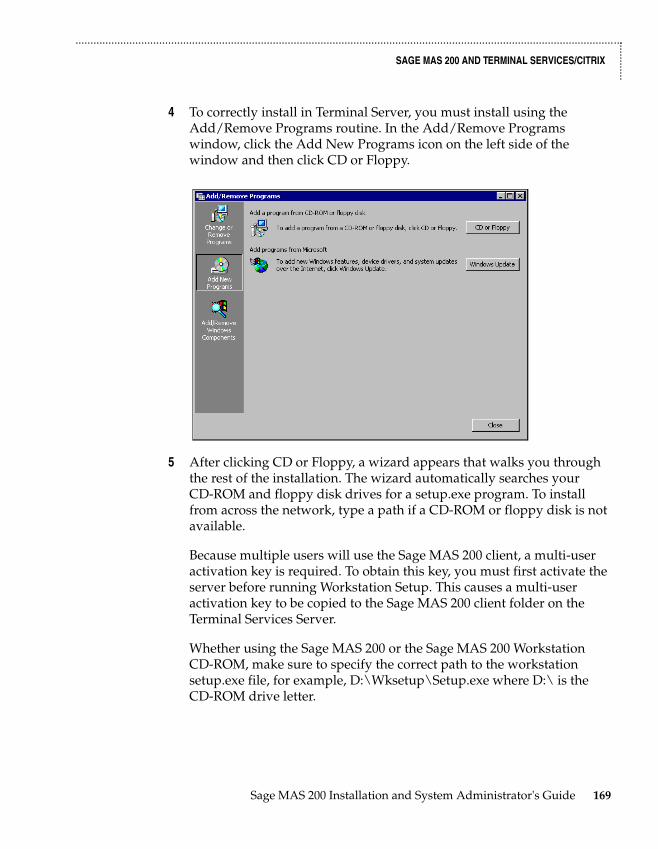
.......................................................................................................................................................................................
SAGE MAS 200 AND TERMINAL SERVICES/CITRIX
......
......
.
4 To correctly install in Terminal Server, you must install using the Add/Remove Programs routine. In the Add/Remove Programs window, click the Add New Programs icon on the left side of the window and then click CD or Floppy.
5 After clicking CD or Floppy, a wizard appears that walks you through the rest of the installation. The wizard automatically searches your CD-ROM and floppy disk drives for a setup.exe program. To install from across the network, type a path if a CD-ROM or floppy disk is not available.
Because multiple users will use the Sage MAS 200 client, a multi-user activation key is required. To obtain this key, you must first activate the server before running Workstation Setup. This causes a multi-user activation key to be copied to the Sage MAS 200 client folder on the Terminal Services Server.
Whether using the Sage MAS 200 or the Sage MAS 200 Workstation CD-ROM, make sure to specify the correct path to the workstation setup.exe file, for example, D:\Wksetup\Setup.exe where D:\ is the CD-ROM drive letter.
Sage MAS 200 Installation and System Administrator's Guide 169
.......................................................................................................................................................................................
Appendix C Running in a Terminal Services/Citrix Environment
......
......
..
The wizard runs the setup.exe routine you specified in the previous window. Install Workstation Setup following the instructions on page 23.
Terminal Services Considerations
Sage MAS 200 will retrieve the workstation name of the client that is coming into the Terminal Server environment and will use that workstation's name for tracking sessions. This allows for a single installation of Workstation Setup that all users can access; however, verify that all user's machines that are coming in through the Terminal Server have unique workstation names.
Because multiple users will use the Sage MAS 200 client, a multi-user activation key is required. To obtain this key, you must first activate the server. After the server is activated, running Workstation Setup through a Terminal Server desktop session (not directly at the server) will copy the ACTIVATE.PVX file in the Sage MAS 200 Server's MAS90\Home\Lib\Keys folder to the MAS90\Home\Lib\Keys folder of the Sage MAS 200 client on the Terminal Server.
Sage MAS 200 can be used under the Terminal Services; however, users must be granted permissions to the MAS90 folder where the client-side application software is installed, if it is installed on an NT File System (NTFS). For information on NTFS permissions requirements, see NTFS Permissions for Workstations on page 165.
For more information on Terminal Server/Citrix considerations, refer to the Supported Platform Matrix in the Sage Online area of the Sage Web site at: www.sagesoftwareonline.com
170 Sage MAS 200 Installation and System Administrator's Guide
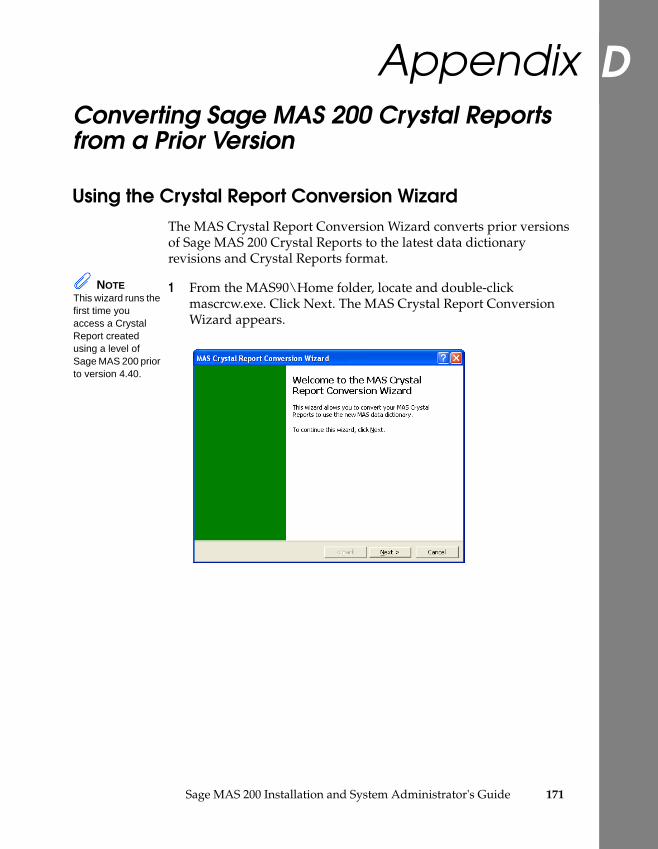
Appendix D
Converting Sage MAS 200 Crystal Reports from a Prior VersionAppendix DUsing the Crystal Report Conversion WizardThe MAS Crystal Report Conversion Wizard converts prior versions of Sage MAS 200 Crystal Reports to the latest data dictionary revisions and Crystal Reports format.
1 From the MAS90\Home folder, locate and double-click mascrcw.exe. Click Next. The MAS Crystal Report Conversion Wizard appears.
NOTE This wizard runs the first time you access a Crystal Report created using a level of Sage MAS 200 prior to version 4.40.
Sage MAS 200 Installation and System Administrator's Guide 171
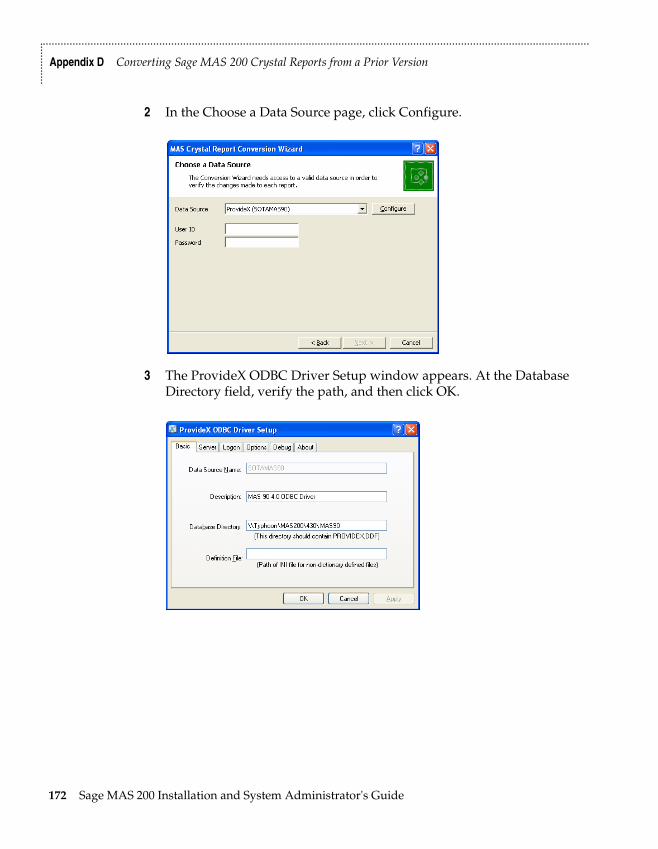
.......................................................................................................................................................................................
Appendix D Converting Sage MAS 200 Crystal Reports from a Prior Version
......
......
..
2 In the Choose a Data Source page, click Configure.
3 The ProvideX ODBC Driver Setup window appears. At the Database Directory field, verify the path, and then click OK.
172 Sage MAS 200 Installation and System Administrator's Guide
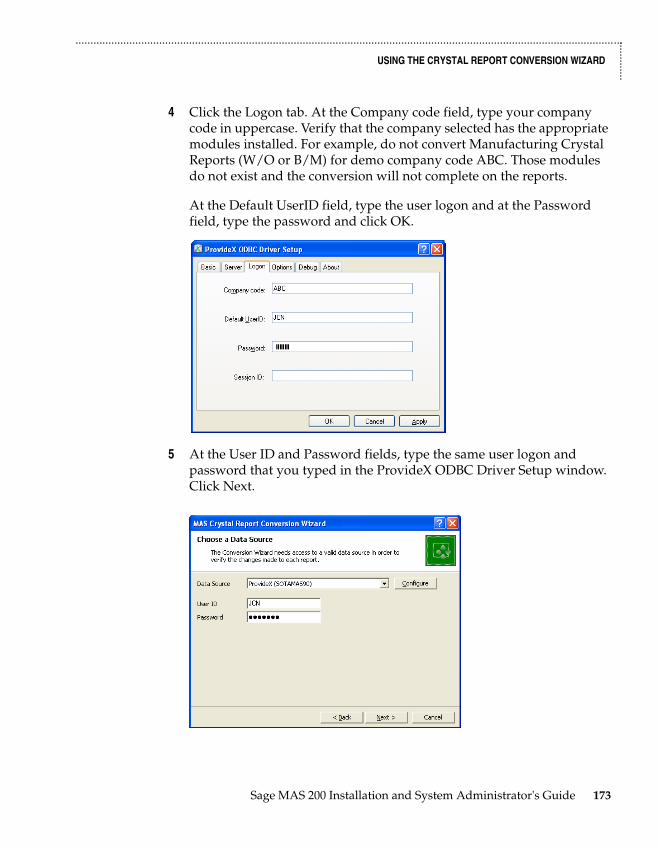
.......................................................................................................................................................................................
USING THE CRYSTAL REPORT CONVERSION WIZARD
......
......
.
4 Click the Logon tab. At the Company code field, type your company code in uppercase. Verify that the company selected has the appropriate modules installed. For example, do not convert Manufacturing Crystal Reports (W/O or B/M) for demo company code ABC. Those modules do not exist and the conversion will not complete on the reports.
At the Default UserID field, type the user logon and at the Password field, type the password and click OK.
5 At the User ID and Password fields, type the same user logon and password that you typed in the ProvideX ODBC Driver Setup window. Click Next.
Sage MAS 200 Installation and System Administrator's Guide 173
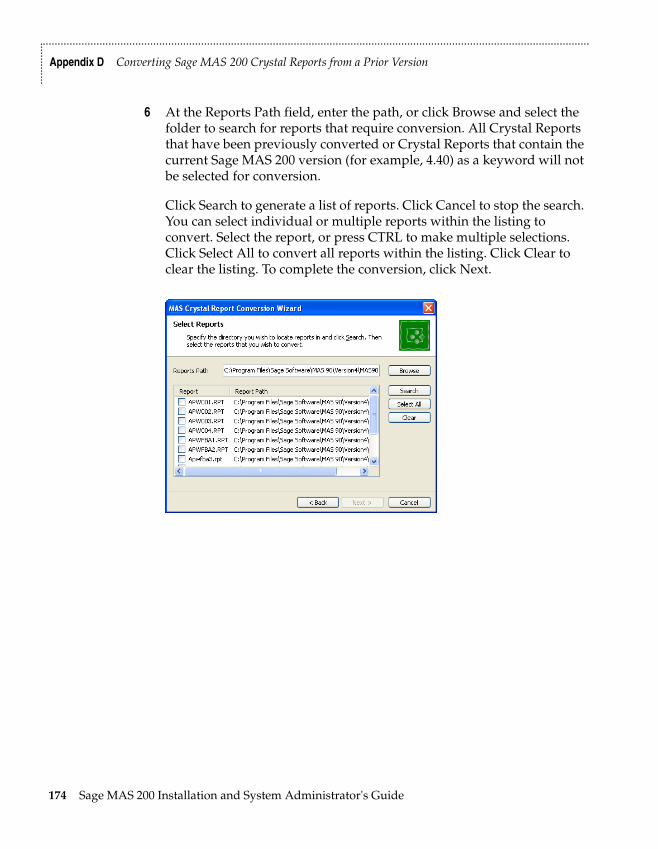
.......................................................................................................................................................................................
Appendix D Converting Sage MAS 200 Crystal Reports from a Prior Version
......
......
..
6 At the Reports Path field, enter the path, or click Browse and select the folder to search for reports that require conversion. All Crystal Reports that have been previously converted or Crystal Reports that contain the current Sage MAS 200 version (for example, 4.40) as a keyword will not be selected for conversion.
Click Search to generate a list of reports. Click Cancel to stop the search. You can select individual or multiple reports within the listing to convert. Select the report, or press CTRL to make multiple selections. Click Select All to convert all reports within the listing. Click Clear to clear the listing. To complete the conversion, click Next.
174 Sage MAS 200 Installation and System Administrator's Guide
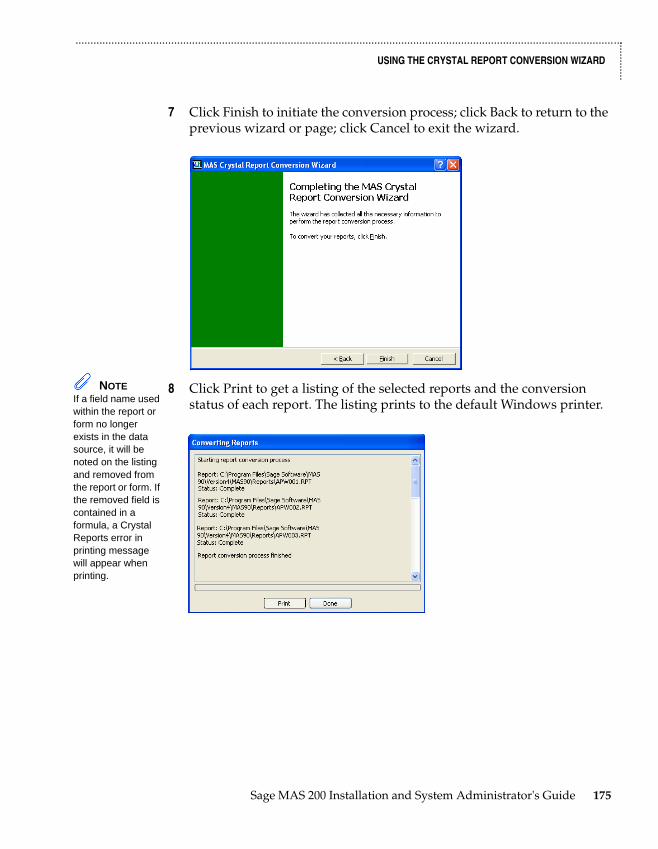
.......................................................................................................................................................................................
USING THE CRYSTAL REPORT CONVERSION WIZARD
......
......
.
7 Click Finish to initiate the conversion process; click Back to return to the previous wizard or page; click Cancel to exit the wizard.
8 Click Print to get a listing of the selected reports and the conversion status of each report. The listing prints to the default Windows printer.
NOTE If a field name used within the report or form no longer exists in the data source, it will be noted on the listing and removed from the report or form. If the removed field is contained in a formula, a Crystal Reports error in printing message will appear when printing.
Sage MAS 200 Installation and System Administrator's Guide 175
.......................................................................................................................................................................................
Appendix D Converting Sage MAS 200 Crystal Reports from a Prior Version
......
......
..
Successfully converted reports generate an unconverted backup file in the same folder with a file extension of .rp_. If Status:Complete appears, the report is successfully converted. If Status:Failed appears, note the error message and verify that the company you are logged onto using ODBC contains application data files for the selected report. If the conversion wizard cannot convert that report, the report must be manually converted. If errors are encountered during the conversion, the wizard will skip the report and continue with the next selected report.
176 Sage MAS 200 Installation and System Administrator's Guide
Appendix E
Overview of Module StartupAppendix EThis appendix explains how to successfully upgrade from another business management system to Sage MAS 200 for the following modules:
• Accounts Payable
• Accounts Receivable
• Bank Reconciliation
• Bar Code
• Bill of Materials
• Data You Need
• Electronic Reporting for W2 & 1099s
• General Ledger Setup Wizard
• Inventory Management Setup Wizard
• Job Cost
• Material Requirements Planning
• Payroll
• Purchase Order
• Sales Order
• Work Order
This appendix is organized alphabetically for ease of reference.
Sage MAS 200 Installation and System Administrator's Guide 177
.......................................................................................................................................................................................
Appendix E Overview of Module Startup
......
......
..
Accounts Payable
Accounts Payable Setup Wizard
The Accounts Payable module includes an Accounts Payable Setup Wizard that you must perform to convert your existing companies and account structure.
The Accounts Payable Setup Wizard provides several pages of questions and options that aid you in quickly setting up the Accounts Payable module for new companies; you must complete this wizard and the Conversion Process on page 179 before using the Accounts Payable module.
Data You Need
Before using the Accounts Payable Setup Wizard, have the following information assembled and available for use:
• Your General Ledger Chart of Accounts
• Your bank account number(s) for the checking accounts used by Accounts Payable
• A list of standard payment terms offered by your vendors
• A list of your vendors, including address and phone numbers
• A list of all unpaid invoices to be processed
To obtain correct information from your Accounts Payable module, you must first bring it up to date with your existing accounts payable system.
NOTESet up your sales tax codes, sales tax classes, and sales tax schedules in Library Master before using the Accounts Payable Setup Wizard.
178 Sage MAS 200 Installation and System Administrator's Guide
.......................................................................................................................................................................................
ACCOUNTS PAYABLE
......
......
.
Conversion Process
Complete the following process to ensure that your system is current. These steps should be performed after completing the setup wizard and after adding all of your information to the Accounts Payable module.
To convert your existing accounts payable system
1 Identify all unpaid invoices as of your last closed accounting period.
2 Prepare an adding machine tape totaling the invoices. This amount should equal the account balance for Accounts Payable in your general ledger.
3 Set the posting date to the last day of the last closed accounting period.
4 Using Invoice Data Entry, enter these invoices into the system. Enter the outstanding balance amount for each invoice as of the end of the last closed accounting period. During the distribution process, post the entire distribution balance to your Accounts Payable general ledger account. This is done because you have already expensed these invoices in a previous accounting period, and to do so again would duplicate those expenses.
By posting to the Accounts Payable account, both a debit and an automatic credit are generated in the same amount to the Accounts Payable general ledger account; therefore, the two amounts offset each other and there is no effect on the general ledger. After the conversion process, you would not normally post to the Accounts Payable general ledger account, but would post to individual general ledger accounts, as appropriate.
As an alternative to this procedure, clear the General Ledger check box in the Accounts Payable Options window. You can then distribute invoices to their respective accounts and no general ledger postings are made. If you use this alternate procedure, be sure to select the General Ledger check box again in the Accounts Payable Options window after the conversion process has completed and you have updated the Daily Transaction Register.
Sage MAS 200 Installation and System Administrator's Guide 179
.......................................................................................................................................................................................
Appendix E Overview of Module Startup
......
......
..
5 Print the Invoice Register. The total shown on the Invoice Register should equal the total on the adding machine tape prepared in step 2. If it does not, an error has been made. Check your adding machine tape and Invoice Register, return to Invoice Data Entry, and make any necessary corrections. Reprint the Invoice Register.
6 Update the invoices.
7 Print the Aged Invoice Report available on the Accounts Payable Reports menu, and retain a copy of this report for your accounting files. Again, the total on this report should equal the adding machine tape total.
8 Run Period End Processing by selecting Period End Processing from the Period End menu, and then clicking Proceed.
9 Reset the posting date to the first day of the current accounting period.
10 Using Invoice Data Entry, enter any invoices you have received since the last closed accounting period. (These invoices should not include any invoices entered in step 4.) Post the distribution balance of each invoice to its appropriate general ledger account (not to the Accounts Payable general ledger account). Print the Invoice Register and update the invoices.
11 Prepare an adding machine tape totaling any checks you have written since your last closed accounting period.
12 Using Manual Check Entry, enter these checks (step 11) into the system. If the check paid an invoice previously entered (step 4 or 10), no general ledger distribution is required. Type the invoice number exactly as you did when you entered it in step 10. If the check paid an invoice that you did not previously enter, you must distribute it to the appropriate general ledger account(s).
13 Print the Manual Check Register. The total should equal the total of the adding machine tape in step 11. If it does not, return to Manual Check Entry, correct the necessary entries, and print the Manual Check Register. When the register total and the adding machine tape agree, update the manual checks.
WARNING If the General Ledger check box is cleared in the Accounts Payable Options window, select the General Ledger check box before proceeding with the update.
180 Sage MAS 200 Installation and System Administrator's Guide
.......................................................................................................................................................................................
ACCOUNTS RECEIVABLE
......
......
.
14 Print the Aged Invoice Report and verify that all invoices paid by the manual checks recorded in step 12 are indicated as paid on the report.
You are ready to begin using your Accounts Payable module.
Accounts Receivable
Accounts Receivable Setup Wizard
The Accounts Receivable module includes an Accounts Receivable Setup Wizard that you must perform to convert your existing companies and account structure.
The Accounts Receivable Setup Wizard provides several pages of questions and options that aid you in quickly setting up the Accounts Receivable module for new companies; you must complete this wizard and the Conversion Process on page 182 before using the Accounts Receivable module.
Data You Need
Before using the Accounts Receivable Setup Wizard, have the following information assembled and available for use:
• Your General Ledger Chart of Accounts
• A list of jurisdictions in which you sell and collect sales tax and their tax rates
• A list of standard payment terms offered to your customers
• A list of your customers, including addresses and phone numbers
• A list of all invoices to process
• A list of all payments to process
To obtain correct information from your Accounts Receivable module, you must first bring it up to date with your existing accounts receivable system.
NOTESet up your sales tax codes, sales tax classes, and sales tax schedules in Library Master before using the Accounts Receivable Setup Wizard.
Sage MAS 200 Installation and System Administrator's Guide 181
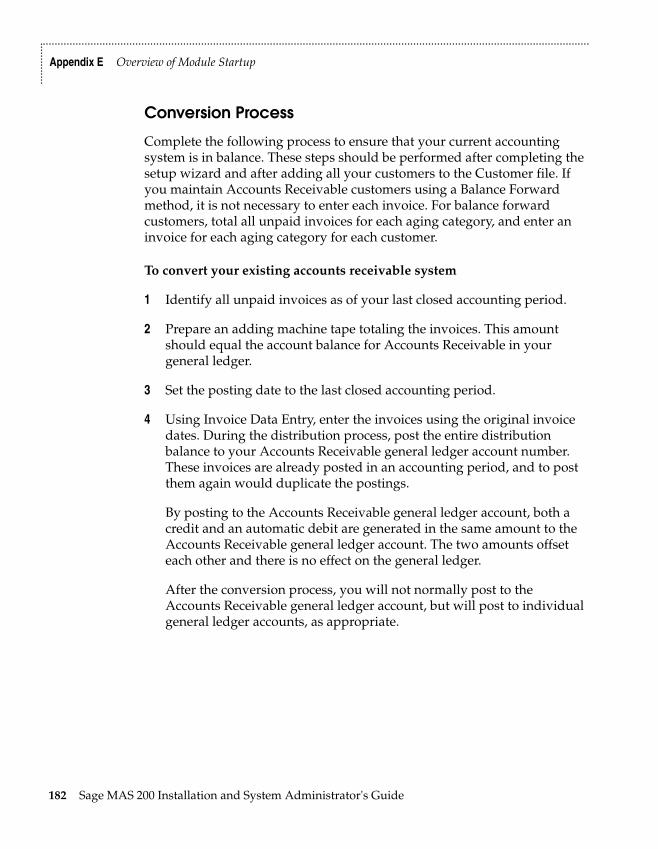
.......................................................................................................................................................................................
Appendix E Overview of Module Startup
......
......
..
Conversion Process
Complete the following process to ensure that your current accounting system is in balance. These steps should be performed after completing the setup wizard and after adding all your customers to the Customer file. If you maintain Accounts Receivable customers using a Balance Forward method, it is not necessary to enter each invoice. For balance forward customers, total all unpaid invoices for each aging category, and enter an invoice for each aging category for each customer.
To convert your existing accounts receivable system
1 Identify all unpaid invoices as of your last closed accounting period.
2 Prepare an adding machine tape totaling the invoices. This amount should equal the account balance for Accounts Receivable in your general ledger.
3 Set the posting date to the last closed accounting period.
4 Using Invoice Data Entry, enter the invoices using the original invoice dates. During the distribution process, post the entire distribution balance to your Accounts Receivable general ledger account number. These invoices are already posted in an accounting period, and to post them again would duplicate the postings.
By posting to the Accounts Receivable general ledger account, both a credit and an automatic debit are generated in the same amount to the Accounts Receivable general ledger account. The two amounts offset each other and there is no effect on the general ledger.
After the conversion process, you will not normally post to the Accounts Receivable general ledger account, but will post to individual general ledger accounts, as appropriate.
182 Sage MAS 200 Installation and System Administrator's Guide
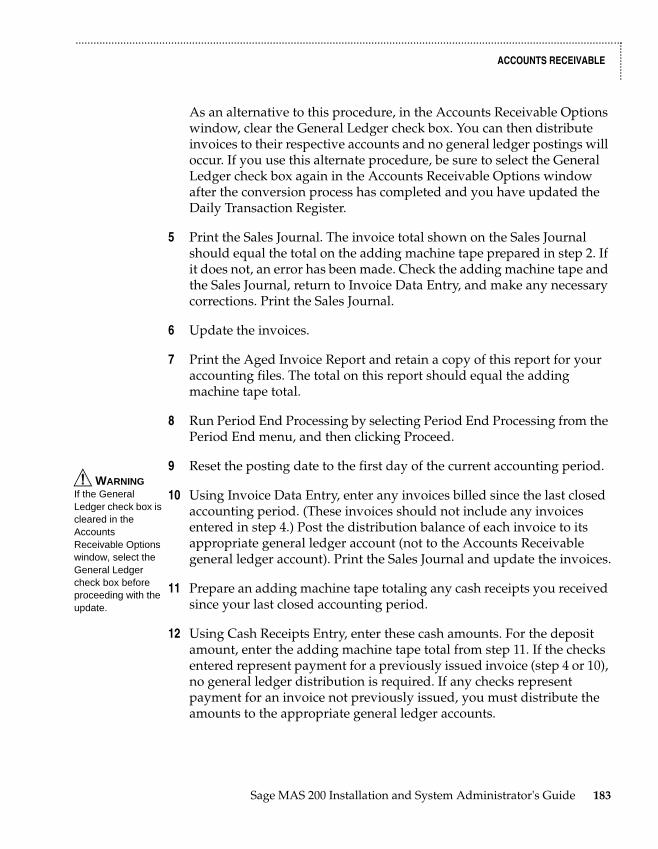
.......................................................................................................................................................................................
ACCOUNTS RECEIVABLE
......
......
.
As an alternative to this procedure, in the Accounts Receivable Options window, clear the General Ledger check box. You can then distribute invoices to their respective accounts and no general ledger postings will occur. If you use this alternate procedure, be sure to select the General Ledger check box again in the Accounts Receivable Options window after the conversion process has completed and you have updated the Daily Transaction Register.
5 Print the Sales Journal. The invoice total shown on the Sales Journal should equal the total on the adding machine tape prepared in step 2. If it does not, an error has been made. Check the adding machine tape and the Sales Journal, return to Invoice Data Entry, and make any necessary corrections. Print the Sales Journal.
6 Update the invoices.
7 Print the Aged Invoice Report and retain a copy of this report for your accounting files. The total on this report should equal the adding machine tape total.
8 Run Period End Processing by selecting Period End Processing from the Period End menu, and then clicking Proceed.
9 Reset the posting date to the first day of the current accounting period.
10 Using Invoice Data Entry, enter any invoices billed since the last closed accounting period. (These invoices should not include any invoices entered in step 4.) Post the distribution balance of each invoice to its appropriate general ledger account (not to the Accounts Receivable general ledger account). Print the Sales Journal and update the invoices.
11 Prepare an adding machine tape totaling any cash receipts you received since your last closed accounting period.
12 Using Cash Receipts Entry, enter these cash amounts. For the deposit amount, enter the adding machine tape total from step 11. If the checks entered represent payment for a previously issued invoice (step 4 or 10), no general ledger distribution is required. If any checks represent payment for an invoice not previously issued, you must distribute the amounts to the appropriate general ledger accounts.
WARNINGIf the General Ledger check box is cleared in the Accounts Receivable Options window, select the General Ledger check box before proceeding with the update.
Sage MAS 200 Installation and System Administrator's Guide 183
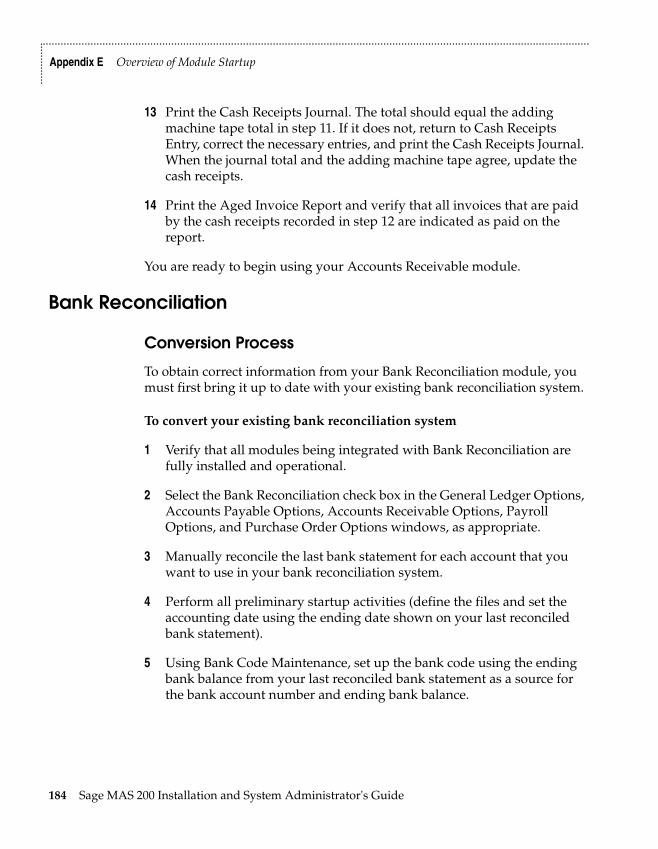
.......................................................................................................................................................................................
Appendix E Overview of Module Startup
......
......
..
13 Print the Cash Receipts Journal. The total should equal the adding machine tape total in step 11. If it does not, return to Cash Receipts Entry, correct the necessary entries, and print the Cash Receipts Journal. When the journal total and the adding machine tape agree, update the cash receipts.
14 Print the Aged Invoice Report and verify that all invoices that are paid by the cash receipts recorded in step 12 are indicated as paid on the report.
You are ready to begin using your Accounts Receivable module.
Bank Reconciliation
Conversion Process
To obtain correct information from your Bank Reconciliation module, you must first bring it up to date with your existing bank reconciliation system.
To convert your existing bank reconciliation system
1 Verify that all modules being integrated with Bank Reconciliation are fully installed and operational.
2 Select the Bank Reconciliation check box in the General Ledger Options, Accounts Payable Options, Accounts Receivable Options, Payroll Options, and Purchase Order Options windows, as appropriate.
3 Manually reconcile the last bank statement for each account that you want to use in your bank reconciliation system.
4 Perform all preliminary startup activities (define the files and set the accounting date using the ending date shown on your last reconciled bank statement).
5 Using Bank Code Maintenance, set up the bank code using the ending bank balance from your last reconciled bank statement as a source for the bank account number and ending bank balance.
184 Sage MAS 200 Installation and System Administrator's Guide

.......................................................................................................................................................................................
BAR CODE
......
......
.
6 Enter all outstanding checks from your last reconciled bank statement, using Check, Deposit and Adjustment Entry. If checks are already being processed through the Accounts Payable or Payroll module, these outstanding checks should be checks that were updated in the check update process, but are not shown on the last bank statement. On the Check tab, clear the Cleared check box when these checks are recorded.
7 Enter all outstanding deposits or adjustments (those not shown on the bank statement) in Check, Deposit and Adjustment Entry. If deposits are being processed through the Accounts Receivable module, these outstanding deposits should have been updated, but not shown, on the last bank statement. On the Check tab, clear the Cleared check box when these deposits and adjustments are recorded.
Print the Bank Reconciliation Register to verify the accuracy of the information entered. If the information on the register is correct, your Bank Reconciliation module is now ready to use.
Bar CodeBefore using the Bar Code module, create and have available the folder names that will be used for importing files from the handheld computer. Enter this information in Bar Code Setup menu > Bar Code Options.
Bill of Materials
Bill of Materials Setup Wizard
The Bill of Materials module includes a Bill of Materials Setup Wizard that you must perform to convert your existing companies and account structure.
The Bill of Materials Setup Wizard provides several pages of questions and options that aid you in quickly setting up the Bill of Materials module for new companies; you must complete this wizard and the Conversion Process on page 186 before using the Bill of Materials module.
Sage MAS 200 Installation and System Administrator's Guide 185
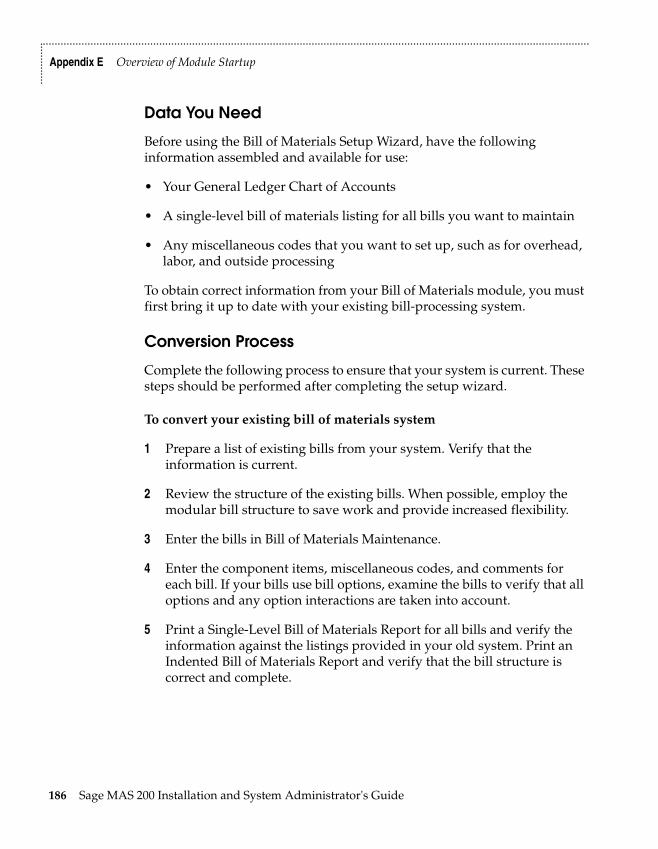
.......................................................................................................................................................................................
Appendix E Overview of Module Startup
......
......
..
Data You Need
Before using the Bill of Materials Setup Wizard, have the following information assembled and available for use:
• Your General Ledger Chart of Accounts
• A single-level bill of materials listing for all bills you want to maintain
• Any miscellaneous codes that you want to set up, such as for overhead, labor, and outside processing
To obtain correct information from your Bill of Materials module, you must first bring it up to date with your existing bill-processing system.
Conversion Process
Complete the following process to ensure that your system is current. These steps should be performed after completing the setup wizard.
To convert your existing bill of materials system
1 Prepare a list of existing bills from your system. Verify that the information is current.
2 Review the structure of the existing bills. When possible, employ the modular bill structure to save work and provide increased flexibility.
3 Enter the bills in Bill of Materials Maintenance.
4 Enter the component items, miscellaneous codes, and comments for each bill. If your bills use bill options, examine the bills to verify that all options and any option interactions are taken into account.
5 Print a Single-Level Bill of Materials Report for all bills and verify the information against the listings provided in your old system. Print an Indented Bill of Materials Report and verify that the bill structure is correct and complete.
186 Sage MAS 200 Installation and System Administrator's Guide

.......................................................................................................................................................................................
E-BUSINESS MANAGER
......
......
.
6 Print a Bill Validation Report. This report examines the entire Bill of Materials file. Correct any inaccuracies and print this report again, if applicable.
You are ready to begin using your Bill of Materials module.
e-Business Manager
e-Business Manager Setup Wizard
The e-Business Manager module includes an e-Business Manager Setup Wizard that you must perform to convert your existing companies and account structure.
The e-Business Manager Setup Wizard provides several pages of questions and options that aid you in quickly setting up the e-Business Manager module for new companies; you must complete this wizard before using the e-Business Manager module.
Data You Need
Before using the e-Business Manager Setup Wizard, have the following information assembled and available for use:
• The IP address and port number for each of the three servers (IIS, SMTP, and Web Engine)
• A list of your item categories
• A list of user IDs and passwords to assign to Internet-enabled customers (for the .order applet only)
• A list of user ID e-mail addresses and the company to which each user is assigned
NOTEFor more information regarding setup procedures, refer to your e-Business Manager Installation Guide.
Sage MAS 200 Installation and System Administrator's Guide 187
.......................................................................................................................................................................................
Appendix E Overview of Module Startup
......
......
..
Electronic Reporting for W2 & 1099sBefore using the Electronic Reporting module, have the following information assembled and available for use:
• The appropriate government forms and publications
• The Quarterly Tax Report printed from the Payroll module
• A Vendor Listing printed from the Accounts Payable module for which you have selected the Print 1099 Payment History check box in the Vendor Listing window
General Ledger
General Ledger Setup Wizard
The General Ledger module includes a General Ledger Setup Wizard that you must perform to convert your existing companies and account structure.
The General Ledger Setup Wizard provides several pages of questions and options that aid you in quickly setting up the General Ledger module for new companies; you must complete this wizard and the Conversion Process on page 189 before using the General Ledger module to process your daily transactions.
Data You Need
Before using the General Ledger Setup Wizard, you should have the following information assembled and available for use:
• Your General Ledger Chart of Accounts
• A Trial Balance from the last completed accounting period
• Copies of your company's latest financial statements, including the Income Statement and Balance Sheet
188 Sage MAS 200 Installation and System Administrator's Guide
.......................................................................................................................................................................................
INVENTORY MANAGEMENT
......
......
.
Conversion Process
To obtain correct information from your General Ledger module, you must first bring it up to date with your existing general ledger system.
• If you are converting at the beginning of a fiscal year, or require only the beginning balances for each account, see Entering Beginning Balances in the Help system.
• If you are converting in the middle of a fiscal year and want to record activity for each accounting period of the current year, as well as beginning balances, see Entering Data for Each Period in the Help system.
Use these procedures as a checklist to ensure that your current accounting system is in balance. These procedures should be performed after completing the General Ledger Setup Wizard.
Inventory Management
Inventory Management Setup Wizard
The Inventory Management module includes an Inventory Management Setup Wizard that you must perform to convert your existing companies and account structure.
The Inventory Management Setup Wizard provides several pages of questions and options that aid you in quickly setting up the Inventory Management module for new companies; you must complete this wizard and the Conversion Process on page 190 before using the Inventory Management module.
Sage MAS 200 Installation and System Administrator's Guide 189
.......................................................................................................................................................................................
Appendix E Overview of Module Startup
......
......
..
Data You Need
Before using the Inventory Management Setup Wizard, have the following information assembled and available for use:
• Your General Ledger Chart of Accounts
• A list of all inventory items containing costs, prices, on-hand quantities, warehouse locations, and reorder requirements
• Any shipping documents, receiving reports, open purchase orders, or adjustment vouchers that must still be processed
To obtain correct information from your Inventory Management module, you must first bring it up to date with your existing inventory system.
Conversion Process
Complete the following process to ensure that your current accounting system is in balance. These steps should be performed after completing the setup wizard and after adding all your inventory items to the Inventory file.
To convert your existing inventory system
1 Prepare a list of current on-hand quantities for all inventory items. You can use the balances as of your last closed inventory accounting period end, or you can perform a physical count.
2 In the Inventory Management Options window, at the Current Inventory Period field, select the previous period (the last closed period).
3 In the Inventory Management Options window, clear the General Ledger check box.
4 Set the posting date to the last day of the last closed accounting period.
190 Sage MAS 200 Installation and System Administrator's Guide
.......................................................................................................................................................................................
INVENTORY MANAGEMENT
......
......
.
5 In the Transaction Entry window, enter each item's current on-hand quantity as a receipt by selecting Receipts at the Transaction Type field. You must enter the quantity on hand and the unit cost for each item.
You can use a single receipt reference for entering the on-hand quantities for all items, or items can be separated into any logical grouping and entered under different references.
6 Print the Transaction Journal and verify all information. If necessary, select Transaction Entry to make corrections.
7 When the register is correct, perform the Transaction Journal update.
8 In the Period End Processing window, select Full Period End Processing. The current period is set to the period in which you begin processing.
9 In the Inventory Management Options window, select the General Ledger check box.
10 Reset the posting date to the first day of the current accounting period.
11 Enter any transactions, such as sales, issues, and receipts for the current accounting period to bring the inventory management system up to date. Use Transaction Entry to record the transactions.
You are ready to begin using your Inventory Management module.
Sage MAS 200 Installation and System Administrator's Guide 191
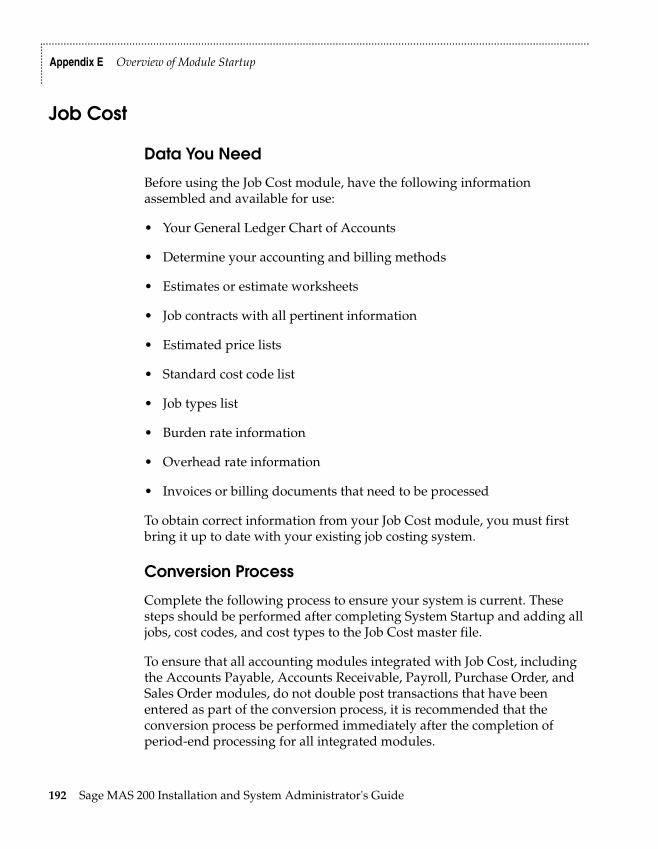
.......................................................................................................................................................................................
Appendix E Overview of Module Startup
......
......
..
Job Cost
Data You Need
Before using the Job Cost module, have the following information assembled and available for use:
• Your General Ledger Chart of Accounts
• Determine your accounting and billing methods
• Estimates or estimate worksheets
• Job contracts with all pertinent information
• Estimated price lists
• Standard cost code list
• Job types list
• Burden rate information
• Overhead rate information
• Invoices or billing documents that need to be processed
To obtain correct information from your Job Cost module, you must first bring it up to date with your existing job costing system.
Conversion Process
Complete the following process to ensure your system is current. These steps should be performed after completing System Startup and adding all jobs, cost codes, and cost types to the Job Cost master file.
To ensure that all accounting modules integrated with Job Cost, including the Accounts Payable, Accounts Receivable, Payroll, Purchase Order, and Sales Order modules, do not double post transactions that have been entered as part of the conversion process, it is recommended that the conversion process be performed immediately after the completion of period-end processing for all integrated modules.
192 Sage MAS 200 Installation and System Administrator's Guide

.......................................................................................................................................................................................
JOB COST
......
......
.
To convert from your existing job cost system
1 Prepare a list of job-to-date cost information, detailed by cost code and cost type, for each open job. You should use the information from your last closed accounting period. If you are changing the coding format of your cost code from your previous system, indicate the new cost codes to use for each entry.
2 In the Job Cost Options window, clear the Post to G/L for Direct Cost Transactions and Post to G/L for Billing & Cash Receipt Transactions check boxes. The job-to-date conversion information to be entered should not be posted to the general ledger.
3 Set the Job Cost accounting date to the last day of the last closed accounting period.
4 In Job Posting Entry, enter a separate batch of direct cost entries for each job. Enter a separate entry with the job-to-date units (quantity) and job-to-date cost for each cost code and/or cost type detail. If each job contains a large number of cost code and/or cost type detail, update each batch separately.
5 If the Accounts Receivable module is not integrated with Job Cost, use Job Posting Entry to enter billing and cash receipt transactions for each job up to the last closed accounting period. Do not enter any billing or cash receipts that should be recorded in the current accounting period.
6 If the Accounts Receivable module is integrated with Job Cost, use Job Billing Entry to enter all invoices that have been billed to outstanding jobs. Use Accounts Receivable Cash Receipts Entry to enter cash receipts for job invoices. If you are integrated with the General Ledger module, you must use General Journal Entry to back out these general ledger postings generated for these transactions to prevent double posting of information previously recorded.
Additionally, if invoices relating to job billing are entered in the Accounts Receivable module before the installation of Job Cost, reverse these invoices using the Adjustment feature in the Accounts Receivable Invoice Data Entry window before recording the job invoices. This prevents doubling the invoice information in the Accounts Receivable module.
Sage MAS 200 Installation and System Administrator's Guide 193
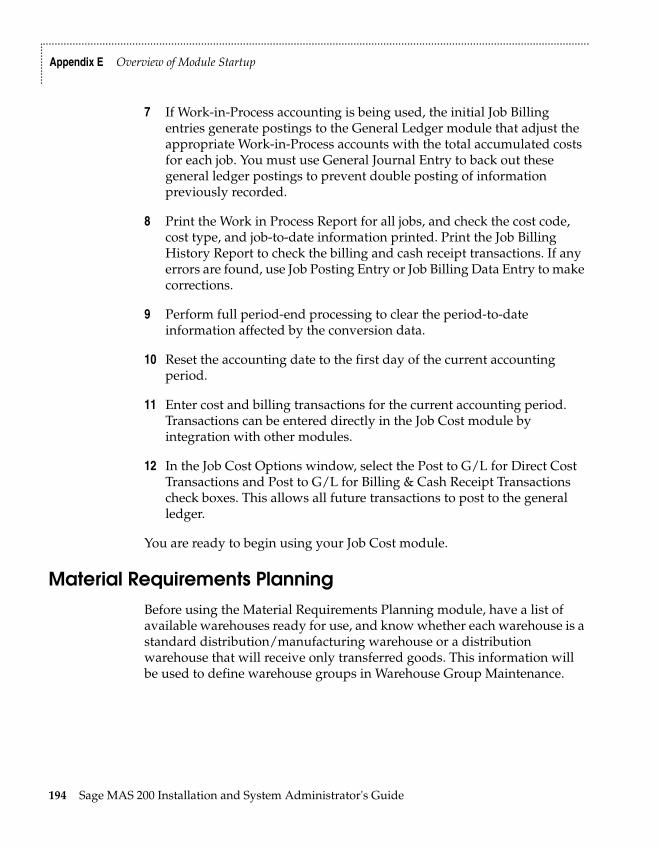
.......................................................................................................................................................................................
Appendix E Overview of Module Startup
......
......
..
7 If Work-in-Process accounting is being used, the initial Job Billing entries generate postings to the General Ledger module that adjust the appropriate Work-in-Process accounts with the total accumulated costs for each job. You must use General Journal Entry to back out these general ledger postings to prevent double posting of information previously recorded.
8 Print the Work in Process Report for all jobs, and check the cost code, cost type, and job-to-date information printed. Print the Job Billing History Report to check the billing and cash receipt transactions. If any errors are found, use Job Posting Entry or Job Billing Data Entry to make corrections.
9 Perform full period-end processing to clear the period-to-date information affected by the conversion data.
10 Reset the accounting date to the first day of the current accounting period.
11 Enter cost and billing transactions for the current accounting period. Transactions can be entered directly in the Job Cost module by integration with other modules.
12 In the Job Cost Options window, select the Post to G/L for Direct Cost Transactions and Post to G/L for Billing & Cash Receipt Transactions check boxes. This allows all future transactions to post to the general ledger.
You are ready to begin using your Job Cost module.
Material Requirements PlanningBefore using the Material Requirements Planning module, have a list of available warehouses ready for use, and know whether each warehouse is a standard distribution/manufacturing warehouse or a distribution warehouse that will receive only transferred goods. This information will be used to define warehouse groups in Warehouse Group Maintenance.
194 Sage MAS 200 Installation and System Administrator's Guide

.......................................................................................................................................................................................
PAYROLL
......
......
.
Payroll
Data You Need
Before using the Payroll module, have the following information assembled and available for use:
• Your General Ledger Chart of Accounts
• A list of the earnings and deductions used for payroll processing
• Employer federal, state, and local tax ID numbers for each tax jurisdiction in which your employees are paid
• Tax tables for the federal, state, and local tax jurisdictions in which your employees are paid
• A list of employees, complete with personal information and quarter-to-date and year-to-date earnings and deduction history
To obtain correct information from your Payroll module, you must first bring it up to date with your existing payroll system.
In compliance with federal and state tax reporting requirements, payroll systems operate on a calendar-year basis. As the year progresses, large quantities of quarter-to-date and year-to-date data are accumulated; therefore, the ideal time to convert from your existing payroll system to the Payroll module is on January 1. If this is not possible for your company, guidelines for installing the Payroll module at different times during the year follow.
Converting at the Beginning of the Calendar Year
If you are installing the Payroll module at the beginning of the calendar year, enter your information into the module; however, make no entries at any quarter-to-date or year-to-date fields. These fields are maintained automatically as payroll is processed throughout the year. With these tasks completed, you can proceed directly to the year's first payroll cycle.
Sage MAS 200 Installation and System Administrator's Guide 195
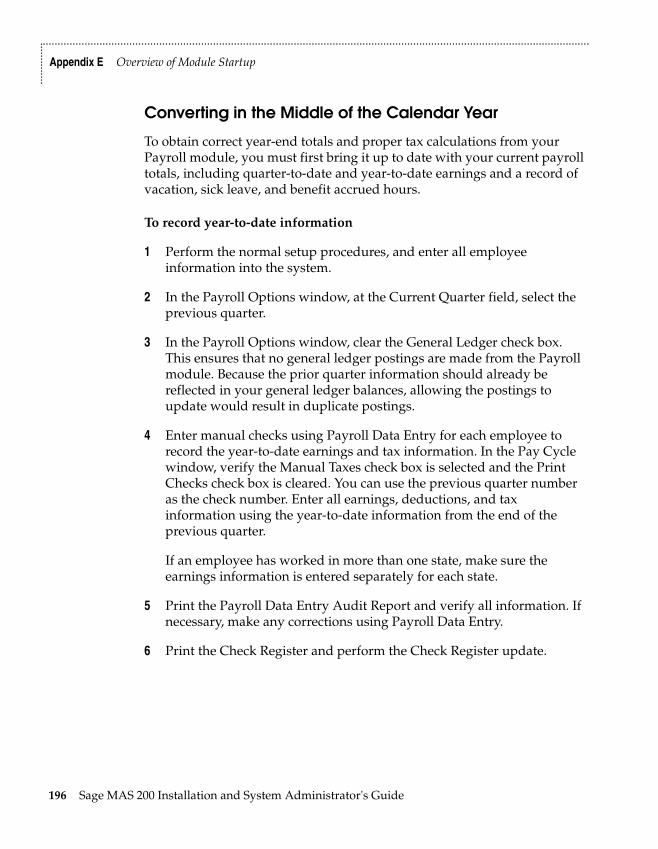
.......................................................................................................................................................................................
Appendix E Overview of Module Startup
......
......
..
Converting in the Middle of the Calendar Year
To obtain correct year-end totals and proper tax calculations from your Payroll module, you must first bring it up to date with your current payroll totals, including quarter-to-date and year-to-date earnings and a record of vacation, sick leave, and benefit accrued hours.
To record year-to-date information
1 Perform the normal setup procedures, and enter all employee information into the system.
2 In the Payroll Options window, at the Current Quarter field, select the previous quarter.
3 In the Payroll Options window, clear the General Ledger check box. This ensures that no general ledger postings are made from the Payroll module. Because the prior quarter information should already be reflected in your general ledger balances, allowing the postings to update would result in duplicate postings.
4 Enter manual checks using Payroll Data Entry for each employee to record the year-to-date earnings and tax information. In the Pay Cycle window, verify the Manual Taxes check box is selected and the Print Checks check box is cleared. You can use the previous quarter number as the check number. Enter all earnings, deductions, and tax information using the year-to-date information from the end of the previous quarter.
If an employee has worked in more than one state, make sure the earnings information is entered separately for each state.
5 Print the Payroll Data Entry Audit Report and verify all information. If necessary, make any corrections using Payroll Data Entry.
6 Print the Check Register and perform the Check Register update.
196 Sage MAS 200 Installation and System Administrator's Guide
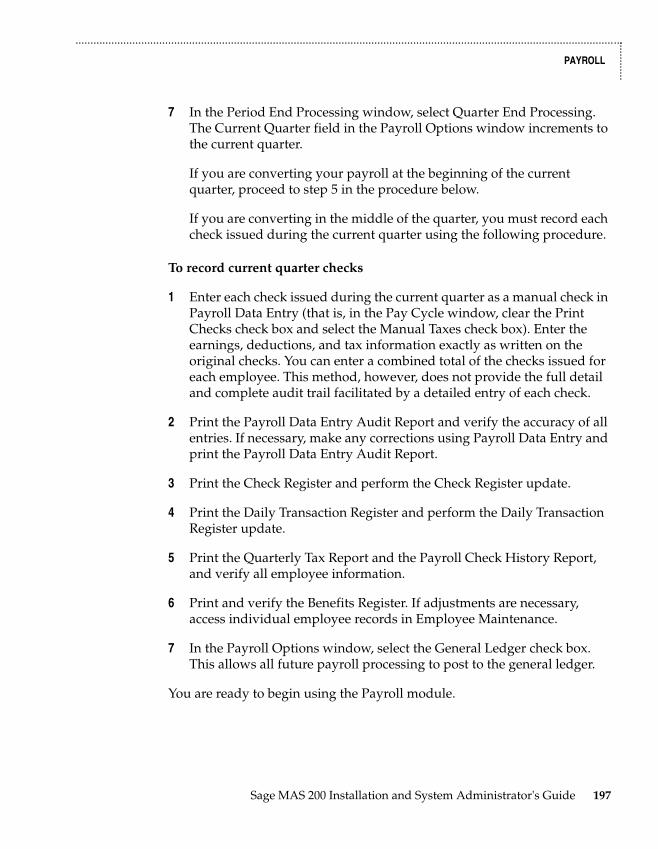
.......................................................................................................................................................................................
PAYROLL
......
......
.
7 In the Period End Processing window, select Quarter End Processing. The Current Quarter field in the Payroll Options window increments to the current quarter.
If you are converting your payroll at the beginning of the current quarter, proceed to step 5 in the procedure below.
If you are converting in the middle of the quarter, you must record each check issued during the current quarter using the following procedure.
To record current quarter checks
1 Enter each check issued during the current quarter as a manual check in Payroll Data Entry (that is, in the Pay Cycle window, clear the Print Checks check box and select the Manual Taxes check box). Enter the earnings, deductions, and tax information exactly as written on the original checks. You can enter a combined total of the checks issued for each employee. This method, however, does not provide the full detail and complete audit trail facilitated by a detailed entry of each check.
2 Print the Payroll Data Entry Audit Report and verify the accuracy of all entries. If necessary, make any corrections using Payroll Data Entry and print the Payroll Data Entry Audit Report.
3 Print the Check Register and perform the Check Register update.
4 Print the Daily Transaction Register and perform the Daily Transaction Register update.
5 Print the Quarterly Tax Report and the Payroll Check History Report, and verify all employee information.
6 Print and verify the Benefits Register. If adjustments are necessary, access individual employee records in Employee Maintenance.
7 In the Payroll Options window, select the General Ledger check box. This allows all future payroll processing to post to the general ledger.
You are ready to begin using the Payroll module.
Sage MAS 200 Installation and System Administrator's Guide 197
.......................................................................................................................................................................................
Appendix E Overview of Module Startup
......
......
..
Purchase Order
Purchase Order Setup Wizard
The Purchase Order module includes a Purchase Order Setup Wizard that you must perform to convert your existing companies and account structure.
The Purchase Order Setup Wizard provides several pages of questions and options that aid you in quickly setting up the Purchase Order module for new companies; you must complete this wizard and the Conversion Process on page 199 before using the Purchase Order module.
Data You Need
Before using the Purchase Order Setup Wizard, have the following information available for use:
• Your General Ledger Chart of Accounts
• A list of miscellaneous charges you commonly pay
• A list of vendor quantity discount rates you use for inventory items
• A list of all addresses to which you have orders shipped
• All open purchase orders and back orders
• All receipts, invoices, returns, and material requisitions as of your last closed accounting period
To obtain correct information from your Purchase Order module, you must first bring it up to date with your existing purchase order system.
198 Sage MAS 200 Installation and System Administrator's Guide
.......................................................................................................................................................................................
PURCHASE ORDER
......
......
.
Conversion Process
Complete the following process to ensure that your current accounting system is in balance. These steps should be performed after completing the setup wizard.
To convert your existing purchase order system
1 Gather all open purchase orders as of your last closed accounting period.
2 Prepare an adding machine tape totaling the orders.
3 Use Purchase Order Entry to enter the orders into the system. In the Default Values for Purchase Order Entry window, clear the Print Purchase Orders check box to prevent the conversion orders from being reprinted. Next, on the Purchase Order Entry Header tab, select Standard Order at the Order Type field and Open at the Order Status field for each order.
Partially received or invoiced purchase orders cannot be processed using the system without double posting to the General Ledger and Inventory Management modules. These orders should be processed manually until they are completed. To enter these orders, you must enter only the unreceived balance on each order as the original order quantity. There are no such restrictions for outstanding orders that have not received any partial receipts or invoices against them.
4 Print the detail version of the Open Purchase Order Report for all order types and orders with an open status. The total on this report should equal the total on the adding machine tape you prepared in step 2. If the totals do not agree, return to Purchase Order Entry and make any necessary corrections and reprint the report as an audit record of your outstanding orders.
5 Record all receipts, invoices, returns, and material requisitions that you have received since the last closed accounting period to bring the system completely up to date.
You are ready to begin using your Purchase Order module.
Sage MAS 200 Installation and System Administrator's Guide 199
.......................................................................................................................................................................................
Appendix E Overview of Module Startup
......
......
..
Sales Order
Sales Order Setup Wizard
The Sales Order module includes a Sales Order Setup Wizard that you must perform to convert your existing companies and account structure.
The Sales Order Setup Wizard provides several pages of questions and options that aid you in quickly setting up the Sales Order module for new companies. You must complete this wizard and the Conversion Process on page 201 before using the Sales Order module to process your daily transactions.
Data You Need
Before using the Sales Order Setup Wizard, have the following information assembled and available for use:
• Your General Ledger Chart of Accounts
• A list of standard miscellaneous charges and items used in your business
• A list of item part numbers sold by your business (if the Inventory Management module is not integrated with Sales Order)
• A list of your shipping rates
• All open orders and back orders
• A Customer Listing from your Accounts Receivable module
• An Inventory Item Listing from your Inventory Management module
To obtain correct information from your Sales Order module, you must first bring it up to date with your existing order processing system.
200 Sage MAS 200 Installation and System Administrator's Guide
.......................................................................................................................................................................................
SALES ORDER
......
......
.
Conversion Process
Complete the following process to ensure that your current accounting system is in balance. These steps should be performed after completing the setup wizard. First, enter any unpaid invoices, as of your last closed accounting period, into the Open Invoice file. This process is performed using the Accounts Receivable module. Second, use the Sales Order module to enter any open orders or back orders into the system.
To convert your existing sales order system
1 Identify all open orders as of your last closed accounting period.
2 Prepare an adding machine tape totaling the orders.
3 Using Sales Order Entry, enter these orders into the system. Use the standard order type for standard sales orders, and the open order status for open orders. When entering the Sales Order Entry default values, clear the Print Sales Orders and Print Pick Sheets check boxes, and enter 00 at the No. of Ship Labels field in the Default Values for Sales Order Entry dialog box to prevent these documents from being printed.
4 Identify all open back orders as of your last closed accounting period.
5 Prepare an adding machine tape totaling the back orders.
6 Using Sales Order Entry, enter these back orders into the system. Use the back-order order type for back orders, and the open order status for open orders.
7 Print the detail version of the Open Sales Order Report for all order types and the open order status. The Open Order and Open Back Order totals shown on this report should equal the totals on the adding machine tapes prepared in steps 2 and 5. If the totals do not agree, check your adding machine tapes and the Open Sales Order Report. Return to Sales Order Entry and make any necessary corrections, and then reprint the report as an audit record of your outstanding orders.
You are ready to begin using the Sales Order module.
Sage MAS 200 Installation and System Administrator's Guide 201
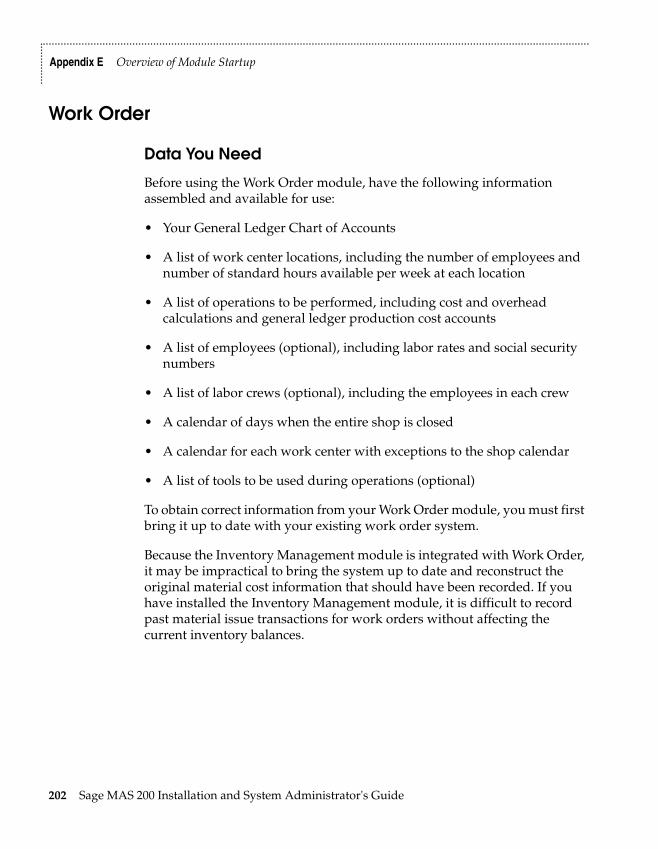
.......................................................................................................................................................................................
Appendix E Overview of Module Startup
......
......
..
Work Order
Data You Need
Before using the Work Order module, have the following information assembled and available for use:
• Your General Ledger Chart of Accounts
• A list of work center locations, including the number of employees and number of standard hours available per week at each location
• A list of operations to be performed, including cost and overhead calculations and general ledger production cost accounts
• A list of employees (optional), including labor rates and social security numbers
• A list of labor crews (optional), including the employees in each crew
• A calendar of days when the entire shop is closed
• A calendar for each work center with exceptions to the shop calendar
• A list of tools to be used during operations (optional)
To obtain correct information from your Work Order module, you must first bring it up to date with your existing work order system.
Because the Inventory Management module is integrated with Work Order, it may be impractical to bring the system up to date and reconstruct the original material cost information that should have been recorded. If you have installed the Inventory Management module, it is difficult to record past material issue transactions for work orders without affecting the current inventory balances.
202 Sage MAS 200 Installation and System Administrator's Guide

.......................................................................................................................................................................................
WORK ORDER
......
......
.
The easiest and most effective way to convert the Work Order module is to enter only new work orders into the system. Do not record any transactions related to preexisting work orders using the Work Order module. You can use the Inventory Management module or the Bill of Materials module to record issues and receipts related to these work orders. For labor and miscellaneous expenses, the general ledger can be adjusted directly using General Ledger General Journal Entry. If the duration of your work orders is short, you can quickly complete the conversion process after all of the preexisting work orders are completed.
Conversion Process
Complete the following process to ensure that your current accounting system is in balance.
To convert your existing work order system
1 In the Work Order Options window, clear the General Ledger check box to prevent any postings being made to the general ledger while entering conversion information.
2 Enter all open work orders using Work Order Entry.
3 Enter all transactions recorded for open work orders using Work Order Transaction Entry. Material costs may not be the same as the original costs.
4 Print the Work Order Transaction Journal, and perform the update.
5 Print the Open Work Order Report to verify the information recorded. If adjustments are necessary, repeat steps 3 and 4.
6 Print the Work in Process Recap report to verify the information recorded and to reconcile to the general ledger.
Sage MAS 200 Installation and System Administrator's Guide 203

.......................................................................................................................................................................................
Appendix E Overview of Module Startup
......
......
..
7 If you are entering material transactions for existing work orders, you can freeze inventory and perform a physical count and physical count entry without updating. Updating the Physical Count Variance Register should be performed only after all material issue transactions are recorded for existing work orders. Adjustments made during the Physical Count Variance Register update are recorded as physical adjustments in the Inventory Management Detail Transaction file. The Inventory Adjustment account in each item's product line is used to offset the Inventory account posting, unless the General Ledger check box is cleared in the Inventory Management Options window during the update process.
8 Perform the physical inventory process to update the quantity-on-hand information in inventory. This step should be performed after all material issue transactions have been recorded for open work orders.
You are ready to begin using your Work Order module.
204 Sage MAS 200 Installation and System Administrator's Guide
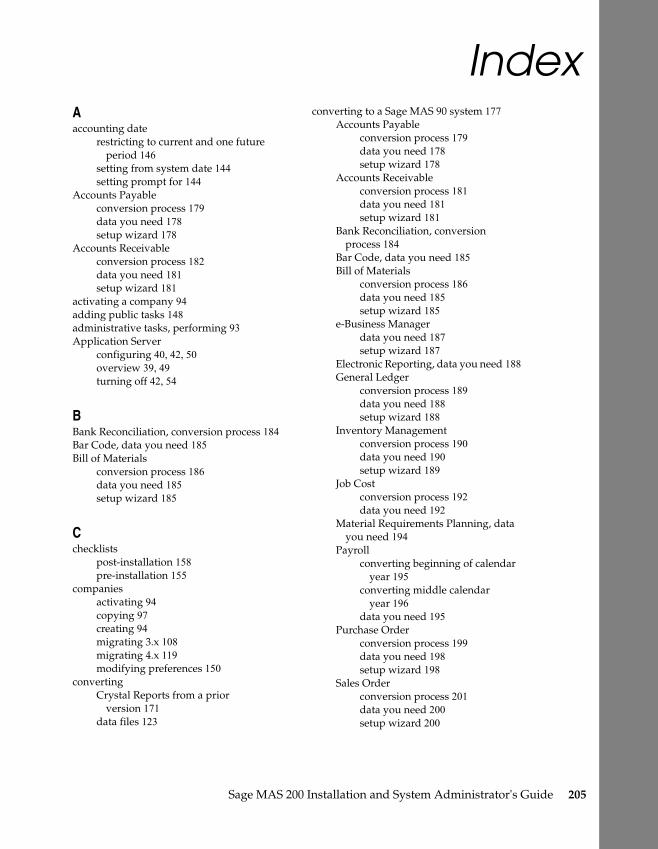
Index
Aaccounting daterestricting to current and one future period 146
setting from system date 144setting prompt for 144
Accounts Payableconversion process 179data you need 178setup wizard 178
Accounts Receivableconversion process 182data you need 181setup wizard 181
activating a company 94adding public tasks 148administrative tasks, performing 93Application Server
configuring 40, 42, 50overview 39, 49turning off 42, 54
BBank Reconciliation, conversion process 184Bar Code, data you need 185Bill of Materials
conversion process 186data you need 185setup wizard 185
Cchecklists
post-installation 158pre-installation 155
companiesactivating 94copying 97creating 94migrating 3.x 108migrating 4.x 119modifying preferences 150
convertingCrystal Reports from a prior
version 171data files 123
Sage MAS 200
converting to a Sage MAS 90 system 177Accounts Payable
conversion process 179data you need 178setup wizard 178
Accounts Receivableconversion process 181data you need 181setup wizard 181
Bank Reconciliation, conversion process 184
Bar Code, data you need 185Bill of Materials
conversion process 186data you need 185setup wizard 185
e-Business Managerdata you need 187setup wizard 187
Electronic Reporting, data you need 188General Ledger
conversion process 189data you need 188setup wizard 188
Inventory Managementconversion process 190data you need 190setup wizard 189
Job Costconversion process 192data you need 192
Material Requirements Planning, data you need 194
Payrollconverting beginning of calendar
year 195converting middle calendar
year 196data you need 195
Purchase Orderconversion process 199data you need 198setup wizard 198
Sales Orderconversion process 201data you need 200setup wizard 200
Installation and System Administrator's Guide 205
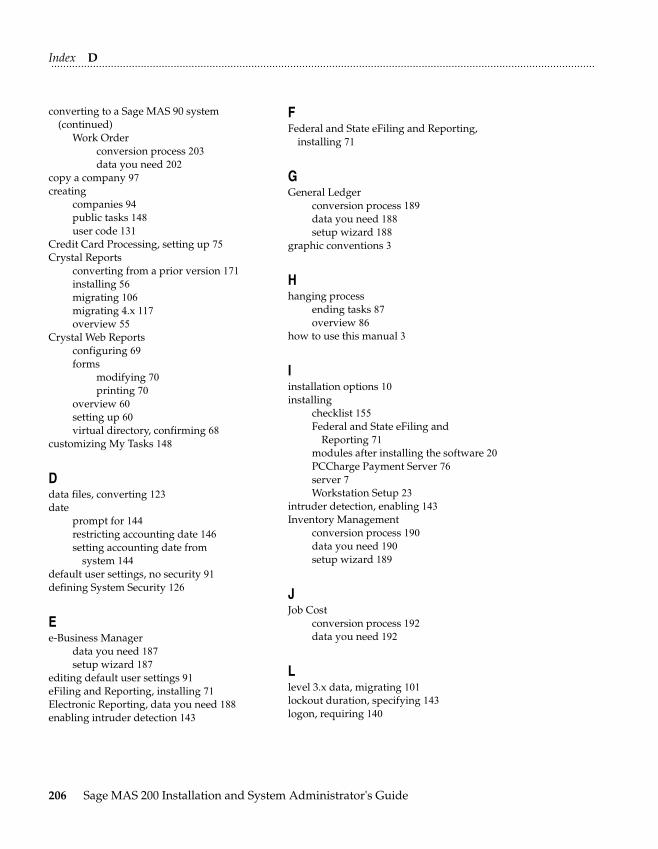
Index D......................................................................................................................................................................................
converting to a Sage MAS 90 system (continued)
Work Orderconversion process 203data you need 202
copy a company 97creating
companies 94public tasks 148user code 131
Credit Card Processing, setting up 75Crystal Reports
converting from a prior version 171installing 56migrating 106migrating 4.x 117overview 55
Crystal Web Reportsconfiguring 69forms
modifying 70printing 70
overview 60setting up 60virtual directory, confirming 68
customizing My Tasks 148
Ddata files, converting 123date
prompt for 144restricting accounting date 146setting accounting date from
system 144default user settings, no security 91defining System Security 126
Ee-Business Manager
data you need 187setup wizard 187
editing default user settings 91eFiling and Reporting, installing 71Electronic Reporting, data you need 188enabling intruder detection 143
206 Sage MAS 200 Installation and System
FFederal and State eFiling and Reporting,
installing 71
GGeneral Ledger
conversion process 189data you need 188setup wizard 188
graphic conventions 3
Hhanging process
ending tasks 87overview 86
how to use this manual 3
Iinstallation options 10installing
checklist 155Federal and State eFiling and
Reporting 71modules after installing the software 20PCCharge Payment Server 76server 7Workstation Setup 23
intruder detection, enabling 143Inventory Management
conversion process 190data you need 190setup wizard 189
JJob Cost
conversion process 192data you need 192
Llevel 3.x data, migrating 101lockout duration, specifying 143logon, requiring 140
Administrator's Guide
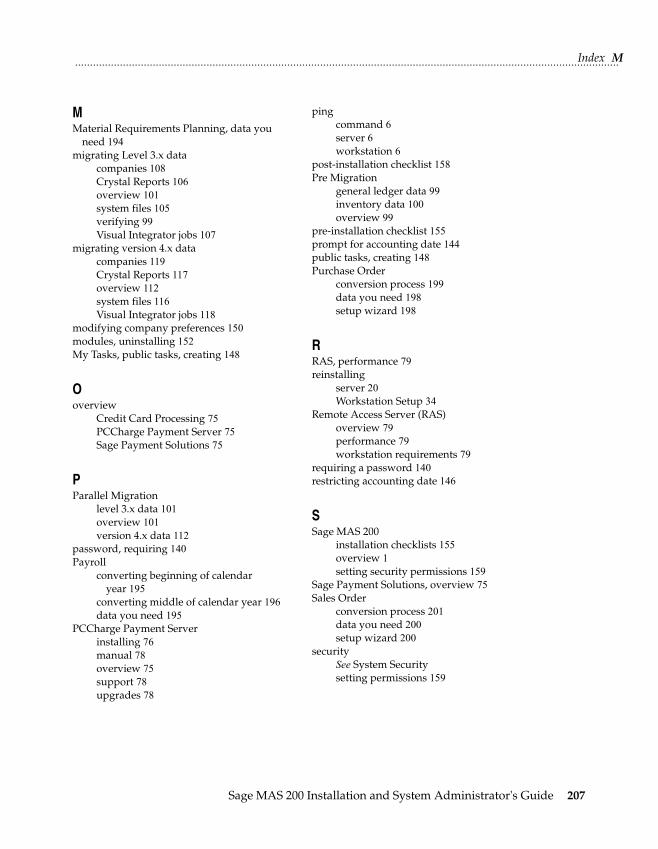
Index M......................................................................................................................................................................................
MMaterial Requirements Planning, data you
need 194migrating Level 3.x data
companies 108Crystal Reports 106overview 101system files 105verifying 99Visual Integrator jobs 107
migrating version 4.x datacompanies 119Crystal Reports 117overview 112system files 116Visual Integrator jobs 118
modifying company preferences 150modules, uninstalling 152My Tasks, public tasks, creating 148
Ooverview
Credit Card Processing 75PCCharge Payment Server 75Sage Payment Solutions 75
PParallel Migration
level 3.x data 101overview 101version 4.x data 112
password, requiring 140Payroll
converting beginning of calendar year 195
converting middle of calendar year 196data you need 195
PCCharge Payment Serverinstalling 76manual 78overview 75support 78upgrades 78
Sage MAS 200
pingcommand 6server 6workstation 6
post-installation checklist 158Pre Migration
general ledger data 99inventory data 100overview 99
pre-installation checklist 155prompt for accounting date 144public tasks, creating 148Purchase Order
conversion process 199data you need 198setup wizard 198
RRAS, performance 79reinstalling
server 20Workstation Setup 34
Remote Access Server (RAS)overview 79performance 79workstation requirements 79
requiring a password 140restricting accounting date 146
SSage MAS 200
installation checklists 155overview 1setting security permissions 159
Sage Payment Solutions, overview 75Sales Order
conversion process 201data you need 200setup wizard 200
securitySee System Securitysetting permissions 159
Installation and System Administrator's Guide 207
Index T......................................................................................................................................................................................
serverinstalling 7reinstalling 20remote access 79
session tracking 46setting
accounting date from system date 144prompt for accounting date 144
SSLencryption 46generating a certificate 48
Supported Platform Matrix 155system files
migrating level 3.x 105migrating version 4.x 116
System Securityaccessing MAS 200 with 92administrative tasks 93creating
user code 131default user settings 91intruder detection, enabling 143lockout duration, specifying 143overview 126
System Startupconverting to a Sage MAS 90 system 177
TTask Menu Maintenance 148tasks, creating public 148TCP/IP
configuration 5ping 6protocol 5
Uuninstalling modules 152user code
creating 131enabling intruder detection 143
VVersion 4.x data, migrating 112Visual Integrator jobs
migrating 3.x 107migrating 4.x 118
208 Sage MAS 200 Installation and System
WWide Area Networks (WAN)
configuration 81overview 81
Work Orderconversion process 203data you need 202
Workstation Setupinstalling 23multiple installations 27reinstalling 34
workstation, Wide Area Networks 81
Administrator's Guide


![Sage Estimating (SQL) Version 15.12 Installation and ...cdn.na.sage.com/Docs/en/customer/estimating/15_12SQL/open/Sage... · Sage Estimating 32-bitWindows systems [Drive]:\Program](https://img.pdfslide.net/doc/110x75/5a78d7a67f8b9a4f1b8d1f8c/sage-estimating-sql-version-1512-installation-and-cdnnasagecomdocsencustomerestimating1512sqlopensagesage.jpg)