Embed Size (px)
Citation preview
Samsung Galaxy S6 Screen ReplacementReplace the display in a Samsung Galaxy S6.
Written By: Dante Mazzanti
Samsung Galaxy S6 Screen Replacement
© iFixit — CC BY-NC-SA www.iFixit.com Page 1 of 26
INTRODUCTION
Follow this guide to replace the display on your Samsung Galaxy S6. The assembly consists of anAMOLED and digitizer panel. The components are fused and must be replaced together. Thisprocedure is useful for fixing broken glass or unresponsive touchscreens.
This guide instructs you to replace only the display while leaving the original frame, logic board, andbattery in place. Note: some replacement screens for this phone come pre-installed in a new frame(a.k.a. chassis), which requires you to transplant all of your phone's internals and install a newbattery. This procedure is very different, so make sure you have the correct part before starting thisguide.
If the frame is damaged or bent, it's important to replace it, or else the new screen may not mountcorrectly and can suffer damage from uneven pressure.
This guide involves removing the rear glass. Removing the rear glass destroys the adhesive holdingit in place. Follow this guide to reinstall the rear glass.
The process of separating the display from the frame usually destroys the display, so don't followthis guide unless you intend to replace the display.
TOOLS:Suction Handle (1)Tweezers (1)SIM Card Eject Tool (1)iFixit Opening Picks set of 6 (1)iOpener (1)Phillips #00 Screwdriver (1)Spudger (1)
PARTS:Galaxy S6 Screen and Digitizer (1)Galaxy S6 Touch Screen Adhesive (1)Galaxy S6 Screen and Digitizer
Assembly (Verizon) (1)Galaxy S6 Screen and Digitizer
Assembly (T-Mobile) (1)Galaxy S6 Screen and Digitizer
Assembly (AT&T) (1)Galaxy S6 Screen and Digitizer
Assembly (Sprint) (1)NuGlas Tempered Glass Screen
Protector for Galaxy S6 (1)
Samsung Galaxy S6 Screen Replacement
© iFixit — CC BY-NC-SA www.iFixit.com Page 2 of 26
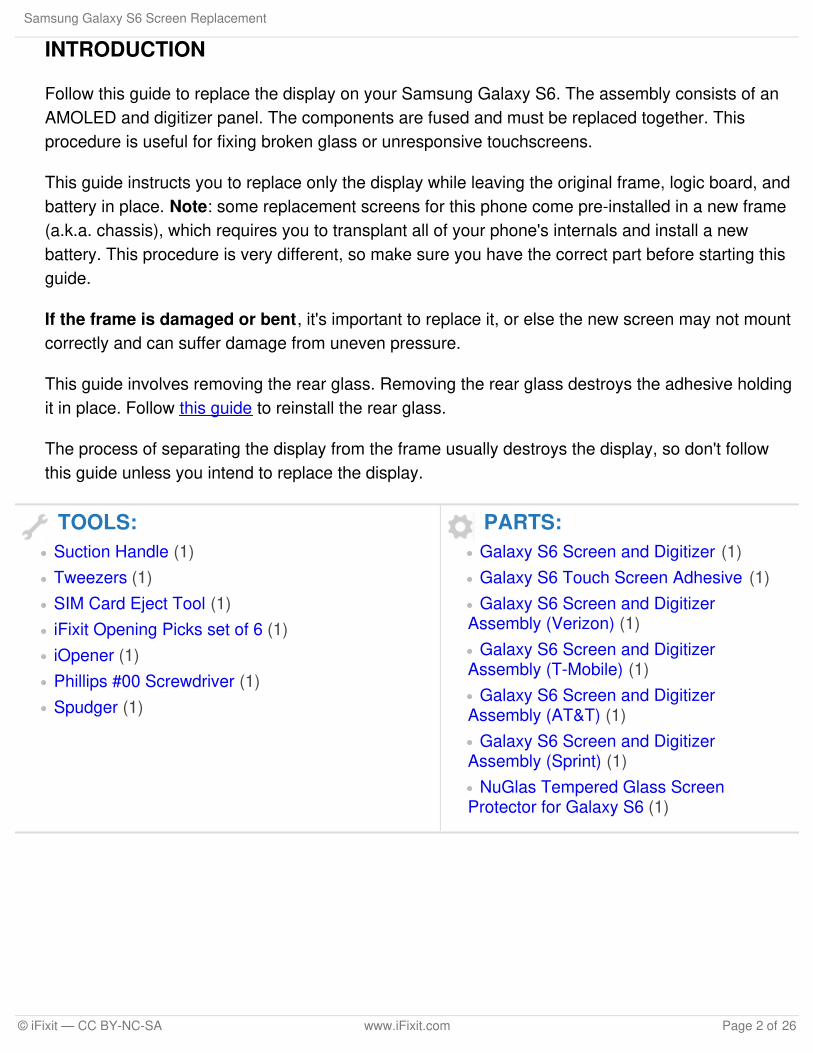
Step 1 — SIM Card
Insert a paper clip or SIM eject tool into the hole in the SIM card slot on the power button side ofthe phone.
Press to eject the SIM card tray.
Don't press too hard or you may damage the SIM card tray.
Step 2
Remove the SIM card tray from thephone.
Samsung Galaxy S6 Screen Replacement
© iFixit — CC BY-NC-SA www.iFixit.com Page 3 of 26
Step 3 — iOpener Heating
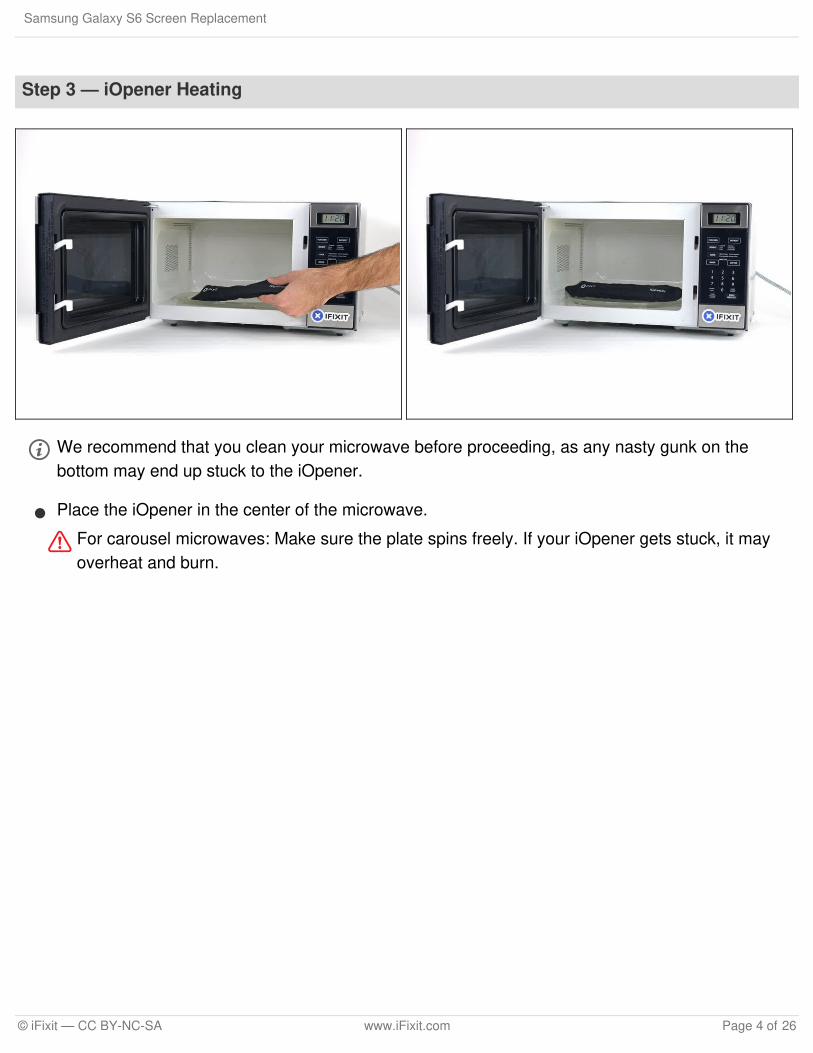
We recommend that you clean your microwave before proceeding, as any nasty gunk on thebottom may end up stuck to the iOpener.
Place the iOpener in the center of the microwave.
For carousel microwaves: Make sure the plate spins freely. If your iOpener gets stuck, it mayoverheat and burn.
Samsung Galaxy S6 Screen Replacement
© iFixit — CC BY-NC-SA www.iFixit.com Page 4 of 26
Step 4
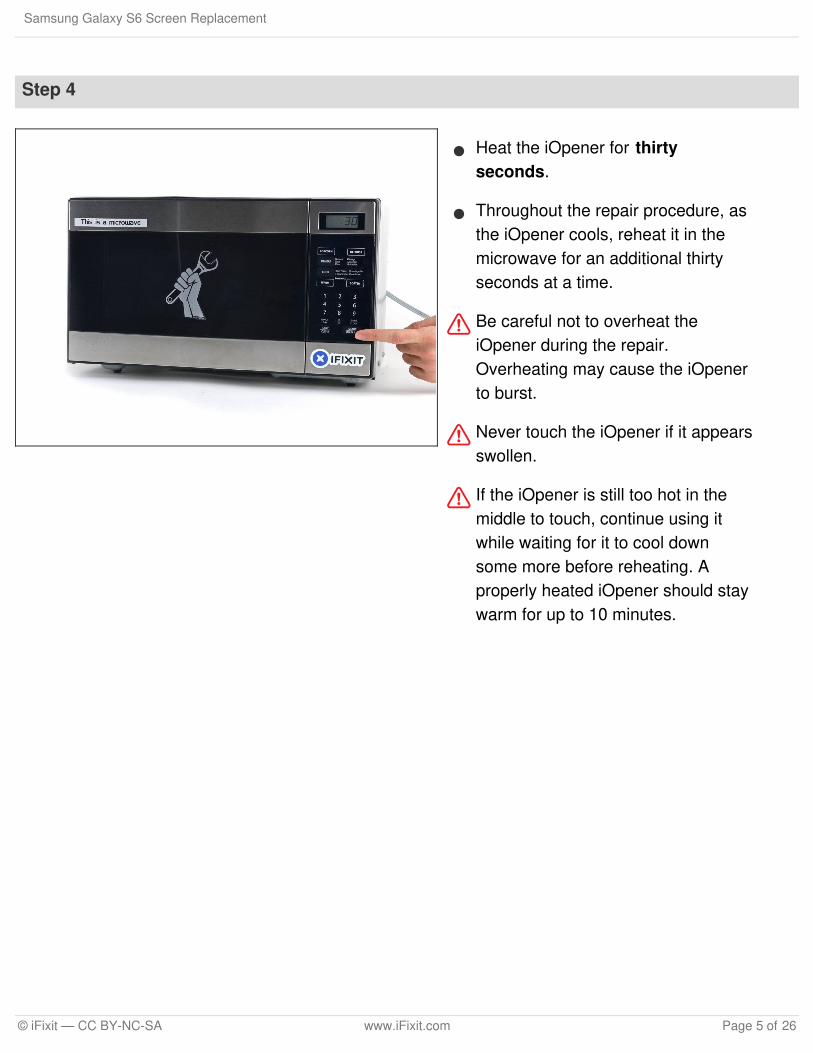
Heat the iOpener for thirtyseconds.
Throughout the repair procedure, asthe iOpener cools, reheat it in themicrowave for an additional thirtyseconds at a time.
Be careful not to overheat theiOpener during the repair.Overheating may cause the iOpenerto burst.
Never touch the iOpener if it appearsswollen.
If the iOpener is still too hot in themiddle to touch, continue using itwhile waiting for it to cool downsome more before reheating. Aproperly heated iOpener should staywarm for up to 10 minutes.
Samsung Galaxy S6 Screen Replacement
© iFixit — CC BY-NC-SA www.iFixit.com Page 5 of 26
Step 5
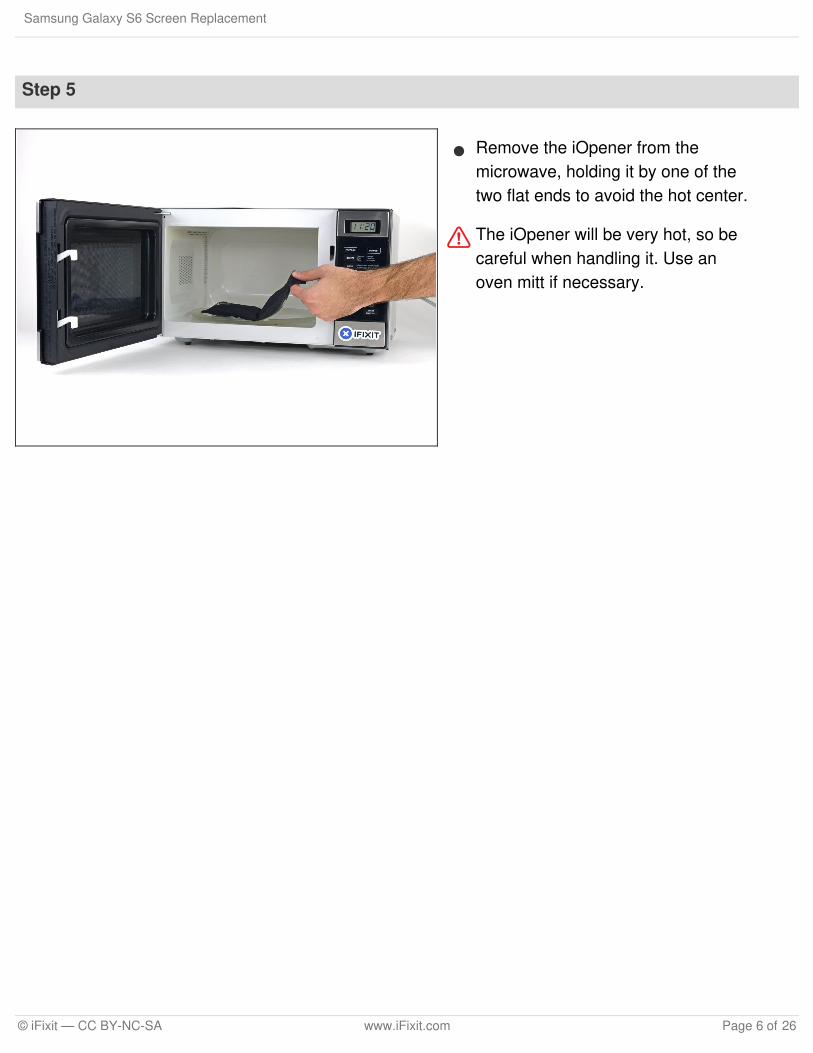
Remove the iOpener from themicrowave, holding it by one of thetwo flat ends to avoid the hot center.
The iOpener will be very hot, so becareful when handling it. Use anoven mitt if necessary.
Samsung Galaxy S6 Screen Replacement
© iFixit — CC BY-NC-SA www.iFixit.com Page 6 of 26
Step 6 — Rear Glass
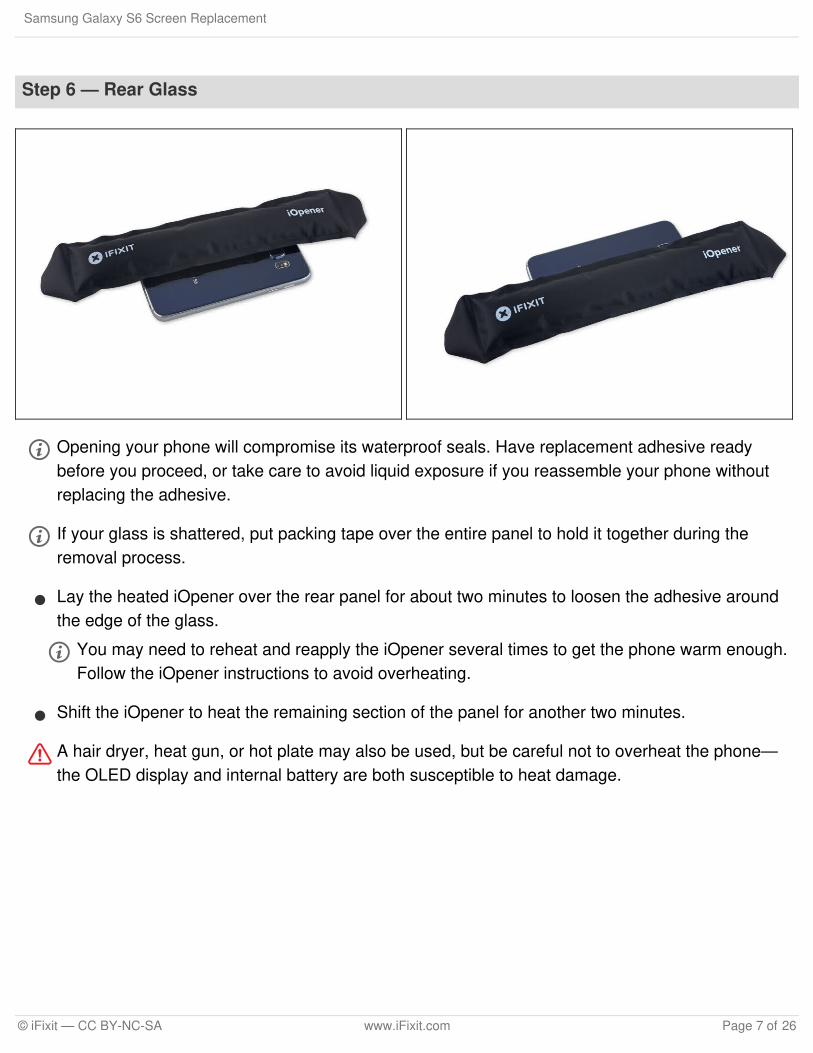
Opening your phone will compromise its waterproof seals. Have replacement adhesive readybefore you proceed, or take care to avoid liquid exposure if you reassemble your phone withoutreplacing the adhesive.
If your glass is shattered, put packing tape over the entire panel to hold it together during theremoval process.
Lay the heated iOpener over the rear panel for about two minutes to loosen the adhesive aroundthe edge of the glass.
You may need to reheat and reapply the iOpener several times to get the phone warm enough.Follow the iOpener instructions to avoid overheating.
Shift the iOpener to heat the remaining section of the panel for another two minutes.
A hair dryer, heat gun, or hot plate may also be used, but be careful not to overheat the phone—the OLED display and internal battery are both susceptible to heat damage.
Samsung Galaxy S6 Screen Replacement
© iFixit — CC BY-NC-SA www.iFixit.com Page 7 of 26
Step 7
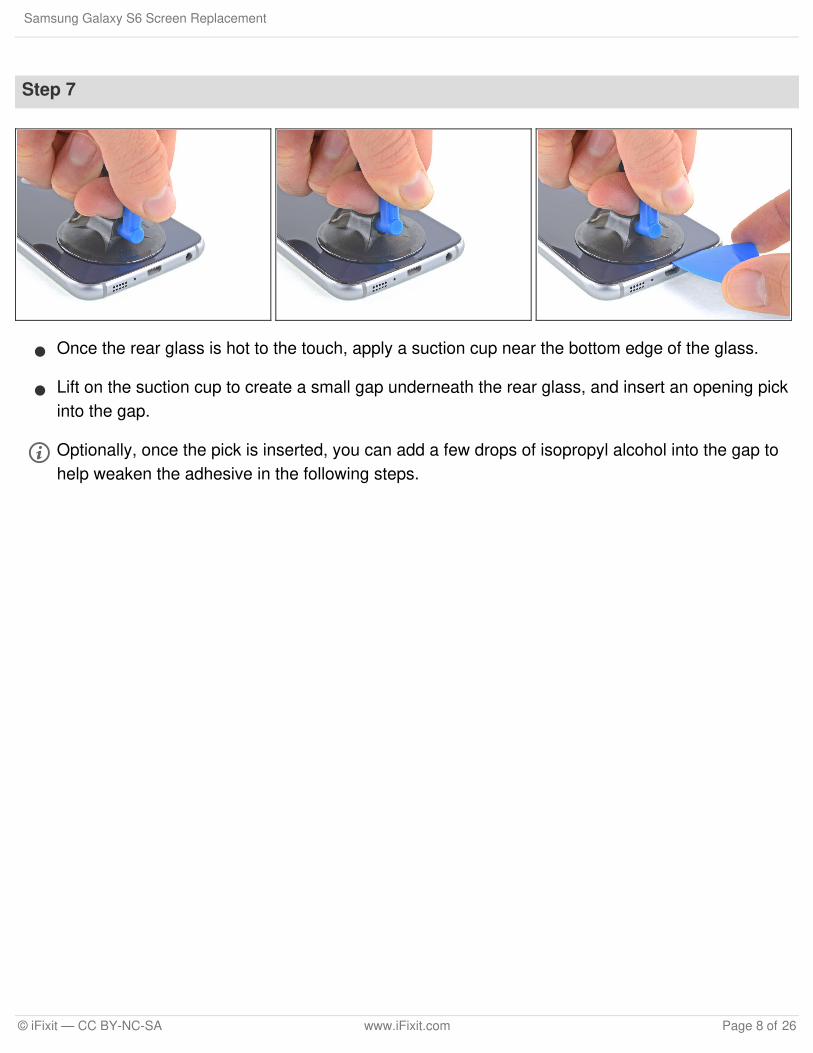
Once the rear glass is hot to the touch, apply a suction cup near the bottom edge of the glass.
Lift on the suction cup to create a small gap underneath the rear glass, and insert an opening pickinto the gap.
Optionally, once the pick is inserted, you can add a few drops of isopropyl alcohol into the gap tohelp weaken the adhesive in the following steps.
Samsung Galaxy S6 Screen Replacement
© iFixit — CC BY-NC-SA www.iFixit.com Page 8 of 26
Step 8
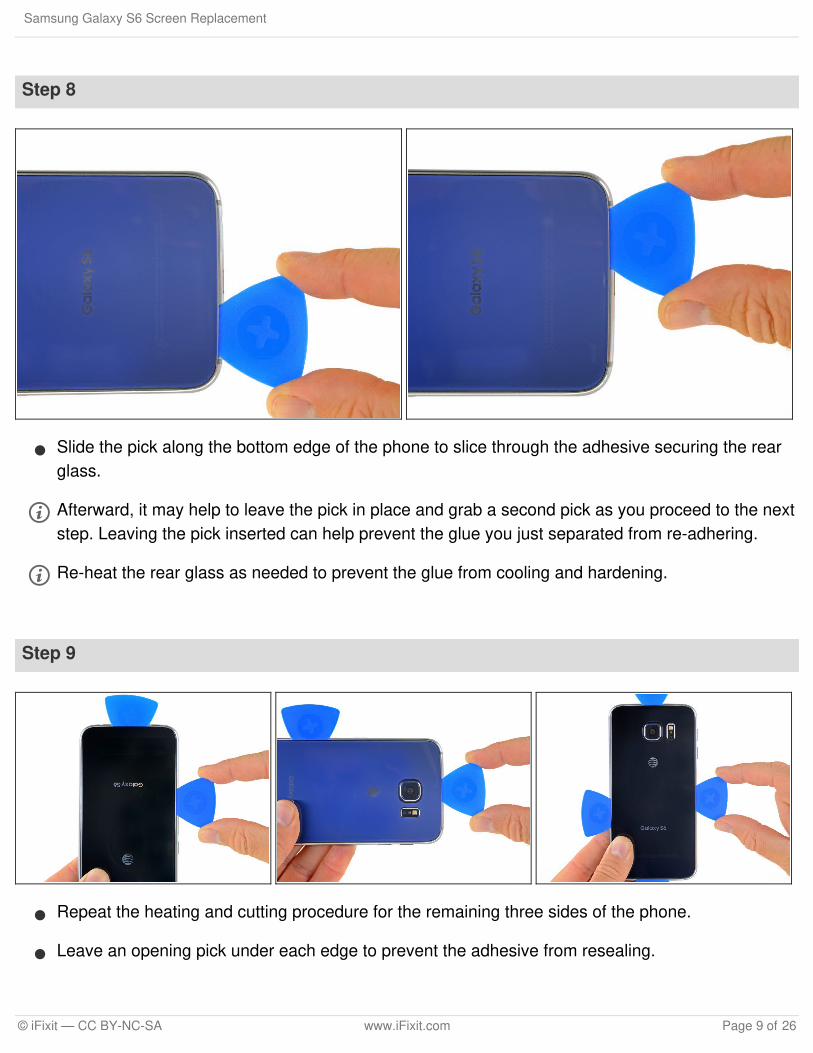
Slide the pick along the bottom edge of the phone to slice through the adhesive securing the rearglass.
Afterward, it may help to leave the pick in place and grab a second pick as you proceed to the nextstep. Leaving the pick inserted can help prevent the glue you just separated from re-adhering.
Re-heat the rear glass as needed to prevent the glue from cooling and hardening.
Step 9
Repeat the heating and cutting procedure for the remaining three sides of the phone.
Leave an opening pick under each edge to prevent the adhesive from resealing.
Samsung Galaxy S6 Screen Replacement
© iFixit — CC BY-NC-SA www.iFixit.com Page 9 of 26
Step 10
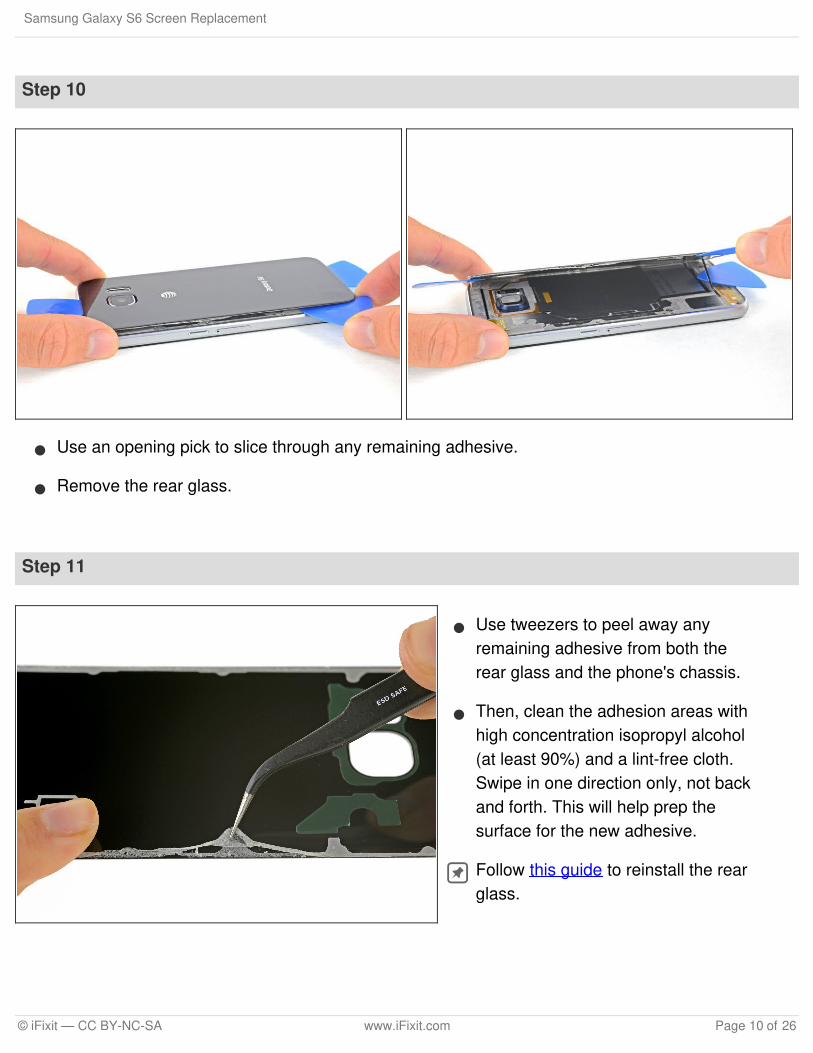
Use an opening pick to slice through any remaining adhesive.
Remove the rear glass.
Step 11
Use tweezers to peel away anyremaining adhesive from both therear glass and the phone's chassis.
Then, clean the adhesion areas withhigh concentration isopropyl alcohol(at least 90%) and a lint-free cloth.Swipe in one direction only, not backand forth. This will help prep thesurface for the new adhesive.
Follow this guide to reinstall the rearglass.
Samsung Galaxy S6 Screen Replacement
© iFixit — CC BY-NC-SA www.iFixit.com Page 10 of 26

Step 12 — Midframe Assembly
Remove the thirteen 3.5mm Phillips#00 screws securing the midframeto the phone.
Step 13
Firmly grasp the edge of the midframe assembly.
Lift up on the midframe assembly while pushing down on the battery to separate the midframeassembly from the rest of the phone.
While lifting the midframe, be careful to avoid snagging it on the audio jack or charging port.
You may need to heat and apply an iOpener to the edges of the display to soften the displayadhesive if midframe separation is difficult.
Samsung Galaxy S6 Screen Replacement
© iFixit — CC BY-NC-SA www.iFixit.com Page 11 of 26
Step 14
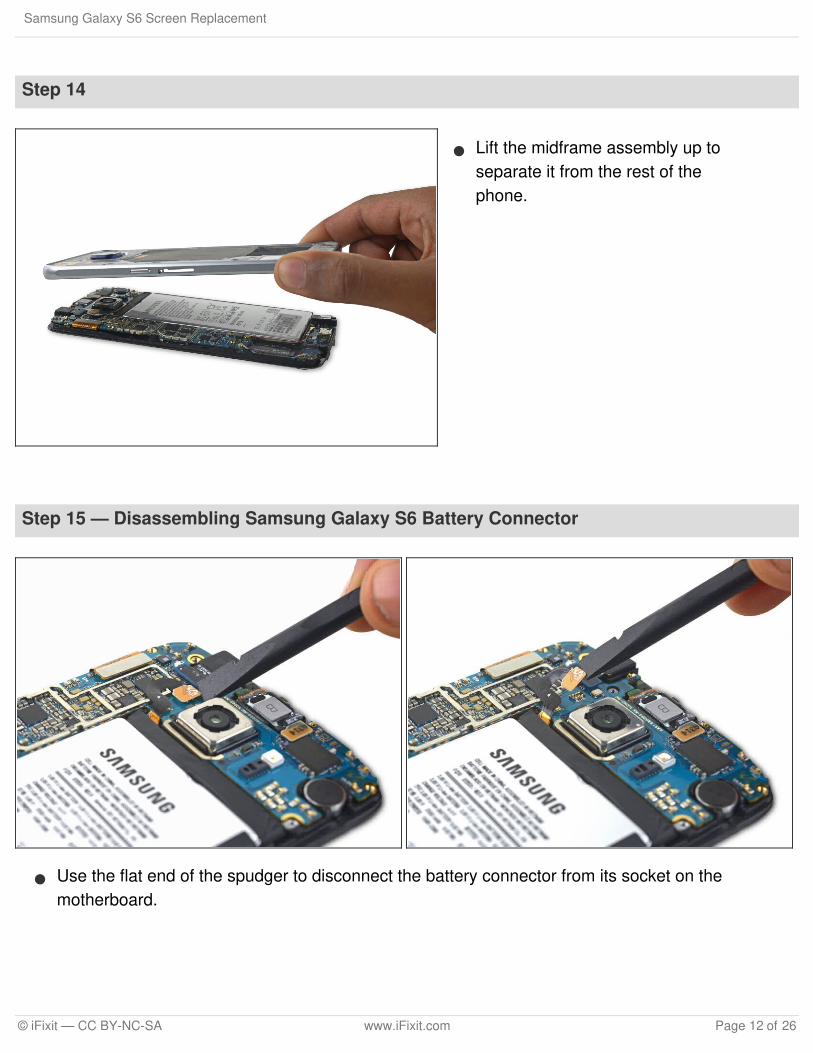
Lift the midframe assembly up toseparate it from the rest of thephone.
Step 15 — Disassembling Samsung Galaxy S6 Battery Connector
Use the flat end of the spudger to disconnect the battery connector from its socket on themotherboard.
Samsung Galaxy S6 Screen Replacement
© iFixit — CC BY-NC-SA www.iFixit.com Page 12 of 26
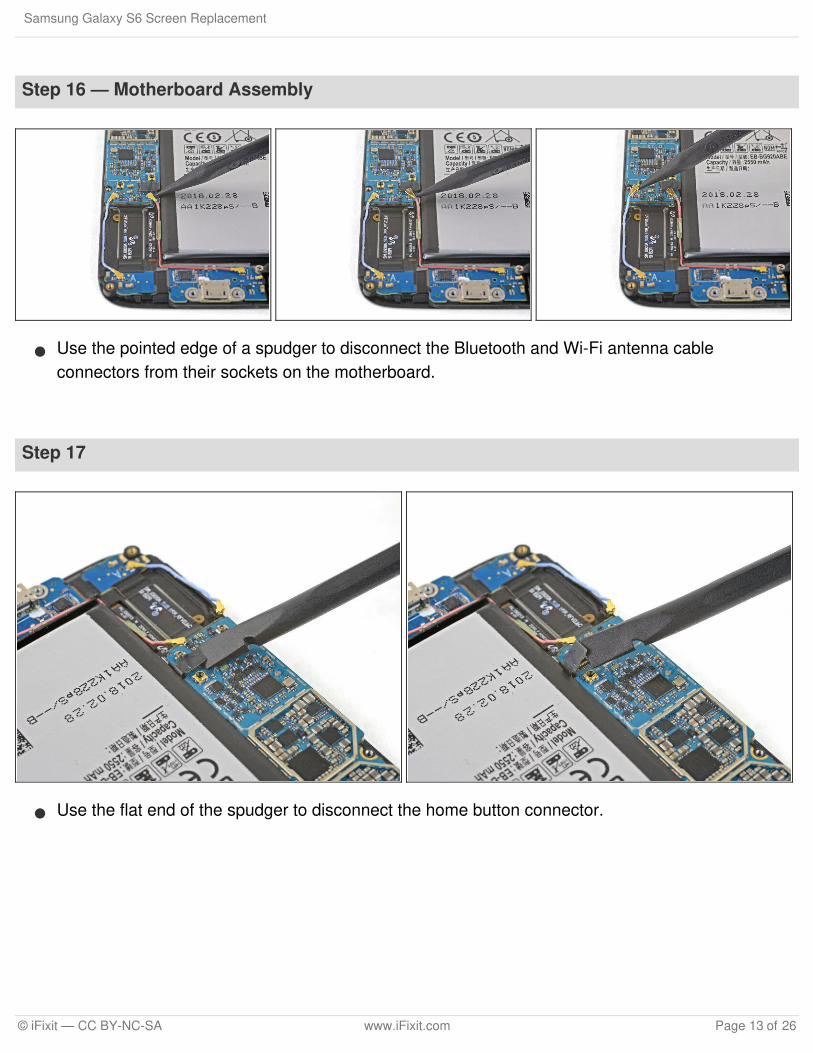
Step 16 — Motherboard Assembly
Use the pointed edge of a spudger to disconnect the Bluetooth and Wi-Fi antenna cableconnectors from their sockets on the motherboard.
Step 17
Use the flat end of the spudger to disconnect the home button connector.
Samsung Galaxy S6 Screen Replacement
© iFixit — CC BY-NC-SA www.iFixit.com Page 13 of 26
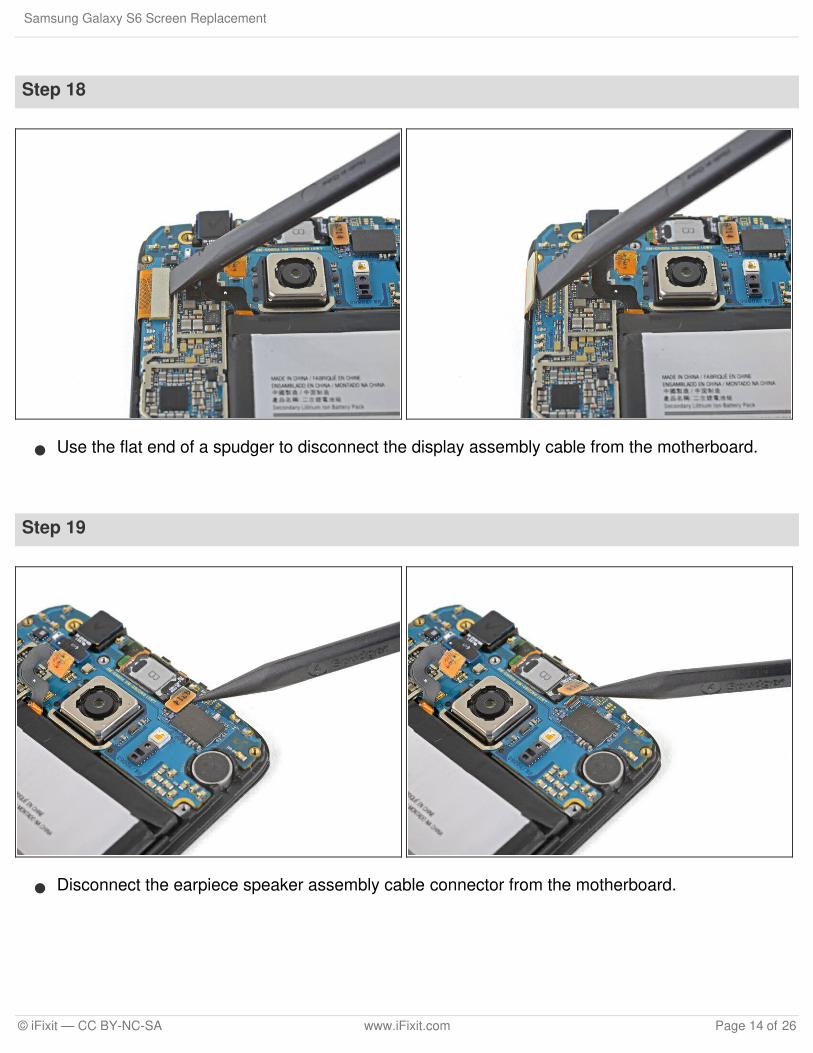
Step 18
Use the flat end of a spudger to disconnect the display assembly cable from the motherboard.
Step 19
Disconnect the earpiece speaker assembly cable connector from the motherboard.
Samsung Galaxy S6 Screen Replacement
© iFixit — CC BY-NC-SA www.iFixit.com Page 14 of 26

Step 20
Lift the camera-side end of the motherboard to separate it from the display frame.
You may need to move some of the ribbon cables out of the way while you lift the motherboard.If the board is hard to lift, check that it is fully disconnected and not caught on any ribbon cables.
Do not fully remove the motherboard yet—it is still attached to the daughterboard via a ribboncable on the underside of the motherboard.
Samsung Galaxy S6 Screen Replacement
© iFixit — CC BY-NC-SA www.iFixit.com Page 15 of 26

Step 21
Use the flat end of a spudger to disconnect the daughterboard ribbon cable connector from itssocket on the underside of the motherboard.
Samsung Galaxy S6 Screen Replacement
© iFixit — CC BY-NC-SA www.iFixit.com Page 16 of 26
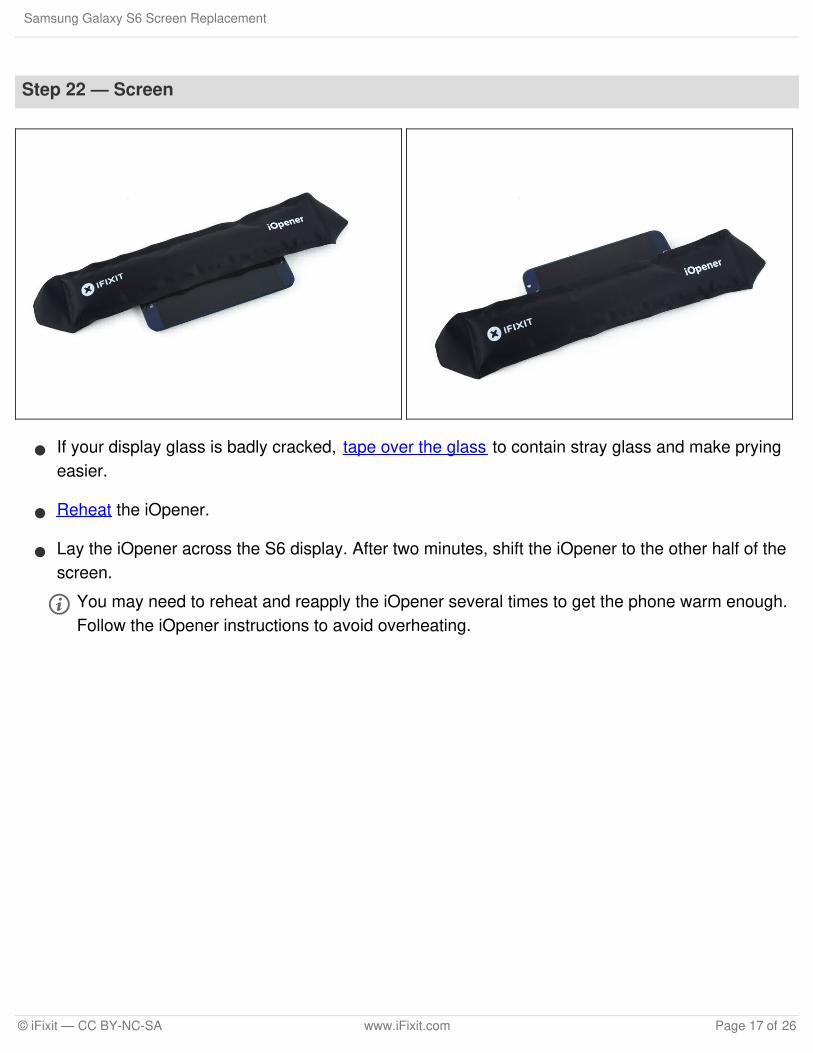
Step 22 — Screen
If your display glass is badly cracked, tape over the glass to contain stray glass and make pryingeasier.
Reheat the iOpener.
Lay the iOpener across the S6 display. After two minutes, shift the iOpener to the other half of thescreen.
You may need to reheat and reapply the iOpener several times to get the phone warm enough.Follow the iOpener instructions to avoid overheating.
Samsung Galaxy S6 Screen Replacement
© iFixit — CC BY-NC-SA www.iFixit.com Page 17 of 26
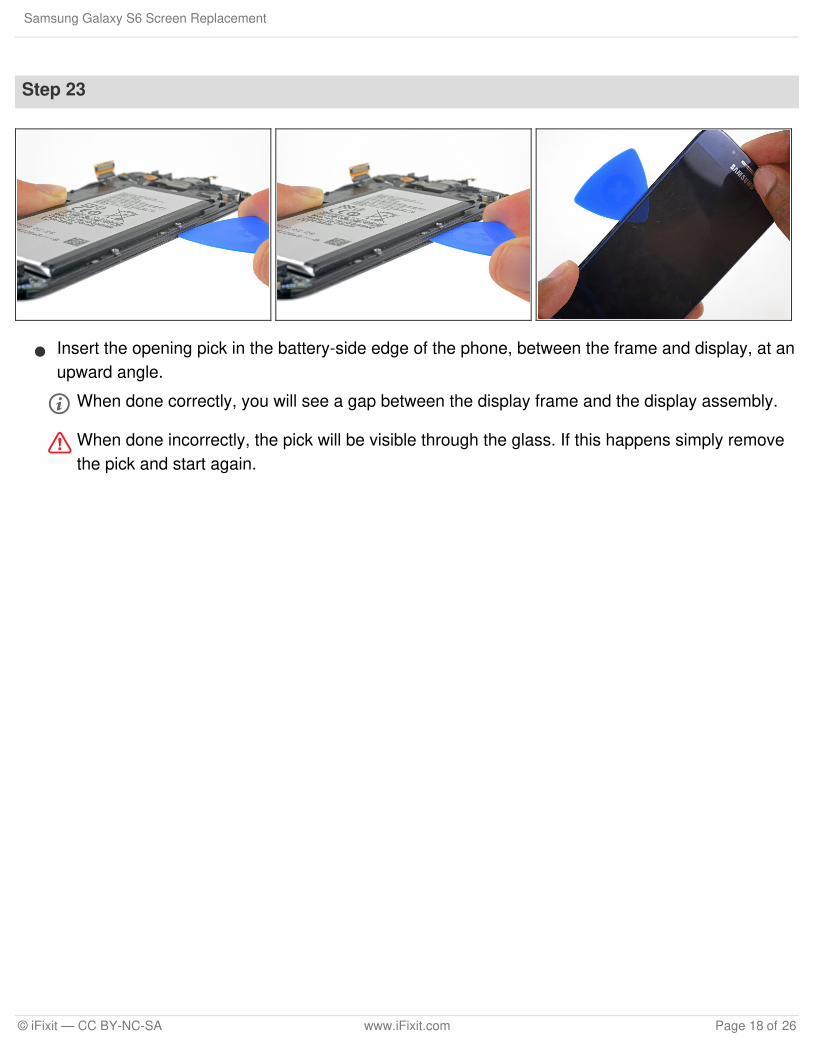
Step 23
Insert the opening pick in the battery-side edge of the phone, between the frame and display, at anupward angle.
When done correctly, you will see a gap between the display frame and the display assembly.
When done incorrectly, the pick will be visible through the glass. If this happens simply removethe pick and start again.
Samsung Galaxy S6 Screen Replacement
© iFixit — CC BY-NC-SA www.iFixit.com Page 18 of 26
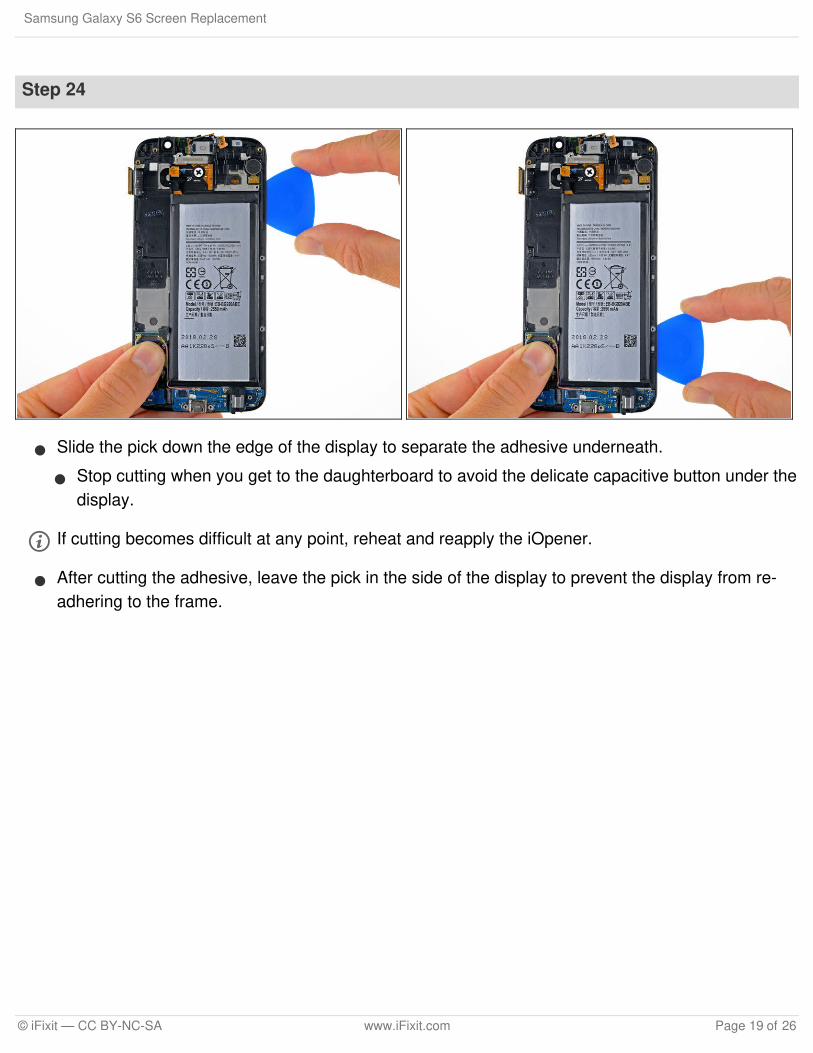
Step 24
Slide the pick down the edge of the display to separate the adhesive underneath.
Stop cutting when you get to the daughterboard to avoid the delicate capacitive button under thedisplay.
If cutting becomes difficult at any point, reheat and reapply the iOpener.
After cutting the adhesive, leave the pick in the side of the display to prevent the display from re-adhering to the frame.
Samsung Galaxy S6 Screen Replacement
© iFixit — CC BY-NC-SA www.iFixit.com Page 19 of 26
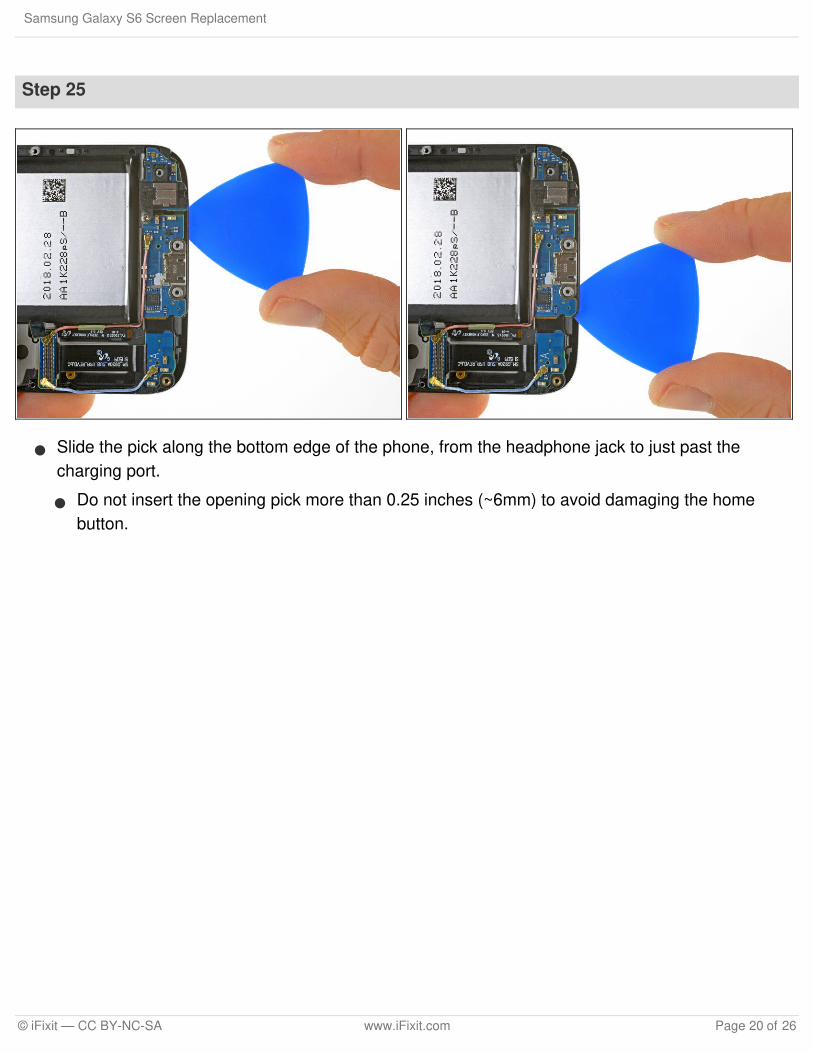
Step 25
Slide the pick along the bottom edge of the phone, from the headphone jack to just past thecharging port.
Do not insert the opening pick more than 0.25 inches (~6mm) to avoid damaging the homebutton.
Samsung Galaxy S6 Screen Replacement
© iFixit — CC BY-NC-SA www.iFixit.com Page 20 of 26
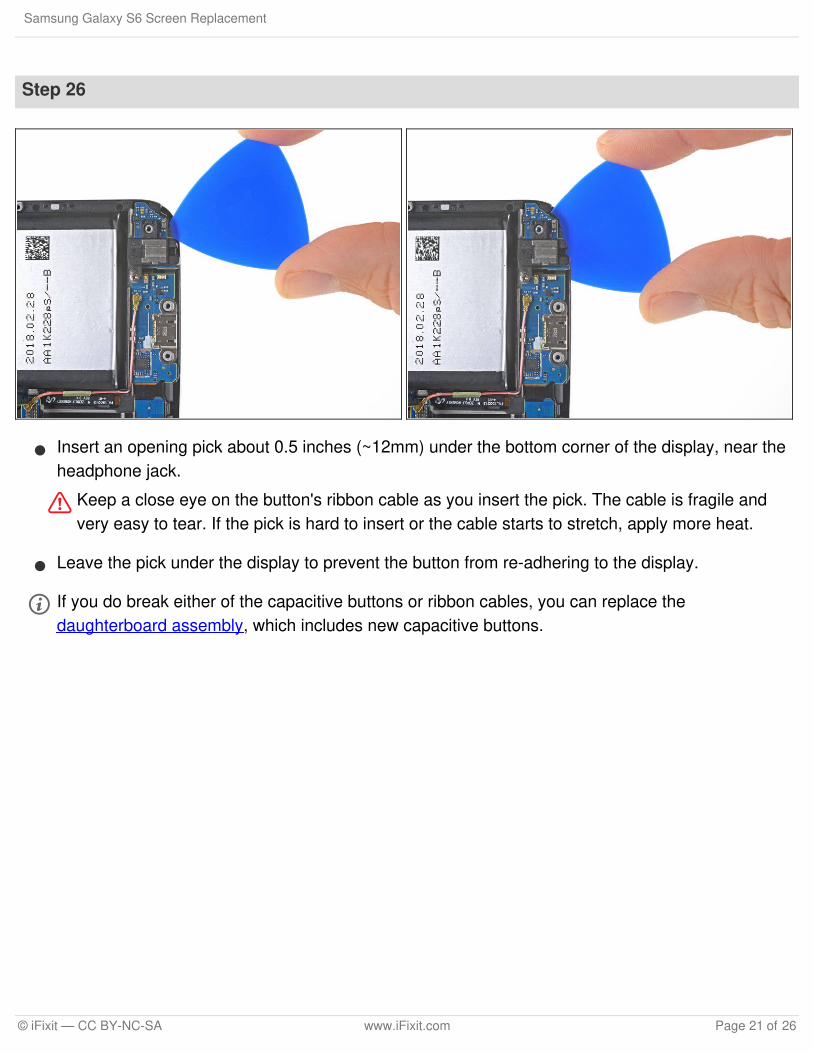
Step 26
Insert an opening pick about 0.5 inches (~12mm) under the bottom corner of the display, near theheadphone jack.
Keep a close eye on the button's ribbon cable as you insert the pick. The cable is fragile andvery easy to tear. If the pick is hard to insert or the cable starts to stretch, apply more heat.
Leave the pick under the display to prevent the button from re-adhering to the display.
If you do break either of the capacitive buttons or ribbon cables, you can replace thedaughterboard assembly, which includes new capacitive buttons.
Samsung Galaxy S6 Screen Replacement
© iFixit — CC BY-NC-SA www.iFixit.com Page 21 of 26

Step 27
Insert an opening pick about 0.5 inches (~12mm) under the opposite bottom corner of the display.
Keep a close eye on the button's ribbon cable as you insert the pick. The cable is fragile andvery easy to tear. If the pick is hard to insert or the cable starts to stretch, apply more heat.
Leave the pick under the display to prevent the button from re-adhering to the display.
Samsung Galaxy S6 Screen Replacement
© iFixit — CC BY-NC-SA www.iFixit.com Page 22 of 26
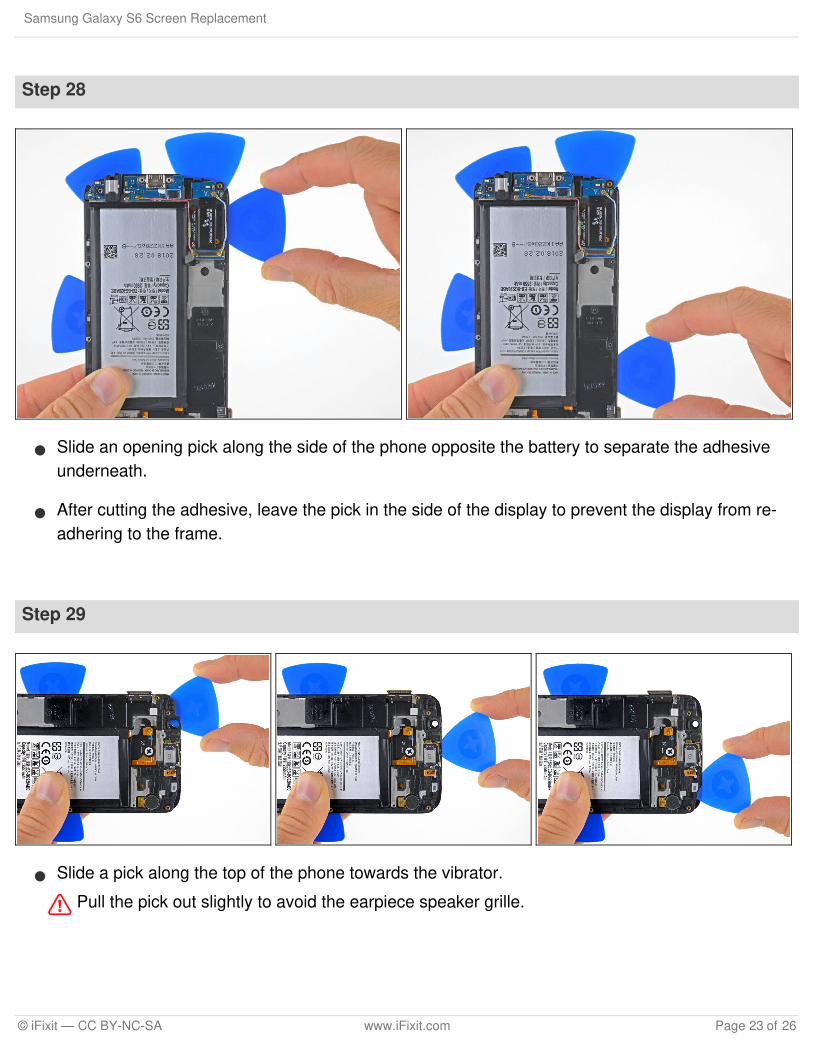
Step 28
Slide an opening pick along the side of the phone opposite the battery to separate the adhesiveunderneath.
After cutting the adhesive, leave the pick in the side of the display to prevent the display from re-adhering to the frame.
Step 29
Slide a pick along the top of the phone towards the vibrator.
Pull the pick out slightly to avoid the earpiece speaker grille.
Samsung Galaxy S6 Screen Replacement
© iFixit — CC BY-NC-SA www.iFixit.com Page 23 of 26
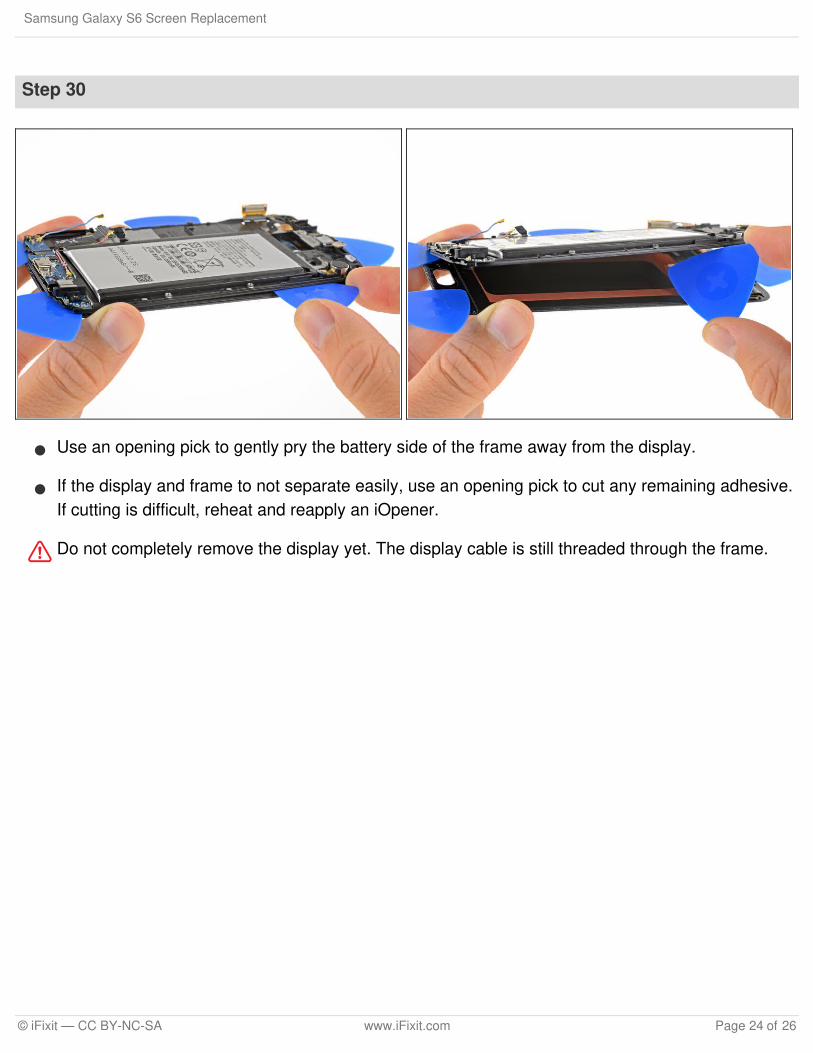
Step 30
Use an opening pick to gently pry the battery side of the frame away from the display.
If the display and frame to not separate easily, use an opening pick to cut any remaining adhesive.If cutting is difficult, reheat and reapply an iOpener.
Do not completely remove the display yet. The display cable is still threaded through the frame.
Samsung Galaxy S6 Screen Replacement
© iFixit — CC BY-NC-SA www.iFixit.com Page 24 of 26
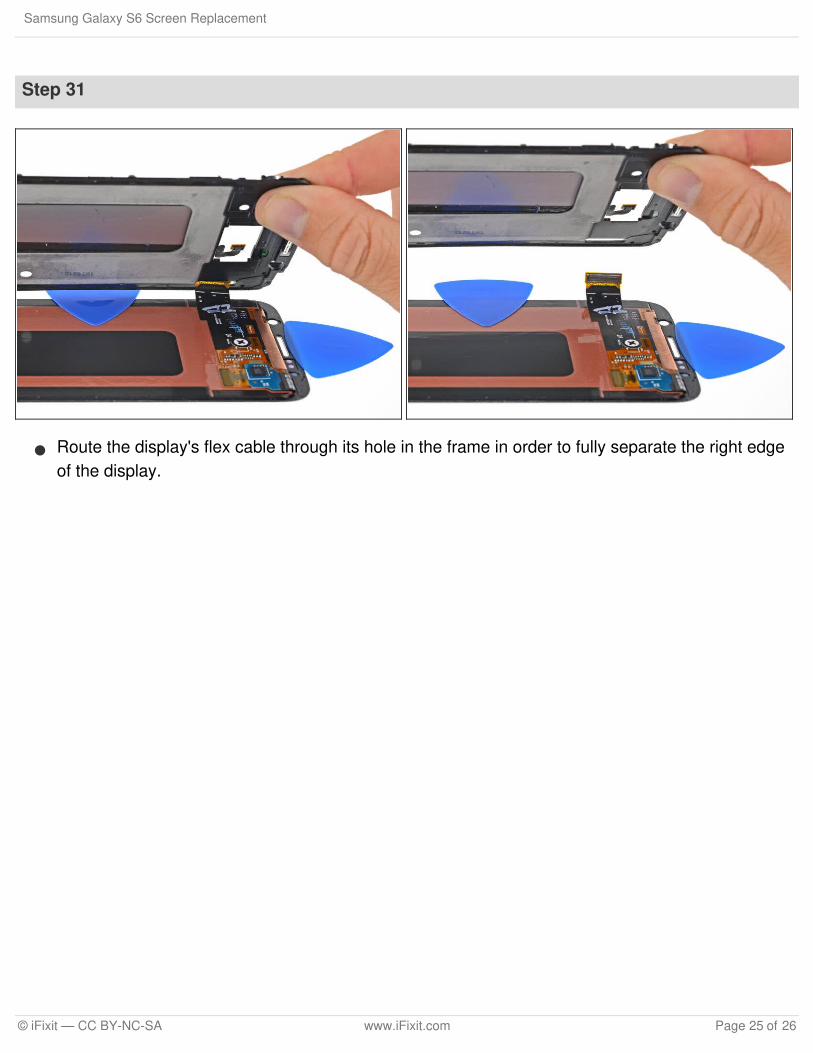
Step 31
Route the display's flex cable through its hole in the frame in order to fully separate the right edgeof the display.
Samsung Galaxy S6 Screen Replacement
© iFixit — CC BY-NC-SA www.iFixit.com Page 25 of 26
To reassemble your device, follow these instructions in reverse order. When reinstalling the rear glass,refer to the rear glass adhesive replacement guide.
This document was last generated on 2019-02-17 08:06:11 AM.
Step 32
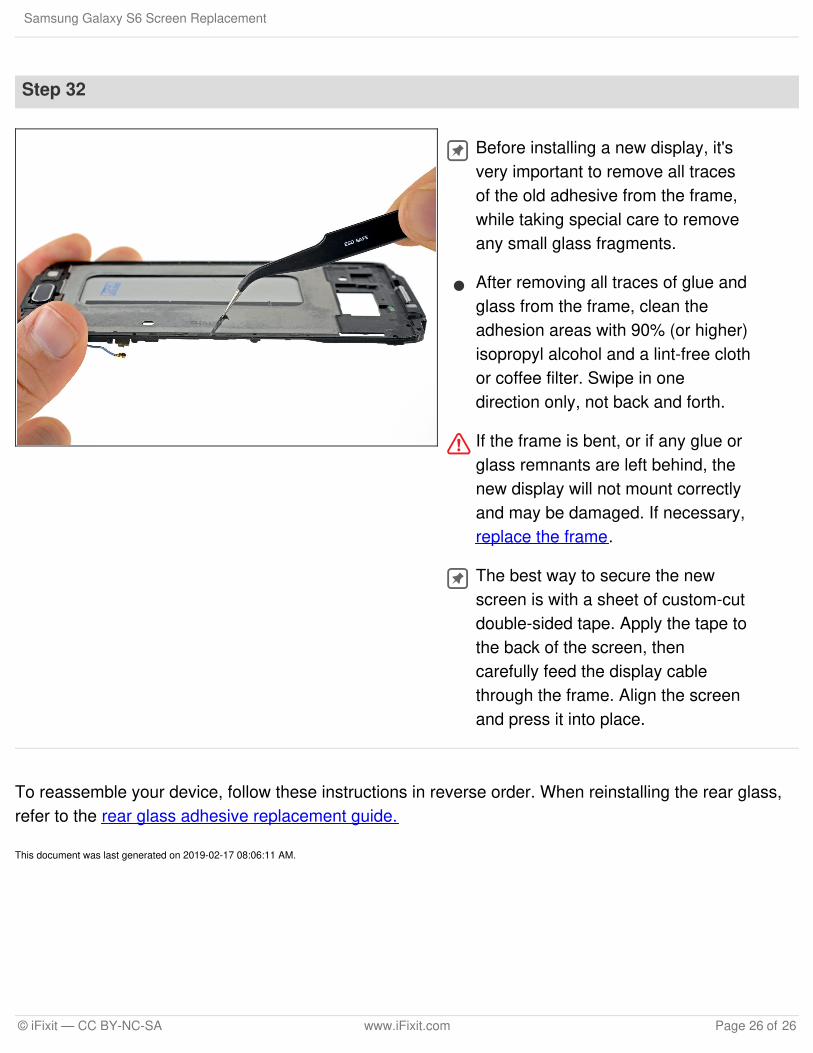
Before installing a new display, it'svery important to remove all tracesof the old adhesive from the frame,while taking special care to removeany small glass fragments.
After removing all traces of glue andglass from the frame, clean theadhesion areas with 90% (or higher)isopropyl alcohol and a lint-free clothor coffee filter. Swipe in onedirection only, not back and forth.
If the frame is bent, or if any glue orglass remnants are left behind, thenew display will not mount correctlyand may be damaged. If necessary,replace the frame.
The best way to secure the newscreen is with a sheet of custom-cutdouble-sided tape. Apply the tape tothe back of the screen, thencarefully feed the display cablethrough the frame. Align the screenand press it into place.
Samsung Galaxy S6 Screen Replacement
© iFixit — CC BY-NC-SA www.iFixit.com Page 26 of 26