Embed Size (px)
Citation preview
Samsung Galaxy S9+ TeardownTeardown of Samsung's 2018 flagship, the Galaxy S9+ performed by iFixit.
Written By: Adam O'Camb
Samsung Galaxy S9+ Teardown
© iFixit — CC BY-NC-SA www.iFixit.com Page 1 of 18

INTRODUCTION
While phone makers and operating system developers of dubious numeracy skip straight from eightto ten, Samsung stays strong and gives us the Samsung Galaxy S9+ (sans notch, even). Onlyteardown will tell if this phone is a true contender, or just a weird AR Emoji machine.
We've also got a teardown of the smaller, standard Galaxy S9—check it out!
There's way more to iFixit than just teardowns! Check us out on Facebook, Twitter, and Instagram tostay up-to-date on all things tech!
TOOLS:Heat Gun (1)
Suction Handle (1)
iFixit Opening Picks set of 6 (1)
Spudger (1)
Phillips #00 Screwdriver (1)
Tweezers (1)
Halberd Spudger (1)
iFixit Adhesive Remover (for Battery, Screen,and Glass Adhesive) (1)
iSclack (1)
Samsung Galaxy S9+ Teardown
© iFixit — CC BY-NC-SA www.iFixit.com Page 2 of 18
Step 1 — Samsung Galaxy S9+ Teardown
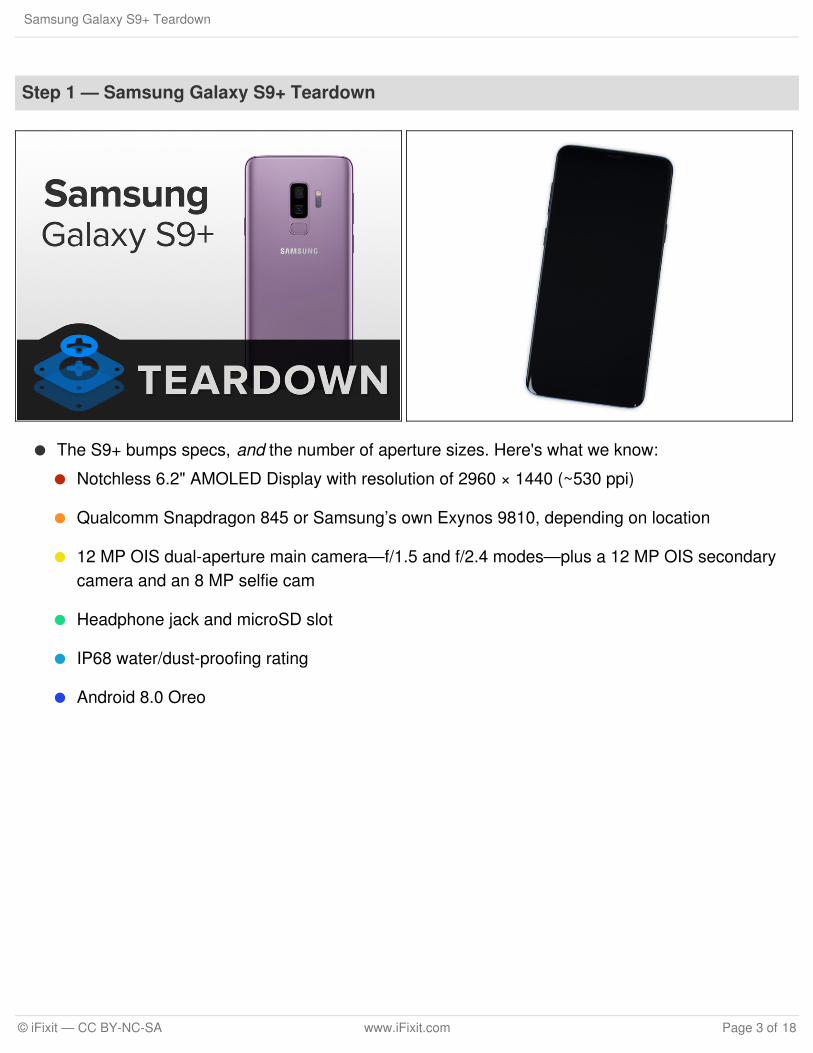
The S9+ bumps specs, and the number of aperture sizes. Here's what we know:
Notchless 6.2" AMOLED Display with resolution of 2960 × 1440 (~530 ppi)
Qualcomm Snapdragon 845 or Samsung’s own Exynos 9810, depending on location
12 MP OIS dual-aperture main camera—f/1.5 and f/2.4 modes—plus a 12 MP OIS secondarycamera and an 8 MP selfie cam
Headphone jack and microSD slot
IP68 water/dust-proofing rating
Android 8.0 Oreo
Samsung Galaxy S9+ Teardown
© iFixit — CC BY-NC-SA www.iFixit.com Page 3 of 18
Step 2
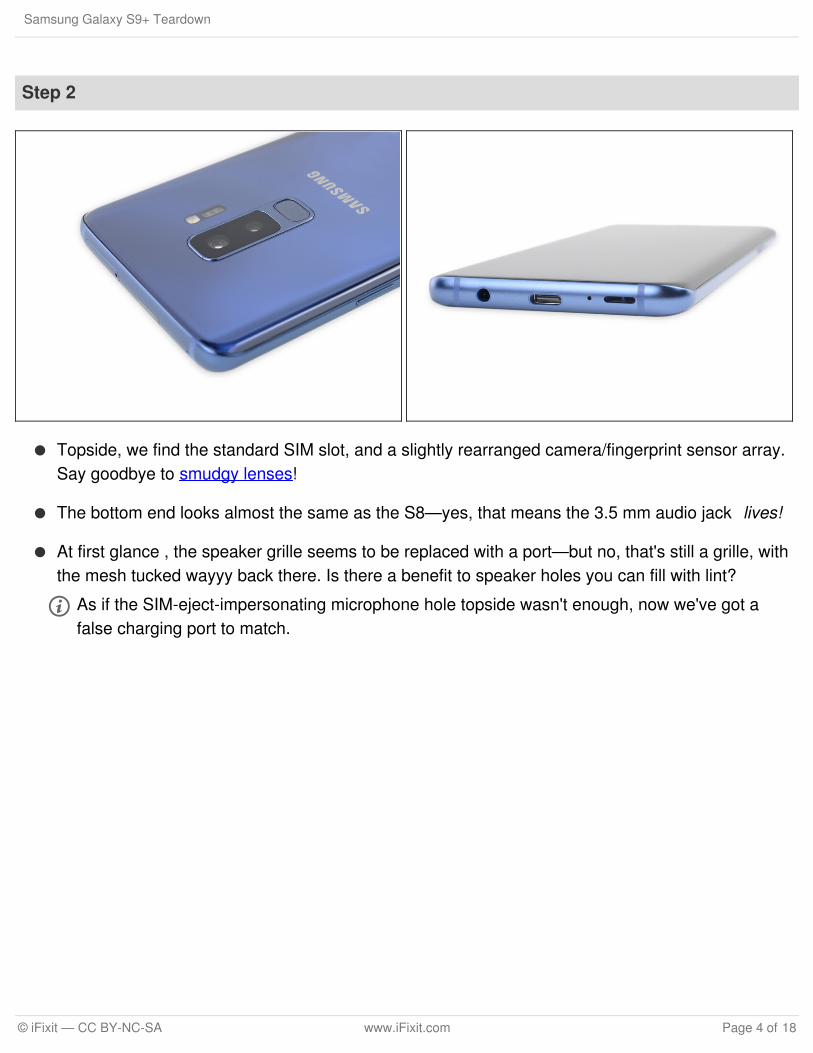
Topside, we find the standard SIM slot, and a slightly rearranged camera/fingerprint sensor array.Say goodbye to smudgy lenses!
The bottom end looks almost the same as the S8—yes, that means the 3.5 mm audio jack lives!
At first glance , the speaker grille seems to be replaced with a port—but no, that's still a grille, withthe mesh tucked wayyy back there. Is there a benefit to speaker holes you can fill with lint?
As if the SIM-eject-impersonating microphone hole topside wasn't enough, now we've got afalse charging port to match.
Samsung Galaxy S9+ Teardown
© iFixit — CC BY-NC-SA www.iFixit.com Page 4 of 18
Step 3
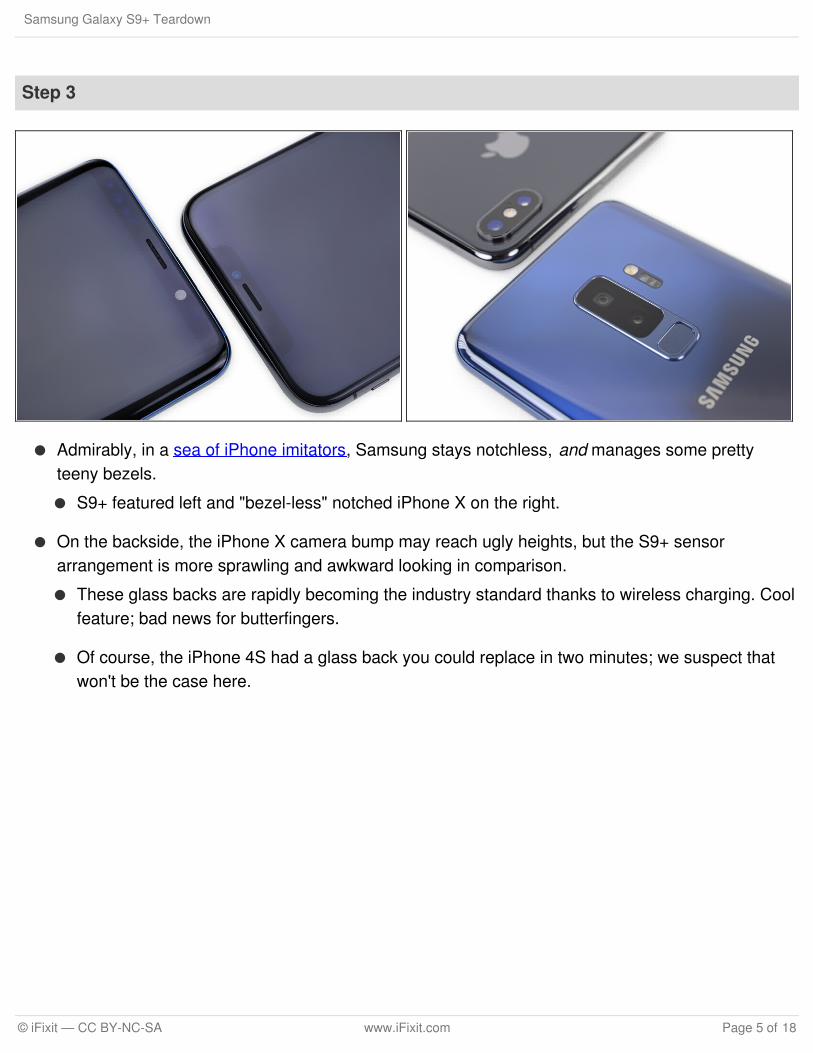
Admirably, in a sea of iPhone imitators, Samsung stays notchless, and manages some prettyteeny bezels.
S9+ featured left and "bezel-less" notched iPhone X on the right.
On the backside, the iPhone X camera bump may reach ugly heights, but the S9+ sensorarrangement is more sprawling and awkward looking in comparison.
These glass backs are rapidly becoming the industry standard thanks to wireless charging. Coolfeature; bad news for butterfingers.
Of course, the iPhone 4S had a glass back you could replace in two minutes; we suspect thatwon't be the case here.
Samsung Galaxy S9+ Teardown
© iFixit — CC BY-NC-SA www.iFixit.com Page 5 of 18
Step 4
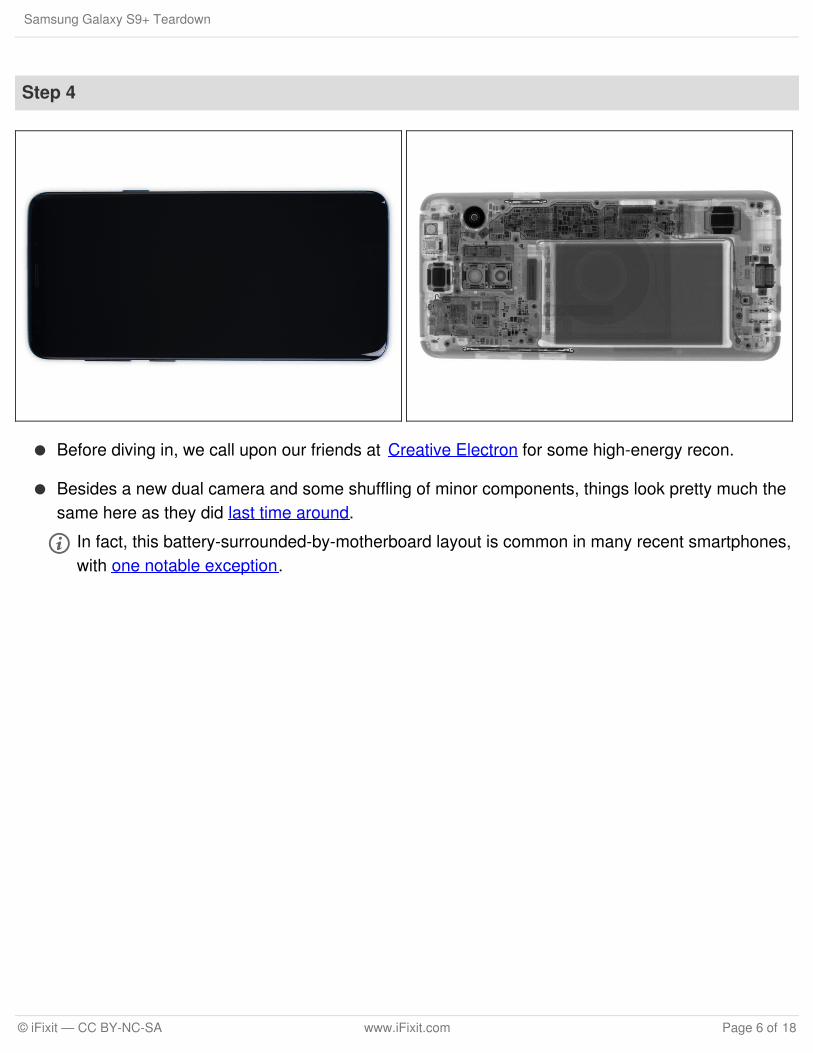
Before diving in, we call upon our friends at Creative Electron for some high-energy recon.
Besides a new dual camera and some shuffling of minor components, things look pretty much thesame here as they did last time around.
In fact, this battery-surrounded-by-motherboard layout is common in many recent smartphones,with one notable exception.
Samsung Galaxy S9+ Teardown
© iFixit — CC BY-NC-SA www.iFixit.com Page 6 of 18

Step 5
While it's no S4, the S9 is actually a welcome respite from our more recent, destructive teardowns.
The standard application of heat and opening pick helps us along, but it's definitely no picnic!
Thanks to prior experience—no thanks to Samsung—we are able to safely dispatch the sensorassembly cable with no casualties. Documentation makes the dream work!
Step 6
After navigating a treacherous opening, we find our way into the back of the phone.
We head straight to the rear camera to get a look at the fancy new dual aperture camera in action.
The camera auto-adjusts the aperture to adjust for low light (at f/1.5 it's got the widest apertureof any phone) while maintaining a more standard (and sharper) f/2.4 for normal photos.
Standard camera lenses use at least five aperture blades to keep the aperture roughly circularthroughout many f-stop adjustments. This Galaxy's aperture has just two rotating, ring-like bladesfor its single adjustment.
Samsung Galaxy S9+ Teardown
© iFixit — CC BY-NC-SA www.iFixit.com Page 7 of 18
Step 7
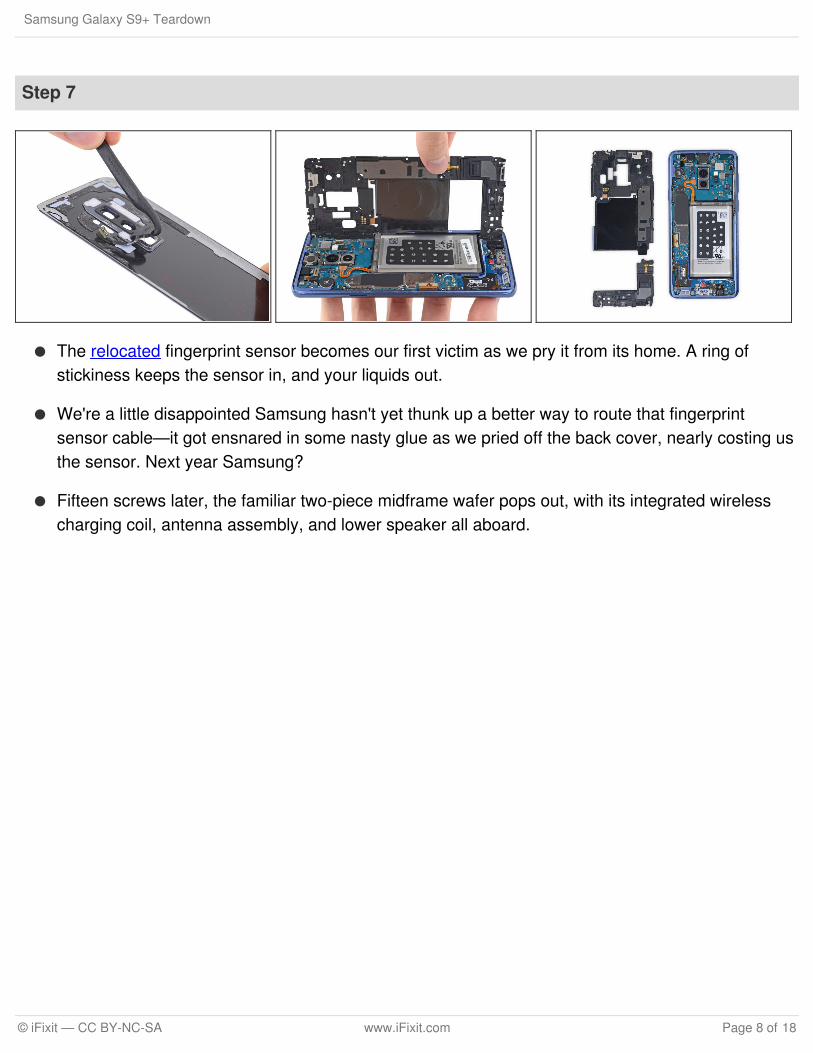
The relocated fingerprint sensor becomes our first victim as we pry it from its home. A ring ofstickiness keeps the sensor in, and your liquids out.
We're a little disappointed Samsung hasn't yet thunk up a better way to route that fingerprintsensor cable—it got ensnared in some nasty glue as we pried off the back cover, nearly costing usthe sensor. Next year Samsung?
Fifteen screws later, the familiar two-piece midframe wafer pops out, with its integrated wirelesscharging coil, antenna assembly, and lower speaker all aboard.
Samsung Galaxy S9+ Teardown
© iFixit — CC BY-NC-SA www.iFixit.com Page 8 of 18
Step 8
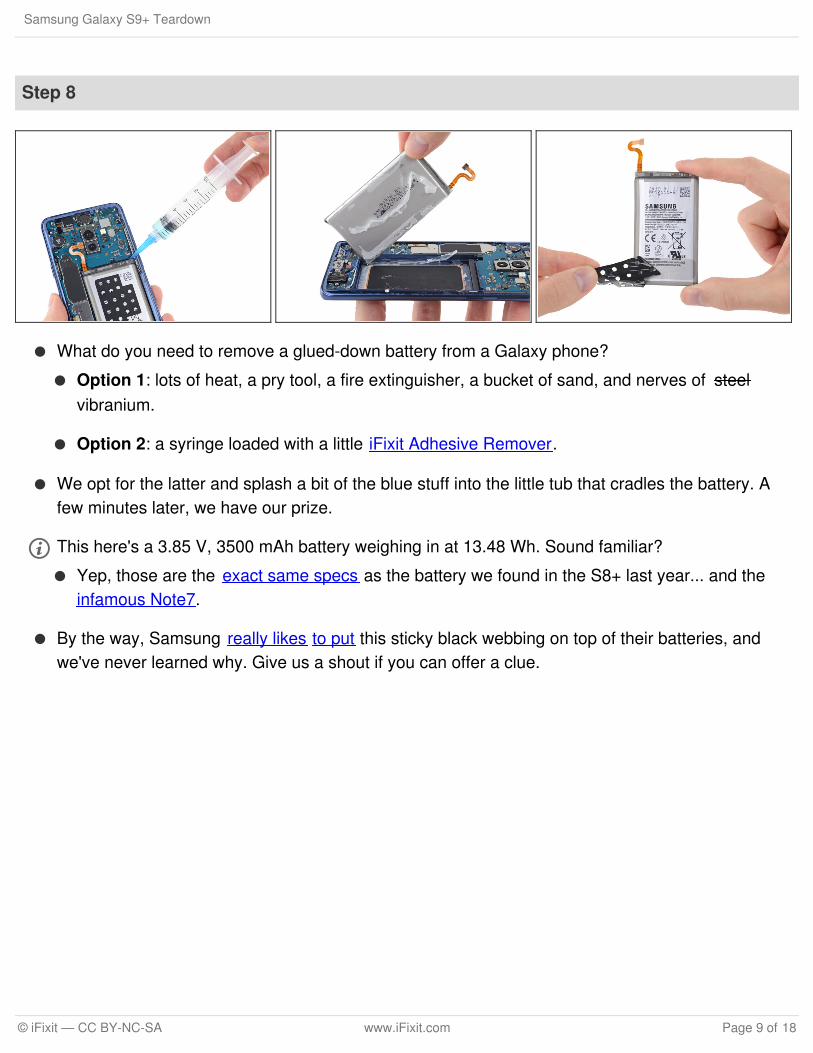
What do you need to remove a glued-down battery from a Galaxy phone?
Option 1: lots of heat, a pry tool, a fire extinguisher, a bucket of sand, and nerves of steelvibranium.
Option 2: a syringe loaded with a little iFixit Adhesive Remover.
We opt for the latter and splash a bit of the blue stuff into the little tub that cradles the battery. Afew minutes later, we have our prize.
This here's a 3.85 V, 3500 mAh battery weighing in at 13.48 Wh. Sound familiar?Yep, those are the exact same specs as the battery we found in the S8+ last year... and theinfamous Note7.
By the way, Samsung really likes to put this sticky black webbing on top of their batteries, andwe've never learned why. Give us a shout if you can offer a clue.
Samsung Galaxy S9+ Teardown
© iFixit — CC BY-NC-SA www.iFixit.com Page 9 of 18
Step 9
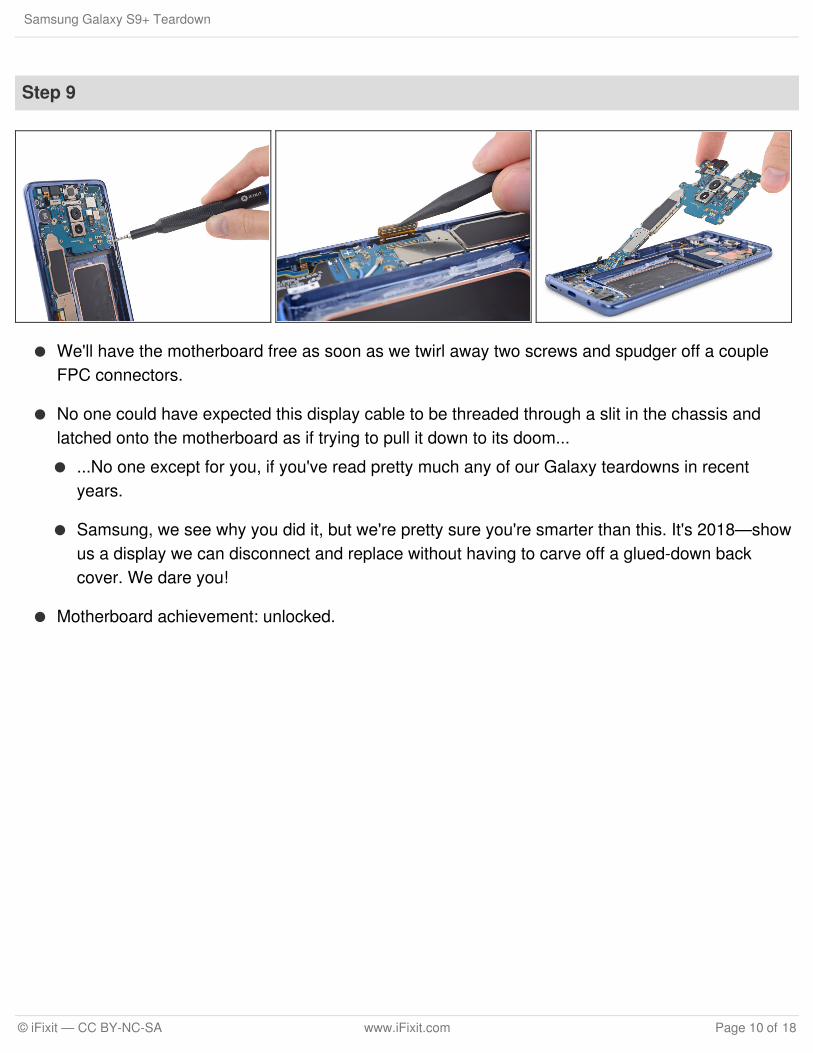
We'll have the motherboard free as soon as we twirl away two screws and spudger off a coupleFPC connectors.
No one could have expected this display cable to be threaded through a slit in the chassis andlatched onto the motherboard as if trying to pull it down to its doom...
...No one except for you, if you've read pretty much any of our Galaxy teardowns in recentyears.
Samsung, we see why you did it, but we're pretty sure you're smarter than this. It's 2018—showus a display we can disconnect and replace without having to carve off a glued-down backcover. We dare you!
Motherboard achievement: unlocked.
Samsung Galaxy S9+ Teardown
© iFixit — CC BY-NC-SA www.iFixit.com Page 10 of 18
Step 10
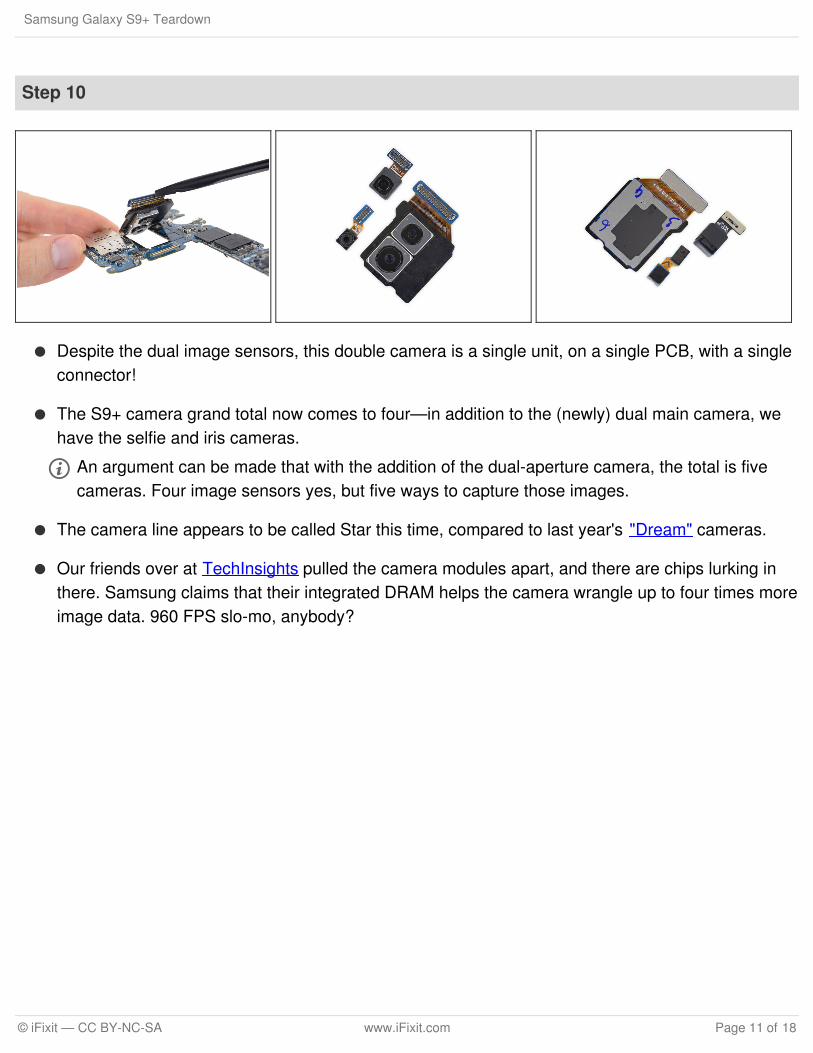
Despite the dual image sensors, this double camera is a single unit, on a single PCB, with a singleconnector!
The S9+ camera grand total now comes to four—in addition to the (newly) dual main camera, wehave the selfie and iris cameras.
An argument can be made that with the addition of the dual-aperture camera, the total is fivecameras. Four image sensors yes, but five ways to capture those images.
The camera line appears to be called Star this time, compared to last year's "Dream" cameras.
Our friends over at TechInsights pulled the camera modules apart, and there are chips lurking inthere. Samsung claims that their integrated DRAM helps the camera wrangle up to four times moreimage data. 960 FPS slo-mo, anybody?
Samsung Galaxy S9+ Teardown
© iFixit — CC BY-NC-SA www.iFixit.com Page 11 of 18
Step 11
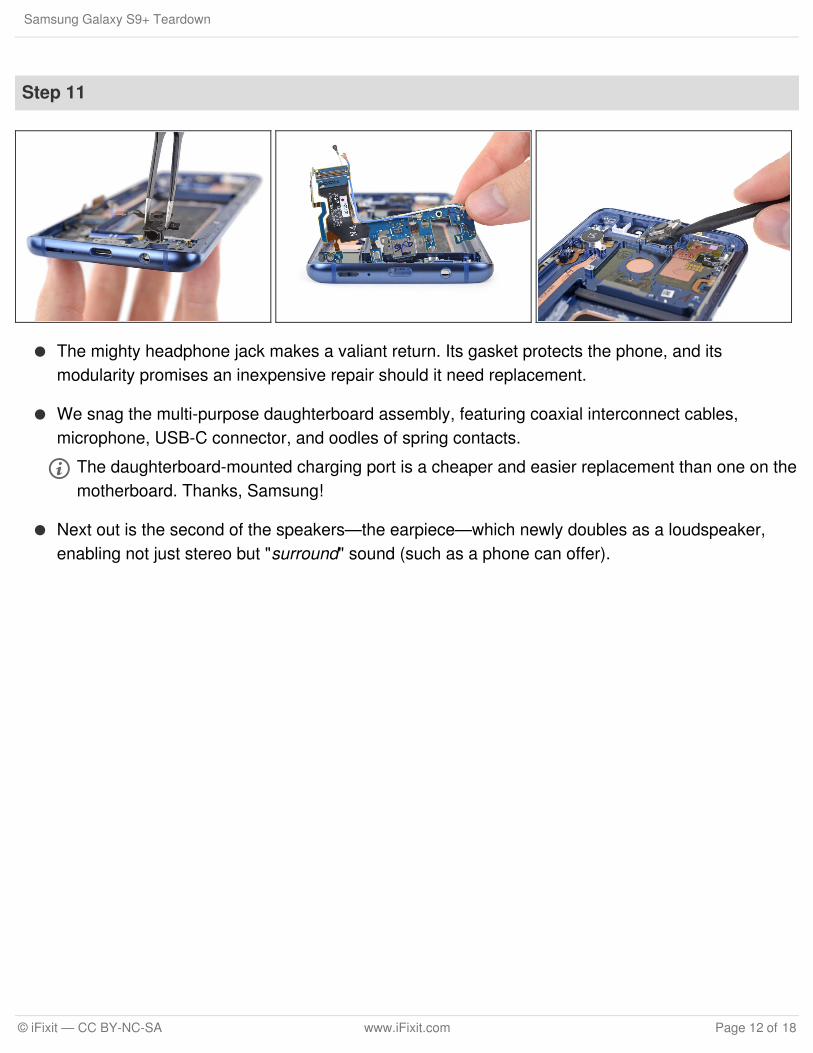
The mighty headphone jack makes a valiant return. Its gasket protects the phone, and itsmodularity promises an inexpensive repair should it need replacement.
We snag the multi-purpose daughterboard assembly, featuring coaxial interconnect cables,microphone, USB-C connector, and oodles of spring contacts.
The daughterboard-mounted charging port is a cheaper and easier replacement than one on themotherboard. Thanks, Samsung!
Next out is the second of the speakers—the earpiece—which newly doubles as a loudspeaker,enabling not just stereo but "surround" sound (such as a phone can offer).
Samsung Galaxy S9+ Teardown
© iFixit — CC BY-NC-SA www.iFixit.com Page 12 of 18

Step 12
Throw that mobo on the table and give it a spin! Side A has all the big hits:
Samsung K3UH6H6-NGCJ LPDDR4X 6 GB DRAM, layered over a Qualcomm Snapdragon 845
Toshiba THGAF4G9N4LBAIR 64 GB UFS (NAND flash + controller)
AVAGO AFEM-9096 KM1746
Qualcomm Aqstic™ WCD9341 audio codec
Maxim MAX77705F PMIC
Qualcomm QET4100 envelope tracker
Maxim MAX98512 audio amplifier
Samsung Galaxy S9+ Teardown
© iFixit — CC BY-NC-SA www.iFixit.com Page 13 of 18
Step 13
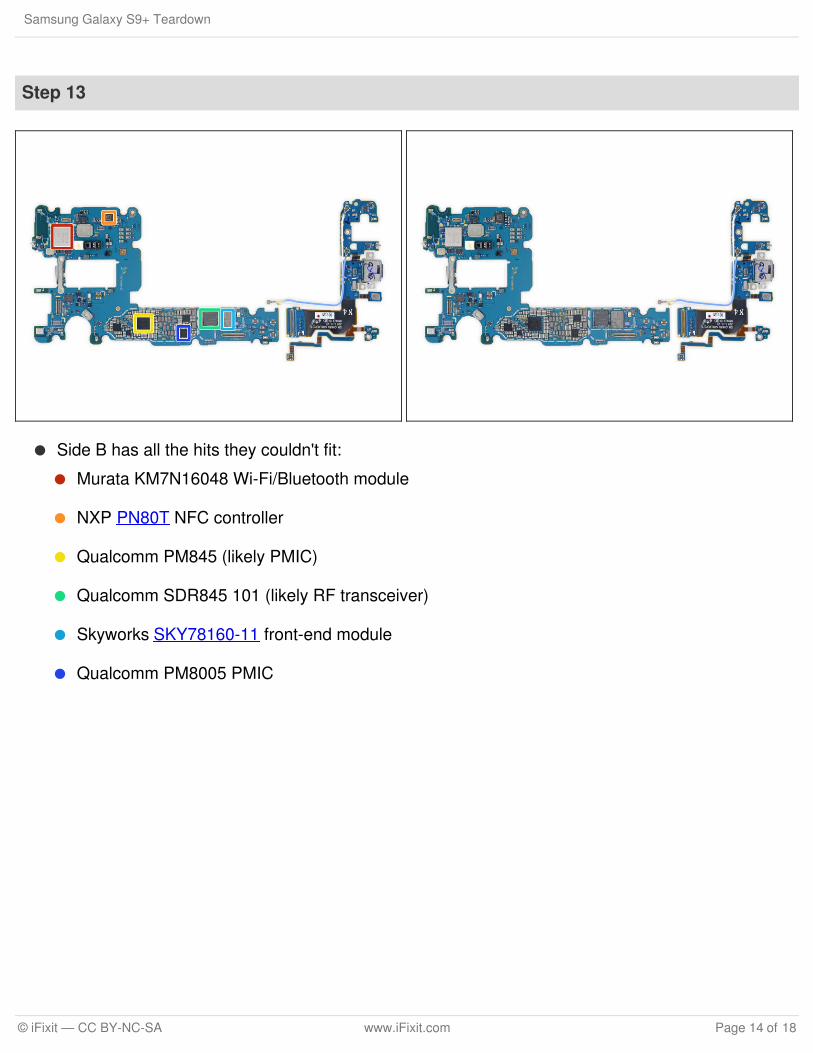
Side B has all the hits they couldn't fit:
Murata KM7N16048 Wi-Fi/Bluetooth module
NXP PN80T NFC controller
Qualcomm PM845 (likely PMIC)
Qualcomm SDR845 101 (likely RF transceiver)
Skyworks SKY78160-11 front-end module
Qualcomm PM8005 PMIC
Samsung Galaxy S9+ Teardown
© iFixit — CC BY-NC-SA www.iFixit.com Page 14 of 18
Step 14
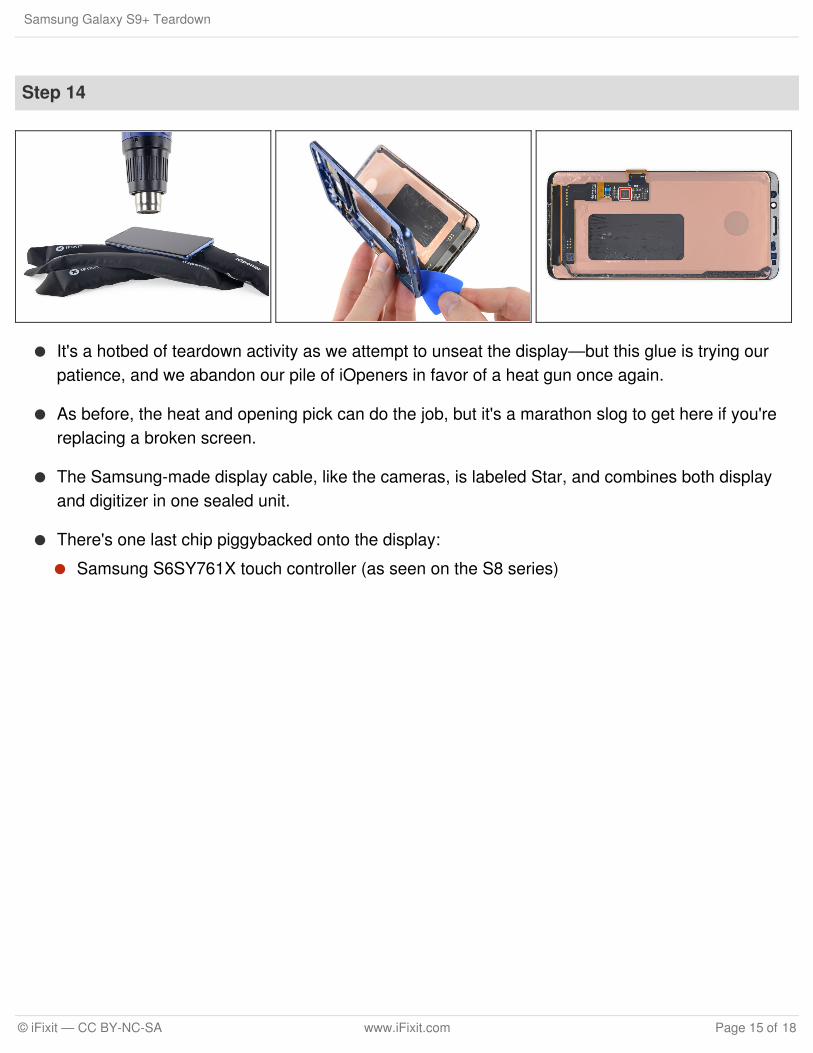
It's a hotbed of teardown activity as we attempt to unseat the display—but this glue is trying ourpatience, and we abandon our pile of iOpeners in favor of a heat gun once again.
As before, the heat and opening pick can do the job, but it's a marathon slog to get here if you'rereplacing a broken screen.
The Samsung-made display cable, like the cameras, is labeled Star, and combines both displayand digitizer in one sealed unit.
There's one last chip piggybacked onto the display:
Samsung S6SY761X touch controller (as seen on the S8 series)
Samsung Galaxy S9+ Teardown
© iFixit — CC BY-NC-SA www.iFixit.com Page 15 of 18
Step 15
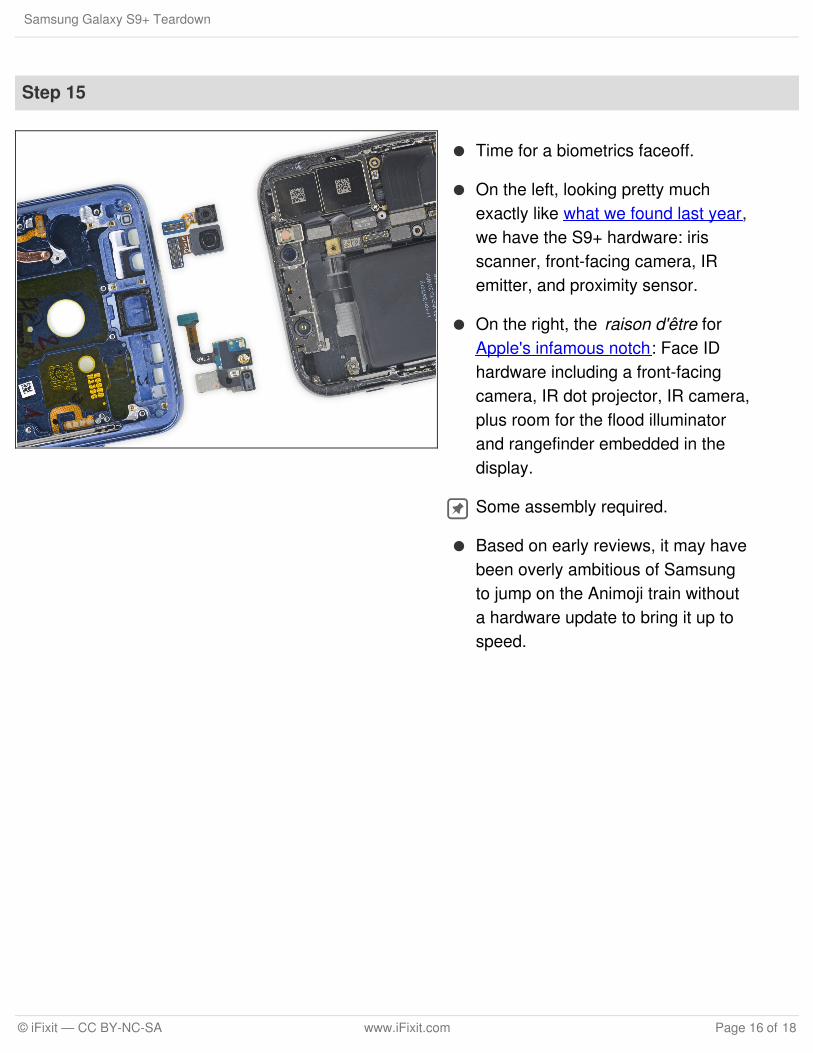
Time for a biometrics faceoff.
On the left, looking pretty muchexactly like what we found last year,we have the S9+ hardware: irisscanner, front-facing camera, IRemitter, and proximity sensor.
On the right, the raison d'être forApple's infamous notch: Face IDhardware including a front-facingcamera, IR dot projector, IR camera,plus room for the flood illuminatorand rangefinder embedded in thedisplay.
Some assembly required.
Based on early reviews, it may havebeen overly ambitious of Samsungto jump on the Animoji train withouta hardware update to bring it up tospeed.
Samsung Galaxy S9+ Teardown
© iFixit — CC BY-NC-SA www.iFixit.com Page 16 of 18
Step 16
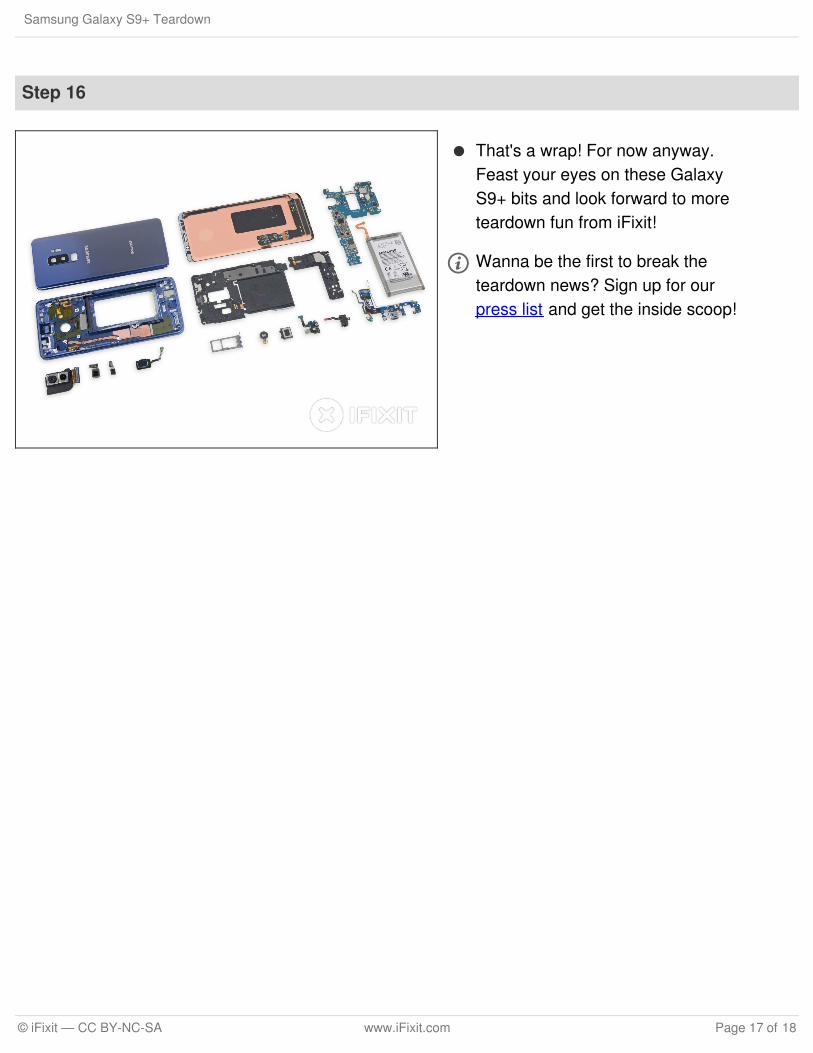
That's a wrap! For now anyway.Feast your eyes on these GalaxyS9+ bits and look forward to moreteardown fun from iFixit!
Wanna be the first to break theteardown news? Sign up for ourpress list and get the inside scoop!
Samsung Galaxy S9+ Teardown
© iFixit — CC BY-NC-SA www.iFixit.com Page 17 of 18
This document was last generated on 2018-03-16 08:03:49 PM.
Step 17 — Final Thoughts
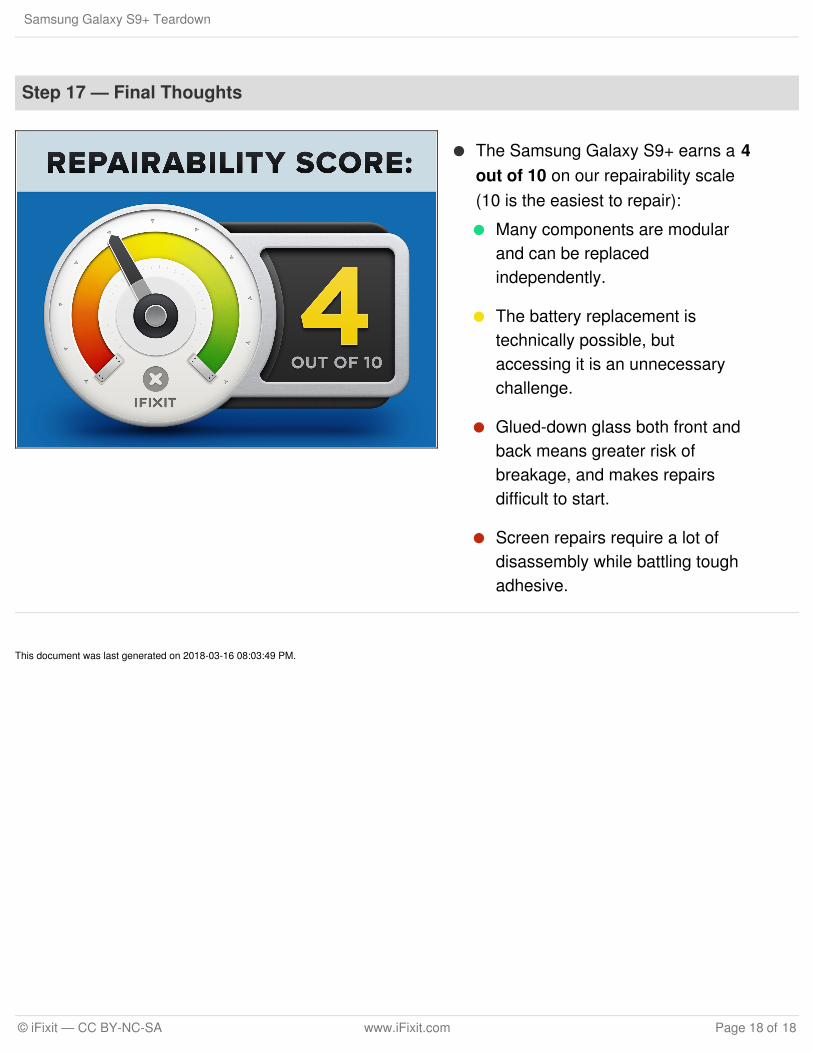
The Samsung Galaxy S9+ earns a 4out of 10 on our repairability scale(10 is the easiest to repair):
Many components are modularand can be replacedindependently.
The battery replacement istechnically possible, butaccessing it is an unnecessarychallenge.
Glued-down glass both front andback means greater risk ofbreakage, and makes repairsdifficult to start.
Screen repairs require a lot ofdisassembly while battling toughadhesive.
Samsung Galaxy S9+ Teardown
© iFixit — CC BY-NC-SA www.iFixit.com Page 18 of 18