Embed Size (px)
Citation preview
8/14/2019 Sanjeev Shakya
http://slidepdf.com/reader/full/sanjeev-shakya 1/12
window basis1. Write down steps for creating desktop wallpapers.2.w.d.s. for creating a creen saver as "welcome to M.Com 1st year"3.w.d.s for creating folder "m.com" in the "c" drive.MS word basis
4.wds for mail merge for creating enevelop labels6.wds down steps for writing an application to the principal asking for 5 daysleave in MS WORD with proper page allignment, page setup &borders/shadings7.(a)wds for inserting a clipart &(b)graphs in MS WORD8.wds for installings printers lasejet 1020(HP)INTERNET
9.wds for creating E-MAIL & sending E-MAIL.10.wds for attaching a file in an E-MAIL.11.wds for searching accounting packages in google.EXCEL
12.wds for creating graph/chart in MS-EXCEL14.wds for the following:-(a)creat a table1 in MS-EXCEL with proper border & shading.(b)insert 2 more columns(c)insert 3 more rows(d)now delete the first row which gives the name of cosmetics.15.calculate sum of profit given in Table1 using formula function(fx) wizard.POWERPOINT16.creat a slide show having different slides. Also wds the steps for creating it &arranging slide transation, animation &its colour. schems on the topic role of computer in aooounting

8/14/2019 Sanjeev Shakya
http://slidepdf.com/reader/full/sanjeev-shakya 2/12
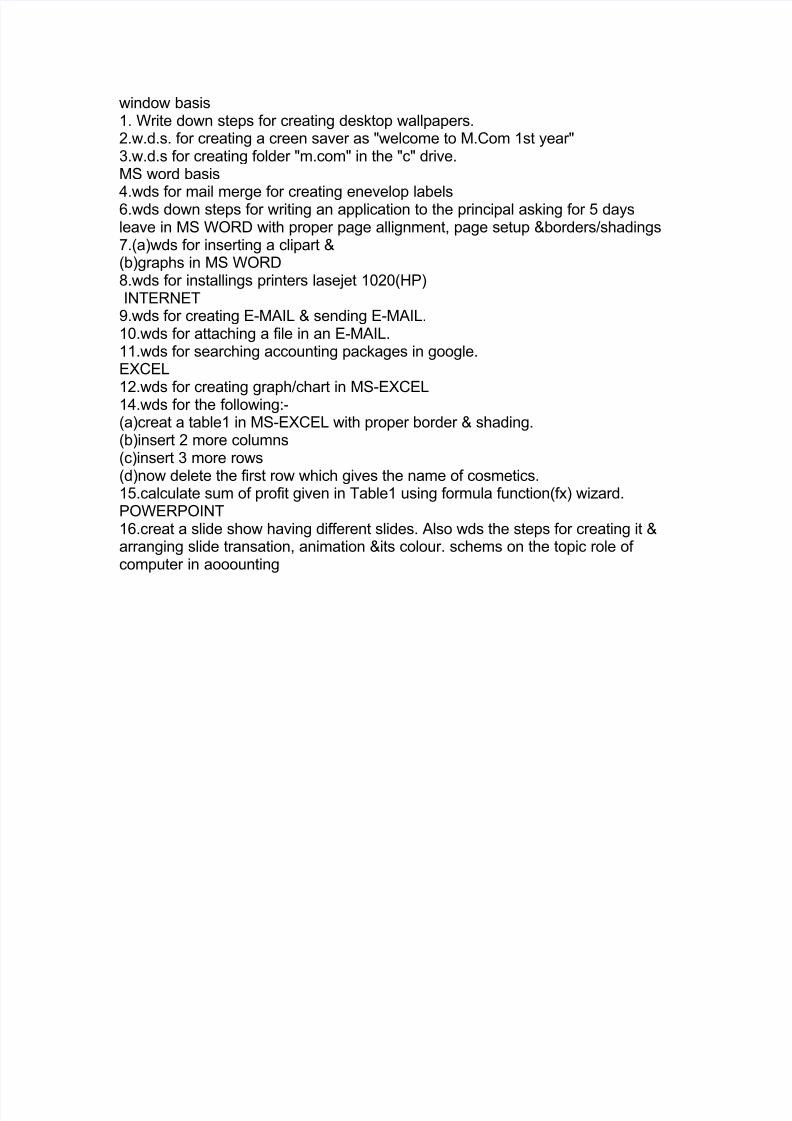
Q- Write down steps for creating desktop wallpapers.
Ans. Step 1.Go to Start – Accessories – Click on Paint
Step2. Drew wallpaper on MS Paint.And go to File Menu –click on “Save As”, Select root where you want to save thefile(C:\Documents and Settings\Administrator\My Documents\My Pictures) withthe file name “M Com” then OK .
8/14/2019 Sanjeev Shakya
http://slidepdf.com/reader/full/sanjeev-shakya 3/12
.
Step3. Go on desktop and right click on Desktop- click on Properties.Click on Desktop tab , then Bourse From where you have save (C:\Documentsand Settings\Administrator\My Documents\My Pictures). Then click on open.Select M Com File in background field. After that click on Apply and OK.
8/14/2019 Sanjeev Shakya
http://slidepdf.com/reader/full/sanjeev-shakya 4/12
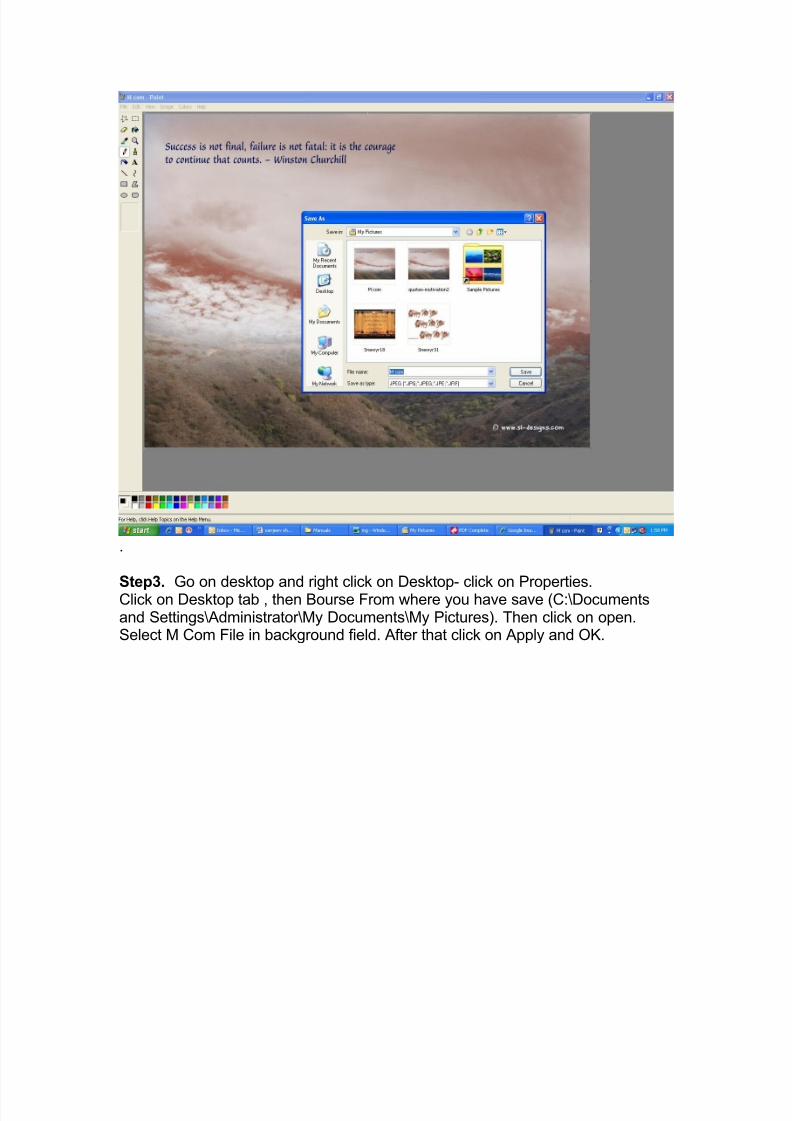
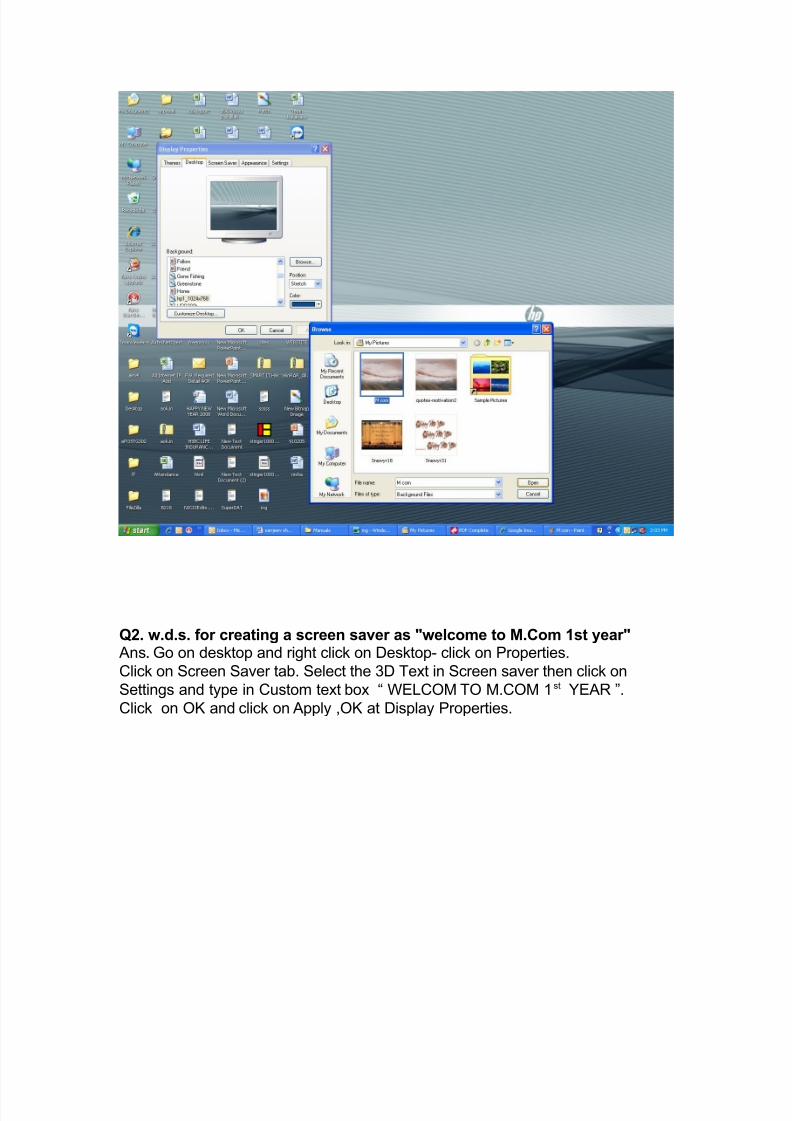
Q2. w.d.s. for creating a screen saver as "welcome to M.Com 1st year"Ans. Go on desktop and right click on Desktop- click on Properties.
Click on Screen Saver tab. Select the 3D Text in Screen saver then click on
Settings and type in Custom text box “ WELCOM TO M.COM 1st YEAR ”.
Click on OK and click on Apply ,OK at Display Properties.
8/14/2019 Sanjeev Shakya
http://slidepdf.com/reader/full/sanjeev-shakya 5/12
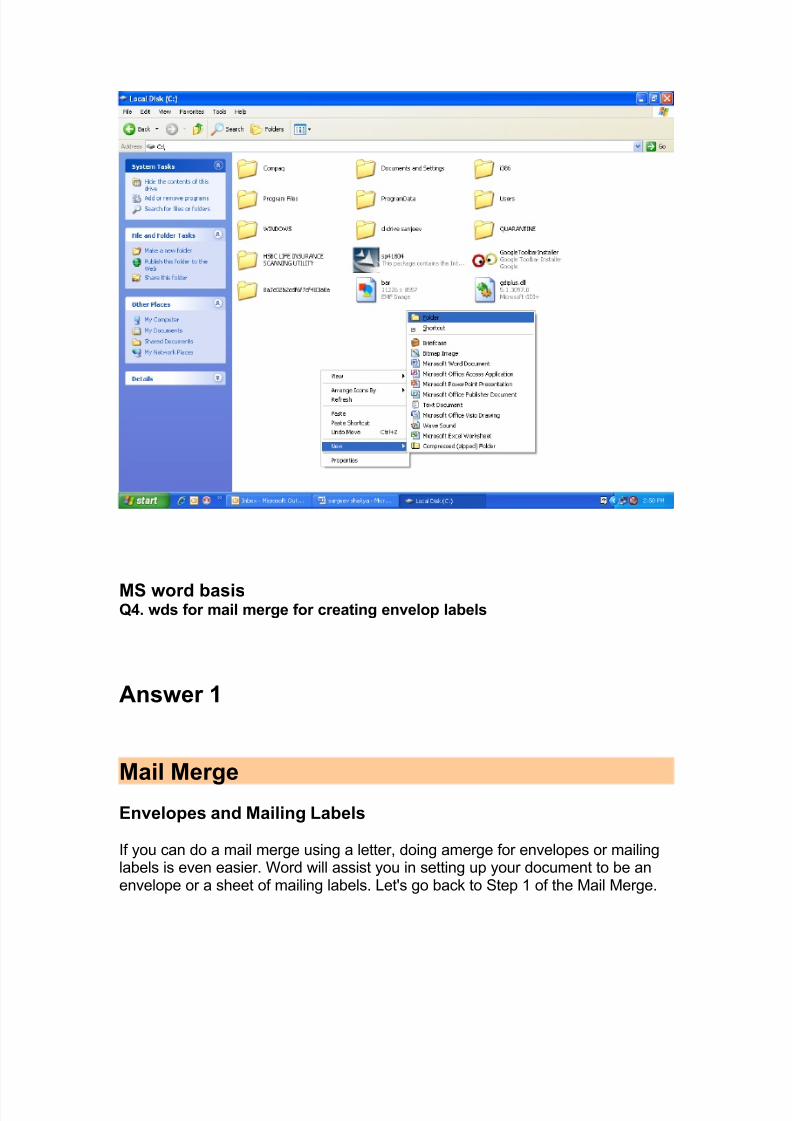
3. W.d.s for creating folder "m.com" in the "c" drive.Ans. Open “My Computer” and open “C drive”. Right Click on Screen go on Newthen click on “Folder” Give the name M.Com.
8/14/2019 Sanjeev Shakya
http://slidepdf.com/reader/full/sanjeev-shakya 6/12
MS word basisQ4. wds for mail merge for creating envelop labels
Answer 1
Mail Merge
Envelopes and Mailing Labels
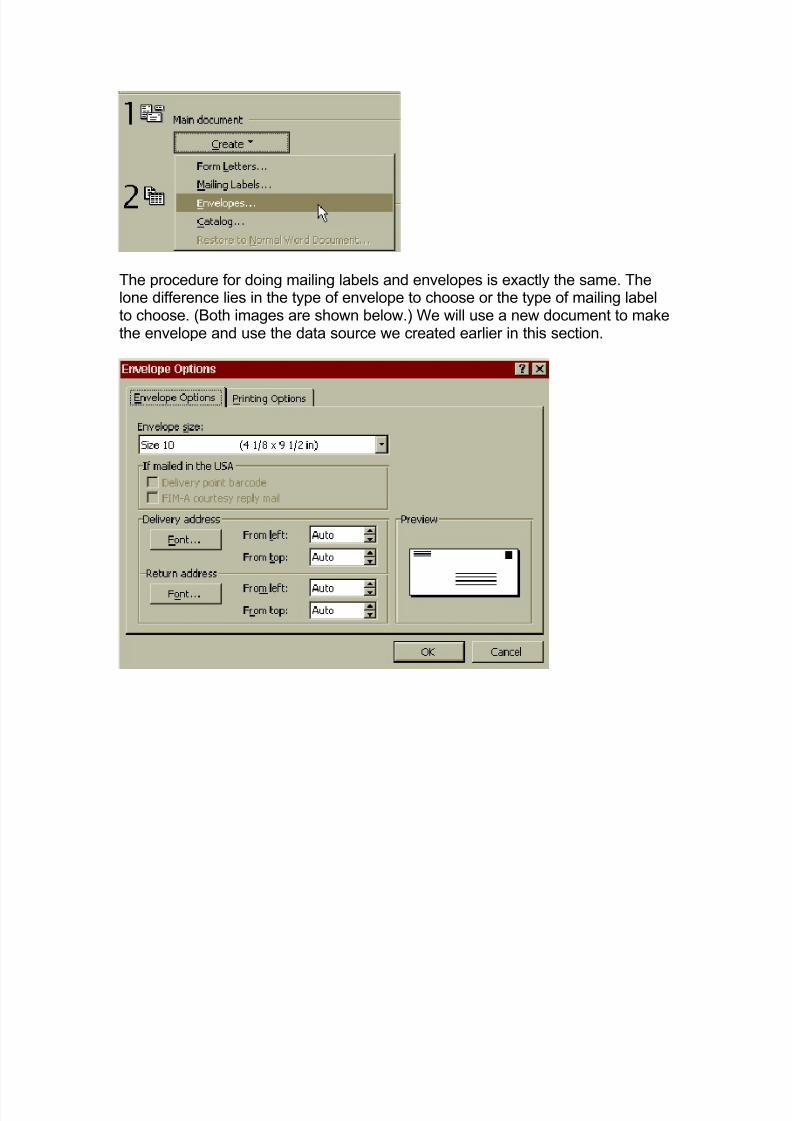
If you can do a mail merge using a letter, doing amerge for envelopes or mailinglabels is even easier. Word will assist you in setting up your document to be anenvelope or a sheet of mailing labels. Let's go back to Step 1 of the Mail Merge.
8/14/2019 Sanjeev Shakya
http://slidepdf.com/reader/full/sanjeev-shakya 7/12
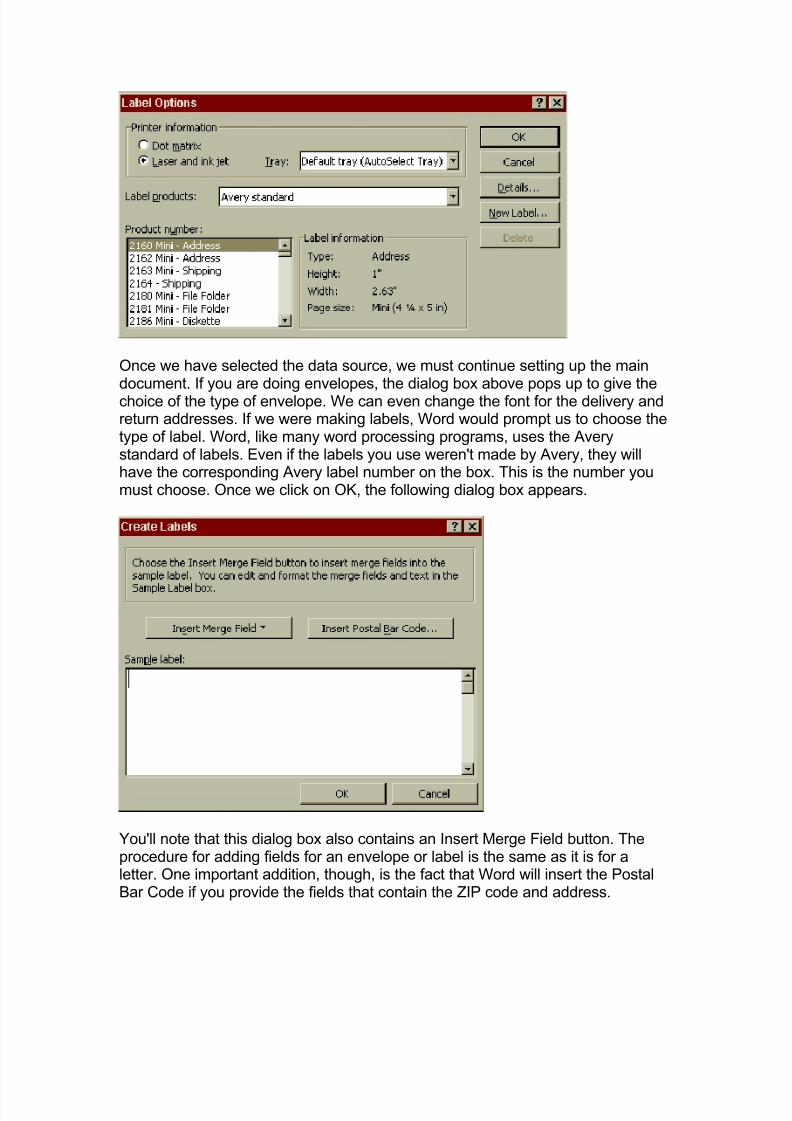
The procedure for doing mailing labels and envelopes is exactly the same. Thelone difference lies in the type of envelope to choose or the type of mailing labelto choose. (Both images are shown below.) We will use a new document to makethe envelope and use the data source we created earlier in this section.
8/14/2019 Sanjeev Shakya
http://slidepdf.com/reader/full/sanjeev-shakya 8/12
8/14/2019 Sanjeev Shakya
http://slidepdf.com/reader/full/sanjeev-shakya 9/12
To use a Mail Merge document in Microsoft Word, first create the document where data willoriginate from: this is called the source document. The source document resembles a smalldatabase of resources combining fields and their related data such as customers name and other
personal information.We are going to create a mail merge used by a car dealer who keeps track of his valuablecustomers and send them a regular newsletter whenever he has a beneficial promotion.
Create A Table Of Resources1. Start Microsoft Word
2. From the main menu, click Tools -> Mail Merge…
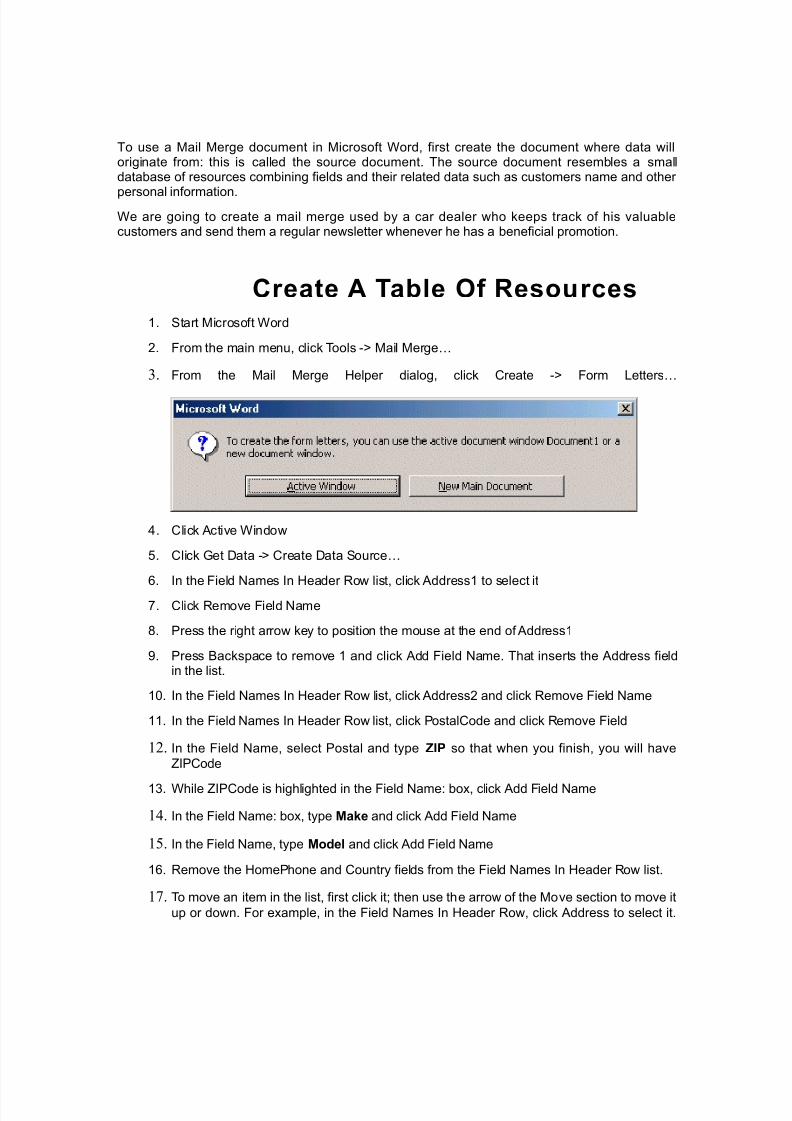
3. From the Mail Merge Helper dialog, click Create -> Form Letters…
4. Click Active Window
5. Click Get Data -> Create Data Source…
6. In the Field Names In Header Row list, click Address1 to select it
7. Click Remove Field Name
8. Press the right arrow key to position the mouse at the end of Address1
9. Press Backspace to remove 1 and click Add Field Name. That inserts the Address fieldin the list.
10. In the Field Names In Header Row list, click Address2 and click Remove Field Name
11. In the Field Names In Header Row list, click PostalCode and click Remove Field
12. In the Field Name, select Postal and type ZIP so that when you finish, you will have
ZIPCode
13. While ZIPCode is highlighted in the Field Name: box, click Add Field Name
14. In the Field Name: box, type Make and click Add Field Name
15. In the Field Name, type Model and click Add Field Name
16. Remove the HomePhone and Country fields from the Field Names In Header Row list.
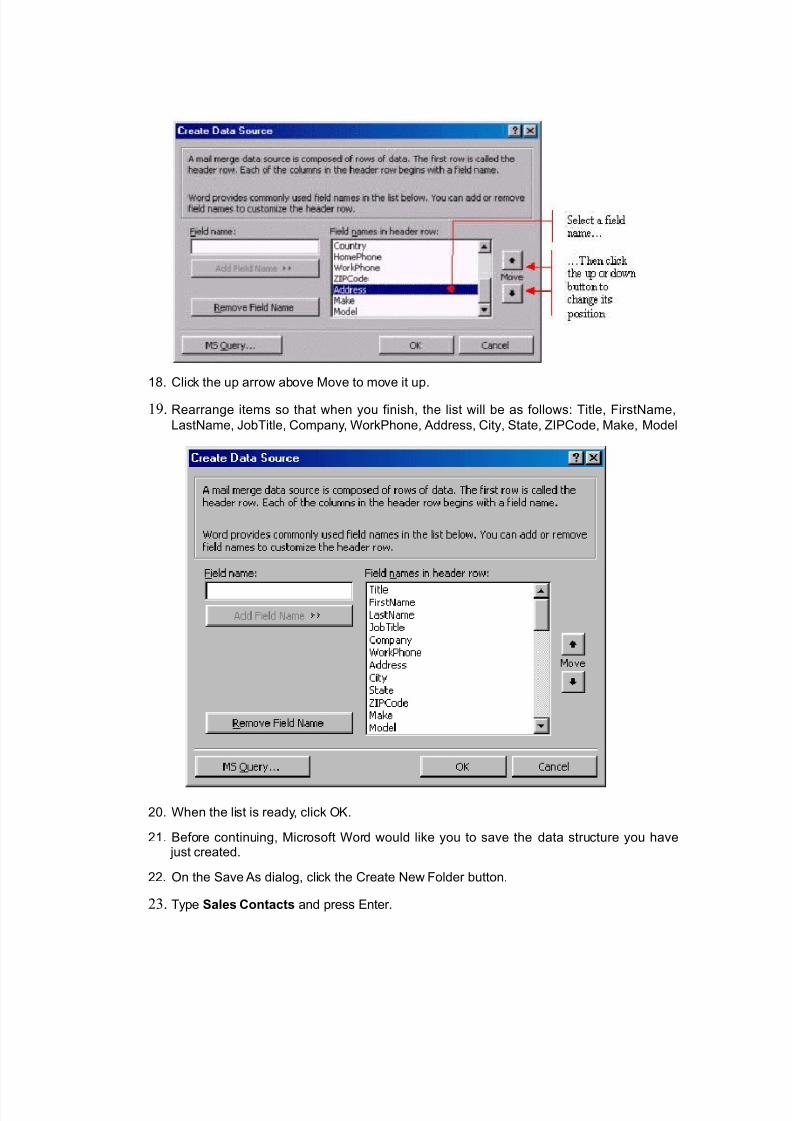
17. To move an item in the list, first click it; then use the arrow of the Move section to move it
up or down. For example, in the Field Names In Header Row, click Address to select it.
8/14/2019 Sanjeev Shakya
http://slidepdf.com/reader/full/sanjeev-shakya 10/12
18. Click the up arrow above Move to move it up.
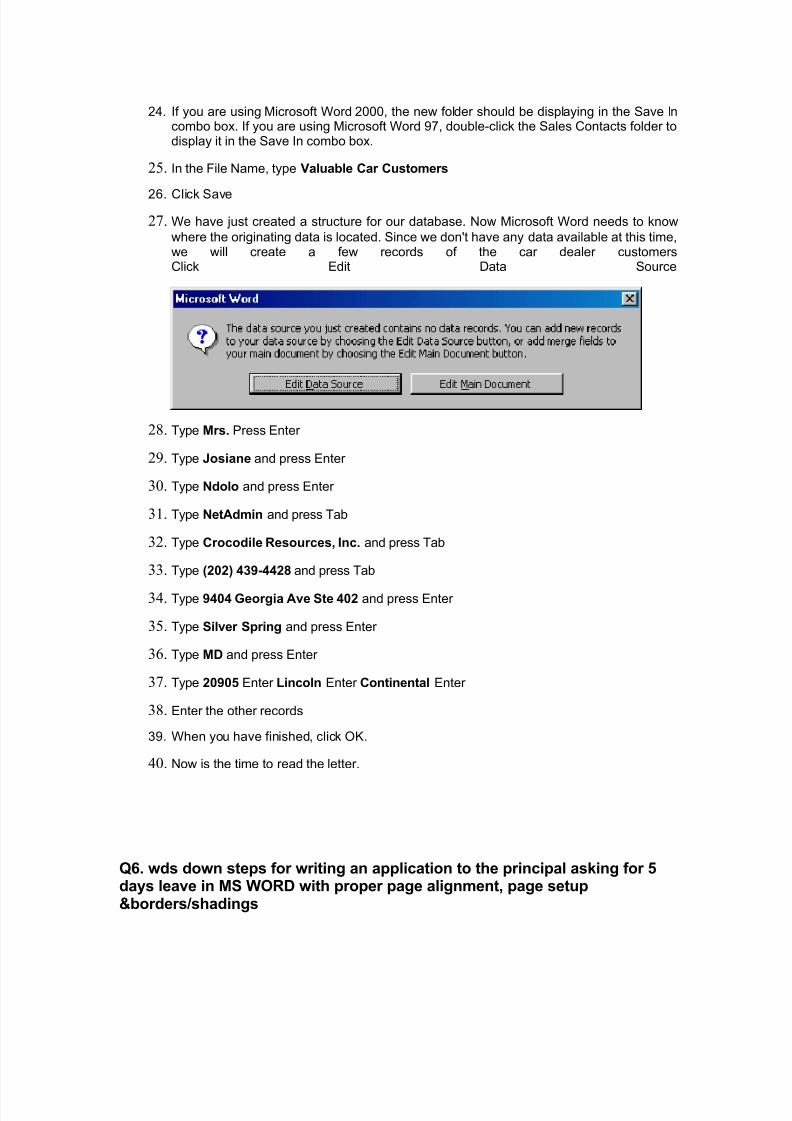
19. Rearrange items so that when you finish, the list will be as follows: Title, FirstName,
LastName, JobTitle, Company, WorkPhone, Address, City, State, ZIPCode, Make, Model
20. When the list is ready, click OK.
21. Before continuing, Microsoft Word would like you to save the data structure you have just created.
22. On the Save As dialog, click the Create New Folder button.
23. Type Sales Contacts and press Enter.
8/14/2019 Sanjeev Shakya
http://slidepdf.com/reader/full/sanjeev-shakya 11/12
24. If you are using Microsoft Word 2000, the new folder should be displaying in the Save Incombo box. If you are using Microsoft Word 97, double-click the Sales Contacts folder todisplay it in the Save In combo box.
25. In the File Name, type Valuable Car Customers
26. Click Save
27. We have just created a structure for our database. Now Microsoft Word needs to know
where the originating data is located. Since we don't have any data available at this time,we will create a few records of the car dealer customersClick Edit Data Source
28. Type Mrs. Press Enter
29. Type Josiane and press Enter
30. Type Ndolo and press Enter
31. Type NetAdmin and press Tab
32. Type Crocodile Resources, Inc. and press Tab
33. Type (202) 439-4428 and press Tab
34. Type 9404 Georgia Ave Ste 402 and press Enter
35. Type Silver Spring and press Enter
36. Type MD and press Enter
37. Type 20905 Enter Lincoln Enter Continental Enter
38. Enter the other records
39. When you have finished, click OK.
40. Now is the time to read the letter.
Q6. wds down steps for writing an application to the principal asking for 5days leave in MS WORD with proper page alignment, page setup&borders/shadings

8/14/2019 Sanjeev Shakya
http://slidepdf.com/reader/full/sanjeev-shakya 12/12
8.wds for installings printers lasejet 1020 HP on windows XP


![The Finall Water Shakya&Alex[1]](https://img.pdfslide.net/doc/110x75/5455150aaf795974408b514b/the-finall-water-shakyaalex1.jpg)