Embed Size (px)
Citation preview

Solaris System Recovery Guide
Version 8.2

Storix System Backup Administrator 2 Version 8.2 Solaris System Recovery Guide
Trademarks and Copyrights
© Copyright Storix, Inc. 1999-2018 USA
Storix is a registered trademark of Storix, Inc. in the USA SBAdmin is a trademark of Storix, Inc in the USA and other countries Intel, Pentium, IA32, Itanium, Celeron and IA64 are registered trademarks of Intel Corporation. AMD, Opteron, and Athlon are registered trademarks of Advanced Micro Devices. Sun Microsystems and the Solaris™ operating system is a trademark of Sun Microsystems, Inc. SPARC is a trademark of SPARC International, Inc. All other company/product names and service marks may be trademarks or registered trademarks of their respective companies.
Publicly Available Software This product either includes or is developed using source code that is publicly available:
AESCrypt* Rijndael and Cipher Block Feedback mode (CFB-128) encryption/decryption algorithms
Copyright 1999, 2000 Enhanced Software Technologies Inc. http://aescrypt.sourceforge.net/
Tcl Open source scripting language Copyright Regents of the University of California, Sun Microsystems, Inc. http://tcl.sourceforge.net
Tk Tk graphics toolkit Copyright Regents of the University of California, Sun Microsystems, Inc. http://tcl.sourceforge.net
DropBear A Smallish SSH 2 Server and Client Copyright 2002, 2003 Matt Johnston http://www.matt.ucc.asn.au/dropbear/dropbear.html
lighttpd Secure, fast, compliant and flexible web-server Copyright 2004 Jan Kneschkle, incremental http://www.lighttpd.net
OpenSSL Toolkit implementing Secure Socket Layer Copyright 1998-2008 The OpenSSL Project Copyright 1995-1998 Eric A. Young, Tim J. Hudson http://www.openssl.org
bpgetfile RPC boot params client
*Encryption Software
SBAdmin System Backup Administrator Backup Data Encryption Feature has a cryptographic component, using Advanced Encryption Standard (AES) "Rijndael" encryption algorithm in Cipher Block Feedback (stream) mode (CFB-128), supporting 128, 192 and 256-bit keys.
It is not for export or redistribution to any of what are called the "T-10 Terrorist States" as determined by the U.S. Department of State. SBAdmin System Backup Administrator Backup Data Encryption Feature has been registered with U.S. Bureau of Information and Security and is distributed under Export Control Classification Number (ECCN) 5D992. This encryption item is authorized for export and re-export under section 742.15 (B)(2) of the Export Administration Regulations (EAR).

Storix System Backup Administrator 3 Version 8.2 Solaris System Recovery Guide
Table of Contents
1. Introduction......................................................................................................... 5 When to Use this Guide .............................................................................................................................. 5 Terminology ................................................................................................................................................ 5
2. Creating Boot Media for System Installation..................................................... 7 When to Create Boot Media ........................................................................................................................ 7 When You Should Create New Boot Media ................................................................................................. 7 Creating System Installation Boot Media ..................................................................................................... 7
CDROM Image Name ............................................................................................................................ 8 Hard Disk ............................................................................................................................................... 9 Network ............................................................................................................................................... 10
No-prompt Installation ............................................................................................................................... 10 Enabling Remote Installation Manager ...................................................................................................... 12
Configuring RIM when Creating Boot Media ......................................................................................... 12 Configuring RIM after Booting from the Boot Media.............................................................................. 13 Connecting to the Remote Install Process ............................................................................................ 13
3. Network Boot/Install Configuration ................................................................. 14 Understanding Network Boot and Network Installation .............................................................................. 14 Enable/Disable Client for Network Boot/Install........................................................................................... 14 Disable a Network Install Client................................................................................................................. 16 Using an Alternate Network to Restore the Data ....................................................................................... 17 Using a Different Install Server than the Boot Server................................................................................. 17 Using the Same Boot Server to Install Different Client Operating Systems ................................................ 18 Updating Network Boot Images ................................................................................................................. 19
4. Booting to the System Installation Process .................................................... 20 Booting the Various System Types............................................................................................................ 20 Booting to the System Installation Process................................................................................................ 20
CDROM ............................................................................................................................................... 20 Hard Disk ............................................................................................................................................. 20 Network Boot ....................................................................................................................................... 21
Completing the Boot Process .................................................................................................................... 21
5. Reinstall from a System Backup ...................................................................... 23 Cloning Systems ....................................................................................................................................... 23 No-Prompt Installation............................................................................................................................... 23 Installing from an Encrypted Backup ......................................................................................................... 24
Enter a HEX Key .................................................................................................................................. 24 Enter an ASCII (text) Key ..................................................................................................................... 24
System Installation Process ...................................................................................................................... 25 After booting from a network boot server.............................................................................................. 25 Verifying the hardware configuration .................................................................................................... 25
The System Installation and Maintenance Menu ....................................................................................... 25 Using Keys and Getting Help ............................................................................................................... 26
Select Installation Device/Backup ............................................................................................................. 27 Select Local Tape Device Drives(s)...................................................................................................... 27 Select Local Disk Backup..................................................................................................................... 29 Install From Local NFS Mount .............................................................................................................. 30 NFS Considerations ............................................................................................................................. 31 Set or Change Network Configuration .................................................................................................. 31 Select Remote Tape Device ................................................................................................................. 32 Select Remote Disk Backup ................................................................................................................. 32
TSM Configuration .................................................................................................................................... 33

Storix System Backup Administrator 4 Version 8.2 Solaris System Recovery Guide
TSM Client Configuration ..................................................................................................................... 35 TSM Server Configuration .................................................................................................................... 35 TSM Administrator Configuration.......................................................................................................... 35
Change the Installation Settings................................................................................................................ 35 Install the System with Current Settings .................................................................................................... 35
6. View/Change Installation Settings ................................................................... 37 Select Disks to Use for Installation ............................................................................................................ 37
VIEW/CHANGE FDISK Partition Table ................................................................................................. 38 VIEW/CHANGE Slice Table ................................................................................................................. 38 ASSIGN all contents of this disk to a Different Disk .............................................................................. 39 MIGRATE a slice on this disk to a different disk ................................................................................... 39 DO NOT RESTORE this backup data................................................................................................... 39
Change FDISK Partition Tables................................................................................................................. 39 Change Slice Tables ................................................................................................................................. 40 Solaris Volume Manager ........................................................................................................................... 41
Replication (State) Databases.............................................................................................................. 42 RAID Devices....................................................................................................................................... 43 Understanding RAID 0+1 ..................................................................................................................... 47
ZFS Filesystem/Volume Manager.............................................................................................................. 48 ZFS Pools ............................................................................................................................................ 49 Virtual Devices ..................................................................................................................................... 50 ZFS Filesystems .................................................................................................................................. 50 ZFS Volumes ....................................................................................................................................... 52
Change Solaris Filesystems ...................................................................................................................... 53 Filesystem Size versus Device Size ..................................................................................................... 54
Change Swap Devices .............................................................................................................................. 54
7. Install the System ............................................................................................. 56 Verification Process .................................................................................................................................. 56 Starting the Installation ............................................................................................................................. 57 Installation Errors ...................................................................................................................................... 57 System Boot Problems.............................................................................................................................. 57 Network Re-configuration (avoiding conflicts)............................................................................................ 58
8. System Recovery Utilities ................................................................................ 59 Configure Remote Install Manager ............................................................................................................ 59 View or Change Backup Group ID............................................................................................................. 60 Start a Maintenance Shell ......................................................................................................................... 61
Index ...................................................................................................................... 62

Storix System Backup Administrator 5 Version 8.2 Solaris System Recovery Guide
1. Introduction The SBAdmin for Solaris System Recovery Guide is a supplement to the SBAdmin User Guide, providing details on reinstalling a Solaris system from a SBAdmin System Backup. Note that a System Backup is not limited to reinstalling the same system from which it was made, but it may also be used to “clone” the original system onto different systems containing the same or different hardware.
When to Use this Guide This guide provides instructions for booting and reinstalling a system from a SBAdmin System Backup. This document should be reviewed after first installing the software to become familiar with this process and its requirements BEFORE a system recovery is required.
Installation from a System Backup is fairly intuitive, but there is information and steps that must be taken to be prepared in the event that a system re-installation is required. The System Backup contains all of the backup data and the information needed to recreate the system and restore the data, but to access the System Installation Process, boot media must be created. This may be a bootable CDROM, local disk or network boot image.
This guide will refer to information found in the SBAdmin User Guide. When doing so, the reference term or section will be shown in Blue Text. If you need to refer to that information in the Administrator User Guide, highlighted sections (in bold) can be found in the Table of Contents, and other terms can be found in the Index.
Terminology The system recovery process is straight-forward and provides much instruction and help screens to guide you through the process. Even when creating and changing devices, filesystems, partition maps, logical volumes, etc, the information provided should make the process fairly intuitive. There are a few terms you should understand before beginning the process:
• Boot Loader: This is a program that exists on the boot disk or CDROM that is used to find and execute the Solaris kernel. It usually will install an initial filesystem in memory, and execute programs within to load device modules needed to access the root (/) filesystem. The boot loader depends on the firmware of the system, since the firmware must know how to load and execute the boot loader.
• Firmware: The firmware of a machine is a mini-operating system that is used to detect available boot devices (disks, CDs or network adapters) and load and execute the “real” operating system. The following table shows the system firmware supported by SBAdmin:
Firmware Supported Systems Boot Media Types Boot loaders
BIOS Intel-based (32-bit, AMD64 and EM64T)
Disk, CDROM, network Solaris 9: /boot(pcfs) Solaris 10: GRUB Solaris 11: GRUB
OpenBoot Sun SPARC servers Disk, CDROM, network pboot/mboot
The firmware typically reads a boot loader from the boot media, which must be written in a manner that the firmware understands how to find. The boot loader is an additional program that is designed to read and execute the Solaris kernel, providing it information needed to configure additional devices, etc.

Storix System Backup Administrator 6 Version 8.2 Solaris System Recovery Guide
• SVM: The Solaris Volume Manager provides the ability to create devices from disk slices that provide optional data striping (RAID 0), mirroring (RAID 1), parity disks (RAID 5) and Software Partitions (SoftParts) for enhanced performance, flexibility and availability. SVM is supported on most Solaris versions today. If it is available on your system it will be automatically included on the SBAdmin boot media even if you are not using it. This allows you to implement SVM during the install process if you are not already doing so, creation of new meta-devices or migration of existing filesystems to SVM. Devices created by SVM are also referred to as “meta-devices” as referred to throughout this document. Other references to these devices may include MDs, multi-disks or meta-devices. Meta disk names are in the format “dN”, where N is a number starting with 0 and incremented for each meta-device.
• ZFS: Solaris 10, release 6/06 and later include ZFS, an easy-to-use, powerful and flexible way of partitioning your disks into dynamically expandable filesystems and extensible raw volumes. ZFS Pools are created from disk slices, and then ZFS Filesystems and ZFS Volumes are created within the pool. If available on the system, ZFS support will be included on the SBAdmin boot media even if it is not currently in use, allowing the creation of new ZFS pools, filesystems and volumes or the migration of existing filesystems to ZFS.
• Filesystems: When not using ZFS, most filesystems in Solaris are created within a disk slice and have a type of UFS (Universal Filesystem). Other supported filesystems include UDFS and PCFS. PCFS filesystems typically reside in a disk partition and typically contain DOS data. PCFS is also used on many for the /boot filesystem, used to configure the system to boot from a hard disk.

Storix System Backup Administrator 7 Version 8.2 Solaris System Recovery Guide
2. Creating Boot Media for System Installation
The SBAdmin Backup Administrator User Interface provides a very simple procedure for creating boot media, which is described in this section. This interface may be used to create boot CDROM images, network boot images, or can configure a local hard disk to boot to the system recovery process. This interface may create any of the boot media types. Also refer to the stmakeboot command in the Commands Reference Guide, which may be run on any client to make bootable media directly from that system.
When to Create Boot Media It is generally a good idea to create bootable media for each individual system that is backed up using SBAdmin. While not always a requirement, this ensures the boot media is fully compatible with the backup to be restored. Multiple systems that have identical operating system release levels and program support may share the same boot media.
If you attempt to boot from media created using one Solaris release (i.e. Solaris 10 release 4), then attempt to install the system from a backup that was running under release 6, you may run into problems during or after the installation completes. This is because the devices and filesystems created during the system recovery will be later accessed by a different Solaris kernel version that may not be compatible or provide the proper support. For this reason, the SBAdmin Installation process provides strong warnings if you boot from a different release level kernel than was running at the time the backup was created. The installation process also verifies that your boot media contains the device and filesystem support that is required to install the system, based on those devices or filesystems that were in use at the time of the backup. If the support is not provided by the bootable media, you will be required to remove or change those devices or filesystems that are not supported.
If you have multiple systems, all running the same release level (but not necessary the exact same device support), it is generally safe to use the same boot media to boot and install different systems. Because the boot media is probably the most important boot media you will ever need, it is probably a good idea to keep at least one spare or create boot media of different types.
When You Should Create New Boot Media 1. Any time your operating system updates. Even if the Solaris version or release level does not change,
support for devices, filesystems and other programs required to rebuild may have been added, changed or removed, possibly creating an incompatibility between the system created during the SBAdmin system installation process and the running Solaris system after the installation is completed.
2. Any time you install a new release level of SBAdmin System Backup Administrator. A release level would be the second level of the version number (i.e. “3” in 6.3.0.0). Although we try to maintain compatibility between current and past versions, there may be times when a new feature supported by the backup software also adds new support to the system recovery process. Since the system recovery programs are written to your boot media, you will need to remake the boot media to make sure you are using the latest installation programs.
Creating System Installation Boot Media To create the boot media, select Utilities->Create System Installation Media->(CDROM, Network, Hard Disk or Tape Boot Images) from the menu bar in the administrator main menu. If using a Network Administrator, you will be prompted to select the client on which the boot media will be created. Note that the boot media is

created on the selected client but may be used to boot other clients of similar system type and operating system release levels.
When selecting A Solaris client, a screen similar to the following will appear:
Remember to use the QuickHelp (right mouse button) on any button or entry field for details on the use and options for each.
Creation of each media type is described separately:
CDROM Image Name This process will make a CDROM ISO image, but will not actually burn the image to the CDROM. This image may be copied to any system where your CD/RW device resides where you can use any software or program you choose to copy the image to the CDROM. When making a CDROM, network support (described below) is always included. If using the Network Administrator you can make the CDROM image for any client you have configured.
To create a bootable CDROM, select Utilities!Create/Manage Boot Media!CDROM Boot Images.
Using Workstation Edition, you will not be prompted for Client name and Boot Server Name.
Storix System Backup Administrator 8 Version 8.2 Solaris System Recovery Guide

Using Network Administrator a minimum of three fields are required Boot Server name, CDROM Boot Image Name, and Client Name.
The Boot Server name is the name of the server the boot media will be stored on. Use the drop down arrow to select a configured server. The boot media will be created using the selected client, but will be copied to “CDROM & Network Boot Images” directory as configured on the selected boot server.
The CDROM Boot Image Name is the name of the image as it will be stored on the filesystem. For clarity you may choose to name the image to reflect the hostname or operating system level of the client. Further detail about the image can be saved in the User Description field and can be viewed when managing boot media through the sbadmin interface.
The Client Name is selected with the drop down menu to the right of the field. This is the client used to create the boot media. The clients Operating System Level and Platform Type will automatically be populated into the appropriate fields. Boot media is not specific to this client, and can be used to boot similar systems running the same Solaris update level.
When this process is complete, you may copy this image to a system containing the CD writer device, if there is no CD burner on the Boot Server.
Hard Disk If you configured a disk for System Backups (see SBAdmin User Guide), then this disk (or disks) can also be made bootable to boot directly to the system recovery process. This allows you to perform your system backups to a local (or SAN-attached/portable) disk, then boot and reinstall the system from that same disk with no need for other backup media.
Using this option will not change how the system boots by default. After configuring a disk to boot to the SBAdmin System Install process, you must select to boot from that disk from within your system firmware boot menus.
To create a bootable disk, select Utilities!Create System Installation Boot Media!Hard Disk Boot Media.
Select the Client Name to configure using the drop down arrow to the right. Next, select the disk to configure in the Hard Disk Name field by using the arrow to the right of the entry field. When pressing the arrow, the system will be queried to find one or more disks that were configured using the option Configure a Disk(s) for local System Backups in the SBAdmin User Guide. If no disks are listed, then none were configured for system backup/recovery.
Storix System Backup Administrator 9 Version 8.2 Solaris System Recovery Guide

Network Use this option to create a network boot image to be used with various network boot loaders to boot a client system over the network from a network boot server.
To create a network boot image on any configured client or server and save the image on the boot server, select either:
Configure!Network Boot/Install!Create/Update a Network Boot Image or Utilities!Create System Installation Boot Media!Network Boot Media
Solaris clients may only be set to network boot from a Solaris boot server.
Select the Boot Server Name. This is the server on which the network boot image will stored after it is created. The network boot server may be the same system from which the network boot image is created.
Next, type the name of the boot image in the Network Boot Image Name field or select the name of an existing image to overwrite by pressing the arrow button to the right of the entry field. If you enter a unique name, a new image will be created using that name. Note that the network boot “image” actually consists of several files on disk, but will always be referred to within the application as a single image by a unique boot image name. The files are copied into the directory specified as the “Directory for Client CDROM & Network Boot Images directory when the server was configured. You may also use the select button to the right to choose an existing name. The named image will be overwritten.
Upon successful completion, the network boot image will be created and transferred, if necessary, to the boot server. It will now be possible to configure any client to boot from this image using the option “Enable/Disable Network Installation of a Client” below.
When all selections are complete, press the Create/Update button. A new window will appear with the output of the command to create the media and any error message if they should occur.
No-prompt Installation CDROM and Network boot media may be created with the default installation options set, also allowing the system to be installed as soon as a system is booted from this media. This allows an installation to take place simply by booting from a network boot image, for instance, with no operator intervention required.
Storix System Backup Administrator 10 Version 8.2 Solaris System Recovery Guide

To prevent a system from being inadvertently reinstalled by simply booting from the wrong device, this option is not available when booting from a hard disk. Be very careful, however, not to leave the CDROM in the drive and the system firmware set to boot from CDROM first, as a no-prompt installation could occur without any user intervention.
Be very careful when using this option, as the user will not have the option of intervening in the system recovery process if the boot media was created for no-prompt installation. The exception, however, is if the defaults are not valid (such as an installation device not being available), or if the backup data will not fit onto the new system’s hardware without some re-configuration.
When creating CDROM boot media, the following options are available when using the option to Create System Installation Media. For Network boot media, the options are available when selecting to Enable Network Installation of a Client. The reason is that, when creating network boot media, a single network boot image may be used for different client systems, and each client system can be configured with different defaults. Refer to each corresponding section for additional details.
If you select either “No-prompt” or “Menus (set defaults)” for the Installation Mode, additional information will appear within the window, such as in the following example:
The Install Server is available only if using a Network Administrator license. If the client will install from a locally-attached tape drive, leave this field set to “none”. If the system will be installed from a remote server, use the arrow button to the right of this field to select a server name.
When selecting a server name, and (when Enabling a Client for Network Boot/Install) the install server differs from the boot server, more information will appear on the screen below this field:
For the client to be installed from a remote server, you must select the name of the client to be installed (which must have been configured from the Network Administrator interface). Also, the network adapter name (of the client) will be required. Other fields are optional, but may be required for the client to contact the server.
Select the Alternate Server Network if the server was configured with an alternate server network. In this case, the client will retrieve the backup data from the server using this alternate network. Be sure to select the correct adapter name the client will use to contact the server via its alternate adapter.
Storix System Backup Administrator 11 Version 8.2 Solaris System Recovery Guide

Enabling Remote Installation Manager This feature will allow connection to the SBAdmin System Installation Process from any remote system. With proper authority, a remote user can connect to, diagnose and perform system installation of a system after that system has been booted from the SBAdmin boot media. This process may be started from the SBAdmin interface on a Network Administrator system, or from any SSH client application. Therefore, installation of even a Workstation Edition system may be managed remotely.
The remote user will be required to enter a password to access the system installation process. This password may have been defined when the boot media was created or may be defined in the system installation menus after booting from the media.
The Remote Install Manager (RIM) may be configured and started in one of two ways:
Configuring RIM when Creating Boot Media To start RIM automatically when booting a system from SBAdmin boot media:
Utilities!Create System Installation Media
Select either Menus (set defaults) or No prompt for the installation mode. The screen will expand to include the following options:
Select “Yes” for Enable Remote Install Manager
Select the Configure button to the right to configure the settings. You will be presented with the following window:
The Remote Install Username is set to “sbadmin” and may not be changed. Enter a password in the Remote Install Password field. The password will be necessary to login to the remote install client.
Storix System Backup Administrator 12 Version 8.2 Solaris System Recovery Guide

Select the Network Adapter that should be configured to connect to the remote install client. If performing a network boot, then you may select UseBootAdapter to use the adapter that was used to perform the network boot. If you configured the Client Network Adapter on the previous screen, you can select UseInstallAdapter to use the same adapter configured for network installation.
Enter the IP Address used to configure the network adapter. This field will be disabled if you selected to use either the boot or install adapter, which will already be enabled.
Enter the Subnet Mask (if necessary) used when configuring the network adapter. This field will be disabled if you select to use either the boot or install adapter.
After pressing Done, the settings will be saved in the boot configuration. The adapter will be enabled, and a remote connection (with appropriate password) will be accepted when booting from this media.
Configuring RIM after Booting from the Boot Media To enable RIM from within the system Installation menus after booting from the SBAdmin boot media.
From within the system installation menus select System Recovery Utilities. Then select Configure Remote Install Manager, and follow the instructions for Configuring Remote Install Manager in the Utilities section.
Connecting to the Remote Install Process To connect to the remote install client use one of the following:
a. SSH client program (i.e. “ssh [email protected]”): Note that you will always use the user id “sbadmin” and the password you selected in the previous step. If you do not have an ssh client program, you can use the one installed on the Network or Workstation Admin System. This program is called strimsh (i.e. “/opt/storix/bin/stremsh [email protected]”). or
Select Utilities!Start Remote Install Manager from the Network Administrator. A window will appear where you must enter the remote install password:
Select the Remote Install Client Name from the drop-down list. The primary IP address of the client will be shown in the Remote Install Client IP field. You may change this IP address if you are connecting using a different adapter.
When you press the Connect button, a new terminal window will display, and the System Installation Menus will appear. You can, from this window, perform all system installation and maintenance tasks for the remote client.
Storix System Backup Administrator 13 Version 8.2 Solaris System Recovery Guide

Storix System Backup Administrator 14 Version 8.2 Solaris System Recovery Guide
3. Network Boot/Install Configuration The information provided in this section will prepare a client system for network boot and installation from a backup server.
Understanding Network Boot and Network Installation Any client system defined to the admin system may be installed or reinstalled from a System Backup. That System Backup will typically reside on the disk or on a tape device attached to a backup server. In order for the client to restore from this backup data, it must first be booted over the network from a boot server, and then installed from an install server.
• The boot server is used solely to deliver the boot images to the target client. The boot images will provide a basic operating system with which the client will run the remainder of the installation process. The boot server must be a Solaris system to boot a Solaris network boot image.
• The install server is used only to provide access to the data to be restored. If the backup is on tape, the install server will be the system on which the tape drive is attached. Likewise, if the backup is a disk image file, the disk will be attached to the install server. It is not required that the install server is a Solaris system.
Although the boot server and install server are typically the same system, this is not a requirement. If, for instance, there are several systems on which tape drives are attached, the client may be installed from any tape on any system, even though the client is always booted from the same boot server.
The first step is to create a network boot image from the client or any other system running the same level of Solaris that you will be installing. The system from which the network boot image is created must also have installed the device support necessary for the target hardware. To create a network boot image on any system and copy the boot image to the boot server, refer to “Create System installation Boot Media - Network”.
Enable/Disable Client for Network Boot/Install This section provides details on configuring a client to be booted and installed from a network boot server and/or network install server. Although the basic settings are simple, there are optional settings which may be used for more flexibility, such as configuring a no-prompt installation of the client, or installing (reading the backup data) from a different network adapter than the one the client was booted from.
To setup the client, select the option Configure!Network Boot/Install!Enable/Disable Network Installation of a Client from the menu bar. You will be prompted for the client to configure. Select the client and press the Continue button. A screen similar to the following will appear:

Options may appear or disappear from this screen depending on your selections. The screen is broken into two main sections; one for configuring the Client network boot options and one for configuring the Client network install options. The setting for the Install Mode toward the bottom of the screen determines whether or not the Client network install options section will appear.
The following fields are used to configure the client to boot from a boot server:
1. Install mode: You must select here whether you want to perform a no-prompt or menu-driven installation:
a. By selecting No-prompt, the client will be installed without entering any information on the client. This is referred to as a no-prompt install. If selected, all of the remaining prompts must be filled in.
b. If Menus (set defaults) is selected, you will be provided the additional prompts now, all of which are optional. The information you provide will appear as defaults on the client after it is booted, but those options may also be changed on the client.
c. If Menus (no-defaults) is selected, it is assumed that and all install options will be selected from the client install menus once it is booted. When selected, all remaining options will disappear from the screen as they no longer apply.
2. Server to boot from: If the server in this field is incorrect, use the arrow button to list and select a different server from which to boot from. By default, the boot server is assumed to be the install server as well. However, the install server may be changed as described later. If updating an image and you choose to change the boot server, the image on the old boot server will be automatically disabled.
f the boot server has been configured with an Alternate Server Network and you wish to perform the network boot over that network, then select the network from the drop-down list.
3. Boot Image Name: Use the arrow button to the right of the entry field to select from a list of boot images previously created using the Create Bootable Installation Media (Network) option. The boot image name selected will determine the operating system, platform and network type that will be used to install the client.
Storix System Backup Administrator 15 Version 8.2 Solaris System Recovery Guide

Storix System Backup Administrator 16 Version 8.2 Solaris System Recovery Guide
4. Gateway Address: If the client must go through a gateway to reach the boot server, enter the IP address of the gateway machine.
5. Subnet Mask: If the client is on a subnet, enter the subnet mask.
6. Network Adapter Hardware Address: If the client and server are on the same network (no gateway between them) and you want to be able to boot the client without entering the client and server IP addresses onto the client’s network boot screen, you can enter the client's network adapter hardware address (12-digits) here. This is also referred to as the MAC address, and is used to respond to a broadcast boot. Having the MAC address available on the server allows the client system to be booted without knowing the server or client IP address, as this information is obtained from the server.
7. Server to install from: This field will, by default, contain the name of the boot server. If the backup data will be restored from a different server than you booted from, select a different install server in this field. If the install server differs from the boot server, additional fields will appear on the screen, which are described in the section Using a Different Install Server than the Boot Server below.
8. If you wish to install the client using the server’s alternate network, select the network from the Alternate Server Network drop-down list. If selected, additional fields will appear as described in the section Using a Different Install Server than the Boot Server below, since the client may need to use a different adapter to reach this alternate network on the install server.
9. Device or File to install from: Use the arrow button to list and select the device or directory from which the backup data will be restored. If a directory is selected, you will be prompted for the specific System Backup from which to install. After selecting the backup, the filename of the backup image will be placed in this field, and the Backup Sequence Number field will be automatically filled in with the sequence number of the client backup selected. If you select a tape device for this field, the device name will be placed in the field, but the backup will not be read at this time, since the backup may not be in the drive at the moment.
10. Backup Sequence Number: If the client will be installed from a tape device, you must manually select the backup sequence number on the tape media to install from. If there is only one System Backup on the tape, the backup sequence number will be 1 (default). If there is more than one, you must enter the appropriate backup sequence number. If you are unsure as to the correct sequence number to use, view the backup label and use the backup sequence number that corresponds to the desired backup.
11. Console Device Name: Select the name of the console device that will be used on the client. If the client is using a graphical display attached to a graphics card on the system, this should be set to “console”. If the client will be booting from an ASCII (text-based) terminal, you will need to select the terminal type from the “Console terminal type” field below.
12. Console terminal type: If the console device selected was a graphical device, the terminal type will be set to console. Otherwise, an ASCII terminal is assumed and you must list and select the specific terminal type. Using the arrow button, you can list the terminal types that are available during the installation process and select one from the list. If you do not select the terminal type at this time, you will be prompted for the terminal type after booting from this image.
When all selections have been made, select the Add/Update button at the bottom of the screen. If a boot image for the specified platform and network type does not already exist on the boot server, one will be created which will take a minute or two. The client boot information will be saved and the client will be ready to boot and install. If you have changed the boot server, the image on the old boot server will be disabled automatically. Refer to the section Boot a Client for Installation from a System Backup to initiate the installation process.
Disable a Network Install Client It may be desirable to disable the network install for a client once the installation of the client is complete. If the client should inadvertently boot over the network and the client is configured for a no-prompt install, the client may end up being reinstalled automatically.

Storix System Backup Administrator 17 Version 8.2 Solaris System Recovery Guide
To un-configure the client, simply select the option Configure!Network Boot/Install!Enable/Disable Network Installation of a Client from the menu bar. Select the client to disable. The client network install configuration will appear. Simply press the Disable button at the bottom of the screen to un-configure the network install.
Un-configuring the network install client will prevent the client from booting over the network. Although the network install will be disabled, the information for the network install will be retained and will be automatically used as defaults should the same client be configured for network install again in the future.
Using an Alternate Network to Restore the Data Even though the boot and install server may be the same, it may be desirable to perform the network install (actual restoration of the data) using a different network than was used to perform the network boot. For instance, the client may boot from the server using the ent0 (ethernet) network, but may want to restore the data from the same server using the tok0 (token-ring) network instead. This is commonly done in order to redirect the restore data traffic onto a different network than that which is in use by other applications.
To install using an alternate server network, a drop-down list is provided on the Network Boot/Install Configuration Screen labeled "Alternate Install Server Network". If you want the alternate server network connection to be used for network install, select the appropriate network. If no option is selected, the default network connection used by the client to reach the server (as defined by the server hostname and network routing information on the client) will be used.
Note that this option will not be available if there was no Alternate Server Networks configured on the install server. To set the Alternate Server Networks for a server, refer to the server configuration options.
If you select this button, additional options will appear which will be required only if you are using a different network adapter on the client system to contact the install server than was used to boot the client. Refer to the section Using a Different Install Server Than the Boot Server below for additional instructions.
Using a Different Install Server than the Boot Server If the Server to install from (install server) is not the same as the Server to boot from (boot server), or if you selected to Use an Alternate Server IP/Hostname to reach the install server, additional fields will appear on the screen allowing you to configure the network differently for contacting the install server:

1. Gateway Address: If the client must go through a gateway to reach the install server, enter the gateway IP
address in this field.
2. Subnet Mask: If the network the client uses to reach the install server uses a subnet mask, enter the subnet mask here.
3. Client Network adapter name: If the client will use a different network adapter to reach the install server than was used to reach the boot server, use the arrow button to select an adapter name from the list. If you select a different adapter, you must also fill in the additional field as well:
a. Client IP Address: Enter the IP address associated with the adapter selected. If you are using a different install server than the boot server, the install server must recognize the client by this IP address and the hostname associated with this IP address must have been used to configure the client in the administrator application. If you are using the same server but an alternate server IP/hostname, you must enter the client IP address that will be used to contact the server using the server’s alternate address. Refer to the Configure Servers option for information on using an Alternate Server Hostname/IP address.
Using the Same Boot Server to Install Different Client Operating Systems The same boot server may be used to boot clients of any platform, network type and operating system type and version. The boot server does not need to have any device support installed to support the client’s hardware and does not need to run the same operating system as the client. If every system is different, you may create a separate boot image for each client. Or, you may create a single boot image for all clients of similar hardware type and operating system version.
SBAdmin will create a network boot image from any client, and then copies that boot image to the boot server. Each boot image is saved under a different name (of your choosing) and may be separately selected when you configure a client to network boot. This allows a single boot image to be used to install different client systems.
This 2-step process is described above in this section. First, Create a Network Boot Image (which also copies the boot image to the boot server), then Enable the Network Install of a Client by selecting the boot image on the server you previously created.
Storix System Backup Administrator 18 Version 8.2 Solaris System Recovery Guide

Storix System Backup Administrator 19 Version 8.2 Solaris System Recovery Guide
Updating Network Boot Images If you have updated the client operating system or installed new base system hardware support (network devices, disk drives, display adapters) or onto a system that you previously created a network boot image from, you will need to recreate that network boot image before the new device support will be accessible to the clients booting from that image.
After installing the new device support, simply follow the instructions for Create/Update a Network Boot Image to recreate the boot image and copy to the boot server. If you recreate the boot image for the same platform, network and Solaris level, it will not be necessary to reconfigure the clients for network boot/install since the clients using the previous boot image will automatically begin using the newly created boot image.

Storix System Backup Administrator 20 Version 8.2 Solaris System Recovery Guide
4. Booting to the System Installation Process
Booting the Various System Types This section will provide general guidelines for booting a system to the Installation and Maintenance Menu, used to install a system from a System Backup. Note that the steps differ widely between systems and new systems are being introduced frequently. If you are not familiar with the process of booting your system from different media, you should refer to your system documentation for detailed instructions.
To begin the system recovery process, the client system must be booted from SBAdmin Boot Media. This may be a local bootable cdrom or a network boot image storied on a boot server. In any case, the remainder of the installation process will be the same.
The instructions for booting the system vary for each boot type and also differ greatly depending on the type of the machine to be booted. SBAdmin supports Solaris 9 and 10 on Intel-based 32 and 64-bit systems which use BIOS firmware, and Solaris 9 and 10 on SPARC systems, which use OpenBoot firmware. The exact details of how to boot each can vary with each model of hardware and version of firmware.
Although specific instructions on booting the systems from the installation media are not described here, here are some hints to help get you started:
Booting to the System Installation Process
CDROM If using BIOS, your system BIOS must be configured to allow booting from CDROM. If your firmware (BIOS/OpenBoot) attempts to boot from a hard disk before booting from CDROM, you will need to change this in case there is already a bootable hard disk in the system. Typically the BIOS can be accessed on most Intel-based (x86) systems by pressing the Delete key immediately after the display messages begin to appear. Once your BIOS is setup to boot from the correct media, just insert the CDROM and turn on or reset the system. If using OpenBoot (OB), you can specify which device to boot from at the OpenBoot Prompt (OBP). To access the OBP, at system initialization (soon after power-on), select the key combination "stop-a". This will prevent the system from booting to the previously configured boot device so that you can interactively select which device to boot from. You can get a list of devices to enter at the OBP by using the devalias command. For cdrom, you will enter the following at the OBP prompt:
ok> boot cdrom
Hard Disk To install from a hard disk configured as a system recovery boot disk, you must select to boot from the disk within the BIOS or OpenBoot options. Typically the BIOS can be accessed on most Intel-based (x86) systems by pressing the Delete key immediately after the display messages begin to appear.
Assuming your firmware is setup to boot by default from the correct media, just turn on or reset the system. The remainder of the boot process will complete without further interaction.
Network Boot To network boot an Intel-based system with BIOS:
Most BIOS-based systems are not, themselves, network boot capable. However, if you have a network adapter card with network boot capabilities, you can have the system BIOS boot to the firmware on the network card. Therefore, the network card will be used to provide the network boot capabilities the system firmware does not.
To initiate a network boot, follow these steps:
1. When the system begins to display messages, press the <Delete> key several times until the setup menus appear.
2. Select Advanced CMOS Setup from the menu.
3. Instructions vary at this point. You should select an option such as “Boot Sequence” or “1st Boot Device” to change the device the system will boot from.
4. Select Network, or the specific network adapter to boot from.
5. Exit the setup menus to boot from the selected device
Depending on the firmware of your network adapter, you may be provided the option of entering the client and server IP address (and optional gateway address). If your boot server is configured with your network adapter hardware (MAC) address, you may perform a broadcast boot without entering the IP addresses. If not, you will need to enter this information. If you are booting across a gateway, you must enter the client, server and gateway addresses (in which case a broadcast boot is not possible).
If you follow the instructions provided here, and/or on the screen, and the boot process does not work (or no network boot option is provided), then neither the system nor your network adapter are boot-capable.
To network boot SPARC systems using OpenBoot firmware:
SPARC systems network boot directly from OpenBoot (OB) without a boot loader. You must specify the OB device name to boot from. For network devices, there is often an alias established in OB that points to the OB device name. This is because the OB device name is rather lengthy and complicated.
From the OBP, enter the following line to boot from the network adapter. ok> boot net
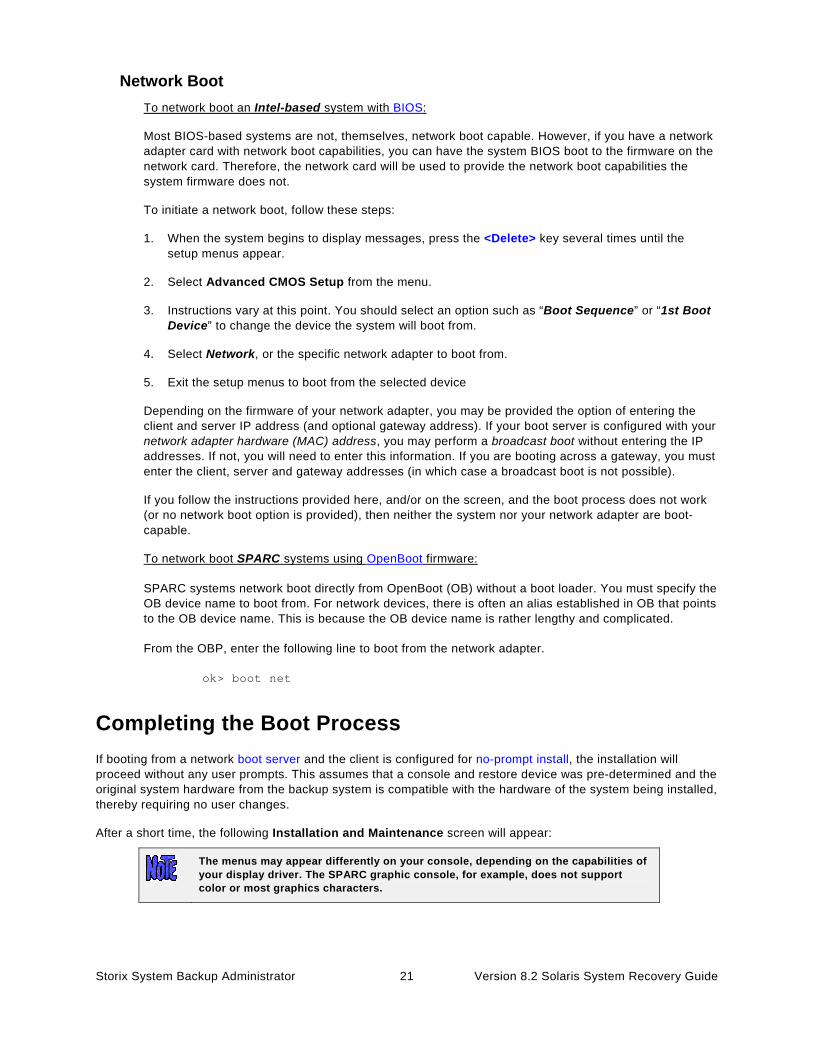
Completing the Boot Process If booting from a network boot server and the client is configured for no-prompt install, the installation will proceed without any user prompts. This assumes that a console and restore device was pre-determined and the original system hardware from the backup system is compatible with the hardware of the system being installed, thereby requiring no user changes.
After a short time, the following Installation and Maintenance screen will appear:
The menus may appear differently on your console, depending on the capabilities of your display driver. The SPARC graphic console, for example, does not support color or most graphics characters.
Storix System Backup Administrator 21 Version 8.2 Solaris System Recovery Guide

The detailed instructions for using the options on this menu are provided in the sections Reinstall a System from a Backup and View/Change Installation Settings.
Storix System Backup Administrator 22 Version 8.2 Solaris System Recovery Guide

5. Reinstall from a System Backup A System Backup may be used to reinstall either the original system or a different system with either the same or different hardware configuration. To initiate the installation, you must first boot the client from CDROM, network boot server, or local (internal, or external/portable) disk, using the instructions found in the section Booting to the System Installation Process.
To setup a client system to be installed from a System Backup on a network install server, you must first configure it using the process described in the section Enable/Disable Network Installation of a Client.
Cloning Systems "Cloning" a system means to install a system from a backup originating on another system. The system from which the backup was made may be identical or completely different than the system you are installing.
If the system to be installed is identical in hardware type and configuration to the one the backup was made from, the installation may be performed with no customization required. However, if the systems differ, there may be changes required. For instance, if the disk configuration on which the volume groups were placed is not available on the new system, messages will be displayed that the original disks are not available and you must select new physical volumes into which the volume groups will be placed. See View/Change Installation Settings.
No-Prompt Installation If the system is set to no-prompt installation, the Installation and Maintenance Menu will not appear (as described in the following section), but the installation will proceed without any input from the user. If your boot media was created for a no-prompt installation, a banner will display as follows:
As indicated, you will have 60 seconds to turn off the system to prevent the system recovery process from continuing (and possibly overwriting all data on the system). There is no way to manually interrupt an install process created for no-prompt installation and cause it to display the installation menus.
However, if any error occurs, such as an install server or device not being available, or if the backup data read from the installation media cannot be installed onto the detected hardware without user intervention, an error message will occur and the System Installation Menus will appear.
Refer to Creating Boot Media and Enable/Disable Network Installation of a Client for information how to pre-answer any questions normally asked during the install process which are required for a no-prompt installation. If configured for no-prompt installation, the installation process will proceed automatically as follows:
1. The defined install server and device will be checked to ensure they are available and readable
2. The selected backup will be read and the installation information will be extracted
Storix System Backup Administrator 23 Version 8.2 Solaris System Recovery Guide
3. The configuration information from the backup will be compared against the current system configuration to ensure that everything may be recreated according to the original backup data. If there are problems which can be corrected, they will be corrected automatically. For instance, if a disk has changed sizes, a filesystem may be automatically reduced in size to make it fit. If there are any problems preventing the installation from continuing without user-interaction, such as no disks matching the original system, or if the disks on the new system are not large enough to contain the original data, the system will enter prompted mode and the installation menus will appear in order for the user to make changes to correct the problems before continuing.
Installing from an Encrypted Backup If the backup to be restored from was encrypted during the backup process, it will be necessary to decrypt the data during the restore. Unlike restoring data on a live system, where the encryption keys are available on the backup system, the encryption key must be entered manually during the system installation. The encryption keys are not stored in the boot media or the backup information as this might be penetrable to hackers.
As warned during the backup process, an encrypted backup cannot be restored without the proper encryption key. This key may not be retrieved from the backup, nor can SBAdmin assist in providing the correct key. If you do not have the proper encryption key needed to decrypt this backup, you will not restore this data!
The encryption key is a value that the user defined prior to performing the backup. If the encryption key is not known, you will not be able to restore the system from this backup. However, to make encryption keys easier to remember and/or enter, it may be entered either as a hexadecimal number or an ASCII text equivalent (if this was the form used to create the original key).
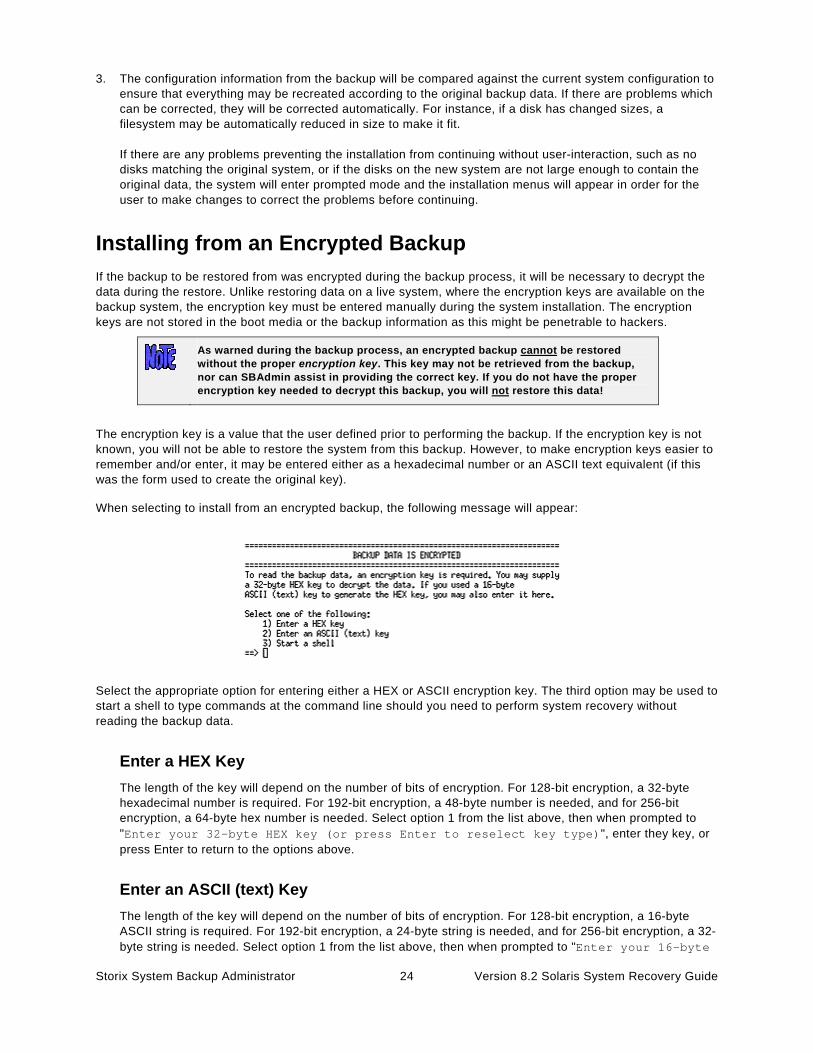
When selecting to install from an encrypted backup, the following message will appear:
Select the appropriate option for entering either a HEX or ASCII encryption key. The third option may be used to start a shell to type commands at the command line should you need to perform system recovery without reading the backup data.
Enter a HEX Key The length of the key will depend on the number of bits of encryption. For 128-bit encryption, a 32-byte hexadecimal number is required. For 192-bit encryption, a 48-byte number is needed, and for 256-bit encryption, a 64-byte hex number is needed. Select option 1 from the list above, then when prompted to "Enter your 32-byte HEX key (or press Enter to reselect key type)", enter they key, or press Enter to return to the options above.
Enter an ASCII (text) Key The length of the key will depend on the number of bits of encryption. For 128-bit encryption, a 16-byte ASCII string is required. For 192-bit encryption, a 24-byte string is needed, and for 256-bit encryption, a 32-byte string is needed. Select option 1 from the list above, then when prompted to "Enter your 16-byte
Storix System Backup Administrator 24 Version 8.2 Solaris System Recovery Guide

Storix System Backup Administrator 25 Version 8.2 Solaris System Recovery Guide
ASCII (text) key (or press Enter to reselect key type)", enter they key, or press Enter to return to the options above.
The key you enter will be converted to an appropriate hexadecimal number and used to decrypt the data, just as if you entered the hex key yourself.
Upon entry of a valid key, the restoration of the data will continue. If an invalid key is entered, you will be informed so, and returned to the above menu of options.
System Installation Process
After booting from a network boot server When the system is booted from the network, the client network installation options will also be copied from the boot server to the client. Any installation options setup when the client was configured for network boot (see Enable/Disable Network Installation of a Client) will be used by default for the installation. These pre-set defaults may include the install server and device, the console device and terminal type, the backup sequence number, or anything else required for the installation to proceed with no required input from the user. If the user selected a no-prompt installation (see No-Prompt Installation above) the installation will continue automatically. Otherwise, the installation menus will appear and the user may manually change any prior defaults, add any settings that were not pre-configured, or continue the installation process with the current settings.
Verifying the hardware configuration Once the backup media is selected, and you chose to either continue the installation with the current settings or to change the volume group, logical volume or filesystem information, the following will occur:
1. The disks defined on the backup are compared against the current system’s hardware configuration. If there are problems that would prevent the backup from being installed onto the system, such as missing disks or disks that are too small to contain the backup data, a list of messages indicating the problems will be displayed and the user will be required to either make changes manually or may select to automatically fix any problems that are non-fatal.
2. Non-fatal errors are those that require changes to the configuration in order to allow the data to be restored, although some settings may differ from those of the original system. There are errors that may be automatically fixed by the installation process. For instance, there may not be enough space on the newly detected disks to build the partitions, slices or filesystems as they were previously defined. If such a situation occurs, you will be provided the option of automatically fixing the errors. This might include automatically reducing filesystem sizes to make them fit onto the new hardware. You may also choose to change any system installation settings manually to either add more disk space or change other SVM, ZFS or filesystem attributes that would allow the system storage to be created as desired.
More details of the verification that takes place is described later in Verification Process.
The System Installation and Maintenance Menu When the boot process has completed, the System Installation and Maintenance Menu will appear:
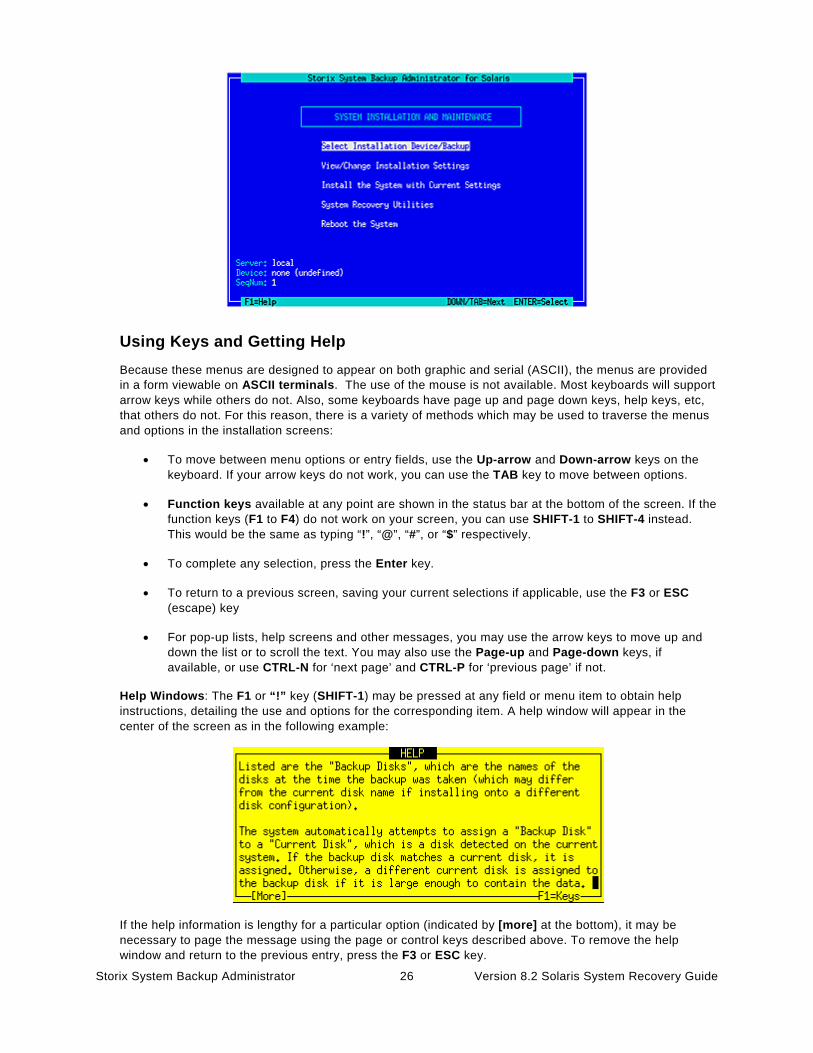
Using Keys and Getting Help Because these menus are designed to appear on both graphic and serial (ASCII), the menus are provided in a form viewable on ASCII terminals. The use of the mouse is not available. Most keyboards will support arrow keys while others do not. Also, some keyboards have page up and page down keys, help keys, etc, that others do not. For this reason, there is a variety of methods which may be used to traverse the menus and options in the installation screens:
• To move between menu options or entry fields, use the Up-arrow and Down-arrow keys on the keyboard. If your arrow keys do not work, you can use the TAB key to move between options.
• Function keys available at any point are shown in the status bar at the bottom of the screen. If the function keys (F1 to F4) do not work on your screen, you can use SHIFT-1 to SHIFT-4 instead. This would be the same as typing “!”, “@”, “#”, or “$” respectively.
• To complete any selection, press the Enter key.
• To return to a previous screen, saving your current selections if applicable, use the F3 or ESC (escape) key
• For pop-up lists, help screens and other messages, you may use the arrow keys to move up and down the list or to scroll the text. You may also use the Page-up and Page-down keys, if available, or use CTRL-N for ‘next page’ and CTRL-P for ‘previous page’ if not.
Help Windows: The F1 or “!” key (SHIFT-1) may be pressed at any field or menu item to obtain help instructions, detailing the use and options for the corresponding item. A help window will appear in the center of the screen as in the following example:
If the help information is lengthy for a particular option (indicated by [more] at the bottom), it may be necessary to page the message using the page or control keys described above. To remove the help window and return to the previous entry, press the F3 or ESC key.
Storix System Backup Administrator 26 Version 8.2 Solaris System Recovery Guide

Pop-up List Options: Pop-up lists are available for many entry options. When supported, “List=F4” will appear at the bottom of the screen. At that field, you may press the F4 or “$” key (SHIFT-4) to list the available options for the corresponding field and select an option from the list. To select an option, use the arrow keys to highlight the desired option and press Enter. The selected option will be placed in the entry field and the pop-up window will disappear.
Select Installation Device/Backup The default installation server and device, if any, will be displayed at the bottom of the screen. If the system was booted from the network, the install server will default to the boot server unless a different install server was defined when the client was configured for network boot.
Select the Select Installation Device/Backup option if you wish to change the server on which the backup media is attached, or the remote or local installation device. You will only be able to select a remote server when using the Network Administrator license. After selecting option this option, you are presented with one of the following additional option screens:
The following menu options may differ if the system from which the boot media created was a TSM node. Refer to the TSM Configuration section below for information and examples.
Highlight the option you wish to select using the up and down arrow keys on the keyboard. Each option is described in detail below:
Select Local Tape Device Drives(s) Regardless of the type of SBAdmin boot media used to boot the target system, you may change the installation settings to allow installation from a local tape drive, even a different drive than was booted from. When selecting this option, a list of local tape devices will be displayed.
Storix System Backup Administrator 27 Version 8.2 Solaris System Recovery Guide

If you are restoring from a parallel tape device, then you should select all tape drives that make up that device. Otherwise you should only select a single tape drive.
After selecting the tape drive, press F3 or ESC and the following window will pop-up on the screen:
If the backup you wish to install from is not the first backup on the media, type the backup sequence number in the Backup Sequence Number field. Refer to the backup sequence number in the backup label if you do not know the correct backup sequence number to use. If an Autoloader is used with the device, select “y” in the Autoloader used? field. Refer to Devices for more information on the use of sequential autoloaders. Once you have selected the desired options, press F3 or ESC to return to the Change Installation Server or Device menu.
When selecting multiple tape drives, the following window will pop-up on the screen:
Storix System Backup Administrator 28 Version 8.2 Solaris System Recovery Guide

The Backup Sequence Number and Autoloader used? options are the same as previously described. However, there is a Parallel Read Policy which should be set to “y” if the backup was created using a Parallel Tape Device.
If the backup was created using a Parallel Tape Device, you must select all tape drives that make up this device and enter “y” for Parallel Read Policy. The devices previously configured on the system are not known when booting in installation mode, so this option provides you a method of defining a parallel tape device on the local system. You must select at least two drives from the list. To do so, highlight the desired entry and press Enter. An arrow (==>) will appear next to each option selected.
Important: You must select the same number of devices used to create the backup and you must select them in the same order as they were previously configured
You may also use sequential tape devices to restore from the backup if the backup spans multiple tapes and you want the installation to automatically span the tapes inserted in different devices. This option is identical to the use of a Sequential Tape Device. The devices previously configured on the system are not known when booting in installation mode, so this option provides you a method of defining sequential devices on the local system.
You must select at least two drives from the list. To do so, highlight the desired entry and press Enter. An arrow (==>) will appear next to each option selected.
Important: You must select the devices in the same order in which they will be read.
Select Local Disk Backup If you configured a locally-attached (or SAN-attached) disk for system backup/recovery (refer to SBAdmin User Guide), and you performed the System Backup to a configured local system backup disk, you may reinstall the system using that backup. If you select this option, the system will be scanned for one or more system backup disks, and then the disks will be queried for available system backups. If any are found, a screen similar to the following will appear, from which you may select the backup to restore:
Storix System Backup Administrator 29 Version 8.2 Solaris System Recovery Guide

Select a backup by highlighting the desired line and pressing ENTER, or press F3 or ESC key to cancel the selection. After making your selection, you are returned to the Change Installation Server or Device menu.
Install From Local NFS Mount If the system backup you wish to use for the recovery is located on a remote NFS share, you may use this option to get access to the backup by performing a NFS mount of the share to the local system. Performing recovery from local NFS mount is supported with Network Edition and Workstation Edition licenses only. You must first select the Set or Change NFS Mount Configuration option which will display a screen similar to the following:
To restore from a NFS mounted backup the Server IP Address, the Client IP Address, the Network Device, and the Share on Server fields must be filled in. If the client requires a gateway to reach the NFS server enter the Gateway Address. When selecting the network device, use the F4 key to list the adapters available on the system. The option to Apply Network Configuration to Restored System indicates whether you wish to migrate the above client network settings to the restored system.
If you receive a message that no network devices are found, then you probably need to Load Additional Network Device Modules.
You should enter “y” in the NFS Version 4 option if the share you will be accessing is to be mounted using NFS v4 (NFS v2, v3, and v4 are supported). The Mount Options field allows you to enter any mount command “-o” options necessary to mount the remote share. Press F3 or ESC to save the options and configure the network.
Storix System Backup Administrator 30 Version 8.2 Solaris System Recovery Guide

After entering the above NFS mount configuration options, select the Select NFS Mount Backup option. Selecting this option will mount the remote share locally and list all system backups found in the share. Only backups of type FULL SYSTEM will be listed. If any are found a screen similar to the following will be shown:
NFS Considerations SBAdmin in no way configures the remote NFS server. It must be configured to allow the client IP you are using read access to the files in the share.
The share is mounted using the options you provided and the mount command as follows:
mount –F nfs –o MOUNTOPTIONS SERVERIP:NFSSHARE /images
Set or Change Network Configuration You may set or change the network install server from which to obtain the backup. The backup itself may be on a tape attached to the server or on the server’s disk drive. Upon selecting this option, a screen similar to the following will be displayed:
The system recovery process does not support mounting NFS shares that require any type of authentication (ie Kerberos).
Storix System Backup Administrator 31 Version 8.2 Solaris System Recovery Guide

To use a network install server, the Server IP Address, Client IP Address and Network Device fields must be filled in. If a gateway is required for the client to reach the install server, enter the gateway the client must use in the Gateway Address field. Under Adapter Configuration, press F4 to list the devices available on the system. The option to Apply Network Configuration to Restored System indicates whether you wish to migrate the above client network settings to the restored system.
If you receive a message that no network devices are found, then you probably need to Load Additional Network Device Modules.
Press the F3 or ESC key to end and return to the Change Installation Server or Device menu once you have finished your selection. When you do so, the network will be configured according to the settings you chose, and the new server will be displayed at the bottom of the screen. If the server has changed, any previous device selection will be removed and you will be required to select a new installation device.
Select Remote Tape Device If a network install server is selected and available (indicated by the Server at the bottom of the screen), you may select to install from a backup in a tape drive attached to the remote server. Note that you may select a remote server and device regardless of the type of boot media used. When selecting this option, a list of tape devices on the server will be displayed and you may select a tape device from the list.
Once you have made your selection, the drive will be checked to ensure that it is available and the name of the device will be displayed at the bottom of the screen, and you will be returned to the Change Installation Server or Device menu.
Select Remote Disk Backup If a network install server is selected and available (indicated by the Server field at the bottom of the screen), you may select to install from a disk file backup available on the server. Note that you may select to install from a remote server and device regardless of the type of boot media used.
When selecting this option, a list of directory devices will be displayed. This list will only include those directory devices that are configured for System Backups. Refer to Configuring Backup Servers and Devices for more information on configuring devices for system backups.
Storix System Backup Administrator 32 Version 8.2 Solaris System Recovery Guide

After selecting the directory device, a list of System Backup images on the server will be displayed, and you may select a backup from the list. The list will also display the client from which the backup was originally made, the date and backup job ID.
If you expect a backup image to appear in the list that does not, it may be that the backup was written with permission for only the original client to read it. If the client to install is not the same as the original client (or the client is installing from a different network adapter and therefore has a different hostname), you must change the backup image to allow clients other than the originating client to read it. Refer to Change Access Permission of a Disk Backup for details.
Once you have made your selection, the Backup ID of the backup file will be displayed in the Device field at the bottom of the screen, and you will be returned to the Change Installation Server or Device menu.
Once the installation server and/or device have been selected, press the F3 or ESC key to return to the Installation and Maintenance Menu.
TSM Configuration When selecting the Change Installation Server or Device option from the main menu and TSM support was enabled on the client from whom you created the boot media, the Set Install Device or Server menu will look a bit different as shown below:
Storix System Backup Administrator 33 Version 8.2 Solaris System Recovery Guide

If you wish to install from a TSM server, select Use TSM Server from the list above. The following screen will appear:
You will need to enter additional information used to contact the TSM server on the screen below:
Storix System Backup Administrator 34 Version 8.2 Solaris System Recovery Guide

Storix System Backup Administrator 35 Version 8.2 Solaris System Recovery Guide
TSM Client Configuration You are required to enter the NODEname of the TSM client you are installing. Note that this is not necessarily the same node from which the backup was originally created. If you know the node’s password, enter it in the NODE Password field. If you do not know the node password, then you will be required to supply the TSM Administrator username and password in the fields below.
Note that, when logging onto the server using the nodename and password, you will have access to backups created by this node, as well as any backups of other nodes for which the backup read permission was set to allow access to any client. If you need access to all client backups on the server, you will need to log on using the administrative username and password as described below.
TSM Server Configuration The required field in this section is the TCPServeraddress. You must use the TCP address, not the hostname, since host name services are not available when booting from the installation media. The remainder of the fields may typically use the defaults shown. Use the F1 key to display detailed help information for any screens.
TSM Administrator Configuration The TSM administrative user information need only be entered if you do not know the NODE Password. Also, by logging onto the server as the administrative user, instead of using the node password, you will have access to all backups on the server, even those for which the permission was set to only allow owner access in the backup profile.
Once you have entered all of the required TSM information, press the F3 or ESC key to return to the previous menu.
Change the Installation Settings The sizes, locations and all other attributes for disks, partitions, slices, SVM (RAID) devices, ZFS volumes & filesystems, swap spaces and filesystems as defined on the backup may be changed using this option. If the backup settings had not been previously read from the backup, the backup will be read and the settings, according to the original system, will be extracted from the backup. The settings will then be verified to ensure they are compatible with the current system’s hardware configuration. If the verification fails, you will be required to fix the information to accommodate installation of the backup onto the current system. This may be done either automatically or by changing the setting manually as described in the section Verify the hardware configuration above.
Upon selection of this option, a set of menus will appear that allow you to customize virtually any attribute of a partition, volume group, logical volume, meta-device or filesystem defined on the backup. You may also choose to exclude certain of these elements from being created or restored, or may select to create them without actually restoring the data. These menus and options are numerous, and are described in detail in the chapter View/Change Installation Settings.
Once you have completed all changes, press the F3 or ESC key to return to the Installation and Maintenance Menu.
Install the System with Current Settings When you have completed all steps necessary prior to installing the system, such as changing the installation server, device or volume group information, you may select this option to begin the installation of the system using the current settings.

Storix System Backup Administrator 36 Version 8.2 Solaris System Recovery Guide
The backup settings will again be verified to ensure consistency with the current hardware configuration as described in Verification Process. If any problems are found, you will be returned to the Installation and Maintenance Menu.
If no problems were found in the system configuration preventing the installation from proceeding, a confirmation screen will appear, showing you the volume groups and disks that will be created or overwritten by the installation. You will be required to press Enter to continue. A final warning will appear and you must then press "y" to continue the installation or "n" to return to the Installation and Maintenance Menu.
Once you have selected to continue, the installation will proceed with no further user input. The partition tables, slices, SVM and ZFS volumes, and filesystems will be created and restored from the backup as defined in the backup information, and as previously customized.
Upon completion of the installation, with the exception of any changes made within the installation menus, the new system will look identical to that of the original system from which the backup was made.
More details on the complete installation process are found in the Install the System chapter below.

6. View/Change Installation Settings From the Main Menu, select View/Change Installation Settings. The first time you enter this option, the backup information will be read from the installation media and compared with the system and disk configuration to ensure there is adequate space on the available disks to perform the installation. Checks will also be made to ensure you booted from boot media that supports all of the devices you will be restoring from the backup. If there are any inconsistencies, you will be required to make changes within these menus to correct the problem.
It is important to note that any options or changes made in these selections have NO AFFECT on the actual disks or their contents until AFTER you begin the installation. If you change your mind at any time, you can cancel or change information without worry as to the state of the data on the disks!
The following is the Change Installation Settings Menu:
At times, you may be required to make changes throughout these menus to correct problems that would prevent the devices from being created or the data from being restored. Only after returning to the Main Menu by pressing F3 or ESC, and selecting to begin the installation, will the data be checked again for consistency and additional changes be required.
Select Disks to Use for Installation If the disks detected on the system do not exactly match those described on the backup, this option will appear automatically. Otherwise, you can select this option from the Settings Menu to display a screen similar to the following. We will refer to this as the Disk Table Menu.
Storix System Backup Administrator 37 Version 8.2 Solaris System Recovery Guide

Many options are available from this screen for moving data between disks. This is necessary when the disks currently available don’t match those defined on the backup, or if you simply want to reorganize the data on the disks for better performance, or to implement SVM or ZFS mirroring or striping.
To return to the Settings Menu, press F3 or ESC. The backup data will again be checked to ensure you have enough room on the disks for the slices or other data as you have defined them. If not, you will be warned, but can make changes in this or other settings to fix the problem before the installation is actually performed.
The above screen shows you the original disk the data resided on and the new disk that is assigned that data. There may be previous disks that are not assigned to a new disk, or even additional detected disks that have no data currently assigned to them. By selecting one of the lines on the screen, you are provided several options as shown below:
Note that the options for displaying or migrating partitions only appear if the selected disk was previously partitioned or you have chosen to create partitions on it. Each option is described below:
VIEW/CHANGE FDISK Partition Table This option will appear only if the selected disk is empty or currently contains a partition table (Intel x86-based systems). This provides the ability to change the partition table for the selected disk by adding, deleting or resizing partitions. Instructions are same as when selecting Change FDISK Partition Tables from the Installation Settings Menu.
VIEW/CHANGE Slice Table This provides the ability to change the slice table for the selected disk by adding, deleting or resizing slices on the disk. Instructions are same as when selecting Change Slice Tables from the Installation Settings Menu.
Storix System Backup Administrator 38 Version 8.2 Solaris System Recovery Guide

ASSIGN all contents of this disk to a Different Disk If you select this option, you will be provided a list of available (unused) disks. If you select a new disk from the list, any partitions, slices or their contents (i.e. filesystems, ZFS or SVM volumes) will be moved to the new disk. The corresponding partition, slice and disk names in any configuration files will reflect the change.
MIGRATE a slice on this disk to a different disk If you select this option, the slice table will be displayed where you can select a slice to be moved to a different disk. You will then be prompted for the location on the new disk to place the slice. If the slice contained filesystem data or was used by another SVM or ZFS device, all other system information will be updated to reflect the new slice name.
DO NOT RESTORE this backup data By selecting this option, you are choosing not to restore the data that is assigned to the selected disk. By doing so, all previous contents will become undefined, and the disk will not be used when installing the system. Any data that actually resides on the disk at this time will not be overwritten.
If you choose not to restore a disk containing partitions or slices, the partitions and slices will be deleted as well as any contents of those partitions or slices, whether they are filesystems, SVM or ZFS volumes. If selecting not to restore a disk’s contents causes any problems which would prevent the installation from being performed, you will be informed so and required to make additional changes before continuing the installation.
When you have finished all changes, press F3 or ESC to return to Select Disks to Use for Installation and F3 or ESC again to return to the Settings Menu.
Change FDISK Partition Tables This option on the menu is really just a shortcut into the same options available when selecting disks to use for installation. You have the same options of changing partition information or adding new partitions to a disk, but must use the Select Disks to Use for Installation option to move partitions or other data between disks.
If there is more than one disk on the system, you will be asked to select a disk from the list. After doing so, a screen similar to the following will appear:
Storix System Backup Administrator 39 Version 8.2 Solaris System Recovery Guide

You may select to add a new partition by pressing Enter at the highlighted line at the top, or move the highlighted line over the partition you wish to change. When adding a new partition you will be prompted where to insert the partition within the table. If you select a line containing an existing partition, you are first asked if you wish to either CHANGE PARTITION INFORMATION or REMOVE THIS PARTITION. If you want to remove the partition from the disk, select the REMOVE option. Otherwise, when selecting to CHANGE, a window similar to the following will be displayed:
You may change any of the options shown. The Size of the partition can be set by either entering the number of sectors (512-bytes each) or by entering the number of megabytes. In either case, the other will be adjusted accordingly. You normally will not need to change the Partition type or Active flag, which usually have no effect. However, if this is a system requiring a /boot filesystem you should not change these settings, since the system firmware looks for boot partitions of this type.
When finished with your selections, press F3 or ESC to return to the Change Partition Table options.
Change Slice Tables This option on the menu is really just a shortcut into the same options available when selecting disks to use for installation. You have the same options of changing slice information or adding new slices to a disk, but must use the Select Disks to Use for Installation option to move slices or other data between disks.
If there is more than one disk on the system, you will be asked to select a disk from the list. After doing so, a screen similar to the following will appear:
You may select to add a new slice by pressing Enter at the highlighted line at the top, or move the highlighted line over the slice you wish to change. When adding a new slice you will be prompted where to insert the slice within the table. If you select a line containing an existing slice, you are first asked if you wish to either CHANGE SLICE INFORMATION or REMOVE THIS SLICE. If you want to remove the partition from the disk, select the REMOVE option. Otherwise, when selecting to CHANGE, a window similar to the following will be displayed:
Storix System Backup Administrator 40 Version 8.2 Solaris System Recovery Guide

You may change any of the options shown. The Size of the slice can be set by either entering the number of sectors (512-bytes each) or by entering the number of megabytes. In either case, the other will be adjusted accordingly.
• Position: This option indicates the position on the disk that this slice will be created. Solaris slices are numbered from 0 to 15, with certain reserved slice numbers, based on the operating system version and platform type. The first slice on the disk (position 1) may, for example, be used by slice 5. Changing this option allows you to simply move slices from one part of the disk to another. If you change this to a number which is already in use, the slices at the selected position and all that follow will be moved after this slice.
• Option: This is either Create Only, indicating that the disk will be created but no raw backup data is restored to it, Create/Restore indicating that the previous raw slice data included on the backup should be restored, or Delete to delete this slice. The option to Create/Restore will only appear if you included raw slice data on your system backup and raw data (i.e. non-filesystem, ZVM or ZFS) from this slice was included.
When finished with your selections, press F3 or ESC to return to the Change Slice Table options.
Solaris Volume Manager The Solaris Volume Manager (SVM) provides the flexibility of logically managing multiple physical disks as one or more logical disk, called meta-devices (also referred to as meta-disks, MD devices, and multi-disks). This allows, for instance, a filesystem to be spread sequentially across multiple disks, striped across disks. Therefore, a filesystem created on a meta-device does not have to use contiguous segments of disk space. Therefore, you can expand and reduce the size of these containers even if there is not contiguous disk space available. Since SVM support in SBAdmin is quite extensive, we’ll provide a quick lesson in SVM terminology, but you should refer to your SVM documentation for details:
• Meta-device: This is the common term for devices created using SVM. A meta-device is a device name starting with a “d” and followed by a number from 0 to 128 (i.e. “d0”). The meta-device will be created using one or more disk slices or other meta-devices.
• Striped (RAID 0): A striped meta-device writes data to one or more disk stripes or soft partitions (see below). If only one stripe is used, the meta-device does not differ from its underlying device. Striping spans the data in small chunks between the underlying disk stripes or soft partitions, providing better performance by utilizing multiple physical devices to concurrently read and write data.
• Mirrored (RAID 1): A mirrored meta-device is comprised of 2 or more other meta-devices, typically striped or soft partitions. By mirroring data, a copy of all data is placed on each of the underlying devices, thereby protecting data from a failure of an underlying device. The actual writable space is equal to the size of the smallest underlying device divided by the number of devices.
• Parity (RAID 5): This type of meta-device is made up of 3 or more disk slices or other soft-partitions (see below). Data is written to all but one of the devices, and the remaining device writes a parity bit which aids in recovery if data after a failure of any one of the underlying devices. The actual writable space is equal to the size of the smallest underlying device minus one.
Storix System Backup Administrator 41 Version 8.2 Solaris System Recovery Guide

• Soft Partitions: This is a type of meta-device created using part of a disk slice or other meta-device. Multiple soft-partitions can share the same devices, therefore creating smaller partitions that share the same larger device and can be easily, added, removed and resized.
• Replication Database (or State Database): Every meta-device requires this database, describing the meta-device itself. This database can exist in a disk slice of its own, or can share a disk slice with the meta-device itself. More than one copy (or replica) of this database can exist on the same device, but it’s usually a good idea to defined more than one replication database using different physical devices in case of a disk failure.
• Hot Spare Pool: A hot spare is one or more disk slice that is placed in a “pool”. Slices from this pool are added to a meta-device automatically if one of the devices that make up the meta-device fails. A hot spare pool may be assigned to one or more meta-devices for this purpose.
When selecting Solaris Volume Manager from the menu, you will be provided another list of options:
You will note that these options may be used not only to change existing SVM configuration, but also for creating new meta-devices, which in turn can contain new or migrated filesystems.
Replication (State) Databases Use this option to assign one or more databases to a disk slice. When selecting the option, you can select an existing database to edit or remove, or add a new database:
Select Add New to create a new database, or use the arrow keys to select a line containing an existing database and press Enter. A screen similar to the following will be displayed:
Storix System Backup Administrator 42 Version 8.2 Solaris System Recovery Guide

If you want to remove this database, move the cursor to the Create option field and press “D”. Otherwise, you can usually accept the default settings by simply pressing ESC to return to the SVM Settings Menu, or press F1 for help on any entry field.
RAID Devices When selecting this menu option, you are provided a list of existing RAID meta-devices and an option to add a new meta-device:
Select Add New to create a new RAID meta-device, or use the arrow keys to select a line containing an existing device and press Enter. If creating a new meta-device, a new record is created with default settings, including setting the type to RAID 0. You can change the RAID type by selecting either RAID 1 (mirrored) or RAID 5 (parity) in the RAID Type field on the screen. The following is an example of each RAID type:
• RAID 0 (striped): This is the default when creating a new RAID meta-device. When creating a new device, selecting an existing RAID 0 device, or when changing the RAID type of a previous RAID device, a screen similar to the following will appear:
Storix System Backup Administrator 43 Version 8.2 Solaris System Recovery Guide

You must define at least one stripe for a RAID 0 device. To do so, move to the # of Stripes field and press F4. This will produce a list of stripes and/or an option to add a new stripe:
After making a selection from the list, an additional window will appear, allowing you to change the settings for the selected stripe:
From this window, you must select the device or devices (stripes or other meta-devices) that make up this stripe. To do so, move to the Device list field and press F4 to select or de-select from a list of existing devices. To delete the stripe, move to the Create option field and press “D”. When finished, press F3 or ESC to return to the RAID Device Settings.
Hot Spare Pool: You can press F4 in this field to list and select an available hot spare pool. This pool is a separate SVM device which must already exist, and may be created using the Hot Spare Pools option described below. Note that hot spare pools are only applicable to RAID 0 devices that are assigned to mirrored (RAID 1) devices.
When all selections are complete, Press F3 or ESC to return the SVM Settings Menu.
• RAID 1 (mirrored) : When selecting a RAID 1 device, or changing the RAID type of a previous device, the following options will appear:
Storix System Backup Administrator 44 Version 8.2 Solaris System Recovery Guide

A RAID 1 meta-device can only be built using other (typically RAID 0) meta-devices. Therefore, if you have not already done so, you must create at least one RAID 0 device first. To select the RAID 1 device on which to create this mirror, press F4 in the Device List field. Only RAID 1 meta-devices which already exist will be provided in the selection list.
The additional options may be set to the default values shown. Otherwise, you can change the additional options by moving to the desired entry field and pressing F4, or press F1 for additional information.
When all entries are complete, press ESC or F3 to return to the SVM Settings Menu.
• RAID 5 (parity) :
When changing the RAID Type to RAID 5, or when selecting an existing RAID 5 device, a screen similar to the following will appear:
Raid 5 meta-devices are configured using disk slices or soft partitions. You will need a minimum of 3 underlying devices to make a RAID 5 meta-device. To select the devices to include, move to the Device List field and press F4 to select. Only defined disk slices and soft partitions will appear. You must select at least 3 devices. If you do not have enough devices, press ESC to return the settings screen above, then type “D” in the Create option field to delete this meta-device.
Hot Spare Pool: You can press F4 in this field to list and select an available hot spare pool. This pool is a separate SVM device which must already exist, and may be created using the Hot Spare Pools option described below.
Storix System Backup Administrator 45 Version 8.2 Solaris System Recovery Guide

The additional options may be set to the default values shown. Otherwise, you can change the additional options by moving to the desired entry field and pressing F4, or press F1 for additional information.
• Soft Partitions: A soft partition is a meta-device that sits on a single disk slice or other meta-device. The difference between the soft partition and other devices is that a soft partition has a fixed size, and multiple soft partitions can share the same underlying device. Therefore, if you have a disk slice or a RAID 0 device that is 6 GB in size, you can create 6 soft partitions, each 1 GB in size, using the same device.
After selecting this option, you are given a list of existing soft partitions and an option to add a new device:
Select Add New to create a new soft partition, or use the arrow keys to select a line containing an existing soft partition and press Enter. A screen similar to the following will be displayed:
• Hot Spare Pools: This type of meta-device contains one or more disk slices which are used as spare parts for other RAID 0 or RAID 5 meta-devices. If a disk fails which contains redundant (mirrored or parity) data, the hot spare will automatically take over for the failed disk, and will be automatically resyncd with the missing data.
Note that only RAID 0 devices which are part of a RAID 1 (mirrored) meta-device will benefit from having a hot spare assigned, since only then is there redundant data.
When selecting this option, you are given a list of existing hot spares and an option to add a new one:
Storix System Backup Administrator 46 Version 8.2 Solaris System Recovery Guide

If you select Add New, a new device will be created with a new name. The name will always start with “hsp”, followed by a number. When adding a new device or selecting an existing device, the following screen will appear:
Move to the Device List field and press F4 to list and select the slice or slices to add to the meta-device. To remove the hot spare pool, move to the Create Option field and press “D”. When doing so, the hot spare will be automatically removed from any other meta-device records it is assigned to.
When complete, press F3 or ESC to return to the SVM Settings Menu.
Understanding RAID 0+1
This information is provided to help you understand the association between RAID 0 and RAID 1 devices in a meta-device, and the hot spare pools used to recover from disk failures. We provide this information in case you choose to use the Storix recovery process to reconfigure your storage for higher performance and availability.
A RAID 0+1 device configuration is a set of striped disks that are mirrored onto another set of striped disks. In other words, striped mirrors. Since mirroring usually causes I/O performance degradation, this design is typically used to get normal disk I/O performance while still having mirrored (redundant) data. A RAID 1 (mirrored) meta-device can only be created on RAID 0 (striped) meta-devices.
If the mirror contains only one RAID 0 device, then no mirroring is actually taking place (nothing to mirror to). If you assign more than one RAID 0 to a mirror, then the data will be replicated onto each RAID 0.
Likewise, if a RAID 0 device has only one underlying device (disk slice or soft partition), then no actual striping is taking place. SVM still allows you to create a RAID 0 with a single device, since only then can you mirror the data. You still end up with a mirrored configuration, but with no underlying striping.
For a RAID 0+1 configuration, you need to have at least 2 stripes, each of which contain at least 2 underlying devices. Then, you create a mirrored meta-device from the 2 stripes.
Storix System Backup Administrator 47 Version 8.2 Solaris System Recovery Guide

Here’s an example:
d0 (RAID 1)
d10 (RAID 0)
d11 (RAID 0)
disk 1 slice
disk 2slice
disk 3slice
disk 4 slice
Devices d10 and d11 are RAID 0 meta-devices, each made from two different disk slices (on different disks). Mirrored meta-device d0 is then created from d10 and d11. Any data written to d0 will be mirrored onto the striped meta-devices, which in turn will each stripe the data onto 2 slices. You can create a filesystem on device d0, and know that the data will be both striped and mirrored, providing both performance and redundancy.
Now that this is done, it’s a good idea to also create a hot spare pool. This hot spare pool will typically consist of a slice from an additional disk. For example, you can have a single host spare device called “hsp001”, which is assigned to both of the RAID 0 devices. Then, if any disk fails within either RAID 0 device, this hot spare slice will automatically fill-in, and will be automatically syncd up with the data from the other mirror.
ZFS Filesystem/Volume Manager The Zettabyte File System is an advanced filesystem for Solaris that includes volume management. ZFS’s ease-of-use, simplified administration and dynamic growth are quickly increasing its popularity. ZFS is available in Solaris 10 (6/06) and later. SBAdmin supports all aspects of ZFS filesystems and volumes, and the ability to migrate older slice-based filesystems to ZFS. The following is some terminology that will be used in this chapter:
• ZFS Pool (Zpool): Underlying devices (currently only disk slices are supported) are combined into a single “pool”, from which ZFS virtual devices (see below) are created. A pool can then be split into multiple ZFS filesystems and raw volumes.
• Virtual Devices: The zpool is comprised of one or more virtual devices, each of which is comprised of one or more disk slices. The virtual devices, containing multiple disk slices, can use striping (RAID 0), mirroring (RAID 1), or raidz (RAID 5/6). Virtual devices can be added to a zpool at any time, extending its storage capacity.
• Datasets: A dataset is either a ZFS filesystem or a ZFS volume. While a volume has a fixed size, the filesystem will grow and shrink dynamically depending on its contents. It is possible to place limitations, or quotas on the amount of space a filesystem can take, and you can also set a reserved size to ensure that there is always at least that amount of space available in the zpool allocated to a particular filesystem. You can place another filesystem type (i.e. UFS) in a volume, but a ZFS filesystem is a unique filesystem with nearly unlimited grown and extremely high performance.
When you select ZFS Filesystem/Volume Manager from the Installation Settings Menu, the following options will appears, which are each described below:
Storix System Backup Administrator 48 Version 8.2 Solaris System Recovery Guide

ZFS Pools The first item on the menu is used to create a zpool and its underlying virtual devices. This section describes editing zpools. Refer to the following section for virtual devices. When selecting this option, you are given a list of existing zpools and an option to create a new one:
If you select Add New, a new zpool name will be generated for you. When creating a new zpool or selecting an existing zpool, you are taken to the following options screen:
From here, you can change the Pool Name (and all datasets and virtual devices within the pool will be changed as well). If you want to delete the zpool, move to the Create Option field and press “D”. To add, change or delete virtual devices, use the down-arrow to move to a virtual device line (1-5) and press Enter or F4 to list and change the attributes. Note that you can only add virtual devices in order, and if a virtual device is deleted, the remaining virtual devices will be moved up in the list as needed. You can only move to a line containing existing virtual device information or the next sequential line to add a new virtual device.
Storix System Backup Administrator 49 Version 8.2 Solaris System Recovery Guide

Changing the virtual device settings is described in the next section. If you are finished with the zpool selections, pres ESC or F3 to return to the ZFS settings menu.
Virtual Devices After you have selected the zpool you want to change, you can add, change or delete virtual devices. The virtual device will be comprised of one or more disk slices, and may be utilized in a mirrored, striped or parity disk configuration for higher performance and/or availability. When selecting a virtual device to add or change, a window similar to the following will appear:
If you want to delete this virtual device, enter a “D” in the Create Option field. You can select from one of the following RAID types by pressing F4 at the RAID Type field:
• stripe: This is the default virtual device type or RAID 0: Data will be striped across all devices selected in the Device List field. You must add one or more devices to this virtual device. If only one device is selected, no striping will occur.
• mirror: Data will be mirrored (RAID 1), or copied, across the devices in the Device List field. This option requires at least 2 devices be selected for mirroring to have affect.
• raidz1: This is a RAID 5: (single parity) configuration, and requires at least 3 devices be selected in the Device List field.
• raidz2: This is a RAID 6: (double parity) configuration, and requires at least 3 devices be selected in the Device List field.
• spare: The disks selected in the Device List field will not have data written to them but will be held for use in case of a failure of another disk in the pool. If a disk failure occurs on a mirrored or parity configuration, one of these disks will automatically replace it and be syncd with the most recent data.
Select or de-select one or more devices for the virtual device by pressing F4 at the Device List field. When all selections are complete, press F3 or ESC to return to the Zpool Settings screen.
ZFS Filesystems After you have created at last one zpool, you can add any number of ZFS filesystems to it. Note that ZFS filesystems are special filesystems contained only in zpools, not to be confused with other Solaris Filesystems. When selecting ZFS Filesystems from the ZFS Settings Menu, you are given a list of existing ZFS filesystems and an option to add a new one:
Storix System Backup Administrator 50 Version 8.2 Solaris System Recovery Guide

When adding a new filesystem, a default mount point and dataset name will be created for you. After selecting to add a new ZFS filesystem or to edit an existing one, the following options screen will appear:
Each option can be explained by pressing the Help (F1) key at any entry field. Note the following:
• Pool Name: You can press F4 at this field to list the existing zpools and select a different zpool. Doing so will move this dataset and any child datasets (i.e. “data2/fs2/stuff” could be a child of “data2/fs2”) to the newly selected zpool. The filesystem mount point will also be changed to reflect the new zpool name unless it was altered previously.
• Dataset Name: This name will be appended to the pool name to create a mount point unless the mount point has been altered before. You can change the dataset name, but the parent of the dataset name you choose must also exist. For example, you cannot have a dataset name “fs2/data2” unless the dataset name “fs2” also exists in the zpool “pool1”.
• Mount Point: This is automatically generated for new zpools based on the zpool and dataset name. If you change the pool name or the dataset name, the mount point will be changed also, but only if it was not altered previously.
• Mount Type: Enter the method used to mount the ZFS filesystem. Selecting “zfs” will mount the filesystem using normal ZFS mounting. Selecting “legacy” will mount the filesystem using traditional /etc/vfstab mounting. Selecting “none” indicates that the filesystem will not be automatically mounted.
• Encryption: This option allows you to apply encryption to the dataset. Selecting “on” will launch a new window where you will provide the encryption properties.
• Quota: Enter the quota property to be used for this dataset. This value limits the amount of space this dataset and its descendants may use.
• Reservation: This size applies to this dataset and any child datasets (i.e. “data2/fs2/stuff” could be a child of “data2/fs2”). This is reserved space in the pool that cannot be used by other datasets. The filesystem is not pre-allocated to this size, but is ensured at least this much space for future growth. Changing this number will reduce the amount of free space within the zpool for other datasets.
When all selections are complete, press F3 or ESC to return to the list of filesystems, and ESC or F3 again to return to the ZFS Settings Menu.
Storix System Backup Administrator 51 Version 8.2 Solaris System Recovery Guide

ZFS Volumes A ZFS volume has a fixed size (but may be increased) and does not contain a ZFS filesystem. It may contain any type of data, including other Solaris Filesystems.
After you have created at last one zpool, you can add any number of ZFS volumes to it. When selecting ZFS Volumes from the ZFS Settings Menu, you are given a list of existing ZFS volumes and an option to add a new one:
When adding a new volume, a new dataset name will be created for you. After selecting to add a new ZFS volume or to edit an existing one, the following options screen will appear:
Each option can be explained by pressing the Help (F1) key at any entry field. Note the following:
• Pool Name: You can press F4 at this field to list the existing zpools and select a different zpool. Doing so will move this dataset and any child datasets (i.e. “data2/fs2/stuff” could be a child of “data2/fs2”) to the newly selected zpool.
• Dataset name: You can change the dataset name, but the parent of the dataset name you choose must also exist. For example, you cannot have a dataset name “vol1/data” unless the dataset name “vol1” also exists in the zpool “pool1”.
• Encryption: This option allows you to apply encryption to the dataset. Selecting “on” will launch a new window where you will provide the encryption properties.
• Volume Size: A non-zero entry is required in this field. This will be the size of the volume, and the total space available in the zpool will be reduced by this value.
• Vol Blksize: Enter the blocksize in this field.
When all selections are complete, press F3 or ESC to return to the list of volumes, and ESC or F3 again to return to the ZFS Settings Menu.
Storix System Backup Administrator 52 Version 8.2 Solaris System Recovery Guide

Change Solaris Filesystems This option may be used to change any of the settings for the Solaris filesystems, which vary depending on the filesystem type. SBAdmin Backup Administrator supports the following filesystem types:
ufs Universal File System (Solaris default)
udfs Universal Disk Format File System
pcfs PC Filesystem (DOS/VFAT)
zfs Zettabyte File System (refer to ZFS Filesystems)
Virtually any of the attributes which are available for the filesystems above can be set or changed from the SBAdmin installation menus. When you select this option you will receive a list of filesystems currently defined:
ZFS filesystems do not appear in this list, and are not covered in this section. Refer to the ZFS Filesystems section for additional information.
Select Add New to create a new filesystem or select an existing filesystem from the list. If you select to add a new filesystem, you are first prompted for the new mount point, or directory, for this new filesystem and the device on which to build the filesystem.
Next, a screen similar to the following will appear:
The options displayed here are for a “ufs” filesystem. If you change to a different filesystem type, the options will change as well. We won’t describe the options in detail since you have much information available with the F1 (help) key. Also use the F4 key to show lists of available options.
The options common to all filesystems are:
Create Option – Here you can press F4 to select Create the filesystem only, or Create it and restore the data, or Delete (filesystem will not be created or restored). Although the filesystem data may be on the backup, you can choose to create the filesystem without actually restoring the data into it.
Storix System Backup Administrator 53 Version 8.2 Solaris System Recovery Guide

Mount point – You can change the directory where the filesystem will be mounted. The data is restored relative to this directory, so the contents, if any will not change. You cannot change the mount point of the root (/), /boot or /usr (if any) filesystems.
Device – Here you can select a new device where the filesystem should be created and/or restored. Possible filesystem devices are disk slices, meta-devices (SVM) and Zpool Virtual Devices. When pressing F4 at this field, you will get a list which contains the devices currently assigned and any devices that are not already assigned. Press Enter on any line to assign the device to the filesystem.
Filesystem type – Here’s where you can select the type of filesystem to create. Only the filesystem types supported by BOTH the boot media and the backup to be restored will be selectable within this field. Changing this field will change the options while appear in the Additional options section below.
Mount options – F4 at this field will display a lengthy list of mount options which apply to all filesystems as well as additional mount options specific to the selected filesystem type. You can combine them in most cases, and some options, when selected, will prompt you for additional input. In most cases, you can use “default”. Don’t change these unless you know what you’re doing.
Additional Options – Various options such as block size, fragment size, label id, etc, will appear, based on the filesystem type selected. The options vary for each filesystem, and the list of available selections under each option will also vary depending on both the filesystem type and the other options selected.
Filesystem Size versus Device Size The minimum filesystem size displayed at the bottom of the screen the size of the data in the original filesystem that was backed up. The size of the device may have to be quite a bit larger depending on the amount of space the filesystem metadata requires.
SBAdmin tries to keep track of the minimum size of the device based on the amount of data to be restored, and this calculation varies based on the filesystem type and many other options that are configurable here. If you change any of the options, such as the fragment size, block size, or number of bytes per inode in a filesystem, the amount of free space may be adversely affected. Be sure you have plenty of free space available (based on the size of the device) in case the change requires more space than the filesystem previously needed.
When you have finished your changes, press F3 or ESC to return to the list of filesystems, then F3 or ESC again to return to the Change Settings menu.
Change Swap Devices Use this option to select the device or devices which should be used as swap devices (also known as swap space and paging space) on the system. Solaris supports disk slices, meta-devices and ZFS volumes for swap devices. When selecting this option, a screen similar to the following will appear:
Storix System Backup Administrator 54 Version 8.2 Solaris System Recovery Guide

Storix System Backup Administrator 55 Version 8.2 Solaris System Recovery Guide
If an arrow (") appears next to a device, then that device is currently configured as a swap device. To select an unselected device, highlight the desired line and press Enter. If you do not want to use that device for swap, press Enter and the arrow will disappear. If removed, the device will then be unassigned and may be used for other features, such as filesystem data.
When you’ve completed your selections, press F3 or ESC to return to the Installation Settings menu.

Storix System Backup Administrator 56 Version 8.2 Solaris System Recovery Guide
7. Install the System To install the system from the SBAdmin System Backup, you first must have selected the Installation Device (which may be located on a local or remote host). You then have the option View/Change the Installation Settings, where you can make any changes to the backup information stored on the backup media. If you used that option, then the backup information was already restored from the backup, verified and modified as needed to ensure the installation can be started.
Verification Process If you select the option Install the System with Current Settings, this backup data will be checked (again if necessary) to ensure the defined devices and filesystems can be created successfully. Here are a few things that are checked:
1. The devices, filesystems, and SVM/ZFS devices defined on the backup are checked to ensure the support is available from the boot media to recreate them.
2. Ensures any backup data previously residing on a disk is assigned to a new disk unless the user explicitly chose not to restore data.
3. Verifies that all devices assigned to SVM meta-devices and ZFS virtual devices are valid and that there are enough devices assigned for the appropriate RAID level.
4. Checks that SVM meta-devices and ZFS pools are large enough to hold the filesystems and volumes defined.
5. Validates the FDISK partition table and slice table and removes any “gaps”.
6. Verifies that partitions will fit onto their respective disks, and that slices will fit into their disks (SPARC) or partitions (Intel). It also verifies that partitions or slices begin at disk track boundaries (in case the disk geometry has changed), where required. Each table is modified as needed to correct boundaries, sizes and to remove “gaps”.
7. Checks that all filesystems are being created on devices large enough to restore the data. Even if a device has not changed, the requirements may change if, for instance, the filesystem type was changed to one which requires more space for filesystem metadata than was previously needed.
8. Verifies that the root filesystem is being restored and the device on which it is defined is still valid.
9. Verifies that the configuration conforms to boot loader requirements of the specific system type.
If any problems are detected, you will be informed of the problem and a recommended solution. In some cases the process will offer to fix the problem for you, or even automatically reduce the sizes of partitions containing filesystem data to make the partitions fit onto a disk. If problems persist, you will need to return to the Change Installation Settings menu to make any changes required to restore the data (or select not to create certain devices or restore certain data).

Starting the Installation If all checks out, you are given one final warning:
Press “y” to continue the installation or “n” to return to the Main Menu.
If you choose to continue the install, the system will begin by reading additional information from the backup media, then creating the devices and filesystems that are defined. After the devices are created, all filesystems are created and mounted.
If the backup was encrypted when it was created, you will be asked to enter the encryption key to decrypt the data during the installation. If the correct key is not entered, you will not be able to continue the installation. Refer to Installing from an Encrypted Backup for more information.
As the data is restored from the backup, a progress indicator will appear showing the status of the restore including the estimated amount of data and time to completion. When all data for all filesystems, volumes, partitions or meta-devices (if included on the backup) is restored, the system will perform some cleanup and post-installation processing and attempt to make the system bootable.
Installation Errors If any error occurs in creating the devices, creating or mounting the filesystems, or restoring the data, you will be provided a message containing the details and the failing command and asked to correct the process manually before continuing the installation. At this point you are placed at a shell prompts where you can diagnose and correct the problem. The command which failed must be completed before the installation can continue successfully. When the problem is corrected, type “exit” to exit the shell and continue the installation.
System Boot Problems The SBAdmin installation process does its best to prevent you from making any changes that might prevent the system from booting. For example, you are not allowed to put the /boot filesystem on a meta-device since boot loaders can’t read the boot configuration or kernel from a meta-device.
The most common boot problem after an install is simply that your system firmware is trying to boot from the wrong device. First remove any removable boot media from the system and try again. If you changed the disk containing the /boot (or root if no /boot) filesystem, you may need to tell your firmware to boot from the new disk. Each firmware used has different menu options, and also names the disks differently, so you will have to refer to your system documentation for details.
Once the root filesystem is available during reboot, control is turned over to the normal system initialization procedures. Any errors that occur at this point will not usually render the system unusable, but may require additional customization (beyond the scope of SBAdmin) to restart all system processes in the correct order.
Should all else fail, at least we know that the system has been configured and restored successfully, so we just need to figure out how to get it to boot. Your SBAdmin Boot CDROM can help. You can boot from the CDROM, and when the menus appear, select “Enter a Maintenance Shell”. You can then perform system maintenance commands to mount any filesystems, diagnose the problem and make the system bootable.
Storix System Backup Administrator 57 Version 8.2 Solaris System Recovery Guide

Storix System Backup Administrator 58 Version 8.2 Solaris System Recovery Guide
Should any system, even when changing the disk configuration, not startup at the end of the installation process the same as the original system, you should report the problem to Storix immediately. With the vast number of Solaris versions and releases, and platform support, it’s virtually impossible for Storix to test every scenario, but will ensure that your system gets up and running!
Network Re-configuration (avoiding conflicts) If the system is reinstalled from a remote install server, then you entered the client IP address when either booting the system, or when selecting to restore from a remote server. In either case, the client IP address entered will be used to reconfigure the network adapter information restored from the backup. In addition, any additional network adapter configurations restored from the backup will be disabled on reboot.
This is important when a single backup is used to reinstall multiple clients, as each client will then reboot with its own customized network configuration, regardless of that on the backup. Network adapters not used during the installation are disabled on reboot to prevent any duplicate IP addresses (i.e. this system and that of the original client the backup was taken from).
If, however, you installed the system from local boot media (CDROM or hard disk), the new network configuration, if different, is not known. It is assumed that the backup being restored came from the same system, and the network configuration is unchanged. Therefore, when the system reboots at the end of the install, it the network will configure with the original settings restored from the backup. If the backup contains IP addresses used by another system on the network, you should unplug the system from the network to prevent IP address conflicts until you have changed the network settings on the newly restored system.

8. System Recovery Utilities
From the System Installation and Maintenance Main Menu, select System Recovery Utilities to display the following options:
Configure Remote Install Manager If you configured RIM at the time you created the boot media, it will be automatically enabled and it will not be necessary to configure in this option. If, however you did not pre-configure RIM, or if you need to change the RIM configuration (network adapter, IP address or subnet, or if you forgot the password you previously assigned), you can configure and enable RIM from within the system Installation menus after booting from the SBAdmin boot media. To do so, select the System Recovery Utilities option from the main menu to display the following:
Select Configure Remote Install Manager. The following screen will display:
Storix System Backup Administrator 59 Version 8.2 Solaris System Recovery Guide

1. The Remote Install Username is set to “sbadmin” and may not be changed. Enter a password in the Remote Install Password field. The password will be necessary to login to the remote install client.
2. Select the Network Device (adapter) that should be configured to connect to the remote install client.
3. Enter the IP Address used to configure the network adapter. Note that, if the selected adapter is already configured (as a boot or install device) and you enter a different IP address than the adapter is currently using, you will be provided a warning and allowed to continue. If you do so, however, the previous settings will no longer apply, and the adapter will be reconfigured under the new IP address.
4. Enter the Subnet Mask (if necessary) used when configuring the network adapter. As with the IP Address, if the adapter is currently configured under a different subnet mask, you will be warned and allowed to reconfigure the adapter under the new subnet mask.
When you have finished your selections, press ESC or to return to the RIM Menu. Then select Start Local SSH Server. The network adapter will be configured with these settings and the RIM server will be started. You can see the current status of the RIM server by looking at the Local SSH settings which appear on the screen.
View or Change Backup Group ID This option is used if you have configured a server with an “Optional client with access to all groups”. For further information about configuring the server this way please see the SBAdmin User guide.
If a backup has been copied to a shared server, the new group id will not match the group id of the original client backup. When restoring from the shared server, you will need to ensure a client is configured with access to all groups, and you have the appropriate group ID to enter on the boot media.
Storix System Backup Administrator 60 Version 8.2 Solaris System Recovery Guide

To change the groups ID simply begin typing and it will replace the old group id. Press the escape key to save the new setting and return to the previous menu.
Start a Maintenance Shell Selecting this option will put you at a Korn (ksh) shell, from which you can enter various system maintenance commands. Should any error occur during the system installation that prevents the process from continuing, you will be automatically placed at this prompt.
When entering the shell from the installation menus, you can simply return to the installation menus by exiting (typing “exit”) from the shell.
Storix System Backup Administrator 61 Version 8.2 Solaris System Recovery Guide

Storix System Backup Administrator 62 Version 8.2 Solaris System Recovery Guide
Index A
ascii encryption key, 24
B
backup sequence number, 28 network install, 16
BIOS, 20 CDROM boot, 20 networkboot, 21
boot booting to install process, 20 problems, 57
boot loader, 5 definition, 5
boot media cdrom, 8 creating, 7–19 disk, 9 network, 10 when to make, 7
boot server. See network boot server booting, 20, See also network boot broadcast boot, 16, 21
C
cdrom create ISO image, 8
CDROM booting, 20
client booting for system installation, 20 network installation, 14
cloning systems, 23 configure
network boot/install, 14 network boot/install client, 15
D
dataset. See ZFS dataset decrypt. See encryption disk
configure boot disk, 9 disk backup file
local install device, 29 disks
selecting for installation, 37–41
E
encryption, 24, 57 installing, 24 software, 2
F
filesystems adding, changing, removing, 53 definition, 6 types, 53
firmware, 5 definition, 5
H
hard disk. See boot media: disk help, 26
system installation menu, 26 hex
encryption key, 24 hot spare pool
assigning, 44, 45 description, 42 meta-device, 46
I
install from system backup. See system installation
install device parallel virtual device, 29 sequential virtual device, 29
install server. See network install server installation. See system installation ISO. See boot media: cdrom
K
keys. See encryption
L
LVM definition, 6
M
MAC address, 16 menu
system installation and maintenance, 21 meta-device
definition, 41 terminology, 41
meta-devices swap device, 54
mirror meta-device, 44 meta-device description, 41 ZFS virtual device, 50
mount point ZFS dataset, 51
MSDOS

Storix System Backup Administrator 63 Version 8.2 Solaris System Recovery Guide
filesystem, 6
N
network, 14 adapter hardware address, 16 alternate install server, 16 re-configuration after system install, 58
network adapter hardware address, 21 remote installation manager, 13, 60
network boot, 21 network boot server, 10, 14, 15, 17, 18, 21, 25 network boot/install, 14
alternate install server, 17 boot image
creating, 10 updating, 19
boot loaders, 10 boot server, 10, 14, See network boot server install device, 16 install server. See network install server installing different AIX levels, 18 unconfigure install client, 16 using alternate network, 17 using different boot and install servers, 17
network install device tape, 32
network install server, 14, 16, 17, 18, 32 changing during install, 27
nfs mount backup file local install device, 30
no-prompt install, 10 no-prompt install, 15 no-prompt install, 21 no-prompt install, 23
O
OpenBoot, 20 CDROM boot, 20 networkboot, 21
OpenFirmware, 5
P
paging space. See swap devices parity
meta-device, 45 meta-device description, 41
partition migrating, 39 PCFS, 6
partition table changing, 38, 39
partition table, 56 PCFS, 6, 53
R
RAID level 0
ZFS virtual device, 50 level 0 meta-device. See stripe level 0+1, 47 level 1
ZFS virtual device, 50 level 1 meta-device. See mirror level 5
ZFS virtual device, 50 level 5 meta-device. See parity level 6
ZFS virtual device, 50 raid devices
descriptions, 41 RAID devices
meta-devices, 43 raidz1
ZFS virtual device, 50 raidz2
ZFS virtual device, 50 recovery. See system installation remote install manager
configuring from install menus, 59, 60 remote installation manager, 12 replication database
adding, changing, removing, 42 reservation
ZFS dataset, 51 RIM. See remote installation manager
S
slice, 41, 42, 45, 46, 47, 48, 50, 54 filesystems, 6 install settings, 35 migrating, 39 position, 41 SVM, 6 ZFS, 6
slice table changing, 38, 40
slice table, 56 soft partition, 41, 45, 47
description, 42 meta-device, 46
Solaris Volume Manager. See SVM spare
ZFS virtual device, 50 ssh program, 13 strimsh program, 13 stripe
meta-device, 43 meta-device description, 41 ZFS virtual device, 50
SVM, 41 swap devices, 54

Storix System Backup Administrator 64 Version 8.2 Solaris System Recovery Guide
system backup network install, 14 system installation, 23
system backup disk local install device, 29
system backup nfs local install device, 30
system installation booting, 20 booting in installation mode, 20 cloning systems, 23 device, 27 errors, 57 install device
changing, 27 selecting a remote device, 32
installing the system, 56 main menu, 22 mode, 15 network install server
changing, 27, 31 no-prompt install, 10, 23 settings, 35, 55 starting, 57 verification, 56
system recovery. See system installation system recovery utilities, 59–60
T
tape autoloader, 28 network install device, 32
tape drive remote, 32
text encryption key, 24
Tivoli. See TSM TSM
administrative user, 35 client, 35
configuration, 33 server, 35
U
UDFS, 6, 53 UFS, 6, 48, 53 utilities. See system recovery utilities
configure remote install manager, 59, 60
V
verify hardware configuration, 25
virtual device. See ZFS virtual device virtual devices
parallel, 29 sequential, 29
Z
Zettabyte File System. See ZFS ZFS
description, 48 filesystem type, 53
ZFS dataset description, 48 filesystems, 50 name, 51, 52 volumes, 52
ZFS filesystems adding, changing, removing, 50
ZFS pool adding, changing, removing, 49 description, 48
ZFS virtual device adding, changing, removing, 50 description, 48
ZFS volumes adding, changing, removing, 52
zpool. See ZFS pool