Embed Size (px)
Citation preview
Storybook Weaver
®
Deluxe 2004
User Guide
www.riverdeep.net

Riverdeep grants limited permission to classroom teachers to duplicate the reproducible portions of this publication for classroom use only and for no other purpose.
In the interest of product development, information and specifications represented herein are subject to change without notice.
© 1998-2003 Riverdeep Interactive Learning Limited, and its licensors. Developed by ZEMNOTT, Inc. Portions © 2002 Franklin Electric Publishers, Inc. Portions © 1999 Espasa Calpe. Portions of this software are based in part of the work of the independent JPEG group. Uses Bink Video. Copyright © 1997-2003 by RAD Game Tools, Inc. Uses Miles Sound System. Copyright © 1991-2003 by RAD Game Tools, Inc. All rights reserved by their respective parties. The Learning Company and Storybook Weaver are registered trademarks of Riverdeep Interactive Learning Limited. Mac and MacinTalk are trademarks of Apple Computer, Inc. Microsoft and Windows are registered trademarks of Microsoft Corporation in the United States and other countries. All other trademarks are the property of their respective owners.
USE OF THIS PRODUCT IS SUBJECT TO CERTAIN RESTRICTIONC AND LIMITATIONS OF WARRANTY UNDER THE LICENSE AGREEMENT CONTAINED HEREIN
Product Instructions
..................................................................................... 1
The Product at a Glance
......................................................................................... 2
Getting Started Storybook Weaver Standalone Version
....................................................... 4Minimum System Requirements ........................................................................ 4
Windows
®
95(b), 98, or Me
...................................................................................... 4
Windows
®
2000 Professional or XP Professional
................................................. 4
Macintosh
®
OS 8.6 to 9.2, Mac OS X
....................................................................... 4Setup Instructions ..................................................................................................... 5
Windows 95, 98, or Me
............................................................................................. 5
Windows 2000 or XP Professional
.......................................................................... 5
Macintosh
.................................................................................................................. 5
The Product in Detail
............................................................................................... 7The Opening Screen ................................................................................................. 7Starting a Story ........................................................................................................... 7
The Title Page
............................................................................................................ 8
The Story Page
....................................................................................................... 10Working with the Words ...................................................................................... 18
Entering Text
.......................................................................................................... 18
Deleting Text
.......................................................................................................... 19
Moving Text
............................................................................................................ 19
Using Spell Check
.................................................................................................. 20
Using the Thesaurus
.............................................................................................. 21Working with Advanced Graphic Features ................................................. 22
Putting Objects Within Objects
............................................................................ 22
Editing Objects with the Object Editor
............................................................... 23
Creating Pictures
................................................................................................... 26
Importing Art
......................................................................................................... 26
Using Art from an External Program
.................................................................. 26The Menus ................................................................................................................. 27
Using the File Menu
.............................................................................................. 27
Storybook Weaver Deluxe Program Preferences
............................................... 28
Table of Contents
Table of Contents
Using the Edit Menu
............................................................................................. 28
The Goodies Menu
................................................................................................ 29
The Font Menu
....................................................................................................... 30
The Help Menu
...................................................................................................... 30
Credits
............................................................................................................................. 31
1
Product Instructions
This part of the manual explains basic product operations.
The Product at a Glance
provides a brief summary of the product, including grade range and learning objectives.
Getting Started
provides hardware requirements, installation and start-up instructions, as well as information about how to contact Technical Support.
The Product in Detail
gives step-by-step product instructions. You may refer to this section to help you answer students’ questions about how the product works.
2
The Product at a Glance
Storybook Weaver Deluxe
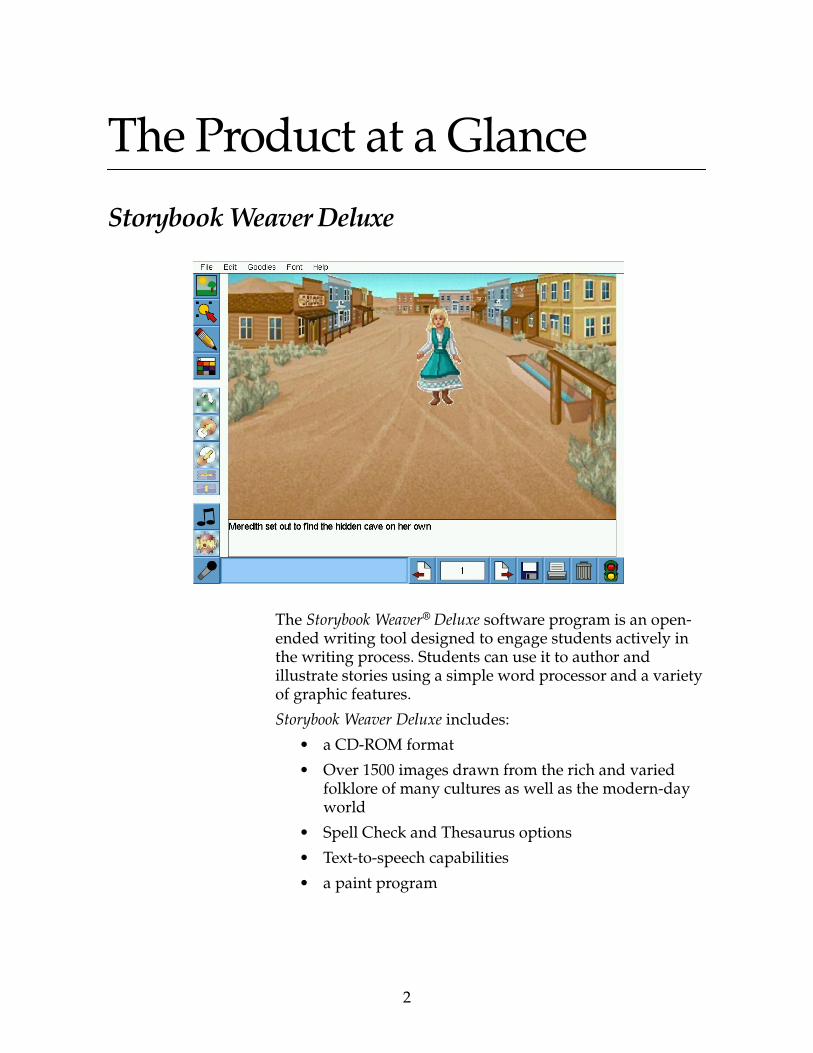
The
Storybook Weaver
®
Deluxe
software program is an open-ended writing tool designed to engage students actively in the writing process. Students can use it to author and illustrate stories using a simple word processor and a variety of graphic features.
Storybook Weaver Deluxe
includes:
• a CD-ROM format
• Over 1500 images drawn from the rich and varied folklore of many cultures as well as the modern-day world
• Spell Check and Thesaurus options
• Text-to-speech capabilities
• a paint program
3
The Product at a Glance
Choosing from a variety of foreground and background colors and scenes, students can construct a variety of settings. To illustrate their storyline, students select from a collection of objects that can be manipulated by changing color, size, and orientation as well as create their own original drawings.
Storybook Weaver Deluxe
has the flexibility to accommodate a wide range of reading and writing abilities. For some students,
Storybook Weaver Deluxe
will provide an introduction to writing; for others, it will provide an enriching environment to express their ideas through writing.
Subject:
Language arts
Grade Range:
Grades K-5
Classroom Use:
Individual or collaborative writing
Learning Objectives:
• to use students’ inherent creativity to write and illustrate a story
• to explore the writing process using a simple word processor and a variety of graphics
• to create illustrations that depict their storyline
• to write with a purpose
• to share writing with an audience
• to enhance vocabulary by associating a word with its picture
• to develop story-sequencing skills
By weaving together the language arts,
Storybook Weaver Deluxe
inspires students to create a variety of stories, from fantasy adventures to everyday events, and provides them with an exciting opportunity to express themselves through their writing.
4
Getting Started
Storybook Weaver Standalone Version
Minimum System Requirements
Windows
®
95(b), 98, or Me
• Pentium
®
, 166 MHz
• 64 MB RAM
• 800 x 600 or higher, High Color
• 8X CD-ROM drive
• 60 MB free space on hard drive for minimum install; 400 MB for full install.
• Windows-compatible sound card
• Internet Explorer
®
5.x (recommended) or Netscape
®
4.7x
Windows
®
2000 Professional or XP Professional
• Pentium II
• 128 MB RAM
• 800 x 600 or higher, High Color
• 8X CD-ROM drive
• 60 MB free space on hard drive for minimum install; 400 MB for full install.
• Windows-compatible sound card
• Internet Explorer 5.x (recommended) or Netscape 4.7x
Macintosh
®
OS 8.6 to 9.2, Mac OS X
• If you're using OS X, log in as an administrator
• G3
®
processor or faster
• 64 MB RAM (with Virtual Memory on)
5
Getting Started Storybook Weaver Standalone Version
• 800 x 600, Thousands of Colors
• 60 MB free space on hard drive for minimum install; 400 MB for full install.
• 8X CD-ROM drive
• Netscape® 4.7x (recommended) or Internet Explorer 5.x (recommended for Mac OS X users)
Setup Instructions
Windows 95, 98, or Me
• Insert the
Storybook Weaver Deluxe
CD, then follow the on-screen instructions. If installation instructions do not appear automatically, choose
Run
from the Start menu, then type
d:\setup
(where
d
represents your CD-ROM drive).
• To run the program after installation, insert the CD and the program will launch automatically. (If the Program does not appear automatically, choose the program from the
Start | Programs | Riverdeep| Storybook Weaver Deluxe
menu.)
Windows 2000 or XP Professional
• Log in as an administrator.
• Follow the instructions listed under
Windows 95, 98, or Me
, above.
Macintosh
• Insert the Storybook Weaver Deluxe CD and double-click the SBW Deluxe icon, then follow the instructions on your computer screen.
• To run the program after installation, please go to the Storybook Weaver Deluxe folder and doubleclick on the Storybook Weaver Deluxe icon.

Getting Started Storybook Weaver Standalone Version
6
7
The Product in Detail
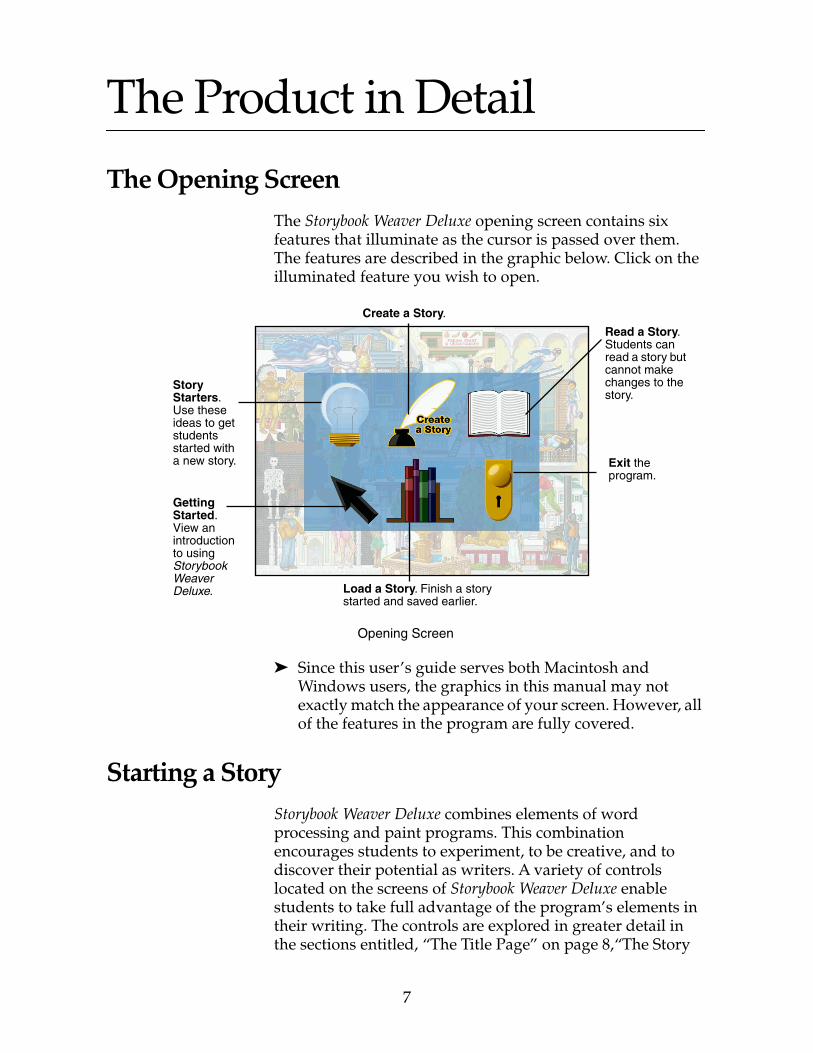
The Opening ScreenThe Storybook Weaver Deluxe opening screen contains six features that illuminate as the cursor is passed over them. The features are described in the graphic below. Click on the illuminated feature you wish to open.
Opening Screen
➤ Since this user’s guide serves both Macintosh and Windows users, the graphics in this manual may not exactly match the appearance of your screen. However, all of the features in the program are fully covered.
Starting a StoryStorybook Weaver Deluxe combines elements of word processing and paint programs. This combination encourages students to experiment, to be creative, and to discover their potential as writers. A variety of controls located on the screens of Storybook Weaver Deluxe enable students to take full advantage of the program’s elements in their writing. The controls are explored in greater detail in the sections entitled, “The Title Page” on page 8,“The Story
Read a Story. Students can read a story but cannot make changes to the story.
Create a Story.
Getting Started. View an introduction to using Storybook Weaver Deluxe.
Exit the program.
Load a Story. Finish a story started and saved earlier.
Story Starters. Use these ideas to get students started with a new story.
The Product in Detail
8
Page” on page 10, “Working with the Words” on page 18, and “Working with Advanced Graphic Features” on page 22.
The Title Page
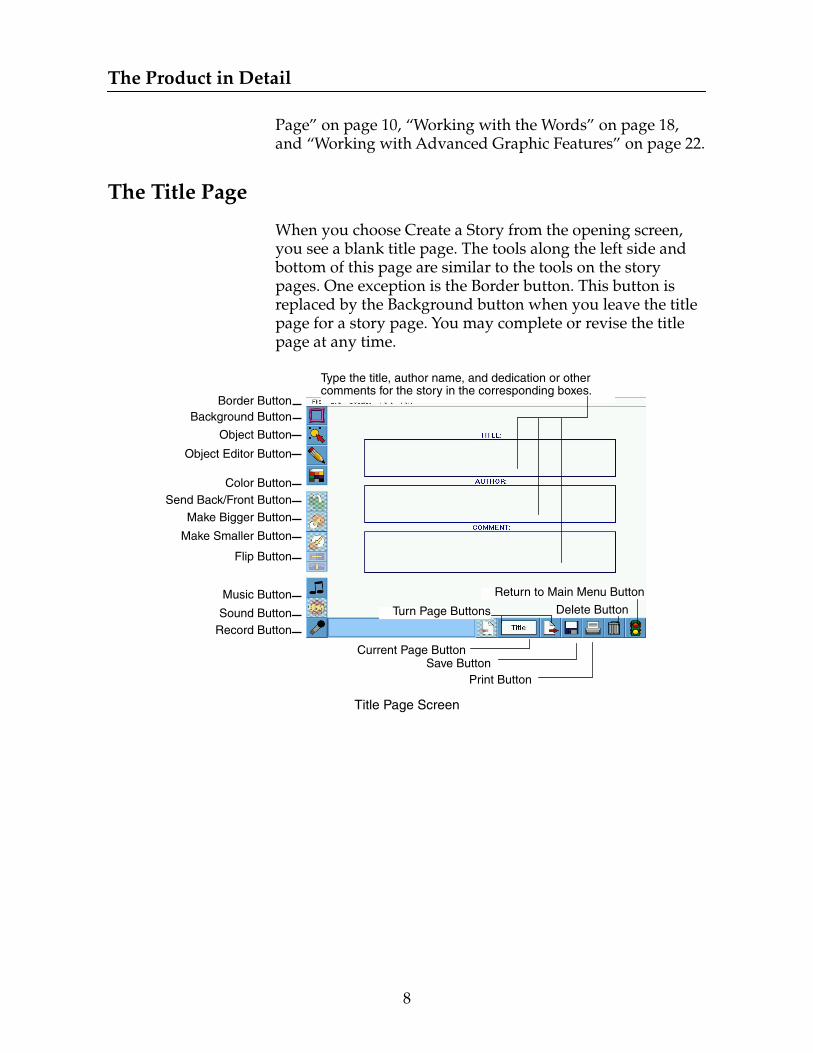
When you choose Create a Story from the opening screen, you see a blank title page. The tools along the left side and bottom of this page are similar to the tools on the story pages. One exception is the Border button. This button is replaced by the Background button when you leave the title page for a story page. You may complete or revise the title page at any time.
Title Page Screen
Type the title, author name, and dedication or other comments for the story in the corresponding boxes.
Object Button
Object Editor Button
Color ButtonSend Back/Front Button
Make Bigger Button
Make Smaller Button
Flip Button
Music Button
Sound ButtonRecord Button
Turn Page Buttons
Current Page ButtonSave Button
Delete Button
Return to Main Menu Button
Print Button
Border ButtonBackground Button
9
The Product in Detail
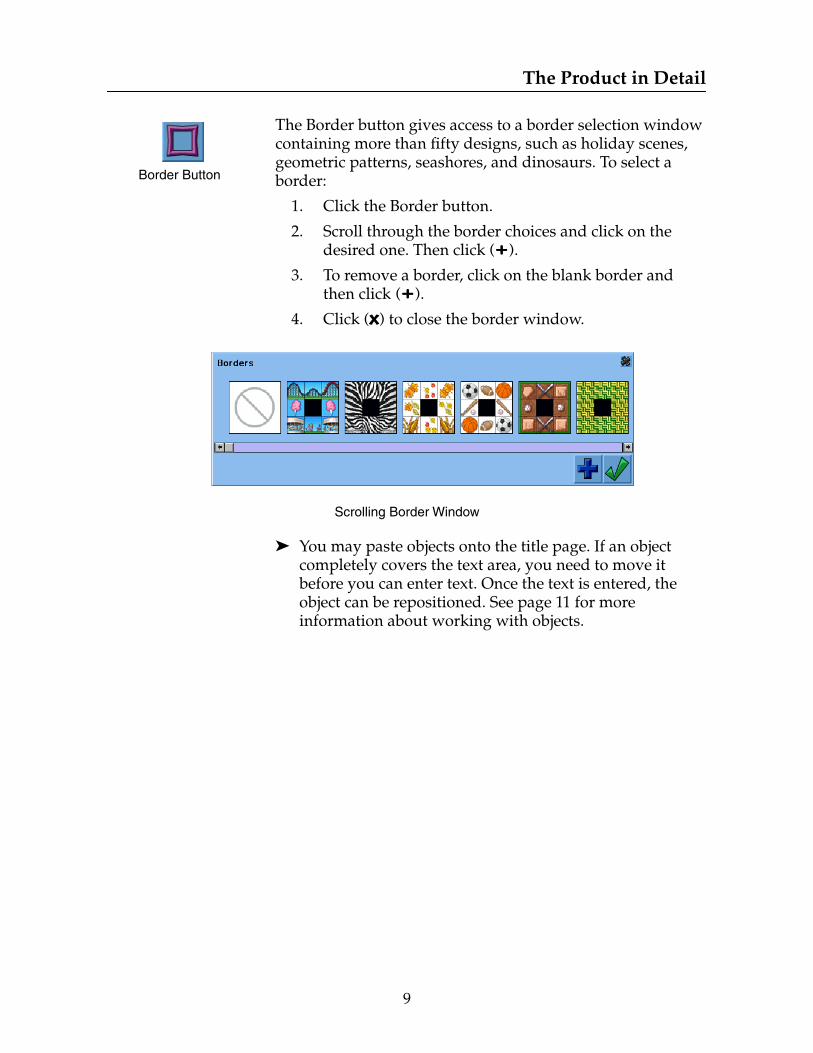
Border Button
The Border button gives access to a border selection window containing more than fifty designs, such as holiday scenes, geometric patterns, seashores, and dinosaurs. To select a border:
1. Click the Border button.
2. Scroll through the border choices and click on the desired one. Then click (++++).
3. To remove a border, click on the blank border and then click (++++).
4. Click (x) to close the border window.
Scrolling Border Window
➤ You may paste objects onto the title page. If an object completely covers the text area, you need to move it before you can enter text. Once the text is entered, the object can be repositioned. See page 11 for more information about working with objects.
The Product in Detail
10
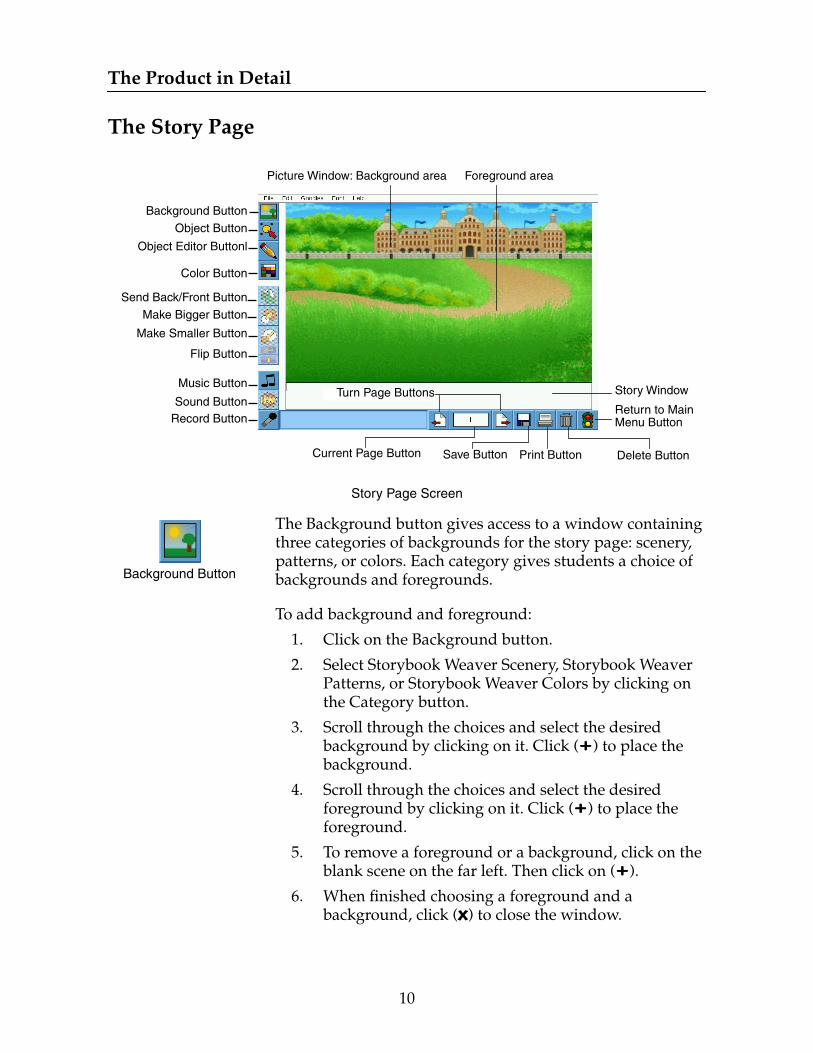
The Story Page
Story Page Screen
Background Button
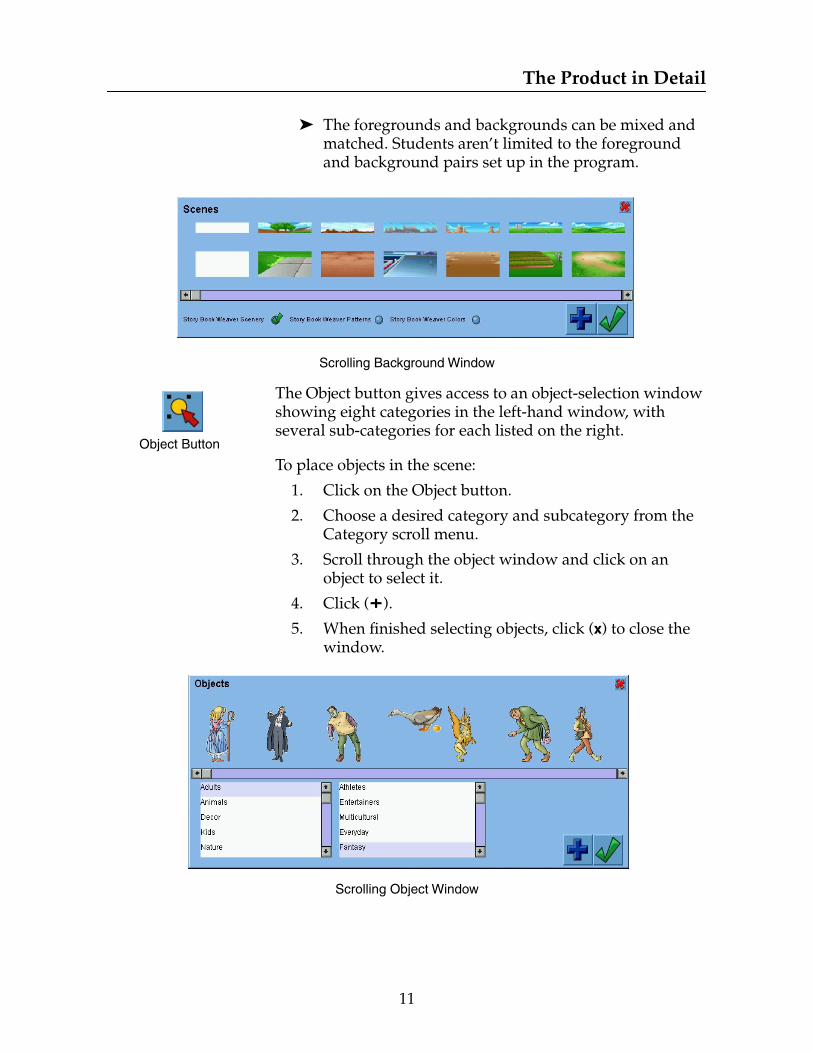
The Background button gives access to a window containing three categories of backgrounds for the story page: scenery, patterns, or colors. Each category gives students a choice of backgrounds and foregrounds.
To add background and foreground:
1. Click on the Background button.
2. Select Storybook Weaver Scenery, Storybook Weaver Patterns, or Storybook Weaver Colors by clicking on the Category button.
3. Scroll through the choices and select the desired background by clicking on it. Click (++++) to place the background.
4. Scroll through the choices and select the desired foreground by clicking on it. Click (++++) to place the foreground.
5. To remove a foreground or a background, click on the blank scene on the far left. Then click on (++++).
6. When finished choosing a foreground and a background, click (x) to close the window.
Picture Window: Background area Foreground area
Background Button
Object Button
Object Editor Buttonl
Color Button
Send Back/Front Button
Make Bigger Button
Make Smaller Button
Flip Button
Music Button
Sound ButtonRecord Button
Turn Page Buttons
Current Page Button Save Button Delete Button
Return to Main Menu Button
Story Window
Print Button
11
The Product in Detail
➤ The foregrounds and backgrounds can be mixed and matched. Students aren’t limited to the foreground and background pairs set up in the program.
Scrolling Background Window
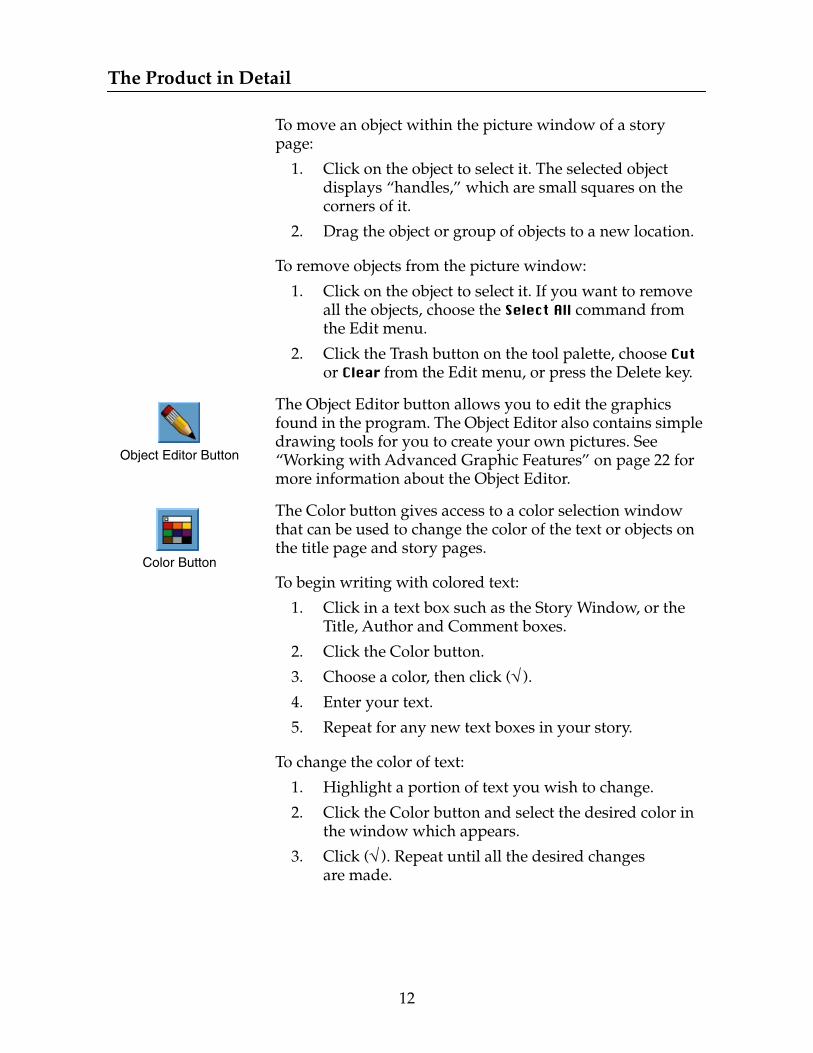
Object Button
The Object button gives access to an object-selection window showing eight categories in the left-hand window, with several sub-categories for each listed on the right.
To place objects in the scene:
1. Click on the Object button.
2. Choose a desired category and subcategory from the Category scroll menu.
3. Scroll through the object window and click on an object to select it.
4. Click (++++).
5. When finished selecting objects, click (x) to close the window.
Scrolling Object Window
The Product in Detail
12
To move an object within the picture window of a story page:
1. Click on the object to select it. The selected object displays “handles,” which are small squares on the corners of it.
2. Drag the object or group of objects to a new location.
To remove objects from the picture window:
1. Click on the object to select it. If you want to remove all the objects, choose the Select All command from the Edit menu.
2. Click the Trash button on the tool palette, choose Cut or Clear from the Edit menu, or press the Delete key.
Object Editor Button
The Object Editor button allows you to edit the graphics found in the program. The Object Editor also contains simple drawing tools for you to create your own pictures. See “Working with Advanced Graphic Features” on page 22 for more information about the Object Editor.
Color Button
The Color button gives access to a color selection window that can be used to change the color of the text or objects on the title page and story pages.
To begin writing with colored text:
1. Click in a text box such as the Story Window, or the Title, Author and Comment boxes.
2. Click the Color button.
3. Choose a color, then click (√).
4. Enter your text.
5. Repeat for any new text boxes in your story.
To change the color of text:
1. Highlight a portion of text you wish to change.
2. Click the Color button and select the desired color in the window which appears.
3. Click (√). Repeat until all the desired changes are made.
13
The Product in Detail
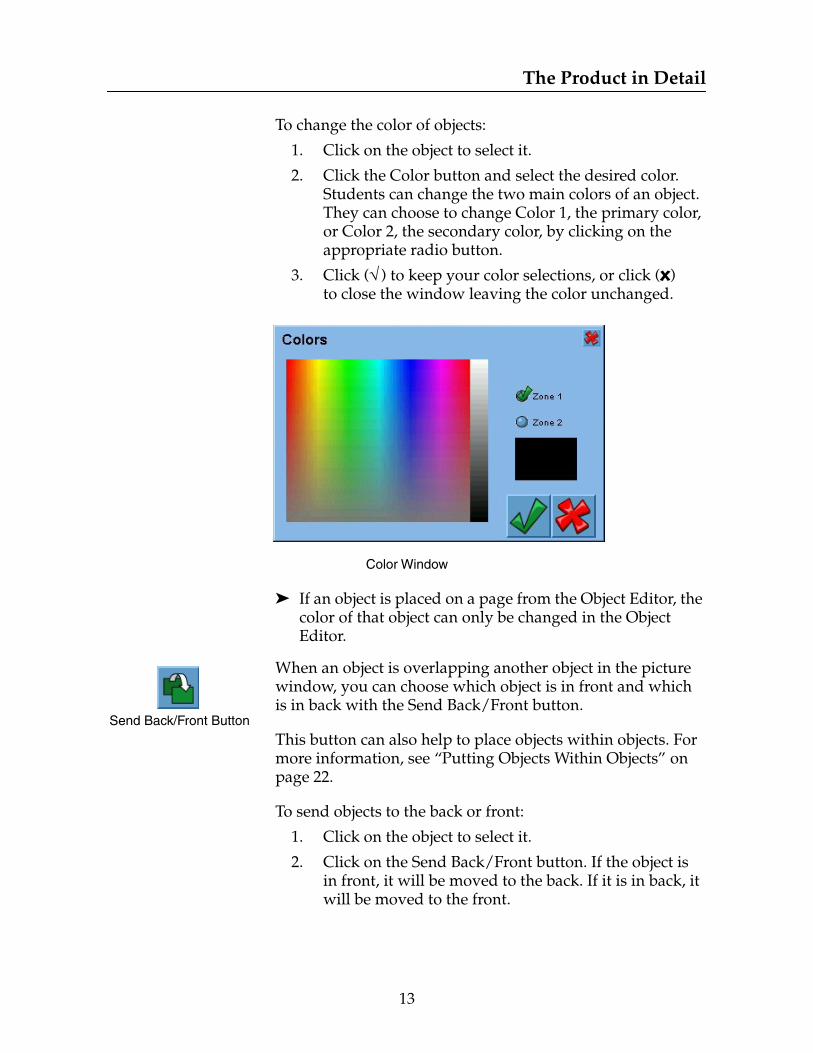
To change the color of objects:
1. Click on the object to select it.
2. Click the Color button and select the desired color. Students can change the two main colors of an object. They can choose to change Color 1, the primary color, or Color 2, the secondary color, by clicking on the appropriate radio button.
3. Click (√) to keep your color selections, or click (x) to close the window leaving the color unchanged.
Color Window
➤ If an object is placed on a page from the Object Editor, the color of that object can only be changed in the Object Editor.
Send Back/Front Button
When an object is overlapping another object in the picture window, you can choose which object is in front and which is in back with the Send Back/Front button.
This button can also help to place objects within objects. For more information, see “Putting Objects Within Objects” on page 22.
To send objects to the back or front:
1. Click on the object to select it.
2. Click on the Send Back/Front button. If the object is in front, it will be moved to the back. If it is in back, it will be moved to the front.

The Product in Detail
14
Make Bigger Button
Make Smaller Button
The Make Bigger and Make Smaller buttons change the size of a selected object.
To change the size of an object:
1. Click on the object to select it.
2. Click the Make Bigger or Make Smaller button until the object reaches the desired size or reaches the maximum or minimum possible size.
Return an object to its original size by using the Ideal Size command on the Goodies menu.
Flip Button (horizontal)
The Flip button changes the direction an object is facing.
To change the direction an object is facing:
1. Click on an object to select it.
2. Click either the horizontal or vertical Flip button.
Flip Button (vertical)
Music Button
The Music button gives access to a music selection window containing more than fifty songs to use on one or more story pages. After a song is applied to a page, that tune will play whenever the story is turned to that page.
To select and apply a song to a page:
1. Click the Music button. The Scrolling Music Window Appears.
2. Scroll through the window and click on an image to select and hear the related song.
3. Click (++++) to add a song.
4. To remove a song, select the blank box and then click (++++).
5. When you are finished adding music, click (x) to close the window.
15
The Product in Detail
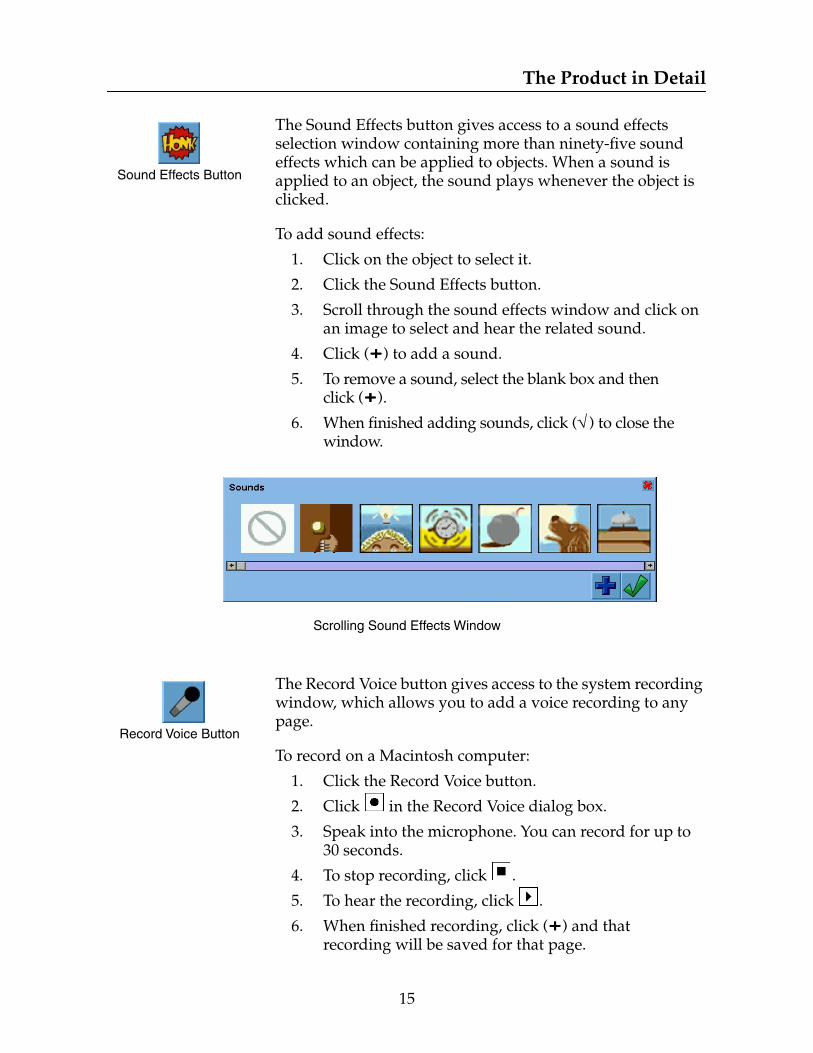
Sound Effects Button
The Sound Effects button gives access to a sound effects selection window containing more than ninety-five sound effects which can be applied to objects. When a sound is applied to an object, the sound plays whenever the object is clicked.
To add sound effects:
1. Click on the object to select it.
2. Click the Sound Effects button.
3. Scroll through the sound effects window and click on an image to select and hear the related sound.
4. Click (++++) to add a sound.
5. To remove a sound, select the blank box and then click (++++).
6. When finished adding sounds, click (√) to close the window.
Scrolling Sound Effects Window
Record Voice Button
The Record Voice button gives access to the system recording window, which allows you to add a voice recording to any page.
To record on a Macintosh computer:
1. Click the Record Voice button.
2. Click in the Record Voice dialog box.
3. Speak into the microphone. You can record for up to 30 seconds.
4. To stop recording, click .
5. To hear the recording, click .
6. When finished recording, click (++++) and that recording will be saved for that page.

The Product in Detail
16
To delete a recording from a page, choose Remove Recording from the Goodies menu.
➤ Adjust the recording level and replay volume using the system controls on the computer.
Macintosh Record Voice Dialog Box
To record on a Windows-compatible computer:
1. Click the Record Voice button.
2. Click in the Record Voice dialog box.
3. Speak into the microphone. You can record for up to thirty seconds.
4. To stop recording, click or in the dialog box.
5. To hear the recording, click .
6. When finished recording, click (++++) and that recording will be saved for that page.
7. To delete a recording from a page, choose Remove Recording from the Goodies menu.
➤ Adjust the recording level and replay volume using the system controls on your computer.
Windows Record Voice Dialog Box
Previous Page Arrow
The Previous Page arrow turns the story to the previous page.
17
The Product in Detail
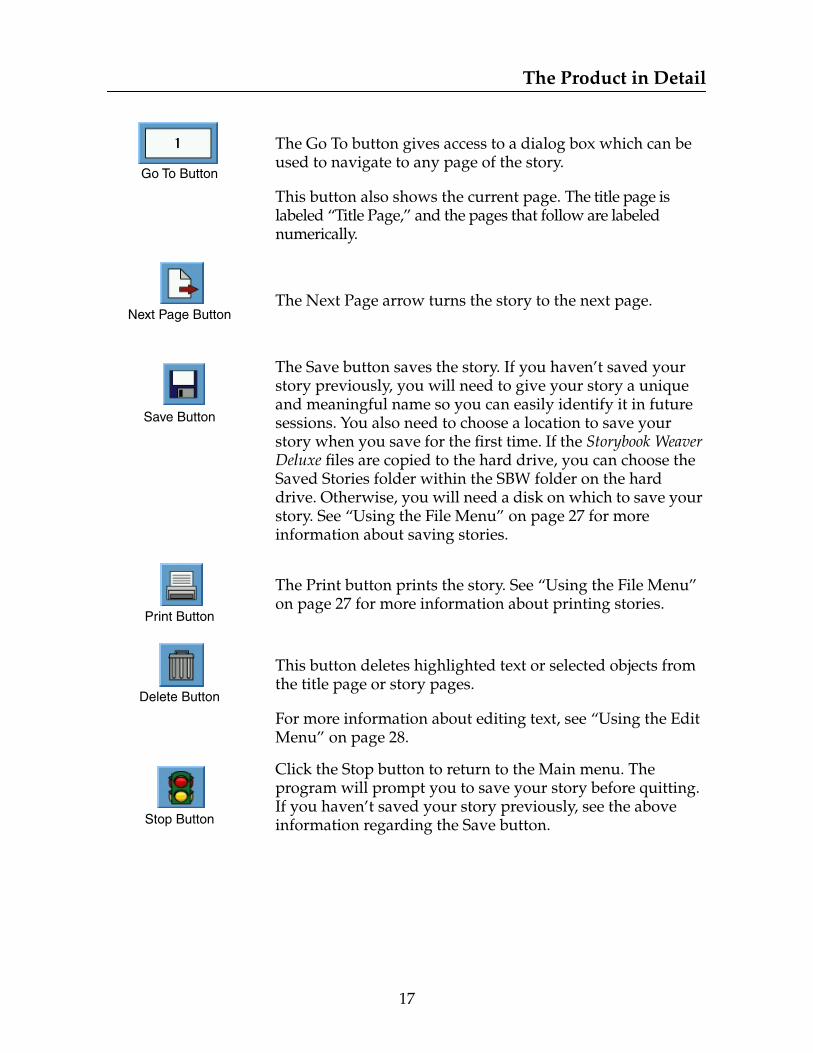
Go To Button
The Go To button gives access to a dialog box which can be used to navigate to any page of the story.
This button also shows the current page. The title page is labeled “Title Page,” and the pages that follow are labeled numerically.
Next Page ButtonThe Next Page arrow turns the story to the next page.
Save Button
The Save button saves the story. If you haven’t saved your story previously, you will need to give your story a unique and meaningful name so you can easily identify it in future sessions. You also need to choose a location to save your story when you save for the first time. If the Storybook Weaver Deluxe files are copied to the hard drive, you can choose the Saved Stories folder within the SBW folder on the hard drive. Otherwise, you will need a disk on which to save your story. See “Using the File Menu” on page 27 for more information about saving stories.
Print Button
The Print button prints the story. See “Using the File Menu” on page 27 for more information about printing stories.
Delete Button
This button deletes highlighted text or selected objects from the title page or story pages.
For more information about editing text, see “Using the Edit Menu” on page 28.
Stop Button
Click the Stop button to return to the Main menu. The program will prompt you to save your story before quitting. If you haven’t saved your story previously, see the above information regarding the Save button.
The Product in Detail
18
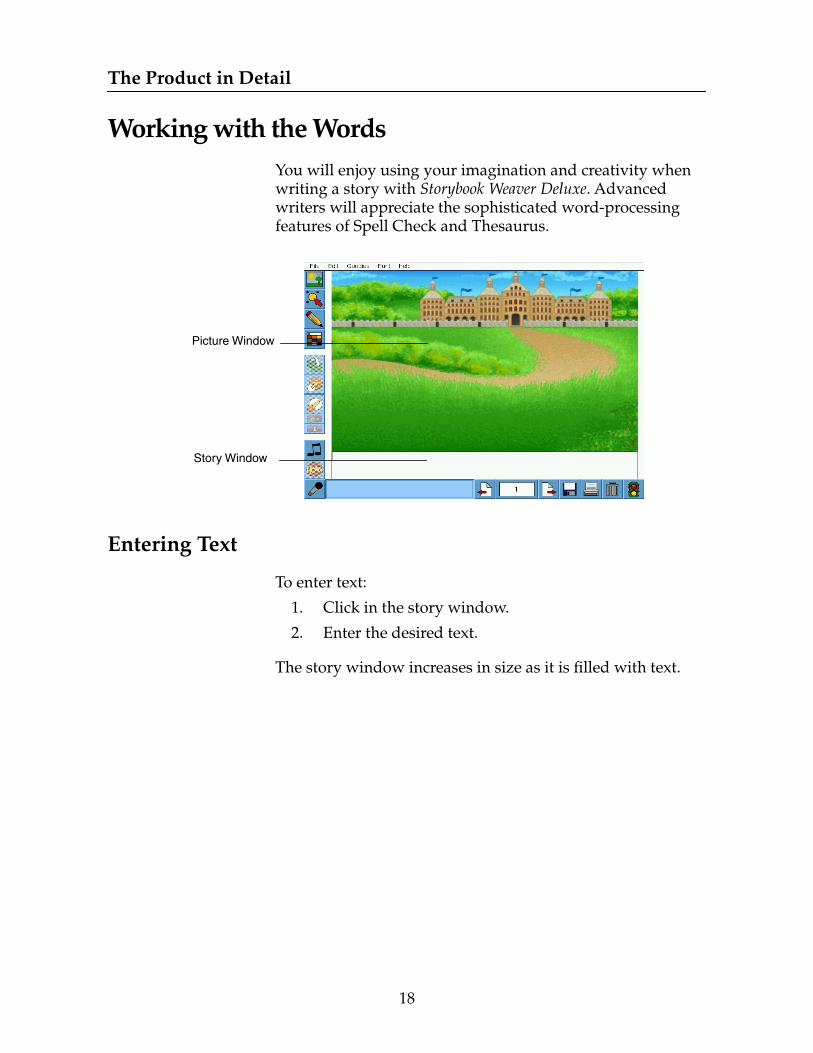
Working with the WordsYou will enjoy using your imagination and creativity when writing a story with Storybook Weaver Deluxe. Advanced writers will appreciate the sophisticated word-processing features of Spell Check and Thesaurus.
Entering Text
To enter text:
1. Click in the story window.
2. Enter the desired text.
The story window increases in size as it is filled with text.
Picture Window
Story Window
19
The Product in Detail
Deleting Text
To delete text:
1. Highlight the text by holding down the mouse button and dragging the cursor across the text to be deleted.
2. Then either press the Delete key, choose the Clear command from the Edit menu, or click the Delete button.
To delete all of the text in the story window, click in the window, choose the Select All command from the Edit menu, and press the Delete key or click the Trash button.
Moving Text
To move text:
1. Highlight the text.
2. Choose the Cut command from the Edit menu.
3. Click the desired location of the text.
4. Choose the Paste command from the Edit menu.
Changing the text size, style, and font is explained in detail in the description of “The Font Menu” on page 30.
The Product in Detail
20
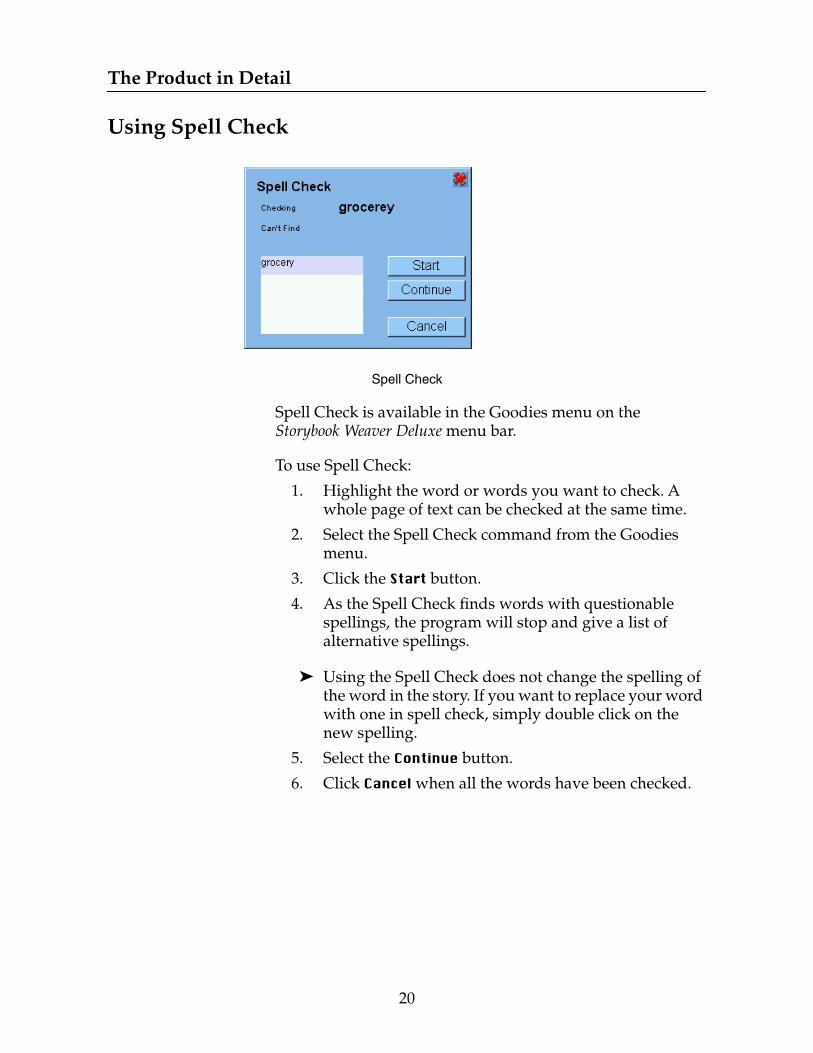
Using Spell Check
Spell Check
Spell Check is available in the Goodies menu on the Storybook Weaver Deluxe menu bar.
To use Spell Check:
1. Highlight the word or words you want to check. A whole page of text can be checked at the same time.
2. Select the Spell Check command from the Goodies menu.
3. Click the Start button.
4. As the Spell Check finds words with questionable spellings, the program will stop and give a list of alternative spellings.
➤ Using the Spell Check does not change the spelling of the word in the story. If you want to replace your word with one in spell check, simply double click on the new spelling.
5. Select the Continue button.
6. Click Cancel when all the words have been checked.

21
The Product in Detail
Using the Thesaurus
The Thesaurus is available in the Goodies menu on the Storybook Weaver Deluxe menu bar.
To use the Thesaurus:
1. Highlight the word to be looked up.
2. Select the Thesaurus command from the Goodies menu.
3. Click the Cancel button to go back to the story screen.
➤ The Thesaurus may be used to check on any word, even if it is not in your story. Simply select Thesaurus from the Goodies menu, type the word in the Word box, and click the Look Up button.
A list of definitions for the word shown in the Word box.
Words that are similar to the one in the Word box.
Thesaurus
The Product in Detail
22
Working with Advanced Graphic FeaturesStorybook Weaver Deluxe offers sophisticated features that make it easy to change the graphics, combine the graphics in new ways, and even create new graphics.
Putting Objects Within Objects
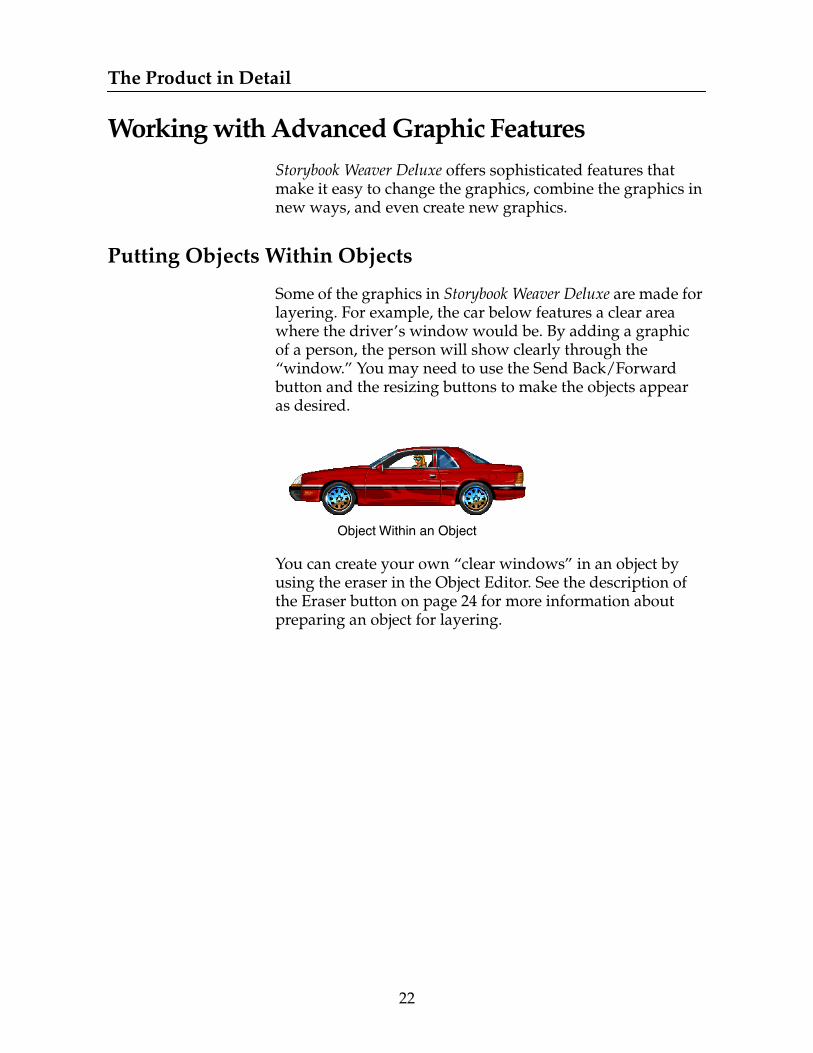
Some of the graphics in Storybook Weaver Deluxe are made for layering. For example, the car below features a clear area where the driver’s window would be. By adding a graphic of a person, the person will show clearly through the “window.” You may need to use the Send Back/Forward button and the resizing buttons to make the objects appear as desired.
Object Within an Object
You can create your own “clear windows” in an object by using the eraser in the Object Editor. See the description of the Eraser button on page 24 for more information about preparing an object for layering.
23
The Product in Detail
Editing Objects with the Object Editor
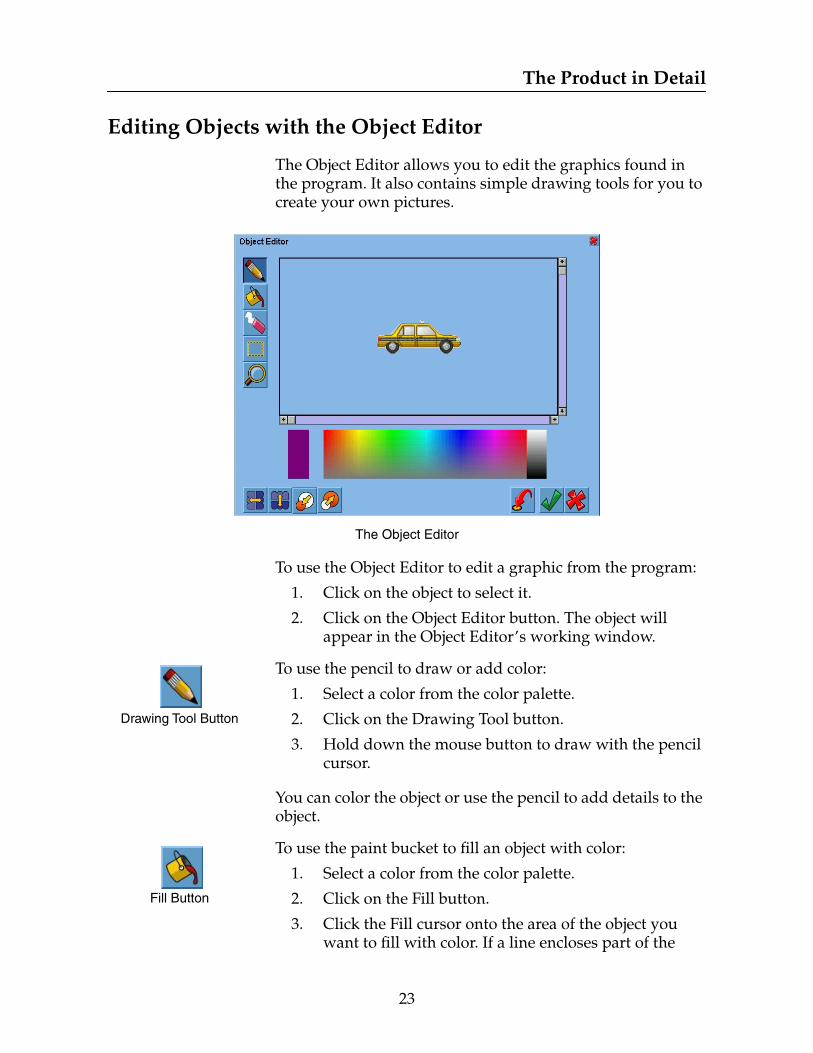
The Object Editor allows you to edit the graphics found in the program. It also contains simple drawing tools for you to create your own pictures.
The Object Editor
To use the Object Editor to edit a graphic from the program:
1. Click on the object to select it.
2. Click on the Object Editor button. The object will appear in the Object Editor’s working window.
Drawing Tool Button
To use the pencil to draw or add color:
1. Select a color from the color palette.
2. Click on the Drawing Tool button.
3. Hold down the mouse button to draw with the pencil cursor.
You can color the object or use the pencil to add details to the object.
Fill Button
To use the paint bucket to fill an object with color:
1. Select a color from the color palette.
2. Click on the Fill button.
3. Click the Fill cursor onto the area of the object you want to fill with color. If a line encloses part of the
The Product in Detail
24
object, only the part clicked on will be filled. Repeat the procedure to fill other parts of the object.
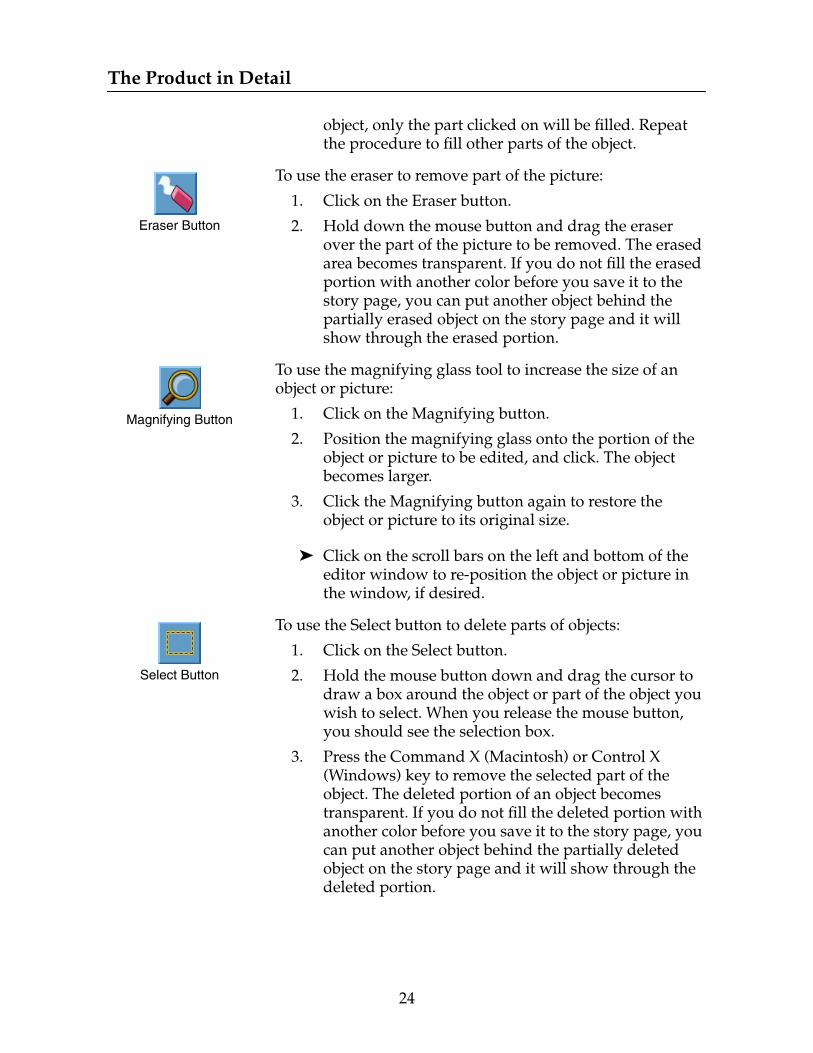
Eraser Button
To use the eraser to remove part of the picture:
1. Click on the Eraser button.
2. Hold down the mouse button and drag the eraser over the part of the picture to be removed. The erased area becomes transparent. If you do not fill the erased portion with another color before you save it to the story page, you can put another object behind the partially erased object on the story page and it will show through the erased portion.
Magnifying Button
To use the magnifying glass tool to increase the size of an object or picture:
1. Click on the Magnifying button.
2. Position the magnifying glass onto the portion of the object or picture to be edited, and click. The object becomes larger.
3. Click the Magnifying button again to restore the object or picture to its original size.
➤ Click on the scroll bars on the left and bottom of the editor window to re-position the object or picture in the window, if desired.
Select Button
To use the Select button to delete parts of objects:
1. Click on the Select button.
2. Hold the mouse button down and drag the cursor to draw a box around the object or part of the object you wish to select. When you release the mouse button, you should see the selection box.
3. Press the Command X (Macintosh) or Control X (Windows) key to remove the selected part of the object. The deleted portion of an object becomes transparent. If you do not fill the deleted portion with another color before you save it to the story page, you can put another object behind the partially deleted object on the story page and it will show through the deleted portion.
25
The Product in Detail
To use the Select button to move objects around the window:
1. Click on the Select button.
2. Hold the mouse button down and drag the cursor to draw a box around the object or part of the object you wish to select. Release the mouse button to see the selection box.
3. Place the cursor somewhere in the selection box.
4. Hold the mouse button down and drag the selected object to a new location.
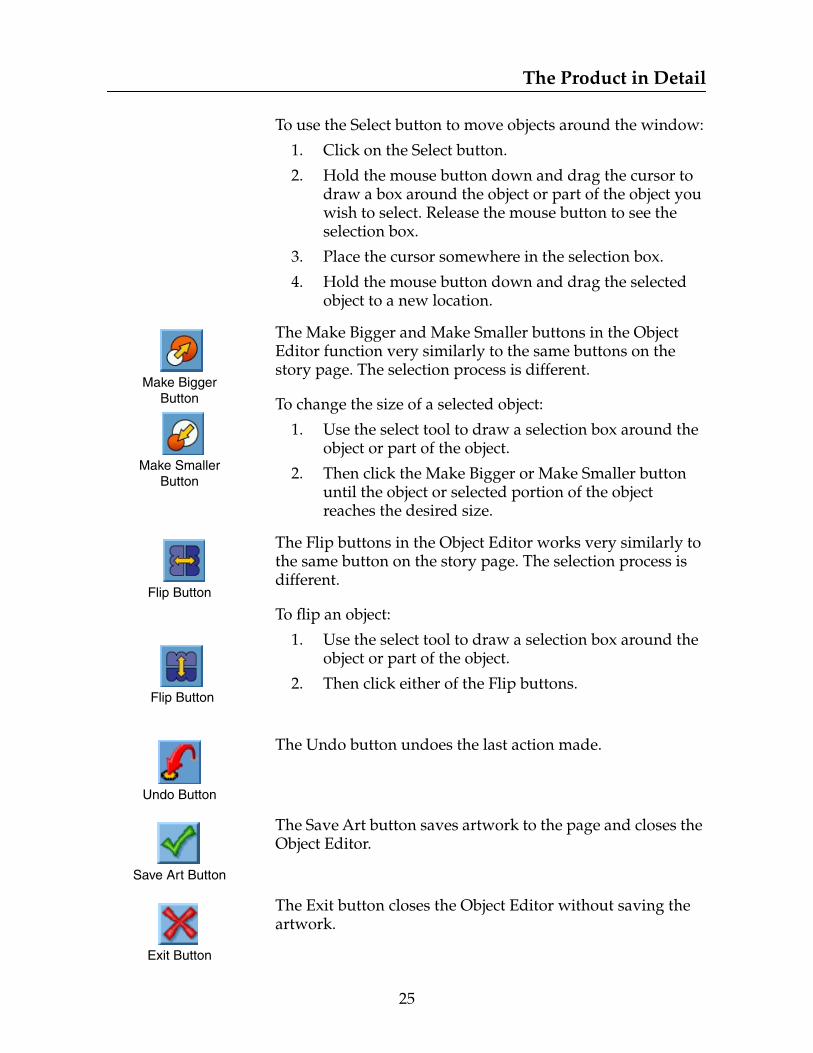
Make Bigger Button
Make Smaller Button
The Make Bigger and Make Smaller buttons in the Object Editor function very similarly to the same buttons on the story page. The selection process is different.
To change the size of a selected object:
1. Use the select tool to draw a selection box around the object or part of the object.
2. Then click the Make Bigger or Make Smaller button until the object or selected portion of the object reaches the desired size.
Flip Button
The Flip buttons in the Object Editor works very similarly to the same button on the story page. The selection process is different.
To flip an object:
1. Use the select tool to draw a selection box around the object or part of the object.
2. Then click either of the Flip buttons.
Undo Button
The Undo button undoes the last action made.
Save Art Button
The Save Art button saves artwork to the page and closes the Object Editor.
Exit Button
The Exit button closes the Object Editor without saving the artwork.
Flip Button

The Product in Detail
26
Creating Pictures
Click on the Object Editor button to create new and unique pictures.
Importing Art
You may want to use scanned and original images created in an external program in your Storybook Weaver Deluxe story. Directions for several different ways of using external art follow. Using scanned images will increase memory requirements for creating and viewing stories.
➤ Please note that you may have varied results when importing original art or scanned images. An image that is brought into Storybook Weaver Deluxe will have its colors adapted to the program color set. You may have to experiment with your images before bringing them into the program. Some images may not work.
Using Art from an External Program
Art created in an external art program can be used in Storybook Weaver Deluxe. Be sure to save your pictures in the Windows bitmap (.bmp) format.
To use external art:
1. Save the art in your external art program using the Windows bitmap (.bmp) format.
2. Choose Import from the File Menu.
3. Locate the art and click on the file with the mouse to select.
4. Click the (√) button to import the picture.
5. Click the Save button. The art is saved to the story page.
27
The Product in Detail
The Menus
Using the File Menu
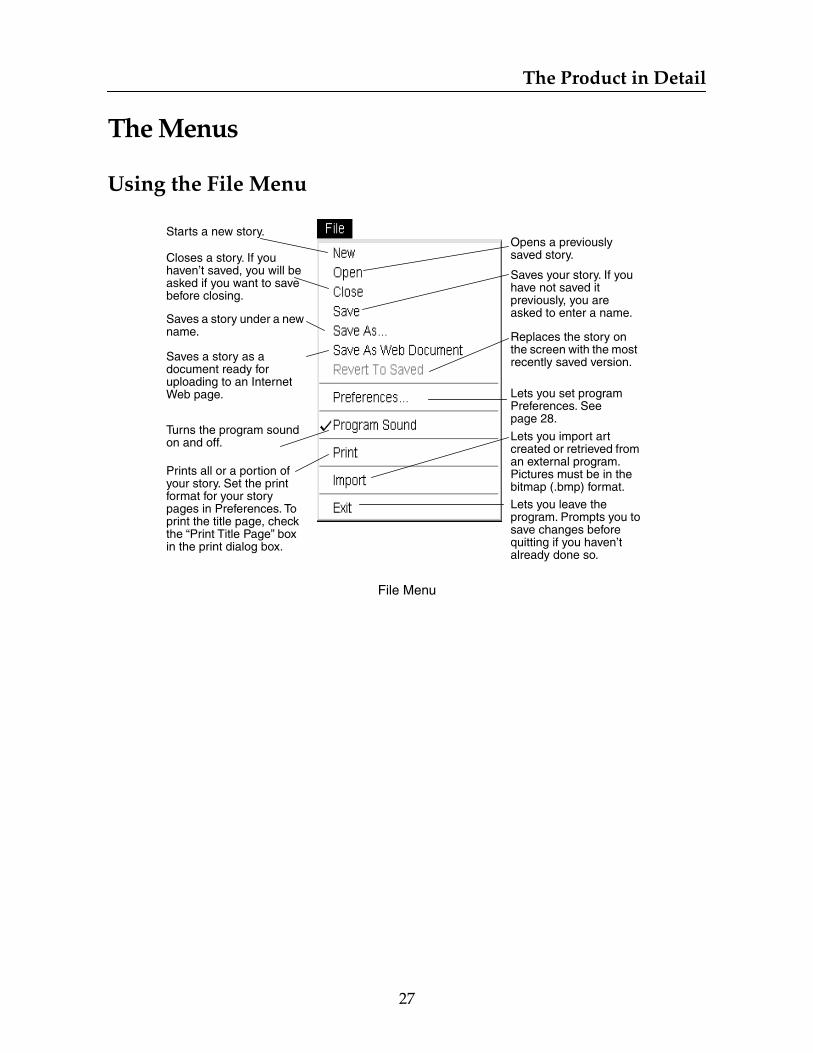
File Menu
Starts a new story.
Saves your story. If you have not saved it previously, you are asked to enter a name.Saves a story under a new
name. Replaces the story on the screen with the most recently saved version.
Lets you set program Preferences. See page 28.
Turns the program sound on and off.
Prints all or a portion of your story. Set the print format for your story pages in Preferences. To print the title page, check the “Print Title Page” box in the print dialog box.
Lets you leave the program. Prompts you to save changes before quitting if you haven’t already done so.
Opens a previously saved story.Closes a story. If you
haven’t saved, you will be asked if you want to save before closing.
Saves a story as a document ready for uploading to an Internet Web page.
Lets you import art created or retrieved from an external program. Pictures must be in the bitmap (.bmp) format.
The Product in Detail
28
Storybook Weaver Deluxe Program Preferences
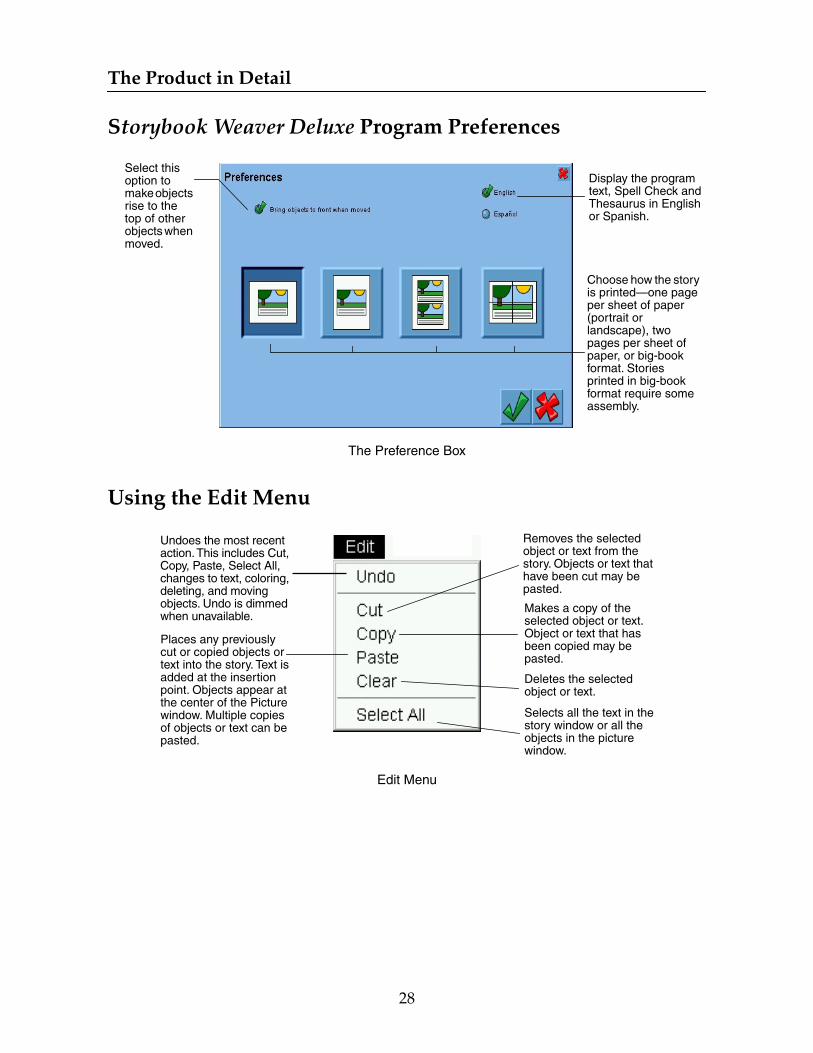
The Preference Box
Using the Edit Menu
Edit Menu
Choose how the story is printed—one page per sheet of paper (portrait or landscape), two pages per sheet of paper, or big-book format. Stories printed in big-book format require some assembly.
Display the program text, Spell Check and Thesaurus in English or Spanish.
Select this option to make objects rise to the top of other objects when moved.
Undoes the most recent action. This includes Cut, Copy, Paste, Select All, changes to text, coloring, deleting, and moving objects. Undo is dimmed when unavailable.
Removes the selected object or text from the story. Objects or text that have been cut may be pasted.
Makes a copy of the selected object or text. Object or text that has been copied may be pasted.
Places any previously cut or copied objects or text into the story. Text is added at the insertion point. Objects appear at the center of the Picture window. Multiple copies of objects or text can be pasted.
Deletes the selected object or text.
Selects all the text in the story window or all the objects in the picture window.
29
The Product in Detail
The Goodies Menu
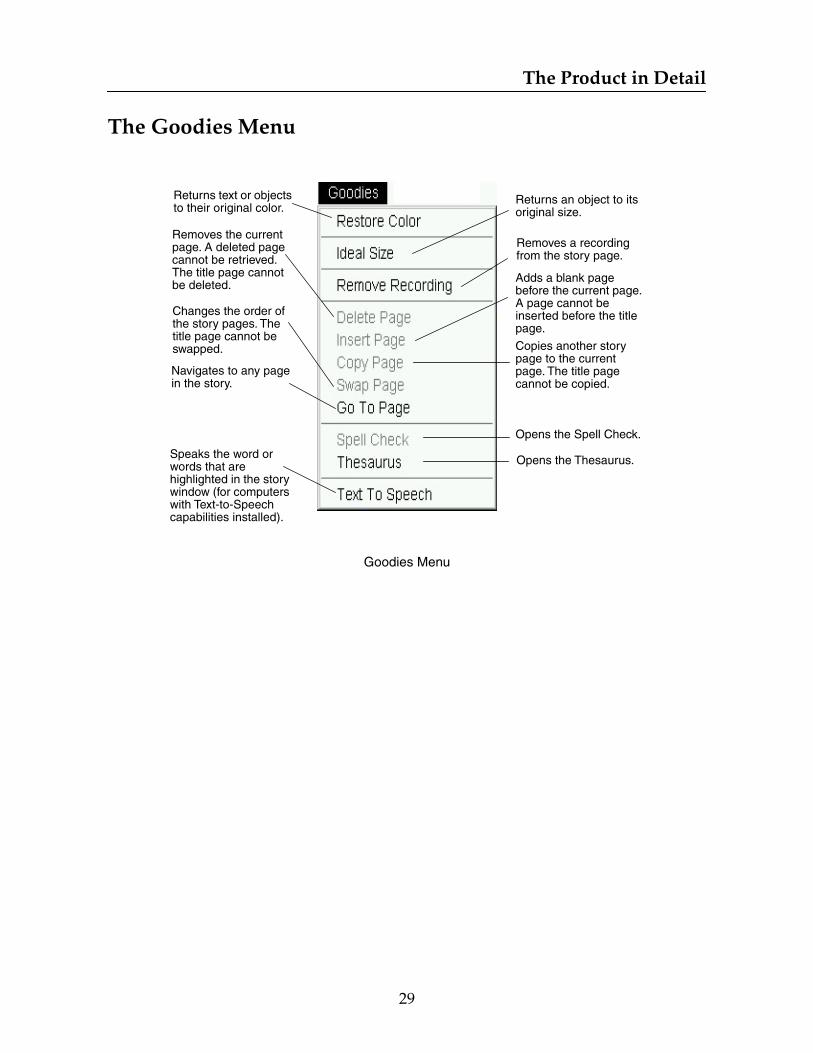
Goodies Menu
Returns text or objects to their original color.
Returns an object to its original size.
Removes the current page. A deleted page cannot be retrieved. The title page cannot be deleted.
Adds a blank page before the current page. A page cannot be inserted before the title page.
Copies another story page to the current page. The title page cannot be copied.
Changes the order of the story pages. The title page cannot be swapped.
Navigates to any page in the story.
Opens the Spell Check.
Opens the Thesaurus.Speaks the word or words that are highlighted in the story window (for computers with Text-to-Speech capabilities installed).
Removes a recording from the story page.
The Product in Detail
30
The Font Menu
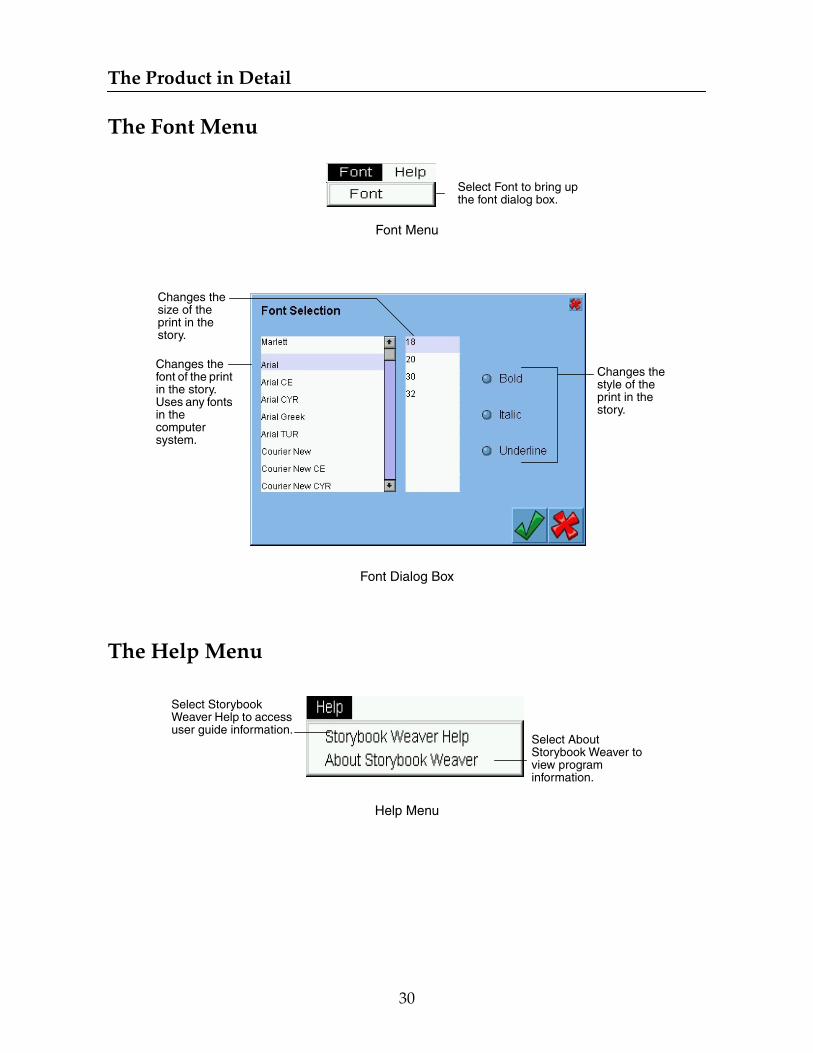
Font Menu
Font Dialog Box
The Help Menu
Help Menu
Select Font to bring up the font dialog box.
Changes the style of the print in the story.
Changes the size of the print in the story.
Changes the font of the print in the story. Uses any fonts in the computer system.
Select Storybook Weaver Help to access user guide information.
Select About Storybook Weaver to view program information.
31
CreditsProducer: Alan Egan
Executive Producer:
Teresa Hagan
Software Development:
Tom Zemlin, Jared Larsen, Chelsey Carter Mona, Gabriel Fulks.
Writer: Denise Kirchoff
Graphics: Susan Stanley, Laura Henion, George Henion
QA Director: Marty Garcia-Carter
QA Manager: Buck Irving
QA Engineer: Carlos Molina
QA Lead: Andrew Viloria
Testers: Edison Dimaano, Tony Traverso
Documentation: Susan Horne, Denise Kirchoff
Spanish Translation:
Mateo Thomas, Peter Riviera, Chelsey Carter Mona, Patricio Rojas

32
Credits
483050-UG 10/03
www.riverdeep.net