Embed Size (px)
Citation preview
© 2011 ANSYS, Inc. November 29, 2012
1
14. 5 Release
Lecture 1Scripting Basics in Mechanical

© 2011 ANSYS, Inc. November 29, 2012
2
Contents
• Introduction
• Mechanical Application Architecture
• Design Simulation Object (DS)
• Finding Functions in Mechanical Application
• Summary

© 2011 ANSYS, Inc. November 29, 2012
3
• Scripting language used – Jscript
• Mechanical Application is build on the Workbench-1 (WB1) architecture, same as Design Modeler
• It’s relatively simpler (compared to DM) to trace the underlying APIs for the various tasks
• Almost all manual processes can be scripted
– Access geometry entities (bodies, faces, etc.)
– Access existing or create new mesh settings, Named selections, etc.
– Generate mesh, etc.
Introduction
© 2011 ANSYS, Inc. November 29, 2012
4
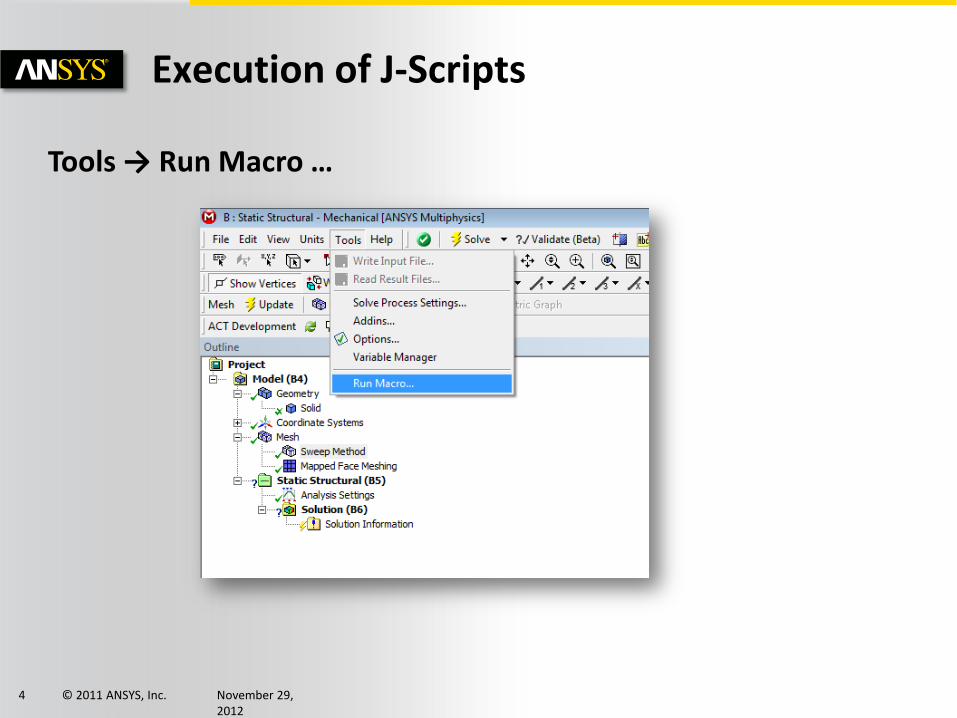
Execution of J-Scripts
Tools → Run Macro …

© 2011 ANSYS, Inc. November 29, 2012
5
Application
Meshing Application Architecture
HTML XML
JavaScript
Core C++ Application Logic
GUI
C:\Program Files\ANSYS Inc\v145\aisol\DesignSpace\DSPages\Language\en-us\xmlC:\Program Files\ANSYS Inc\v145\aisol\DesignSpace\DSPages\xml
C:\Program Files\ANSYS Inc\v145\aisol\DesignSpace\DSPages\scripts
Note:Meshing and Mechanical applications shares the same XML and JScriptcode
Workbench Design Modeler and Mechanical application share same architecture
Path for accessing JScript and XML files:

© 2011 ANSYS, Inc. November 29, 2012
6
Design Simulation Object (DS)
DS
• This is the entry point for macro execution into the Mechanical session
• This is : wb.AppletList.Applet("DSApplet").App
– wb is the Workbench (WB1) master object
• Design Modeler, Mechanical etc. applications are applets built on this object

© 2011 ANSYS, Inc. November 29, 2012
7
Finding Functions
Generic Procedure:
• Locate functionality in GUI
• Search the dsstringtable.xml files for menu string
• Note the corresponding ID of the string
– ID is like: ID_***
• Search for the string id ID_*** in DSPages/xml folder
• Note the methodName under actionCallback
– Command is like: do***
• Search for the command do*** in DSPages/scripts
• Attach a debugger to Mechanical process to see the script in action

© 2011 ANSYS, Inc. November 29, 2012
8
Finding The Desired Function
Objective:
• Understand how a pressure load is inserted
Approach:
• Locate functionality in GUI

© 2011 ANSYS, Inc. November 29, 2012
9
Finding The Desired Function (2)
• Go to ~DSPages\Language\en-us\xml
• Find the ID_** for Menu string “Pressure” from the dsstringtable.xml
• Search the ID_*** to find the methodName in ~DSPages\xml folder
– Search returns two files
– dscontextmenu.xml
– dstoolbar.xml
You will get the string “Pressure” at multiple locations. Select the one that is most reasonableIn this case it is: ID_EnvironmentInsertStructuralLoadPressure

© 2011 ANSYS, Inc. November 29, 2012
10
Finding The Desired Function (3)
• Open the dscontextmenu.xml file and look for the same string
• The methodName under actionCallback for this string is doInsertEnvironmentPressure
(Searching through “dstoolbar.xml” will also give same methodName)
• Search on the string do*** in ~DSPages/scripts
– Search returns one file DSMenuWrap.js
• Open this file and look for function doInsertEnvironmentPressure
• It has no arguments and it can be called by the following code:
• DS.Script.doInsertEnvironmentPressure();
© 2011 ANSYS, Inc. November 29, 2012
11
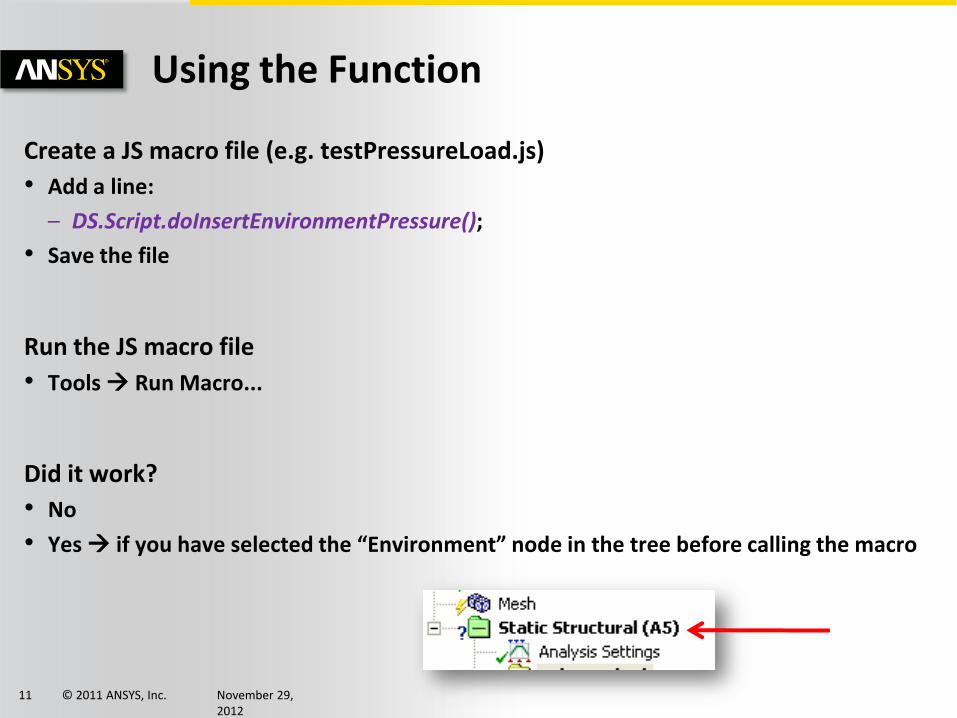
Using the Function
Create a JS macro file (e.g. testPressureLoad.js)
• Add a line:
– DS.Script.doInsertEnvironmentPressure();
• Save the file
Run the JS macro file
• Tools Run Macro...
Did it work?
• No
• Yes if you have selected the “Environment” node in the tree before calling the macro

© 2011 ANSYS, Inc. November 29, 2012
12
Analyzing the Outcome
Lets look into the doInsertEnvironmentPressure function again
• This function is calling another function
– doEnvironmentInsertLoad with an argument 8130
• Search doEnvironmentInsertLoad string in DSPages/scripts
– Search returns two files
– DSMenuWrap.js Already we have looked into this!
– DSMenuScript.js Lets look into this now

© 2011 ANSYS, Inc. November 29, 2012
13
Analyzing the Outcome (2)
There is a check inside the function
• It works only when the active object in “Tree” is Environment object
• Otherwise, it doesn’t do anything!

© 2011 ANSYS, Inc. November 29, 2012
14
Attach Debugger to Mechanical session
• To see the script in action, attach debugger to the Mechanical Process– Using Visual Studio Professional
• Approach:– Open Mechanical session– Start Visual Studio (VS)– Go to Tools Attach to Process...– Select the suitable
"AnsysWBU.exe”• Note that the "Script" option under
"Type" (column 4 in the window) is available
• If it is not picked up by default, try to use the "Select" option (button on the right of "Attach to" in the window)
Note: If Design Modeler is also open, there may be multiple AnsysWBU.exe processes
!
© 2011 ANSYS, Inc. November 29, 2012
15
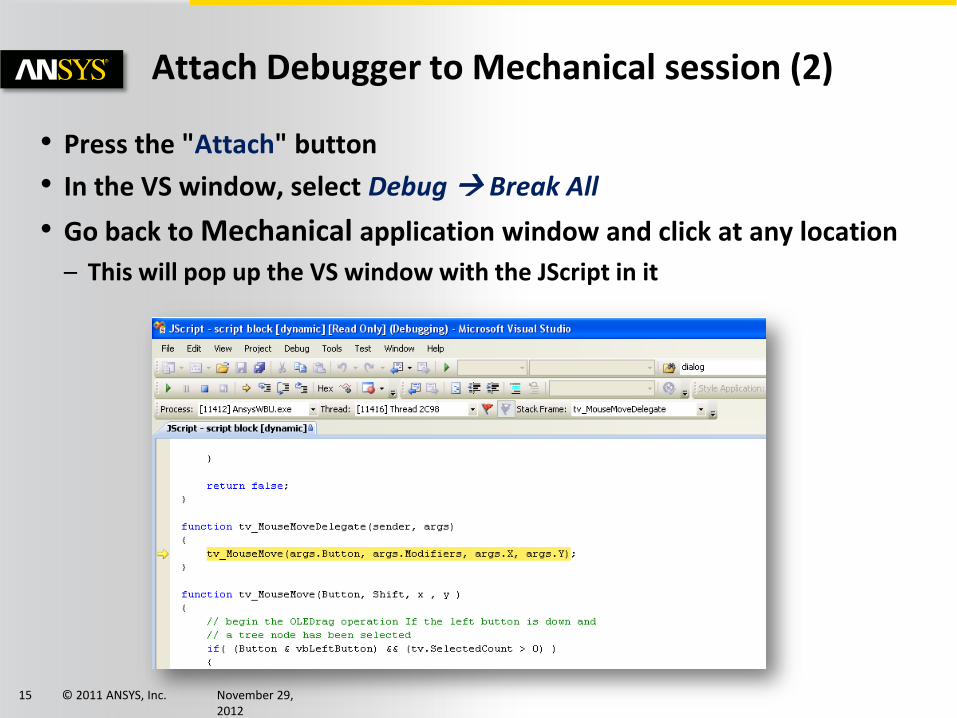
Attach Debugger to Mechanical session (2)
• Press the "Attach" button
• In the VS window, select Debug Break All
• Go back to Mechanical application window and click at any location
– This will pop up the VS window with the JScript in it
© 2011 ANSYS, Inc. November 29, 2012
16
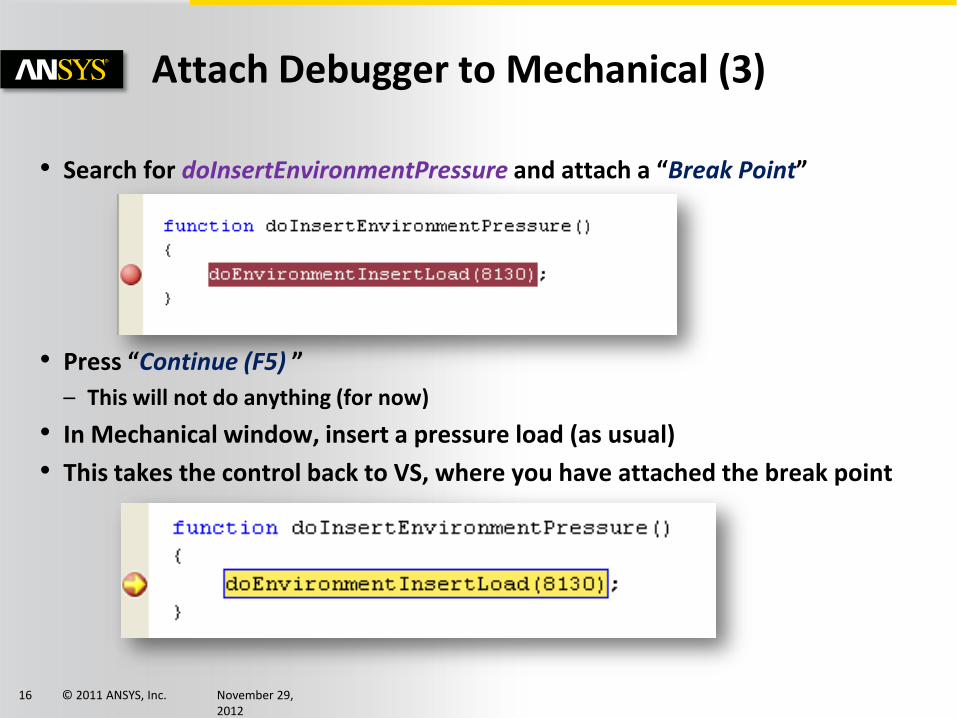
Attach Debugger to Mechanical (3)
• Search for doInsertEnvironmentPressure and attach a “Break Point”
• Press “Continue (F5) ”
– This will not do anything (for now)
• In Mechanical window, insert a pressure load (as usual)
• This takes the control back to VS, where you have attached the break point

© 2011 ANSYS, Inc. November 29, 2012
17
Attach Debugger to Mechanical (4)
• “Step Into (F11)” the function
– This will take to the function: doEnvironmentInsertLoad
• Go line by line “Step Over (F10)”
• Add variables to the Watch window to check different objects
– Specifically watch
• “ds” and
• “wb”
• When done, you can use “Continue (F5)”
• And detach the debugger
– Debug Detach All
© 2011 ANSYS, Inc. November 29, 2012
18
Summary
This presentation highlighted following points:
• Mechanical application architecture
• How to find functions to be used in automation scripts