Embed Size (px)
Citation preview
Seam 2.x Web Development
David Salter
Chapter No. 2 "Developing Seam Applications"
For More Information: www.packtpub.com/seam-2-x-web-development/book
In this package, you will find: A Biography of the author of the book
A preview chapter from the book, Chapter NO.2 "Developing Seam Applications"
A synopsis of the book’s content
Information on where to buy this book
About the Author David Salter is an enterprise software architect who has been developing software professionally since 1991. His relationship with Java goes right back to the beginning, using Java 1.0 for writing desktop applications and applets for interactive web sites. David has been developing Enterprise Java applications using both the J2EE standards and open source solutions since 2001. David runs Develop In Java, a Java community web site, for all levels of Java developers.
First and foremost, I would like to thank my wife and family for putting up with my many hours at the computer whilst writing this book. Special thanks and love to my wife for all her encouragement and support.
I'd also like to say thank you to all the people at Packt Publishing for helping me with this book. Thank you Sarah for encouraging and believing in me from the beginning. Thanks also to Neelkanth and Rakesh for your hard work helping me to complete the book.
Finally, thanks to Gavin King and JBoss, without whom there would be no book.
For More Information: www.packtpub.com/seam-2-x-web-development/book
Seam 2.x Web Development This book provides a complete walk-through of developing Web applications using Seam, Facelets, and RichFaces, and explains how to deploy them to the JBoss Application Server.
This book introduces you to the fundamentals of Seam applications, describing topics such as Injection, Outjection, and Bijection. You will understand the Facelets framework, AJAX, database persistence, and advanced Seam concepts, through the many examples explained in the book.
A practical approach is taken throughout the book to describe the technologies and tools involved. You will add functionality to Seam applications after you learn how to use the Seam Generator RAD tools and how to customize and fully test application functionality. Hints and tips on how to use Seam and the JBoss Application Server are provided along the way.
What This Book Covers Chapter 1 provides an overview of the Seam Framework, and describes the benefits that we, as Java developers, will gain by using the framework. We learn that Seam is much more than a framework, and that it comes packed with support for numerous other features.
Chapter 2 teaches you how to develop applications using Seam, and explains some of the features discussed in previous chapter. In this chapter, we will learn the basic structure of a Seam application and learn more about Seam components. We will also see exactly how Seam bridges the gap between the Web tier and the Server tier.
Chapter 3 takes you through page navigation using Seam page flows. We also see how we can define page flow within the pages.xml file of our applications by defining both static rules and rules encompassing JSF expression language.
Chapter 4 shows you why Facelets is recommended, and what it offers over JSP. We'll also look at the SeamGen tool and see why this is a much better way of creating Seam applications and building scripts. Finally, we bring both SeamGen and Facelets together and re-create the Vacation Planner project that we wrote in Chapter 3, (realizing in the course of doing so how much easier and more advanced it is), using these technologies
For More Information: www.packtpub.com/seam-2-x-web-development/book
In Chapter 5, we take a look at TestNG and see how it can be used to build sets of test suites. We have a look at how Seam provides excellent facilities by allowing us to perform testing of our applications, at the class, Seam component, and user interface levels.
In Chapter 6, we take a look at RichFaces and learn that it's a JSF component library that allows us to easily build rich user interfaces within web applications. This chapter explains how Seam is fully integrated with RichFaces, and that applications generated by SeamGen require no special configuration to allow RichFaces to be used. This chapter also lists all of the components available within RichFaces.
Chapter 7 introduces database persistence with Seam. We take a closer look at how SeamGen helps us to create and configure our applications, allowing test, development, and production profiles to be configured.
Chapter 8 takes a closer look at what exactly a conversational application is and why they make web application development easier and more functional. We also take a look at different component scopes and see why they are important to Seam.
In Chapter 9, we take a look at AJAX and how it can be applied to Seam applications. We also take a closer look at the two different AJAX technologies within the Seam framework: Seam Remoting and AJAX4JSF.
Chapter 10 discusses how security is implemented within a Seam application highlighting the most common features, such as logon pages, user access rights, CAPTCHAs, and so on, which are used to secure Seam applications. We also highlight some of the more advanced security features that can be used.
Chapter 11 walks through some of the more advanced features of Seam, such as internationalization, URL rewriting, PDF document generation, and so on, and also discusses how these can be used within our web applications.

For More Information: www.packtpub.com/seam-2-x-web-development/book
Developing Seam Applications
In the previous chapter, we learned what the Seam Framework is, and what it offers to Java developers. In this chapter, we are going to start learning how to develop applications using Seam, and we will see some of the features we had discussed previously. In this chapter, we will learn the basic structure of a Seam application. We will see in practice how Seam Injection and Outjection work, and we will learn more about Seam components. We will also see exactly how Seam bridges the gap between the Web tier (using Java Server Faces) and the Server tier (using Enterprise Java Beans).
Seam application architecture
As most enterprise Java developers are probably familiar with JSF and JSP, we will be using this as the view technology for our sample applications, until we have a solid understanding of Seam. In Chapter 4, we will introduce Facelets as the recommended view technology for Seam-based applications.
For More Information: www.packtpub.com/seam-2-x-web-development/book
Developing Seam Applications
[ 24 ]
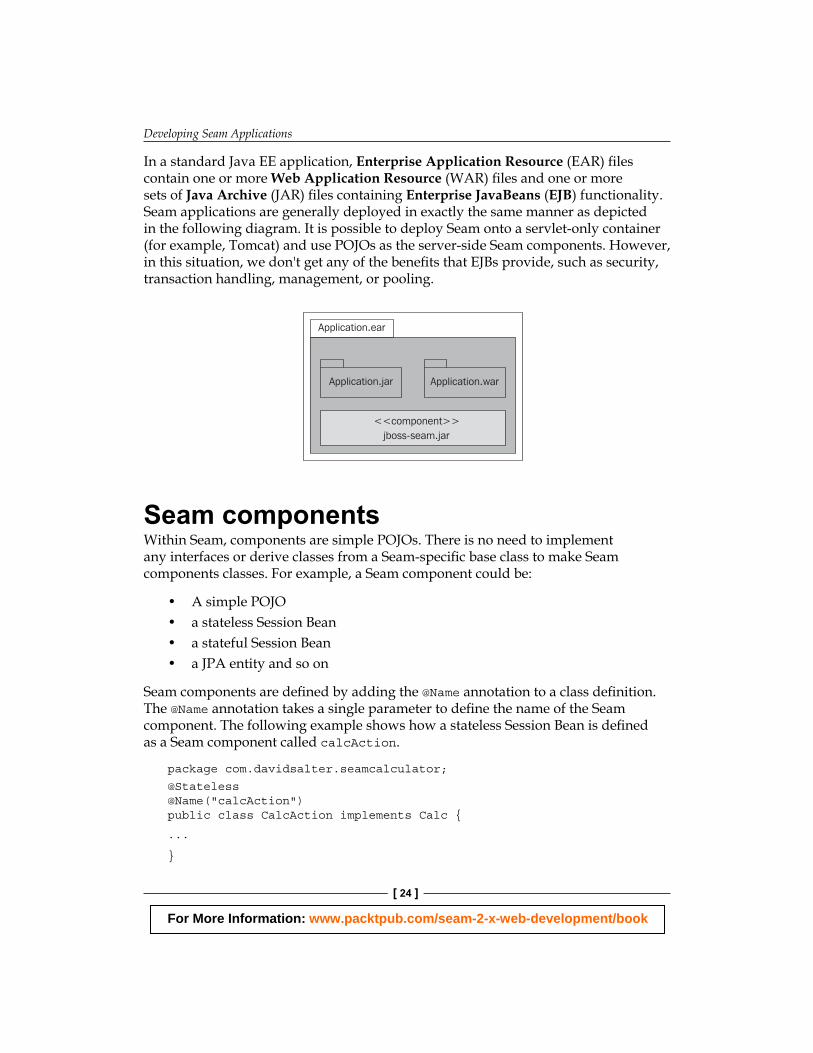
In a standard Java EE application, Enterprise Application Resource (EAR) fi les contain one or more Web Application Resource (WAR) fi les and one or more sets of Java Archive (JAR) fi les containing Enterprise JavaBeans (EJB) functionality. Seam applications are generally deployed in exactly the same manner as depicted in the following diagram. It is possible to deploy Seam onto a servlet-only container (for example, Tomcat) and use POJOs as the server-side Seam components. However, in this situation, we don't get any of the benefi ts that EJBs provide, such as security, transaction handling, management, or pooling.
<<component>>jboss-seam.jar
Application.jar Application.war
Application.ear
Seam components Within Seam, components are simple POJOs. There is no need to implement any interfaces or derive classes from a Seam-specifi c base class to make Seam components classes. For example, a Seam component could be:
A simple POJOa stateless Session Beana stateful Session Beana JPA entity and so on
Seam components are defi ned by adding the @Name annotation to a class defi nition. The @Name annotation takes a single parameter to defi ne the name of the Seam component. The following example shows how a stateless Session Bean is defi ned as a Seam component called calcAction.
package com.davidsalter.seamcalculator;
@Stateless@Name("calcAction")public class CalcAction implements Calc {
...
}
••••
For More Information: www.packtpub.com/seam-2-x-web-development/book
Chapter 2
[ 25 ]
When a Seam application is deployed to JBoss, the log output at startup lists what Seam components are deployed, and what type they are. This can be useful for diagnostic purposes, to ensure that your components are deployed correctly. Output similar to the following will be shown in the JBoss console log when the CalcAction class is deployed:
21:24:24,097 INFO [Initialization] Installing components...21:24:24,121 INFO [Component] Component: calcAction, scope: STATELESS, type: STATELESS_SESSION_BEAN, class: com.davidsalter.seamcalculator.CalcAction, JNDI: SeamCalculator/CalcAction/local
Object Injection and Outjection One of the benefi ts of using Seam is that it acts as the "glue" between the web technology and the server-side technology. By this we mean that the Seam Framework allows us to use enterprise beans (for example, Session Beans) directly within the Web tier without having to use Data Transfer Object (DTO) patterns and without worrying about exposing server-side functionality on the client.
Additionally, if we are using Session Beans for our server-side functionality, we don't really have to develop an additional layer of JSF backing beans, which are essentially acting as another layer between our web page and our application logic.
In order to fully understand the benefi ts of Seam, we need to fi rst describe what we mean by Injection and Outjection.
Injection is the process of the framework setting component values before an object is created. With injection, the framework is responsible for setting components (or injecting them) within other components. Typically, Injection can be used to allow component values to be passed from the web page into Seam components.
Outjection works in the opposite direction to Injection. With Outjection, components are responsible for setting component values back into the framework. Typically, Outjection is used for setting component values back into the Seam Framework, and these values can then be referenced via JSF Expression Language (EL) within JSF pages. This means that Outjection is typically used to allow data values to be passed from Seam components into web pages.
Seam allows components to be injected into different Seam components by using the @In annotation and allows us to outject them by using the @Out annotation. For example, if we have some JSF code that allows us to enter details on a web form, we may use an <h:inputText …/> tag such as this:
<h:inputText value="#{calculator.value1}" required="true"/>
For More Information: www.packtpub.com/seam-2-x-web-development/book
Developing Seam Applications
[ 26 ]
The Seam component calculator could then be injected into a Seam component using the @In annotation as follows:
@Inprivate Calculator calculator;
With Seam, all of the default values on annotations are the most likely ones to be used. In the preceding example therefore, Seam will look up a component called calculator and inject that into the calculator variable. If we wanted Seam to inject a variable with a different name to the variable that it is being injected into, we can adorn the @In annotation with the value parameter.
@In (value="myCalculator")private Calculator calculator;
In this example, Seam will look up a component called myCalculator and inject it into the variable calculator.
Similarly, if we want to outject a variable from a Seam component into a JSF page, we would use the @Out annotation.
@Outprivate Calculator calculator;
The outjected calculator object could then be used in a JSF page in the following manner:
<h:outputText value="#{calculator.answer}"/>
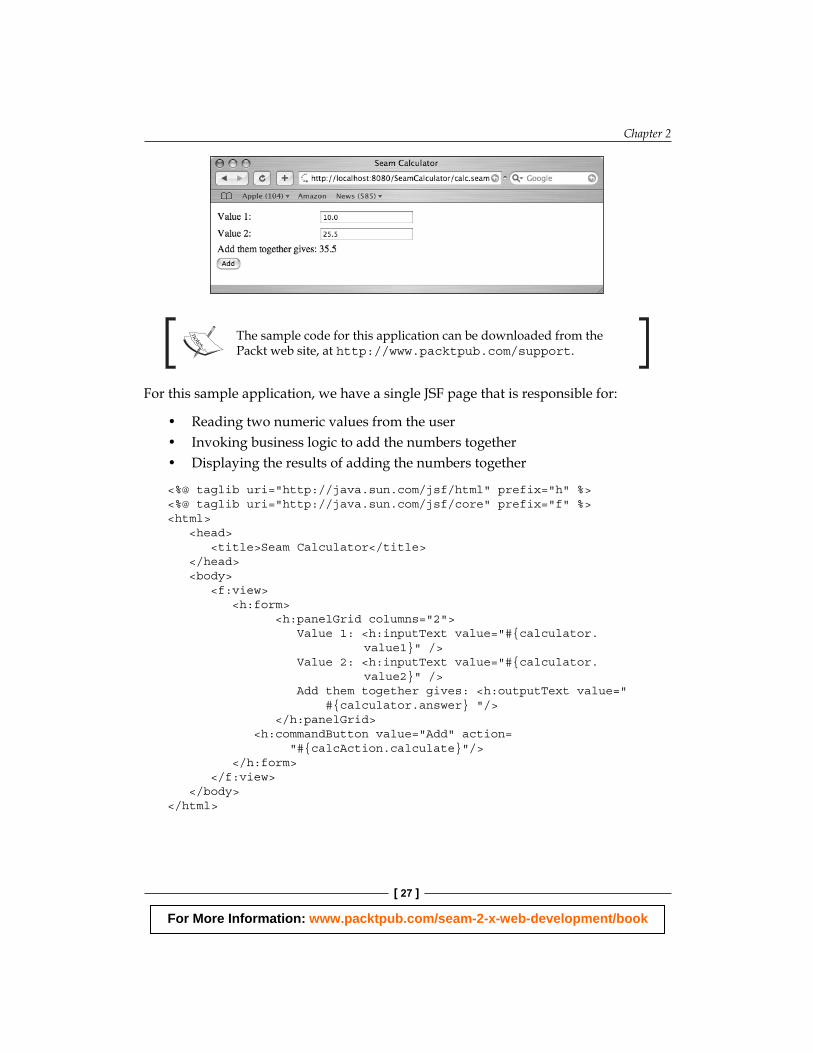
Example application To see these concepts in action, and to gain an understanding of how Seam components are used instead of JSF backing beans, let us look at a simple calculator web application. This simple application allows us to enter two numbers on a web page. Clicking the Add button on the web page will cause the sum of the numbers to be displayed.
This basic application will give us an understanding of the layout of a Seam application and how we can inject and outject components between the business layer and the view. The application functionality is shown in the following screenshot.
For More Information: www.packtpub.com/seam-2-x-web-development/book
Chapter 2
[ 27 ]
The sample code for this application can be downloaded from the Packt web site, at http://www.packtpub.com/support.
For this sample application, we have a single JSF page that is responsible for:
Reading two numeric values from the userInvoking business logic to add the numbers togetherDisplaying the results of adding the numbers together
<%@ taglib uri="http://java.sun.com/jsf/html" prefix="h" %><%@ taglib uri="http://java.sun.com/jsf/core" prefix="f" %><html> <head> <title>Seam Calculator</title> </head> <body> <f:view> <h:form> <h:panelGrid columns="2"> Value 1: <h:inputText value="#{calculator. value1}" /> Value 2: <h:inputText value="#{calculator. value2}" /> Add them together gives: <h:outputText value=" #{calculator.answer} "/> </h:panelGrid> <h:commandButton value="Add" action= "#{calcAction.calculate}"/> </h:form> </f:view> </body></html>
•••
For More Information: www.packtpub.com/seam-2-x-web-development/book
Developing Seam Applications
[ 28 ]
We can see that there is nothing Seam-specifi c in this JSF page. However, we are binding two inputText areas, one outputText area, and a button action to Seam components by using standard JSF Expression Language.
JSF EL Seam Bindingcalculator.value1 This is bound to the member variable value1 on the Seam
component called calculator. This value will be injected into the Seam component.
calculator.value2 This is bound to the member variable value2 on the Seam component called calculator. This value will be injected into the Seam component.
calculator.answer This is bound to the member variable answer on the Seam component called calculator. This value will be outjected from the Seam component.
calcAction.calculate This will invoke the method calculate() on the Seam component called calcAction.
Our business logic for this sample application is performed in a simple POJO class called Calculator.java.
package com.davidsalter.seamcalculator;
import java.io.Serializable;
import org.jboss.seam.annotations.Name;
@Name("calculator")public class Calculator {
private double value1; private double value2; private double answer;
public double getValue1() { return value1; }
public void setValue1(double value1) { this.value1 = value1; }
public double getValue2() { return value2; }
public void setValue2(double value2) { this.value2 = value2; }
public double getAnswer() {
For More Information: www.packtpub.com/seam-2-x-web-development/book
Chapter 2
[ 29 ]
return answer; }
public void add() { this.answer = value1 + value2; }}
This class is decorated with the @Name("calculator") annotation, which causes it to be registered to Seam with the name, "calculator". The @Name annotation causes this object to be registered as a Seam component that can subsequently be used within other Seam components via Injection or Outjection by using the @In and @Out annotations.
Finally, we need to have a class that is acting as a backing bean for the JSF page that allows us to invoke our business logic. In this example, we are using a Stateless Session Bean. The Session Bean and its local interface are as follows.
In the Java EE 5 specifi cation, a Stateless Session Bean is used to represent a single application client's communication with an application server. A Stateless Session Bean, as its name suggests, contains no state information; so they are typically used as transaction façades. A Façade is a popular design pattern, which defi nes how simplifi ed access to a system can be provided. For more information about the Façade pattern, check out the following link:
http://java.sun.com/blueprints/corej2eepatterns/Patterns/SessionFacade.html
Defi ning a Stateless Session Bean using Java EE 5 technologies requires an interface and an implementation class to be defi ned. The interface defi nes all of the methods that are available to clients of the Session Bean, whereas the implementation class contains a concrete implementation of the interface. In Java EE 5, a Session Bean interface is annotated with either the @Local or @Remote or both annotations. An @Local interface is used when a Session Bean is to be accessed locally within the same JVM as its client (for example, a web page running within an application server). An @Remote interface is used when a Session Bean's clients are remote to the application server that is running within a different JVM as the application server.
There are many books that cover Stateless Session Beans and EJB 3 in depth, such as EJB 3 Developer's Guide by Michael Sikora, published by Packt Publishing. For more information on this book, check out the following link:
http://www.packtpub.com/developer-guide-for-ejb3
For More Information: www.packtpub.com/seam-2-x-web-development/book
Developing Seam Applications
[ 30 ]
In the following code, we are registering our CalcAction class with Seam under the name calcAction. We are also Injecting and Outjecting the calculator variable so that we can use it both to retrieve values from our JSF form and pass them back to the form.
package com.davidsalter.seamcalculator;
import javax.ejb.Stateless;
import org.jboss.seam.annotations.In;import org.jboss.seam.annotations.Out;import org.jboss.seam.annotations.Name;
@Stateless@Name("calcAction")public class CalcAction implements Calc {
@In @Out private Calculator calculator;
public String calculate() {
calculator.add(); return "";
}}
package com.davidsalter.seamcalculator;
import javax.ejb.Local;
@Localpublic interface Calc {
public String calculate();}
That's all the code we need to write for our sample application. If we review this code, we can see several key points where Seam has made our application development easier:
All of the code that we have developed has been written as POJOs, which will make unit testing a lot easier.We haven't extended or implemented any special Seam interfaces.We've not had to defi ne any JSF backing beans explicitly in XML. We're using Java EE Session Beans to manage all of the business logic and web-tier/business-tier integration.We've not used any DTO objects to transfer data between the web and the business tiers. We're using a Seam component that contains both state and behavior.
•
••
•
For More Information: www.packtpub.com/seam-2-x-web-development/book
Chapter 2
[ 31 ]
If you are familiar with JSF, you can probably see that adding Seam into a fairly standard JSF application has already made our development simpler.
Finally, to enable Seam to correctly fi nd our Seam components and deploy them correctly to the application server, we need to create an empty fi le called seam. properties and place it within the root of the classpath of the EJB JAR fi le. Because this fi le is empty, we will not discuss it further here. We will, however, see the location of this fi le in the section Application layout, later in this chapter.
To deploy the application as a WAR fi le embedded inside an EAR fi le, we need to write some deployment descriptors.
WAR file deployment descriptors To deploy a WAR fi le with Seam, we need to defi ne several fi les within the \WEB-INF directory of the archive:
web.xml
faces-config.xml
components.xml
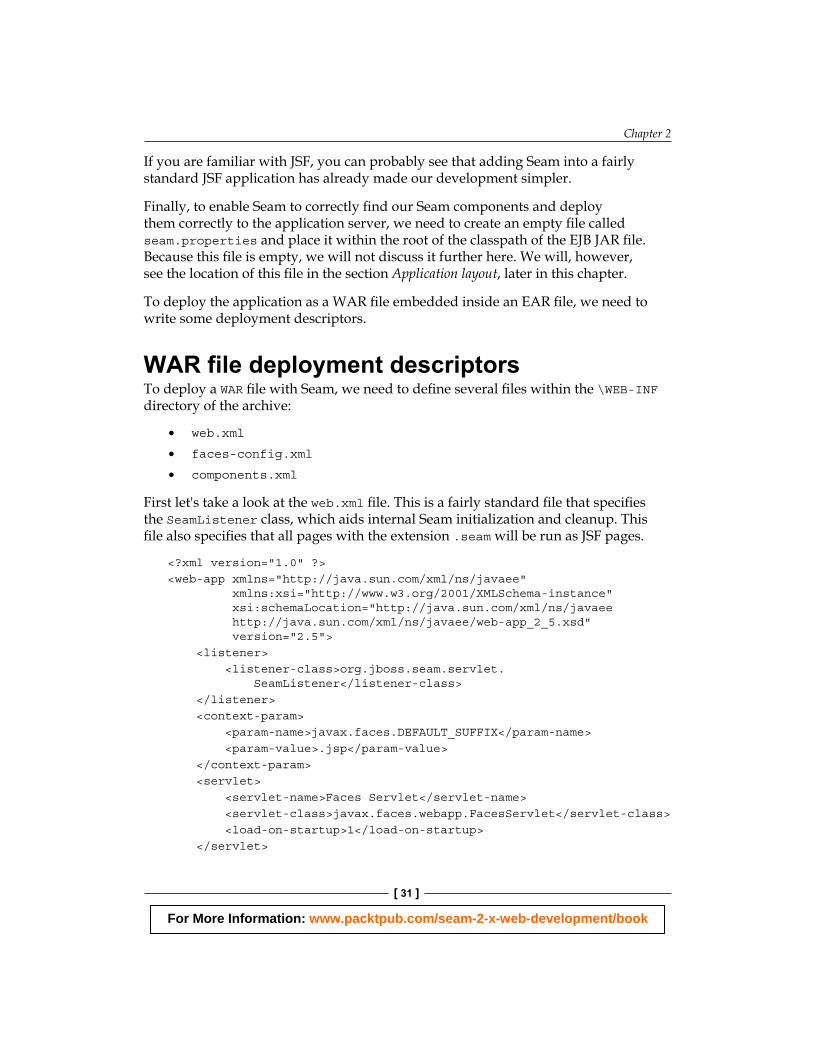
First let's take a look at the web.xml fi le. This is a fairly standard fi le that specifi es the SeamListener class, which aids internal Seam initialization and cleanup. This fi le also specifi es that all pages with the extension .seam will be run as JSF pages.
<?xml version="1.0" ?><web-app xmlns="http://java.sun.com/xml/ns/javaee" xmlns:xsi="http://www.w3.org/2001/XMLSchema-instance" xsi:schemaLocation="http://java.sun.com/xml/ns/javaee http://java.sun.com/xml/ns/javaee/web-app_2_5.xsd" version="2.5"> <listener> <listener-class>org.jboss.seam.servlet. SeamListener</listener-class> </listener> <context-param> <param-name>javax.faces.DEFAULT_SUFFIX</param-name> <param-value>.jsp</param-value> </context-param> <servlet> <servlet-name>Faces Servlet</servlet-name> <servlet-class>javax.faces.webapp.FacesServlet</servlet-class> <load-on-startup>1</load-on-startup> </servlet>
•
•
•
For More Information: www.packtpub.com/seam-2-x-web-development/book
Developing Seam Applications
[ 32 ]
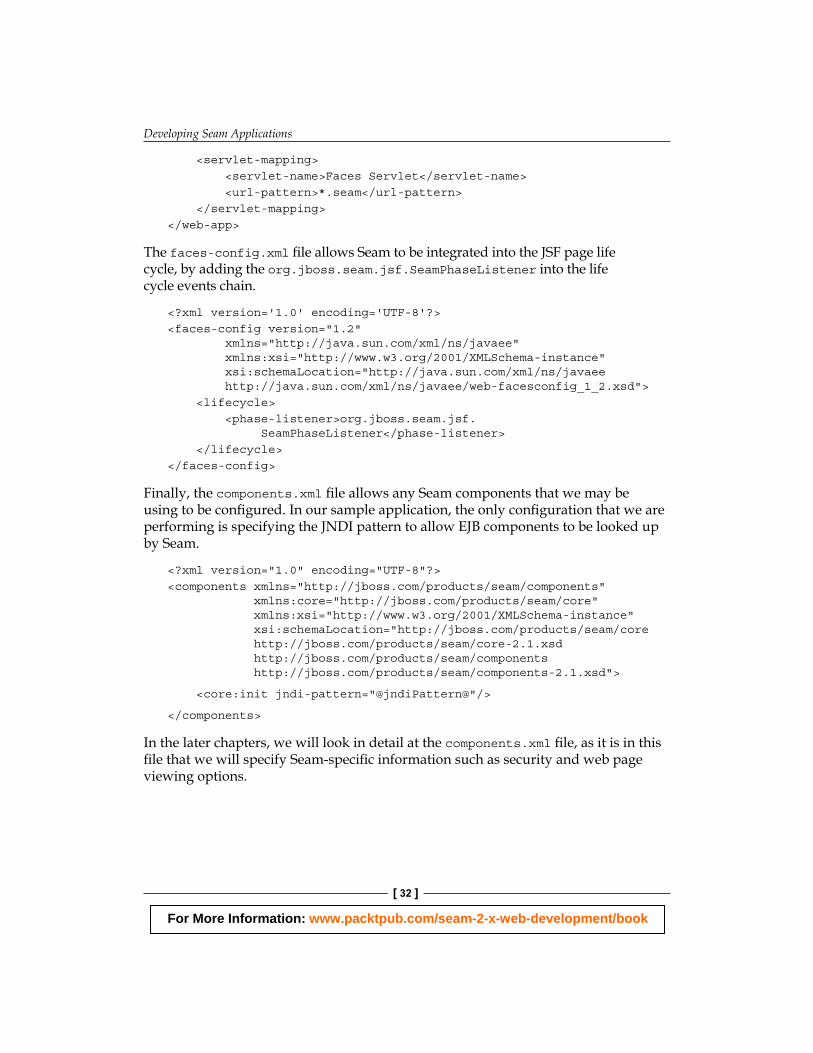
<servlet-mapping> <servlet-name>Faces Servlet</servlet-name> <url-pattern>*.seam</url-pattern> </servlet-mapping></web-app>
The faces-config.xml fi le allows Seam to be integrated into the JSF page life cycle, by adding the org.jboss.seam.jsf.SeamPhaseListener into the life cycle events chain.
<?xml version='1.0' encoding='UTF-8'?><faces-config version="1.2" xmlns="http://java.sun.com/xml/ns/javaee" xmlns:xsi="http://www.w3.org/2001/XMLSchema-instance" xsi:schemaLocation="http://java.sun.com/xml/ns/javaee http://java.sun.com/xml/ns/javaee/web-facesconfig_1_2.xsd"> <lifecycle> <phase-listener>org.jboss.seam.jsf. SeamPhaseListener</phase-listener> </lifecycle></faces-config>
Finally, the components.xml fi le allows any Seam components that we may be using to be confi gured. In our sample application, the only confi guration that we are performing is specifying the JNDI pattern to allow EJB components to be looked up by Seam.
<?xml version="1.0" encoding="UTF-8"?><components xmlns="http://jboss.com/products/seam/components" xmlns:core="http://jboss.com/products/seam/core" xmlns:xsi="http://www.w3.org/2001/XMLSchema-instance" xsi:schemaLocation="http://jboss.com/products/seam/core http://jboss.com/products/seam/core-2.1.xsd http://jboss.com/products/seam/components http://jboss.com/products/seam/components-2.1.xsd">
<core:init jndi-pattern="@jndiPattern@"/>
</components>
In the later chapters, we will look in detail at the components.xml fi le, as it is in this fi le that we will specify Seam-specifi c information such as security and web page viewing options.
For More Information: www.packtpub.com/seam-2-x-web-development/book
Chapter 2
[ 33 ]
EAR file deployment descriptors To deploy an EAR fi le with Seam on JBoss, we need to defi ne several deployment descriptors within the \META-INF directory of the archive:
application.xml
ejb-jar.xml
jboss-app.xml
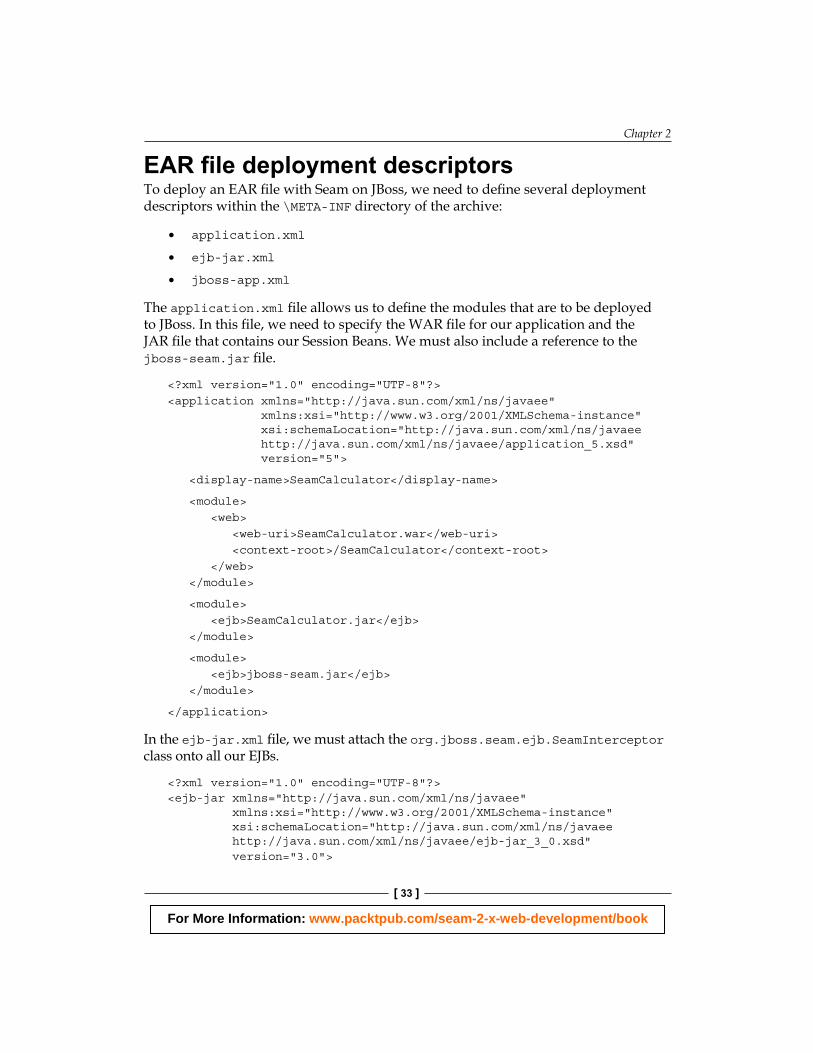
The application.xml fi le allows us to defi ne the modules that are to be deployed to JBoss. In this fi le, we need to specify the WAR fi le for our application and the JAR fi le that contains our Session Beans. We must also include a reference to the jboss-seam.jar fi le.
<?xml version="1.0" encoding="UTF-8"?><application xmlns="http://java.sun.com/xml/ns/javaee" xmlns:xsi="http://www.w3.org/2001/XMLSchema-instance" xsi:schemaLocation="http://java.sun.com/xml/ns/javaee http://java.sun.com/xml/ns/javaee/application_5.xsd" version="5">
<display-name>SeamCalculator</display-name>
<module> <web> <web-uri>SeamCalculator.war</web-uri> <context-root>/SeamCalculator</context-root> </web> </module>
<module> <ejb>SeamCalculator.jar</ejb> </module>
<module> <ejb>jboss-seam.jar</ejb> </module>
</application>
In the ejb-jar.xml fi le, we must attach the org.jboss.seam.ejb.SeamInterceptor class onto all our EJBs.
<?xml version="1.0" encoding="UTF-8"?><ejb-jar xmlns="http://java.sun.com/xml/ns/javaee" xmlns:xsi="http://www.w3.org/2001/XMLSchema-instance" xsi:schemaLocation="http://java.sun.com/xml/ns/javaee http://java.sun.com/xml/ns/javaee/ejb-jar_3_0.xsd" version="3.0">
•
•
•
For More Information: www.packtpub.com/seam-2-x-web-development/book
Developing Seam Applications
[ 34 ]
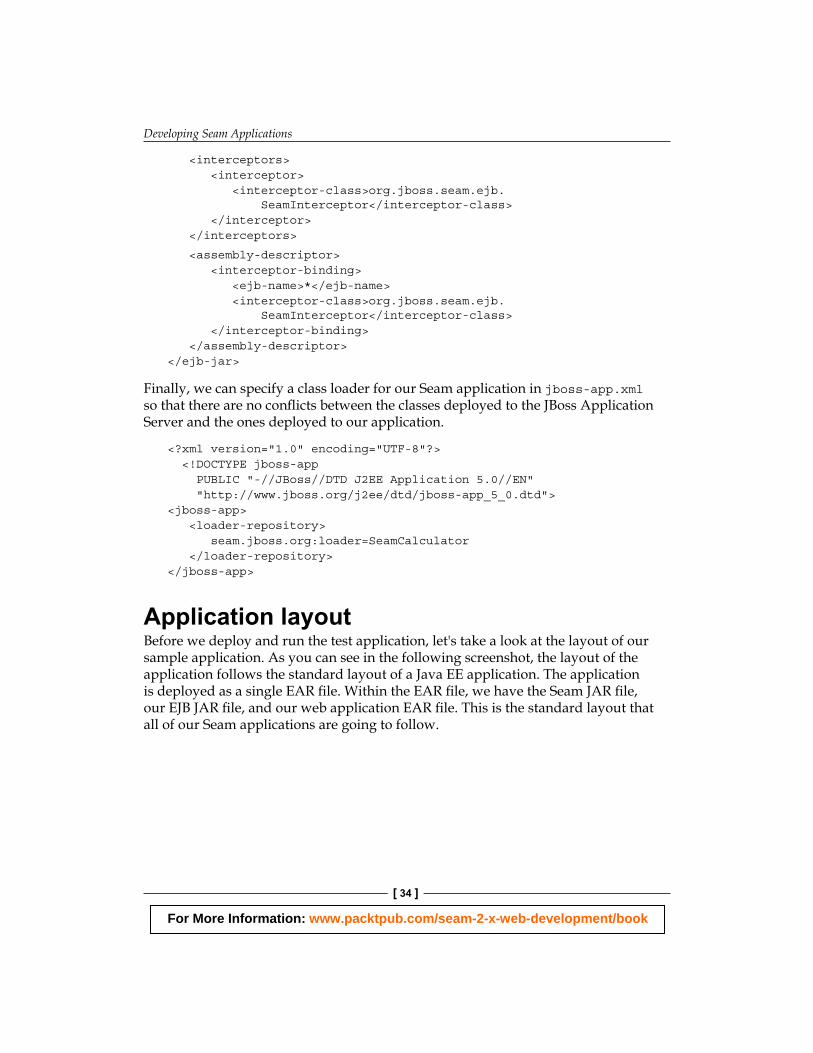
<interceptors> <interceptor> <interceptor-class>org.jboss.seam.ejb. SeamInterceptor</interceptor-class> </interceptor> </interceptors>
<assembly-descriptor> <interceptor-binding> <ejb-name>*</ejb-name> <interceptor-class>org.jboss.seam.ejb. SeamInterceptor</interceptor-class> </interceptor-binding> </assembly-descriptor></ejb-jar>
Finally, we can specify a class loader for our Seam application in jboss-app.xml so that there are no confl icts between the classes deployed to the JBoss Application Server and the ones deployed to our application.
<?xml version="1.0" encoding="UTF-8"?> <!DOCTYPE jboss-app PUBLIC "-//JBoss//DTD J2EE Application 5.0//EN" "http://www.jboss.org/j2ee/dtd/jboss-app_5_0.dtd"><jboss-app> <loader-repository> seam.jboss.org:loader=SeamCalculator </loader-repository> </jboss-app>
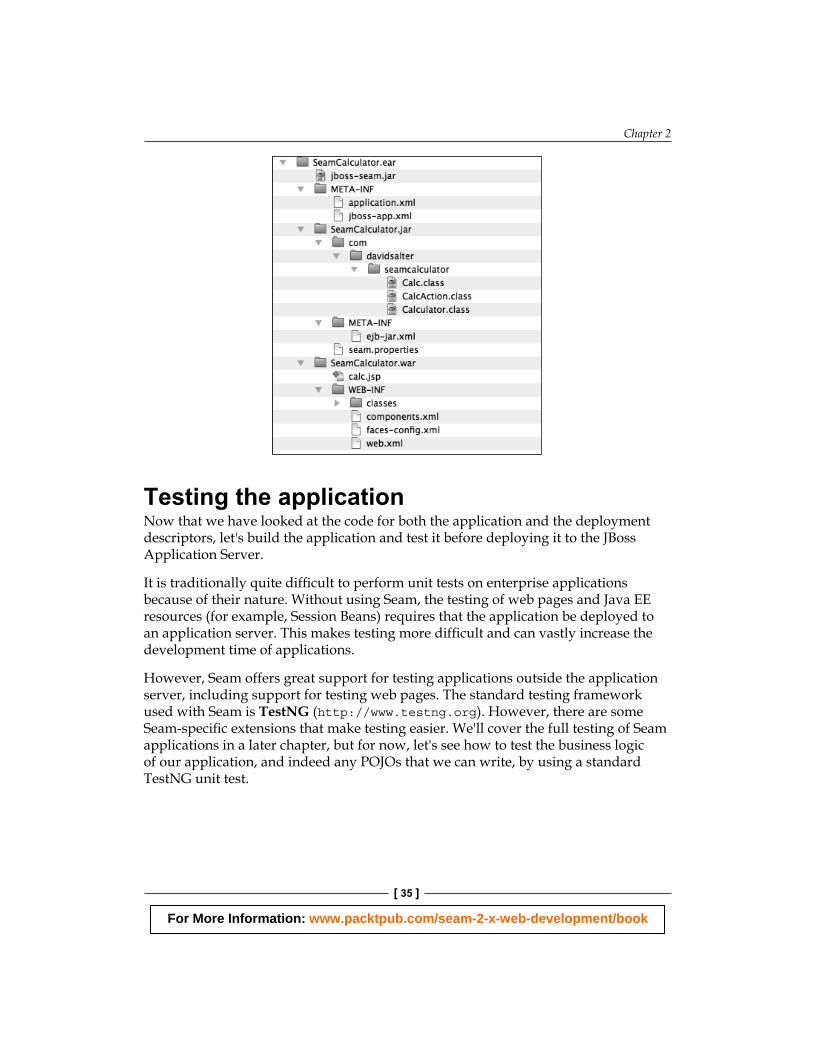
Application layout Before we deploy and run the test application, let's take a look at the layout of our sample application. As you can see in the following screenshot, the layout of the application follows the standard layout of a Java EE application. The application is deployed as a single EAR fi le. Within the EAR fi le, we have the Seam JAR fi le, our EJB JAR fi le, and our web application EAR fi le. This is the standard layout that all of our Seam applications are going to follow.
For More Information: www.packtpub.com/seam-2-x-web-development/book
Chapter 2
[ 35 ]
Testing the applicationNow that we have looked at the code for both the application and the deployment descriptors, let's build the application and test it before deploying it to the JBoss Application Server.
It is traditionally quite diffi cult to perform unit tests on enterprise applications because of their nature. Without using Seam, the testing of web pages and Java EE resources (for example, Session Beans) requires that the application be deployed to an application server. This makes testing more diffi cult and can vastly increase the development time of applications.
However, Seam offers great support for testing applications outside the application server, including support for testing web pages. The standard testing framework used with Seam is TestNG (http://www.testng.org). However, there are some Seam-specifi c extensions that make testing easier. We'll cover the full testing of Seam applications in a later chapter, but for now, let's see how to test the business logic of our application, and indeed any POJOs that we can write, by using a standard TestNG unit test.
For More Information: www.packtpub.com/seam-2-x-web-development/book
Developing Seam Applications
[ 36 ]
TestNG uses Java 5 annotations to allow methods to be declared as tests. To declare a method as a unit test, we simply need to adorn the method with the @Test annotation. Within a test, we can then assert different conditions to test whether our code is working as expected.
We could write a simple test for our calculator application as follows:
package com.davidsalter.seamcalculator.test;
import com.davidsalter.seamcalculator.Calculator;import org.testng.annotations.Test;
public class CalculatorTest {
private static double tolerance = 0.001;
@Test public void testAdd() throws Exception { Calculator testCalculator = new Calculator(); testCalculator.setValue1(10.0); testCalculator.setValue2(20.0); testCalculator.add(); assert (testCalculator.getAnswer() - 30.0 < tolerance); }}
This test simply instantiates an instance of the Calculator class, sets up some test data, and invokes the add() method before asserting that the answer is as expected.
Before we can run this unit test, we must also defi ne an XML fi le that details which tests to run. For Seam tests, this fi le is typically called AllTests. xml. The contents of this fi le, for our sample application, are as follows:
<!DOCTYPE suite SYSTEM "http://testng.org/testng-1.0.dtd" >
<suite name="Calculator - All" verbose="1"> <test name="Calculator"> <packages> <package name="com.davidsalter.seamcalculator.test"/> </packages> </test></suite>
Finally, before we can build and test the application, we need to copy a few JAR fi les from the Seam installation into our build path. To build and test a basic Seam application, we need to build against some of the Seam JAR fi les:
For More Information: www.packtpub.com/seam-2-x-web-development/book
Chapter 2
[ 37 ]
jboss-seam.jar – This contains the main Seam Framework such as the @In and @Out annotationsejb-api.jar – This contains the references we need to build EJB 3 Session Beanstestng.jar – This contains the TestNG framework that allows us to test our application
All of these JAR fi les can be found in the <jboss_seam>/lib directory, where <jboss_seam> is the directory that you have installed Seam into. If you have taken the sample application from the download bundle for this chapter, copy these fi les into the /lib directory of the project.
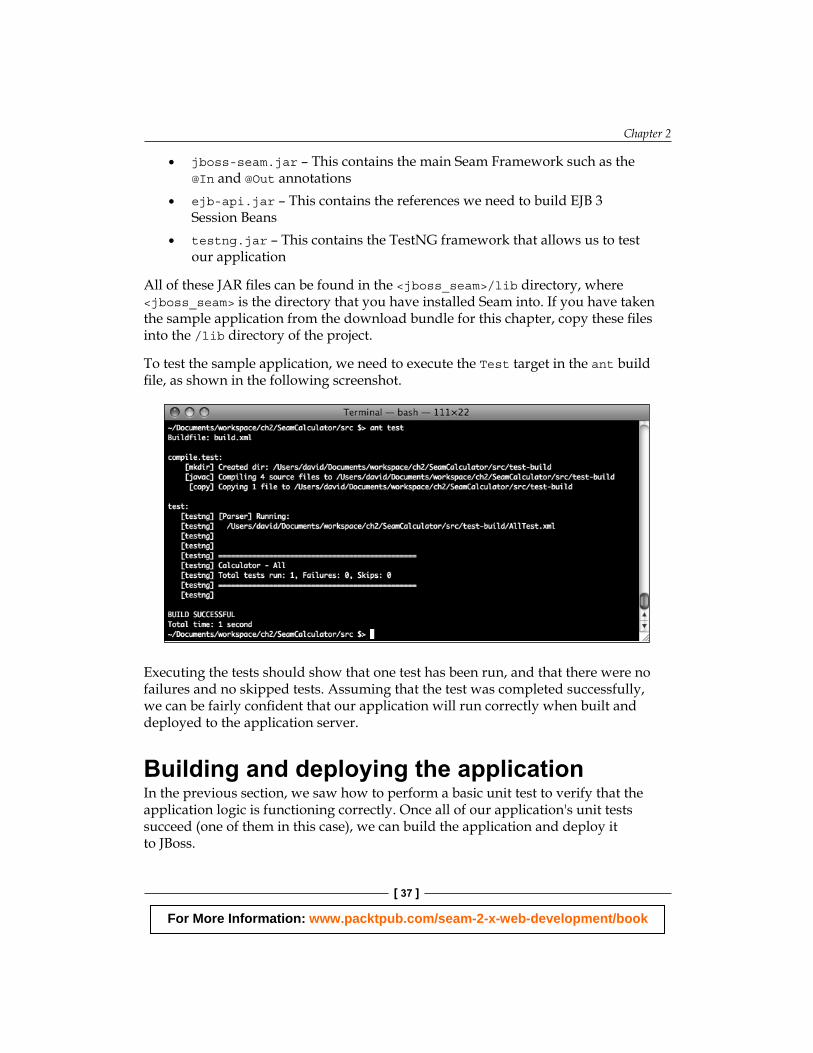
To test the sample application, we need to execute the Test target in the ant build fi le, as shown in the following screenshot.
Executing the tests should show that one test has been run, and that there were no failures and no skipped tests. Assuming that the test was completed successfully, we can be fairly confi dent that our application will run correctly when built and deployed to the application server.
Building and deploying the applicationIn the previous section, we saw how to perform a basic unit test to verify that the application logic is functioning correctly. Once all of our application's unit tests succeed (one of them in this case), we can build the application and deploy it to JBoss.
•
•
•
For More Information: www.packtpub.com/seam-2-x-web-development/book
Developing Seam Applications
[ 38 ]
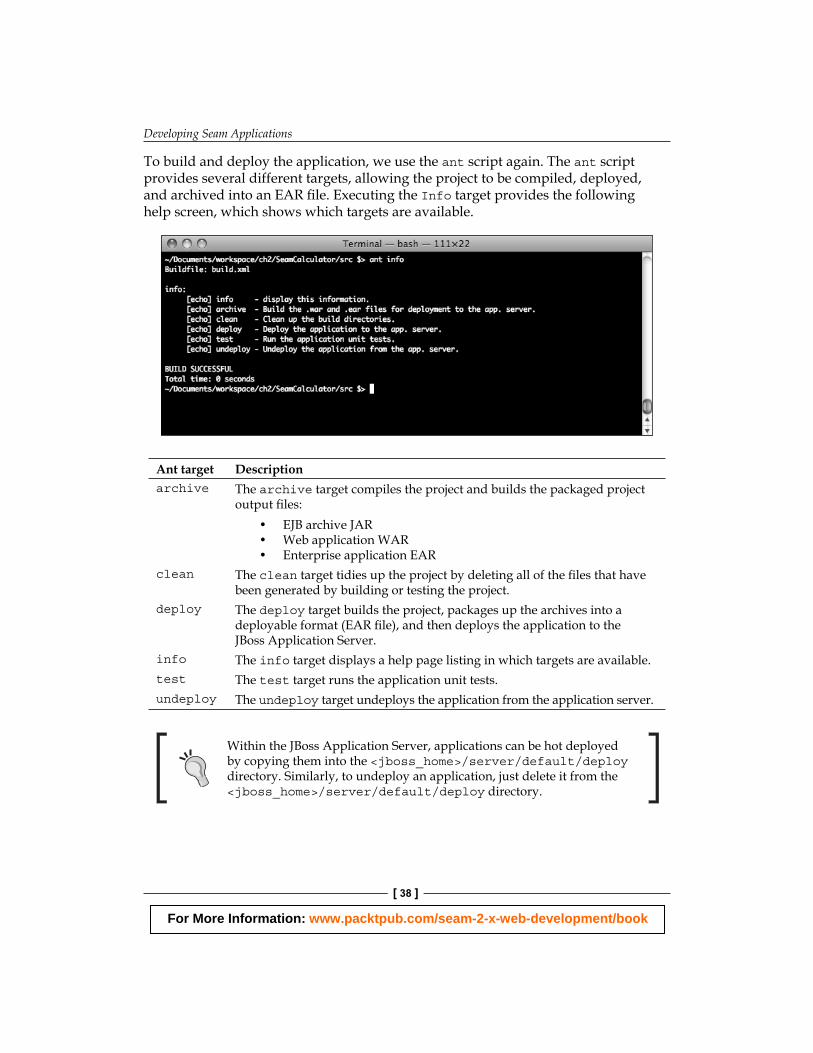
To build and deploy the application, we use the ant script again. The ant script provides several different targets, allowing the project to be compiled, deployed, and archived into an EAR fi le. Executing the Info target provides the following help screen, which shows which targets are available.
Ant target Descriptionarchive The archive target compiles the project and builds the packaged project
output fi les:EJB archive JARWeb application WAREnterprise application EAR
•••
clean The clean target tidies up the project by deleting all of the fi les that have been generated by building or testing the project.
deploy The deploy target builds the project, packages up the archives into a deployable format (EAR fi le), and then deploys the application to the JBoss Application Server.
info The info target displays a help page listing in which targets are available.test The test target runs the application unit tests.undeploy The undeploy target undeploys the application from the application server.
Within the JBoss Application Server, applications can be hot deployed by copying them into the <jboss_home>/server/default/deploy directory. Similarly, to undeploy an application, just delete it from the <jboss_home>/server/default/deploy directory.
For More Information: www.packtpub.com/seam-2-x-web-development/book
Chapter 2
[ 39 ]
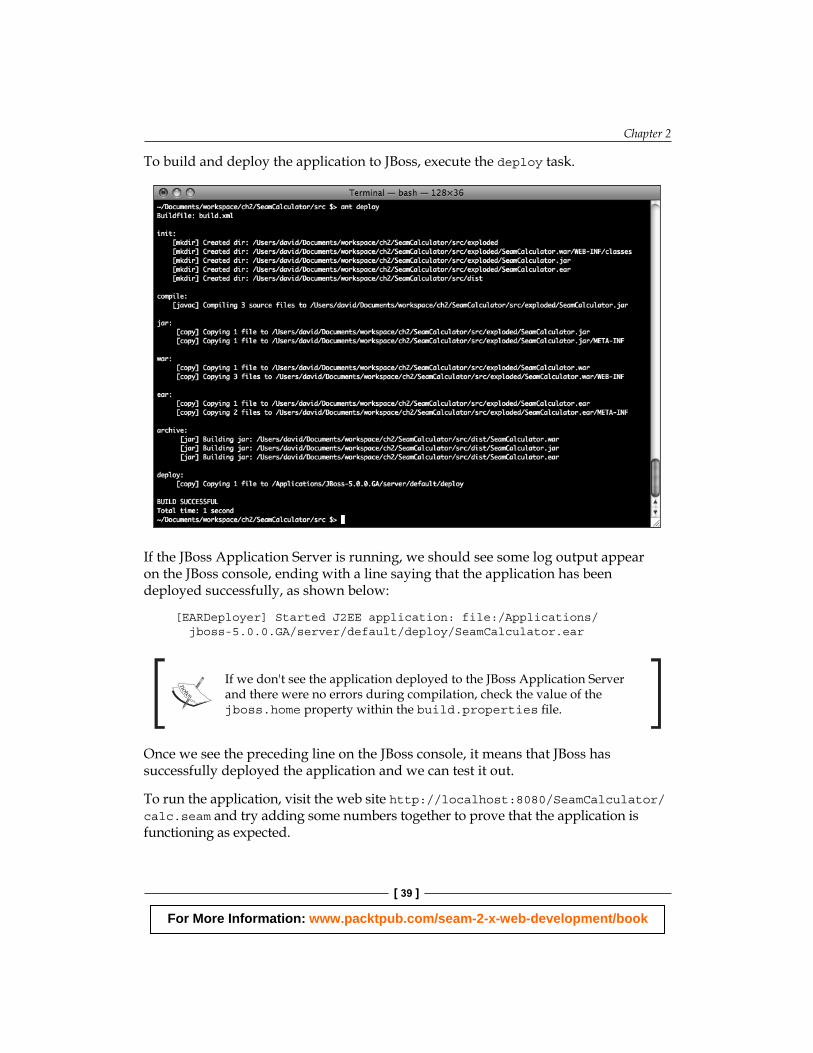
To build and deploy the application to JBoss, execute the deploy task.
If the JBoss Application Server is running, we should see some log output appear on the JBoss console, ending with a line saying that the application has been deployed successfully, as shown below:
[EARDeployer] Started J2EE application: file:/Applications/ jboss-5.0.0.GA/server/default/deploy/SeamCalculator.ear
If we don't see the application deployed to the JBoss Application Server and there were no errors during compilation, check the value of the jboss.home property within the build.properties fi le.
Once we see the preceding line on the JBoss console, it means that JBoss has successfully deployed the application and we can test it out.
To run the application, visit the web site http://localhost:8080/SeamCalculator/calc.seam and try adding some numbers together to prove that the application is functioning as expected.
For More Information: www.packtpub.com/seam-2-x-web-development/book
Developing Seam Applications
[ 40 ]
Seam data validation So far we've looked at Seam and learned how Seam can act as JSF backing beans and how it can act as the glue between our server-tier Session Beans and our web-tier JSF pages. Unfortunately, though, users could easily break our sample application by entering invalid data (for example, entering blank values or non-numeric values into the edit boxes). Seam provides validation tools to help us to make our application more robust and provide feedback to our users. Let's look at these tools now.
Data validation In order to perform consistent data validation, we would ideally want to perform all data validation within our data model. We want to perform data validation in our data model so that we can then keep all of the validation code in one place, which should then make it easier to keep it up-to-date if we ever change our minds about allowable data values.
Seam makes extensive use of the Hibernate validation tools to perform validation of our domain model. The Hibernate validation tools grew from the Hibernate project (http://www.hibernate.org) to allow the validation of entities before they are persisted to the database. To use the Hibernate validation tools in an application, we need to add hibernate-validator.jar into the application's class path, after which we can use annotations to defi ne the validation that we want to use for our data model. We'll discuss data validation and the Hibernate validator further in Chapter 7, when we talk about persisting objects to the database. But for now, let's look at a few validations that we can add to our sample Seam Calculator application.
In order to implement data validation with Seam, we need to apply annotations either to the member variables in a class or to the getter of the member variables. It's good practice to always apply these annotations to the same place in a class. Hence, throughout this book, we will always apply our annotation to the getter methods within classes.
In our sample application, we are allowing numeric values to be entered via edit boxes on a JSF form. To perform data validation against these inputs, there are a few annotations that can help us.
For More Information: www.packtpub.com/seam-2-x-web-development/book
Chapter 2
[ 41 ]
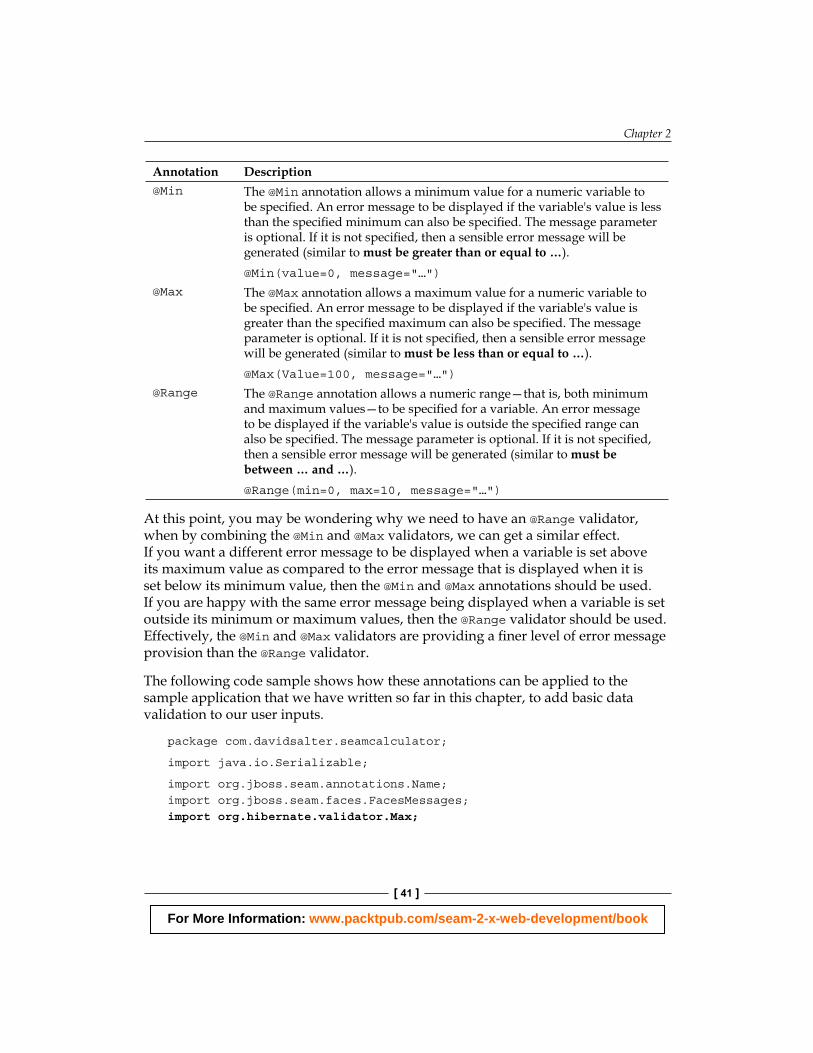
Annotation Description@Min The @Min annotation allows a minimum value for a numeric variable to
be specifi ed. An error message to be displayed if the variable's value is less than the specifi ed minimum can also be specifi ed. The message parameter is optional. If it is not specifi ed, then a sensible error message will be generated (similar to must be greater than or equal to …). @Min(value=0, message="…")
@Max The @Max annotation allows a maximum value for a numeric variable to be specifi ed. An error message to be displayed if the variable's value is greater than the specifi ed maximum can also be specifi ed. The message parameter is optional. If it is not specifi ed, then a sensible error message will be generated (similar to must be less than or equal to …). @Max(Value=100, message="…")
@Range The @Range annotation allows a numeric range—that is, both minimum and maximum values—to be specifi ed for a variable. An error message to be displayed if the variable's value is outside the specifi ed range can also be specifi ed. The message parameter is optional. If it is not specifi ed, then a sensible error message will be generated (similar to must be between … and …). @Range(min=0, max=10, message="…")
At this point, you may be wondering why we need to have an @Range validator, when by combining the @Min and @Max validators, we can get a similar effect. If you want a different error message to be displayed when a variable is set above its maximum value as compared to the error message that is displayed when it is set below its minimum value, then the @Min and @Max annotations should be used. If you are happy with the same error message being displayed when a variable is set outside its minimum or maximum values, then the @Range validator should be used. Effectively, the @Min and @Max validators are providing a fi ner level of error message provision than the @Range validator.
The following code sample shows how these annotations can be applied to the sample application that we have written so far in this chapter, to add basic data validation to our user inputs.
package com.davidsalter.seamcalculator;
import java.io.Serializable;
import org.jboss.seam.annotations.Name;import org.jboss.seam.faces.FacesMessages;import org.hibernate.validator.Max;
For More Information: www.packtpub.com/seam-2-x-web-development/book
Developing Seam Applications
[ 42 ]
import org.hibernate.validator.Min;import org.hibernate.validator.Range;
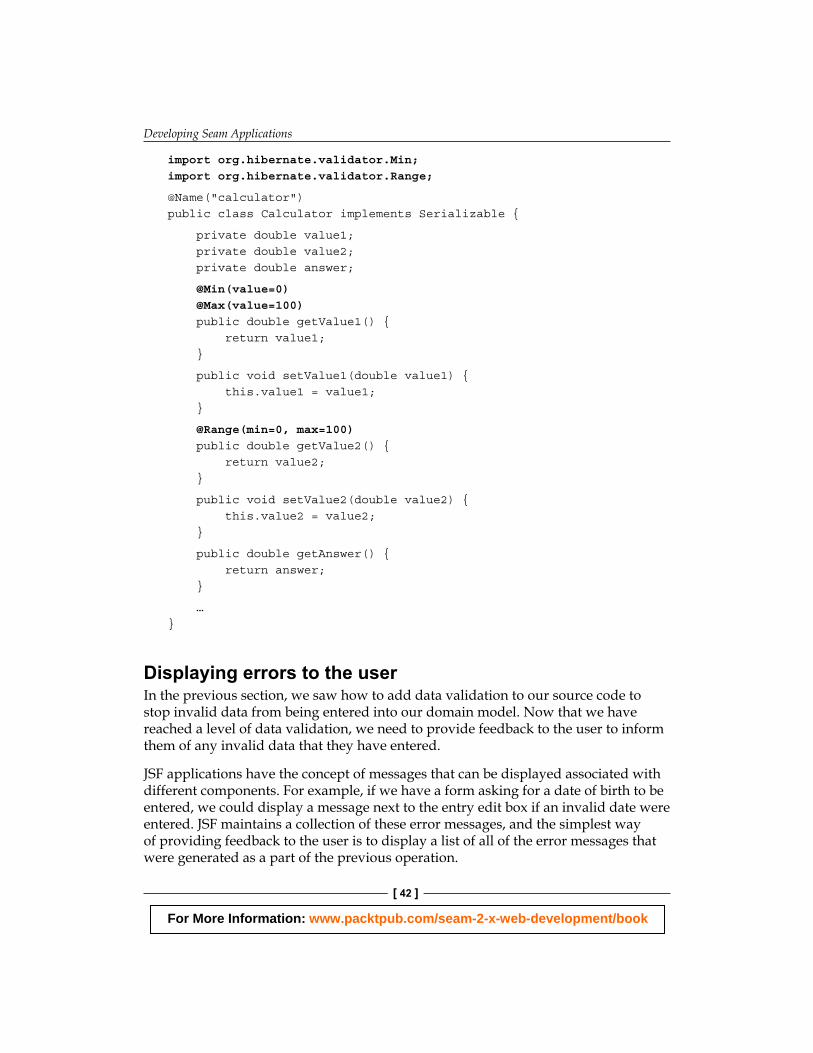
@Name("calculator")public class Calculator implements Serializable {
private double value1; private double value2; private double answer;
@Min(value=0) @Max(value=100) public double getValue1() { return value1; } public void setValue1(double value1) { this.value1 = value1; }
@Range(min=0, max=100) public double getValue2() { return value2; }
public void setValue2(double value2) { this.value2 = value2; }
public double getAnswer() { return answer; }
…}
Displaying errors to the user In the previous section, we saw how to add data validation to our source code to stop invalid data from being entered into our domain model. Now that we have reached a level of data validation, we need to provide feedback to the user to inform them of any invalid data that they have entered.
JSF applications have the concept of messages that can be displayed associated with different components. For example, if we have a form asking for a date of birth to be entered, we could display a message next to the entry edit box if an invalid date were entered. JSF maintains a collection of these error messages, and the simplest way of providing feedback to the user is to display a list of all of the error messages that were generated as a part of the previous operation.
For More Information: www.packtpub.com/seam-2-x-web-development/book
Chapter 2
[ 43 ]
In order to obtain error messages within the JSF page, we need to tell JSF which components we want to be validated against the domain model. This is achieved by using the <s:validate/> or <s:validateAll/> tags. These are Seam-specifi c tags and are not a part of the standard JSF runtime. In order to use these tags, we need to add the following taglib reference to the top of the JSF page.
<%@ taglib uri="http://jboss.com/products/seam/taglib" prefix="s" %>
In order to use this tag library, we need to add a few additional JAR fi les into the WEB-INF/lib directory of our web application, namely:
jboss-el.jar
jboss-seam-ui.jar
jsf-api.jar
jsf-impl.jar
This tag library allows us to validate all of the components (<s:validateAll/>) within a block of JSF code, or individual components (<s:validate/>) within a JSF page.
To validate all components within a particular scope, wrap them all with the <s:validateAll/> tag as shown here:
<h:form> <s:validateAll> <h:inputText value="…" />
<h:inputText value="…" /> </s:validateAll></h:form>
To validate individual components, embed the <s:validate/> tag within the component, as shown in the following code fragment.
<h:form> <h:inputText value="…" > <s:validate/> </h:inputText>
<h:inputText value="…" > <s:validate/> </h:inputText></h:form>
•
•
•
•
For More Information: www.packtpub.com/seam-2-x-web-development/book
Developing Seam Applications
[ 44 ]
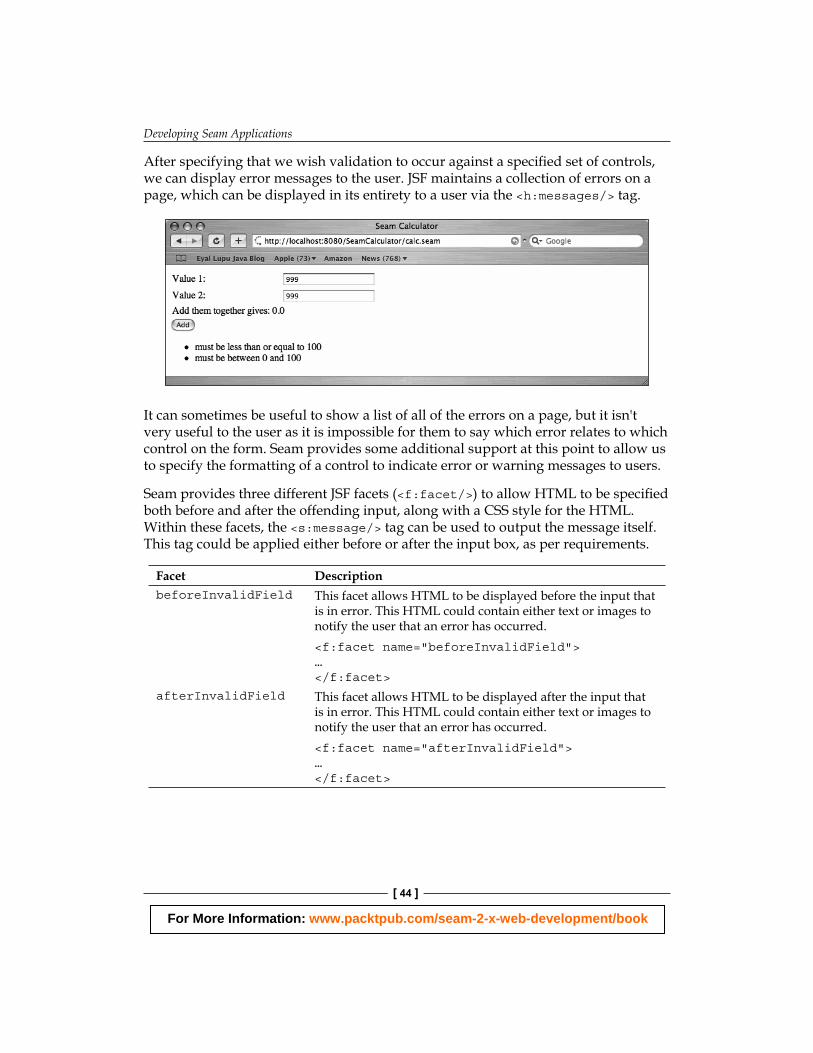
After specifying that we wish validation to occur against a specifi ed set of controls, we can display error messages to the user. JSF maintains a collection of errors on a page, which can be displayed in its entirety to a user via the <h:messages/> tag.
It can sometimes be useful to show a list of all of the errors on a page, but it isn't very useful to the user as it is impossible for them to say which error relates to which control on the form. Seam provides some additional support at this point to allow us to specify the formatting of a control to indicate error or warning messages to users.
Seam provides three different JSF facets (<f:facet/>) to allow HTML to be specifi ed both before and after the offending input, along with a CSS style for the HTML. Within these facets, the <s:message/> tag can be used to output the message itself. This tag could be applied either before or after the input box, as per requirements.
Facet DescriptionbeforeInvalidField This facet allows HTML to be displayed before the input that
is in error. This HTML could contain either text or images to notify the user that an error has occurred. <f:facet name="beforeInvalidField">…</f:facet>
afterInvalidField This facet allows HTML to be displayed after the input that is in error. This HTML could contain either text or images to notify the user that an error has occurred. <f:facet name="afterInvalidField">…</f:facet>
For More Information: www.packtpub.com/seam-2-x-web-development/book
Chapter 2
[ 45 ]
Facet DescriptionaroundInvalidField This facet allows the CSS style of the text surrounding the
input that is in error to be specifi ed. <f:facet name="aroundInvalidField">…</f:facet>
In order to specify these facets for a particular fi eld, the <s:decorate/> tag must be specifi ed outside the facet scope.
<s:decorate> <f:facet name="aroundInvalidField"> <s:span styleClass="invalidInput"/> </f:facet> <f:facet name="beforeInvalidField"> <f:verbatim>**</f:verbatim> </f:facet> <f:facet name="afterInvalidField"> <s:message/> </f:facet> <h:inputText value="#{calculator.value1}" required="true" > <s:validate/> </h:inputText></s:decorate>
In the preceding code snippet, we can see that a CSS style called invalidInput is being applied to any error or warning information that is to be displayed regarding the <inputText/> fi eld. An erroneous input fi eld is being adorned with a double asterisk (**) preceding the edit box, and the error message specifi c to the inputText fi eld after is displayed in the edit box.
Applying these features to our sample application, the calc.jsp fi le will appear as follows:
<%@ taglib uri="http://java.sun.com/jsf/html" prefix="h" %><%@ taglib uri="http://java.sun.com/jsf/core" prefix="f" %><%@ taglib uri="http://jboss.com/products/seam/taglib" prefix="s" %>
<html> <head> <title>Seam Calculator</title> <link href="styles.css" rel="stylesheet" type="text/css" /> </head> <body> <f:view>
For More Information: www.packtpub.com/seam-2-x-web-development/book
Developing Seam Applications
[ 46 ]
<h:form> <h:panelGrid columns="2"> Value 1: <s:decorate> <f:facet name="aroundInvalidField"> <s:span styleClass="invalidInput"/> </f:facet> <f:facet name="beforeInvalidField"> <f:verbatim>**</f:verbatim> </f:facet> <f:facet name="afterInvalidField"> <s:message/> </f:facet> <h:inputText value="#{calculator.value1}" required="true" > <s:validate/> </h:inputText> </s:decorate>
Value 2: <s:decorate> <f:facet name="aroundInvalidField"> <s:span styleClass="invalidInput"/> </f:facet> <f:facet name="beforeInvalidField"> <f:verbatim>**</f:verbatim> </f:facet> <f:facet name="afterInvalidField"> <s:message/> </f:facet> <h:inputText value="#{calculator.value2}" required="true"> <s:validate/> </h:inputText> </s:decorate>
Adding them together gives: <h:outputText value="#{calculator.answer}"/> </h:panelGrid> <h:commandButton value="Add" action="#{calcAction.calculate}"/> <h:messages/> </h:form> </f:view> </body></html>
For More Information: www.packtpub.com/seam-2-x-web-development/book
Chapter 2
[ 47 ]
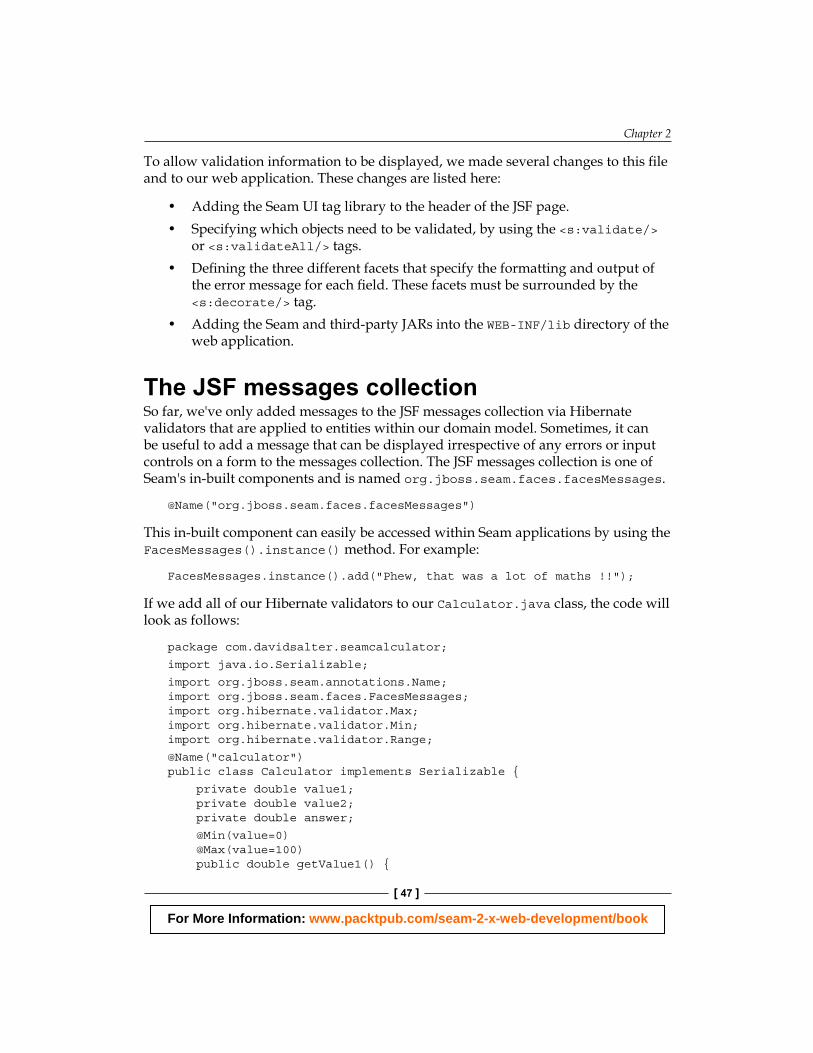
To allow validation information to be displayed, we made several changes to this fi le and to our web application. These changes are listed here:
Adding the Seam UI tag library to the header of the JSF page.Specifying which objects need to be validated, by using the <s:validate/> or <s:validateAll/> tags.Defi ning the three different facets that specify the formatting and output of the error message for each fi eld. These facets must be surrounded by the <s:decorate/> tag.Adding the Seam and third-party JARs into the WEB-INF/lib directory of the web application.
The JSF messages collection So far, we've only added messages to the JSF messages collection via Hibernate validators that are applied to entities within our domain model. Sometimes, it can be useful to add a message that can be displayed irrespective of any errors or input controls on a form to the messages collection. The JSF messages collection is one of Seam's in-built components and is named org.jboss.seam.faces.facesMessages.
@Name("org.jboss.seam.faces.facesMessages")
This in-built component can easily be accessed within Seam applications by using the FacesMessages().instance() method. For example:
FacesMessages.instance().add("Phew, that was a lot of maths !!");
If we add all of our Hibernate validators to our Calculator.java class, the code will look as follows:
package com.davidsalter.seamcalculator;
import java.io.Serializable;
import org.jboss.seam.annotations.Name;import org.jboss.seam.faces.FacesMessages;import org.hibernate.validator.Max;import org.hibernate.validator.Min;import org.hibernate.validator.Range;
@Name("calculator")public class Calculator implements Serializable {
private double value1; private double value2; private double answer;
@Min(value=0) @Max(value=100) public double getValue1() {
••
•
•
For More Information: www.packtpub.com/seam-2-x-web-development/book
Developing Seam Applications
[ 48 ]
return value1; }
public void setValue1(double value1) { this.value1 = value1; }
@Range(min=0, max=100) public double getValue2() { return value2; }
public void setValue2(double value2) { this.value2 = value2; }
public double getAnswer() { return answer; }
public void add() { this.answer = value1 + value2;
//Access the "org.jboss.seam.faces.facesMessages" component and add a message into it. FacesMessages.instance().add("Phew, that was a lot of maths !!"); }}
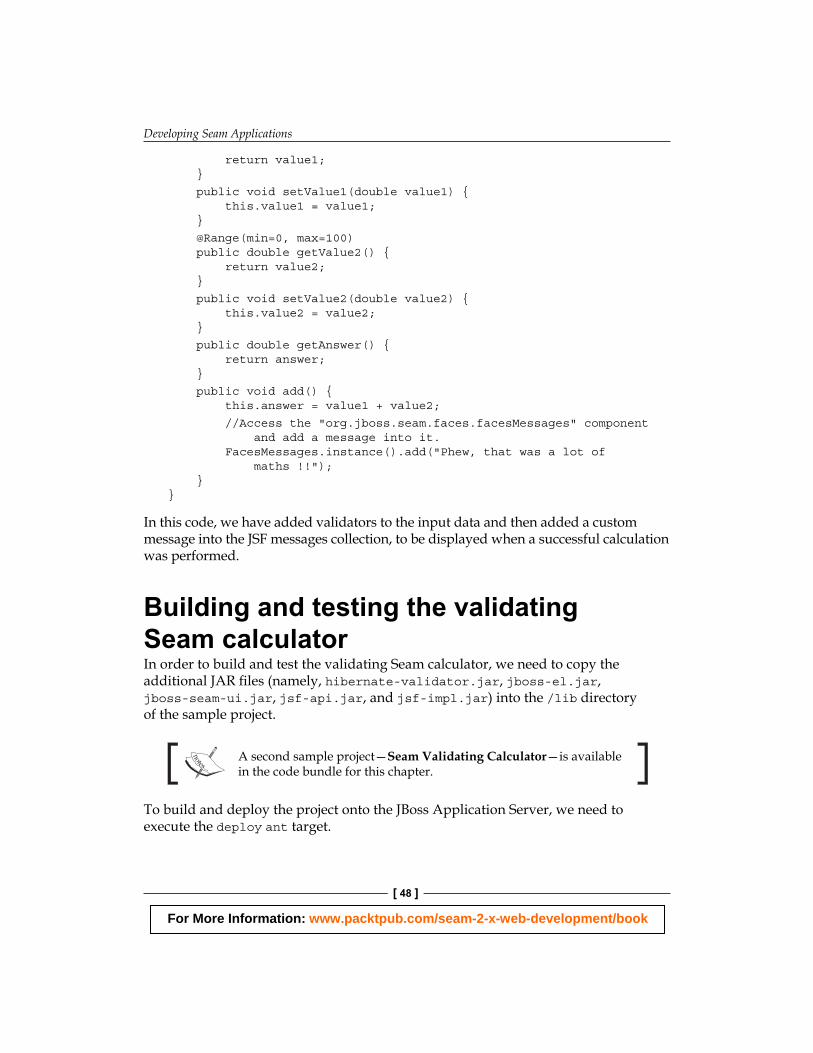
In this code, we have added validators to the input data and then added a custom message into the JSF messages collection, to be displayed when a successful calculation was performed.
Building and testing the validating Seam calculator In order to build and test the validating Seam calculator, we need to copy the additional JAR fi les (namely, hibernate-validator.jar, jboss-el.jar, jboss-seam-ui.jar, jsf-api.jar, and jsf-impl.jar) into the /lib directory of the sample project.
A second sample project—Seam Validating Calculator—is available in the code bundle for this chapter.
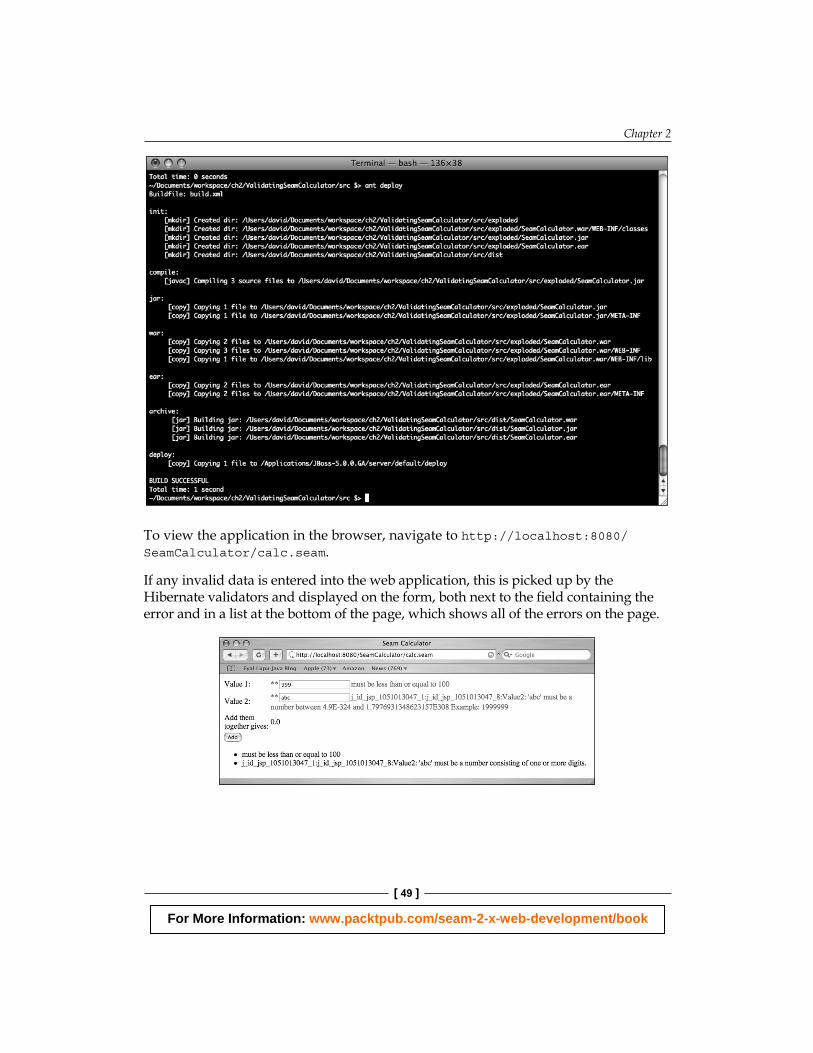
To build and deploy the project onto the JBoss Application Server, we need to execute the deploy ant target.
For More Information: www.packtpub.com/seam-2-x-web-development/book
Chapter 2
[ 49 ]
To view the application in the browser, navigate to http://localhost:8080/SeamCalculator/calc.seam.
If any invalid data is entered into the web application, this is picked up by the Hibernate validators and displayed on the form, both next to the fi eld containing the error and in a list at the bottom of the page, which shows all of the errors on the page.
For More Information: www.packtpub.com/seam-2-x-web-development/book
Developing Seam Applications
[ 50 ]
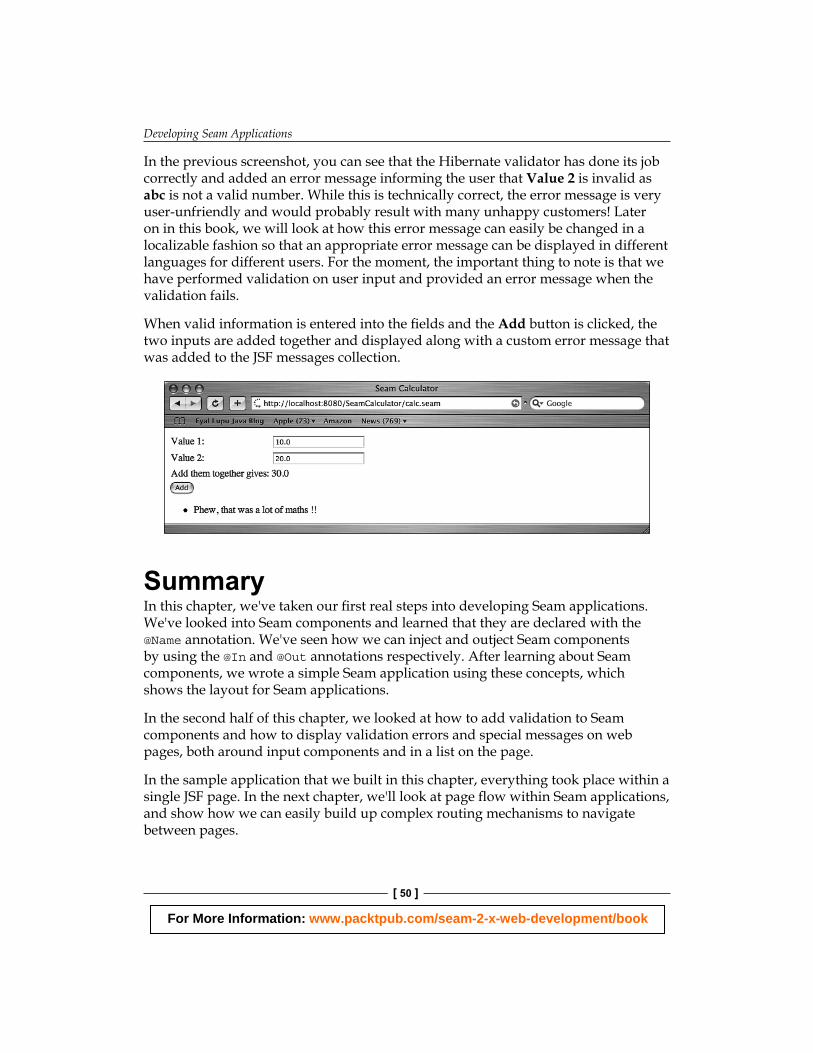
In the previous screenshot, you can see that the Hibernate validator has done its job correctly and added an error message informing the user that Value 2 is invalid as abc is not a valid number. While this is technically correct, the error message is very user-unfriendly and would probably result with many unhappy customers! Later on in this book, we will look at how this error message can easily be changed in a localizable fashion so that an appropriate error message can be displayed in different languages for different users. For the moment, the important thing to note is that we have performed validation on user input and provided an error message when the validation fails.
When valid information is entered into the fi elds and the Add button is clicked, the two inputs are added together and displayed along with a custom error message that was added to the JSF messages collection.
SummaryIn this chapter, we've taken our fi rst real steps into developing Seam applications. We've looked into Seam components and learned that they are declared with the @Name annotation. We've seen how we can inject and outject Seam components by using the @In and @Out annotations respectively. After learning about Seam components, we wrote a simple Seam application using these concepts, which shows the layout for Seam applications.
In the second half of this chapter, we looked at how to add validation to Seam components and how to display validation errors and special messages on web pages, both around input components and in a list on the page.
In the sample application that we built in this chapter, everything took place within a single JSF page. In the next chapter, we'll look at page fl ow within Seam applications, and show how we can easily build up complex routing mechanisms to navigate between pages.
For More Information: www.packtpub.com/seam-2-x-web-development/book
Where to buy this book You can buy Seam 2.x Web Development from the Packt Publishing website: http://www.packtpub.com/seam-2-x-web-development/book
Free shipping to the US, UK, Europe and selected Asian countries. For more information, please read our shipping policy.
Alternatively, you can buy the book from Amazon, BN.com, Computer Manuals and most internet book retailers.
www.PacktPub.com


![Seam - ####### [###20080327] - JBoss...Table of Contents JBoss Seam## .....xi 1. Seam ## .....1](https://img.pdfslide.net/doc/110x75/60d604b5fa8e121d9f6a07dc/seam-20080327-jboss-table-of-contents-jboss-seam-xi.jpg)