Embed Size (px)
Citation preview
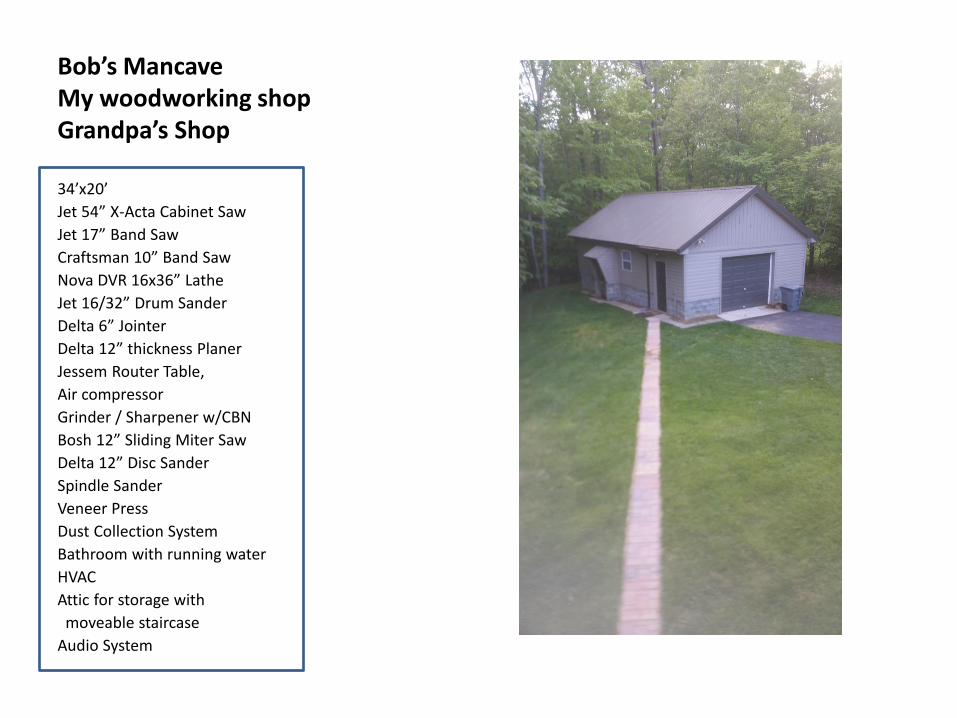
Bob’s Mancave My woodworking shop Grandpa’s Shop
34’x20’
Jet 54” X-Acta Cabinet Saw
Jet 17” Band Saw
Craftsman 10” Band Saw
Nova DVR 16x36” Lathe
Jet 16/32” Drum Sander
Delta 6” Jointer
Delta 12” thickness Planer
Jessem Router Table,
Air compressor
Grinder / Sharpener w/CBN
Bosh 12” Sliding Miter Saw
Delta 12” Disc Sander
Spindle Sander
Veneer Press
Dust Collection System
Bathroom with running water
HVAC
Attic for storage with
moveable staircase
Audio System

How I learned
• Robert DeHart and Friends • School for Creative Woodwork • Segmented Turning by Melcome Tibbetts • Segmented Turning, A Practical Guide by Dennis
Keeling • Woodturning with Ray Allen, written by Dale Nish • Internet • Seg-easy.com – Segmentology videos by Jerry
Bennett • Mostly from The School of Hard Knocks
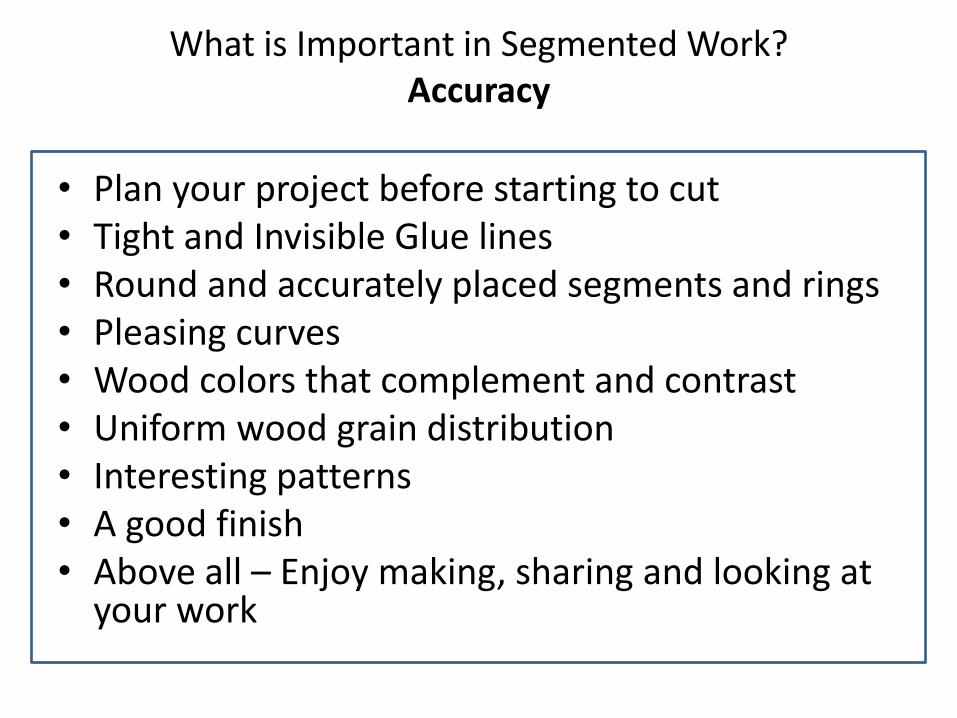
What is Important in Segmented Work? Accuracy
• Plan your project before starting to cut • Tight and Invisible Glue lines • Round and accurately placed segments and rings • Pleasing curves • Wood colors that complement and contrast • Uniform wood grain distribution • Interesting patterns • A good finish • Above all – Enjoy making, sharing and looking at
your work
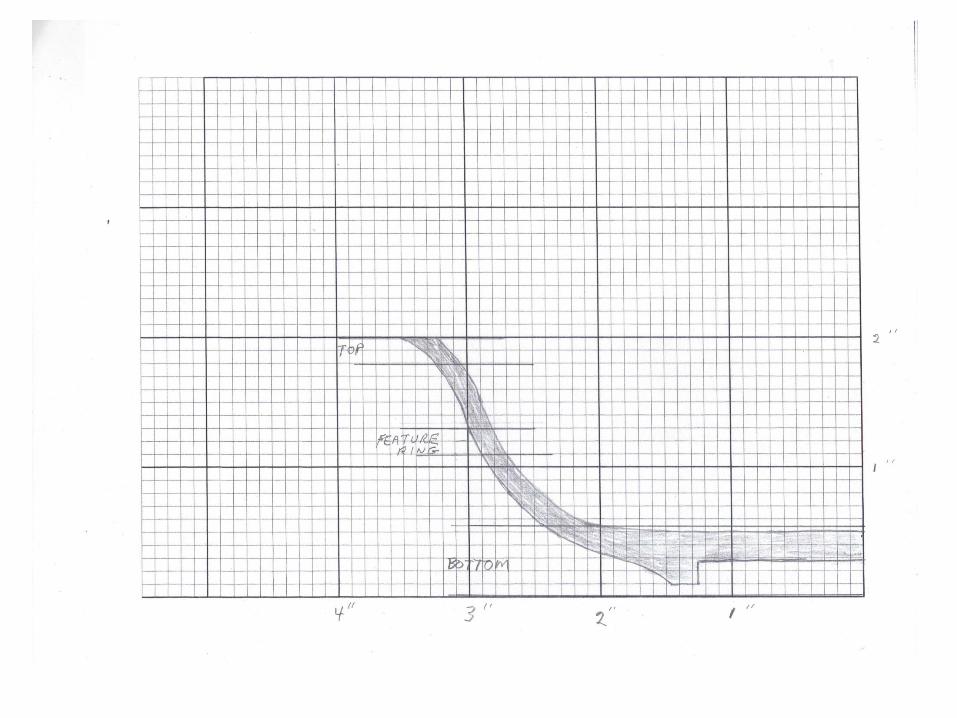
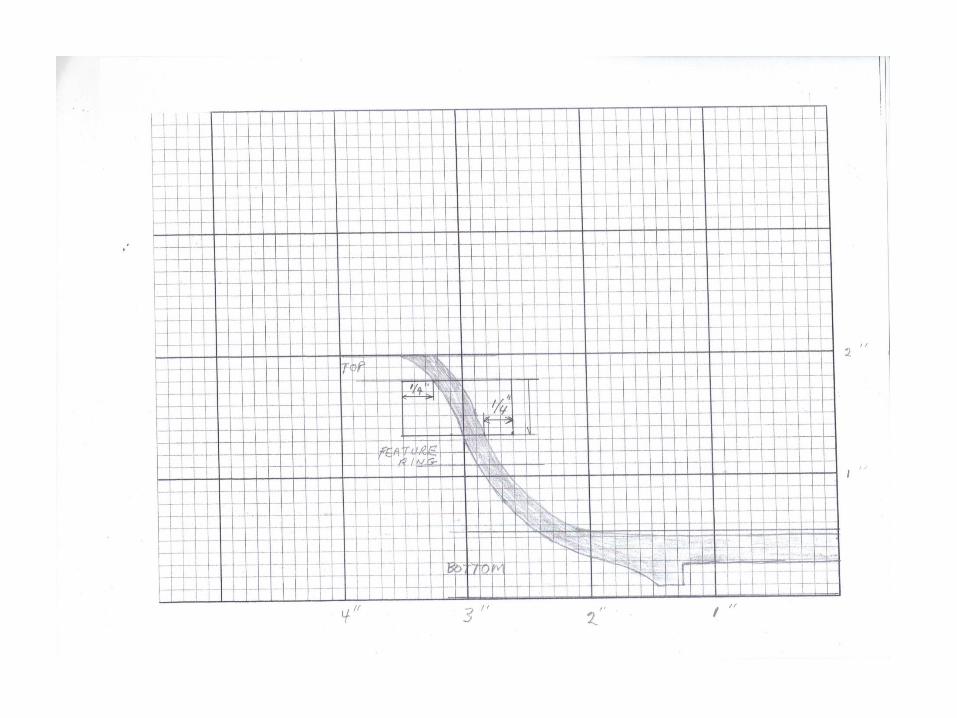
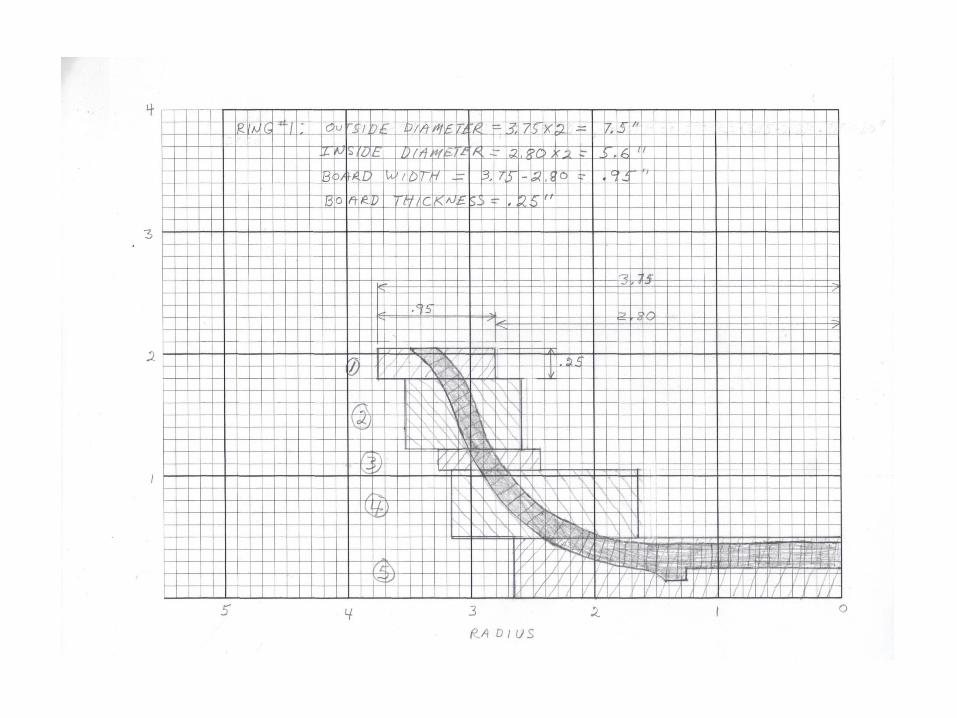
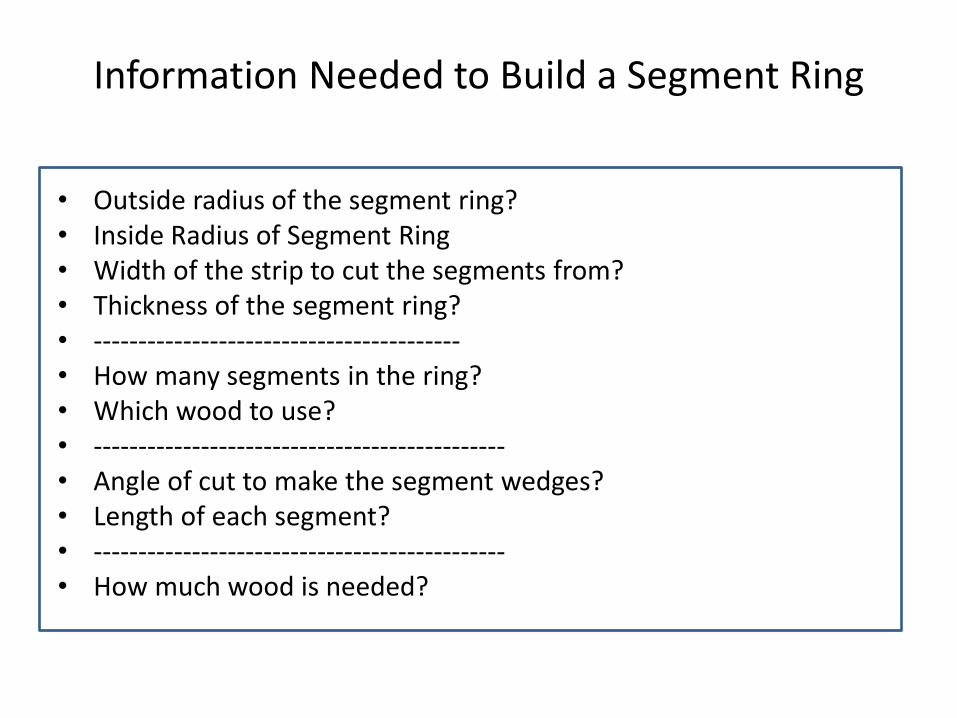
Information Needed to Build a Segment Ring
• Outside radius of the segment ring? • Inside Radius of Segment Ring • Width of the strip to cut the segments from? • Thickness of the segment ring? • ----------------------------------------- • How many segments in the ring? • Which wood to use? • ---------------------------------------------- • Angle of cut to make the segment wedges? • Length of each segment? • ---------------------------------------------- • How much wood is needed?
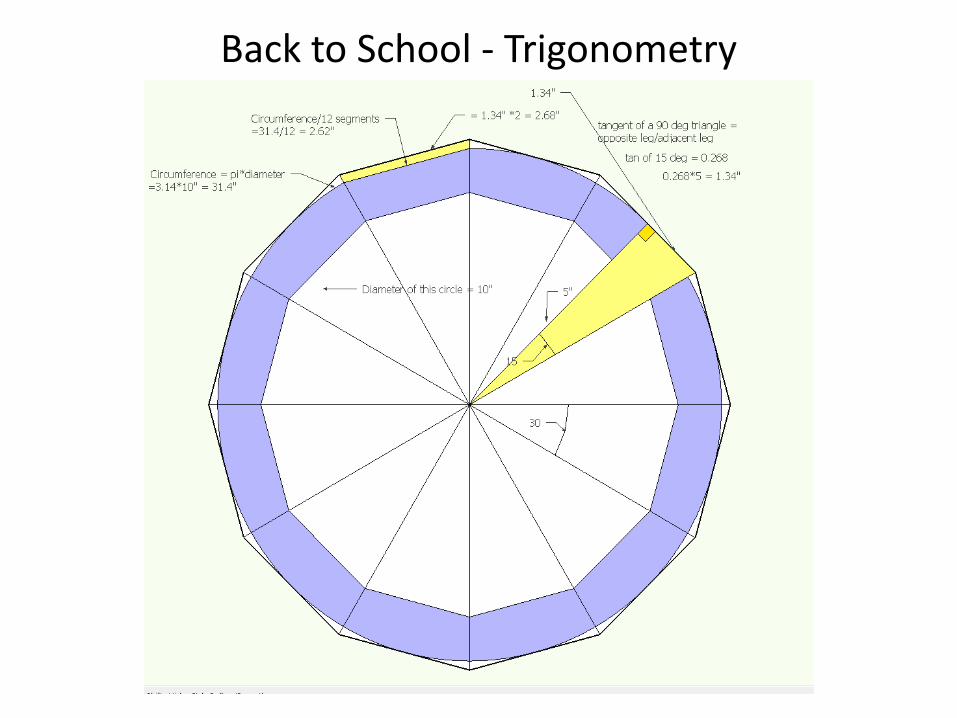
Back to School - Trigonometry
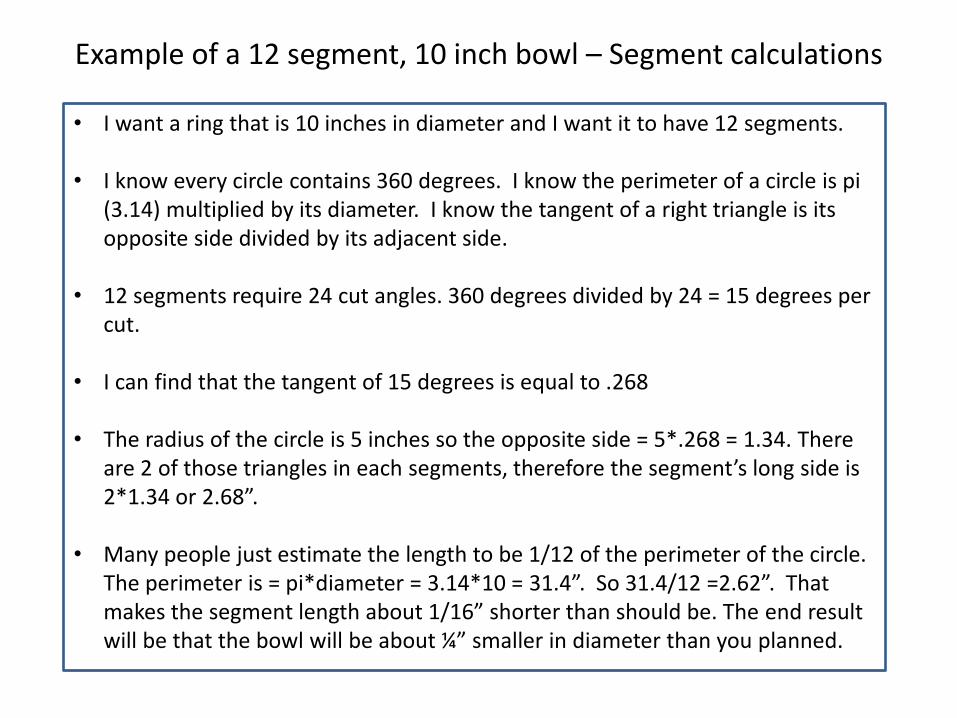
Example of a 12 segment, 10 inch bowl – Segment calculations
• I want a ring that is 10 inches in diameter and I want it to have 12 segments.
• I know every circle contains 360 degrees. I know the perimeter of a circle is pi (3.14) multiplied by its diameter. I know the tangent of a right triangle is its opposite side divided by its adjacent side.
• 12 segments require 24 cut angles. 360 degrees divided by 24 = 15 degrees per cut.
• I can find that the tangent of 15 degrees is equal to .268
• The radius of the circle is 5 inches so the opposite side = 5*.268 = 1.34. There are 2 of those triangles in each segments, therefore the segment’s long side is 2*1.34 or 2.68”.
• Many people just estimate the length to be 1/12 of the perimeter of the circle. The perimeter is = pi*diameter = 3.14*10 = 31.4”. So 31.4/12 =2.62”. That makes the segment length about 1/16” shorter than should be. The end result will be that the bowl will be about ¼” smaller in diameter than you planned.
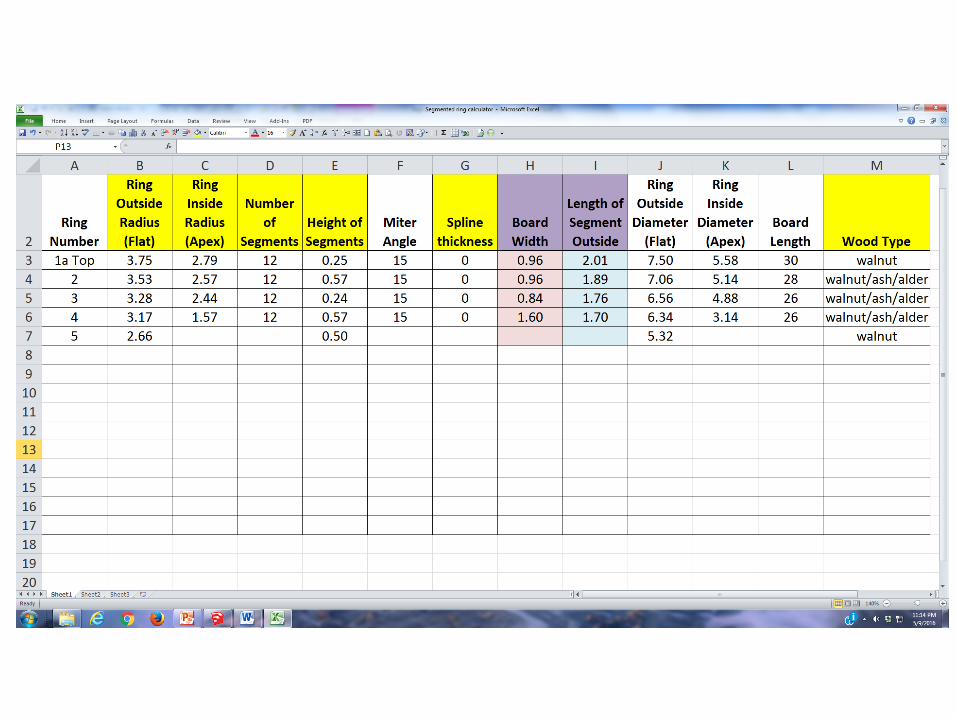

I do the same using Google Sketch-up
Ripping and dimensioning the wood strips: -The Board Strip -
• The “board width” and “thickness” dimensions shown on the Excel Sheet refers to a finished ring.
• Often the strip after cutting it needs some re-dimensioning • The strip may deform again due to internal stresses and
need to be jointed again. Not good to try cutting segment angles from a curved board strip.
• The board strip will need some additional thickness sanding- either on lathe or drum sander.
• If your strip is a glued-up laminate, it will need to be cleaned-up. So add some additional wood as you see fit.
• Generally, I add 1/16” to the width and 0.10” to the thickness before cutting. If gluing up laminates, I will add ¼” to the width.

Cutting the Segments “Considerations”
• Accuracy is the main consideration. Fine work needs to be cut to 1/10th of a degree.
• Digital protractors and digital angle gauges and digital calipers are very helpful.
• Saw blade should be 90 degrees to the table. Use a sharp, clean and quality cross-cut saw blade.
• Use zero clearance saw blade insert. • Test your segments by assembling them with rubber bands
or clamp them. If they do not fit tight, adjust the angle of the cut.
• Consider wood grain direction before cutting. • Determine the best method to cut the segments.
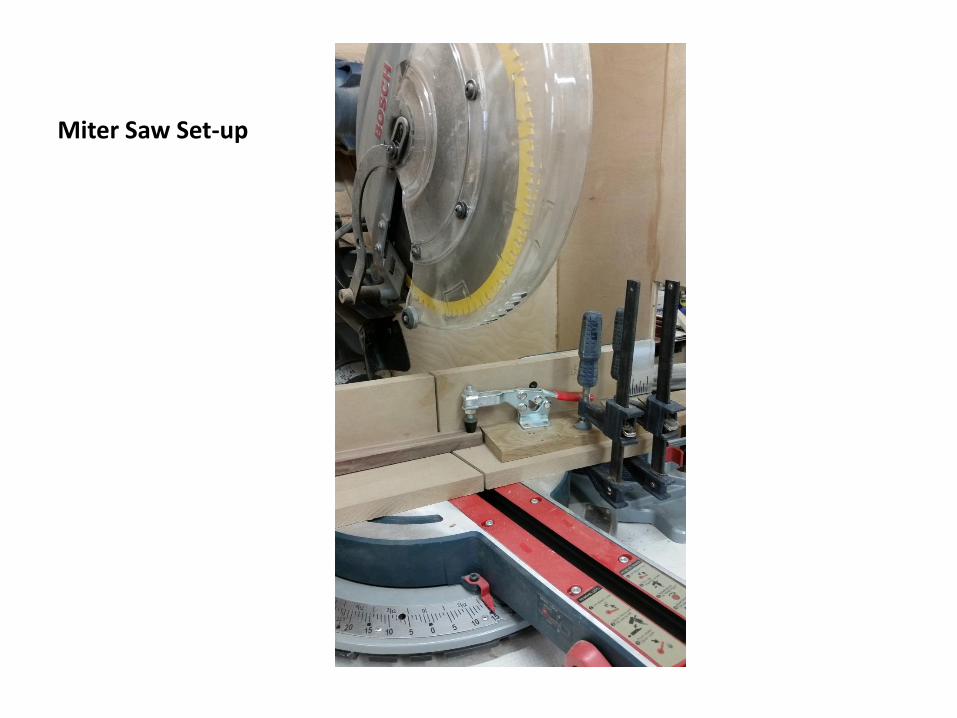
Miter Saw Set-up
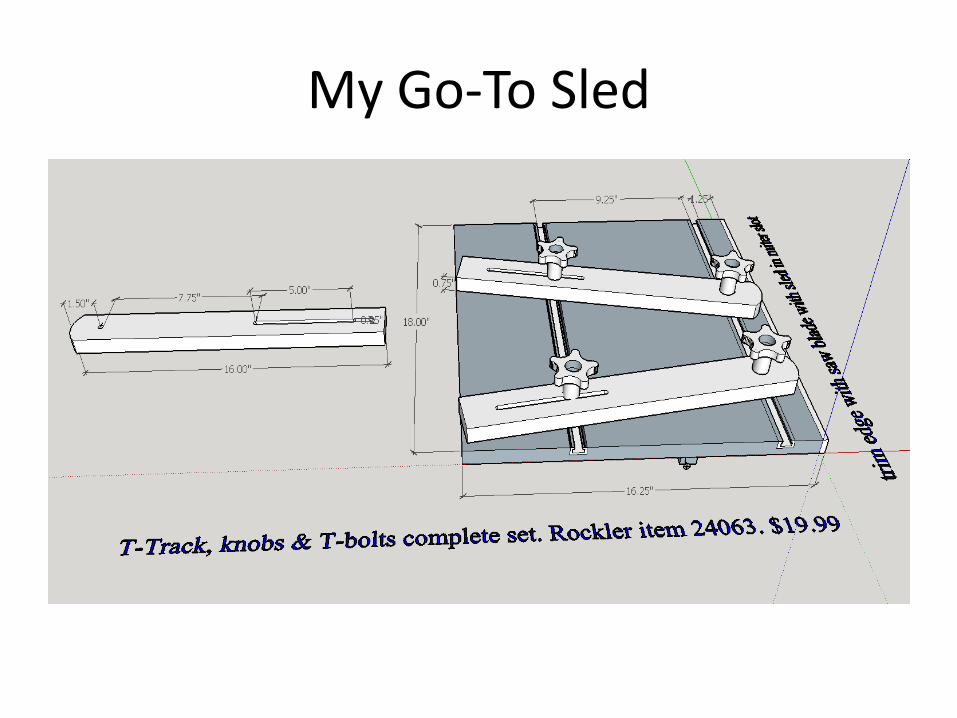
My Go-To Sled
Sled set-up Recommendations
• See seg-easy.com videos
• Can use a digital protractor
• Can use a seg-easy template
• If making a 12 segment ring, can use a 30/60 degree triangle.
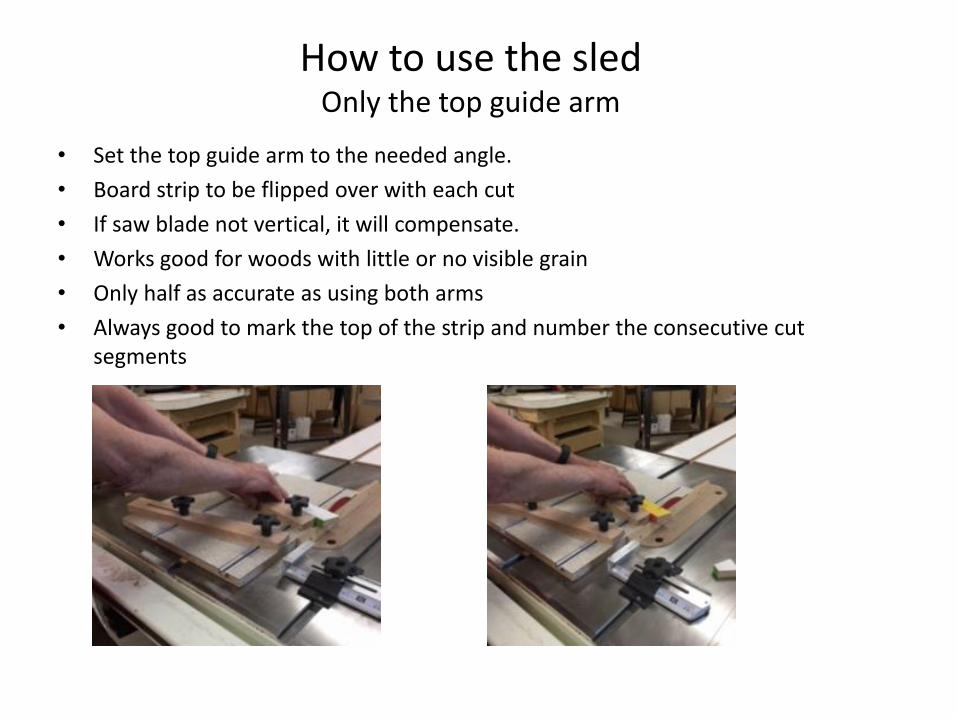
How to use the sled Only the top guide arm
• Set the top guide arm to the needed angle.
• Board strip to be flipped over with each cut
• If saw blade not vertical, it will compensate.
• Works good for woods with little or no visible grain
• Only half as accurate as using both arms
• Always good to mark the top of the strip and number the consecutive cut segments
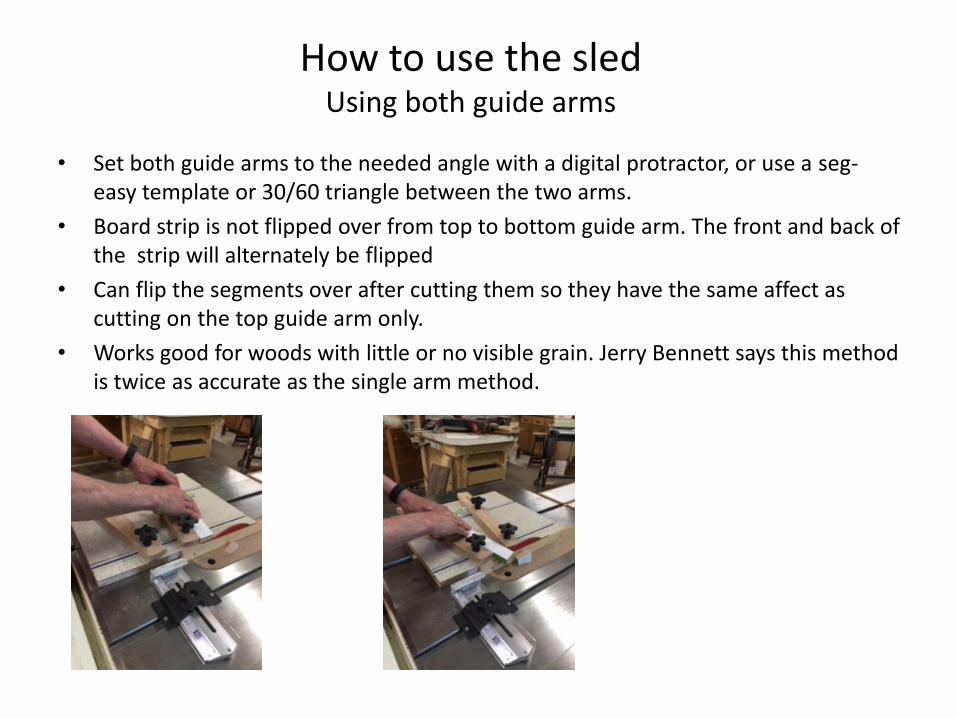
How to use the sled Using both guide arms
• Set both guide arms to the needed angle with a digital protractor, or use a seg-easy template or 30/60 triangle between the two arms.
• Board strip is not flipped over from top to bottom guide arm. The front and back of the strip will alternately be flipped
• Can flip the segments over after cutting them so they have the same affect as cutting on the top guide arm only.
• Works good for woods with little or no visible grain. Jerry Bennett says this method is twice as accurate as the single arm method.

How to use the sled Using both guide arms but re-establishing original angle on top
• Board strip is not flipped over from top to bottom guide arm
• If saw blade is not vertical, it will not compensate.
• Works good for woods with heavy visible grain. Nothing gets flipped
• Number all consecutive segments.
• A small wedge needs to be cut off and wasted on the top arm cut.
• Requires a longer strip
• Requires more time
• I move segment build-up away from the saw blade with a thin flat strip
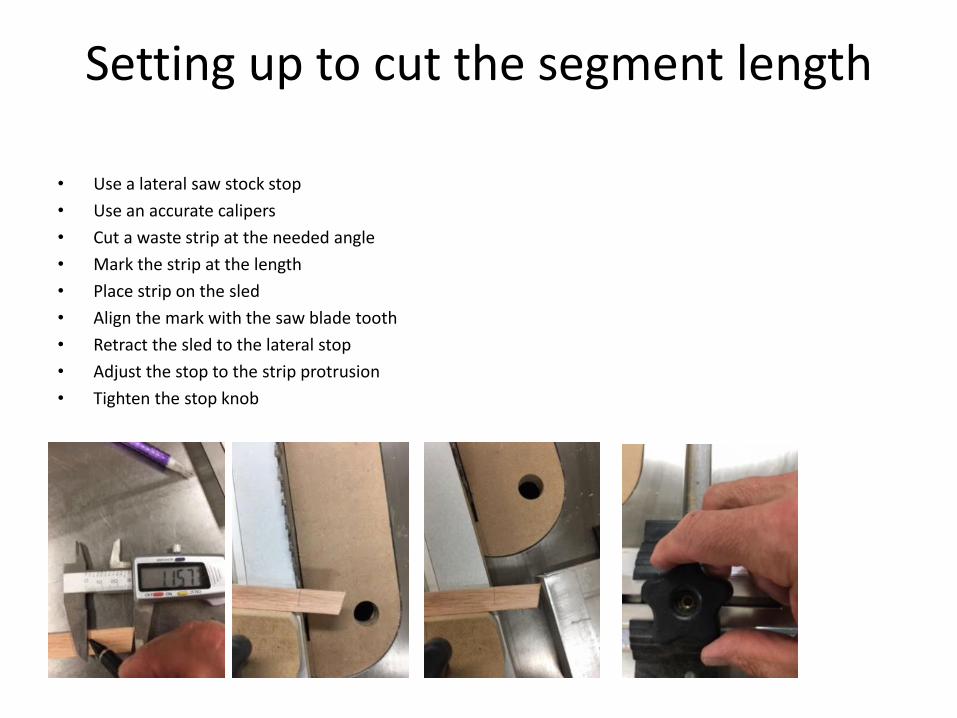
Setting up to cut the segment length
• Use a lateral saw stock stop
• Use an accurate calipers
• Cut a waste strip at the needed angle
• Mark the strip at the length
• Place strip on the sled
• Align the mark with the saw blade tooth
• Retract the sled to the lateral stop
• Adjust the stop to the strip protrusion
• Tighten the stop knob
Preparing and Assembling the Segments
• I use a flat piece of sand paper on a flat surface and clean the fuzz off of the 4 sides. I try to stay off of the angle surfaces.
• Assemble the segments in a circle. Try to match them with respect to their consecutive cut and/or grain orientation and color.
• Assure the fit is tight.
• Number them either clockwise or counterclockwise.
Gluing the Segments
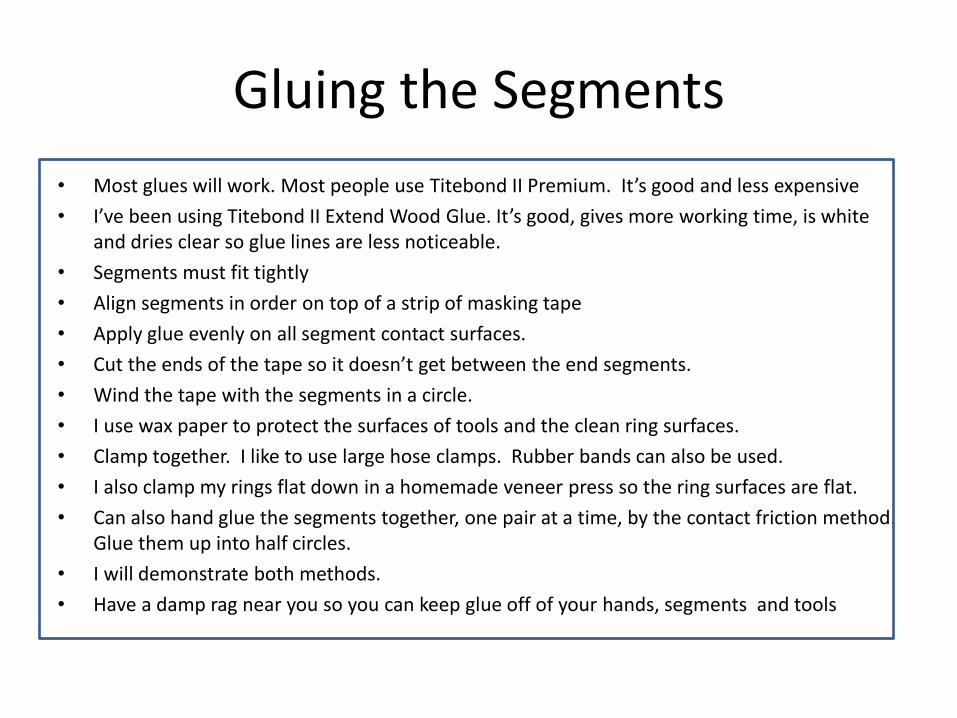
• Most glues will work. Most people use Titebond II Premium. It’s good and less expensive
• I’ve been using Titebond II Extend Wood Glue. It’s good, gives more working time, is white and dries clear so glue lines are less noticeable.
• Segments must fit tightly
• Align segments in order on top of a strip of masking tape
• Apply glue evenly on all segment contact surfaces.
• Cut the ends of the tape so it doesn’t get between the end segments.
• Wind the tape with the segments in a circle.
• I use wax paper to protect the surfaces of tools and the clean ring surfaces.
• Clamp together. I like to use large hose clamps. Rubber bands can also be used.
• I also clamp my rings flat down in a homemade veneer press so the ring surfaces are flat.
• Can also hand glue the segments together, one pair at a time, by the contact friction method. Glue them up into half circles.
• I will demonstrate both methods.
• Have a damp rag near you so you can keep glue off of your hands, segments and tools
Cleaning-up the Segment Rings
• I use my drum sander
• Can flatten a face of a ring against a disk sander
• Can flatten a face by manually sanding the ring against a flat surface
• Can mount the ring to a concentric flat disk on the lathe and either flatten it with cutting tools or with sandpaper mounted on a flat surface.
Gluing the Rings Together
• Build the assembly onto a Glue Block • Can use a press, clamps or the lathe for gluing
pressure. I like using my veneer press. • Turn the outside diameter of the glue block and the
successive rings round. • Center the next ring on the stack, align the segments
and wedge the ring in place with scrap wood chips and hot glue and place the assembly in a press or in other clamps.
• If assembling the ring stack on the lathe, prepare a concentric tailstock disk, center the segment ring on the disk and attach it to the tail stock.

Ring Repairs
• If there is an open glue joint in a ring, I have been successful running it through a band saw and regluing and clamping it.
• When gluing pairs together by the contact friction method, normally the resulting the semi-circle joints won’t join. They can best be trimmed using a ring clamping sled on the table saw.
• Some people are successful adjusting angles, etc on a disk sander. I have had only limited success with that.

Turning
• I usually start by turning the sharp edges off of the exterior so if I accidently touch it, I won’t get hurt. I leave most material on the outside to provide rigidity while turning the inside.
• I use small round scrapers on the inside to shear off the rough edges. I finish the inside to my drawing dimensions before returning to the outside.
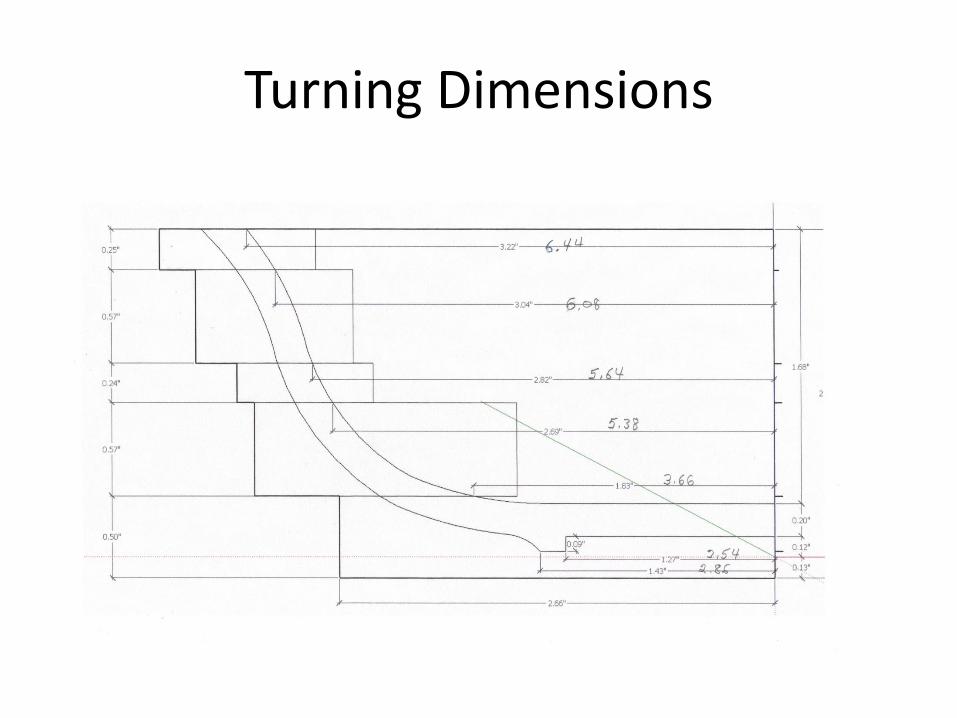
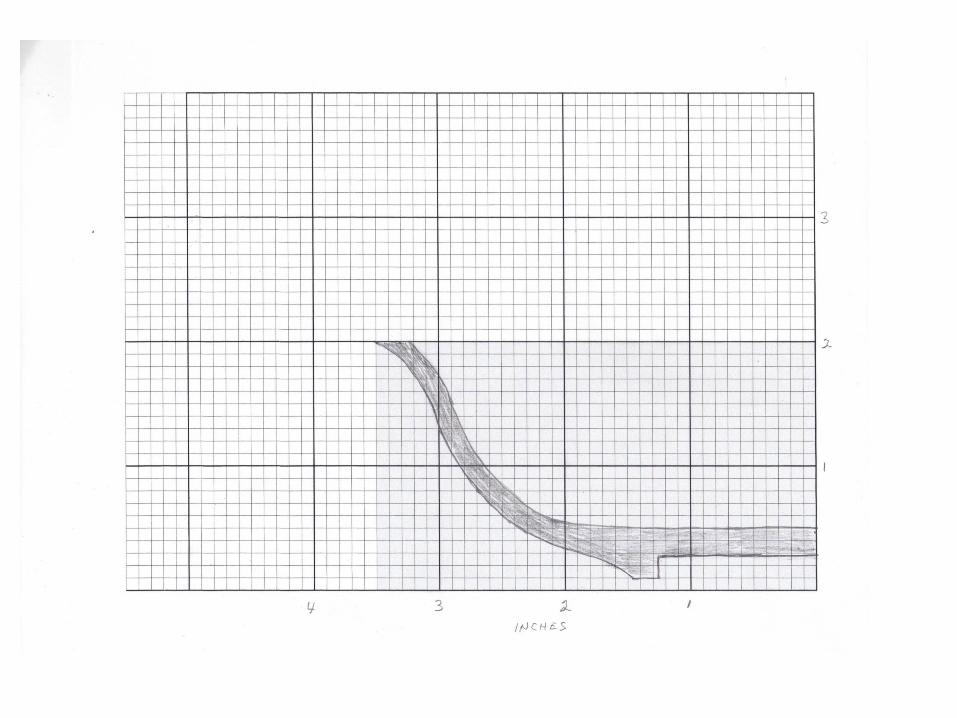
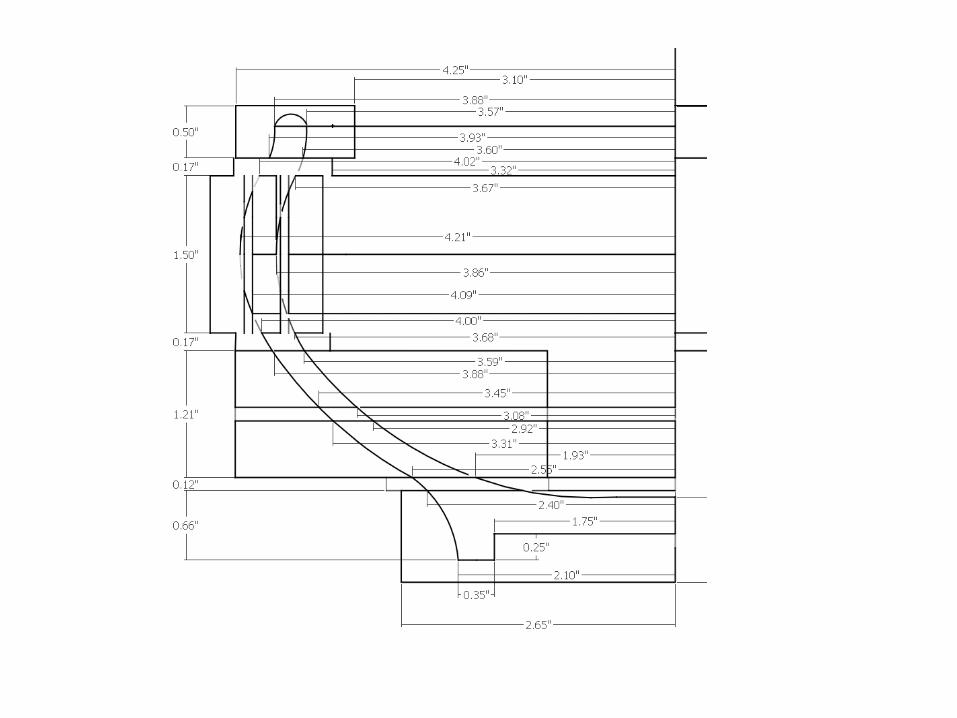
Turning Dimensions