Embed Size (px)
Citation preview
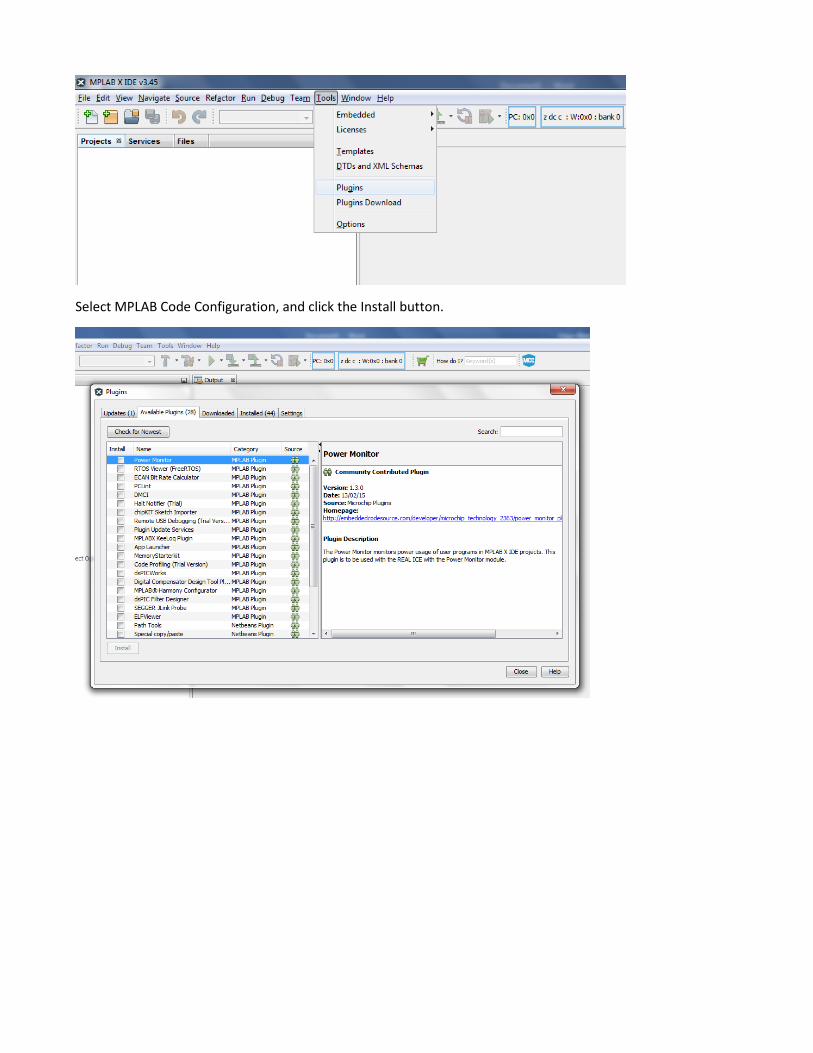
Select MPLAB Code Configuration, and click the Install button.
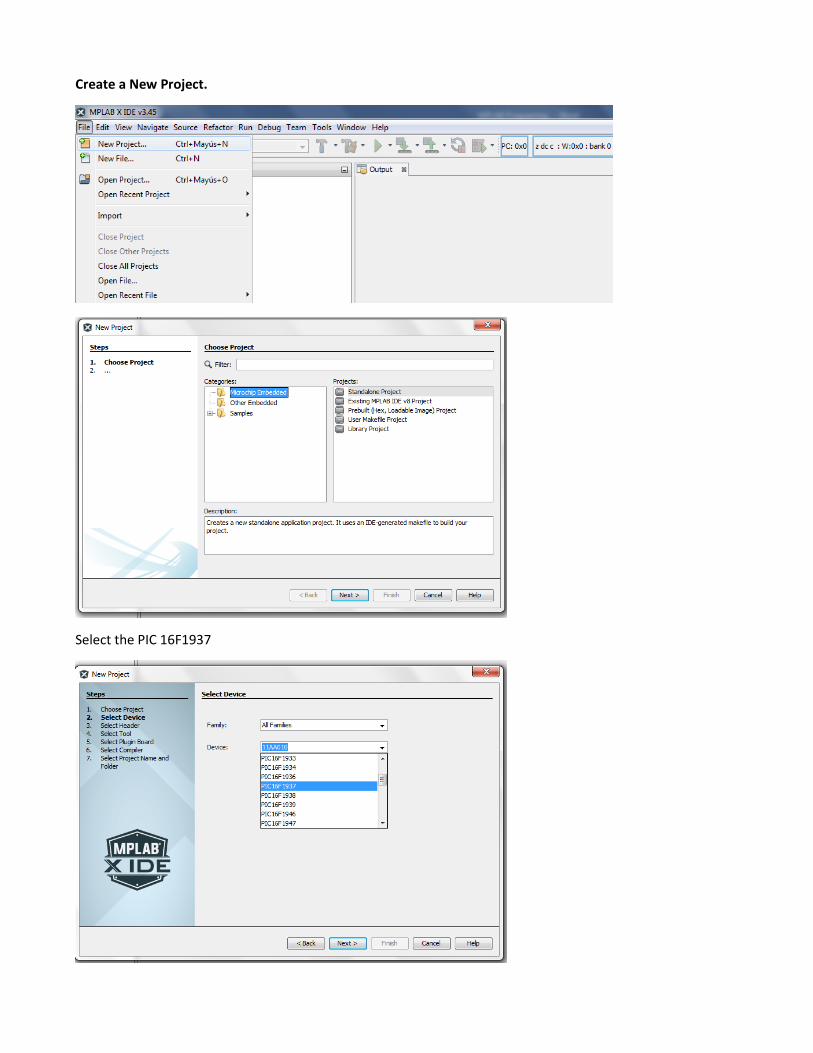
Create a New Project.
Select the PIC 16F1937

Select Programming tool (PICkit 3):
Select Language Compiler (XC8):

Name your Project:
The new project is build:

Initialisations
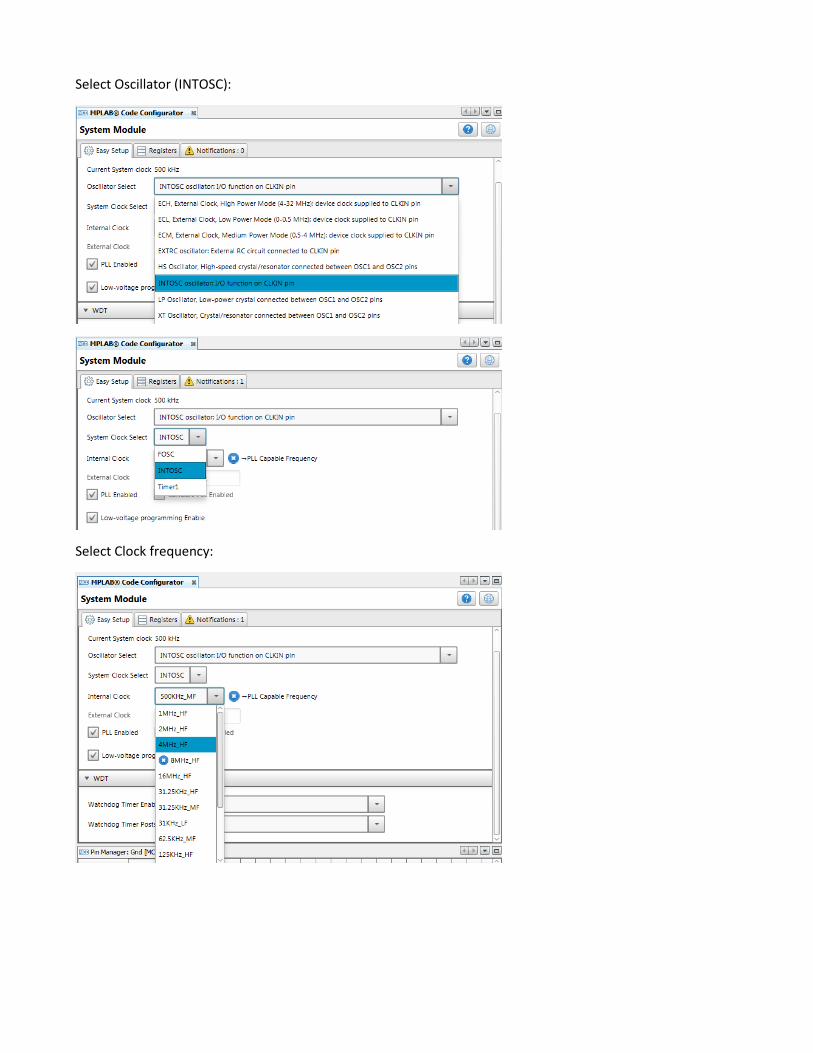
Select Oscillator (INTOSC):
Select Clock frequency:

We can do this in the registers as well:
Interrupt Module. Enable Interrupts-On-Change (IOCI):
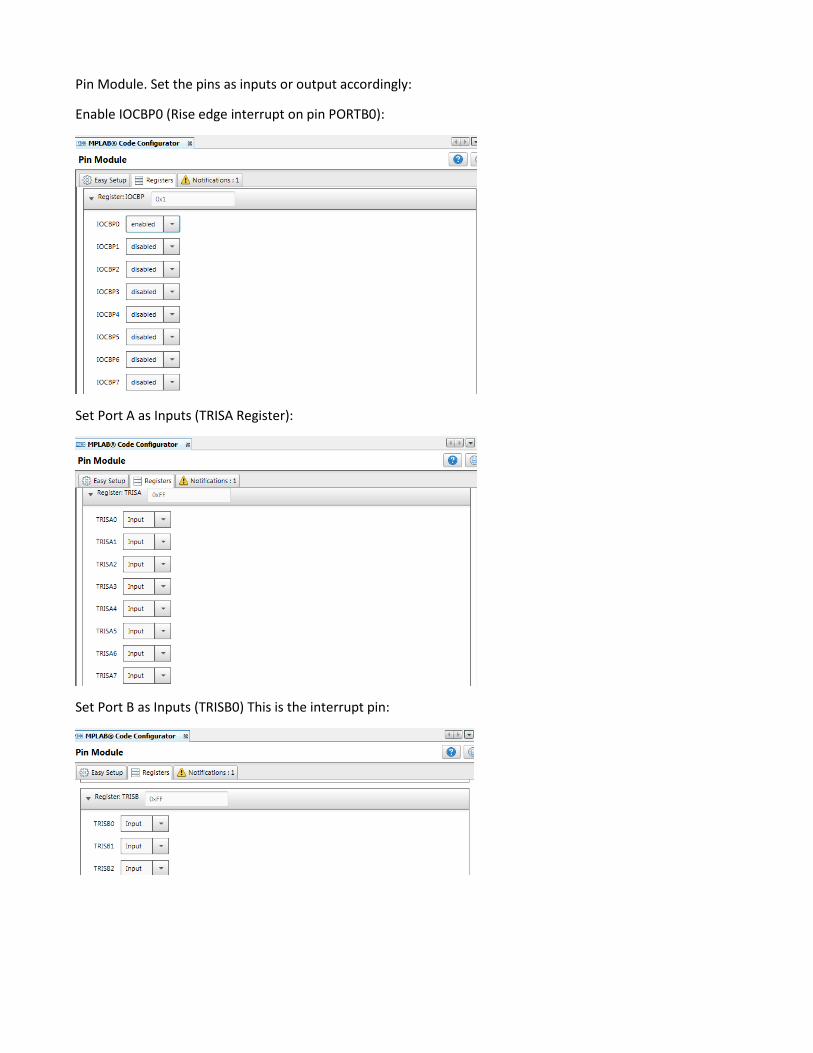
Pin Module. Set the pins as inputs or output accordingly:
Enable IOCBP0 (Rise edge interrupt on pin PORTB0):
Set Port A as Inputs (TRISA Register):
Set Port B as Inputs (TRISB0) This is the interrupt pin:
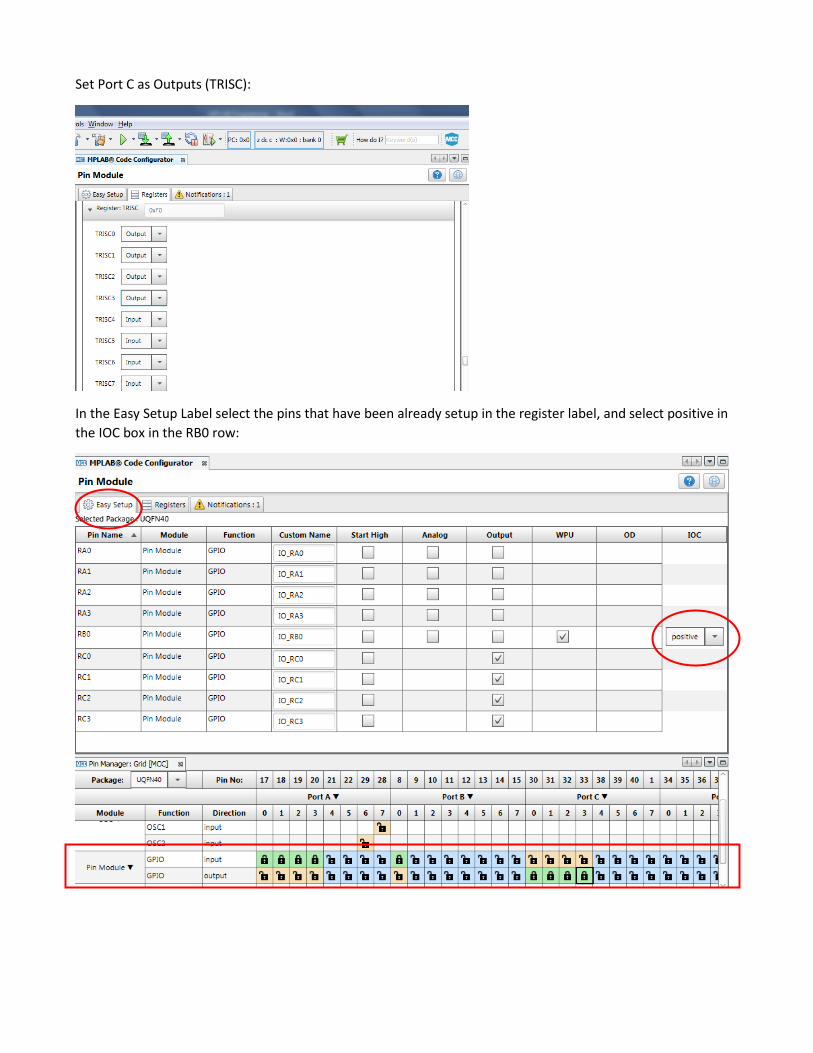
Set Port C as Outputs (TRISC):
In the Easy Setup Label select the pins that have been already setup in the register label, and select positive in the IOC box in the RB0 row:
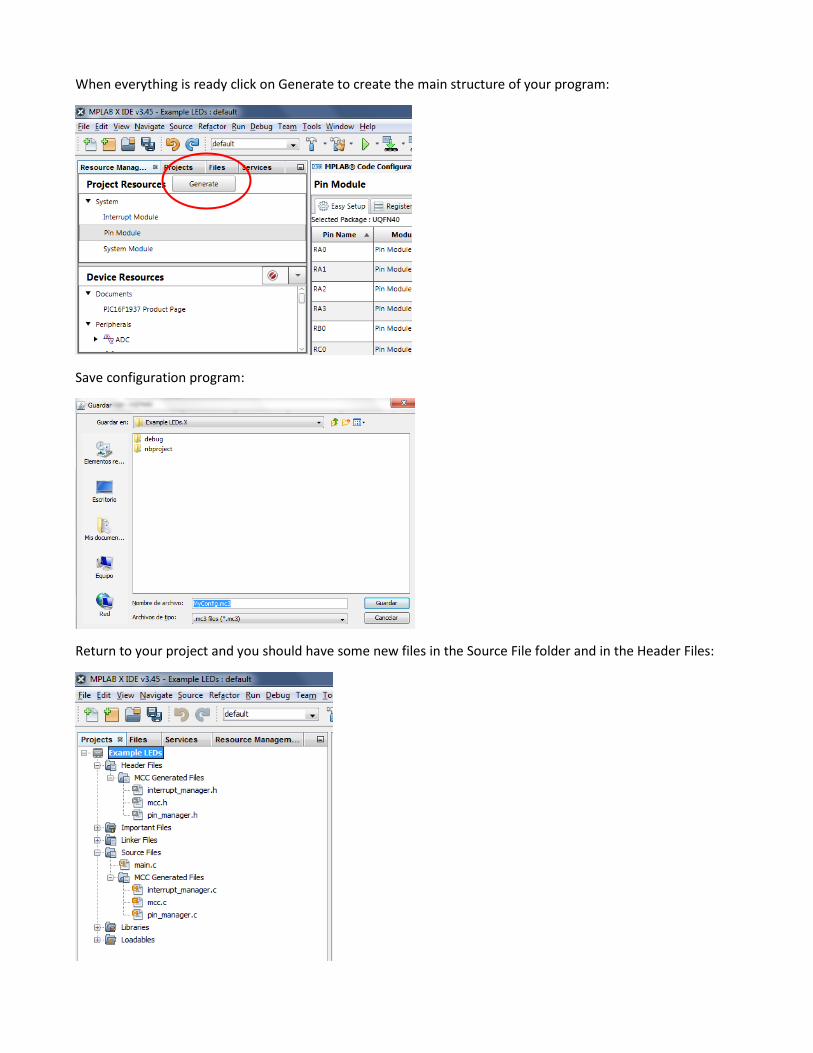
When everything is ready click on Generate to create the main structure of your program:
Save configuration program:
Return to your project and you should have some new files in the Source File folder and in the Header Files:
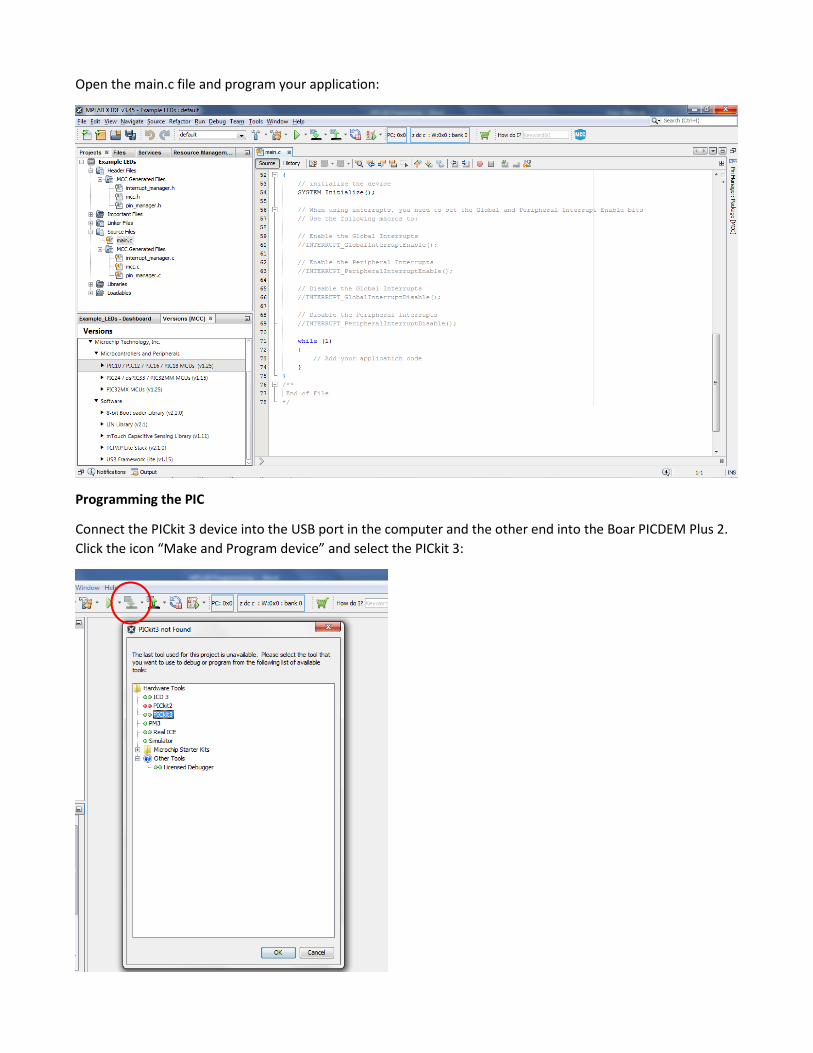
Open the main.c file and program your application:
Programming the PIC
Connect the PICkit 3 device into the USB port in the computer and the other end into the Boar PICDEM Plus 2. Click the icon “Make and Program device” and select the PICkit 3: