Embed Size (px)
Citation preview

Icebox - Sendio SPAM Filter
Sendio Icebox The Navajo Department of Information Technology (DIT) installed and implemented a SPAM filter in 2008 to capture unwanted mail before it gets to your email inbox.
This SPAM filter called Sendio Icebox is very efficient at catching unwanted email. However, it can capture mail that you do want and should be check periodically.
How does it work? Virus Check
Silverlisting
Whitelisting
Sender Address Verification (SAV).
Virus Check Traditional signature-based scanning for “known”
viruses.
Zero-hour scan that helps identify outbreaks of previously unknown viruses.
Silverlisting Validates a remote email server by deferring the
original message and waiting for a resend-the-request from the remote server. Most spam-sending systems will not resend the request and will simply move on to send the next spam message.
Once the sending e-mail server resends it will not be checked again for 30 days.
Whitelists A whitelist is a list of trusted senders that need not be
checked. Whitelists can be manually added to Personal and System whitelists.
You can also import contacts from your email program (i.e. Microsoft Outlook) to specify a list of “trusted” senders that need not be verified.
Sender Address Verification When a new contact sends email the message is held in the user’s pending queue and a Sender Address Verification (SAV) email is sent to the new contact sender. This step ensures the sender is a real person and not a machine that is generating spam. When the sender replies to the SAV (REPLY and SEND) it is received by Sendio and:
The original message is immediately delivered to the inbox.
The sender’s email address is automatically added to your personal whitelist (Contacts). All future messages are immediately delivered.
Checking the Icebox You should check the Sendio Icebox at least once per day to check your pending queue when you first get a navajo-nsn.gov account. You can check the pending queue less frequently as Sendio learns you contacts.
If you are expecting an email from someone outside of navajo-nsn.gov for the first time check the Sendio pending queue for that message or add the contact to your whitelist.
Accessing Sendio Icebox It is important to check the email that is pending delivery (pending queue) on the Sendio Icebox. To do this you must log onto your account using an internet browser. In the web URL address field, type in http://ice.navajo-nsn.gov and press enter.
You can access Sendio from outside navajo-nsn.gov by using the web URL shown above.

You will see a logon window. Type in your navajo-nsn.gov email address and password and click OK.
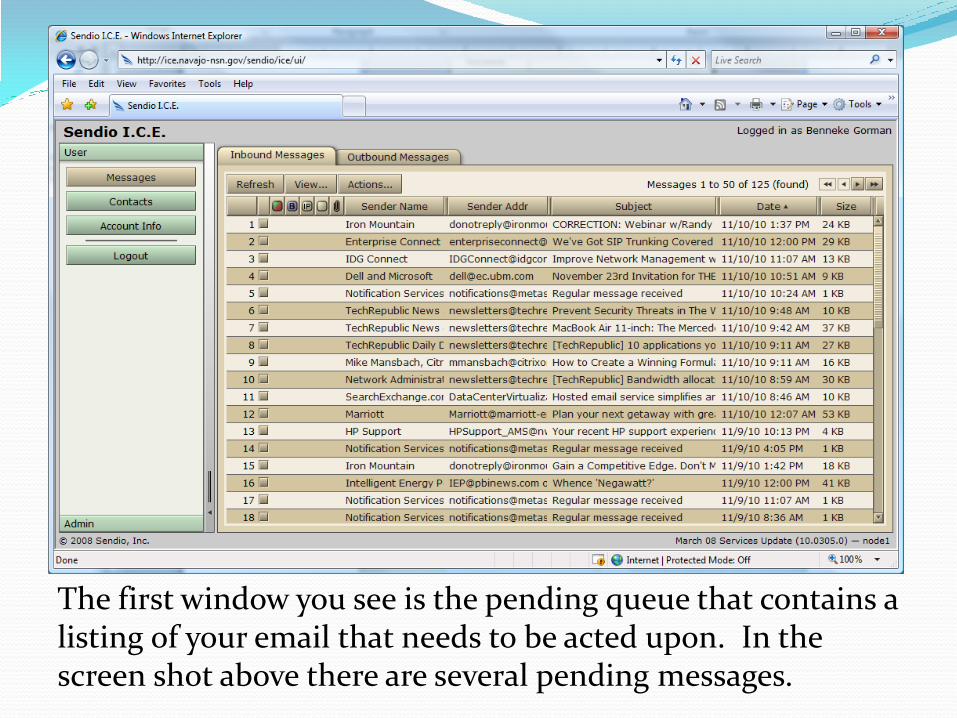
The first window you see is the pending queue that contains a listing of your email that needs to be acted upon. In the screen shot above there are several pending messages.
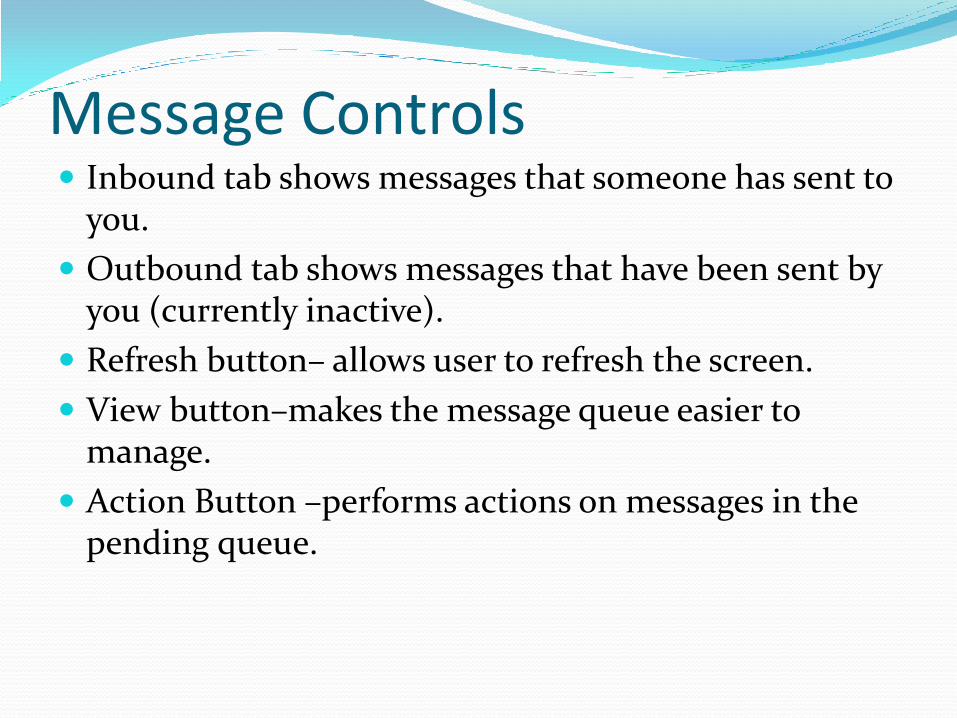
Message Controls Inbound tab shows messages that someone has sent to
you.
Outbound tab shows messages that have been sent by you (currently inactive).
Refresh button– allows user to refresh the screen.
View button–makes the message queue easier to manage.
Action Button –performs actions on messages in the pending queue.
Open a Message
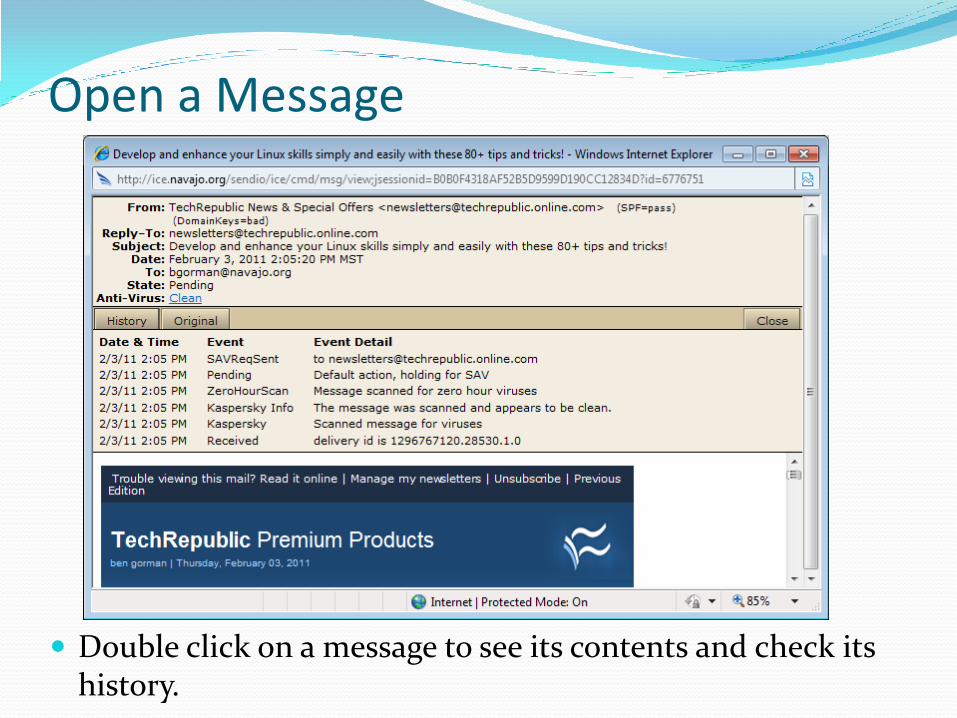
Double click on a message to see its contents and check its history.
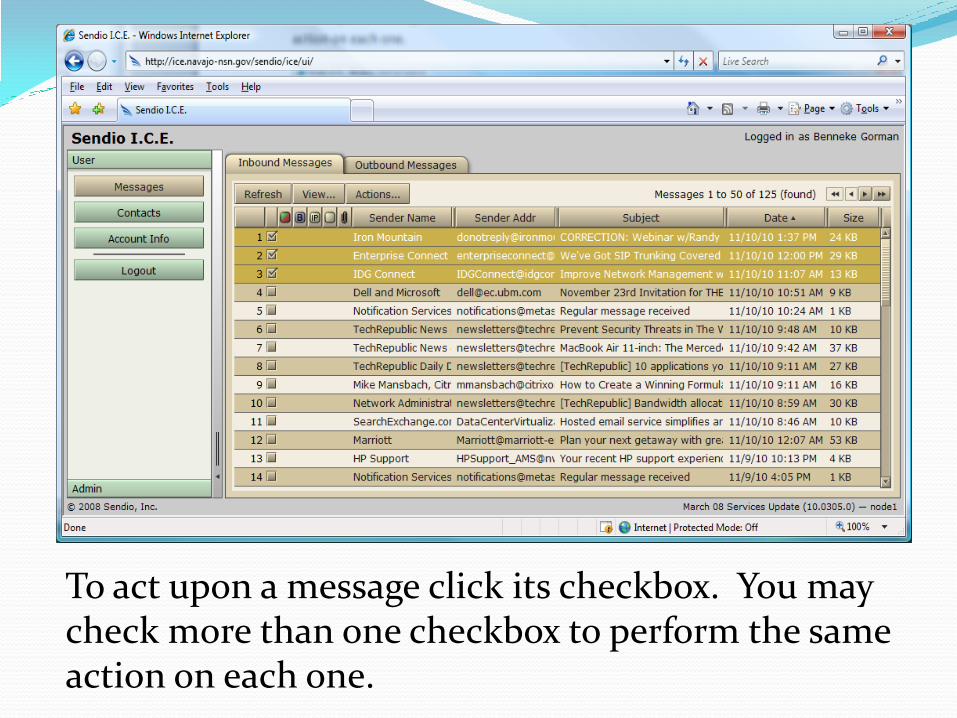
To act upon a message click its checkbox. You may check more than one checkbox to perform the same action on each one.
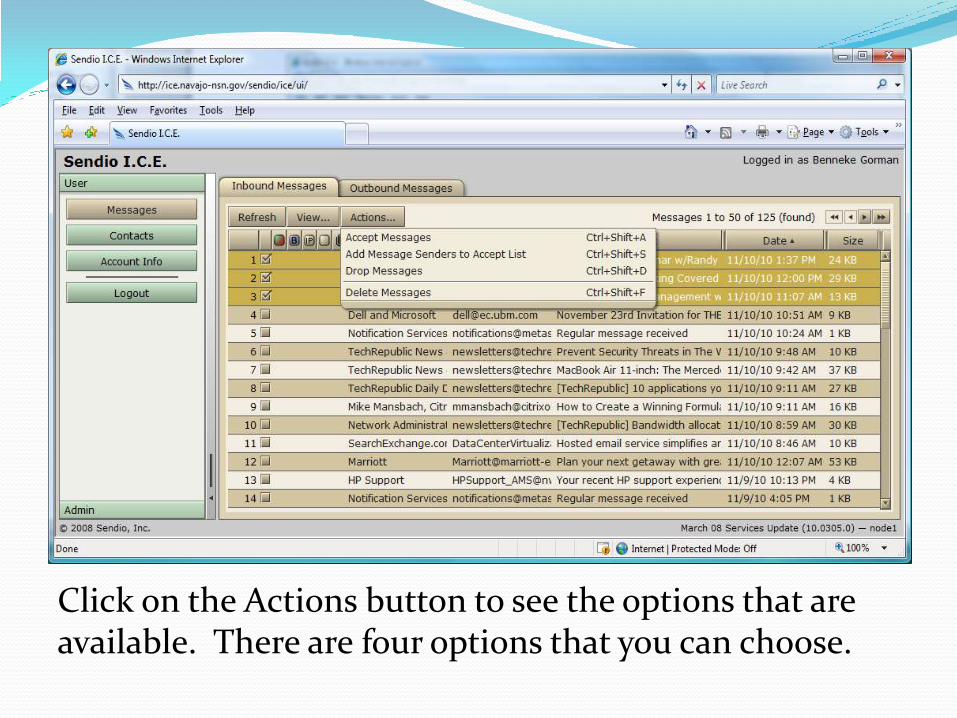
Click on the Actions button to see the options that are available. There are four options that you can choose.
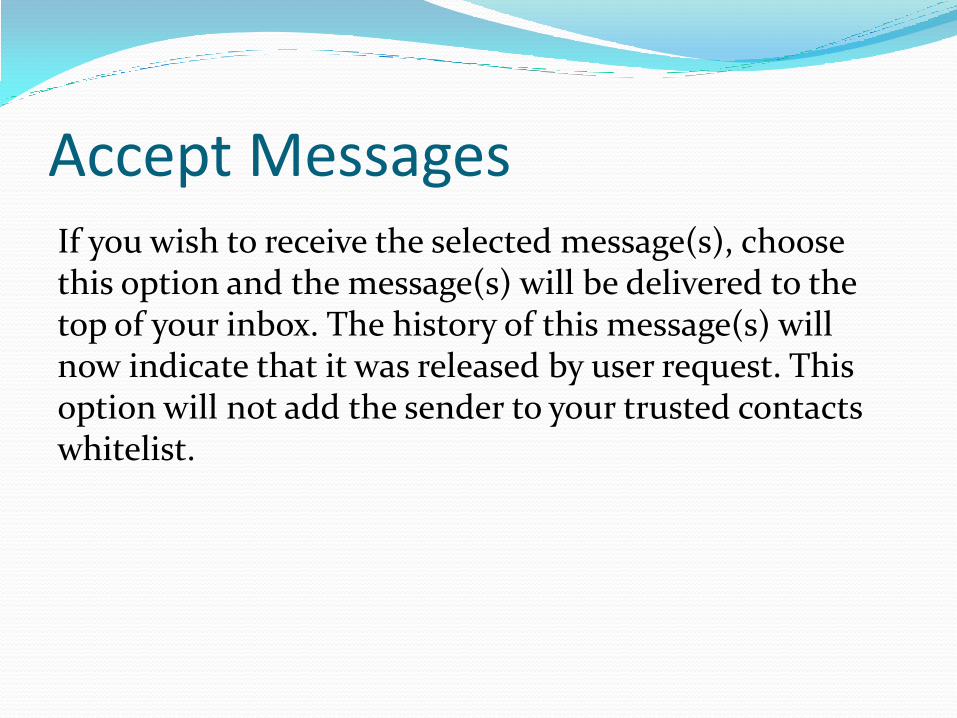
Accept Messages If you wish to receive the selected message(s), choose this option and the message(s) will be delivered to the top of your inbox. The history of this message(s) will now indicate that it was released by user request. This option will not add the sender to your trusted contacts whitelist.
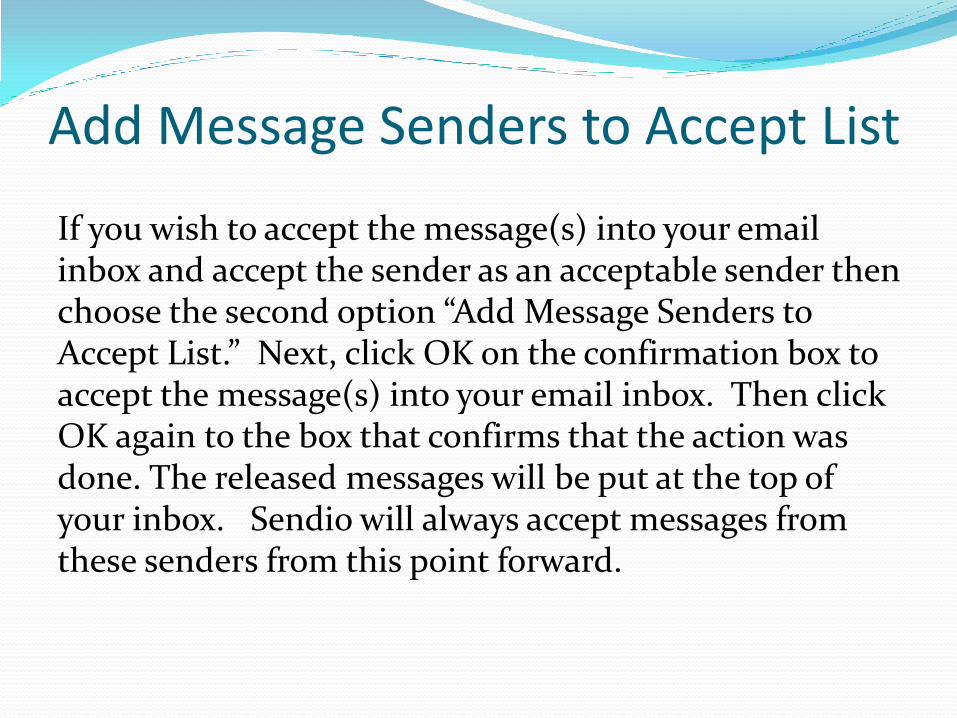
Add Message Senders to Accept List
If you wish to accept the message(s) into your email inbox and accept the sender as an acceptable sender then choose the second option “Add Message Senders to Accept List.” Next, click OK on the confirmation box to accept the message(s) into your email inbox. Then click OK again to the box that confirms that the action was done. The released messages will be put at the top of your inbox. Sendio will always accept messages from these senders from this point forward.
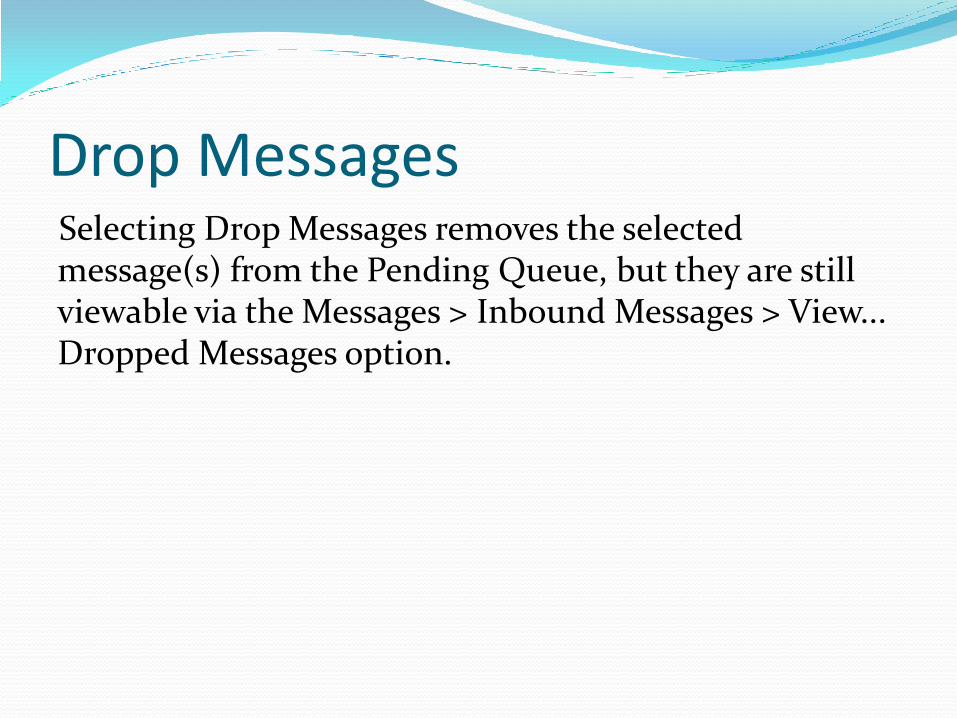
Drop Messages Selecting Drop Messages removes the selected message(s) from the Pending Queue, but they are still viewable via the Messages > Inbound Messages > View... Dropped Messages option.
Delete Messages The Delete Messages menu option immediately deletes the selected message(s) from your Message Queue. Deleted messages are not recoverable.
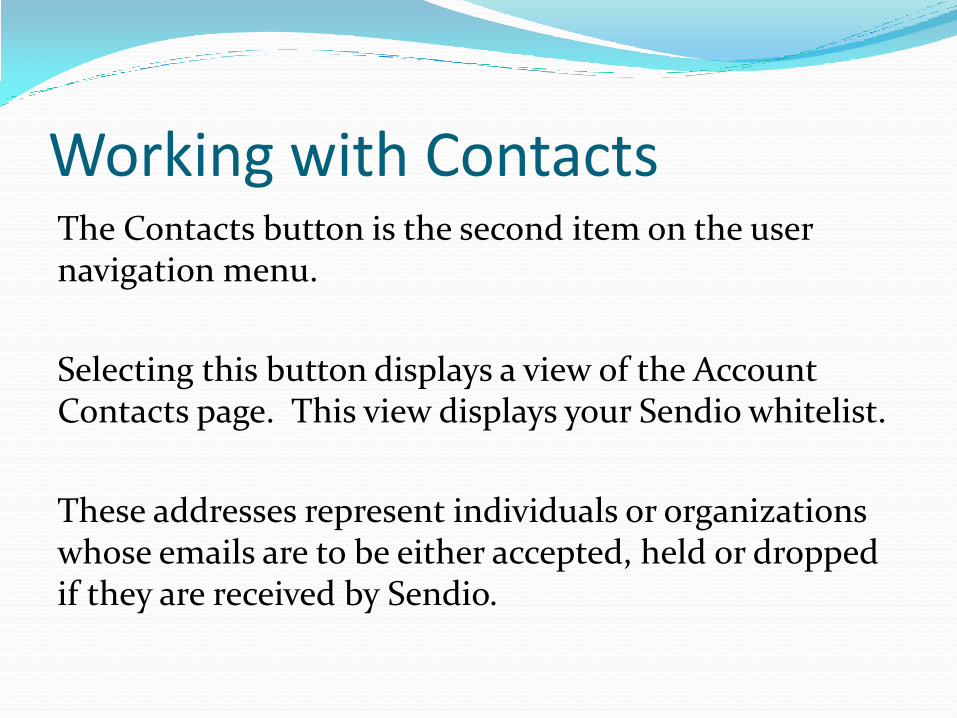
Working with Contacts The Contacts button is the second item on the user navigation menu.
Selecting this button displays a view of the Account Contacts page. This view displays your Sendio whitelist.
These addresses represent individuals or organizations whose emails are to be either accepted, held or dropped if they are received by Sendio.
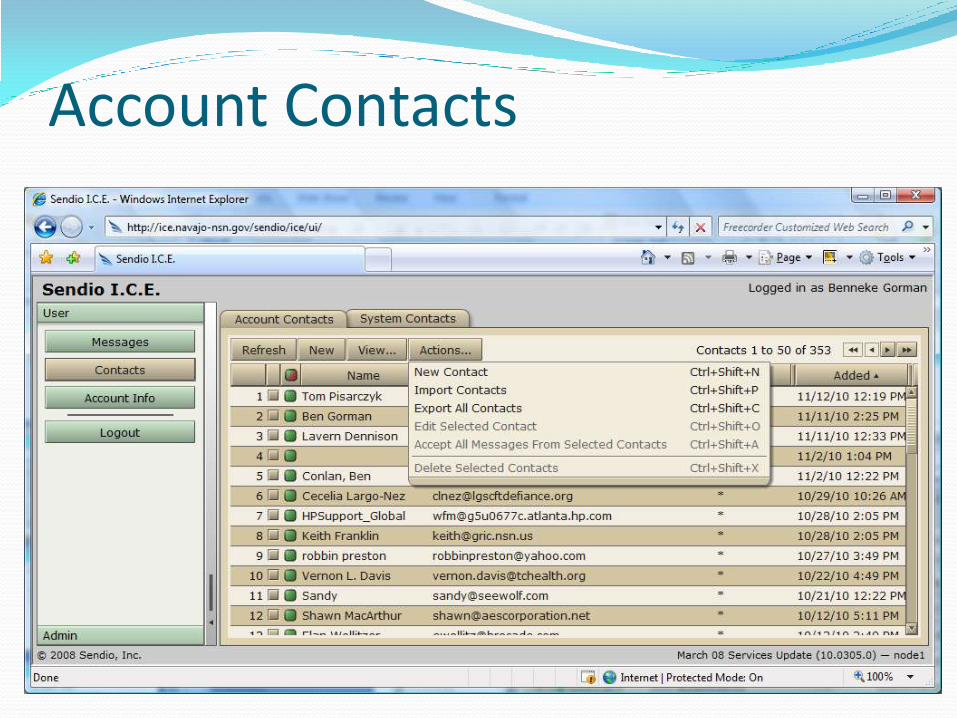
Account Contacts
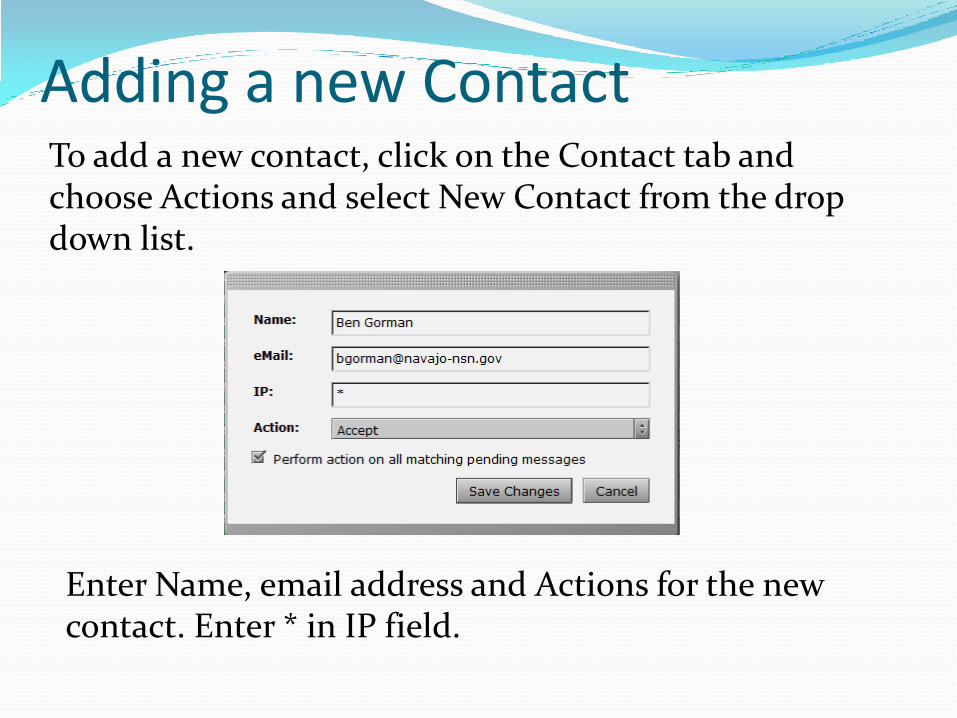
Adding a new Contact To add a new contact, click on the Contact tab and choose Actions and select New Contact from the drop down list.
Enter Name, email address and Actions for the new contact. Enter * in IP field.
Editing Contacts To edit a contact click on the Contact tab and choose Actions and select Edit Contact from the drop down list.
Name, email address and Actions can be edited.
Viewing Contacts Contacts pages are sorted by the date that the contact was added to the system. The data is resorted by clicking on any of the column headings at the top of the table.
To search for a contact click on the View button and select Custom Contact search. Fill in the appropriate fields and click the Set Search button.
Contact Icons On the left side of the page is a column with a square two-color icon in the header:
A green icon means this “sender” is on your Accept-List and messages from this sender are to be immediately delivered.
A red icon indicates that the address of this “sender” is on your Drop-List and that messages from this sender are to be immediately discarded and not delivered.
A white/gray icon indicates that the address of this “sender” is on a Hold-List and that messages from this sender are to be held in a user’s Pending Queue, and either manually released to the inbox or simply allowed to “age out” of the queue.
Import Contacts The Import Contacts action opens a window which walks you through the process of importing a set of contacts from an external source.
Please review the full Sendio User Guide for details on importing existing contacts.
Resource Guide This is a brief tutorial for accessing Sendio to check your pending queue. For more information on using the Sendio web interface there is a downloadable user’s guide at http://www.sendio.com/supportfiles/documentation/v5/ESP-UserQuickStartGuide-SENDIO5-09092010.pdf
Account Info The Account Info > Details page is the default display, showing a summary of your account information. It contains a summary of account information and access to Local and Directory passwords.
The Account Info > Addresses page displays all email addresses that are associated with your account.

Contact Info: Ben Gorman, Sr. Network Specialist
Navajo Department of Information Technology
(928) 871-6016