Embed Size (px)
Citation preview
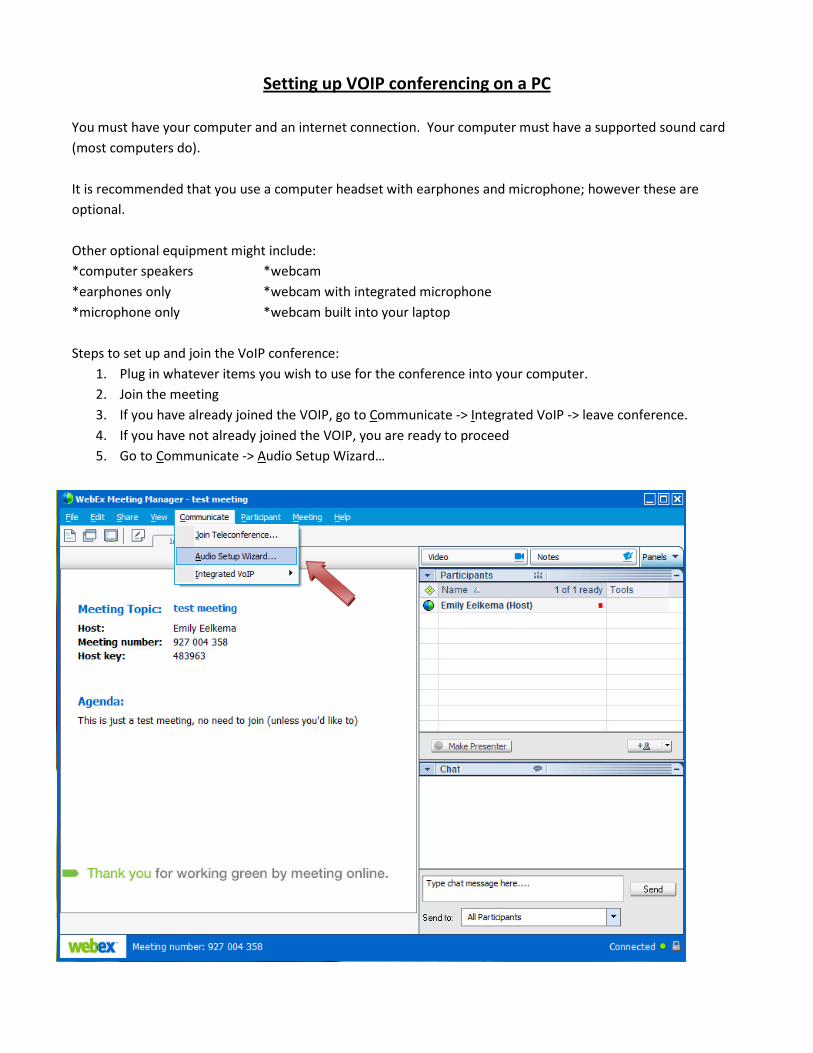
Setting up VOIP conferencing on a PC
You must have your computer and an internet connection. Your computer must have a supported sound card
(most computers do).
It is recommended that you use a computer headset with earphones and microphone; however these are
optional.
Other optional equipment might include:
*computer speakers *webcam
*earphones only *webcam with integrated microphone
*microphone only *webcam built into your laptop
Steps to set up and join the VoIP conference:
1. Plug in whatever items you wish to use for the conference into your computer.
2. Join the meeting
3. If you have already joined the VOIP, go to Communicate -> Integrated VoIP -> leave conference.
4. If you have not already joined the VOIP, you are ready to proceed
5. Go to Communicate -> Audio Setup Wizard…

6. The audio set-up wizard will open.
7. Quit all other programs that play or record sound.
8. Click Next >
9. Select your preferred recording device from the dropdown list
10. Select your preferred playback device from the dropdown list
NOTE: You may see two or more identical options in each list.
NOTE: If you are unsure of which device to use, select any one and move on. You will test the selected
device in the next step. If it doesn’t work, you will be able to go back and change it.
11. click Next >

12. Follow the instructions in the next pop-up box:
13. If you cannot hear anything, make sure:
a. your headphones or speakers are fully plugged in to the computer
b. If you speakers need AC power, make sure they are plugged into a wall outlet, and that they are
powered ‘ON’
c. Make sure the volume is UNmuted on your computer and/or speakers
d. Make sure the volume is turned up on your computer and/or speakers.
14. If you still cannot hear anything, click the < Back button, and select a different playback device.
Repeat the testing process
15. When you can hear comfortably, click Next >

16. Press the record button, and speak into your microphone
17. While speaking, use the slider to adjust your microphone level so it remains just below the red range on
the meter.
18. When you are done recording, press the Play Button, and make sure you can hear your recording.
19. If no microphone level appears, or if you cannot hear your recording,
a. Make sure your microphone is properly connected
b. OR, click < Back twice to return to the device selection screen. Select a new Recording Device.
Click Next > twice and test the microphone again.
NOTE: If you cannot get your microphone to work, you will still be able to ask questions via the ‘Chat’ function

20. Click Next >
21. Choose the setup that is most appropriate for you.
NOTE: If you choose the Desktop Or Laptop speaker's option,
you must press CTRL on your keyboard when you wish to speak to the
presenter.
NOTE: You can choose headphones even if you do not have any plugged in.
22. Click Next >
23. Both of the Advance options should be checked. If they are not, check them.
24. Click Next >
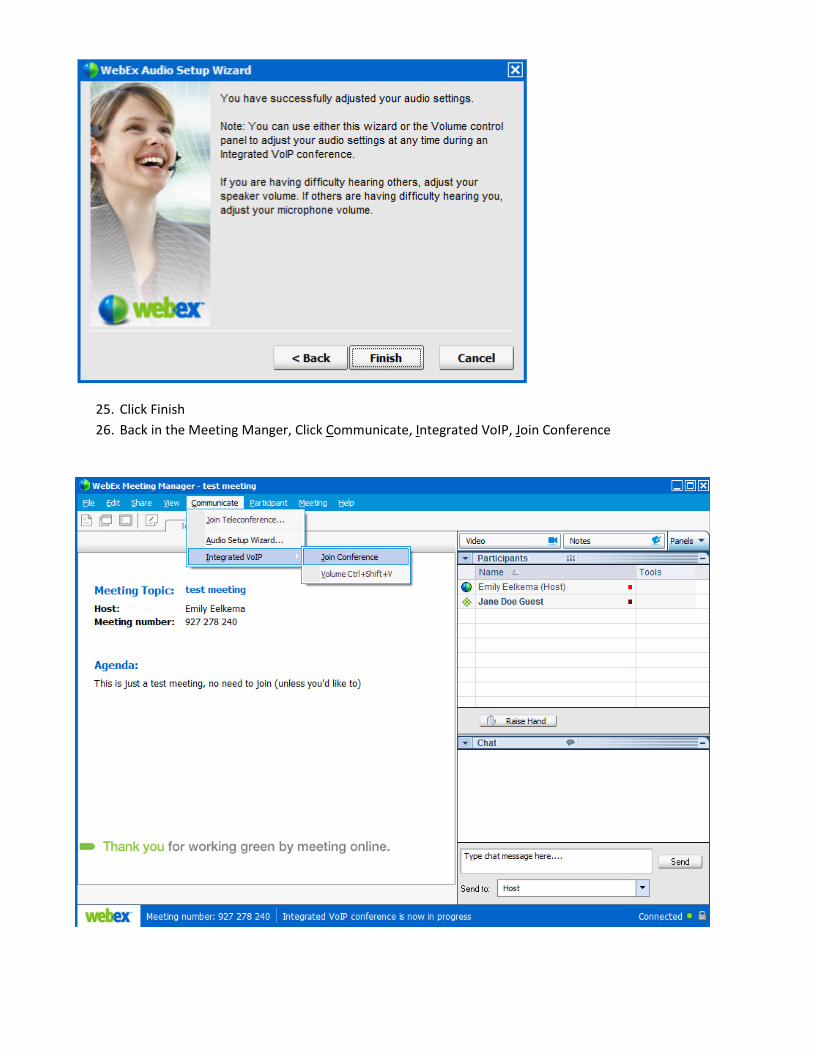
25. Click Finish
26. Back in the Meeting Manger, Click Communicate, Integrated VoIP, Join Conference
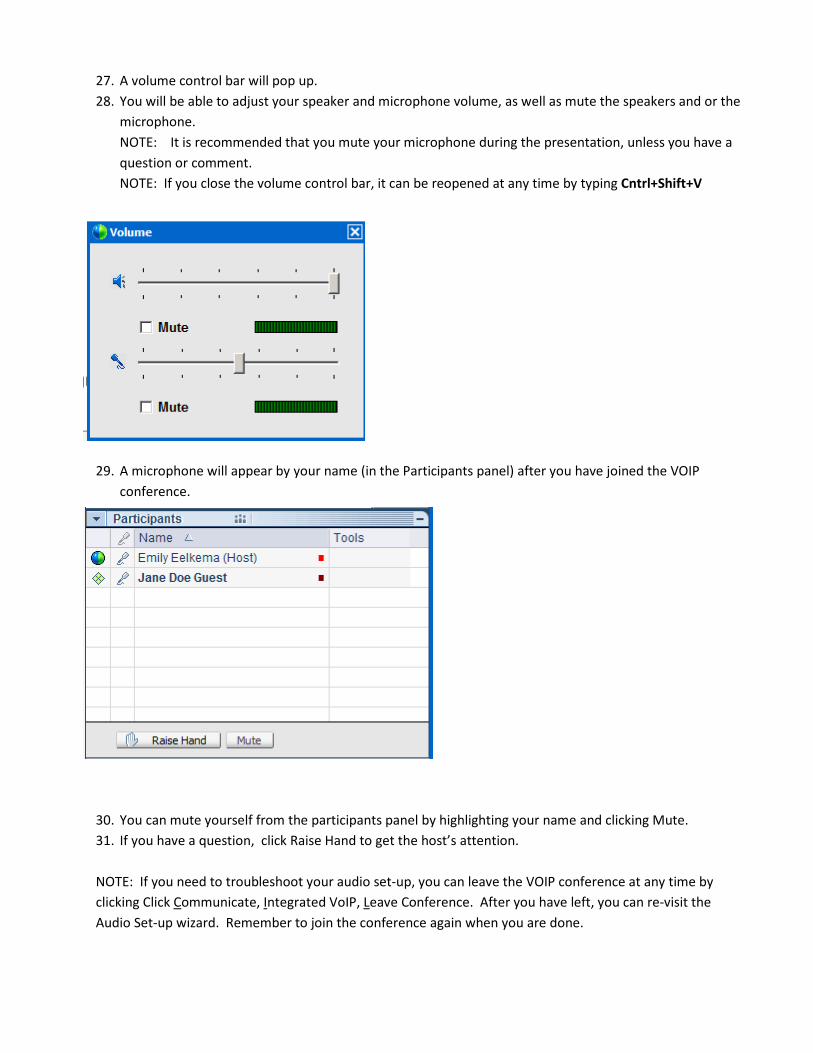
27. A volume control bar will pop up.
28. You will be able to adjust your speaker and microphone volume, as well as mute the speakers and or the
microphone.
NOTE: It is recommended that you mute your microphone during the presentation, unless you have a
question or comment.
NOTE: If you close the volume control bar, it can be reopened at any time by typing Cntrl+Shift+V
29. A microphone will appear by your name (in the Participants panel) after you have joined the VOIP
conference.
30. You can mute yourself from the participants panel by highlighting your name and clicking Mute.
31. If you have a question, click Raise Hand to get the host’s attention.
NOTE: If you need to troubleshoot your audio set-up, you can leave the VOIP conference at any time by
clicking Click Communicate, Integrated VoIP, Leave Conference. After you have left, you can re-visit the
Audio Set-up wizard. Remember to join the conference again when you are done.

Frequently Asked Questions:
Q: I don’t have a microphone / I can’t get my microphone to work! How can I ask a question?
A: You can use the chat feature in Meeting Manger
1. Select the message recipient. The ‘Send-to’ drop-down lists lets you choose from the host, all
participants, all attendees, or certain attendees.
2. Type your question in the box
3. Click Send
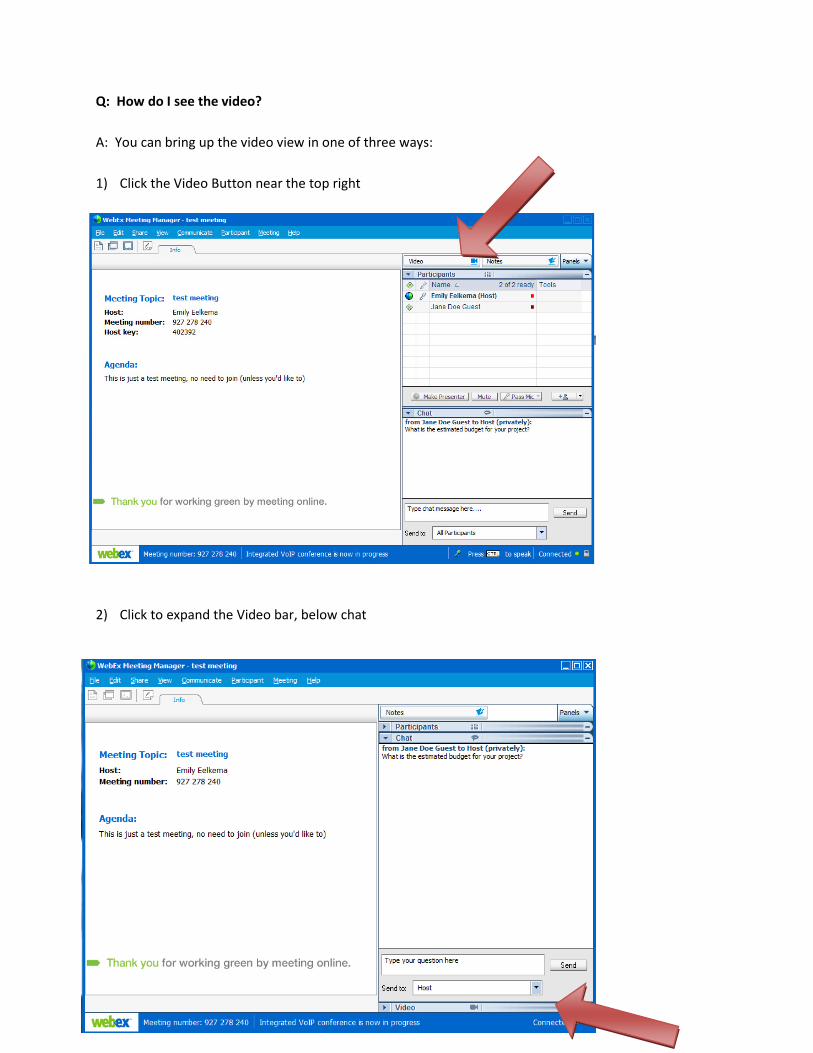
Q: How do I see the video?
A: You can bring up the video view in one of three ways:
1) Click the Video Button near the top right
2) Click to expand the Video bar, below chat
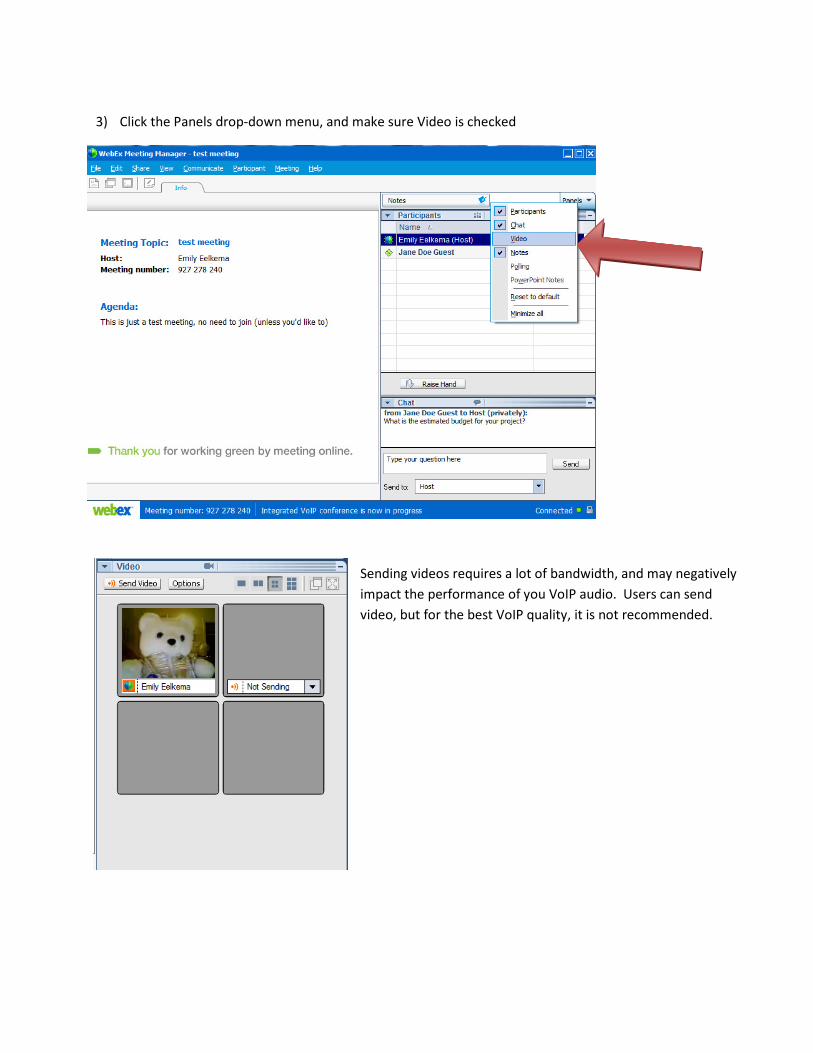
3) Click the Panels drop-down menu, and make sure Video is checked
Sending videos requires a lot of bandwidth, and may negatively
impact the performance of you VoIP audio. Users can send
video, but for the best VoIP quality, it is not recommended.