Embed Size (px)
Citation preview

REVISED DATE: 6/17/2016 PAGE 1 OF 13
SharePoint Quick Start
Navigating to your project sites 1. Go to mail.csuohio.edu and use your CSU ID and CampusNet password
2. Click on the app drawer on the top left corner and select Sites.
3. Select the desired site under “Following” on the left sidebar

REVISED DATE: 6/17/2016 PAGE 2 OF 13
Creating a project subsite 1. From the desired site, click on Site Contents on the left sidebar.
2. Click on new subsite at the bottom of the page
3. Enter the desired details of the site and select the “Project Site” template

REVISED DATE: 6/17/2016 PAGE 3 OF 13
4. Set the Desired Permissions
NOTE: If you select Use unique permissions, please see the unique permissions section under
“Setting Security Levels”
5. Set Desired Navigation Settings
TIP: You can reorder the navigation on your site, see “Reordering Navigation” to learn more.
6. Click Create!

REVISED DATE: 6/17/2016 PAGE 4 OF 13
How to add a logo to your SharePoint Site 1. Click on the settings icon on the top left of your screen and then click on “Site settings”
2. Click on “Title, description, and logo” link under the Look and Feel section.

REVISED DATE: 6/17/2016 PAGE 5 OF 13
3. Select the desired logo from your computer by selecting “From Computer” then Click “OK”.
4. Your logo should now show on your SharePoint Site.

REVISED DATE: 6/17/2016 PAGE 6 OF 13
Setting Security Levels 1. Click on the settings icon on the top left of your screen and then click on “Site settings”
2. Click on the “Site permissions” link under the Users and Permissions section.
1
2

REVISED DATE: 6/17/2016 PAGE 7 OF 13
3. Depending on how your SharePoint site was setup, these steps may vary. Feel free to contact
our helpdesk if you have any questions.
a. If you had setup your SharePoint site to inherit permissions from the parent site and want
to have unique permissions:
i. Click on “Stop Inheriting Permissions” under the Permissions tab.
ii. It will prompt you to create new groups with the desired permissions. Read the
descriptions on the left and choose the permissions desired.
IMPORTANT: Please make sure that you define yourself as an owner of the site.
Failure to define yourself as a site owner will cause you to be locked out from changing
important settings later on such as permissions.

REVISED DATE: 6/17/2016 PAGE 8 OF 13
b. If you had setup your SharePoint site with unique permissions from the parent site
and want to inherit permissions from the parent site:
i. Under the permissions tab, click on “Delete unique permissions”
PLEASE NOTE: Depending on your unique permissions, people who DO NOT have
access to the parent site will lose access.
ii. The site will start using the permissions of the parent site.
REVISED DATE: 6/17/2016 PAGE 9 OF 13
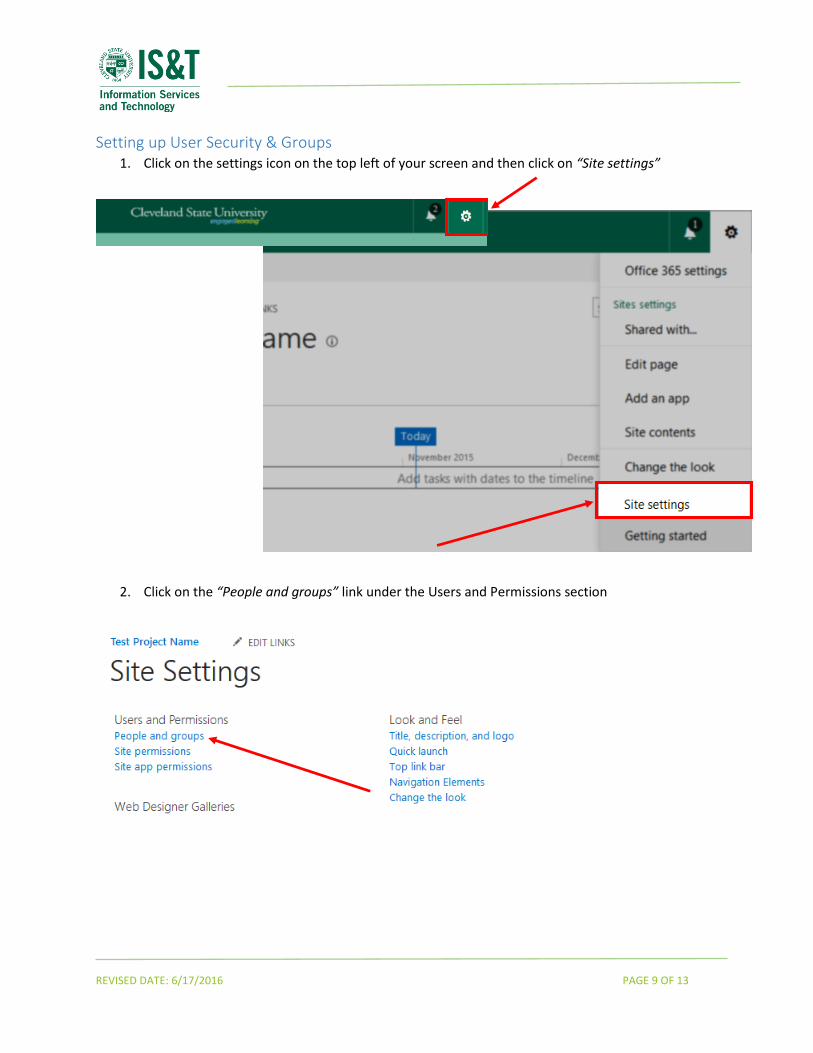
Setting up User Security & Groups 1. Click on the settings icon on the top left of your screen and then click on “Site settings”
2. Click on the “People and groups” link under the Users and Permissions section

REVISED DATE: 6/17/2016 PAGE 10 OF 13
3. Select the group that you would like from the left sidebar
4. This is where you can add or remove site users from a group:
a. To add a user:
i. Click on “New” then enter the user’s email address.
NOTE: If you are inviting an external user (i.e. a user without a @csuohio.edu or @vikes.csuohio.edu
email), they will be prompted to create/login a Microsoft Account before they can access your site.
ii. Click “Share”.
REVISED DATE: 6/17/2016 PAGE 11 OF 13
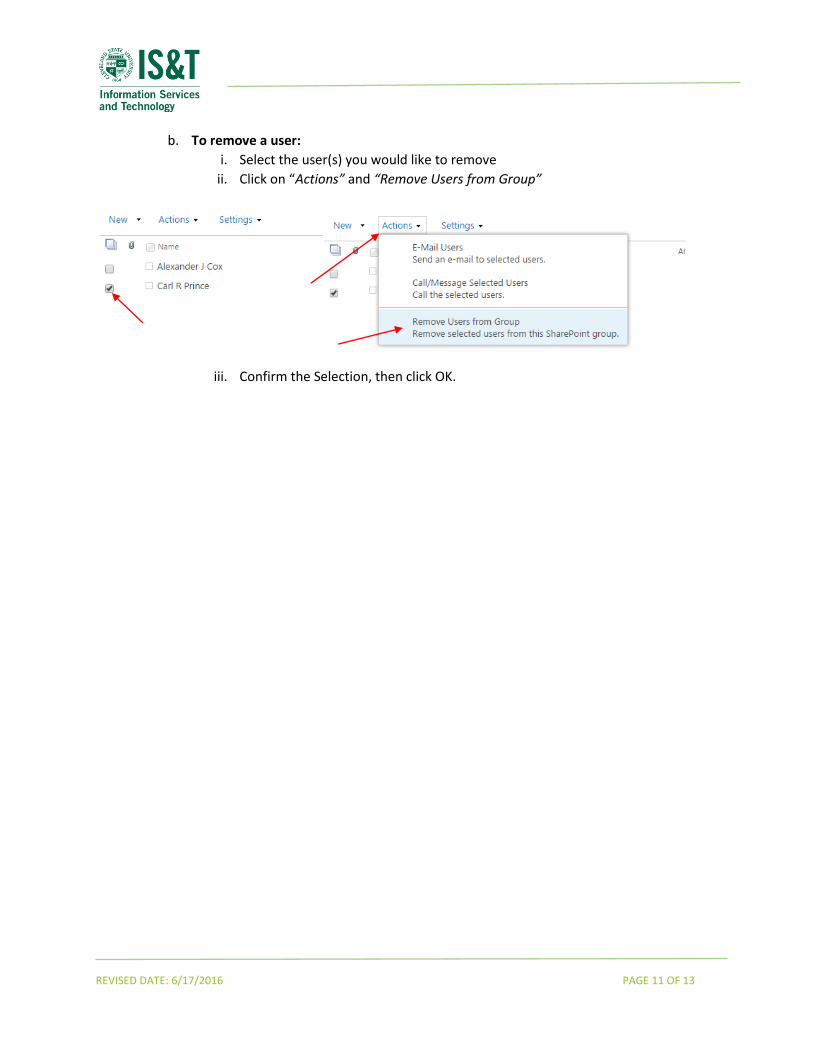
b. To remove a user:
i. Select the user(s) you would like to remove
ii. Click on “Actions” and “Remove Users from Group”
iii. Confirm the Selection, then click OK.
REVISED DATE: 6/17/2016 PAGE 12 OF 13
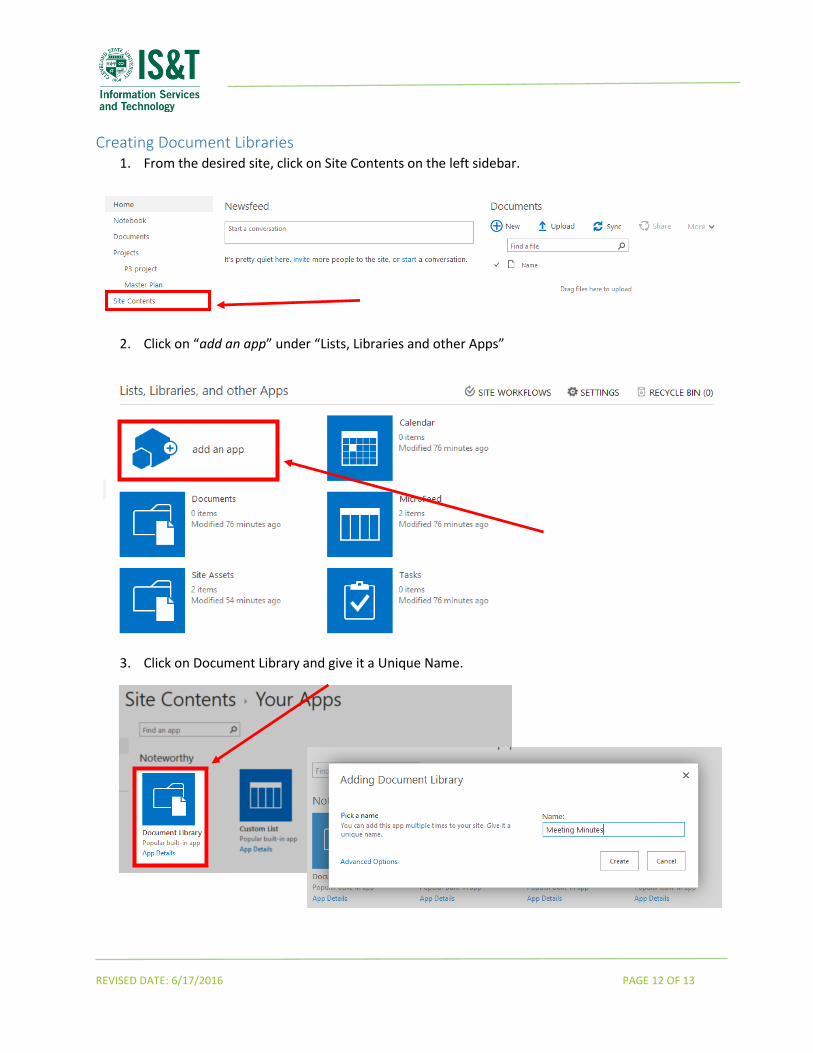
Creating Document Libraries 1. From the desired site, click on Site Contents on the left sidebar.
2. Click on “add an app” under “Lists, Libraries and other Apps”
3. Click on Document Library and give it a Unique Name.

REVISED DATE: 6/17/2016 PAGE 13 OF 13
Reordering Navigation
1. Click on “Edit Links” on the Left Sidebar
2. Drag the desired link to the location you would like then Click Save.
If you have any questions about SharePoint or this guide, feel free to
contact the IS&T Help Desk at (216) 687-5050 or online at http://easy.csuohio.edu