Embed Size (px)
Citation preview

SharpShooter Reports.WPF 基本的な使い方
Last modified on: November 15, 2012
※本ドキュメント内のスクリーンショットは英語表記ですが SharpShooter Reports JP(日本語版)では日本語で表示されます。

2
www.perpetuumsoft.com PERPETUUM software
目次
はじめに ................................................................................................................................................ 3
システムの必要条件 ............................................................................................................................. 3
ライセンス認証 ..................................................................................................................................... 3
アクティベーション ............................................................................................................................. 5
開発 ........................................................................................................................................................ 5
手順 1. アプリケーションの作成 ..................................................................................................... 5
手順 2.プロジェクトにレポートテンプレートを追加する ............................................................ 7
手順 3. 参照の追加 ............................................................................................................................ 8
手順 4. XAML コードの追加 .............................................................................................................. 8
手順 5. データソースの作成と代入.................................................................................................. 9
手順 6. レポートテンプレートの編集 ............................................................................................ 10
手順 7. レポートのデザイン ........................................................................................................... 11
手順 8. レポート表示 ...................................................................................................................... 12
3
www.perpetuumsoft.com PERPETUUM software
はじめに このユーザーガイドには SharpShooter Reports.WPF を使った簡単なレポートテンプレートの作成方
法が含まれています。
このユーザーガイドは SharpShooter Reports.WPF ユーザーのために用意されたものです。
システムの必要条件 SharpShooter Reports.WPF を使用するには以下が必要となります。
· .NET Framework 4.0 · Visual Studio 2010
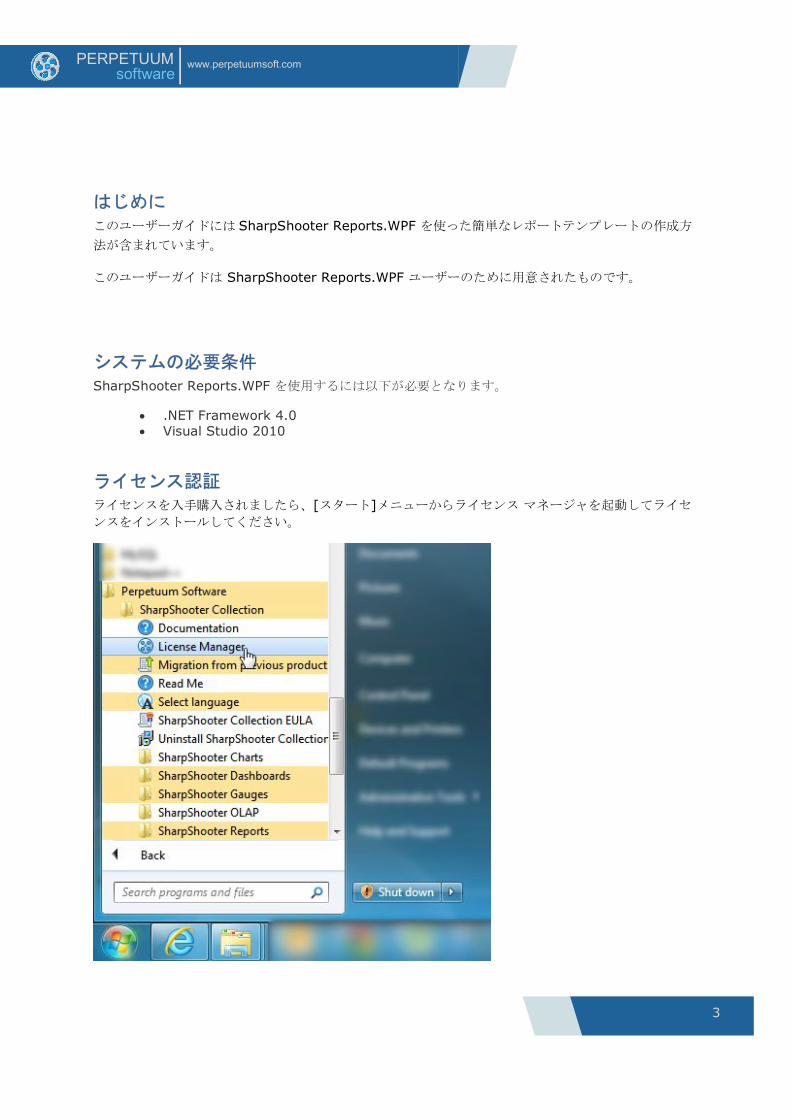
ライセンス認証 ライセンスを入手購入されましたら、[スタート]メニューからライセンス マネージャを起動してライセ
ンスをインストールしてください。
4
www.perpetuumsoft.com PERPETUUM software
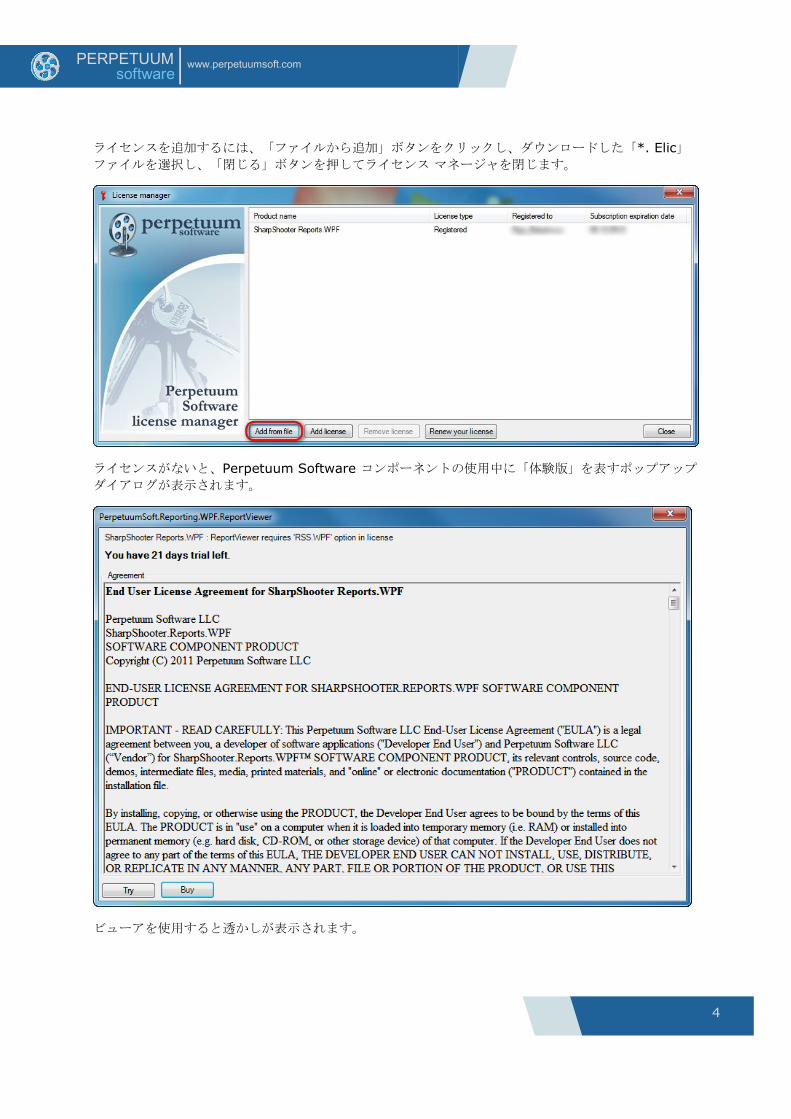
ライセンスを追加するには、「ファイルから追加」ボタンをクリックし、ダウンロードした「*. Elic」ファイルを選択し、「閉じる」ボタンを押してライセンス マネージャを閉じます。
ライセンスがないと、Perpetuum Software コンポーネントの使用中に「体験版」を表すポップアップ
ダイアログが表示されます。
ビューアを使用すると透かしが表示されます。
5
www.perpetuumsoft.com PERPETUUM software
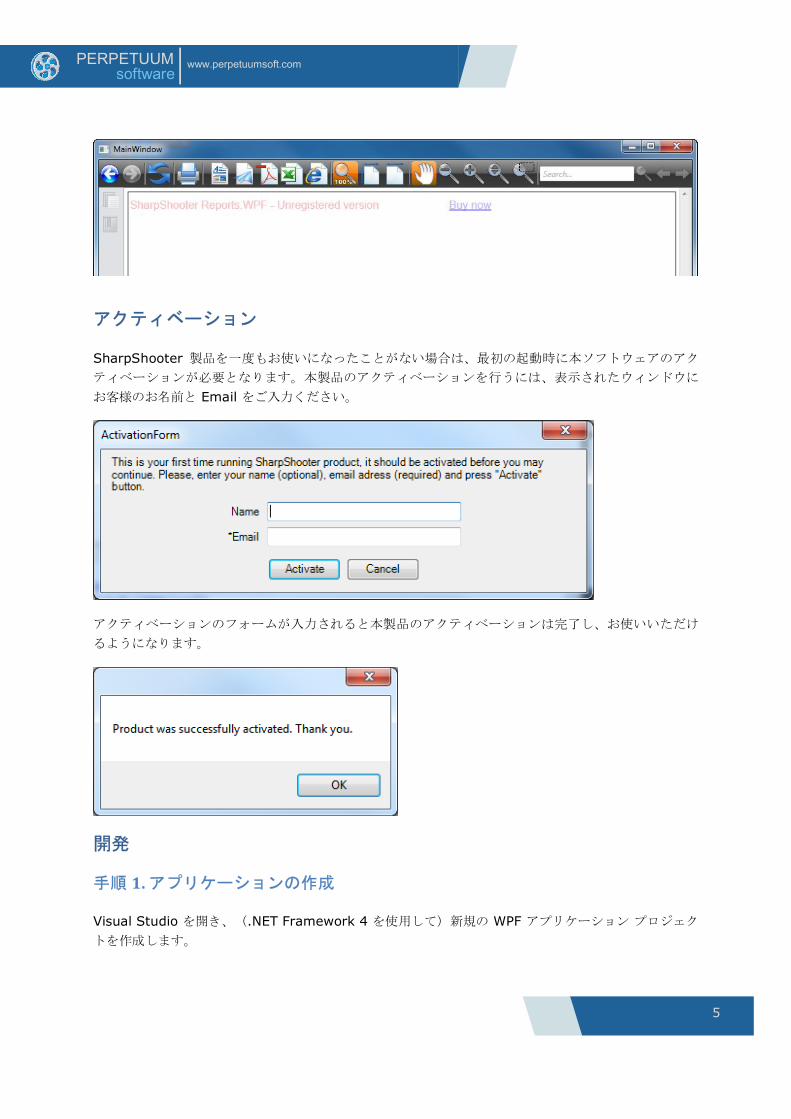
アクティベーション
SharpShooter 製品を一度もお使いになったことがない場合は、 初の起動時に本ソフトウェアのアク
ティベーションが必要となります。本製品のアクティベーションを行うには、表示されたウィンドウに
お客様のお名前と Email をご入力ください。
アクティベーションのフォームが入力されると本製品のアクティベーションは完了し、お使いいただけ
るようになります。
開発
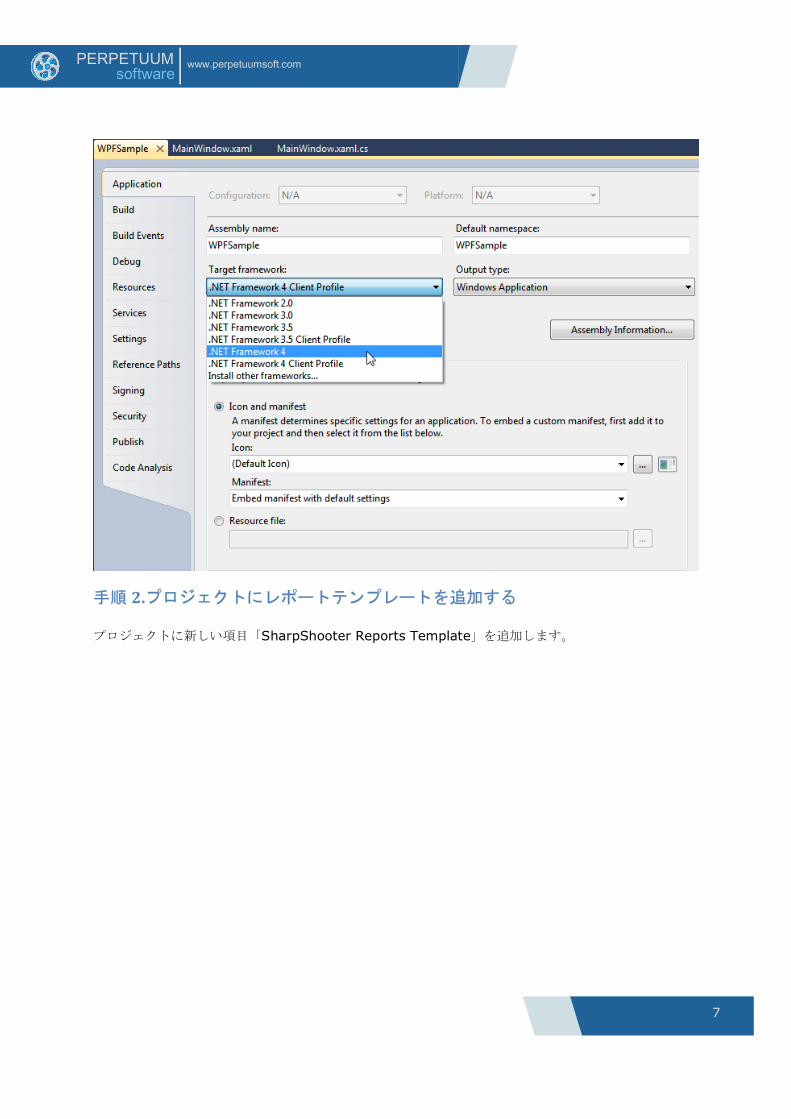
手順 1. アプリケーションの作成
Visual Studio を開き、(.NET Framework 4 を使用して)新規の WPF アプリケーション プロジェク
トを作成します。

6
www.perpetuumsoft.com PERPETUUM software
クライアント プロファイルをデフォルトのフレームワークとしてお使いの場合は、プロジェクトのプロ
パティでフルバージョンのフレームワークに変更してください。
7
www.perpetuumsoft.com PERPETUUM software
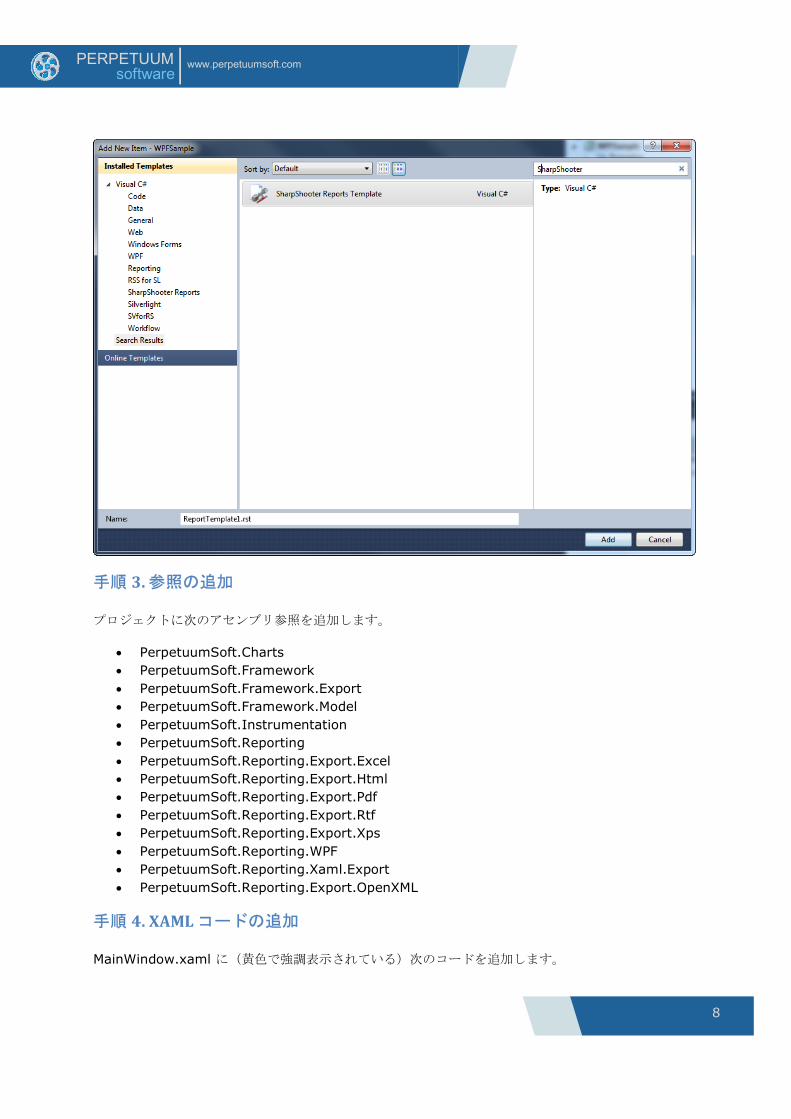
手順 2.プロジェクトにレポートテンプレートを追加する
プロジェクトに新しい項目「SharpShooter Reports Template」を追加します。
8
www.perpetuumsoft.com PERPETUUM software
手順 3. 参照の追加
プロジェクトに次のアセンブリ参照を追加します。
· PerpetuumSoft.Charts · PerpetuumSoft.Framework · PerpetuumSoft.Framework.Export · PerpetuumSoft.Framework.Model · PerpetuumSoft.Instrumentation · PerpetuumSoft.Reporting · PerpetuumSoft.Reporting.Export.Excel · PerpetuumSoft.Reporting.Export.Html · PerpetuumSoft.Reporting.Export.Pdf · PerpetuumSoft.Reporting.Export.Rtf · PerpetuumSoft.Reporting.Export.Xps · PerpetuumSoft.Reporting.WPF · PerpetuumSoft.Reporting.Xaml.Export · PerpetuumSoft.Reporting.Export.OpenXML
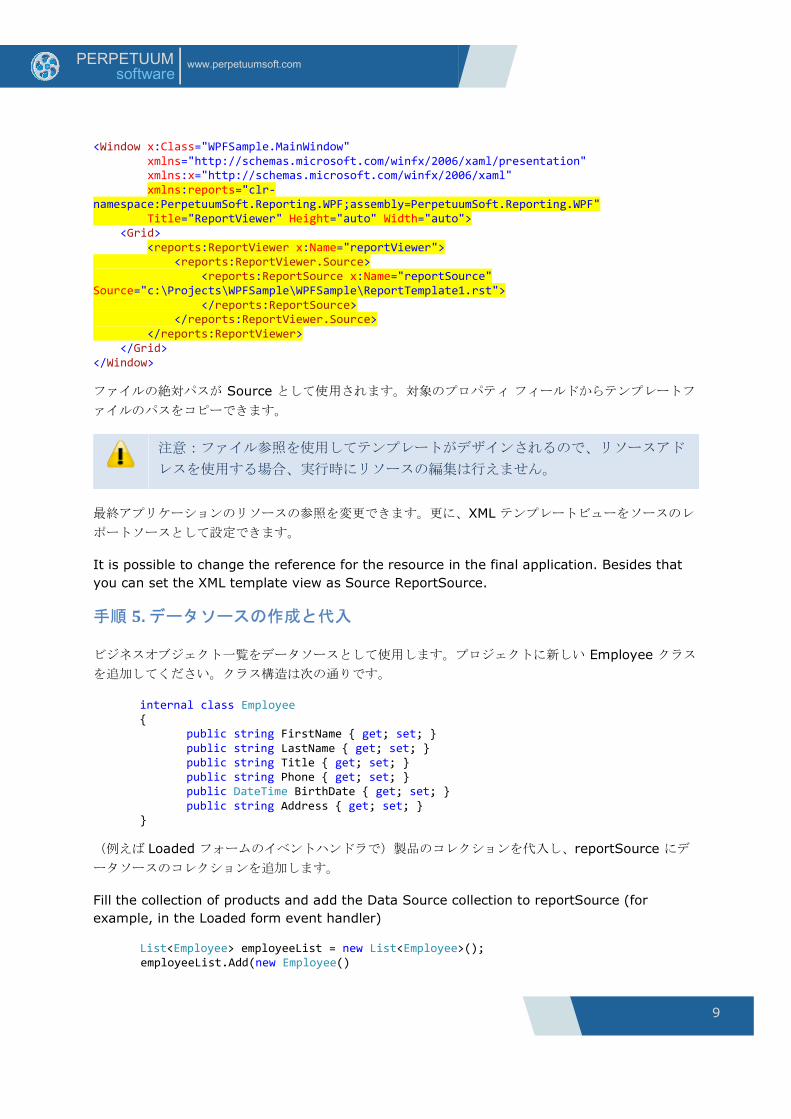
手順 4. XAML コードの追加
MainWindow.xaml に(黄色で強調表示されている)次のコードを追加します。
9
www.perpetuumsoft.com PERPETUUM software
<Window x:Class="WPFSample.MainWindow" xmlns="http://schemas.microsoft.com/winfx/2006/xaml/presentation" xmlns:x="http://schemas.microsoft.com/winfx/2006/xaml" xmlns:reports="clr-namespace:PerpetuumSoft.Reporting.WPF;assembly=PerpetuumSoft.Reporting.WPF" Title="ReportViewer" Height="auto" Width="auto"> <Grid> <reports:ReportViewer x:Name="reportViewer"> <reports:ReportViewer.Source> <reports:ReportSource x:Name="reportSource" Source="c:\Projects\WPFSample\WPFSample\ReportTemplate1.rst"> </reports:ReportSource> </reports:ReportViewer.Source> </reports:ReportViewer> </Grid> </Window>
ファイルの絶対パスが Source として使用されます。対象のプロパティ フィールドからテンプレートフ
ァイルのパスをコピーできます。
終アプリケーションのリソースの参照を変更できます。更に、XML テンプレートビューをソースのレ
ポートソースとして設定できます。
It is possible to change the reference for the resource in the final application. Besides that you can set the XML template view as Source ReportSource.
手順 5. データソースの作成と代入
ビジネスオブジェクト一覧をデータソースとして使用します。プロジェクトに新しい Employee クラス
を追加してください。クラス構造は次の通りです。
internal class Employee { public string FirstName { get; set; } public string LastName { get; set; } public string Title { get; set; } public string Phone { get; set; } public DateTime BirthDate { get; set; } public string Address { get; set; }
}
(例えば Loaded フォームのイベントハンドラで)製品のコレクションを代入し、reportSource にデ
ータソースのコレクションを追加します。
Fill the collection of products and add the Data Source collection to reportSource (for example, in the Loaded form event handler)
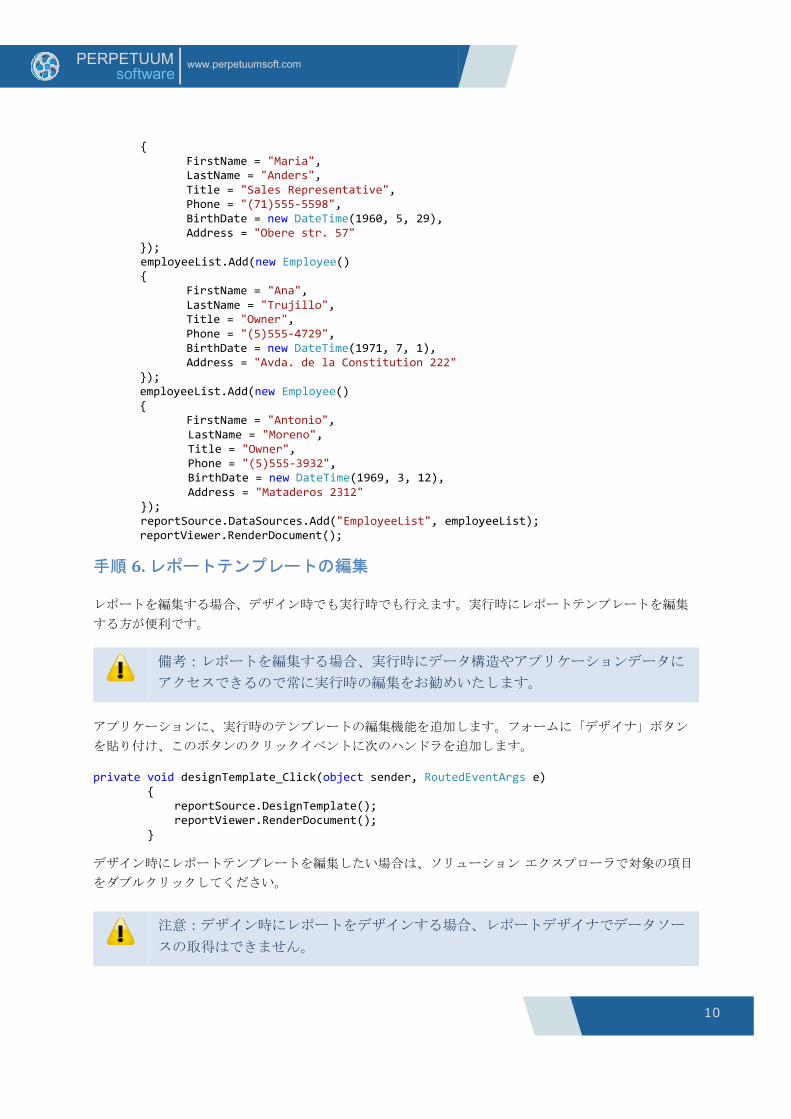
List<Employee> employeeList = new List<Employee>(); employeeList.Add(new Employee()
注意:ファイル参照を使用してテンプレートがデザインされるので、リソースアド
レスを使用する場合、実行時にリソースの編集は行えません。
10
www.perpetuumsoft.com PERPETUUM software
{ FirstName = "Maria", LastName = "Anders",
Title = "Sales Representative", Phone = "(71)555-5598", BirthDate = new DateTime(1960, 5, 29), Address = "Obere str. 57"
}); employeeList.Add(new Employee() {
FirstName = "Ana", LastName = "Trujillo", Title = "Owner", Phone = "(5)555-4729", BirthDate = new DateTime(1971, 7, 1), Address = "Avda. de la Constitution 222"
}); employeeList.Add(new Employee() {
FirstName = "Antonio", LastName = "Moreno", Title = "Owner", Phone = "(5)555-3932", BirthDate = new DateTime(1969, 3, 12), Address = "Mataderos 2312" }); reportSource.DataSources.Add("EmployeeList", employeeList);
reportViewer.RenderDocument();
手順 6. レポートテンプレートの編集
レポートを編集する場合、デザイン時でも実行時でも行えます。実行時にレポートテンプレートを編集
する方が便利です。
アプリケーションに、実行時のテンプレートの編集機能を追加します。フォームに「デザイナ」ボタン
を貼り付け、このボタンのクリックイベントに次のハンドラを追加します。
private void designTemplate_Click(object sender, RoutedEventArgs e) { reportSource.DesignTemplate(); reportViewer.RenderDocument(); }
デザイン時にレポートテンプレートを編集したい場合は、ソリューション エクスプローラで対象の項目
をダブルクリックしてください。
注意:デザイン時にレポートをデザインする場合、レポートデザイナでデータソー
スの取得はできません。
備考:レポートを編集する場合、実行時にデータ構造やアプリケーションデータに
アクセスできるので常に実行時の編集をお勧めいたします。
11
www.perpetuumsoft.com PERPETUUM software
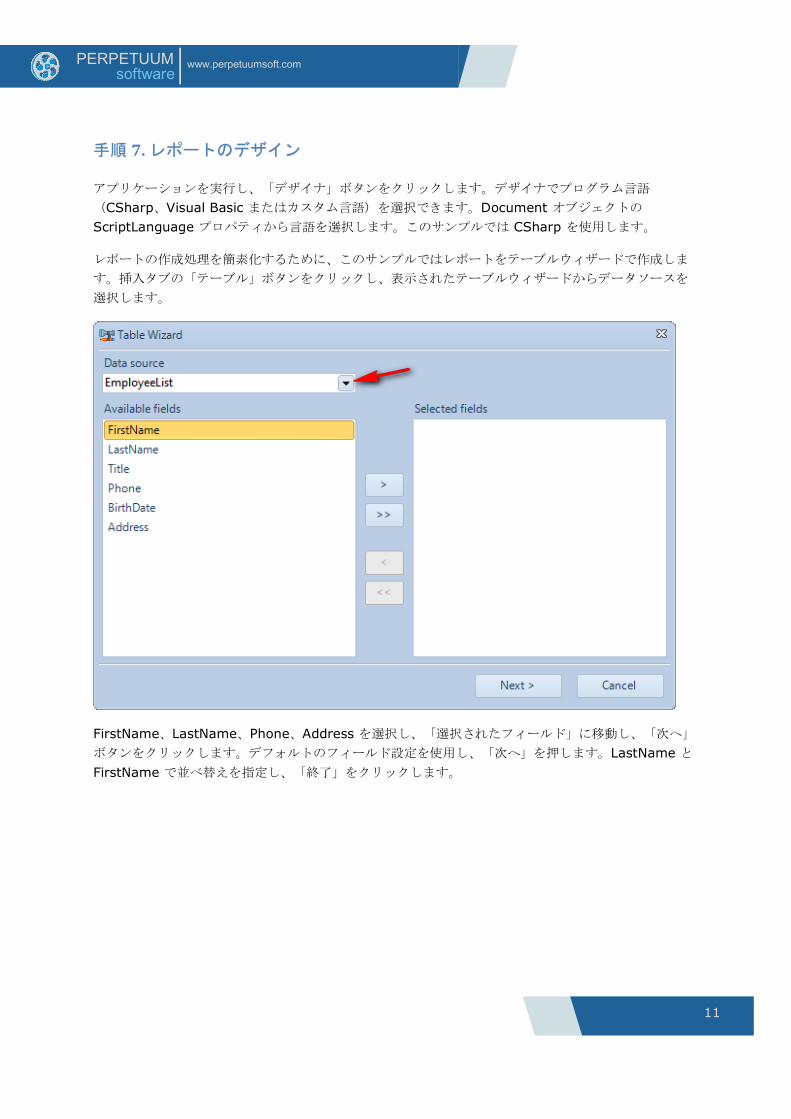
手順 7. レポートのデザイン
アプリケーションを実行し、「デザイナ」ボタンをクリックします。デザイナでプログラム言語
(CSharp、Visual Basic またはカスタム言語)を選択できます。Document オブジェクトの ScriptLanguage プロパティから言語を選択します。このサンプルでは CSharp を使用します。
レポートの作成処理を簡素化するために、このサンプルではレポートをテーブルウィザードで作成しま
す。挿入タブの「テーブル」ボタンをクリックし、表示されたテーブルウィザードからデータソースを
選択します。
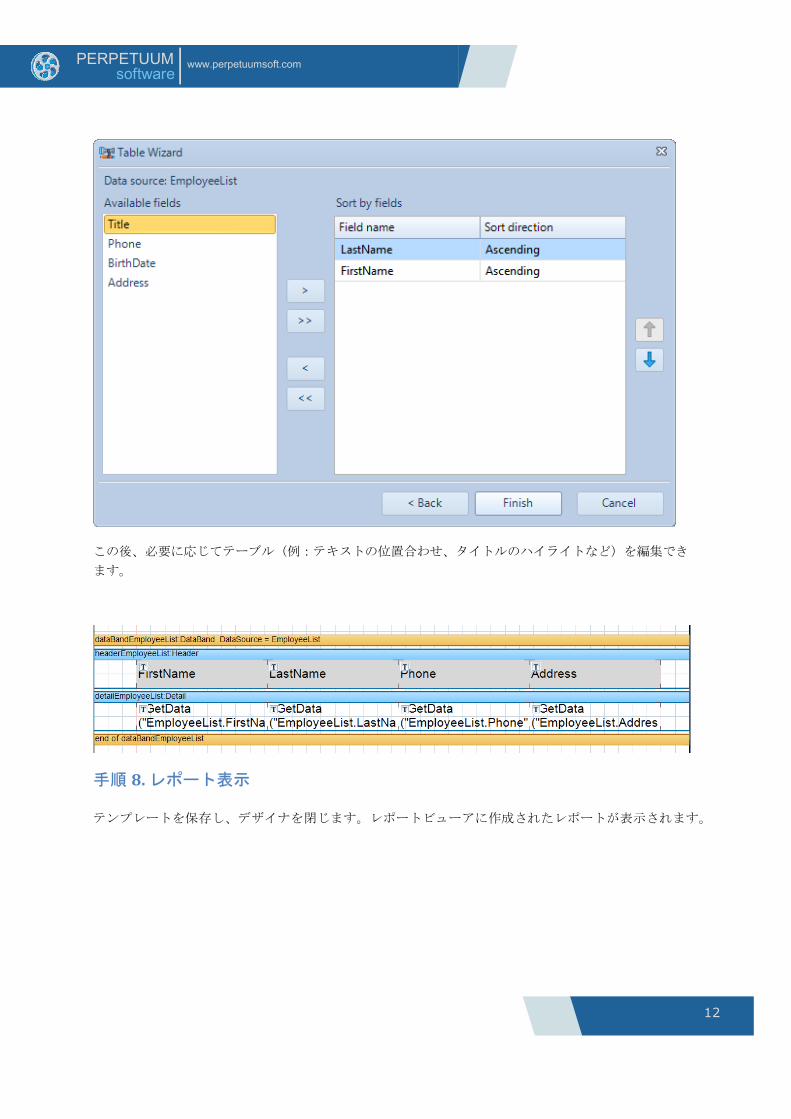
FirstName、LastName、Phone、Address を選択し、「選択されたフィールド」に移動し、「次へ」
ボタンをクリックします。デフォルトのフィールド設定を使用し、「次へ」を押します。LastName と FirstName で並べ替えを指定し、「終了」をクリックします。
12
www.perpetuumsoft.com PERPETUUM software
この後、必要に応じてテーブル(例:テキストの位置合わせ、タイトルのハイライトなど)を編集でき
ます。
手順 8. レポート表示
テンプレートを保存し、デザイナを閉じます。レポートビューアに作成されたレポートが表示されます。
13
www.perpetuumsoft.com PERPETUUM software
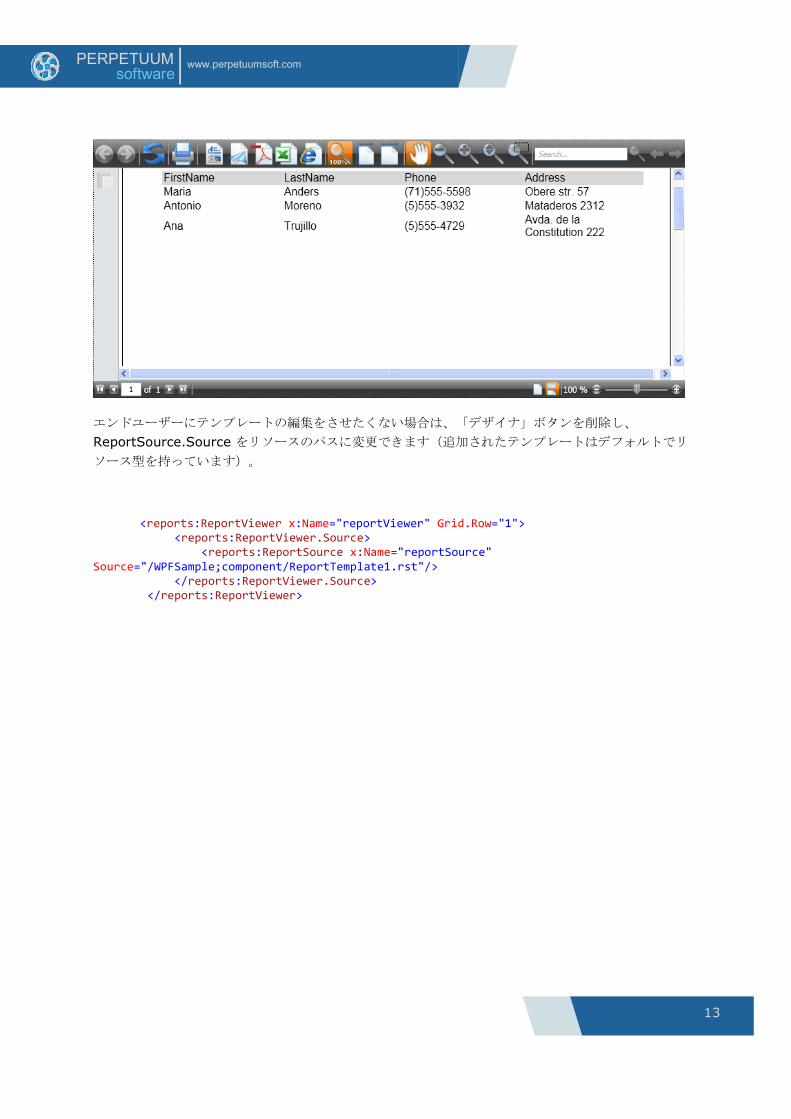
エンドユーザーにテンプレートの編集をさせたくない場合は、「デザイナ」ボタンを削除し、
ReportSource.Source をリソースのパスに変更できます(追加されたテンプレートはデフォルトでリ
ソース型を持っています)。
<reports:ReportViewer x:Name="reportViewer" Grid.Row="1"> <reports:ReportViewer.Source> <reports:ReportSource x:Name="reportSource" Source="/WPFSample;component/ReportTemplate1.rst"/> </reports:ReportViewer.Source> </reports:ReportViewer>