Embed Size (px)
Citation preview
Page 1StitchCraft
Shirt Collars Made Easy
Making the PatternThe classic shirt with a collar stand (also known as neck band) and collar is a great addition to any wardrobe and one that can be dressed up or down. Mastering the collar can take a bit of practice. Getting nice collar points is tricky and attaching the collar stand to the shirt can be an exercise in frustration, particularly the end bits with the lumpy seams.
Here’s a method for elimating some of the seams to get a nice smooth finish.
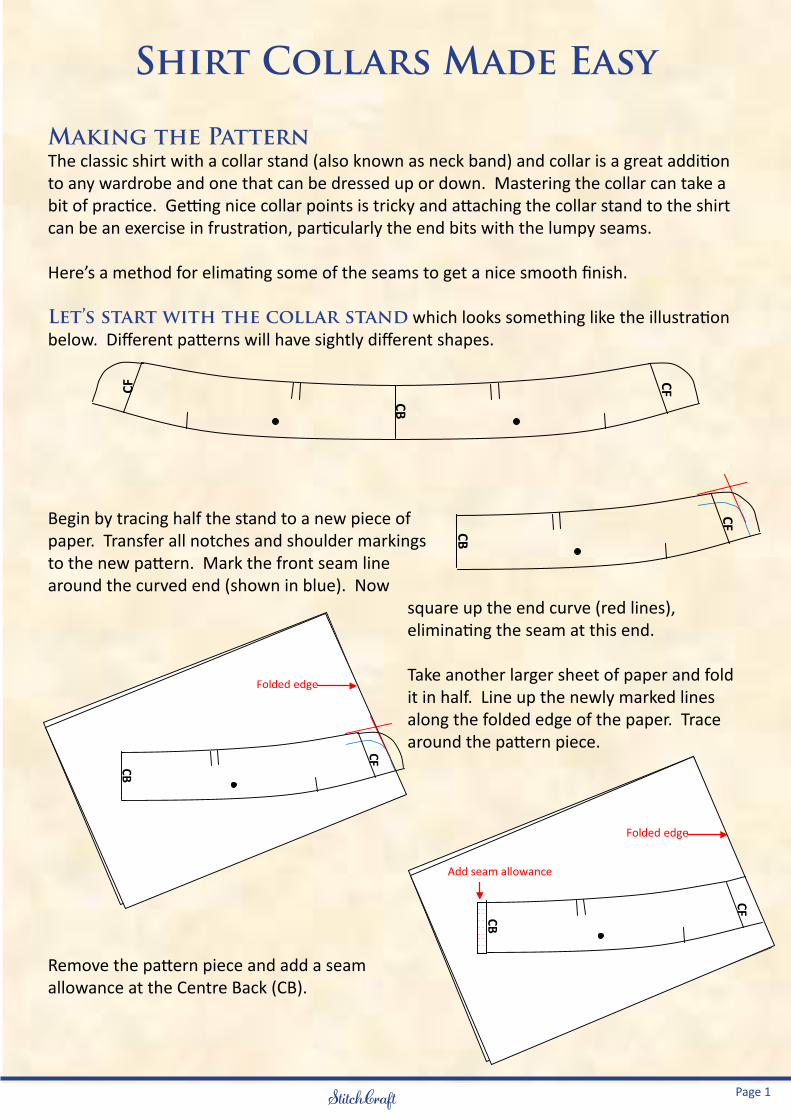
Let’s start with the collar stand which looks something like the illustration below. Different patterns will have sightly different shapes.
Begin by tracing half the stand to a new piece of paper. Transfer all notches and shoulder markings to the new pattern. Mark the front seam line around the curved end (shown in blue). Now
square up the end curve (red lines), eliminating the seam at this end.
Take another larger sheet of paper and fold it in half. Line up the newly marked lines along the folded edge of the paper. Trace around the pattern piece.
Remove the pattern piece and add a seam allowance at the Centre Back (CB).
CB
CF CF
CB
CF
CB
CF
Folded edge
CB
CF
Folded edge
Add seam allowance
Page 2StitchCraft
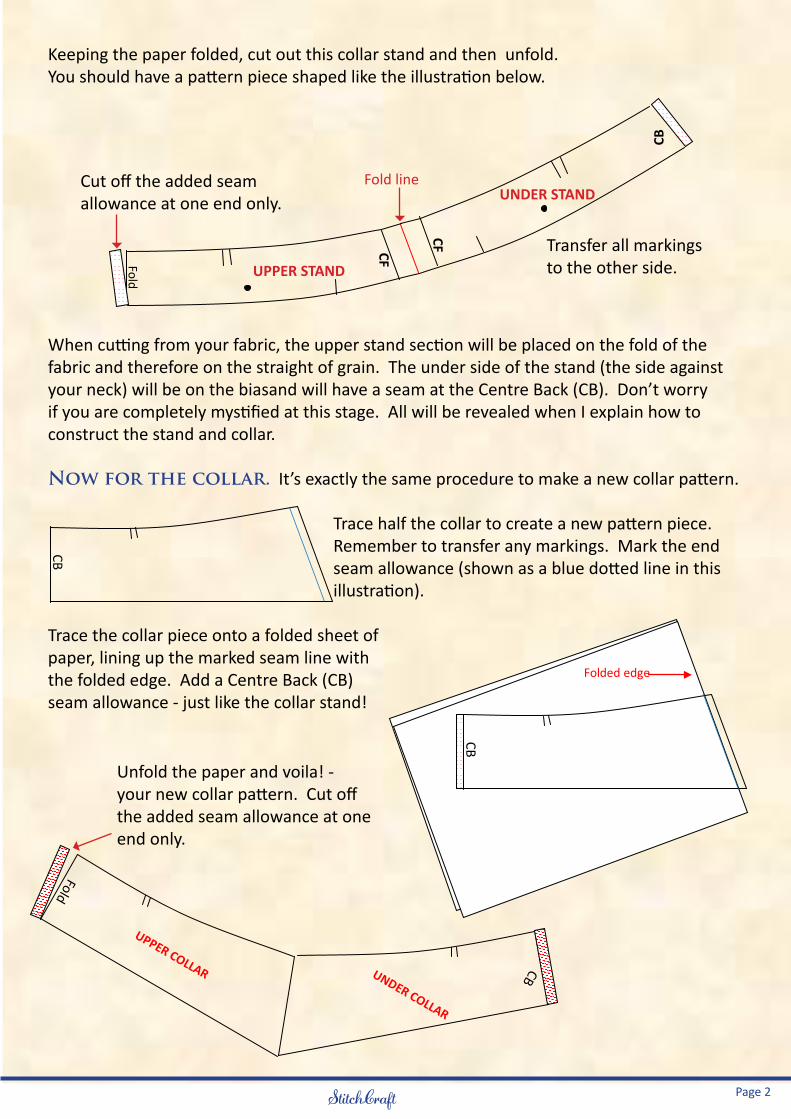
Keeping the paper folded, cut out this collar stand and then unfold. You should have a pattern piece shaped like the illustration below.
When cutting from your fabric, the upper stand section will be placed on the fold of the fabric and therefore on the straight of grain. The under side of the stand (the side against your neck) will be on the biasand will have a seam at the Centre Back (CB). Don’t worry if you are completely mystified at this stage. All will be revealed when I explain how to construct the stand and collar.
Now for the collar. It’s exactly the same procedure to make a new collar pattern.
Trace half the collar to create a new pattern piece. Remember to transfer any markings. Mark the end seam allowance (shown as a blue dotted line in this illustration).
Trace the collar piece onto a folded sheet of paper, lining up the marked seam line with the folded edge. Add a Centre Back (CB) seam allowance - just like the collar stand!
CB
CF Fold
CF
Cut off the added seam allowance at one end only.
Transfer all markings to the other side.UPPER STAND
UNDER STANDFold line
CB
CB
Folded edge
CB
Fold
UPPER COLLAR UNDER COLLAR
Unfold the paper and voila! - your new collar pattern. Cut off the added seam allowance at one end only.
Page 3StitchCraft
Collar Construction
You’ve made your new pattern and now you’re scratching your head, wondering how it all goes together.
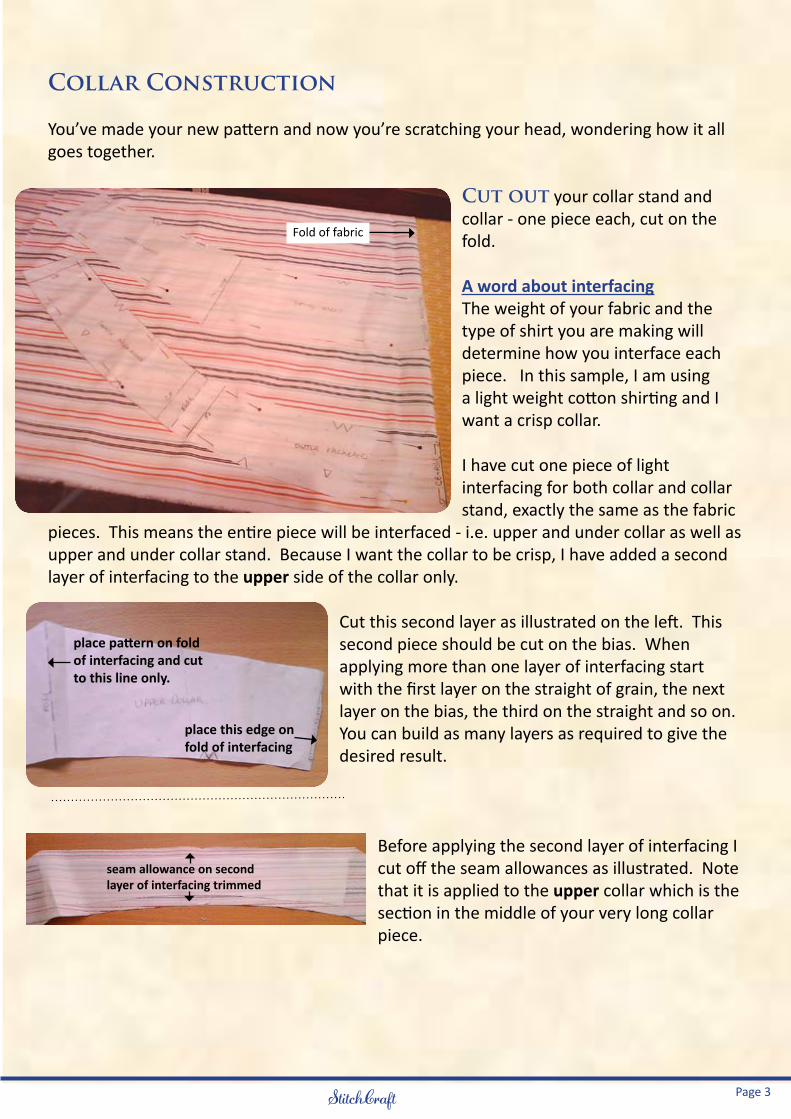
Cut out your collar stand and collar - one piece each, cut on the fold.
A word about interfacingThe weight of your fabric and the type of shirt you are making will determine how you interface each piece. In this sample, I am using a light weight cotton shirting and I want a crisp collar.
I have cut one piece of light interfacing for both collar and collar stand, exactly the same as the fabric
pieces. This means the entire piece will be interfaced - i.e. upper and under collar as well as upper and under collar stand. Because I want the collar to be crisp, I have added a second layer of interfacing to the upper side of the collar only.
Cut this second layer as illustrated on the left. This second piece should be cut on the bias. When applying more than one layer of interfacing start with the first layer on the straight of grain, the next layer on the bias, the third on the straight and so on. You can build as many layers as required to give the desired result.
Before applying the second layer of interfacing I cut off the seam allowances as illustrated. Note that it is applied to the upper collar which is the section in the middle of your very long collar piece.
Fold of fabric
place pattern on fold of interfacing and cut to this line only.
place this edge on fold of interfacing
seam allowance on second layer of interfacing trimmed
Page 4StitchCraft
Stitch
Upper collar
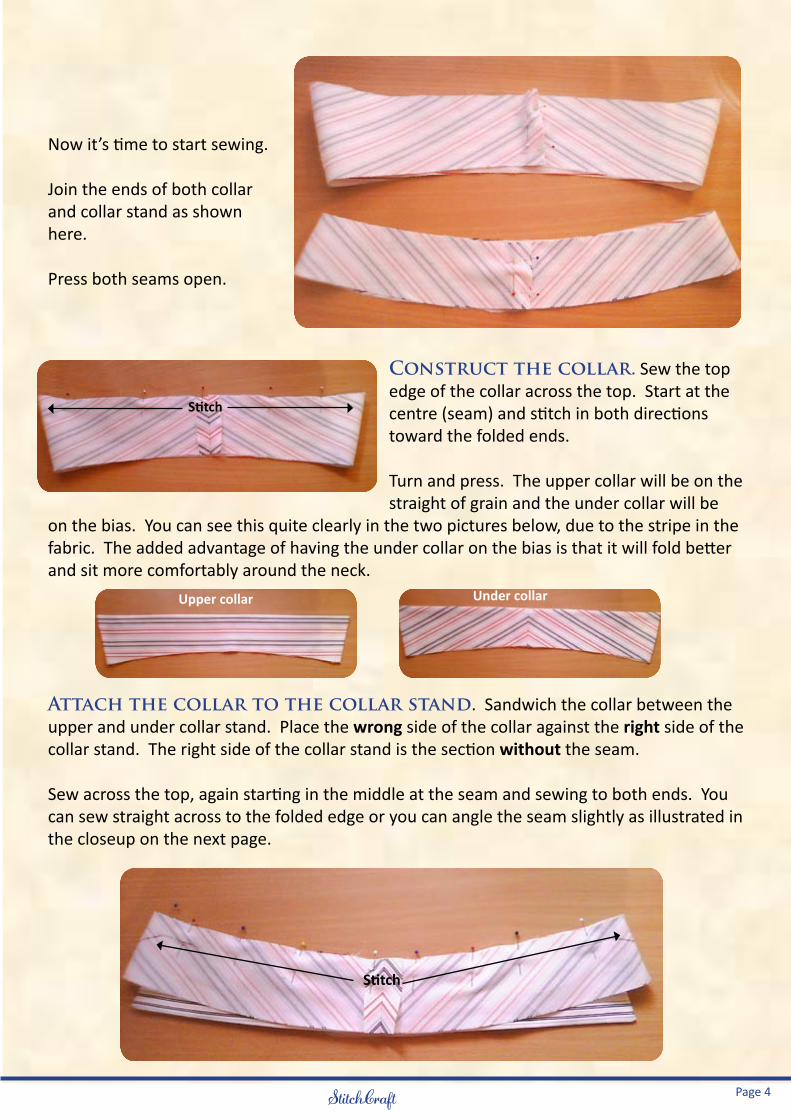
Now it’s time to start sewing.
Join the ends of both collar and collar stand as shown here.
Press both seams open.
Construct the collar. Sew the top edge of the collar across the top. Start at the centre (seam) and stitch in both directions toward the folded ends.
Turn and press. The upper collar will be on the straight of grain and the under collar will be
on the bias. You can see this quite clearly in the two pictures below, due to the stripe in the fabric. The added advantage of having the under collar on the bias is that it will fold better and sit more comfortably around the neck.
Attach the collar to the collar stand. Sandwich the collar between the upper and under collar stand. Place the wrong side of the collar against the right side of the collar stand. The right side of the collar stand is the section without the seam.
Sew across the top, again starting in the middle at the seam and sewing to both ends. You can sew straight across to the folded edge or you can angle the seam slightly as illustrated in the closeup on the next page.
Under collar
Stitch

Page 5StitchCraft
Angle the seam at the end
Note the inside of the collar stand is on the bias, just like the under side of your collar.You have no seams at the end of your collar which makes it much easier to achieve a nice point. The absence of seams at the end of the collar stand eliminates that annoying ‘bump’ you get where the stand is attached to the shirt at the front edges.
Your collar is now ready to attach to the shirt!