Embed Size (px)
Citation preview

Page 1
© 2014 Lancer Systems all rights reserved

Page 2
PROPRIETARY NOTICE: This contains Lancer Systems’ confidential, proprietary and/or competition sensitive data. Lancer Systems is AS9100C:2009 ISO9001:2008 CERTIFIED
ITAR NOTICE: “Warning – This document contains technical data whose export is restricted by the Arms Export Control Act (Title 22, U.S.C. Sec. 2751, et. Seq.) or the Export Administration Act of 1979 as amended, Title 50 U.S.C. App. 2401 et, seq. Violations of these export laws are subject to severe criminal penalties. Disseminate in Accordance with provisions of DOD Directive 5230.25.”
Page 3
Table of Contents
Safety Rules …………………………………………………………………….. 4
Carbon Fiber Handguard ……...…………………………………………. 5 Description .…………………………………………………………. 5
Features and Options …………………………………………………. 5 Tool Box …………………………………………………………… 6 Clearing the Rifle …………………………………………………. 6 - 7 Removal of original handguard ……………………………………….. 8 Installation of Lancer handguard ……………………………………….. 9 - 13

Page 4
Safety Rules
Cardinal Rules of Firearms Safety 1. Treat every firearm as if it were loaded until positively ascertained
otherwise by you 2. Never point a firearm at anything or anybody that you do not intend to
shoot, or in a direction where an unintentional discharge may do harm 3. Never place your finger into the trigger guard until ready and justified to
fire 4. Be sure of your threat, backstop and beyond
Rendering a Firearm Safe 1. Always point a firearm in the safest direction (MUZZLE AWARENESS) 2. Safety ON (if applicable) 3. Magazine removed (or cylinder open, unload cylinder) 4. Bolt, slide or cocking lever locked to the rear 5. Visually and physically inspect the chamber
NOTE: Wear eye protection during disassembly and reassembly of your firearm.
Page 5
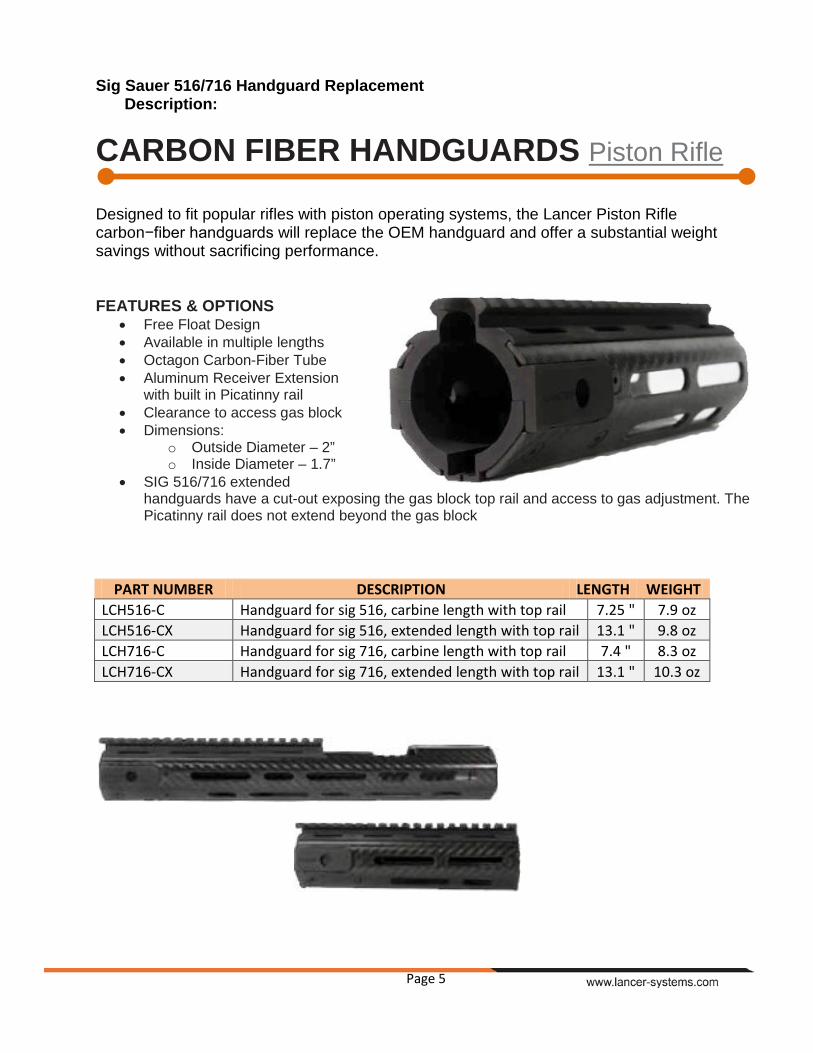
Sig Sauer 516/716 Handguard Replacement Description:
CARBON FIBER HANDGUARDS Piston Rifle Designed to fit popular rifles with piston operating systems, the Lancer Piston Rifle carbon−fiber handguards will replace the OEM handguard and offer a substantial weight savings without sacrificing performance. FEATURES & OPTIONS
• Free Float Design • Available in multiple lengths • Octagon Carbon-Fiber Tube • Aluminum Receiver Extension
with built in Picatinny rail • Clearance to access gas block • Dimensions:
o Outside Diameter – 2” o Inside Diameter – 1.7”
• SIG 516/716 extended handguards have a cut-out exposing the gas block top rail and access to gas adjustment. The Picatinny rail does not extend beyond the gas block
PART NUMBER DESCRIPTION LENGTH WEIGHT LCH516-C Handguard for sig 516, carbine length with top rail 7.25 " 7.9 oz LCH516-CX Handguard for sig 516, extended length with top rail 13.1 " 9.8 oz LCH716-C Handguard for sig 716, carbine length with top rail 7.4 " 8.3 oz LCH716-CX Handguard for sig 716, extended length with top rail 13.1 " 10.3 oz

Page 6
Tool Box: 5/32, 3/32, 5/64, 1/8, inch hex keys
Left, right, front and back is established by placing the firearm or part/component in the shooting oriented position.
Clearing the rifle Before disassembling, ensure the rifle and magazine are completely unloaded and free of ammunition, as follows:
With the rifle pointed in the safest direction
1. Move the safety selector to the “safe” position.
Page 7
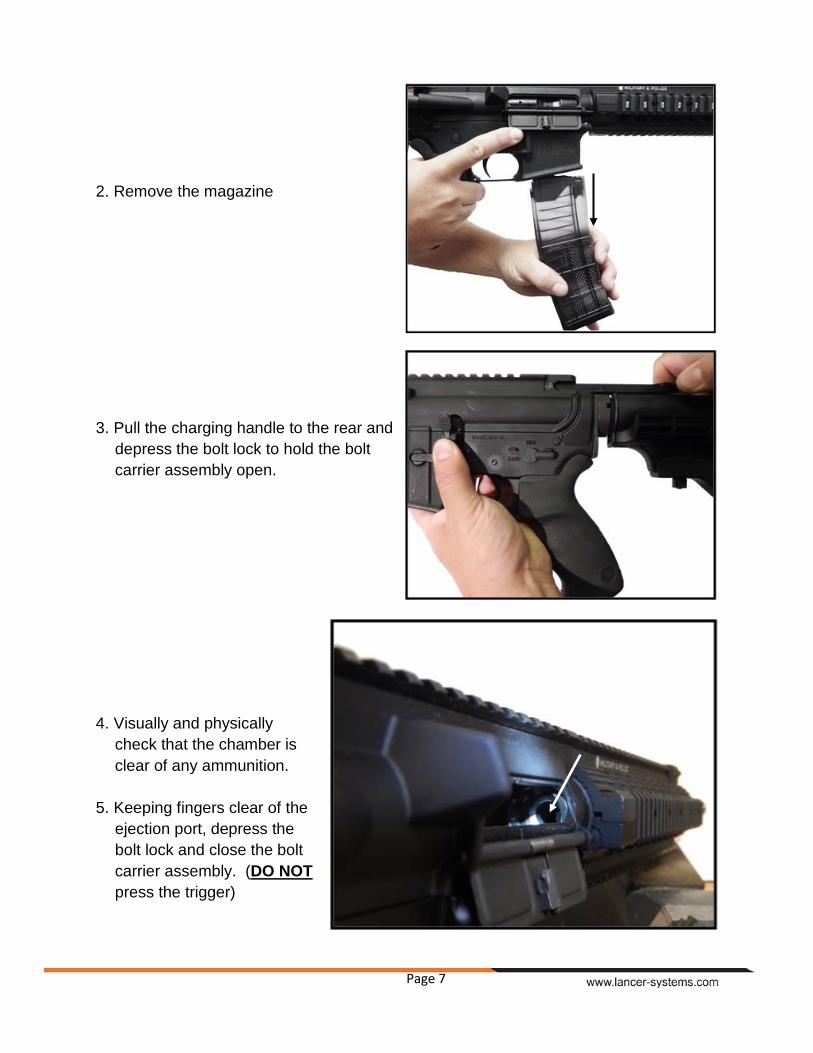
2. Remove the magazine 3. Pull the charging handle to the rear and
depress the bolt lock to hold the bolt carrier assembly open.
4. Visually and physically
check that the chamber is clear of any ammunition.
5. Keeping fingers clear of the
ejection port, depress the bolt lock and close the bolt carrier assembly. (DO NOT press the trigger)

Page 8
Removal of the original handguard. Note: Rifle may remain complete during this procedure. There is no need to field strip the rifle.
1. Using a 3/32 hex key, remove the front side screws from the underside of the handguard.
2. Repeat for the rear handguard screws. 3. Remove the handguard, now in two
pieces, from the rifle. Disassembly is complete.
Page 9
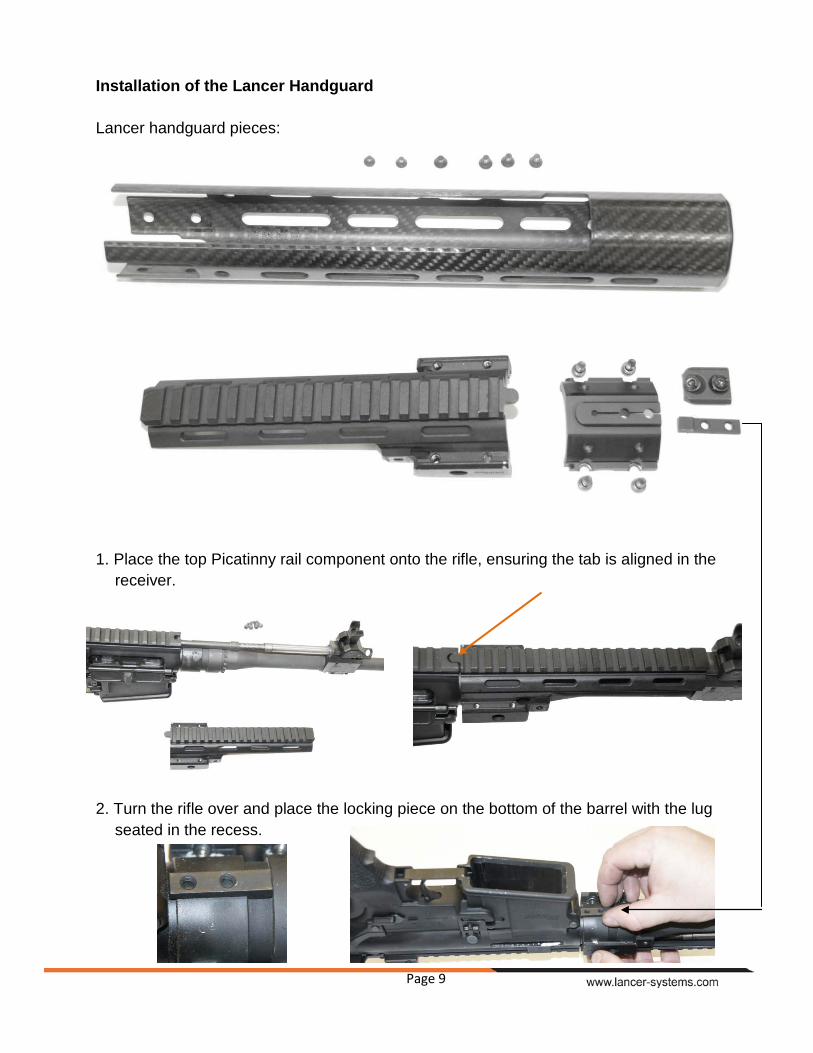
Installation of the Lancer Handguard Lancer handguard pieces:
1. Place the top Picatinny rail component onto the rifle, ensuring the tab is aligned in the
receiver.
2. Turn the rifle over and place the locking piece on the bottom of the barrel with the lug
seated in the recess.

Page 10
3. Hold the bottom collar in place. 4. Insert four screws securing the collar to the Picatinny rail component. 5. Using a 5/32 hex key, tighten the four
screws.

Page 11
6. Place the bushing on top of the bottom collar aligning the holes. The flat edge of the bushing faces the receiver.
7. Ensure the bushing, bottom collar and locking piece holes are all aligned. Insert screws
into the assembly and tighten the two screws with a 1/8 inch hex key.
8. Orient the carbon fiber handguard with the large, long opening to the top.
Front

Page 12
9. Slide the handguard over the barrel, continuing back towards the receiver.
10. Engage the upper rear edge of the
handguard into the slots of Picatinny rail component on both sides.
11. Continue the handguard to the rear, ensuring the side cutouts of the handguard startle
the lugs of the collar and Picatinny rail assembly. 12. Continue the handguard back to the receiver.

Page 13
13. Using a 3/32 inch hex key, insert and tighten the four bottom handguard screws.
14. Using a 5/64 inch hex key, insert and tighten the side screws (2) one each side.
Handguard installation is complete.