Embed Size (px)
Citation preview

Signed by:
Signature: Quality Manager - On behalf of Uni-corp Europe
Directrice de Qualité - au nom de Uni-corp
Europe S.A.R.L. Anita Tan
EC DECLARATION OF CONFORMITY / DECLARATION CE DE CONFORMITE / DECLARACIÓN DE CONFORMIDAD CE / DECLARAÇÃO
CE DE CONFORMIDADE
We, Uni-corp Europe, 33 Avenue Pierre Brossolette, 94048 Créteil Cedex, France, hereby certify that if the product described within this certificate is bought from an authorised Paclite dealer within the EEA, it conforms to the following directives: Machinery Directive 2006/42/EC, Electromagnetic Compatibility Directive 2004/108/EC (as amended by 92/31/EEC & 93/68 EEC). The physical agent (vibration) conforms with the directive 2002/44/EC. The low voltage directive 2006/95/EC, BS EN ISO 12100-1/2 Safety of machinery and associated harmonised standards, where applicable. Noise emissions conform to directive 2005/88/EC Annex VI), for machines under article 12 the notified body is TÜV Rheinland Product Safety GmbH - Am Grauen Stein - D-51105 Köln, Germany. Nous soussignons, Uni-corp Europe, 33 Avenue Pierre Brossolette, 94048 Créteil Cedex, France, certifions que si le produit décrit dans ce certificat est acheté chez un distributeur de la marque déposée “Paclite” au sein de la EEA, celui-ci est conforme aux norms CEE ci-après: Norme de la machine 2006/42/CE, Norme compatible pour l’électromagnétisme 2004/108/CE (modifie par 92/31/CEE et 93/68/CEE). Le nombre de vibrations est en accord avec la directive 2002/44/CE. Caractéristiques basse tension 2006/95/CEE, BS EN ISO 12100-1/2 , Norme de sécurité des machines et des critères associés et configurés, si applicable. Les émissions debruit sont conformes à la directive 2005/88/CE Annexe VI pour machines, article 12. L’objet mentionné est TÜV Rheinland Product Safety GmbH - Am Grauen Stein - D-51105 Köln, Allemagne. La Sociedad, Uni-corp Europe, 33 Avenue Pierre Brossolette, 94048 Créteil Cedex, France, por el presente documento certifica que si el producto descrito en este certificado es comprado a un distribuidor autorizado de Paclite en la EEA, este es conforme a las siguientes directivas: 2006/42/CE de la CEE, Directiva 2004/108/CEE sobre Compatibilidad Electromagnética (según enmiendas 92/31/CEE y 93/68 CEE). El numero de vibraciones esta de acuerdo con la Directiva 2002/44/CE. Directiva sobre Bajo Voltaje 2006/95/CEE, BS EN ISO 12100-1/2 de Seguridad de Maquinaria y Niveles armonizados estándares asociados donde sean aplicables. Emisión de Ruídos conforme a la Directiva 2005/88/CE Anexo VI para máquinas bajo articulo 12 la mencionada unidad está TÜV Rheinland Product Safety GmbH - Am Grauen Stein - D-51105 Köln, Germany. O signatário, Uni-corp Europe, 33 Avenue Pierre Brossolette, 94048 Créteil Cedex, France, pelo presente, declara que se o produto descrito neste certificado foi adquirido a um distribuidor autorizado do Paclite em qualquer pais da EEA, está em conformidade com o estabelecido nas seguintes directivas comunitárias: 2006/42/CE, Directiva de Compatibilidade Electromagnética 2004/108/CEE (conforme corrigido pelas 92/31/EEC & 93/68 EEC). O numero de vibrações está de acordo com a directiva 2002/44/CE LB. A directiva de baixa voltagem 2006/95/CEE, BS EN ISO 12100-1/2 Segurança da maquinaria e às normas harmonizadas afins se aplicáveis. As emissões de ruido respeitam e estão dentro das directivas para máquinas 2005/88/CE Anexo VI, artigo 12, sendo o organismo notificado TÜV Rheinland Product Safety GmbH - Am Grauen Stein - D-51105 Köln, Germany.
E
P
GB/US
F
PRODUCT TYPE……
MODEL……………….
SERIAL No…………..
DATE OF
MANUFACTURE…….
WEIGHT………………
TYPE DE PRODUIT….
MODELE……………...
Nº DE SERIE………….
DATE DE
FABRICATION……….
POIDS…………………
TIPO DE PRODUCTO..
MODELO……………...
Nº DE SERIE………….
FECHA DE
FABRICACIÓN……….
PESO…………………
TIPO DE PRODUCTO..
MODELO……………...
Nº DE SÉRIE………….
DATA DE
FABRIC……………….
PESO……………….…
Foreword
This manual has been written to help you operate your walk-behind floor saw safely. It is intended
primarily for dealers and operators of Paclite Equipment walk-behind floor saws. It is
recommended that you keep this manual or a copy of it with the machine so that it is readily
available for reference.
Before you operate or carry out any maintenance on this machine YOU MUST READ and
UNDERSTAND this manual.
Should you have ANY QUESTIONS about the safe use or maintenance of this machine after
reading this manual, ASK YOUR SUPERVISOR or CONTACT: Paclite Equipment on +65 6756
7688
Paclite Equipment reserves the right to change machine specification without prior notice or
obligation.
Directions with regard notations
Text in this manual to which special attention must be paid are shown in the following way:
Contents Foreword .................................................................................................................................................. 2
Safety Information ............................................................................................................................... 3-4
Environment............................................................................................................................................. 4
Machine Description ................................................................................................................................ 5
Pre-Start Checks ..................................................................................................................................... 6
Start And Stop Procedure ........................................................................................................................ 6
Operation ............................................................................................................................................. 7-8
Service and Maintenance .................................................................................................................. 9-12
Trouble Shooting ................................................................................................................................... 13
Technical Data ....................................................................................................................................... 14
Transportation and Storage ................................................................................................................... 15
Warranty ................................................................................................................................................ 16
This WARNING sign indicates a potential hazard, which if ignored could result in
the DEATH of the operator and/or those close by. WARNING
This CAUTION sign indicates a potential hazard, which if ignored, could result in
injuries to the operator and/or those close by, as well as damaging the machine.
CAUTION
Walk-behind Floor Saw Manual
3
Safety Information For your own personal protection and for the safety of those around you, please read and ensure
you fully understand the following safety information. It is the responsibility of the operator to
ensure that he/she fully understands how to operate this equipment safely. If you are unsure about
the safe and correct use of the walk-behind floor saw, consult your supervisor or Paclite
Equipment.
General Safety
The owner of this machine must observe, and also train the user of the machine to observe,
the effective labour protection laws in the country of application.
This machine is to be used for is intended application only.
This machine must only be operated by well-trained personnel.
Personal Protective Equipment (PPE) must be worn by the operator whenever the equipment
is being used.
Cordon off the work area and keep members of the public and unauthorised personnel at a
safe distance.
Make sure you know how to safely switch this machine OFF before you switch it ON in case
you run into any difficulties.
Always switch OFF the engine before servicing it.
During use, the engine becomes very hot. Always allow the engine to cool down before
touching it.
Never leave the engine running and unattended.
Never remove or tamper with any fitted guards; they are there for your own protection. If they
are damaged or missing, DO NOT USE THE MACHINE until the guard has been replaced or
repaired.
Never use a wet blade without an adequate supply of water to the blade.
Never touch or try to stop a moving baled with your hand.
Do not cut deeper than 2.5cm per pass with a dry blade.
Never touch a dry diamond blade immediately after use. Blades require several minutes to
cool the machine has been switched off.
Always switch OFF the engine before transporting it, moving it around site or servicing it.
Do not operate the machine when you are ill, feeling tired or when under the influence of
alcohol or drugs.
This machine is designed to eliminate the possible risks arising from the use of it. However,
risks DO reside, and these residual risks are not clearly recognisable and may cause personal
injury or property damage, and possibly death. If such unpredictable and unrecognisable risks
Improper maintenance can be hazardous. Read and understand this section
before you perform any maintenance, service or repairs.
CAUTION
4
become apparent, the machine must be stopped immediately, and operator or his supervisor
must take appropriate measure to eliminate such risks. It is sometimes necessary that the
manufacturer must be informed of such an event for future counter measuring.
Fuel Safety
Before re-fuelling, switch off the engine and allow it to cool.
When re-fuelling, use a proper funnel, and avoid spilling over the engine.
When re-fuelling, DO NOT smoke or allow naked flames in the area.
Spilt fuel must be made safe immediately by using sand. If fuel is spilt on your clothes, change
them.
Store fuel in an approved, purpose made container away from heat and sources of ignition.
Health & Safety
Fuel
Do not ingest fuel or inhale fuel vapors and avoid contact with your skin. Wash fuel splashes
immediately. If you get fuel in your eyes, irrigate with copious amounts of water and seek medical
attention as soon as possible.
Exhaust Fumes
PPE (Personal Protective Equipment)
Suitable PPE must be worn when using this equipment i.e. safety goggles, gloves, ear defenders,
dust mask and steel toe-capped footwear (with anti-slip soles for added protection). Wear clothing
suitable for the work you are doing. Always protect skin from contact with concrete.
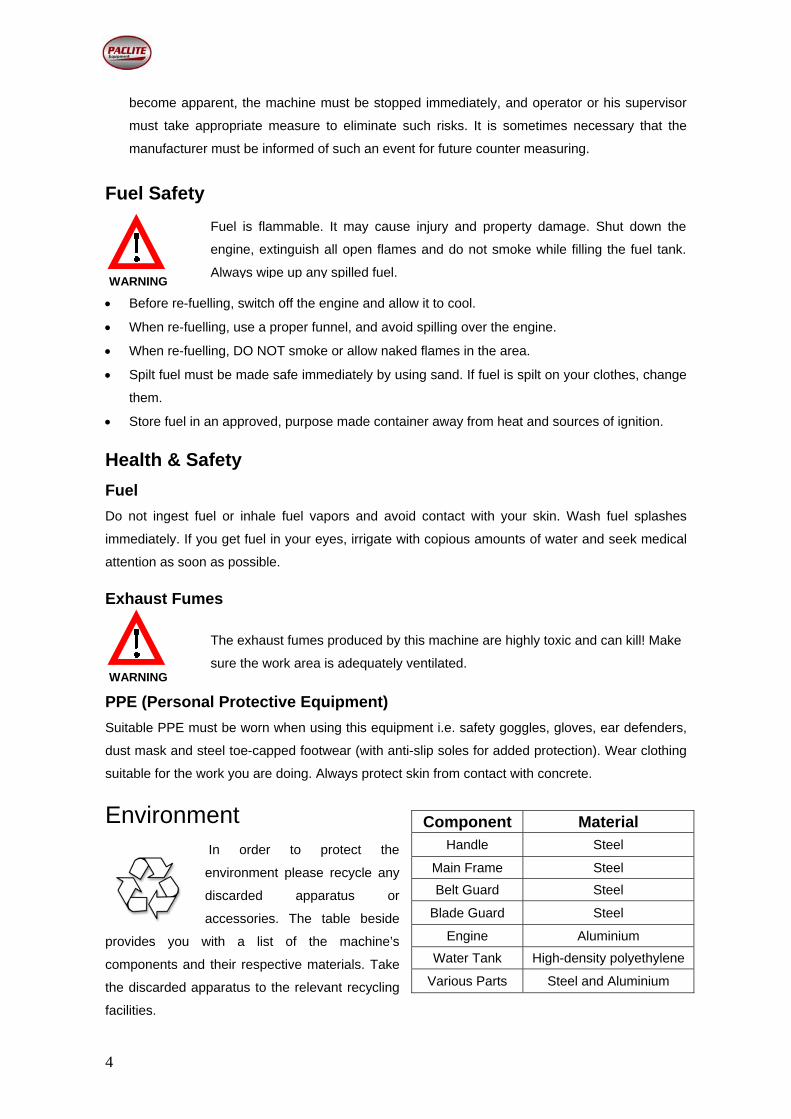
Environment In order to protect the
environment please recycle any
discarded apparatus or
accessories. The table beside
provides you with a list of the machine’s
components and their respective materials. Take
the discarded apparatus to the relevant recycling
facilities.
Component Material Handle Steel
Main Frame Steel
Belt Guard Steel
Blade Guard Steel
Engine Aluminium
Water Tank High-density polyethylene
Various Parts Steel and Aluminium
Fuel is flammable. It may cause injury and property damage. Shut down the
engine, extinguish all open flames and do not smoke while filling the fuel tank.
Always wipe up any spilled fuel.WARNING
The exhaust fumes produced by this machine are highly toxic and can kill! Make
sure the work area is adequately ventilated.WARNING
Walk-behind Floor Saw Manual
5
Machine Description
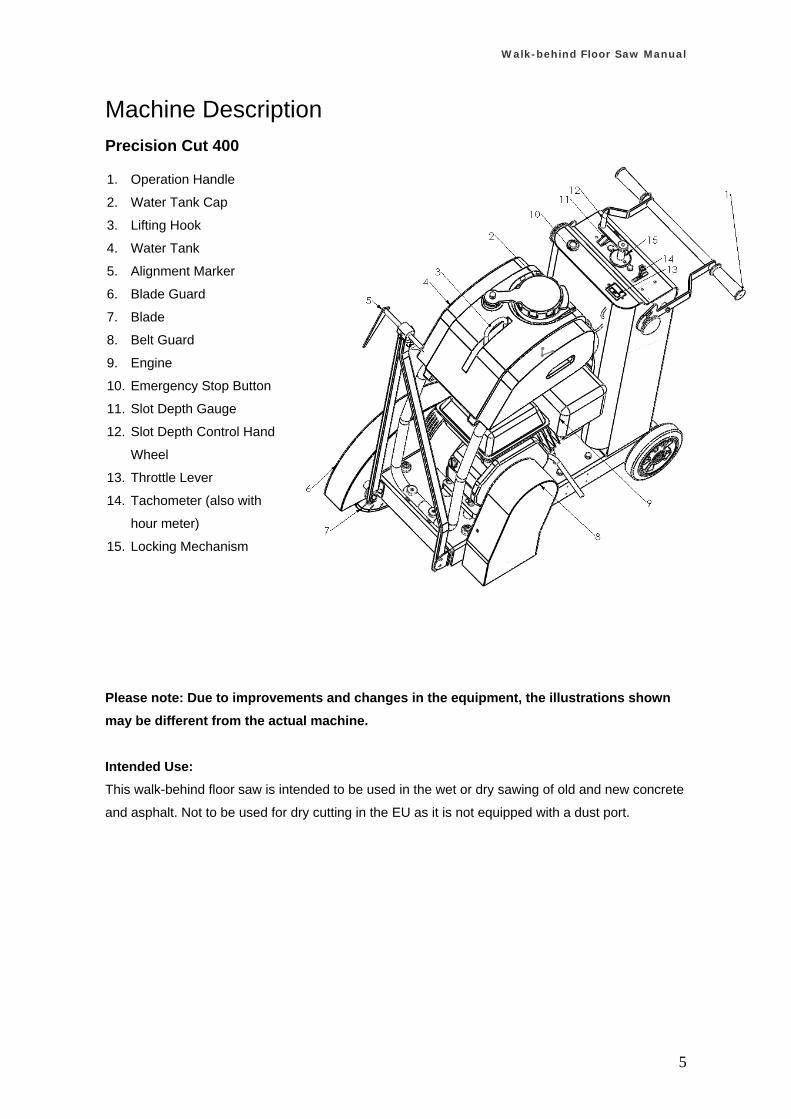
Precision Cut 400 Please note: Due to improvements and changes in the equipment, the illustrations shown
may be different from the actual machine.
Intended Use:
This walk-behind floor saw is intended to be used in the wet or dry sawing of old and new concrete
and asphalt. Not to be used for dry cutting in the EU as it is not equipped with a dust port.
1. Operation Handle
2. Water Tank Cap
3. Lifting Hook
4. Water Tank
5. Alignment Marker
6. Blade Guard
7. Blade
8. Belt Guard
9. Engine
10. Emergency Stop Button
11. Slot Depth Gauge
12. Slot Depth Control Hand
Wheel
13. Throttle Lever
14. Tachometer (also with
hour meter)
15. Locking Mechanism
6
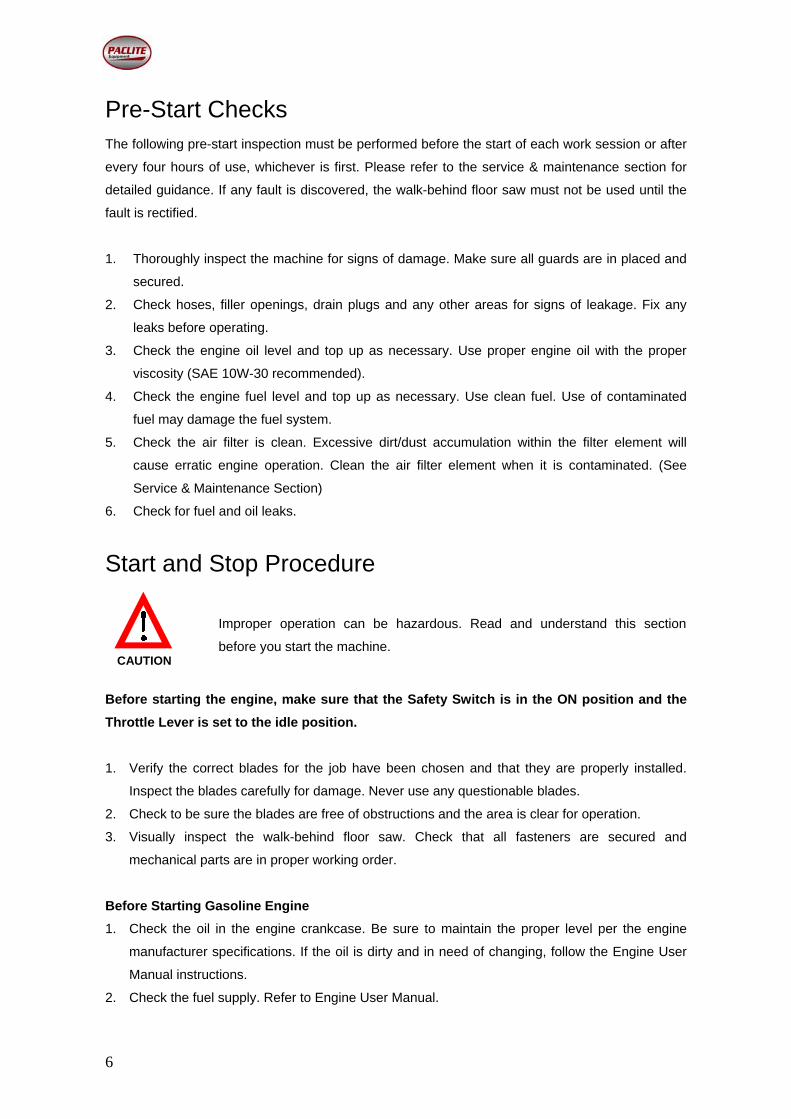
Pre-Start Checks
The following pre-start inspection must be performed before the start of each work session or after
every four hours of use, whichever is first. Please refer to the service & maintenance section for
detailed guidance. If any fault is discovered, the walk-behind floor saw must not be used until the
fault is rectified.
1. Thoroughly inspect the machine for signs of damage. Make sure all guards are in placed and
secured.
2. Check hoses, filler openings, drain plugs and any other areas for signs of leakage. Fix any
leaks before operating.
3. Check the engine oil level and top up as necessary. Use proper engine oil with the proper
viscosity (SAE 10W-30 recommended).
4. Check the engine fuel level and top up as necessary. Use clean fuel. Use of contaminated
fuel may damage the fuel system.
5. Check the air filter is clean. Excessive dirt/dust accumulation within the filter element will
cause erratic engine operation. Clean the air filter element when it is contaminated. (See
Service & Maintenance Section)
6. Check for fuel and oil leaks.
Start and Stop Procedure
Before starting the engine, make sure that the Safety Switch is in the ON position and the
Throttle Lever is set to the idle position.
1. Verify the correct blades for the job have been chosen and that they are properly installed.
Inspect the blades carefully for damage. Never use any questionable blades.
2. Check to be sure the blades are free of obstructions and the area is clear for operation.
3. Visually inspect the walk-behind floor saw. Check that all fasteners are secured and
mechanical parts are in proper working order.
Before Starting Gasoline Engine
1. Check the oil in the engine crankcase. Be sure to maintain the proper level per the engine
manufacturer specifications. If the oil is dirty and in need of changing, follow the Engine User
Manual instructions.
2. Check the fuel supply. Refer to Engine User Manual.
Improper operation can be hazardous. Read and understand this section
before you start the machine. CAUTION
Walk-behind Floor Saw Manual
7
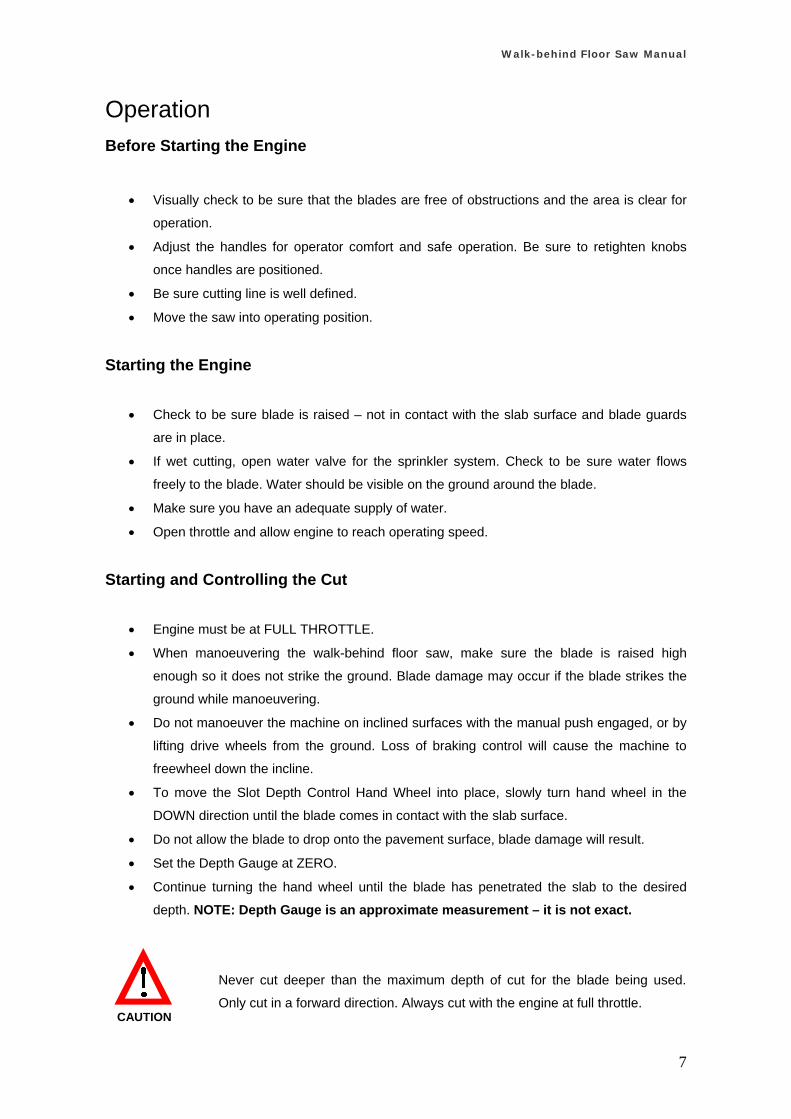
Operation
Before Starting the Engine
Visually check to be sure that the blades are free of obstructions and the area is clear for
operation.
Adjust the handles for operator comfort and safe operation. Be sure to retighten knobs
once handles are positioned.
Be sure cutting line is well defined.
Move the saw into operating position.
Starting the Engine
Check to be sure blade is raised – not in contact with the slab surface and blade guards
are in place.
If wet cutting, open water valve for the sprinkler system. Check to be sure water flows
freely to the blade. Water should be visible on the ground around the blade.
Make sure you have an adequate supply of water.
Open throttle and allow engine to reach operating speed.
Starting and Controlling the Cut
Engine must be at FULL THROTTLE.
When manoeuvering the walk-behind floor saw, make sure the blade is raised high
enough so it does not strike the ground. Blade damage may occur if the blade strikes the
ground while manoeuvering.
Do not manoeuver the machine on inclined surfaces with the manual push engaged, or by
lifting drive wheels from the ground. Loss of braking control will cause the machine to
freewheel down the incline.
To move the Slot Depth Control Hand Wheel into place, slowly turn hand wheel in the
DOWN direction until the blade comes in contact with the slab surface.
Do not allow the blade to drop onto the pavement surface, blade damage will result.
Set the Depth Gauge at ZERO.
Continue turning the hand wheel until the blade has penetrated the slab to the desired
depth. NOTE: Depth Gauge is an approximate measurement – it is not exact.
Never cut deeper than the maximum depth of cut for the blade being used.
Only cut in a forward direction. Always cut with the engine at full throttle. CAUTION
8
Machine speed is controlled by using the throttle lever.
Actual cutting speed is determined by type of blade, material to be cut and depth of cut.
Do not force the blade while cutting. Use proper forward speed and allow the blade to cut
and not climb out of the cut or stall in the cut.
NOTE: If while cutting the front wheels start to lift, reduce forward speed.
Always cut in a straight line. Do not force a turn in the cutting line as blade warpage or
breakage may result.
If the blade stalls in the cut and stops power source
Raise the blade completely out of the cut.
Check the blade flanges and nut/bolt, to be sure they are tight.
Remove/open guard and secure.
To Stop Cutting
Stop moving the machine forward.
Raise the blade in the UP direction to be clear of the cut.
Turn off the water valve.
Return the Throttle Lever to the idle position and allow to cool
Shut off the engine.
Do not leave the machine until the blade has completely stopped.
Make sure you choke the wheels to prevent the machine from rolling.
Parking the Walk-behind Floor Saw
The parking brake on the right-hand side rear wheel is designed to hold the machine on a slope of
not more than 10 degrees with the rear wheels facing downhill (maximum weight should be on the
braked wheels).
Engaging the Parking Brake
Pull the lever toward the centre of the machine and rotate upwards 180 degrees.
Disengaging the Parking Brake
Pull the lever toward the centre of the machine. Then rotate downwards 180 degrees and
release to lock in position.
For positioning the saw, the maximum forward speed is 60mm per minute. For
safety reasons, when in reverse, move at a slow walking pace. DO NOT
FORCE IT TO GO FASTER. CAUTION
Walk-behind Floor Saw Manual
9
Service and Maintenance
The Paclite Equipment Walk-behind Floor Saws are designed to give many years of trouble free
operation. It is, however, important that the simple regular maintenance listed in this section is
carried out. It is recommended that an approved Paclite Equipment dealer carry out all major
maintenance and repairs. Always use genuine Paclite Equipment replacement parts, the use of
spurious parts may void your warranty. Before any maintenance is carried out on the machine,
switch off the engine and disconnect the HT lead from the spark plug. Always set the machine on
level ground to ensure any fluid levels will be correctly read. Only use recommended oils.
Before Changing Blades
Do not use warped, twisted, or out-of-balance blades.
Unbalanced blades will wear excessively, vibrate and damage both arbor shaft and
bearings.
Make sure you have the proper blade for the job. Determine the proper hardness and
composition of the slab. Give your dealer complete information including the desired depth
of the cut and the length of the cut. If in doubt, contact the blade manufacturer. Never
exceed the maximum operating speed of the blade.
Before carrying out any maintenance on this machine ensure the engine has
been switched off. The engine should also be allowed to cool as parts of the
engine become hot during use. CAUTION
Inspect all blades carefully before installing. Check for cracks, loose segments
and oversized, worn or out-of-round arbor holes. Do not use any questionable
blades since serious injury and/or damage to property could result. WARNING
For safety reasons, Paclite Equipment does not recommend the use of abrasive
blades. Abrasive blades can break and cause serious personal injury to the
operator and/or bystanders. If abrasive blades are used by choice, only use
those which are marked as reinforced abrasive blades WARNING
Do not remove or lift the blade guard unless the blade has stopped completely
and the engine is off.
WARNING
10
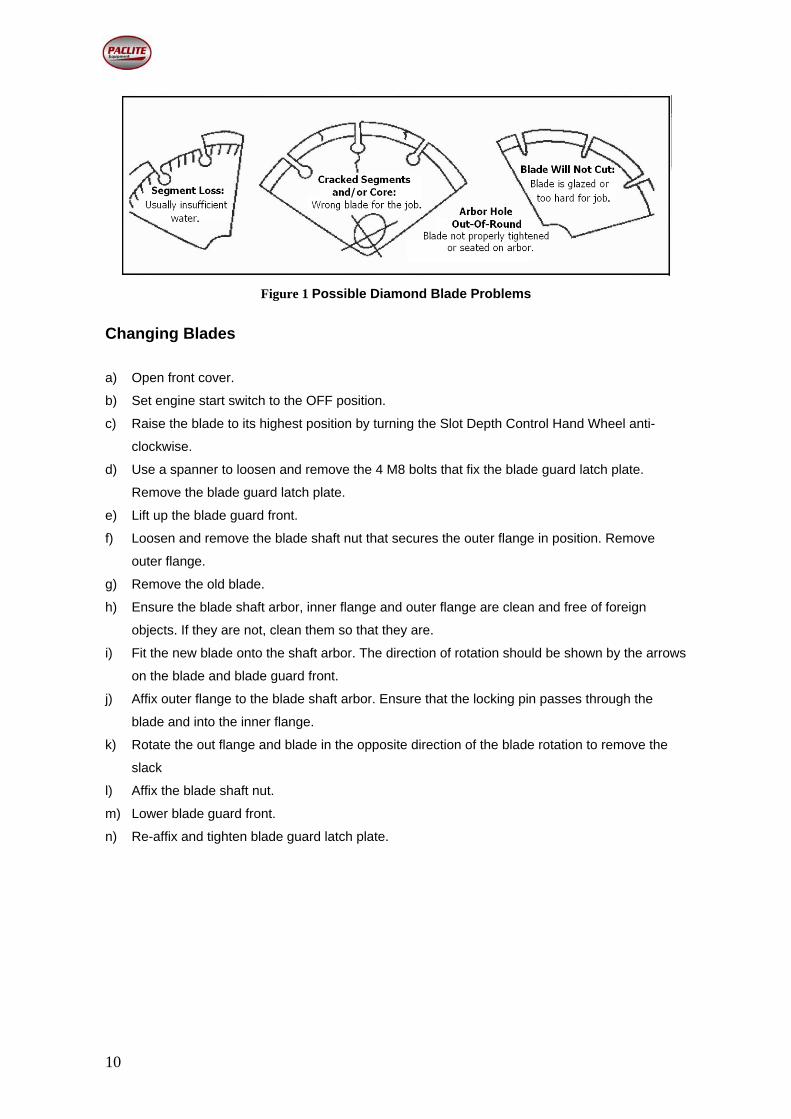
Figure 1 Possible Diamond Blade Problems
Changing Blades
a) Open front cover.
b) Set engine start switch to the OFF position.
c) Raise the blade to its highest position by turning the Slot Depth Control Hand Wheel anti-
clockwise.
d) Use a spanner to loosen and remove the 4 M8 bolts that fix the blade guard latch plate.
Remove the blade guard latch plate.
e) Lift up the blade guard front.
f) Loosen and remove the blade shaft nut that secures the outer flange in position. Remove
outer flange.
g) Remove the old blade.
h) Ensure the blade shaft arbor, inner flange and outer flange are clean and free of foreign
objects. If they are not, clean them so that they are.
i) Fit the new blade onto the shaft arbor. The direction of rotation should be shown by the arrows
on the blade and blade guard front.
j) Affix outer flange to the blade shaft arbor. Ensure that the locking pin passes through the
blade and into the inner flange.
k) Rotate the out flange and blade in the opposite direction of the blade rotation to remove the
slack
l) Affix the blade shaft nut.
m) Lower blade guard front.
n) Re-affix and tighten blade guard latch plate.
Walk-behind Floor Saw Manual
11
Check Engine Oil before Each Operation
Refer to the Engine User Manual for specific instructions.
Change Engine Oil Every 50 Hours of Operation (sooner if necessary)
Inspect Belts
Remove the belt guard, then check the belt tension by placing light finger pressure on the
top of the belt, as near as possible to the centre between the engine drive and gearbox
pulley. The belt should deflect by between 7mm ~10mm.
On new machines, after installation of new belts, adjust the belt tension after the first 4
hours, then as necessary.
To change the belts:
Remove the belt guard and loosen screws on drive idler fixing plate, which will reduce the
belt tension enabling the removal of the drive belt.
Install the new belt and loosely tighten (the plate should still be able to move) the screws
on the drive idler fixing plate.
Using a spanner on the tightening screw, apply torque to the drive idler so that the drive
idler is forced against the drive belt. Ideal torque is 50Nm. If you have no torque wrench
then the belt should deflect around 7-8mm at its slackest point.
Once the torque of the belt is set, tighten the centre slot bolt to hold the position of the idler
and then tighten the remaining bolts.
Re-affix the belt guard.
Water Tank
Remove the water tank cap by turning anti-clockwise.
Fill water tank with water only.
Refit the cap by turning clockwise.
The flow of water from this machine is designed only to suppress airborne
concrete dust and should therefore only be used with DRY cutting diamond
blades. CAUTION
Never fill the water tank with any flammable liquids or gasoline as serious injury
or death could occur. CAUTION
12
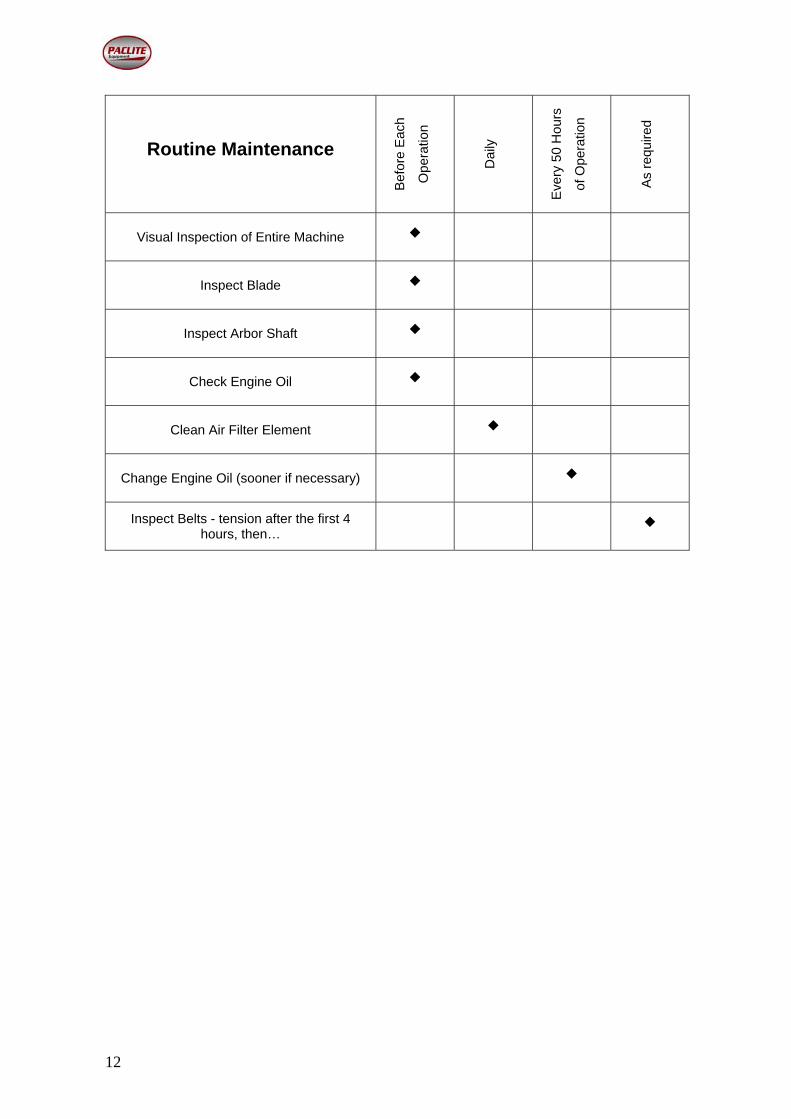
Routine Maintenance
Bef
ore
Eac
h
Ope
ratio
n
Dai
ly
Eve
ry 5
0 H
ours
of O
pera
tion
As
requ
ired
Visual Inspection of Entire Machine ◆
Inspect Blade ◆
Inspect Arbor Shaft ◆
Check Engine Oil ◆
Clean Air Filter Element ◆
Change Engine Oil (sooner if necessary) ◆
Inspect Belts - tension after the first 4 hours, then…
◆

Walk-behind Floor Saw Manual
13
Trouble Shooting
Problems Possible Causes Countermeasures
Engine will not start.
a. No fuel getting to engine.
b. Engine switched off.
c. Spark plug fouled.
d. Engine cold.
e. Honda Engine flooded.
a. Open fuel tap. Fill fuel
tank.
b. Switch engine on.
c. Clean, check and reset
plug gap.
d. Close choke.
e. Open choke, fully open
throttle, pull recoil starter
until engine fires.
Blade not turning. a. Belts incorrectly tensioned.
b. Belts broken.
a. Re-tension belts.
b. Replace belts
Excessive noise, vibration
or wobble from blade.
a. Check condition of arbor shaft
bearings.
b. Check Drive Pin for damage.
c. Check tightness of arbor shaft
nut.
d. Check condition of blade
flange.
e. Check blade for signs of
damage.
a. Replace as necessary.
b. Replace Drive Pin.
c. Tighten as necessary.
d. Replace as necessary.
e. Replace blade.
14
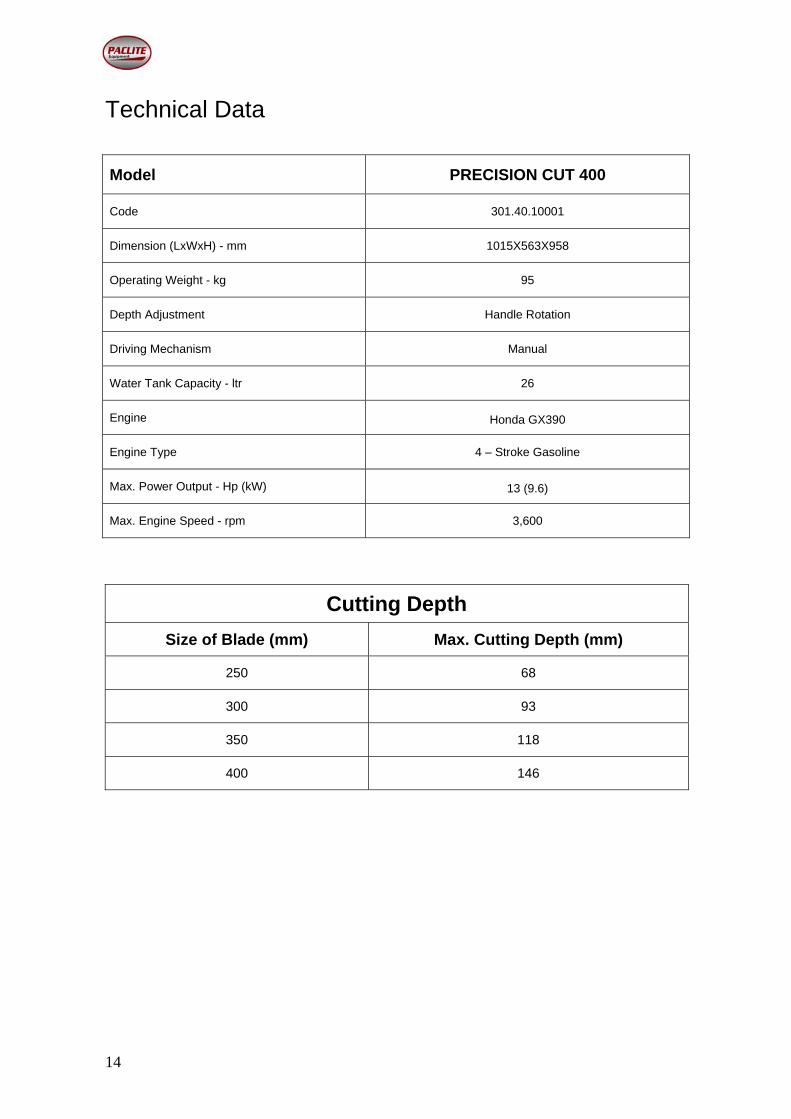
Technical Data
Model PRECISION CUT 400
Code 301.40.10001
Dimension (LxWxH) - mm 1015X563X958
Operating Weight - kg 95
Depth Adjustment Handle Rotation
Driving Mechanism Manual
Water Tank Capacity - ltr 26
Engine Honda GX390
Engine Type 4 – Stroke Gasoline
Max. Power Output - Hp (kW) 13 (9.6)
Max. Engine Speed - rpm 3,600
Cutting Depth
Size of Blade (mm) Max. Cutting Depth (mm)
250 68
300 93
350 118
400 146
Walk-behind Floor Saw Manual
15
Transportation and Storage
For long-term storage, empty the fuel in the carburetor by running the engine with the fuel tap
closed.
The chemical composition of the fuel will deteriorate after prolonged storage. When the
machine needs to be stored for a long time, remove all the fuel from the fuel tank and the
water from the water tank. Also remove the fuel from the float chamber of the carburetor by
draining the fuel out from the drain plug.
Wash away asphalt/concrete accumulated on the walk-behind floor saw. Clean the engine
mounting plate. Apply a light coat of oil on arbor shaft, blade retaining cap and backing plate to
prevent rust formation. Cover the machine and store it in a dry place.
Always use the lifting hook for hoisting purposes. Use proper hoisting equipment and
techniques.
Remove the blade before transporting or hoisting. Serious personal injury or damage to the
equipment can result. Do not transport the machine with the engine running.
Be certain the area surrounding the machine is clear of personnel before hoisting.
Extreme Care must be taken when transporting, loading or unloading this
machine CAUTION
16
Warranty
Your new Paclite Walk-behind Floor Saw is warranted to the original purchaser for a period of one-
year (12 months) from the original date of purchase.
The Paclite Equipment warranty covers defects in design, materials and workmanship.
The following are not covered under the Paclite Equipment warranty:
1. Damage caused by abuse, misuse, dropping or other similar damage caused by or as a result
of failure to follow assembly, operation or user maintenance instructions.
2. Alterations, additions or repairs carried out by persons other than Paclite Equipment or their
recognised agents.
3. Transportation or shipment costs to and from Paclite Equipment or their recognised agents, for
repair or assessment against a warranty claim, on any machine.
4. Materials and/or labour costs to renew, repair or replace components due to fair wear and tear.
5. The engine, air filter and the engine spark plug.
Paclite Equipment and/or their recognised agents, directors, employees or insurers will not be held
liable for consequential or other damages, losses or expenses in connection with or by reason of
or the inability to use the machine for any purpose.
Warranty Claims
All warranty claims should firstly be directed to Uni-corp Europe, either by telephone, by fax, by
email, or in writing.
For warranty claims:
Uni-corp Europe S.A.R.L. / Paclite Equipment,
12, Avenue des Coquelicots 94385 Bonneuil- sur -Marne France
FRANCE
Tel +33 1 49 56 02 82 /Fax. +33 1 43 99 19 50
Email: [email protected]

Uni-corp Europe S.A.R.L.Paclite Equipment 12, Avenue des Coquelicots 94385 Bonneuil- sur -MarneFRANCE
+33 1 49 56 02 82
[email protected] paclite-equip.com
+33 43 99 19 50