Embed Size (px)
Citation preview
Copyright © Oracle, 2010.. All rights reserved.
Practice - Viewing and Creating Site Attribute Information SITE HUB PARTNER TRAINING.DOC Page 1 of 21 Rev 1
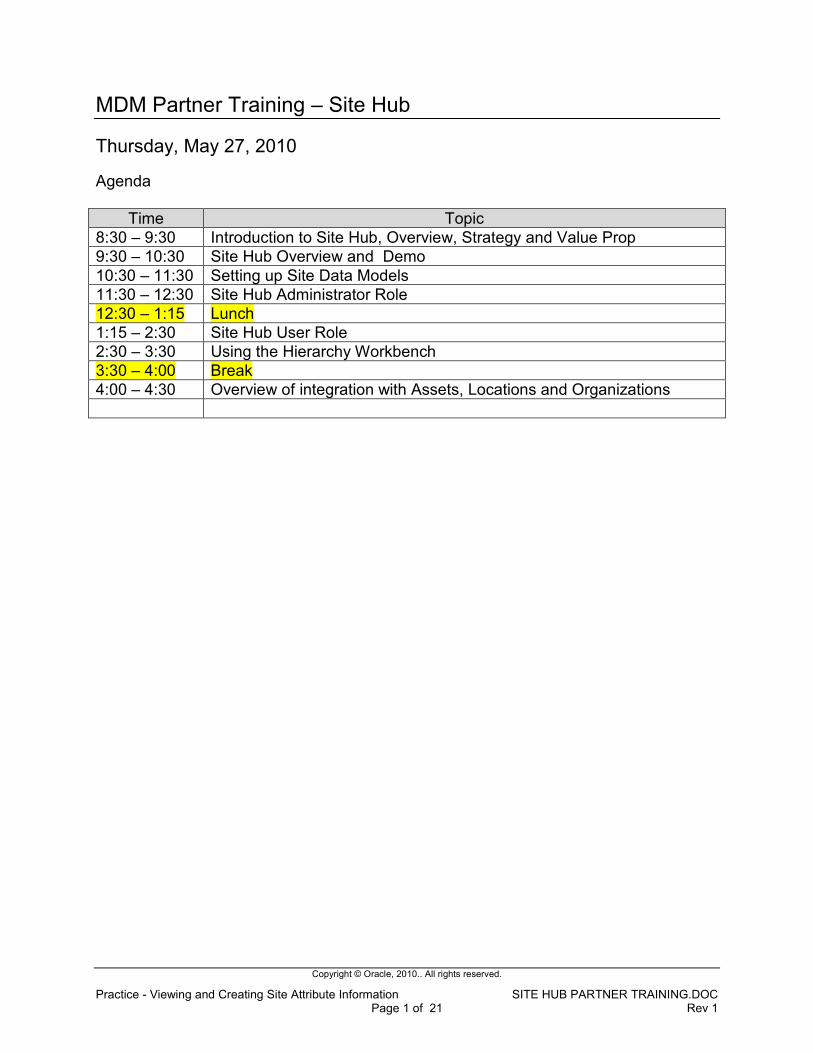
MDM Partner Training – Site Hub
Thursday, May 27, 2010
Agenda
Time Topic
8:30 – 9:30 Introduction to Site Hub, Overview, Strategy and Value Prop
9:30 – 10:30 Site Hub Overview and Demo
10:30 – 11:30 Setting up Site Data Models
11:30 – 12:30 Site Hub Administrator Role
12:30 – 1:15 Lunch
1:15 – 2:30 Site Hub User Role
2:30 – 3:30 Using the Hierarchy Workbench
3:30 – 4:00 Break
4:00 – 4:30 Overview of integration with Assets, Locations and Organizations
Copyright © Oracle, 2010.. All rights reserved.
Practice - Viewing and Creating Site Attribute Information SITE HUB PARTNER TRAINING.DOC Page 2 of 21 Rev 1
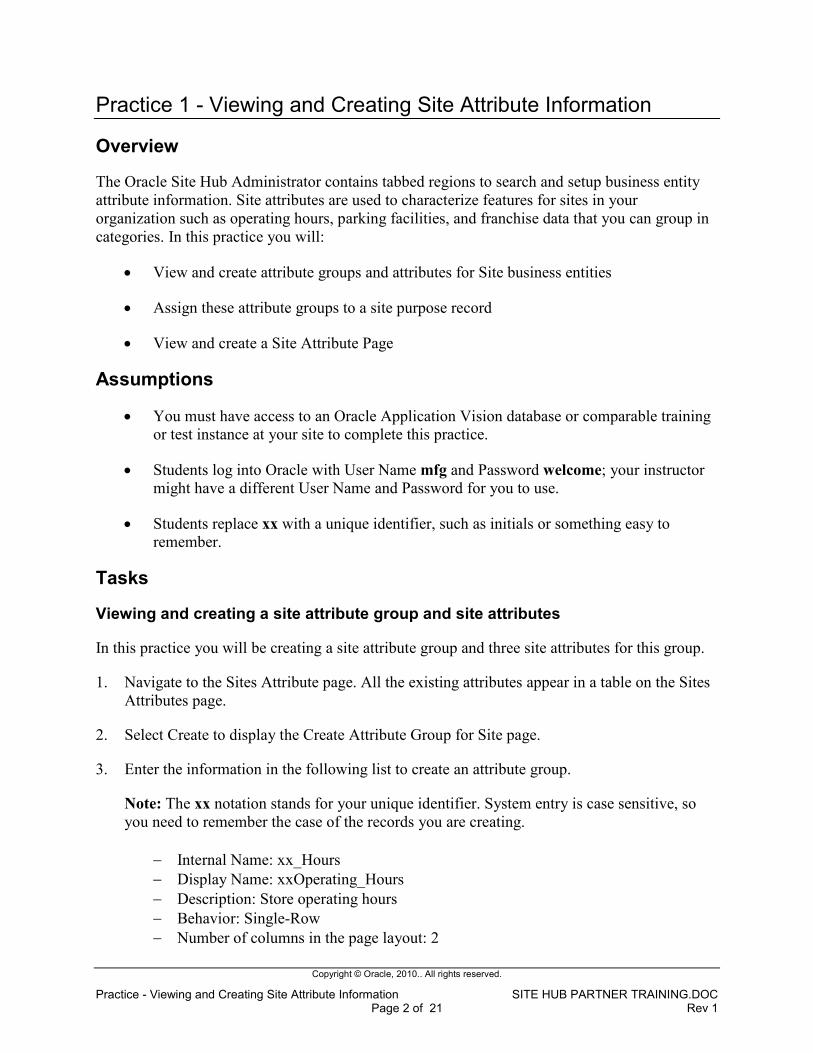
Practice 1 - Viewing and Creating Site Attribute Information
Overview
The Oracle Site Hub Administrator contains tabbed regions to search and setup business entity
attribute information. Site attributes are used to characterize features for sites in your
organization such as operating hours, parking facilities, and franchise data that you can group in
categories. In this practice you will:
• View and create attribute groups and attributes for Site business entities
• Assign these attribute groups to a site purpose record
• View and create a Site Attribute Page
Assumptions
• You must have access to an Oracle Application Vision database or comparable training
or test instance at your site to complete this practice.
• Students log into Oracle with User Name mfg and Password welcome; your instructor
might have a different User Name and Password for you to use.
• Students replace xx with a unique identifier, such as initials or something easy to
remember.
Tasks
Viewing and creating a site attribute group and site attributes
In this practice you will be creating a site attribute group and three site attributes for this group.
1. Navigate to the Sites Attribute page. All the existing attributes appear in a table on the Sites
Attributes page.
2. Select Create to display the Create Attribute Group for Site page.
3. Enter the information in the following list to create an attribute group.
Note: The xx notation stands for your unique identifier. System entry is case sensitive, so
you need to remember the case of the records you are creating.
− Internal Name: xx_Hours
− Display Name: xxOperating_Hours
− Description: Store operating hours
− Behavior: Single-Row
− Number of columns in the page layout: 2

Copyright © Oracle, 2010.. All rights reserved.
Practice - Viewing and Creating Site Attribute Information SITE HUB PARTNER TRAINING.DOC Page 3 of 21 Rev 1
4. Select Apply and Add Attributes to display the Create Attribute page.
5. Enter the data in the following table to create attributes for this attribute group just created.
Use the default of not enabled for the Required and Indexed check boxes.
Internal
Name
Display
Name
Seq Data
Type
Column Enable Display
As
xx_start_time xx_start_time 10 Char C_EXT_ATTR1 Yes Text
Field
Select Apply and Add Another
xx_close_time xx_close_time 20 Char C_EXT_ATTR2 Yes Text
Field
Select Apply and Add Another
xx_holiday_hours xx_holiday_hours 30 Char C_EXT_ATTR3 Yes Text
Field
Select Apply
After you select Apply, the Attribute Group Details page appears displaying your new
record, and the associated attributes. View the details of your group record and its attributes.
Creating a site attribute group by copying a record
In this practice you will be creating a new site attribute group by copying and renaming an
existing record, and associating attributes to this new record.
1. Navigate to the Sites Attributes.
2. Select Copy for the Mall Stores attribute group. The Create Attribute Group for Site page
displays.
3. Enter the following values in these fields, where xx stands for your unique identifier:
− Internal Name: xx_retail_outlets
− Display Name: xxMall Stores
4. Save your work, the Attribute Group Details page displays.
You can delete or add new attributes to this group. For this practice we will leave the
attributes as they are.
Copyright © Oracle, 2010.. All rights reserved.
Practice - Viewing and Creating Site Attribute Information SITE HUB PARTNER TRAINING.DOC Page 4 of 21 Rev 1
Assigning a site purpose to attribute groups
In this practice you will be assigning a site purpose record to the two newly created attribute
groups.
1. Navigate to the Sites Assignments page.
2. Select Retail Store in the site Purpose field, and select Go. All the attribute groups assigned
to this site purpose appear on the page.
3. Select Add Attribute Groups to display attribute groups without assignments to this purpose.
4. Select the new attribute groups you just created, xxOperating Hours and xxMall Stores, and
select Apply.
Viewing and creating a Site Attribute Page
In this practice you will create attribute page data, and assign the attribute groups you created to
this attribute page.
1. Navigate to the Sites Assignments page, select the Retail Store purpose value, and select Go.
2. Select the Attributes Page tab.
The existing attribute pages created for the Retail Store site purpose appear on the page.
You can select records for editing or deletion in the table.
3. Select Create Page to display the Create Site Page page.
4. Enter the following values to create a Site Attribute page:
− Display Name: xxSite Page
− Internal Name: xx_site_info
− Description: xxSite Info page
− Basic Information Sequence: Instructor will assign
− Attribute Group Sequence: 10
− Attribute Group Display Name: xxMall Stores
5. Select Add Another Row and select:
− Attribute Group Sequence: 20
− Attribute Group Display Name: xxOperating Hours
6. Save your work
Copyright © Oracle, 2010.. All rights reserved.
Practice - Viewing and Creating Site Attribute Information SITE HUB PARTNER TRAINING.DOC Page 5 of 21 Rev 1
Practice 2- Setting an Attribute Page for the Map Display
Overview
The Info Window tabbed region of the Map Preferences page enables you to select attribute
pages for a site, location, and trade area group to display on the site map. In this practice you
will:
• Associate a Trade Area Group record with a Trade Area Group Attribute page.
Assumptions
• Students replace xx with a unique identifier, such as initials or something easy to
remember.
Tasks
Associating a trade area group with a trade area group attribute page
In this practice you will be associating the Trade Area Group and Trade Area Group Attribute
page you created for viewing on the site map.
1. Navigate to the Site Map Preferences page, the Info Window tabbed region.
2. In the Entity field, select Trade Area.
The Info Window displays any Trade Area Group records already associated to attribute
pages.
3. Add the following information to create a new record:
− Trade Area Group: xxRetail
− Attribute Page: xx Retail Trade Info
3. Save your work.
.
Copyright © Oracle, 2010.. All rights reserved.
Practice - Viewing and Creating Site Attribute Information SITE HUB PARTNER TRAINING.DOC Page 6 of 21 Rev 1
Practice 3 - Viewing Search Criteria and Results Formats
Overview
You can create different search criteria for different business processes, personalize criteria, and
use a context for the format. Different results formats enable specific attributes to be included in
the result. In this practice you will:
• View search criteria formats
• View results formats
Tasks
Viewing search criteria formats
You can create different search criteria for different business functions in your organization such
as retail store, distribution, or manufacturing processes.
1. Navigate to the Search Criteria page.
2. In the Purpose field, select Corporate Office Site, and select Go.
The two search criteria formats created display in the table.
3. Select the record, Age & Condition Search, and choose Edit.
View the attributes listed here including Legal Entity, Tenure, Last Remodel Date, and so
on. These attirbutes are useful for a search on the age and condition of site buildings.
4. Cancel to return to the Search Criteria page, and select the record, Vision Corporate Office
Sites Search.
4. Choose Edit.
View the different attributes listed for this earch.
Viewing search results formats
When creating results formats, select specific attributes to be included in the result set.
1. Navigate to the Results Format page.
2. In the Purpose field, select Real Estate, and select Go
3. Select the record, Vision Lease Renegotiation Display, and choose Edit.
Copyright © Oracle, 2010.. All rights reserved.
Practice - Viewing and Creating Site Attribute Information SITE HUB PARTNER TRAINING.DOC Page 7 of 21 Rev 1
Attribute column values are selected in the Available Columns box, and moved to the
Selected Columns box. You can search for attribute column values by selecting values in
the following fields: Attribute Name, Selected Contexts, and Attribute Group.
4. You have the option to customize your format by renaming the attribute columns. Select
Rename Columns.
The Rename Columns page displays the original column names of the records selected. You
can enter new values in the New Column Name fields.
Copyright © Oracle, 2010.. All rights reserved.
Practice - Viewing and Creating Site Attribute Information SITE HUB PARTNER TRAINING.DOC Page 8 of 21 Rev 1
Practice 4- Creating Site Records
Overview
The Create Site page provides several methods to create records. You can save your record after
imputing basic information, or continue to add attribute and attachment detail. Depending on
specific values added and associations with other Oracle products, certain regions are visible in
the saved record. In this practice you will:
• Create a site record manually
• Create a site record by copying another record
• Create a site record using a template
Assumptions
• Students replace xx with a unique identifier, such as initials or something easy to
remember.
Tasks
Creating a site record manually
In this practice you will be creating a site record using manual data entry.
1. Navigate to the Create Site page.
2. Choose New Site, and then select Create to display the Create Site: Basic Information page.
3. Enter the following information.
Note: The xx notation stands for your unique identifier.
− Number: xxCA2025
− Name: xxClothing Store
− Type: Internal
− Status: Active
− Brand Name: Brand One
− Legal Entity: Vision Corporation
Primary Address Region
− Country: United States
− Address Line 1:Instructor will assign
− City: Instructor will assign
− State: Instructor will assign
− Postal Code: Instructor will assign
Copyright © Oracle, 2010.. All rights reserved.
Practice - Viewing and Creating Site Attribute Information SITE HUB PARTNER TRAINING.DOC Page 9 of 21 Rev 1
4. Select Retail Store Site Purpose, and select Continue.
The Create Sites: Detail Information page displays; it is used to associate attribute pages and
attachments with site records.
5. In the Attributes tab, select the Site Entity and the Site Attribute Page name you created—
xxSite Page.
6. Select Go.
7. Enter values in the Site Attribute Page; in the xxMall Stores and xxOperating Hours regions:
− Store Name: Select any value, you can search for records using the letters B, G, or S
− Details: View Site
− Enter your own values for the other fields.
8. Select Location in the Entity field.
9. Select the xxWeather page.
9. Enter values in the fields on this page:
− xxtemperature: 70
− xx_average_rainfall: 18
10. Select the xxLoc Info page.
11. Enter information in the Site Status, Broke, and roker email fields on this page. Use any
values.
12. Select Apply to save your information and create this site record.
Creating a site record by copying an existing record
In this practice you will be creating a site record by using values from another existing site
record.
1. Navigate to the Create Site page.
2. Choose Copy an Existing Site, and then enter the number S94403-900.
3. Select Create to display the Create Site: Basic Information page.
The values from the original site are copied into this record including Type, Status, Brand,
Calendar, Entity, External Party, Country, and Purpose fields. All these values can be
changed.
Copyright © Oracle, 2010.. All rights reserved.
Practice - Viewing and Creating Site Attribute Information SITE HUB PARTNER TRAINING.DOC Page 10 of 21 Rev 1
You must enter unique new values in the Number and Name fields.
4. Enter values in the following fields:
− Number: Use your unique identifier as the prefix, and any other values following
that identifier.
− Name: Any value you want to use.
− Address: Your home address.
5. Choose Select Attribute Groups for Copy.
The Basic Information: Copy Attribute Groups page enables you to copy available attribute
groups. By default, all available attribute groups are enabled for copying based the Purpose
and Country specified and appear in the Selected Attribute Groups box.
6. Move all the records from the Selected box to the Available box.
7. Move the following records from the Available box, back to the Selected box.
− xxMall Stores
− Space Utilization
− Selling Hours
− Parking
8. Select Apply to save your work, the Create Site: Basic Information page refreshes.
9. Select Save to create a new site record.
Creating a site record using a template
In this practice you will be creating a site record using a site template that was previously created
for your organization.
1. Navigate to the Create Site page.
2. Choose Create from Existing Templates, and then select Create to display the Create
Template: Template Selection page.
3. In the Country field, select United States.
4. In the Templates section, select VO Corporate Office Template.
5. Select Continue to display the Create Site: Basic Information page.
6. Enter values in the following fields:
− Number: Use your unique identifier as the prefix, and any other values following
that identifier.
− Name: Any value you want to use.
− Address: Another address you know.
7. Change the purpose to Retail Store.
Copyright © Oracle, 2010.. All rights reserved.
Practice - Viewing and Creating Site Attribute Information SITE HUB PARTNER TRAINING.DOC Page 11 of 21 Rev 1
8. Select Set as Primary.for the Retail Store purpose.
9. Select Continue to display the Create Site: Detail Information page.
10. In the Attributes tabbed region, select the Location Entity value, and the xxLoc Info page.
11. Enter information in the following fields:
− Site Status: Select any status
− Broker: Enter any name
− Broker email: Enter any email address
11. Select Finish to create your site record.

Copyright © Oracle, 2010.. All rights reserved.
Practice - Viewing and Creating Site Attribute Information SITE HUB PARTNER TRAINING.DOC Page 12 of 21 Rev 1
Practice 5 -Importing and Exporting Records
Responsibility: Site Hub
You can export attribute and site records from other systems, and import those records into Site
Hub using a spreadsheet. You first create import format templates, and then select a format
according to context values. The data is then moved into Site Hub.
1. Navigate to the Import Format page.
� (N) Site Management Administrator > Sites > Import Format
2. Select Retail Store in the Purpose field, and select Go.
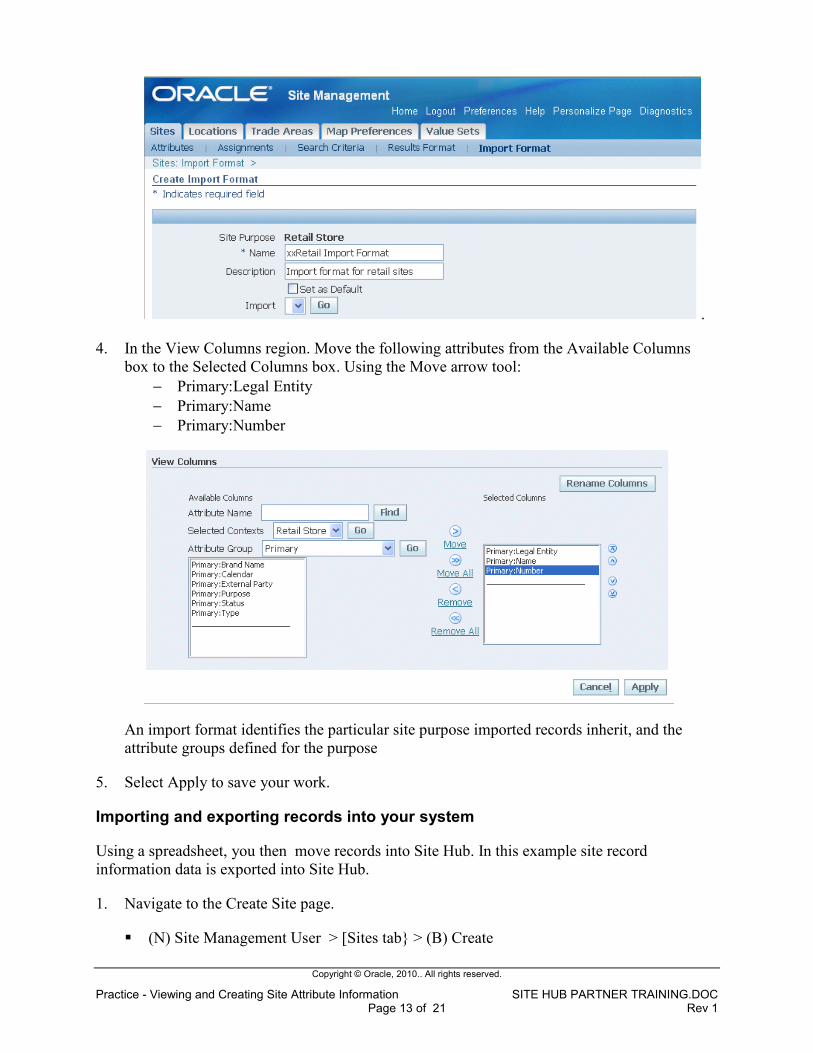
3. Select Create to display the Create Import Format page, and add the following information:
− Name: xxRetail Import Format
− Description: Import format for retail sites
Copyright © Oracle, 2010.. All rights reserved.
Practice - Viewing and Creating Site Attribute Information SITE HUB PARTNER TRAINING.DOC Page 13 of 21 Rev 1
.
4. In the View Columns region. Move the following attributes from the Available Columns
box to the Selected Columns box. Using the Move arrow tool:
− Primary:Legal Entity
− Primary:Name
− Primary:Number
An import format identifies the particular site purpose imported records inherit, and the
attribute groups defined for the purpose
5. Select Apply to save your work.
Importing and exporting records into your system
Using a spreadsheet, you then move records into Site Hub. In this example site record
information data is exported into Site Hub.
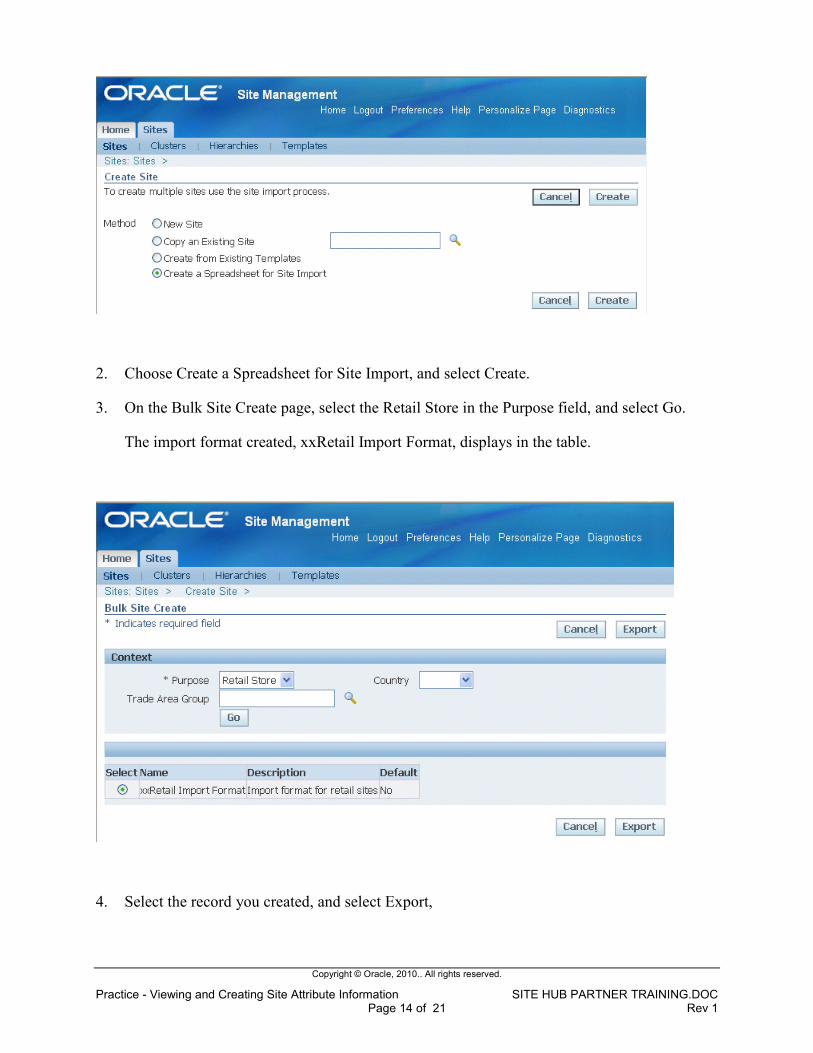
1. Navigate to the Create Site page.
� (N) Site Management User > [Sites tab} > (B) Create
Copyright © Oracle, 2010.. All rights reserved.
Practice - Viewing and Creating Site Attribute Information SITE HUB PARTNER TRAINING.DOC Page 14 of 21 Rev 1
2. Choose Create a Spreadsheet for Site Import, and select Create.
3. On the Bulk Site Create page, select the Retail Store in the Purpose field, and select Go.
The import format created, xxRetail Import Format, displays in the table.
4. Select the record you created, and select Export,
Copyright © Oracle, 2010.. All rights reserved.
Practice - Viewing and Creating Site Attribute Information SITE HUB PARTNER TRAINING.DOC Page 15 of 21 Rev 1
5. On the Viewer page, you have a choice of several versions of Microsoft Excel to choose.
Select Excel 2000.
If you enable the Reporting check box, the document created cannot be uploaded back to the
Site Hub application. This feature is for reporting purposes only.
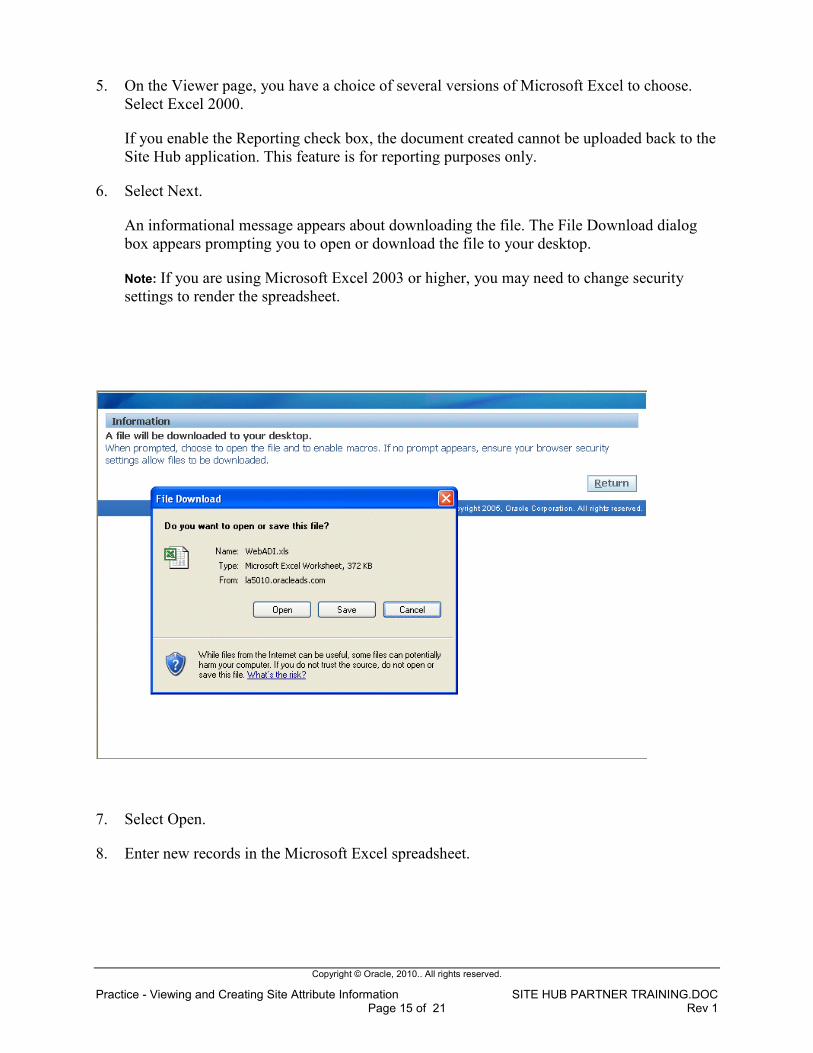
6. Select Next.
An informational message appears about downloading the file. The File Download dialog
box appears prompting you to open or download the file to your desktop.
Note: If you are using Microsoft Excel 2003 or higher, you may need to change security
settings to render the spreadsheet.
7. Select Open.
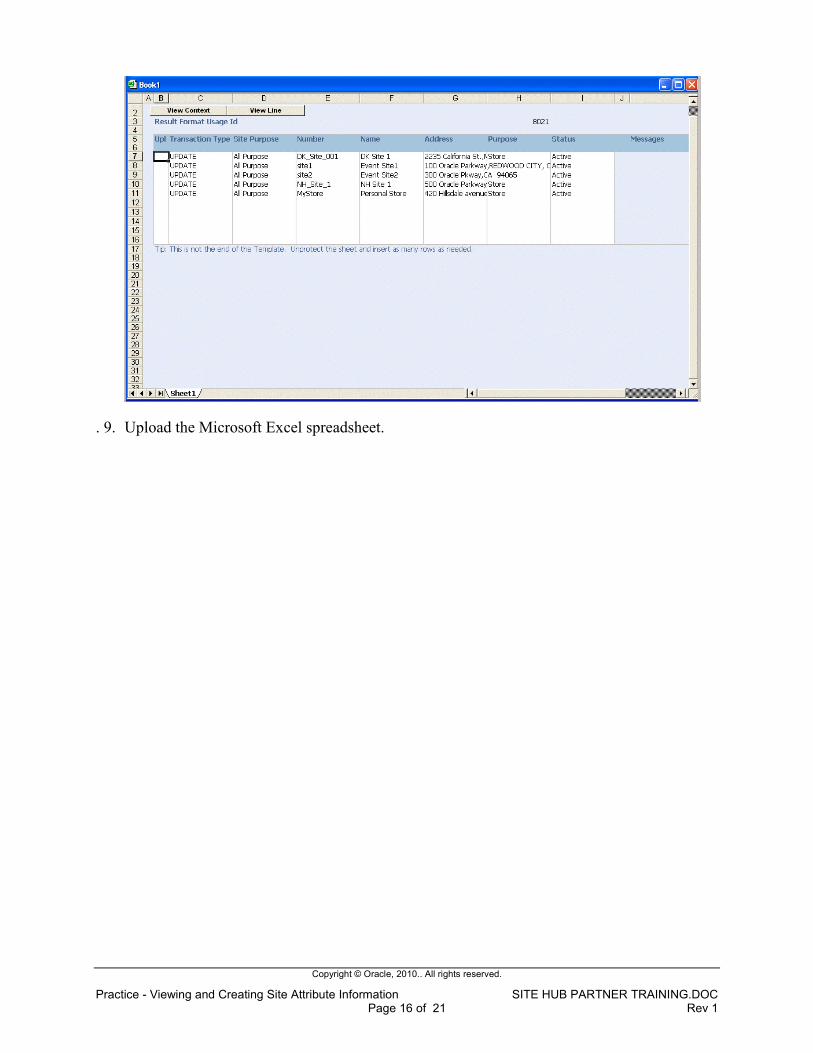
8. Enter new records in the Microsoft Excel spreadsheet.
Copyright © Oracle, 2010.. All rights reserved.
Practice - Viewing and Creating Site Attribute Information SITE HUB PARTNER TRAINING.DOC Page 16 of 21 Rev 1
. 9. Upload the Microsoft Excel spreadsheet.
Copyright © Oracle, 2010.. All rights reserved.
Practice - Viewing and Creating Site Attribute Information SITE HUB PARTNER TRAINING.DOC Page 17 of 21 Rev 1
Practice 6- Using the Site Map
Overview
The Site Map page uses Google Map functionality to enable a view of your sites in their
geographic locations. You can select criteria for the type of site information displayed including
site types, site purposes, trade areas, and associated attribute pages. In this practice you will:
• View sites on the Site Map page
• Change site criteria of the records you are viewing on the map
Assumptions
• Students replace xx with a unique identifier, such as initials or something easy to
remember.
Tasks
Viewing site information on the Site Map page
In this practice you will view information displayed about sites on the Site Map page.
1. Navigate to the View Site page for site record xxCA2025.
2. Select View Map.
3. Double-click the map icon for your site.
The attribute page information you associated to the site displays in tabs for each business
entity. Select each tab and view the information entered.
4. In the Select Additional Sites within this radius of Key Sites field, enter 25 miles.
5. In the Select Additional Sites column, select the site purposes Corporate Office Site and
Retail Store.
6. Select Go. The other sites fulfilling your purpose and radius criteria appear on the map.
7. Scroll to the Mapped Sites region. This region lists all the sites now mapped on the page.
8. Enable the Select box for the two sites you created.
9. In the Action box, select Map Trade Area Group.
10. Select Go to display the trade area groups on the Site Map page.
You can enlarge or minimize the view using the magnifying ruler tool.

Copyright © Oracle, 2010.. All rights reserved.
Practice - Viewing and Creating Site Attribute Information SITE HUB PARTNER TRAINING.DOC Page 18 of 21 Rev 1

Copyright © Oracle, 2010.. All rights reserved.
Practice - Viewing and Creating Site Attribute Information SITE HUB PARTNER TRAINING.DOC Page 19 of 21 Rev 1
Practice 7- Viewing and Creating Site Hierarchies
Overview
You can create hierarchical structures for your sites according to the attributes of the site.
Hierarchies are sites grouped for common characteristics at several levels. This grouping enables
you to view the site attributes and details at node levels. After creating your hierarchical
structures—you can add or remove sites, and move or copy the node structure. In this practice
you will:
• View site hierarchies
• Create a site hierarchy including nodes and associated sites
Assumptions
• Students replace xx with a unique identifier, such as initials or something easy to
remember.
Tasks
Viewing site hierarchies
In this practice you will view an existing site hierarcy structure in your environment.
1. Navigate to the Hierarchies Simple Search page.
2. Enable the My Hierarchies check box, and select Go.
All hierarchy records created under the specific User Name and Password used to access the
environment display.
3. Select the Name link for the record: Vision Operations Real Estate.
Select the checkbox and click the button Update Hierarchy.
4. The Hierarchy Workbench opens up. From the Hierarchies List, drag the hierarchy named
‘Vision Operations Real Estate’ to Edit Pane 1. Expand the nodes created(HQ, North
America, EMEA, APAC) to see the children of those nodes.
Creating a site hierarchy
In this practice you create a new site hierarchy record, and add nodes and associated sites to the
record.
1. Navigate to the Hierarchies page.

Copyright © Oracle, 2010.. All rights reserved.
Practice - Viewing and Creating Site Attribute Information SITE HUB PARTNER TRAINING.DOC Page 20 of 21 Rev 1
2. Choose Create.
3. On the Create Hierarchy: Basic Information page, enter the following information:
− Name: xxHierarchy
− Description: My Hierarchy record
− Start Date: Today’s date
− End Date: Optional
4. Select Apply to return to the Hierarchies page.
This page displays a table with several hierarchies. Select the hierarchy just created
(xxHierarchy) and click on the icon for Update Hierarchy.
5. The Hierarchy workbench appears. Drag the xxHierarchy from the hierarchies list to Edit
Pane 1.
6. Create the Create Node icon on the workbench and enter the following information:
− Name: xxEast Retail stores
− Description: xxEastern stores
7. Save your work.
8. Repeat Steps 5 – 6 using the following information:
− Name: xxWest Retail stores
− Description: xxWestern stores
9. Save your work.
10. Select the icon ‘Add Site’.
11. Select Add Sites for the xxWest Retail stores record.
The Add Sites popup appears.
12. Search for the sites starting with S:
13. Choose any 3 sites and attach to the xxWest Retail node. Include one the sites you created
in the selection.
14. Click Select. The sites get added to the node.
15. Repeat Steps 11 – 14. Choose any 2 sites starting with W and attach to the xxEast Retail
node. Include another one of the sites you created in the selection.
16. Click Select. The sites get added to the node
17. Click Save.
18. View the entire hierarchy with sites associated to the nodes.

Copyright © Oracle, 2010.. All rights reserved.
Practice - Viewing and Creating Site Attribute Information SITE HUB PARTNER TRAINING.DOC Page 21 of 21 Rev 1