Embed Size (px)
Citation preview
Tutor Module for Key Skills IT Level 2 Test
Skill Area 4 – Lay out and present information
4.1 Select and use appropriate layouts for presenting combined information
Skill Area 4 – Lay out and present information.......................................................14.1 Select and use appropriate layouts for presenting combined information..........1Questions may, for example, require candidates to:................................................1Types of documents.................................................................................................2
Memos..................................................................................................................2Letter....................................................................................................................3Invoice..................................................................................................................4Publicity flyer........................................................................................................5Report...................................................................................................................6Newsletter.............................................................................................................7Statements...........................................................................................................8Agenda.................................................................................................................8Email.....................................................................................................................9Advertisement for a jobs, goods or services.........................................................9Invitation to an event...........................................................................................10Table of results for sports activities....................................................................11Forms to collect information................................................................................12
Formatting documents............................................................................................13Word Menu, Standard and Formatting toolbars..............................................13Excel Menu, Standard and Formatting toolbars..............................................13Access Menu, Standard and Formatting toolbars in Tables............................13Other toolbars.................................................................................................13
Menu toolbar - Word...............................................................................................14Standard toolbar - Word.........................................................................................17Formatting Toolbar - Word.....................................................................................18
Bullets.............................................................................................................20Numbering......................................................................................................20Borders...........................................................................................................20Problems with Page Borders...........................................................................21Fonts...............................................................................................................21€ font:..............................................................................................................22Change case...................................................................................................23
Excel formatting.....................................................................................................23Menu toolbar - Excel...........................................................................................23
Column and Row height..................................................................................23Standard toolbar - Excel.....................................................................................25Formatting toolbar - Excel...................................................................................25Formatting charts and graphs.............................................................................25
Practice questions...................................................................................................26
IT TOOLKIT © BBC 2004SKILL AREA 4.1: Lay out and present information – Part 1
BBC Key Skills: http://www.bbc.co.uk/keyskills
IT TOOLKIT Page 1 of 27 © BBC 2004SKILL AREA 4.1: Lay out and present information – Part 1
BBC Key Skills: http://www.bbc.co.uk/keyskills
Skill Area 4 – Lay out and present information
4.1 Select and use appropriate layouts for presenting combined information
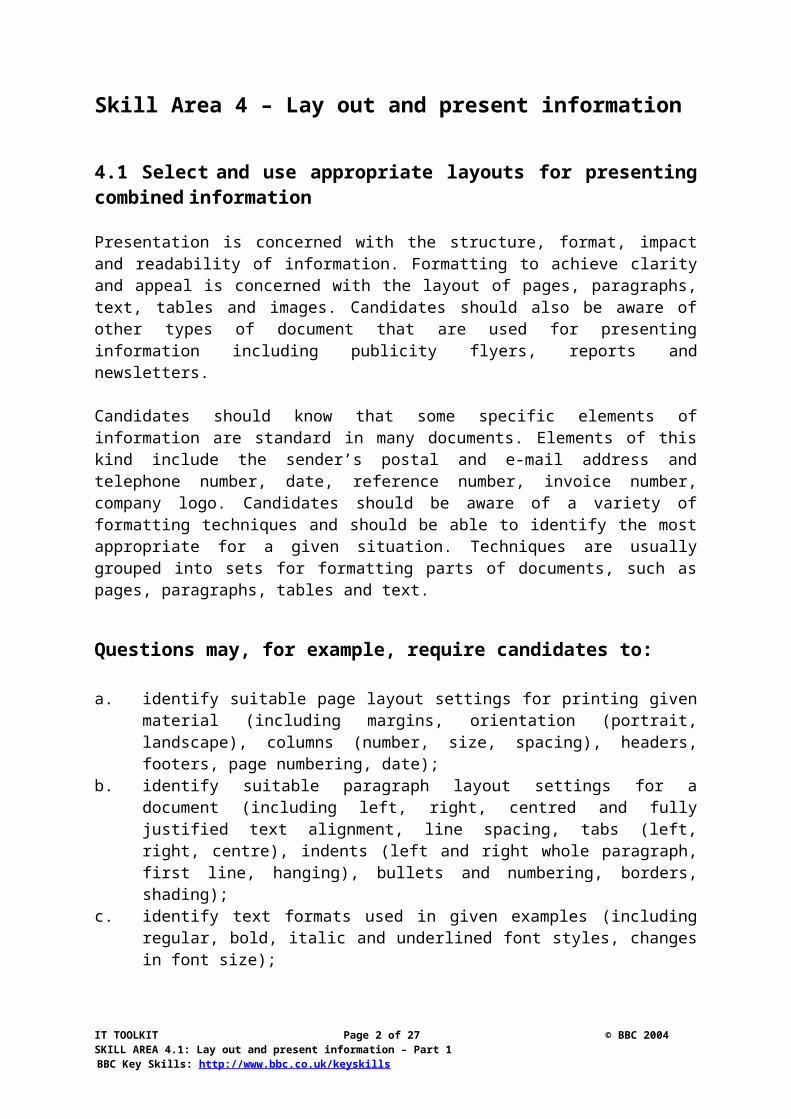
Presentation is concerned with the structure, format, impact and readability of information. Formatting to achieve clarity and appeal is concerned with the layout of pages, paragraphs, text, tables and images. Candidates should also be aware of other types of document that are used for presenting information including publicity flyers, reports and newsletters.
Candidates should know that some specific elements of information are standard in many documents. Elements of this kind include the sender’s postal and e-mail address and telephone number, date, reference number, invoice number, company logo. Candidates should be aware of a variety of formatting techniques and should be able to identify the most appropriate for a given situation. Techniques are usually grouped into sets for formatting parts of documents, such as pages, paragraphs, tables and text.
Questions may, for example, require candidates to:
a. identify suitable page layout settings for printing given material (including margins, orientation (portrait, landscape), columns (number, size, spacing), headers, footers, page numbering, date);
b. identify suitable paragraph layout settings for a document (including left, right, centred and fully justified text alignment, line spacing, tabs (left, right, centre), indents (left and right whole paragraph, first line, hanging), bullets and numbering, borders, shading);
c. identify text formats used in given examples (including regular, bold, italic and underlined font styles, changes in font size);
d. identify number formats used in given examples of database fields and spreadsheet cells (including currency, percentage, number of decimal places);
e. identify table format settings used in given examples (including row and column size, horizontal and vertical text alignment, merged/split cells, borders, shading);
f. identify suitable spreadsheet layouts for given information (including row height, column width, row and column headings, sheet titles);
g. identify suitable chart layouts for given results (including pie charts, bar charts, line graphs);
h. identify suitable headings for charts and graphs (including chart title, legend, axis and data labels, text alignment).
IT TOOLKIT Page 2 of 27 © BBC 2004SKILL AREA 4.1: Lay out and present information – Part 1
BBC Key Skills: http://www.bbc.co.uk/keyskills
Types of documents
There will be examples of some of the documents shown on the previous page but not all. Some, like emails, are generally familiar to students, who prefer this form of communication to letters and memos. Other items, like Reports, are printed on plain paper and laid out consistently following the guidelines in this Tutor Module. However, there will be guidance for several documents to show formatting and what information can normally be found on them.
Memos
This is a written message sent to someone who works for the same company as the sender. Therefore, no address is required.
Type of paper and formatting
Plain paper with emboldened heading: MEMORANDUM. A4 portrait or A5 landscape paper. Margins at least 2.5 cm or 1” on left-hand side (so that it can be hold-punched). Other margins at least 1.5 cm or ½”. Blank line between all headings and paragraphs.
Must include:
To: From: Date: Subject: Paragraphing to tell the recipient what it’s about.
IT TOOLKIT Page 3 of 27 © BBC 2004SKILL AREA 4.1: Lay out and present information – Part 1
BBC Key Skills: http://www.bbc.co.uk/keyskills

Letter
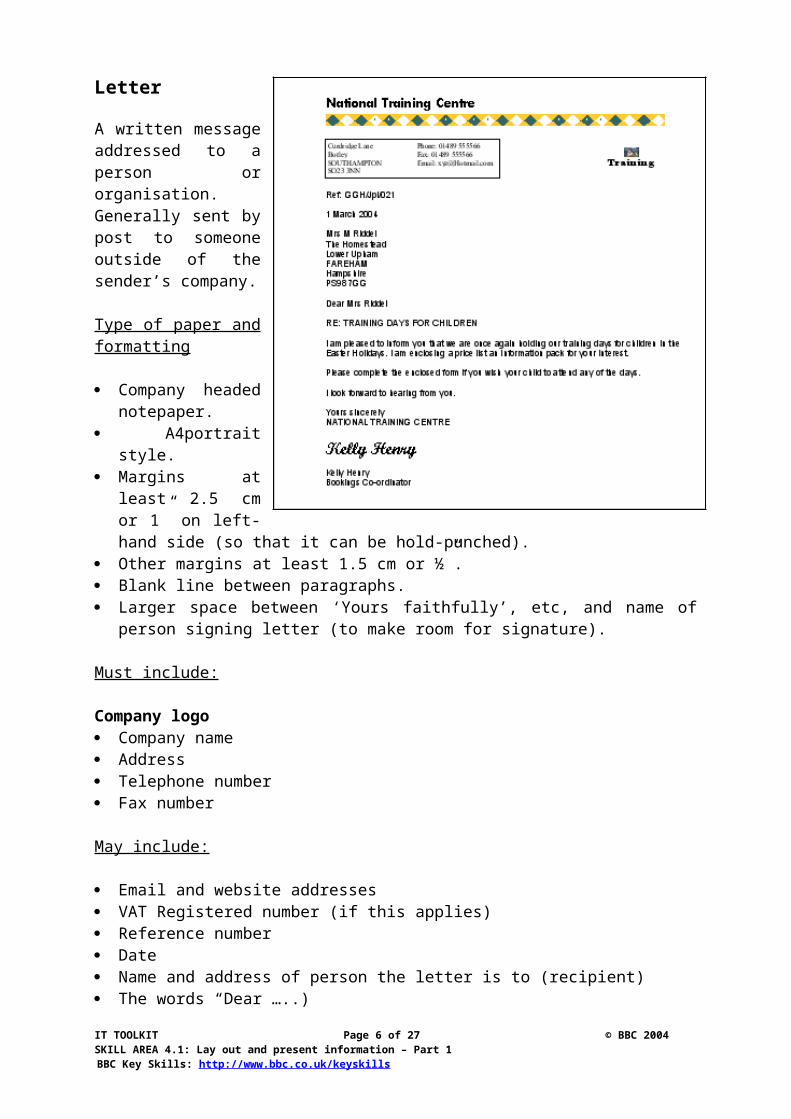
A written message addressed to a person or organisation. Generally sent by post to someone outside of the sender’s company.
Type of paper and formatting
Company headed notepaper.
A4portrait style. Margins at least 2.5
cm or 1” on left-hand side (so that it can be hold-punched).
Other margins at least 1.5 cm or ½”.
Blank line between paragraphs.
Larger space between ‘Yours faithfully’, etc, and name of person signing letter (to make room for signature).
Must include:
Company logo Company name Address Telephone number Fax number
May include:
Email and website addresses VAT Registered number (if this applies) Reference number Date Name and address of person the letter is to (recipient) The words “Dear …..) Reference line to describe contents of letter Paragraphing to tell the recipient what it’s about Yours faithfully/sincerely, etc Name of person signing the letter and their signature “Enc” at the bottom if something is enclosed (this is missing in the above
example)
IT TOOLKIT Page 4 of 27 © BBC 2004SKILL AREA 4.1: Lay out and present information – Part 1
BBC Key Skills: http://www.bbc.co.uk/keyskills
Invoice
A bill – an itemised statement to show someone how much they owe for something they’ve bought or a service that has been provided. They come in a variety of formats depending on the organisation.
Type of paper and formatting
A4 portrait or A5 landscape paper.
Generally this is a printed Invoice with a unique invoice number.
Heading is similar to company headed notepaper and may contain similar details.
Margins at least 2.5 cm or 1” on left-hand side (so that it can be hold-punched).
Other margins at least 1.5 cm or ½”Tables for information
Columns formatted to fit information. Usually 4-7 columns with widest column being allocated for the description of item.
Column headings can include:
Number of items Reference Number Description of item Cost per item VAT rate Discount rate Total cost of items
Must include:
Invoice number Date Name and address of person the invoice is to (recipient/buyer) What has been bought or service rendered (usually split into individual items and
their cost) Total cost
May include:IT TOOLKIT Page 5 of 27 © BBC 2004SKILL AREA 4.1: Lay out and present information – Part 1
BBC Key Skills: http://www.bbc.co.uk/keyskills
Order number For the attention of …. Reference details VAT Delivery charge E&OE (Errors and Omission Excepted – in case there’s an error in calculations)
Publicity flyer
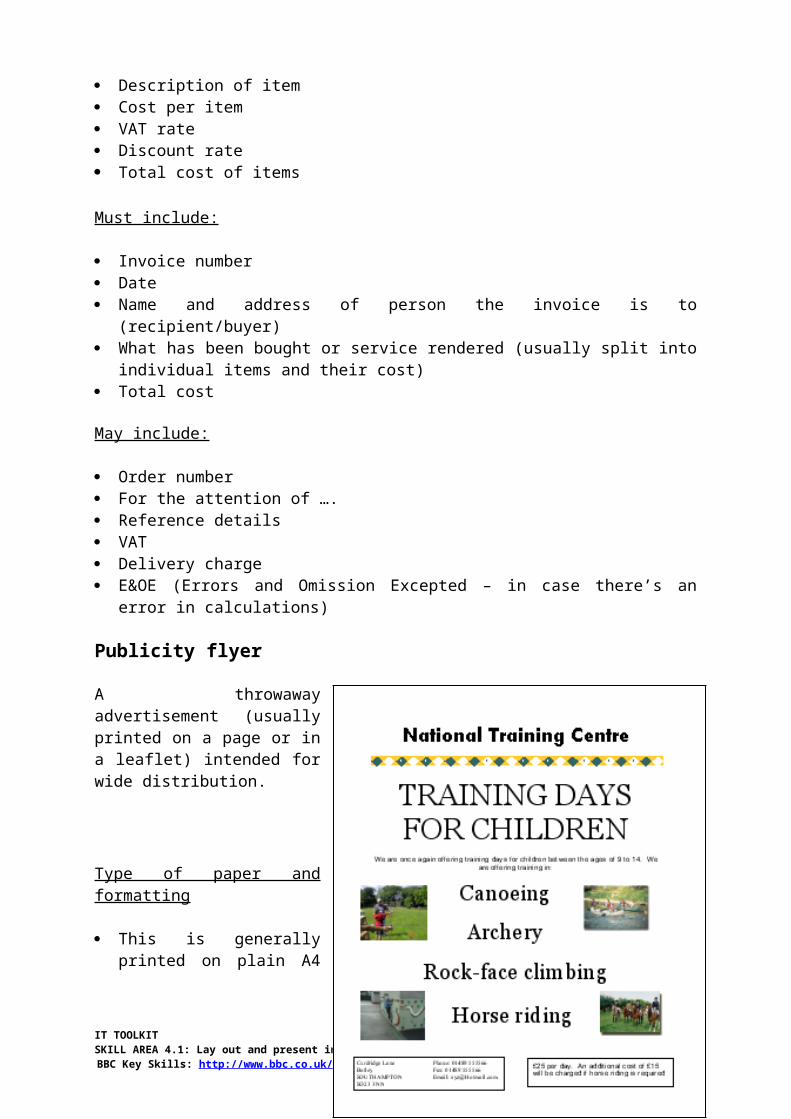
A throwaway advertisement (usually printed on a page or in a leaflet) intended for wide distribution.
Type of paper and formatting
This is generally printed on plain A4 paper, but often brightly coloured to catch the reader’s eye.
Orientation can be portrait or landscape.
Can be on A3 (twice as big as A4) or smaller on A5.
Paper orientation can be portrait or landscape.
Margins vary depending on layout.
Sometimes a desktop publishing computer program, ie, Publisher, is used to format the leaflet.
May have:
Eye-catching layout - big and bold with key words, ie , FREE, BARGAIN, etc, larger than rest of information.
An advert saying when, where, what is for sale or what function is being held. May have a picture or diagram.
IT TOOLKIT Page 6 of 27 © BBC 2004SKILL AREA 4.1: Lay out and present information – Part 1
BBC Key Skills: http://www.bbc.co.uk/keyskills

Report
A written document describing the findings of some individual or group.
Type of paper and formatting
Plain A4 paper, sometimes with a front cover to explain what the report is about. Usually A4 portrait.
Margins at least 2.5 cm or 1” on left-hand side (so that it can be hold-punched).
Headings and/or numbered items.
Must have
Title page Terms of reference (what you have been asked to do, ie, research a particular
subject) Procedure (how you gathered the information, ie, interviews, visits, observation,
etc) Findings (what you have found – simple facts) Conclusion (statement about your findings – summing up Recommendations – recommendations for future research or projects Appendices – more information that could be included in a footnote.
May have:
Header or footer with date, and page number
IT TOOLKIT Page 7 of 27 © BBC 2004SKILL AREA 4.1: Lay out and present information – Part 1
BBC Key Skills: http://www.bbc.co.uk/keyskills
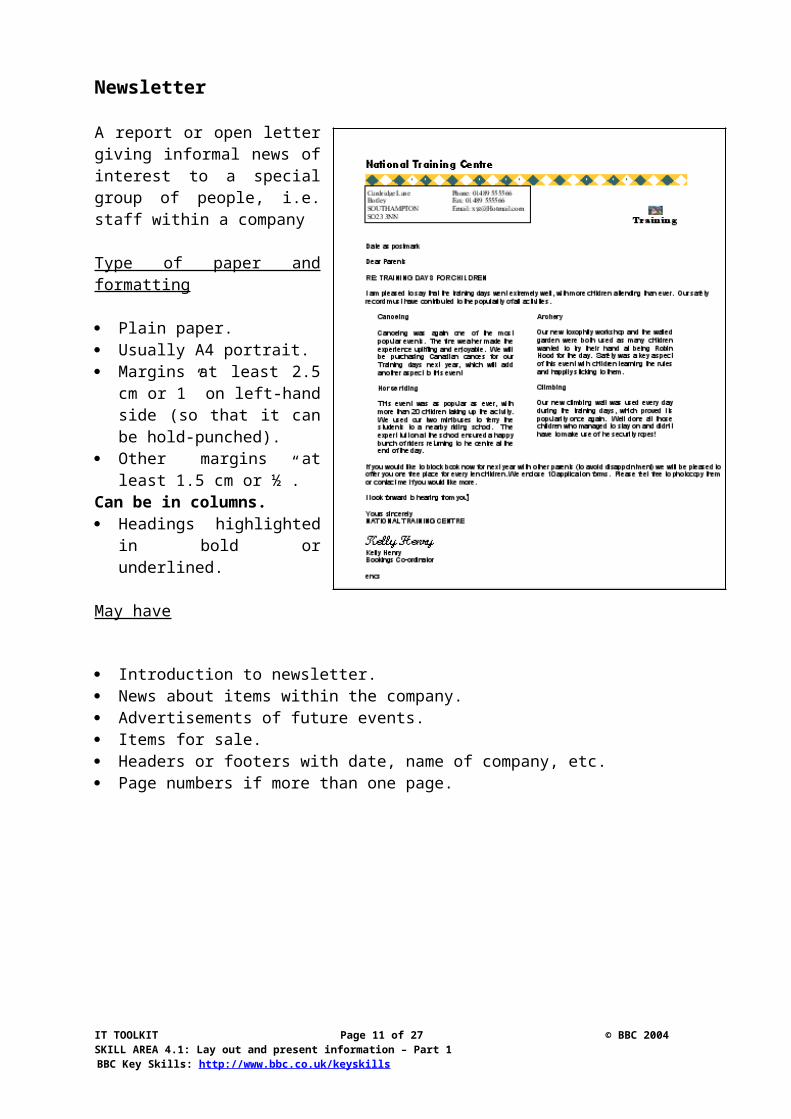
Newsletter
A report or open letter giving informal news of interest to a special group of people, i.e. staff within a company
Type of paper and formatting
Plain paper. Usually A4 portrait. Margins at least 2.5 cm or 1”
on left-hand side (so that it can be hold-punched).
Other margins at least 1.5 cm or ½”.
Can be in columns. Headings highlighted in bold
or underlined.
May have
Introduction to newsletter. News about items within the
company. Advertisements of future
events. Items for sale. Headers or footers with date, name of company, etc. Page numbers if more than one page.
IT TOOLKIT Page 8 of 27 © BBC 2004SKILL AREA 4.1: Lay out and present information – Part 1
BBC Key Skills: http://www.bbc.co.uk/keyskills

StatementsA statement of a list of financial transactions, ie, a list of invoices sent in a month, or money in and out of a bank.
Type of paper and formatting
Headed notepaper with tables to clarify transactions, which have taken place during a period, generally once a month.
Must include:
Dates each transaction took place.
Any invoice or reference numbers to help identify the amounts..
A date by which the amounts are to be paid.
Agenda
A list of topics that will be discussed at a meeting – usually issued some time before the meeting takes place
Type of paper and formatting
A4 portrait or A5 landscape paper. Usually on plain paper with
heading in bold: AGENDA. Margins at least 2.5 cm or 1” on
left-hand side (so that it can be hold-punched).
Other margins at least 1.5 cm or ½”. Blank line space between items. Items numbered.
Must include:
Date, time and place of meeting List of items to be discussed Present Minutes of the last meeting read and agreed Matters arising Any other business
IT TOOLKIT Page 9 of 27 © BBC 2004SKILL AREA 4.1: Lay out and present information – Part 1
BBC Key Skills: http://www.bbc.co.uk/keyskills
EmailElectronic mail - a system of world-wide electronic communication in which a computer user can compose a message at one terminal that is generated at the recipient's terminal when he logs in
Type of paper and formatting
Printed on plain paper usually A4 Portrait (as this is the most common in people’s printers).
Generally more informal than other forms of communication. Email addresses, date, and subject sit above the message.
Must include:
Email address, name and ‘signature’ of sender Date and time email sent Email address of recipient Subject Message
May include:
May include attachments. Shortened words or email emotions to explain how the sender is feeling, ie, :-)
(smiley face) , ;-) (wink), etc.
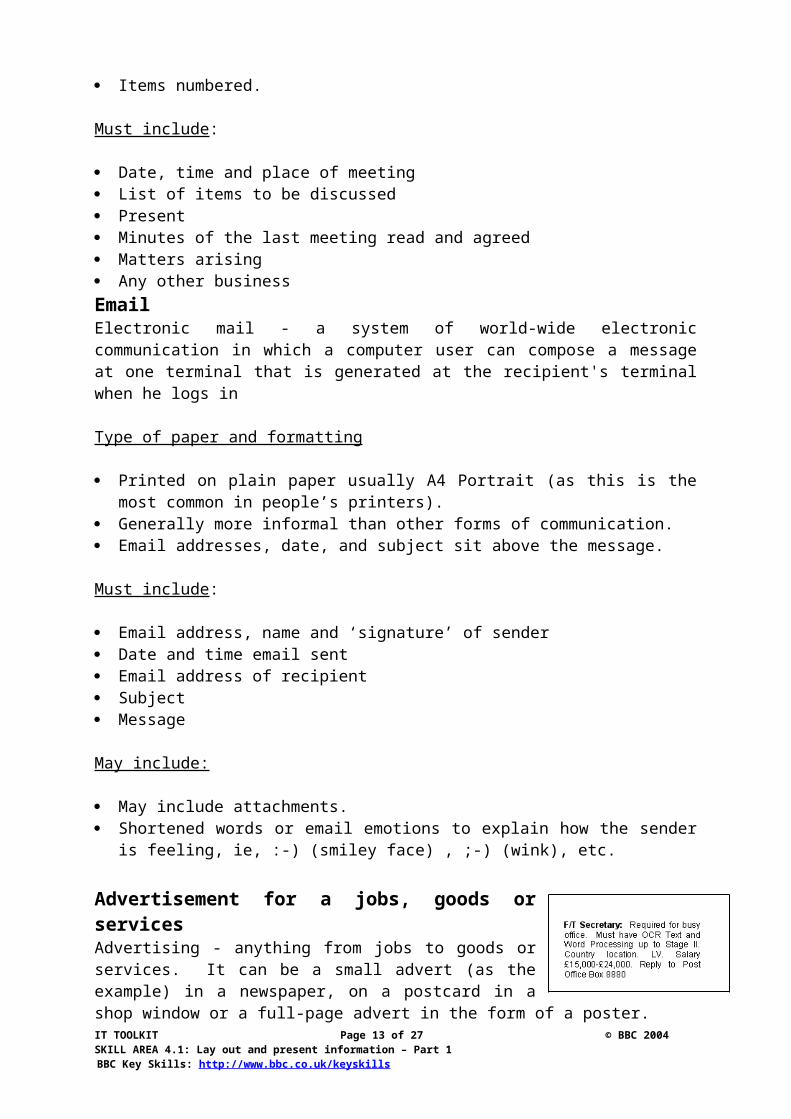
Advertisement for a jobs, goods or services Advertising - anything from jobs to goods or services. It can be a small advert (as the example) in a newspaper, on a postcard in a shop window or a full-page advert in the form of a poster.
Type of paper and formatting
Plain – generally an advert will take up only a small amount of space, probably postcard size (A6) or even smaller. May be in the form of a poster. Eye-catching heading to grab attention. Accurate information . Emboldening and or underlining. Emphasis to pick out key points. Bullet points, asterisks or numbered items to aid clarity.
Must include:
Key points – essential information that must be included.
May include:
Abbreviations such as F/T (Full-time), P/T (Part-time), LV (Luncheon vouchers), etc.
IT TOOLKIT Page 10 of 27 © BBC 2004SKILL AREA 4.1: Lay out and present information – Part 1
BBC Key Skills: http://www.bbc.co.uk/keyskills
Invitation to an event
Type of paper and formatting
Generally an invitation will take up only a small amount of space, probably postcard size (A6). It may be on card or paper, brightly coloured, plain or patterned.
Name and address of person it’s being sent to on the reverse side if a postcard-size piece of card is being used.
Margins at least 1.5 cm or ½”.
Centred Emboldening Underlining Emphasis to pick out key points.
Must have:
Name of invited person. Date, time and location of event.
May have:
RSVP (Respondez S’il Vous Plait – ie, please respond) Who to respond to, their address and any contact number/email and deadline Border Picture
IT TOOLKIT Page 11 of 27 © BBC 2004SKILL AREA 4.1: Lay out and present information – Part 1
BBC Key Skills: http://www.bbc.co.uk/keyskills
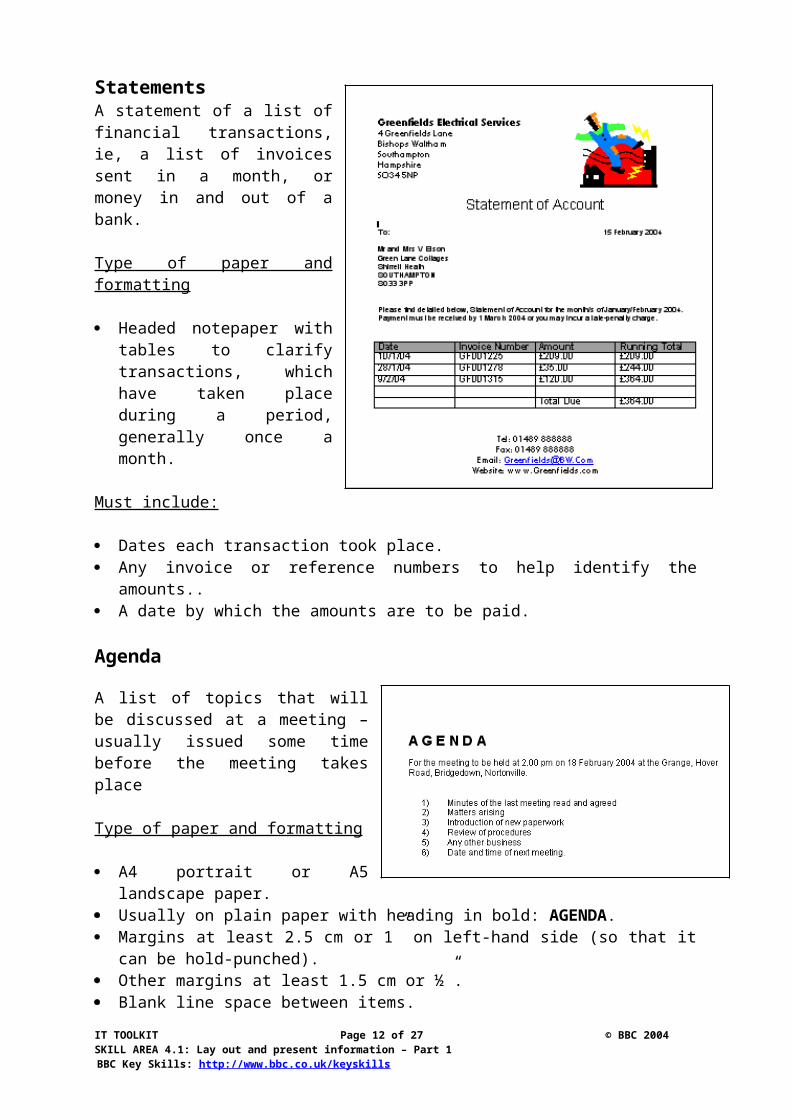
Table of results for sports activities
Table of results for most sports activities can be found on the Internet, in newspapers, on TV, etc. They inform the reader of the successes or failures. The example below is taken from Poole Pirates Speedway Website (http://www.1stbend.co.uk/poole/archive/2003/fixtures.html).
Type of paper and formatting
Plain A4/A5 Left-hand margin of 1” or 2.5 cm Other margins at least 1.5 cm or ½” Heading with details of event Text and tables to give results May have coloured formatting to enhance layout
May have:
Event details Home/Away (whether the event took place at the home venue or away) Abbreviations (W = Won, L = Lost, D =Drawn, etc) Scores, positions, points, etc Headings on the table of resultsForms to collect information
IT TOOLKIT Page 12 of 27 © BBC 2004SKILL AREA 4.1: Lay out and present information – Part 1
BBC Key Skills: http://www.bbc.co.uk/keyskills
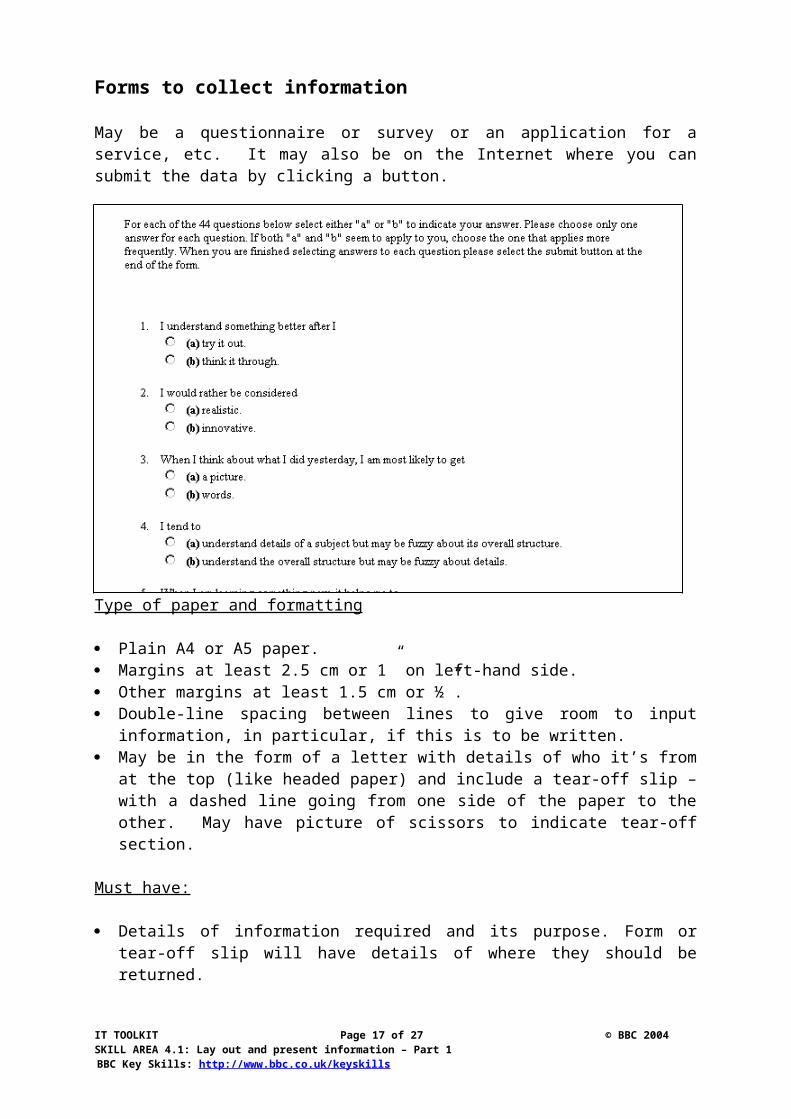
Forms to collect information
May be a questionnaire or survey or an application for a service, etc. It may also be on the Internet where you can submit the data by clicking a button.
Type of paper and formatting
Plain A4 or A5 paper. Margins at least 2.5 cm or 1” on left-hand side. Other margins at least 1.5 cm or ½”. Double-line spacing between lines to give room to input information, in particular,
if this is to be written. May be in the form of a letter with details of who it’s from at the top (like headed
paper) and include a tear-off slip – with a dashed line going from one side of the paper to the other. May have picture of scissors to indicate tear-off section.
Must have:
Details of information required and its purpose. Form or tear-off slip will have details of where they should be returned.
Form or tear-off slip will have details of where they should be returned.
IT TOOLKIT Page 13 of 27 © BBC 2004SKILL AREA 4.1: Lay out and present information – Part 1
BBC Key Skills: http://www.bbc.co.uk/keyskills

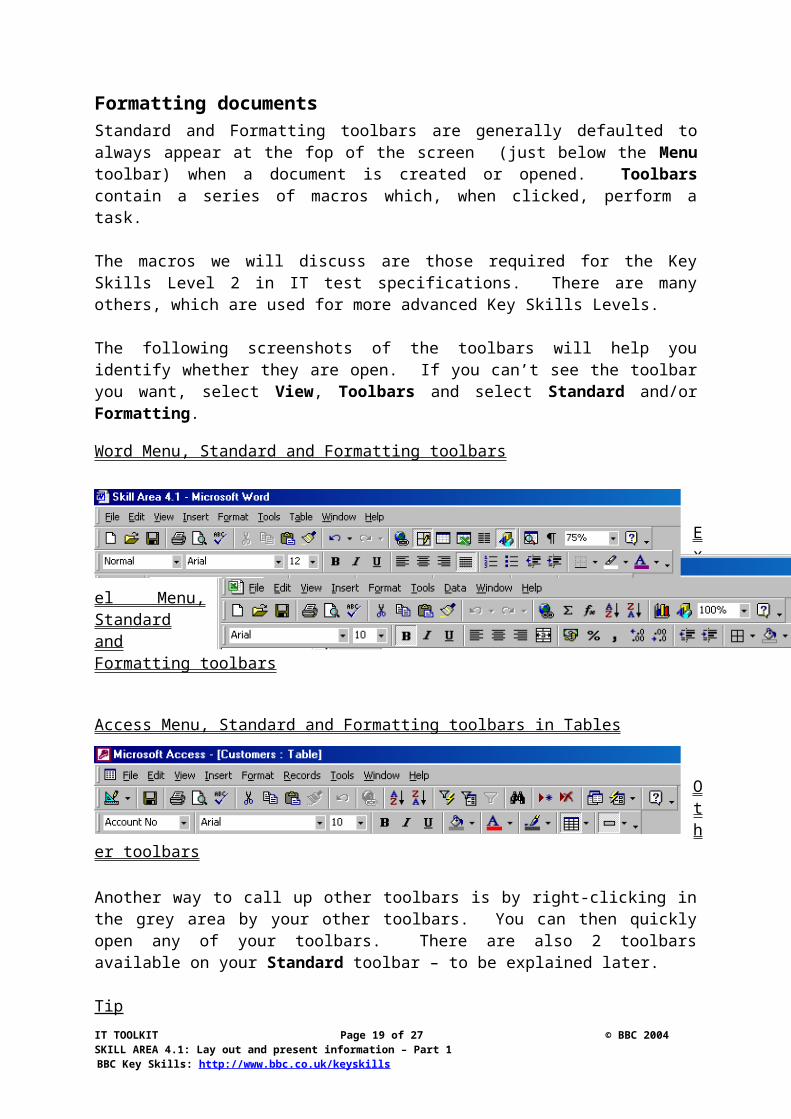
Formatting documentsStandard and Formatting toolbars are generally defaulted to always appear at the fop of the screen (just below the Menu toolbar) when a document is created or opened. Toolbars contain a series of macros which, when clicked, perform a task.
The macros we will discuss are those required for the Key Skills Level 2 in IT test specifications. There are many others, which are used for more advanced Key Skills Levels.
The following screenshots of the toolbars will help you identify whether they are open. If you can’t see the toolbar you want, select View, Toolbars and select Standard and/or Formatting.
Word Menu, Standard and Formatting toolbars
E xce
l Menu, Standard and Formatting toolbars
Access Menu, Standard and Formatting toolbars in Tables
O the
r toolbars
Another way to call up other toolbars is by right-clicking in the grey area by your other toolbars. You can then quickly open any of your toolbars. There are also 2 toolbars available on your Standard toolbar – to be explained later.
Tip
Only open other toolbars when required. Too many on the screen at once make the ‘viewing’ space of your document too small.
Menu toolbar - Word
The above are Menus, which can be clicked to activate, or, if you prefer to use hot keys, tap Alt, then the letter underlined on the appropriate menu, ie, F for File, E for IT TOOLKIT Page 14 of 27 © BBC 2004SKILL AREA 4.1: Lay out and present information – Part 1
BBC Key Skills: http://www.bbc.co.uk/keyskills
Edit. There are many functions that will not be covered in this Skill Area. We will move around the toolbars selecting only those relevant to the Key Skills IT Level 2 test.
Help – Top right-hand iconYou can ask the Help menu any questions about functions in Microsoft. Help is extremely useful and can even be used during tests on computer, ie, the Key Skills Level 3 test. Therefore, you should use this often to familiarise yourself with searching this valuable resource.
Margins
File Menu Page setup Margins
On Page Setup, you can tab between margin boxes. Type directly over highlighted numbers. Don’t add cm or inches when doing this. The computer will recognise the format and do it for you.
You can use the tabs on the Ruler Line to change margins but this won’t change the whole document if you are adding this after keying in the work.
Do’s and don’ts for setting margins
Never have a left-hand margin smaller than 1” or 2.5 cm. This is where you may need to hole-punch your work and if the margins are any smaller, you will hole-punch the words.
The right-hand margin can be ½” or 1.3 cm but never any smaller. The right-hand margin must never be larger
than the left-hand margin as the work will look unbalanced.
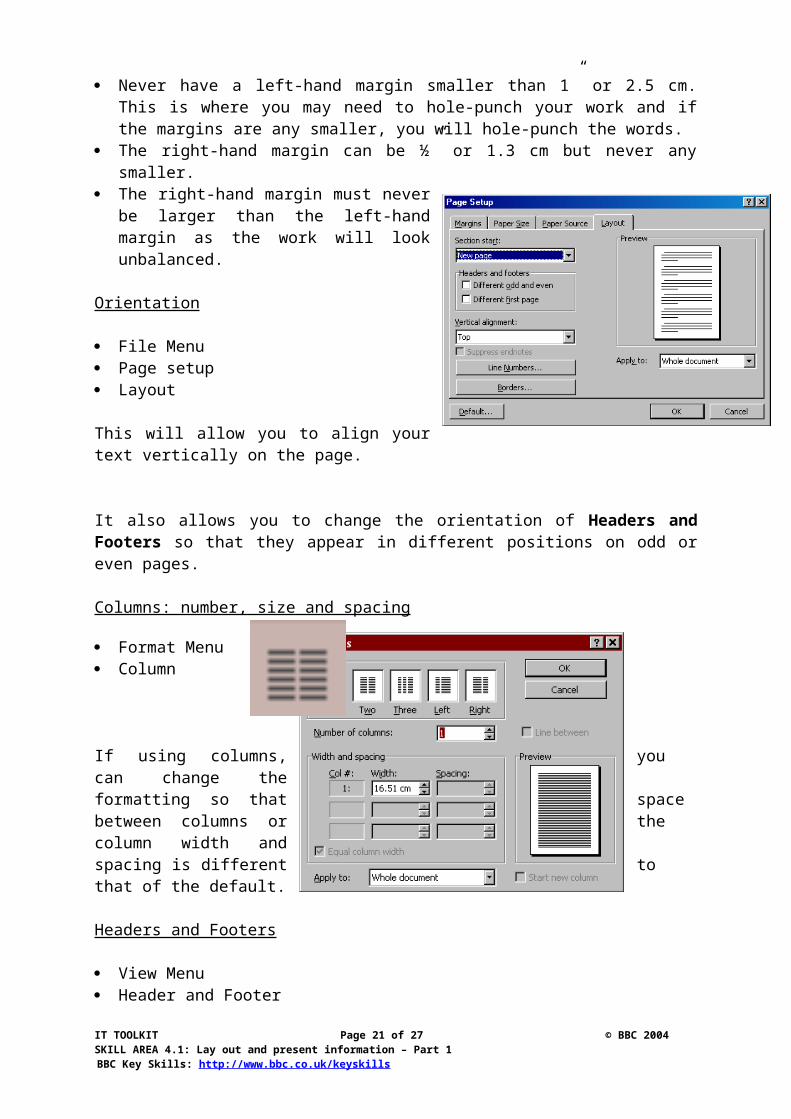
Orientation
File Menu Page setup Layout
This will allow you to align your text vertically on the page.
It also allows you to change the orientation of Headers and Footers so that they appear in different positions on odd or even pages.
IT TOOLKIT Page 15 of 27 © BBC 2004SKILL AREA 4.1: Lay out and present information – Part 1
BBC Key Skills: http://www.bbc.co.uk/keyskills

Columns: number, size and spacing
Format Menu Column
If using columns, you can change the formatting so that space between columns or the column width and spacing is different to that of the default.
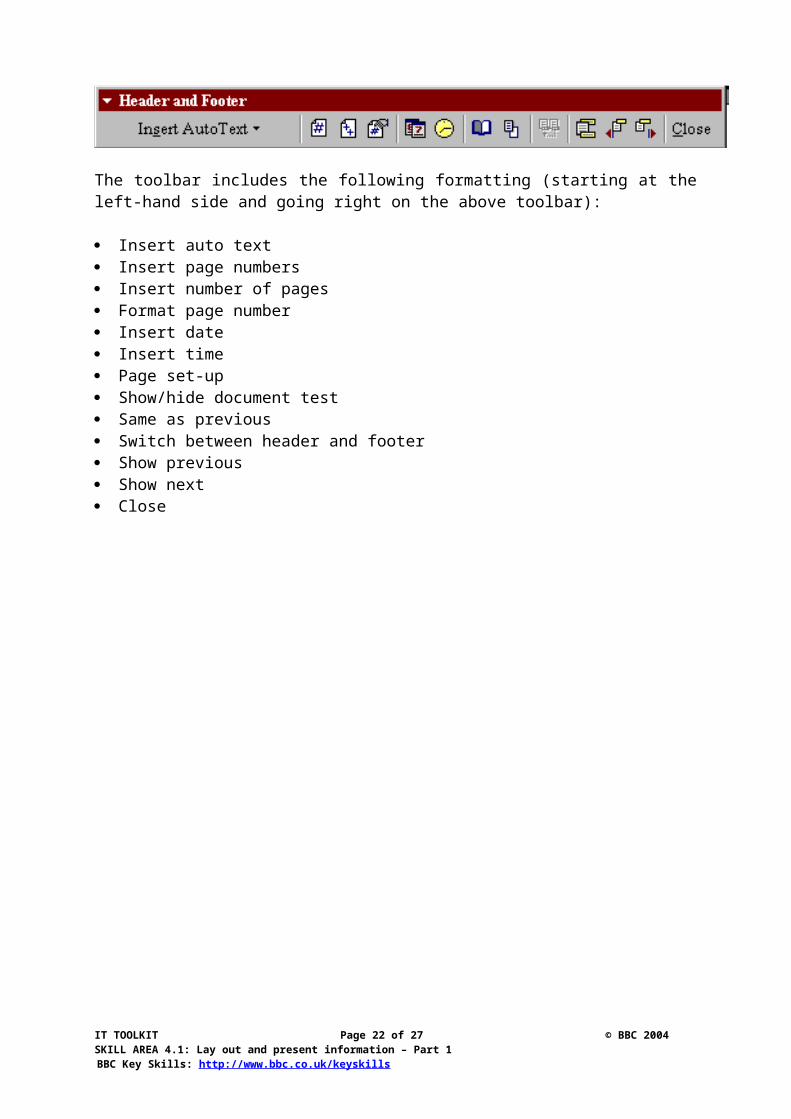
Headers and Footers
View Menu Header and Footer
The toolbar includes the following formatting (starting at the left-hand side and going right on the above toolbar):
Insert auto text Insert page numbers Insert number of pages Format page number Insert date Insert time Page set-up Show/hide document test Same as previous Switch between header and footer Show previous Show next Close
IT TOOLKIT Page 16 of 27 © BBC 2004SKILL AREA 4.1: Lay out and present information – Part 1
BBC Key Skills: http://www.bbc.co.uk/keyskills
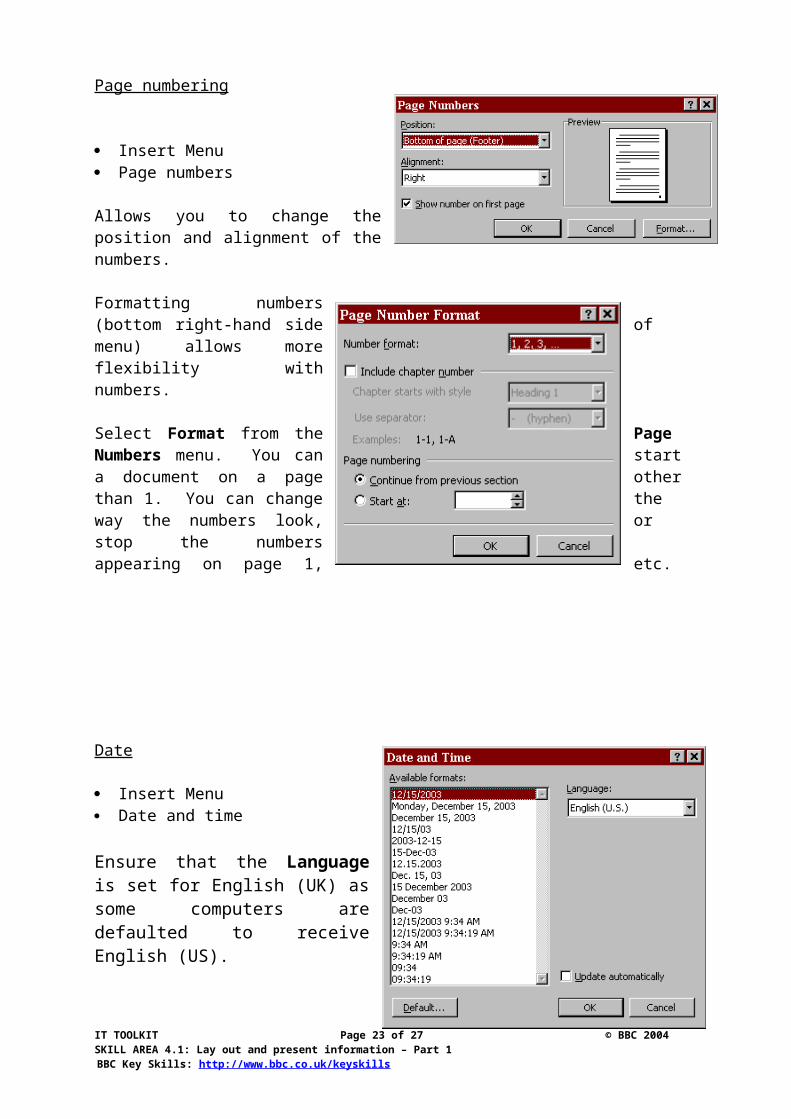
Page numbering
Insert Menu Page numbers
Allows you to change the position and alignment of the numbers.
Formatting numbers (bottom right-hand side of menu) allows more flexibility with numbers.
Select Format from the Page Numbers menu. You can start a document on a page other than 1. You can change the way the numbers look, or stop the numbers appearing on page 1, etc.
Date
Insert Menu Date and time
Ensure that the Language is set for English (UK) as some computers are defaulted to receive English (US).
IT TOOLKIT Page 17 of 27 © BBC 2004SKILL AREA 4.1: Lay out and present information – Part 1
BBC Key Skills: http://www.bbc.co.uk/keyskills
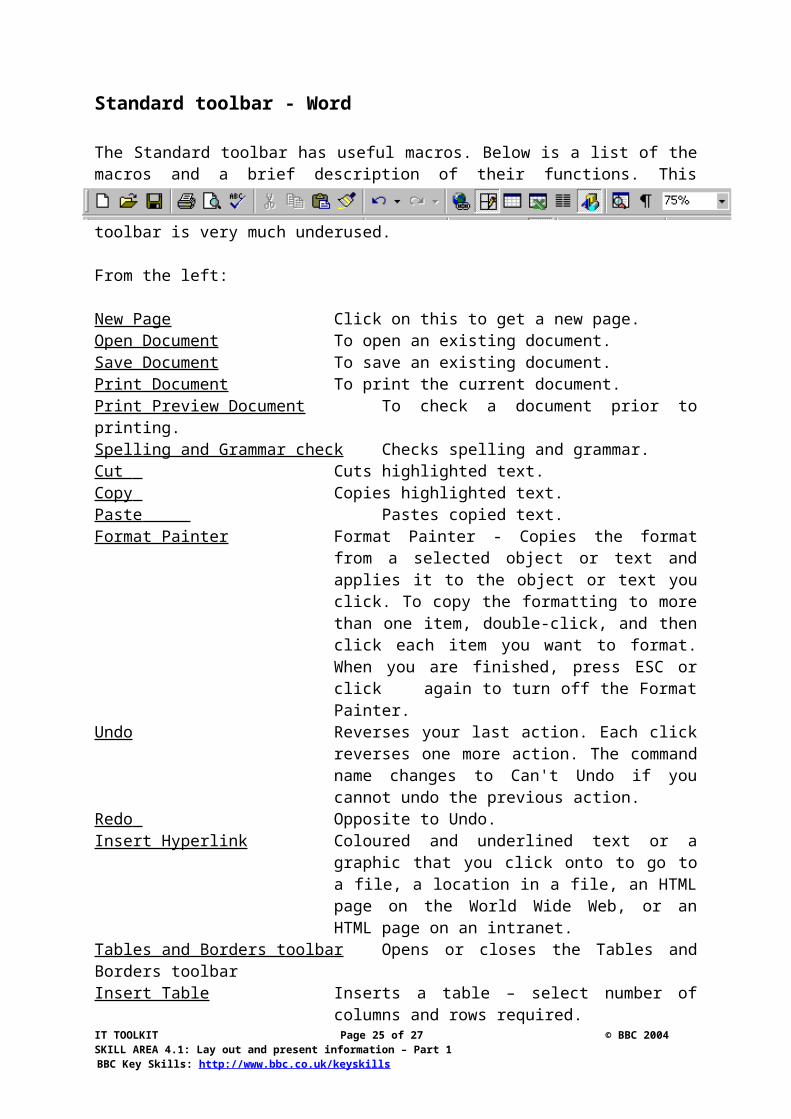
Standard toolbar - Word
The Standard toolbar has useful macros. Below is a list of the macros and a brief description of their functions. This toolbar is very much underused.
From the left:
New Page Click on this to get a new page.Open Document To open an existing document.Save Document To save an existing document.Print Document To print the current document.Print Preview Document To check a document prior to printing.Spelling and Grammar check Checks spelling and grammar.Cut Cuts highlighted text.Copy Copies highlighted text.Paste Pastes copied text.Format Painter Format Painter - Copies the format from a selected
object or text and applies it to the object or text you click. To copy the formatting to more than one item, double-click, and then click each item you want to format. When you are finished, press ESC or click again to turn off the Format Painter.
Undo Reverses your last action. Each click reverses one more action. The command name changes to Can't Undo if you cannot undo the previous action.
Redo Opposite to Undo.Insert Hyperlink Coloured and underlined text or a graphic that you
click onto to go to a file, a location in a file, an HTML page on the World Wide Web, or an HTML page on an intranet.
Tables and Borders toolbar Opens or closes the Tables and Borders toolbarInsert Table Inserts a table – select number of columns and
rows required.Insert Excel Spreadsheet Insert an active spreadsheet.Columns Insert a column – select number of columns
required – between 1 and 4.Drawing toolbar Opens or closes the Tables and Borders toolbarDocument map Changes the layout of a document so that
headings can be seen on left-hand side.Show/Hide Shows/hides returns, spaces, tabs, etc.Zoom You can "zoom in" to get a close-up view of your
document or "zoom out" to see more of the page at a reduced size. This is a better option than Print Preview as you can manipulate the document as well as viewing it.
IT TOOLKIT Page 18 of 27 © BBC 2004SKILL AREA 4.1: Lay out and present information – Part 1
BBC Key Skills: http://www.bbc.co.uk/keyskills
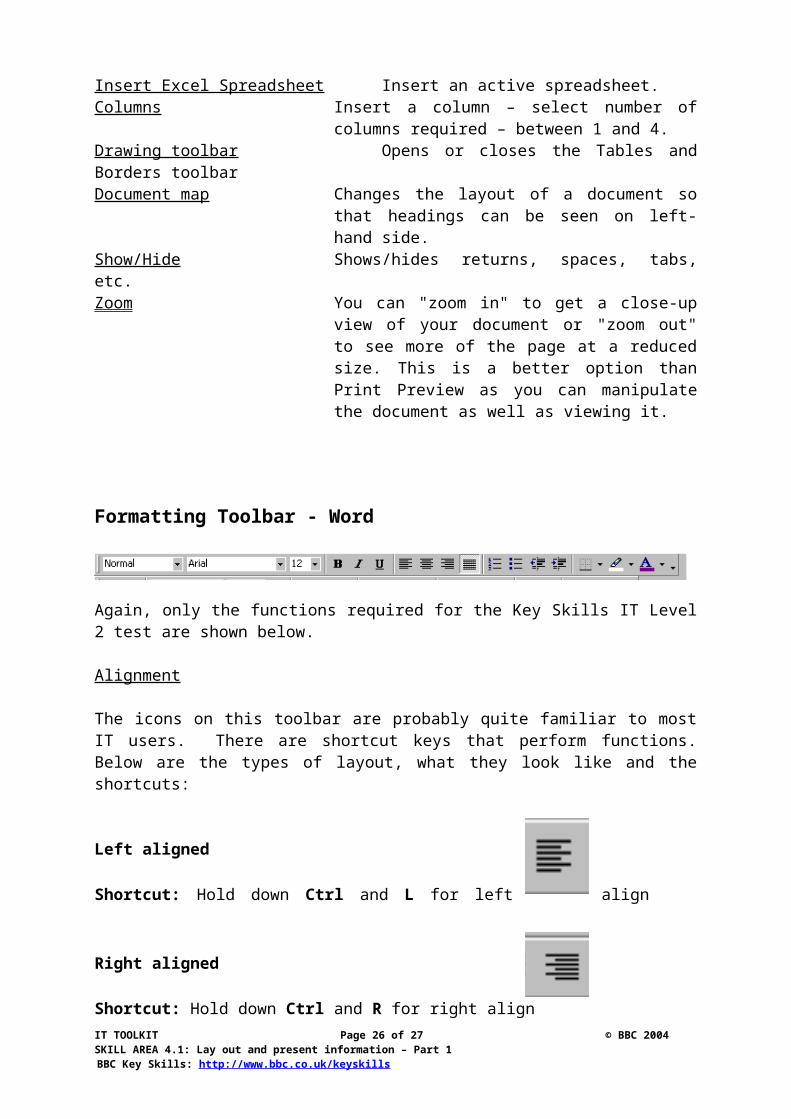
Formatting Toolbar - Word
Again, only the functions required for the Key Skills IT Level 2 test are shown below.
Alignment
The icons on this toolbar are probably quite familiar to most IT users. There are shortcut keys that perform functions. Below are the types of layout, what they look like and the shortcuts:
Left aligned
Shortcut: Hold down Ctrl and L for left align
Right aligned
Shortcut: Hold down Ctrl and R for right align
Center aligned
Shortcut: Hold down Ctrl and E for center align
Fully justified
Shortcut: Hold down Ctrl and J for fully justified
Don’ t mix ragged and justified margins in the same document.
Line spacing
Format Menu Paragraph Line spacing
How they look:
Single line spacing looks like this. The sentences in a paragraph will be close together without additional spaces between.
Double line spacing looks line this. The sentences in a paragraph will have one blank
line space between them.
IT TOOLKIT Page 19 of 27 © BBC 2004SKILL AREA 4.1: Lay out and present information – Part 1
BBC Key Skills: http://www.bbc.co.uk/keyskills

One-and-a-half line spacing looks like this. The sentences in a paragraph will have
half a blank line space between them.
Shortcut: Hold down Ctrl and 1 for single-line spacing.
Shortcut: Hold down Ctrl and 2 for double-line spacing.
Shortcut: Hold down Ctrl and 5 for one-and-a-half-line spacing.
Tabs – left, right and center Format Menu Tabs Select appropriate instruction
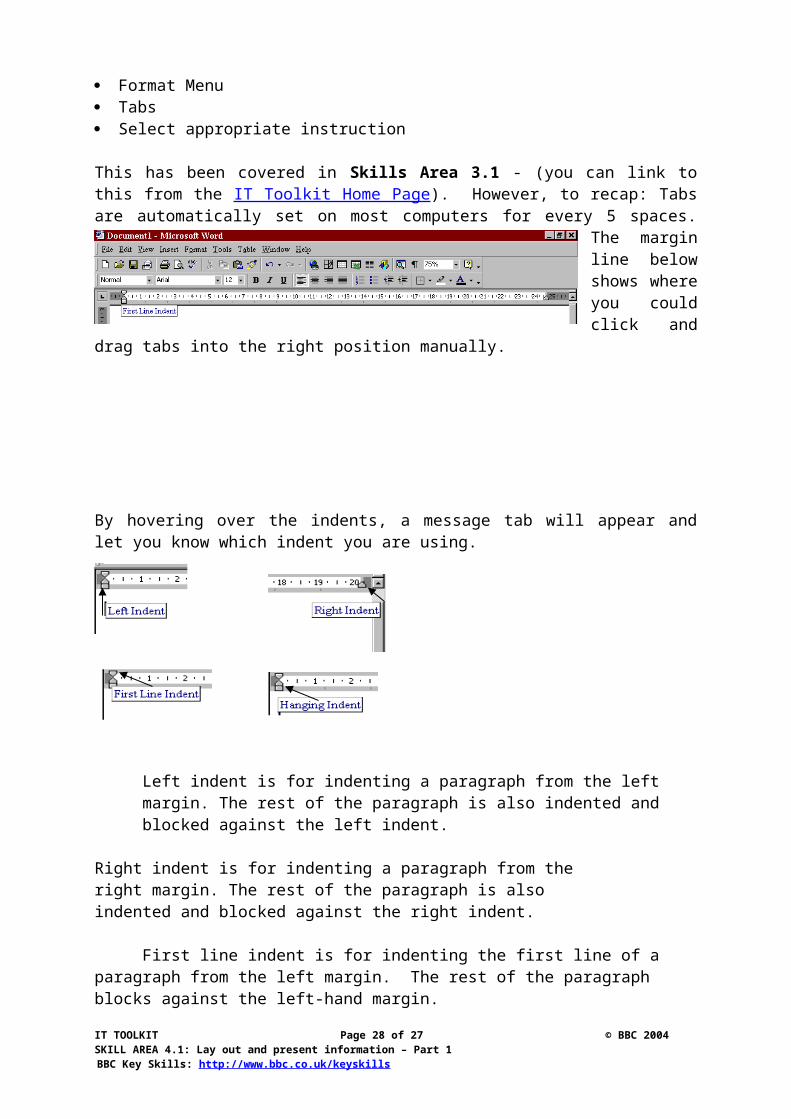
This has been covered in Skills Area 3.1 - (you can link to this from the IT Toolkit Home Page). However, to recap: Tabs are automatically set on most computers for every 5 spaces. The margin line below shows where you could click and drag tabs
into the right position manually.
By hovering over the indents, a message tab will appear and let you know which indent you are using.
Left indent is for indenting a paragraph from the left margin. The rest of the paragraph is also indented and blocked against the left indent.
Right indent is for indenting a paragraph from the right margin. The rest of the paragraph is also indented and blocked against the right indent.
First line indent is for indenting the first line of a paragraph from the left margin. The rest of the paragraph blocks against the left-hand margin.
Hanging indent is for a hanging paragraph, ie, the first line touches the left margin with all following lines indented three places.
IT TOOLKIT Page 20 of 27 © BBC 2004SKILL AREA 4.1: Lay out and present information – Part 1
BBC Key Skills: http://www.bbc.co.uk/keyskills
Bullets
This is what bullets look like. You can change the way they look by formatting them.
Format Bullets and Numbering
You can also move the position of the bullets (or numbers) by clicking on one of these icons on the Formatting toolbar – one takes the bullets nearer the margin, the other moves them further away.
Numbering
1. This is what numbering looks like.2. With each new line you get the next
sequential number.3. You can change the way the numbers
look.
As with Bullets, you can change the way numbers look by selecting the Bullets and Numbering pull-down menu from the Format menu.
Borders
Format Menu Borders and Shading
There are various types of border - this is an example of a text border.
Text border
A page border goes around the edge of the page. You don’t have to use simple lines – you can add art to liven up the page.
IT TOOLKIT Page 21 of 27 © BBC 2004SKILL AREA 4.1: Lay out and present information – Part 1
BBC Key Skills: http://www.bbc.co.uk/keyskills
The example below indicates where this can be found
Problems with Page Borders
There are two problems that can occur with Page Borders:
You may need to change your Page Border options to enable you to see the bottom of your border. Select Options (bottom right-hand corner).
o In the Measure From: section, select Text. This should cure the problem.
If using Art, you may not be able to see a Header or Footer that has been applied. Change to a thinner border if this happens.
Fonts
Today we have such a large variety of fonts we are spoilt for choice. They fall into two types – monospaced and proportionally spaced fonts:
Monospaced font : This refers to a set of characters which all have the same width. So a ‘w’ takes up just as much space on the line as an ‘i’. Typewriters used monospaced fonts like this but today, Courier is one of the only monospaced fonts still available. Courier looks like this.
Proportionally spaced font: This refers to characters of differing widths. Typically, the widest character is the capital M and the narrowest is the lowercase l. Most fonts are proportionally spaced.
€ font:
IT TOOLKIT Page 22 of 27 © BBC 2004SKILL AREA 4.1: Lay out and present information – Part 1
BBC Key Skills: http://www.bbc.co.uk/keyskills
The Euro is now on a lot of keyboards but if it isn’t on yours yet, you may be able to use shortcut keys to obtain it – hold Ctrl + Alt and press E (if your computer is very old you may not be able to do this).
Image font: There are fonts that have images rather than letters that can be useful and save time searching for ClipArt to demonstrate a point (or the Drawing toolbar for arrows, etc). The fonts are called Wingdings - of which there are 3 series – and Webdings – which currently is on its first series. See examples below:
Wingdings3 in alphabetical order - lower case:
Upper case:
Webdings in alphabetical order – lower case:
Upper case:
However, there are certain rules you should remember when choosing fonts for a document:
1. Unless you are producing a newsletter or display work, you should stick to one or two fonts per document.
2. Don’t use fancy fonts – these may look ok for one or two words, but whole paragraphs are very difficult to read, ie, this is not a good font to use for a Report.
3. Some fonts don’t ‘travel’ well, i.e. if you produce a PowerPoint presentation or send someone an email attachment with unusual fonts, the receiver may not have them on their own computer and therefore, may not be able to read them. Generally, these fonts re-format to something quite unreadable.
4. In the body of your work, avoid font sizes below 10 (unless really desperate for space) or larger than 14 (even if you’re desperate to fill up space!). It’s better to decrease your margins.
5. Don’t type everything in capital letters or use a font which only displays capital letters, ie, Copperplate Gothic.
Change case
IT TOOLKIT Page 23 of 27 © BBC 2004SKILL AREA 4.1: Lay out and present information – Part 1
BBC Key Skills: http://www.bbc.co.uk/keyskills

You can change the case (UPPER or lower) by highlighting the word or words and selecting Format, Change Case.
Tip: To increase fonts by one size, highlight words, hold Ctrl and ] (square bracket - to the left of the return key on the keyboard) and pump the ]. The font increases by one size each time you pump. To decrease, use the [ (square bracket)
Tip: For display work, change document to Zoom 50% so that you can see all your document. Highlight all text (Ctrl A highlights all). Pump Ctrl and ] square bracket. You will see your work grow and fill the page. You can make the fonts smaller again by pumping the other square bracket [.
Excel formatting
Formatting using the Excel toolbar is very similar to that of Word.
Menu toolbar - Excel
The Format, Cells, Number, is one of the most widely used:
Format Menu Cells Number
Column and Row height
Format Menu Row Height
IT TOOLKIT Page 24 of 27 © BBC 2004SKILL AREA 4.1: Lay out and present information – Part 1
BBC Key Skills: http://www.bbc.co.uk/keyskills
Shortcut to reformatting column and row width and height
Highlight the whole spreadsheet (click in grey box between A and 1 in the column/row headings). Manually drag the line between 1 and 2 or column between A and B to the width desired. All rows and columns will format to the width selected.
Or
Highlight whole sheet as above, and double-click between columns or rows in the grey area between column and row headings. A double-headed arrow should appear and it’s at this point you double-click.
Row and column headings
Each cell is named in the box above the row and column headings. If you click in the box, you can give a cell or series of cells, a name of their own:
To print row and column headings:
File Menu Page Setup Sheet Row and Column Headings
Sheet titles
Right-click over the sheet nameType in new name
Or
Double-click over the name itself.Type in the new name.
IT TOOLKIT Page 25 of 27 © BBC 2004SKILL AREA 4.1: Lay out and present information – Part 1
BBC Key Skills: http://www.bbc.co.uk/keyskills
Standard toolbar - Excel
All of these are the same as for Word with the exception of:
AutoSum – automatically adds a series of numbers.
Paste function – brings up a menu for any function the spreadsheet can operate.
Sort alphabetically and numerically – sorts data into order.
Formatting toolbar - Excel
Format Currency, ie £39.00.
Percentage, ie, 39%.
Comma style, ie, 39,000 (this also removes currency from a cell).
Decimal places – increase or decrease.
Text alignment plus Merge cells (so that text in a heading, for instance, can take up more than one cell).
Quick tip: Add date to Excel and Access cells - hold Ctrl and type ; (semi-colon)
Formatting charts and graphs
See Skills Area 3.3 - (you can link to this from the IT Toolkit Home Page) for details on formatting a chart or graph.
IT TOOLKIT Page 26 of 27 © BBC 2004SKILL AREA 4.1: Lay out and present information – Part 1
BBC Key Skills: http://www.bbc.co.uk/keyskills
Practice questions
1) On the notice below, how has the heading been formatted:i. Underscore?ii. Emboldening?
2) How have the various points been laid out:i. Numbering?ii. Bulleted points?
3) Is the work laid out in:i. Centre style?ii. Right justify style?iii. Left justify style?iv. Fully justified style?
4) To see the differences in costs of the following cars, how would this be better displayed:i. Using a table in Word?ii. Using an Access database?iii. Using a graph?
5) What would be an appropriate title for the spreadsheet:i. Cost of new vehicles?ii. A list of cars?
IT TOOLKIT Page 27 of 27 © BBC 2004SKILL AREA 4.1: Lay out and present information – Part 1
BBC Key Skills: http://www.bbc.co.uk/keyskills
Answers
1) On the notice, the heading has been formatted by:
Emboldening
2) The various points been laid out with:
Bulleted points
3) The work is laid out in:
Fully justified style
4) To see the differences in cost of the following cars, it would have been better displayed:
Using a graph
5) An appropriate title for the spreadsheet could be:
Cost of new vehicles
IT TOOLKIT Page 28 of 27 © BBC 2004SKILL AREA 4.1: Lay out and present information – Part 1
BBC Key Skills: http://www.bbc.co.uk/keyskills