Embed Size (px)
Citation preview

Skintonesusing Academy Watercolour Pencils
The Skintones projects are designed to give you a greater understanding of using Academy Watercolour Pencils to create multicultural skin tones. The three projects will guide you through step by step instructions to on how to blend the colours to create new colours and tones.
Materials used:
Before you start make a wet and dry colour chart, this way you can easily see which colours you need for your drawing.
Derwent Academy Watercolour Skintones 12 tinHB pencil for tracingDerwent plastic eraser and Derwent kneadable eraserDerwent metal sharpenerEmbossing tool from Derwent Essential Drawing Tools SetDerwent craft knifeHot Pressed Watercolour Paper (gives a smoother finish but if unavailable, use NOT paper)
Different ways to use Derwent Academy Watercolour Pencils
Use pencils dry - large areas can be covered by using long downward strokes or small circles. Details can be added later using a sharply pointed pencil.Make a wash - by scraping colour from a pencil with a craft knife onto a palette or saucer then adding water. Make sure the paint is fully dissolved and test the colour on spare paper before applying to your picture. Washes always appear lighter once dry, so allow for this when mixing your wash. Mix more colour than you think you will need to avoid having to stop and mix more halfway through a wash.Dampen large areas of dry colour with a flat watercolour brush - this method is good for blending two shades together and gives you good control, but it does take longer than producing a wash.Dampen areas of dry colour - with a Derwent waterbrush. This is good for strengthening colour on fine detail.Make a paper palette - by putting a block of dry colour down onto a scrap of paper. Using a wet brush touch the dry colour, this will lift the colour onto the brush and can then be applied to your drawing.
These portraits were made using a combination of these methods. Experiment to see which techniques you prefer for straight and curly hair, pale and dark skin and fine details. Then have fun with portraits of your family and friends.
Tips Keep pencils sharp so the colour fills the ridges of the paper and gives a smoother finish. Refer frequently to the photo as well as the stage you are working on. Work from light to dark except when making a wash, use your brush only slightly damp, not wet enough to soak the paper. The Derwent waterbrushes are ideal for this as the flow of water is regulated. Use directional strokes to emphasise the contours of the face. Leave plenty of white highlights on the forehead, nose, hair etc. Make sure a wash is completely dry before adding another wash. To enable you to judge tonal contrasts in the skin, punch holes in two scraps of paper and place them over different areas of the skin to isolate them.
Tracing paper or carbon paperFlat quarter inch synthetic watercolour brushDerwent Fine Waterbrush Spare paper for practicingRags or paper towels for wiping brushesMasking tapeWatercolour palette or saucer
Skintonesusing Academy Watercolour Pencils
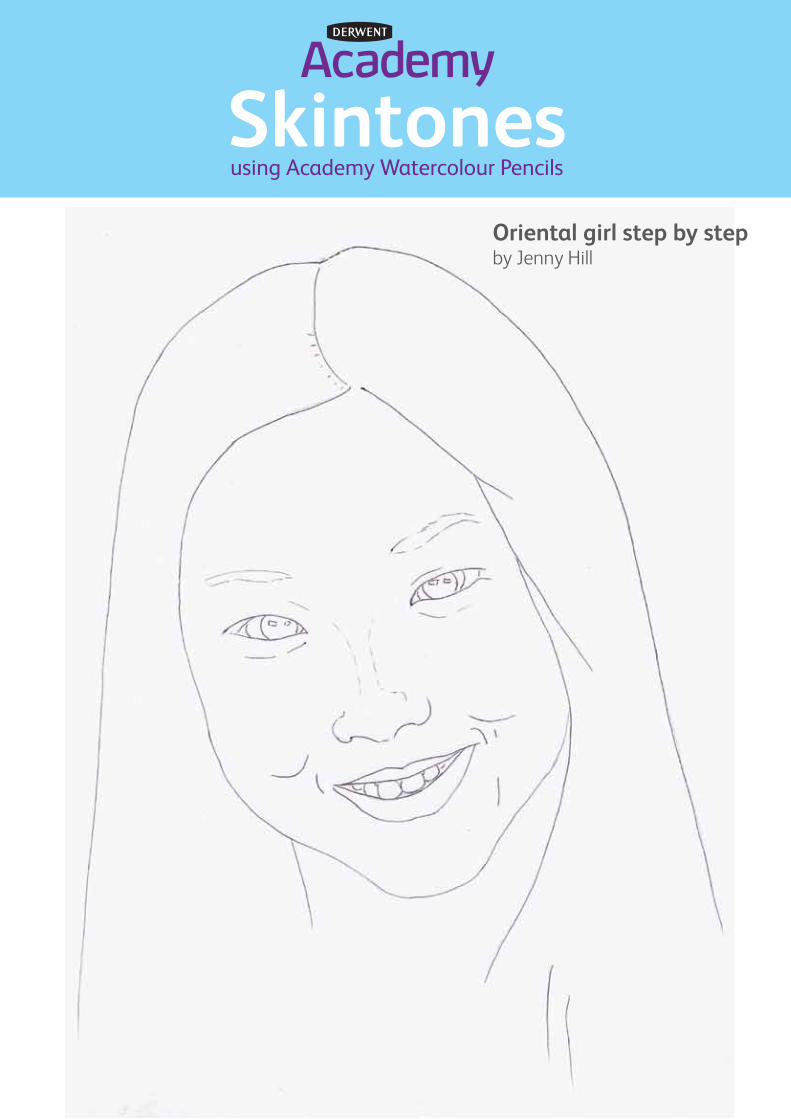
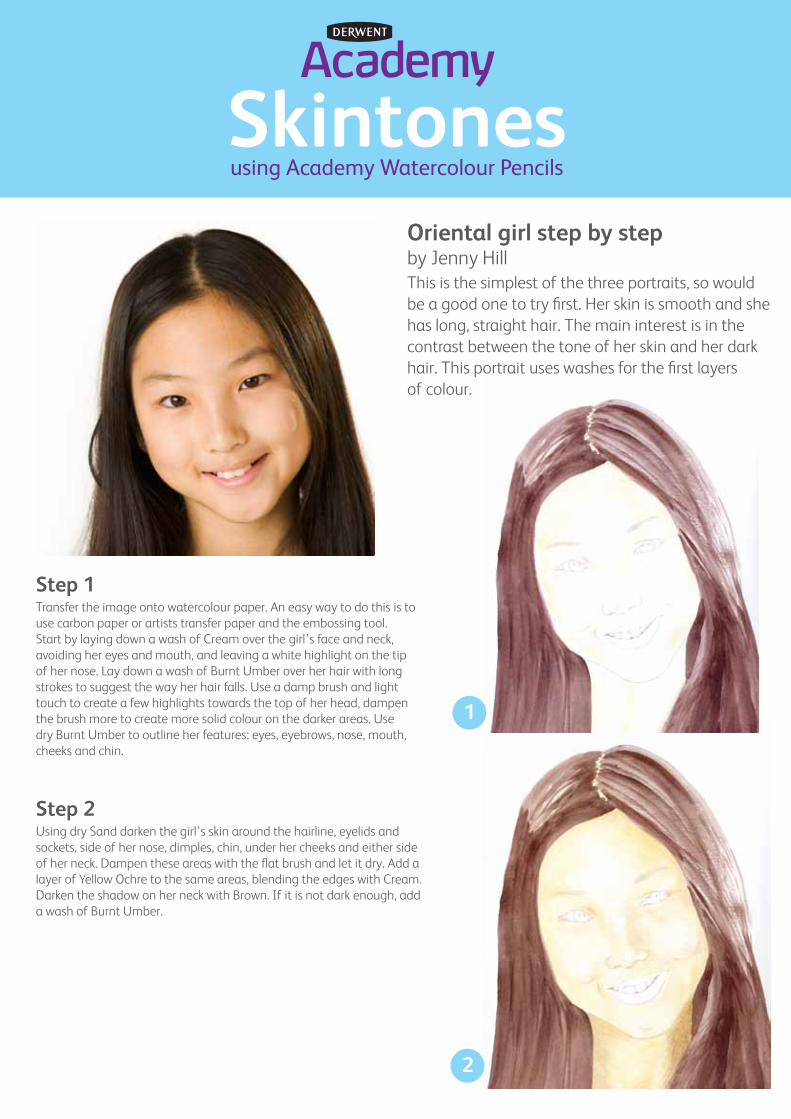
Oriental girl step by step by Jenny Hill
Skintonesusing Academy Watercolour Pencils
Step 1 Transfer the image onto watercolour paper. An easy way to do this is to use carbon paper or artists transfer paper and the embossing tool.Start by laying down a wash of Cream over the girl’s face and neck, avoiding her eyes and mouth, and leaving a white highlight on the tip of her nose. Lay down a wash of Burnt Umber over her hair with long strokes to suggest the way her hair falls. Use a damp brush and light touch to create a few highlights towards the top of her head, dampen the brush more to create more solid colour on the darker areas. Use dry Burnt Umber to outline her features: eyes, eyebrows, nose, mouth, cheeks and chin.
Step 2 Using dry Sand darken the girl’s skin around the hairline, eyelids and sockets, side of her nose, dimples, chin, under her cheeks and either side of her neck. Dampen these areas with the flat brush and let it dry. Add a layer of Yellow Ochre to the same areas, blending the edges with Cream. Darken the shadow on her neck with Brown. If it is not dark enough, add a wash of Burnt Umber.
Oriental girl step by step by Jenny HillThis is the simplest of the three portraits, so would be a good one to try first. Her skin is smooth and she has long, straight hair. The main interest is in the contrast between the tone of her skin and her dark hair. This portrait uses washes for the first layers of colour.
1
2
Skintonesusing Academy Watercolour Pencils
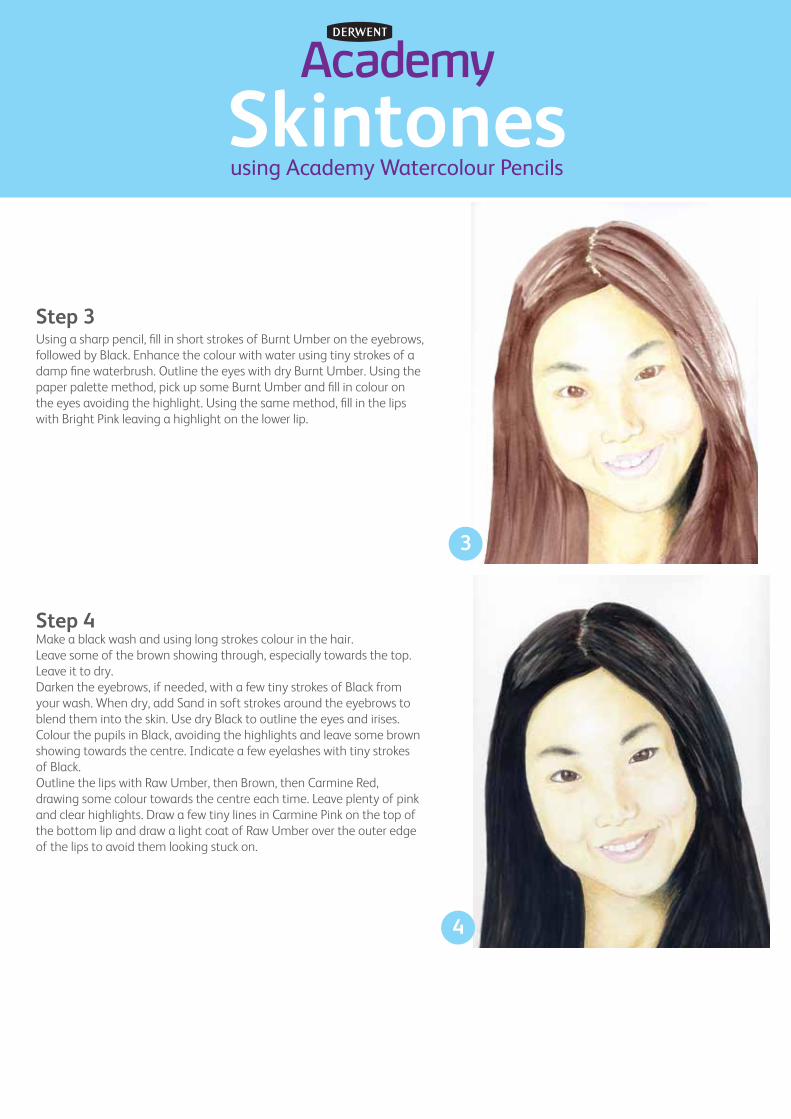
Step 3 Using a sharp pencil, fill in short strokes of Burnt Umber on the eyebrows, followed by Black. Enhance the colour with water using tiny strokes of a damp fine waterbrush. Outline the eyes with dry Burnt Umber. Using the paper palette method, pick up some Burnt Umber and fill in colour on the eyes avoiding the highlight. Using the same method, fill in the lips with Bright Pink leaving a highlight on the lower lip.
Step 4 Make a black wash and using long strokes colour in the hair. Leave some of the brown showing through, especially towards the top. Leave it to dry. Darken the eyebrows, if needed, with a few tiny strokes of Black from your wash. When dry, add Sand in soft strokes around the eyebrows to blend them into the skin. Use dry Black to outline the eyes and irises. Colour the pupils in Black, avoiding the highlights and leave some brown showing towards the centre. Indicate a few eyelashes with tiny strokes of Black. Outline the lips with Raw Umber, then Brown, then Carmine Red, drawing some colour towards the centre each time. Leave plenty of pink and clear highlights. Draw a few tiny lines in Carmine Pink on the top of the bottom lip and draw a light coat of Raw Umber over the outer edge of the lips to avoid them looking stuck on.
3
4
Skintonesusing Academy Watercolour Pencils
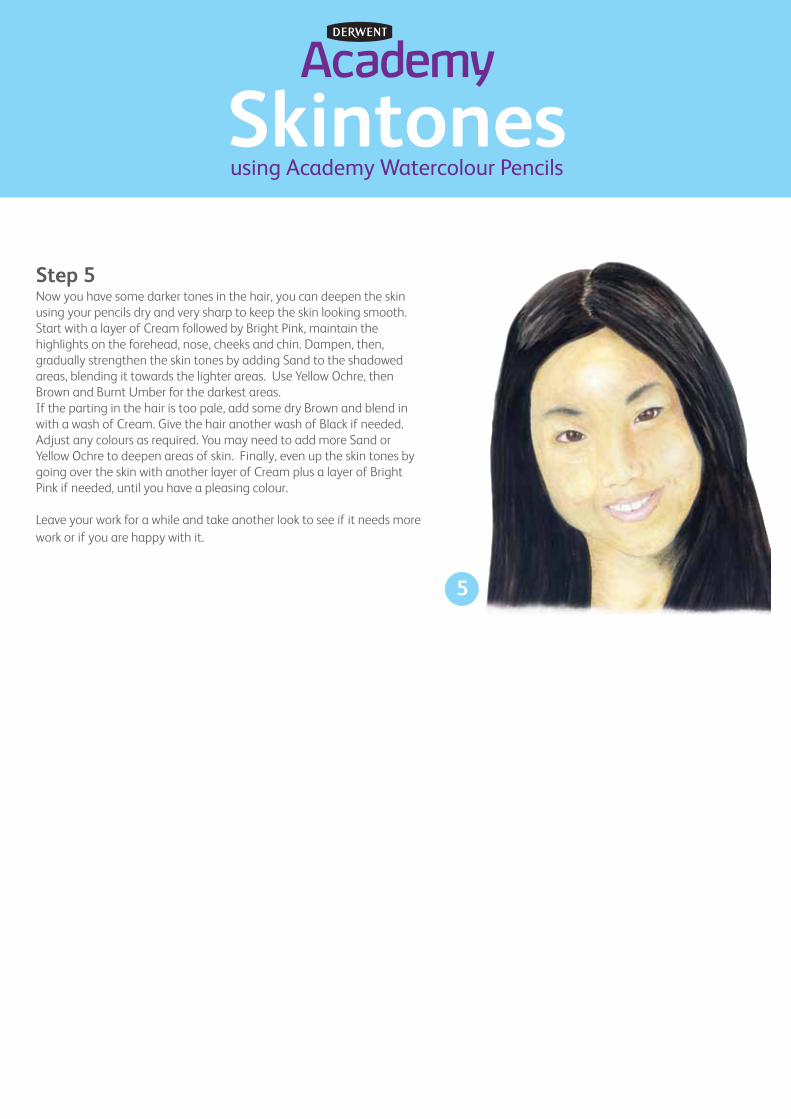
Step 5 Now you have some darker tones in the hair, you can deepen the skin using your pencils dry and very sharp to keep the skin looking smooth. Start with a layer of Cream followed by Bright Pink, maintain the highlights on the forehead, nose, cheeks and chin. Dampen, then, gradually strengthen the skin tones by adding Sand to the shadowed areas, blending it towards the lighter areas. Use Yellow Ochre, then Brown and Burnt Umber for the darkest areas. If the parting in the hair is too pale, add some dry Brown and blend in with a wash of Cream. Give the hair another wash of Black if needed. Adjust any colours as required. You may need to add more Sand or Yellow Ochre to deepen areas of skin. Finally, even up the skin tones by going over the skin with another layer of Cream plus a layer of Bright Pink if needed, until you have a pleasing colour.
Leave your work for a while and take another look to see if it needs more work or if you are happy with it.
5
Skintonesusing Academy Watercolour Pencils
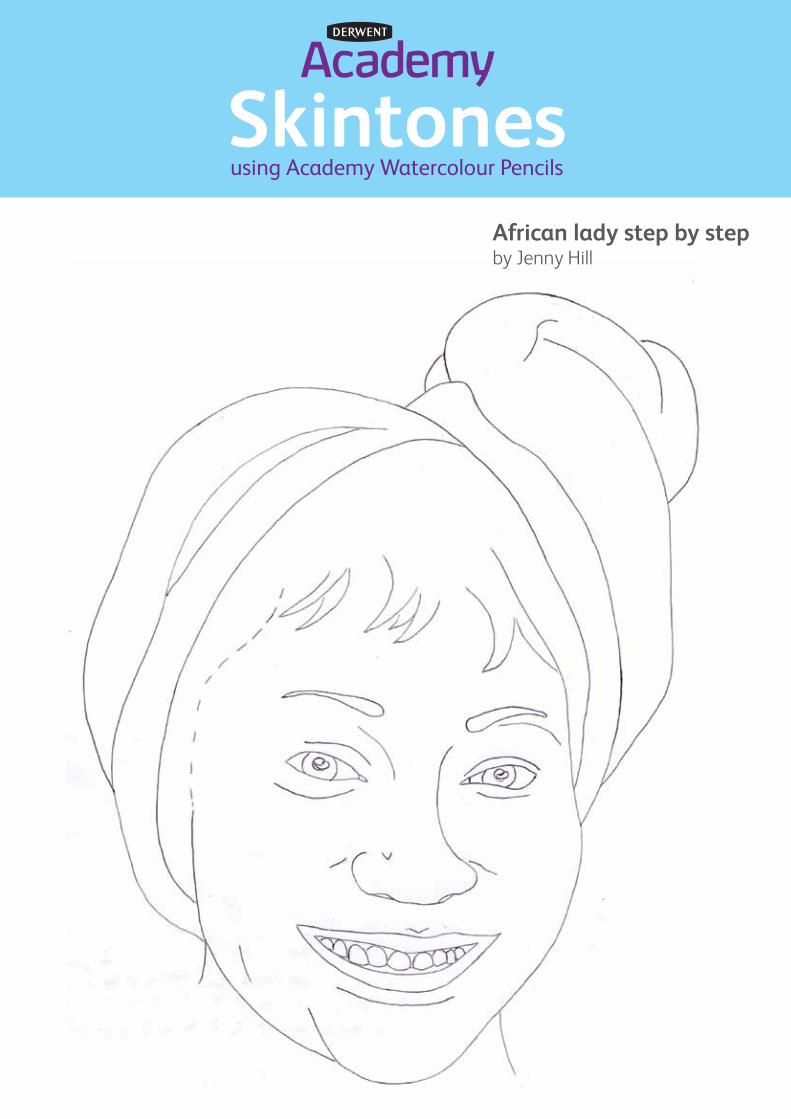
African lady step by step by Jenny Hill
Skintonesusing Academy Watercolour Pencils
African lady step by step by Jenny Hill
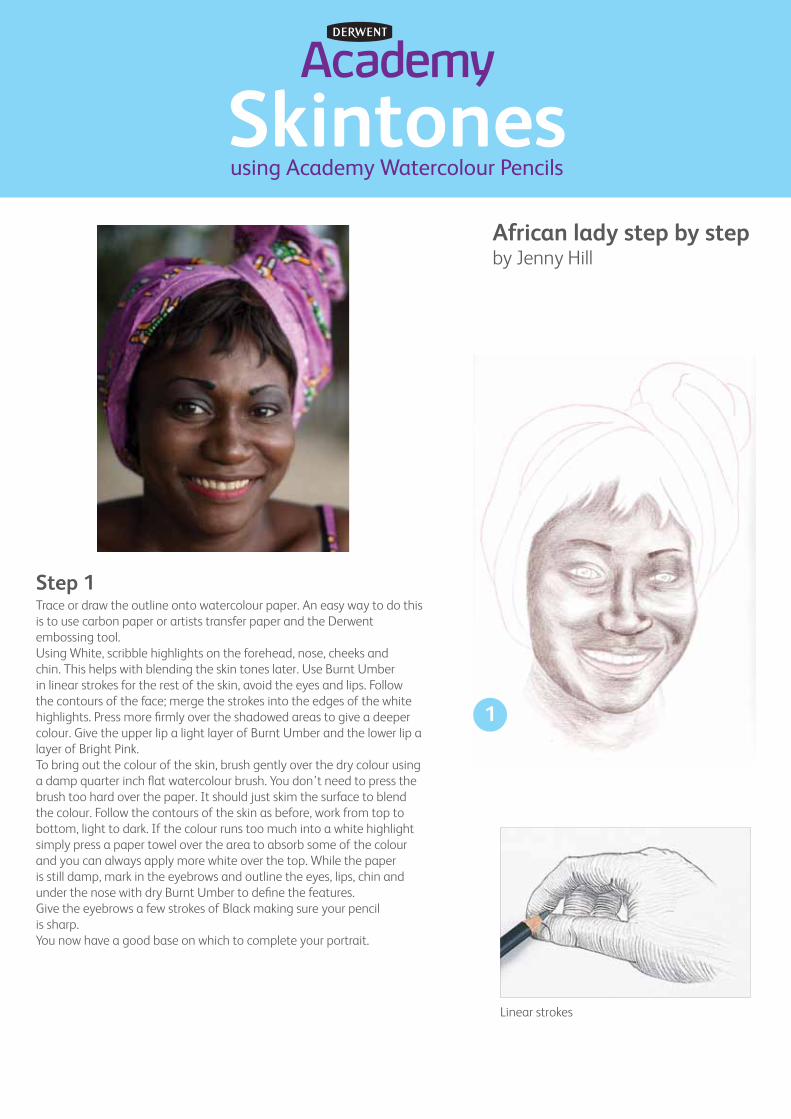
Step 1 Trace or draw the outline onto watercolour paper. An easy way to do this is to use carbon paper or artists transfer paper and the Derwent embossing tool. Using White, scribble highlights on the forehead, nose, cheeks and chin. This helps with blending the skin tones later. Use Burnt Umber in linear strokes for the rest of the skin, avoid the eyes and lips. Follow the contours of the face; merge the strokes into the edges of the white highlights. Press more firmly over the shadowed areas to give a deeper colour. Give the upper lip a light layer of Burnt Umber and the lower lip a layer of Bright Pink.To bring out the colour of the skin, brush gently over the dry colour using a damp quarter inch flat watercolour brush. You don’t need to press the brush too hard over the paper. It should just skim the surface to blend the colour. Follow the contours of the skin as before, work from top to bottom, light to dark. If the colour runs too much into a white highlight simply press a paper towel over the area to absorb some of the colour and you can always apply more white over the top. While the paper is still damp, mark in the eyebrows and outline the eyes, lips, chin and under the nose with dry Burnt Umber to define the features.Give the eyebrows a few strokes of Black making sure your pencil is sharp. You now have a good base on which to complete your portrait.
Linear strokes
1
Skintonesusing Academy Watercolour Pencils
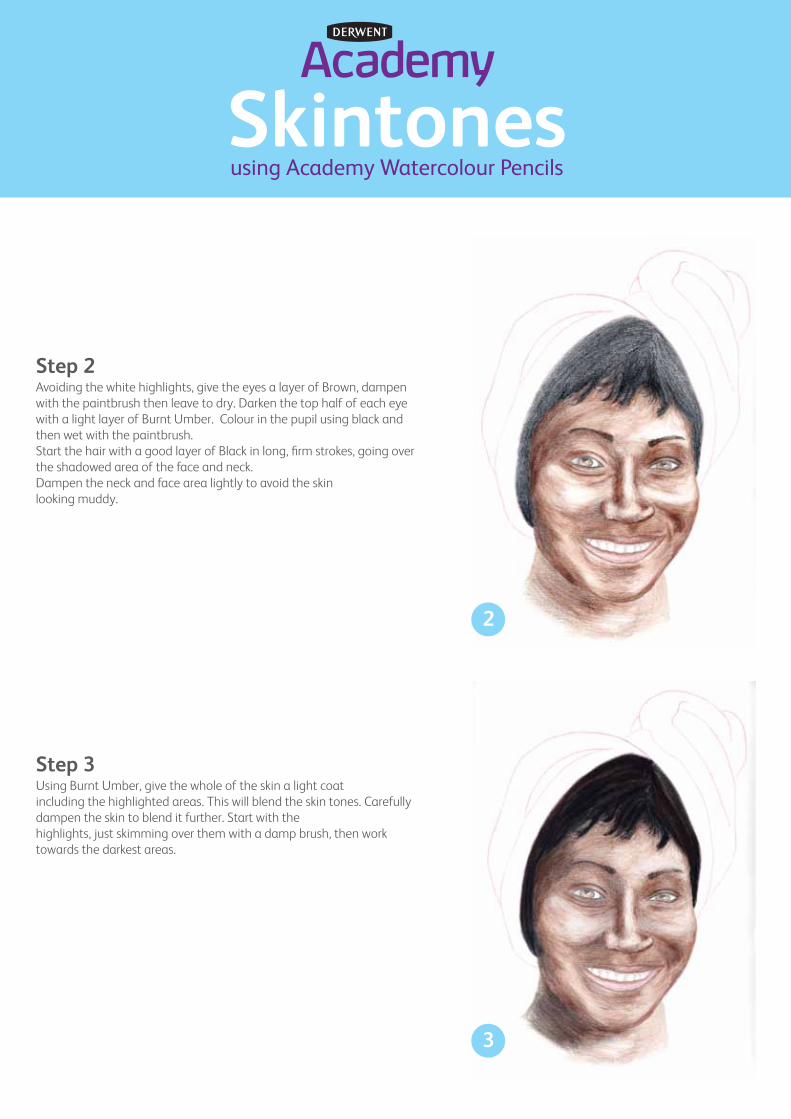
Step 2 Avoiding the white highlights, give the eyes a layer of Brown, dampen with the paintbrush then leave to dry. Darken the top half of each eye with a light layer of Burnt Umber. Colour in the pupil using black and then wet with the paintbrush.Start the hair with a good layer of Black in long, firm strokes, going over the shadowed area of the face and neck. Dampen the neck and face area lightly to avoid the skin looking muddy.
Step 3 Using Burnt Umber, give the whole of the skin a light coatincluding the highlighted areas. This will blend the skin tones. Carefully dampen the skin to blend it further. Start with the highlights, just skimming over them with a damp brush, then work towards the darkest areas.
2
3
Skintonesusing Academy Watercolour Pencils
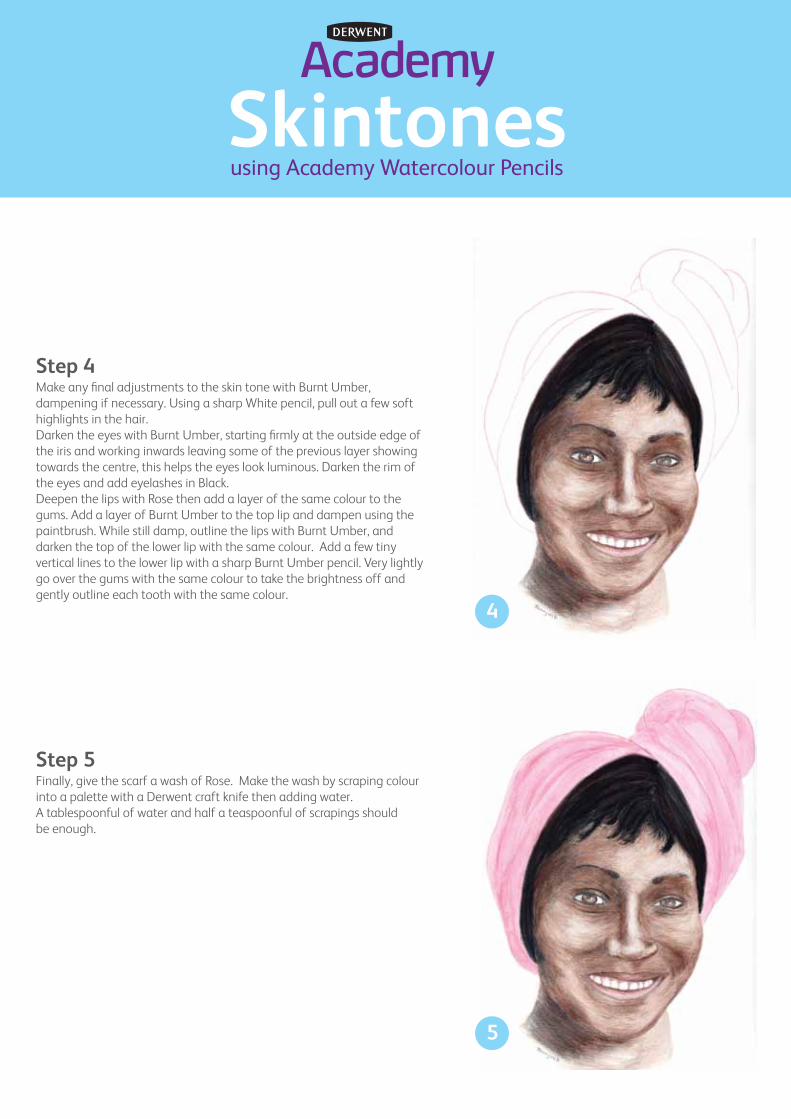
Step 4 Make any final adjustments to the skin tone with Burnt Umber, dampening if necessary. Using a sharp White pencil, pull out a few soft highlights in the hair.Darken the eyes with Burnt Umber, starting firmly at the outside edge of the iris and working inwards leaving some of the previous layer showing towards the centre, this helps the eyes look luminous. Darken the rim of the eyes and add eyelashes in Black. Deepen the lips with Rose then add a layer of the same colour to the gums. Add a layer of Burnt Umber to the top lip and dampen using the paintbrush. While still damp, outline the lips with Burnt Umber, and darken the top of the lower lip with the same colour. Add a few tiny vertical lines to the lower lip with a sharp Burnt Umber pencil. Very lightly go over the gums with the same colour to take the brightness off and gently outline each tooth with the same colour.
Step 5 Finally, give the scarf a wash of Rose. Make the wash by scraping colour into a palette with a Derwent craft knife then adding water. A tablespoonful of water and half a teaspoonful of scrapings should be enough.
4
5

Skintonesusing Academy Watercolour Pencils
Senior Gent step by step by Jenny Hill
Skintonesusing Academy Watercolour Pencils
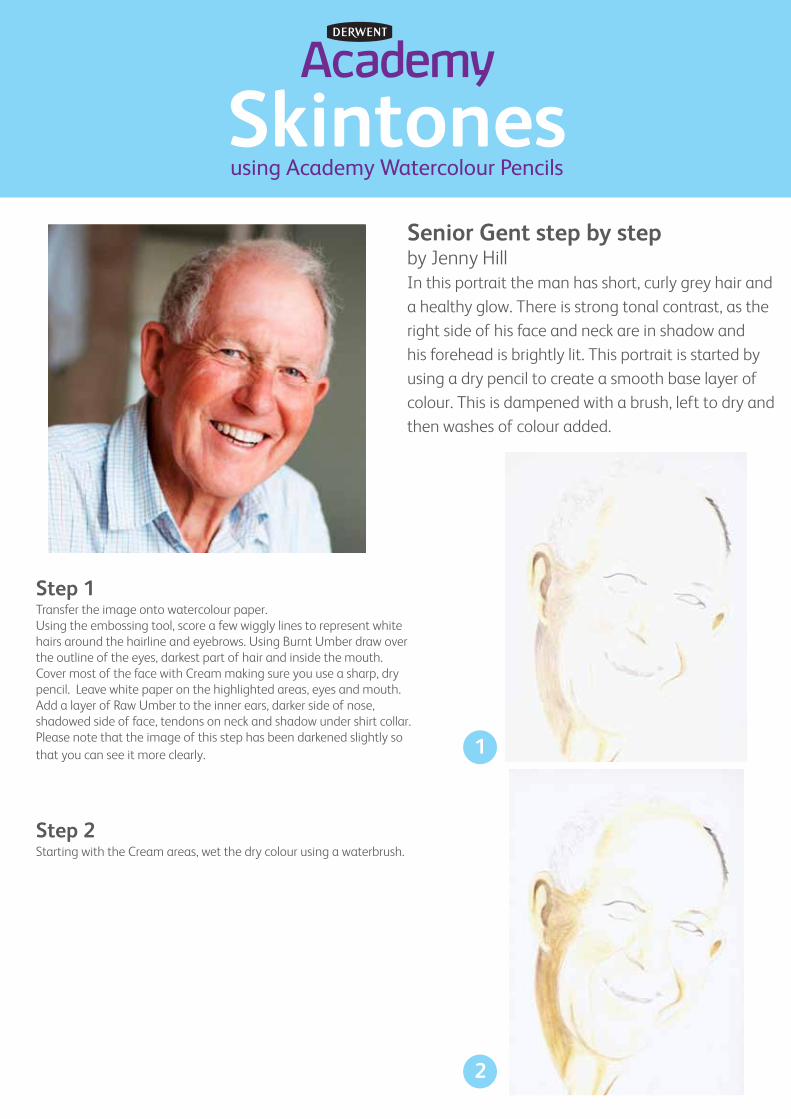
Senior Gent step by step by Jenny HillIn this portrait the man has short, curly grey hair and a healthy glow. There is strong tonal contrast, as the right side of his face and neck are in shadow and his forehead is brightly lit. This portrait is started by using a dry pencil to create a smooth base layer of colour. This is dampened with a brush, left to dry and then washes of colour added.
Step 1 Transfer the image onto watercolour paper. Using the embossing tool, score a few wiggly lines to represent white hairs around the hairline and eyebrows. Using Burnt Umber draw over the outline of the eyes, darkest part of hair and inside the mouth.Cover most of the face with Cream making sure you use a sharp, dry pencil. Leave white paper on the highlighted areas, eyes and mouth. Add a layer of Raw Umber to the inner ears, darker side of nose, shadowed side of face, tendons on neck and shadow under shirt collar. Please note that the image of this step has been darkened slightly so that you can see it more clearly.
Step 2 Starting with the Cream areas, wet the dry colour using a waterbrush.
1
2

Skintonesusing Academy Watercolour Pencils
Step 3 Make two washes with Bright Pink, one very pale and one darker. Using the waterbrush, start with a light wash over the forehead and lighter parts of the skin. Add a little of the darker wash to the lighter one and use this on the medium areas of the forehead, nose and cheeks. Use the deeper coloured wash over the darker parts of the face and neck.Make a medium wash of Burnt Umber and brush in a few areas of colour on the hair as shown. Mark in a few strokes of the same colour on the eyebrows with the waterbrush.
Step 4 Mouth: Leave the teeth and eyes white. Go over the lips with the pale wash leaving a white highlight on the lower lip. Darken inside the mouth with Black, going carefully round the teeth. Outline the lips with dry Carmine Red and add a light layer of Brown on the top lip. Mark a few lines on the lower lip in Carmine Red. Slightly dull the edges of each tooth by using a light wash of White, followed by a light layer of Bright Pink.
Hair: Make a grey wash with diluted Black. Using the waterbrush indicate a few darker hairs with random wiggly lines, then use the same method with a wash of Burnt Umber on the darker side of his head. The white lines scored earlier should now show up white against the darker colours.
Eyes: Using dry Burnt Umber outline each iris firmly. With a light touch, draw the colour slightly over the white of both eyes. Colour the pupils with dry Black leaving highlights as shown and using dry Brown colour in each iris. Make them darker at the top than the bottom and lighter towards the centre; this will give the appearance of roundness.
Skin: Go over the mid-tones of the skin with dry Brown. For the darker areas of skin, including around the hairline, dark side of face and under his right nostril, use Burnt Umber. Vary how firmly you press, depending on the depth of colour needed for each area. Mark in the wrinkles with the same colour, smudging each slightly with a finger or a kneadable eraser to soften the edges of each wrinkle. Adjust skin tones as necessary by going over any areas that is too pink with a light layer of dry Brown and any that are too yellow with a light layer of Bright Pink.
Finally, suggest the man’s shirt with a few lines of Yellow Ochre or a colour of your choice.
For more information, project sheets and expert tips visit www.derwentacademy.co.uk and www.pencils.co.uk
3
4