Embed Size (px)
Citation preview
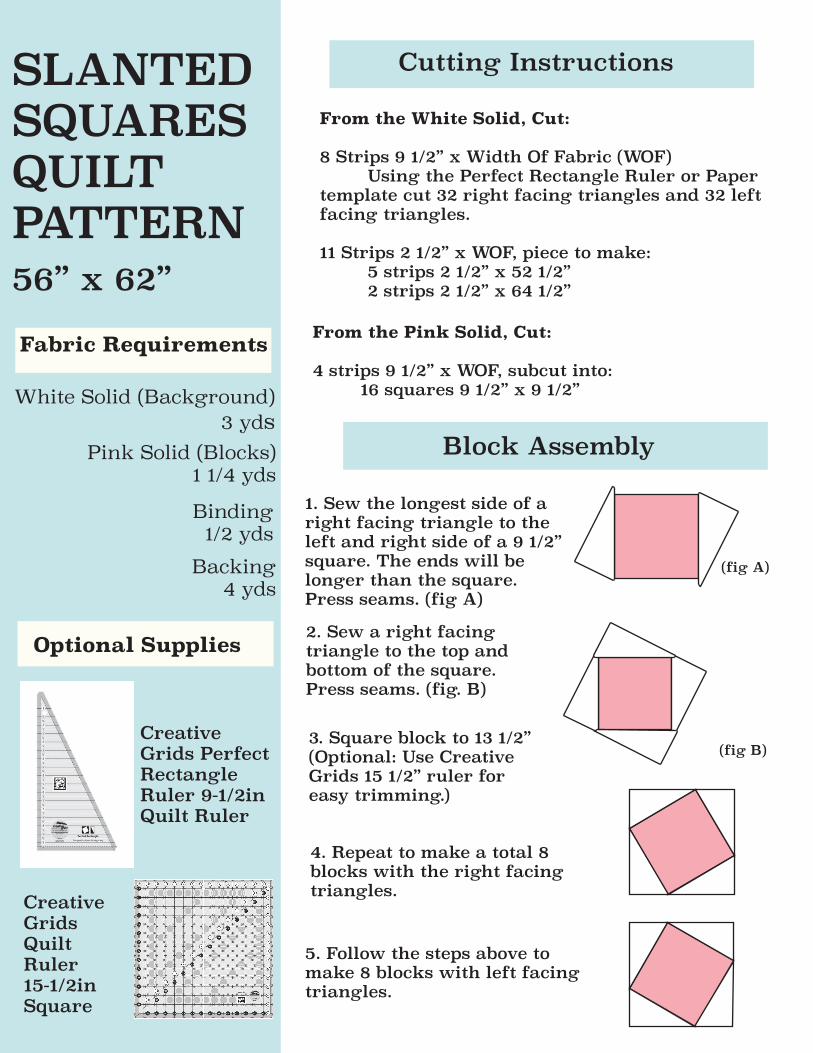
SLANTEDSQUARESQUILTPATTERN56” x 62”
Fabric Requirements
White Solid (Background)3 yds
Pink Solid (Blocks)1 1/4 yds
Binding1/2 yds
Backing4 yds
Cutting Instructions
From the White Solid, Cut:
8 Strips 9 1/2” x Width Of Fabric (WOF) Using the Perfect Rectangle Ruler or Paper template cut 32 right facing triangles and 32 left facing triangles.
11 Strips 2 1/2” x WOF, piece to make: 5 strips 2 1/2” x 52 1/2” 2 strips 2 1/2” x 64 1/2”
From the Pink Solid, Cut:
4 strips 9 1/2” x WOF, subcut into: 16 squares 9 1/2” x 9 1/2”
Optional Supplies
Block Assembly
1. Sew the longest side of a right facing triangle to the left and right side of a 9 1/2” square. The ends will be longer than the square. Press seams. (fig A)
2. Sew a right facing triangle to the top and bottom of the square. Press seams. (fig. B)
3. Square block to 13 1/2”(Optional: Use Creative Grids 15 1/2” ruler for easy trimming.)
4. Repeat to make a total 8 blocks with the right facing triangles.
(fig A)
(fig B)
5. Follow the steps above to make 8 blocks with left facing triangles.
Creative Grids Perfect Rectangle Ruler 9-1/2in Quilt Ruler
Creative Grids Quilt Ruler 15-1/2in Square

1. Layout the blocks in 4 rows as shown in the diagram. Place a 2 1/2” x 52 1/2” strip of white solid in between each row. (fig. C)
Quilt Assembly
(fig C)
2. Sew the blocks into rows. Then sew the rows and sashing together. (fig. D)
(fig D)
3. Sew a 2 1/2” x 52 1/2” strip of white solid to the top and bottom of the unit. Then sew a 2 1/2” x 64 1/2” to the left and right side. (Fig. E)
(fig E)
4. Baste, quilt, bind and enjoy!
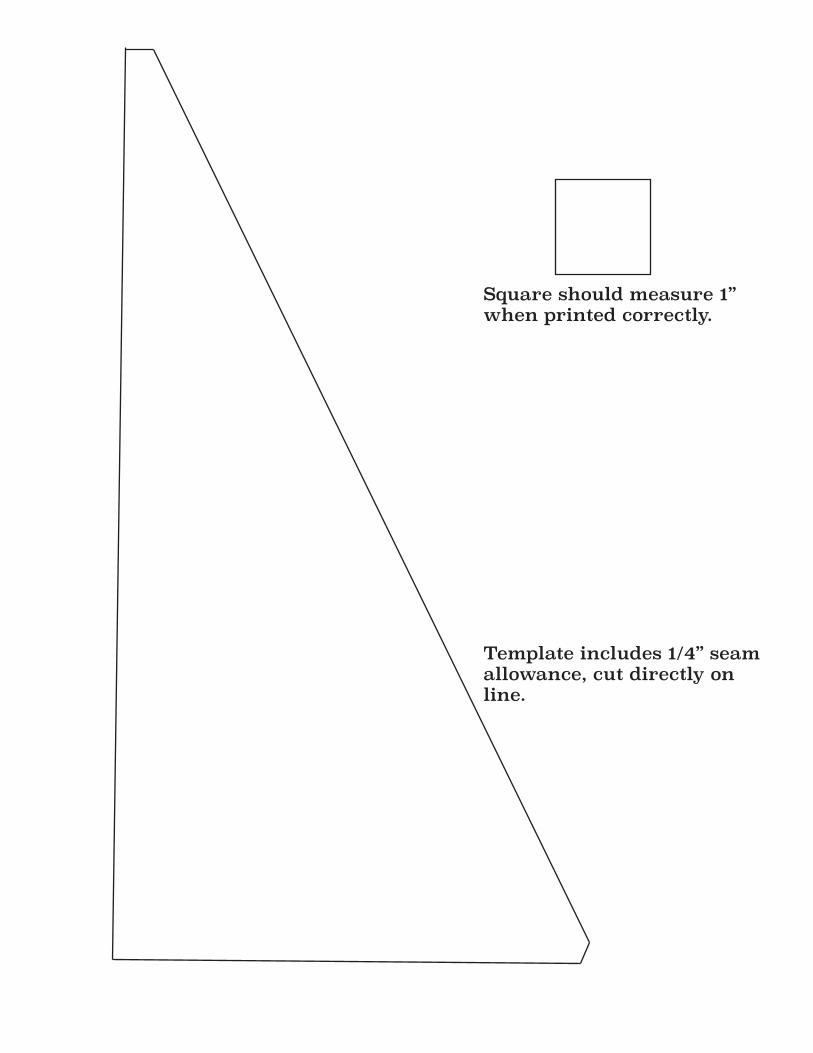
Square should measure 1” when printed correctly.
Template includes 1/4” seam allowance, cut directly on line.