Embed Size (px)
Citation preview
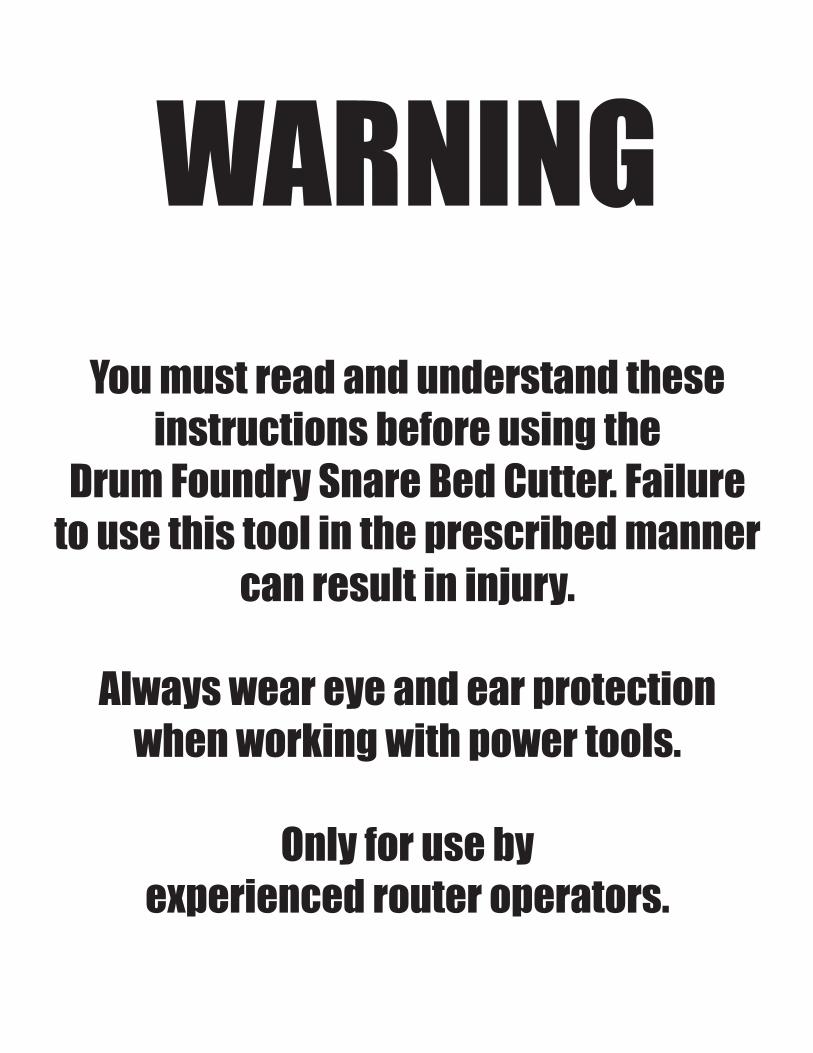
WARNING
You must read and understand these instructions before using the
Drum Foundry Snare Bed Cutter. Failure to use this tool in the prescribed manner
can result in injury.
Always wear eye and ear protection when working with power tools.
Only for use by experienced router operators.

SIDE SUPPORTS TEMPLATEATTACHMENTSCREWS
TEMPLATE ID
HANDLE SLIDING SHELL CLAMPLOCKING KNOB
SHELL DEPTH RULERSQUARING GUIDE
JIG BASE
SNARE BED TEMPLATE
SHELL DEPTH INDICATOR ARROW
The Drum Foundry Snare Bed Cutter
Part Descriptions
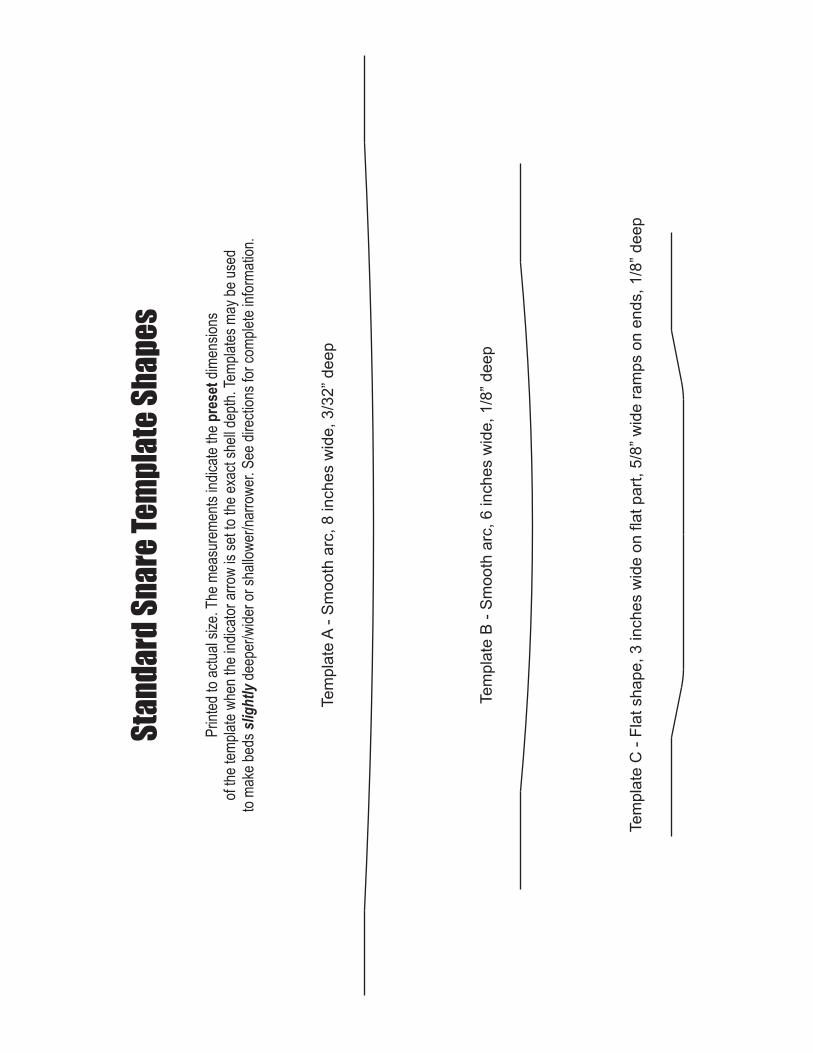
Sta
nd
ard
Sn
are
Te
mp
late
Sh
ap
es
Prin
ted
to a
ctua
l siz
e. T
he m
easu
rem
ents
indi
cate
the
pre
set
dim
ensi
ons
of th
e te
mpl
ate
whe
n th
e in
dica
tor
arro
w is
set
to th
e ex
act s
hell
dept
h. T
empl
ates
may
be
used
to m
ake
beds
slig
htl
y de
eper
/wid
er o
r sh
allo
wer
/nar
row
er. S
ee d
irect
ions
for
com
plet
e in
form
atio
n.
Tem
pla
te B
- S
mo
oth
arc
, 6
inch
es w
ide
, 1
/8”
de
ep
Tem
pla
te A
- S
mo
oth
arc
, 8
inch
es w
ide
, 3
/32
” d
ee
p
Tem
pla
te C
- F
lat sh
ap
e, 3
in
ch
es
wid
e o
n fla
t p
art
, 5
/8”
wid
e r
am
ps o
n e
nd
s, 1
/8”
de
ep
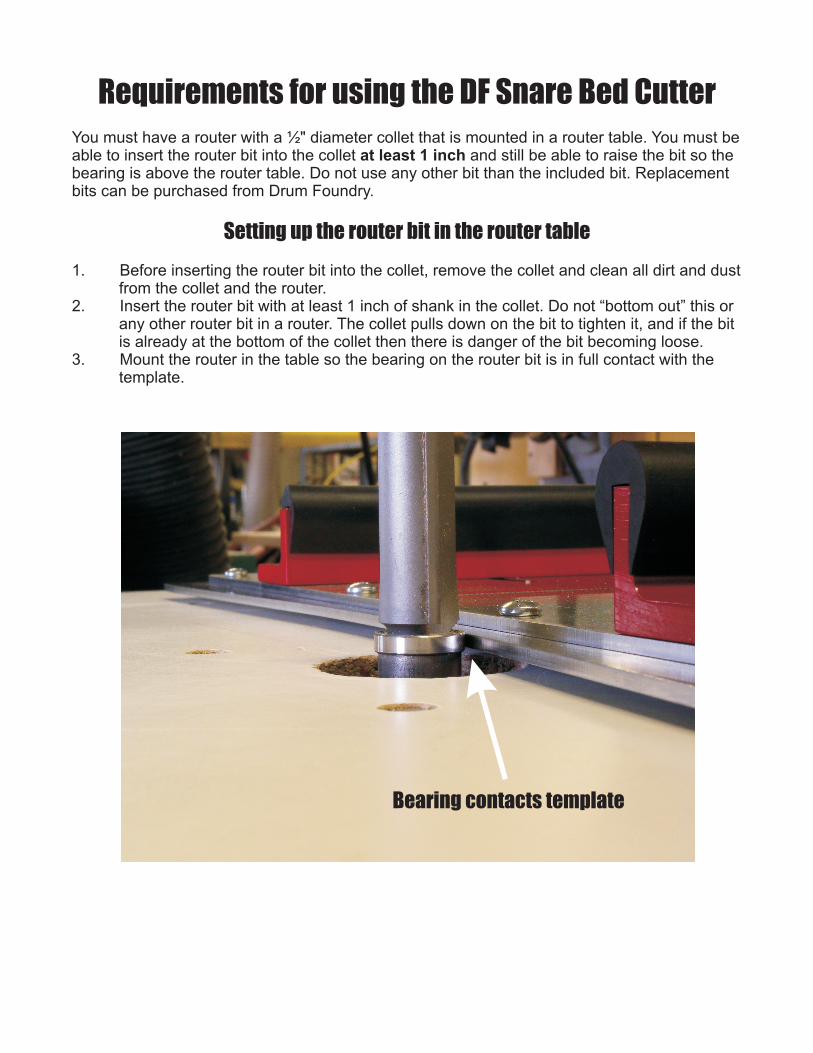
Requirements for using the DF Snare Bed CutterYou must have a router with a ½" diameter collet that is mounted in a router table. You must be able to insert the router bit into the collet at least 1 inch and still be able to raise the bit so the bearing is above the router table. Do not use any other bit than the included bit. Replacement bits can be purchased from Drum Foundry.
Setting up the router bit in the router table
1. Before inserting the router bit into the collet, remove the collet and clean all dirt and dust from the collet and the router.
2. Insert the router bit with at least 1 inch of shank in the collet. Do not “bottom out” this or any other router bit in a router. The collet pulls down on the bit to tighten it, and if the bit is already at the bottom of the collet then there is danger of the bit becoming loose.
3. Mount the router in the table so the bearing on the router bit is in full contact with the template.
Bearing contacts template
Setting up the shell in the jig and using the standard templates
1. We suggest that your bearing edges are already cut on your shell before you cut the snare bed. Mark the exact center of your snare beds on both sides.
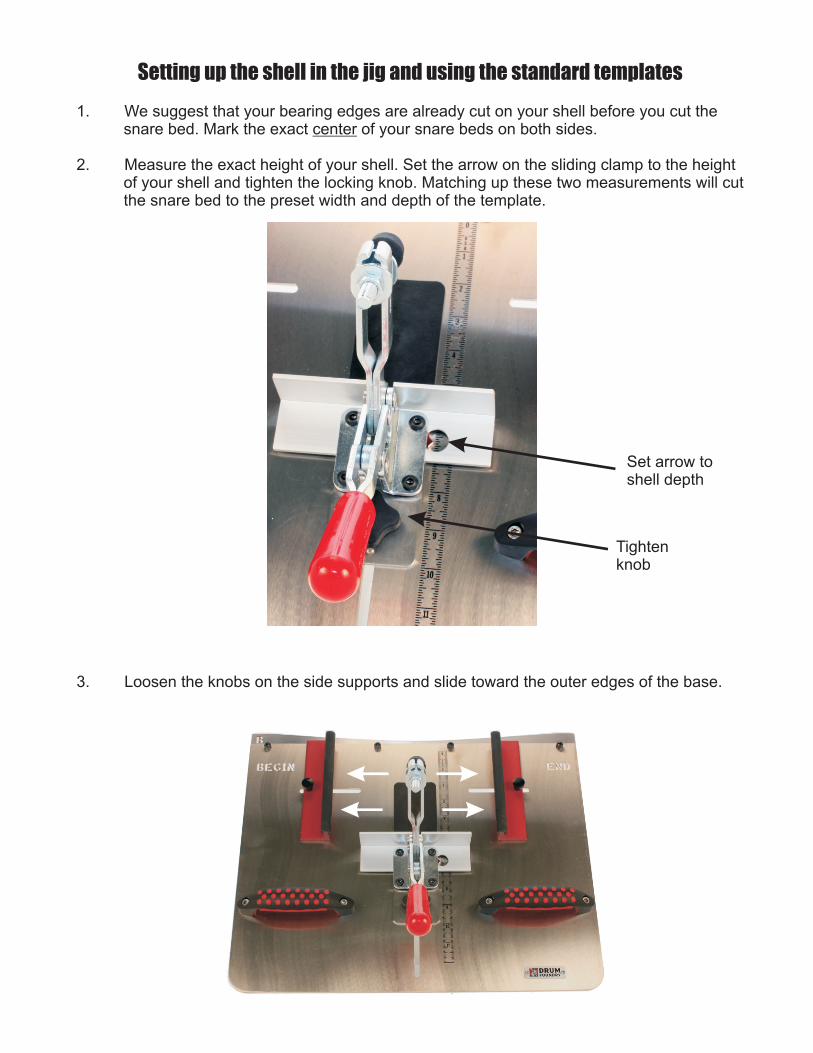
2. Measure the exact height of your shell. Set the arrow on the sliding clamp to the height of your shell and tighten the locking knob. Matching up these two measurements will cut the snare bed to the preset width and depth of the template.
3. Loosen the knobs on the side supports and slide toward the outer edges of the base.
Set arrow toshell depth
Tightenknob
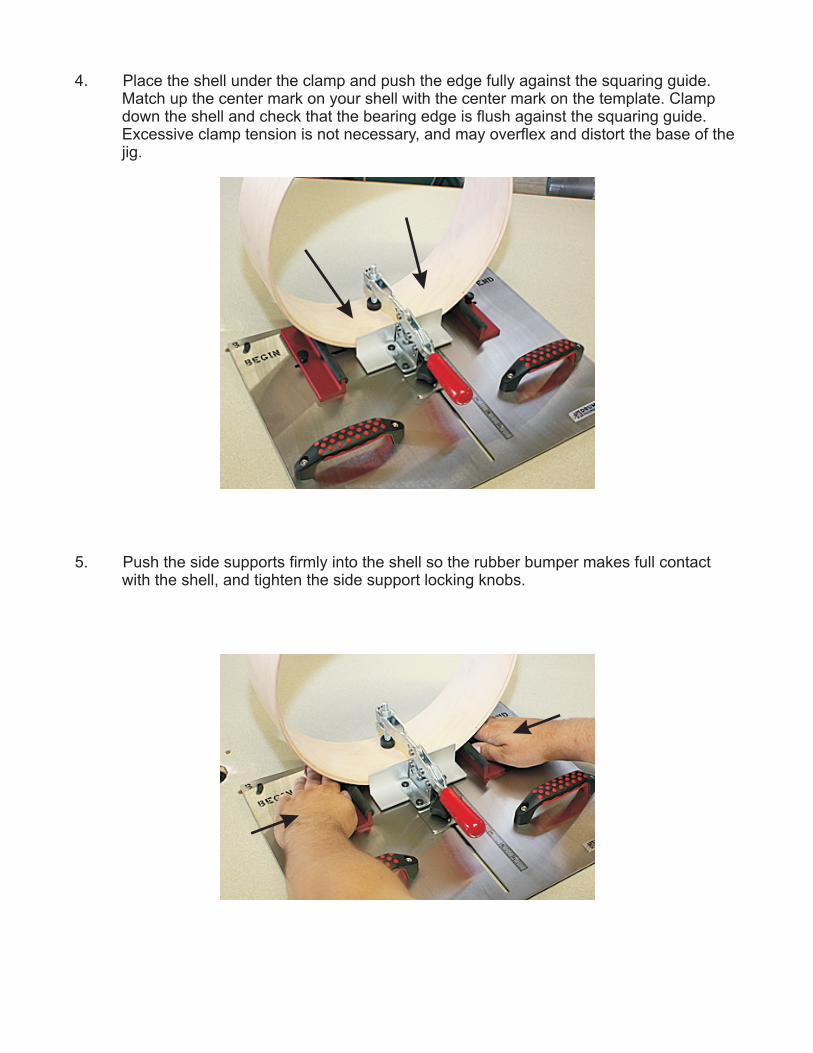
4. Place the shell under the clamp and push the edge fully against the squaring guide. Match up the center mark on your shell with the center mark on the template. Clamp down the shell and check that the bearing edge is flush against the squaring guide. Excessive clamp tension is not necessary, and may overflex and distort the base of the jig.
5. Push the side supports firmly into the shell so the rubber bumper makes full contact with the shell, and tighten the side support locking knobs.

IMPORTANT! Before cutting the snare bed, double check that
all knobs are secure and the shell is stable.
4. Start the router motor with the jig at a safe distance away from the blades. The base is marked with a “BEGIN” and “END”. This will ensure that you are always cutting in the correct and safe direction in relation to the router bit rotation.
DO NOT use a climb cut by starting at the side marked “END”! You will not achieve any better results by doing so, and it is much more dangerous.
Check that you have set the measurement correctly and the shell is not too far out over the template. The router bit bearing must contact template before the cutting edges touch the shell.
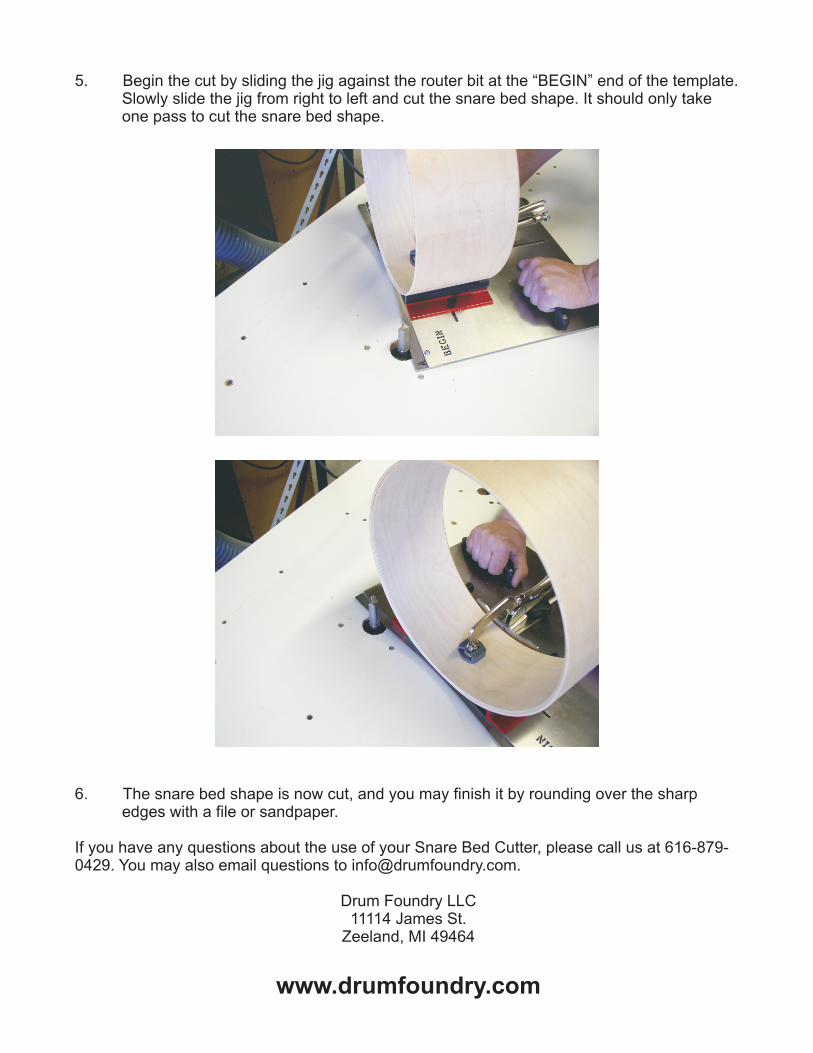
5. Begin the cut by sliding the jig against the router bit at the “BEGIN” end of the template. Slowly slide the jig from right to left and cut the snare bed shape. It should only take one pass to cut the snare bed shape.
6. The snare bed shape is now cut, and you may finish it by rounding over the sharp edges with a file or sandpaper.
If you have any questions about the use of your Snare Bed Cutter, please call us at 616-879-0429. You may also email questions to [email protected].
Drum Foundry LLC11114 James St.
Zeeland, MI 49464
www.drumfoundry.com