Embed Size (px)
Citation preview
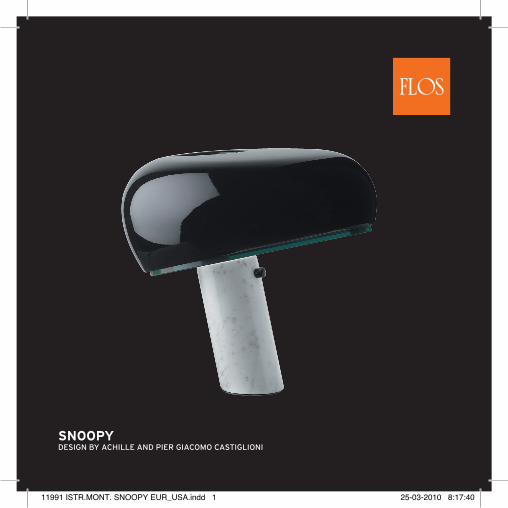
SNOOPYdesign by Achille And Pier giAcomo cAstiglioni
11991 ISTR.MONT. SNOOPY EUR_USA.indd 1 25-03-2010 8:17:40
FLOSHISTORY
FLOS was founded in 1962. The very same year we began producing a number of lamps that were to become classics in Italian industrial design. These first lamps were Arco, Relemme, Toio and Taccia - all designed by Achille and Piergiacomo Castiglioni. As a tangible proof of their timeless design and technical excellence, these lamps continue to be produced today.
Itallstartedwithcocoon...In 1959 Arturo Eisenkeil from Merano, an importer of cocoon, a spray-on plastic coating produced in the United States, was tracking down possible applications for this new material. He joined forces with Dino Gavina and Cesare Cassina and set up a company to produce lighting fixtures. This marked the beginning of our long-standing association in the area of design with the Castiglioni brothers and Tobia Scarpa. The first cocoon lamps ever created were the offspring of this collaboration: Viscontea, Taraxacum and Gatto by the Castiglioni brothers and Fantasma by Scarpa.
And then…We moved from Merano to the province of Brescia in 1964: at first to Nave and then to our current premises in Bovezzo. Sergio Gandini became chairman of the company in 1965. In 1974, Flos became the owner of Arteluce - one of the key Italian companies in the industrial design sector. Gino Sarfatti, an industrialist and designer, is the founder of Arteluce. Several models designed by Sarfatti himself have been incorporated into our product range.
Quality is givenFrom the very outset, our distinguishing feature has been the high quality approach to lamp design and production. Many of the numerous lamps designed for Flos, first by Achille and Piergiacomo, are undoubtedly some of the best-known and most successful products of industrial design. They have won awards and historical-critical accolades, and are included in all the most important collections and design museums around the world. Some significant product examples over the last forty years are: Parentesi (1970), Brera (1992), Fucsia (1996) and the recent
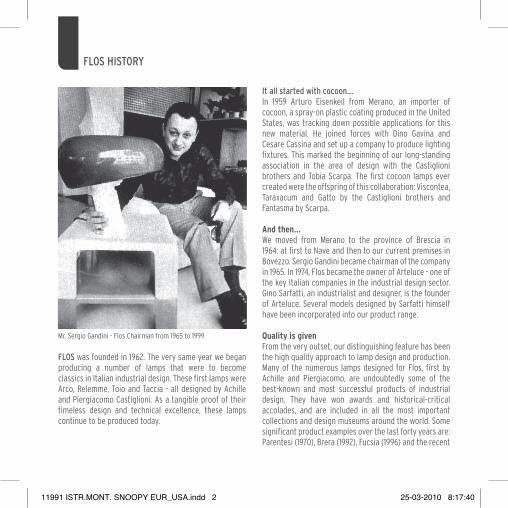
Mr. Sergio Gandini - Flos Chairman from 1965 to 1999
11991 ISTR.MONT. SNOOPY EUR_USA.indd 2 25-03-2010 8:17:40
Diabolo (1998). The revolutionary Parentesi by Achille Castiglioni and Pio Manzù is a fine thread stretched between floor and ceiling and was awarded the compasso d’Oro in 1979.
OvertheyearsProminent Italian and international names have designed for Flos and Arteluce. Marc Newson created the Helice aluminum floor lamp (1992). Marc Sadler’s Drop rubber wall lamp was awarded the Compasso d’Oro in 1994 - the very same year also awarded to Flos for its activity as a company. In 1988, we began producing Arà, the first Philippe Starck lamp. This was the beginning of an important working relationship that has lasted ever since. Arà was followed, among others, by the small colored Miss Sissi (1991) in plastic that turned out to be a cult object and an enormous commercial success. The following years came Rosy Angelis (1994), the Romeo Moon (1996) and Archimoon (1998) series.
In sync with timeThroughout the nineties the work of Achille Castiglioni and Philippe Starck has been flanked by a series of products from new and other designers. This reflects our desire to keep our attitude to discover the most talented designers to maintain our leadership in innovation. We began producing Jasper Morrison’s Globall series in 1998, keynoted by a large opaline sphere that can be used with various types of supports. Kostantin Gricic is another innovative designer and we produce two of his works: May Day that is reinventing a versatile, multi-purpose floor or suspension lamp, and Boxer redesigning a characterless type with contemporary materials and lines. Finally, we also produce Antonio Citterio’s Lastra ceiling fixture. This
lamp combine advanced lighting technology, printed circuitry and single adjustable task lighting with a traditional accent conjured up by the imposing crystal sheet and lamp hanging over the dining table.
Communicating designWe have the same high quality approach to the way we communicate through our catalogues and graphic image, fitting, showrooms and exhibitions. Our first catalogues were signed by Max Huber and the logo was designed by Pino Tovaglia. Today our communication takes advantage of the collaboration with international talents such as Jean Baptiste Mondino for the photography, or Ferruccio Laviani for the design of our show room.
ThenewmilleniumOur production will continue to be imbued with various design trends that embody our attention to leading-edgeresearch combined with highly efficient production, sales and communications. In 2002, we celebrated forty years’ production of designer lamps.
11991 ISTR.MONT. SNOOPY EUR_USA.indd 3 25-03-2010 8:17:40
THEDESIGNERS
ACHILLE CASTIGLIONI was born in Milan in 1918 and graduated with a degree in architecture in 1944.As early as 1940 he dedicated himself to testing industrial production with brothers Livio (1911-1979) and Pier Giacomo (1913-1968).After graduating, he began research into shapes, techniques and new materials, aimed at developing an integral design process.In 1969, he was authorized by the Ministry of Education to teach “Artistic Design for Industry” and was a professor at Turin´s Faculty of Architecture until 1980 and then professor of “Industrial Design“ in Milan until 1993.Since 1950 he has worked in the area of testing and research into outfittings and presentations for exhibitions (Triennale di Milano, Montecatini, Agip, Rai) He was one of the founders of ADI in 1956. MoMA in New York features 14 of his works. Other works can be found at: Victoria and Albert Museum (London), Kunstgewerbe Museum (Zurich), Staatliches Museum fur Angewandte Kunst (Munich), Museo del Design (Prato), Uneleckoprumyslove Prague Museum, Israel Museum (Jerusalem), The Denver Art Museum, Vitra Design Museum (Weil am Rhein), Angewandte Kunst Museum (Hamburg and Cologne). He has been awarded 9 Compasso d´Oro.He staged a one-man show between 1984 and 1986 organized by the Museum fur Angewandte Kunst (Vienna), then at Akademie der Kunst (Berlin), Triennale di Milano (Milan), Kunstgewerbe Museum (Zurich), Haags Gemeentemuseum (the Hague), Circulo de Bellas Artes (Madrid) and at the Centre Georges Pompidou (Paris). 1985: Honorary Member of the “Committee of Advisors” at Art Center College of Design (Pasadena, California and Montreaux, Switzerland). 1986: Honorary Member of the Faculty of Royal
Designers for Industry, Royal Society of Art (London). 1987: Honorary Degree from the Royal College of Art (London). 1993: Annual award from “The Chartered Society of Designers” (London). 1994: “Primavera del Design” Award from the Department of Culture (Catalonia). 1995: “Art sur Table” Award from the Conseil National des Art Culinaire (Paris). 1996: “IF Design Wettbewerb” Award from Industrie Forum Design (Hanover). 1996: “Longevity-Langlebigkeit” Award from Design Center (Stuttgart). 1999: “Domus/INARCH 1998 Award” alla carriera from INARCH. 1999: “Targa d´Oro Unione Italiana per il Disegno” Award from the Faculty of Architecture of Genoa. 1999 : Wins the Enel “Sostegni per l´Ambiente” competition together with architect Michele De Lucchi. Achille Castiglioni died in 2002.
PIER GIACOMO CASTIGLIONI was born in Milan in 1913. He graduated from the department of Architecture at Milan Polytechnic in 1937.He began working with his younger brother Achille, immediately after the war, directing his interests toward urban planning, architecture and design in a multivarious and intense professional enterprise, contributing actively to international cultural life by participating in numerous conferences and round tables, most of them focused on industrial design. He is known, with his brother, throughout the world for their designs for lighting fixtures and furniture. In 1956, he was among the founding members of the A.D.I. (Industrial Design Association).His expertise and interests led him into the field of teaching; Pier Giacomo was professor of Architectural Composition at Milan Polytechnic until he died in 1968.
11991 ISTR.MONT. SNOOPY EUR_USA.indd 4 25-03-2010 8:17:40

Achille and Pier Giacomo Castiglioni
11991 ISTR.MONT. SNOOPY EUR_USA.indd 5 25-03-2010 8:17:40
<IT> ISTRUZIONIDIINSTALLAZIONEEDIMPIEGO
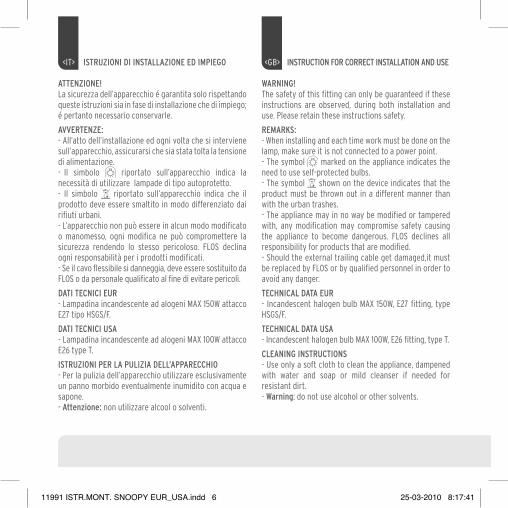
ATTENZIONE!La sicurezza dell’apparecchio é garantita solo rispettando queste istruzioni sia in fase di installazione che di impiego; é pertanto necessario conservarle.
AVVERTENZE:- All’atto dell’installazione ed ogni volta che si interviene sull’apparecchio, assicurarsi che sia stata tolta la tensione di alimentazione.- Il simbolo riportato sull’apparecchio indica la necessità di utilizzare lampade di tipo autoprotetto.- Il simbolo riportato sull’apparecchio indica che il prodotto deve essere smaltito in modo differenziato dai rifiuti urbani.- L’apparecchio non può essere in alcun modo modificato o manomesso, ogni modifica ne può compromettere la sicurezza rendendo lo stesso pericoloso. FLOS declina ogni responsabilità per i prodotti modificati.- Se il cavo flessibile si danneggia, deve essere sostituito da FLOS o da personale qualificato al fine di evitare pericoli.
DATITECNICIEUR- Lampadina incandescente ad alogeni MAX 150W attacco E27 tipo HSGS/F.
DATITECNICIUSA- Lampadina incandescente ad alogeni MAX 100W attacco E26 type T.
ISTRUZIONIPERLAPULIZIADELL’APPARECCHIO- Per la pulizia dell’apparecchio utilizzare esclusivamente un panno morbido eventualmente inumidito con acqua e sapone.- Attenzione: non utilizzare alcool o solventi.
<GB> INSTRUCTIONFORCORRECTINSTALLATIONANDUSE
WARNING!The safety of this fitting can only be guaranteed if these instructions are observed, during both installation and use. Please retain these instructions safety.
REMARKS:- When installing and each time work must be done on the lamp, make sure it is not connected to a power point.- The symbol marked on the appliance indicates the need to use self-protected bulbs.- The symbol shown on the device indicates that the product must be thrown out in a different manner than with the urban trashes.- The appliance may in no way be modified or tampered with, any modification may compromise safety causing the appliance to become dangerous. FLOS declines all responsibility for products that are modified.- Should the external trailing cable get damaged,it must be replaced by FLOS or by qualified personnel in order to avoid any danger.
TECHNICALDATAEUR - Incandescent halogen bulb MAX 150W, E27 fitting, type HSGS/F.
TECHNICALDATAUSA - Incandescent halogen bulb MAX 100W, E26 fitting, type T.
CLEANINGINSTRUCTIONS- Use only a soft cloth to clean the appliance, dampened with water and soap or mild cleanser if needed for resistant dirt.- Warning: do not use alcohol or other solvents.
11991 ISTR.MONT. SNOOPY EUR_USA.indd 6 25-03-2010 8:17:41
<DE> INSTALLATION-UNDGEBRAUCHSANWEISUNGEN
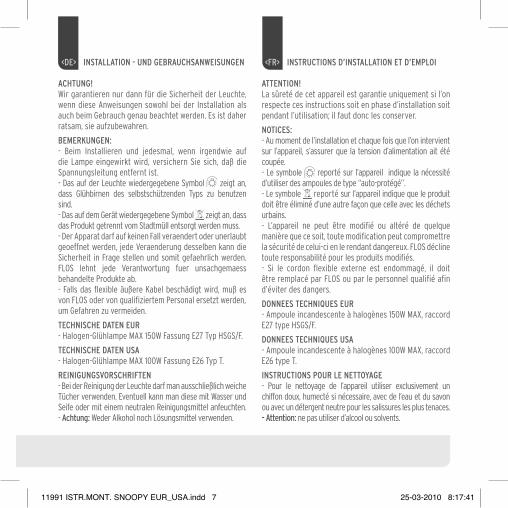
ACHTUNG!Wir garantieren nur dann für die Sicherheit der Leuchte, wenn diese Anweisungen sowohl bei der Installation als auch beim Gebrauch genau beachtet werden. Es ist daher ratsam, sie aufzubewahren.
BEMERKUNGEN:- Beim Installieren und jedesmal, wenn irgendwie auf die Lampe eingewirkt wird, versichern Sie sich, daß die Spannungsleitung entfernt ist.- Das auf der Leuchte wiedergegebene Symbol zeigt an, dass Glühbirnen des selbstschützenden Typs zu benutzen sind.- Das auf dem Gerät wiedergegebene Symbol zeigt an, dass das Produkt getrennt vom Stadtmüll entsorgt werden muss.- Der Apparat darf auf keinen Fall veraendert oder unerlaubt geoeffnet werden, jede Veraenderung desselben kann die Sicherheit in Frage stellen und somit gefaehrlich werden. FLOS lehnt jede Verantwortung fuer unsachgemaess behandelte Produkte ab.- Falls das flexible äußere Kabel beschädigt wird, muß es von FLOS oder von qualifiziertem Personal ersetzt werden,um Gefahren zu vermeiden.
TECHNISCHEDATENEUR- Halogen-Glühlampe MAX 150W Fassung E27 Typ HSGS/F.
TECHNISCHEDATENUSA- Halogen-Glühlampe MAX 100W Fassung E26 Typ T.
REINIGUNGSVORSCHRIFTEN- Bei der Reinigung der Leuchte darf man ausschließlich weiche Tücher verwenden. Eventuell kann man diese mit Wasser und Seife oder mit einem neutralen Reinigungsmittel anfeuchten. - Achtung: Weder Alkohol noch Lösungsmittel verwenden.
<FR> INSTRUCTIONSD’INSTALLATIONETD’EMPLOI
ATTENTION!La sûreté de cet appareil est garantie uniquement si l’on respecte ces instructions soit en phase d’installation soit pendant l’utilisation; il faut donc les conserver.
NOTICES:- Au moment de l’installation et chaque fois que l’on intervient sur l’appareil, s’assurer que la tension d’alimentation ait été coupée.- Le symbole reporté sur l’appareil indique la nécessité d’utiliser des ampoules de type “auto-protégé”.- Le symbole reporté sur l’appareil indique que le produit doit être éliminé d’une autre façon que celle avec les déchets urbains.- L’appareil ne peut être modifié ou altéré de quelque manière que ce soit, toute modification peut compromettre la sécurité de celui-ci en le rendant dangereux. FLOS décline toute responsabilité pour les produits modifiés.- Si le cordon flexible externe est endommagé, il doit être remplacé par FLOS ou par le personnel qualifié afin d’éviter des dangers.
DONNEESTECHNIQUESEUR- Ampoule incandescente à halogènes 150W MAX, raccord E27 type HSGS/F.
DONNEESTECHNIQUESUSA- Ampoule incandescente à halogènes 100W MAX, raccord E26 type T.
INSTRUCTIONSPOURLENETTOYAGE- Pour le nettoyage de l’appareil utiliser exclusivement un chiffon doux, humecté si nécessaire, avec de l’eau et du savon ou avec un détergent neutre pour les salissures les plus tenaces. -Attention: ne pas utiliser d’alcool ou solvents.
11991 ISTR.MONT. SNOOPY EUR_USA.indd 7 25-03-2010 8:17:41
<ES> INSTRUCCIONESDEINSTALACIÓNYDEUSO
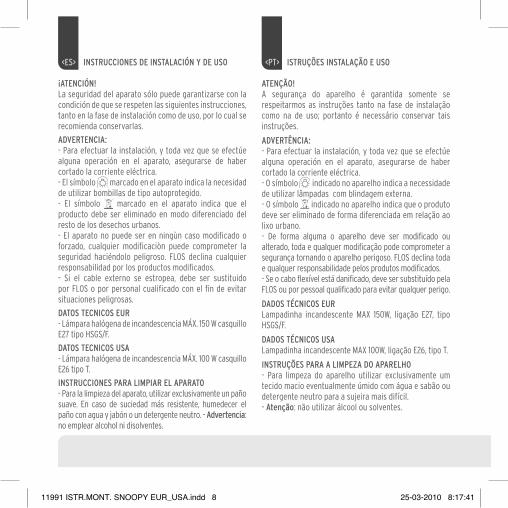
¡ATENCIÓN!La seguridad del aparato sólo puede garantizarse con la condición de que se respeten las siguientes instrucciones, tanto en la fase de instalación como de uso, por lo cual se recomienda conservarlas.
ADVERTENCIA:- Para efectuar la instalación, y toda vez que se efectúe alguna operación en el aparato, asegurarse de haber cortado la corriente eléctrica.- El símbolo marcado en el aparato indica la necesidad de utilizar bombillas de tipo autoprotegido.- El símbolo marcado en el aparato indica que el producto debe ser eliminado en modo diferenciado del resto de los desechos urbanos.- El aparato no puede ser en ningùn caso modificado o forzado, cualquier modificaciòn puede comprometer la seguridad haciéndolo peligroso. FLOS declina cualquier responsabilidad por los productos modificados.- Si el cable externo se estropea, debe ser sustituido por FLOS o por personal cualificado con el fin de evitar situaciones peligrosas.
DATOSTECNICOSEUR- Lámpara halógena de incandescencia MÁX. 150 W casquillo E27 tipo HSGS/F.
DATOSTECNICOSUSA- Lámpara halógena de incandescencia MÁX. 100 W casquillo E26 tipo T.
INSTRUCCIONESPARALIMPIARELAPARATO- Para la limpieza del aparato, utilizar exclusivamente un paño suave. En caso de suciedad más resistente, humedecer el paño con agua y jabón o un detergente neutro. - Advertencia: no emplear alcohol ni disolventes.
<PT> ISTRUÇÕESINSTALAÇÃOEUSO
ATENÇÃO!A segurança do aparelho é garantida somente se respeitarmos as instruções tanto na fase de instalação como na de uso; portanto é necessário conservar tais instruções.
ADVERTÊNCIA:- Para efectuar la instalación, y toda vez que se efectúe alguna operación en el aparato, asegurarse de haber cortado la corriente eléctrica.- O símbolo indicado no aparelho indica a necessidade de utilizar lâmpadas com blindagem externa.- O símbolo indicado no aparelho indica que o produto deve ser eliminado de forma diferenciada em relação ao lixo urbano.- De forma alguma o aparelho deve ser modificado ou alterado, toda e qualquer modificação pode comprometer a segurança tornando o aparelho perigoso. FLOS declina toda e qualquer responsabilidade pelos produtos modificados.- Se o cabo flexível está danificado, deve ser substituído pela FLOS ou por pessoal qualificado para evitar qualquer perigo.
DADOSTÉCNICOSEURLampadinha incandescente MAX 150W, ligação E27, tipo HSGS/F.
DADOSTÉCNICOSUSALampadinha incandescente MAX 100W, ligação E26, tipo T.
INSTRUÇÕESPARAALIMPEZADOAPARELHO- Para limpeza do aparelho utilizar exclusivamente um tecido macio eventualmente úmido com água e sabão ou detergente neutro para a sujeira mais difícil. - Atenção: não utilizar álcool ou solventes.
11991 ISTR.MONT. SNOOPY EUR_USA.indd 8 25-03-2010 8:17:41
<RUS> ИНСТРУКЦИИ ПО МОНТАЖУ И ПРИМЕНЕНИЮ
ВНИМАНИЕ!Надёжность устройства гарантируется только при соблюдении данных инструкций, как в фазе монтажа, так и при применении, поэтому необходимо обеспечить их сохранность.ПРЕДУПРЕЖДЕНИЯ:- В момент установки и каждый раз при проведении работ с устройством, убедиться в снятии напряжения питания.- Обозначение приведённое на устройстве, указывает на необходимость использования самозащищаемых лампочек.- Символ приведённый на устройстве, указывает на то, что данная продукция должна быть переработана отдельно от городских отходов.- Устройство не может изменяться или разбираться, любые изменения могут нарушить надёжность, делая его опасным. FLOS не несёт ответственность за измененную продукцию.- При повреждении гибкого кабеля он должен заменяться FLOS или квалифицированным персоналом в целях предотвращения опасности.ТЕХНИЧЕСКИЕ ДАННЫЕ EURЛампа накаливания макс.150Вт. цоколь E27, тип HSGS/F.ТЕХНИЧЕСКИЕ ДАННЫЕ USAЛампа накаливания макс.100Вт. цоколь E26, тип T.ИНСТРУКЦИИ ПО ОЧИСТКЕ УСТРОЙСТВАДля очистки устройства использовать только мягкую тряпку, смоченную водой с мылом или нейтральным моющим средством для наиболее стойких загрязнений. - Внимание: Не использовать спирт или другие растворители.
<J> 取り付けおよびご使用方法
危険ですので、器具を改造したり、部品を追加・変更して使用しないでください。改造した製品に対しては、FLOSは一切責任を負いません。警告安全な器具の取り付けおよびご使用のために、取扱説明書に従って作業を行ってください。また、取扱説明書は必ず保管してください。注意‐取り付け作業および取り外しや再取り付け時には、必ず電源を切ってください。- 器具上の表示 は、破損防止形または飛散防止形の電球の使用を表します。- 器具上の表示 は、一般ごみと区別し 本製品を廃棄しなければならないことを表しますアメリカ対応のみ高温発光です。‐危険ですので、器具を改造したり、部品を追加・変更して使用しないでください。改造した製品に対しては、FLOSは一切責任を負いません。 - 電気接続に精通していない場合は、有資格の電気技術者に連絡してください。技術的な仕様 EUR白熱ハロゲン球 最大150W、口金E27、HSGS/Fタイプ技術的な仕様 USA白熱ハロゲン球 最大100W、口金E26、Tタイプ器具の清掃について器具の清掃には、柔らかい布を使用してください。落ちにくい汚れは、柔らかい布を石鹸水または薄めた中性洗剤に浸し、十分に絞ってから拭き取ってください。注意:アルコールや溶剤などは使用しないでください。
11991 ISTR.MONT. SNOOPY EUR_USA.indd 9 25-03-2010 8:17:41
<IT>
<GB>
<DE>
<FR>
<ES>
<PT>
<RUS>
<J>
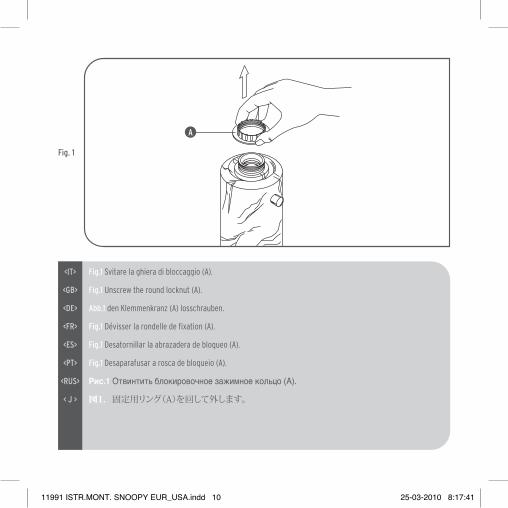
Fig.1 Svitare la ghiera di bloccaggio (A).
Fig.1 Unscrew the round locknut (A).
Abb.1 den Klemmenkranz (A) losschrauben.
Fig.1Dévisser la rondelle de fixation (A).
Fig.1 Desatornillar la abrazadera de bloqueo (A).
Fig.1 Desaparafusar a rosca de bloqueio (A).
Рис.1 Отвинтить блокировочное зажимное кольцо (А).
図1.固定用リング(A)を回して外します。
Fig.1
A
11991 ISTR.MONT. SNOOPY EUR_USA.indd 10 25-03-2010 8:17:41
BD
E
<IT>
<GB>
<DE>
<FR>
<ES>
<PT>
<RUS>
<J>
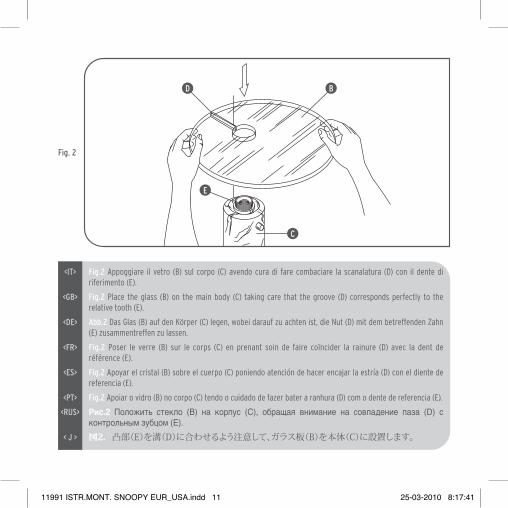
Fig.2 Appoggiare il vetro (B) sul corpo (C) avendo cura di fare combaciare la scanalatura (D) con il dente di riferimento (E).
Fig.2 Place the glass (B) on the main body (C) taking care that the groove (D) corresponds perfectly to the relative tooth (E).
Abb.2 Das Glas (B) auf den Körper (C) legen, wobei darauf zu achten ist, die Nut (D) mit dem betreffenden Zahn (E) zusammentreffen zu lassen.
Fig.2Poser le verre (B) sur le corps (C) en prenant soin de faire coïncider la rainure (D) avec la dent de référence (E).
Fig.2 Apoyar el cristal (B) sobre el cuerpo (C) poniendo atención de hacer encajar la estría (D) con el diente de referencia (E).
Fig.2 Apoiar o vidro (B) no corpo (C) tendo o cuidado de fazer bater a ranhura (D) com o dente de referencia (E).
Рис.2 Положить стекло (В) на корпус (С), обращая внимание на совпадение паза (D) с контрольным зубцом (E).図2.凸部(E)を溝(D)に合わせるよう注意して、ガラス板(B)を本体(C)に設置します。
Fig.2
C
11991 ISTR.MONT. SNOOPY EUR_USA.indd 11 25-03-2010 8:17:41
A
<IT>
<GB>
<DE>
<FR>
<ES>
<PT>
<RUS>
<J>
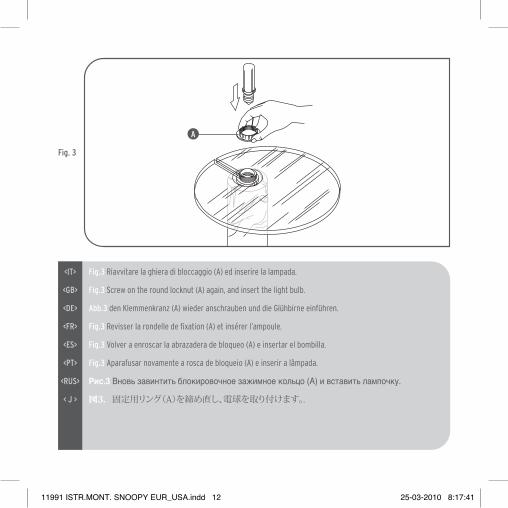
Fig.3 Riavvitare la ghiera di bloccaggio (A) ed inserire la lampada.
Fig.3 Screw on the round locknut (A) again, and insert the light bulb.
Abb.3 den Klemmenkranz (A) wieder anschrauben und die Glühbirne einführen.
Fig.3Revisser la rondelle de fixation (A) et insérer l’ampoule.
Fig.3 Volver a enroscar la abrazadera de bloqueo (A) e insertar el bombilla.
Fig.3 Aparafusar novamente a rosca de bloqueio (A) e inserir a lâmpada.
Рис.3 Вновь завинтить блокировочное зажимное кольцо (А) и вставить лампочку.
図3.固定用リング(A)を締め直し、電球を取り付けます。.
Fig.3
11991 ISTR.MONT. SNOOPY EUR_USA.indd 12 25-03-2010 8:17:41
B
F G
<IT>
<GB>
<DE>
<FR>
<ES>
<PT>
<RUS>
<J>
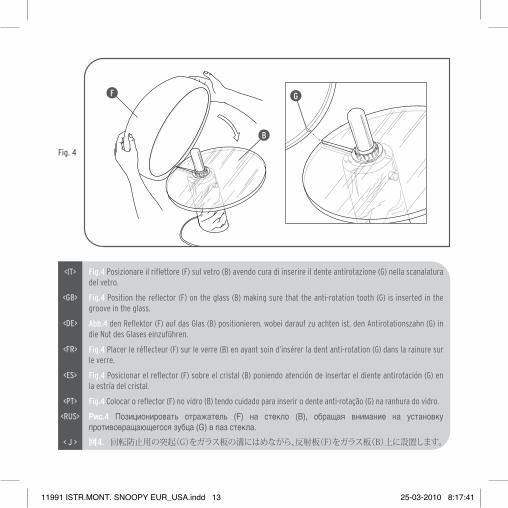
Fig.4 Posizionare il riflettore (F) sul vetro (B) avendo cura di inserire il dente antirotazione (G) nella scanalatura del vetro.
Fig.4 Position the reflector (F) on the glass (B) making sure that the anti-rotation tooth (G) is inserted in the groove in the glass.
Abb.4 den Reflektor (F) auf das Glas (B) positionieren, wobei darauf zu achten ist, den Antirotationszahn (G) in die Nut des Glases einzuführen.
Fig.4Placer le réflecteur (F) sur le verre (B) en ayant soin d’insérer la dent anti-rotation (G) dans la rainure sur le verre.
Fig.4 Posicionar el reflector (F) sobre el cristal (B) poniendo atención de insertar el diente antirotación (G) en la estría del cristal.
Fig.4 Colocar o reflector (F) no vidro (B) tendo cuidado para inserir o dente anti-rotação (G) na ranhura do vidro.
Рис.4 Позиционировать отражатель (F) на стекло (B), обращая внимание на установку противовращающегося зубца (G) в паз стекла.図4.回転防止用の突起(G)をガラス板の溝にはめながら、反射板(F)をガラス板(B)上に設置します。
Fig.4
11991 ISTR.MONT. SNOOPY EUR_USA.indd 13 25-03-2010 8:17:41
<IT>
<GB>
<DE>
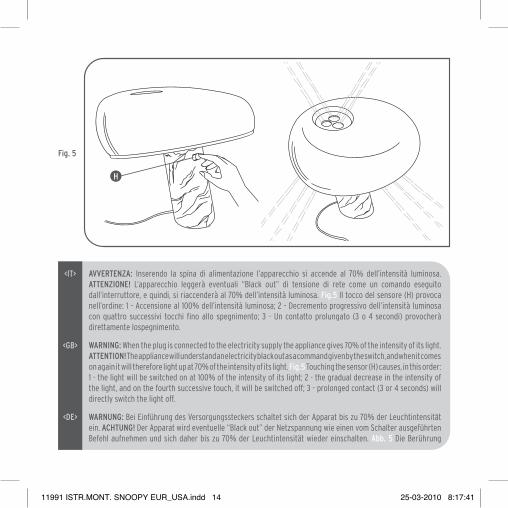
AVVERTENZA: Inserendo la spina di alimentazione l’apparecchio si accende al 70% dell’intensità luminosa. ATTENZIONE! L’apparecchio leggerà eventuali “Black out” di tensione di rete come un comando eseguito dall’interruttore, e quindi, si riaccenderà al 70% dell’intensità luminosa.Fig.5 ll tocco del sensore (H) provoca nell’ordine: 1 - Accensione al 100% dell’intensità luminosa; 2 - Decremento progressivo dell’intensità luminosa con quattro successivi tocchi fino allo spegnimento; 3 - Un contatto prolungato (3 o 4 secondi) provocherà direttamente lospegnimento.
WARNING:When the plug is connected to the electricity supply the appliance gives 70% of the intensity of its light. ATTENTION! The appliance will understand an electricity black out as a command given by the switch, and when it comes on again it will therefore light up at 70% of the intensity of its light.Fig.5 Touching the sensor (H) causes, in this order: 1 - the light will be switched on at 100% of the intensity of its light; 2 - the gradual decrease in the intensity of the light, and on the fourth successive touch, it will be switched off; 3 - prolonged contact (3 or 4 seconds) will directly switch the light off.
WARNUNG: Bei Einführung des Versorgungssteckers schaltet sich der Apparat bis zu 70% der Leuchtintensität ein. ACHTUNG! Der Apparat wird eventuelle “Black out” der Netzspannung wie einen vom Schalter ausgeführten Befehl aufnehmen und sich daher bis zu 70% der Leuchtintensität wieder einschalten. Abb.5 Die Berührung
Fig.5
H
11991 ISTR.MONT. SNOOPY EUR_USA.indd 14 25-03-2010 8:17:41
<FR>
<ES>
<PT>
<RUS>
<J>
des Sensors (H) ruft nacheinander hervor: 1 - 100%ige Einschaltung der Leuchtintensität; 2 - Fortschreitende Abnahme der Leuchtintensität mit vier folgenden Berührungen bis zum Ausschalten; 3 - Ein verlängerter Kontakt (3 oder 4 Sekunden) wird ein direktes Ausschalten hervorrufen.
AVERTISSEMENT: En insérant la prise d’alimentation, l’appareil s’allume à 70% de l’intensité lumineuse maximum. ATTENTION! L’appareil enregistrera d’éventuels “Black out” de tension de réseau comme une commande effectuée par l’interrupteur et donc se rallumera à 70% de l’intensité lumineuse maximum. Fig.5 La pression du capteur (H) provoque dans l’ordre: 1 - Allumage de 100% de l’intensité lumineuse maximum; 2 - Baisse progressive de l’intensité lumineuse par quatre pressions successives jusqu’à l’extinction; 3 - Une pression prolongée (3 ou 4 secondes) provoquera directement l’extinction.
ADVERTENCIA: Insertando la clavija de alimentación el aparato se enciende un 70% de la intensidad luminosa. ¡ATENCIÓN! El aparato soporta eventuales “Black out de tensión de red “ (cortes de corriente eléctrica) como un mando ejecutado por el interruptor, y por lo tanto, se volverá a encender al 70% de la intensidad luminosa. Fig.5 El toque del sensor (H) provoca en el orden: 1 - Encendido al 100% de la intensidad luminosa; 2 - Disminución progresiva de la intensidad luminosa con cuatro toques sucesivos hasta el apagado; 3 - Un contacto prolongado (3 o 4 segundos) provocarà directamente el apagado.
ADVERTÊNCIA: Ligando o pino de alimentação o aparelho acende com 70% da intensidade luminosa. ATENÇÃO: O aparelho percebe eventuais “Black out” de tensão da rede como um comando do interruptor, e logo, se acenderá com 70% da intensidade luminosa. Fig.5 O toque ao sensor (H) provocará na seguinte ordem: 1 - Ligação a 100% da intensidade luminosa; 2 - Diminuição progressiva da intensidade luminosa com quatro toques sucessivos até apagar; 3 - Um contacto prolongado (3 ou 4 segundos) desligará directamente.
ПРЕДУПРЕЖДЕНИЕ: Вставляя вилку питания, устройство включается на 70% яркости света. ВНИМАНИЕ: Устройством считываются возможные отключения напряжения сети как команда выключателя, и поэтому оно вновь включается на 70% яркости света. Рис.5 Касание датчика (H) приводит к следующему: 1 - Включение на 100% яркости света; 2 - Прогрессивное уменьшение яркости света посредством четырёх касаний до выключения; 3 - Продолжительный контакт (3 или 4 секунды) приводит к выключению.
警告: 電源プラグの接続時、本照明器具は70 %の明るさで点灯します。 注意: 本器具は「停電」時に自動的にスイッチが切れますが、電力回復 時に70 %の明るさで再点灯します。 図5.タッチ式センサー(H)により、次の順序で点灯・消灯を行います‐1:100 %の明るさで点灯。2:触れるたびに明るさが切り替わり、4回目で消灯。3:長く(3~4秒)触れると消灯します。
11991 ISTR.MONT. SNOOPY EUR_USA.indd 15 25-03-2010 8:17:41
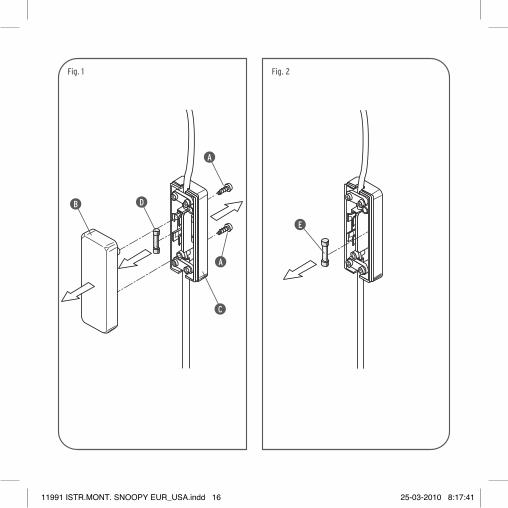
Fig.1 Fig.2
A
D
E
B
A
C
11991 ISTR.MONT. SNOOPY EUR_USA.indd 16 25-03-2010 8:17:41
<IT>
<GB>
<DE>
<FR>
<ES>
<PT>
<RUS>
<J>
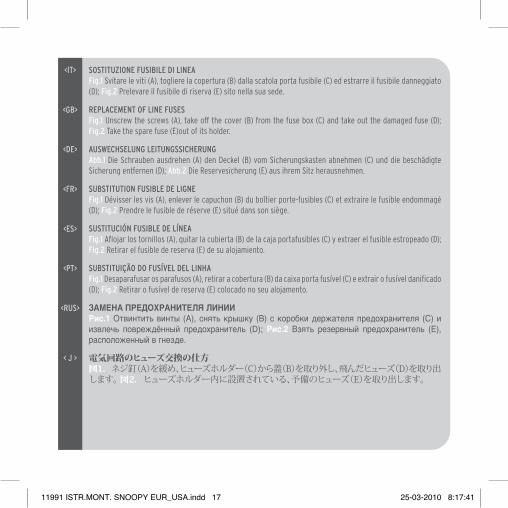
SOSTITUZIONEFUSIBILEDILINEAFig.1 Svitare le viti (A), togliere la copertura (B) dalla scatola porta fusibile (C) ed estrarre il fusibile danneggiato (D); Fig.2 Prelevare il fusibile di riserva (E) sito nella sua sede.
REPLACEMENTOFLINEFUSESFig.1Unscrew the screws (A), take off the cover (B) from the fuse box (C) and take out the damaged fuse (D); Fig.2 Take the spare fuse (E)out of its holder.
AUSWECHSELUNGLEITUNGSSICHERUNGAbb.1 Die Schrauben ausdrehen (A) den Deckel (B) vom Sicherungskasten abnehmen (C) und die beschädigte Sicherung entfernen (D); Abb.2 Die Reservesicherung (E) aus ihrem Sitz herausnehmen.
SUBSTITUTIONFUSIBLEDELIGNEFig.1 Dévisser les vis (A), enlever le capuchon (B) du boîtier porte-fusibles (C) et extraire le fusible endommagé (D); Fig.2Prendre le fusible de réserve (E) situé dans son siège.
SUSTITUCIÓNFUSIBLEDELíNEAFig.1 Aflojar los tornillos (A), quitar la cubierta (B) de la caja portafusibles (C) y extraer el fusible estropeado (D); Fig.2 Retirar el fusible de reserva (E) de su alojamiento.
SUBSTITUIÇÃODOFUSíVELDELLINHAFig.1 Desaparafusar os parafusos (A), retirar a cobertura (B) da caixa porta fusível (C) e extrair o fusível danificado (D); Fig.2 Retirar o fusível de reserva (E) colocado no seu alojamento.
ЗАМЕНА ПРЕДОХРАНИТЕлЯ лИНИИРис.1 Отвинтить винты (А), снять крышку (В) с коробки держателя предохранителя (С) и извлечь повреждённый предохранитель (D); Рис.2 Взять резервный предохранитель (E), расположенный в гнезде.
電気回路のヒューズ交換の仕方図1.ネジ釘(A)を緩め、ヒューズホルダー(C)から蓋(B)を取り外し、飛んだヒューズ(D)を取り出します。 図2.ヒューズホルダー内に設置されている、予備のヒューズ(E)を取り出します。
11991 ISTR.MONT. SNOOPY EUR_USA.indd 17 25-03-2010 8:17:41
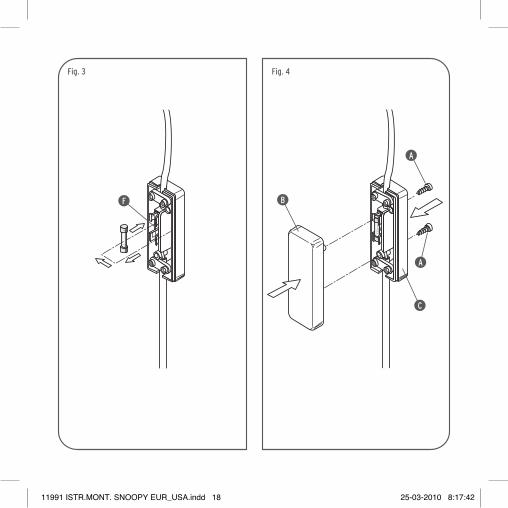
Fig.3 Fig.4
F
A
B
A
C
11991 ISTR.MONT. SNOOPY EUR_USA.indd 18 25-03-2010 8:17:42
1199
1 - 25/0
3/2010
<IT>
<GB>
<DE>
<FR>
<ES>
<PT>
<RUS>
<J>
SOSTITUZIONEFUSIBILEDILINEAFig.3 Sostituire il fusibile nuovo a quello danneggiato, inserendolo nel suo alloggiamento (F); Fig.4 Chiudere la copertura (B) alla scatola porta fusibile (C) serrandola con le viti (A). DATI TECNICI:Fusibile di linea tipo 0,8 A.
REPLACEMENTOFLINEFUSESFig.3 Substitute the damaged fuse, inserting the new one in the housing (F); Fig.4 Close the cover (B) on the fuse box (C) and retighten the screws A). TECHNICAL DATA: Circuit fuses type 0,8 A.
AUSWECHSELUNGLEITUNGSSICHERUNGAbb.3 Die beschädigte Sicherung durch die neue Sicherung ersetzen und diese an ihrem Sitz anbringen; Abb.4 Die Deckel (B) des Sicherungskastens (C) schließen und die Schrauben anziehen (A). TECHNISCHE DATEN: Leitungssicherung 0,8 A.
SUBSTITUTIONFUSIBLEDELIGNEFig.3 Remplacer le fusible endommagé avec le neuf en l’introduisant dans son logement (F); Fig.4 Remettre la protection (B) en place sur le boîtier porte-fusibles (C) et serrer les vis (A). DONNEES TECHNIQUES: Fusible de ligne type 0,8 A.
SUSTITUCIÓNFUSIBLEDELíNEAFig.3 Volver a enroscar la abrazadera de bloqueo (A) e insertar el bombilla; Fig.4 Posicionar el reflector (F) sobre el cristal (B) poniendo atención de insertar el diente antirotación (G) en la estría del cristal. DATOS TECNICOS: Fusible de línea de 0,08 A.
SUBSTITUIÇÃODOFUSíVELDELLINHAFig.3 Substituir o fusíve danificado pelo novo, introduzindo-o no seu alojamento (F); Fig.4 Fechar a cobertura (B) da caixa porta fusível (C) apertando-a com os parafusos (A). DADOS TÉCNICOS: Fusível de linha do tipo 0,8 A.
ЗАМЕНА ПРЕДОХРАНИТЕлЯ лИНИИРис.3 Заменить повреждённый предохранитель на новый, устанавливая его в гнездо (F); Рис.4 Закрыть крышку (В) на коробке держателя предохранителя (С), затягивая винты (А).ТЕХНИЧЕСКИЕ ДАННЫЕ: Предохранитель линии типа 0.8 А.
電気回路のヒューズ交換の仕方図3.飛んだヒューズを新しい物と取り替え、ホルダー内のくぼみ(F)に挿入します。 図4.再びヒューズホルダー(C)に蓋(B)を被せ、ネジ釘(A)を締めます。 テクニカルデータ 電気回路のヒューズタイプ0.8A.
11991 ISTR.MONT. SNOOPY EUR_USA.indd 19 25-03-2010 8:17:42
www.flos.com
11991 ISTR.MONT. SNOOPY EUR_USA.indd 20 25-03-2010 8:17:42