Embed Size (px)
Citation preview

How to setup the Pearson Scorm Services Java Integration ToolkitContents
A. Software Installation...........................................................................................................................2
1. Java – Java SE Development Kit 8u5...............................................................................................2
2. Environment variables....................................................................................................................2
3. Eclipse IDE for Java EE Developers – Eclipse Kepler (4.3.2) with Java 8 support...........................2
4. Maven Plugin for Eclipse – m2e......................................................................................................2
B. Setup projects in Eclipse.....................................................................................................................4
C. Build the project.................................................................................................................................9
1. Set appropriate Java version in eclipse..........................................................................................9
2. Clean the project...........................................................................................................................12
3. Compile, run tests, package the project and Install the project..................................................13
4. Run the Java WebApp...................................................................................................................14

A. Software Installation1. Java – Java SE Development Kit 8u5
http://www.oracle.com/technetwork/java/javase/downloads/jdk8-downloads-2133151.html
2. Environment variablesa. Setup JAVA_HOME environment variable and set it to directory where Java is installed.
For example, if java.exe is present in C:\Program Files\Java\jdk1.8.0_05\bin, then set the JAVA_HOME to C:\Program Files\Java\jdk1.8.0_05
b. Then add %JAVA_HOME% to the PATH environment variable
3. Eclipse IDE for Java EE Developers – Eclipse Kepler (4.3.2) with Java 8 supporthttps://www.eclipse.org/downloads/packages/eclipse-ide-java-ee-developers/keplersr2-java8-patches
4. Maven Plugin for Eclipse – m2eNOTE: This needs to be installed ONLY IF you are NOT using “Eclipse Kepler IDE for JEE”. Installation can be done from Eclipse Marketplace Client (MPC)
(Reference: http://marketplace.eclipse.org/marketplace-client-intro)
You can start MPC by launching Eclipse and accessing it from the Help menu.

Once launched the Marketplace Client presents a wizard that looks like this:
Type “m2e” in the Find textbox and click on Go. You should see the following plugin:
Click on Install
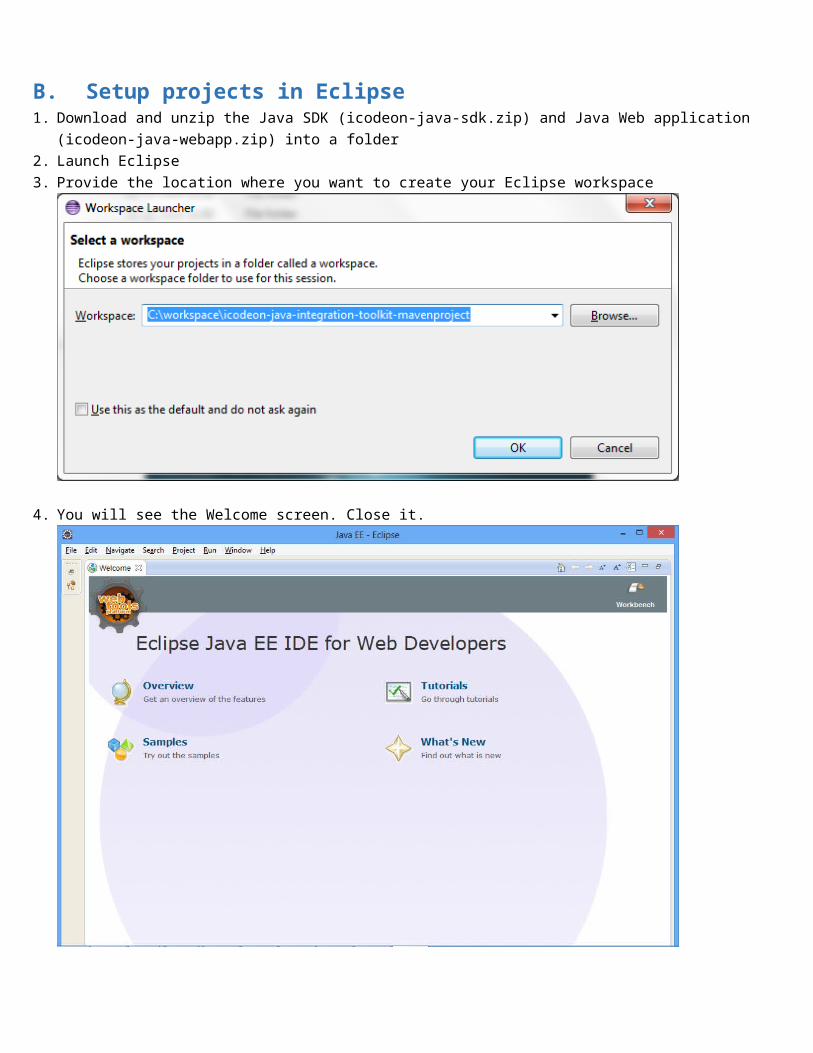
B. Setup projects in Eclipse1. Download and unzip the Java SDK (icodeon-java-sdk.zip) and Java Web application (icodeon-java-webapp.zip) into a
folder2. Launch Eclipse3. Provide the location where you want to create your Eclipse workspace
4. You will see the Welcome screen. Close it.

5. Now import the project into Eclipse. Go to the ‘Project Explorer’ on the left hand side and right click. Click on ‘Import -> Import…’

6. Select ‘Existing Maven Projects’
7. Click on Next. Using the ‘Browse…’ button to select the folder where the downloaded projects are unzipped.

8. You will then see the pom.xml files listed. You can select the required projects and click on Next

9. Maven plugin connectors are automatically selected.
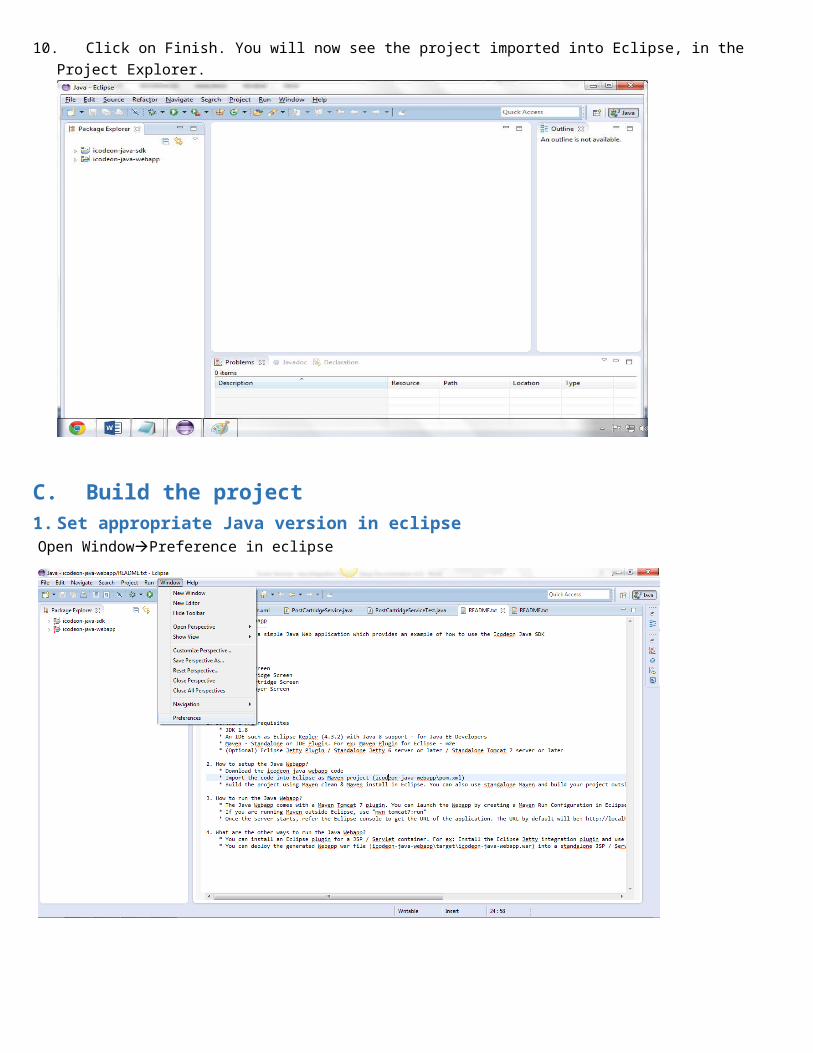
10. Click on Finish. You will now see the project imported into Eclipse, in the Project Explorer.
C.Build the project1. Set appropriate Java version in eclipseOpen WindowPreference in eclipse

Click the link Java Installed JREs in the left pane. Please select C:\Program Files\Java\jdk1.8.0_05 Java SDK if present. Click “Ok” to complete.
If C:\Program Files\Java\jdk1.8.0_05 is not present, then click “Add…” button.
Select “Standard VM” option and click Next button.

Copy or browse Java SDK 8.x home directory (C:\Program Files\Java\jdk1.8.0_05) in “JRE home:” textbox and click “Finish” button

2. Clean the projectRight click on the project on Project Explorer and select Run as Maven clean
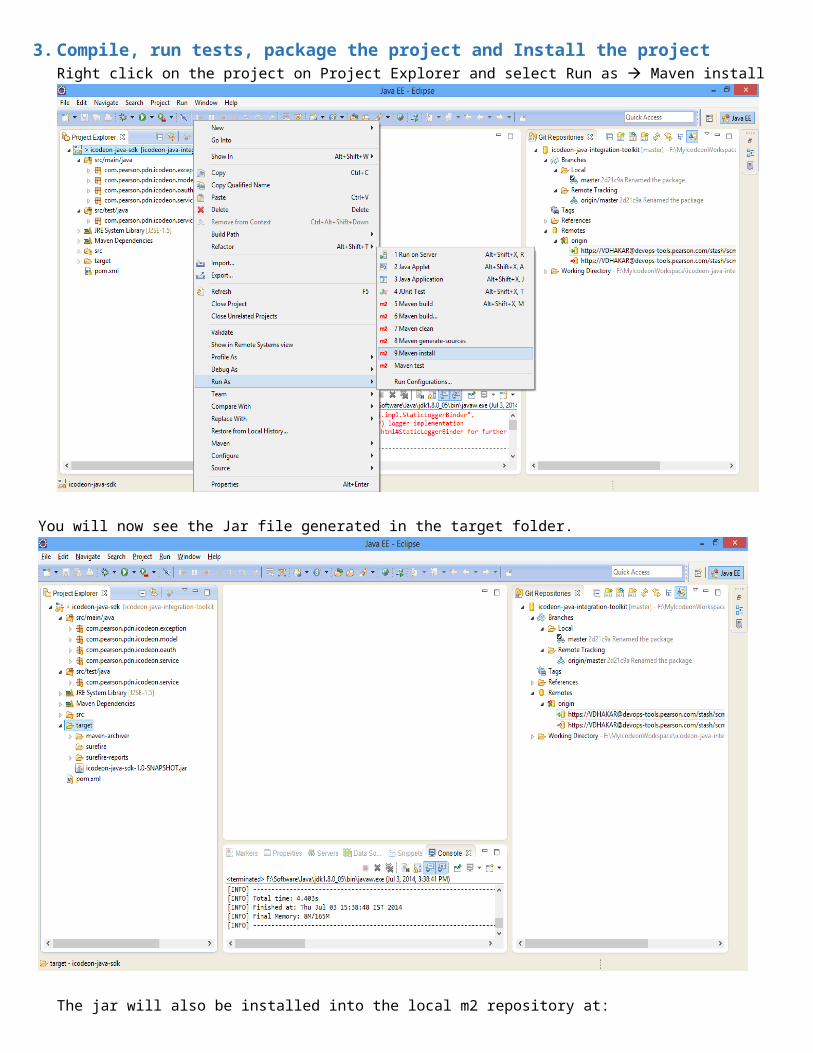
3. Compile, run tests, package the project and Install the projectRight click on the project on Project Explorer and select Run as Maven install
You will now see the Jar file generated in the target folder.
The jar will also be installed into the local m2 repository at:

C:\Users\<username>\.m2\repository\com\pearson\pdn\icodeon\icodeon-java-sdk\1.0-SNAPSHOT
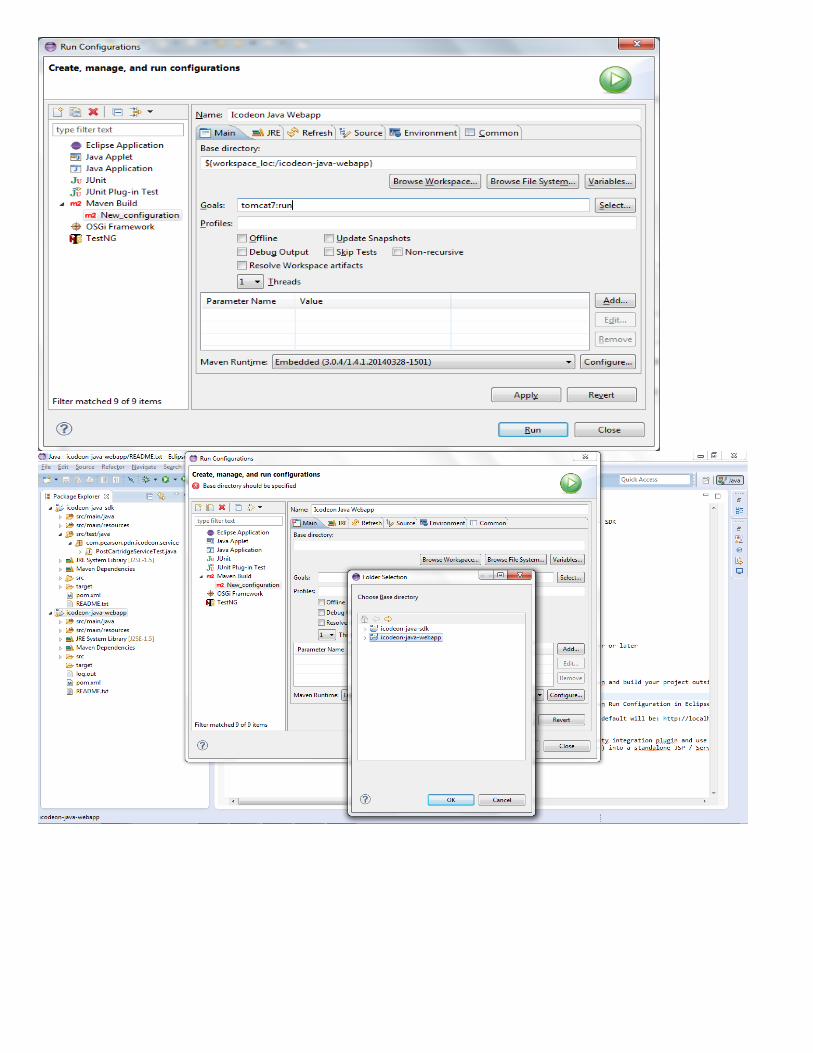
4. Run the Java WebAppThe Java Webapp comes with a Maven Tomcat 7 plugin. You can launch the Webapp by creating a Maven Run Configuration in Eclipse with the goal "tomcat7:run"
1. Right click on the Icodeon-java-webapp project. Click Run As Run Configuration… option.
2. Right click “Maven Build” in the left pane and click “New”

3.o Enter appropriate name in “Name” field. o Click “Browse Workspace…” button and select the “Icodeon-java-webapp”. o Enter “tomcat7:run” in the “Goals” fieldo Click “Apply” buttono Click “Run”o Once the server starts, refer the Eclipse console to get the URL of the application. The URL by default will
be: http://localhost:8080/icodeon-java-webapp. Launch this in a browser.