Embed Size (px)
Citation preview

Sony PlayStation SCPH-9002 TeardownGeschreven door: imacg517
Sony PlayStation SCPH-9002 Teardown Concept: 2019-11-14ID van de handleiding: 2631 -
Dit document is aangemaakt op 2020-03-01 12:36:12 AM (MST).
© iFixit — CC BY-NC-SA nl.iFixit.com Pagina 1 van 7
INTRODUCTIE
I have a PlayStation 1, and i have decided to make a new teardown of it.
I'm spanish, so my english is a bit poor, and sorry for the mistakes made in this teardown.
Without further delay, we start.
GEREEDSCHAPPEN:iFixit Opening Tools (1)Spudger (1)64 Bit Driver Kit (1)
Sony PlayStation SCPH-9002 Teardown Concept: 2019-11-14ID van de handleiding: 2631 -
Dit document is aangemaakt op 2020-03-01 12:36:12 AM (MST).
© iFixit — CC BY-NC-SA nl.iFixit.com Pagina 2 van 7

Stap 1 — Sony PlayStation SCPH-9002 Teardown
Here's the PS1.
Turn the PS1 over and remove the six screws.
Stap 2
Remove the top cover. It's veryeasy.
Sony PlayStation SCPH-9002 Teardown Concept: 2019-11-14ID van de handleiding: 2631 -
Dit document is aangemaakt op 2020-03-01 12:36:12 AM (MST).
© iFixit — CC BY-NC-SA nl.iFixit.com Pagina 3 van 7

Stap 3
Disconnect both CD-ROMconnectors.
CD connector one and the socketit connects to.
CD connector two and the socketit connects to.
Stap 4
Remove the CD-ROM reader. You should be able to pull it out gently, although you may have towiggle it around a bit to loosen the rubber holders.
Sony PlayStation SCPH-9002 Teardown Concept: 2019-11-14ID van de handleiding: 2631 -
Dit document is aangemaakt op 2020-03-01 12:36:12 AM (MST).
© iFixit — CC BY-NC-SA nl.iFixit.com Pagina 4 van 7

Stap 5
Detach both cables. They go to thepower supply and to the memorycards and controller connectors.
Stap 6
Remove the four screws and themetal cover.
Sony PlayStation SCPH-9002 Teardown Concept: 2019-11-14ID van de handleiding: 2631 -
Dit document is aangemaakt op 2020-03-01 12:36:12 AM (MST).
© iFixit — CC BY-NC-SA nl.iFixit.com Pagina 5 van 7
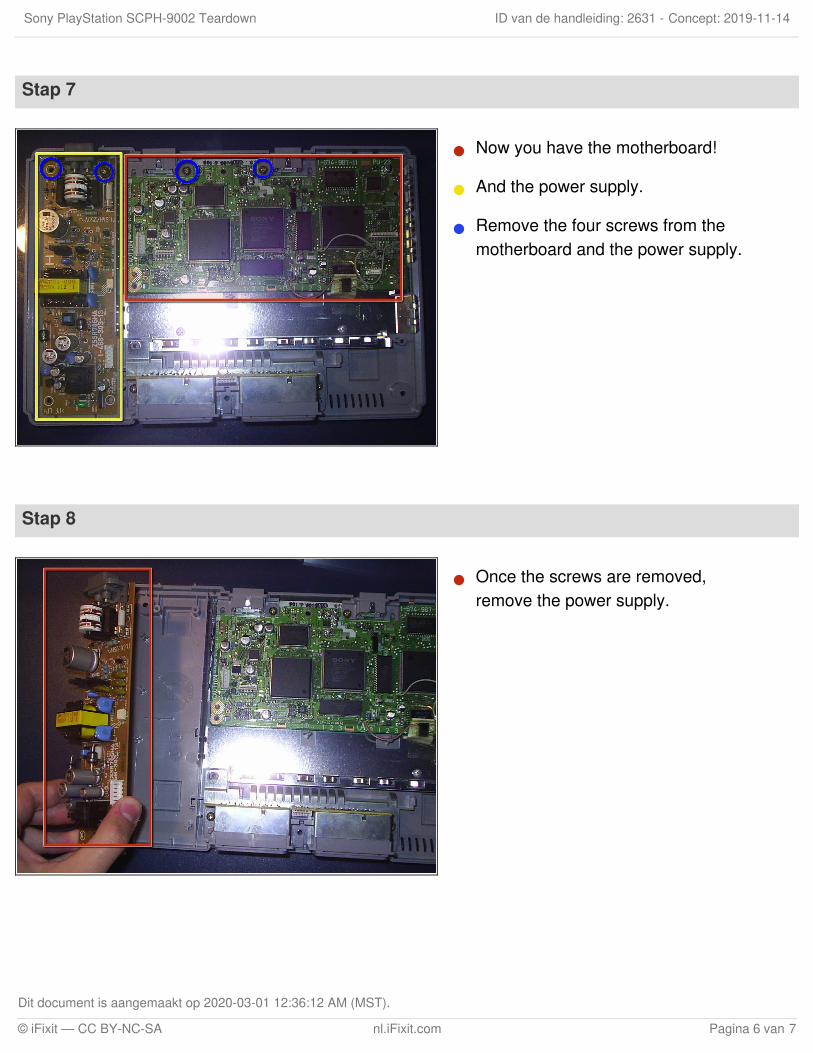
Stap 7
Now you have the motherboard!
And the power supply.
Remove the four screws from themotherboard and the power supply.
Stap 8
Once the screws are removed,remove the power supply.
Sony PlayStation SCPH-9002 Teardown Concept: 2019-11-14ID van de handleiding: 2631 -
Dit document is aangemaakt op 2020-03-01 12:36:12 AM (MST).
© iFixit — CC BY-NC-SA nl.iFixit.com Pagina 6 van 7
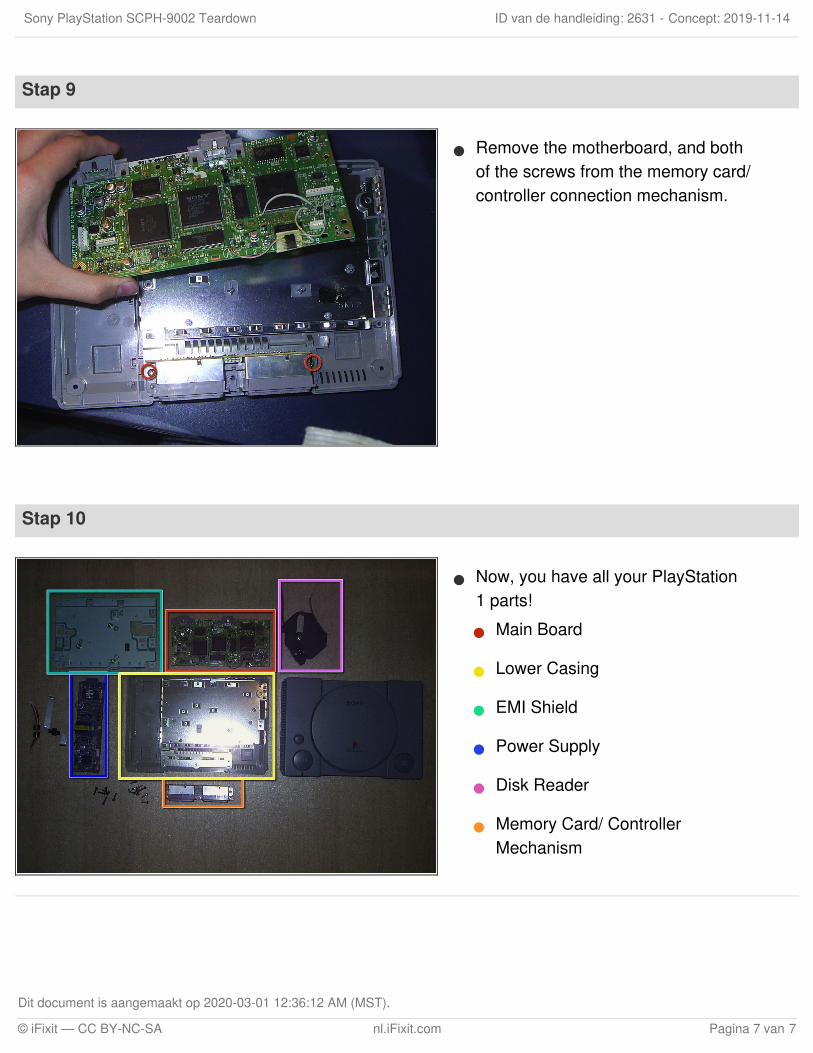
Stap 9
Remove the motherboard, and bothof the screws from the memory card/controller connection mechanism.
Stap 10
Now, you have all your PlayStation1 parts!
Main Board
Lower Casing
EMI Shield
Power Supply
Disk Reader
Memory Card/ ControllerMechanism
Sony PlayStation SCPH-9002 Teardown Concept: 2019-11-14ID van de handleiding: 2631 -
Dit document is aangemaakt op 2020-03-01 12:36:12 AM (MST).
© iFixit — CC BY-NC-SA nl.iFixit.com Pagina 7 van 7


![SCPH-70000 - playstation.com · model name1[SCPH-70000] [2-187-122-03(1)]](https://img.pdfslide.net/doc/110x75/5b92aa7e09d3f232708c4201/scph-70000-model-name1scph-70000-2-187-122-031-.jpg)