Embed Size (px)
DESCRIPTION
Assigning a Category
Citation preview

Sorting Contacts with Categories
Lunch and Learn

Workshop Outline
Assigning a Category Sorting Contacts by Category Creating a Category

Assigning a Category
Assigning a Category
Switch to your Contacts in Outlook.
See the default view: Address Cards.
Note: If you do not see the lower toolbar: Access the View menu. Select Toolbars. Click Advanced.

Assigning a Category
Open a contact for which you would like to assign a category.
Assigning a Category
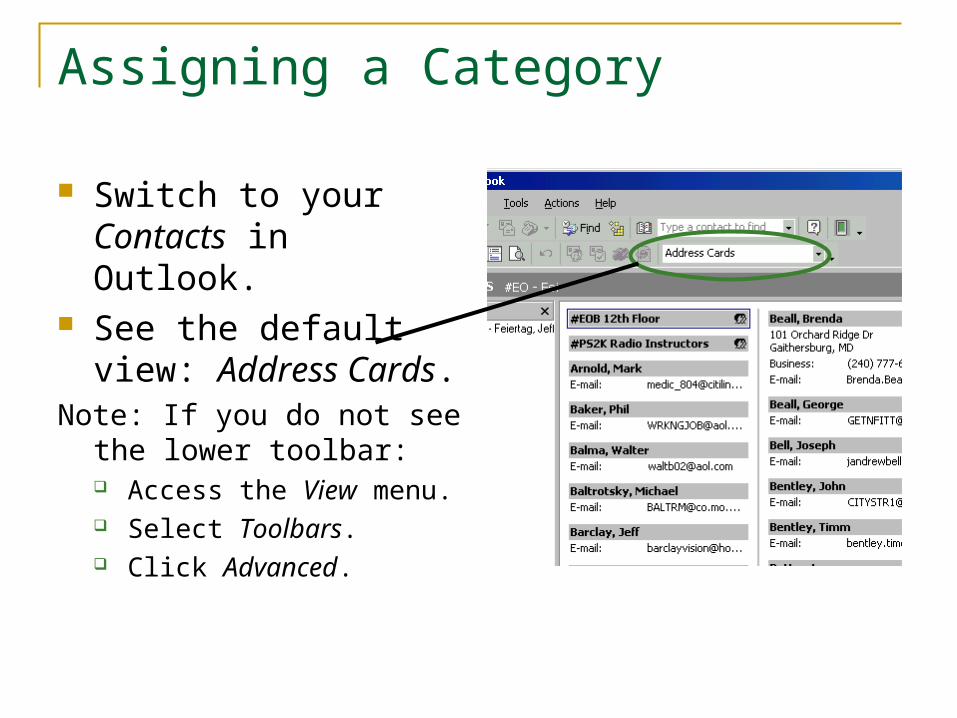
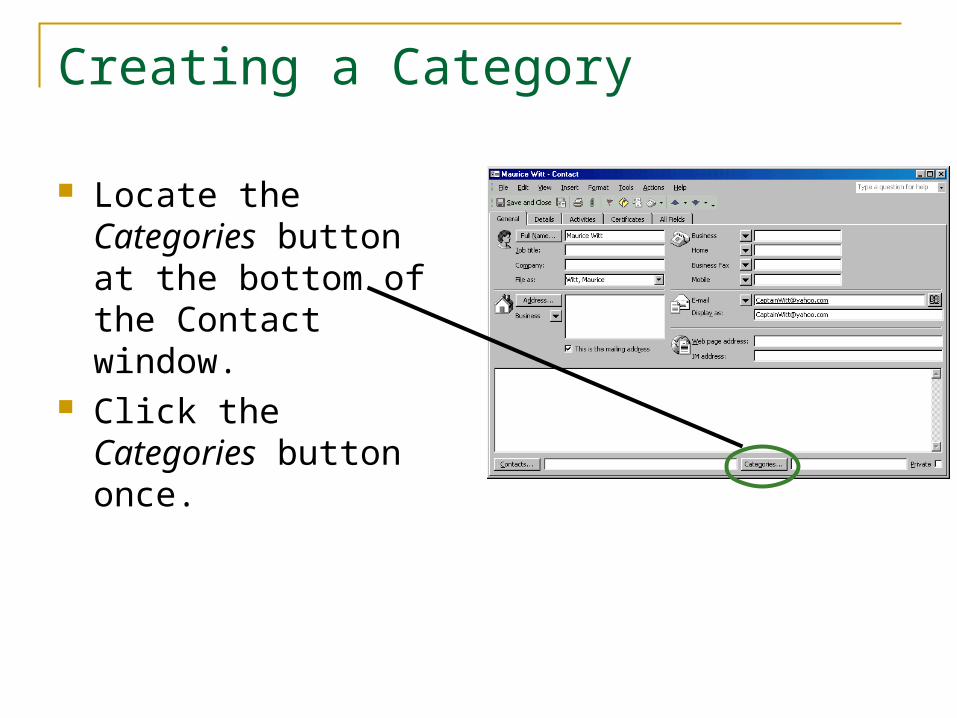
Locate the Categories button at the bottom of the Contact window.
Click the Categories button once.

Assigning a Category
Note the new window that opens.
Find an appropriate category to use for this contact.
Check the box next to your desired category and click the OK button.

Assigning a Category
Note that the item you chose now appears in the Category input box.

Assigning a Category
Click the Save and Close button to continue.

Sorting Contacts by Category

Sorting Contacts by Category
Click the drop-down arrow in the Current View option box.
Select By Category from the list.

Sorting Contacts by Category
Note that the list of contacts changes to a categorized list.
Find the category you assigned to your contact and click the plus (+) to expand the list.
See the contact(s) associated with the category.

Creating a Category
Creating a Category
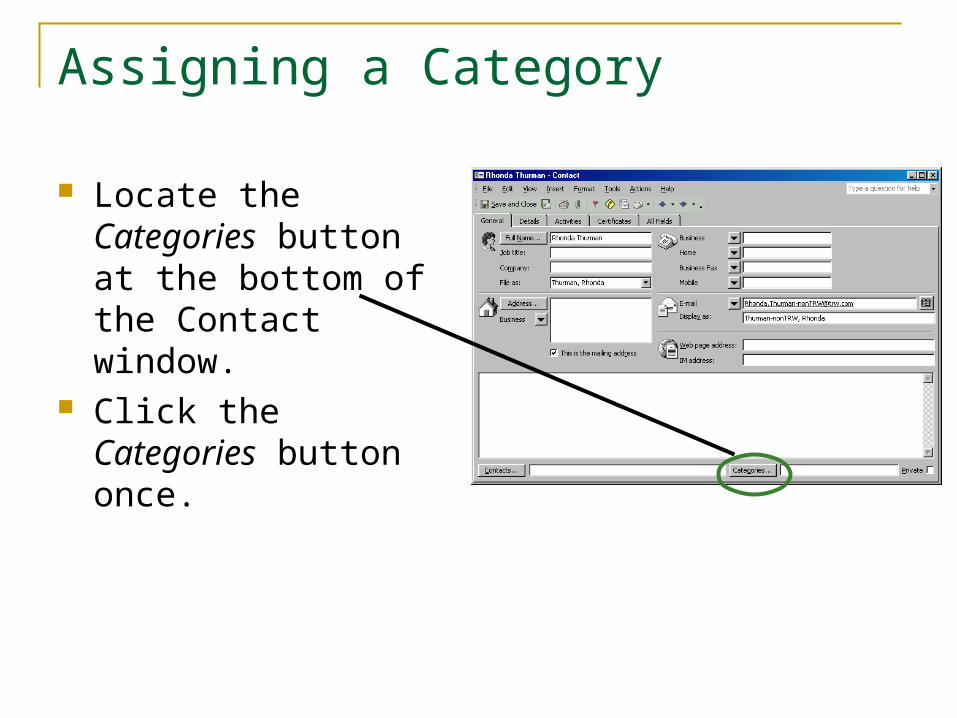
Return to the Address Cards option in the Current View drop-down list.
Open a contact for which you would like to assign a category.
Creating a Category
Locate the Categories button at the bottom of the Contact window.
Click the Categories button once.

Creating a Category
Note the new window that opens.
Type the name for a category you would like to create.
Click the Add to List button once.
Click the OK button.

Creating a Category
Note that the item you chose now appears in the Category input box.
Click the Save and Close button in your contact to finish.
Creating a Category
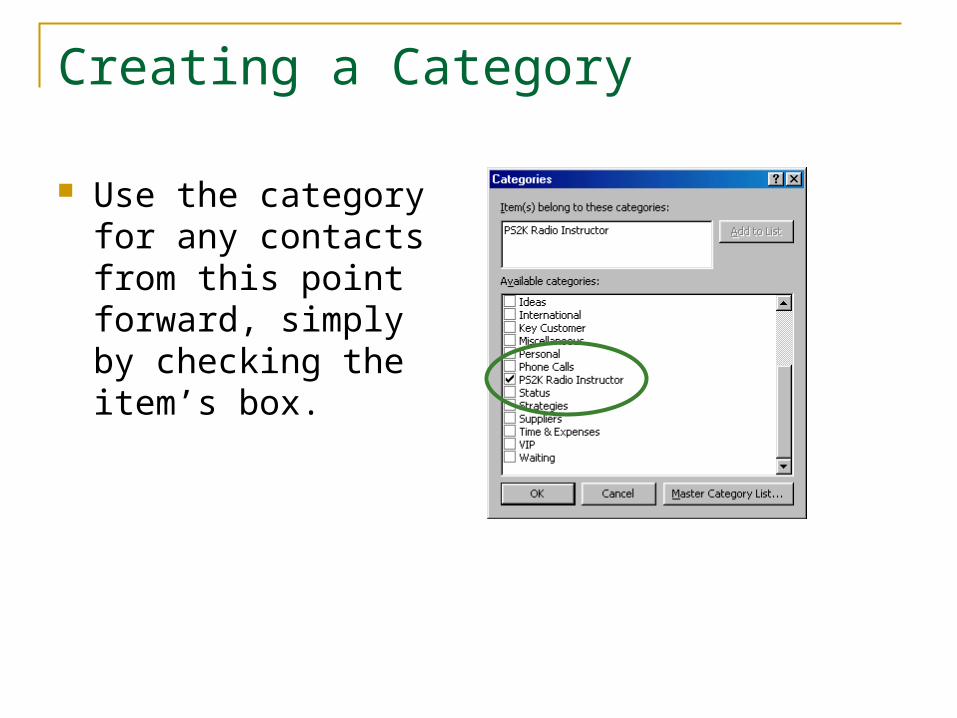
Use the category for any contacts from this point forward, simply by checking the item’s box.