Embed Size (px)
Citation preview
www.iita.org
Standard Operation Procedures (SOP) for
IITA Seedbank

i
Standard Operation Procedures (SOP) for IITA seedbank
Oyatomi Olaniyi, Ihenacho Jeffrey, Adebowale Oladepo, and DUMET Dominique
ii
© International Institute of Tropical Agriculture (IITA), 2012. Ibadan, Nigeria
To Headquarters from outside Nigeria:IITA, Carolyn House,26 Dingwall Road, Croydon CR9 3EE, UK
Within Nigeria:PMB 5320, Oyo RoadIbadan, Oyo State
ISBN 978-978-00000-0-0
Correct citation: ooooooooo
iii
Content
Introduction ....................................................................................................... 1
1. Standard operation procedures for seed processing ................................. 2 Harvest ....................................................................................................... 2 Pre-drying .................................................................................................. 2 Threshing and purifying ............................................................................. 3 Fumigation ................................................................................................ 3 Seed cleaning, purifying, and identity check .............................................. 4 Seed drying ............................................................................................... 5 Moisture content during drying ................................................................... 6 Seed sorting for germination and water content check .............................. 8 Water content determination for storage .................................................... 8 Germination ............................................................................................... 8 Seed counting and weighing .................................................................... 10 Packaging ................................................................................................ 11 Data capture and bar code printing .......................................................... 13 Sample sorting for distribution ................................................................ 20 Shipment .................................................................................................. 20
2. Standard Operation Procedures for seed sorting from medium and long-term store .................................................................................. 22 Issuing the sorting list .............................................................................. 22 Sorting germplasm from the cold store .................................................... 23
3. Standard Operational Procedures for the regeneration of clean seeds .........25 Seed sorting (Refer to IITA genebank SOP on seed sorting) ................... 25 Planting ................................................................................................... 28 Hand pollination ....................................................................................... 28 Data collection ......................................................................................... 28 Fertilizer application and staking .............................................................. 29 Elimination of diseased plants ................................................................ 29 Harvesting ................................................................................................ 30 Seed processing ...................................................................................... 31
iv
Figures1. Harvesting bag ......................................................................................... 22. Seed drying in glass house. ..................................................................... 23a. Dried seeds for threshing. ........................................................................ 33b. Threshing seeds. ...................................................................................... 33c. Manual seed threshing. ............................................................................ 34a. Seed Blower. ............................................................................................ 44c. Clean seeds after blowing. ....................................................................... 44b. Seed blower. ............................................................................................. 45. Fumigating Chamber. ............................................................................... 46. Inside Fumigating Chamber. ..................................................................... 47a. Seed files. ................................................................................................. 57b. Seed files. ................................................................................................. 58. Seed lot with off-types. ............................................................................. 59a. Seed lots on dehydration shelves. ............................................................ 69b. Seed lots on dehydration shelves. ............................................................ 610. Moisture reader. ........................................................................................ 611. Seeds Grinders. ........................................................................................ 712. Seed samples in aluminum foils for oven drying. ..................................... 713. Seeds set for germination test. ................................................................. 914. Seeds set for germination test. ................................................................. 915. Mechanical scarification. .......................................................................... 916a. Germinating seeds. ............................................................................... 1016b. Germinating seeds. ............................................................................... 1017. Temperature Logger. ............................................................................. 1018a. Seed lot on weighing balance. ............................................................... 1118b. Seed Counter. ....................................................................................... 1119. Air Tight plastic containers ...................................................................... 1120. Vacuum sealed aluminum foil. ............................................................... 1221a. Log in to the Inventory. .......................................................................... 1421b. Import the data. ...................................................................................... 1522. Select printer. .......................................................................................... 1623. List of seed lots for selection. ................................................................. 1724a. Print labels. ............................................................................................. 1824b. Printed bar code labels ........................................................................... 1925. 5°C Temporary storage. .......................................................................... 1926. Pre-labelled seeds envelopes. ............................................................... 20
v
27. Transfer the into labeled seed envelope ................................................ 2428b. Seeds on the designated shelf. .............................................................. 2428a. Put seeds on the designated shelf. ........................................................ 2429. Seeds for regeneration arranged in box. ................................................ 2530. Planting pots arrangement. .................................................................... 2631. Seed Scarification. .................................................................................. 2632. Seeds Coated with Mancozeb. ............................................................... 2733a. Planting hole. .......................................................................................... 2733b. Seeds sown. ........................................................................................... 2734. Hand Pollination. .................................................................................... 2835. Emerging seedling. ................................................................................. 2836. Staking. ................................................................................................... 2937. Twinning. ................................................................................................ 2939. Havesting Bags. ..................................................................................... 3038. Plant numbering for indexing. ................................................................. 30
1
Introduction
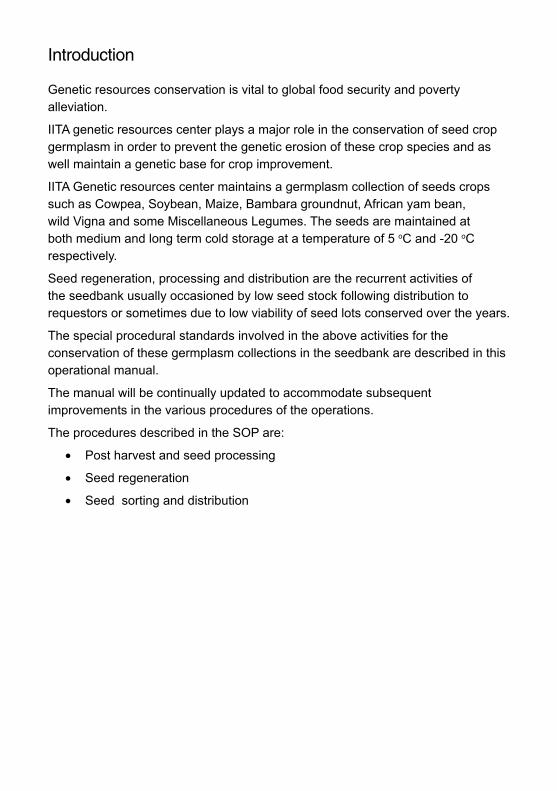
Genetic resources conservation is vital to global food security and poverty alleviation.
IITA genetic resources center plays a major role in the conservation of seed crop germplasm in order to prevent the genetic erosion of these crop species and as well maintain a genetic base for crop improvement.
IITA Genetic resources center maintains a germplasm collection of seeds crops such as Cowpea, Soybean, Maize, Bambara groundnut, African yam bean, wild Vigna and some Miscellaneous Legumes. The seeds are maintained at both medium and long term cold storage at a temperature of 5 oC and -20 oC respectively.
Seed regeneration, processing and distribution are the recurrent activities of the seedbank usually occasioned by low seed stock following distribution to requestors or sometimes due to low viability of seed lots conserved over the years.
The special procedural standards involved in the above activities for the conservation of these germplasm collections in the seedbank are described in this operational manual.
The manual will be continually updated to accommodate subsequent improvements in the various procedures of the operations.
The procedures described in the SOP are:
• Post harvest and seed processing
• Seed regeneration
• Seed sorting and distribution
2
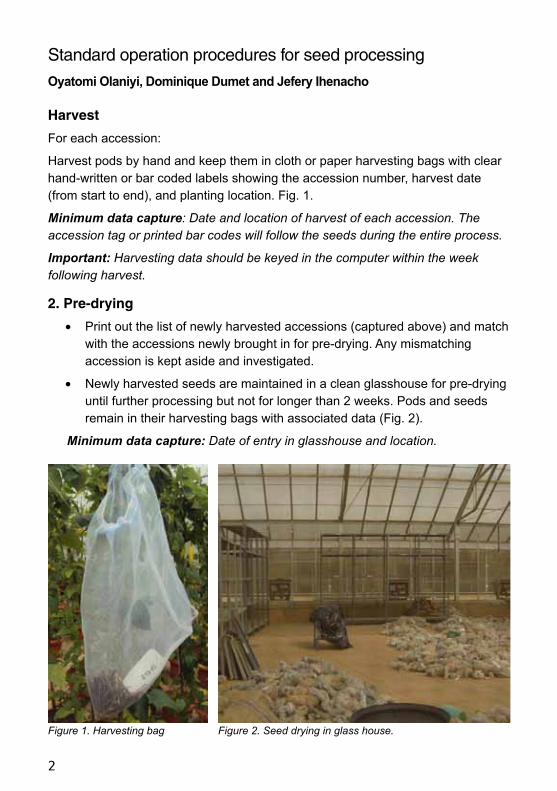
Figure 1. Harvesting bag
Standard operation procedures for seed processing
Oyatomi Olaniyi, Dominique Dumet and Jefery Ihenacho
Harvest
For each accession:
Harvest pods by hand and keep them in cloth or paper harvesting bags with clear hand-written or bar coded labels showing the accession number, harvest date (from start to end), and planting location. Fig. 1.
Minimum data capture: Date and location of harvest of each accession. The accession tag or printed bar codes will follow the seeds during the entire process.
Important: Harvesting data should be keyed in the computer within the week following harvest.
2. Pre-drying
• Print out the list of newly harvested accessions (captured above) and match with the accessions newly brought in for pre-drying. Any mismatching accession is kept aside and investigated.
• Newly harvested seeds are maintained in a clean glasshouse for pre-drying until further processing but not for longer than 2 weeks. Pods and seeds remain in their harvesting bags with associated data (Fig. 2).
Minimum data capture: Date of entry in glasshouse and location.
Figure 2. Seed drying in glass house.
3
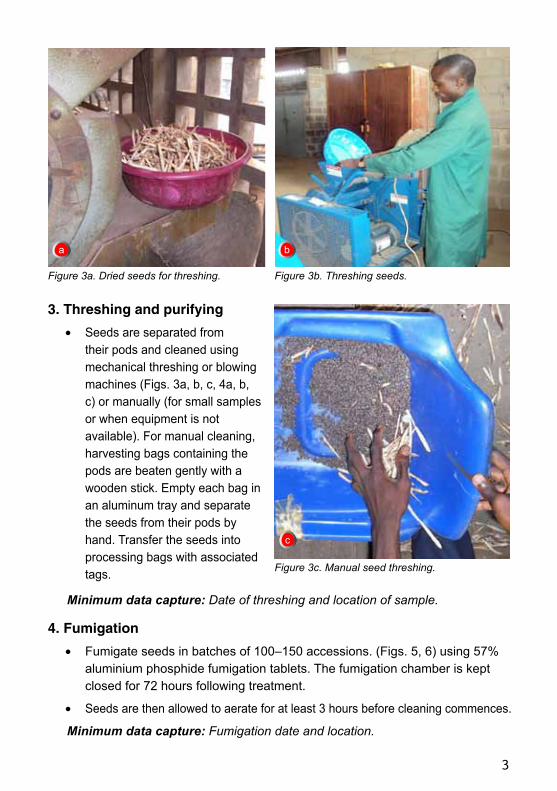
3. Threshing and purifying
• Seeds are separated from their pods and cleaned using mechanical threshing or blowing machines (Figs. 3a, b, c, 4a, b, c) or manually (for small samples or when equipment is not available). For manual cleaning, harvesting bags containing the pods are beaten gently with a wooden stick. Empty each bag in an aluminum tray and separate the seeds from their pods by hand. Transfer the seeds into processing bags with associated tags.
Figure 3a. Dried seeds for threshing. Figure 3b. Threshing seeds.
Minimum data capture: Date of threshing and location of sample.
4. Fumigation
• Fumigate seeds in batches of 100–150 accessions. (Figs. 5, 6) using 57% aluminium phosphide fumigation tablets. The fumigation chamber is kept closed for 72 hours following treatment.
• Seeds are then allowed to aerate for at least 3 hours before cleaning commences.
Minimum data capture: Fumigation date and location.
Figure 3c. Manual seed threshing.
a b
c
4
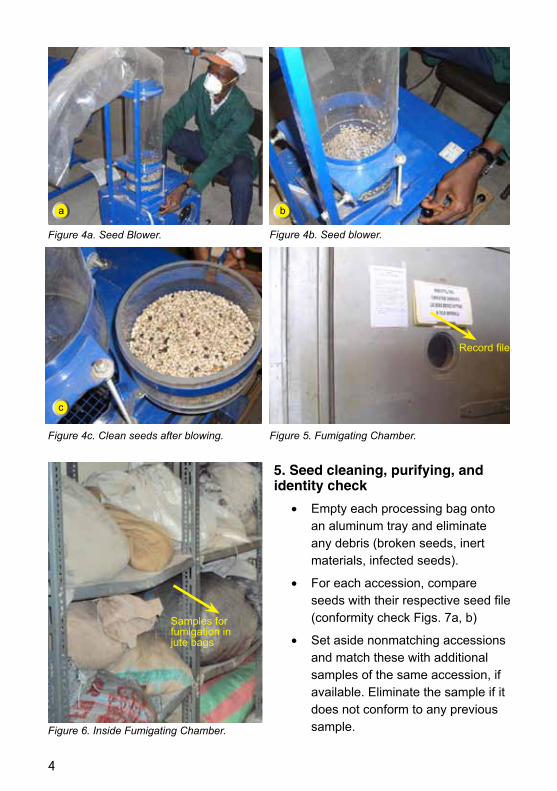
5. Seed cleaning, purifying, and identity check
• Empty each processing bag onto an aluminum tray and eliminate any debris (broken seeds, inert materials, infected seeds).
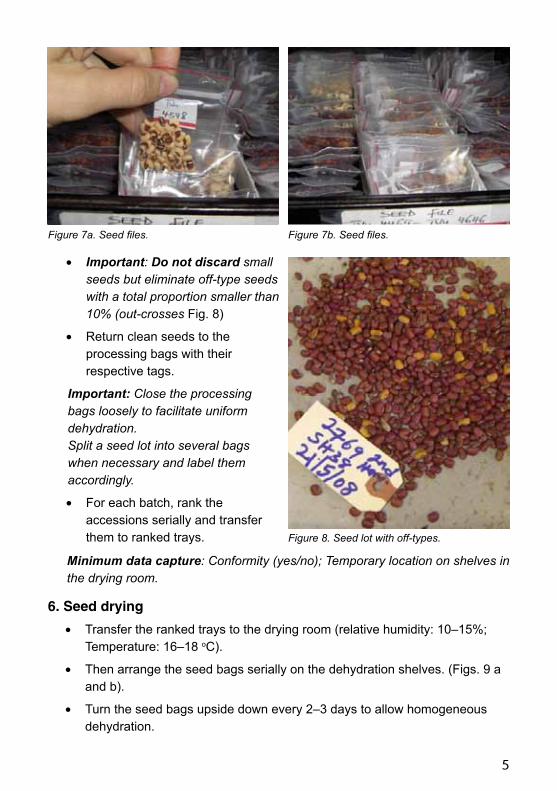
• For each accession, compare seeds with their respective seed file (conformity check Figs. 7a, b)
• Set aside nonmatching accessions and match these with additional samples of the same accession, if available. Eliminate the sample if it does not conform to any previous sample.
Figure 4a. Seed Blower. Figure 4b. Seed blower.
Figure 4c. Clean seeds after blowing.
a b
c
Figure 5. Fumigating Chamber.
Figure 6. Inside Fumigating Chamber.
Samples for fumigation in jute bags
Record file.
5
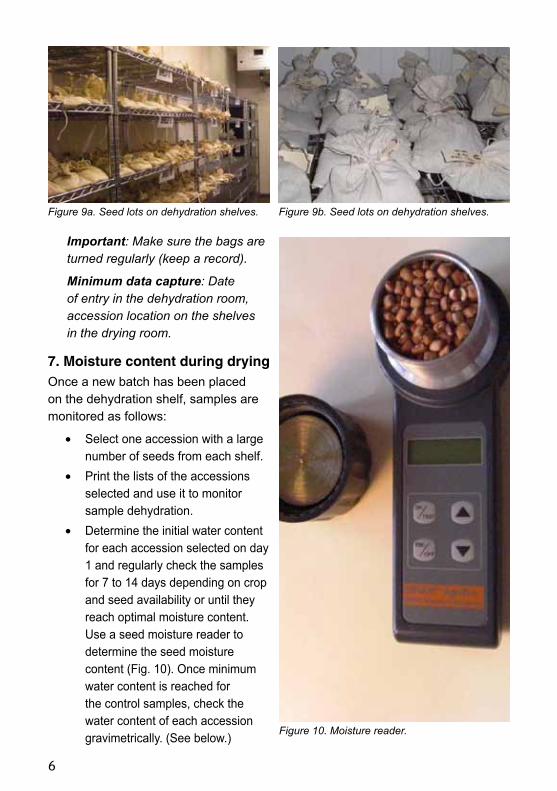
• Important: Do not discard small seeds but eliminate off-type seeds with a total proportion smaller than 10% (out-crosses Fig. 8)
• Return clean seeds to the processing bags with their respective tags.
Important: Close the processing bags loosely to facilitate uniform dehydration. Split a seed lot into several bags when necessary and label them accordingly.
• For each batch, rank the accessions serially and transfer them to ranked trays.
Figure 7a. Seed files. Figure 7b. Seed files.
Figure 8. Seed lot with off-types.
Minimum data capture: Conformity (yes/no); Temporary location on shelves in the drying room.
6. Seed drying
• Transfer the ranked trays to the drying room (relative humidity: 10–15%; Temperature: 16–18 oC).
• Then arrange the seed bags serially on the dehydration shelves. (Figs. 9 a and b).
• Turn the seed bags upside down every 2–3 days to allow homogeneous dehydration.
6
Important: Make sure the bags are turned regularly (keep a record).
Minimum data capture: Date of entry in the dehydration room, accession location on the shelves in the drying room.
7. Moisture content during dryingOnce a new batch has been placed on the dehydration shelf, samples are monitored as follows:
• Select one accession with a large number of seeds from each shelf.
• Print the lists of the accessions selected and use it to monitor sample dehydration.
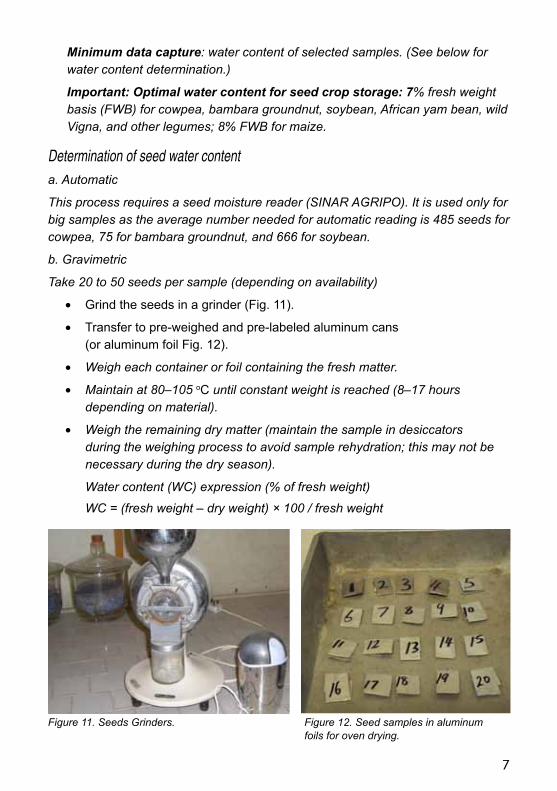
• Determine the initial water content for each accession selected on day 1 and regularly check the samples for 7 to 14 days depending on crop and seed availability or until they reach optimal moisture content. Use a seed moisture reader to determine the seed moisture content (Fig. 10). Once minimum water content is reached for the control samples, check the water content of each accession gravimetrically. (See below.)
Figure 9a. Seed lots on dehydration shelves. Figure 9b. Seed lots on dehydration shelves.
Figure 10. Moisture reader.
7
Minimum data capture: water content of selected samples. (See below for water content determination.)
Important: Optimal water content for seed crop storage: 7% fresh weight basis (FWB) for cowpea, bambara groundnut, soybean, African yam bean, wild Vigna, and other legumes; 8% FWB for maize.
Determination of seed water contenta. Automatic
This process requires a seed moisture reader (SINAR AGRIPO). It is used only for big samples as the average number needed for automatic reading is 485 seeds for cowpea, 75 for bambara groundnut, and 666 for soybean.
b. Gravimetric
Take 20 to 50 seeds per sample (depending on availability)
• Grind the seeds in a grinder (Fig. 11).
• Transfer to pre-weighed and pre-labeled aluminum cans (or aluminum foil Fig. 12).
• Weigh each container or foil containing the fresh matter.
• Maintain at 80–105 oC until constant weight is reached (8–17 hours depending on material).
• Weigh the remaining dry matter (maintain the sample in desiccators during the weighing process to avoid sample rehydration; this may not be necessary during the dry season). Water content (WC) expression (% of fresh weight) WC = (fresh weight – dry weight) × 100 / fresh weight
Figure 11. Seeds Grinders. Figure 12. Seed samples in aluminum foils for oven drying.

8
8. Seed sorting for germination and water content check
Once random samples have reached the optimal water content for storage, process the seeds as follows:
• Take all the seed bags on the selected shelf out of the drying room.
• From each batch, place 40 to 70 seeds in an envelope and label this with the accession number or add bar code tags to the bag. Use these samples for water content and germination tests
Important: During the rainy season, the water content check must be done as soon as seeds are packed in the envelope to avoid sample rehydration.
9. Water content determination for storage
• Take 20 to 50 seeds out of the envelope and process as follows.
• Grind 20 to 50 seeds (depending on availability).
• Transfer to pre-weighed and pre-labeled aluminum cans (or aluminum foil).
• Weigh each container or foil containing the fresh matter.
• Maintain at 80–105 0C until constant weight is reached (8–17 hours depending on the material).
• Weigh remaining the dry matter using a precision balance. (During the rainy season, maintain the sample in desiccators during the weighing process to avoid sample rehydration.)
Minimum data capture: Fresh weight before oven drying, dry weight after oven drying, derived water content. Use a precision balance.
10. Germination
Germination tests are performed in polyethylene boxes as follows:
• Add a pinch of Mancozeb (anti-fungus) to each envelope containing the seeds tags (written on the envelope or as bar code).
Important: Wear a mask and gloves as Mancozeb is very toxic in powder form.
• Cut and arrange seedburo K-22 germination paper sheets (also known as Kimpak or crepe paper) in the transparent polyethylene boxes (7 to 14 layers per box). Use round boxes (110 ×45 mm) for small seeds and rectangular boxes (170 ×110 ×50 mm) for big seeds.
• Add 20 to 30 ml of water to each box.
• Pour off excess water from the germination boxes before autoclaving.
9
• With the help of forceps, place 10 to 20 seeds in each autoclaved box (2 rows/lines). Figs. 13, 14.
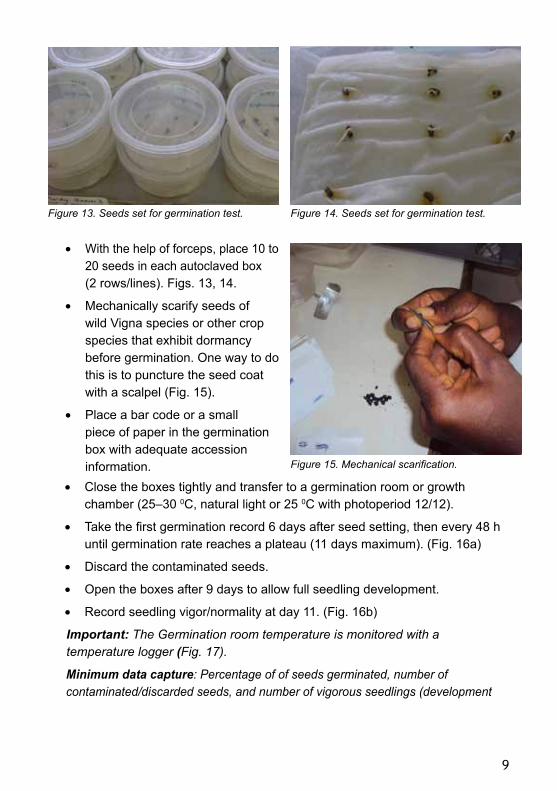
• Mechanically scarify seeds of wild Vigna species or other crop species that exhibit dormancy before germination. One way to do this is to puncture the seed coat with a scalpel (Fig. 15).
• Place a bar code or a small piece of paper in the germination box with adequate accession information.
Figure 13. Seeds set for germination test. Figure 14. Seeds set for germination test.
Figure 15. Mechanical scarification.
• Close the boxes tightly and transfer to a germination room or growth chamber (25–30 0C, natural light or 25 0C with photoperiod 12/12).
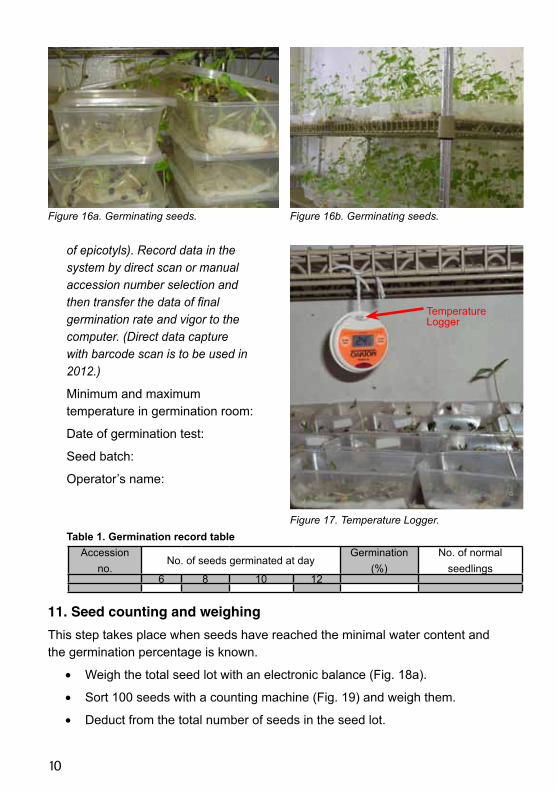
• Take the first germination record 6 days after seed setting, then every 48 h until germination rate reaches a plateau (11 days maximum). (Fig. 16a)
• Discard the contaminated seeds.
• Open the boxes after 9 days to allow full seedling development.
• Record seedling vigor/normality at day 11. (Fig. 16b)
Important: The Germination room temperature is monitored with a temperature logger (Fig. 17).
Minimum data capture: Percentage of of seeds germinated, number of contaminated/discarded seeds, and number of vigorous seedlings (development
10
of epicotyls). Record data in the system by direct scan or manual accession number selection and then transfer the data of final germination rate and vigor to the computer. (Direct data capture with barcode scan is to be used in 2012.)
Minimum and maximum temperature in germination room:
Date of germination test:
Seed batch:
Operator’s name:
Figure 16a. Germinating seeds. Figure 16b. Germinating seeds.
Figure 17. Temperature Logger. Table 1. Germination record table
Accession no.
No. of seeds germinated at dayGermination
(%) No. of normal
seedlings6 8 10 12
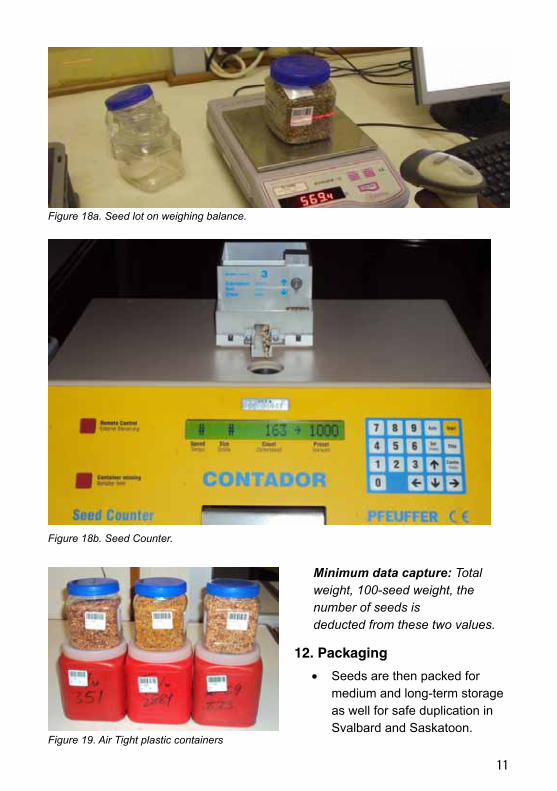
11. Seed counting and weighing
This step takes place when seeds have reached the minimal water content and the germination percentage is known.
• Weigh the total seed lot with an electronic balance (Fig. 18a).
• Sort 100 seeds with a counting machine (Fig. 19) and weigh them.
• Deduct from the total number of seeds in the seed lot.
Temperature Logger
11
Figure 18a. Seed lot on weighing balance.
Minimum data capture: Total weight, 100-seed weight, the number of seeds is deducted from these two values.
12. Packaging
• Seeds are then packed for medium and long-term storage as well for safe duplication in Svalbard and Saskatoon.
Figure 19. Air Tight plastic containers
Figure 18b. Seed Counter.
12
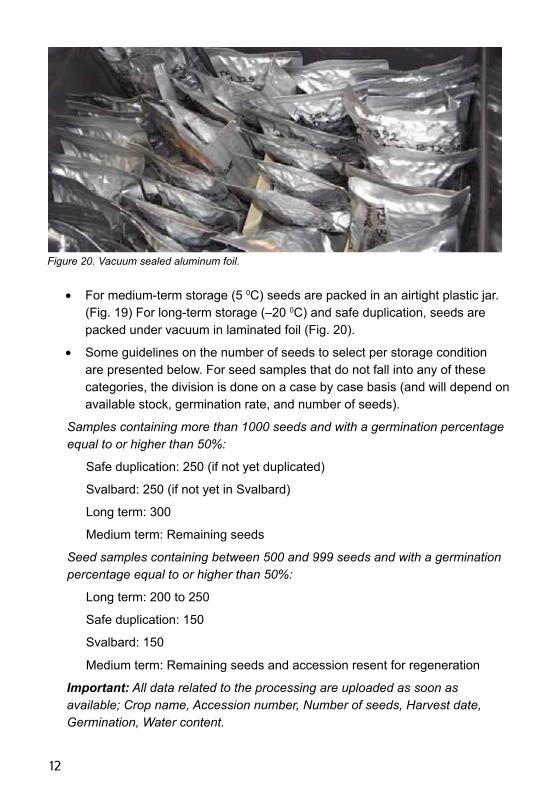
• For medium-term storage (5 0C) seeds are packed in an airtight plastic jar.(Fig. 19) For long-term storage (–20 0C) and safe duplication, seeds are packed under vacuum in laminated foil (Fig. 20).
• Some guidelines on the number of seeds to select per storage condition are presented below. For seed samples that do not fall into any of these categories, the division is done on a case by case basis (and will depend on available stock, germination rate, and number of seeds).
Samples containing more than 1000 seeds and with a germination percentage equal to or higher than 50%:
Safe duplication: 250 (if not yet duplicated)
Svalbard: 250 (if not yet in Svalbard)
Long term: 300
Medium term: Remaining seeds
Seed samples containing between 500 and 999 seeds and with a germination percentage equal to or higher than 50%:
Long term: 200 to 250
Safe duplication: 150
Svalbard: 150
Medium term: Remaining seeds and accession resent for regeneration
Important: All data related to the processing are uploaded as soon as available; Crop name, Accession number, Number of seeds, Harvest date, Germination, Water content.
Figure 20. Vacuum sealed aluminum foil.
13
Important: Make sure to link the samples going to Svalbard and Saskatoon with their parent stocks remaining in Ibadan (for further monitoring).
Important: Prior to packaging for safe duplication or Svalbard, check whether or not the accession has already been sent. (Samples are duplicated only once in both locations.)
Important: Prior to packaging, make sure that all seeds harvested during the same season are ready to be packed as they will be merged. Do not create several seed lots for the same accession harvested during the same season.
Important: Before the bar codes are printed and pasted on the container of each accession, paper labels containing the accession details are enclosed in the containers.
13. Data capture and bar code printing
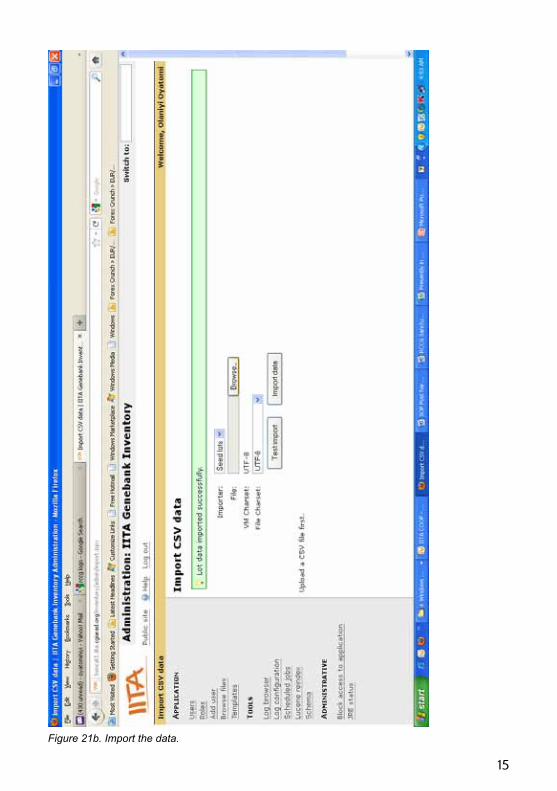
• A CSV data file is prepared for any accession batch (a CSV file is an excel file saved in a CSV format with all variables to be captured. (Fig. 24) See Annex 1.
• Log in to the system and enter “administration”. Test the import by clicking on test import.
• If the test is successful, repeat above steps and select import data.
• The file is imported to the inventory with all data captured during the processing.
Important: For all virus-indexed samples, indicate in the column of the excel file whether TRUE or FALSE for virus-free samples and non-virus-free samples before importing the file.
Printing the barcodes
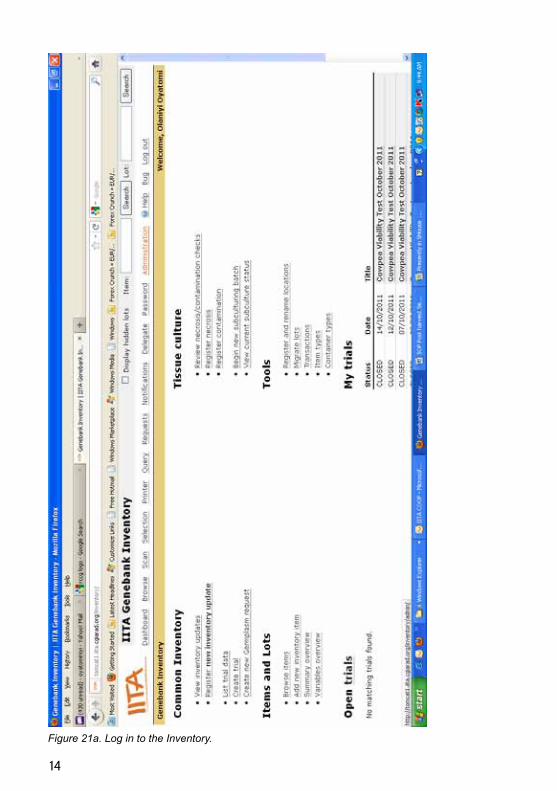
• Log on to the genebank inventory, click on administration and select Import (Figs. 21a-b).
• On the dashboard of the inventory click on printer and then select on Zebra ZM4Plus at Seedbank (Fig. 22).
• Browse the file location and select the file containing the list of the accessions.
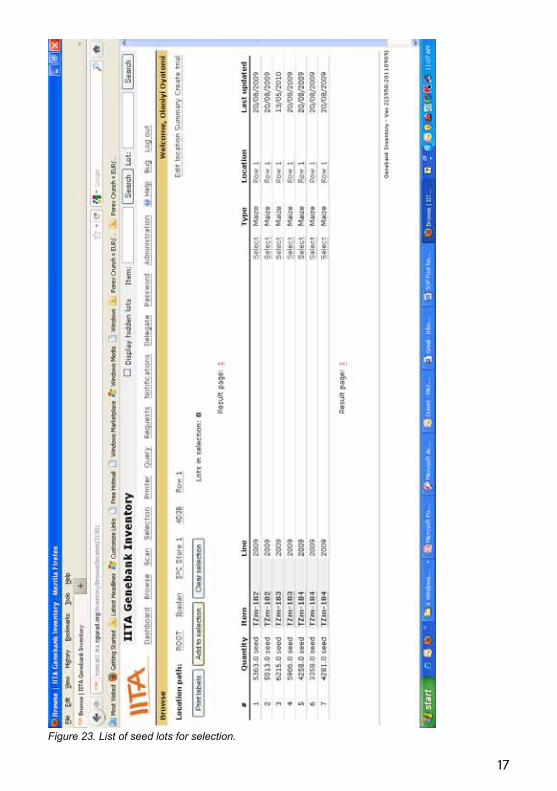
• Click on add to selection. All the accessions in the location will be selected for printing (Fig. 23).
• Click on selection and then click print Labels. The barcodes are printed (Fig. 24a-b).
14
Figure 21a. Log in to the Inventory.
15
Figure 21b. Import the data.

16
Figure 22. Select printer.
17
Figure 23. List of seed lots for selection.

18
Figure 24a. Print labels.
19
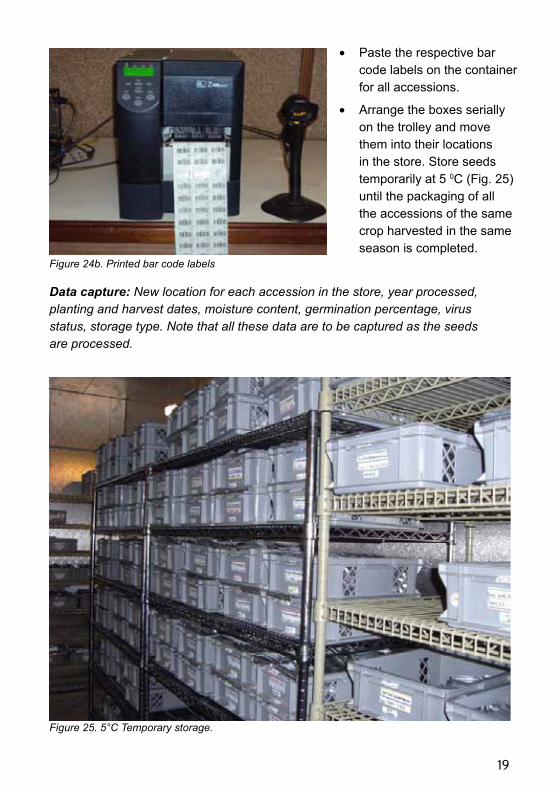
Figure 24b. Printed bar code labels
Data capture: New location for each accession in the store, year processed, planting and harvest dates, moisture content, germination percentage, virus status, storage type. Note that all these data are to be captured as the seeds are processed.
Figure 25. 5°C Temporary storage.
• Paste the respective bar code labels on the container for all accessions.
• Arrange the boxes serially on the trolley and move them into their locations in the store. Store seeds temporarily at 5 0C (Fig. 25) until the packaging of all the accessions of the same crop harvested in the same season is completed.
20
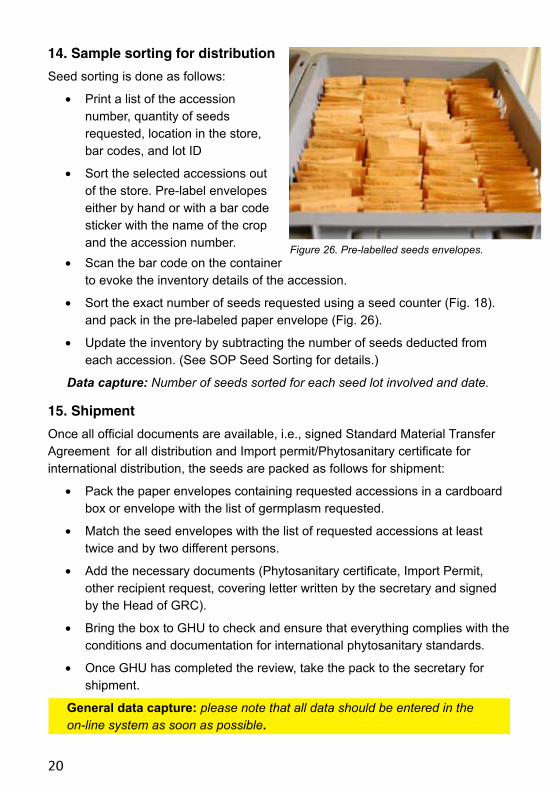
14. Sample sorting for distribution
Seed sorting is done as follows:
• Print a list of the accession number, quantity of seeds requested, location in the store, bar codes, and lot ID
• Sort the selected accessions out of the store. Pre-label envelopes either by hand or with a bar code sticker with the name of the crop and the accession number. Figure 26. Pre-labelled seeds envelopes.
• Scan the bar code on the container to evoke the inventory details of the accession.
• Sort the exact number of seeds requested using a seed counter (Fig. 18). and pack in the pre-labeled paper envelope (Fig. 26).
• Update the inventory by subtracting the number of seeds deducted from each accession. (See SOP Seed Sorting for details.)
Data capture: Number of seeds sorted for each seed lot involved and date.
15. Shipment
Once all official documents are available, i.e., signed Standard Material Transfer Agreement for all distribution and Import permit/Phytosanitary certificate for international distribution, the seeds are packed as follows for shipment:
• Pack the paper envelopes containing requested accessions in a cardboard box or envelope with the list of germplasm requested.
• Match the seed envelopes with the list of requested accessions at least twice and by two different persons.
• Add the necessary documents (Phytosanitary certificate, Import Permit, other recipient request, covering letter written by the secretary and signed by the Head of GRC).
• Bring the box to GHU to check and ensure that everything complies with the conditions and documentation for international phytosanitary standards.
• Once GHU has completed the review, take the pack to the secretary for shipment.
General data capture: please note that all data should be entered in the on-line system as soon as possible.
21
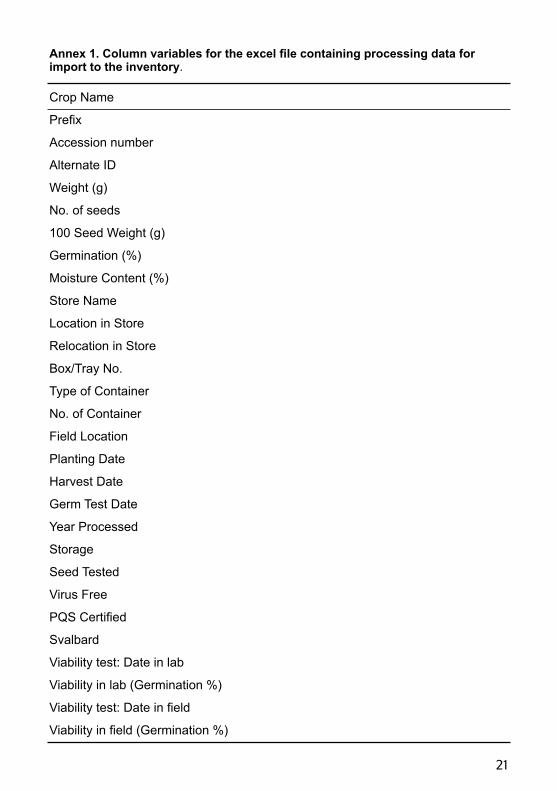
Annex 1. Column variables for the excel file containing processing data for import to the inventory.
Crop Name
Prefix
Accession number
Alternate ID
Weight (g)
No. of seeds
100 Seed Weight (g)
Germination (%)
Moisture Content (%)
Store Name
Location in Store
Relocation in Store
Box/Tray No.
Type of Container
No. of Container
Field Location
Planting Date
Harvest Date
Germ Test Date
Year Processed
Storage
Seed Tested
Virus Free
PQS Certified
Svalbard
Viability test: Date in lab
Viability in lab (Germination %)
Viability test: Date in field
Viability in field (Germination %)

22
Standard Operation Procedures for seed sorting from medium and long-term store
Oyatomi Olaniyi and Dominique Dumet
All international seed crop collections maintained at IITA produce orthodox seeds, i.e., seeds that can sustain low temperatures and low water content. As a result, seed crop collection are maintained in both long-term (–20 0C) and medium term (–5 0C) storage conditions after optimal dehydration (see Seed processing section) and when possible in vacuum packaging.
Because of the large number of seed lots maintained in the gene bank (over 50 000 lots), it is important to carefully sort and record seed sorting whether for distribution, viability testing, or safe duplication.
The seed bank inventory system has the facility to capture information related to individual regeneration seed lots, seed processing, virus indexing, seed store location, accession characterization, evaluation data, as well as the passport data. Note that one seed lot contains all seeds harvested from one accession planted at a specific time.
Issuing the sorting list
• The list of all accessions to be sorted is provided (or approved) by the gene bank curator and transferred by email to the seed bank manager.
• The list will have the following information: purpose of sorting (distribution, regeneration, viability test, and safe duplication), name of the crop, as well as the requestor’s name, country, and institution when distribution will follow the sorting. It also shows either the bar code or lot ID(to locate the sample) or the sample location in the store if the sample is not yet bar coded.
• The list’s title must match the subject of the email. − Example of title: Cowpea Oyatomi Olaniyi Obafemi Awolowo University
Ile Ife Nigeria (i.e., name of the crop, recipient name, and Institute/Country of the requestor).
• The number of seeds to be sorted per accession is indicated in the validated list.
Example of list: Cowpea Oyatomi Olaniyi Obafemi Awolowo University Ile Ife Nigeria
Acc NoLocation in the store
Location on shelves
Storage type
Lot ID Bar codeNo. of seeds to
be sortedTVu-274 8R2A Tray 55 Long 134164 127179 20
TVu-5255 R6C7 Tray 661 Medium 195991 172667 20
23
Sorting germplasm from the cold store
• The person in charge of sorting the seeds follows the following steps:
• Collect the approved list of accessions to be sorted from the seed bank manager.
• Locate the seed lots in the store (using the inventory system).
• Take out of the store the containers containing the selected samples, place the samples on a trolley and bring them into the seed laboratory. (Note that seeds coming from -20 oC store are kept overnight at 5 oC before being transferred to the laboratory).
• Open the inventory system and Select ‘’register new inventory update’’ on the dash board.
• Enter the date and title for the seed sorting. The title of the transaction must precisely match the list name Fig. 24a.
• Click on the “subtype” and select on the particular subtype title: regeneration, distribution, viability tests, or safe duplication.
• Describe the transaction. The description should clearly state the purpose of the seed sorting. If it is a request, it should include the name and location of the requestor. If the sorting is meant for regeneration, the year and the month for the planting activity should be indicated in the description. e.g., Cowpea for regeneration October 2011
• Click on “Start editing”.
• Scan the bar code of the container and enter the number of seeds to be sorted. Fig. 24b.
• Pour enough seeds out of the container into the preset seed counter and collect the specified number of seeds counted by the seed counter. Fig. 25.
• Transfer the seeds to a pre-labeled or pre-bar-coded seed envelope and arrange the seeds in serial order of the accession numbers in a box (Fig. 26).
Conformity check • Arrange the seed lots serially in a plastic tray and match them with the respective
seed files to check their conformity.
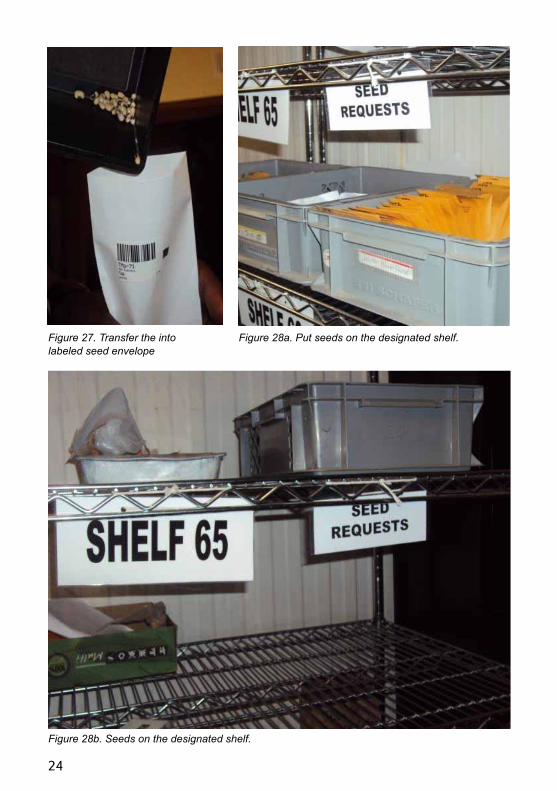
Transit location attribution• Once conformity is confirmed, keep all sorted seed lots in a designated
location in the drying room untilall official documents requested for distribution are cleared (Fig. 27a,b)
24
Figure 27. Transfer the into labeled seed envelope
Figure 28a. Put seeds on the designated shelf.
Figure 28b. Seeds on the designated shelf.
25
Standard Operational Procedures for the regeneration of clean seeds
Oyatomi Olaniyi, Dominique Dumet and Oladepo Adebowale
IITA’s Genetic Resources Center maintains a germplasm collection of seed crops such as cowpea, soybean, maize, Bambara groundnut, African yambean, wild Vigna, and some miscellaneous legumes. The seeds are maintained in both medium –term cold storage at a temperature of 5 0C and long-term at –20 0C.
Seed regeneration is a recurrent activity of the seed bank as this is usually occasioned by a low seed stock following distribution to requestors or sometimes to the low viability of seed lots conserved over the years.
During seed regeneration, virus indexing is usually also done by the Germplasm Health Unit of the institute for all accessions planted to obtain clean seed lots that are free from endemic viruses.
Seed sorting (Refer to IITA genebank SOP on seed sorting)
Seed regeneration is usually necessitated for the following reasons
• Low seed stock.
• Seed not previously indexed for viruses.
• Low viability of seed lots
− Number of seeds to be sorted
Depending on the seed lot viability and the quantity of seeds available,
• Sort 10 to 50 seeds.
• Pack in small seed envelopes and properly label them with their accession numbers and bar codes.− (to be replaced by
printed bar code in 2012).
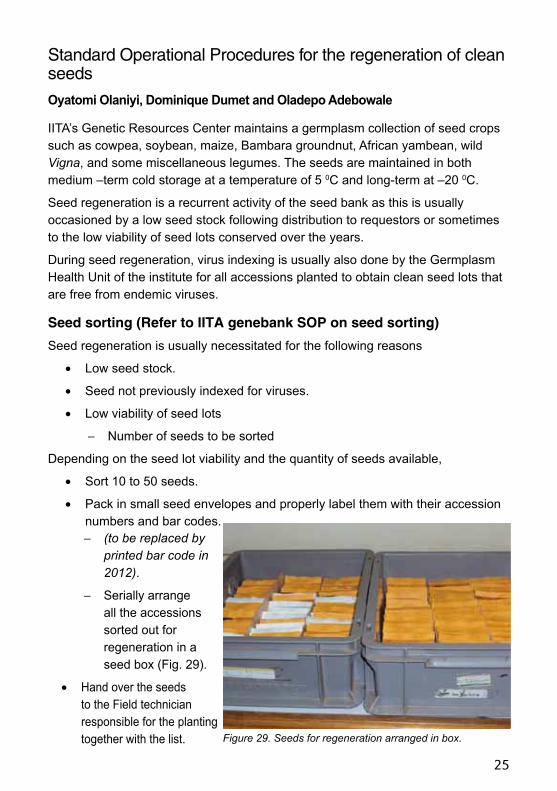
− Serially arrange all the accessions sorted out for regeneration in a seed box (Fig. 29).
• Hand over the seeds to the Field technician responsible for the planting together with the list. Figure 29. Seeds for regeneration arranged in box.
26
Planting
Planting is exclusively performed in the screen house for clean seed production.
Pre-planting operations• Wash and disinfect the screen house by spraying with insecticide and
fungicide (100 ml/20 L of water).
Chemicals for disinfecting the screen house are as follows:
− KARATE 5EC 50g/lambda-cyhalothrin
− ACTELLIC 25EC 250g Pirimiphos-methyl/liter {an organophosphorus compound}
• Clean the pots with soap and water.
• Fill the pots with sterilized top soil.
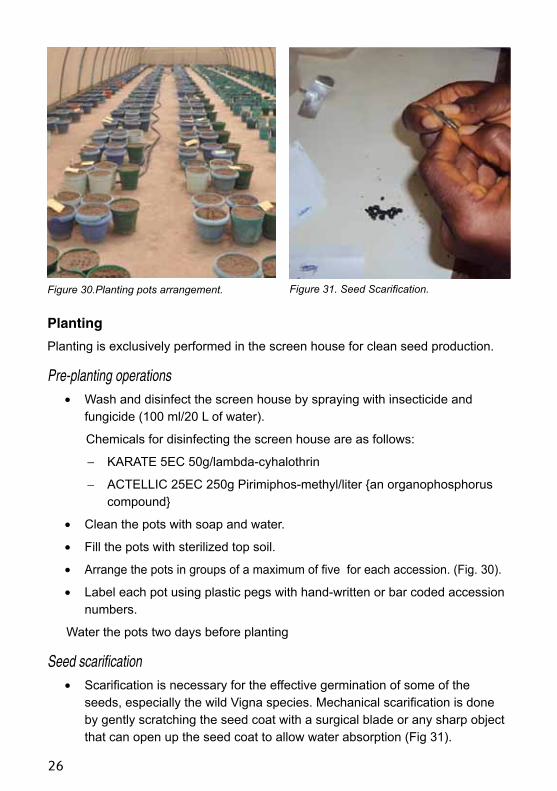
• Arrange the pots in groups of a maximum of five for each accession. (Fig. 30).
• Label each pot using plastic pegs with hand-written or bar coded accession numbers.
Water the pots two days before planting
Seed scarification• Scarification is necessary for the effective germination of some of the
seeds, especially the wild Vigna species. Mechanical scarification is done by gently scratching the seed coat with a surgical blade or any sharp object that can open up the seed coat to allow water absorption (Fig 31).
Figure 31. Seed Scarification.Figure 30.Planting pots arrangement.
27
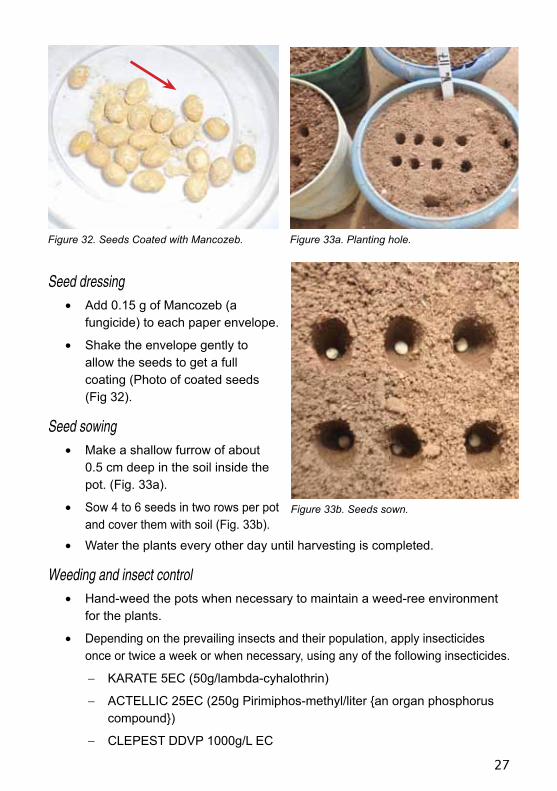
Seed dressing• Add 0.15 g of Mancozeb (a
fungicide) to each paper envelope.
• Shake the envelope gently to allow the seeds to get a full coating (Photo of coated seeds (Fig 32).
Seed sowing• Make a shallow furrow of about
0.5 cm deep in the soil inside the pot. (Fig. 33a).
• Sow 4 to 6 seeds in two rows per pot and cover them with soil (Fig. 33b).
Figure 32. Seeds Coated with Mancozeb. Figure 33a. Planting hole.
Figure 33b. Seeds sown.
• Water the plants every other day until harvesting is completed.
Weeding and insect control• Hand-weed the pots when necessary to maintain a weed-ree environment
for the plants.
• Depending on the prevailing insects and their population, apply insecticides once or twice a week or when necessary, using any of the following insecticides.
− KARATE 5EC (50g/lambda-cyhalothrin)
− ACTELLIC 25EC (250g Pirimiphos-methyl/liter {an organ phosphorus compound})
− CLEPEST DDVP 1000g/L EC
28
Hand pollination
• Hand pollination is required for some wild Vigna species.
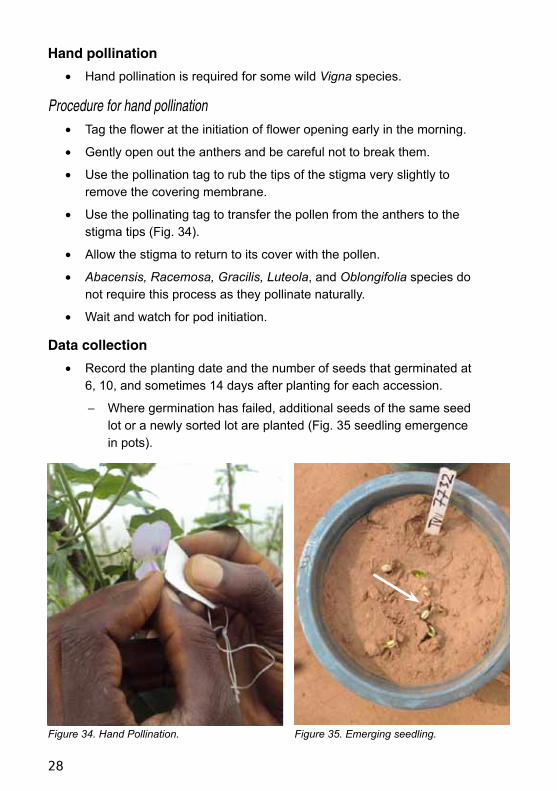
Procedure for hand pollination• Tag the flower at the initiation of flower opening early in the morning.
• Gently open out the anthers and be careful not to break them.
• Use the pollination tag to rub the tips of the stigma very slightly to remove the covering membrane.
• Use the pollinating tag to transfer the pollen from the anthers to the stigma tips (Fig. 34).
• Allow the stigma to return to its cover with the pollen.
• Abacensis, Racemosa, Gracilis, Luteola, and Oblongifolia species do not require this process as they pollinate naturally.
• Wait and watch for pod initiation.
Data collection
• Record the planting date and the number of seeds that germinated at 6, 10, and sometimes 14 days after planting for each accession.
− Where germination has failed, additional seeds of the same seed lot or a newly sorted lot are planted (Fig. 35 seedling emergence in pots).
Figure 34. Hand Pollination. Figure 35. Emerging seedling.
29
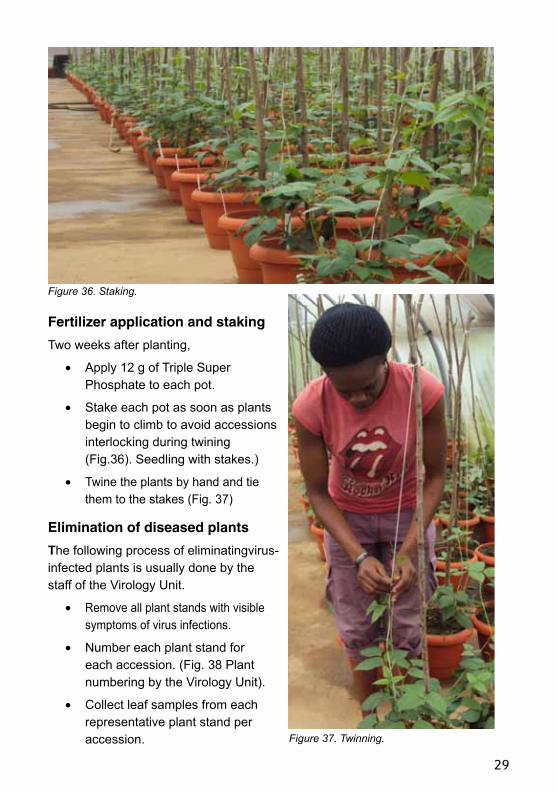
Fertilizer application and staking
Two weeks after planting,
• Apply 12 g of Triple Super Phosphate to each pot.
• Stake each pot as soon as plants begin to climb to avoid accessions interlocking during twining (Fig.36). Seedling with stakes.)
• Twine the plants by hand and tie them to the stakes (Fig. 37)
Elimination of diseased plants
The following process of eliminatingvirus-infected plants is usually done by the staff of the Virology Unit.
• Remove all plant stands with visible symptoms of virus infections.
• Number each plant stand for each accession. (Fig. 38 Plant numbering by the Virology Unit).
• Collect leaf samples from each representative plant stand per accession.
Figure 36. Staking.
Figure 37. Twinning.
30
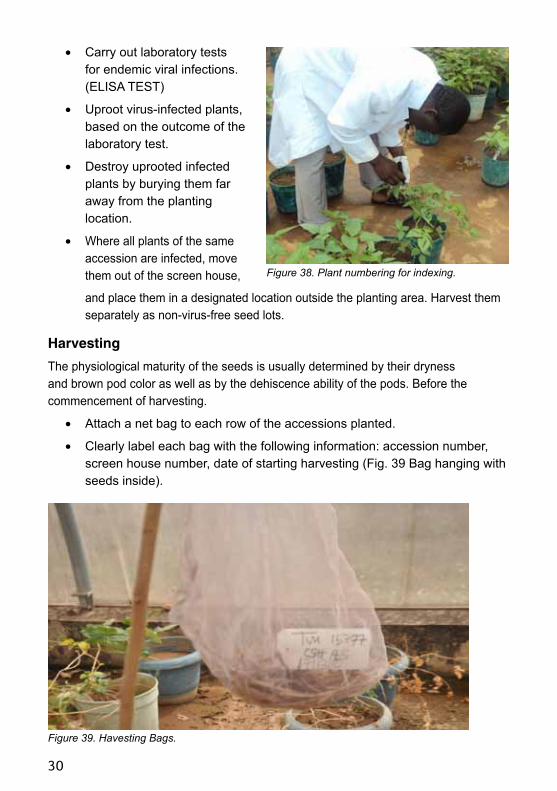
• Carry out laboratory tests for endemic viral infections.(ELISA TEST)
• Uproot virus-infected plants, based on the outcome of the laboratory test.
• Destroy uprooted infected plants by burying them far away from the planting location.
• Where all plants of the same accession are infected, move them out of the screen house, Figure 38. Plant numbering for indexing.
Figure 39. Havesting Bags.
and place them in a designated location outside the planting area. Harvest them separately as non-virus-free seed lots.
Harvesting
The physiological maturity of the seeds is usually determined by their dryness and brown pod color as well as by the dehiscence ability of the pods. Before the commencement of harvesting.
• Attach a net bag to each row of the accessions planted.
• Clearly label each bag with the following information: accession number, screen house number, date of starting harvesting (Fig. 39 Bag hanging with seeds inside).

31
• Continuously harvest the dry pods and drop them into the net bag until all pods are harvested.
• In the case of wild Vigna, harvesting ends when enough seeds have been collected.
Seed processing
All harvested seed pods are moved from the screen house to the glass house until they are dry enough for threshing (usually between 2 and 3 weeks).