Embed Size (px)
Citation preview
For additional information about NGSS, go to page 20 of this guide.
FEATURED CROSSCUTTING CONCEPT
NEXT GENERATION SCIENCE STANDARDS
FEATURED PRACTICE DISCIPLINARY CORE IDEAS
Science and Teaching for Field Instructors
Interdependent Relationships in EcosystemsSystems and System ModelsDeveloping and Using Models
Tips:To ensure a successful experience, review the teaching tips
found on page 2 and throughout this guide. =
Related Activities:Discovery Swap, Tracking,
Evaluating Evidence (classroom activity)
Materials: • Double journal page with pictures• Simple guide to plants (or organisms) in the area • Whiteboard and marker For more details, see “Gathering student materials,” page 3.
Timing:55–75 minutes
Setting:In a native plant area, ideally somewhere that tracks and sign of animals are evident. Good substrates for tracks and signs include sand, mud, and snow.
Grade Level:Grades 4–8. Adaptable for younger or older students.
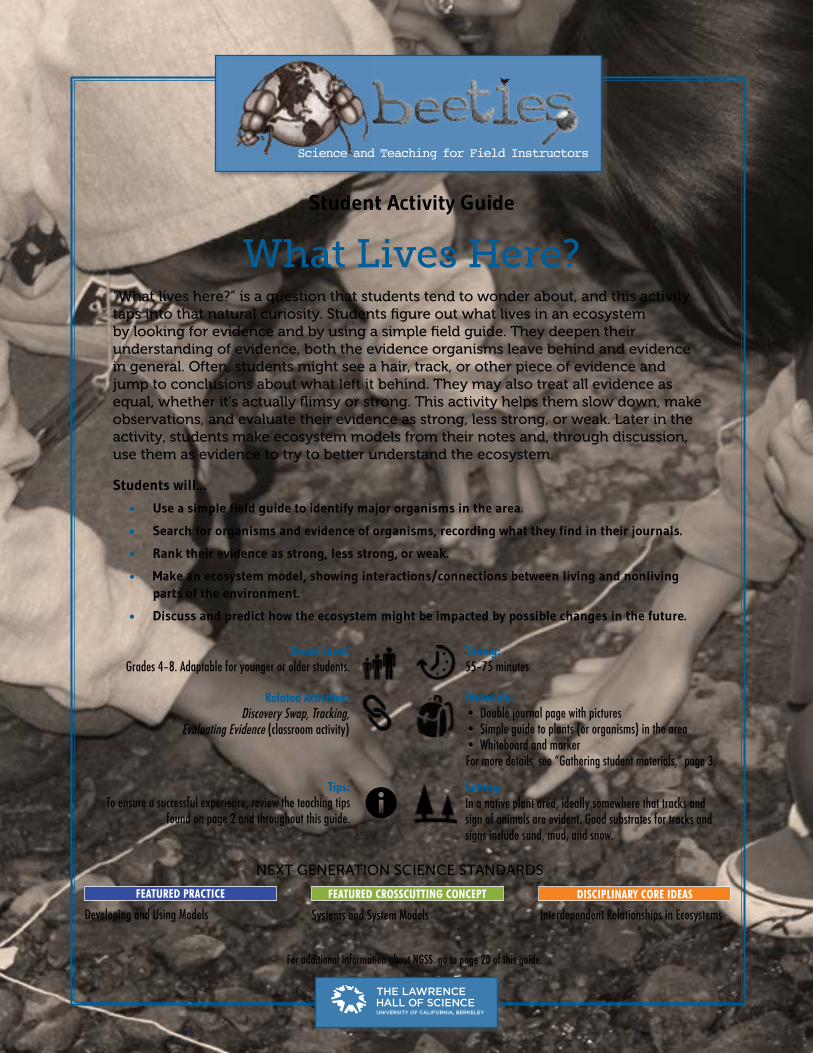
Student Activity Guide
What Lives Here?“What lives here?” is a question that students tend to wonder about, and this activity taps into that natural curiosity. Students figure out what lives in an ecosystem by looking for evidence and by using a simple field guide. They deepen their understanding of evidence, both the evidence organisms leave behind and evidence in general. Often, students might see a hair, track, or other piece of evidence and jump to conclusions about what left it behind. They may also treat all evidence as equal, whether it’s actually flimsy or strong. This activity helps them slow down, make observations, and evaluate their evidence as strong, less strong, or weak. Later in the activity, students make ecosystem models from their notes and, through discussion, use them as evidence to try to better understand the ecosystem.
Students will…
• Use a simple field guide to identify major organisms in the area.
• Search for organisms and evidence of organisms, recording what they find in their journals.
• Rank their evidence as strong, less strong, or weak.
• Make an ecosystem model, showing interactions/connections between living and nonliving parts of the environment.
• Discuss and predict how the ecosystem might be impacted by possible changes in the future.
All materials created by BEETLES™ at The Lawrence Hall of Science.Find the latest activities and information at http://beetlesproject.org.
2 • Student Activity Guide
Energy & Matter-Focused Activity
What Lives Here?
T E A C H I N G T I P S
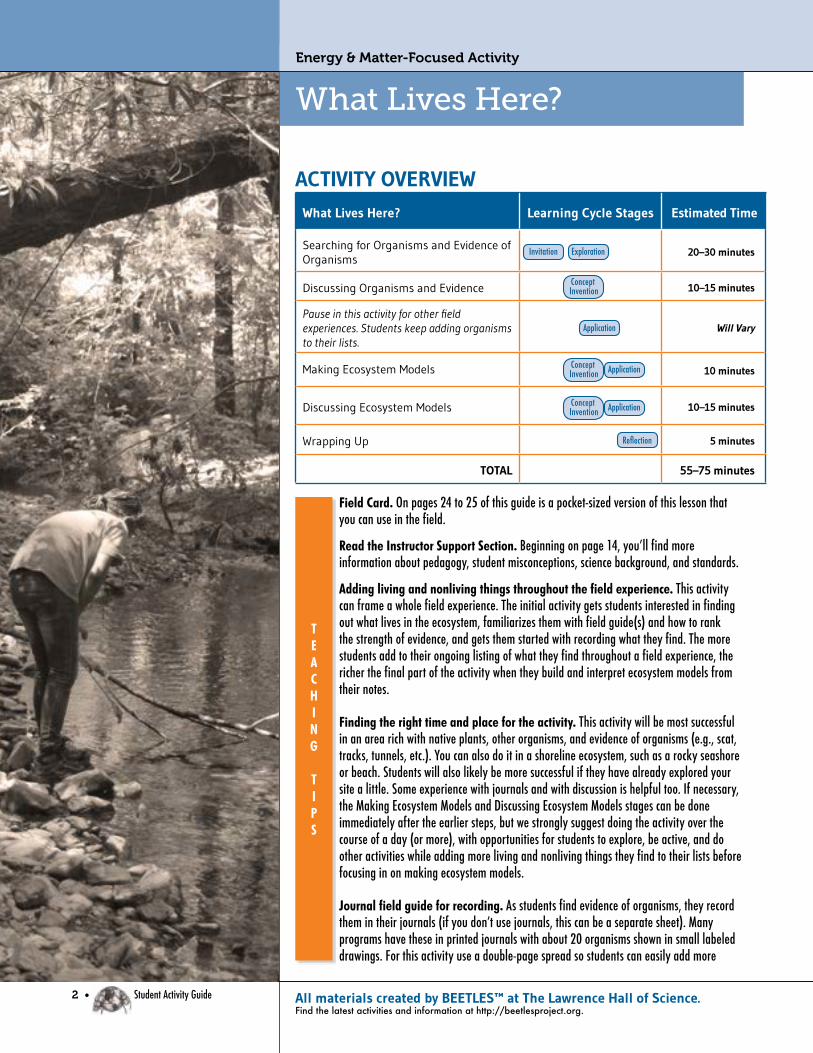
Field Card. On pages 24 to 25 of this guide is a pocket-sized version of this lesson that you can use in the field.
Read the Instructor Support Section. Beginning on page 14, you’ll find more information about pedagogy, student misconceptions, science background, and standards.
Adding living and nonliving things throughout the field experience. This activity can frame a whole field experience. The initial activity gets students interested in finding out what lives in the ecosystem, familiarizes them with field guide(s) and how to rank the strength of evidence, and gets them started with recording what they find. The more students add to their ongoing listing of what they find throughout a field experience, the richer the final part of the activity when they build and interpret ecosystem models from their notes.
Finding the right time and place for the activity. This activity will be most successful in an area rich with native plants, other organisms, and evidence of organisms (e.g., scat, tracks, tunnels, etc.). You can also do it in a shoreline ecosystem, such as a rocky seashore or beach. Students will also likely be more successful if they have already explored your site a little. Some experience with journals and with discussion is helpful too. If necessary, the Making Ecosystem Models and Discussing Ecosystem Models stages can be done immediately after the earlier steps, but we strongly suggest doing the activity over the course of a day (or more), with opportunities for students to explore, be active, and do other activities while adding more living and nonliving things they find to their lists before focusing in on making ecosystem models.
Journal field guide for recording. As students find evidence of organisms, they record them in their journals (if you don’t use journals, this can be a separate sheet). Many programs have these in printed journals with about 20 organisms shown in small labeled drawings. For this activity use a double-page spread so students can easily add more
ACTIVITY OVERVIEWWhat Lives Here? Learning Cycle Stages Estimated Time
Searching for Organisms and Evidence of Organisms 20–30 minutes
Discussing Organisms and Evidence 10–15 minutes
Pause in this activity for other field experiences. Students keep adding organisms to their lists.
Will Vary
Making Ecosystem Models 10 minutes
Discussing Ecosystem Models 10–15 minutes
Wrapping Up 5 minutes
TOTAL 55–75 minutes
Invitation Exploration
Concept Invention
Application
Concept Invention
Concept Invention
Application
Application
Reflection

What Lives Here? • 3© The Regents of the University of CaliforniaNot for resale, redistribution, or use other than educational use without further permission.
TEACHING NOTES
T E A C H I N G T I P S
living and nonliving things to it and make lines showing interaction connections between them. It will be more useful for this activity (and more satisfying for students) if it focuses mostly on broad categories students will have an easier time identifying, such as spider, ant, millipede, sow bug, lizard, fly, etc. instead of more exotic things like multiple species of hawks that are challenging to tell apart. In some cases, you may want to also go to the species level (raven, raccoon, etc.). Students use this to build an ecosystem model later in the activity, and including a variety of kinds of organisms makes it easier for them to come up with connections. If you do this activity without any journal field guide pages, students will need to record whatever they find on blank pages.
Native plant field guide. It can be hard to identify plants from tiny drawings in a field journal, so a separate key of 10 to 20 plants on your site with color photos, and a short description of how to identify each one, can be very helpful. When using field guides with students, simple is good, and comprehensive can be overwhelming. If you’re exploring a marine ecosystem, a simple field guide to organisms can be used instead of a native plant guide.
Practice using field guides. You may choose to use other field guides too. But even with simple field guides, students will need some guidance if they haven’t used them before. It’s worth taking the time early in a field experience to teach students how to use simple field guides, and some instructors give a student a small backpack full of guides, so the group can independently decide to look things up when they are intrigued. Also, by introducing field guides in advance, you can shorten this activity. If you haven’t introduced field guides beforehand, give students time to practice looking at the pictures of plants and making observations so they can identify each plant before they begin looking for evidence of organisms. Choose the strategy you think will make the most sense for your group of students. If you think your group might struggle with sitting through this process at the beginning of the activity, it’s probably best to introduce field guides at some point before the activity.
The nature of evidence. Science is an evidence-based approach to making explanations about the natural world. Because evidence is a common term, students often can jump right into using it when asked, without a definition. But without guidance, students may treat all evidence as equal, give more weight to weak evidence, or dismiss strong evidence. There are different ways of evaluating the strength of evidence (see the background section). This activity introduces one way: the size of the assumption. If you see a lizard, it takes a very small assumption to explain that lizards are part of the ecosystem. It’s a much larger assumption to use evidence like hairs, tracks, bones, or scratch marks to explain the presence of certain organisms. The smaller the assumption, the stronger the evidence. Helping students begin to evaluate the strength of evidence will help them develop their scientific reasoning abilities, and will prepare them to become more engaged and thoughtful citizens of the world.
Gathering student materials. For students gather and prepare: • Journal page that lists or has pictures of plants and animals that students
typically might find on your site (see “Journal field guide for recording” above)• Simple guide to plants (or organisms) in the area, preferably with photos or
large drawings (see “Native plant field guide” above for more information) • Journals (or paper plus clipboards) and pencils • Optional: 1 hand lens per student • Optional: other age-appropriate field guides

4 • Student Activity Guide
WhAt LivEs hErE?
TEACHING NOTES
All materials created by BEETLES™ at The Lawrence Hall of Science.Find the latest activities and information at http://beetlesproject.org.
searching for Organisms and Evidence of Organisms
1. Ask students to Turn & Talk or Walk & Talk about the following questions, and share out briefly after each question:
P What different kinds of organisms can you see that live here? P What are organisms you think might live here, but that you can’t see right now? P Have you heard the word “evidence” before? How would you explain what it is?
2. Make sure students have a working definition of evidence, such as “Evidence is data that helps answer a question, form an explanation, or disprove an explanation.”
3. Ask students to find a partner and list the kinds of evidence organisms might leave behind, then have a few students share out. If they don’t mention any of the following, add them: hairs, scat, tunnels in bushes, spider webs, bones, stripped bark, etc.
4. Tell the group they’ll be acting like “science detectives,” looking for evidence of organisms to figure out what lives here. Build suspense and pique students’ interest. Tell them they might discover evidence people haven’t seen here before, or notice more organisms because they are slowing down and spending focused time on it.
5. If students will be using a plant key and could use motivation and practice, give them a few minutes to get familiar with the resources they’ll be using. Some students aren’t motivated to identify plants, and/or are unfamiliar with field guides, but can become interested by spending time with the field guide in advance. Explain that soon, they’re going to go look for evidence of what lives here. One way to do this is by identifying plants using a plant identification key. They’re now going to take time to get familiar with the plant identification key.
P You’ll sit with your partner, and go through each plant picture, one-by-one. As you look at each, say out loud what you notice about it that might help you identify it. For example, “This one has tiny green leaves. Oh look! The leaves only stick out on one side. That seems important to identify it.”
6. Divide students into pairs, and tell them to begin looking at each plant picture in the key one by one, describing what they notice about each plant type. Help out any pairs that may be struggling. Call “time” before any teams lose interest.
7. Tell students that when they find an organism or evidence of an organism, they should try to figure out what it is, and mark it or write the name of it in their journal, leaving space next to it. Tell students to record organisms they find on a full double-page spread in their journals, so they have space to add more things and add interactions later. If it’s already in their journal, they can make a dot next to it. Otherwise they’ll write it in. If they find a plant but aren’t able to identify it, they can make up a descriptive name for it (e.g., toothbrush leaf plant).
Defining organisms. If your students don’t know the word “organism,” take a moment to define it here as any living thing. Then use it many times, including in writing.
Strategies for finding organisms and evidence of organisms. For specific strategies on how to find organisms in different ecosystems, see the BEETLES resource “Ecosystem Literacy and Exploration Protocols.” For strategies for finding evidence of organisms, such as tracks and scat, see the Instructor Support section.

What Lives Here? • 5© The Regents of the University of CaliforniaNot for resale, redistribution, or use other than educational use without further permission.
TEACHING NOTES8. Explain boundaries and other guidelines, such as avoiding stepping on plants, then send students to explore. Make sure students know the boundaries. Coach them on avoiding stepping on plants, if appropriate.
9. Circulate, troubleshoot, and help out struggling students. Help focus students on the task by asking questions that appeal to their curiosity. Direct students to certain areas/plants that are particularly interesting. Ask questions, such as:
P I think there may be tiny animal tracks by the fence. Why don’t you see if you can find any there? P Can you figure out the size of animal, or what kind of animal might have made these tracks? P Check out this cool looking plant. Look at the interesting shape of the flowers. Can you use your plant key to figure out which kind it is?
10. As you circulate, engage students in discussion about evidence they find, and remind them to record what they find in their journals.
Discussing Organisms and Evidence
1. After about 15 minutes of exploration (BEFORE students lose interest), each pair joins with another pair to discuss findings. Tell pairs to share what organism(s) they think might live here, and the evidence that makes them think so. Encourage students to take each other to where they were exploring to show others the actual evidence they found.
2. Gather the group and explain that not all evidence is created equal. P Not all evidence is created equal. When scientists are using evidence, they often think about whether it is strong, less strong, or weak. P We’re going to think about the strength of evidence about the organisms we recorded in our journals.
3. Explain differences between strong, less strong, and weak evidence, and model how students will record this in their journals:
P Strong evidence: If you found the actual organism, that’s strong evidence. Like if a plant matched a plant in the field guide. Or if you actually see a lizard. If there’s strong evidence that an organism lives here, draw a circle around it in your journal. [Model this on a whiteboard.] P Less strong evidence: If you didn’t see an actual organism, you might still have found pretty strong evidence that it was here, like tracks, spider webs, shed exoskeletons, or scat. It’s still pretty strong evidence, but not as strong as finding the actual organism. If you find evidence like this, circle the organ-ism with a dotted line. [Model this.] P Weak evidence: If you find evidence like a hair or piece of scat that might be from a certain organism, but you’re really not sure, it’s weak. Write a question mark next to the name in your journal. [Model this.]
Journaling Strategies. Tell students to record this on 1 side of a sheet of paper, or on 2 pages facing each other in a journal. Later, when they record connections between the organisms, it’ll be important that they all be on one page, or on facing pages.
Different types of engagement. During this portion of the activity, some students might be more focused on finding actual organisms, while others might be more excited to look for evidence of organisms. Either one is fine, as long as students are positively engaged!
Make the right decision for your group. Thinking about the quality of evidence is a super important skill, but if you think recording the quality of evidence in journals at this time will be too much for your group of students, skip this part.
Encourage discussion about ranking evidence. Putting evidence in these categories is deliciously debatable. For example, some may argue that a very clear raccoon track is strong evidence, not less strong. Encourage these discussions, and guide students to base them on evidence and reasoning!

6 • Student Activity Guide
WhAt LivEs hErE?
TEACHING NOTES
All materials created by BEETLES™ at The Lawrence Hall of Science.Find the latest activities and information at http://beetlesproject.org.
4. Tell students to work with their exploration partners to rank the strength of evidence for each organism they found, and record it in their journals. Remind students to circle the organism’s name if they have strong evidence for it, make a dotted line for less strong evidence, and write a question mark next to it if it’s weak evidence.
5. Do a Whip Around, using questions below and occasional follow-ups. Occasionally, add follow-up questions/comments to follow interesting threads, such as, “Where did you see that?” or “Raise your hand if you saw that same thing.” But keep things moving.
P When it’s your turn, say the name of an organism you found strong evidence for. [It’s OK to repeat one already said. If they didn’t find one they can say “pass.”] P When it’s your turn, say the name of an organism you found less strong evidence for. P When it’s your turn, say the name of an organism you found weak evidence for.
6. Since the group is a team, have students add names of organisms others mentioned to their journals. Tell students to take a few minutes to record organisms found by others in their journals. They should also include symbols to show if it was strong, less strong, or weak evidence.
7. Encourage scientific argumentation. Encourage students to agree or disagree with each other while discussing evidence.
8. Continue with the field experience, adding organisms to journals, and occasionally ask a student to identify a plant, track, etc. If you have time, do other exploring and activities with students, occasionally pausing the group to add more organisms to their journals. Now and then, ask a student who you saw identify something like a type of plant, to identify it for the group, and to share its identifying characteristics.
Pause in this activity for other field experiences. Meanwhile, students keep adding organisms to their lists.
Making Ecosystem Models
1. At a different point during the day (or week) of your field experience, at a new location or after doing other activities in which students have seen organisms, sit the group down to add to journals. Ask students to add any organisms they’ve seen to their journals.
2. Tell students to look outward and take a moment to imagine the complexity of all the plants, big animals, tiny animals, fungi, and bacteria in this ecosystem. Tell students to stand looking outwards from the group at nature. Ask them to quietly imagine how many different kinds of plants there are in the area, and how many of each. Do the same with big animals (mammals, snakes, lizards, fish, etc.) tiny animals (insects, spiders, worms, etc.), and fungi. Tell them to each pick up a pinch of soil, and tell them there may be millions of bacteria in it⏤and it’s unimaginable how many are
Whip Arounds. In a “Whip Around,” each student in the circle answers the question with one or two words. The instructor can choose or not choose to ask follow-up questions about a few of them. Whip Arounds can work well with big or particularly energetic groups of students, because it moves fast and gives everyone (brief) input. But it might not be the best routine for this moment. While it’s important to hear what they found, it’s also important to do it in a way in which students will be engaged. If it won’t work for your group of students to have every student say one organism, you could ask to hear from just a few of them instead of doing a full-on Whip Around.
Language of uncertainty. Encourage students to use language of uncertainty to reflect scientific open-mindedness when talking about their evidence and explanations, such as I think… Maybe… It seems like… The evidence seems to show.…
Finding the right time for the ecosystem models. It might be a lot to do this whole activity in one go. Read your group, and if they seem excited to keep thinking about the organisms they found and able to focus for a little while longer, then press on. If it seems like they’re becoming disengaged, or could use a break, then do some high energy activity, like hiking up a big hill, scrambling over a rough trail, or running across a field, and then lead the discussion. Or wait until later in the field experience.

What Lives Here? • 7© The Regents of the University of CaliforniaNot for resale, redistribution, or use other than educational use without further permission.
TEACHING NOTESin the whole ecosystem! Explain that the organisms they have found and recorded is a very tiny fraction of what’s actually living there.
3. Explain that they’ll be using a science “thinking tool,” of systems and system models, to try to understand part of the ecosystem.
4. Describe that scientists often make a model of a system and its parts to try to better understand the natural world. Tell students it’s a “big idea” in science that scientists often isolate one system (like an ecosystem, as opposed to the whole biosphere), or parts of it to learn more about the larger systems that make up the world. In What Lives Here?, students identify parts of the ecosystem they’re exploring, and focus on the many interactions between those parts.
5. Tell students it’s impossible to completely understand an ecosystem, but they will make models of parts of the ecosystem to help understand it, kind of like scientists do. Explain that they’ll each use the information they’ve already recorded and add more to make a model of the ecosystem.
6. Explain that they will include living and nonliving things. Explain that so far they have only included living things, but there are lots of nonliving things in every ecosystem too.
7. Have students brainstorm nonliving things in the ecosystem. Do a quick brainstorm of nonliving things to give students ideas.
8. Discuss that they won’t be able to include everything in a model, and that including what they think is important affects what they’ll learn from it. Explain that when making a model, the person making the model gets to choose what’s included and what isn’t. These are important decisions, because they affect what kind of understanding they’ll be able to get from the model.
9. Brainstorm nonliving things in the area that might be connected to organisms and are important to include in their models, and tell them to write some down. Tell students to brainstorm nonliving things that might be connected to the organisms they saw, and that might be important to them, and important to understand the ecosystem. For example, if they’ve noticed strong winds, and have seen ravens riding the winds, and plant growth being short and rounded from wind, wind could be an important nonliving thing to include in their model. Tell them to add significant nonliving things (e.g., sand, rocks, ,dirt, logs creek, litter) in their models.
10. Encourage students to add more living and nonliving things to their models. When students come up with new living and nonliving things, brainstorm ways they might be connected with other living and nonliving things in the area. If you’re doing this while continuing to move through your field experience, it can be helpful to pause the whole group after an experience or observation, or when they’re arrived at a new location, to take a minute to add any new evidence to their models.
NGSS quote about systems. “The natural and designed world is complex; it is too large and complicated to investigate and comprehend all at once. Scientists and students learn to define small portions for the convenience of investigation. The units of investigations can be referred to as ‘systems.’ A system is an organized group of related objects or components that form a whole. Systems can consist, for example, of organisms, machines, fundamental particles, galaxies, ideas, and numbers. Systems have boundaries, components, resources, flow, and feedback” -the National Science Education Standards.
Noticing systems within systems. Throughout your students’ field experience, keep asking them to point out interactions between the parts of the different ecosystems they see. A further step could be to ask them to begin to notice smaller systems within the ecosystem, such as recognizing a tree as a system with its own internal parts, or any organism as a system of interacting body parts. The more systems students identify, the more they will come to recognize the usefulness of a systems lens to understand the natural world.
Are dirt and logs nonliving things? Dirt is full of living things, and so are logs. Decide whether you want to keep things simple and let students call them nonliving things, or if you want to challenge them to think deeper about the topic.

8 • Student Activity Guide
WhAt LivEs hErE?
TEACHING NOTES
All materials created by BEETLES™ at The Lawrence Hall of Science.Find the latest activities and information at http://beetlesproject.org.
11. Define the term interaction, give examples, and ask students to brainstorm types of interactions between different organisms and nonliving parts of the ecosystem. Explain that an interaction is when something affects another thing, give examples of interactions, and lead a brainstorm of interactions:
P When an animal eats something, it’s interacting with it; when a bird flies, it’s interacting with the air and wind; and even when an animal stands on some-thing else it’s interacting with it. P What are different ways things interact in nature? [Record the list they brain-storm.]
12. Explain that students will make a model/diagram using lines to show interactions between things they’ve recorded. Tell students they will work in pairs to add lines to their lists of organisms to show interactions or connections between different organisms they’ve seen, or between organisms and nonliving things in the environment, to make a model of interactions in the ecosystem. Each line represents some kind of connection or interaction. See the example in the sidebar.
13. Explain that scientists use models like the ecosystem model they’re creating to represent things in the real world—like interactions between things in an ecosystem—to better understand them and show their thinking. Explain to students what they’re trying to do is help their brain explicitly think about relationships between things in this ecosystem. It’s a tool for creative thinking and also for helping them be clear about what they’re including and not including in their model.
14. Describe that their model will be more useful if it shows which parts might be more key to the ecosystem, like by making thicker lines around key parts. Explain that in any ecosystem there are living and nonliving things that are more influential to what is going on in the ecosystem. Maybe it’s a top carnivore. Maybe it’s strong winds or huge waves. Maybe it’s water in a desert or snow in the mountains. Maybe it’s a plant that many organisms depend on.
15. Explain that they can show key interactions with bigger/thicker lines or arrows. Some interactions might be more key too, like fungus decaying wood, elk eating young trees, or sea otters eating sea urchins. Students can show these by making lines or arrows that are bigger or thicker, while making others smaller or thinner.
16. Discuss that they can also add labels to the lines, like “eat” or “makes home in,” to explain the type of interaction.
17. Give pairs (or groups of four) about 10 minutes to discuss and record as many interactions as they can while you circulate and ask questions. Encourage them to talk to each other as they work. Circulate and check in with pairs or groups. When students add an interaction, ask questions like, “What’s your evidence for that interaction?” or “Does that seem like a key part of the ecosystem? What makes you think that?”
Ranking levels of strength of evidence of interactions. If you think your students are up for it, you might want to have students rank each interaction line as strong, less strong, or weak. Explain that if it’s a kind of connection they have strong evidence for, like if they saw a gopher digging in dirt, they’ll make a solid line. If their evidence is less strong, like if they saw raccoon prints by the water representing an interaction between the raccoon and water, they’ll make a dotted line. If their evidence is weak, like if they haven’t seen evidence of it, but it seems reasonable, such as if they think a lizard they saw might eat flies they saw, they’ll write a question mark next to the line.
Ecosystem Model Example

What Lives Here? • 9© The Regents of the University of CaliforniaNot for resale, redistribution, or use other than educational use without further permission.
TEACHING NOTES18. If your students are antsy, move them to another location before Discussing Ecosystem Models. Some groups will be focused enough to continue directly into the next stage of the activity, but others will need to move around and perhaps do something different for a while. This may also give them more things to add to their ecosystem models before the discussion.
Discussing Ecosystem Models
1. After students finish adding interactions to their models, lead a discussion in which students use their ecosystem models as evidence for their explanations about the ecosystem. Ask students some of the questions below to lead a discussion. During the discussion:
• Help students evaluate the strength of evidence used. If students cite something on their model as evidence, ask if they have strong, less strong, or weak evidence for it, and perhaps what their evidence was. Follow student interests, use Turn & Talks and ask follow-up questions. Follow students’ interests in the discussion, and move the discussion along before the group becomes disinterested. Use Turn & Talks after some questions and hand motions showing agreement to keep the whole group involved. After students share their ideas, ask follow-up questions like “What makes you think that?”, “What’s your evidence for that?”, or “Does anyone agree, disagree, or have a different idea?”.
2. Suggested discussion questions: • Based on our models, which organisms might compete for the same
food?
• How might other organisms in the model be affected if decreased?
• If increased or decreased, how might it affect the organisms we saw? Trace the connections out...how does it affect all the connections?
• How might it affect the ecosystem if this (choose something with a “thick” line around it) were to disappear?
• How might it affect other organisms in the model if this producer (choose one) were to die off?
• How might it affect other things in this model if (name an organism something many organisms interacted with) disappeared?
• How might it affect the organisms in this model if there was less of (name a nonliving thing that many things interacted with)?
• How might all these interactions be affected if a road were put in the middle of this environment we just explored? If we turned this piece of land into a farm?
Discussion leading resources. See BEETLES Encouraging Student Discussion and Productive Talk for resources for leading discussions.
10 • Student Activity Guide
WhAt LivEs hErE?
TEACHING NOTES
All materials created by BEETLES™ at The Lawrence Hall of Science.Find the latest activities and information at http://beetlesproject.org.
3. Explain that although other parts of an ecosystem are impacted when a part of an ecosystem changes, ecosystems as a whole are generally resilient.
P Impacts on one part of an ecosystem impacts other parts. P If students haven’t already brought this up, explain how the many connec-tions they observed between parts of the ecosystem mean that if one thing in the ecosystem changes, generally, the rest of the organisms can shift to get what they need. P If possible, use a specific example that students brought up to explain this.
4. Explain how more diverse ecosystems are more resilient: P The more wide range of organisms and parts of an ecosystem, the more con-nections there are likely to be among the parts of the ecosystem. P The more the connections, the more organisms are able to adjust if conditions change.
5. Explain that some factors (those with thick circles, as well as things like asteroid impacts or deforestation) have a bigger impact on an ecosystem, depending on the factor and diversity of the ecosystem.
P The more important the factor in the ecosystem, the more any changes to it will impact the ecosystem. P The less diverse the ecosystem, the more it will be affected by an impact. P The more severe the impact, the more the ecosystem will be affected.
6. Wrap up the discussion when it seems like the group is ready to move on by briefly summarizing points brought up by students and pointing out interdependence. It can help give closure to a discussion, and help students remember what was discussed, if you summarize the discussion at the end. Point out that this model shows examples of the interdependence between living and nonliving things in an ecosystem.
7. Ask students to revise their models based on anything they learned in the discussion. Explain that scientists revise their models when new evidence comes to light, or when their thinking has changed. Give students a chance to update their ecosystem models if their peers mentioned any interactions or evidence that they had not included initially, or if they have new ideas.
8. Explain that nature and all its interactions and connections is very complex, and you can’t fully predict what will happen if one part of an ecosystem changes—but using an ecosystem model like the one students created can help. Tell students that the number of connections and interactions between things in an ecosystem make it hard to predict what might happen if something changes, but actually writing out all the interactions you think might be happening can help with making predictions about possible future effects.
9. Point out limitations of models, and ask students for other limitations. Explain that models can’t represent the world exactly as it is, so it’s important to be aware of their limitations. Point out one limitation of students’ models, such as they only show interactions between things at this time of year, but there may be other interactions in other times
The loss of one type of organism doesn’t doom the entire ecosystem. When first learning about interconnectedness of ecosystems, sometimes students end up with an oversimplified idea of interconnectedness, and think that if one type of organism is gone the ripple effects will crash the entire ecosystem. While it’s true that indirect effects from the loss of a species can affect many parts of an ecosystem, those closest and most connected are most affected, and the effects are less the further away the organisms are from direct effects. Some species, like a predator that keeps an herbivore from overgrazing, are more important to an ecosystem than others, and their loss can deeply impact an ecosystem. The more diversity in an ecosystem, the more robust, and the better it can survive losses. But the more losses of species, the less diversity.

What Lives Here? • 11© The Regents of the University of CaliforniaNot for resale, redistribution, or use other than educational use without further permission.
TEACHING NOTESof year (e.g., in the winter, some organisms may hibernate and may not interact with other organisms as they do in other seasons). Ask students to share other ways their models are not completely accurate representations of the real world.
10. Explain that scientists use models like ecosystem models when they are trying to decide how to lessen harmful human impacts on an ecosystem, or manage natural resources.
Wrapping Up
1. Ask students to Turn & Talk or Walk & Talk using some of the following questions:
P What have you learned about this ecosystem from making your model? P What questions do you still have about these organisms and how they interact? P If you were in charge of a group who was going to decide whether or not to change this environment by adding a road, or turning part of it into a farm, what might you decide? What other information would you want to have? P What were some of the most interesting organisms and interactions you observed or thought about? P What helped you to learn during this activity? P If you were to take a younger brother or sister or friend here and teach them how to find organisms and evidence of organisms, how might you do it? P Martin Luther King Jr. said: “We are all of us interconnected.” What does that quote mean to you? What are some of the interconnections you’ve observed today? How are you connected to this place?
Showing a food web made by scientists. To help students understand how what they did relates to work by professional scientists, it can be helpful to show students the food web of the Puerto Rico El Verde forest below.
Food Web by Scientists
Image by Neo Martinez, produced by Network3D

12 • Student Activity Guide
WhAt LivEs hErE?
TEACHING NOTES
All materials created by BEETLES™ at The Lawrence Hall of Science.Find the latest activities and information at http://beetlesproject.org.
instructor support teaching Knowledge
Key Vocabulary
Data. Factual information, such as observations, measurements, or test results.
Evidence. Data that help answer a question, form an explanation, or disprove an explanation.
Explanation. A nonfiction evidence-based story about how or why something in the natural world appears or happens. A scientific explanation must connect data or phenomena with accepted scientific knowledge.
Models (physical or mental) are also explanations. A scientific model shows something that can’t be seen directly in the natural world. It explains why or how something happens, and can often be used to make predictions. Food chains, food webs, and food pyramids are all examples of models based on evidence and used by scientists to come up with explanations and/or predictions.
Useful Criteria for Evaluating the Strength of Evidence in Making an Explanation
• Quantity of evidence. Something that has been observed one time by one person is not as strong evidence as something observed multiple times by one person, or multiple times by many different people. The more data you have, the more clear patterns and important details often will be. The more evidence collected through reliable sources, the more certain we can be about an explanation.
• Size of assumption. This refers to the conceptual leap needed to connect the evidence with the explanation or conclusion. A smaller assumption means the explanation is more probable, that the evidence is stronger, and that there’s a higher level of certainty. With students you might want to call “size of assumption” something simpler, like “explanations that have stronger connections to evidence than others,” “explanations that are closer to the evidence,” “stronger evidence,” or “evidence that leaves the least doubt.”
• Quality of source. The higher the quality and reliability of the source, the stronger the evidence, and the higher level of certainty. If you have a lot of evidence from a lower quality source, it may not compare well with having less evidence from a higher quality source. If you have a small size of an assumption but a low quality of source, it may not be convincing.
Scientists use reasoning to weigh these criteria to evaluate evidence supporting an explanation. These are some of the BEETLES student activities that focus on making explanations from evidence: NSI: Nature Scene Investigators, Case of the Disappearing Log, Tracking, Bark Beetles Exploration, and Structures & Behaviors. Tracking also deals with students looking at the sizes of their assumptions when making explanations.
What Lives Here? • 13© The Regents of the University of CaliforniaNot for resale, redistribution, or use other than educational use without further permission.
TEACHING NOTESQuestions that encourage explanations from evidence and arguing from evidence:
• What do you notice? What’s happening here?
• Do you agree with that observation?
• What questions do you have about it?
• What might have happened here?
• What’s an explanation for that? What’s a different explanation for it?
• What are some pros and cons for those explanations?
• What’s the evidence for that explanation?
• Do we have evidence against that explanation?
• What evidence would you like to have to be more certain of that explanation?
• What’s your source for that? Does it seem like a trustworthy source for science information?
Science language. Science is about coming up with the best explanation for all the available evidence. It’s also about being open-minded about another explanation that could be better. In science, nothing is ever proven. That’s why scientists tend to use language of uncertainty when discussing ideas and explanations. Try to use sentence starters like, “Maybe…” “I wonder if…” “That evidence makes me think…” “The evidence seems to show…” “I’m not sure, but I think...” and encourage students to phrase their statements in similar language.
Following students’ interest and engaging them in finding evidence. If students are most interested in the live organisms they find, it’s fine for them to focus on those organisms and the interactions between them. But giving students strategies for tracking may help them get excited about and feel empowered to find evidence of organisms that live in the area but that are not present at the moment. Different skills and strategies are useful for identifying different evidence of animals. Below are some useful tracking skills for common animal signs:
• Footprints: When looking at tracks, orient the tracks between you and the sun. This positioning accentuates the shadows in the tracks, and keeps your group’s shadows from blocking the tracks. When possible, draw a circle or two lines around the tracks to keep students from accidentally stepping on tracks.
• Footprints: Note the size, shape, number of toes, presence of claws, and spacing between tracks. All of these traits can tell you about the animal that left the footprints. For example, canine tracks have four toes, tend to be oval in shape, and have visible toenail marks. Feline tracks also have four toes, but tend to be more circular, and do not often have toenail marks because their claws retract into their paws when they take a step.

14 • Student Activity Guide
WhAt LivEs hErE?
TEACHING NOTES
All materials created by BEETLES™ at The Lawrence Hall of Science.Find the latest activities and information at http://beetlesproject.org.
• Footprints: Assume the animal’s perspective. Get on all fours and put your head low to the ground, at the approximate height of the animal. When you glance down the set of tracks from this direction, new patterns may emerge.
• Footprints: Think about the environment in which the track was found to get a sense of how old a track is. For, example, if a track was found in the mud, ask yourself: “When was the last rain?”, “How long has this ground been wet?”, or “Are there rain drops visible on top of the track?” If you find a track on the wet sand at the beach, ask yourself: “When was the last high tide?” By thinking about the substrate and how fresh and crisp the track is you can make an educated guess about when the animal was there.
• Scat: Note the shape, size, and contents of scat to help identify who left a little gift on the trail. Scat location and surroundings can also be informative. For example, certain animals, like foxes, mark their territory by scatting on prominent locations like rocks. Bobcat scat, by contrast, tends to be surrounded by scratch marks that the bobcat makes with its hind legs. SAFETY NOTE: While scat is exciting to explore, it is also the disease vector of choice for many pathogens. Touching, tasting, and smelling are not appropriate modes for scat investigations.
• Kill sites: Investigate the carcass and the surrounding area for clues. Look in the surrounding area for fur, feathers, blood, or drag marks. Investigate bones, teeth marks, remaining flesh, sun bleaching, and the extent to which a skeleton is intact to make inferences about how long ago an animal died. SAFETY NOTE: Animal carcasses can also be sources of disease. Touching, tasting, and smelling are not appropriate modes for explorations of kill sites.
• “Doors” and “windows”: Pay attention to the size of the door or window to help identify the animal that made it. These signs of animals are often less familiar to students, but in certain habitats, can be extremely abundant. Animals leave behind trails of pressed down vegetation, “tunnels” through brush, broken twigs, holes, or compacted paths. The size of these trails is a useful identification trait.
Making Models of Ecosystems
Ecosystems are ridiculously complex, and it’s impossible for scientists to completely understand how they work. Ecologists make models that explain and focus on different parts of an ecosystem, to help us better understand the whole. One type of model is a food web, which shows what eats what (trophic relationships), and focuses on how matter and energy are transferred as organisms eat each other. Interaction webs not only include food web information but also represent other types of relationships between organisms, such as how organisms are affected by temperature, moisture, and other abiotic factors in the environment. There are many other kinds of models of ecosystems, each meant to simplify and explain a part of the whole. When scientists develop models, they make decisions about what to include and what not to include (they delineate the boundaries of the system). You can’t include everything, because if you did it would be the actual ecosystem!

What Lives Here? • 15© The Regents of the University of CaliforniaNot for resale, redistribution, or use other than educational use without further permission.
TEACHING NOTESThese decisions affect the usefulness and complexity of the model. Ecologists may eventually invent new types of models that capture a critical perspective on ecosystems, as they learn more and more about the interconnections between living and nonliving things on Earth.
The ecosystem model students make in What Lives Here? is meant to show relationships between living and nonliving things. Of course there’s no way to include everything, so again, you need to make decisions about what to include and what not to include. With students, much of this will be decided by:
• What they see
• What they can identify
• What they happen to think of
• What they feel like recording (the last one isn’t very scientific, but it’s true)
The more you can guide students to make thoughtful decisions about what and what not to include, the more useful their models will be for explaining and understanding the ecosystem, and for becoming familiar with how models are used.
For example, you might wonder if students should draw connections with CO2. If CO2 is included in the model, there will be lines all over the place, because some organisms take it in and others spew it out. That might be fine if you think it will help a student to recognize the importance of this gas exchange, and including it in the model will help them to better understand it. If your goal is for students to understand the idea that everything is connected, lines going all over the place and between everything make that point pretty well. It’s worth considering that all those lines might also make it hard to focus on any other aspect of the ecosystem. Students who already understand ideas about interconnectedness should probably focus their models on specific kinds of information. For example, if you’re in an area pounded by waves, the relationship between the waves and organisms could be important to record. But in an area with little waves, but lots of seaweed, your model would probably be more useful if it focused on relationships between organisms and seaweed. In an area with lots of living and fallen trees it can be useful to show relationships between other organisms and the trees.
Students might also want to include some things in their models that are scarce. For example, in the ocean showing connections to water would be overwhelming, but in a desert ecosystem where water is more scarce, it might be a useful way to help understand the ecosystem. Before leading this activity, think yourself about what the key players are in the ecosystem. Then you can help students identify what or who they think the key players are, and encourage them to include these in their models. It can also be helpful if models include symbols showing levels of importance for different parts of the system. For example, thick lines can show what the ecologist or student thinks are more important relationships, and thicker lines around specific parts can be used to show they’re more critical factors for the ecosystem.

16 • Student Activity Guide
WhAt LivEs hErE?
TEACHING NOTES
All materials created by BEETLES™ at The Lawrence Hall of Science.Find the latest activities and information at http://beetlesproject.org.
There’s no need for all student models to be identical. They can include different parts, and different sorts of relationships. What students are focusing on and trying to make sense of in the ecosystem will determine their decisions about what to include. The symbols students use will affect their models, too. Encourage thoughtfulness and also try to structure some sharing between students, so they can see other students’ interpretations and perspectives and have the opportunity to learn from each other.
Content Knowledge
The following information is meant as background information about interactions in an ecosystem for instructors, not as talking points for a lecture, nor as a list of concepts students should understand.
Interactions between Living Things
Direct effects. An ecosystem is made up of all the living and nonliving things that interact in a particular environment. The many interactions that can happen between living organisms is complex and layered. The following are some types of (two-way) interactions:
• Mutualism. Mutualisms are interactions in which both organisms benefit. For example, a tree and a fungus may have a mutualistic interaction in which the fungus helps the tree get nutrients and water from the soil and the tree gives sugars to the fungus.
• Commensalism. Commensalism is when one organism benefits and the other is unaffected. For example, a squirrel living in a tree may get shelter from the tree without affecting the tree positively or negatively.
• Competition. In a competition between organisms, each organism is negatively affected by the other. For example, when two organisms compete for the same food source, each organism would have more food available if the other was absent, i.e., each is negatively affected by the presence of the other.
• Predation/parasitism/herbivory. In these types of interactions, one organism benefits at the expense of the other. For example, when a tick sucks blood from another organism—the tick benefits at the expense of the other organism. When an animal eats a plant, the animal gets food at the expense of the plant. Eating a mouse may be great for a snake, but the interaction is not exactly beneficial for the mouse.
Each of the types of interactions above are examples of direct effects of one organism on another. In each, the presence and abundance of one organism directly affects the other organism.
Indirect effects. An ecosystem model helps us see direct effects, but it also can model and help us understand indirect effects. For example, consider a situation in which coyotes eat rabbits, and rabbits eat wildflowers. The coyote may not have a direct effect on the wildflowers, but if there’s a change in the coyote population, like if the coyote population goes down from hunting, the rabbit population could go up, gobbling up more wildflowers, which would have a negative effect on the wildflowers. In this case, the coyote has

What Lives Here? • 17© The Regents of the University of CaliforniaNot for resale, redistribution, or use other than educational use without further permission.
TEACHING NOTESan indirect effect on wildflowers, because a change in one level (carnivore) affects lower levels (producer). The opposite can happen too—a change in a lower level of the food chain can affect a higher level, like if the population of wildflowers were to go up or down. Of course, the organisms in a food chain are highly interconnected with the ecosystem, so indirect effects may be made stronger or weaker by the interactions between organisms at any level of the food chain with other organisms in the ecosystem.
Keystone species. In some situations, one species may have big effects on many other species within an ecosystem. In an extreme case, changes to one species may cause dramatic changes in the entire ecosystem. A species like this is called a keystone species. Sea stars are one well-known example of a keystone species. Sea stars prey on mussels, so without sea stars, an intertidal ecosystem can be overrun by mussels, which outcompete other organisms. Another example of a keystone species is the honey bee. Honey bees are important pollinators, so without them, plants make fewer seeds, which could ultimately lead to catastrophic effects on plant populations, and the many species that rely on plants for food, shelter, etc.
Relationships between living and nonliving things. In addition to living things interacting with each other in an ecosystem, ecosystem dynamics are made more complicated by interactions between living and nonliving parts of an ecosystem. In many ways, the nonliving parts of an ecosystem determine the organisms that live there. The availability of water, nutrients in the soil, and quality of the air, all affect what organisms can or can’t survive somewhere. Changes to these and other nonliving parts of an ecosystem can affect living parts, which can cause more changes to living parts, which can cause more changes to nonliving parts, which change living parts, and on it goes!
Human Impacts on Ecosystems
Humans are major drivers of change in ecosystems. Some of the changes humans have caused are direct and easily observable—for example, the destruction of forests to build cities and roads or to clear land for agriculture have clear destructive effects on ecosystems. Extraction of resources—water, food, wood, coal, etc. also have observable effects on ecosystems. But there are many other ways humans impact ecosystems, which are harder to observe directly. The many effects of human-induced climate change on ecosystems is one glaring example. Research to better understand ecosystems and ecosystem dynamics helps people become aware of these impacts, and can help people figure out how to better manage natural resources.

18 • Student Activity Guide
WhAt LivEs hErE?
TEACHING NOTES
All materials created by BEETLES™ at The Lawrence Hall of Science.Find the latest activities and information at http://beetlesproject.org.
Common relevant Misconceptions
= Misconception. In a food web, a change in the size of one population will only affect the populations of its predators and prey.More accurate information. The organisms in a food web are intricately connected. When one population changes, it can affect the populations of species that are directly related to it through predator and prey relationships, but it can also affect populations of organisms that are indirectly related. The extent to which a change in one population affects other populations or the food web as a whole varies depending on its role in the ecosystem and the overall health of the ecosystem.
= Misconception. If one species in an ecosystem dies off, everything else in the ecosystem will be affected and the ecosystem will collapse.More accurate information. When a species dies off, those directly connected to it in an ecosystem tend to be most affected. Other organisms may also be indirectly affected, but the effects are less the more links away from the species they are. The loss of certain species (see keystone species above) impact an ecosystem more than others. The more diverse an ecosystem, the more resilient it is. When a species is lost, the ecosystem will adjust to the loss, but will be less diverse and less resilient to other impacts. Certain catastrophic effects, like changing climate, increased acidification of the ocean, asteroid impacts, overfishing, or deforestation can cause ecosystem collapse, in which the carrying capacity (the amount of organisms it can support) for species of the ecosystem is reduced. When the effect is really bad, it can lead to mass extinction. The severity of an impact on an ecosystem by an event or loss of species depends on how bad the effect is and how diverse and resilient the ecosystem is.
Connections to the Next Generation science standards (NGss)
BEETLES student activities are designed to incorporate the “three-dimensional” learning that is called for in the Next Generation Science Standards (NGSS). Three dimensional learning weaves together Science Practices (what scientists do), Crosscutting Concepts (thinking tools scientists use), and Disciplinary Core Ideas (what scientists know). Students should be exploring and investigating rich phenomena, and figuring out how the natural world works. The abilities involved in using Science Practices and Crosscutting Concepts —looking at nature and figuring things out, using certain lenses to guide thinking, and understanding ecosystems more deeply—are mindsets and tools students can take with them and apply anywhere to deepen their understanding of nature. And, they’re interesting and fun to do!
About the Next Generation Science Standards (NGSS). The development of the Next Generation Science Standards followed closely on the movement to adopt nationwide English language arts and mathematics Common Core standards. In the case of the science standards, the National Research Council (NRC) first wrote a Framework for K-12 Science Education that beautifully describes an updated and comprehensive vision for proficiency in science across our nation. The Framework–validated by science researchers, educators and cognitive scientists–was then the basis for the development of the NGSS. As our understanding of how children learn has grown dramatically since the last science standards were published, the NGSS has pushed the science education community further towards engaging students in the practices used by scientists and engineers, and using the “big ideas” of science to actively learn about the natural world. Research shows that teaching science as a process of inquiry and explanation helps students to form a deeper understanding of science concepts and better recognize how science applies to everyday life. In order to emphasize these important aspects of science, the NGSS are organized into three dimensions of learning: Science and Engineering Practices, Crosscutting Concepts and Disciplinary Core Ideas (DCI’s). The DCI’s are divided into four disciplines: Life Science (LS), Physical Science (PS), Earth and Space Science (ESS) and Engineering, Technology and Applied Science (ETS). Read more About the Next Generation Science Standards at http://www.nextgenscience.org/ and http://ngss.nsta.org/

What Lives Here? • 19© The Regents of the University of CaliforniaNot for resale, redistribution, or use other than educational use without further permission.
TEACHING NOTESIn What Lives Here?, students engage in the practice of Developing and Using Models, and have the opportunity to relate what they learn to the Crosscutting Concept of Systems and System Models. Students will build understanding of Disciplinary Core Ideas related to Interdependent Relationships in Ecosystems, Cycles of Matter and Energy Transfer in Ecosystems, and Ecosystem Dynamics, Functioning, and Resilience, and Human Impacts on Earth Systems.
Featured Science and Engineering Practices
Engaging students in developing and using models. According to NRC’s A Framework for K-12 Science Education, scientists use conceptual models to investigate parts of a system not visible to the naked eye to better visualize and understand phenomena. The scientist decides what to include and what not to include in their model, which affects what they can see or can’t see through the model. Students should be developing models that represent their current understanding of a system or process under study, in order to help develop explanations and communicate ideas to others.
• In What Lives Here? students make ecosystem models to show their understanding of the complex web of interactions between parts of an ecosystem.
• They use these models to make explanations about the ecosystem and predict how a change to one part of the ecosystem might affect other parts.
• Students’ models help them deepen their understanding of the complex interactions in ecosystems and help them see how models are a powerful tool for making predictions.
• Models are based on evidence, and as students use symbols to show different strengths of evidence in their models it helps them understand that models always include inaccuracies.
• As students revise their models it’s a chance to emphasize how scientists continually update, revise, and refine their models as new evidence comes to light.
Featured Crosscutting Concepts
Learning science through the lens of systems and system models. The world is complicated! Isolating systems for study- like focusing on one body system, or in this case, focusing just on the interactions between parts of an ecosystem- helps scientists and engineers understand parts of how the world works. Investigating the parts of a system can help students recognize that each organism and object does not exist in isolation, but rather in relation to the other parts of the system it’s a part of.
• In What Lives Here?, students identify parts of the ecosystem they’re exploring, and focus on the many interactions between those parts.
• Throughout your students’ field experience, keep asking them to point out interactions between the parts of the different ecosystems they see.
Importance of teaching science practices. “Engaging in the practices of science helps students understand how scientific knowledge develops…It can also pique students’ curiosity, capture their interest, and motivate their continued study…” -National Research Council, A Framework for K-12 Science Education. Focus on these science practices will help to ensure a more scientifically literate public who will be better able to make thoughtful decisions.
About Crosscutting Concepts in the NGSS. Crosscutting concepts are considered powerful thinking tools for how scientists make sense of the natural world. The seven “big ideas” listed as crosscutting concepts are: Patterns; Cause & Effect; Scale, Proportion & Quantity; Systems and System Models; Energy & Matter: Flows, Cycles and Conservation; Structure & Function; and Stability & Change. These concepts may sound familiar, as they are quite similar to the themes referred to in science literacy documents as being important ideas that unify all disciplines of science and engineering.

20 • Student Activity Guide
WhAt LivEs hErE?
TEACHING NOTES
All materials created by BEETLES™ at The Lawrence Hall of Science.Find the latest activities and information at http://beetlesproject.org.
• A further step could be to have students begin to notice smaller systems within the ecosystem, for example to recognize a tree as a system with its own internal parts, or an organism as a system of interacting body parts.
• The more systems students identify, the more they will come to recognize the usefulness of a systems lens to understand the natural world.
To help your students understand and use this “thinking tool,” explain that scientists use models to isolate one system, or parts of it, to learn about the larger systems that make up the world. They decide what parts of the system to focus on, and which to leave out, in order to understand something better. They pay attention to interactions between parts of a system. They also notice things outside the system that affect it. It’s important that students interpret their models, and use them to answer questions, in order to be using their models in a scientific manner.
Featured Disciplinary Core Ideas
Building a foundation for understanding Disciplinary Core Ideas. The NGSS make it clear that students need multiple learning experiences to build their understanding of Disciplinary Core Ideas. What Lives Here? gives students a chance to develop understanding of some Disciplinary Core Ideas related to Interdependent Relationships in Ecosystems (LS2.A), Cycles of Matter and Energy Transfer in Ecosystems (LS2.B), Ecosystem Dynamics, Functioning, and Resilience (LS2.C), and Human Impacts on Earth Systems (ESS3.C).
As students make and discuss ecosystem models for the living and nonliving things in their surroundings, they build some understanding of the ways in which organisms get what they need from their environment in order to survive (LS2.A), as well as the ways that matter gets transferred through different parts of the ecosystem (LS2.B). When students discuss how organisms would be affected by increases or decreases in other organisms, or by changes to the environment, they develop understanding of ecosystem dynamics (LS2.C). Finally, when students consider how the interactions within the ecosystem would be affected by human actions, such as road construction or the conversion of the land to a farm, they grapple with the effects of human activities on the natural world (ESS3.C).
Performance Expectations to Work Toward
The NGSS represent complex knowledge and multi-faceted thinking abilities for students. No single activity can adequately prepare someone for an NGSS performance expectation. Performance expectations are examples of things students should be able to do, after engaging in multiple learning experiences or long-term instructional units, to demonstrate their understanding of important Disciplinary Core Ideas and Science Practices, as well as their ability to apply the crosscutting concepts. Performance expectations are not a “curriculum” to be taught to students. Below are some of the performance expectations that this activity can help students work toward:
5-LS2-1. Develop a model to describe the movement of matter among plants, animals, decomposers, and the environment.
Translating the codes used in the NGSS. Each standard in the NGSS is organized as a collection of performance expectations (PE) for a particular science topic. Each PE has a specific code, provided here so that they can be easily referenced in the NGSS documents. The first number or initial refers to the grade level: K - kindergarten, 1 - first, 2 - second,etc...MS - middle school, and HS - high school. The next letters in the code refer to the science discipline for the standard: LS, PS, ESS, ETS. The number following the discipline denotes the specific core idea within the discipline that is addressed by the PE, and the last digit identifies the number of the PE itself. So...3-LS4-4 means it’s part of a third grade standard (3) for life science (LS), addressing the fourth core idea (4), Biological Evolution: Unity and Diversity, within the life science standards, that deals with Biodiversity and Humans. It’s also the fourth performance expectation (4) that makes up the complete LS4 standard at this grade level.

What Lives Here? • 21© The Regents of the University of CaliforniaNot for resale, redistribution, or use other than educational use without further permission.
TEACHING NOTESMS-LS2-1. Analyze and interpret data to provide evidence for the effects of resource availability on organisms and populations of organisms in an ecosystem. MS-LS2-3. Develop a model to describe the cycling of matter and flow of energy among living and nonliving parts of an ecosystem.
MS-LS2-4. Construct an argument supported by empirical evidence that changes to physical or biological components of an ecosystem affect populations.
Activity Connections
Using Tracking before this activity could familiarize students with skills for finding evidence of organisms that are not present at the moment. Blending In & Standing Out could be a good follow-up activity to focus students on the role of colors and patterns in interactions between organisms. Interview an Organism is another activity that tackles the Crosscutting Concept of Systems and System Models in the context of an ecosystem. Both Decomposition Mission and Food, Build, Do, Waste give students more practice with models.
Concept InventionApplication
Invitation
Exploration
→
→
→
→
→ExplorationReflection
Learning Cycle Stage This activity takes students through a full learning cycle.

What Lives Here? • 22
FIELD CARDCut out along outer lines and fold along the centerline. This makes a handy reference card that will fit in your pocket.
4. Explain: Partners rank strength of evidence for each organism found, & record in journals.
5. Do 3 Whip Arounds for organisms for which they found strong, less strong, & weak evidence.
6. Explain: We’re a team, so add names of organisms others mentioned to your journals.
7. Encourage scientific argumentation. 8. Continue with field experience, adding organisms to journals, &
occasionally ask a student to identify a plant, track, etc.
PAUSE FOR OTHER FIELD EXPERIENCES. STUDENTS KEEP ADDING ORGANISMS.
Making Ecosystem Models1. Sit group to add to journals. 2. Explain: Look outward & imagine complexity of all the plants, big
animals, tiny animals, fungi, & bacteria in this ecosystem. 3. Explain: You’ll be using science “thinking tool” systems and
system models to try to understand part of the ecosystem.4. Explain: Scientists often make a model of a system and its parts
to try to understand natural world. 5. Explain: It’s impossible to completely understand an ecosystem,
but you’ll make models of parts of the ecosystem to help understand it, kind of like scientists.
6. Explain: Include living & nonliving things. 7. Brainstorm nonliving things in the ecosystem. 8. Explain: You can’t include everything in model, & including what
you think is important affects what you’ll learn from it. 9. Brainstorm nonliving things in the area that might be connected
to organisms & are important to include in models, & tell them to write some down.
10. Explain: Add more living & nonliving things to models. 11. Define “interaction,” give examples, & brainstorm types of
interactions between living & nonliving parts of ecosystem. 12. Explain: You’ll make a model/diagram using lines to show
interactions between things.
(continued on next page)
www.beetlesproject.org
What Lives Here?Searching for Organisms and Evidence of Organisms1. Use Turn & Talk or Walk & Talk to share out briefly after each
question:
PWhat different kinds of organisms can you see that live here? PWhat are organisms you think might live here, but you can’t
see right now? PHave you heard the word “evidence” before? How would you
explain what it is? 2. Agree on definition of evidence, e.g.: “Evidence is data that
helps answer a question, form an explanation, or disprove an explanation.”
3. Partners list kinds of evidence organisms might leave behind, then a few share out.
4. Explain: You’ll be like “science detectives,” looking for evidence of organisms to figure out what lives here.
5. OPTIONAL: Model how, then give students a few minutes to get familiar with plant key they’ll be using.
6. Pairs describe what they notice about each type of plant in pictures.
7. Explain: When you find an organism or evidence of an organism, try to figure out what it is, & mark it or write the name of it in your journal, leaving space next to it.
8. Explain boundaries etc., then send students to explore.9. Circulate, troubleshoot, ask questions, & help out. 10. As you circulate, engage students in discussion about evidence
they find, & remind them to record what they find in their journals.
Discussing Organisms & Evidence1. After ~15 minutes each pair join with another pair to discuss
findings. 2. Gather group & explain that not all evidence is created equal.3. Explain strong (draw circle), less strong (dotted circle), & weak (?)
evidence, & model how to record this in their journals.
© The Regents of the University of California

What Lives Here? • 23
FIELD CARDCut out along outer lines and fold along the centerline. This makes a handy reference card that will fit in your pocket.
5. Wrap up discussion by briefly summarizing points brought up & pointing out interdependence.
6. Students revise models based on anything they learned in the discussion.
7. Explain: Nature is complex, & you can’t fully predict what will happen if one part of an ecosystem changes—but an ecosystem model can help.
8. Point out limitations of models, & ask students for other limitations.
9. Explain: Scientists use models like ecosystem models when they’re trying to decide how to lessen harmful human impacts on an ecosystem, or manage natural resources.
Wrapping Up1. Use Turn & Talk or Walk & Talk with some of these questions:
PWhat questions do you still have about these organisms & how they interact?
P If you were in charge of a group who was going to decide whether or not to change this environment by adding a road, or turning part of it into a farm, what might you decide? What other information would you want to have?
PWhat were some of the most interesting organisms & inter-actions you observed or thought about?
PWhat helped you learn during this activity? P If you were to take a younger brother or sister or friend here
& teach them how to find organisms & evidence of organisms, how might you do it?
PMartin Luther King Jr. said: “We are all of us interconnected.” What does that quote mean to you? What are some of the inter-connections you’ve observed today? How are you connected to this place?
www.beetlesproject.org
(continued from previous page)
13. Explain: Scientists use models like this to represent things in real world—like interactions between things in an ecosystem—to better understand them & show their thinking.
14. Explain: You can include thicker lines to show parts that seem more key, thicker lines to show key interactions, and labels, like “eat” or “makes home in,” to explain type of interaction.
15. 2’s or 4’s discuss & record for ~10 minutes interactions while you circulate & ask questions.
16. If students are antsy, move to other location before next phase.
Discussing Ecosystem Models1. Ask some of questions below to lead discussion where students
use ecosystem models as evidence for explanations about the ecosystem. (Help students evaluate strength of evidence used, follow student interests, use Turn & Talks & ask follow-up questions.)
PWhich organisms might compete for the same food? PHow might the organisms/ecosystem be affected:
• If decreased or increased? Trace the connections out.• If (choose something with a “thick” line around it) were to
disappear?• If this producer were to die off?• If (name an organism something many organisms
interacted with) disappeared?• If there was less of (name a nonliving thing that
many things interacted with)?• If a road were put in the middle of this environment we just
explored? If we turned this piece of land into a farm?2. Explain: Although other parts of an ecosystem are impacted
when a part of an ecosystem changes, ecosystems as a whole are generally resilient.
3. Explain: More diverse ecosystems are more resilient.4. Explain: Some factors have a bigger impact on an ecosystem.
© The Regents of the University of California

What Lives Here? • 24 • Student Activity Guide
ABOUT BEETLES™
BEETLES™ (Better Environmental Education Teaching, Learning, and Expertise Sharing) is a program of The Lawrence Hall of Science at the University of California, Berkeley, that provides professional learning sessions, student activities, and supporting resources for outdoor science program leaders and their staff. The goal is to infuse outdoor science programs everywhere with research-based approaches and tools to science teaching and learning that help them continually improve their programs. www.beetlesproject.org
The Lawrence Hall of Science is the public science center of the University of California, Berkeley. www.lawrencehallofscience.org
Principal Investigator and Articulate Beetle: Craig StrangProject Director, Lead Curriculum & Professional Learning Developer, and Idea Beetle: Kevin Beals Project Manager, Professional Learning & Curriculum Developer, and Beetle Herder: Jedda ForemanCurriculum & Professional Learning Developer and Head Fireball: Lynn BarakosCurriculum & Professional Learning Developer and Champion-Of-All-The-Things: Emilie LygrenResearch and Evaluation Team: Bernadette Chi, Juna Snow, and Valeria RomeroCollaborator, Super Naturalist, Chief Scalawag and Brother-from-Another-Mother: John (Jack) Muir LawsProject Consultants: Catherine Halversen, Mark Thomas, and Penny SirotaAdvisory Board: Nicole Ardoin, Kathy DiRanna, Bora Simmons, Kathryn Hayes, April Landale, John Muir Laws, Celeste Royer, Jack Shea (emeritus), Drew Talley, & Art Sussman.
Editor: Laurie DunneDesigner: Barbara Clinton
The following programs have contributed to the development of these materials by field testing and providing invaluable feedback to the development team. For a complete list of contributors and additional partners, please see our website at beetlesproject.org/about/partners/
California: YMCA Camp Campbell, Rancho El Chorro Outdoor School, Blue Sky Meadow of Los Angeles County Outdoor Science School, YMCA Point Bonita, Walker Creek Ranch, Santa Cruz County Outdoor Science School, Foothill Horizons Outdoor School, Exploring New Horizons Outdoor Schools, Sierra Nevada Journey’s School, San Joaquin Outdoor Education, YMCA Camp Arroyo, Shady Creek Outdoor School, San Mateo Outdoor Education, Walden West Outdoor School, Westminster Woods.Other locations: Balarat Outdoor Education, CO; Barrier Island Environmental Education Center, SC; Chincoteague Bay Field Station, VA; Eagle Bluff Environmental Learning Center, MN; Great Smokey Mountain Institute at Tremont, TN; Wellfleet Bay Wildlife Sanctuary-Mass Audubon, MA; Mountain Trail Outdoor School, NC; NatureBridge, multiple locations; Nature’s Classroom, multiple locations; North Cascade Institute Mountain School, WA; Northbay, MD; Outdoor Education Center at Camp Olympia, TX; The Ecology School, ME; UWSP Treehaven, WI; Wolf Ridge Environmental Learning Center, MN; YMCA Camp Mason Outdoor Center, NJ; and YMCA Erdman, HI.
Photos: Pages 1 and 2 by Kevin Beals. Icons: Backpack by Rémy Médard; Growth by Arthur Shlain; Cut by Nathan Thomson; Outside by Petr Holusa; Park by Antar Walker; &Time by Wayne Middleton all from The Noun Project.
Funding from 2012-2018 for BEETLES publications such as this one has been generously provided by the Pisces Foundation, the S.D. Bechtel, Jr. Foundation, The Dean Witter Foundation, and the Mary A. Crocker Trust.
© 2018 by The Regents of the University of California. All rights reserved. These materials may be reproduced, copied, and distributed in their entirety for non-commercial educational purposes, but may not be sold, rented, or otherwise distributed. Neither text nor illustrations may be modified, excerpted or republished into other material without the prior express written consent of the copyright holder. The existing trademark and copyright notices may not be removed or obscured.
To contact BEETLES™, email [email protected]