Embed Size (px)
Citation preview
Study Guide: Geographic Information Systems Area: Land-use Analysis with ArcView 3.x Subject: Using Soil Maps to Assess Site Suitability – Dinosaur National Monument Objectives: Upon completing this study guide you should be able to: Select an appropriate site based upon than one criteria. Create a buffer to a set distance Use external metadata to develop analysis Necessary Skills: This study guide will be easier to complete if you review the following skills:
1. Add spatial and tabular data to ArcView 2. Enable extensions within ArcView 3. Use the Geoprocessing Wizard 4. Apply queries in ArcView
Introduction: As a GIS technician for the National Park Service you have been asked to develop some site suitability studies for the Dinosaur National Monument in Utah. You will base your initial studies on SSURGO data provided by the Natural Resources Conservation Service of the United States Department of Agriculture. You have asked for and received a soils map of the area, and information on generally suitability of the soils for certain applications. You have received a shapefile of the soil-mapping units for the area. You have also received a database file that shows the soil suitability. The fields and their attributes are explained in a text file Tabular.txt The information is included in a zip file along with files for the roads and streams (hydrography) of the site. If not already unzipped, you should unzip the Dino_Ntl_Mtm zip archive to your hard disk. Your first task is to determine sites along the Yampa Bench Road that may be suitable for picnic or camping areas.
Note: Your instructor should give you information about the location of the data files.
Creating the ArcView Project
1. Locate the data on a writeable storage area like a hard drive.
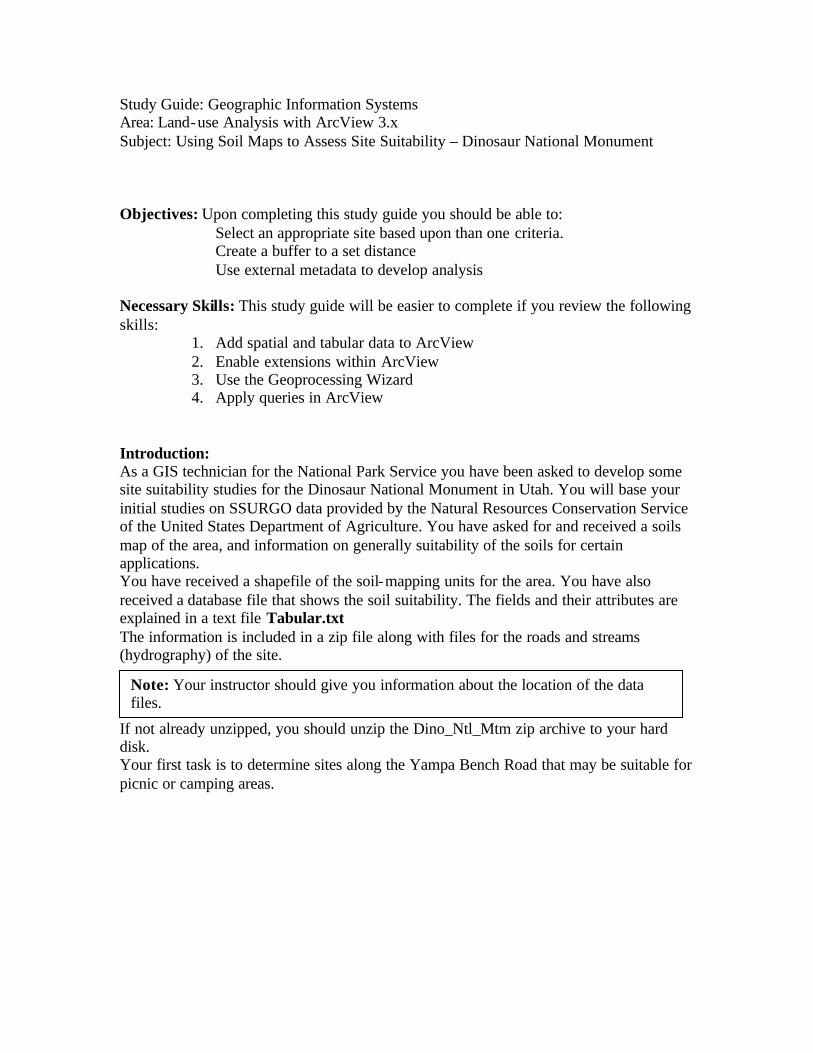
The tree in Windows Explorer should look like that shown below.
Create a new folder under Dinosaur Ntl Mt and call it Work.
2. Set your ArcView Working directory to your newly created folder by placing the path to the working folder in the dialog box.
3. Add themes to an ArcView View If a View in not already open, create one. From View > Properties, name this View: Yampa Bench Sites Add the following shapefiles from the Rawdata folder. Dinords_utm12- This is a feature set of the roads in and surronding the monument Co692autm12n- This is the soil mapping units for the monument
The path would be: ……..\Dinosaur Ntl Mt\Work

Clipdinohydro- This is a feature set of the rivers and streams of the monument.
4. Return to the View > Properties and set both the Map Units to meters and the Distance Units to Feet.
5. Make the Dinords_utm theme active by clicking on it. It will be highlighted in a box.
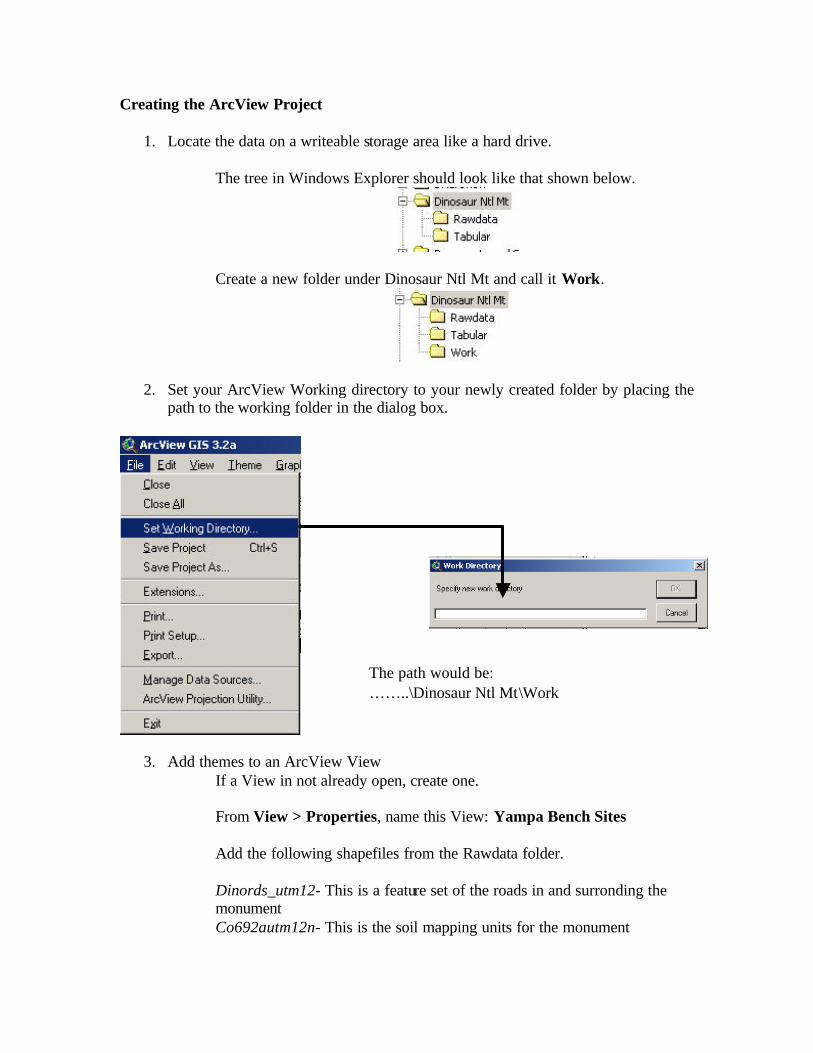
6. Click the query builder.
With the query builder, select the Yampa Bench Road. You will notice that this road has several versions of the name in the attributes. Select the first one, then subsequent names using the Add to Set feature.
Note: We will use these setting later to create a buffer. The Map Units are meters because this data has been projected to Universal Transfer Mecator (UTM) which is in meter.
7. When all of the parts of Yampa Bench Road are selected…
Use Theme > Convert to Shapefile to save the selected features as Yampa_Bench_rd.
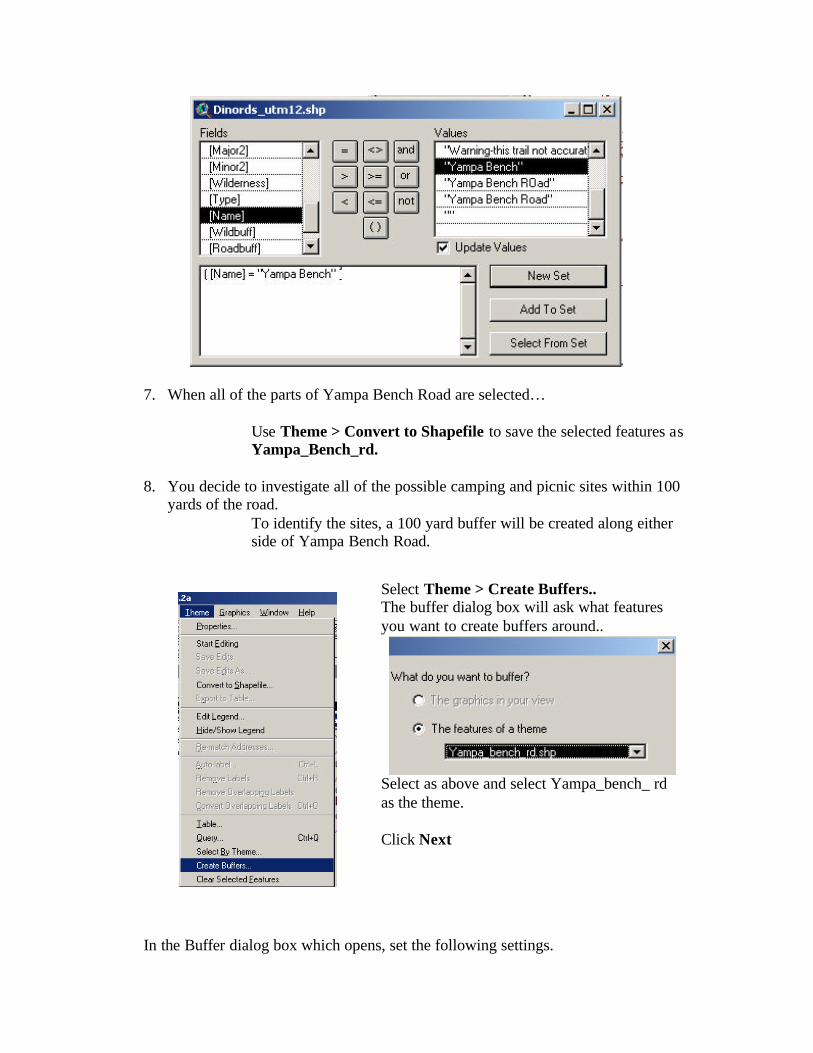
8. You decide to investigate all of the possible camping and picnic sites within 100 yards of the road.
To identify the sites, a 100 yard buffer will be created along either side of Yampa Bench Road.
In the Buffer dialog box which opens, set the following settings.
Select Theme > Create Buffers.. The buffer dialog box will ask what features you want to create buffers around..
Select as above and select Yampa_bench_ rd as the theme. Click Next
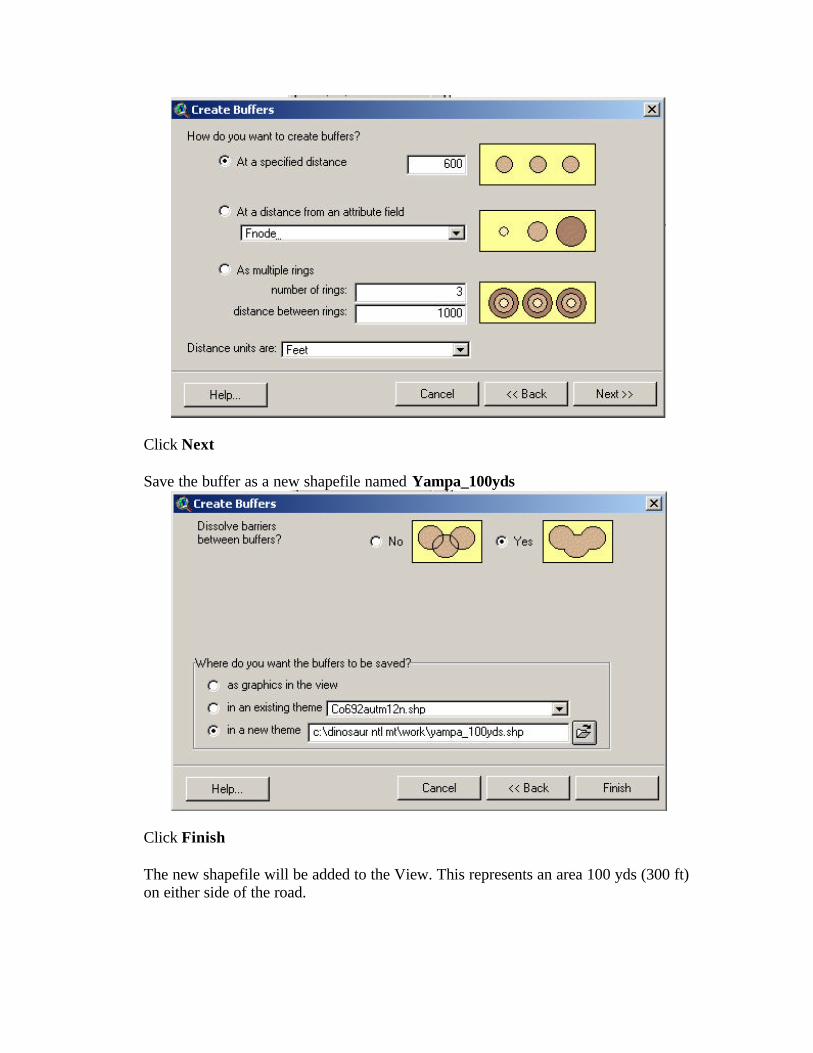
Click Next Save the buffer as a new shapefile named Yampa_100yds
Click Finish The new shapefile will be added to the View. This represents an area 100 yds (300 ft) on either side of the road.
9. The buffer will be used to clip the soil mapping units so that the soil characteristics of the target area can be analyzed.
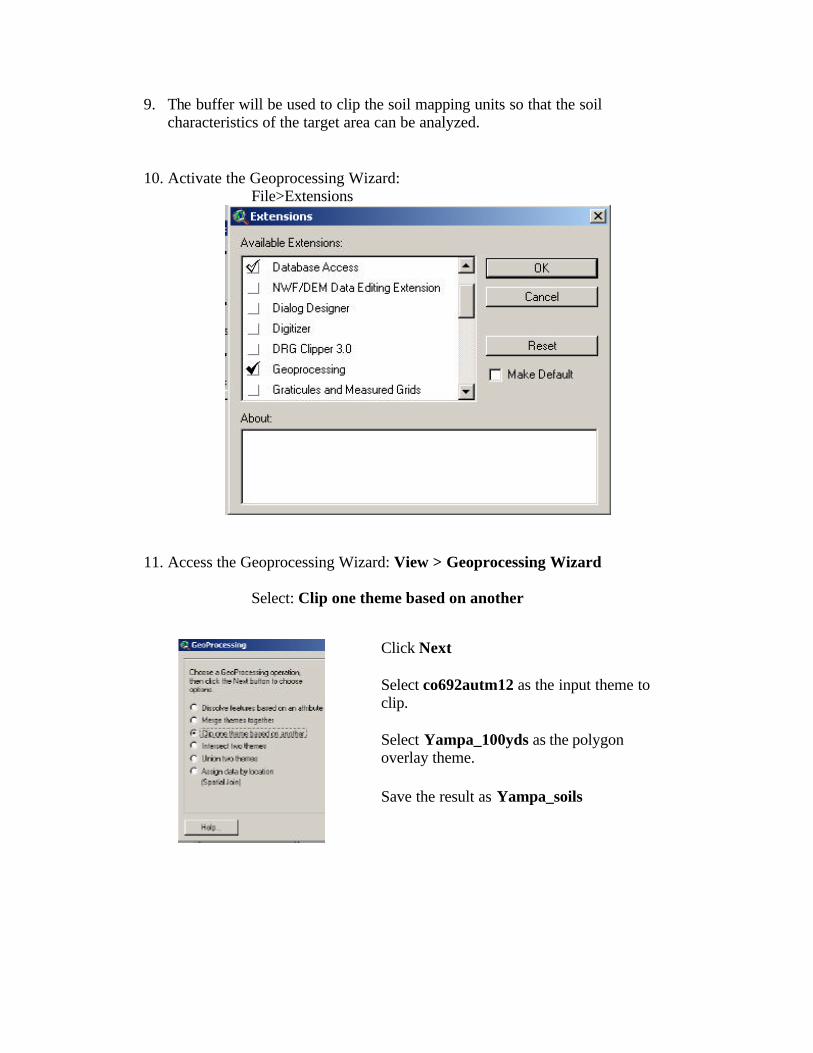
10. Activate the Geoprocessing Wizard: File>Extensions
11. Access the Geoprocessing Wizard: View > Geoprocessing Wizard Select: Clip one theme based on another
Click Next Select co692autm12 as the input theme to clip. Select Yampa_100yds as the polygon overlay theme. Save the result as Yampa_soils
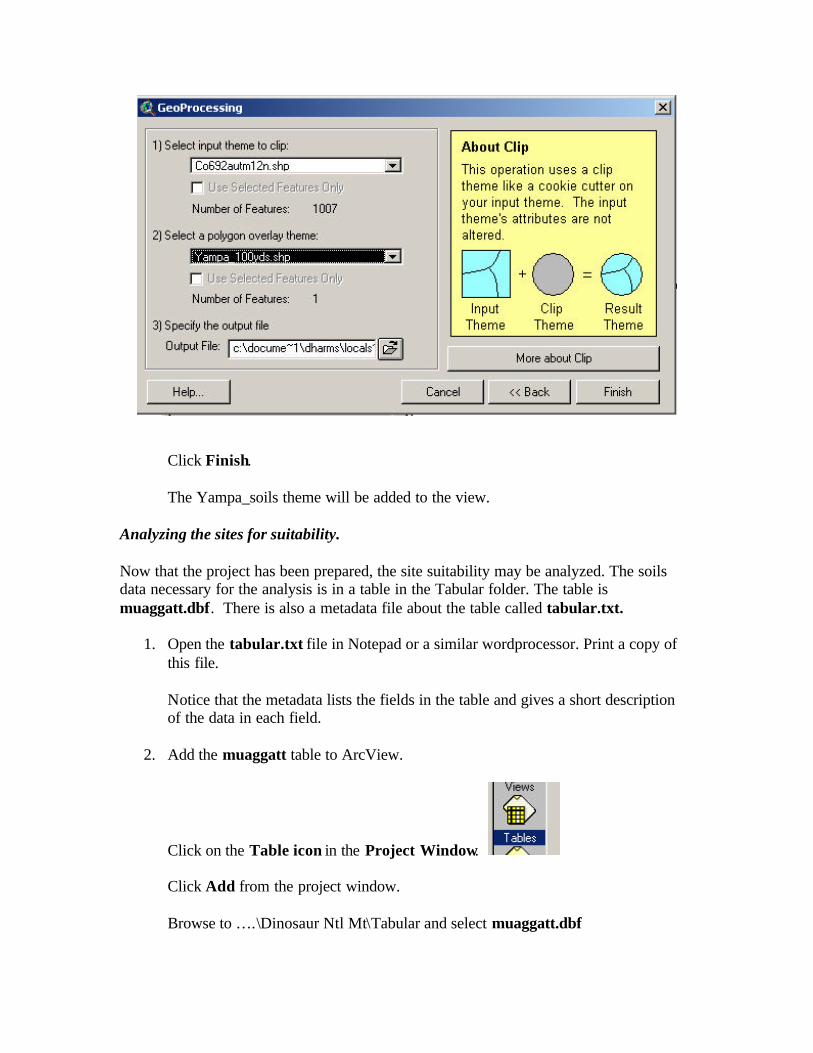
Click Finish. The Yampa_soils theme will be added to the view. Analyzing the sites for suitability. Now that the project has been prepared, the site suitability may be analyzed. The soils data necessary for the analysis is in a table in the Tabular folder. The table is muaggatt.dbf. There is also a metadata file about the table called tabular.txt.
1. Open the tabular.txt file in Notepad or a similar wordprocessor. Print a copy of this file.
Notice that the metadata lists the fields in the table and gives a short description of the data in each field.
2. Add the muaggatt table to ArcView.
Click on the Table icon in the Project Window. Click Add from the project window. Browse to ….\Dinosaur Ntl Mt\Tabular and select muaggatt.dbf
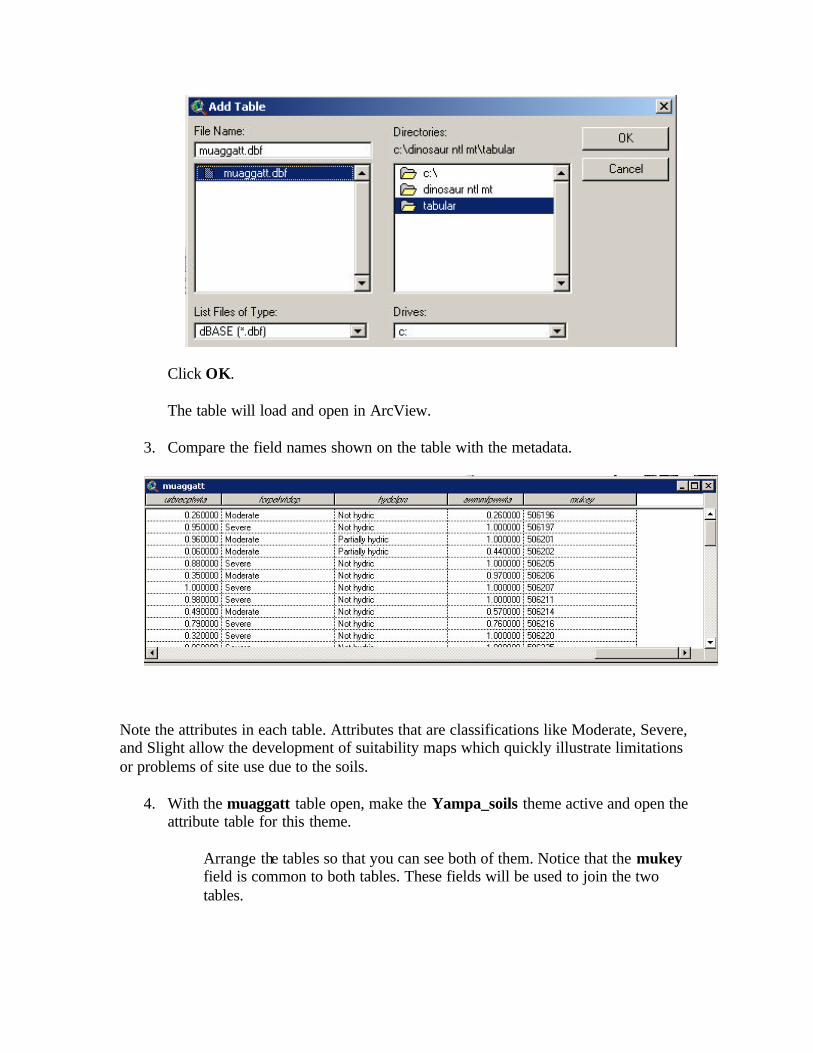
Click OK. The table will load and open in ArcView.
3. Compare the field names shown on the table with the metadata.
Note the attributes in each table. Attributes that are classifications like Moderate, Severe, and Slight allow the development of suitability maps which quickly illustrate limitations or problems of site use due to the soils.
4. With the muaggatt table open, make the Yampa_soils theme active and open the attribute table for this theme.
Arrange the tables so that you can see both of them. Notice that the mukey field is common to both tables. These fields will be used to join the two tables.

5. Join the muaggratt table and the Attributes of Yampa_soils table using the
mukey
6. To determine the areas which might be suitable for camping or picnics, the correct
attributes must be selected. You know from experience that the rankings for recreational trails and paths applies, and the limitations for dwellings with basements also apply.
Study the metadata from tabular.txt that you printed. Determine the fields which will give you a suitability category for dwellings without basements and limitations for paths and trails (dominate condition).
7. Create two new themes, one showing the limitations for paths and trails as Not limted, slightly limited, and very limited.
Make a copy of Yampa_soils. Make Yampa_soils active. Edit > Copy Theme Paste the copy into the view: Edit > Paste
8. Change the name of the copied theme (you will have 2 Yampa_soils themes) to Path_Trail_Lim.
Make the copy active.
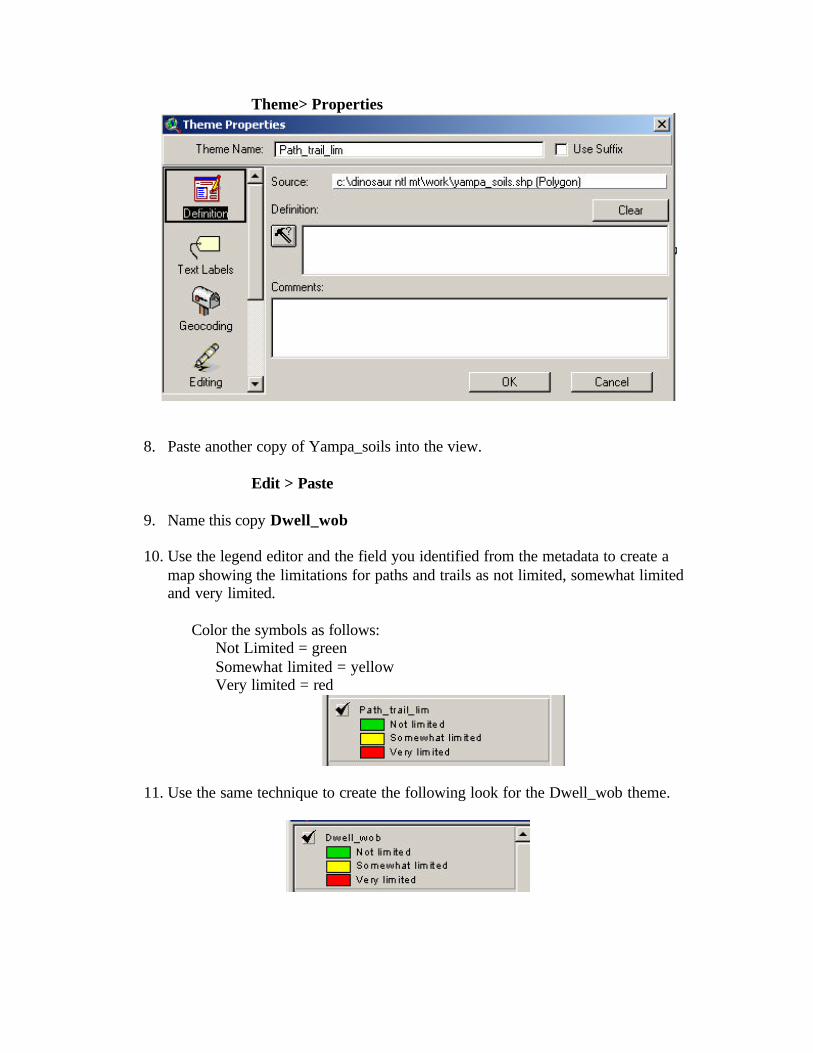
Theme> Properties
8. Paste another copy of Yampa_soils into the view.
Edit > Paste
9. Name this copy Dwell_wob
10. Use the legend editor and the field you identified from the metadata to create a map showing the limitations for paths and trails as not limited, somewhat limited and very limited.
Color the symbols as follows: Not Limited = green Somewhat limited = yellow Very limited = red
11. Use the same technique to create the following look for the Dwell_wob theme.
12. We now have two themes which indicate the places that are probable sites, however they are not correlated so that we can see if they overlap. A spatial join will be used to determine the Not Limited sites.
13. Create a theme of the Not Limited Dwell_wob features.
Open the query builder. Select the Not Limited features of this theme. Convert the selection set to NL_dwb shapefile.
14. Create a theme of Not Limited Path_Trail_lim features. Open the query builder Select the Not Limited features of this theme Convert the selection set to NL_PT shapefile.
15. Join the attribute tables of NL_dwb and NL_PT themes using the Shape field as the common field.
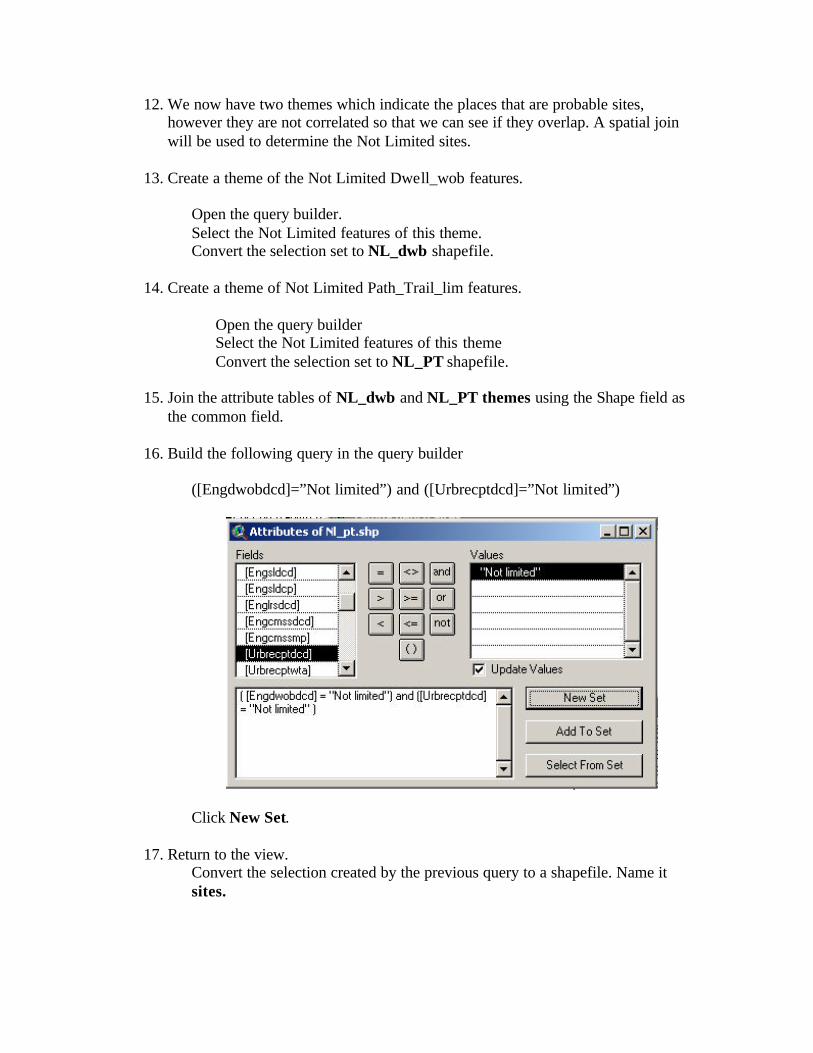
16. Build the following query in the query builder
([Engdwobdcd]=”Not limited”) and ([Urbrecptdcd]=”Not limited”)
Click New Set.
17. Return to the view. Convert the selection created by the previous query to a shapefile. Name it sites.

We now have a map of the locations which can be investigated for possible picnic or camping sites along the Yampa Bench Road.