Embed Size (px)
Citation preview
1
Berry Picking
Dick Alan, Alaska Native Clipart, Alaska Native Knowledge Network Website
Subsistence Gathering Education Unit
Authors: Telida Village Council, Environmental Protection Agency IGAP Program
Alaska Native Knowledge Consultant: Steven Nikolai Sr., Telida Village
Sources: The sources that we used for the gathering lessons included:
1. Collins, Raymond L., Dickinanek’ Hwt’ana: A History of the People of the Upper Kuskokwim who live in Nikolai and Telida. (National Park Service, U.S. Department of the Interior, Denali National Park and Preserve) 2000
2. Andre, Alestine and Fehr, Alan, Gwich’in Ethnobotany, Plants used by the
Gwich’in for Food, Medicine, Shelter and Tools, (Gwich’in Social and Cultural Institute and Aurora Research Institute, Inuvik, Northwest Territories) 2000
3. Garibaldi, Ann, Medicinal Flora of the Alaska Natives, (Alaska Heritage
Program, Environment and Natural Resources Institute, University of Alaska Anchorage, Anchorage, Alaska) 1999
4. Holen, Davin L., William E. Simeone, and Liz Williams 2006 “Lake
Minchumina, Telida, Nikolai and Cantwell Subsistence Community Use Profiles and Traditional Fisheries Use,” (Alaska Department of Fish and Game Division of Subsistence, Technical Paper No. 296. Juneau, Alaska) 2004 www.subsistence.adfg.state.ak.us/TechPap/tp296.pdf.
5. Hosley, Edward; Factionalism and Acculturation in an Alaskan Athapaskan
Community, (University of California, L.A) 1966 Ph.D Dissertation
6. Jones, Eliza and Anderson, Katherine, Roots of Northern Athabascan Life – The Birch Tree (Reprinted by the Iditarod Area School District, Alaska) 1984

2
7. Kari, Priscilla, R. comp, Dena’ina K’et’una – Tanaina Plantlore, (Adult Literacy Laboratory, University of Alaska Anchorage, Anchorage, AK) 1977
8. Nelson, Richard K., et al; Tracks in the Wildland A Portrayal of Koyukon and
Nunamiut Subsistence (University of Alaska Fairbanks, Alaska) 1982
9. Nikolai Elementary Students; Athabaskan Recipes, (Iditarod Area Schools, Bilingual/Bicultural Program) 1980
10. Pratt, Verna E., Alaska’s Wild Berries and Berry-like Fruit, (Alaskakrafts, Inc.,
Anchorage, AK) 1995
11. Schofield, Janice J, Alaska’s Wild Plants – A Guide to Alaska’s Edible Harvest, (Alaska Northwest Publishing, Portland, OR) 1999
12. Stanek, Sheryl and Butcher, Barbara, Collecting and Using Alaska’s Wild
Berries and Other Wild Products, (Alaska Cooperative Extension, College of Rural Alaska-University of Alaska Fairbanks, Fairbanks, AK) 1998
13. Steinbright, Jan ed.; From Skins, Trees, Quills and Beads: The Work of Nine
Athabascans, (Institute of Alaska Native Arts) 1985
14. Stokes, Jeff; “Natural Resource Utilization of Four Upper Kuskokwim Communities,” Alaska Department of Fish and Game Division of Subsistence, Technical Paper No. 86. Juneau, Alaska 1984. Also found online at:
www.subsistence.adfg.state.ak.us/TechPap/tp086.pdf.
15. Sullivan, Robert J., The Ten’a Food Quest, (The Catholic University of America Press, Washington, D.C.) 1942 Ph.D. Dissertation
16. Viereck, Leslie A., and Little, Elbert L., Alaska Trees and Shrubs, (Snowy Owl
Books, University of Alaska Press, Fairbanks, AK) 2007 2nd Edition.
17. Viereck, Eleanor G., Alaska’s Wilderness Medicines – Healthful Plants of the Far North, (Alaska Northwest Books, Portland, OR) 1987
Websites
1. www.ankn.uaf.edu/curriculum/units/spruce.html Athabascan Digging and Preparing Spruce Roots Unit Study.
2. www.ankn.uaf.edu/curriculum/units/snowshoe.html Athabascan Snowshoe Unit
Study.
3
Title: Subsistence Gathering on the Upper Kuskokwim River Authors: Telida Village Council and the Environmental Protection Agency’s Indian General Assistance Program, Alaska Department of Fish and Game Grade Level: All Ages Context: Spring, Summer and Fall ARSI Region: Upper Kuskokwim River
Unit Outline Lesson One – Plant Gathering in the Upper Kuskokwim
Activity 1 – Why We Gather and What We Gather Activity 2 – Village Area Topography
Lesson Two – Berries Activity 1 – How Berries were Important Activity 2 – Berry Identification Activity 3 – Berry Gathering Day Activity 4 – Preparing Berries Traditionally Activity 5 – Berry Medicine
Lesson Three – Trees Activity 1 – The Boreal Forest Trees: A Few Survivors Activity 2 – The Spruce and Birch: Which is the Most Valuable? Activity 3 – Spruces Roots Activity 4 – Our Other Trees Are Special, Too!
Lesson Four – Other Plants
Activity 1 – The Common and Abundant Willow Activity 2 – Plant Medicine Activity 3 – Shopping in Nature’s Store Activity 4 – A Natural Buffet
4
Lesson 1 – Plant Gathering in the Upper Kuskokwim Materials for this teaching lesson were adapted from the following sources:
1. Stokes, Jeff W. 1985: “Natural Resource Utilization of Four Upper Kuskokwim Communities.” Tech. Paper 86, www.subsistence.adfg.state.ak.us/TechPap/tp086.pdf
2. Holen, Davin L., William E. Simeone, and Liz Williams 2006: “Lake
Minchumina, Telida, Nikolai and Cantwell Subsistence Community Use Profiles and Traditional Fisheries Use,” Tech Paper No. 296, www.subsistence.adfg.state.ak.us/TechPap/tp296.pdf
3. Andre, Alestine and Fehr, Alan, Gwich’in Ethnobotany, Plants used by the
Gwich’in for Food, Medicine, Shelter and Tools, (Gwich’in Social and Cultural Institute and Aurora Research Institute, Inuvik, Northwest Territories) 2000
4. Alaska Department of Fish and Game Ecosystems,
www.wc.adfg.state.ak.us/index.cfm?adfg=ecosystems.borealwhere
Information:
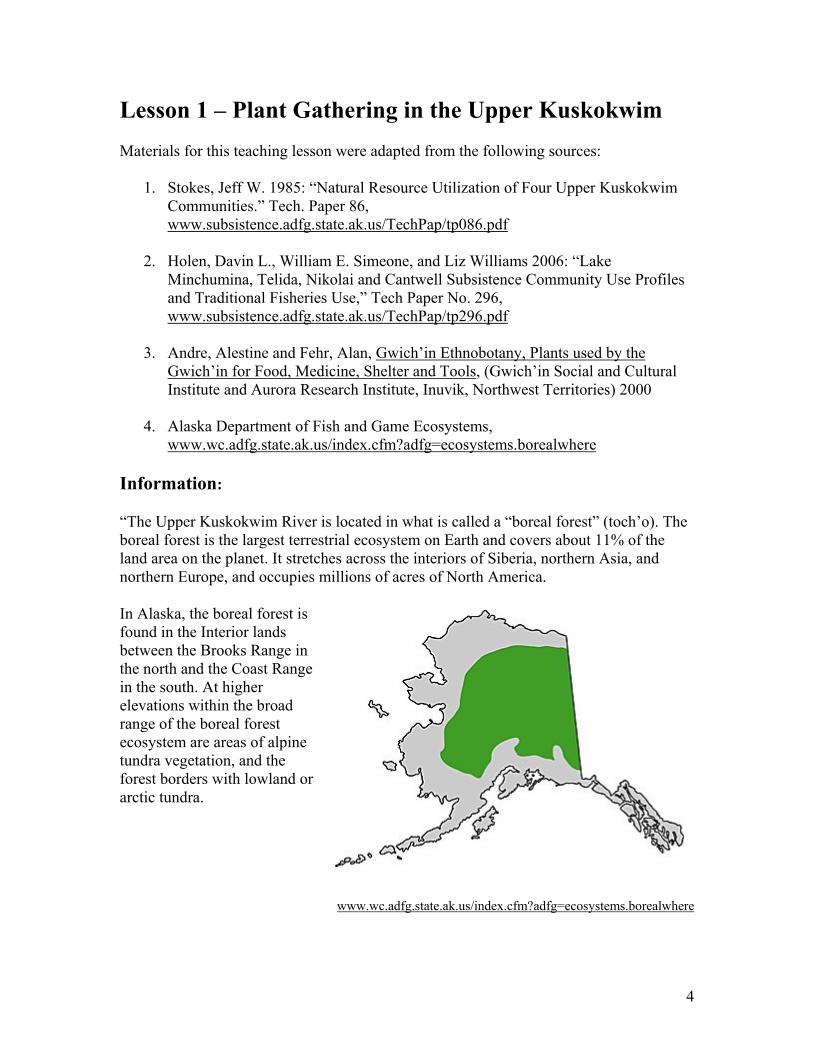
“The Upper Kuskokwim River is located in what is called a “boreal forest” (toch’o). The boreal forest is the largest terrestrial ecosystem on Earth and covers about 11% of the land area on the planet. It stretches across the interiors of Siberia, northern Asia, and northern Europe, and occupies millions of acres of North America.
In Alaska, the boreal forest is found in the Interior lands between the Brooks Range in the north and the Coast Range in the south. At higher elevations within the broad range of the boreal forest ecosystem are areas of alpine tundra vegetation, and the forest borders with lowland or arctic tundra.
www.wc.adfg.state.ak.us/index.cfm?adfg=ecosystems.borealwhere
5
Alaska's boreal forest (sometimes called by the Russian word “taiga") is a mixture of forest types-from sunny aspen groves to spruce bogs-dotted with meadows, marshes, lakes, and rivers, and containing many different types of animals.
Other characteristics of our boreal forest are; cold weather (it's the coldest terrestrial ecosystem on Earth), long winters, permafrost, forest fires, and warm summers.
Black spruce and white spruce are the most common evergreens in the boreal forest. Balsam poplar, paper birch, and aspen grow on south-facing, recently disturbed sites such as river bars and recent burns. Common shrubs include willow, highbush cranberry, alder, rose, Labrador tea, and blueberry. Groundcover plants include mosses, lichens, grasses, sedges, and lowbush cranberry. Horsetail is also common.” (Source of Information: Alaska Department of Fish and Game, Ecosystems )
“Our ancestors have lived in the boreal forest region ever since the glaciers melted and plant life had begun to thrive again. We have subsisted off the boreal forest for just as long. We have trapped, hunted, fished and gathered the plants that we have needed to live and have healthly lives. The plants we gather have been used for a variety
of reasons. They have provided nutrition, shelter, transportation, hunting, trapping and fishing tools, medicine, and for cooking and warmth.
There is a wide variety and usage of the plants in our region. Today, they are mostly used for food, construction materials, and for heating fuel. Spruce and birch trees provide important sources of firewood and materials for building and handicraft construction. Willow, alder, and cottonwood are used to smoke fish and for meat preservation. A few species or plant products are still used for medicinal purposes.” (Stokes,1984:305) The past medicinal use of plants by people of the Upper Kuskokwim region has been widespread. According to older residents berries, greens, and other naturally occurring plants have historically rounded out the diet of area residents. Plant gathering was an important part of the seasonal subsistence life; there were places where certain plant species were gathered every year. Berries were important throughout the fall and winter and were gathered in great quantities. Sometimes we gathered so many berries that we could not carry them all home. One Nikolai resident said that the extra berries were preserved by putting them under the moss in shallow pits. We could pick them up later in the winter. Some plants were gathered for medicinal purposes that ranged from curing headaches to treating
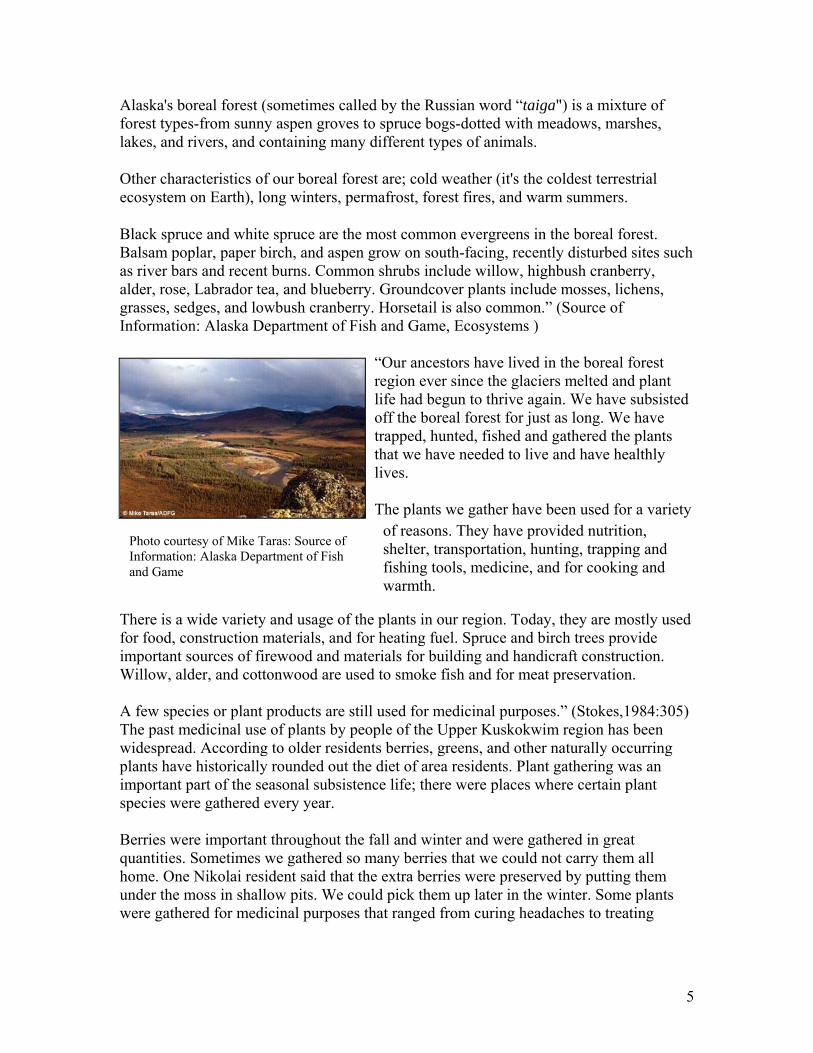
Photo courtesy of Mike Taras: Source of Information: Alaska Department of Fish and Game
6
major wounds.” (Source of Information: Alaska Department of Fish and Game(Stokes, 1984:121) “Plants are renewable resources that grow back year after year if they are taken care of. There are four things to remember when collecting plants: 1) Don’t pick out an area; take only what you need; 2) Do not take or destroy the whole plant if you do not need it all; 3) Collect the plants as far away from your community as possible, they are cleaner; 4) Do not strip bark from around the whole tree trunk when collecting inner or outer bark, it will kill the tree.” (Alestine, and Fehr, Alan, 2000:10) “We believe we must respect the plants we collect. Some Elders suggest leaving something after you have disturbed them, and praying while collecting and preparing medicinal plants. Others say that you should talk to the plant and tell it what you are going to use it for. The time of year for harvesting some plants really matters. The parts of some plants are stronger at different times of the year; so you should know what you are planning to use
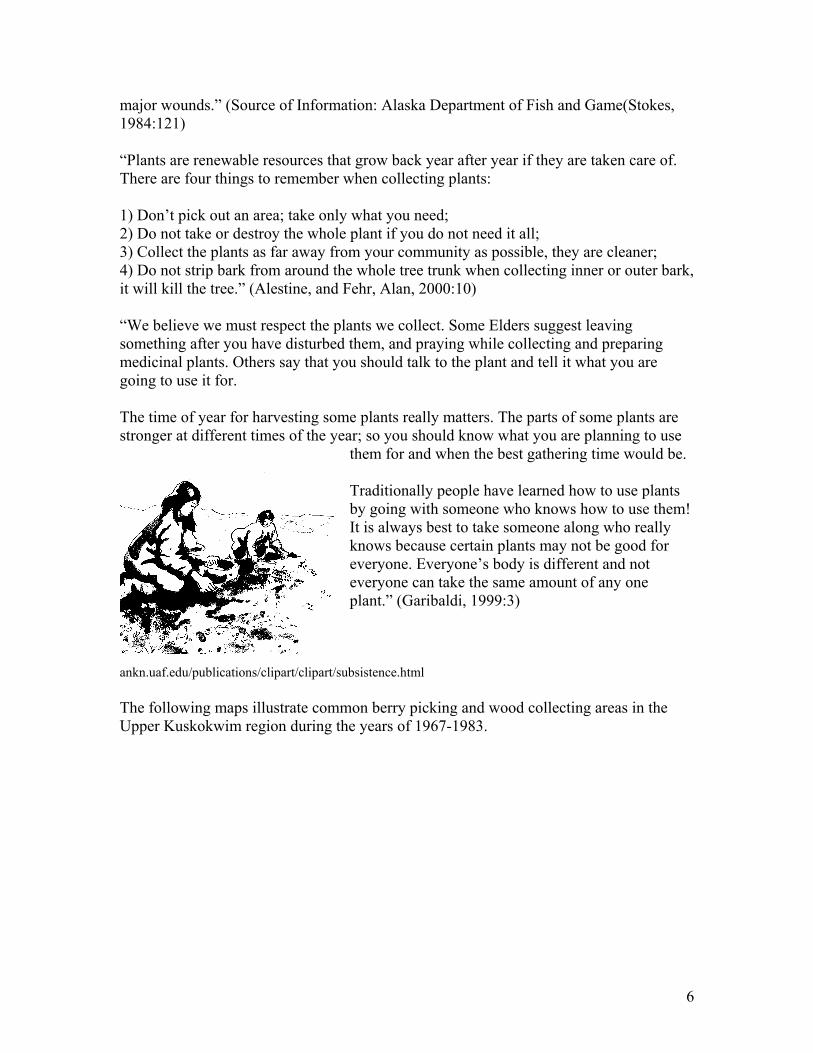
them for and when the best gathering time would be. Traditionally people have learned how to use plants by going with someone who knows how to use them! It is always best to take someone along who really knows because certain plants may not be good for everyone. Everyone’s body is different and not everyone can take the same amount of any one plant.” (Garibaldi, 1999:3)
ankn.uaf.edu/publications/clipart/clipart/subsistence.html The following maps illustrate common berry picking and wood collecting areas in the Upper Kuskokwim region during the years of 1967-1983.
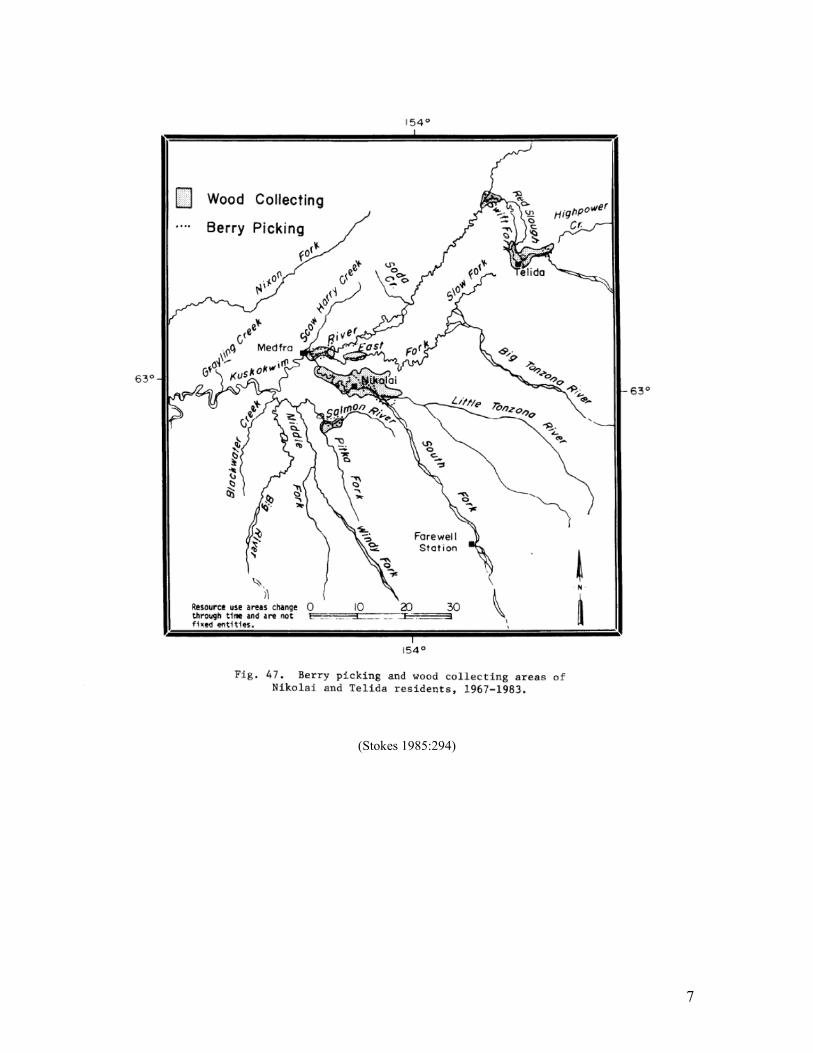
7
(Stokes 1985:294)
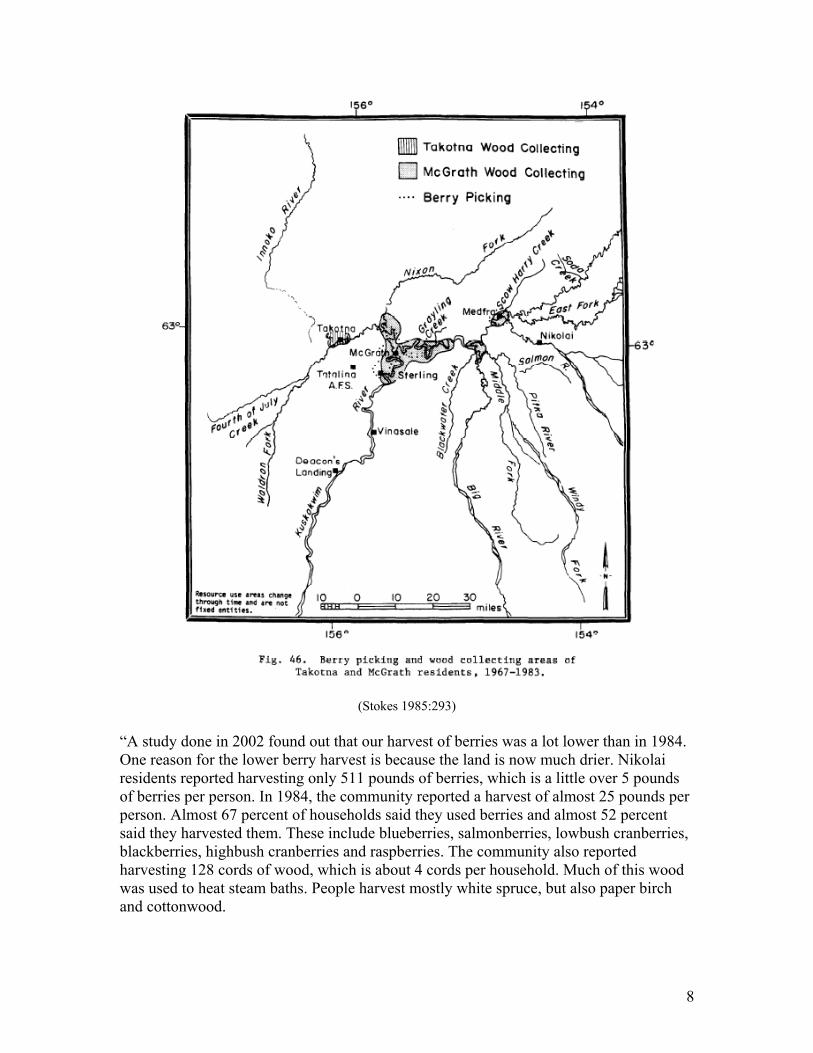
8
(Stokes 1985:293) “A study done in 2002 found out that our harvest of berries was a lot lower than in 1984. One reason for the lower berry harvest is because the land is now much drier. Nikolai residents reported harvesting only 511 pounds of berries, which is a little over 5 pounds of berries per person. In 1984, the community reported a harvest of almost 25 pounds per person. Almost 67 percent of households said they used berries and almost 52 percent said they harvested them. These include blueberries, salmonberries, lowbush cranberries, blackberries, highbush cranberries and raspberries. The community also reported harvesting 128 cords of wood, which is about 4 cords per household. Much of this wood was used to heat steam baths. People harvest mostly white spruce, but also paper birch and cottonwood.

9
Above is a graph that shows the changes of subsistence harvest between 1984 and 2002. Notice the above far right where the berries are listed. Berries were once a much bigger part of our diet than they are now.
(Holen, et al 2006:115)

10
(Holen, et al 2006:85) The table above shows all the plants that were gathered in Nikolai in 2002, instead of showing just berries. It says that “ut of 96 people, 48 gathered plants.” Source of Information: Alaska Department of Fish and Game (Holen, William and Williams, 2004: 11, 115, & 85)
11
Lesson One – Plant Gathering in the Upper Kuskokwim Activity 1 – Why We Gather and What We Gather Activity 2 – Village Area Topography Resources and materials:
Elders familiar with gathering, history, and Upper Kuskokwim dialect words “Elders in the Classroom” by Roby Littlefield Adult volunteers familiar with area types of land cover Lesson 1 teaching text Computer with Internet access and printer Chart Paper, whiteboard or blackboard Markers Land Cover Types maps of region prepared by William Putman, Tanana Chiefs
Conference Forestry Program located in Appendix: o Near McGrath o Near Takotna o Near Nikolai o Near Telida
Resource web site for forestry terminology: http://www.sfrc.ufl.edu/Extension/ssfor11.htm
Poster board Art materials Drawing paper Learning logs (individual student notebooks for recording unit) Unit file (individual student files for keeping unit materials) Other resource maps of the region: Topographic maps of their area (UAF
Geophysical maps, Innoko National Park office) Miscellaneous pictures of Boreal forest characteristics Camera/audio/visual equipment as appropriate
12
Activity 1 – Why We Gather and What We Gather 1. Read and discuss the material in Lesson 1:
Make a chart of key points of why we gather. Discuss the traditional way of learning to gather by going with someone who
knows and learn the following: o To identify plants for certain uses o Where to find plants o When to gather o Ways to gather o Ways the plants are used o How to prepare for use o How to preserve o Ways the plants are used o Which plants are not good for some people.
Have the students share stories about their gathering experiences.
2. Discuss the types of things we gather and use. Brainstorm the following: List all the different plant resources that can be gathered. On chart paper (or
blackboard/white board) make a list of plants commonly gathered. o Different types of berries o Different types of roots, leaves, grasses o Various wood resources
List the various uses for gathered resources and next to each one, write its uses: o Nutrition (food) o Shelter (temporary) o Construction: homes, other buildings, etc. o Transportation: snowshoes, sleds o Tools: hunting, trapping, fishing, cooking, etc. o Medicine o Making fire for cooking and warmth
For Example:
Berries food/nutrition Birch fire wood, construction and bark for baskets Aspen smoking wood for meat, salmon
3. Have the students write in the learning logs:
A summary about gathering; The list of plant resources and uses.
13
Note: Very young students can draw pictures of plant resources and label them.
4. Invite an Elder, or group of Elders, to share about gathering history, why gathering was important, and how that has changed.
5. Prepare the students beforehand to receive the Elder(s), practice listening skills, and how to ask questions properly.
The teacher will discuss the active listening points, communication points, and
preferring of Elders points (Refer to “Elders in the Classroom” by Roby Littlefield).
Have the students share on their experiences with the Elders and make list of
the key points on chart paper to remember, to honor, and to receive from the time they spent with the Elder(s).
Brainstorm with the students and come up with questions to ask the Elder(s).
Then make a list of questions on chart paper. The older students can copy the list into their learning logs.
Note: Remember to ask about the traditional rules for gathering and respecting the plants.
Examples from Lesson 1 text: Gathering Rules When collecting plants:
Don’t not completely pick out an area, take only what you need; Do not take or destroy the whole plant if you do not need it all; Collect the plants as far away from your community as possible, they are cleaner; Do not strip the bark from around the entire tree trunk when collecting inner or
outer bark, this will kill the tree. Respect for the Plant
Talking to the plant; Explain what you are using the plant for; Leaving something after disturbing it; Praying.
6. Introduce and welcome the Elder(s) to the class. Give the Elder(s) liberty to share
about the importance of gathering, what is traditionally gathered for various reasons, when and where they have been traditionally gathered, and how gathering has changed.
As the Elder(s) shares, older students can take a few notes especially on points
that answer some of the questions listed. (Remind students beforehand that

14
listening and honoring the Elder(s) is more important than note taking. So, note taking should be short and quick. The teacher should take notes for the follow up discussion with the class.)
At the appropriate time, the students can ask additional questions and the older
students can record the answers to them in their learning logs.
If permission is granted and if appropriate, take picture, video, or audio recordings.
7. Provide a regional map of the area around the village for the Elder(s) to identify
different gathering areas and traditional names. Label the areas identified on the map.
Note areas that have current names that differ from the traditional names. Label
areas with both the current and the traditional names.
8. Have a review and discussion with the class about what the Elder(s) shared and make a list on chart paper of the key points.
9. Provide each student with a regional map. Have the students record the information
on the plant gathering areas, as well as the traditional and the current names for them.
10. Have the older students write a short report in their learning logs on their time spent
with the Elder(s). The younger students can draw a picture in their learning logs about the Elder’s sharing with some key word labels.
11. Students keep all unit materials in their individual unit file. Activity 2 – Village Area Topography 1. Review the lesson text on the type of terrain around the village. On chart paper (or
blackboard or white board) list the key points about the Boreal forest areas. Allow the students to identify the main points:
Forestry name: Boreal forest; UK dialect: toch’o; Russian word: taiga Mix of forest types: Black spruce and White spruce, Balsam poplar (aka
cottonwood), Paper birch, aspen, and willows Bogs Meadows Marshes Lakes and rivers Other plant types:
o Shrubs: willow, Highbush cranberry, alder, rose, Labrador tea, and blueberry
15
o Ground Plants: mosses, lichens, grasses, sedges, and Lowbush cranberry
Other characteristics: cold weather, long winters, permafrost, forest fires, and warm summers.
2. Have the students record the key points of the Boreal forest in their learning logs.
(Note: With the younger students select the key vocabulary words from the discussion to copy in their learning logs).
3. Have the students make a poster about the Boreal Forest. Each student can make a poster, or the teacher can divide the class into small groups or work partners to make the posters together.
Poster must display words: “Boreal forest,”toch’o”, and “taiga.” Find pictures for the poster of various Boreal forest terrain characteristics
using the Internet or any teacher resources, pictures or magazines. The students may also draw pictures.
Have the older students label the pictures and the advanced students can represent each type of terrain with a short written description (like what is a meadow, bog, forest stand, marsh, etc.).
4. Provide the students with the topographic map of the vegetative types of the village
area and also the maps of the other village’s topography included in the unit materials. (Note: A village map of the other four villages described in the Lesson 1 materials can be obtained by contacting William Putnam at Tanana Chiefs Conference.)
Familiarize the students with the forestry terminology that is used on the map.
Discuss the different code descriptions and what they mean. A resource website for forestry terminology is: http://www.sfrc.ufl.edu/Extension/ssfor11.htm.
Examples of terminology definitions from the website:
Crown: the portion of an individual tree above the main stem, consisting of live branches and foliage.
Crown cover or crown closure: the percentage of a given ground area that is covered by the vertical projection of the crowns of trees.
Density: a measure used in plant and animal ecology to indicate the number of individuals of an organism within a given area.
Well stocked: the stand density at which trees are spaced widely enough to prevent competition, yet closely enough to fully use site resources.
Stand: a group of trees sufficiently uniform in species composition, size, age, structure, spatial arrangement, and condition to be distinguished from surrounding stands and managed as a single unit.

16
Stand density: a quantitative measure of how completely a stand of trees occupies a site-- "stocking."”
Practice reading the cover type maps as a class. Use the map key to identify what
the different areas of the map represent, and then, have the students practice with their partner, or in small group, to identify the various areas.
For Example, coded areas marked: BSD Black spruce dwarf stand CWP3 Cottonwood pole timber stand, medium stocked SS/HP1 White spruce saw timber mixed with hardwood pole timber stand, poorly stocked
5. Walking research of the area: Divide the class into small groups or work partners (at least four groups in all). Pair the groups with the Elders or the adult volunteers that are familiar with the cover types in the area around the village.
Send the groups and Elder/adult volunteers out with maps to find some of the
nearby areas marked on the maps. Send each group in different directions: north, east, south, and west. If you have more than four groups, then sections can be assigned.
Have each group observe the area for the vegetative cover types and
characteristics and then, compare them to the cover types on the map.
If available, take camera shots of the observation area.
Have the groups make notes on what they observe using the coding from the cover type map key.
6. Class Discussion: After the field trip, allow each group to share what they observed
as they walked their assigned area:
1) Were the areas easy to identify, based on the descriptions of the vegetation? 2) Was the area similar to what was on the map, or very different? 3) What kind of changes did the groups observe from the mapped area? 4) How had the areas changed and what could be the cause of the changes?
7. On the copy of the TCC Land Cover Types Map of the village area, use a different
color marker to write down any major changes that were observed in the area. 8. Have the students write about what they learned about the topography and vegetative
types in their learning logs. The younger students can make a drawing of the different areas around the village with some key label words.
17
Lesson Two –Berries (Jija) Materials for this teaching lesson were adapted from the following sources:
1. Stokes, Jeff W. 1985: “Natural Resource Utilization of Four Upper Kuskokwim Communities.” www.subsistence.adfg.state.ak.us/TechPap/tp086.pdf
2. Kari, Priscilla, R. comp, Dena’ina K’et’una – Tanaina Plantlore, (Adult Literacy
Laboratory, University of Alaska Anchorage, Anchorage, AK) 1977
3. Stanek, Sheryl and Butcher, Barbara, Collecting and Using Alaska’s Wild Berries and Other Wild Products, (Alaska Cooperative Extension, College of Rural Alaska-University of Alaska Fairbanks, Fairbanks, AK) 1998
4. Pratt, Verna E., Alaska’s Wild Berries and Berry-like Fruit, (Alaskakrafts, Inc.,
Anchorage, AK) 1995
5. Viereck, Eleanor G., Alaska’s Wilderness Medicines – Healthful Plants of the Far North, (Alaska Northwest Books, Portland, OR) 1987
Information:
“Among our people, berries are the most important edible wild plant product. Some years we pick many, some years not so many, depending on things like the temperature, rain and snowfall, and animals and birds eating them. Too little or too much rain in the spring can badly affect the berries. Also, late spring frosts, or lower than normal temperatures also affects the number and health of the berries. When there is a low berry year, black bears and birds also affect how many berries there are to pick.
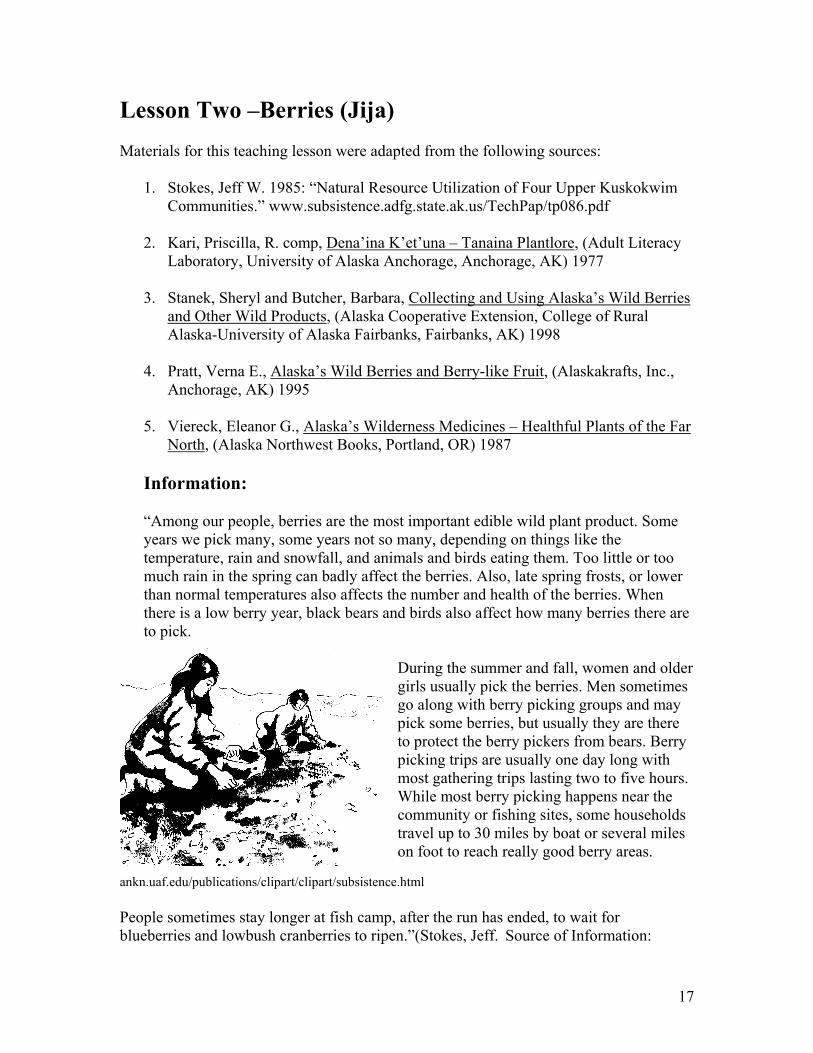
During the summer and fall, women and older girls usually pick the berries. Men sometimes go along with berry picking groups and may pick some berries, but usually they are there to protect the berry pickers from bears. Berry picking trips are usually one day long with most gathering trips lasting two to five hours. While most berry picking happens near the community or fishing sites, some households travel up to 30 miles by boat or several miles on foot to reach really good berry areas.
ankn.uaf.edu/publications/clipart/clipart/subsistence.html People sometimes stay longer at fish camp, after the run has ended, to wait for blueberries and lowbush cranberries to ripen.”(Stokes, Jeff. Source of Information:
18
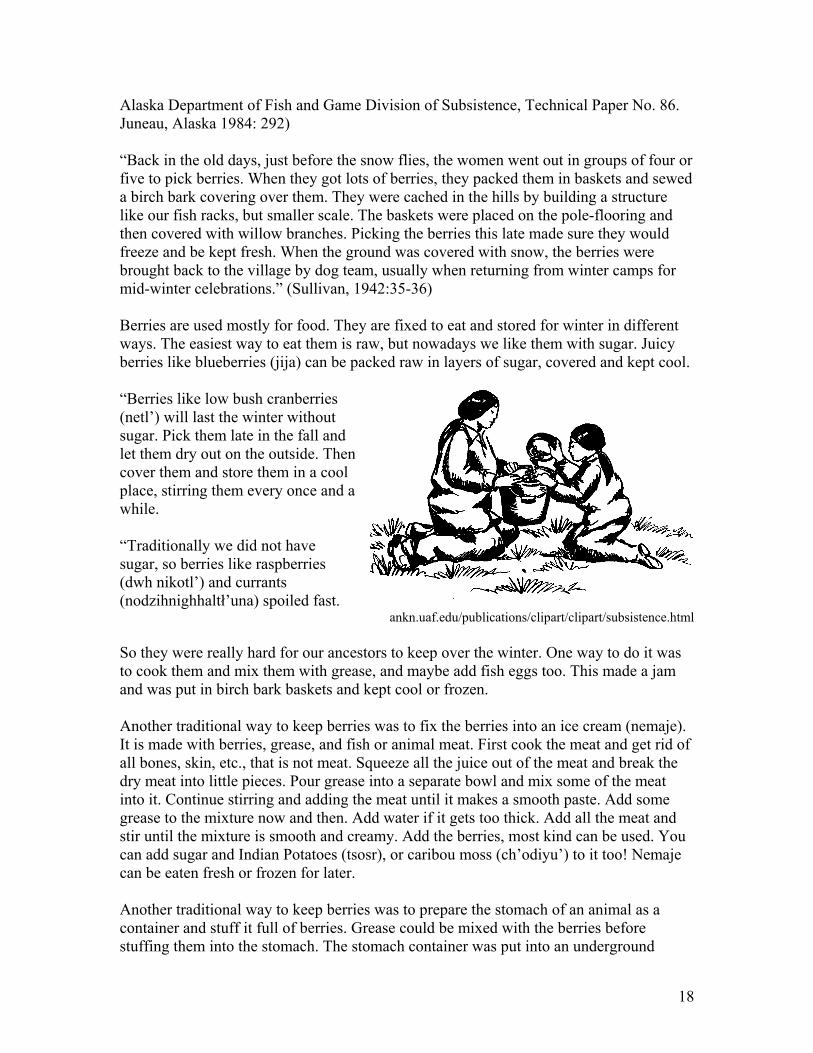
Alaska Department of Fish and Game Division of Subsistence, Technical Paper No. 86. Juneau, Alaska 1984: 292) “Back in the old days, just before the snow flies, the women went out in groups of four or five to pick berries. When they got lots of berries, they packed them in baskets and sewed a birch bark covering over them. They were cached in the hills by building a structure like our fish racks, but smaller scale. The baskets were placed on the pole-flooring and then covered with willow branches. Picking the berries this late made sure they would freeze and be kept fresh. When the ground was covered with snow, the berries were brought back to the village by dog team, usually when returning from winter camps for mid-winter celebrations.” (Sullivan, 1942:35-36) Berries are used mostly for food. They are fixed to eat and stored for winter in different ways. The easiest way to eat them is raw, but nowadays we like them with sugar. Juicy berries like blueberries (jija) can be packed raw in layers of sugar, covered and kept cool. “Berries like low bush cranberries (netl’) will last the winter without sugar. Pick them late in the fall and let them dry out on the outside. Then cover them and store them in a cool place, stirring them every once and a while. “Traditionally we did not have sugar, so berries like raspberries (dwh nikotl’) and currants (nodzihnighhaltł’una) spoiled fast.
ankn.uaf.edu/publications/clipart/clipart/subsistence.html So they were really hard for our ancestors to keep over the winter. One way to do it was to cook them and mix them with grease, and maybe add fish eggs too. This made a jam and was put in birch bark baskets and kept cool or frozen. Another traditional way to keep berries was to fix the berries into an ice cream (nemaje). It is made with berries, grease, and fish or animal meat. First cook the meat and get rid of all bones, skin, etc., that is not meat. Squeeze all the juice out of the meat and break the dry meat into little pieces. Pour grease into a separate bowl and mix some of the meat into it. Continue stirring and adding the meat until it makes a smooth paste. Add some grease to the mixture now and then. Add water if it gets too thick. Add all the meat and stir until the mixture is smooth and creamy. Add the berries, most kind can be used. You can add sugar and Indian Potatoes (tsosr), or caribou moss (ch’odiyu’) to it too! Nemaje can be eaten fresh or frozen for later. Another traditional way to keep berries was to prepare the stomach of an animal as a container and stuff it full of berries. Grease could be mixed with the berries before stuffing them into the stomach. The stomach container was put into an underground
19
cache to keep it cool, or they dug a hole in the bottom of a shallow part of a lake and buried it. They dug it back up just before the ice froze on the lake. By then the air temperature would be cold enough to keep the berries safe for the winter. They would keep all kinds of berries this way. Dry and seedy berries that don’t taste very good and are hard to eat, like bearberries (jezramoyanagha’), we picked them anyway. We always prepared for hard times by using everything that was there in order to live. We dried and cooked them with grease or mixed them with raw grease. We let the mixture harden. After it was hard we could slice it and eat it like a sandwich, or store it for the winter. Sometimes this kind of food saved our lives during times of starvation.”(Kari, 1977: 31-33) Today all berries can be frozen or made into jams. They are easy to keep over the winter now.
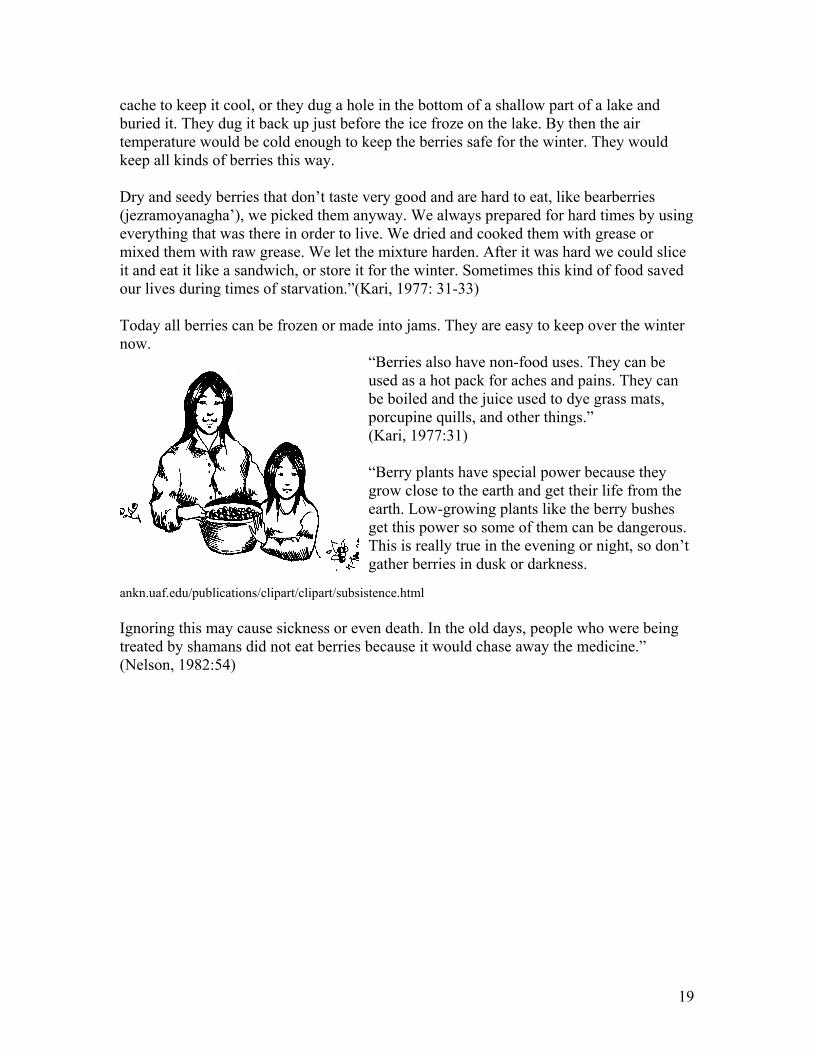
“Berries also have non-food uses. They can be used as a hot pack for aches and pains. They can be boiled and the juice used to dye grass mats, porcupine quills, and other things.” (Kari, 1977:31) “Berry plants have special power because they grow close to the earth and get their life from the earth. Low-growing plants like the berry bushes get this power so some of them can be dangerous. This is really true in the evening or night, so don’t gather berries in dusk or darkness.
ankn.uaf.edu/publications/clipart/clipart/subsistence.html Ignoring this may cause sickness or even death. In the old days, people who were being treated by shamans did not eat berries because it would chase away the medicine.” (Nelson, 1982:54)
20
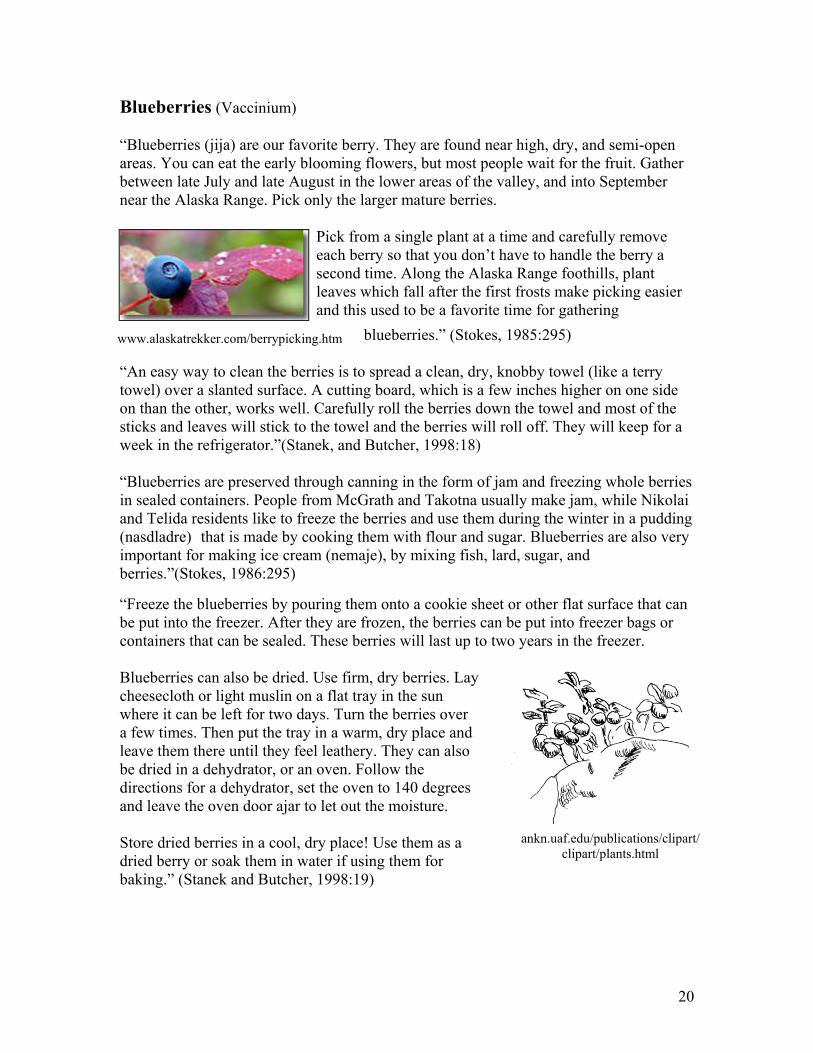
Blueberries (Vaccinium) “Blueberries (jija) are our favorite berry. They are found near high, dry, and semi-open areas. You can eat the early blooming flowers, but most people wait for the fruit. Gather between late July and late August in the lower areas of the valley, and into September near the Alaska Range. Pick only the larger mature berries.
Pick from a single plant at a time and carefully remove each berry so that you don’t have to handle the berry a second time. Along the Alaska Range foothills, plant leaves which fall after the first frosts make picking easier and this used to be a favorite time for gathering
blueberries.” (Stokes, 1985:295)
“An easy way to clean the berries is to spread a clean, dry, knobby towel (like a terry towel) over a slanted surface. A cutting board, which is a few inches higher on one side on than the other, works well. Carefully roll the berries down the towel and most of the sticks and leaves will stick to the towel and the berries will roll off. They will keep for a week in the refrigerator.”(Stanek, and Butcher, 1998:18) “Blueberries are preserved through canning in the form of jam and freezing whole berries in sealed containers. People from McGrath and Takotna usually make jam, while Nikolai and Telida residents like to freeze the berries and use them during the winter in a pudding (nasdladre) that is made by cooking them with flour and sugar. Blueberries are also very important for making ice cream (nemaje), by mixing fish, lard, sugar, and berries.”(Stokes, 1986:295)
“Freeze the blueberries by pouring them onto a cookie sheet or other flat surface that can be put into the freezer. After they are frozen, the berries can be put into freezer bags or containers that can be sealed. These berries will last up to two years in the freezer. Blueberries can also be dried. Use firm, dry berries. Lay cheesecloth or light muslin on a flat tray in the sun where it can be left for two days. Turn the berries over a few times. Then put the tray in a warm, dry place and leave them there until they feel leathery. They can also be dried in a dehydrator, or an oven. Follow the directions for a dehydrator, set the oven to 140 degrees and leave the oven door ajar to let out the moisture. Store dried berries in a cool, dry place! Use them as a dried berry or soak them in water if using them for baking.” (Stanek and Butcher, 1998:19)
www.alaskatrekker.com/berrypicking.htm
ankn.uaf.edu/publications/clipart/ clipart/plants.html
21
www.alaskatrekker.com/berrypicking.htm
“Blueberries are high in vitamin C, iron, and mineral salts. They help encourage the appetite of people who are recovering from illness or accidents. Gargle blueberry juice for sore throat and gums. Blueberry leaf tea (leaves are picked before the berries ripen) can be used to help stabilize blood sugar levels. Infusions of the leaves (they are antiseptic) can treat urinary problems. If you drink too much blueberry leaf tea it can cause you to be nauseated and vomit!”(Schofield, 1999:33)
“To get the juice from the berries, put 11 cups of blueberries and 1 cup of water into a pot. Smash the berries. Bring the mixture to a boil then turn it down to simmer for 10 minutes. Lay a jelly cloth or several layers of cheesecloth in a strainer and let the juice drain into a bowl. If you want clear juice don’t squeeze or press
the berries, just let them drain through the cloths. Juice can be frozen or canned.”(Stanek & Butcher, 1998: 19)
Bog Blueberry (Vaccinium uliginosum) Habitat – Bogs, woodlands, wet and dry tundra up into alpine. Form – Shrub – upright up to 2 feet, prostrate in alpine areas, thin branches. Leaves – Deciduous – oval, 5/8 to ¾ , alternate, turning orange, red, or purplish in the fall. Flowers – June – pinkish, small, opening with the leaves. Fruit – Mid July to early September – berry, dark blue with a lighter bloom, round to oval, juicy, tart, acidic. Uses – Raw, cooked, dried – jelly, jam, pies, desserts, breads, syrup, tea. There are two sub-species in Alaska, Vaccinium alpinum and Vaccinium micophyllum. A similar species is the dwarf blueberry, Vaccinium caespitsoum. There is also an Alaska Blueberry Vaccinium alaskensis.”(Pratt, 1995:60) Salmonberries (Rubus chamaemorus) “Salmonberries (nikotl'), also known in other parts of Alaska as cloudberries, are usually the first berry to ripen each summer. Pick between late June and the middle of July. Salmonberries are not as widely found as blueberries. They live in open wet areas, and most patches are fairly small. Because of the selective occurrence of this species, known sites are visited from year to year. Salmonberries are best picked when not quite ripe. The berry and surrounding sepals are often removed from the plant in one piece, and separated later, the berries are often left to ripen in an open container for several days.
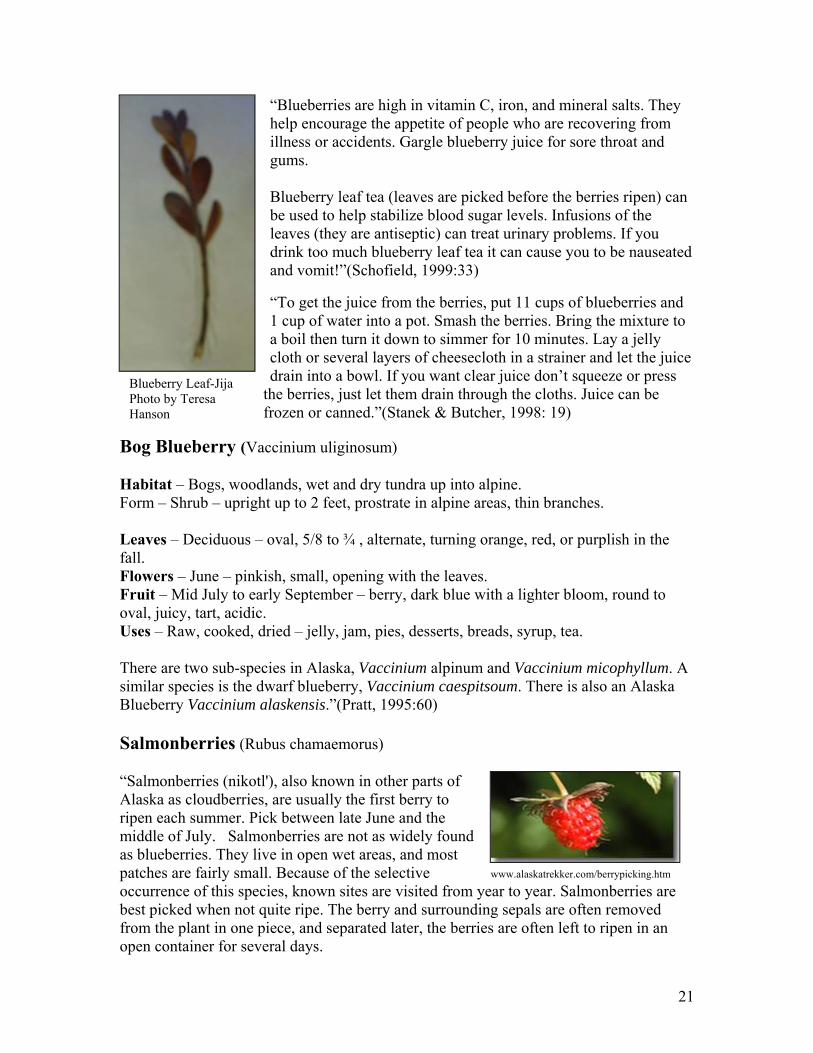
Blueberry Leaf-Jija Photo by Teresa Hanson
22
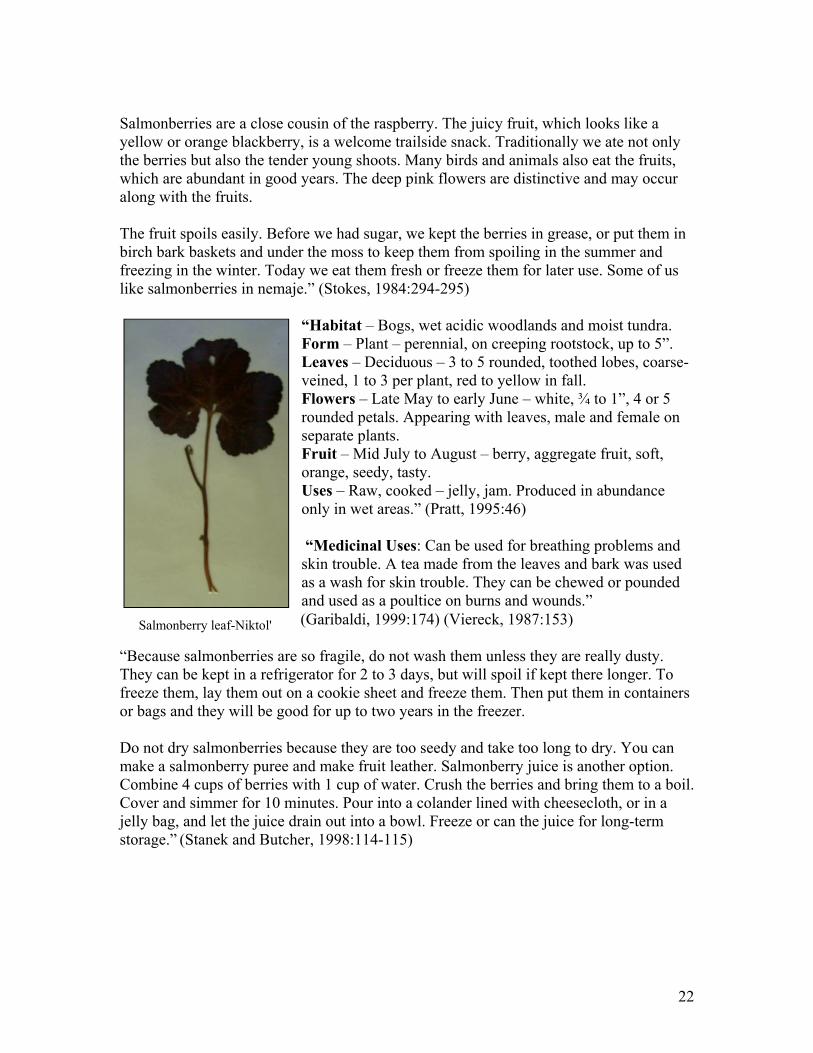
Salmonberry leaf-Niktol'
Salmonberries are a close cousin of the raspberry. The juicy fruit, which looks like a yellow or orange blackberry, is a welcome trailside snack. Traditionally we ate not only the berries but also the tender young shoots. Many birds and animals also eat the fruits, which are abundant in good years. The deep pink flowers are distinctive and may occur along with the fruits. The fruit spoils easily. Before we had sugar, we kept the berries in grease, or put them in birch bark baskets and under the moss to keep them from spoiling in the summer and freezing in the winter. Today we eat them fresh or freeze them for later use. Some of us like salmonberries in nemaje.” (Stokes, 1984:294-295)
“Habitat – Bogs, wet acidic woodlands and moist tundra. Form – Plant – perennial, on creeping rootstock, up to 5”. Leaves – Deciduous – 3 to 5 rounded, toothed lobes, coarse-veined, 1 to 3 per plant, red to yellow in fall. Flowers – Late May to early June – white, ¾ to 1”, 4 or 5 rounded petals. Appearing with leaves, male and female on separate plants. Fruit – Mid July to August – berry, aggregate fruit, soft, orange, seedy, tasty. Uses – Raw, cooked – jelly, jam. Produced in abundance only in wet areas.” (Pratt, 1995:46) “Medicinal Uses: Can be used for breathing problems and skin trouble. A tea made from the leaves and bark was used as a wash for skin trouble. They can be chewed or pounded and used as a poultice on burns and wounds.”
(Garibaldi, 1999:174) (Viereck, 1987:153)
“Because salmonberries are so fragile, do not wash them unless they are really dusty. They can be kept in a refrigerator for 2 to 3 days, but will spoil if kept there longer. To freeze them, lay them out on a cookie sheet and freeze them. Then put them in containers or bags and they will be good for up to two years in the freezer. Do not dry salmonberries because they are too seedy and take too long to dry. You can make a salmonberry puree and make fruit leather. Salmonberry juice is another option. Combine 4 cups of berries with 1 cup of water. Crush the berries and bring them to a boil. Cover and simmer for 10 minutes. Pour into a colander lined with cheesecloth, or in a jelly bag, and let the juice drain out into a bowl. Freeze or can the juice for long-term storage.” (Stanek and Butcher, 1998:114-115)
23
www.alaskatrekker.com/berrypicking.htm
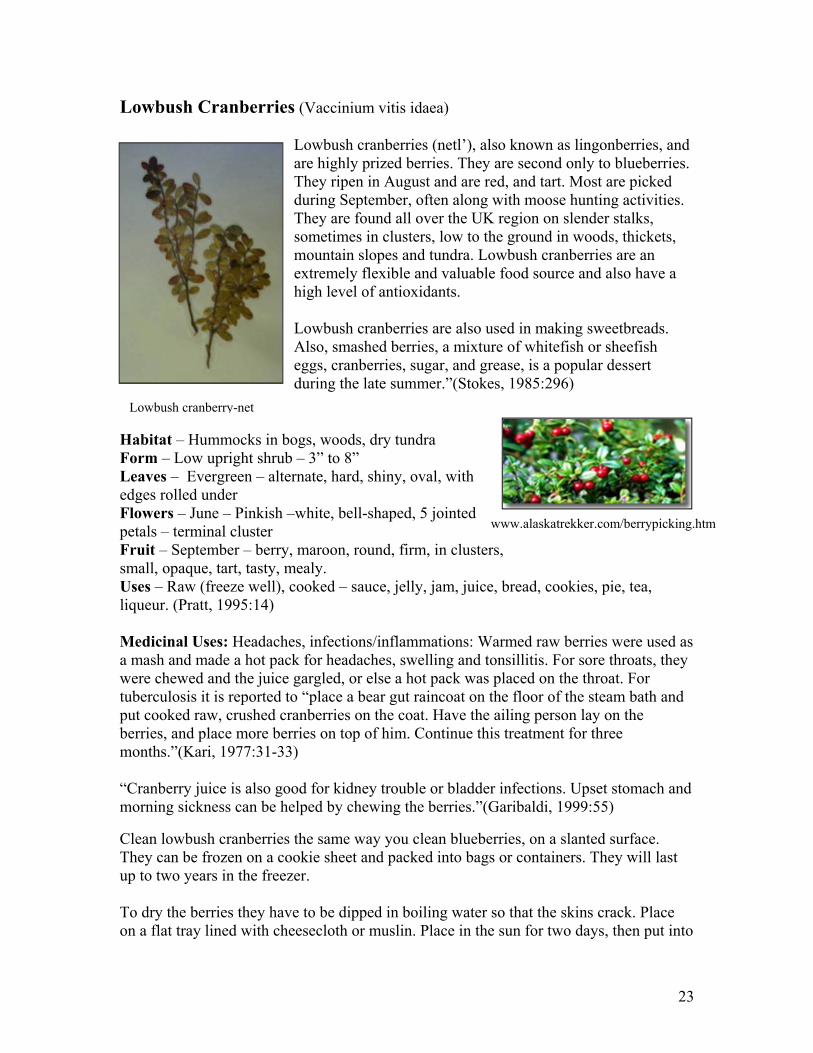
Lowbush Cranberries (Vaccinium vitis idaea)
Lowbush cranberries (netl’), also known as lingonberries, and are highly prized berries. They are second only to blueberries. They ripen in August and are red, and tart. Most are picked during September, often along with moose hunting activities. They are found all over the UK region on slender stalks, sometimes in clusters, low to the ground in woods, thickets, mountain slopes and tundra. Lowbush cranberries are an extremely flexible and valuable food source and also have a high level of antioxidants. Lowbush cranberries are also used in making sweetbreads. Also, smashed berries, a mixture of whitefish or sheefish eggs, cranberries, sugar, and grease, is a popular dessert during the late summer.”(Stokes, 1985:296)
Habitat – Hummocks in bogs, woods, dry tundra Form – Low upright shrub – 3” to 8” Leaves – Evergreen – alternate, hard, shiny, oval, with edges rolled under Flowers – June – Pinkish –white, bell-shaped, 5 jointed petals – terminal cluster Fruit – September – berry, maroon, round, firm, in clusters, small, opaque, tart, tasty, mealy. Uses – Raw (freeze well), cooked – sauce, jelly, jam, juice, bread, cookies, pie, tea, liqueur. (Pratt, 1995:14) Medicinal Uses: Headaches, infections/inflammations: Warmed raw berries were used as a mash and made a hot pack for headaches, swelling and tonsillitis. For sore throats, they were chewed and the juice gargled, or else a hot pack was placed on the throat. For tuberculosis it is reported to “place a bear gut raincoat on the floor of the steam bath and put cooked raw, crushed cranberries on the coat. Have the ailing person lay on the berries, and place more berries on top of him. Continue this treatment for three months.”(Kari, 1977:31-33) “Cranberry juice is also good for kidney trouble or bladder infections. Upset stomach and morning sickness can be helped by chewing the berries.”(Garibaldi, 1999:55)
Clean lowbush cranberries the same way you clean blueberries, on a slanted surface. They can be frozen on a cookie sheet and packed into bags or containers. They will last up to two years in the freezer. To dry the berries they have to be dipped in boiling water so that the skins crack. Place on a flat tray lined with cheesecloth or muslin. Place in the sun for two days, then put into
Lowbush cranberry-net
24
www.alaskatrekker.com/berrypicking.htm
a warm, dry place and leave them until they become leathery. Store the dried berries on a cool, dry place and use them like raisins. They can be soaked in water again and used for baking. To juice the berries, combine 4 cups of clean berries with 2 ½ cups water. Crush them and bring to a boil, then cover them and simmer them for 10 minutes. Then drain the juice like the other berries.” (Stanek and Bucher, 1998:79) There are countless recipe ideas that can be made with lowbush cranberries. (Or lingonberries!)
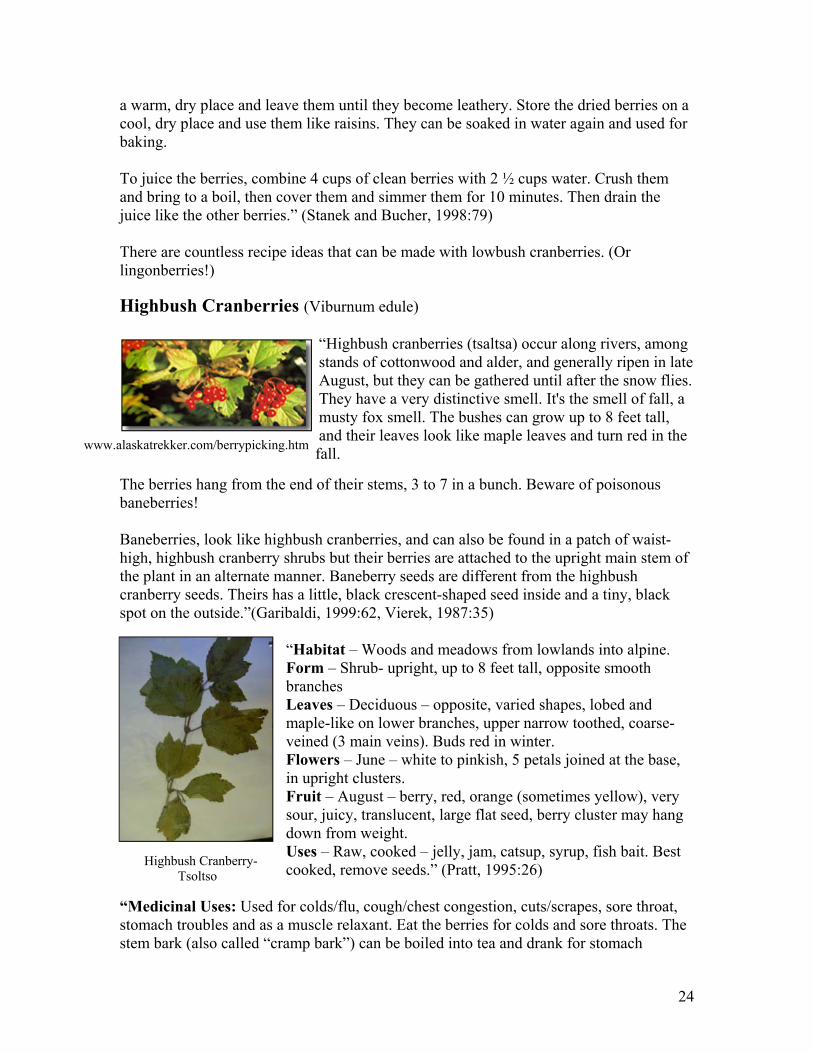
Highbush Cranberries (Viburnum edule)
“Highbush cranberries (tsaltsa) occur along rivers, among stands of cottonwood and alder, and generally ripen in late August, but they can be gathered until after the snow flies. They have a very distinctive smell. It's the smell of fall, a musty fox smell. The bushes can grow up to 8 feet tall, and their leaves look like maple leaves and turn red in the
fall.
The berries hang from the end of their stems, 3 to 7 in a bunch. Beware of poisonous baneberries! Baneberries, look like highbush cranberries, and can also be found in a patch of waist-high, highbush cranberry shrubs but their berries are attached to the upright main stem of the plant in an alternate manner. Baneberry seeds are different from the highbush cranberry seeds. Theirs has a little, black crescent-shaped seed inside and a tiny, black spot on the outside.”(Garibaldi, 1999:62, Vierek, 1987:35)
“Habitat – Woods and meadows from lowlands into alpine. Form – Shrub- upright, up to 8 feet tall, opposite smooth branches Leaves – Deciduous – opposite, varied shapes, lobed and maple-like on lower branches, upper narrow toothed, coarse-veined (3 main veins). Buds red in winter. Flowers – June – white to pinkish, 5 petals joined at the base, in upright clusters. Fruit – August – berry, red, orange (sometimes yellow), very sour, juicy, translucent, large flat seed, berry cluster may hang down from weight. Uses – Raw, cooked – jelly, jam, catsup, syrup, fish bait. Best cooked, remove seeds.” (Pratt, 1995:26)
“Medicinal Uses: Used for colds/flu, cough/chest congestion, cuts/scrapes, sore throat, stomach troubles and as a muscle relaxant. Eat the berries for colds and sore throats. The stem bark (also called “cramp bark”) can be boiled into tea and drank for stomach
Highbush Cranberry- Tsoltso
25
www.alaskatrekker.com/berrypicking.htm
troubles and menstrual cramps, and gargled for sore throats, colds and laryngitis. The branches make good steam bath switches.”(Garibaldi, 1999:57-58; Pratt, 1995:46:Viereck, 1987:35) Highbush cranberry flavor combines with other berries like raspberries, currants and rose hips and actually improves their flavors! Highbush cranberries are cleaned, stored, frozen and juiced like the other berries. For juice used 4 cups of berries with 1 cup of water. Follow usual procedures of the other berries. These berries do not dry because of their flavor and large, flat stone, abut they can be pureed and made into fruit leather.” (Stanek and Butcher, 1998:62-63)
Raspberries (Rubus idaeus)
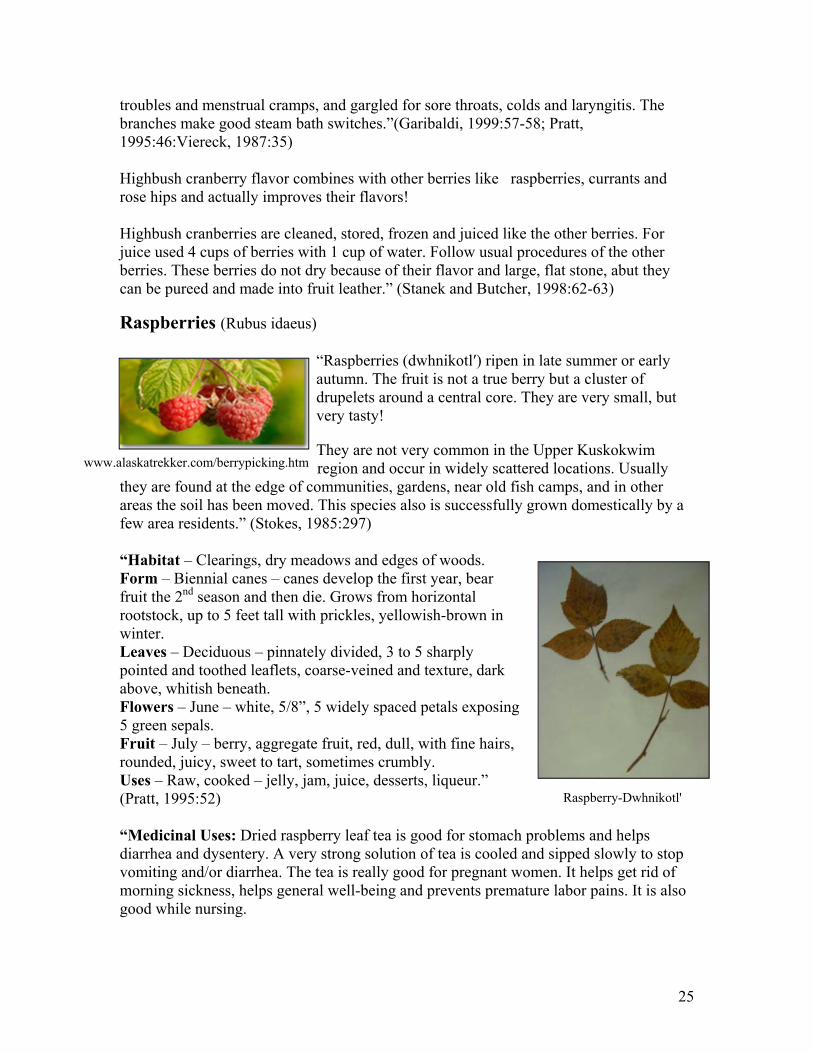
“Raspberries (dwhnikotl′) ripen in late summer or early autumn. The fruit is not a true berry but a cluster of drupelets around a central core. They are very small, but very tasty! They are not very common in the Upper Kuskokwim
region and occur in widely scattered locations. Usually they are found at the edge of communities, gardens, near old fish camps, and in other areas the soil has been moved. This species also is successfully grown domestically by a few area residents.” (Stokes, 1985:297) “Habitat – Clearings, dry meadows and edges of woods. Form – Biennial canes – canes develop the first year, bear fruit the 2nd season and then die. Grows from horizontal rootstock, up to 5 feet tall with prickles, yellowish-brown in winter. Leaves – Deciduous – pinnately divided, 3 to 5 sharply pointed and toothed leaflets, coarse-veined and texture, dark above, whitish beneath. Flowers – June – white, 5/8”, 5 widely spaced petals exposing 5 green sepals. Fruit – July – berry, aggregate fruit, red, dull, with fine hairs, rounded, juicy, sweet to tart, sometimes crumbly. Uses – Raw, cooked – jelly, jam, juice, desserts, liqueur.” (Pratt, 1995:52) “Medicinal Uses: Dried raspberry leaf tea is good for stomach problems and helps diarrhea and dysentery. A very strong solution of tea is cooled and sipped slowly to stop vomiting and/or diarrhea. The tea is really good for pregnant women. It helps get rid of morning sickness, helps general well-being and prevents premature labor pains. It is also good while nursing.
Raspberry-Dwhnikotl'
26
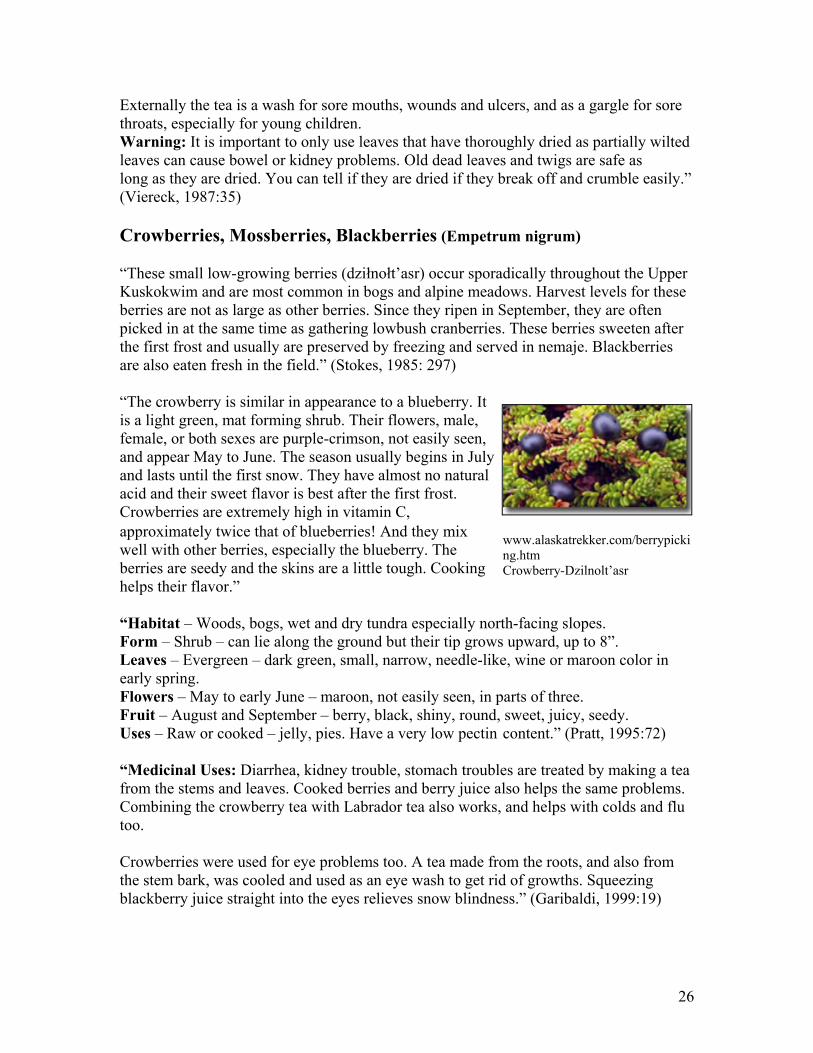
Externally the tea is a wash for sore mouths, wounds and ulcers, and as a gargle for sore throats, especially for young children. Warning: It is important to only use leaves that have thoroughly dried as partially wilted leaves can cause bowel or kidney problems. Old dead leaves and twigs are safe as long as they are dried. You can tell if they are dried if they break off and crumble easily.” (Viereck, 1987:35) Crowberries, Mossberries, Blackberries (Empetrum nigrum) “These small low-growing berries (dziłnołt’asr) occur sporadically throughout the Upper Kuskokwim and are most common in bogs and alpine meadows. Harvest levels for these berries are not as large as other berries. Since they ripen in September, they are often picked in at the same time as gathering lowbush cranberries. These berries sweeten after the first frost and usually are preserved by freezing and served in nemaje. Blackberries are also eaten fresh in the field.” (Stokes, 1985: 297) “The crowberry is similar in appearance to a blueberry. It is a light green, mat forming shrub. Their flowers, male, female, or both sexes are purple-crimson, not easily seen, and appear May to June. The season usually begins in July and lasts until the first snow. They have almost no natural acid and their sweet flavor is best after the first frost. Crowberries are extremely high in vitamin C, approximately twice that of blueberries! And they mix well with other berries, especially the blueberry. The berries are seedy and the skins are a little tough. Cooking helps their flavor.” “Habitat – Woods, bogs, wet and dry tundra especially north-facing slopes. Form – Shrub – can lie along the ground but their tip grows upward, up to 8”. Leaves – Evergreen – dark green, small, narrow, needle-like, wine or maroon color in early spring. Flowers – May to early June – maroon, not easily seen, in parts of three. Fruit – August and September – berry, black, shiny, round, sweet, juicy, seedy. Uses – Raw or cooked – jelly, pies. Have a very low pectin content.” (Pratt, 1995:72) “Medicinal Uses: Diarrhea, kidney trouble, stomach troubles are treated by making a tea from the stems and leaves. Cooked berries and berry juice also helps the same problems. Combining the crowberry tea with Labrador tea also works, and helps with colds and flu too. Crowberries were used for eye problems too. A tea made from the roots, and also from the stem bark, was cooled and used as an eye wash to get rid of growths. Squeezing blackberry juice straight into the eyes relieves snow blindness.” (Garibaldi, 1999:19)
www.alaskatrekker.com/berrypicking.htm Crowberry-Dzilnolt’asr
27
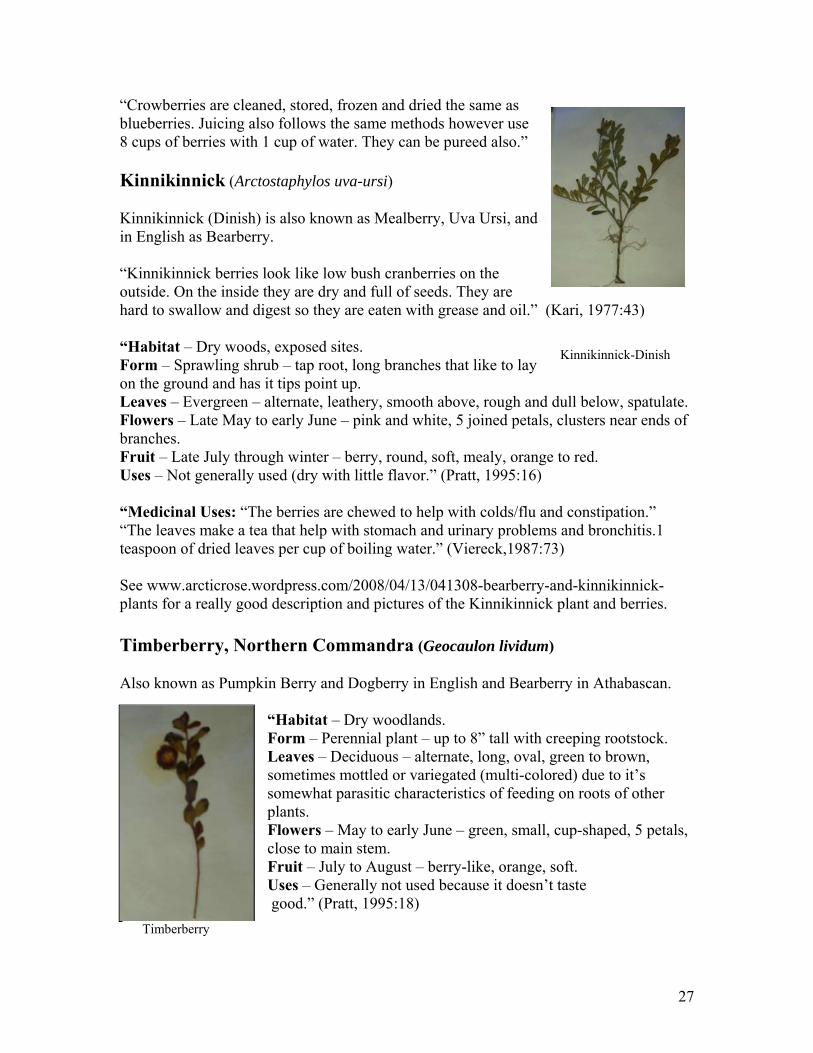
“Crowberries are cleaned, stored, frozen and dried the same as blueberries. Juicing also follows the same methods however use 8 cups of berries with 1 cup of water. They can be pureed also.” Kinnikinnick (Arctostaphylos uva-ursi) Kinnikinnick (Dinish) is also known as Mealberry, Uva Ursi, and in English as Bearberry. “Kinnikinnick berries look like low bush cranberries on the outside. On the inside they are dry and full of seeds. They are hard to swallow and digest so they are eaten with grease and oil.” (Kari, 1977:43) “Habitat – Dry woods, exposed sites. Form – Sprawling shrub – tap root, long branches that like to lay on the ground and has it tips point up. Leaves – Evergreen – alternate, leathery, smooth above, rough and dull below, spatulate. Flowers – Late May to early June – pink and white, 5 joined petals, clusters near ends of branches. Fruit – Late July through winter – berry, round, soft, mealy, orange to red. Uses – Not generally used (dry with little flavor.” (Pratt, 1995:16) “Medicinal Uses: “The berries are chewed to help with colds/flu and constipation.” “The leaves make a tea that help with stomach and urinary problems and bronchitis.1 teaspoon of dried leaves per cup of boiling water.” (Viereck,1987:73) See www.arcticrose.wordpress.com/2008/04/13/041308-bearberry-and-kinnikinnick-plants for a really good description and pictures of the Kinnikinnick plant and berries. Timberberry, Northern Commandra (Geocaulon lividum) Also known as Pumpkin Berry and Dogberry in English and Bearberry in Athabascan.
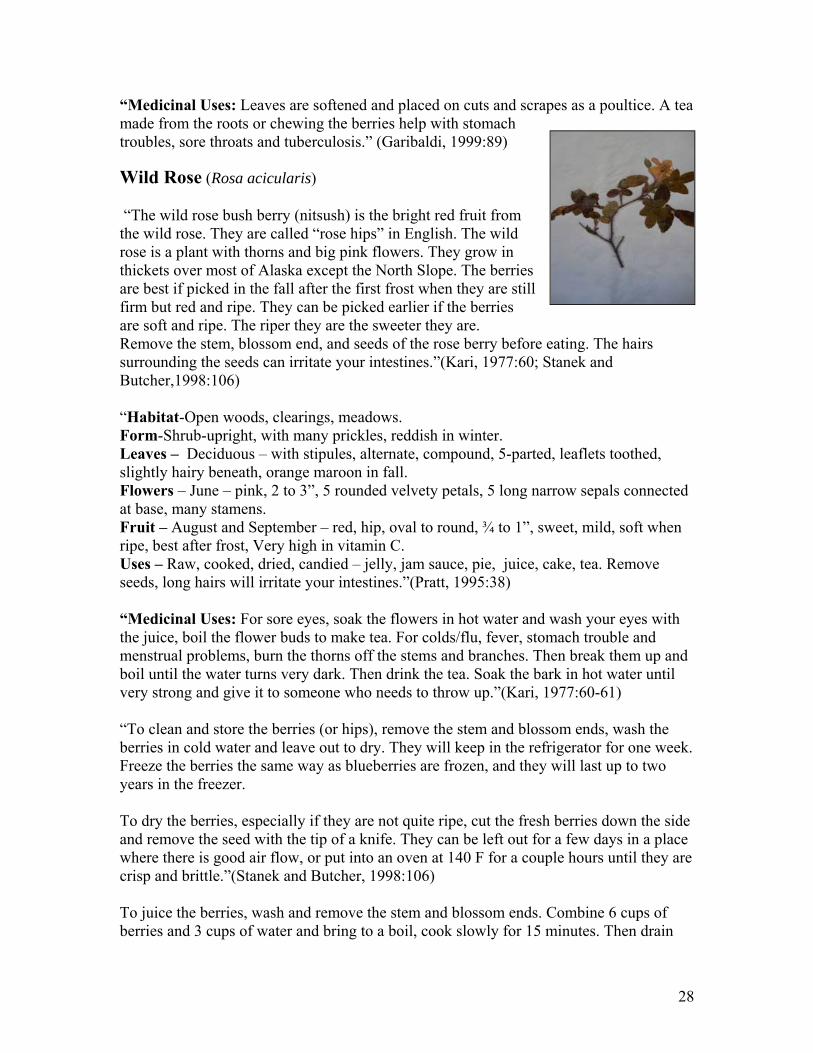
“Habitat – Dry woodlands. Form – Perennial plant – up to 8” tall with creeping rootstock. Leaves – Deciduous – alternate, long, oval, green to brown, sometimes mottled or variegated (multi-colored) due to it’s somewhat parasitic characteristics of feeding on roots of other plants. Flowers – May to early June – green, small, cup-shaped, 5 petals, close to main stem. Fruit – July to August – berry-like, orange, soft. Uses – Generally not used because it doesn’t taste good.” (Pratt, 1995:18)
Timberberry
Kinnikinnick-Dinish
28
“Medicinal Uses: Leaves are softened and placed on cuts and scrapes as a poultice. A tea made from the roots or chewing the berries help with stomach troubles, sore throats and tuberculosis.” (Garibaldi, 1999:89) Wild Rose (Rosa acicularis)
“The wild rose bush berry (nitsush) is the bright red fruit from the wild rose. They are called “rose hips” in English. The wild rose is a plant with thorns and big pink flowers. They grow in thickets over most of Alaska except the North Slope. The berries are best if picked in the fall after the first frost when they are still firm but red and ripe. They can be picked earlier if the berries are soft and ripe. The riper they are the sweeter they are. Remove the stem, blossom end, and seeds of the rose berry before eating. The hairs surrounding the seeds can irritate your intestines.”(Kari, 1977:60; Stanek and Butcher,1998:106) “Habitat-Open woods, clearings, meadows. Form-Shrub-upright, with many prickles, reddish in winter. Leaves – Deciduous – with stipules, alternate, compound, 5-parted, leaflets toothed, slightly hairy beneath, orange maroon in fall. Flowers – June – pink, 2 to 3”, 5 rounded velvety petals, 5 long narrow sepals connected at base, many stamens. Fruit – August and September – red, hip, oval to round, ¾ to 1”, sweet, mild, soft when ripe, best after frost, Very high in vitamin C. Uses – Raw, cooked, dried, candied – jelly, jam sauce, pie, juice, cake, tea. Remove seeds, long hairs will irritate your intestines.”(Pratt, 1995:38) “Medicinal Uses: For sore eyes, soak the flowers in hot water and wash your eyes with the juice, boil the flower buds to make tea. For colds/flu, fever, stomach trouble and menstrual problems, burn the thorns off the stems and branches. Then break them up and boil until the water turns very dark. Then drink the tea. Soak the bark in hot water until very strong and give it to someone who needs to throw up.”(Kari, 1977:60-61) “To clean and store the berries (or hips), remove the stem and blossom ends, wash the berries in cold water and leave out to dry. They will keep in the refrigerator for one week. Freeze the berries the same way as blueberries are frozen, and they will last up to two years in the freezer. To dry the berries, especially if they are not quite ripe, cut the fresh berries down the side and remove the seed with the tip of a knife. They can be left out for a few days in a place where there is good air flow, or put into an oven at 140 F for a couple hours until they are crisp and brittle.”(Stanek and Butcher, 1998:106) To juice the berries, wash and remove the stem and blossom ends. Combine 6 cups of berries and 3 cups of water and bring to a boil, cook slowly for 15 minutes. Then drain
29
them the same way you do the other berries.” Sources of Information: Alaska Department of Fish and Game (Stokes, 1984:106)
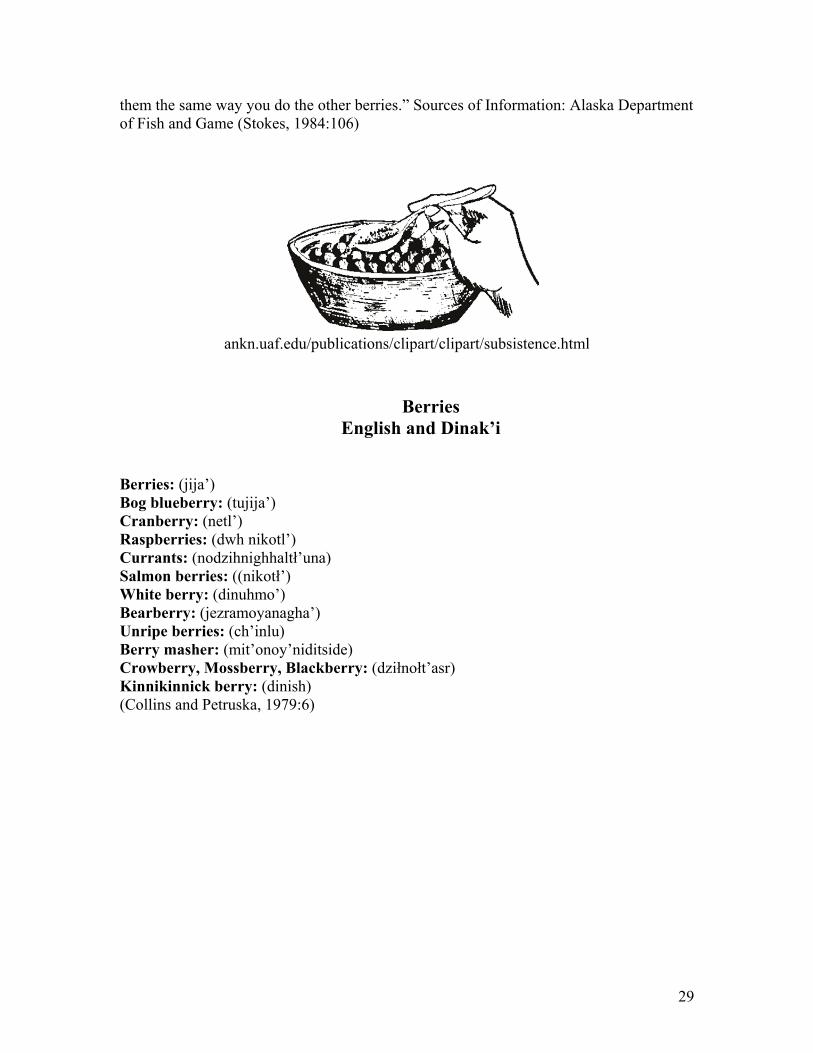
ankn.uaf.edu/publications/clipart/clipart/subsistence.html
Berries
English and Dinak’i
Berries: (jija’) Bog blueberry: (tujija’) Cranberry: (netl’) Raspberries: (dwh nikotl’) Currants: (nodzihnighhaltł’una) Salmon berries: ((nikotł’) White berry: (dinuhmo’) Bearberry: (jezramoyanagha’) Unripe berries: (ch’inlu) Berry masher: (mit’onoy’niditside) Crowberry, Mossberry, Blackberry: (dziłnołt’asr) Kinnikinnick berry: (dinish) (Collins and Petruska, 1979:6)
30
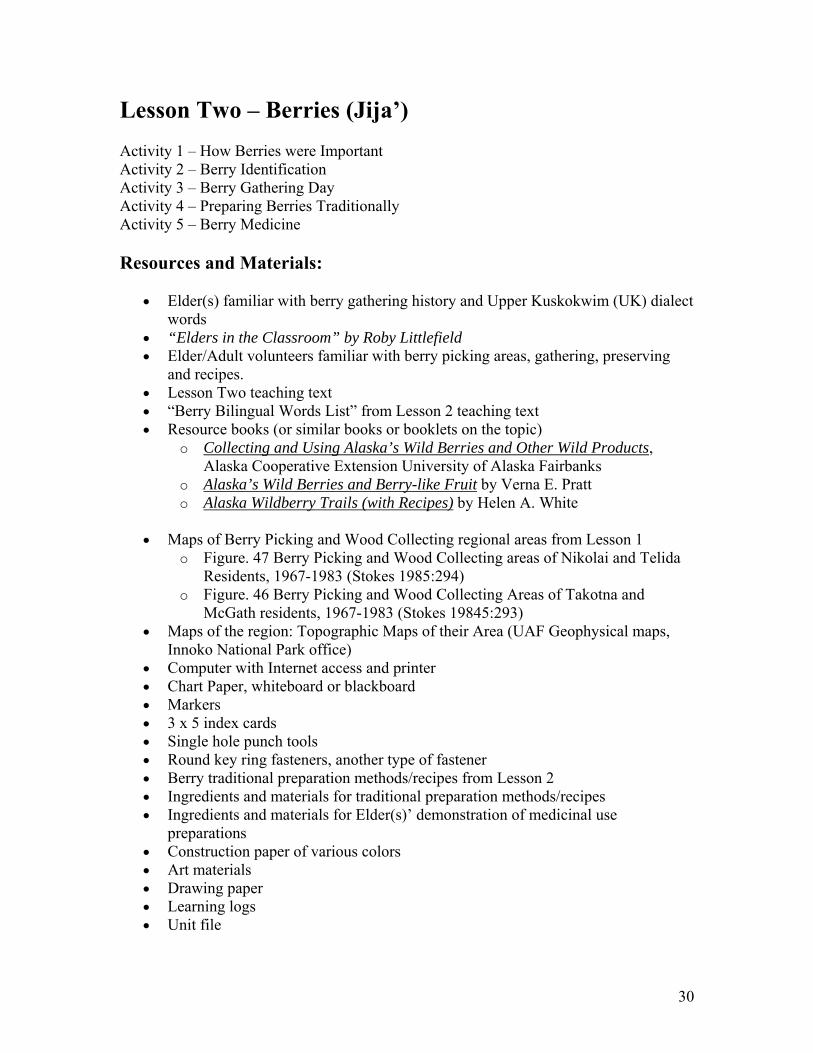
Lesson Two – Berries (Jija’) Activity 1 – How Berries were Important Activity 2 – Berry Identification Activity 3 – Berry Gathering Day Activity 4 – Preparing Berries Traditionally Activity 5 – Berry Medicine Resources and Materials:
Elder(s) familiar with berry gathering history and Upper Kuskokwim (UK) dialect words
“Elders in the Classroom” by Roby Littlefield Elder/Adult volunteers familiar with berry picking areas, gathering, preserving
and recipes. Lesson Two teaching text “Berry Bilingual Words List” from Lesson 2 teaching text Resource books (or similar books or booklets on the topic)
o Collecting and Using Alaska’s Wild Berries and Other Wild Products, Alaska Cooperative Extension University of Alaska Fairbanks
o Alaska’s Wild Berries and Berry-like Fruit by Verna E. Pratt o Alaska Wildberry Trails (with Recipes) by Helen A. White
Maps of Berry Picking and Wood Collecting regional areas from Lesson 1
o Figure. 47 Berry Picking and Wood Collecting areas of Nikolai and Telida Residents, 1967-1983 (Stokes 1985:294)
o Figure. 46 Berry Picking and Wood Collecting Areas of Takotna and McGath residents, 1967-1983 (Stokes 19845:293)
Maps of the region: Topographic Maps of their Area (UAF Geophysical maps, Innoko National Park office)
Computer with Internet access and printer Chart Paper, whiteboard or blackboard Markers 3 x 5 index cards Single hole punch tools Round key ring fasteners, another type of fastener Berry traditional preparation methods/recipes from Lesson 2 Ingredients and materials for traditional preparation methods/recipes Ingredients and materials for Elder(s)’ demonstration of medicinal use
preparations Construction paper of various colors Art materials Drawing paper Learning logs Unit file
31
Miscellaneous pictures of different berries on berry list from the Lesson 2 text, Internet, and other resources
Berry gathering containers, some traditional containers, if available Camera/audio/visual equipment as appropriate
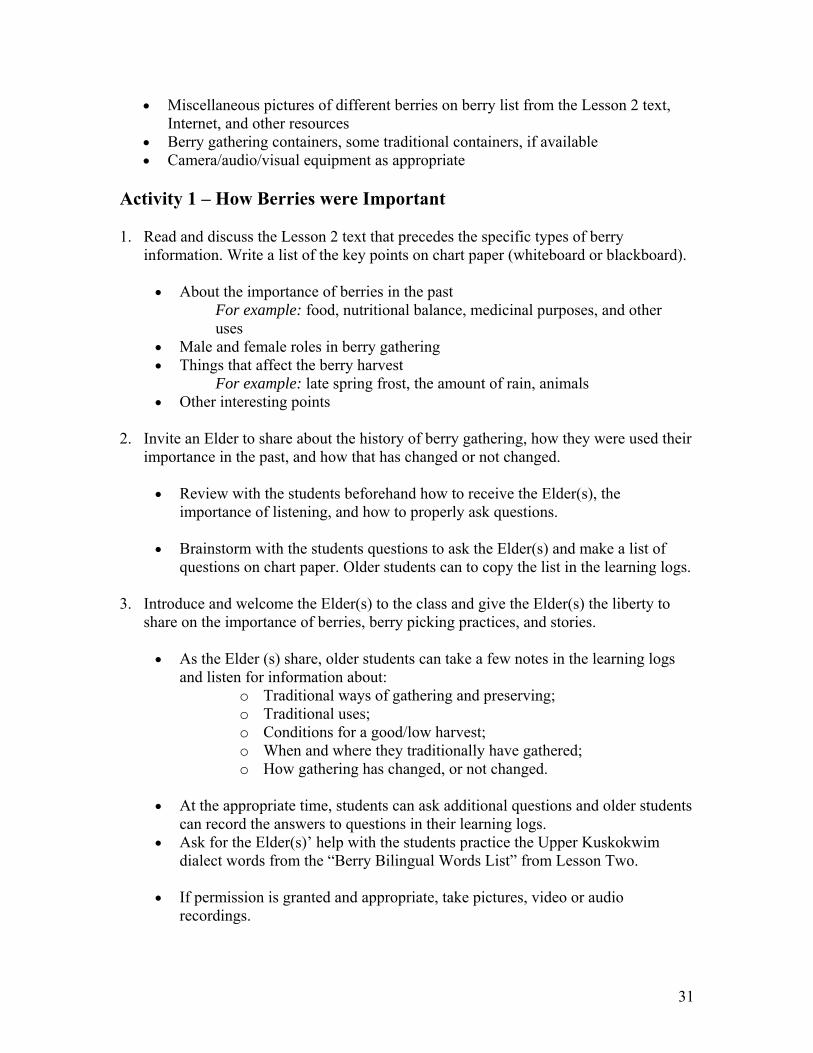
Activity 1 – How Berries were Important 1. Read and discuss the Lesson 2 text that precedes the specific types of berry
information. Write a list of the key points on chart paper (whiteboard or blackboard).
About the importance of berries in the past For example: food, nutritional balance, medicinal purposes, and other uses
Male and female roles in berry gathering Things that affect the berry harvest
For example: late spring frost, the amount of rain, animals Other interesting points
2. Invite an Elder to share about the history of berry gathering, how they were used their
importance in the past, and how that has changed or not changed. Review with the students beforehand how to receive the Elder(s), the
importance of listening, and how to properly ask questions. Brainstorm with the students questions to ask the Elder(s) and make a list of
questions on chart paper. Older students can to copy the list in the learning logs.
3. Introduce and welcome the Elder(s) to the class and give the Elder(s) the liberty to share on the importance of berries, berry picking practices, and stories.
As the Elder (s) share, older students can take a few notes in the learning logs
and listen for information about: o Traditional ways of gathering and preserving; o Traditional uses; o Conditions for a good/low harvest; o When and where they traditionally have gathered; o How gathering has changed, or not changed.
At the appropriate time, students can ask additional questions and older students
can record the answers to questions in their learning logs. Ask for the Elder(s)’ help with the students practice the Upper Kuskokwim
dialect words from the “Berry Bilingual Words List” from Lesson Two. If permission is granted and appropriate, take pictures, video or audio
recordings.
32
4. Provide a regional map of the area around the village for the Elder(s) to identify different berry gathering areas and the traditional names for the areas.
Label the berry areas identified on the map.
Note areas that have current names that differ from the traditional names. Label
the areas with both the current and the traditional names. 5. Have a review and discussion with the class about what the Elder(s) shared and make
a list on chart paper of key points. 6. Provide each student with a regional map. Have students record information on berry
gathering areas and traditional names and current names of gathering areas.
7. Have the older students write a short report in their learning logs on the time with the Elder(s). Younger students can draw a picture in their learning logs about the Elder(s)’sharing with some key label words.
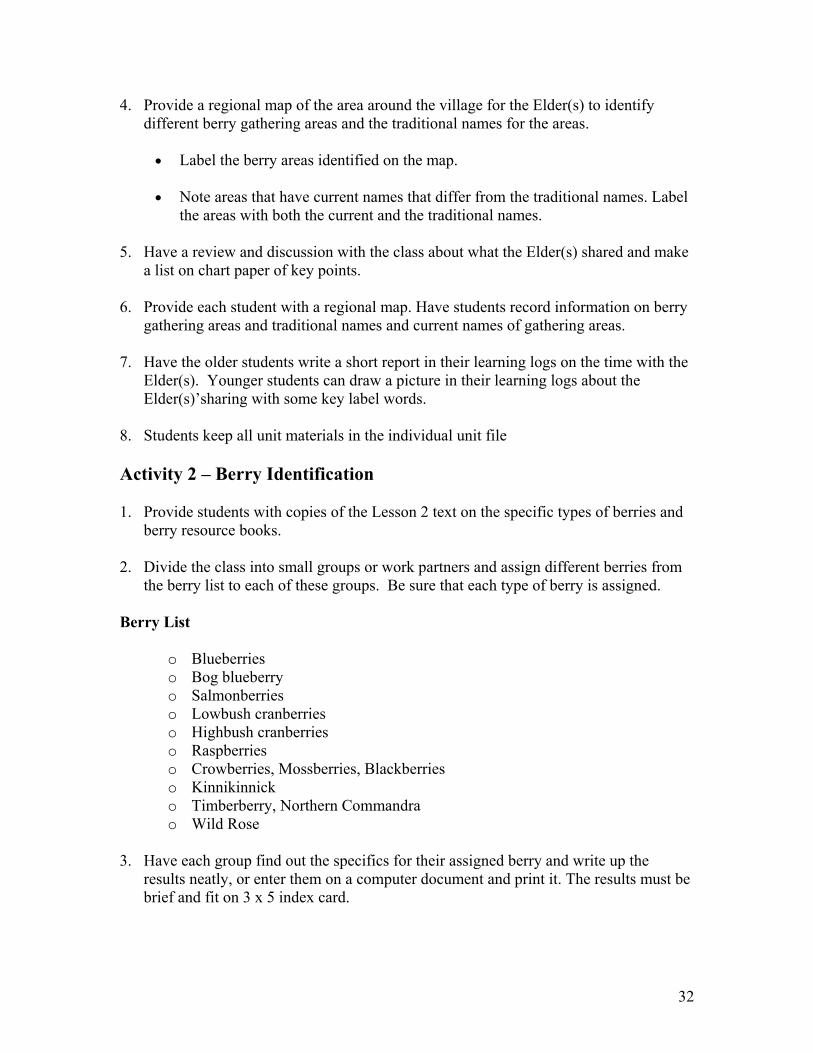
8. Students keep all unit materials in the individual unit file Activity 2 – Berry Identification 1. Provide students with copies of the Lesson 2 text on the specific types of berries and
berry resource books. 2. Divide the class into small groups or work partners and assign different berries from
the berry list to each of these groups. Be sure that each type of berry is assigned. Berry List
o Blueberries o Bog blueberry o Salmonberries o Lowbush cranberries o Highbush cranberries o Raspberries o Crowberries, Mossberries, Blackberries o Kinnikinnick o Timberberry, Northern Commandra o Wild Rose
3. Have each group find out the specifics for their assigned berry and write up the results neatly, or enter them on a computer document and print it. The results must be brief and fit on 3 x 5 index card.

33
Berry Information Format:
o Name: (Common) (UK dialect) (Scientific) (Other Names) o How to identify: o Where to find: o When to gather: o How to gather: o How to preserve:
(Note: The teacher can make a sized form on the computer to use with it, or the students may draw a 3 inch by 5 inch box to write the answer in). 4. Gather the completed information from each group and check the information for
accuracy. Make photocopies of the information for each set of berries for each student.
(Note: Return any set of incomplete or incorrect information to group for completion or correction) 5. Give each student photocopies of all the sets of berry information. Students will cut
and paste the information onto 3 x 5 index cards. Use a hole punch and punch holes in each index card and then fasten the cards together.
6. Have the students find pictures for each berry on the berry list from the text, Internet,
and other resources. Pictures must be small enough to fit on the blank side of 3 x 5 index card. Print, photocopy, cut out or trace the pictures; Paste the appropriate berry picture to the opposite side of the berry information
card; Have the cards checked by the other students or teacher to make sure the pictures
are on the appropriate cards. 7. The students may return to their small groups and practice identifying berries with the
flip books; looking at the pictures and naming the berries.

34
Activity 3 – Berry Gathering Day Plan a day for berry gathering! 1. Divide the class into small groups for berry gathering (at least four groups but larger
classes may have more). Each group will be assigned one of the four target berries as their primary berry to gather:
o Blueberry o Highbush or Lowbush Cranberry o Bearberry o Rasberry or Currents
2. Find an Adult volunteer for each group that is familiar with the area berry locations,
berry identification, and gathering:
Have an Adult volunteer scout out a good area for the group’s target berry; Have preference for locations within short walking distance of the village; If a good location is further that walking distance, consider how to transport the
group; The Adult volunteer will present the planned location for berry gathering to the
teacher. 3. Meet with the Adult volunteers and pick the date for the berry picking.
If transportation is needed, arrange for it. Obtain the appropriate permission slips for the students to participate in the
gathering activity. 4. On Berry Picking Day, focus on the target berry.
Each student must have a small container for berry picking; Adult volunteer will have a big container for the target berry; Review the information from Activity 2 on target berry to prepare for gathering; The Adult volunteer will escort students to planned area to pick the target berry; The students will begin to gather target berries with instruction and assistance of
the Adult volunteer; The students will combine the berries that they have gathered into the big
container until there is enough for the traditional preservation method or recipe. 5. Remember the gathering rules from Lesson One and the time that the Elder(s) spent
sharing with the class.
When collecting plants: 1) Don’t pick out an area; take only the plants that you will need; 2) Do not take or destroy the whole plant if you do not need all of it.
35
Traditional ways to respect the plant: 1) Talking to the plant; 2) Explain what you are using the plant for; 3) Leaving something after disturbing it; 4) Praying.
Practice some creative ways for honoring the traditional ways: Talking
o Introduce yourself and thank the plant for its berries; o Share traditional stories; o Share about other berry picking experiences. Explaining o Share how important the berries have been to the people; o Share how these berries are to be used to teach traditional ways; o Recall different uses for berries. Sounds keep animals away, LIKE BEARS! o Wear bear bells or other rhythmic noise makers like shaker bracelets. o Make up rhythmic movements and sounds for moving about when
picking berries (some of traditional dances are from the movements of berry picking.)
o Make up a group berry picking song or chant. Sing or chant things to do with the berries. Include some UK dialect words.
o The Adult volunteer can teach the group a traditional song or chant.
6. Extra Berry Picking Day Activities (after the target berry is gathered) are listed below.
Hunting for other berries using the berry identification guide and the group find
checklist: o Students can try to find other berries from the berry list; o When a student finds another berry from the list, they confirm it with
the Adult volunteer; o The Adult volunteer should then check the berry off the group berry
find list.
Personal student berry gathering; o Students can find berries for their personal containers o The students may pick a personal target berry or mix berries.
7. Plan for the Berry Day Wrap-Up
The groups return to the classroom and store the target berry for use in Activity 3; Compare the group berry find checklists to see which group found the most types of berries;
Students may bag up the personal berries to take home;
36
Have the groups share the rhythmic movement and the sounds that they used; Have the groups share the songs and chants they made up or learned.
8. Have the students write about the Berry Picking Day in their learning logs. The
younger students can draw pictures with the key word labels. Activity 4 – Preparing Berries Traditionally 1. Invite an Elder/Adult volunteer that is familiar with the traditional preparations to
help the students with their selected method/recipe for the berry project. Alternatively, an Elder/Adult volunteer, or even the students, may suggest a different traditional method/recipe and provide the instructions and ingredient/materials list for it. Provide the selected traditional preparation method/recipe for the Elder(s) to
review, or, the Elder/Adult Volunteer will provide an alternative method/recipe. (Note: An Elder/Volunteer can explain the method/recipe and the teacher can transcribe the instructions for a written record.)
The Elder/Adult volunteer will interpret the selected methods/recipes that do not
have clear enough specifics to successfully complete them.
The teacher will work with the Elder/Adult volunteer to gather the ingredients, tools, and materials needed for the method/recipe.
2. Each gathering group will work with an Elder/Adult volunteer to prepare the target
berries that were gathered. If permission is granted and appropriate, take pictures, video or an audio recording of each group activity.
Blueberry Group Recipe: Blueberry Juice Ingredients and materials:
o 11 cups of blueberries o 1 cup of water o Pot that can contain the ingredients listed above o Stove or hot plate o Large bowl o Large strainer o Berry smashing tool o Jelly cloth or layers of cheesecloth o Pitcher o Refrigerator o Cups
37
Instructions:
To get the juice out of the berries, put 11 cups of blueberries and 1 cup of water into a pot. Smash the berries. Bring the mixture to a boil then bring it down to a simmer for 10 minutes. Lay a jelly cloth or several layers of cheesecloth in a strainer and strain the mixture, letting the juice drain into a bowl. If clear juice is desire, then do not squeeze or press the berries. Simply allow them to drain through the cloths without added pressure.
Procedure:
1. Gather the ingredients and the materials. 2. Observe and follow the Elder/Adult volunteer’s instructions. Every student
will get an opportunity to assist in the preparation. 3. Pour the prepared juice into the pitcher and chill in the refrigerator. 4. Pour the chilled juice in the cups for the class to taste.
Bearberry Group Traditional method:
Dry and seedy berries don’t taste very good and are hard to eat. We dried and cooked them with grease. Then, we let the mixture harden. After it was hardened, we could slice it and eat it like a sandwich, or store it for the winter. Sometimes, this kind of food saved our lives during times of starvation.
Elder Interpretation: This traditional method needs some interpretation:
1. How to dry the berries; 2. What kind of grease was used and how to obtain it; 3. Amount of grease per berries; 4. Method of cooking and length of time to cook; 5. Method of hardening.
Ingredients and Materials:
Bearberries Grease Cooking pot Stove or hot plate Drying screen or rack Cookie sheet, tray, or large plate Serving plate Cutting knife
38
Procedure:
1. Gather the ingredients and the materials. 2. Observe and follow the Elder/Adult volunteer’s instructions. Every student
will get an opportunity to assist in the preparation. 3. Dry the berries on the drying screen or a rack. 4. Cook the dry berries with grease. 5. Spread the cooked mix on the cookie sheet, tray or large plate. 6. Allow the mixture to harden. 7. Cut into slices and place on a serving plate. 8. Allow the class to taste the slices.
Raspberry Group Method: Raspberries (dwh nikotl’) and currants (nodzihnighhaltł’una) spoiled quickly. One way that we preserved them was by cooking and mixing them with grease, and possibly adding fish egg, for a jam. Afterwards, we put them in birch bark baskets and kept them cool. Elder interpretation: This traditional method needs some interpretation:
o Method of cooking berries and the length of time; o What kind of grease and how to obtain it; o Amount of grease per berries; o Amount of fish eggs to add; o Whether birch basket cooling is necessary, or if another container be used.
Ingredients and materials:
Raspberries, currants, or similar berries Grease Fish eggs Large cooking spoon Cooking pot Stove or hot plate Birch basket (or other container if appropriate) Small bowls or cups Spoons
39
Procedure:
Cook the berries in the pot. Stir in the grease. Stir in the fish eggs. Pour the mixture into the birch bark basket (or other container, if appropriate). Allow to completely cool. Place spoon portions into small bowls or cups. Serve to the students.
Cranberry Group
Recipe/method:
Another traditional way that we kept the berries was to fix the berries into an ice cream (nemaje). The nemaje is made with berries, grease, and fish or animal meat. First, cook the meat and get rid of all the bones, skin, and all that is not meat. Then, squeeze all the juice out of the meat and break the dry meat into little pieces. Pour the grease into a separate bowl and mix some of the meat into it. Continue to stir and add the meat until it makes a smooth paste. Add some grease to the mixture every now and then. Add water if the mixture gets too thick. Then add all of the meat and stir until the mixture is smooth and creamy, Add the berries (most kind can be used.) Sugar and Indian Potatoes (tsosr), or caribou moss (ch’odiyu’)can be added to it also! Nemaje can be eaten fresh or frozen for later. From Lesson Two text (Kari 1977:32) Elder Interpretation
Can the meat/or fish preparation be from canned boneless/skinless meat or fish or is it important to prepare it fresh as the recipe directs?
Best ingredient for a particular kind of fish or meat; Amount and type of grease in proportion to the berries; Amount of fish/meat in proportion to the berries; Any suggested preparation of the berries; Whether sugar is recommended and how much? (non-traditional ingredient); What are the effects of the Indian potatoes? Is this ingredient recommended if
available? What are the preparations for the best mix? Amount needed? What is the effect of the Caribou moss? Is this ingredient recommended if
available? What preparations are necessary for the best mix? What is the amount needed?
Ingredients and materials
Berries Grease Dry meat/fish broken to pieces
40
Water/meat or fish juice Sugar, if desired Indian Potatoes, if desired and available Caribou Moss, if desired and available Large stirring spoon Small container Large bowl-like container with lid Freezer Spoons Small bowls or cups
Procedure
1. Cook the meat/fish or use canned or dried meat/fish. 2. Squeeze the juice out of cooked or canned meat/fish and save a small bowl of
the juice. 3. Dry the meat/fish and break it into pieces. 4. Pour most of the grease into a large bowl-like container and mix in some
meat/fish. Save a portion of the grease to add while mixing. 5. Continue stirring and adding meat/fish until it is a smooth paste. 6. Add grease to the mixture, now and then, until the mixture is smooth and
creamy. 7. Add water/meat/fish juice if the mixture becomes too thick. 8. Add all the meat/fish. 9. Stir until the mixture is smooth and creamy. 10. Add the berries. 11. Add the sugar, Indian Potatoes and/or Caribou Grass, as desired. 12. Stir until the mixture is smooth and creamy. 13. Spoon a small amount for tasting into a small container. 14. Place the lid on the large container and store it in the freezer overnight. 15. Allow the students a have a spoonful of the fresh batch from the small
container. 16. Next day, serve the class portions from a frozen batch in small bowls or cups.
3. Have the students write in their learning logs about the preparation experience and all
of the tasting experience for each group. The younger students can draw sequential pictures of the preparation experience with key word labels. They may then, label each of the tasting experiences with one of the following smiley face symbols: a smile, a frown or an undecided face.
4. Berry Recipes for Today: Have the students use resource books and do an Internet
search for other non-traditional recipes.
1. Have each student select the three recipes that they would like to try. Each of the three recipes must be for a different type of berry on the “Berry Bilingual Words List”.

41
2. Have the students make copies of the selected recipes; 3. Keep the recipes in the Unit Folder.
Activity 5 – Berry Medicine
Invite the Elder(s) that are familiar with the medicinal uses of berries to share on the history of the medicinal uses of berries as well as the traditional stories about berries as medicine.
o Make an appointment to visit with the Elder(s). Remember the Elder
protocol; o Ask the Elder(s) to demonstrate by making a few when to medicinal
preparations for the berries; o Volunteer to assist the Elder(s) in gathering the materials and the
ingredients needed to prepare the demonstrations.
Prepare the students for the visit with the Elder(s).
o Review with the students beforehand how to receive the Elder(s) and the importance of listening, and properly asking questions.
o Class discussion: Allow the students to share their personal experiences
with the medicinal use of berries, stories they have heard about their uses, and the uses remembered from the Lesson Two text. List some of the uses discussed on the chart paper (blackboard/whiteboard).
o Brainstorm with the students for questions to ask the Elder(s) and make a
list of the questions on chart paper. The older students can copy the list into their learning logs.
Introduce and welcome the Elder(s) to the class and give the Elder(s) the liberty to share on the medicinal use of berries. When the Elder(s) are ready to demonstrate the preparations, encourage the students with the Elder(s)’ choice to assist, while also having the teacher’s help available.
As the Elder(s) share, the older students should take a few notes in their learning
logs and listen for key points. At the appropriate time, the students may ask additional question. The older
students can record the answers to the questions in their learning logs. If permission is granted and appropriate, take pictures, video, or audio
recordings.
42
Discuss what the Elder(s) shared and demonstrated. Have the students write about the Elder’s sharing and demonstration in their learning logs. The younger students can draw pictures of the time with the Elder(s) labeling pictures with key words.
Divide the class into small groups or work partners. Using the Lesson 2 texts on different types of berries, have the students list the different medicinal uses of berries related to specific needs.
Have the students continue to work with small group or work partners to make a
medicinal use booklet categorized by need with the medicinal uses added in. For the younger students, provide medicinal use pictures and allow the students to paste and label with key words.
For Example: Stomach trouble
o Raspberries: Dried raspberry leaf tea is good for stomach problems. A very strong solution of tea is cooled and sipped slowly to stop vomiting and/or diarrhea. It is important to use leaves that have thoroughly dried only, as partially wilted leaves can cause bowel or kidney problems. Old dead leaves and twigs are safe as long as they are dried. They are dried if they break off and crumble easily.
o Highbush Cranberries: A tea made from boiled stem bark (also called “cramp
bark”) can be drank for stomach troubles;
o Crowberry tea: A tea made from the stems and leaves;
o Crowberries: cooked berries and berry juice;
o Combined Crowberry tea and Labrador tea. Colds and flu
o Highbush Cranberries: Eat the berries for colds and sore throats;
o Combined Crowberry tea and Labrador tea;
o Kinnikinnick berries chewed to help with colds/flu;
o Wild rose stem tea: burn the thorns off the stems and the branches. Then, break them up and boil until the water turns very dark. Then, drink the tea.

43
Eye problems
o Crowberries: A tea made from the roots, and stem bark cooled and used as an eye wash to get rid of growths. Squeezing blackberry juice straight into the eyes relieves snow blindness;
o Wild rose tea for sore eyes: soak the flowers in hot water and wash your
eyes with the juice. 1. Students will save all medicinal use information in the Unit Folder.
44
Lesson Three - Trees Materials for this teaching lesson were adapted from the following sources: 1. Alaska Science Forum: www.gi.alaska.edu/ScienceForum/plants.html 2. Alaska’s Trees and Shrubs by Viereck and Little 3. Dena’ina K’et’una – Tanaina Plantlore by Priscilla Kari 4. Gwitch’in Ethnobotany by Alestine Andre and Alan Fehr 5. Nikolai Hwnod Dinyaghe; Alaska’s Wilderness Medicines – Healthful Plants of the Far North by Eleanor Viereck 6. Stokes, Jeff W. 1985: Natural Resource Utilization of Four Upper Kuskokwim Communities. www.subsistence.adfg.state.ak.us/TechPap/tp086.pdf
7. Snowshoe Education Unit: www.ankn.uaf.edu/curriculum/units/snowshoe.html
8. Spruce Education Unit: www.ankn.uaf.edu/curriculum/units/spruce.html 9. Clipart provided by the Alaska Native Knowledge Network, www.ankn.uaf.edu 10. Photos by Teresa and Phylicia Hanson (unless otherwise noted) Storytime: “Athabaskan people say different trees got their different kinds of bark in Storytime, long time ago, when all the animals and plants were people. At that time all the trees were married to the Raven:
The Raven was always tricking people – he was hurting people for his own selfish reasons. And the Mink was the Raven’s nephew. The Mink got mad at his uncle for those tricks, and so when the Raven flew off, the Mink shot him down. And the Raven said, “You’re going to be sorry for this. There’s going to be a flood.” And sure enough, it started flooding. So the Mink jumped into a birch basket and started floating downriver. As he was floating downriver he came to some trees, and he said to them, “You know that your husband has been killed. So all the trees started crying and they said, “We have to do the mourning dance. Do the mourning dance.
45
And the wind started blowing and the trees started swaying in the wind, and they have to do something to show their sorrow. So the spruce tree started pinching herself – so that’s why it’s got that funny bark. And the Alder started scratching her skin. She had a lot of blood, so she just started bleeding real lots, and so her skin became really red. That’s why alders have those red scratches on them and the bark is used for red dye. Then the Birch tree said, “If we’re showing our sorrow, why do we just pinch ourselves and make scratchings on our skin?” And she just took her skin and started tearing it off. So that’s why the birch tree has that peeling bark. But the Cotton tree said, “If we want to show our sorrow, why don’t we do it right?” Then she just took a knife and started making big slashes into her skin and actually cut her flesh. So that’s why the cotton tree has big slashes in the bark like that.” (Jones and Anderson, 1984:4-6)
Information: “Trees are our most widely used plant group. They are used for heating homes, preserving meat and flavoring, building construction, and making other wooden items. Nikolai, Telida, and Takotna residents usually cut standing green or seasoned (dry) trees for firewood, some McGrath residents collect driftwood from the main Kuskokwim near the community. McGrath and Takotna residents usually to gather firewood in advance, stockpiling it for the winter, while Nikolai and Telida people cut and haul firewood periodically throughout the winter, usually late in the fall before freeze-up and again in the late spring just before break-up, periods when overland travel is harder.” (Stokes, 1984:298) White Spruce (Picea glauca) “White Spruce (Ts’ima) is the most sought-after tree species. It is considered ideal for building log structures. White spruce are often felled, cut to length, and peeled in the late spring and early summer for later use in construction. It is often cut during the winter for firewood. Green white spruce is used by many people, but seasoned wood is better. Before a tree is cut, people often chop into the tree with an axe to how deep the green is, or the frozen outer layer. The color and evenness indicates the depth of this outer portion. Spruce that contain more than an inch of wet or frozen wood burn poorly and are not really used for firewood. Also we tend to avoid cutting trees which would be good for house logs.” (Stokes, 1984:298-299)
ankn.uaf.edu/publications/clipart/clipart/trees.html
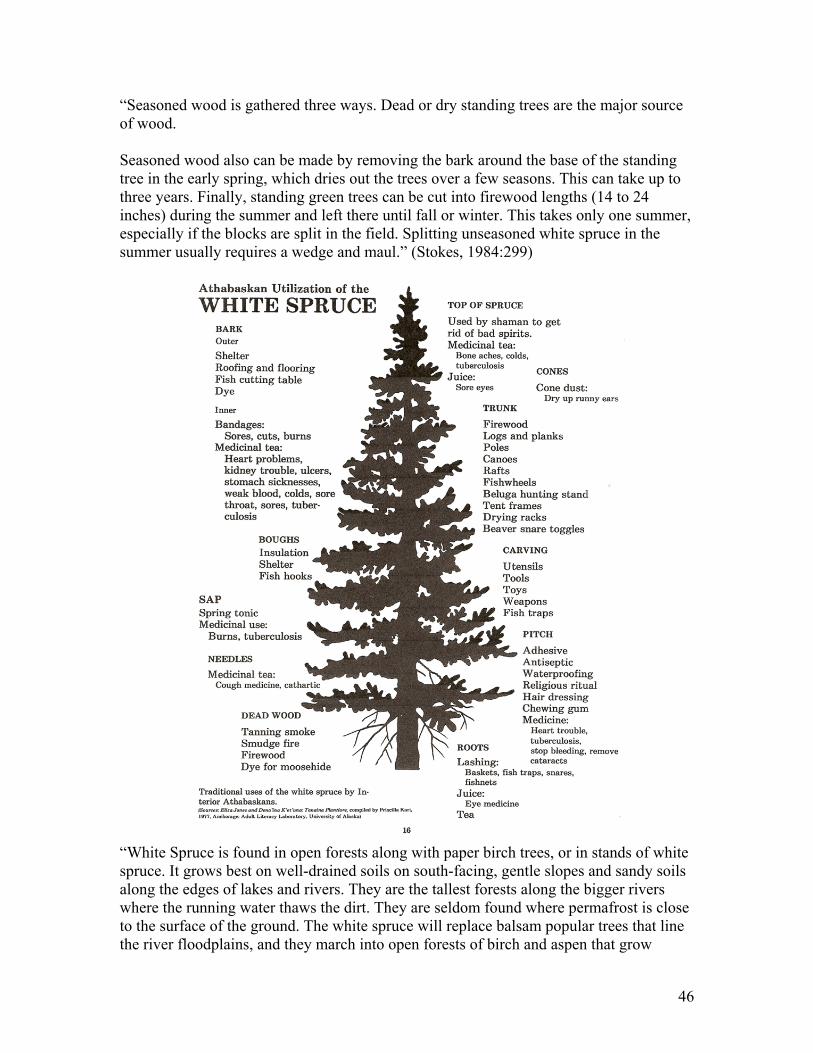
46
“Seasoned wood is gathered three ways. Dead or dry standing trees are the major source of wood. Seasoned wood also can be made by removing the bark around the base of the standing tree in the early spring, which dries out the trees over a few seasons. This can take up to three years. Finally, standing green trees can be cut into firewood lengths (14 to 24 inches) during the summer and left there until fall or winter. This takes only one summer, especially if the blocks are split in the field. Splitting unseasoned white spruce in the summer usually requires a wedge and maul.” (Stokes, 1984:299)
“White Spruce is found in open forests along with paper birch trees, or in stands of white spruce. It grows best on well-drained soils on south-facing, gentle slopes and sandy soils along the edges of lakes and rivers. They are the tallest forests along the bigger rivers where the running water thaws the dirt. They are seldom found where permafrost is close to the surface of the ground. The white spruce will replace balsam popular trees that line the river floodplains, and they march into open forests of birch and aspen that grow
47
following a fire. The tree can live up to 100 to 200 years!” (Viereck and Little, 2007:53-54) “Spruce pitch or gum (ts'imadzagha') gathered from standing white spruce trees has medicinal value among some older Nikolai and Telida residents. Also, the green spruce boughs (ił) are sometimes used to; line the bottom of dog houses during the winter and spring, for tent flooring in the summer, and for seasonal indoor decoration. Squares of white spruce bark (ch'ilotr'esh) are used for slip free fish-cutting surfaces and roofs of fish drying structures. According to our elders, roots from white spruce trees were split along the grain and used for heavy-duty binding purposes such as canoes and birch bark baskets. The gum was utilized to seal canoes.” (Stokes, 1984:298-299)
The Life of a White Spruce in the Subarctic Alaska Science Forum: March 18, 1985, Article #707
by John Zasada
Yearly cycle in the life of an Alaskan White Spruce Tree
The conditions under which this tree lives in the Interior are sometimes so demanding that it might seem impossible that it survives at all. It does because in some ways its annual growth cycle is well-adapted to our growing season.
Back in the 1960s, forester Bob Gregory made seasonal growth measurements of Alaskan white spruce at the same times that another forester measured tree growth at the extreme opposite end of the white spruce's range in the state of Massachusetts. They found out that throughout the year, trees at both locations produced the same amount of wood, but the Alaska trees only took half the time as the trees in Massachusetts. Our subarctic trees are able to take advantage of Alaska's growing season by completing growth quickly during the long summer days.
Our trees do not do as well when it comes to the production of seeds. Cones reach full size by June 1 in the Fairbanks area and somewhat later at higher elevations. The embryo (a small tree in the making) reaches full size about one month later. The finer stages of seed maturation--changes in the chemical composition of the seed that are important to the life of the embryo as it begins its struggle to become a mature tree--take place right up to the time that seed is released. At higher elevations (like near Denali Park) seeds do not mature even though the cones are fully developed. So the seeds are not able to produce seedlings and won't be able to produce a new tree.
Other hazards such as insects, animals and disease continually threaten the roots, needles and bark of the white spruce. Because of the trees’ strength and flexibility they have been able to survive and reproduce in the face of so many threatening factors. www.gi.alaska.edu/ScienceForum/ASF7/707.html (Zasada, 1985:107)
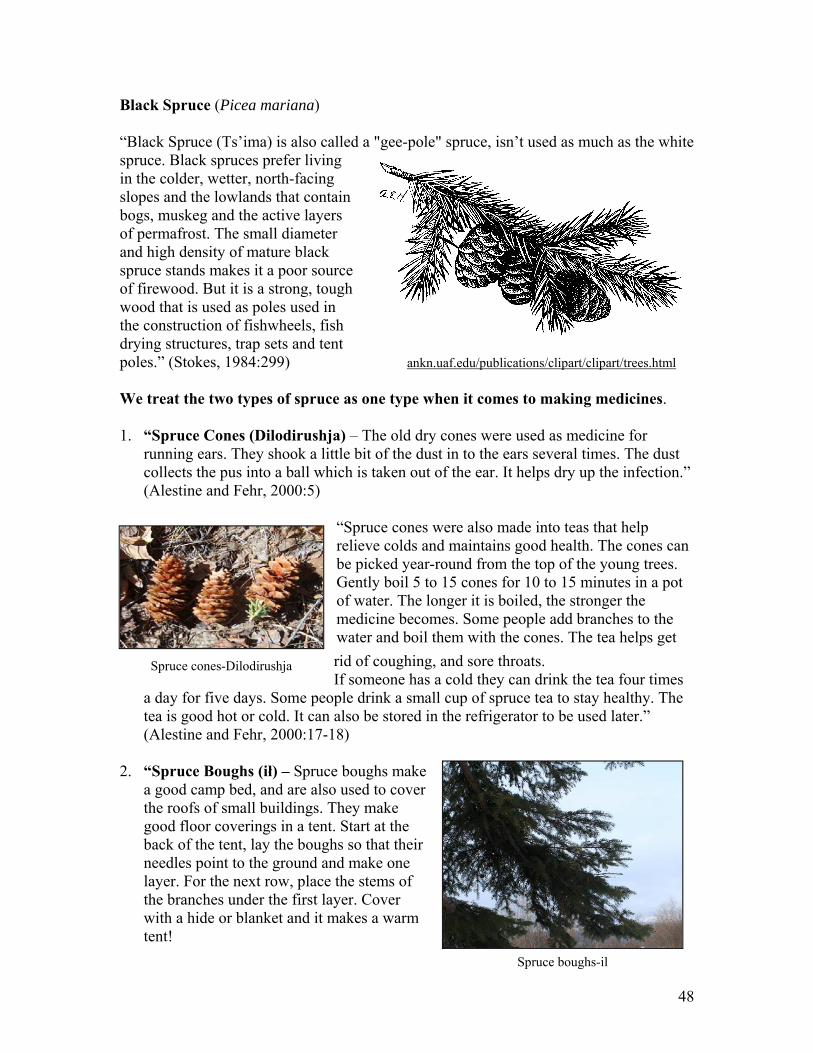
48
Black Spruce (Picea mariana) “Black Spruce (Ts’ima) is also called a "gee-pole" spruce, isn’t used as much as the white spruce. Black spruces prefer living in the colder, wetter, north-facing slopes and the lowlands that contain bogs, muskeg and the active layers of permafrost. The small diameter and high density of mature black spruce stands makes it a poor source of firewood. But it is a strong, tough wood that is used as poles used in the construction of fishwheels, fish drying structures, trap sets and tent poles.” (Stokes, 1984:299) ankn.uaf.edu/publications/clipart/clipart/trees.html We treat the two types of spruce as one type when it comes to making medicines. 1. “Spruce Cones (Dilodirushja) – The old dry cones were used as medicine for
running ears. They shook a little bit of the dust in to the ears several times. The dust collects the pus into a ball which is taken out of the ear. It helps dry up the infection.” (Alestine and Fehr, 2000:5)
“Spruce cones were also made into teas that help relieve colds and maintains good health. The cones can be picked year-round from the top of the young trees. Gently boil 5 to 15 cones for 10 to 15 minutes in a pot of water. The longer it is boiled, the stronger the medicine becomes. Some people add branches to the water and boil them with the cones. The tea helps get
rid of coughing, and sore throats. If someone has a cold they can drink the tea four times
a day for five days. Some people drink a small cup of spruce tea to stay healthy. The tea is good hot or cold. It can also be stored in the refrigerator to be used later.” (Alestine and Fehr, 2000:17-18)
2. “Spruce Boughs (ił) – Spruce boughs make
a good camp bed, and are also used to cover the roofs of small buildings. They make good floor coverings in a tent. Start at the back of the tent, lay the boughs so that their needles point to the ground and make one layer. For the next row, place the stems of the branches under the first layer. Cover with a hide or blanket and it makes a warm tent!
Spruce cones-Dilodirushja
Spruce boughs-il
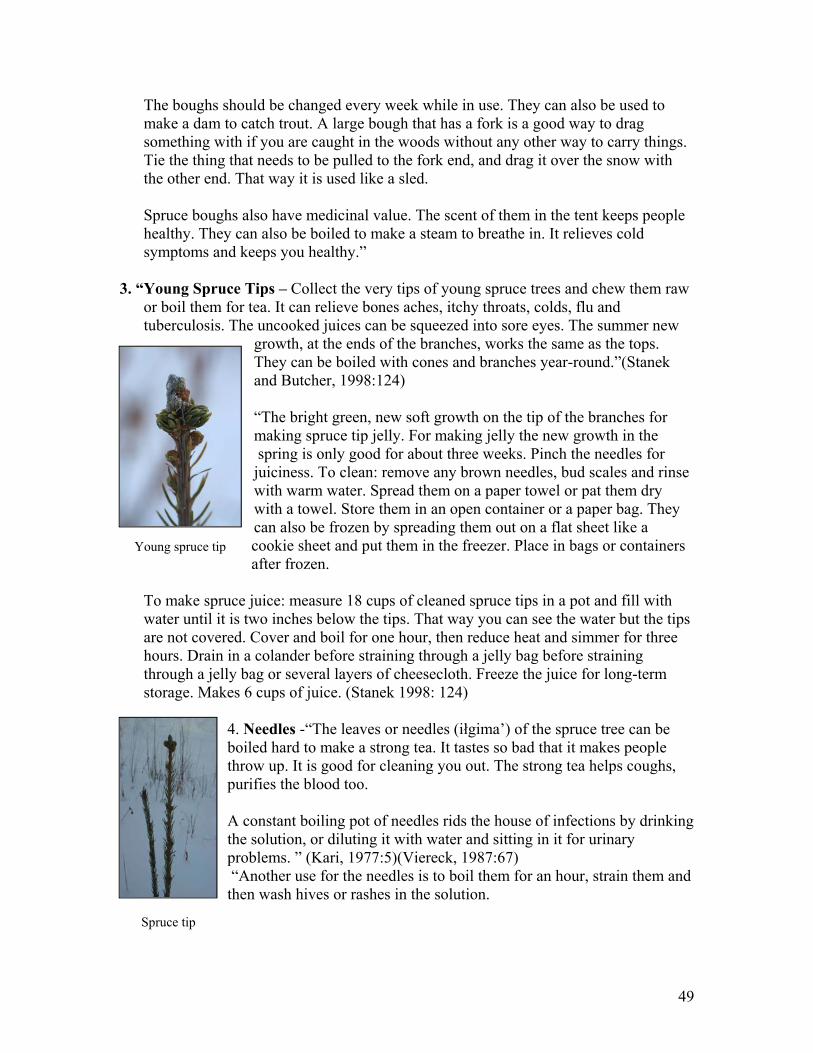
49
The boughs should be changed every week while in use. They can also be used to make a dam to catch trout. A large bough that has a fork is a good way to drag something with if you are caught in the woods without any other way to carry things. Tie the thing that needs to be pulled to the fork end, and drag it over the snow with the other end. That way it is used like a sled.
Spruce boughs also have medicinal value. The scent of them in the tent keeps people healthy. They can also be boiled to make a steam to breathe in. It relieves cold symptoms and keeps you healthy.”
3. “Young Spruce Tips – Collect the very tips of young spruce trees and chew them raw
or boil them for tea. It can relieve bones aches, itchy throats, colds, flu and tuberculosis. The uncooked juices can be squeezed into sore eyes. The summer new
growth, at the ends of the branches, works the same as the tops. They can be boiled with cones and branches year-round.”(Stanek and Butcher, 1998:124) “The bright green, new soft growth on the tip of the branches for making spruce tip jelly. For making jelly the new growth in the spring is only good for about three weeks. Pinch the needles for juiciness. To clean: remove any brown needles, bud scales and rinse with warm water. Spread them on a paper towel or pat them dry with a towel. Store them in an open container or a paper bag. They can also be frozen by spreading them out on a flat sheet like a cookie sheet and put them in the freezer. Place in bags or containers after frozen.
To make spruce juice: measure 18 cups of cleaned spruce tips in a pot and fill with water until it is two inches below the tips. That way you can see the water but the tips are not covered. Cover and boil for one hour, then reduce heat and simmer for three hours. Drain in a colander before straining through a jelly bag before straining through a jelly bag or several layers of cheesecloth. Freeze the juice for long-term storage. Makes 6 cups of juice. (Stanek 1998: 124)
4. Needles -“The leaves or needles (iłgima’) of the spruce tree can be boiled hard to make a strong tea. It tastes so bad that it makes people throw up. It is good for cleaning you out. The strong tea helps coughs, purifies the blood too. A constant boiling pot of needles rids the house of infections by drinking the solution, or diluting it with water and sitting in it for urinary problems. ” (Kari, 1977:5)(Viereck, 1987:67) “Another use for the needles is to boil them for an hour, strain them and then wash hives or rashes in the solution.
Young spruce tip
Spruce tip
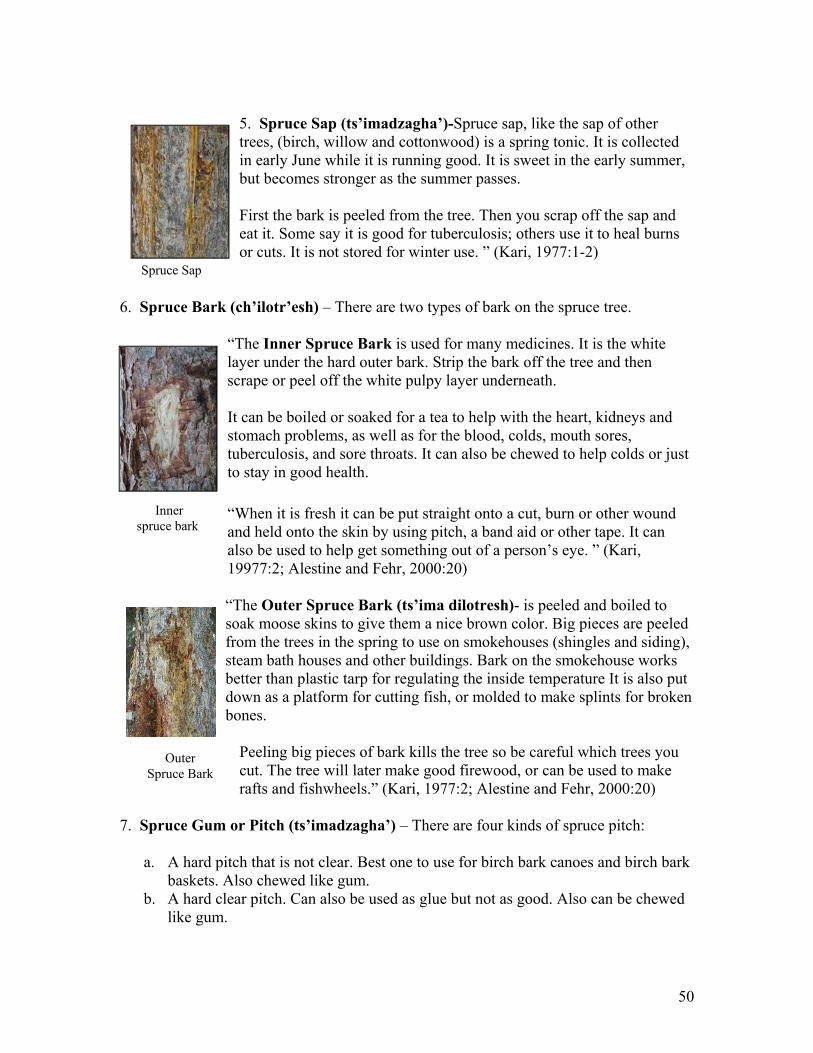
50
Inner spruce bark
5. Spruce Sap (ts’imadzagha’)-Spruce sap, like the sap of other trees, (birch, willow and cottonwood) is a spring tonic. It is collected in early June while it is running good. It is sweet in the early summer, but becomes stronger as the summer passes. First the bark is peeled from the tree. Then you scrap off the sap and eat it. Some say it is good for tuberculosis; others use it to heal burns or cuts. It is not stored for winter use. ” (Kari, 1977:1-2)
6. Spruce Bark (ch’ilotr’esh) – There are two types of bark on the spruce tree.
“The Inner Spruce Bark is used for many medicines. It is the white layer under the hard outer bark. Strip the bark off the tree and then scrape or peel off the white pulpy layer underneath. It can be boiled or soaked for a tea to help with the heart, kidneys and stomach problems, as well as for the blood, colds, mouth sores, tuberculosis, and sore throats. It can also be chewed to help colds or just to stay in good health.
“When it is fresh it can be put straight onto a cut, burn or other wound and held onto the skin by using pitch, a band aid or other tape. It can also be used to help get something out of a person’s eye. ” (Kari, 19977:2; Alestine and Fehr, 2000:20) “The Outer Spruce Bark (ts’ima dilotresh)- is peeled and boiled to soak moose skins to give them a nice brown color. Big pieces are peeled from the trees in the spring to use on smokehouses (shingles and siding), steam bath houses and other buildings. Bark on the smokehouse works better than plastic tarp for regulating the inside temperature It is also put down as a platform for cutting fish, or molded to make splints for broken bones.
Peeling big pieces of bark kills the tree so be careful which trees you cut. The tree will later make good firewood, or can be used to make rafts and fishwheels.” (Kari, 1977:2; Alestine and Fehr, 2000:20)
7. Spruce Gum or Pitch (ts’imadzagha’) – There are four kinds of spruce pitch:
a. A hard pitch that is not clear. Best one to use for birch bark canoes and birch bark baskets. Also chewed like gum.
b. A hard clear pitch. Can also be used as glue but not as good. Also can be chewed like gum.
Outer Spruce Bark
Spruce Sap

51
c. A soft pitch found on the outer bark. Medicine for heart trouble and tuberculosis. Chew it raw. Also good to put on a cut to stop the bleeding quickly. Can also be used as glue.
d. A soft white pitch found inside spruce wood. It is a salve for cuts, sores, or any kind of skin infection. Put it raw on the sick place.” (Kari, 1977:31-33)
8. Spruce Wood – There are three kinds of spruce wood:
a. A hard wood from the Black spruce b. A light White Spruce wood. Grows along with birch on drier ground. c. A medium hard and medium dark from the white spruce. Grows in thick spruce
forests where the ground is mossy and damp”(Kari, 1977:29)
9. Dried Spruce Wood (Nododitridre) can be, and has been used for:
“Log houses Firewood” Sources of Information: Alaska Department of Fish and Game (Stokes,
1985:298) 10. Spruce Roots (Ts’imaghwya’) – The spruce root has many uses as rope and string. It has been used to make snowshoes (osh), fishnets (tameł), and sewing the
rims of birch baskets (tuts’o), baby baskets (sotł), and boats. It was also used to make snares (gaguł), and fish traps (is). The juice of the root was used as eye medicine by biting off the end of the root and let the juice drip into the eye. It can be made into tea and used for the same uses as the inner bark of the spruce tree. The roots can also vbe dried for the winter. Then they just have to be soaked in water again before they are used. They are easy to find along river banks after spring breakup when the roots are sticking out the sides of the banks. Also look for them in damp, mossy areas where it is easy to dig.
For a really good unit for studying all the things that can be done with spruce roots go to: www.ankn.uaf.edu/curriculum/units/spruce.html or look in your school library for the booklet called Digging and Preparing Spruce Roots by Alan and Helen Dick. It will also be found in the Iditarod Area School District school shelves.
11. “Dried Spruce Branches – The dried out branches and twigs found at the base of
spruce trees could save your life. They can start a fire when they are wet. Also use the hairy looking lichen that may be on the trees. They work the best. Carry some in your pockets when traveling to be sure you have a supply. “It could save your life if you had to make a fire when it’s 60 below. When you are traveling in the bush and you need to make a fire, break off a bunch of dry twigs from the tree, light a match to it and place it under your wood to start a fire.” Quote from Nap Norbert (Alestine and Fehr, 1999:20-21)
12. “Rotten Spruce Wood – Hang a tanned moose hide over a slow burning fire of
rotten spruce wood for a couple of days to make the hide a yellow color. Or soak a
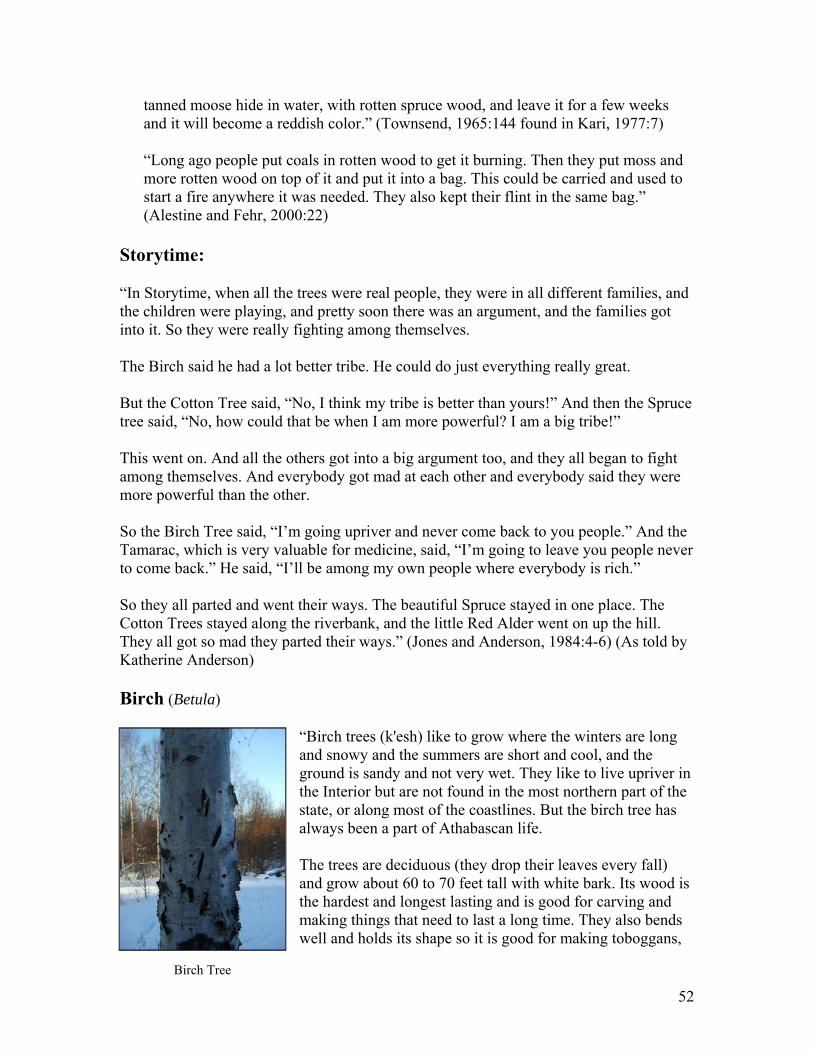
52
tanned moose hide in water, with rotten spruce wood, and leave it for a few weeks and it will become a reddish color.” (Townsend, 1965:144 found in Kari, 1977:7)
“Long ago people put coals in rotten wood to get it burning. Then they put moss and more rotten wood on top of it and put it into a bag. This could be carried and used to start a fire anywhere it was needed. They also kept their flint in the same bag.” (Alestine and Fehr, 2000:22)
Storytime: “In Storytime, when all the trees were real people, they were in all different families, and the children were playing, and pretty soon there was an argument, and the families got into it. So they were really fighting among themselves.
The Birch said he had a lot better tribe. He could do just everything really great. But the Cotton Tree said, “No, I think my tribe is better than yours!” And then the Spruce tree said, “No, how could that be when I am more powerful? I am a big tribe!” This went on. And all the others got into a big argument too, and they all began to fight among themselves. And everybody got mad at each other and everybody said they were more powerful than the other. So the Birch Tree said, “I’m going upriver and never come back to you people.” And the Tamarac, which is very valuable for medicine, said, “I’m going to leave you people never to come back.” He said, “I’ll be among my own people where everybody is rich.” So they all parted and went their ways. The beautiful Spruce stayed in one place. The Cotton Trees stayed along the riverbank, and the little Red Alder went on up the hill. They all got so mad they parted their ways.” (Jones and Anderson, 1984:4-6) (As told by Katherine Anderson) Birch (Betula)
“Birch trees (k'esh) like to grow where the winters are long and snowy and the summers are short and cool, and the ground is sandy and not very wet. They like to live upriver in the Interior but are not found in the most northern part of the state, or along most of the coastlines. But the birch tree has always been a part of Athabascan life. The trees are deciduous (they drop their leaves every fall) and grow about 60 to 70 feet tall with white bark. Its wood is the hardest and longest lasting and is good for carving and making things that need to last a long time. They also bends well and holds its shape so it is good for making toboggans,
Birch Tree
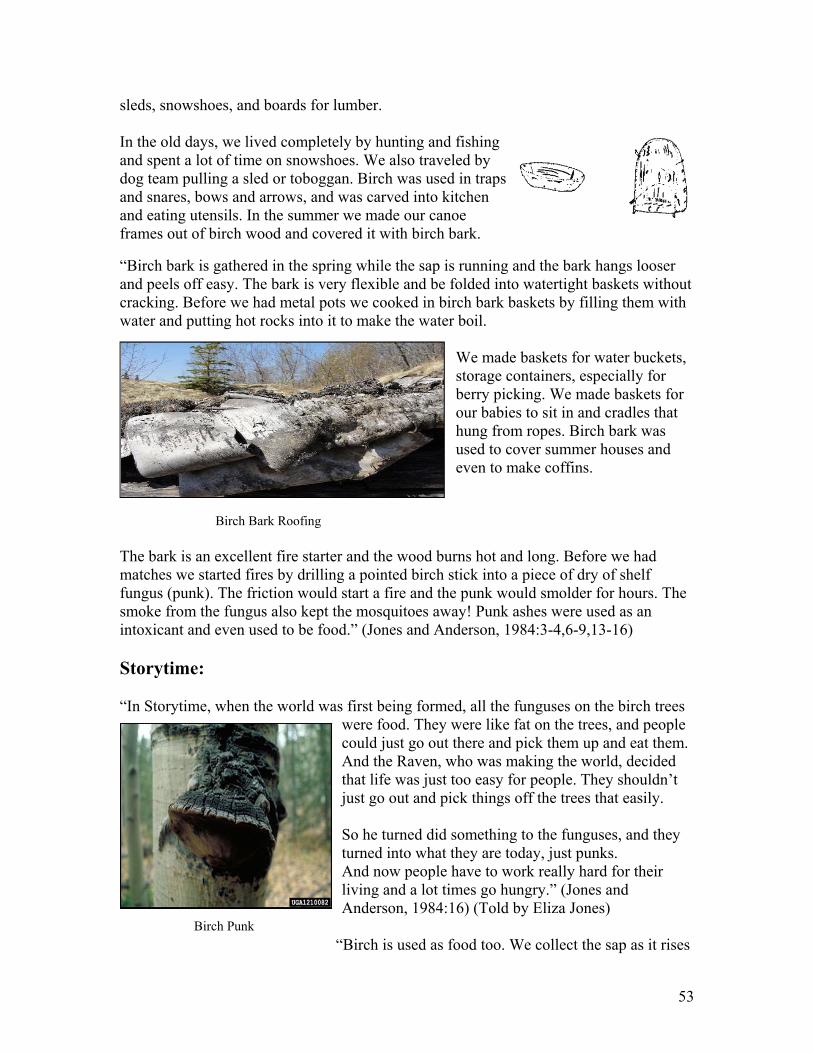
53
sleds, snowshoes, and boards for lumber. In the old days, we lived completely by hunting and fishing and spent a lot of time on snowshoes. We also traveled by dog team pulling a sled or toboggan. Birch was used in traps and snares, bows and arrows, and was carved into kitchen and eating utensils. In the summer we made our canoe frames out of birch wood and covered it with birch bark.
“Birch bark is gathered in the spring while the sap is running and the bark hangs looser and peels off easy. The bark is very flexible and be folded into watertight baskets without cracking. Before we had metal pots we cooked in birch bark baskets by filling them with water and putting hot rocks into it to make the water boil.
We made baskets for water buckets, storage containers, especially for berry picking. We made baskets for our babies to sit in and cradles that hung from ropes. Birch bark was used to cover summer houses and even to make coffins.
Birch Bark Roofing The bark is an excellent fire starter and the wood burns hot and long. Before we had matches we started fires by drilling a pointed birch stick into a piece of dry of shelf fungus (punk). The friction would start a fire and the punk would smolder for hours. The smoke from the fungus also kept the mosquitoes away! Punk ashes were used as an intoxicant and even used to be food.” (Jones and Anderson, 1984:3-4,6-9,13-16) Storytime: “In Storytime, when the world was first being formed, all the funguses on the birch trees
were food. They were like fat on the trees, and people could just go out there and pick them up and eat them. And the Raven, who was making the world, decided that life was just too easy for people. They shouldn’t just go out and pick things off the trees that easily. So he turned did something to the funguses, and they turned into what they are today, just punks. And now people have to work really hard for their living and a lot times go hungry.” (Jones and Anderson, 1984:16) (Told by Eliza Jones)
“Birch is used as food too. We collect the sap as it rises
Birch Punk

54
in the tree during the spring to make syrup. We used to peel back the bark and scrape or suck the sap off the wood. We also made a hole in the tree and stuck a hollow bone into it and let the sap drip into a container. The sap was really good for getting fresh vegetables and vitamins in the early spring. The sap is also good to put on boils and sores as medicine.” (Kari, 1977:14-15) “Young birch trees can be cut down into small pieces and boiled in a large pot, stems, twigs and leaves are all used. The boiled juice is a tea that should be strained before putting it into jars. It is a medicine for stomach problems like heartburn and ulcers. Drink ½ cup before breakfast and ½ cup before bed. Sticky gum can also be chewed with this medicine.” (Alestine and Fehr, 2000:26) “Birch root tea can be made for washing the eyes of people with snow blindness. Dig up the roots and clean with a knife. Wash them, cut them into pieces and boil. A tea from the buds of the tree can be made into a tea for the same purpose. Roots can also be used for sewing baskets.” (Alestine and Fehr, 2000:26-27) “Birch leaves are used to make a tea for comfort, and as a therapy for gout, rheumatism, dropsy and for dissolving kidney stones. A strong juice from the leaves acts as a diuretic. A mouthwash can also be made from the leaves.” (Viereck, 1987:9)
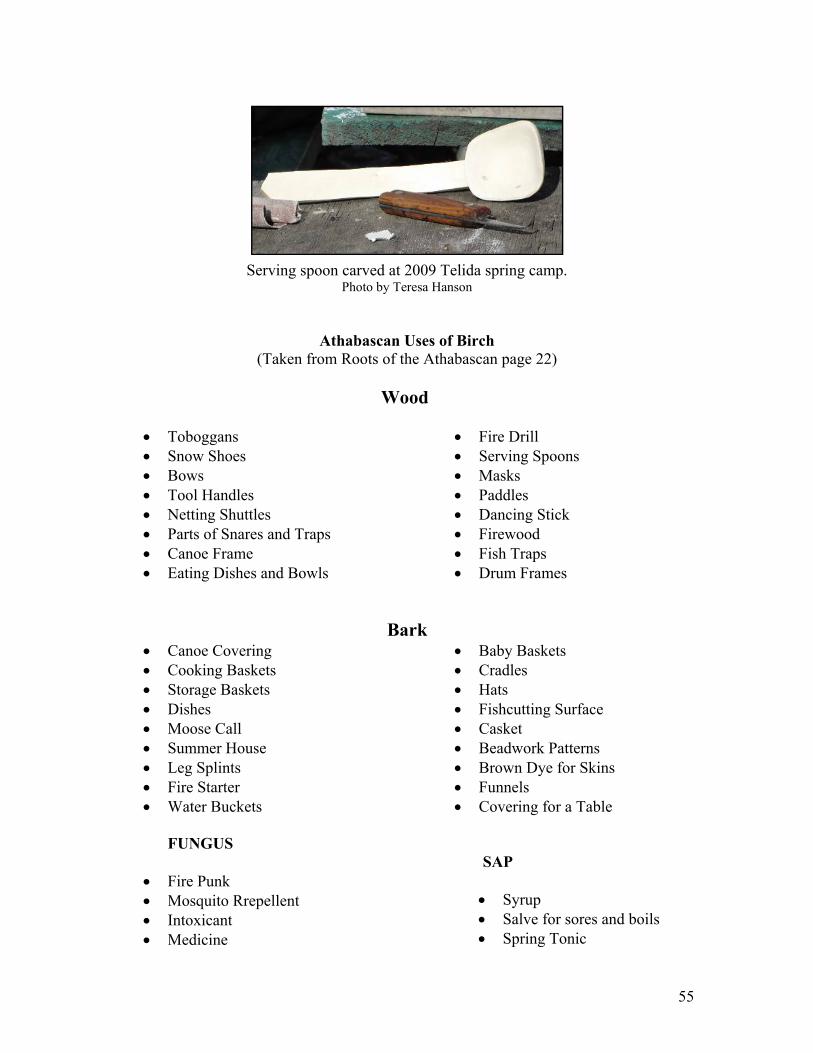
55
Serving spoon carved at 2009 Telida spring camp.
Photo by Teresa Hanson
Athabascan Uses of Birch
(Taken from Roots of the Athabascan page 22)
Wood
Toboggans Snow Shoes Bows Tool Handles Netting Shuttles Parts of Snares and Traps Canoe Frame Eating Dishes and Bowls
Fire Drill Serving Spoons Masks Paddles Dancing Stick Firewood Fish Traps Drum Frames
Bark Canoe Covering Cooking Baskets Storage Baskets Dishes Moose Call Summer House Leg Splints Fire Starter Water Buckets
Baby Baskets Cradles Hats Fishcutting Surface Casket Beadwork Patterns Brown Dye for Skins Funnels Covering for a Table
FUNGUS
Fire Punk Mosquito Rrepellent Intoxicant Medicine
SAP
Syrup Salve for sores and boils Spring Tonic
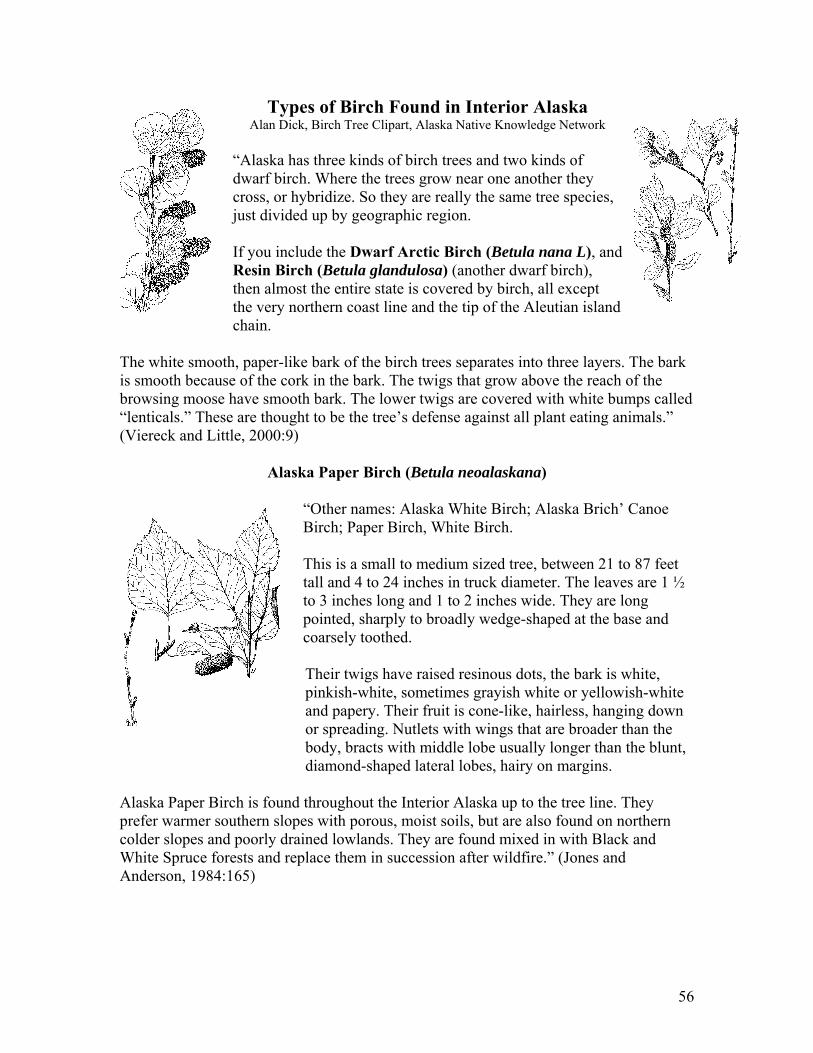
56
Types of Birch Found in Interior Alaska Alan Dick, Birch Tree Clipart, Alaska Native Knowledge Network
“Alaska has three kinds of birch trees and two kinds of dwarf birch. Where the trees grow near one another they cross, or hybridize. So they are really the same tree species, just divided up by geographic region. If you include the Dwarf Arctic Birch (Betula nana L), and Resin Birch (Betula glandulosa) (another dwarf birch), then almost the entire state is covered by birch, all except the very northern coast line and the tip of the Aleutian island chain.
The white smooth, paper-like bark of the birch trees separates into three layers. The bark is smooth because of the cork in the bark. The twigs that grow above the reach of the browsing moose have smooth bark. The lower twigs are covered with white bumps called “lenticals.” These are thought to be the tree’s defense against all plant eating animals.” (Viereck and Little, 2000:9)
Alaska Paper Birch (Betula neoalaskana)
“Other names: Alaska White Birch; Alaska Brich’ Canoe Birch; Paper Birch, White Birch. This is a small to medium sized tree, between 21 to 87 feet tall and 4 to 24 inches in truck diameter. The leaves are 1 ½ to 3 inches long and 1 to 2 inches wide. They are long pointed, sharply to broadly wedge-shaped at the base and coarsely toothed. Their twigs have raised resinous dots, the bark is white, pinkish-white, sometimes grayish white or yellowish-white and papery. Their fruit is cone-like, hairless, hanging down or spreading. Nutlets with wings that are broader than the body, bracts with middle lobe usually longer than the blunt, diamond-shaped lateral lobes, hairy on margins.
Alaska Paper Birch is found throughout the Interior Alaska up to the tree line. They prefer warmer southern slopes with porous, moist soils, but are also found on northern colder slopes and poorly drained lowlands. They are found mixed in with Black and White Spruce forests and replace them in succession after wildfire.” (Jones and Anderson, 1984:165)
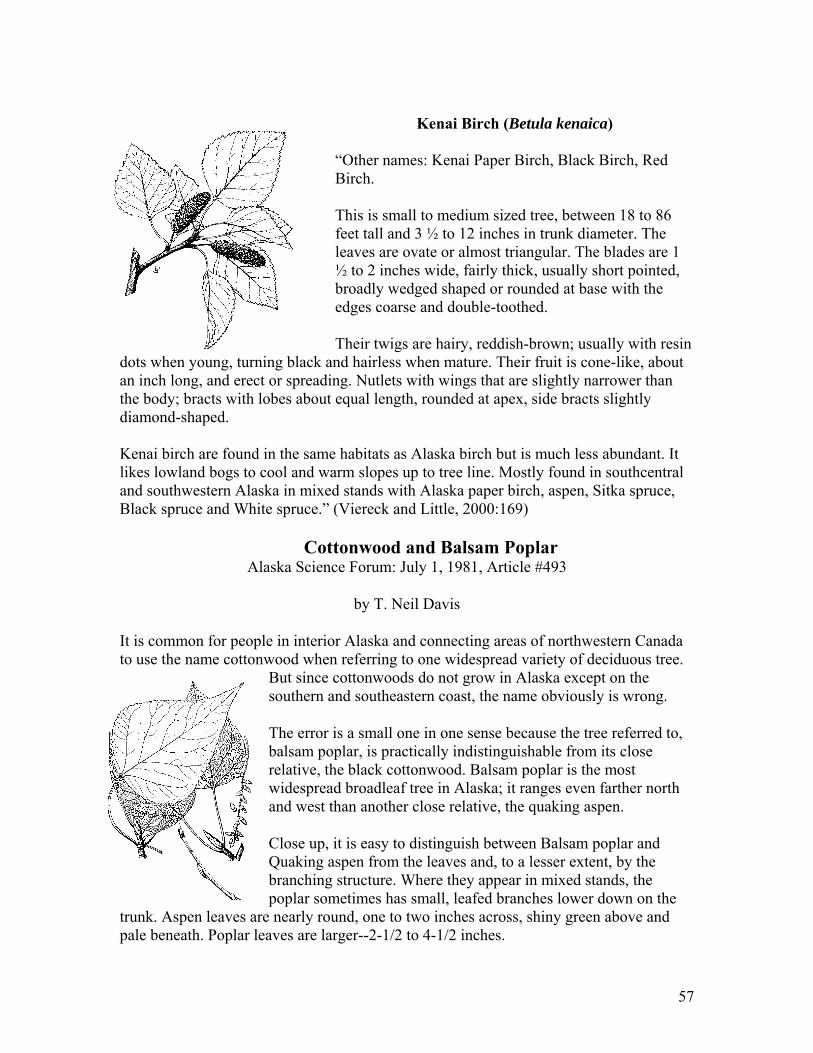
57
Kenai Birch (Betula kenaica)
“Other names: Kenai Paper Birch, Black Birch, Red Birch. This is small to medium sized tree, between 18 to 86 feet tall and 3 ½ to 12 inches in trunk diameter. The leaves are ovate or almost triangular. The blades are 1 ½ to 2 inches wide, fairly thick, usually short pointed, broadly wedged shaped or rounded at base with the edges coarse and double-toothed. Their twigs are hairy, reddish-brown; usually with resin
dots when young, turning black and hairless when mature. Their fruit is cone-like, about an inch long, and erect or spreading. Nutlets with wings that are slightly narrower than the body; bracts with lobes about equal length, rounded at apex, side bracts slightly diamond-shaped. Kenai birch are found in the same habitats as Alaska birch but is much less abundant. It likes lowland bogs to cool and warm slopes up to tree line. Mostly found in southcentral and southwestern Alaska in mixed stands with Alaska paper birch, aspen, Sitka spruce, Black spruce and White spruce.” (Viereck and Little, 2000:169)
Cottonwood and Balsam Poplar Alaska Science Forum: July 1, 1981, Article #493
by T. Neil Davis
It is common for people in interior Alaska and connecting areas of northwestern Canada to use the name cottonwood when referring to one widespread variety of deciduous tree.
But since cottonwoods do not grow in Alaska except on the southern and southeastern coast, the name obviously is wrong.
The error is a small one in one sense because the tree referred to, balsam poplar, is practically indistinguishable from its close relative, the black cottonwood. Balsam poplar is the most widespread broadleaf tree in Alaska; it ranges even farther north and west than another close relative, the quaking aspen.
Close up, it is easy to distinguish between Balsam poplar and Quaking aspen from the leaves and, to a lesser extent, by the branching structure. Where they appear in mixed stands, the poplar sometimes has small, leafed branches lower down on the
trunk. Aspen leaves are nearly round, one to two inches across, shiny green above and pale beneath. Poplar leaves are larger--2-1/2 to 4-1/2 inches.
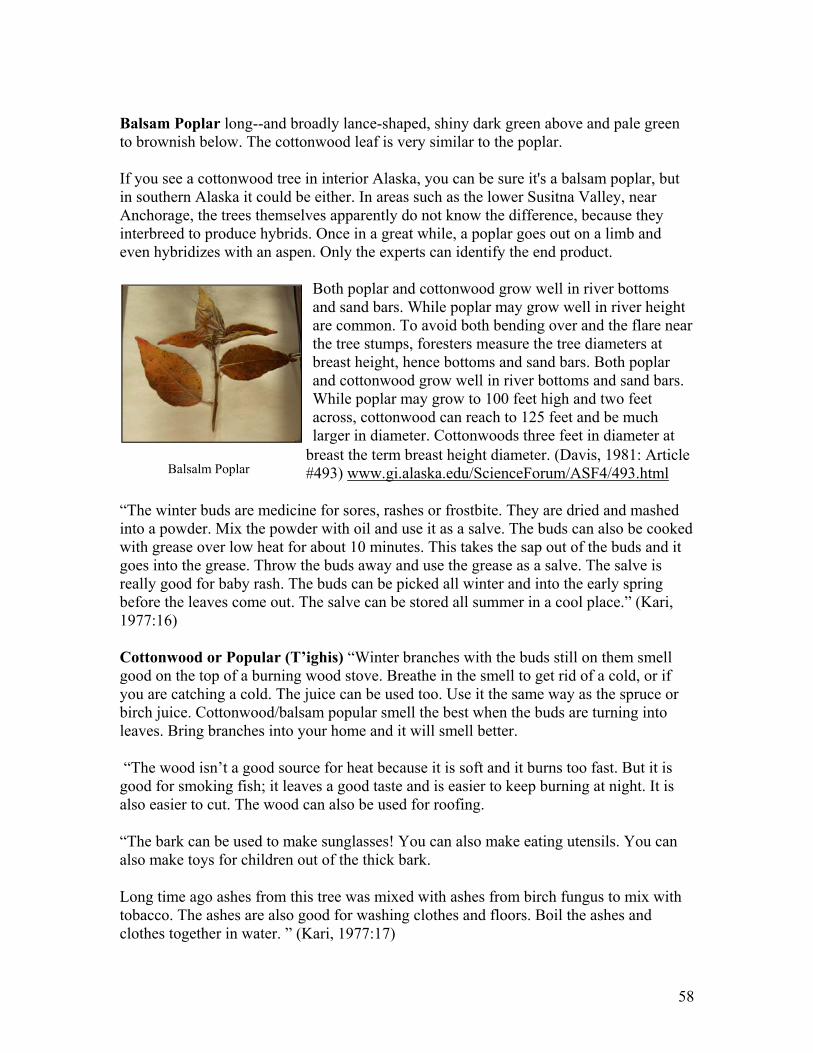
58
Balsam Poplar long--and broadly lance-shaped, shiny dark green above and pale green to brownish below. The cottonwood leaf is very similar to the poplar. If you see a cottonwood tree in interior Alaska, you can be sure it's a balsam poplar, but in southern Alaska it could be either. In areas such as the lower Susitna Valley, near Anchorage, the trees themselves apparently do not know the difference, because they interbreed to produce hybrids. Once in a great while, a poplar goes out on a limb and even hybridizes with an aspen. Only the experts can identify the end product.
Both poplar and cottonwood grow well in river bottoms and sand bars. While poplar may grow well in river height are common. To avoid both bending over and the flare near the tree stumps, foresters measure the tree diameters at breast height, hence bottoms and sand bars. Both poplar and cottonwood grow well in river bottoms and sand bars. While poplar may grow to 100 feet high and two feet across, cottonwood can reach to 125 feet and be much larger in diameter. Cottonwoods three feet in diameter at
breast the term breast height diameter. (Davis, 1981: Article #493) www.gi.alaska.edu/ScienceForum/ASF4/493.html
“The winter buds are medicine for sores, rashes or frostbite. They are dried and mashed into a powder. Mix the powder with oil and use it as a salve. The buds can also be cooked with grease over low heat for about 10 minutes. This takes the sap out of the buds and it goes into the grease. Throw the buds away and use the grease as a salve. The salve is really good for baby rash. The buds can be picked all winter and into the early spring before the leaves come out. The salve can be stored all summer in a cool place.” (Kari, 1977:16)
Cottonwood or Popular (T’ighis) “Winter branches with the buds still on them smell good on the top of a burning wood stove. Breathe in the smell to get rid of a cold, or if you are catching a cold. The juice can be used too. Use it the same way as the spruce or birch juice. Cottonwood/balsam popular smell the best when the buds are turning into leaves. Bring branches into your home and it will smell better.
“The wood isn’t a good source for heat because it is soft and it burns too fast. But it is good for smoking fish; it leaves a good taste and is easier to keep burning at night. It is also easier to cut. The wood can also be used for roofing.
“The bark can be used to make sunglasses! You can also make eating utensils. You can also make toys for children out of the thick bark.
Long time ago ashes from this tree was mixed with ashes from birch fungus to mix with tobacco. The ashes are also good for washing clothes and floors. Boil the ashes and clothes together in water. ” (Kari, 1977:17)
Balsalm Poplar
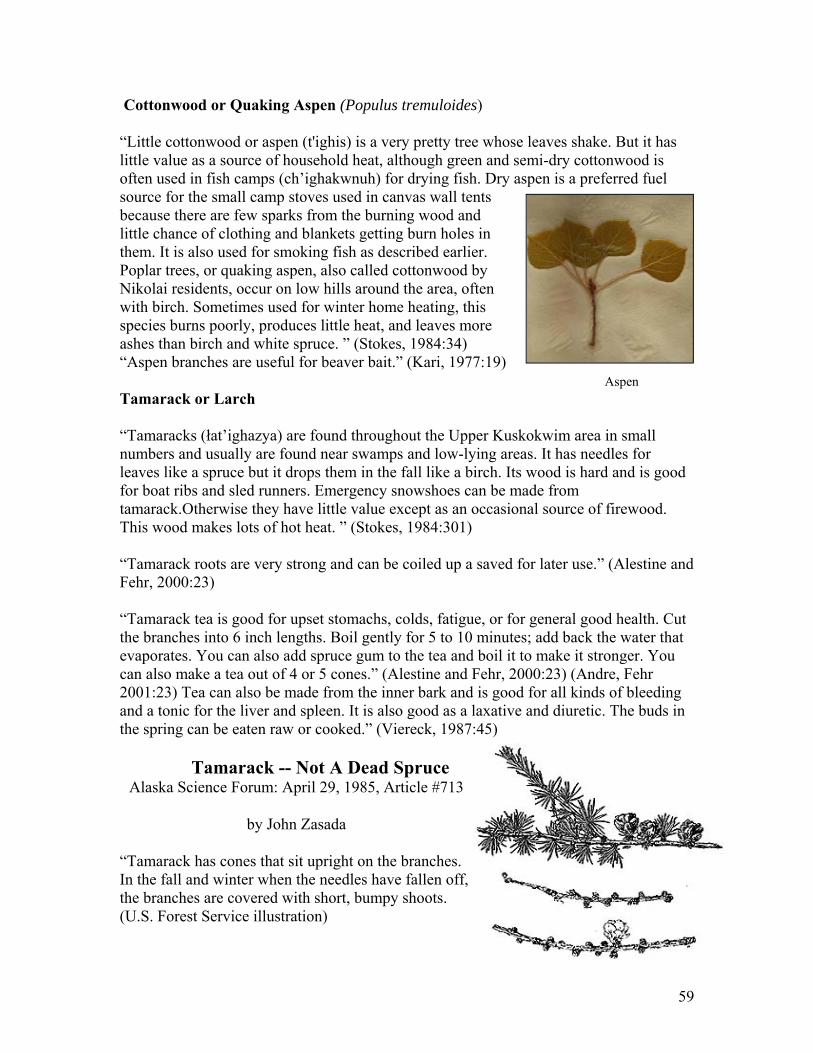
59
Cottonwood or Quaking Aspen (Populus tremuloides) “Little cottonwood or aspen (t'ighis) is a very pretty tree whose leaves shake. But it has little value as a source of household heat, although green and semi-dry cottonwood is often used in fish camps (ch’ighakwnuh) for drying fish. Dry aspen is a preferred fuel source for the small camp stoves used in canvas wall tents because there are few sparks from the burning wood and little chance of clothing and blankets getting burn holes in them. It is also used for smoking fish as described earlier. Poplar trees, or quaking aspen, also called cottonwood by Nikolai residents, occur on low hills around the area, often with birch. Sometimes used for winter home heating, this species burns poorly, produces little heat, and leaves more ashes than birch and white spruce. ” (Stokes, 1984:34) “Aspen branches are useful for beaver bait.” (Kari, 1977:19) Tamarack or Larch “Tamaracks (łat’ighazya) are found throughout the Upper Kuskokwim area in small numbers and usually are found near swamps and low-lying areas. It has needles for leaves like a spruce but it drops them in the fall like a birch. Its wood is hard and is good for boat ribs and sled runners. Emergency snowshoes can be made from tamarack.Otherwise they have little value except as an occasional source of firewood. This wood makes lots of hot heat. ” (Stokes, 1984:301) “Tamarack roots are very strong and can be coiled up a saved for later use.” (Alestine and Fehr, 2000:23) “Tamarack tea is good for upset stomachs, colds, fatigue, or for general good health. Cut the branches into 6 inch lengths. Boil gently for 5 to 10 minutes; add back the water that evaporates. You can also add spruce gum to the tea and boil it to make it stronger. You can also make a tea out of 4 or 5 cones.” (Alestine and Fehr, 2000:23) (Andre, Fehr 2001:23) Tea can also be made from the inner bark and is good for all kinds of bleeding and a tonic for the liver and spleen. It is also good as a laxative and diuretic. The buds in the spring can be eaten raw or cooked.” (Viereck, 1987:45)
Tamarack -- Not A Dead Spruce Alaska Science Forum: April 29, 1985, Article #713
by John Zasada
“Tamarack has cones that sit upright on the branches. In the fall and winter when the needles have fallen off, the branches are covered with short, bumpy shoots. (U.S. Forest Service illustration)
Aspen
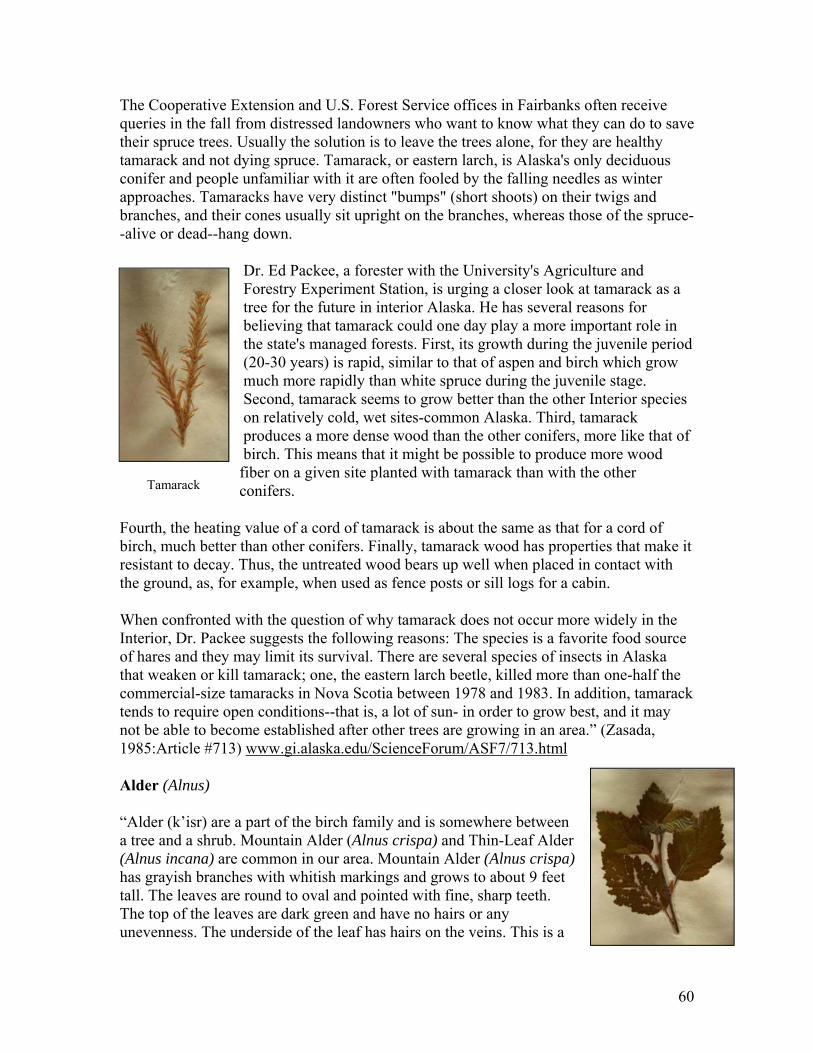
60
The Cooperative Extension and U.S. Forest Service offices in Fairbanks often receive queries in the fall from distressed landowners who want to know what they can do to save their spruce trees. Usually the solution is to leave the trees alone, for they are healthy tamarack and not dying spruce. Tamarack, or eastern larch, is Alaska's only deciduous conifer and people unfamiliar with it are often fooled by the falling needles as winter approaches. Tamaracks have very distinct "bumps" (short shoots) on their twigs and branches, and their cones usually sit upright on the branches, whereas those of the spruce--alive or dead--hang down.
Dr. Ed Packee, a forester with the University's Agriculture and Forestry Experiment Station, is urging a closer look at tamarack as a tree for the future in interior Alaska. He has several reasons for believing that tamarack could one day play a more important role in the state's managed forests. First, its growth during the juvenile period (20-30 years) is rapid, similar to that of aspen and birch which grow much more rapidly than white spruce during the juvenile stage. Second, tamarack seems to grow better than the other Interior species on relatively cold, wet sites-common Alaska. Third, tamarack produces a more dense wood than the other conifers, more like that of birch. This means that it might be possible to produce more wood fiber on a given site planted with tamarack than with the other conifers.
Fourth, the heating value of a cord of tamarack is about the same as that for a cord of birch, much better than other conifers. Finally, tamarack wood has properties that make it resistant to decay. Thus, the untreated wood bears up well when placed in contact with the ground, as, for example, when used as fence posts or sill logs for a cabin.
When confronted with the question of why tamarack does not occur more widely in the Interior, Dr. Packee suggests the following reasons: The species is a favorite food source of hares and they may limit its survival. There are several species of insects in Alaska that weaken or kill tamarack; one, the eastern larch beetle, killed more than one-half the commercial-size tamaracks in Nova Scotia between 1978 and 1983. In addition, tamarack tends to require open conditions--that is, a lot of sun- in order to grow best, and it may not be able to become established after other trees are growing in an area.” (Zasada, 1985:Article #713) www.gi.alaska.edu/ScienceForum/ASF7/713.html
Alder (Alnus) “Alder (k’isr) are a part of the birch family and is somewhere between a tree and a shrub. Mountain Alder (Alnus crispa) and Thin-Leaf Alder (Alnus incana) are common in our area. Mountain Alder (Alnus crispa) has grayish branches with whitish markings and grows to about 9 feet tall. The leaves are round to oval and pointed with fine, sharp teeth. The top of the leaves are dark green and have no hairs or any unevenness. The underside of the leaf has hairs on the veins. This is a
Tamarack
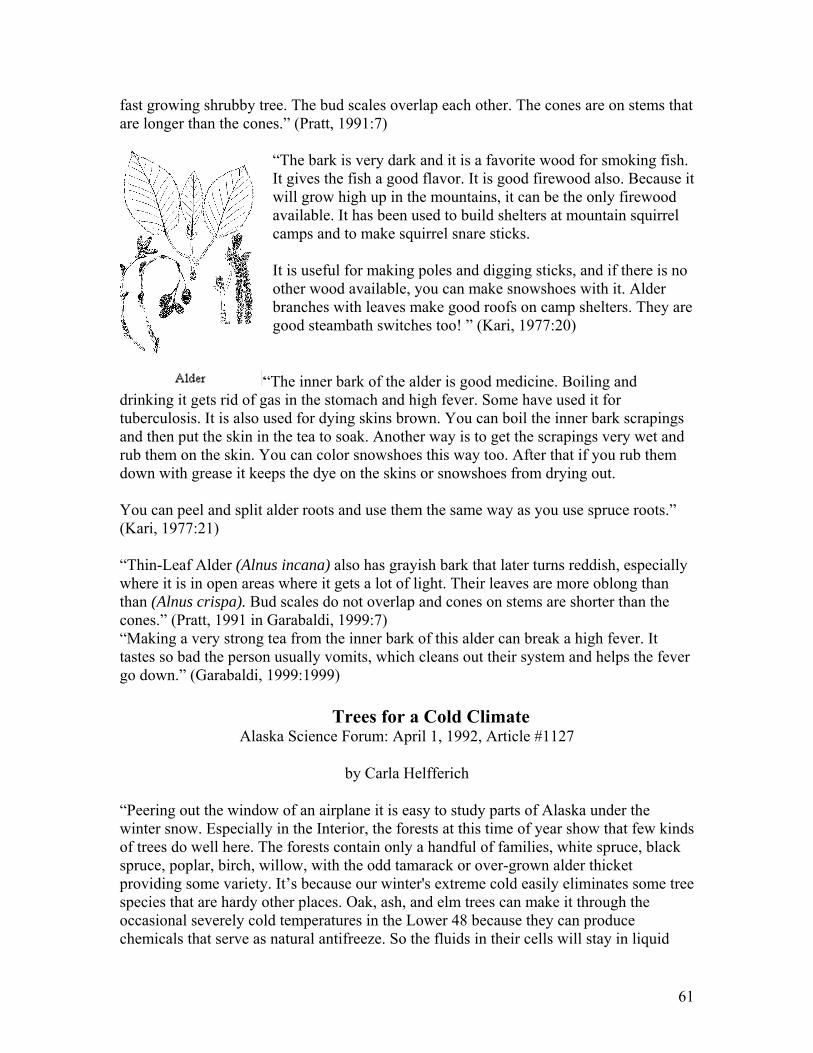
61
fast growing shrubby tree. The bud scales overlap each other. The cones are on stems that are longer than the cones.” (Pratt, 1991:7)
“The bark is very dark and it is a favorite wood for smoking fish. It gives the fish a good flavor. It is good firewood also. Because it will grow high up in the mountains, it can be the only firewood available. It has been used to build shelters at mountain squirrel camps and to make squirrel snare sticks. It is useful for making poles and digging sticks, and if there is no other wood available, you can make snowshoes with it. Alder branches with leaves make good roofs on camp shelters. They are good steambath switches too! ” (Kari, 1977:20)
“The inner bark of the alder is good medicine. Boiling and drinking it gets rid of gas in the stomach and high fever. Some have used it for tuberculosis. It is also used for dying skins brown. You can boil the inner bark scrapings and then put the skin in the tea to soak. Another way is to get the scrapings very wet and rub them on the skin. You can color snowshoes this way too. After that if you rub them down with grease it keeps the dye on the skins or snowshoes from drying out. You can peel and split alder roots and use them the same way as you use spruce roots.” (Kari, 1977:21) “Thin-Leaf Alder (Alnus incana) also has grayish bark that later turns reddish, especially where it is in open areas where it gets a lot of light. Their leaves are more oblong than than (Alnus crispa). Bud scales do not overlap and cones on stems are shorter than the cones.” (Pratt, 1991 in Garabaldi, 1999:7) “Making a very strong tea from the inner bark of this alder can break a high fever. It tastes so bad the person usually vomits, which cleans out their system and helps the fever go down.” (Garabaldi, 1999:1999)
Trees for a Cold Climate
Alaska Science Forum: April 1, 1992, Article #1127
by Carla Helfferich
“Peering out the window of an airplane it is easy to study parts of Alaska under the winter snow. Especially in the Interior, the forests at this time of year show that few kinds of trees do well here. The forests contain only a handful of families, white spruce, black spruce, poplar, birch, willow, with the odd tamarack or over-grown alder thicket providing some variety. It’s because our winter's extreme cold easily eliminates some tree species that are hardy other places. Oak, ash, and elm trees can make it through the occasional severely cold temperatures in the Lower 48 because they can produce chemicals that serve as natural antifreeze. So the fluids in their cells will stay in liquid

62
form down to 40 below. But if it gets colder than that their sap will freeze, expanding, crystallizing, and rupturing the cells containing them. Our Interior winters would kill trees that rely on antifreeze alone to survive deep cold.
The hardiest trees rely on physics more than on chemistry to make it through the winter. When the seasonal chill begins to reach black or white spruce, for example, the sap leaves their living cells and flows into intercellular spaces. There, ice crystals can form without damaging anything vital for the tree's survival.
Conditions underground matter, too. Few tree seeds can sprout in the wet and cold of muskeg. Tamarack and black spruce are among the few species that can spring up and grow on this unforgiving ground.
Also, our trees living in the far north first had to get here. It wasn't that long ago, compared to the life of a species, that Alaska was covered with ice at the edges and was too dry for much tree growth in the middle.
When the ice sheets melted, trees that had continued living south of the glaciers could expand their ranges onto the newly exposed territory. The speed at which they moved depended partly on their ability to handle soil and weather conditions and partly on the mobility of their seeds. Maples, for example, moved northward from their refuge around the mouth of the Mississippi River at an average pace of about 200 meters a year. White spruce, on the other hand, raced northward 10 times as quickly into the western Arctic, where they could live on raw mineral soil that was first uncovered as the ice left. Their small, winged seeds traveled wonderfully on the winds whipping off the shrinking ice sheet that had covered the middle of North America.
Summer temperatures also are important for determining which kinds of trees grow where, one reason why the mild-winter Aleutians aren't forested. After the ice sheets withdrew from what is now New England, spruces soon covered the land. Over a span of some 500 years, the average July temperature increased about two degrees Celsius, and pines replaced the spruces.
Nature isn't yet done with Alaska's forest. Slowly but surely the pines seem to be advancing north and west through the Yukon. Jack pine and lodgepole pine can handle any winter temperature Alaska can offer, but they need a little more summer warmth to set seeds than spruces do. So far, individual pines can survive if people plant them in Alaska, but they haven't settled down and raised families here.
Yet the pine species have raced our way, at a couple hundred meters a year, for the last 12,000 years. They have adapted and evolved as they've come, so even without human- induced climate warming, they should be along shortly. Perhaps they'll make it over the border in time for Alaska's bicentennial---if they hurry.” (Helfferich, 1992:#1277) www.gi.alaska.edu/ScienceForum/ASF11/1127.html.
63
Lesson Three – Trees Activity 1 – The Boreal Forest Trees: A Few Survivors Activity 2 -- The Spruce and Birch: Which is the Most Valuable? Activity 3 -- Spruces Roots Activity 4 -- Our Other Trees Are Special, Too! Materials and Resources:
Elder(s) familiar with the history of gathering, traditional gathering methods, uses of various tree resources, and traditional stories about trees
Adult volunteers familiar with gathering spruce roots Lesson 3 text Framing hammer (large hammer) Traditional digging tool Traditional root debarking tool Small knife or pocket knife Crisco or other grease Computer with Internet access and printer Chart Paper, whiteboard, or blackboard Markers Poster board Construction paper Art materials Drawing paper Learning logs Unit file
64
Activity 1 – The Boreal Forest Trees: A Few Survivors 1. Read and discuss: “Trees for a Cold Climate,” by Carla Helfferich, Alaska Science
Forum: April 1, 1992, Article #1127 (Article contained in Lesson 3). List the key points on chart paper.
. Only 6 families of trees survive during the winter in the Boreal forest in
interior Alaska: Spruce – white and black Balsam poplar aka cottonwood Birch Tamarack Alder Aspen (omitted from the article) Missing are oak, ash, and elm trees that survive cold temperatures in the lower
48 states. The oak, ash and elm produce chemicals that serve as a natural antifreeze that
works down to 40 below zero.
Because the temperatures of Interior Alaska dip down colder than -40° F, the antifreeze chemicals in the oak, ash and elm trees don’t work. The sap freezes, expands, crystallizes, and ruptures the cells in the trees.
Yukon, Jack pine, and Lodgepole pine can survive the winter temperatures
Alaska offers, but they need a little more warmth during the summer. 2. Make a list of the reasons why certain Boreal forest tree types survive in Alaska while
others so not. The students should find the answers in the article and the lesson text on the different trees’ unique ability to survive. Students can work with small groups and work partners.
Examples:
Spruce (both white and black) -- the sap leaves their living cells and flows into intercellular spaces. Once there, ice crystals can form without damaging anything that is vital to the tree's survival.
Tamarack and black spruce -- can sprout in the wet and cold of the muskeg.
White spruce -- live on the raw mineral soil that is first uncovered when the ice melts.

65
3. Make a “Survivors” and “Non-survivors” comparison chart.
On a sheet of construction paper, draw a line in the center from the top to the bottom, dividing the paper in half.
Label the left side: “Survivors,” and the right side, “Non-survivors.”
On the left side, paste pictures of the trees living in interior Alaska. Label each
picture with the name of the tree: White spruce; Black spruce; birch; Tamarack; alder; aspen and Balsam popular.
On the right side, paste pictures of the trees that cannot survive in Alaska. Find
one non-surviving tree for each surviving tree. Look on the Internet or in the resource book for pictures of trees found in the United States.
Compare the types of non-surviving trees that the students found. How many
different trees did the students find all together?
For example: the Palm tree, Olive tree, Apple tree, maple, oak, elm, pine, Banana tree, dogwood, cedar, etc.
Have the students keep the chart in the Unit folder.
66
Activity 2 – The Spruce and Birch: Which is the Most Valuable? 1. Both the spruce and the birch are valuable trees for a variety of traditional uses.
Divide the class into groups to research the uses of the spruce and the birch tree; see which has more.
2. Invite an Elder(s) to share about the variety of traditional uses of both the spruce and
birch trees. 3. Introduce and welcome the Elder(s) to the class and give them the liberty to share on
the importance of the spruce tree and birch, the historical uses, and traditional stories.
As the Elder(s) share, the older students can take a few notes in their learning logs and listen for information about spruce and birch usage.
i. Traditional uses
ii. Different gathering techniques for various uses: wood, roots, bark, sap etc.
iii. How gathering has changed At the appropriate time, students can ask additional questions and older students
can record the answers to the questions in their learning logs. Ask the Elder(s) to help the students as they practice the Upper Kuskokwim
Dialect words for birch and spruce, and their various parts and usages. If permission is granted and appropriate, take pictures, a video, or an audio
recording.
Have students write about what the Elder(s)’ shared in their learning logs. 4. Have each group research their assigned tree (either spruce or birch). Their research
should include interviewing Elders, family members and neighbors, as well as searching in the lesson text, Internet, and other resource materials to discover the unusual uses and the traditional stories about the trees.
Different uses of different parts of the tree Most common use Most unusual use Items made from spruce Medicinal uses Traditional stories
5. Have each group prepare a class presentation on the value of their assigned tree.
Each group will give a presentation on the birch/spruce tree. The following instructions should be used: (15 minutes maximum)
67
o Make a poster display of the tree with the different types and
characteristics o Make a chart listing as many uses that were found for that particular tree o Display items made from the tree o Demonstrate one of the uses of the tree o Share a traditional story about their tree. (If they do not find a traditional
story in their research, the group can make up a story using the traditional style).
6. The teacher and the two adult volunteers will decide which group did the best job of presenting their tree as the most valuable one based upon their presentations.
7. Class Discussion: What would happen if only spruce or birch were available in the
area? What are the things that would be missing if there were only spruce trees? What are the things that would be missing if there were only birch trees?
8. Then, have students write about the value of the spruce and the birch trees in their
learning logs. Activity 3 – Spruces Roots 1. Invite Elder(s) to share on spruce roots; finding, digging, preparing, and using spruce
roots. Ask the Elder(s) to bring items that are made from spruce roots, if possible. If not, then gather items from another source for the Elder(s) to use.
2. Class Discussion: review what the Elder(s) shared. Have the students write the details
from this sharing time and from the class discussion in their learning logs. The younger students can draw the pictures with the key word labels.
3. Plan a field trip to find spruce roots: Refer to “Digging and Preparing Spruce
Roots” by Alan & Helen Dick, Donna Miller MacAlpine, Iditarod Area School District http://www.ankn.uaf.edu/curriculum/units/spruce.html. This explains the process. (The booklets may also be in your school library.)
Divide the class into groups and find an Elder/adult volunteer familiar with
gathering spruce roots to guide each of the groups. Have the Elder/adult guide recommend a good location for spruce root gathering. If walking to good location is not possible, have the Elder/adult guide recommend
a good location for spruce tree root gathering. Have the students obtain the necessary permission slips prior to the field trip.
Steps 4 – 8 are adapted from the “Digging and Preparing Spruce Roots” reference (Pictures are included from the source.)
4. Find Spruce Tree Roots

68
When you are looking for spruce tree roots you want to find ones that are long, taper little, have few branches, and are tough. If there are short roots, they will break easily and have many branches to be cleaned off. June to July is the best time to dig roots because the bark will slip off easily. Roots dug in the spring and the fall will be harder to debark, but will certainly not be impossible.
It is important to find a good place to dig up spruce tree roots; take the necessary time to look for a good spot among the spruce stands. Keep in mind that spruce tree roots grow very deep in the soil and will be hard to dig up; roots mixed with alder, birch, and willow roots can be difficult to untangle; and roots that are exposed on the cutbank of a river will be dry and take a long time to soften.
A nice moss floor, with relatively little brush is a good place to dig around to see the number and the depth of the spruce root trees. There may be a need to try several places until locating a good spot.
The condition of the roots can be seen by looking at the tree. This is because the roots will be similar to the trunk and the branches of the tree. The best tree is tall with little taper, few branches and branches are that are hard to break.
5. Dig Spruce Tree Roots
To dig the spruce roots, use a digging stick like the one above or use the claw end of a framing hammer. While digging the roots, make sure to coil them together, to help prevent them from drying.
6. Clean the Spruce Tree Roots
First, cut off all the small root hairs on the spruce root with a pocket knife.
Next, remove the bark by pulling it through the claw of a hammer or pulling it through an ax split in a stump (though the bark tends to plug the split).
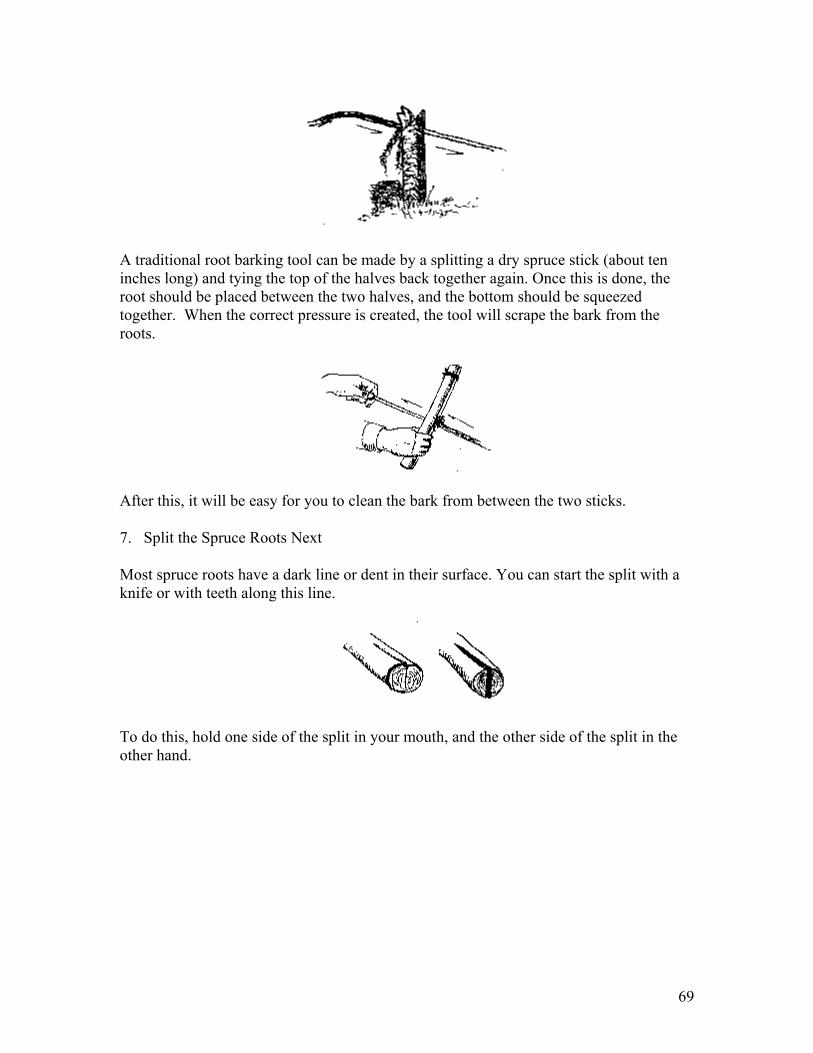
69
A traditional root barking tool can be made by a splitting a dry spruce stick (about ten inches long) and tying the top of the halves back together again. Once this is done, the root should be placed between the two halves, and the bottom should be squeezed together. When the correct pressure is created, the tool will scrape the bark from the roots.
After this, it will be easy for you to clean the bark from between the two sticks.
7. Split the Spruce Roots Next
Most spruce roots have a dark line or dent in their surface. You can start the split with a knife or with teeth along this line.
To do this, hold one side of the split in your mouth, and the other side of the split in the other hand.
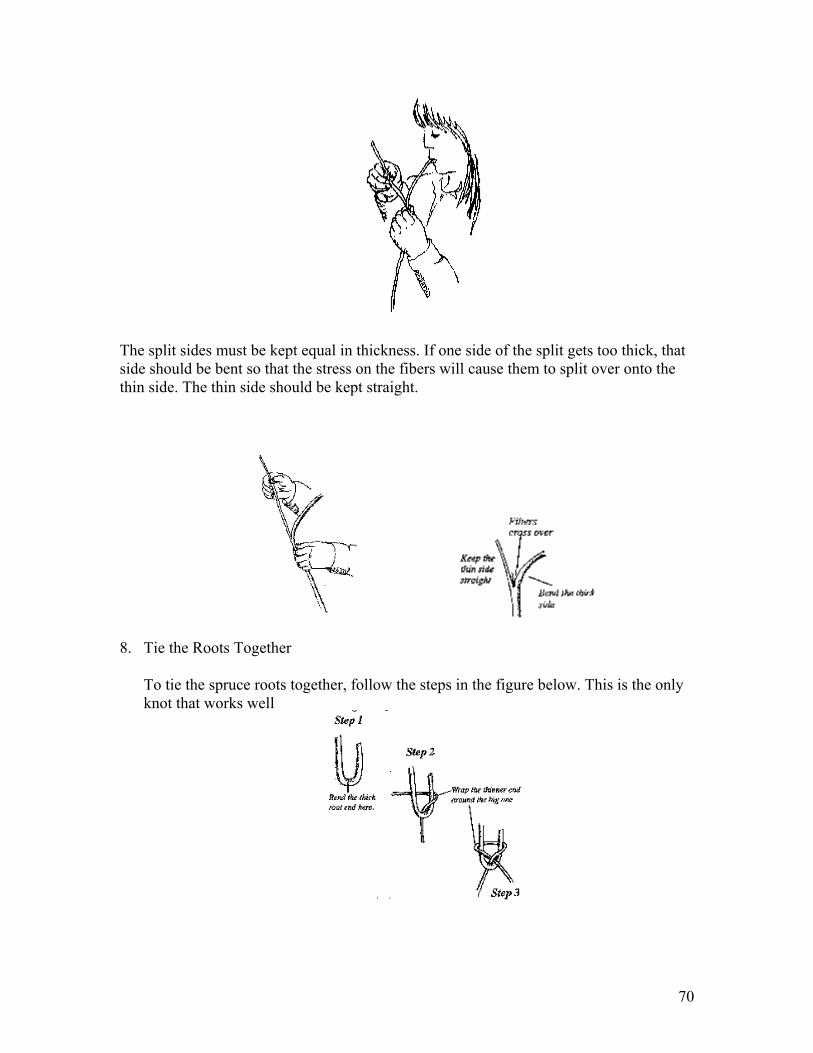
70
The split sides must be kept equal in thickness. If one side of the split gets too thick, that side should be bent so that the stress on the fibers will cause them to split over onto the thin side. The thin side should be kept straight.
8. Tie the Roots Together
To tie the spruce roots together, follow the steps in the figure below. This is the only knot that works well

71
9. Cleaning Your Hands
After working with the spruce roots, use Crisco or another kind of grease to remove the spruce gum. This works best because both the spruce tree gum and grease are non-polar substances that repel each other. Then after this is done, hands can be washed with soap and water.
Optional Activities for Using Spruce Roots
Make snowshoes using spruce roots for webbing. Find instructions at: www.ankn.uaf.edu/curriculum/units/snowshoe.html
Work with an Elder or other Adult volunteer who has experience with birch bark basket making. Have them teach the students how to use spruce roots for decorative fastening.
Work with an Elder/Adult volunteer to make a fish trap using spruce roots. Activity 4 – Our Other Trees Are Special, Too! 1. Invite an Elder(s) to share on the traditional use(s) of Balsam Poplar (T’ighis) aka
cottonwood, Quaking Aspen (ch’ighakwnuh) aka cottonwood, Tamarack or Larch (łat’ighazya), and Alder (k’isr).
2. As the Elder(s) share, older students can take a few notes in their learning logs and
listen for information about various trees:
Traditional uses Information from traditional stories about particular trees How the use has changed 3. At the appropriate time, the students may ask additional questions and older students can record the answers to the questions in their learning logs.
For Example:
Why are certain trees referred to as cottonwood? How can you tell the tamarack from the spruce tree? Which tree is preferred for smoking meat and fish?
4. Ask the Elder(s) for their help as the students practice the Upper Kuskokwim dialect words for the different trees.
5. If permission is granted and appropriate, take pictures, a video or make an audio recording.
6. Have the students write about the Elder(s) sharing in their learning logs.

72
3. Divide the class into small groups or work partners. Have the students work together to make a chart on the other trees: Balsam Poplar, Quaking Aspen, Tamarack or Larch, and Alder (k’isr).
Chart categories:
Tree name with the picture Location Unique characteristics Traditional uses
Students can use the information in Lesson 3, the Internet, the Elder(s)’ sharing, and resource books to find pictures and information.
4. Read and discuss “Tamarack -- Not a Dead Spruce”, by John Zasada in Lesson 3.
Find pictures of the Tamarack tree in the summer season and compare it to the spruce tree.
Find pictures of the Tamarack tree in the fall, once it has lost its needles, as well as in the winter.
Have the students look for Tamarack trees in the village area. Have the students write what they learned about the Tamarack tree in their
learning aaa logs. Younger students can draw how the Tamarack tree looks during the different
seasons of the year.
5. Read and discuss “Cottonwood and Balsam Poplar”, by T. Neil Davis in Lesson 3.
Find pictures of a true cottonwood and compare it to the Balsam popular and the Quaking aspen.
Why would people call the Balsam popular and the Quaking aspen a cottonwood? Have students write what they learned about true cottonwoods and the Alaskan
so-called cottonwood in their learning logs. Younger students can draw pictures about the cottonwood.
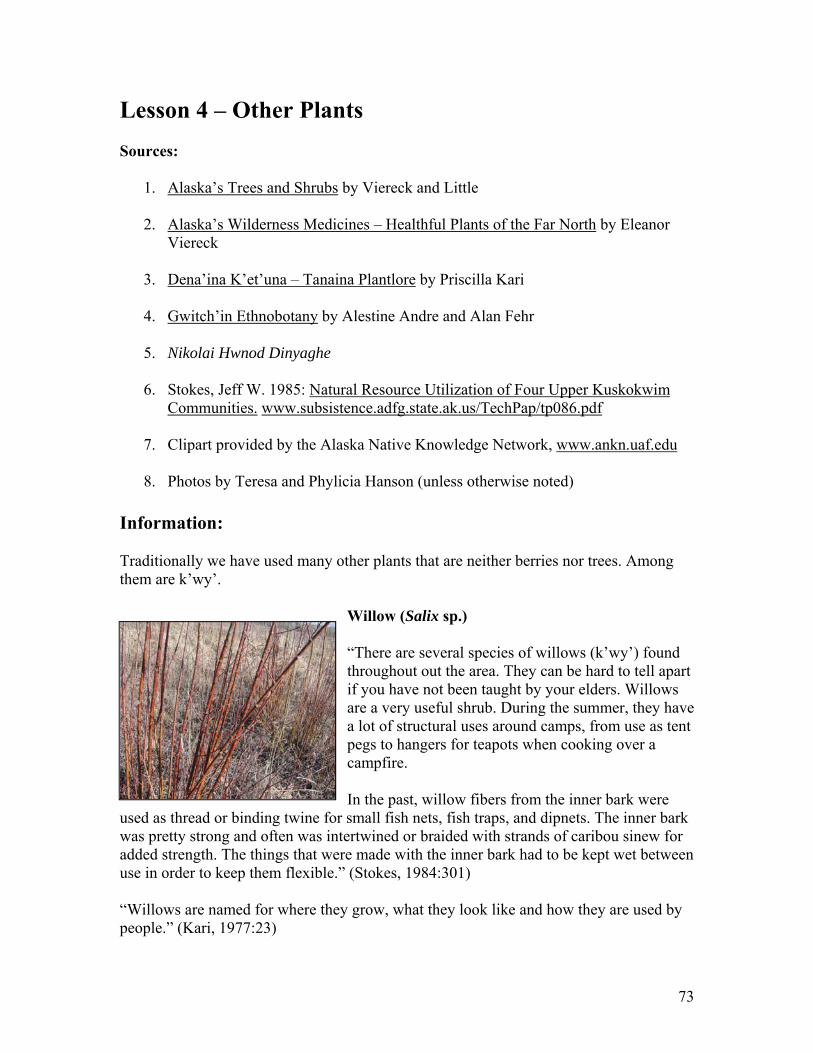
73
Willow-k’wy
Lesson 4 – Other Plants Sources:
1. Alaska’s Trees and Shrubs by Viereck and Little
2. Alaska’s Wilderness Medicines – Healthful Plants of the Far North by Eleanor Viereck
3. Dena’ina K’et’una – Tanaina Plantlore by Priscilla Kari
4. Gwitch’in Ethnobotany by Alestine Andre and Alan Fehr
5. Nikolai Hwnod Dinyaghe
6. Stokes, Jeff W. 1985: Natural Resource Utilization of Four Upper Kuskokwim
Communities. www.subsistence.adfg.state.ak.us/TechPap/tp086.pdf
7. Clipart provided by the Alaska Native Knowledge Network, www.ankn.uaf.edu
8. Photos by Teresa and Phylicia Hanson (unless otherwise noted) Information: Traditionally we have used many other plants that are neither berries nor trees. Among them are k’wy’.
Willow (Salix sp.) “There are several species of willows (k’wy’) found throughout out the area. They can be hard to tell apart if you have not been taught by your elders. Willows are a very useful shrub. During the summer, they have a lot of structural uses around camps, from use as tent pegs to hangers for teapots when cooking over a campfire. In the past, willow fibers from the inner bark were
used as thread or binding twine for small fish nets, fish traps, and dipnets. The inner bark was pretty strong and often was intertwined or braided with strands of caribou sinew for added strength. The things that were made with the inner bark had to be kept wet between use in order to keep them flexible.” (Stokes, 1984:301) “Willows are named for where they grow, what they look like and how they are used by people.” (Kari, 1977:23)
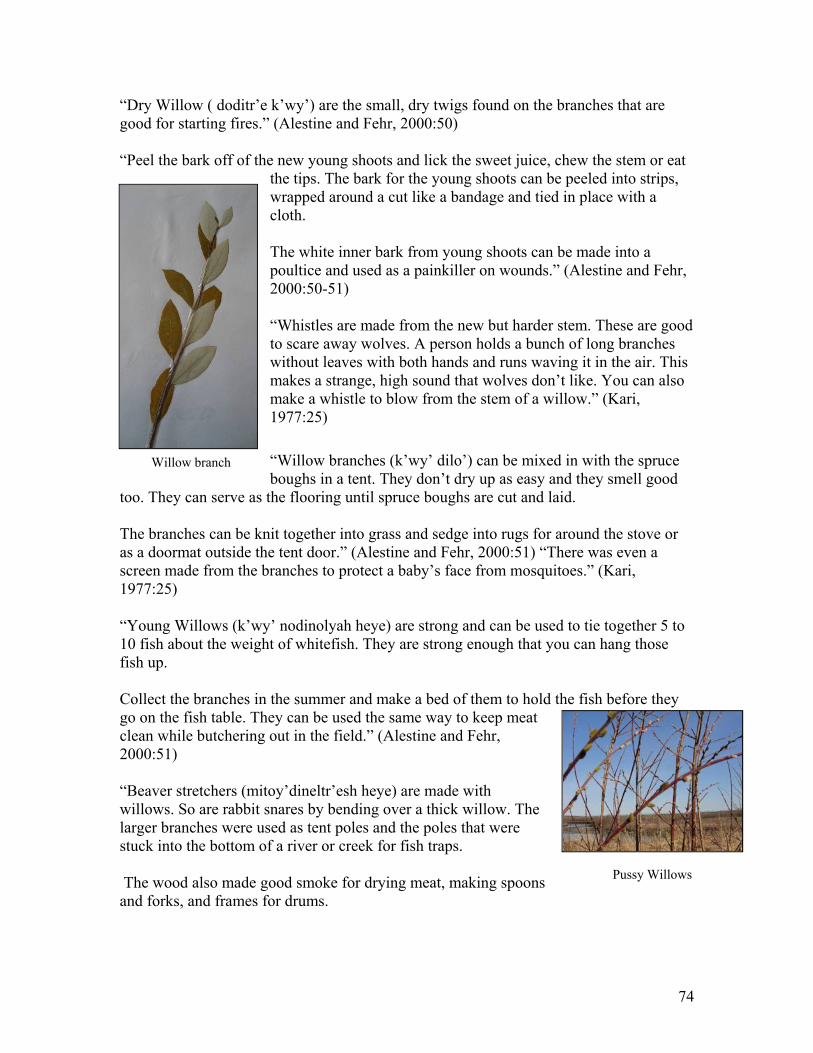
74
Willow branch
Pussy Willows
“Dry Willow ( doditr’e k’wy’) are the small, dry twigs found on the branches that are good for starting fires.” (Alestine and Fehr, 2000:50) “Peel the bark off of the new young shoots and lick the sweet juice, chew the stem or eat
the tips. The bark for the young shoots can be peeled into strips, wrapped around a cut like a bandage and tied in place with a cloth. The white inner bark from young shoots can be made into a poultice and used as a painkiller on wounds.” (Alestine and Fehr, 2000:50-51) “Whistles are made from the new but harder stem. These are good to scare away wolves. A person holds a bunch of long branches without leaves with both hands and runs waving it in the air. This makes a strange, high sound that wolves don’t like. You can also make a whistle to blow from the stem of a willow.” (Kari, 1977:25)
“Willow branches (k’wy’ dilo’) can be mixed in with the spruce boughs in a tent. They don’t dry up as easy and they smell good
too. They can serve as the flooring until spruce boughs are cut and laid. The branches can be knit together into grass and sedge into rugs for around the stove or as a doormat outside the tent door.” (Alestine and Fehr, 2000:51) “There was even a screen made from the branches to protect a baby’s face from mosquitoes.” (Kari, 1977:25) “Young Willows (k’wy’ nodinolyah heye) are strong and can be used to tie together 5 to 10 fish about the weight of whitefish. They are strong enough that you can hang those fish up. Collect the branches in the summer and make a bed of them to hold the fish before they go on the fish table. They can be used the same way to keep meat clean while butchering out in the field.” (Alestine and Fehr, 2000:51) “Beaver stretchers (mitoy’dineltr’esh heye) are made with willows. So are rabbit snares by bending over a thick willow. The larger branches were used as tent poles and the poles that were stuck into the bottom of a river or creek for fish traps. The wood also made good smoke for drying meat, making spoons and forks, and frames for drums.
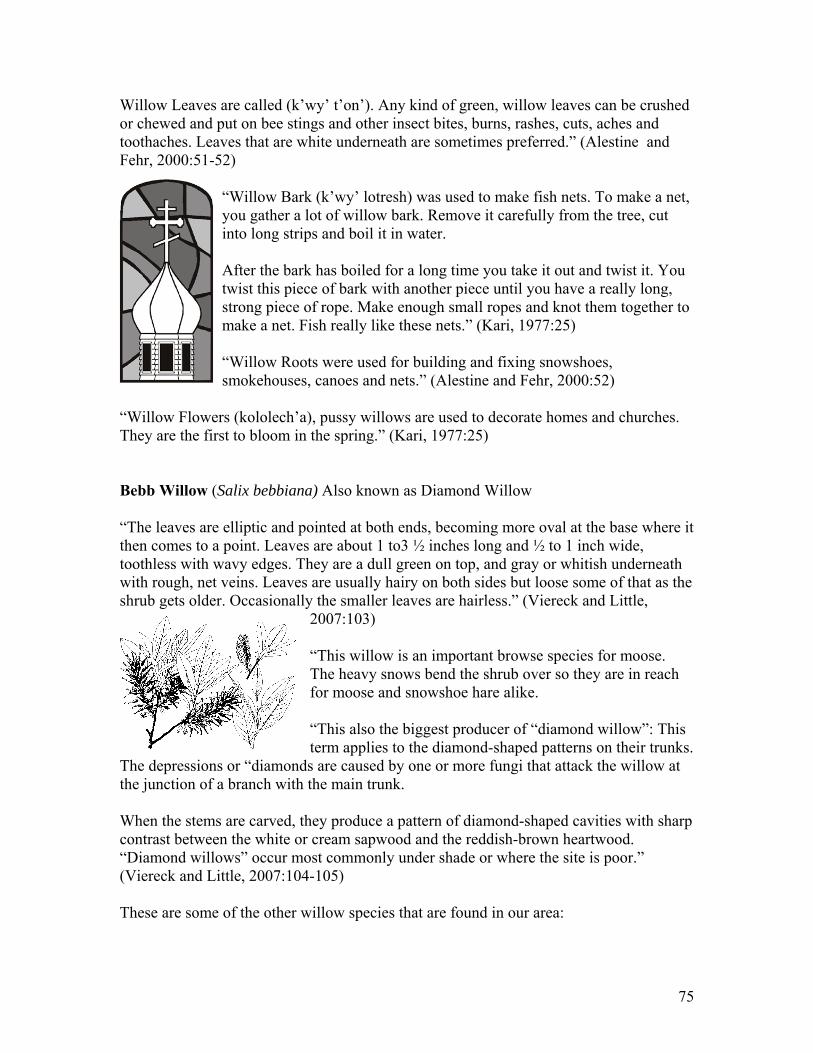
75
Willow Leaves are called (k’wy’ t’on’). Any kind of green, willow leaves can be crushed or chewed and put on bee stings and other insect bites, burns, rashes, cuts, aches and toothaches. Leaves that are white underneath are sometimes preferred.” (Alestine and Fehr, 2000:51-52)
“Willow Bark (k’wy’ lotresh) was used to make fish nets. To make a net, you gather a lot of willow bark. Remove it carefully from the tree, cut into long strips and boil it in water. After the bark has boiled for a long time you take it out and twist it. You twist this piece of bark with another piece until you have a really long, strong piece of rope. Make enough small ropes and knot them together to make a net. Fish really like these nets.” (Kari, 1977:25) “Willow Roots were used for building and fixing snowshoes, smokehouses, canoes and nets.” (Alestine and Fehr, 2000:52)
“Willow Flowers (kololech’a), pussy willows are used to decorate homes and churches. They are the first to bloom in the spring.” (Kari, 1977:25) Bebb Willow (Salix bebbiana) Also known as Diamond Willow “The leaves are elliptic and pointed at both ends, becoming more oval at the base where it then comes to a point. Leaves are about 1 to3 ½ inches long and ½ to 1 inch wide, toothless with wavy edges. They are a dull green on top, and gray or whitish underneath with rough, net veins. Leaves are usually hairy on both sides but loose some of that as the shrub gets older. Occasionally the smaller leaves are hairless.” (Viereck and Little,
2007:103) “This willow is an important browse species for moose. The heavy snows bend the shrub over so they are in reach for moose and snowshoe hare alike. “This also the biggest producer of “diamond willow”: This term applies to the diamond-shaped patterns on their trunks.
The depressions or “diamonds are caused by one or more fungi that attack the willow at the junction of a branch with the main trunk. When the stems are carved, they produce a pattern of diamond-shaped cavities with sharp contrast between the white or cream sapwood and the reddish-brown heartwood. “Diamond willows” occur most commonly under shade or where the site is poor.” (Viereck and Little, 2007:104-105) These are some of the other willow species that are found in our area:
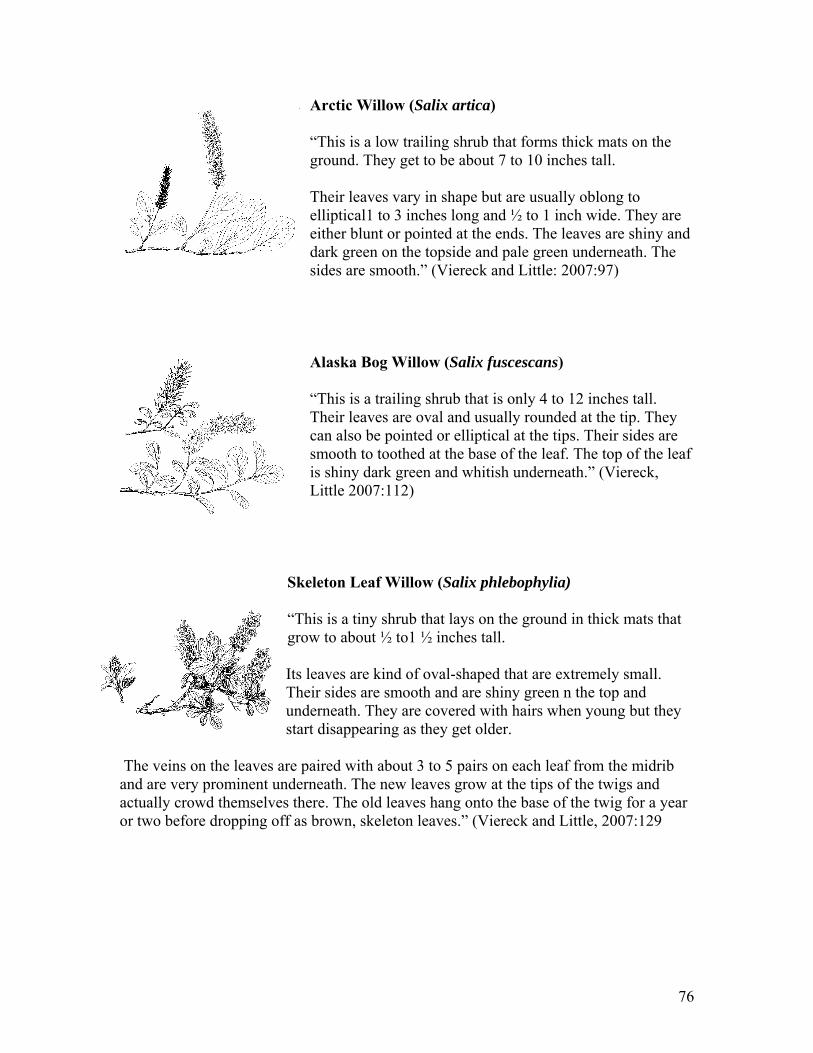
76
Arctic Willow (Salix artica) “This is a low trailing shrub that forms thick mats on the ground. They get to be about 7 to 10 inches tall. Their leaves vary in shape but are usually oblong to elliptical1 to 3 inches long and ½ to 1 inch wide. They are either blunt or pointed at the ends. The leaves are shiny and dark green on the topside and pale green underneath. The sides are smooth.” (Viereck and Little: 2007:97)
Alaska Bog Willow (Salix fuscescans) “This is a trailing shrub that is only 4 to 12 inches tall. Their leaves are oval and usually rounded at the tip. They can also be pointed or elliptical at the tips. Their sides are smooth to toothed at the base of the leaf. The top of the leaf is shiny dark green and whitish underneath.” (Viereck, Little 2007:112)
Skeleton Leaf Willow (Salix phlebophylia)
“This is a tiny shrub that lays on the ground in thick mats that grow to about ½ to1 ½ inches tall.
Its leaves are kind of oval-shaped that are extremely small. Their sides are smooth and are shiny green n the top and underneath. They are covered with hairs when young but they start disappearing as they get older.
The veins on the leaves are paired with about 3 to 5 pairs on each leaf from the midrib and are very prominent underneath. The new leaves grow at the tips of the twigs and actually crowd themselves there. The old leaves hang onto the base of the twig for a year or two before dropping off as brown, skeleton leaves.” (Viereck and Little, 2007:129
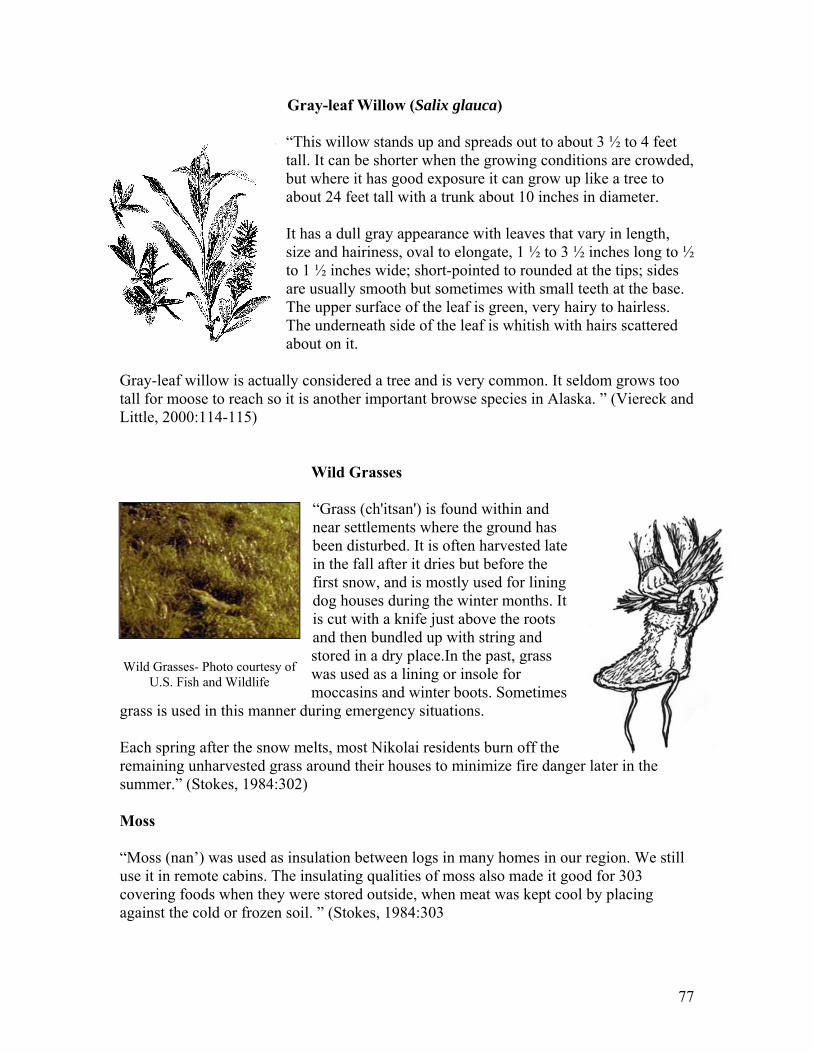
77
Gray-leaf Willow (Salix glauca)
“This willow stands up and spreads out to about 3 ½ to 4 feet tall. It can be shorter when the growing conditions are crowded, but where it has good exposure it can grow up like a tree to about 24 feet tall with a trunk about 10 inches in diameter. It has a dull gray appearance with leaves that vary in length, size and hairiness, oval to elongate, 1 ½ to 3 ½ inches long to ½ to 1 ½ inches wide; short-pointed to rounded at the tips; sides are usually smooth but sometimes with small teeth at the base. The upper surface of the leaf is green, very hairy to hairless. The underneath side of the leaf is whitish with hairs scattered about on it.
Gray-leaf willow is actually considered a tree and is very common. It seldom grows too tall for moose to reach so it is another important browse species in Alaska. ” (Viereck and Little, 2000:114-115)
Wild Grasses
“Grass (ch'itsan') is found within and near settlements where the ground has been disturbed. It is often harvested late in the fall after it dries but before the first snow, and is mostly used for lining dog houses during the winter months. It is cut with a knife just above the roots and then bundled up with string and stored in a dry place.In the past, grass was used as a lining or insole for moccasins and winter boots. Sometimes
grass is used in this manner during emergency situations. Each spring after the snow melts, most Nikolai residents burn off the remaining unharvested grass around their houses to minimize fire danger later in the summer.” (Stokes, 1984:302) Moss “Moss (nan’) was used as insulation between logs in many homes in our region. We still use it in remote cabins. The insulating qualities of moss also made it good for 303 covering foods when they were stored outside, when meat was kept cool by placing against the cold or frozen soil. ” (Stokes, 1984:303
Wild Grasses- Photo courtesy of U.S. Fish and Wildlife
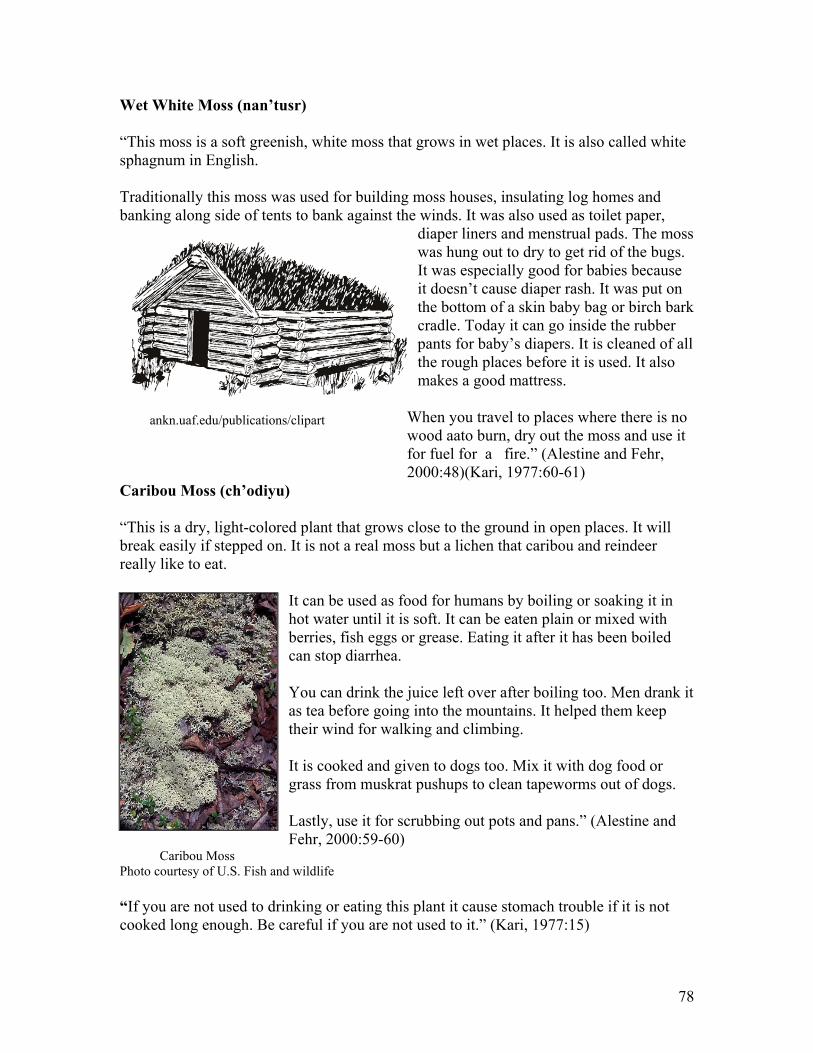
78
Wet White Moss (nan’tusr) “This moss is a soft greenish, white moss that grows in wet places. It is also called white sphagnum in English. Traditionally this moss was used for building moss houses, insulating log homes and banking along side of tents to bank against the winds. It was also used as toilet paper,
diaper liners and menstrual pads. The moss was hung out to dry to get rid of the bugs. It was especially good for babies because it doesn’t cause diaper rash. It was put on the bottom of a skin baby bag or birch bark cradle. Today it can go inside the rubber pants for baby’s diapers. It is cleaned of all the rough places before it is used. It also makes a good mattress.
When you travel to places where there is no wood aato burn, dry out the moss and use it for fuel for a fire.” (Alestine and Fehr, 2000:48)(Kari, 1977:60-61)
Caribou Moss (ch’odiyu) “This is a dry, light-colored plant that grows close to the ground in open places. It will break easily if stepped on. It is not a real moss but a lichen that caribou and reindeer really like to eat.
It can be used as food for humans by boiling or soaking it in hot water until it is soft. It can be eaten plain or mixed with berries, fish eggs or grease. Eating it after it has been boiled can stop diarrhea. You can drink the juice left over after boiling too. Men drank it as tea before going into the mountains. It helped them keep their wind for walking and climbing. It is cooked and given to dogs too. Mix it with dog food or grass from muskrat pushups to clean tapeworms out of dogs. Lastly, use it for scrubbing out pots and pans.” (Alestine and Fehr, 2000:59-60)
Caribou Moss Photo courtesy of U.S. Fish and wildlife “If you are not used to drinking or eating this plant it cause stomach trouble if it is not cooked long enough. Be careful if you are not used to it.” (Kari, 1977:15)
ankn.uaf.edu/publications/clipart
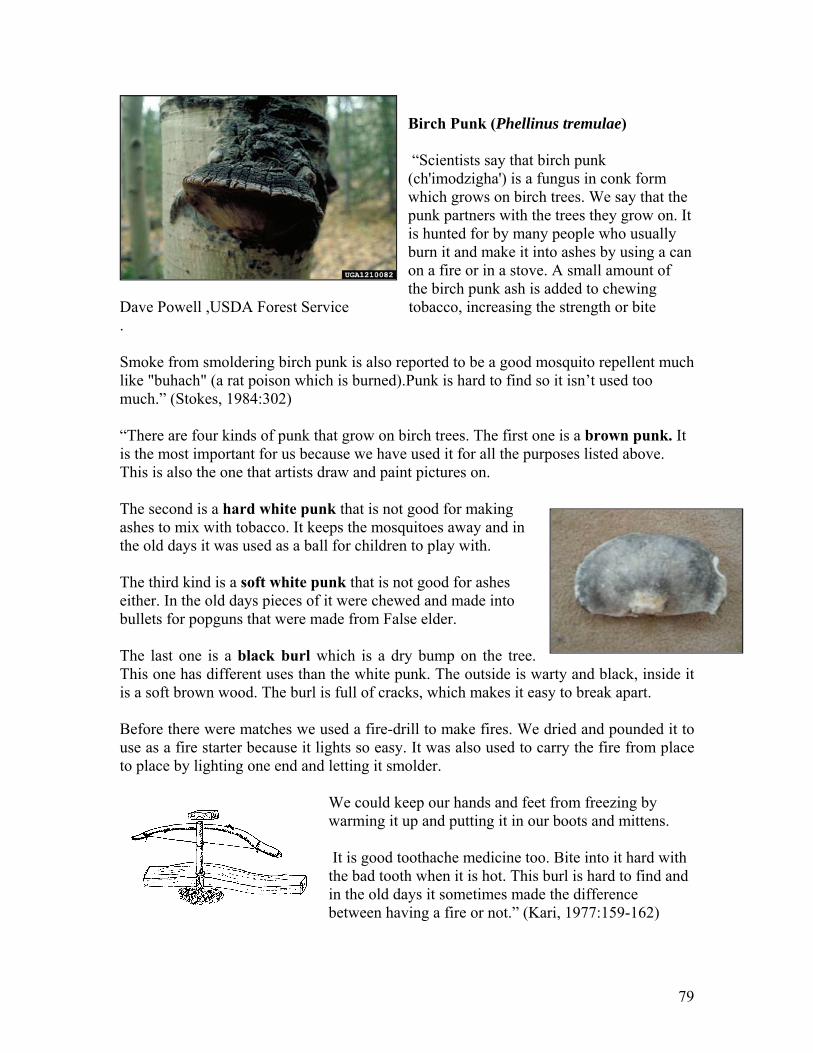
79
Birch Punk (Phellinus tremulae) “Scientists say that birch punk (ch'imodzigha') is a fungus in conk form which grows on birch trees. We say that the punk partners with the trees they grow on. It is hunted for by many people who usually burn it and make it into ashes by using a can on a fire or in a stove. A small amount of the birch punk ash is added to chewing
Dave Powell ,USDA Forest Service tobacco, increasing the strength or bite . Smoke from smoldering birch punk is also reported to be a good mosquito repellent much like "buhach" (a rat poison which is burned).Punk is hard to find so it isn’t used too much.” (Stokes, 1984:302) “There are four kinds of punk that grow on birch trees. The first one is a brown punk. It is the most important for us because we have used it for all the purposes listed above. This is also the one that artists draw and paint pictures on. The second is a hard white punk that is not good for making ashes to mix with tobacco. It keeps the mosquitoes away and in the old days it was used as a ball for children to play with. The third kind is a soft white punk that is not good for ashes either. In the old days pieces of it were chewed and made into bullets for popguns that were made from False elder. The last one is a black burl which is a dry bump on the tree. This one has different uses than the white punk. The outside is warty and black, inside it is a soft brown wood. The burl is full of cracks, which makes it easy to break apart. Before there were matches we used a fire-drill to make fires. We dried and pounded it to use as a fire starter because it lights so easy. It was also used to carry the fire from place to place by lighting one end and letting it smolder.
We could keep our hands and feet from freezing by warming it up and putting it in our boots and mittens. It is good toothache medicine too. Bite into it hard with the bad tooth when it is hot. This burl is hard to find and in the old days it sometimes made the difference between having a fire or not.” (Kari, 1977:159-162)
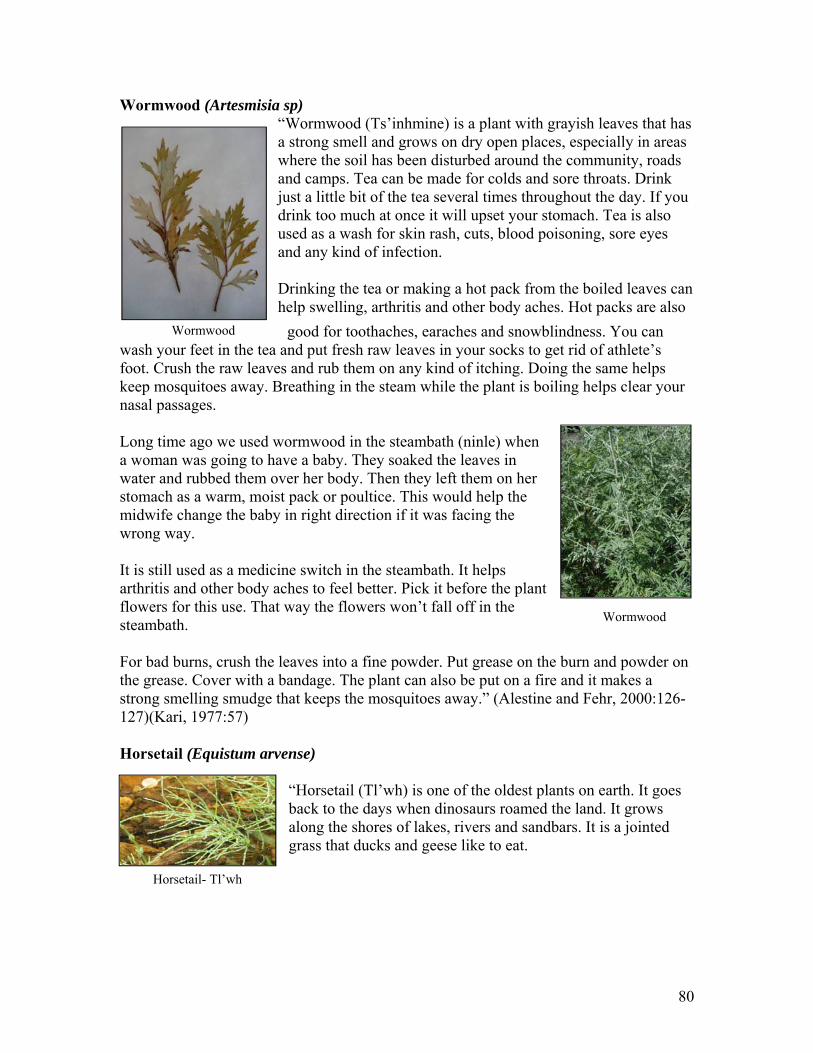
80
Wormwood
Wormwood (Artesmisia sp) “Wormwood (Ts’inhmine) is a plant with grayish leaves that has a strong smell and grows on dry open places, especially in areas where the soil has been disturbed around the community, roads and camps. Tea can be made for colds and sore throats. Drink just a little bit of the tea several times throughout the day. If you drink too much at once it will upset your stomach. Tea is also used as a wash for skin rash, cuts, blood poisoning, sore eyes and any kind of infection. Drinking the tea or making a hot pack from the boiled leaves can help swelling, arthritis and other body aches. Hot packs are also
good for toothaches, earaches and snowblindness. You can wash your feet in the tea and put fresh raw leaves in your socks to get rid of athlete’s foot. Crush the raw leaves and rub them on any kind of itching. Doing the same helps keep mosquitoes away. Breathing in the steam while the plant is boiling helps clear your nasal passages. Long time ago we used wormwood in the steambath (ninle) when a woman was going to have a baby. They soaked the leaves in water and rubbed them over her body. Then they left them on her stomach as a warm, moist pack or poultice. This would help the midwife change the baby in right direction if it was facing the wrong way. It is still used as a medicine switch in the steambath. It helps arthritis and other body aches to feel better. Pick it before the plant flowers for this use. That way the flowers won’t fall off in the steambath. For bad burns, crush the leaves into a fine powder. Put grease on the burn and powder on the grease. Cover with a bandage. The plant can also be put on a fire and it makes a strong smelling smudge that keeps the mosquitoes away.” (Alestine and Fehr, 2000:126-127)(Kari, 1977:57) Horsetail (Equistum arvense)
“Horsetail (Tl’wh) is one of the oldest plants on earth. It goes back to the days when dinosaurs roamed the land. It grows along the shores of lakes, rivers and sandbars. It is a jointed grass that ducks and geese like to eat.
Wormwood
Horsetail- Tl’wh
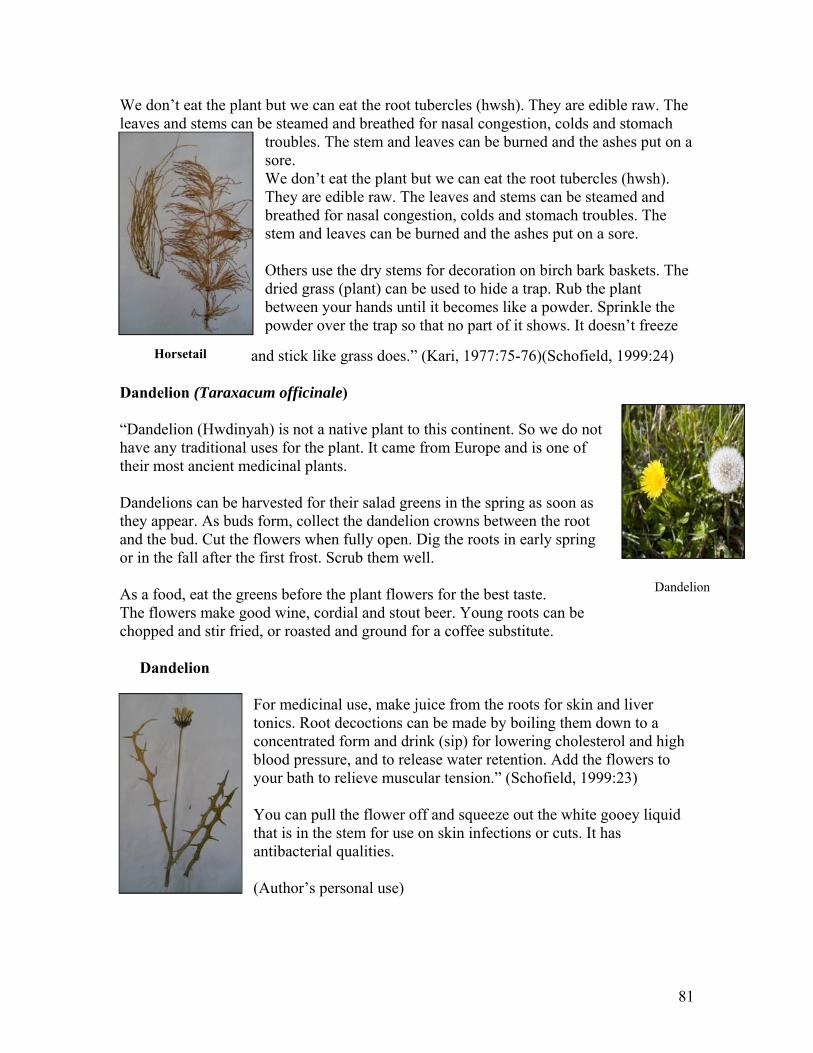
81
We don’t eat the plant but we can eat the root tubercles (hwsh). They are edible raw. The leaves and stems can be steamed and breathed for nasal congestion, colds and stomach
troubles. The stem and leaves can be burned and the ashes put on a sore. We don’t eat the plant but we can eat the root tubercles (hwsh). They are edible raw. The leaves and stems can be steamed and breathed for nasal congestion, colds and stomach troubles. The stem and leaves can be burned and the ashes put on a sore. Others use the dry stems for decoration on birch bark baskets. The dried grass (plant) can be used to hide a trap. Rub the plant between your hands until it becomes like a powder. Sprinkle the powder over the trap so that no part of it shows. It doesn’t freeze
and stick like grass does.” (Kari, 1977:75-76)(Schofield, 1999:24)
Dandelion (Taraxacum officinale) “Dandelion (Hwdinyah) is not a native plant to this continent. So we do not have any traditional uses for the plant. It came from Europe and is one of their most ancient medicinal plants. Dandelions can be harvested for their salad greens in the spring as soon as they appear. As buds form, collect the dandelion crowns between the root and the bud. Cut the flowers when fully open. Dig the roots in early spring or in the fall after the first frost. Scrub them well. As a food, eat the greens before the plant flowers for the best taste. The flowers make good wine, cordial and stout beer. Young roots can be chopped and stir fried, or roasted and ground for a coffee substitute. Dandelion
For medicinal use, make juice from the roots for skin and liver tonics. Root decoctions can be made by boiling them down to a concentrated form and drink (sip) for lowering cholesterol and high blood pressure, and to release water retention. Add the flowers to your bath to relieve muscular tension.” (Schofield, 1999:23) You can pull the flower off and squeeze out the white gooey liquid that is in the stem for use on skin infections or cuts. It has antibacterial qualities. (Author’s personal use)
Horsetail
Dandelion
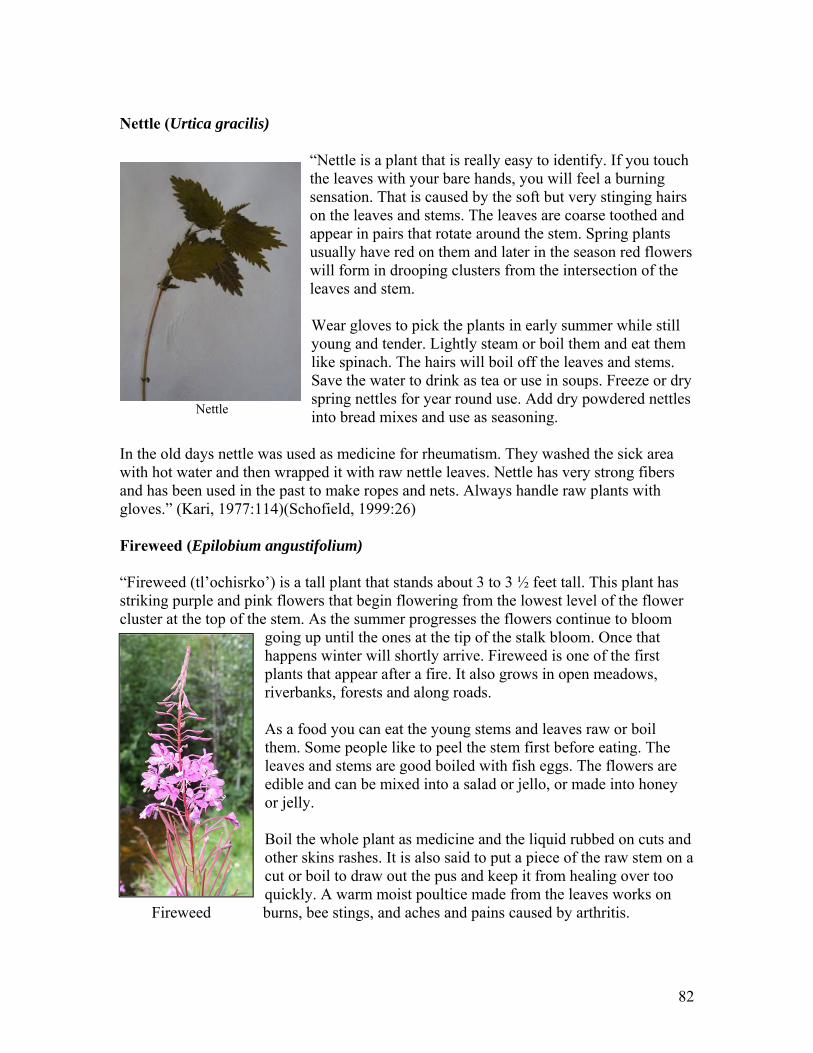
82
Nettle
Nettle (Urtica gracilis)
“Nettle is a plant that is really easy to identify. If you touch the leaves with your bare hands, you will feel a burning sensation. That is caused by the soft but very stinging hairs on the leaves and stems. The leaves are coarse toothed and appear in pairs that rotate around the stem. Spring plants usually have red on them and later in the season red flowers will form in drooping clusters from the intersection of the leaves and stem. Wear gloves to pick the plants in early summer while still young and tender. Lightly steam or boil them and eat them like spinach. The hairs will boil off the leaves and stems. Save the water to drink as tea or use in soups. Freeze or dry spring nettles for year round use. Add dry powdered nettles into bread mixes and use as seasoning.
In the old days nettle was used as medicine for rheumatism. They washed the sick area with hot water and then wrapped it with raw nettle leaves. Nettle has very strong fibers and has been used in the past to make ropes and nets. Always handle raw plants with gloves.” (Kari, 1977:114)(Schofield, 1999:26) Fireweed (Epilobium angustifolium) “Fireweed (tl’ochisrko’) is a tall plant that stands about 3 to 3 ½ feet tall. This plant has striking purple and pink flowers that begin flowering from the lowest level of the flower cluster at the top of the stem. As the summer progresses the flowers continue to bloom
going up until the ones at the tip of the stalk bloom. Once that happens winter will shortly arrive. Fireweed is one of the first plants that appear after a fire. It also grows in open meadows, riverbanks, forests and along roads. As a food you can eat the young stems and leaves raw or boil them. Some people like to peel the stem first before eating. The leaves and stems are good boiled with fish eggs. The flowers are edible and can be mixed into a salad or jello, or made into honey or jelly. Boil the whole plant as medicine and the liquid rubbed on cuts and other skins rashes. It is also said to put a piece of the raw stem on a cut or boil to draw out the pus and keep it from healing over too quickly. A warm moist poultice made from the leaves works on
Fireweed burns, bee stings, and aches and pains caused by arthritis.
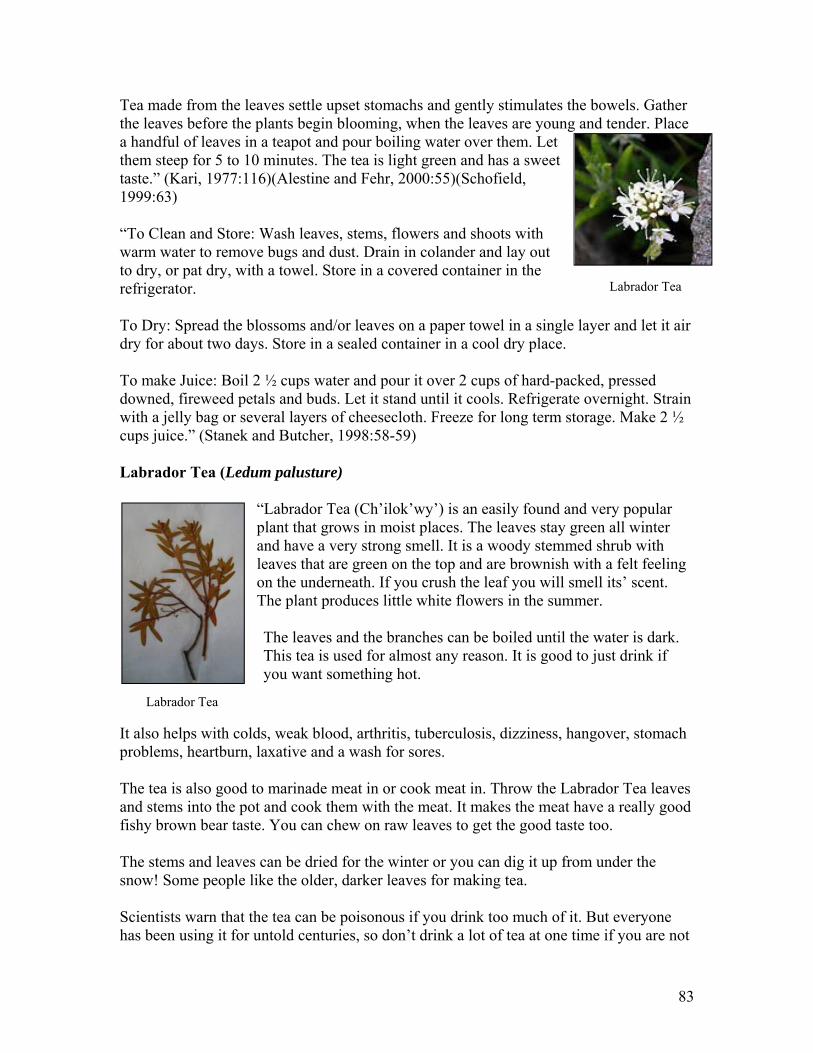
83
Labrador Tea
Tea made from the leaves settle upset stomachs and gently stimulates the bowels. Gather the leaves before the plants begin blooming, when the leaves are young and tender. Place a handful of leaves in a teapot and pour boiling water over them. Let them steep for 5 to 10 minutes. The tea is light green and has a sweet taste.” (Kari, 1977:116)(Alestine and Fehr, 2000:55)(Schofield, 1999:63) “To Clean and Store: Wash leaves, stems, flowers and shoots with warm water to remove bugs and dust. Drain in colander and lay out to dry, or pat dry, with a towel. Store in a covered container in the refrigerator. To Dry: Spread the blossoms and/or leaves on a paper towel in a single layer and let it air dry for about two days. Store in a sealed container in a cool dry place. To make Juice: Boil 2 ½ cups water and pour it over 2 cups of hard-packed, pressed downed, fireweed petals and buds. Let it stand until it cools. Refrigerate overnight. Strain with a jelly bag or several layers of cheesecloth. Freeze for long term storage. Make 2 ½ cups juice.” (Stanek and Butcher, 1998:58-59) Labrador Tea (Ledum palusture)
“Labrador Tea (Ch’ilok’wy’) is an easily found and very popular plant that grows in moist places. The leaves stay green all winter and have a very strong smell. It is a woody stemmed shrub with leaves that are green on the top and are brownish with a felt feeling on the underneath. If you crush the leaf you will smell its’ scent. The plant produces little white flowers in the summer. The leaves and the branches can be boiled until the water is dark. This tea is used for almost any reason. It is good to just drink if you want something hot.
It also helps with colds, weak blood, arthritis, tuberculosis, dizziness, hangover, stomach problems, heartburn, laxative and a wash for sores. The tea is also good to marinade meat in or cook meat in. Throw the Labrador Tea leaves and stems into the pot and cook them with the meat. It makes the meat have a really good fishy brown bear taste. You can chew on raw leaves to get the good taste too. The stems and leaves can be dried for the winter or you can dig it up from under the snow! Some people like the older, darker leaves for making tea. Scientists warn that the tea can be poisonous if you drink too much of it. But everyone has been using it for untold centuries, so don’t drink a lot of tea at one time if you are not
Labrador Tea
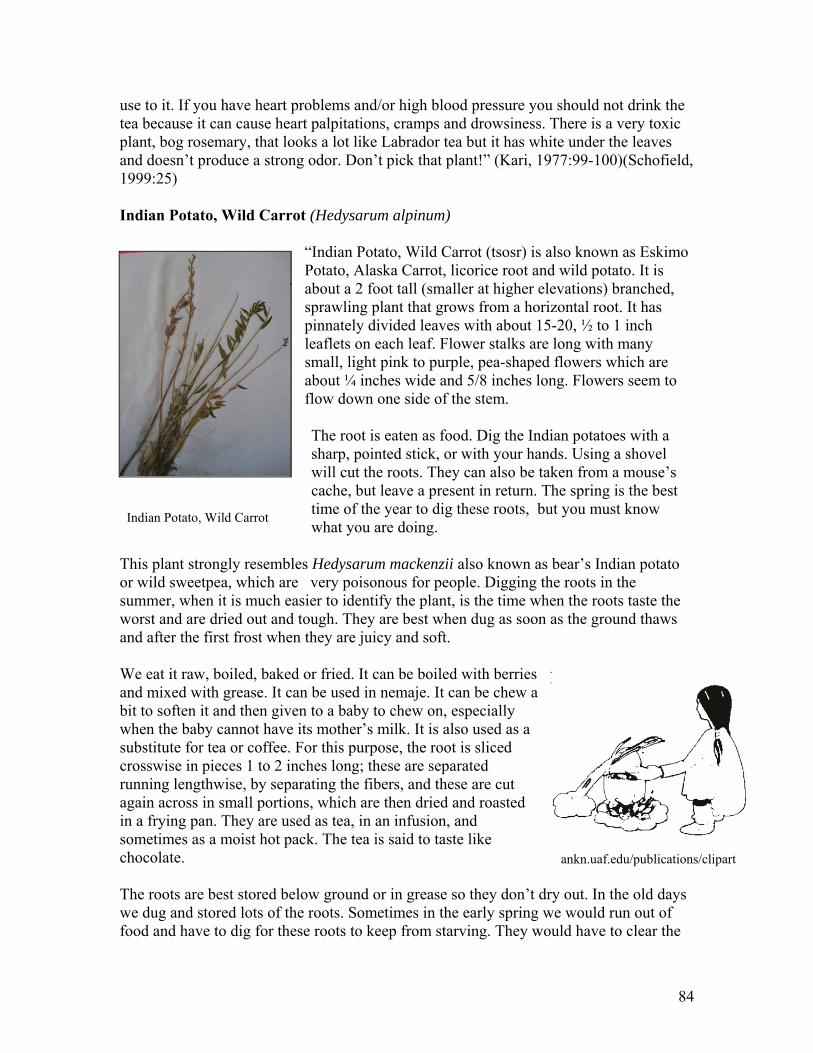
84
use to it. If you have heart problems and/or high blood pressure you should not drink the tea because it can cause heart palpitations, cramps and drowsiness. There is a very toxic plant, bog rosemary, that looks a lot like Labrador tea but it has white under the leaves and doesn’t produce a strong odor. Don’t pick that plant!” (Kari, 1977:99-100)(Schofield, 1999:25) Indian Potato, Wild Carrot (Hedysarum alpinum)
“Indian Potato, Wild Carrot (tsosr) is also known as Eskimo Potato, Alaska Carrot, licorice root and wild potato. It is about a 2 foot tall (smaller at higher elevations) branched, sprawling plant that grows from a horizontal root. It has pinnately divided leaves with about 15-20, ½ to 1 inch leaflets on each leaf. Flower stalks are long with many small, light pink to purple, pea-shaped flowers which are about ¼ inches wide and 5/8 inches long. Flowers seem to flow down one side of the stem. The root is eaten as food. Dig the Indian potatoes with a sharp, pointed stick, or with your hands. Using a shovel will cut the roots. They can also be taken from a mouse’s cache, but leave a present in return. The spring is the best time of the year to dig these roots, but you must know what you are doing.
This plant strongly resembles Hedysarum mackenzii also known as bear’s Indian potato or wild sweetpea, which are very poisonous for people. Digging the roots in the summer, when it is much easier to identify the plant, is the time when the roots taste the worst and are dried out and tough. They are best when dug as soon as the ground thaws and after the first frost when they are juicy and soft. We eat it raw, boiled, baked or fried. It can be boiled with berries and mixed with grease. It can be used in nemaje. It can be chew a bit to soften it and then given to a baby to chew on, especially when the baby cannot have its mother’s milk. It is also used as a substitute for tea or coffee. For this purpose, the root is sliced crosswise in pieces 1 to 2 inches long; these are separated running lengthwise, by separating the fibers, and these are cut again across in small portions, which are then dried and roasted in a frying pan. They are used as tea, in an infusion, and sometimes as a moist hot pack. The tea is said to taste like chocolate. The roots are best stored below ground or in grease so they don’t dry out. In the old days we dug and stored lots of the roots. Sometimes in the early spring we would run out of food and have to dig for these roots to keep from starving. They would have to clear the
Indian Potato, Wild Carrot
ankn.uaf.edu/publications/clipart
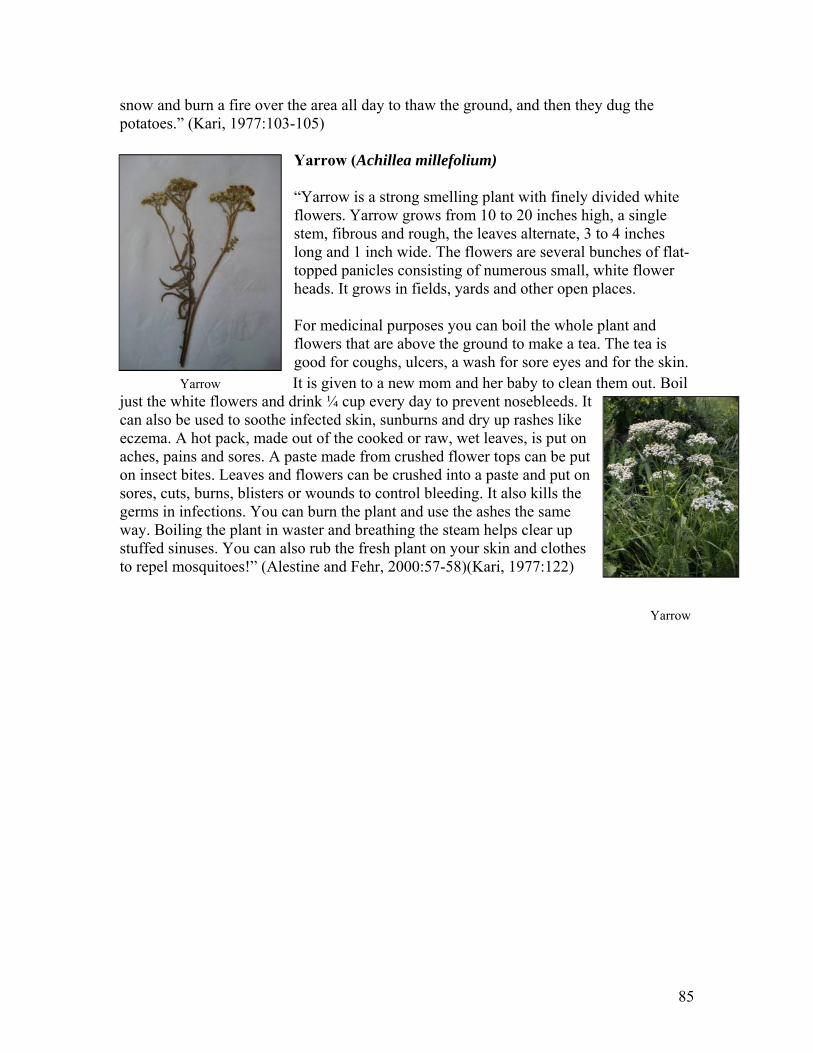
85
snow and burn a fire over the area all day to thaw the ground, and then they dug the potatoes.” (Kari, 1977:103-105)
Yarrow (Achillea millefolium) “Yarrow is a strong smelling plant with finely divided white flowers. Yarrow grows from 10 to 20 inches high, a single stem, fibrous and rough, the leaves alternate, 3 to 4 inches long and 1 inch wide. The flowers are several bunches of flat-topped panicles consisting of numerous small, white flower heads. It grows in fields, yards and other open places. For medicinal purposes you can boil the whole plant and flowers that are above the ground to make a tea. The tea is good for coughs, ulcers, a wash for sore eyes and for the skin. It is given to a new mom and her baby to clean them out. Boil
just the white flowers and drink ¼ cup every day to prevent nosebleeds. It can also be used to soothe infected skin, sunburns and dry up rashes like eczema. A hot pack, made out of the cooked or raw, wet leaves, is put on aches, pains and sores. A paste made from crushed flower tops can be put on insect bites. Leaves and flowers can be crushed into a paste and put on sores, cuts, burns, blisters or wounds to control bleeding. It also kills the germs in infections. You can burn the plant and use the ashes the same way. Boiling the plant in waster and breathing the steam helps clear up stuffed sinuses. You can also rub the fresh plant on your skin and clothes to repel mosquitoes!” (Alestine and Fehr, 2000:57-58)(Kari, 1977:122)
Yarrow
Yarrow
86
Lesson Four – Other Plants Activity 1 – The Common and Abundant Willow Activity 2 – Plant Medicine Activity 3 – Shopping in Nature’s Store Activity 4 – A Natural Buffet Resources and Materials:
Elders familiar with gathering regional plants, traditional gathering locations and
uses of various plants Adult volunteers familiar with gathering useful plants of the area Lesson 4 text Resource books Computer with internet access and printer Gathering containers Traditional digging tool or small spades Small knife or pocket knife Chart Paper, whiteboard or blackboard Markers Poster board Construction paper Art materials Drawing paper Learning logs Unit file Camera/video/audio equipment as needed
Activity 1 – The Common and Abundant Willow 1. Invite an Elder/s familiar with willows, and various kinds of willows, to give a
walking tour of the willows near the village. Have them share traditional stories about the valuable willows.
Encourage the students to walk respectfully with the Elder/s and listen
carefully to what they say. Select one or two students who are good note takers to bring a small notebook
to take a few notes.
2. Remind the students prior to their walk among the willows to use their senses to learn about willows:
What do the willows sound like when you walk through them, or the wind blows
them? How do the willows smell?

87
How do the willows feel as you explore them gently with your fingertips? What do see first about the willows when you look at them from a distance? Then
up close? If appropriate, taste a willow leaf and then the bark, what does it taste like? Are there obvious differences in the variety of willows that affect the senses
differently?
If not many varieties of willows are near walking distance allow the Elder/s to give directions to areas where other varieties can be found.
3. Discuss the field trip with the Elder/s.
What did you learn about willows from the Elder/s sharing? What did you learn from your senses? Have the students write about the experience in their learning logs. Younger
students can draw pictures about the experience and use key label words. 4. Read and discuss the willow portion of Lesson Four text. On chart paper list key
points. 5. Have students write and illustrate a story about the willows:
Students can draw their own pictures, trace pictures from text or other resource books, use photocopied pictures or print pictures from the Internet to illustrate story.
Have a class sharing time where the students take turns sharing their story with a partner and rotate partners until each student has shared his story a few times with others.
Have students store their story in individual unit file. Additional willow centered activities available: www.ankn.uaf.edu/curriculum/units/Willow/index.html

88
Activity 2 – Plant Medicine 1. Invite an Elder/s familiar with the medicinal uses of various plants to share on plant
use. Make an appointment to visit with Elder/s and remember Elder protocol. Ask the Elder/s to demonstrate a few medicinal preparations. Volunteer to assist the Elder in gathering materials and ingredients needed to
prepare the demonstrations. 2. Prepare students for the Elder/s visit:
Review with the students beforehand how to receive the Elder, importance of listening and properly asking questions.
Class discussion: Allow students to share personal experiences with medicinal uses of plants, stories heard about plant medicine, and personal experiences with natural remedies.
Brainstorm with students questions to ask the Elder/s and make a list of questions on chart paper. Older students can to copy list in the learning logs.
3. Introduce and welcome the Elder/s to the class and give the Elder/s liberty to share on
plant medicines. When the Elder/s is ready to demonstrate preparations, have them choose a student to assist. The teacher is also available to help.
As the Elder/s shares, older students can take a few notes in learning logs and
listen for key points. At the appropriate time, students can ask additional questions and older students
can record the answers to questions in their learning logs. If permission is granted and appropriate, take pictures, video or audio recording.
4. Discuss what the Elder/s shared and demonstrated. Have students write in their learning logs about the Elder/s sharing and demonstrations. Younger students can draw pictures of their time with the Elder/s labeling pictures with key words.
5. Divide class into small groups or work partners. Using Lesson Four text on the
different plants, have students make a plant medicine chart. Chart format:
o Name of plant with picture; o Various medicinal uses; o Preparation directions; o Any warnings.
89
Activity 3 – Shopping in Nature’s Store 1. Invite an Elder/s familiar with gathering different plants for food.
Allow the Elder/s freedom share on various traditional food plants. How to gather plants with specific instructions on certain methods. Where to locate plants in the area, or the type of area to look for certain plants. The best time to gather various plants. Furnish a regional map of the village area and ask the Elder/s where the
different plants can be found. Mark areas on map with different plant names. As the Elder/s shares, older students can take a few notes in learning logs and
listen for key points. At the appropriate time, students can ask additional questions and older students
can record the answers to questions in their learning logs. If permission is granted and appropriate, take pictures, video or audio recording.
2. Plan a field trip for gathering edible plants.
Divide the class into small harvest groups. Find an Elder/adult volunteer familiar with gathering edible plants to work with
each group. Make a list of specific plants to gather. Furnish each group with a copy of area regional map so each group can mark the
plant gathering areas indicated by the Elder/s who shared. If there are specific areas in different locations where certain plants can be
gathered, assign different groups to each area to harvest the specific plant. If the plant areas are general, give each group a general shopping list. Each group determines the containers and tools they need for the gathering time. Example of shopping list: Caribou moss (ch’odiyu) Horsetail (tl’wh) root tubercles (hwsh) Dandelion (hwdinyah) greens Fireweed (tl’ochisrko’) young stems and leaves and flowers Labrador Tea (ch’ilok’wy’) Indian Potato, Wild Carrot (tsosr)
3. Send groups out with their shopping list and adult guide. Review any warnings about gathering plants. For Example: There is a very toxic plant, bog rosemary, that looks a lot like Labrador tea but it has white under the leaves and doesn’t produce a strong odor. Don’t pick that plant!

90
Review any special gathering instructions. For Example: Dig the Indian potatoes with a sharp, pointed stick, or with your hands. Using a shovel will cut the roots. Have students obtain appropriate permission slips for the field trip.
4. After groups return, take an inventory of the harvest and store for it use in the next
activity. 5. Have students write about the experience in their learning logs. Younger students can
draw pictures with key word labels.

91
Activity 4 – A Natural Buffet
1. Elders and Adult volunteers familiar with preparing harvested plants from Activity 3.
Meet with teacher and students to plan menu based on Activity 3 harvest. Make lists of additional ingredients and materials to prepare menu. Pair Elder/adult with student (s) to make menu items.
2. Make a preparation plan for menu items. The following preparation ideas are based on Lesson 4 text information. The Elder/s and other adult volunteers can modify these plans according to their own personal experiences. Caribou Moss and Berries Boil Caribou moss in water until soft then mix in available berries. You can also drink the tea. Warning: If you are not used to eating or drinking this plant it can cause stomach trouble if it is not cooked long enough. Be careful! Horsetail Root Tubercles Serve raw. Dandelion Fireweed Salad with sliced Horsetail Root Tubercles Mix fresh cut spring dandelion greens with fireweed’s tender new leaves, and peel chopped fireweed stems. Top it off with sliced horsetail root tubercles and fireweed flowers. Stir Fried Young Dandelion Roots Chop young Dandelion roots and stir fry in meat grease. Ground Roasted Dandelion Root Coffee-Substitute Roast dandelion roots over a fire until crispy and then grind into powder. Add the powder to boiling water and stir. Boiled Fireweed Stems and Leaves with Fish Eggs Peel and cut fireweed stems and boil with fireweed’s tender new leaves. Mix in fish eggs.
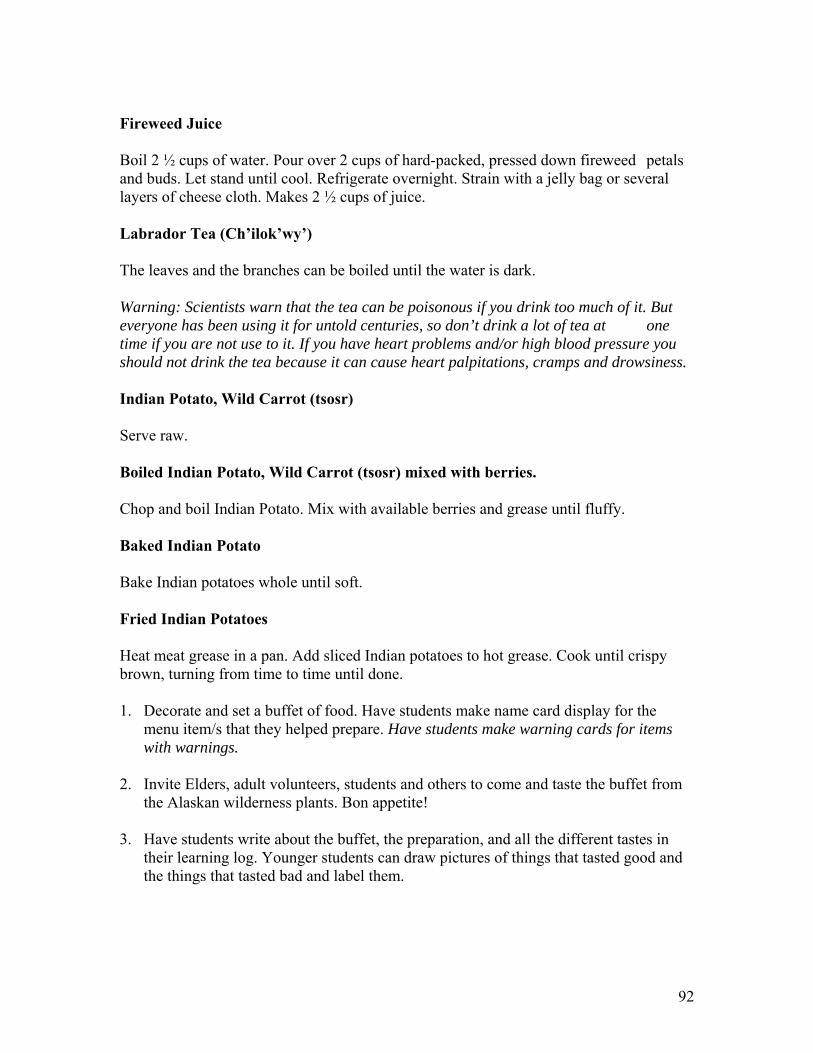
92
Fireweed Juice Boil 2 ½ cups of water. Pour over 2 cups of hard-packed, pressed down fireweed petals and buds. Let stand until cool. Refrigerate overnight. Strain with a jelly bag or several layers of cheese cloth. Makes 2 ½ cups of juice. Labrador Tea (Ch’ilok’wy’) The leaves and the branches can be boiled until the water is dark. Warning: Scientists warn that the tea can be poisonous if you drink too much of it. But everyone has been using it for untold centuries, so don’t drink a lot of tea at one time if you are not use to it. If you have heart problems and/or high blood pressure you should not drink the tea because it can cause heart palpitations, cramps and drowsiness. Indian Potato, Wild Carrot (tsosr) Serve raw. Boiled Indian Potato, Wild Carrot (tsosr) mixed with berries. Chop and boil Indian Potato. Mix with available berries and grease until fluffy. Baked Indian Potato Bake Indian potatoes whole until soft. Fried Indian Potatoes Heat meat grease in a pan. Add sliced Indian potatoes to hot grease. Cook until crispy brown, turning from time to time until done. 1. Decorate and set a buffet of food. Have students make name card display for the
menu item/s that they helped prepare. Have students make warning cards for items with warnings.
2. Invite Elders, adult volunteers, students and others to come and taste the buffet from
the Alaskan wilderness plants. Bon appetite! 3. Have students write about the buffet, the preparation, and all the different tastes in
their learning log. Younger students can draw pictures of things that tasted good and the things that tasted bad and label them.