Embed Size (px)
Citation preview

Supermicro Update Manager
(SUM)
User’s Guide
Revision 2.0

Supermicro Update Manager User’s Guide 2
The information in this USER’S GUIDE has been carefully reviewed and is believed to be accurate. The
vendor assumes no responsibility for any inaccuracies that may be contained in this document, makes no
commitment to update or to keep current the information in this manual, or to notify any person
organization of the updates. Please Note: For the most up-to-date version of this manual, please see our
web site at www.supermicro.com.
Super Micro Computer, Inc. (“Supermicro”) reserves the right to make changes to the product described in
this manual at any time and without notice. This product, including software, if any, and documentation
may not, in whole or in part, be copied, photocopied, reproduced, translated or reduced to any medium or
machine without prior written consent.
DISCLAIMER OF WARRANTY ON SOFTWARE AND MATERIALS. You expressly acknowledge and agree that
use of the Software and Materials is at your sole risk. FURTHERMORE, SUPER MICRO COMPUTER INC. DOES
NOT WARRANT OR MAKE ANY REPRESENTATIONS REGARDING THE USE OR THE RESULTS OF THE USE OF
THE SOFTWARE OR MATERIALS IN TERMS OF THEIR CORRECTNESS, ACCURACY, RELIABILITY, OR
OTHERWISE. NO ORAL OR WRITTEN INFORMATION OR ADVICE GIVEN BY SUPER MICRO COMPUTER INC.
OR SUPER MICRO COMPUTER INC. AUTHORIZED REPRESENTATIVE SHALL CREATE A WARRANTY OR IN ANY
WAY INCREASE THE SCOPE OF THIS WARRANTY. SHOULD THE SOFTWARE AND/OR MATERIALS PROVE
DEFECTIVE, YOU (AND NOT SUPER MICRO COMPUTER INC. OR A SUPER MICRO COMPUTER INC.
AUTHORIZED REPRESENTATIVE) ASSUME THE ENTIRE COST OF ALL NECESSARY SERVICE, REPAIR, OR
CORRECTION.
LIMITATION OF LIABILITY. UNDER NO CIRCUMSTANCES INCLUDING NEGLIGENCE, SHALL SUPER MICRO
COMPUTER INC. BE LIABLE FOR ANY INCIDENTAL, SPECIAL, OR CONSEQUENTIAL DAMAGES THAT RESULT
FROM THE USE OR INABILITY TO USE THE SOFTWARE OR MATERIALS, EVEN IF SUPER MICRO COMPUTER
INC. OR A SUPER MICRO COMPUTER INC. AUTHORIZED REPRESENTATIVE HAS BEEN ADVISED OF THE
POSSIBILITY OF SUCH DAMAGES.
Any disputes arising between manufacturer and customer shall be governed by the laws of Santa Clara
County in the State of California, USA. The State of California, County of Santa Clara shall be the exclusive
venue for the resolution of any such disputes. Super Micro's total liability for all claims will not exceed the
price paid for the hardware product. Manual Revision 2.0 Release Date: September 30, 2017 Unless you request and receive written permission from Super Micro Computer, Inc., you may not copy any part of this document. Information in this document is subject to change without notice. Other products and companies referred to herein are trademarks or registered trademarks of their respective companies or mark holders. Copyright © 2017 by Super Micro Computer, Inc. All rights reserved. Printed in the United States of America

Supermicro Update Manager User’s Guide 3
Version History Date Rev Description
July-02-2013 1.0 1. Created this document.
July-30-2013 1.0a 1. Revised the software description of SUM and SMCIPMITool.jar in 1.2.1
Remote Management Server Requirements.
September-12-2013 1.1 1. Added in-band Usage related sections.
2. Changed the command LoadFactoryDefault to LoadDefaultBiosCfg.
October-02-2013 1.2
1. Added Get/Change DMI information capability.
2. Added multi-system usage for OOB channel.
3. Eliminated –me_type option for the in-band UpdateBios command.
4. In-band UpdateBios command supports X10 MB.
January-06-2014 1.2a
1. Required BMC firmware image and IPMI driver to be installed for all in-
band commands except the UpdateBios command.
2. Required product key to be activated for all in-band commands except the
UpdateBios command.
3. Added the summary of running multiple systems.
4. Added exit code 80. Description: Product key is not activated.
June-09-2014 1.3
Major revision with new management command groups.
1. Added BMC Management commands: GetBmcInfo, UpdateBmc,
GetBmcCfg, ChangeBmcCfg.
2. Added System Check commands: CheckAssetInfo, CheckSensorData,
CheckSystemUtilization.
3. Added System Event Log commands: GetEventLog and ClearEventLog.
4. Added in-band-usage for ActivateProductKey command.
5. Added exit code 68. Description: Invalid BMC configuration text file.

Supermicro Update Manager User’s Guide 4
6. Added exit code 69. Description: Invalid asset information.
July-31-2014 1.4
1. Added Application commands: TpmProvision, MountIsoImage,
UnmountIsoImage.
2. For X10 Grantley platform, in-band update bios requires –reboot option.
3. Revised CheckSystemUtilization output message for HDD/Network.
4. Revise output message for CheckAssetInfo: Units format matches
dmidecode outoput.
5. Added exit code 36. Required device does not exist.
6. Added exit code 37. Required device does not work.
7. Added notices for exit code when using in-band command with –reboot
option through SSH connection.
Feb-06-2015 1.4a
1. Added a notice for in-band UpdateBios command for jumper-less solution:
You should use default OS when multi-boot is installed.
2. Changed the TpmProvision command: cleartpm option should be used
with –image_url option.
3. Added support for checking SFT-SUM and SFT-DCMS-Single node product
keys.
4. Added a notice for In-band UpdateBios command: The command will
disable some functions in OS, but they will be recovered after OS reboot.
5. Added a notice for in-band UpdateBios using SSH connection: Change the
timeout length for both SSH client and server site to be two times longer
than the typical time length of execution.
6. Changed the name “Product Key” to “Node Product Key”.
7. Added exit code 11. Invalid command line data.
8. Added the notice of using the CheckSensorData command output.
9. Updated the CheckAssetInfo command output: adding the CPU version
field and changing the name “Network Interface” to “Add-on Network
Interface”.

Supermicro Update Manager User’s Guide 5
10. Added Appendix C: Platform Feature Support Matrix.
11. Added the OS architecture information in the CheckSystemUtilization
command output message.
12. Added a reminder for In-band Windows driver setup.
July-23-2015 1.5
1. Added in-band support for BMC management commands: GetBmcInfo,
UpdateBmc, GetBmcCfg, and ChangeBmcCfg.
2. Added in-band support for EventLog management commands:
GetEventLog and ClearEventLog.
3. Added in-band support for CheckOOBSupport command.
4. Removed requirement of actool.
5. Removed JAVA environment requirement for all commands, except OOB
UpdateBios and UpdateBmc commands.
6. Changed the ActivateProductKey command: supports 344 bytes node
product key format.
7. Added Key management commands: QueryProductKey, ClearProdcutKey.
8. Added a BIOS management command: EditDmiInfo.
9. Added Appendix D Third-Party Software.
10. Added the log support when rare exceptions occurred.
11. Added exit code 12: Function access denied.
January-28-2016 1.6
1. Supported X11 platform.
2. Removed JAVA requirement.
3. Supported FreeBSD OS for FreeBSD 7.1 x86_64 or later.
4. Supported RHEL4 OS for RHEL4u3 x86_64 or later
5. Added auto-activation feature using credential files
6. Added –overwrite_cfg and –overwrite_sdr option for UpdateBmc
command.
7. In-Band UpdateBios supported MEDisabling feature which has similar
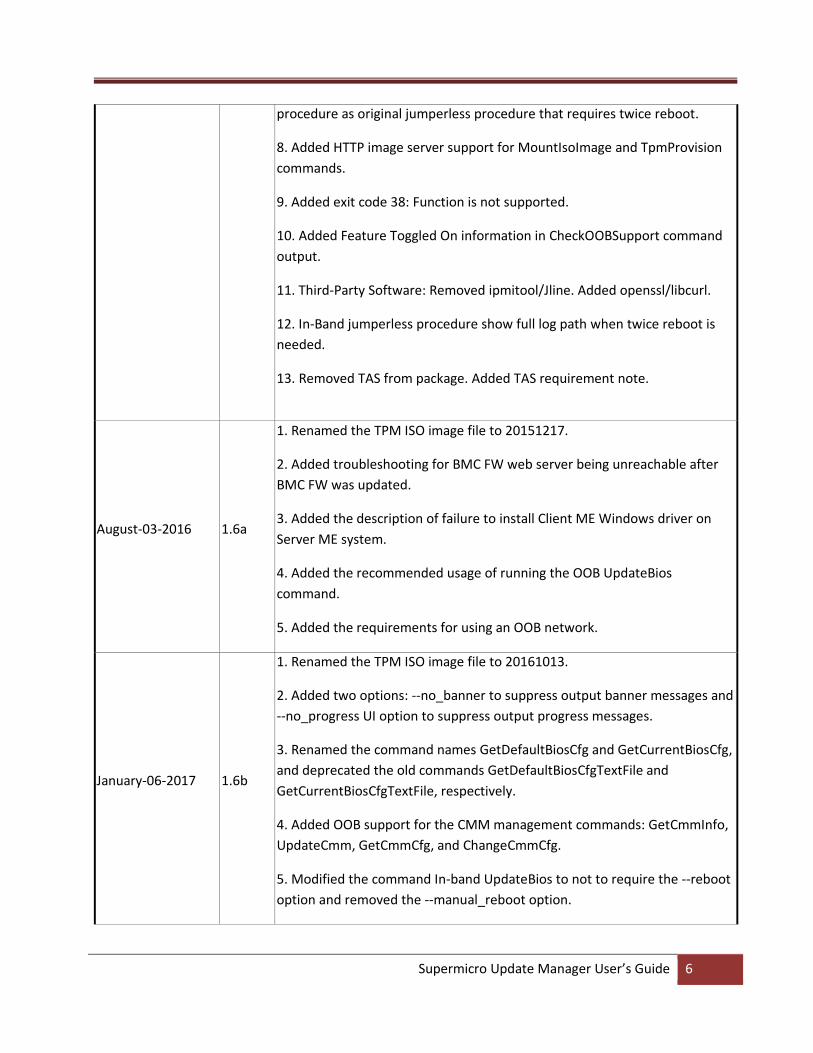
Supermicro Update Manager User’s Guide 6
procedure as original jumperless procedure that requires twice reboot.
8. Added HTTP image server support for MountIsoImage and TpmProvision
commands.
9. Added exit code 38: Function is not supported.
10. Added Feature Toggled On information in CheckOOBSupport command
output.
11. Third-Party Software: Removed ipmitool/Jline. Added openssl/libcurl.
12. In-Band jumperless procedure show full log path when twice reboot is
needed.
13. Removed TAS from package. Added TAS requirement note.
August-03-2016 1.6a
1. Renamed the TPM ISO image file to 20151217.
2. Added troubleshooting for BMC FW web server being unreachable after
BMC FW was updated.
3. Added the description of failure to install Client ME Windows driver on
Server ME system.
4. Added the recommended usage of running the OOB UpdateBios
command.
5. Added the requirements for using an OOB network.
January-06-2017 1.6b
1. Renamed the TPM ISO image file to 20161013.
2. Added two options: --no_banner to suppress output banner messages and
--no_progress UI option to suppress output progress messages.
3. Renamed the command names GetDefaultBiosCfg and GetCurrentBiosCfg,
and deprecated the old commands GetDefaultBiosCfgTextFile and
GetCurrentBiosCfgTextFile, respectively.
4. Added OOB support for the CMM management commands: GetCmmInfo,
UpdateCmm, GetCmmCfg, and ChangeCmmCfg.
5. Modified the command In-band UpdateBios to not to require the --reboot
option and removed the --manual_reboot option.
Supermicro Update Manager User’s Guide 7
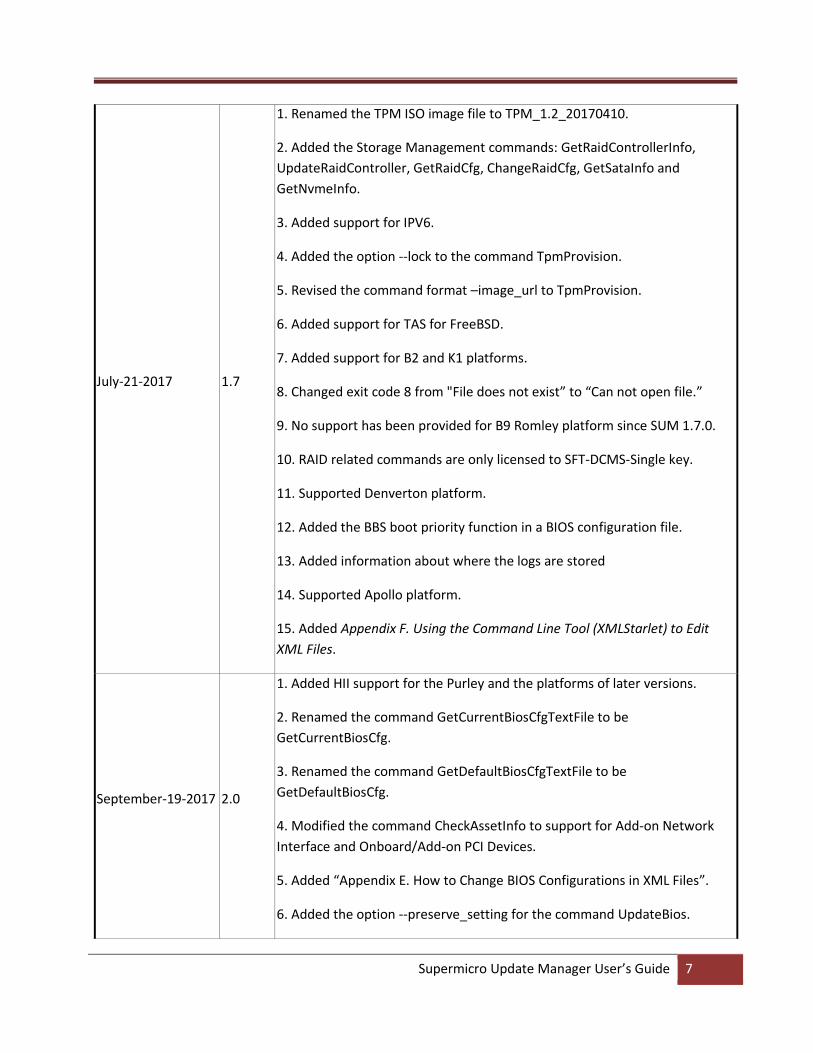
July-21-2017 1.7
1. Renamed the TPM ISO image file to TPM_1.2_20170410.
2. Added the Storage Management commands: GetRaidControllerInfo,
UpdateRaidController, GetRaidCfg, ChangeRaidCfg, GetSataInfo and
GetNvmeInfo.
3. Added support for IPV6.
4. Added the option --lock to the command TpmProvision.
5. Revised the command format –image_url to TpmProvision.
6. Added support for TAS for FreeBSD.
7. Added support for B2 and K1 platforms.
8. Changed exit code 8 from "File does not exist” to “Can not open file.”
9. No support has been provided for B9 Romley platform since SUM 1.7.0.
10. RAID related commands are only licensed to SFT-DCMS-Single key.
11. Supported Denverton platform.
12. Added the BBS boot priority function in a BIOS configuration file.
13. Added information about where the logs are stored
14. Supported Apollo platform.
15. Added Appendix F. Using the Command Line Tool (XMLStarlet) to Edit
XML Files.
September-19-2017 2.0
1. Added HII support for the Purley and the platforms of later versions.
2. Renamed the command GetCurrentBiosCfgTextFile to be
GetCurrentBiosCfg.
3. Renamed the command GetDefaultBiosCfgTextFile to be
GetDefaultBiosCfg.
4. Modified the command CheckAssetInfo to support for Add-on Network
Interface and Onboard/Add-on PCI Devices.
5. Added “Appendix E. How to Change BIOS Configurations in XML Files”.
6. Added the option --preserve_setting for the command UpdateBios.
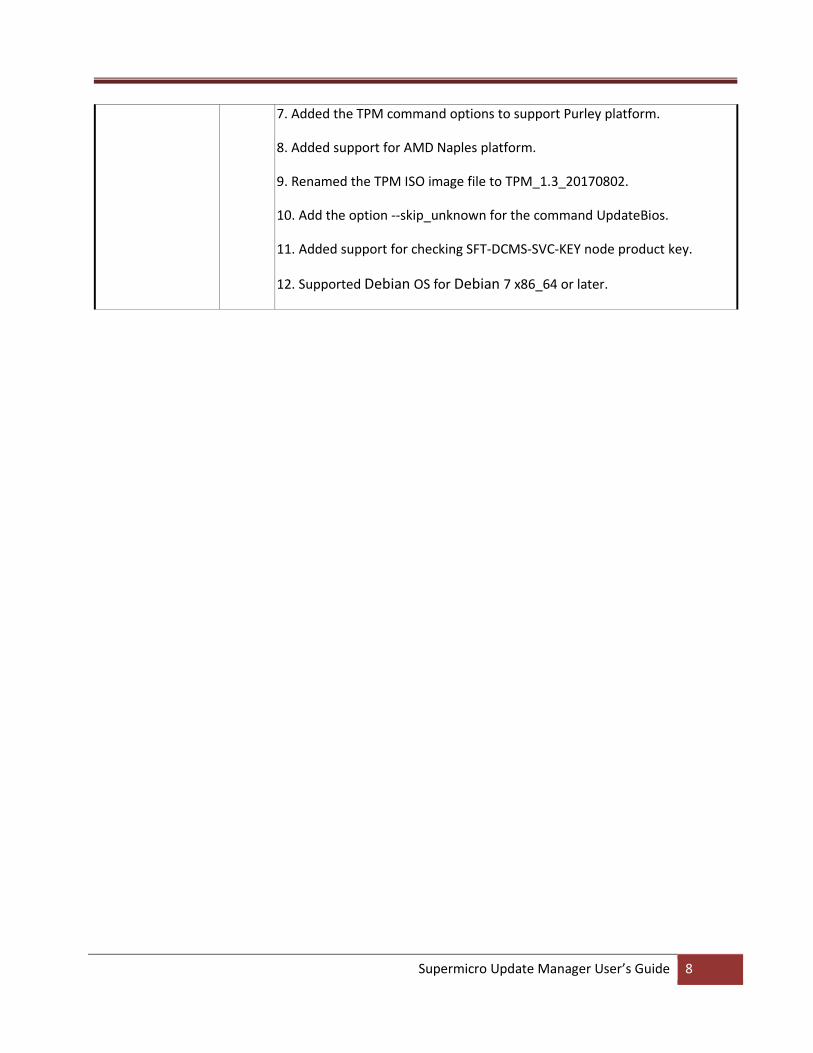
Supermicro Update Manager User’s Guide 8
7. Added the TPM command options to support Purley platform.
8. Added support for AMD Naples platform.
9. Renamed the TPM ISO image file to TPM_1.3_20170802.
10. Add the option --skip_unknown for the command UpdateBios.
11. Added support for checking SFT-DCMS-SVC-KEY node product key.
12. Supported Debian OS for Debian 7 x86_64 or later.
Supermicro Update Manager User’s Guide 9
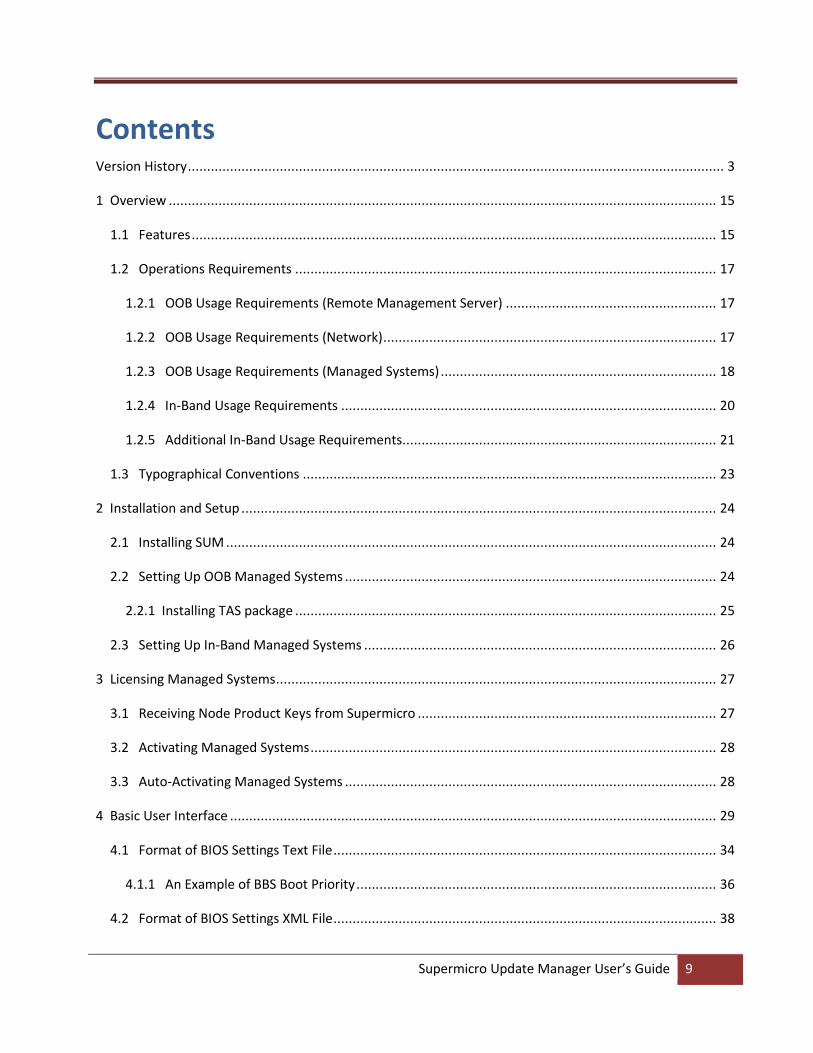
Contents Version History ............................................................................................................................................ 3
1 Overview ............................................................................................................................................... 15
1.1 Features ......................................................................................................................................... 15
1.2 Operations Requirements .............................................................................................................. 17
1.2.1 OOB Usage Requirements (Remote Management Server) ....................................................... 17
1.2.2 OOB Usage Requirements (Network) ....................................................................................... 17
1.2.3 OOB Usage Requirements (Managed Systems) ........................................................................ 18
1.2.4 In-Band Usage Requirements .................................................................................................. 20
1.2.5 Additional In-Band Usage Requirements.................................................................................. 21
1.3 Typographical Conventions ............................................................................................................ 23
2 Installation and Setup ............................................................................................................................ 24
2.1 Installing SUM ................................................................................................................................ 24
2.2 Setting Up OOB Managed Systems ................................................................................................. 24
2.2.1 Installing TAS package .............................................................................................................. 25
2.3 Setting Up In-Band Managed Systems ............................................................................................ 26
3 Licensing Managed Systems ................................................................................................................... 27
3.1 Receiving Node Product Keys from Supermicro .............................................................................. 27
3.2 Activating Managed Systems .......................................................................................................... 28
3.3 Auto-Activating Managed Systems ................................................................................................. 28
4 Basic User Interface ............................................................................................................................... 29
4.1 Format of BIOS Settings Text File .................................................................................................... 34
4.1.1 An Example of BBS Boot Priority .............................................................................................. 36
4.2 Format of BIOS Settings XML File .................................................................................................... 38

Supermicro Update Manager User’s Guide 10
4.3 Format of DMI Information Text File .............................................................................................. 41
4.4 Format of BMC Configuration XML File ........................................................................................... 43
4.5 Format of RAID Configuration XML File .......................................................................................... 45
4.6 Format of CMM Configuration Text File .......................................................................................... 54
5 Managing a Single System ...................................................................................................................... 56
5.1 Key Management for a Single System ............................................................................................. 57
5.1.1 Activating a Single Managed System ........................................................................................ 57
5.1.2 Querying the Node Product Keys ............................................................................................. 57
5.1.3 Clearing Node Product Key ...................................................................................................... 58
5.2 System Checks for a Single System ................................................................................................. 60
5.2.1 Checking OOB Support ............................................................................................................ 60
5.2.2 Checking Asset Information (OOB Only)................................................................................... 61
5.2.3 Checking Sensor Data (OOB Only) ............................................................................................ 69
5.2.4 Checking System Utilization (OOB Only) .................................................................................. 70
5.3 BIOS Management for a Single System ........................................................................................... 73
5.3.1 Getting BIOS Firmware Image Information .............................................................................. 73
5.3.2 Updating the BIOS Firmware Image ......................................................................................... 73
5.3.3 Receiving Current BIOS Settings .............................................................................................. 76
5.3.4 Updating BIOS Settings Based on the Current BIOS Settings .................................................... 76
5.3.5 Receiving Factory BIOS Settings ............................................................................................... 77
5.3.6 Updating BIOS Settings Based on the Factory Settings ............................................................. 78
5.3.7 Loading Factory BIOS Settings ................................................................................................. 78
5.3.8 Receiving DMI Information ...................................................................................................... 78
5.3.9 Editing DMI Information .......................................................................................................... 79
5.3.10 Updating DMI Information .................................................................................................... 80
Supermicro Update Manager User’s Guide 11
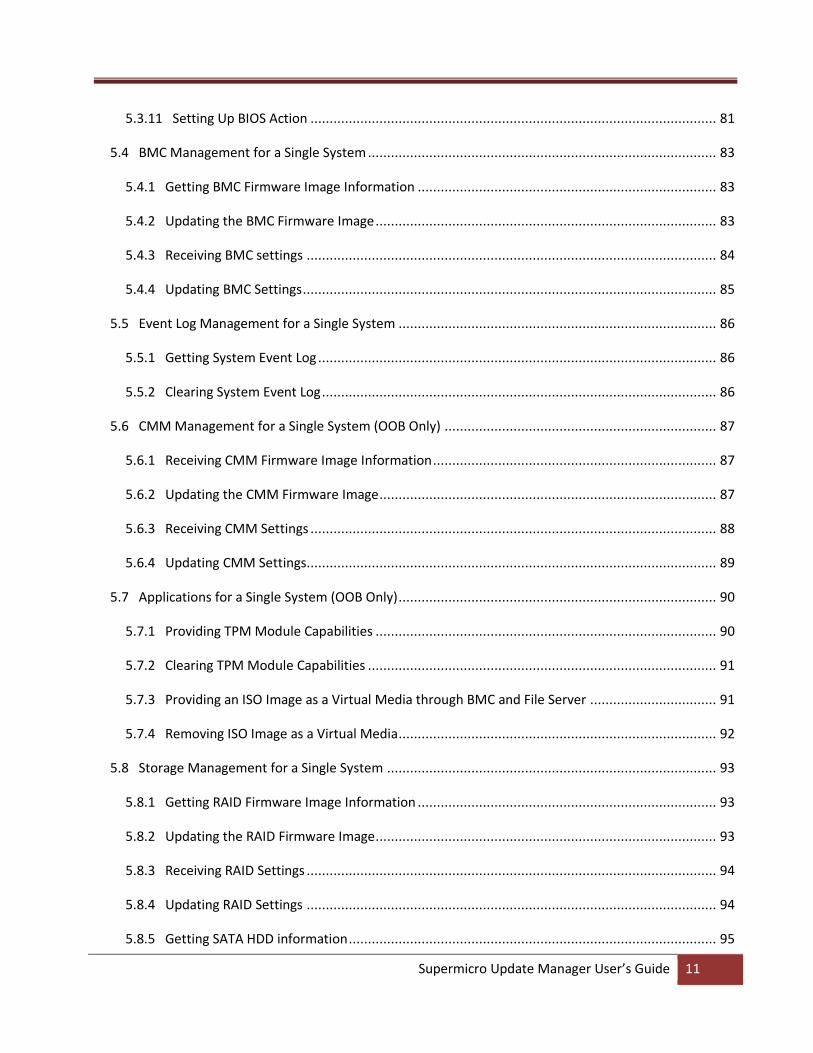
5.3.11 Setting Up BIOS Action .......................................................................................................... 81
5.4 BMC Management for a Single System ........................................................................................... 83
5.4.1 Getting BMC Firmware Image Information .............................................................................. 83
5.4.2 Updating the BMC Firmware Image ......................................................................................... 83
5.4.3 Receiving BMC settings ........................................................................................................... 84
5.4.4 Updating BMC Settings ............................................................................................................ 85
5.5 Event Log Management for a Single System ................................................................................... 86
5.5.1 Getting System Event Log ........................................................................................................ 86
5.5.2 Clearing System Event Log ....................................................................................................... 86
5.6 CMM Management for a Single System (OOB Only) ....................................................................... 87
5.6.1 Receiving CMM Firmware Image Information .......................................................................... 87
5.6.2 Updating the CMM Firmware Image ........................................................................................ 87
5.6.3 Receiving CMM Settings .......................................................................................................... 88
5.6.4 Updating CMM Settings........................................................................................................... 89
5.7 Applications for a Single System (OOB Only) ................................................................................... 90
5.7.1 Providing TPM Module Capabilities ......................................................................................... 90
5.7.2 Clearing TPM Module Capabilities ........................................................................................... 91
5.7.3 Providing an ISO Image as a Virtual Media through BMC and File Server ................................. 91
5.7.4 Removing ISO Image as a Virtual Media ................................................................................... 92
5.8 Storage Management for a Single System ...................................................................................... 93
5.8.1 Getting RAID Firmware Image Information .............................................................................. 93
5.8.2 Updating the RAID Firmware Image ......................................................................................... 93
5.8.3 Receiving RAID Settings ........................................................................................................... 94
5.8.4 Updating RAID Settings ........................................................................................................... 94
5.8.5 Getting SATA HDD information ................................................................................................ 95

Supermicro Update Manager User’s Guide 12
5.8.6 Getting NVMe information ...................................................................................................... 96
6 Managing Multiple Systems (OOB Only) ................................................................................................. 98
6.1 Input Output Controls for Multiple Systems ..................................................................................100
6.1.1 File Input ................................................................................................................................100
6.1.2 File Output .............................................................................................................................100
6.1.3 Screen Output ........................................................................................................................101
6.1.4 Log Output .............................................................................................................................102
6.2 Key Management for Multiple Systems .........................................................................................104
6.2.1 Activating Multiple Managed Systems ....................................................................................104
6.2.2 Querying Node Product Key ...................................................................................................105
6.2.3 Clearing Node Product Keys ...................................................................................................105
6.3 System Checks for Multiple System ...............................................................................................107
6.3.1 Checking OOB Support ...........................................................................................................107
6.3.2 Checking Asset Information ....................................................................................................107
6.3.3 Checking Sensor Data .............................................................................................................108
6.3.4 Checking System Utilization ....................................................................................................108
6.4 BIOS Management for Multiple Systems .......................................................................................109
6.4.1 Getting BIOS Firmware Image Information .............................................................................109
6.4.2 Updating the BIOS Firmware Image ........................................................................................109
6.4.3 Receiving Current BIOS Settings .............................................................................................110
6.4.4 Updating BIOS Settings Based on a Current Sample Settings ...................................................111
6.4.5 Receiving Factory BIOS Settings ..............................................................................................112
6.4.6 Updating BIOS Settings Based on Factory Sample Settings ......................................................112
6.4.7 Loading Factory BIOS Settings ................................................................................................113
6.4.8 Receiving DMI Information .....................................................................................................113
Supermicro Update Manager User’s Guide 13
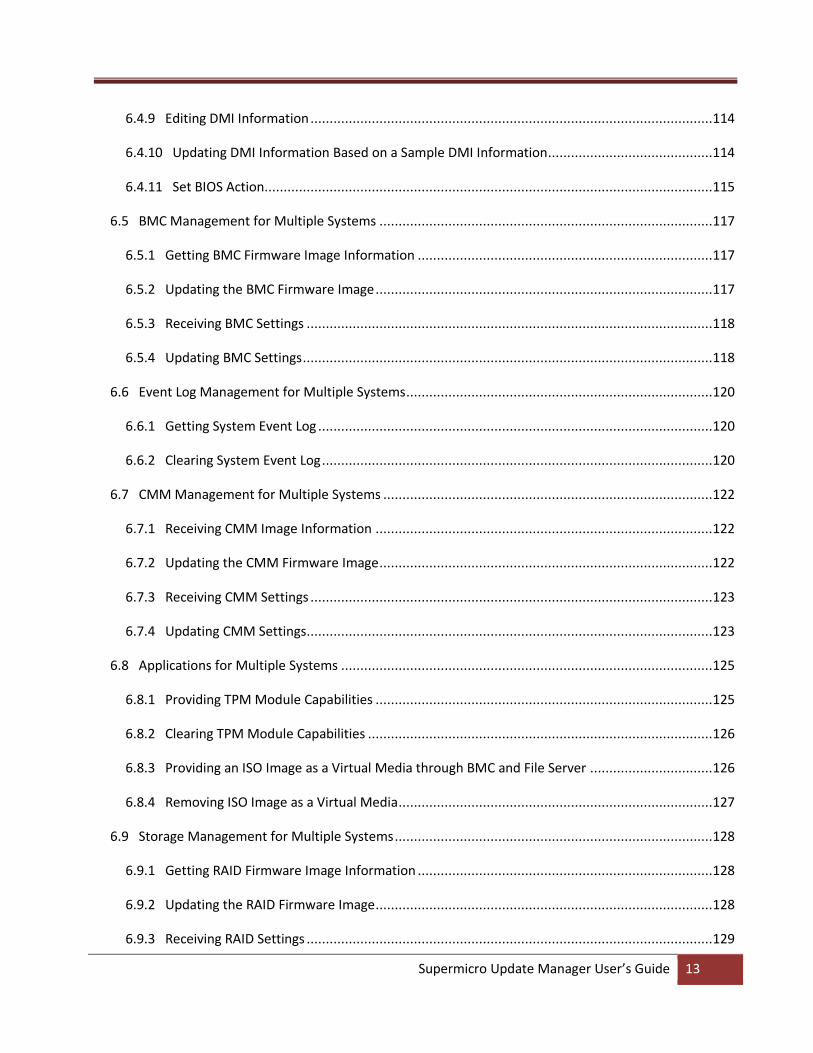
6.4.9 Editing DMI Information .........................................................................................................114
6.4.10 Updating DMI Information Based on a Sample DMI Information...........................................114
6.4.11 Set BIOS Action.....................................................................................................................115
6.5 BMC Management for Multiple Systems .......................................................................................117
6.5.1 Getting BMC Firmware Image Information .............................................................................117
6.5.2 Updating the BMC Firmware Image ........................................................................................117
6.5.3 Receiving BMC Settings ..........................................................................................................118
6.5.4 Updating BMC Settings ...........................................................................................................118
6.6 Event Log Management for Multiple Systems ................................................................................120
6.6.1 Getting System Event Log .......................................................................................................120
6.6.2 Clearing System Event Log ......................................................................................................120
6.7 CMM Management for Multiple Systems ......................................................................................122
6.7.1 Receiving CMM Image Information ........................................................................................122
6.7.2 Updating the CMM Firmware Image .......................................................................................122
6.7.3 Receiving CMM Settings .........................................................................................................123
6.7.4 Updating CMM Settings..........................................................................................................123
6.8 Applications for Multiple Systems .................................................................................................125
6.8.1 Providing TPM Module Capabilities ........................................................................................125
6.8.2 Clearing TPM Module Capabilities ..........................................................................................126
6.8.3 Providing an ISO Image as a Virtual Media through BMC and File Server ................................126
6.8.4 Removing ISO Image as a Virtual Media ..................................................................................127
6.9 Storage Management for Multiple Systems ...................................................................................128
6.9.1 Getting RAID Firmware Image Information .............................................................................128
6.9.2 Updating the RAID Firmware Image ........................................................................................128
6.9.3 Receiving RAID Settings ..........................................................................................................129
Supermicro Update Manager User’s Guide 14
6.9.4 Updating RAID Settings ..........................................................................................................130
6.9.5 Getting SATA HDD Information ...............................................................................................131
6.9.6 Getting NVMe Information .....................................................................................................131
Appendix A. SUM Exit Codes .....................................................................................................................133
Appendix B. Management Interface and License Requirements ................................................................137
Appendix C. Platform Feature Support Matrix ..........................................................................................139
Appendix D. Third-Party Software.............................................................................................................143
Appendix E. How to Change BIOS Configurations in XML Files ...................................................................144
E.1 Numeric ........................................................................................................................................144
E.2 CheckBox ......................................................................................................................................145
E.3 Option ...........................................................................................................................................145
E.3.1 Setting Up the “SATA RAID Option ROM/UEFI Driver”.............................................................145
E.3.2 Enabling the Support for Ipv4 PXE ..........................................................................................146
E.3.3 Selecting the Link Speed .........................................................................................................147
E.4 Password.......................................................................................................................................148
E.4.1 Changing a New Password .......................................................................................................148
E.5 String ............................................................................................................................................149
Appendix F. Using the Command Line Tool (XMLStarlet) to Edit XML Files ................................................151
F.1 Introduction ..................................................................................................................................151
F.2 Getting/Setting a XML Value (XML Element) ..................................................................................151
F.3 Getting/Setting a XML Value (XML Attribute) ................................................................................152
Contacting Supermicro .............................................................................................................................153
Supermicro Update Manager User’s Guide 15
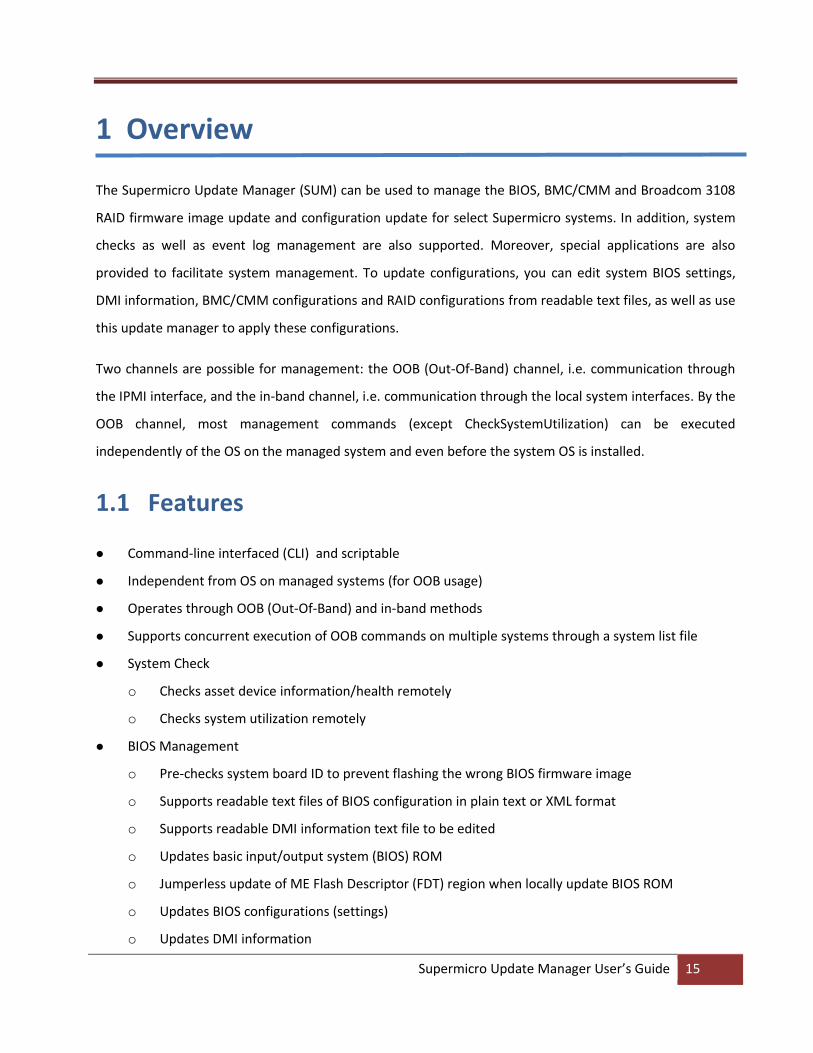
1 Overview
The Supermicro Update Manager (SUM) can be used to manage the BIOS, BMC/CMM and Broadcom 3108
RAID firmware image update and configuration update for select Supermicro systems. In addition, system
checks as well as event log management are also supported. Moreover, special applications are also
provided to facilitate system management. To update configurations, you can edit system BIOS settings,
DMI information, BMC/CMM configurations and RAID configurations from readable text files, as well as use
this update manager to apply these configurations.
Two channels are possible for management: the OOB (Out-Of-Band) channel, i.e. communication through
the IPMI interface, and the in-band channel, i.e. communication through the local system interfaces. By the
OOB channel, most management commands (except CheckSystemUtilization) can be executed
independently of the OS on the managed system and even before the system OS is installed.
1.1 Features
Command-line interfaced (CLI) and scriptable
Independent from OS on managed systems (for OOB usage)
Operates through OOB (Out-Of-Band) and in-band methods
Supports concurrent execution of OOB commands on multiple systems through a system list file
System Check
o Checks asset device information/health remotely
o Checks system utilization remotely
BIOS Management
o Pre-checks system board ID to prevent flashing the wrong BIOS firmware image
o Supports readable text files of BIOS configuration in plain text or XML format
o Supports readable DMI information text file to be edited
o Updates basic input/output system (BIOS) ROM
o Jumperless update of ME Flash Descriptor (FDT) region when locally update BIOS ROM
o Updates BIOS configurations (settings)
o Updates DMI information
Supermicro Update Manager User’s Guide 16
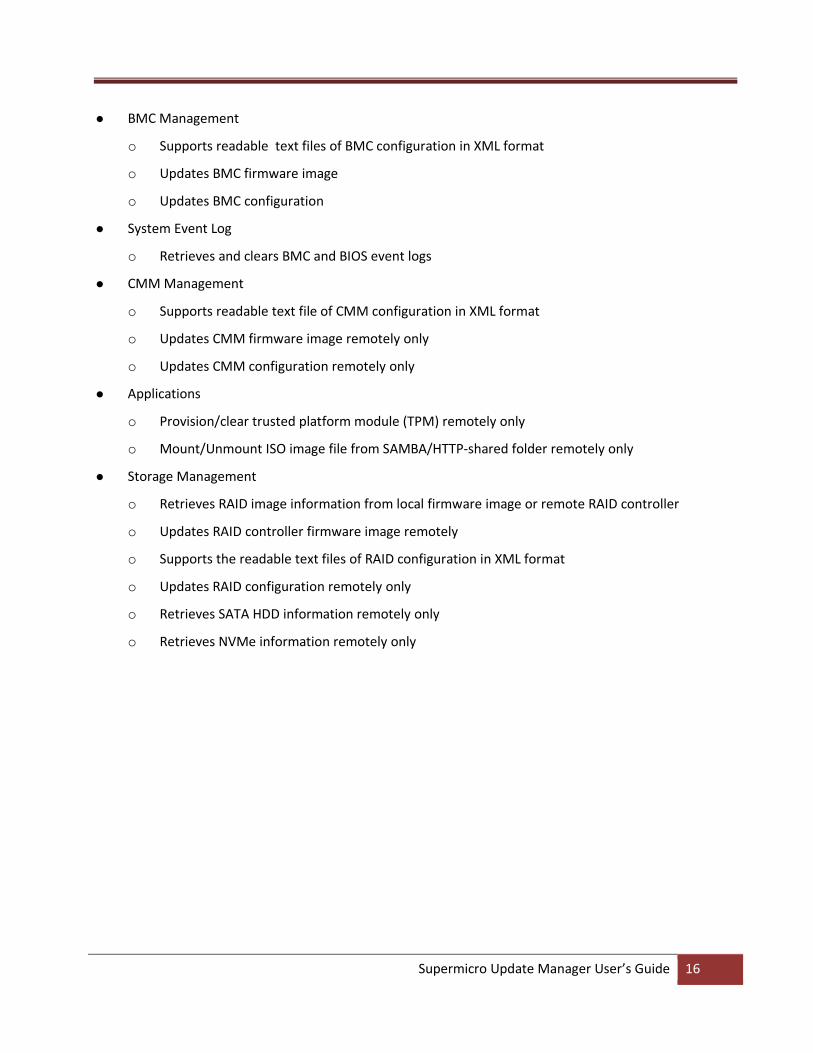
BMC Management
o Supports readable text files of BMC configuration in XML format
o Updates BMC firmware image
o Updates BMC configuration
System Event Log
o Retrieves and clears BMC and BIOS event logs
CMM Management
o Supports readable text file of CMM configuration in XML format
o Updates CMM firmware image remotely only
o Updates CMM configuration remotely only
Applications
o Provision/clear trusted platform module (TPM) remotely only
o Mount/Unmount ISO image file from SAMBA/HTTP-shared folder remotely only
Storage Management
o Retrieves RAID image information from local firmware image or remote RAID controller
o Updates RAID controller firmware image remotely
o Supports the readable text files of RAID configuration in XML format
o Updates RAID configuration remotely only
o Retrieves SATA HDD information remotely only
o Retrieves NVMe information remotely only
Supermicro Update Manager User’s Guide 17
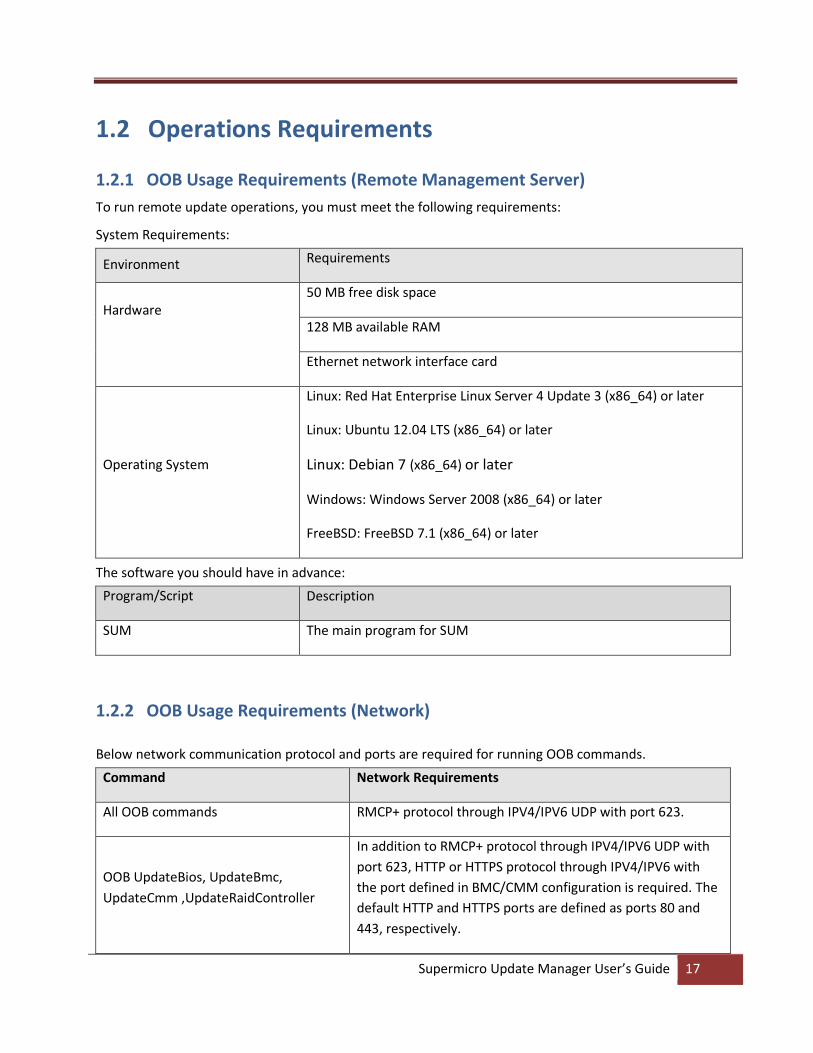
1.2 Operations Requirements
1.2.1 OOB Usage Requirements (Remote Management Server)
To run remote update operations, you must meet the following requirements:
System Requirements:
Environment Requirements
Hardware
50 MB free disk space
128 MB available RAM
Ethernet network interface card
Operating System
Linux: Red Hat Enterprise Linux Server 4 Update 3 (x86_64) or later
Linux: Ubuntu 12.04 LTS (x86_64) or later
Linux: Debian 7 (x86_64) or later
Windows: Windows Server 2008 (x86_64) or later
FreeBSD: FreeBSD 7.1 (x86_64) or later
The software you should have in advance:
Program/Script Description
SUM The main program for SUM
1.2.2 OOB Usage Requirements (Network)
Below network communication protocol and ports are required for running OOB commands.
Command Network Requirements
All OOB commands RMCP+ protocol through IPV4/IPV6 UDP with port 623.
OOB UpdateBios, UpdateBmc,
UpdateCmm ,UpdateRaidController
In addition to RMCP+ protocol through IPV4/IPV6 UDP with
port 623, HTTP or HTTPS protocol through IPV4/IPV6 with
the port defined in BMC/CMM configuration is required. The
default HTTP and HTTPS ports are defined as ports 80 and
443, respectively.
Supermicro Update Manager User’s Guide 18
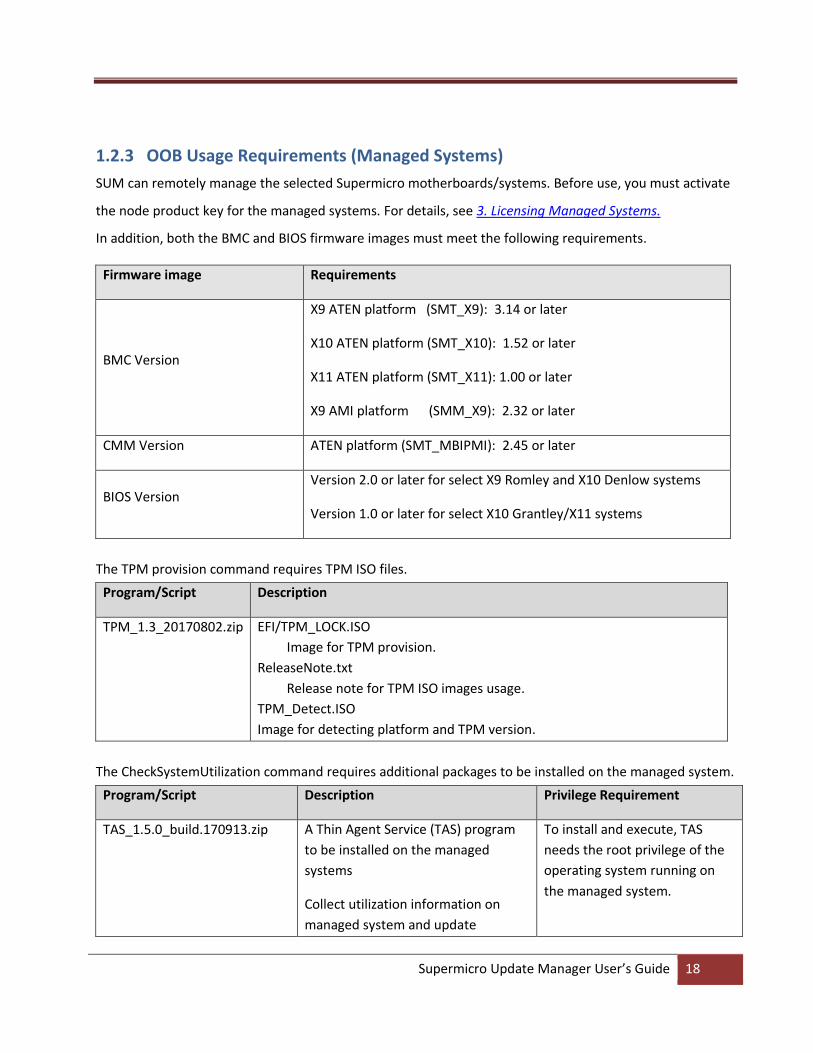
1.2.3 OOB Usage Requirements (Managed Systems)
SUM can remotely manage the selected Supermicro motherboards/systems. Before use, you must activate
the node product key for the managed systems. For details, see 3. Licensing Managed Systems.
In addition, both the BMC and BIOS firmware images must meet the following requirements.
Firmware image Requirements
BMC Version
X9 ATEN platform (SMT_X9): 3.14 or later
X10 ATEN platform (SMT_X10): 1.52 or later
X11 ATEN platform (SMT_X11): 1.00 or later
X9 AMI platform (SMM_X9): 2.32 or later
CMM Version ATEN platform (SMT_MBIPMI): 2.45 or later
BIOS Version Version 2.0 or later for select X9 Romley and X10 Denlow systems
Version 1.0 or later for select X10 Grantley/X11 systems
The TPM provision command requires TPM ISO files.
Program/Script Description
TPM_1.3_20170802.zip EFI/TPM_LOCK.ISO
Image for TPM provision.
ReleaseNote.txt
Release note for TPM ISO images usage.
TPM_Detect.ISO
Image for detecting platform and TPM version.
The CheckSystemUtilization command requires additional packages to be installed on the managed system.
Program/Script Description Privilege Requirement
TAS_1.5.0_build.170913.zip A Thin Agent Service (TAS) program
to be installed on the managed
systems
Collect utilization information on
managed system and update
To install and execute, TAS
needs the root privilege of the
operating system running on
the managed system.

Supermicro Update Manager User’s Guide 19
information to BMC
Below OS and tools are pre-requisite for TAS to be installed successfully on the managed system.
OS Supported OS list Program/Script
Windows Windows 2008 R2 SP1 Windows 2012 R2
1. .NET framework 3.5 2. smartmontools 6.5-1 3. NVMe vendor specific driver (only required for using the nvme function) 4. Windows patch “KB3033929”(only required for Windows Server 2008 R2 SP1) 5. Intel RST CLI tool 13.2.0.1016 and 13.2.x.xxxx RSTe driver (specify tool version for specify RSTe driver version)
Linux RHEL 6.5, 6.6 RHEL 7.0, 7.1 SLES 11 SP3 Ubuntu 14.04 LTS CentOS 6.5
1. ethtool package 2.6.33 2. openIpmi driver 3. smartmontools 6.5 4. glibc 2.12 5. storcli 1.20.15 (for Linux LSI) 6. mdadm 3.2.5 (for RAID) 7. nmcli 0.8.1 8. net-tools 1.60-110.el6-2 9. lsscsi 0.23-2.el6 10. lsblk 2.17.2
FreeBSD 10.1 release 1. smartmontools 6.5 2. libc 7 3. storcli 1.20.15 (for LSI 3108) 4. graid (starting with FreeBSD 9.1 for RAID) and geom_raid.ko 5. pciutils 3.5.2 6. mfip.ko(for LSI MegaRAID SMART)
Below firmware image is pre-requisite for TAS to run successfully on the managed system.
Firmware image Requirements
BMC Version X10 ATEN platform (SMT_X10): 1.58 or later
X11 ATEN platform (SMT_X11): 1.00 or later

Supermicro Update Manager User’s Guide 20
1.2.4 In-Band Usage Requirements
With the use of in-band, SUM can perform BIOS/BMC/EventLog Management functions for selected
Supermicro motherboards/systems. The managed system must meet the following requirements.
System Requirements:
Environment Requirements
Hardware
50 MB free disk space
128 MB available RAM
Firmware image BIOS Version 3.0 or later for X9 Romley and X10 Denlow select
systems.
BIOS Version 1.0 or later for X10 Grantley/X11 select systems.
Operating System Linux: Red Hat Enterprise Linux Server 4 updates 3 (x86_64) or later.
Linux: Ubuntu 12.04 LTS (x86_64) or later
Linux: Debian 7 (x86_64) or later
Windows: Windows Server 2008 (x86_64) or later
FreeBSD: FreeBSD 7.1 (x86_64) or later
Note: Though SUM can be run on Red Hat Enterprise Linux Server 4 updates 3 or later,
several OS might not be supported by hardware. For the list of supported operating systems,
please check OS compatibility support list.
Execution Privilege Requirements:
Privilege Description
SUM Execution Privilege To execute in-band functions, SUM needs the root/Administrator
privilege of the operating system running on the managed system.
The software you should get in advance:
OS Program/Script Description
Supermicro Update Manager User’s Guide 21
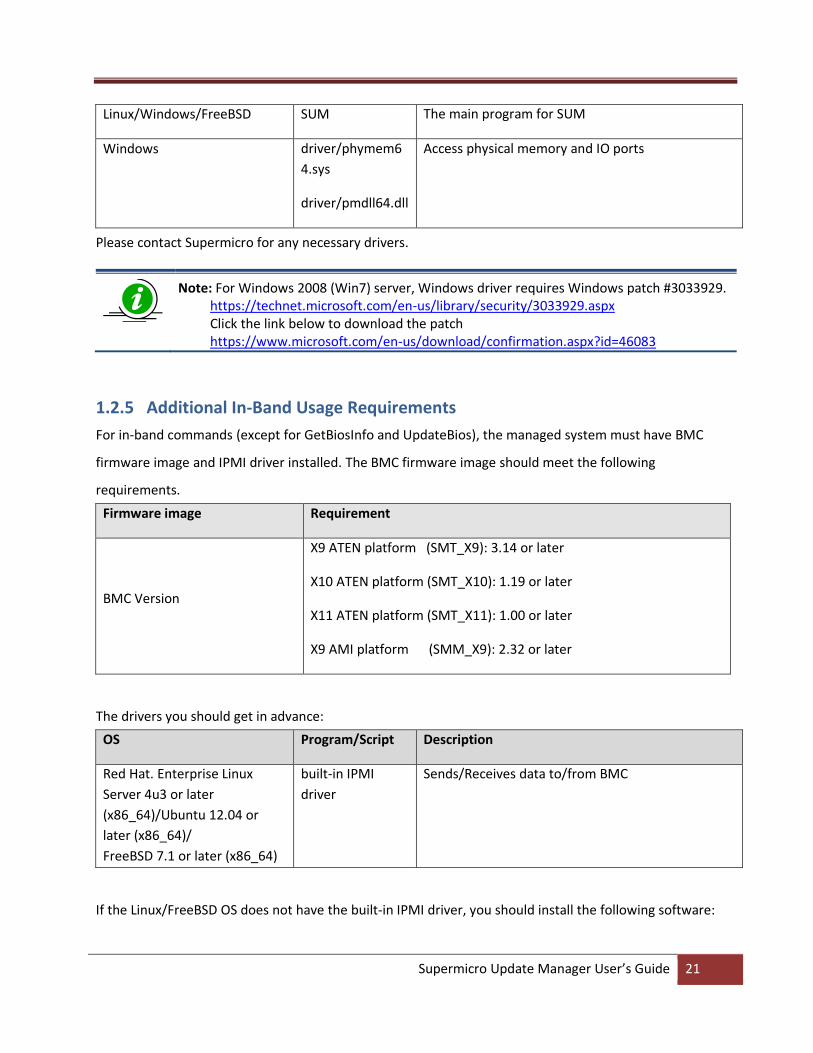
Linux/Windows/FreeBSD SUM The main program for SUM
Windows driver/phymem6
4.sys
driver/pmdll64.dll
Access physical memory and IO ports
Please contact Supermicro for any necessary drivers.
Note: For Windows 2008 (Win7) server, Windows driver requires Windows patch #3033929. https://technet.microsoft.com/en-us/library/security/3033929.aspx Click the link below to download the patch https://www.microsoft.com/en-us/download/confirmation.aspx?id=46083
1.2.5 Additional In-Band Usage Requirements
For in-band commands (except for GetBiosInfo and UpdateBios), the managed system must have BMC
firmware image and IPMI driver installed. The BMC firmware image should meet the following
requirements.
Firmware image Requirement
BMC Version
X9 ATEN platform (SMT_X9): 3.14 or later
X10 ATEN platform (SMT_X10): 1.19 or later
X11 ATEN platform (SMT_X11): 1.00 or later
X9 AMI platform (SMM_X9): 2.32 or later
The drivers you should get in advance:
OS Program/Script Description
Red Hat. Enterprise Linux
Server 4u3 or later
(x86_64)/Ubuntu 12.04 or
later (x86_64)/
FreeBSD 7.1 or later (x86_64)
built-in IPMI
driver
Sends/Receives data to/from BMC
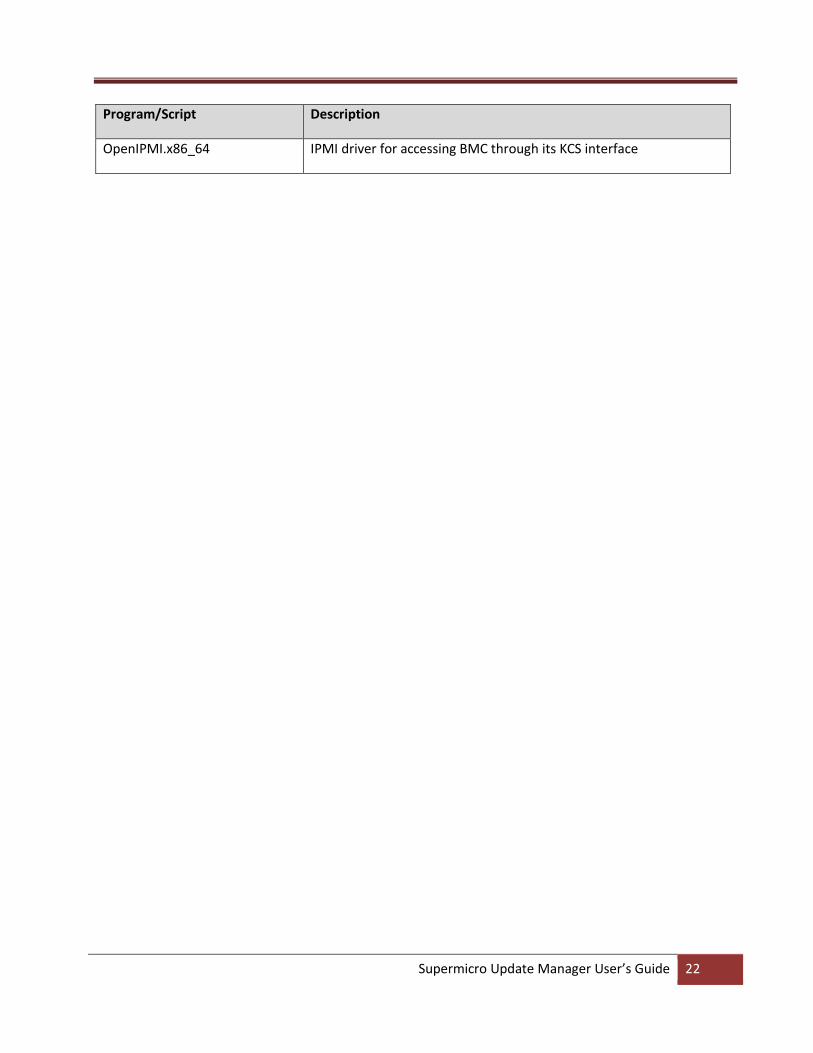
If the Linux/FreeBSD OS does not have the built-in IPMI driver, you should install the following software:
Supermicro Update Manager User’s Guide 22
Program/Script Description
OpenIPMI.x86_64 IPMI driver for accessing BMC through its KCS interface
Supermicro Update Manager User’s Guide 23
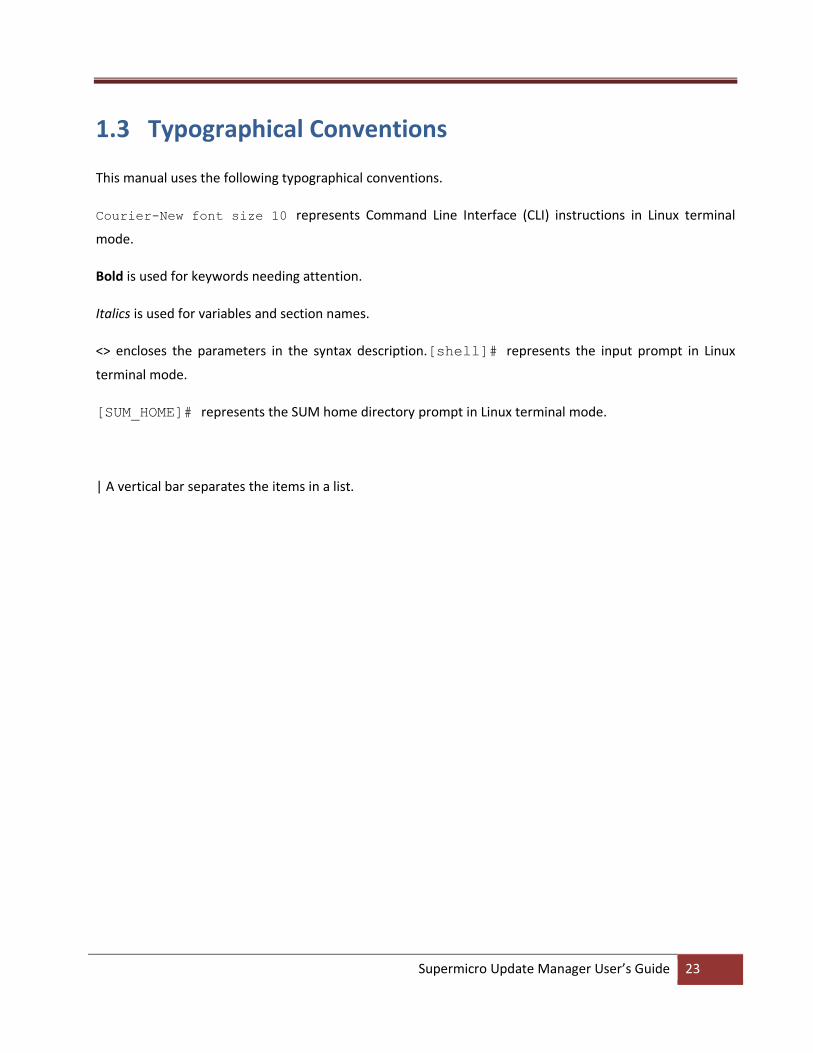
1.3 Typographical Conventions
This manual uses the following typographical conventions.
Courier-New font size 10 represents Command Line Interface (CLI) instructions in Linux terminal
mode.
Bold is used for keywords needing attention.
Italics is used for variables and section names.
<> encloses the parameters in the syntax description.[shell]# represents the input prompt in Linux
terminal mode.
[SUM_HOME]# represents the SUM home directory prompt in Linux terminal mode.
| A vertical bar separates the items in a list.
Supermicro Update Manager User’s Guide 24
2 Installation and Setup
2.1 Installing SUM
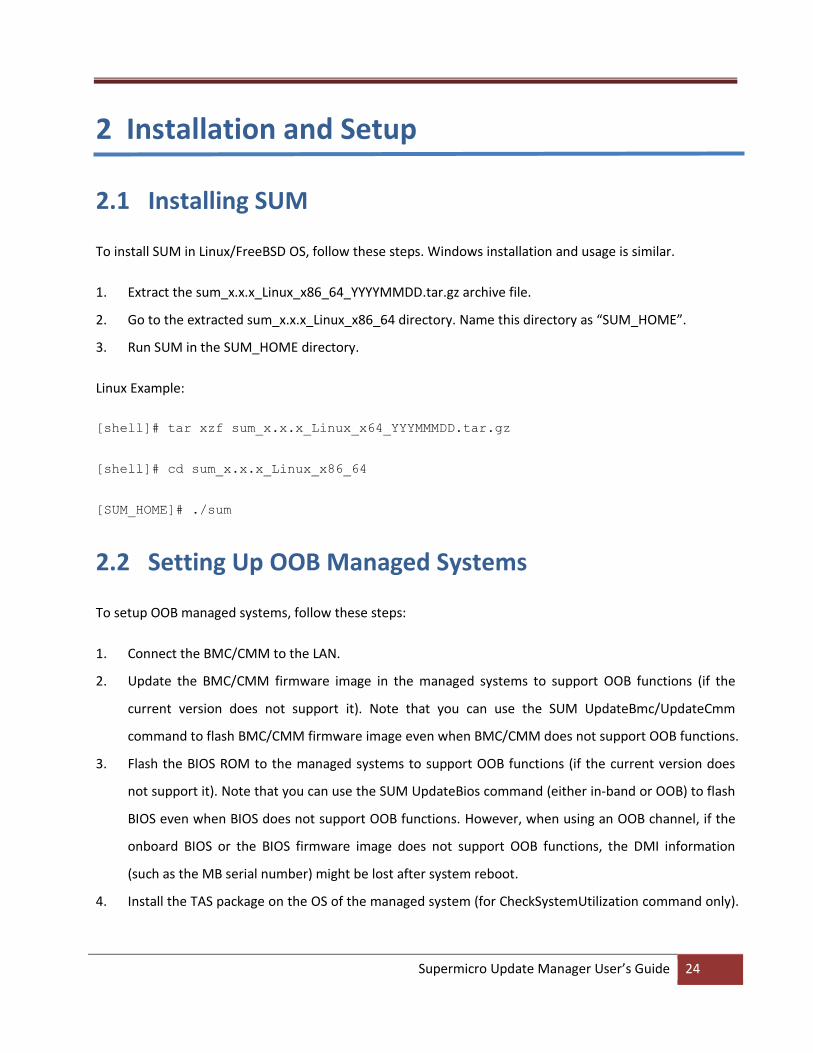
To install SUM in Linux/FreeBSD OS, follow these steps. Windows installation and usage is similar.
1. Extract the sum_x.x.x_Linux_x86_64_YYYYMMDD.tar.gz archive file.
2. Go to the extracted sum_x.x.x_Linux_x86_64 directory. Name this directory as “SUM_HOME”.
3. Run SUM in the SUM_HOME directory.
Linux Example:
[shell]# tar xzf sum_x.x.x_Linux_x64_YYYMMMDD.tar.gz
[shell]# cd sum_x.x.x_Linux_x86_64
[SUM_HOME]# ./sum
2.2 Setting Up OOB Managed Systems
To setup OOB managed systems, follow these steps:
1. Connect the BMC/CMM to the LAN.
2. Update the BMC/CMM firmware image in the managed systems to support OOB functions (if the
current version does not support it). Note that you can use the SUM UpdateBmc/UpdateCmm
command to flash BMC/CMM firmware image even when BMC/CMM does not support OOB functions.
3. Flash the BIOS ROM to the managed systems to support OOB functions (if the current version does
not support it). Note that you can use the SUM UpdateBios command (either in-band or OOB) to flash
BIOS even when BIOS does not support OOB functions. However, when using an OOB channel, if the
onboard BIOS or the BIOS firmware image does not support OOB functions, the DMI information
(such as the MB serial number) might be lost after system reboot.
4. Install the TAS package on the OS of the managed system (for CheckSystemUtilization command only).
Supermicro Update Manager User’s Guide 25
2.2.1 Installing TAS package
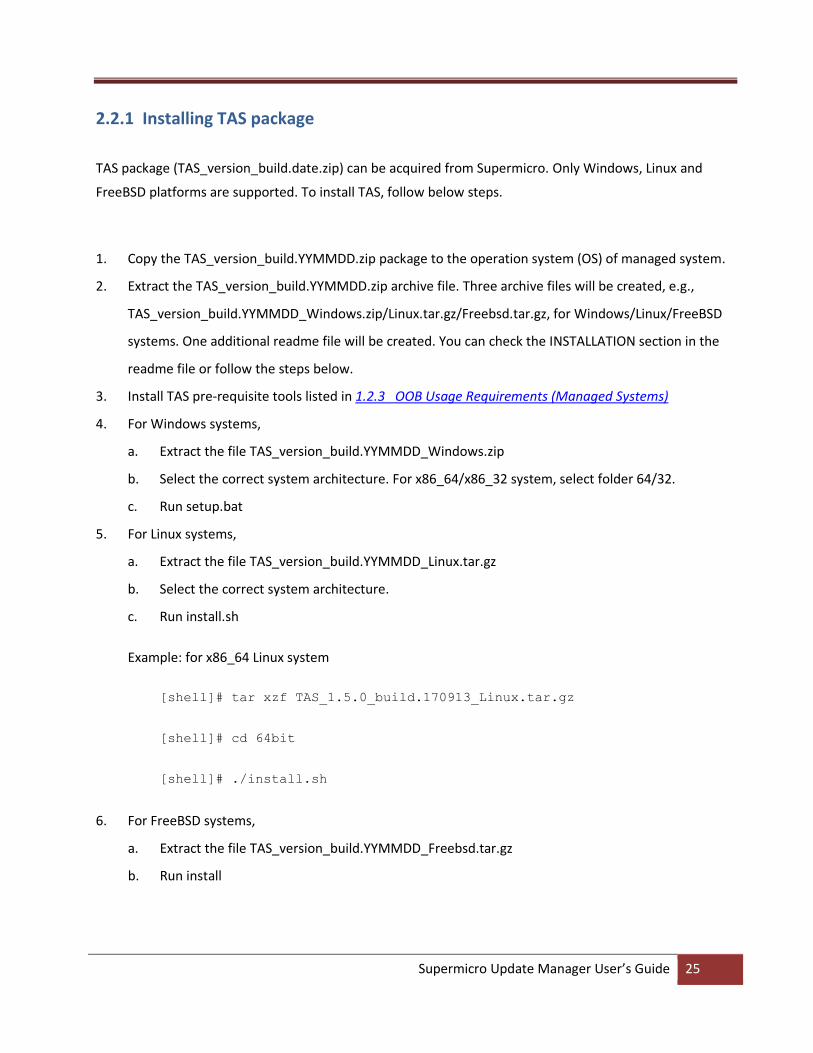
TAS package (TAS_version_build.date.zip) can be acquired from Supermicro. Only Windows, Linux and
FreeBSD platforms are supported. To install TAS, follow below steps.
1. Copy the TAS_version_build.YYMMDD.zip package to the operation system (OS) of managed system.
2. Extract the TAS_version_build.YYMMDD.zip archive file. Three archive files will be created, e.g.,
TAS_version_build.YYMMDD_Windows.zip/Linux.tar.gz/Freebsd.tar.gz, for Windows/Linux/FreeBSD
systems. One additional readme file will be created. You can check the INSTALLATION section in the
readme file or follow the steps below.
3. Install TAS pre-requisite tools listed in 1.2.3 OOB Usage Requirements (Managed Systems)
4. For Windows systems,
a. Extract the file TAS_version_build.YYMMDD_Windows.zip
b. Select the correct system architecture. For x86_64/x86_32 system, select folder 64/32.
c. Run setup.bat
5. For Linux systems,
a. Extract the file TAS_version_build.YYMMDD_Linux.tar.gz
b. Select the correct system architecture.
c. Run install.sh
Example: for x86_64 Linux system
[shell]# tar xzf TAS_1.5.0_build.170913_Linux.tar.gz
[shell]# cd 64bit
[shell]# ./install.sh
6. For FreeBSD systems,
a. Extract the file TAS_version_build.YYMMDD_Freebsd.tar.gz
b. Run install
Supermicro Update Manager User’s Guide 26
2.3 Setting Up In-Band Managed Systems
For Windows OS, no action is required. As a reminder, if the version of the currently installed Windows
driver is old, SUM would stop TAS/SD5, load a new driver and restart TAS/SD5. For Linux OS, the following
actions are required unless “InBand SMI E7h” support is noted in BIOS release note. If E7h is not supported
by BIOS, to set up the Linux in-band managed systems, simply copy and paste the OS specific driver file
"sum_bios.ko", under the SUM_HOME/driver directory, to the SUM_HOME directory.
Supermicro Update Manager User’s Guide 27
3 Licensing Managed Systems
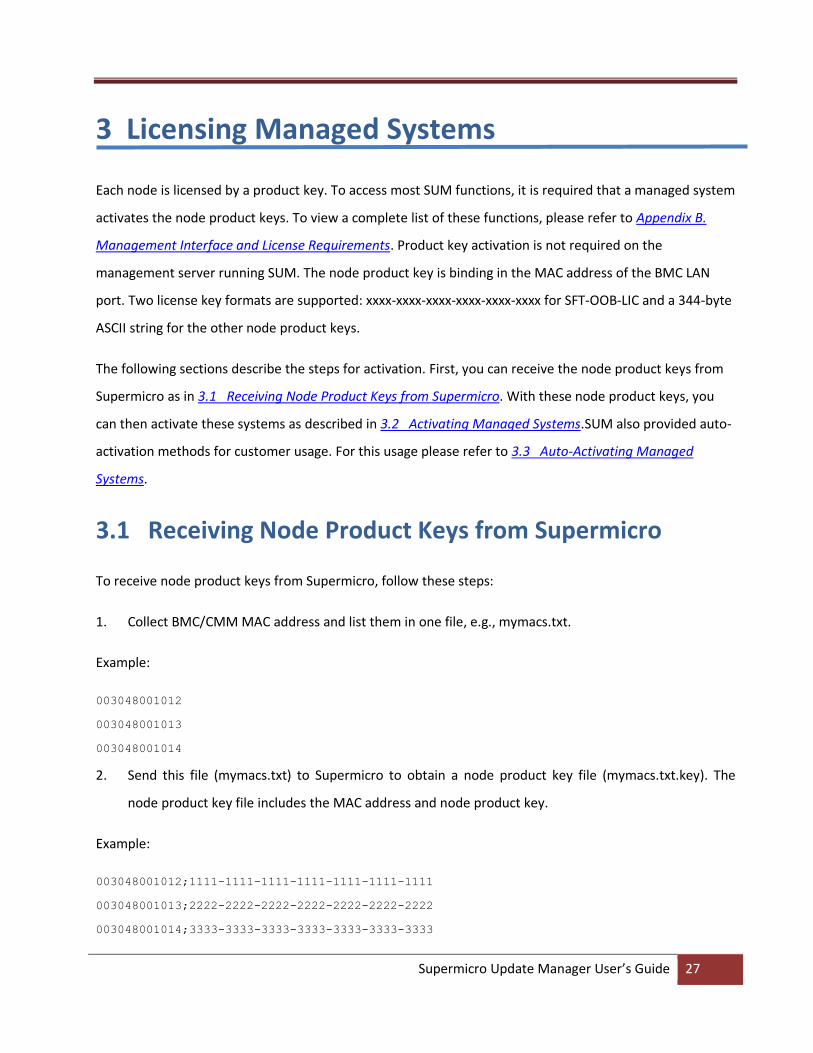
Each node is licensed by a product key. To access most SUM functions, it is required that a managed system
activates the node product keys. To view a complete list of these functions, please refer to Appendix B.
Management Interface and License Requirements. Product key activation is not required on the
management server running SUM. The node product key is binding in the MAC address of the BMC LAN
port. Two license key formats are supported: xxxx-xxxx-xxxx-xxxx-xxxx-xxxx for SFT-OOB-LIC and a 344-byte
ASCII string for the other node product keys.
The following sections describe the steps for activation. First, you can receive the node product keys from
Supermicro as in 3.1 Receiving Node Product Keys from Supermicro. With these node product keys, you
can then activate these systems as described in 3.2 Activating Managed Systems.SUM also provided auto-
activation methods for customer usage. For this usage please refer to 3.3 Auto-Activating Managed
Systems.
3.1 Receiving Node Product Keys from Supermicro
To receive node product keys from Supermicro, follow these steps:
1. Collect BMC/CMM MAC address and list them in one file, e.g., mymacs.txt.
Example:
003048001012
003048001013
003048001014
2. Send this file (mymacs.txt) to Supermicro to obtain a node product key file (mymacs.txt.key). The
node product key file includes the MAC address and node product key.
Example:
003048001012;1111-1111-1111-1111-1111-1111-1111
003048001013;2222-2222-2222-2222-2222-2222-2222
003048001014;3333-3333-3333-3333-3333-3333-3333
Supermicro Update Manager User’s Guide 28
3.2 Activating Managed Systems
To activate a single system, see 5.1.1 Activating a Single Managed System. To simultaneously activate
multiple systems see 6.2.1 Activating Multiple Managed Systems.
3.3 Auto-Activating Managed Systems
Sometimes, activation product key is a burden on customers. To relief customer from activating product
keys, SUM provides an auto-activation feature to do activation automatically. Follow below steps to do
auto-activation.
1. Receive credential file (cred.bin) from Supermicro by providing the MAC address list (mymac.txt)
which can be obtained by Step 1 of 3.1 Receiving Node Product Keys from Supermicro.
2. Put the credential file into SUM_HOME/credential directory
3. SUM will auto-activate product key from cred.bin when running license required commands.

Supermicro Update Manager User’s Guide 29
4 Basic User Interface
SUM is a binary executable file written in C++ language. Running this file on either Windows or
Linux/FreeBSD is similar. In this document, we only provide you with the examples of running on Linux. To
display the usage information, use this command:
[SUM_HOME]# ./sum
To display the usage information for each SUM command, use this syntax:
[SUM_HOME]# ./sum -h -c <command name>
Example:
[SUM_HOME]# ./sum -h -c UpdateBios
Usage Information
Options Description or usage
-h Shows help information (case insensitive)
-v Displays the verbose output on the screen
--no_banner Hides the version and copyright banner
--no_progress Hides the progress message
-i <BMC/CMM IP address or host name>
-l <BMC/CMM system list file name>
-u <BMC/CMM user ID>
-p <BMC/CMM user password>
-c <command name> (case insensitive)
System Check
Commands Long options
CheckOOBSupport None
CheckAssetInfo (OOB only) None
CheckSensorData (OOB only) None
CheckSystemUtilization (OOB only) (TAS thin agent required)
None
Key Management
Supermicro Update Manager User’s Guide 30
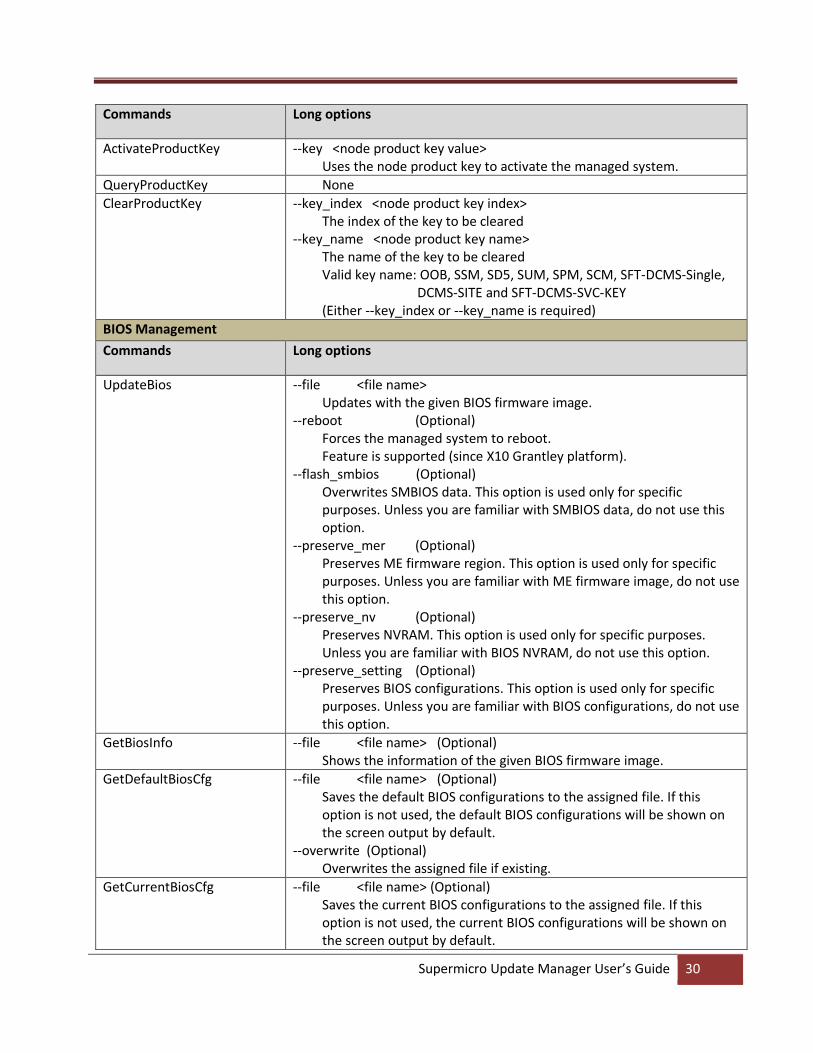
Commands Long options
ActivateProductKey --key <node product key value> Uses the node product key to activate the managed system.
QueryProductKey None
ClearProductKey --key_index <node product key index> The index of the key to be cleared
--key_name <node product key name> The name of the key to be cleared Valid key name: OOB, SSM, SD5, SUM, SPM, SCM, SFT-DCMS-Single,
DCMS-SITE and SFT-DCMS-SVC-KEY (Either --key_index or --key_name is required)
BIOS Management
Commands Long options
UpdateBios --file <file name> Updates with the given BIOS firmware image.
--reboot (Optional) Forces the managed system to reboot. Feature is supported (since X10 Grantley platform).
--flash_smbios (Optional) Overwrites SMBIOS data. This option is used only for specific purposes. Unless you are familiar with SMBIOS data, do not use this option.
--preserve_mer (Optional) Preserves ME firmware region. This option is used only for specific purposes. Unless you are familiar with ME firmware image, do not use this option.
--preserve_nv (Optional) Preserves NVRAM. This option is used only for specific purposes. Unless you are familiar with BIOS NVRAM, do not use this option.
--preserve_setting (Optional) Preserves BIOS configurations. This option is used only for specific purposes. Unless you are familiar with BIOS configurations, do not use this option.
GetBiosInfo --file <file name> (Optional) Shows the information of the given BIOS firmware image.
GetDefaultBiosCfg --file <file name> (Optional) Saves the default BIOS configurations to the assigned file. If this option is not used, the default BIOS configurations will be shown on the screen output by default.
--overwrite (Optional) Overwrites the assigned file if existing.
GetCurrentBiosCfg --file <file name> (Optional) Saves the current BIOS configurations to the assigned file. If this option is not used, the current BIOS configurations will be shown on the screen output by default.
Supermicro Update Manager User’s Guide 31
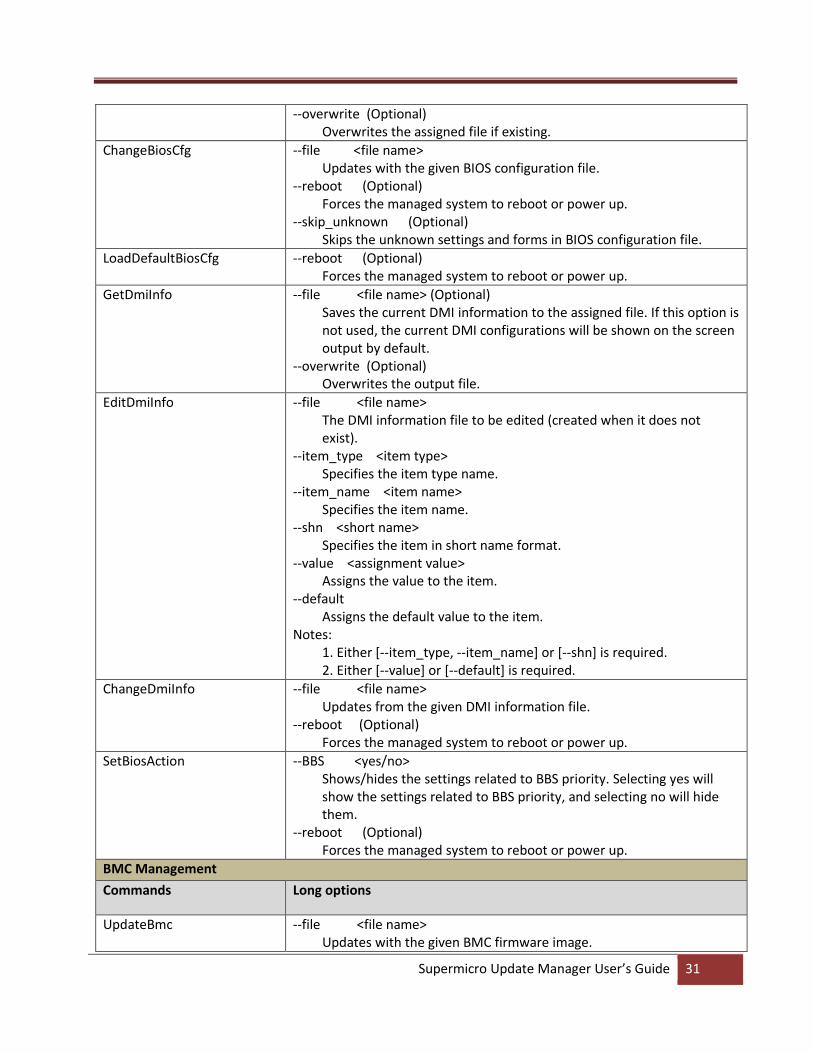
--overwrite (Optional) Overwrites the assigned file if existing.
ChangeBiosCfg --file <file name> Updates with the given BIOS configuration file.
--reboot (Optional) Forces the managed system to reboot or power up.
--skip_unknown (Optional) Skips the unknown settings and forms in BIOS configuration file.
LoadDefaultBiosCfg --reboot (Optional) Forces the managed system to reboot or power up.
GetDmiInfo --file <file name> (Optional) Saves the current DMI information to the assigned file. If this option is not used, the current DMI configurations will be shown on the screen output by default.
--overwrite (Optional) Overwrites the output file.
EditDmiInfo --file <file name> The DMI information file to be edited (created when it does not exist).
--item_type <item type> Specifies the item type name.
--item_name <item name> Specifies the item name.
--shn <short name> Specifies the item in short name format.
--value <assignment value> Assigns the value to the item.
--default Assigns the default value to the item.
Notes: 1. Either [--item_type, --item_name] or [--shn] is required. 2. Either [--value] or [--default] is required.
ChangeDmiInfo --file <file name> Updates from the given DMI information file.
--reboot (Optional) Forces the managed system to reboot or power up.
SetBiosAction --BBS <yes/no> Shows/hides the settings related to BBS priority. Selecting yes will show the settings related to BBS priority, and selecting no will hide them.
--reboot (Optional) Forces the managed system to reboot or power up.
BMC Management
Commands Long options
UpdateBmc --file <file name> Updates with the given BMC firmware image.

Supermicro Update Manager User’s Guide 32
--overwrite_cfg (Optional) Overwrites current BMC configurations including network settings using factory default values in the given BMC firmware image. This might cause IPMI connection lost. For ATEN BMC FW or AMI Hermon BMC FW, this option requires --overwrite_sdr option.
--overwrite_sdr (Optional) Overwrites current BMC SDR data For AMI BMC FW, this option requires --overwrite_cfg option.
GetBmcInfo --file <file name> (Optional) Shows the information of the given BMC firmware image.
GetBmcCfg --file <file name> (Optional) Saves the current BMC configuration to the assigned file. If this option is not used, the current BMC configurations will be shown on the screen output by default.
--overwrite (Optional) Overwrites the assigned file if existing.
ChangeBmcCfg --file <file name> Updates from the given BMC configuration file.
System Event Log
Commands Long options
GetEventLog --file <file name> (optional) Saves the system event log to a file. If this option is not used, the log will be shown on the screen output.
ClearEventLog --reboot (Optional) Forces the managed system to reboot or power up.
CMM Management (OOB Only)
Commands Long options
UpdateCmm --file <file name> Updates with the given CMM firmware image.
--overwrite_cfg (Optional) Overwrites the current CMM configurations, including network settings using factory default values in the given CMM firmware image. This might cause the IPMI connection to be lost.
GetCmmInfo --file <file name> (Optional) Shows information on the given CMM firmware image.
GetCmmCfg --file <file name> (Optional) Saves the current CMM configuration to the assigned file. If this option is not used, the current CMM configurations will be shown on the screen output by default.
--overwrite (Optional) Overwrites the output file.
ChangeCmmCfg --file <file name>
Supermicro Update Manager User’s Guide 33
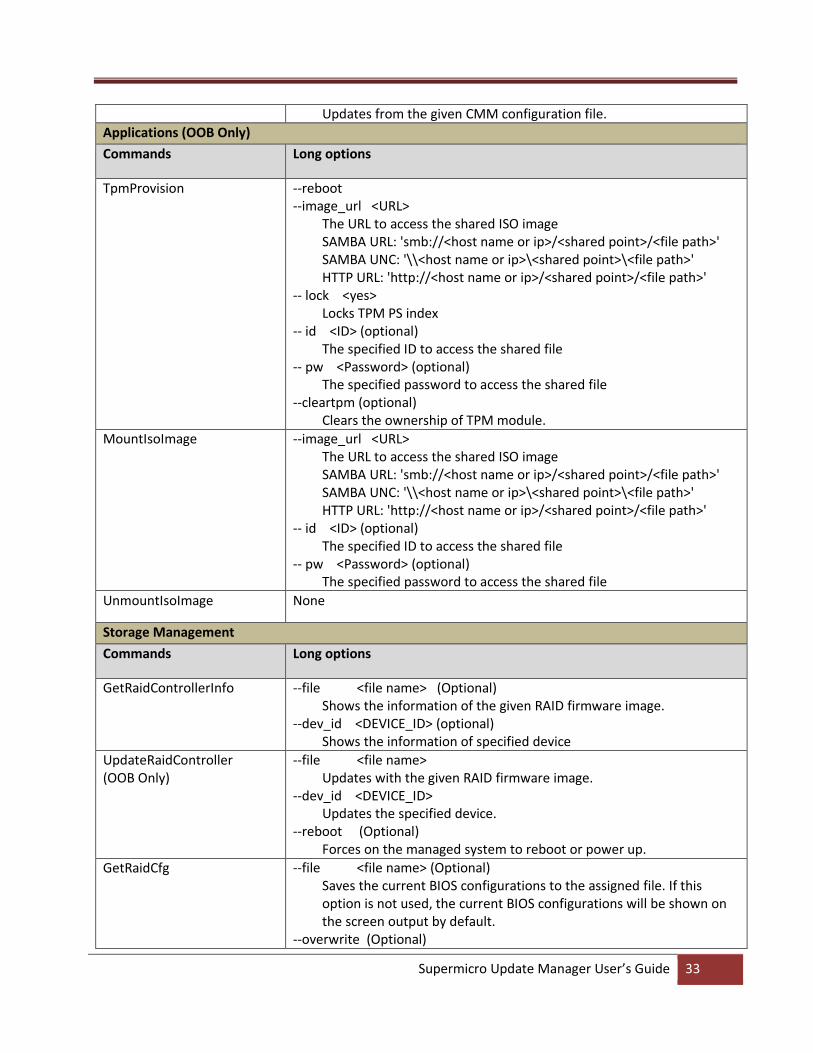
Updates from the given CMM configuration file.
Applications (OOB Only)
Commands Long options
TpmProvision --reboot --image_url <URL>
The URL to access the shared ISO image SAMBA URL: 'smb://<host name or ip>/<shared point>/<file path>' SAMBA UNC: '\\<host name or ip>\<shared point>\<file path>' HTTP URL: 'http://<host name or ip>/<shared point>/<file path>'
-- lock <yes> Locks TPM PS index
-- id <ID> (optional) The specified ID to access the shared file
-- pw <Password> (optional) The specified password to access the shared file
--cleartpm (optional) Clears the ownership of TPM module.
MountIsoImage --image_url <URL> The URL to access the shared ISO image SAMBA URL: 'smb://<host name or ip>/<shared point>/<file path>' SAMBA UNC: '\\<host name or ip>\<shared point>\<file path>' HTTP URL: 'http://<host name or ip>/<shared point>/<file path>'
-- id <ID> (optional) The specified ID to access the shared file
-- pw <Password> (optional) The specified password to access the shared file
UnmountIsoImage None
Storage Management
Commands Long options
GetRaidControllerInfo --file <file name> (Optional) Shows the information of the given RAID firmware image.
--dev_id <DEVICE_ID> (optional) Shows the information of specified device
UpdateRaidController (OOB Only)
--file <file name> Updates with the given RAID firmware image.
--dev_id <DEVICE_ID> Updates the specified device.
--reboot (Optional) Forces on the managed system to reboot or power up.
GetRaidCfg --file <file name> (Optional) Saves the current BIOS configurations to the assigned file. If this option is not used, the current BIOS configurations will be shown on the screen output by default.
--overwrite (Optional)

Supermicro Update Manager User’s Guide 34
Overwrites the output file.
ChangeRaidCfg --file <file name> Updates from the given RAID configuration file.
GetSataInfo (OOB Only) None
GetNvmeInfo (OOB Only) --dev_id <DEVICE_ID> (optional) Shows the information of the specified device.
Notes:
• During execution, DO NOT remove the AC power on the managed system.
• DO NOT flash BMC and BIOS firmware images at the same time.
• To execute SUM, use either the relative path method, e.g. ./sum or absolute path
method, e.g. /opt/sum_x.x.x_Linux_x64/sum in script file or shell command line.
• DO NOT update firmware image and configuration at the same managed system
concurrently by in-band and OOB method.
• Before running the OOB UpdateBios command, it is recommended that the managed
system is shut down first.
• For in-band usage, simply ignore the -l, -i, -u and -p options.
• For concurrent execution of OOB commands for managing multiple systems, use the -l
option. For details on how to manage multiple systems, see 6 Managing Multiple
Systems (OOB Only).
• When a command is executed, it will be recorded in sum.log. In addition, when rare
exceptions occur in BMC/CMM/RAID configurations get/set commands, timestamp logs
will be created. These logs are stored at “/var/log/supermicro/SUM” or $PWD (present
working directory). If the folder “/var/log/supermicro/SUM” exists, the logs will be
stored there. Otherwise, they are stored in the same folder as $PWD.
• For --reboot option in OOB usage, if target OS does not support software shutdown,
system will be forced powered off and then powered up. Please make sure usage of this
option to avoid data lost. For RedHat 7.x OS, to enable software shutdown support, we
can run below command in console prompt:
gsettings set org.gnome.settings-daemon.plugins.power button-power shutdown
4.1 Format of BIOS Settings Text File
The BIOS settings file is designed to display the BIOS setup menu in text format
for easier configurations. Each setup item consists of a variable, a value,
Supermicro Update Manager User’s Guide 35
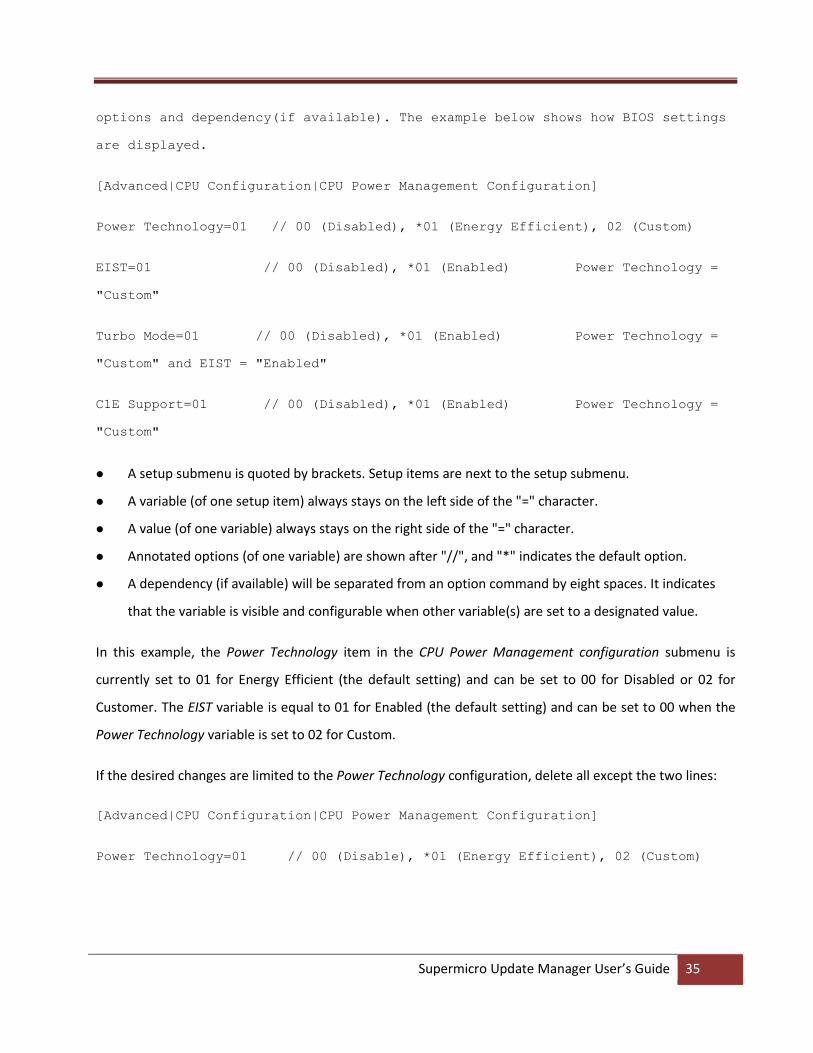
options and dependency(if available). The example below shows how BIOS settings
are displayed.
[Advanced|CPU Configuration|CPU Power Management Configuration]
Power Technology=01 // 00 (Disabled), *01 (Energy Efficient), 02 (Custom)
EIST=01 // 00 (Disabled), *01 (Enabled) Power Technology =
"Custom"
Turbo Mode=01 // 00 (Disabled), *01 (Enabled) Power Technology =
"Custom" and EIST = "Enabled"
C1E Support=01 // 00 (Disabled), *01 (Enabled) Power Technology =
"Custom"
A setup submenu is quoted by brackets. Setup items are next to the setup submenu.
A variable (of one setup item) always stays on the left side of the "=" character.
A value (of one variable) always stays on the right side of the "=" character.
Annotated options (of one variable) are shown after "//", and "*" indicates the default option.
A dependency (if available) will be separated from an option command by eight spaces. It indicates
that the variable is visible and configurable when other variable(s) are set to a designated value.
In this example, the Power Technology item in the CPU Power Management configuration submenu is
currently set to 01 for Energy Efficient (the default setting) and can be set to 00 for Disabled or 02 for
Customer. The EIST variable is equal to 01 for Enabled (the default setting) and can be set to 00 when the
Power Technology variable is set to 02 for Custom.
If the desired changes are limited to the Power Technology configuration, delete all except the two lines:
[Advanced|CPU Configuration|CPU Power Management Configuration]
Power Technology=01 // 00 (Disable), *01 (Energy Efficient), 02 (Custom)
Supermicro Update Manager User’s Guide 36
Notes:
You can remove unnecessary menu items (or variables), and their values still remain
the same after an update.
If all menu items are removed (or the file becomes empty), no configurations are
changed.
The Setup submenu is required for setting up the items.
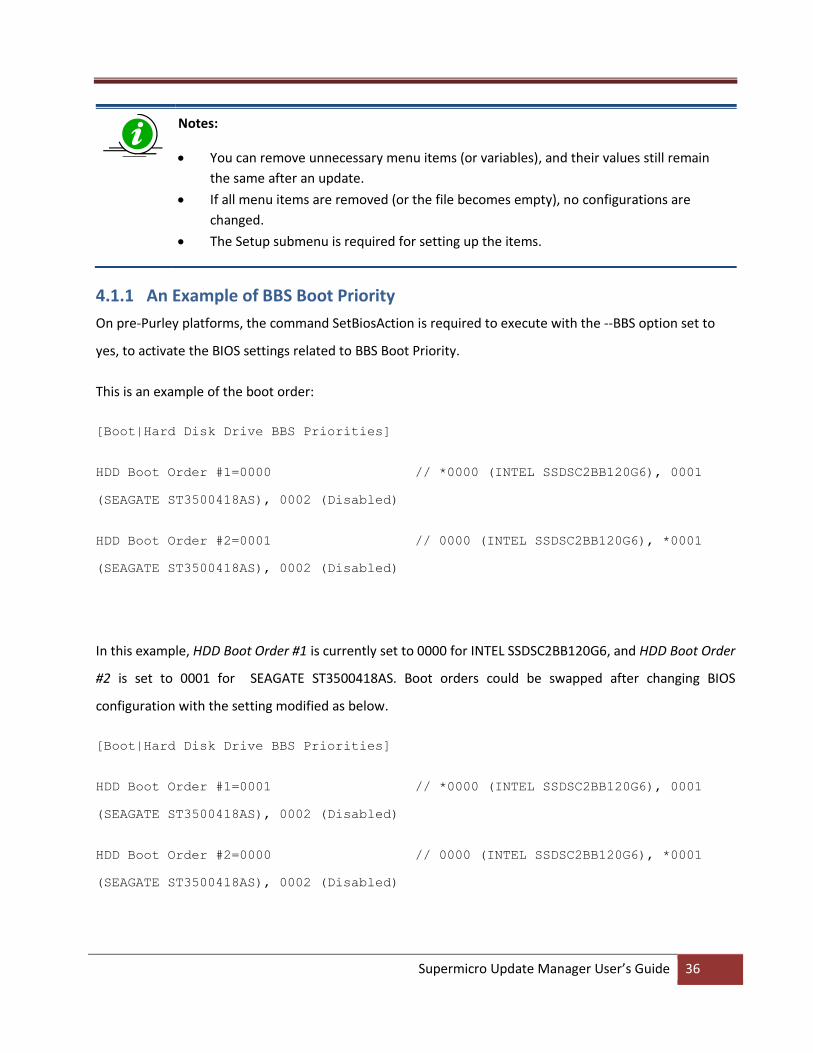
4.1.1 An Example of BBS Boot Priority
On pre-Purley platforms, the command SetBiosAction is required to execute with the --BBS option set to
yes, to activate the BIOS settings related to BBS Boot Priority.
This is an example of the boot order:
[Boot|Hard Disk Drive BBS Priorities]
HDD Boot Order #1=0000 // *0000 (INTEL SSDSC2BB120G6), 0001
(SEAGATE ST3500418AS), 0002 (Disabled)
HDD Boot Order #2=0001 // 0000 (INTEL SSDSC2BB120G6), *0001
(SEAGATE ST3500418AS), 0002 (Disabled)
In this example, HDD Boot Order #1 is currently set to 0000 for INTEL SSDSC2BB120G6, and HDD Boot Order
#2 is set to 0001 for SEAGATE ST3500418AS. Boot orders could be swapped after changing BIOS
configuration with the setting modified as below.
[Boot|Hard Disk Drive BBS Priorities]
HDD Boot Order #1=0001 // *0000 (INTEL SSDSC2BB120G6), 0001
(SEAGATE ST3500418AS), 0002 (Disabled)
HDD Boot Order #2=0000 // 0000 (INTEL SSDSC2BB120G6), *0001
(SEAGATE ST3500418AS), 0002 (Disabled)

Supermicro Update Manager User’s Guide 37
The device is mapped with the boot order. Please note that after BIOS configurations are changed, the
boot order indices (“0000” and ‘0001’ are boot order indices in the example above) and the mapped
devices may be different. In this example, after ChangeBiosCfg took effect, GetCurrentBiosCfg will have the
configuration as below:
[Boot|Hard Disk Drive BBS Priorities]
HDD Boot Order #1=0000 // *0000 (SEAGATE ST3500418AS), 0001
(INTEL SSDSC2BB120G6), 0002 (Disabled)
HDD Boot Order #2=0001 // 0000 (SEAGATE ST3500418AS), *0001
(INTEL SSDSC2BB120G6), 0002 (Disabled)
Note: The settings of boot orders should not be the same except Disabled.
Supermicro Update Manager User’s Guide 38
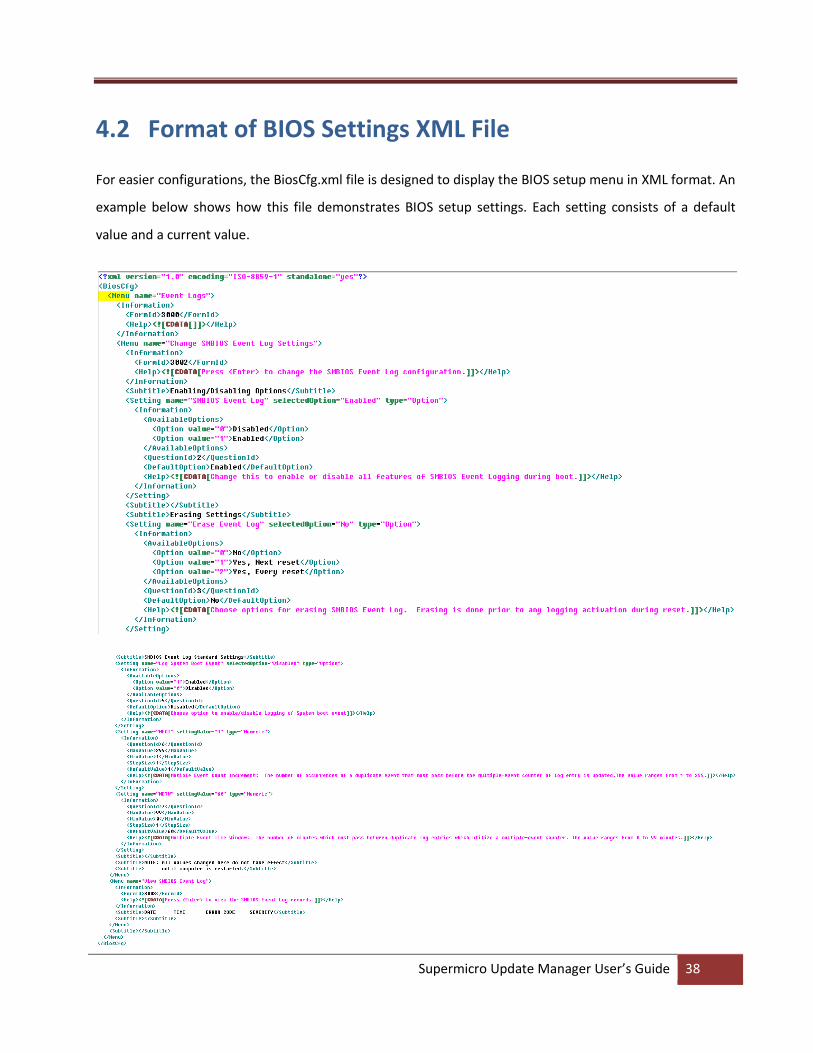
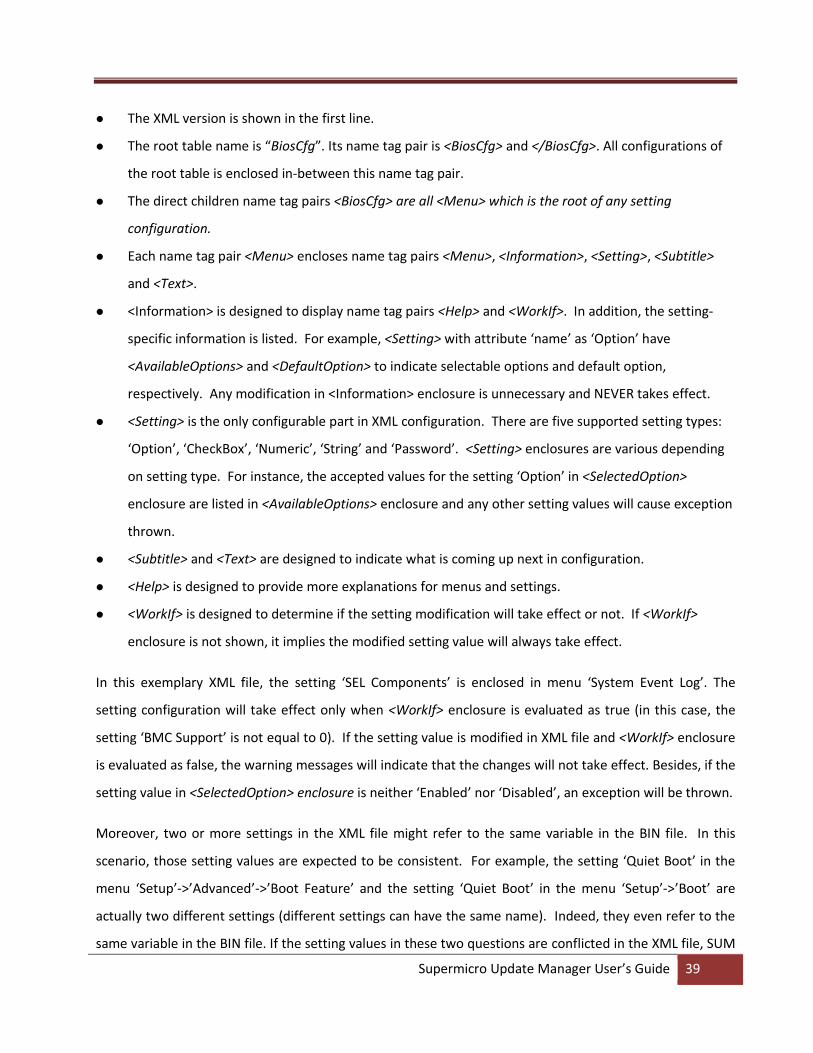
4.2 Format of BIOS Settings XML File
For easier configurations, the BiosCfg.xml file is designed to display the BIOS setup menu in XML format. An
example below shows how this file demonstrates BIOS setup settings. Each setting consists of a default
value and a current value.
Supermicro Update Manager User’s Guide 39
The XML version is shown in the first line.
The root table name is “BiosCfg”. Its name tag pair is <BiosCfg> and </BiosCfg>. All configurations of
the root table is enclosed in-between this name tag pair.
The direct children name tag pairs <BiosCfg> are all <Menu> which is the root of any setting
configuration.
Each name tag pair <Menu> encloses name tag pairs <Menu>, <Information>, <Setting>, <Subtitle>
and <Text>.
<Information> is designed to display name tag pairs <Help> and <WorkIf>. In addition, the setting-
specific information is listed. For example, <Setting> with attribute ‘name’ as ‘Option’ have
<AvailableOptions> and <DefaultOption> to indicate selectable options and default option,
respectively. Any modification in <Information> enclosure is unnecessary and NEVER takes effect.
<Setting> is the only configurable part in XML configuration. There are five supported setting types:
‘Option’, ‘CheckBox’, ‘Numeric’, ‘String’ and ‘Password’. <Setting> enclosures are various depending
on setting type. For instance, the accepted values for the setting ‘Option’ in <SelectedOption>
enclosure are listed in <AvailableOptions> enclosure and any other setting values will cause exception
thrown.
<Subtitle> and <Text> are designed to indicate what is coming up next in configuration.
<Help> is designed to provide more explanations for menus and settings.
<WorkIf> is designed to determine if the setting modification will take effect or not. If <WorkIf>
enclosure is not shown, it implies the modified setting value will always take effect.
In this exemplary XML file, the setting ‘SEL Components’ is enclosed in menu ‘System Event Log’. The
setting configuration will take effect only when <WorkIf> enclosure is evaluated as true (in this case, the
setting ‘BMC Support’ is not equal to 0). If the setting value is modified in XML file and <WorkIf> enclosure
is evaluated as false, the warning messages will indicate that the changes will not take effect. Besides, if the
setting value in <SelectedOption> enclosure is neither ‘Enabled’ nor ‘Disabled’, an exception will be thrown.
Moreover, two or more settings in the XML file might refer to the same variable in the BIN file. In this
scenario, those setting values are expected to be consistent. For example, the setting ‘Quiet Boot’ in the
menu ‘Setup’->’Advanced’->’Boot Feature’ and the setting ‘Quiet Boot’ in the menu ‘Setup’->’Boot’ are
actually two different settings (different settings can have the same name). Indeed, they even refer to the
same variable in the BIN file. If the setting values in these two questions are conflicted in the XML file, SUM

Supermicro Update Manager User’s Guide 40
will then throw an exception. For more details on usages, see Appendix E. How to Change BIOS
Configurations in XML Files.
Notes:
Unchanged settings can be deleted to skip update.
XML version line and the root <BiosCfg> should not be deleted.
XML configuration contains extended ASCII characters, i.e. © , ® and µ . It is REQUIRED
to use a text editor that supports extended ASCII characters (ISO-8859-1 encoding).
Otherwise, the extended ASCII characters might be lost after they are saved. It is
suggested that Notepad++ in Windows and Vim in Linux should be used to view and
edit the XML configuration.
For using tools to edit XML files, please refer to Appendix F. Using the Command Line
Tool (XMLStarlet) to Edit XML Files.
Supermicro Update Manager User’s Guide 41
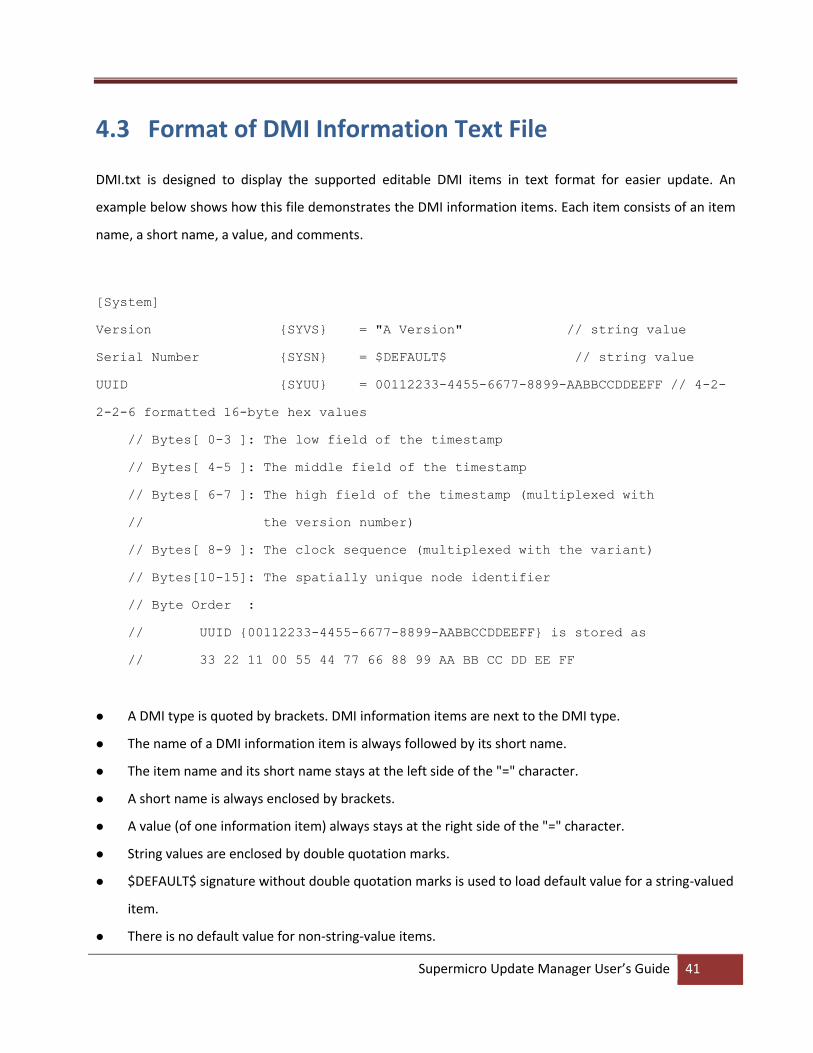
4.3 Format of DMI Information Text File
DMI.txt is designed to display the supported editable DMI items in text format for easier update. An
example below shows how this file demonstrates the DMI information items. Each item consists of an item
name, a short name, a value, and comments.
[System]
Version {SYVS} = "A Version" // string value
Serial Number {SYSN} = $DEFAULT$ // string value
UUID {SYUU} = 00112233-4455-6677-8899-AABBCCDDEEFF // 4-2-
2-2-6 formatted 16-byte hex values
// Bytes[ 0-3 ]: The low field of the timestamp
// Bytes[ 4-5 ]: The middle field of the timestamp
// Bytes[ 6-7 ]: The high field of the timestamp (multiplexed with
// the version number)
// Bytes[ 8-9 ]: The clock sequence (multiplexed with the variant)
// Bytes[10-15]: The spatially unique node identifier
// Byte Order :
// UUID {00112233-4455-6677-8899-AABBCCDDEEFF} is stored as
// 33 22 11 00 55 44 77 66 88 99 AA BB CC DD EE FF
A DMI type is quoted by brackets. DMI information items are next to the DMI type.
The name of a DMI information item is always followed by its short name.
The item name and its short name stays at the left side of the "=" character.
A short name is always enclosed by brackets.
A value (of one information item) always stays at the right side of the "=" character.
String values are enclosed by double quotation marks.
$DEFAULT$ signature without double quotation marks is used to load default value for a string-valued
item.
There is no default value for non-string-value items.
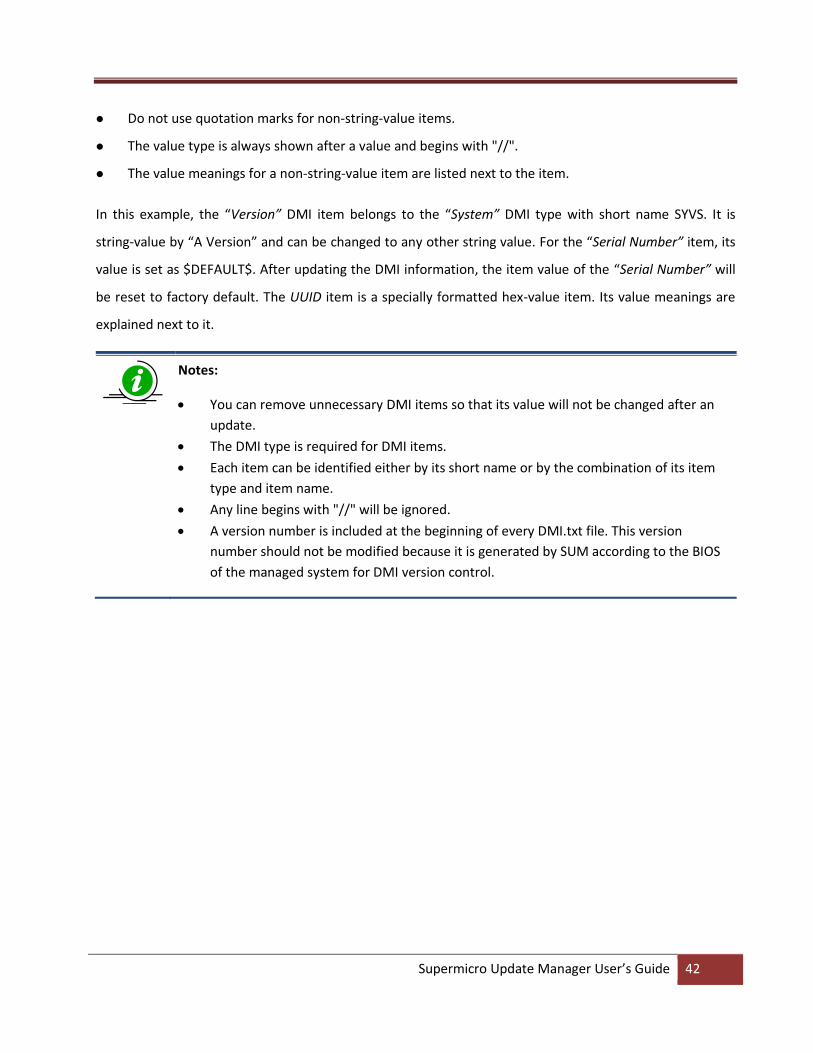
Supermicro Update Manager User’s Guide 42
Do not use quotation marks for non-string-value items.
The value type is always shown after a value and begins with "//".
The value meanings for a non-string-value item are listed next to the item.
In this example, the “Version” DMI item belongs to the “System” DMI type with short name SYVS. It is
string-value by “A Version” and can be changed to any other string value. For the “Serial Number” item, its
value is set as $DEFAULT$. After updating the DMI information, the item value of the “Serial Number” will
be reset to factory default. The UUID item is a specially formatted hex-value item. Its value meanings are
explained next to it.
Notes:
You can remove unnecessary DMI items so that its value will not be changed after an
update.
The DMI type is required for DMI items.
Each item can be identified either by its short name or by the combination of its item
type and item name.
Any line begins with "//" will be ignored.
A version number is included at the beginning of every DMI.txt file. This version
number should not be modified because it is generated by SUM according to the BIOS
of the managed system for DMI version control.

Supermicro Update Manager User’s Guide 43
4.4 Format of BMC Configuration XML File
The BMC configuration file is designed to display the supported and editable BMC configuration elements
in XML format for an easier update process. An example below shows how this file demonstrates the BMC
configurable elements.
<?xml version="1.0"?>
<BmcCfg>
<!--You can remove unnecessary elements so that-->
<!--their values will not be changed after update-->
<StdCfg Action="None">
<!--Supported Action:None/Change-->
<!--Standard BMC configuration tables-->
<FRU Action="Change">
<!--Supported Action:None/Change-->
<Configuration>
<!--Configuration for FRU data-->
<BoardMfgName>Supermicro</BoardMfgName>
<!--string value, 0~16 characters-->
</Configuration>
</FRU>
</StdCfg>
<OemCfg Action="Change">
<!--Supported Action:None/Change-->
<!--OEM BMC configuration tables-->
<ServiceEnabling Action="Change">
<!--Supported Action:None/Change-->
<Configuration>
<!--Configuration for ServiceEnabling-->
<HTTP>Enable</HTTP>
<!--Enable/Disable-->
</Configuration>
</ServiceEnabling>
</OemCfg>
</BmcCfg>

Supermicro Update Manager User’s Guide 44
The XML version is shown in the first line.
The root table name is “BmcCfg”. Its name tag pair is <BmcCfg> and </BmcCfg>. All information
belongs to the root table is enclosed in-between this name tag pair.
There could be two direct children for the root table: “StdCfg” and “OemCfg”.
“StdCfg” and “OemCfg” could have child tables.
Configurable elements are listed in the “Configuration” field of each child table.
Each configurable element has a name tag pair. The element value is enclosed by its name tag pair.
Comments could be given following any element or table name tag. Each comment is enclosed by “<!-
-“ and “-->” tags. The supported usage of each element and table are shown in its following
comments.
Configuration tables could have “Action” attribute. Supported actions are shown in the comments. If
action is “None”, all the configurations and children of this table will be skipped.
Configuration tables could contain more table specific attributes in case needed.
In this example, the Action is None for the StdCfg table. As such, SUM will skip updating the element
BoardMfgName of the table FRU. On the other hand, SUM will try to update the value as Enable for the
HTTP element of the ServiceEnabling table in the OemCfg table.
Notes:
Child tables or configurable elements can be deleted to skip update for these tables or
configuration elements.
Child tables or configurable elements cannot be left alone without parents.
XML version line and the root table should not be deleted.
For using tools to edit XML files, please refer to Appendix F. Using the Command Line
Tool (XMLStarlet) to Edit XML Files.

Supermicro Update Manager User’s Guide 45
4.5 Format of RAID Configuration XML File
The RAID configuration file is designed to display the supported editable RAID configuration elements in
XML format for easier update. The example below shows how the RAID configurable elements are
demonstrated in this file.
The XML version is shown in the first line.
The root table name is “RAIDCfg”. <RAIDCfg> and </RAIDCfg> are its tag pair. All information in the
root table is enclosed between this tag pair.
There could be two child tags for the root table: “Information” and “RAIDController”.
“Information” and “RAIDController” could have child tables.
Configurable elements are listed in the “Configuration” field of each child table.
Each configurable element has a tag pair. The element value is enclosed by its tag pair.
Comments may be given following any element or table tag. Each comment is enclosed by the “<!--
“ and “-->” tags. The supported usage of each element and table are shown in the comments that
follow.
Configuration tables may have “Action” attributes. Supported actions are shown in the comments. If
action is “None”, all configuration and child tables of this table will be skipped.
Configuration tables may contain more table specific attributes when needed.
To create a logical volume, RAIDInfo action should be “Change”,and RAID action should be “Create”.
“PhysicalDriveList” field must contain all drive IDs for RAID creation, and “ArrayID” field should be
set to “-1”.
To delete a logical volume, RAIDinfo action should be “Change”, RAID action should be “Delete” and
assign corresponding logical drive ID or “ALL” to “DeletingLogicalDriveList” field.
To delete all arrays built in the RAID controller, RAIDinfo action should be “ClearAll”.
To change RAID configuration, you have to delete original RAID and create new RAID, with proper
modification of “Level”, “Span” and “PhysicalDriveList” fields.
To enable HDD LED in RAID controller, fill drive ID to “LocatingPhysicalDriveIDList” field and set RAID
action to “Locate”
Supermicro Update Manager User’s Guide 46
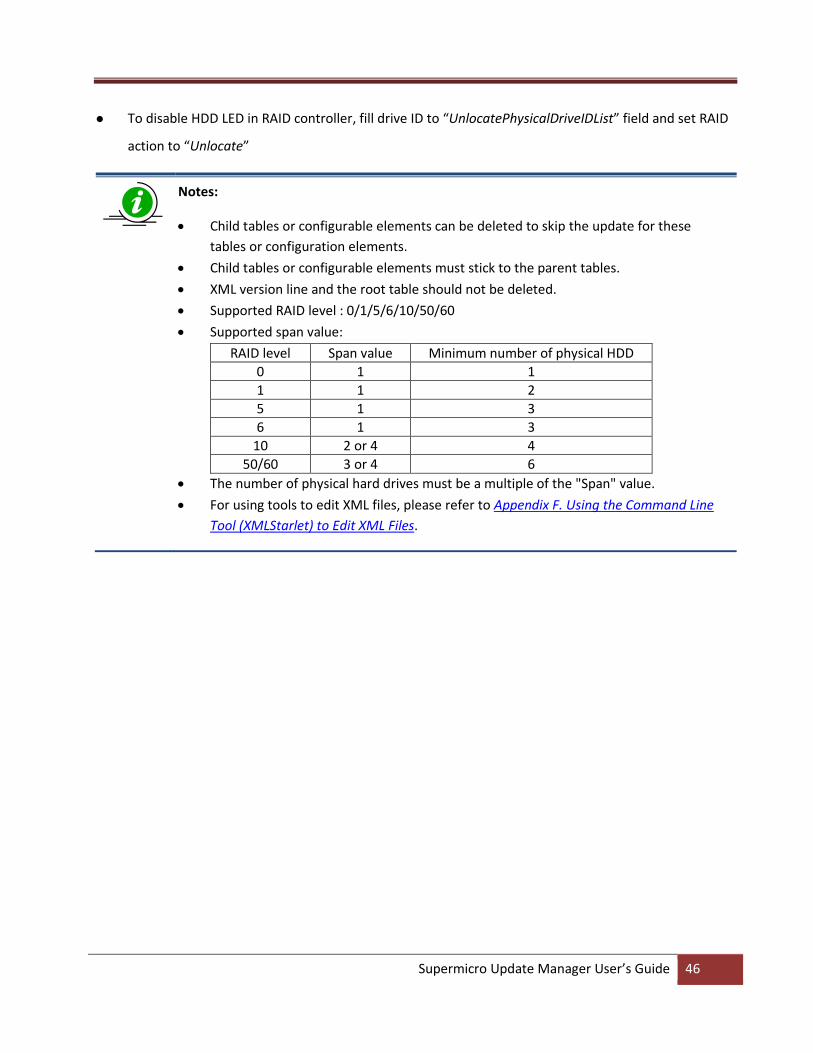
To disable HDD LED in RAID controller, fill drive ID to “UnlocatePhysicalDriveIDList” field and set RAID
action to “Unlocate”
Notes:
Child tables or configurable elements can be deleted to skip the update for these
tables or configuration elements.
Child tables or configurable elements must stick to the parent tables.
XML version line and the root table should not be deleted.
Supported RAID level : 0/1/5/6/10/50/60
Supported span value:
RAID level Span value Minimum number of physical HDD
0 1 1
1 1 2
5 1 3
6 1 3
10 2 or 4 4
50/60 3 or 4 6
The number of physical hard drives must be a multiple of the "Span" value.
For using tools to edit XML files, please refer to Appendix F. Using the Command Line
Tool (XMLStarlet) to Edit XML Files.

Supermicro Update Manager User’s Guide 47
Example:
<?xml version="1.0"?>
<RAIDCfg>
<Information>
<TotalRaidController>1</TotalRaidController>
</Information>
<RAIDController Action="Change" DeviceID="0">
<!--Supported Action:None/Change-->
<ControllerProperties Action="None">
<!--Supported Action:None/Change-->
<Configuration>
<BiosBootMode>Stop on Error</BiosBootMode>
<!--RAID controller BIOS boot mode, enumerated string value-->
<!--Supported values: Stop on Error/Pause on Error/Ignore Errors/Safe Mode on Error-->
</Configuration>
</ControllerProperties>
<RAIDInfo Action="Change">
<!--Supported Action:None/Change/ClearAll-->
<RAID Action="None" ArrayID="-1">
<!--Supported Action:None/Add/Delete/Create/Locate/Unlocate-->
<Information>
<PhysicalDriveCount>0</PhysicalDriveCount>
<!--Total number of physical drives in this RAID-->
<LogicalDriveCount>0</LogicalDriveCount>
<!--Total number of logical drives in this RAID-->
<LocatedPhysicalDriveList></LocatedPhysicalDriveList>
<!--located physical drives-->
<FreeSize>0</FreeSize>
<!--Free size of RAID, unit: MB-->
<LogicalDriveInfo></LogicalDriveInfo>
</Information>
Supermicro Update Manager User’s Guide 48
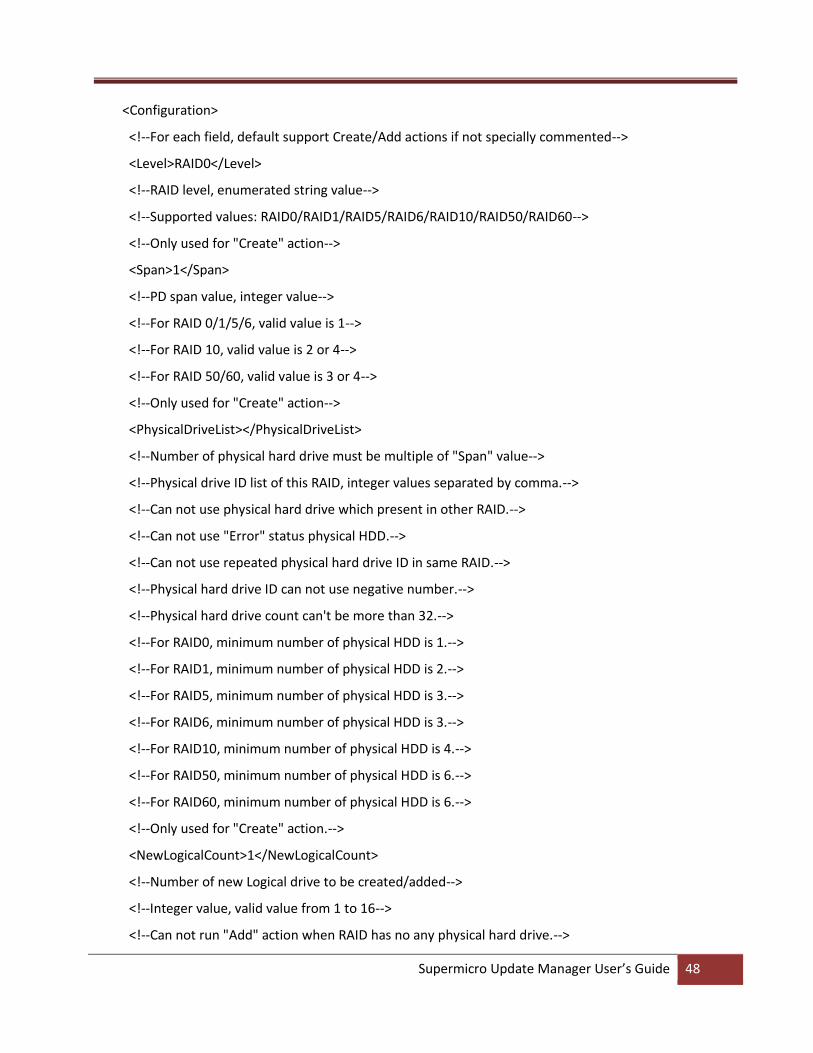
<Configuration>
<!--For each field, default support Create/Add actions if not specially commented-->
<Level>RAID0</Level>
<!--RAID level, enumerated string value-->
<!--Supported values: RAID0/RAID1/RAID5/RAID6/RAID10/RAID50/RAID60-->
<!--Only used for "Create" action-->
<Span>1</Span>
<!--PD span value, integer value-->
<!--For RAID 0/1/5/6, valid value is 1-->
<!--For RAID 10, valid value is 2 or 4-->
<!--For RAID 50/60, valid value is 3 or 4-->
<!--Only used for "Create" action-->
<PhysicalDriveList></PhysicalDriveList>
<!--Number of physical hard drive must be multiple of "Span" value-->
<!--Physical drive ID list of this RAID, integer values separated by comma.-->
<!--Can not use physical hard drive which present in other RAID.-->
<!--Can not use "Error" status physical HDD.-->
<!--Can not use repeated physical hard drive ID in same RAID.-->
<!--Physical hard drive ID can not use negative number.-->
<!--Physical hard drive count can't be more than 32.-->
<!--For RAID0, minimum number of physical HDD is 1.-->
<!--For RAID1, minimum number of physical HDD is 2.-->
<!--For RAID5, minimum number of physical HDD is 3.-->
<!--For RAID6, minimum number of physical HDD is 3.-->
<!--For RAID10, minimum number of physical HDD is 4.-->
<!--For RAID50, minimum number of physical HDD is 6.-->
<!--For RAID60, minimum number of physical HDD is 6.-->
<!--Only used for "Create" action.-->
<NewLogicalCount>1</NewLogicalCount>
<!--Number of new Logical drive to be created/added-->
<!--Integer value, valid value from 1 to 16-->
<!--Can not run "Add" action when RAID has no any physical hard drive.-->
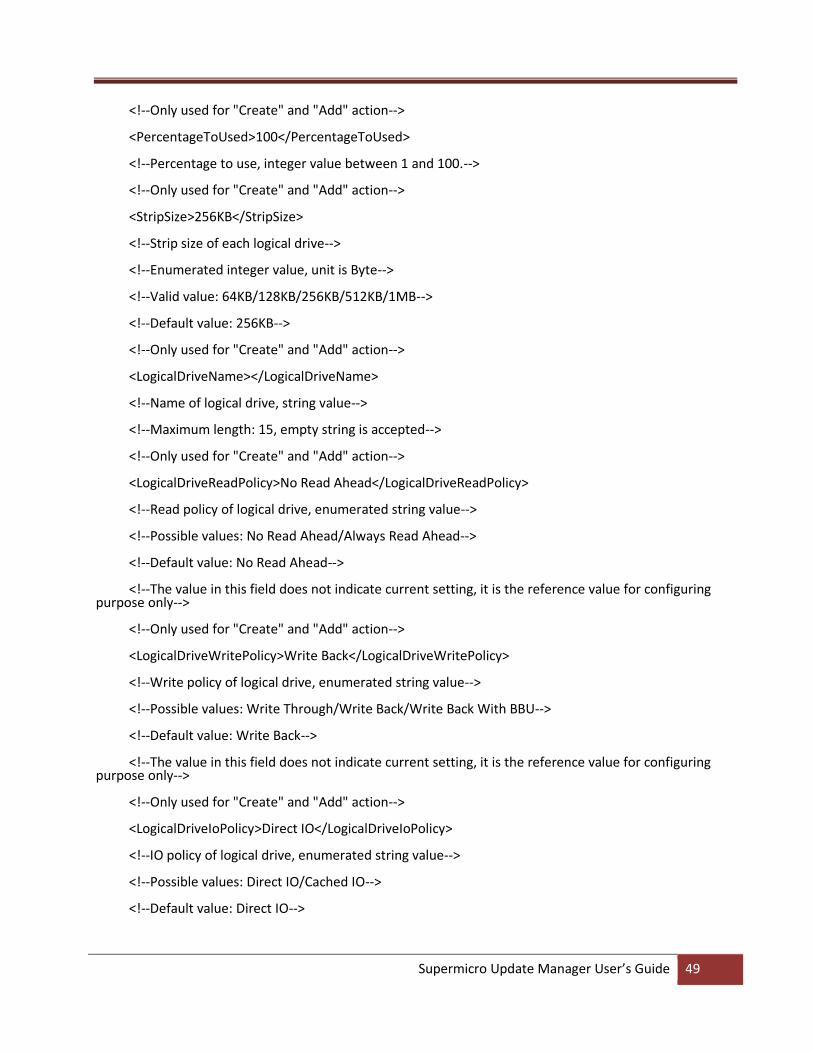
Supermicro Update Manager User’s Guide 49
<!--Only used for "Create" and "Add" action-->
<PercentageToUsed>100</PercentageToUsed>
<!--Percentage to use, integer value between 1 and 100.-->
<!--Only used for "Create" and "Add" action-->
<StripSize>256KB</StripSize>
<!--Strip size of each logical drive-->
<!--Enumerated integer value, unit is Byte-->
<!--Valid value: 64KB/128KB/256KB/512KB/1MB-->
<!--Default value: 256KB-->
<!--Only used for "Create" and "Add" action-->
<LogicalDriveName></LogicalDriveName>
<!--Name of logical drive, string value-->
<!--Maximum length: 15, empty string is accepted-->
<!--Only used for "Create" and "Add" action-->
<LogicalDriveReadPolicy>No Read Ahead</LogicalDriveReadPolicy>
<!--Read policy of logical drive, enumerated string value-->
<!--Possible values: No Read Ahead/Always Read Ahead-->
<!--Default value: No Read Ahead-->
<!--The value in this field does not indicate current setting, it is the reference value for configuring purpose only-->
<!--Only used for "Create" and "Add" action-->
<LogicalDriveWritePolicy>Write Back</LogicalDriveWritePolicy>
<!--Write policy of logical drive, enumerated string value-->
<!--Possible values: Write Through/Write Back/Write Back With BBU-->
<!--Default value: Write Back-->
<!--The value in this field does not indicate current setting, it is the reference value for configuring purpose only-->
<!--Only used for "Create" and "Add" action-->
<LogicalDriveIoPolicy>Direct IO</LogicalDriveIoPolicy>
<!--IO policy of logical drive, enumerated string value-->
<!--Possible values: Direct IO/Cached IO-->
<!--Default value: Direct IO-->
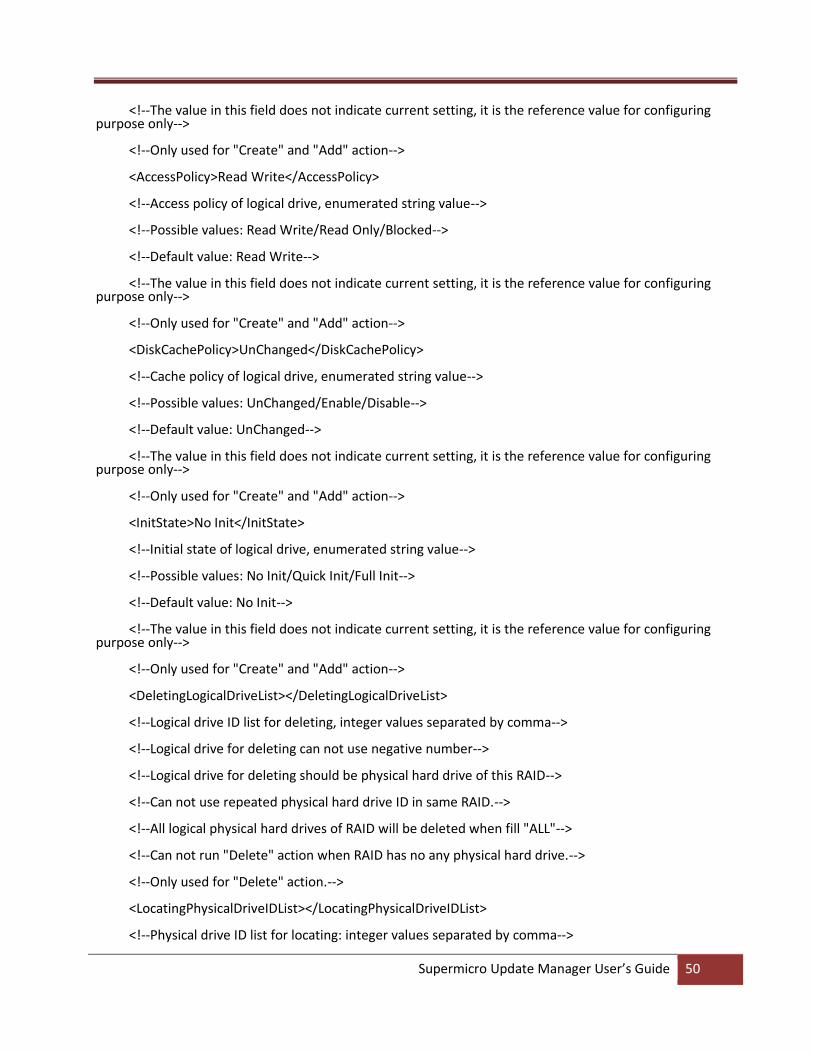
Supermicro Update Manager User’s Guide 50
<!--The value in this field does not indicate current setting, it is the reference value for configuring purpose only-->
<!--Only used for "Create" and "Add" action-->
<AccessPolicy>Read Write</AccessPolicy>
<!--Access policy of logical drive, enumerated string value-->
<!--Possible values: Read Write/Read Only/Blocked-->
<!--Default value: Read Write-->
<!--The value in this field does not indicate current setting, it is the reference value for configuring purpose only-->
<!--Only used for "Create" and "Add" action-->
<DiskCachePolicy>UnChanged</DiskCachePolicy>
<!--Cache policy of logical drive, enumerated string value-->
<!--Possible values: UnChanged/Enable/Disable-->
<!--Default value: UnChanged-->
<!--The value in this field does not indicate current setting, it is the reference value for configuring purpose only-->
<!--Only used for "Create" and "Add" action-->
<InitState>No Init</InitState>
<!--Initial state of logical drive, enumerated string value-->
<!--Possible values: No Init/Quick Init/Full Init-->
<!--Default value: No Init-->
<!--The value in this field does not indicate current setting, it is the reference value for configuring purpose only-->
<!--Only used for "Create" and "Add" action-->
<DeletingLogicalDriveList></DeletingLogicalDriveList>
<!--Logical drive ID list for deleting, integer values separated by comma-->
<!--Logical drive for deleting can not use negative number-->
<!--Logical drive for deleting should be physical hard drive of this RAID-->
<!--Can not use repeated physical hard drive ID in same RAID.-->
<!--All logical physical hard drives of RAID will be deleted when fill "ALL"-->
<!--Can not run "Delete" action when RAID has no any physical hard drive.-->
<!--Only used for "Delete" action.-->
<LocatingPhysicalDriveIDList></LocatingPhysicalDriveIDList>
<!--Physical drive ID list for locating: integer values separated by comma-->
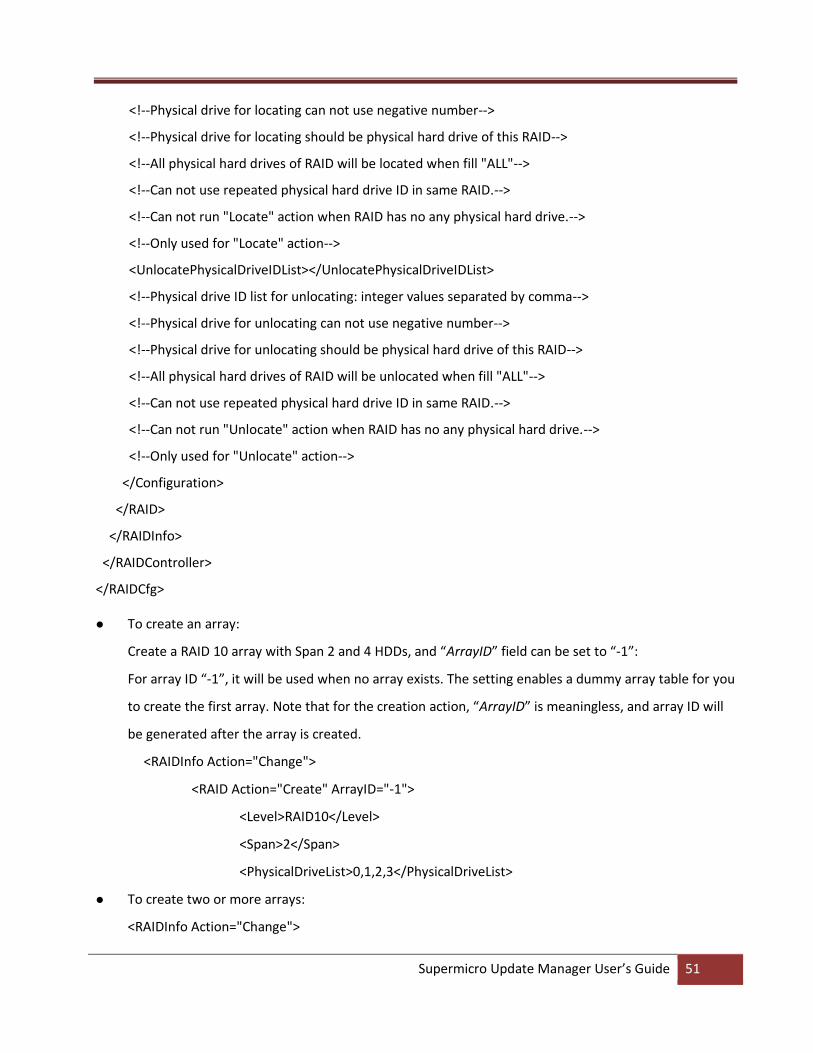
Supermicro Update Manager User’s Guide 51
<!--Physical drive for locating can not use negative number-->
<!--Physical drive for locating should be physical hard drive of this RAID-->
<!--All physical hard drives of RAID will be located when fill "ALL"-->
<!--Can not use repeated physical hard drive ID in same RAID.-->
<!--Can not run "Locate" action when RAID has no any physical hard drive.-->
<!--Only used for "Locate" action-->
<UnlocatePhysicalDriveIDList></UnlocatePhysicalDriveIDList>
<!--Physical drive ID list for unlocating: integer values separated by comma-->
<!--Physical drive for unlocating can not use negative number-->
<!--Physical drive for unlocating should be physical hard drive of this RAID-->
<!--All physical hard drives of RAID will be unlocated when fill "ALL"-->
<!--Can not use repeated physical hard drive ID in same RAID.-->
<!--Can not run "Unlocate" action when RAID has no any physical hard drive.-->
<!--Only used for "Unlocate" action-->
</Configuration>
</RAID>
</RAIDInfo>
</RAIDController>
</RAIDCfg>
To create an array:
Create a RAID 10 array with Span 2 and 4 HDDs, and “ArrayID” field can be set to “-1”:
For array ID “-1”, it will be used when no array exists. The setting enables a dummy array table for you
to create the first array. Note that for the creation action, “ArrayID” is meaningless, and array ID will
be generated after the array is created.
<RAIDInfo Action="Change">
<RAID Action="Create" ArrayID="-1">
<Level>RAID10</Level>
<Span>2</Span>
<PhysicalDriveList>0,1,2,3</PhysicalDriveList>
To create two or more arrays:
<RAIDInfo Action="Change">
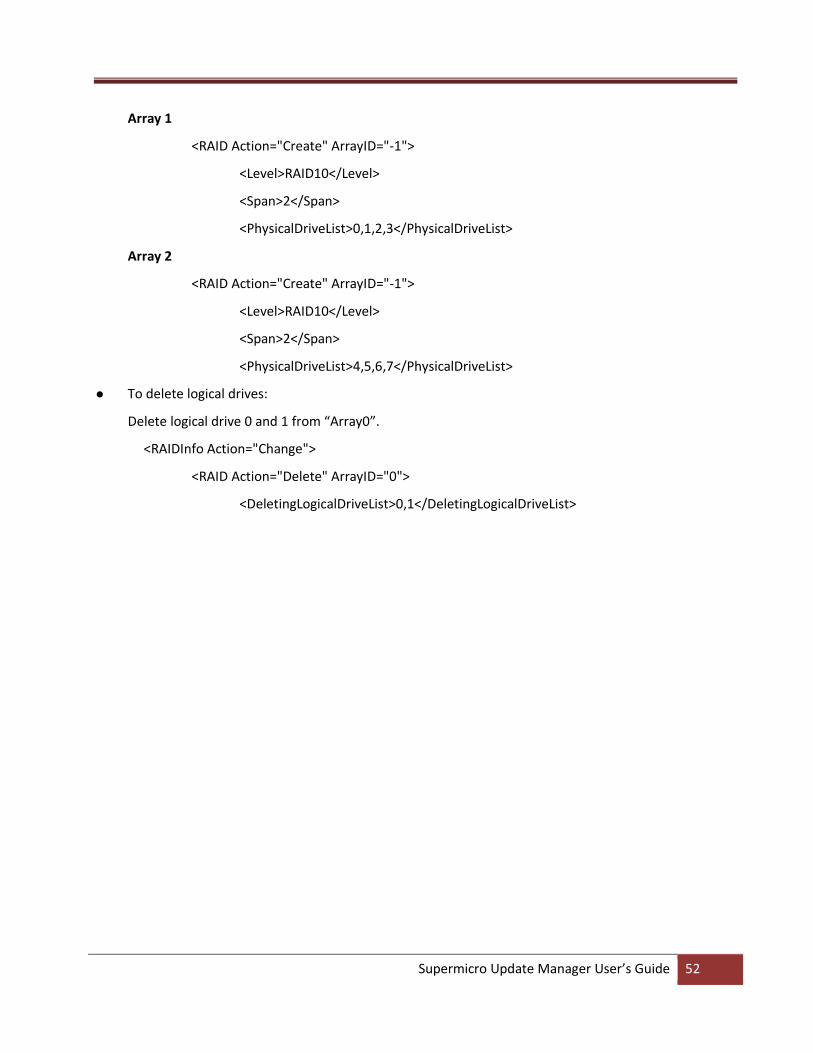
Supermicro Update Manager User’s Guide 52
Array 1
<RAID Action="Create" ArrayID="-1">
<Level>RAID10</Level>
<Span>2</Span>
<PhysicalDriveList>0,1,2,3</PhysicalDriveList>
Array 2
<RAID Action="Create" ArrayID="-1">
<Level>RAID10</Level>
<Span>2</Span>
<PhysicalDriveList>4,5,6,7</PhysicalDriveList>
To delete logical drives:
Delete logical drive 0 and 1 from “Array0”.
<RAIDInfo Action="Change">
<RAID Action="Delete" ArrayID="0">
<DeletingLogicalDriveList>0,1</DeletingLogicalDriveList>

Supermicro Update Manager User’s Guide 53
To delete an Array:
Use “ALL” to delete every logical drive from “Array0”. After this, “Array0” will be:
<RAIDInfo Action="Change">
<RAID Action="Delete" ArrayID="0">
<DeletingLogicalDriveList>ALL</DeletingLogicalDriveList>
To delete all arrays:
Use “ClearAll” to delete every array. After this, every array will disappear.
<RAIDInfo Action="ClearAll">
Locate HDDs:
Locate HDD1/HDD2/HDD3 in “Array0”. LEDs of HDD1/HDD2/HDD3 will be lighted.
<RAIDInfo Action="Change">
<RAID Action="Locate" ArrayID="0">
<LocatingPhysicalDriveIDList>1,2,3</LocatingPhysicalDriveIDList>
Unlocate HDDs:
Unlocate HDD1/HDD4 in “Array0”. LEDe of HDD1/HDD4 will be dimmed.
<RAIDInfo Action="Change">
<RAID Action="Unlocate" ArrayID="0">
<UnlocatePhysicalDriveIDList>1,4</UnlocatePhysicalDriveIDList>
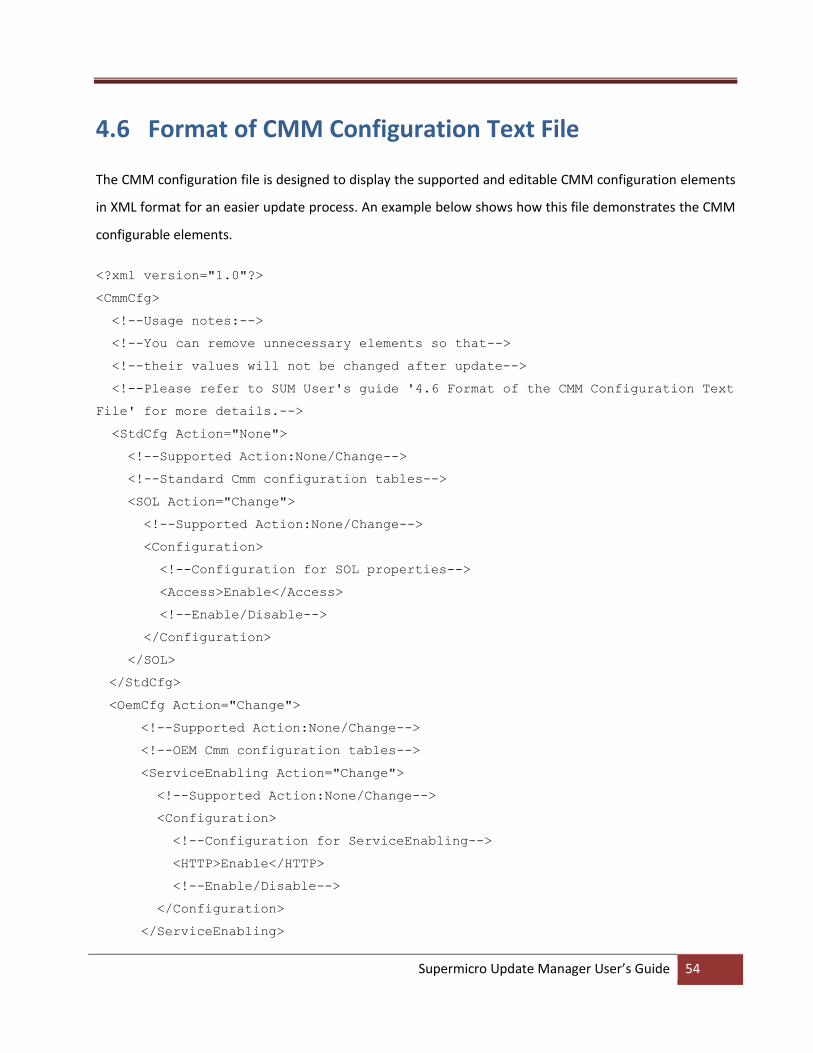
Supermicro Update Manager User’s Guide 54
4.6 Format of CMM Configuration Text File
The CMM configuration file is designed to display the supported and editable CMM configuration elements
in XML format for an easier update process. An example below shows how this file demonstrates the CMM
configurable elements.
<?xml version="1.0"?>
<CmmCfg>
<!--Usage notes:-->
<!--You can remove unnecessary elements so that-->
<!--their values will not be changed after update-->
<!--Please refer to SUM User's guide '4.6 Format of the CMM Configuration Text
File' for more details.-->
<StdCfg Action="None">
<!--Supported Action:None/Change-->
<!--Standard Cmm configuration tables-->
<SOL Action="Change">
<!--Supported Action:None/Change-->
<Configuration>
<!--Configuration for SOL properties-->
<Access>Enable</Access>
<!--Enable/Disable-->
</Configuration>
</SOL>
</StdCfg>
<OemCfg Action="Change">
<!--Supported Action:None/Change-->
<!--OEM Cmm configuration tables-->
<ServiceEnabling Action="Change">
<!--Supported Action:None/Change-->
<Configuration>
<!--Configuration for ServiceEnabling-->
<HTTP>Enable</HTTP>
<!--Enable/Disable-->
</Configuration>
</ServiceEnabling>
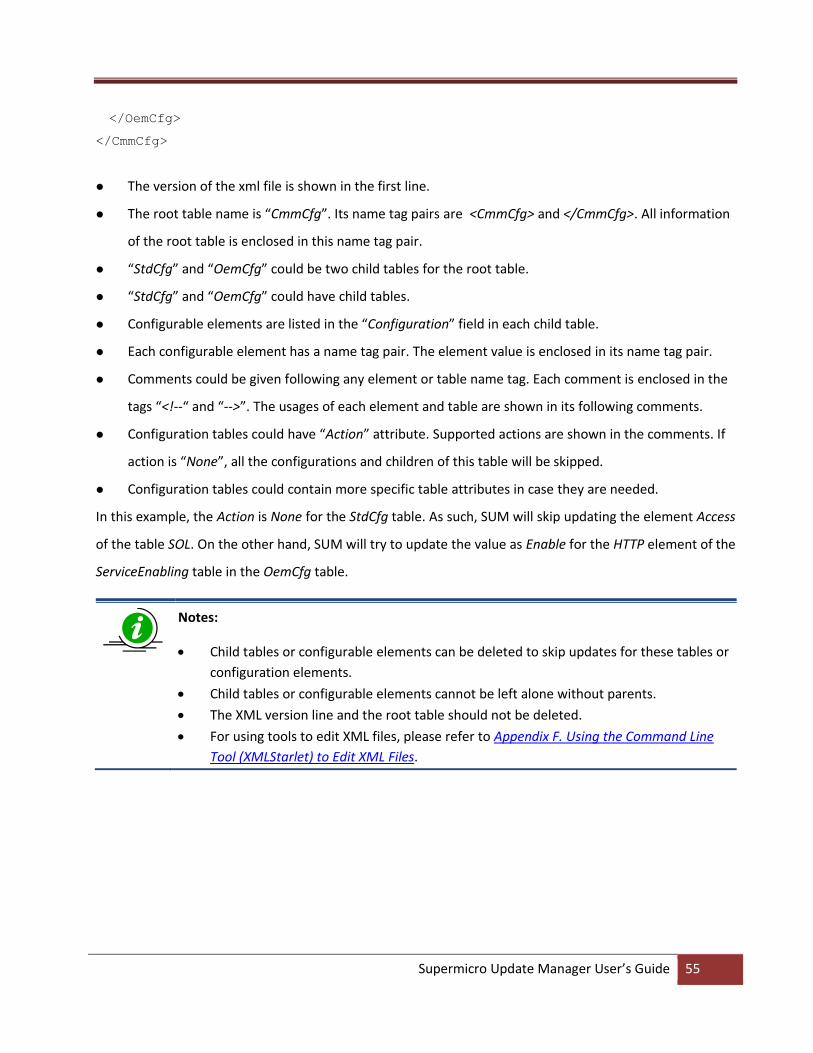
Supermicro Update Manager User’s Guide 55
</OemCfg>
</CmmCfg>
The version of the xml file is shown in the first line.
The root table name is “CmmCfg”. Its name tag pairs are <CmmCfg> and </CmmCfg>. All information
of the root table is enclosed in this name tag pair.
“StdCfg” and “OemCfg” could be two child tables for the root table.
“StdCfg” and “OemCfg” could have child tables.
Configurable elements are listed in the “Configuration” field in each child table.
Each configurable element has a name tag pair. The element value is enclosed in its name tag pair.
Comments could be given following any element or table name tag. Each comment is enclosed in the
tags “<!--“ and “-->”. The usages of each element and table are shown in its following comments.
Configuration tables could have “Action” attribute. Supported actions are shown in the comments. If
action is “None”, all the configurations and children of this table will be skipped.
Configuration tables could contain more specific table attributes in case they are needed.
In this example, the Action is None for the StdCfg table. As such, SUM will skip updating the element Access
of the table SOL. On the other hand, SUM will try to update the value as Enable for the HTTP element of the
ServiceEnabling table in the OemCfg table.
Notes:
Child tables or configurable elements can be deleted to skip updates for these tables or
configuration elements.
Child tables or configurable elements cannot be left alone without parents.
The XML version line and the root table should not be deleted.
For using tools to edit XML files, please refer to Appendix F. Using the Command Line
Tool (XMLStarlet) to Edit XML Files.
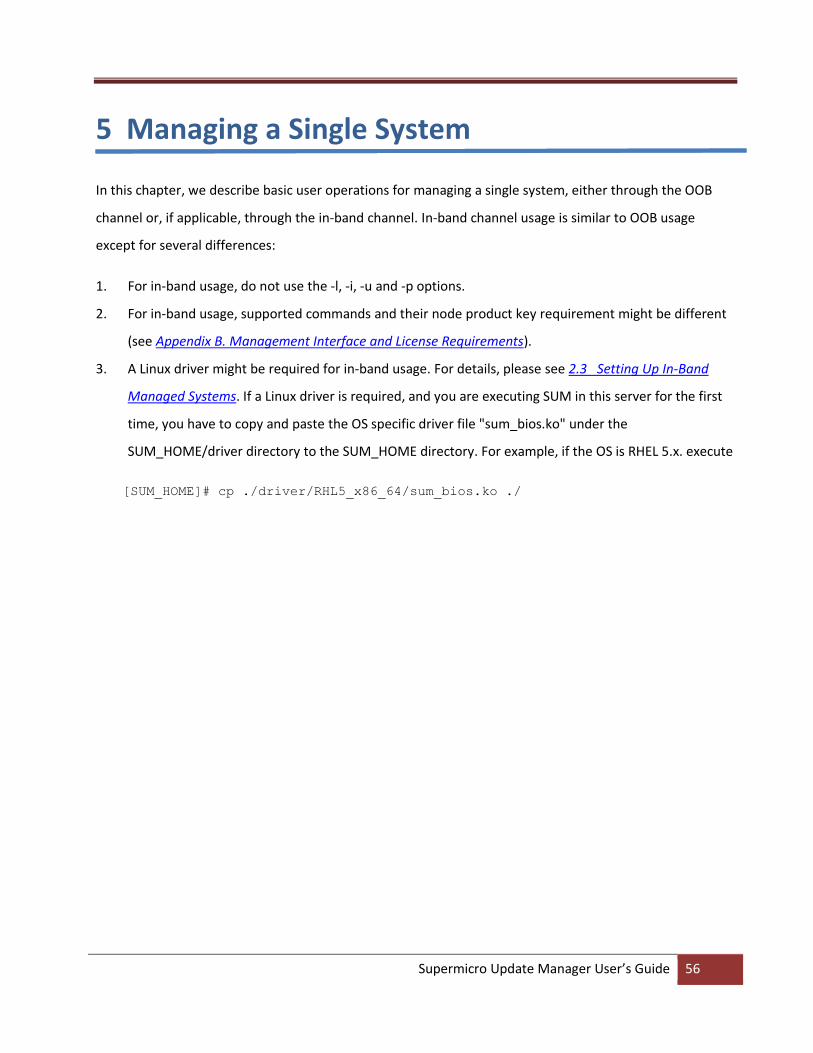
Supermicro Update Manager User’s Guide 56
5 Managing a Single System
In this chapter, we describe basic user operations for managing a single system, either through the OOB
channel or, if applicable, through the in-band channel. In-band channel usage is similar to OOB usage
except for several differences:
1. For in-band usage, do not use the -l, -i, -u and -p options.
2. For in-band usage, supported commands and their node product key requirement might be different
(see Appendix B. Management Interface and License Requirements).
3. A Linux driver might be required for in-band usage. For details, please see 2.3 Setting Up In-Band
Managed Systems. If a Linux driver is required, and you are executing SUM in this server for the first
time, you have to copy and paste the OS specific driver file "sum_bios.ko" under the
SUM_HOME/driver directory to the SUM_HOME directory. For example, if the OS is RHEL 5.x. execute
[SUM_HOME]# cp ./driver/RHL5_x86_64/sum_bios.ko ./

Supermicro Update Manager User’s Guide 57
5.1 Key Management for a Single System
5.1.1 Activating a Single Managed System
To activate systems individually, follow these steps by using the command “ActivateProductKey”.
1. Obtain a node product key from Supermicro. See 3.1 Receiving Product Keys from Supermicro.
2. Use the following SUM command.
Syntax:
sum [-i <IP or host name> -u <username> -p <password>] -c ActivateProductKey --
key <nodeproductkey>
Example:
OOB:
[SUM_HOME]# ./sum -i 192.168.34.56 -u ADMIN -p XXXXXX –c ActivateProductKey –-
key 1111-1111-1111-1111-1111-1111
In-Band:
[SUM_HOME]# ./sum –c ActivateProductKey –-key 1111-1111-1111-1111-1111-1111
5.1.2 Querying the Node Product Keys
To query the node product keys activated in the managed system, use the command “QueryProductKey.”
Syntax:
sum [-i <IP or host name> -u <username> -p <password>] -c QueryProductKey
Example:
OOB:
[SUM_HOME]# ./sum -i 192.168.34.56 -u ADMIN -p XXXXXX –c QueryProductKey
In-Band:
[SUM_HOME]# ./sum –c QueryProductKey

Supermicro Update Manager User’s Guide 58
The console output contains the information below. Each line is a node product key that has been activated
in the managed system. In each line, the first field is the key index while the second field is the key name.
Except for the OOB key, all keys have extra fields describing detailed attributes.
[0] OOB
[1] SFT-DCMS-Single, version: none, invoice: none, creation date: 2017/09/13
05:32:55(Key is good.)
[2] SUM, version: none, invoice: none, creation date: 2014/09/10 09:51:38(Key is
expired.)
[3] SFT-DCMS-SVC-KEY, version: none, invoice: none, creation date: 2017/09/13
09:52:25(Key is good.)
Number of product keys: 3
5.1.3 Clearing Node Product Key
To clear the activated node product keys in the managed system, use the command “ClearProductKey”.
Before executing the “ClearProductKey command,” query the existing NodeProductKeyName and
NodeProductKeyIndex values from the output of the command “QueryProductKey” (see 5.1.2 Querying the
Node Product Key).
Syntax:
sum [-i <IP or host name> -u <username> -p <password>] -c ClearProductKey --
key_name <NodeProductKeyName>
sum [-i <IP or host name> -u <username> -p <password>] -c ClearProductKey --
key_index <NodeProductKeyIndex>
Example:
OOB:
[SUM_HOME]# ./sum -i 192.168.34.56 -u ADMIN -p XXXXXX –c ClearProductKey --
key_name SUM
In-Band:
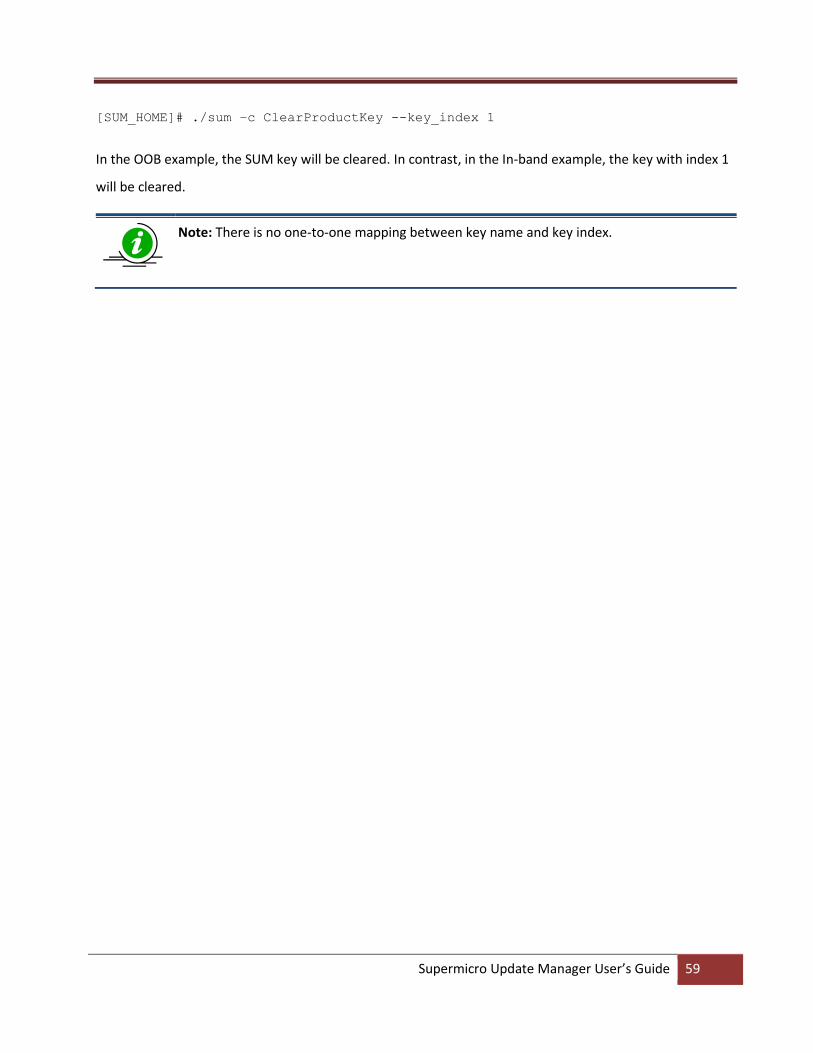
Supermicro Update Manager User’s Guide 59
[SUM_HOME]# ./sum –c ClearProductKey --key_index 1
In the OOB example, the SUM key will be cleared. In contrast, in the In-band example, the key with index 1
will be cleared.
Note: There is no one-to-one mapping between key name and key index.

Supermicro Update Manager User’s Guide 60
5.2 System Checks for a Single System
5.2.1 Checking OOB Support
Use the command CheckOOBSupport to check if both BIOS and BMC firmware images support OOB
functions.
Notes:
If your BMC does not support OOB functions, you can update the BMC firmware image
using the SUM UpdateBmc command.
To update the BIOS in the managed system to support OOB functions, you can use the
SUM UpdateBios command (either in-band or OOB) to flash BIOS even when BIOS does
not support OOB functions. For details, see 5.3.2 Updating the BIOS Image. However,
when using OOB channel, if the onboard BIOS or the BIOS firmware image does not
support OOB functions, the DMI information, such as MB serial number, might get lost
after system reboot.
If Feature Toggled On is No, all licensed features will be turned OFF and Node Product
Key Activated will be N/A.
Known Limitations:
If we roll back BIOS from OOB-supported version to non-supported version, the information for “BIOS
build date” and “OOB support in BIOS” fields will not be changed accordingly.
Syntax:
sum [-i <IP or host name> -u <username> -p <password>] -c CheckOOBSupport
Example:
[SUM_HOME]# ./sum -i 192.168.34.56 -u ADMIN -p XXXXXX –c CheckOOBSupport
The console output contains the following information.
[KEY]
Node Product Key Activated.......OOB
Feature Toggled On...............YES

Supermicro Update Manager User’s Guide 61
[BMC]
BMC FW Version...................02.41
BMC Supports OOB BIOS Config.....Yes
BMC Supports OOB DMI Edit........Yes
[BIOS]
BIOS Board ID....................0660
BIOS Build Date..................2013/9/18
BIOS Supports OOB BIOS Config....Yes
BIOS Supports OOB DMI Edit.......Yes
5.2.2 Checking Asset Information (OOB Only)
Use the command “CheckAssetInfo” to check the asset information for the managed system.
Syntax:
sum -i <IP or host name> -u <username> -p <password> -c CheckAssetInfo
Example:
[SUM_HOME]# ./sum -i 192.168.34.56 -u ADMIN -p XXXXXX –c CheckAssetInfo
The console output contains the following information.
Supermicro Update Manager (for UEFI BIOS) 2.0.0 (2017/03/03) (x86_64)
Copyright© 2017 Super Micro Computer, Inc. All rights reserved
System
======
Product Name: SuperPN
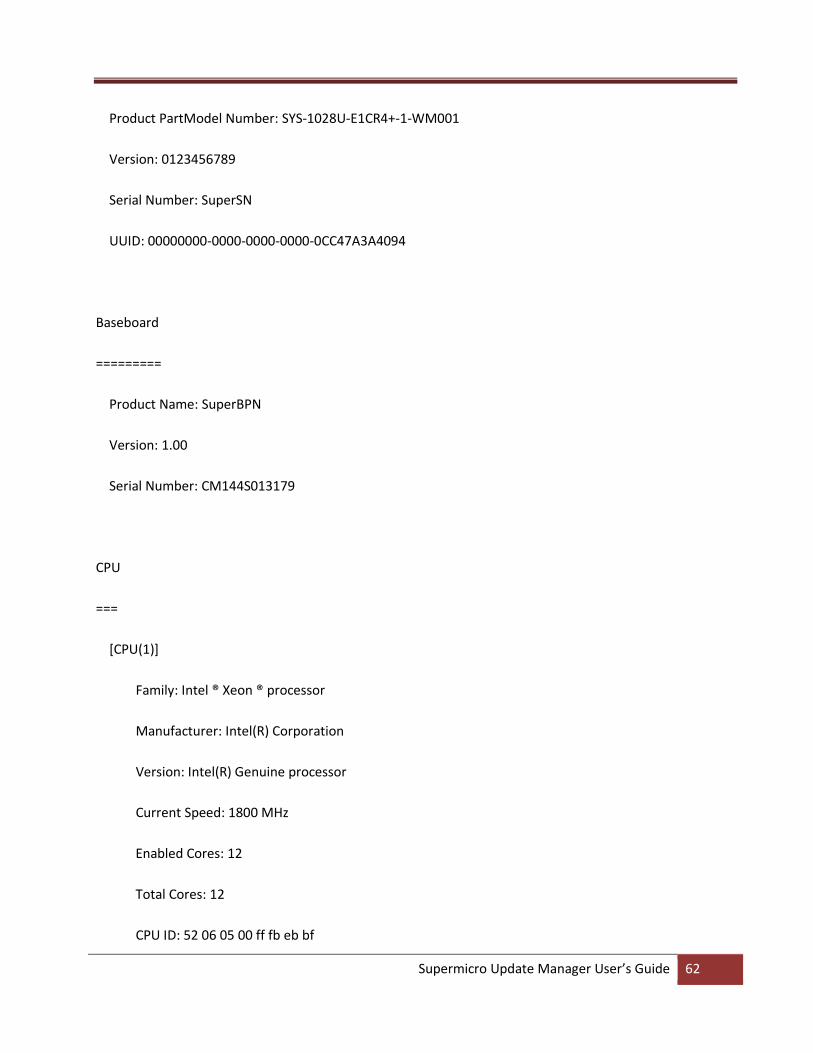
Supermicro Update Manager User’s Guide 62
Product PartModel Number: SYS-1028U-E1CR4+-1-WM001
Version: 0123456789
Serial Number: SuperSN
UUID: 00000000-0000-0000-0000-0CC47A3A4094
Baseboard
=========
Product Name: SuperBPN
Version: 1.00
Serial Number: CM144S013179
CPU
===
[CPU(1)]
Family: Intel ® Xeon ® processor
Manufacturer: Intel(R) Corporation
Version: Intel(R) Genuine processor
Current Speed: 1800 MHz
Enabled Cores: 12
Total Cores: 12
CPU ID: 52 06 05 00 ff fb eb bf

Supermicro Update Manager User’s Guide 63
[CPU(2)] N/A
Memory
======
[MEM(1)] N/A
[MEM(2)] N/A
[MEM(3)] N/A
[MEM(4)] N/A
[MEM(5)] N/A
[MEM(6)] N/A
[MEM(7)] N/A
[MEM(8)] N/A
[MEM(9)] N/A
[MEM(10)] N/A
[MEM(11)]
Locator: P1-DIMMF1
Manufacturer: SK Hynix
Manufacturing Date (YY/WW): 14/05
Part Number: HMA41GR7MFR4N-TFT1
Serial Number: 101E19A4
Size: 8192 MB
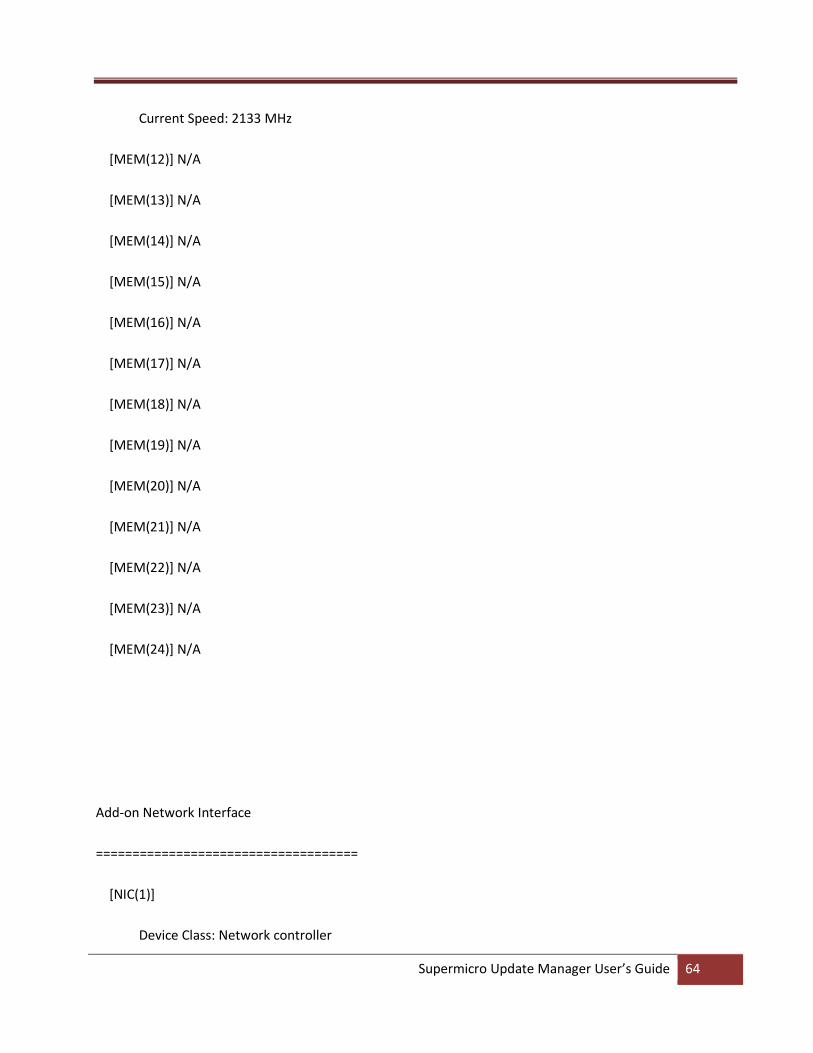
Supermicro Update Manager User’s Guide 64
Current Speed: 2133 MHz
[MEM(12)] N/A
[MEM(13)] N/A
[MEM(14)] N/A
[MEM(15)] N/A
[MEM(16)] N/A
[MEM(17)] N/A
[MEM(18)] N/A
[MEM(19)] N/A
[MEM(20)] N/A
[MEM(21)] N/A
[MEM(22)] N/A
[MEM(23)] N/A
[MEM(24)] N/A
Add-on Network Interface
====================================
[NIC(1)]
Device Class: Network controller
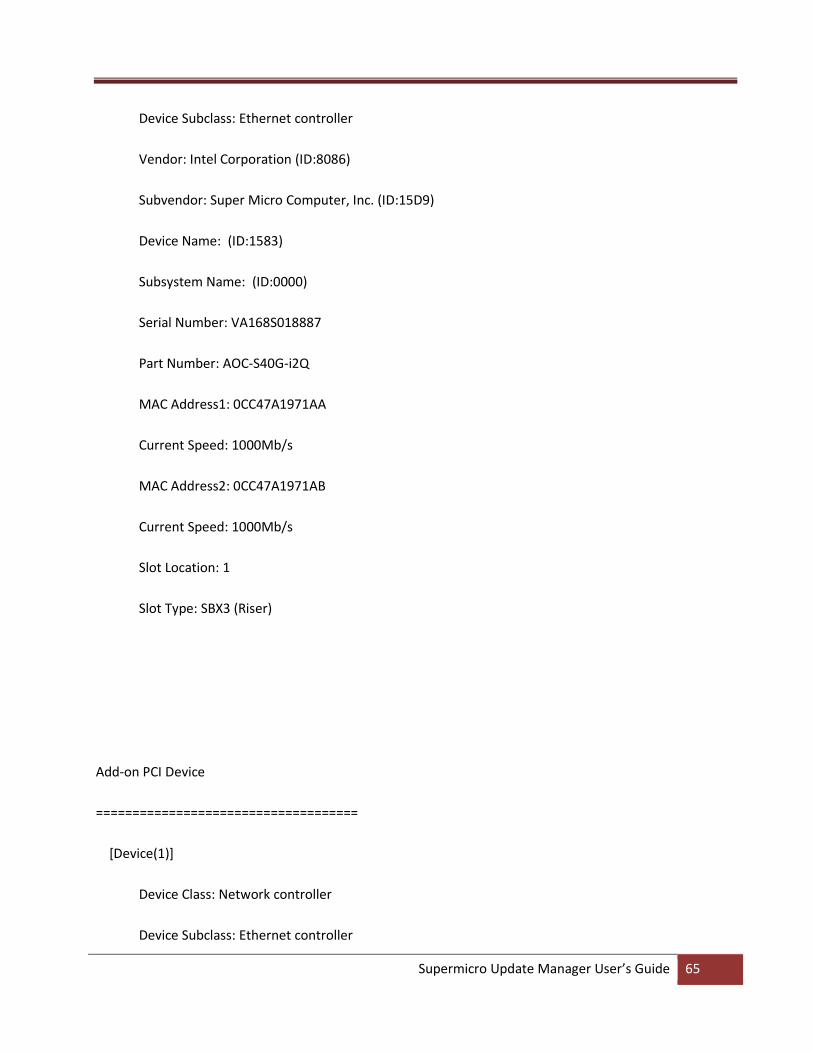
Supermicro Update Manager User’s Guide 65
Device Subclass: Ethernet controller
Vendor: Intel Corporation (ID:8086)
Subvendor: Super Micro Computer, Inc. (ID:15D9)
Device Name: (ID:1583)
Subsystem Name: (ID:0000)
Serial Number: VA168S018887
Part Number: AOC-S40G-i2Q
MAC Address1: 0CC47A1971AA
Current Speed: 1000Mb/s
MAC Address2: 0CC47A1971AB
Current Speed: 1000Mb/s
Slot Location: 1
Slot Type: SBX3 (Riser)
Add-on PCI Device
====================================
[Device(1)]
Device Class: Network controller
Device Subclass: Ethernet controller

Supermicro Update Manager User’s Guide 66
Vendor: Intel Corporation (ID:8086)
Subvendor: Super Micro Computer, Inc. (ID:15D9)
Device Name: (ID:1583)
Subsystem Name: (ID:0000)
Slot Location: 1
Slot Type: SBX3 (Riser)
Onboard Network Interface
====================================
[NIC(1)]
Device Class: Network controller
Device Subclass: Ethernet controller
Vendor: Intel Corporation (ID:8086)
Subvendor: Super Micro Computer, Inc. (ID:15D9)
Device Name: (ID:1528)
Subsystem Name: AOC-UR-i2XT (ID:085D)
Serial Number: N/A
Part Number: N/A

Supermicro Update Manager User’s Guide 67
MAC Address: N/A
Device Status of LAN1: Enabled
Device Type of LAN1: Ethernet
Reference Designation of LAN1: Intel Ethernet X540 #1
Device Status of LAN2: Enabled
Device Type of LAN2: Ethernet
Reference Designation of LAN2: Intel Ethernet X540 #2
Onboard PCI Device
====================================
[Device(1)]
Device Class: Display controller
Device Subclass: VGA controller (VGA compatible controller)
Vendor: ASPEED Technology Inc. (ID:1A03)
Subvendor: Super Micro Computer, Inc. (ID:15D9)
Device Name: (ID:2000)
Subsystem Name: (ID:091C)

Supermicro Update Manager User’s Guide 68
Device Status of Video1: Enabled
Device Type: Video
Reference Designation of Video1: ASPEED Video AST2500
[Device(2)]
Device Class: Network controller
Device Subclass: Ethernet controller
Vendor: Intel Corporation (ID:8086)
Subvendor: Super Micro Computer, Inc. (ID:15D9)
Device Name: (ID:1528)
Subsystem Name: AOC-UR-i2XT (ID:085D)
Device Status of LAN1: Enabled
Device Type of LAN1: Ethernet
Reference Designation of LAN1: Intel Ethernet X540 #1
Device Status of LAN2: Enabled
Device Type of LAN2: Ethernet
Reference Designation of LAN2: Intel Ethernet X540 #2
System Network Interface
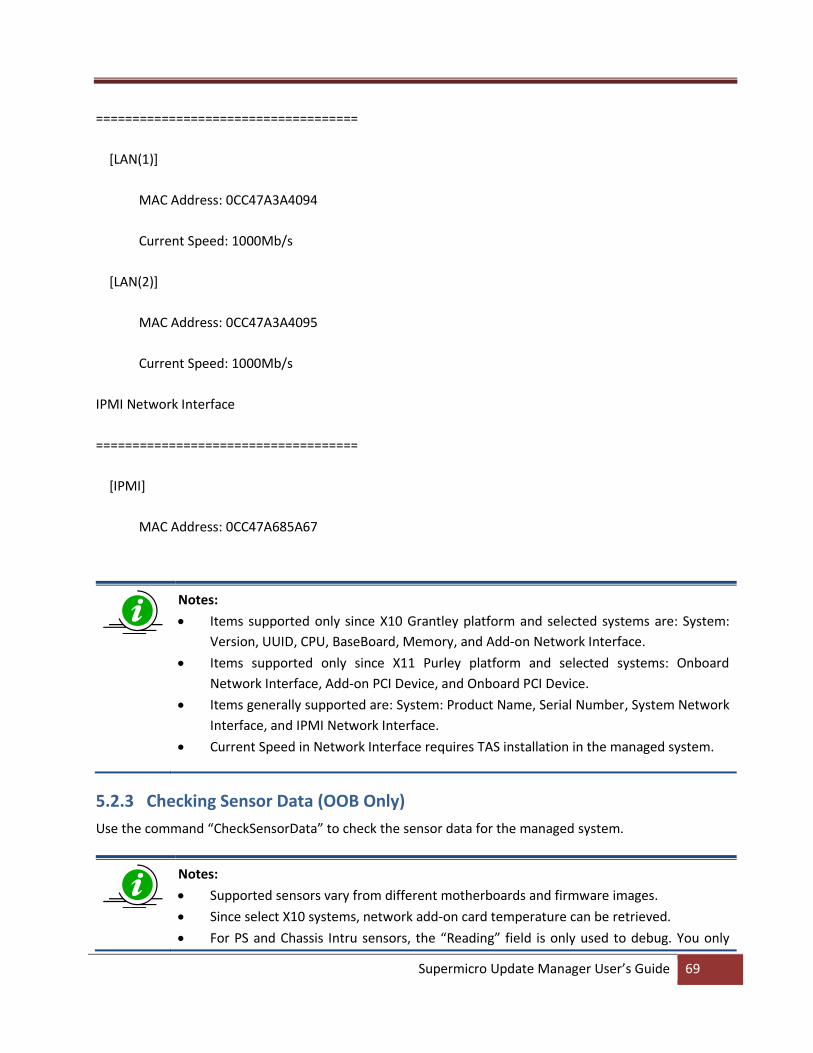
Supermicro Update Manager User’s Guide 69
====================================
[LAN(1)]
MAC Address: 0CC47A3A4094
Current Speed: 1000Mb/s
[LAN(2)]
MAC Address: 0CC47A3A4095
Current Speed: 1000Mb/s
IPMI Network Interface
====================================
[IPMI]
MAC Address: 0CC47A685A67
Notes:
Items supported only since X10 Grantley platform and selected systems are: System:
Version, UUID, CPU, BaseBoard, Memory, and Add-on Network Interface.
Items supported only since X11 Purley platform and selected systems: Onboard
Network Interface, Add-on PCI Device, and Onboard PCI Device.
Items generally supported are: System: Product Name, Serial Number, System Network
Interface, and IPMI Network Interface.
Current Speed in Network Interface requires TAS installation in the managed system.
5.2.3 Checking Sensor Data (OOB Only)
Use the command “CheckSensorData” to check the sensor data for the managed system.
Notes:
Supported sensors vary from different motherboards and firmware images.
Since select X10 systems, network add-on card temperature can be retrieved.
For PS and Chassis Intru sensors, the “Reading” field is only used to debug. You only

Supermicro Update Manager User’s Guide 70
need to check if the “Status” field shows “OK”.
Syntax:
sum -i <IP or host name> -u <username> -p <password> -c CheckSensorData
Example:
[SUM_HOME]# ./sum -i 192.168.34.56 -u ADMIN -p XXXXXX –c CheckSensorData
For CPU temperature sensor, the console output contains the following information.
Status | (#)Sensor | Reading | Low Limit | High Limit |
------ | --------- | ------- | --------- | ---------- |
OK | (4) CPU Temp | 48C/118F | N/A | 97C/207F |
5.2.4 Checking System Utilization (OOB Only)
Use the command “CheckSystemUtilization” to check the device utilization status for the managed system.
Notes:
This command requires a TAS agent to collect the system statuses. If a TAS agent is not
installed on the managed system, the system statuses will be shown as N/A.
The OS of the managed system must be booted for the TAS agent to collect the real-
time device utilization.
This command is supported since X10 platforms and select systems
Syntax:
sum -i <IP or host name> -u <username> -p <password> -c CheckSystemUtilization
Example:
[SUM_HOME]# ./sum -i 192.168.34.56 -u ADMIN -p XXXXXX –c CheckSystemUtilization
The console output contains the following information.
Time
====

Supermicro Update Manager User’s Guide 71
Last Sample Time: 2014-05-16_17:16:02
OS
==
OS Name: RedHatEnterpriseServer
OS Version: 6.4 x86_64
CPU
===
CPU Utilization: 2.74 %
Memory
======
Memory Utilization: 8 %
LSI(1)
======
HDD Name: /dev/sdb
Slot number: 1
SMART Status: Ok
HDD(1)
======
HDD name: /dev/sda
SMART Status: Ok
Serial number: Z2AABXL3
Total Partitions: 2
[Partition(1)]
Partition Name: /dev/sda1
Utilization: N/A
Used Space: N/A
Total Space: 17.58 GB
[Partition(2)]
Partition Name: /dev/sda2
Utilization: 22.01 %

Supermicro Update Manager User’s Guide 72
Used Space: 3.62 GB
Total Space: 17.30 GB
RSTe(1)
======
Volume name: /dev/md126
Controller name: Intel RSTe
Numbers of Drives: 2
[HDD(1)]
HDD name: /dev/sdc
SMART Status: Ok
[HDD(2)]
HDD name: /dev/sdd
SMART Status: Ok
Network
=======
Total Devices: 2
[NIC(1)]
Device Name: eth0
Utilization: <1 %
Status: up
[NIC(2)]
Device Name: eth1
Utilization: 0 %
Status: down
Notes:
RAID Device type LSI, RSTe and NVMe shows only if they have been installed on the host
machine.
When RSTe Device installed on the host machine, normal Hard Disk type (HDD)
information will not display.
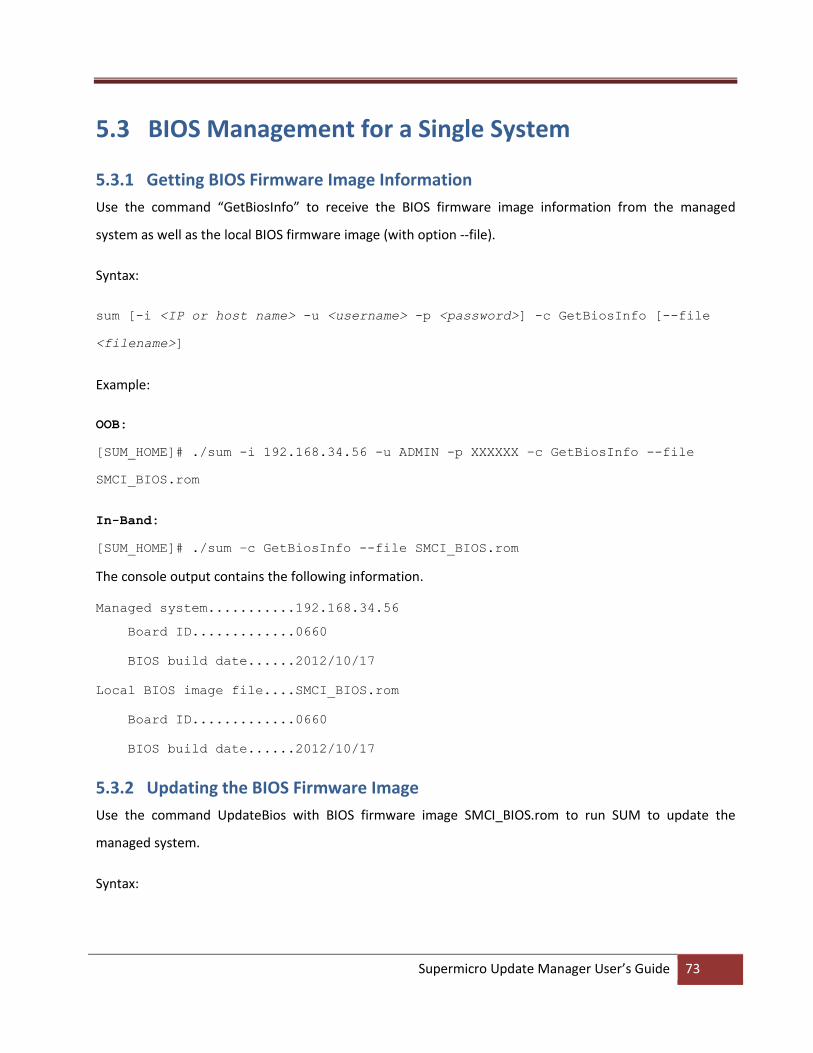
Supermicro Update Manager User’s Guide 73
5.3 BIOS Management for a Single System
5.3.1 Getting BIOS Firmware Image Information
Use the command “GetBiosInfo” to receive the BIOS firmware image information from the managed
system as well as the local BIOS firmware image (with option --file).
Syntax:
sum [-i <IP or host name> -u <username> -p <password>] -c GetBiosInfo [--file
<filename>]
Example:
OOB:
[SUM_HOME]# ./sum -i 192.168.34.56 -u ADMIN -p XXXXXX –c GetBiosInfo --file
SMCI_BIOS.rom
In-Band:
[SUM_HOME]# ./sum –c GetBiosInfo --file SMCI_BIOS.rom
The console output contains the following information.
Managed system...........192.168.34.56
Board ID.............0660
BIOS build date......2012/10/17
Local BIOS image file....SMCI_BIOS.rom
Board ID.............0660
BIOS build date......2012/10/17
5.3.2 Updating the BIOS Firmware Image
Use the command UpdateBios with BIOS firmware image SMCI_BIOS.rom to run SUM to update the
managed system.
Syntax:

Supermicro Update Manager User’s Guide 74
sum [-i <IP or host name> -u <username> -p <password>] -c UpdateBios --file
<filename> [options…]
Option Commands Descriptions
--reboot Forces the managed system to reboot.
--flash_smbios Overwrites SMBIOS data.
--preserve_mer Preserves ME firmware region.
--preserve_nv Preserves NVRAM.
--preserve_setting Preserves setting configurations.
Notes:
Before performing the OOB UpdateBios command, it is recommended to shut down
the managed system first.
When doing in-band UpdateBios command, SUM will disable watchdog and unload
me/mei driver from the OS if exists.
With the Server ME embedded on the Supermicro system, you may encounter a
problem executing the in-band SUM command “UpdateBios” when the Client ME
driver (MEIx64) is installed on the Windows platform. To prevent the system from
hanging, you need to remove the driver before updating BIOS. The steps are displayed
upon detection.
When using SSH connection to do in-band UpdateBios command, SSH timeout on both
client and server side should be adjusted to avoid broken pipe during command
execution. Typical execution time is within 30 minutes. Timeout value should be longer
than 30 minutes.
If BIOS FDT (Flash Descriptor Table) is different or ME protection needs to be disabled
when the In-band UpdateBios command is run, a warning message stating necessary
actions is displayed.
When multiple boot is installed, we should use default boot OS to run this command so
that when FDT is different, the jumper-less solution can continue updating BIOS after
the first reboot.
OOB UpdateBios command has not been supported for MBs that implemented client
ME such as X11SAE-F, X11SAT-F, X11SSZ-(Q)F/LN4F, X11SBA-(LN4)F and C7-series.
X9DRL-3F/-iF MB does not support OOB update BIOS and OOB/In-band DMI
information related commands.
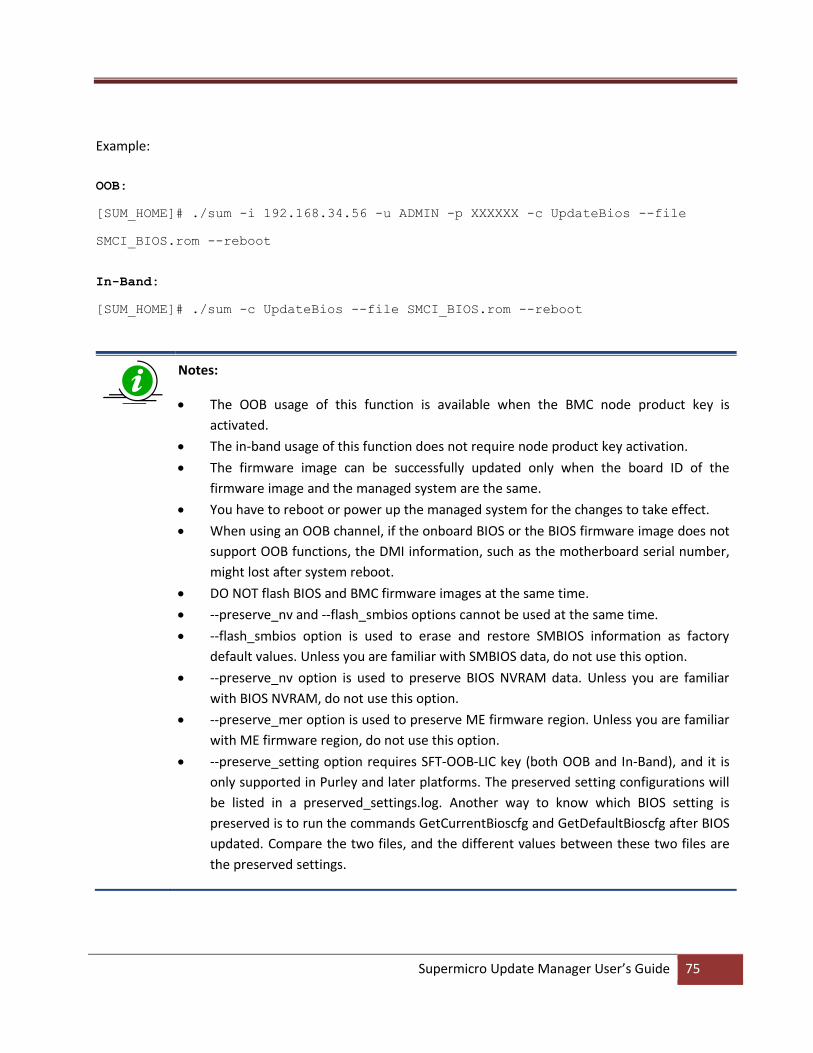
Supermicro Update Manager User’s Guide 75
Example:
OOB:
[SUM_HOME]# ./sum -i 192.168.34.56 -u ADMIN -p XXXXXX -c UpdateBios --file
SMCI_BIOS.rom --reboot
In-Band:
[SUM_HOME]# ./sum -c UpdateBios --file SMCI_BIOS.rom --reboot
Notes:
The OOB usage of this function is available when the BMC node product key is
activated.
The in-band usage of this function does not require node product key activation.
The firmware image can be successfully updated only when the board ID of the
firmware image and the managed system are the same.
You have to reboot or power up the managed system for the changes to take effect.
When using an OOB channel, if the onboard BIOS or the BIOS firmware image does not
support OOB functions, the DMI information, such as the motherboard serial number,
might lost after system reboot.
DO NOT flash BIOS and BMC firmware images at the same time.
--preserve_nv and --flash_smbios options cannot be used at the same time.
--flash_smbios option is used to erase and restore SMBIOS information as factory
default values. Unless you are familiar with SMBIOS data, do not use this option.
--preserve_nv option is used to preserve BIOS NVRAM data. Unless you are familiar
with BIOS NVRAM, do not use this option.
--preserve_mer option is used to preserve ME firmware region. Unless you are familiar
with ME firmware region, do not use this option.
--preserve_setting option requires SFT-OOB-LIC key (both OOB and In-Band), and it is
only supported in Purley and later platforms. The preserved setting configurations will
be listed in a preserved_settings.log. Another way to know which BIOS setting is
preserved is to run the commands GetCurrentBioscfg and GetDefaultBioscfg after BIOS
updated. Compare the two files, and the different values between these two files are
the preserved settings.
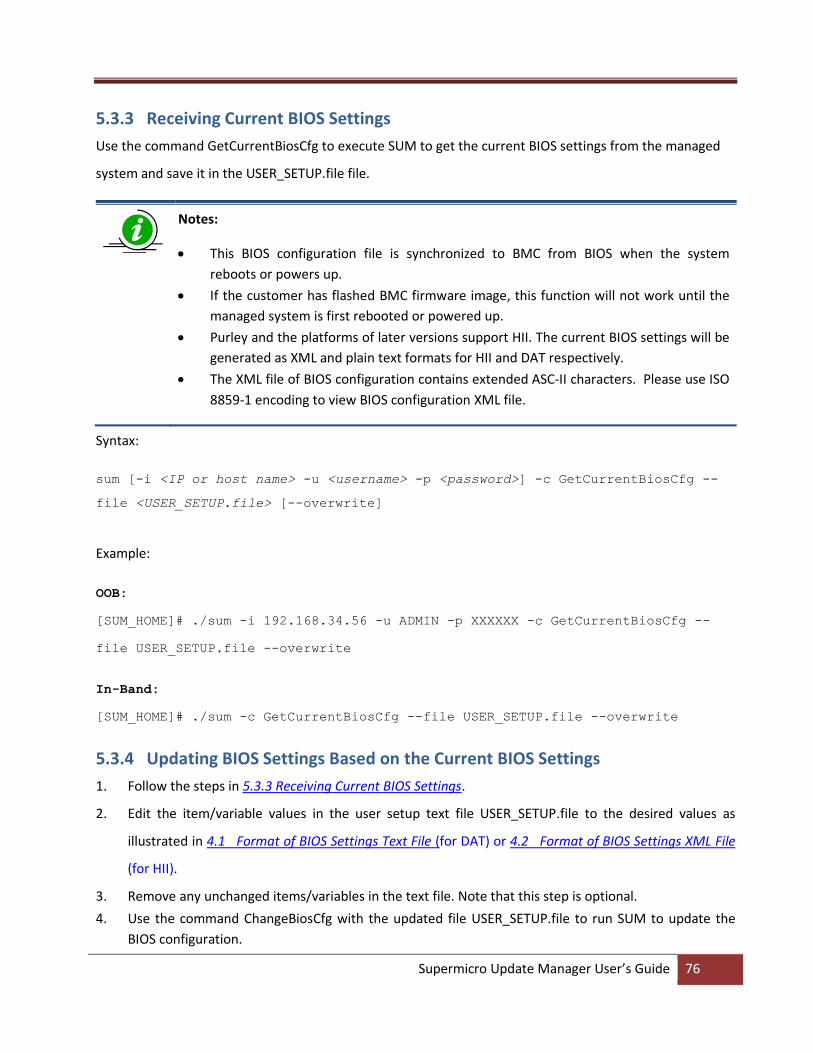
Supermicro Update Manager User’s Guide 76
5.3.3 Receiving Current BIOS Settings
Use the command GetCurrentBiosCfg to execute SUM to get the current BIOS settings from the managed
system and save it in the USER_SETUP.file file.
Notes:
This BIOS configuration file is synchronized to BMC from BIOS when the system
reboots or powers up.
If the customer has flashed BMC firmware image, this function will not work until the
managed system is first rebooted or powered up.
Purley and the platforms of later versions support HII. The current BIOS settings will be
generated as XML and plain text formats for HII and DAT respectively.
The XML file of BIOS configuration contains extended ASC-II characters. Please use ISO
8859-1 encoding to view BIOS configuration XML file.
Syntax:
sum [-i <IP or host name> -u <username> -p <password>] -c GetCurrentBiosCfg --
file <USER_SETUP.file> [--overwrite]
Example:
OOB:
[SUM_HOME]# ./sum -i 192.168.34.56 -u ADMIN -p XXXXXX -c GetCurrentBiosCfg --
file USER_SETUP.file --overwrite
In-Band:
[SUM_HOME]# ./sum -c GetCurrentBiosCfg --file USER_SETUP.file --overwrite
5.3.4 Updating BIOS Settings Based on the Current BIOS Settings
1. Follow the steps in 5.3.3 Receiving Current BIOS Settings.
2. Edit the item/variable values in the user setup text file USER_SETUP.file to the desired values as
illustrated in 4.1 Format of BIOS Settings Text File (for DAT) or 4.2 Format of BIOS Settings XML File
(for HII).
3. Remove any unchanged items/variables in the text file. Note that this step is optional.
4. Use the command ChangeBiosCfg with the updated file USER_SETUP.file to run SUM to update the
BIOS configuration.

Supermicro Update Manager User’s Guide 77
Notes:
The editable BIOS configuration items may be changed for different BIOS versions.
Please make sure the BIOS configurations are consistent with the BIOS version on the
managed system.
The uploaded configuration will only take effect after a system reboot or power up.
For HII, when the new BIOS firmware image is flashed, there may be conflicts between
the XML files of new and old BIOS settings. The XML file of current BIOS settings should
be re-downloaded, re-modified and then updated.
Syntax:
sum [-i <IP or host name> -u <username> -p <password>] -c ChangeBiosCfg --file
<USER_SETUP.file> [--reboot]
Example:
OOB:
[SUM_HOME]# ./sum -i 192.168.34.56 -u ADMIN -p XXXXXX -c ChangeBiosCfg --file
USER_SETUP.file --reboot
In-Band:
[SUM_HOME]# ./sum -c ChangeBiosCfg --file USER_SETUP.file --reboot
5.3.5 Receiving Factory BIOS Settings
Use the command GetDefaultBiosCfg to execute SUM to get the default factory BIOS settings from the
managed system and save it in the USER_SETUP.file file.
Syntax:
sum [-i <IP or host name> -u <username> -p <password>] -c GetDefaultBiosCfg --
file <USER_SETUP.file> [--overwrite]
Example:
OOB:
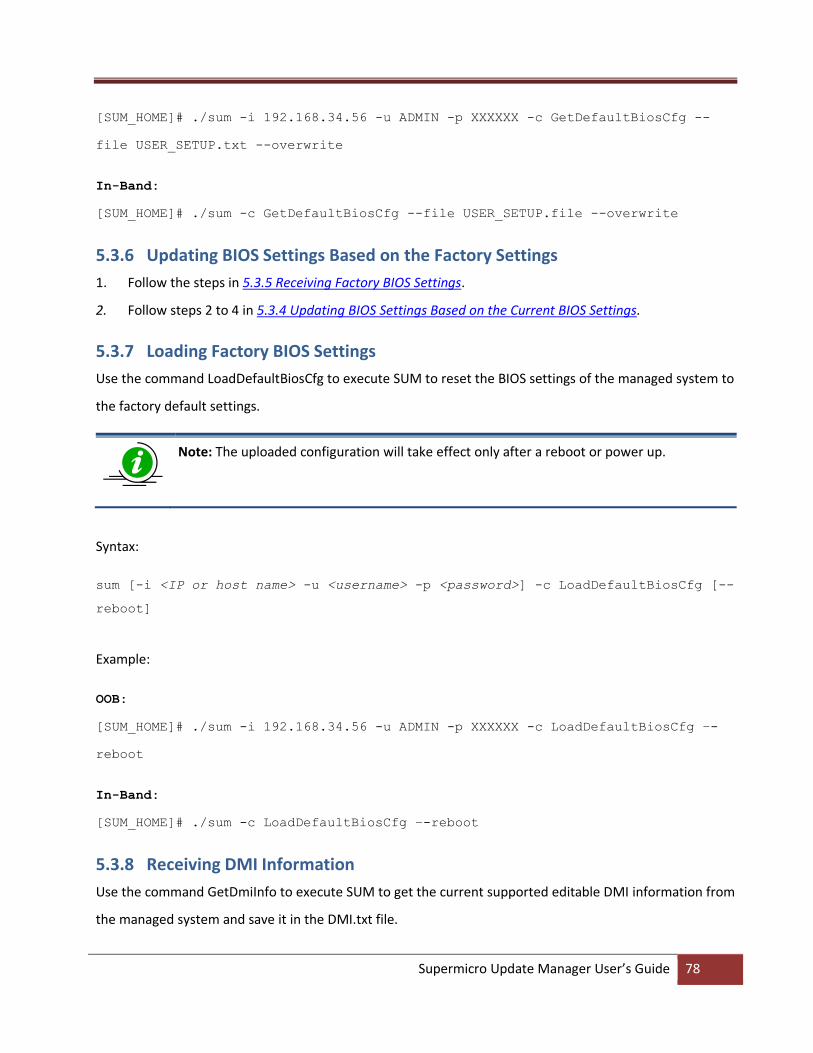
Supermicro Update Manager User’s Guide 78
[SUM_HOME]# ./sum -i 192.168.34.56 -u ADMIN -p XXXXXX -c GetDefaultBiosCfg --
file USER_SETUP.txt --overwrite
In-Band:
[SUM_HOME]# ./sum -c GetDefaultBiosCfg --file USER_SETUP.file --overwrite
5.3.6 Updating BIOS Settings Based on the Factory Settings
1. Follow the steps in 5.3.5 Receiving Factory BIOS Settings.
2. Follow steps 2 to 4 in 5.3.4 Updating BIOS Settings Based on the Current BIOS Settings.
5.3.7 Loading Factory BIOS Settings
Use the command LoadDefaultBiosCfg to execute SUM to reset the BIOS settings of the managed system to
the factory default settings.
Note: The uploaded configuration will take effect only after a reboot or power up.
Syntax:
sum [-i <IP or host name> -u <username> -p <password>] -c LoadDefaultBiosCfg [--
reboot]
Example:
OOB:
[SUM_HOME]# ./sum -i 192.168.34.56 -u ADMIN -p XXXXXX -c LoadDefaultBiosCfg –-
reboot
In-Band:
[SUM_HOME]# ./sum -c LoadDefaultBiosCfg –-reboot
5.3.8 Receiving DMI Information
Use the command GetDmiInfo to execute SUM to get the current supported editable DMI information from
the managed system and save it in the DMI.txt file.

Supermicro Update Manager User’s Guide 79
Notes:
This DMI file is synchronized to BMC from BIOS when the system reboots or powers up.
If the customer has flashed BMC firmware image, this function will not work until the
managed system is first rebooted or powered up.
The supported editable DMI items could vary from BIOS to BIOS. SUM will only show
supported items.
Syntax:
sum [-i <IP or host name> -u <username> -p <password>] -c GetDmiInfo --file
<DMI.txt> [--overwrite]
Example:
OOB:
[SUM_HOME]# ./sum -i 192.168.34.56 -u ADMIN -p XXXXXX -c GetDmiInfo --file
DMI.txt --overwrite
In-Band:
[SUM_HOME]# ./sum -c GetDmiInfo --file DMI.txt --overwrite
5.3.9 Editing DMI Information
There are two ways to edit DMI information for the managed system. You can either execute the
EditDmiInfo command or manually edit the received DMI.txt file.
Manually Editing
1. Follow the steps in 5.3.8 Receiving DMI Information to receive the DMI information text file (DMI.txt).
2. Replace the item values in the DMI.txt file with the desired values illustrated in 4.3 Format of DMI
Information Text File.
3. Remove the unchanged items in the text file. Note that this step is optional.
Note: The supported editable DMI items may be changed for different BIOS versions. The
version variable of the DMI.txt file must be the same as that from the managed system and
should not be edited.
Executing the EditDmiInfo Command
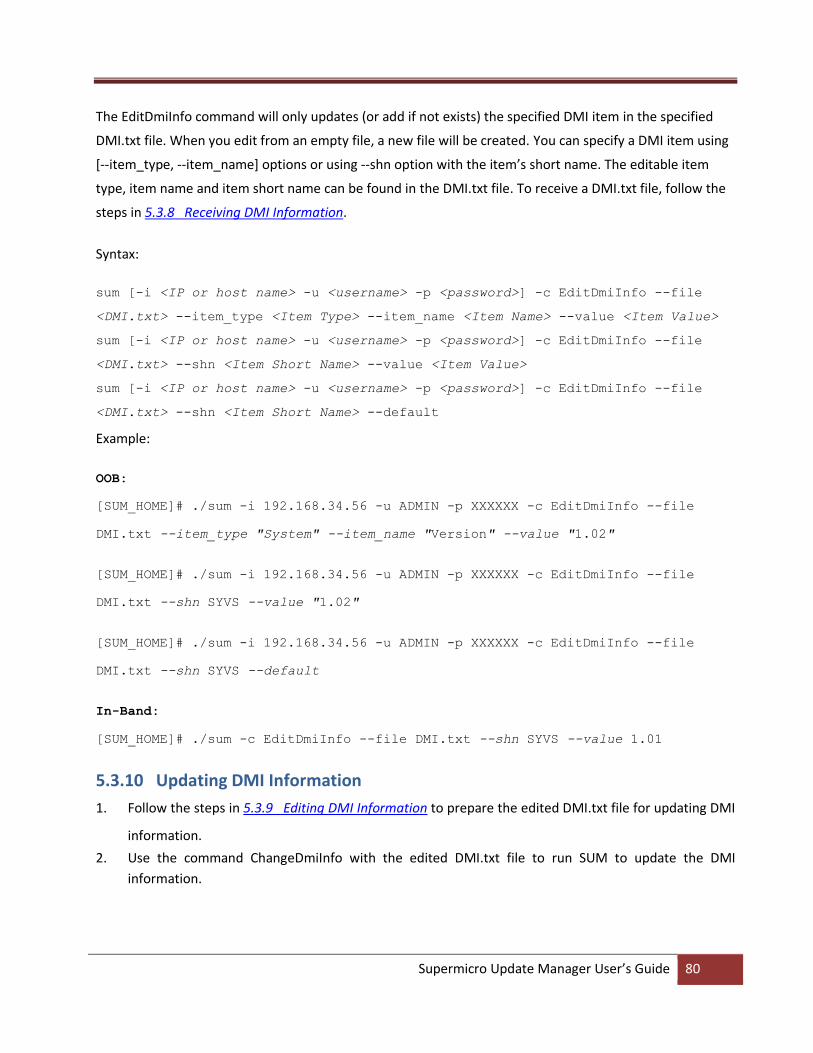
Supermicro Update Manager User’s Guide 80
The EditDmiInfo command will only updates (or add if not exists) the specified DMI item in the specified
DMI.txt file. When you edit from an empty file, a new file will be created. You can specify a DMI item using
[--item_type, --item_name] options or using --shn option with the item’s short name. The editable item
type, item name and item short name can be found in the DMI.txt file. To receive a DMI.txt file, follow the
steps in 5.3.8 Receiving DMI Information.
Syntax:
sum [-i <IP or host name> -u <username> -p <password>] -c EditDmiInfo --file
<DMI.txt> --item_type <Item Type> --item_name <Item Name> --value <Item Value>
sum [-i <IP or host name> -u <username> -p <password>] -c EditDmiInfo --file
<DMI.txt> --shn <Item Short Name> --value <Item Value>
sum [-i <IP or host name> -u <username> -p <password>] -c EditDmiInfo --file
<DMI.txt> --shn <Item Short Name> --default
Example:
OOB:
[SUM_HOME]# ./sum -i 192.168.34.56 -u ADMIN -p XXXXXX -c EditDmiInfo --file
DMI.txt --item_type "System" --item_name "Version" --value "1.02"
[SUM_HOME]# ./sum -i 192.168.34.56 -u ADMIN -p XXXXXX -c EditDmiInfo --file
DMI.txt --shn SYVS --value "1.02"
[SUM_HOME]# ./sum -i 192.168.34.56 -u ADMIN -p XXXXXX -c EditDmiInfo --file
DMI.txt --shn SYVS --default
In-Band:
[SUM_HOME]# ./sum -c EditDmiInfo --file DMI.txt --shn SYVS --value 1.01
5.3.10 Updating DMI Information
1. Follow the steps in 5.3.9 Editing DMI Information to prepare the edited DMI.txt file for updating DMI
information.
2. Use the command ChangeDmiInfo with the edited DMI.txt file to run SUM to update the DMI
information.

Supermicro Update Manager User’s Guide 81
Notes:
The supported editable DMI items may be changed for different BIOS versions. The
version variable of the DMI.txt file must be the same as that from the managed system
and should not be edited.
The uploaded information will only take effect after a system reboots or powers up.
X9DRL-3F/-iF MB does not support DMI related functions.
Syntax:
sum [-i <IP or host name> -u <username> -p <password>] -c ChangeDmiInfo --file
<DMI.txt> [--reboot]
Example:
OOB:
[SUM_HOME]# ./sum -i 192.168.34.56 -u ADMIN -p XXXXXX -c ChangeDmiInfo --file
DMI.txt --reboot
In-Band:
[SUM_HOME]# ./sum -c ChangeDmiInfo --file DMI.txt --reboot
5.3.11 Setting Up BIOS Action
Use the command SetBiosAction to execute SUM to show or hide the settings related to BBS priority.
Note: The uploaded configurations will take effect only after the system is rebooted or
powered up.
Syntax:
sum [-i <IP or host name> -u <username> -p <password>] -c SetBiosAction -–BBS
<yes/no> [--reboot]
Example:
OOB:
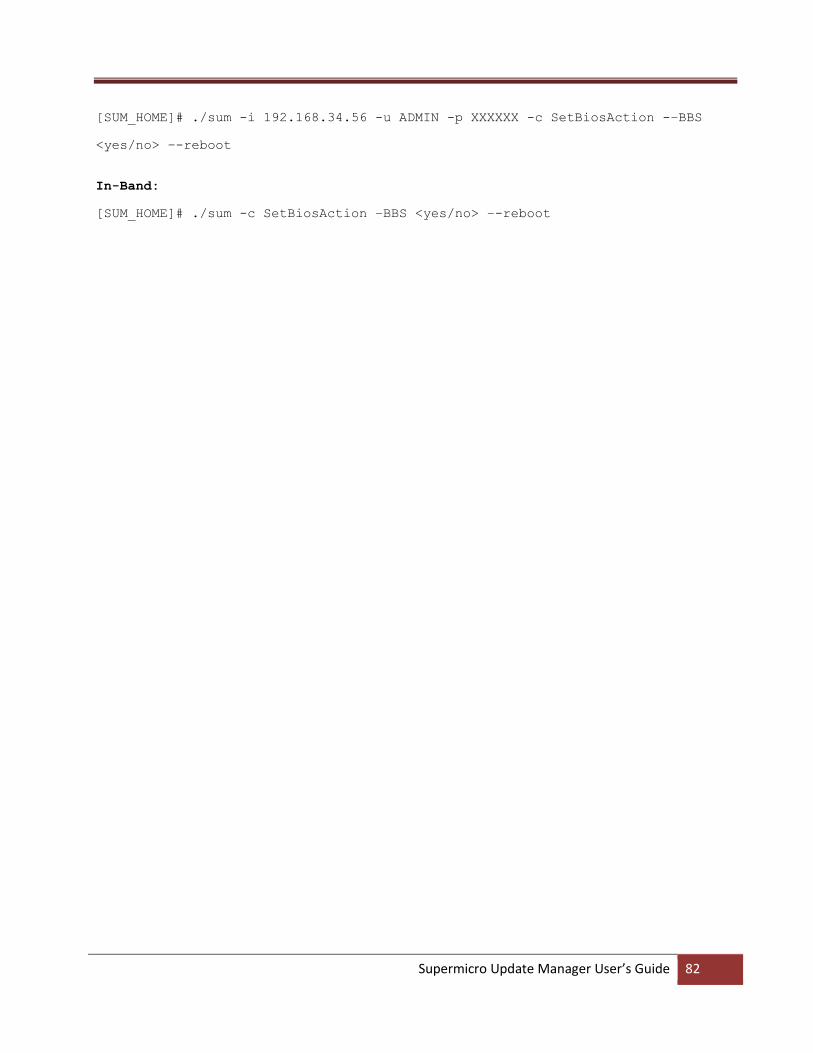
Supermicro Update Manager User’s Guide 82
[SUM_HOME]# ./sum -i 192.168.34.56 -u ADMIN -p XXXXXX -c SetBiosAction -–BBS
<yes/no> –-reboot
In-Band:
[SUM_HOME]# ./sum -c SetBiosAction –BBS <yes/no> –-reboot

Supermicro Update Manager User’s Guide 83
5.4 BMC Management for a Single System
5.4.1 Getting BMC Firmware Image Information
Use the command “GetBmcInfo” to receive the BMC firmware image information from the managed
system as well as the BMC firmware image.
Syntax:
sum [-i <IP or host name> -u <username> -p <password>] -c GetBmcInfo [--file
<filename>]
Example:
[SUM_HOME]# ./sum -i 192.168.34.56 -u ADMIN -p XXXXXX –c GetBmcInfo --file
SMCI_BMC.rom
The console output contains the following information.
Managed system...........192.168.34.56
BMC type.............X10_ATEN
BMC version..........01.30
Local BMC image file.....SMCI_BMC.rom
BMC type.............X10_ATEN
BMC version..........01.33
5.4.2 Updating the BMC Firmware Image
Use the command UpdateBmc with BMC firmware image SMCI_BMC.rom to run SUM to update the
managed system.
Notes:
BMC will be reset after updating.
BMC configurations will be preserved by default after updating unless --overwrite_cfg
option is used.
DO NOT flash BIOS and BMC firmware images at the same time.
UpdateBmc command does not support AMI BMC FW. For OOB UpdateBmc usage,
please use SUM version 1.4.2.
--overwrite_cfg option overwrites current BMC configurations including network
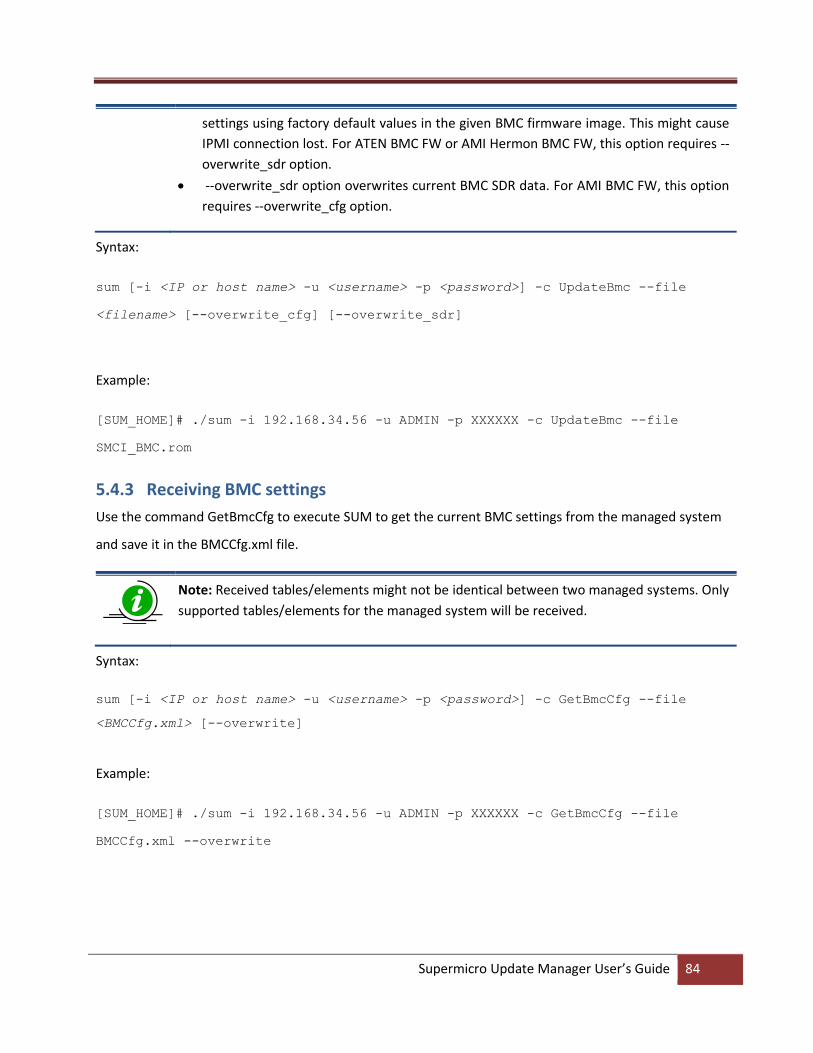
Supermicro Update Manager User’s Guide 84
settings using factory default values in the given BMC firmware image. This might cause
IPMI connection lost. For ATEN BMC FW or AMI Hermon BMC FW, this option requires --
overwrite_sdr option.
--overwrite_sdr option overwrites current BMC SDR data. For AMI BMC FW, this option
requires --overwrite_cfg option.
Syntax:
sum [-i <IP or host name> -u <username> -p <password>] -c UpdateBmc --file
<filename> [--overwrite_cfg] [--overwrite_sdr]
Example:
[SUM_HOME]# ./sum -i 192.168.34.56 -u ADMIN -p XXXXXX -c UpdateBmc --file
SMCI_BMC.rom
5.4.3 Receiving BMC settings
Use the command GetBmcCfg to execute SUM to get the current BMC settings from the managed system
and save it in the BMCCfg.xml file.
Note: Received tables/elements might not be identical between two managed systems. Only
supported tables/elements for the managed system will be received.
Syntax:
sum [-i <IP or host name> -u <username> -p <password>] -c GetBmcCfg --file
<BMCCfg.xml> [--overwrite]
Example:
[SUM_HOME]# ./sum -i 192.168.34.56 -u ADMIN -p XXXXXX -c GetBmcCfg --file
BMCCfg.xml --overwrite

Supermicro Update Manager User’s Guide 85
5.4.4 Updating BMC Settings
1. Follow the steps in 5.4.3 Receiving BMC settings.
2. Edit the configurable element values in the BMC configuration text file BMCCfg.xml to the desired
values as illustrated in 4.4 Format of BMC Configuration Text File.
3. Skip unchanged tables in the text file by setting the Action attribute as “None”. Note that this step is
optional.
4. Remove unchanged tables/elements in the text file. Note that this step is optional.
5. Use the command ChangeBmcCfg with the updated BMCCfg.xml file to run SUM to update the BMC
configuration.
Syntax:
sum [-i <IP or host name> -u <username> -p <password>] -c ChangeBmcCfg --file
<BMCCfg.xml>
Example:
[SUM_HOME]# ./sum -i 192.168.34.56 -u ADMIN -p XXXXXX -c ChangeBmcCfg --file
BMCCfg.xml
Note: The connection could drop if the LAN configuration is changed.
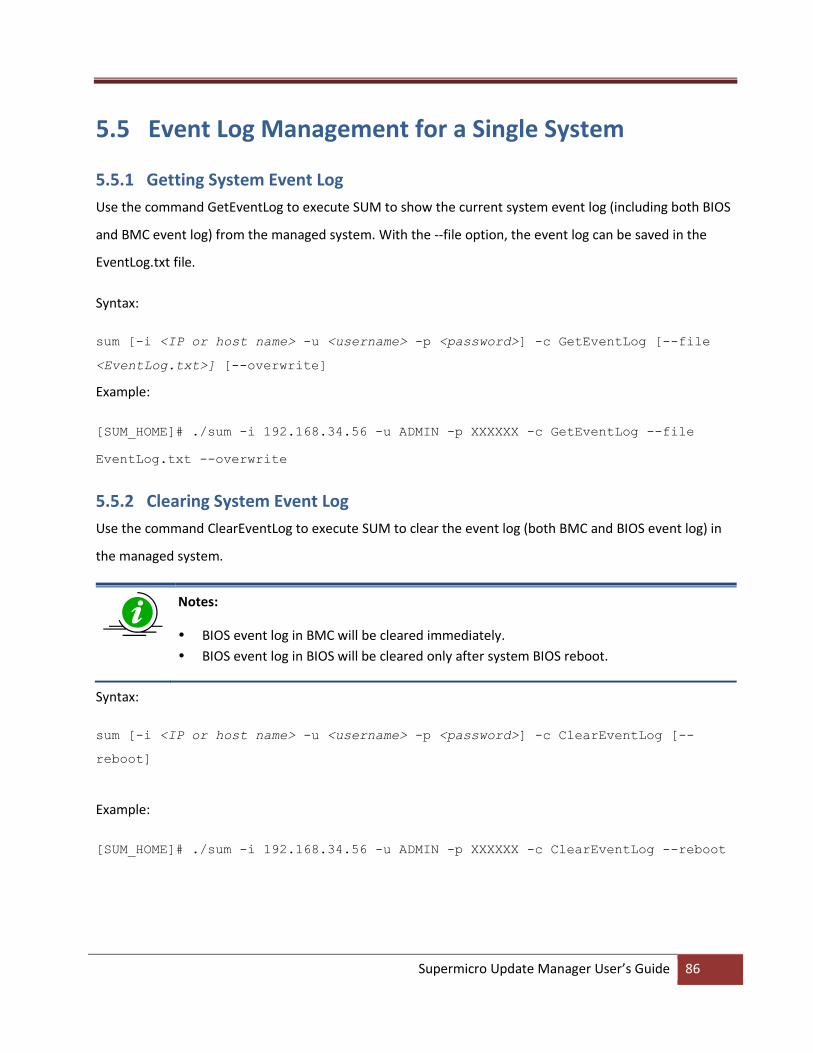
Supermicro Update Manager User’s Guide 86
5.5 Event Log Management for a Single System
5.5.1 Getting System Event Log
Use the command GetEventLog to execute SUM to show the current system event log (including both BIOS
and BMC event log) from the managed system. With the --file option, the event log can be saved in the
EventLog.txt file.
Syntax:
sum [-i <IP or host name> -u <username> -p <password>] -c GetEventLog [--file
<EventLog.txt>] [--overwrite]
Example:
[SUM_HOME]# ./sum -i 192.168.34.56 -u ADMIN -p XXXXXX -c GetEventLog --file
EventLog.txt --overwrite
5.5.2 Clearing System Event Log
Use the command ClearEventLog to execute SUM to clear the event log (both BMC and BIOS event log) in
the managed system.
Notes:
BIOS event log in BMC will be cleared immediately.
BIOS event log in BIOS will be cleared only after system BIOS reboot.
Syntax:
sum [-i <IP or host name> -u <username> -p <password>] -c ClearEventLog [--
reboot]
Example:
[SUM_HOME]# ./sum -i 192.168.34.56 -u ADMIN -p XXXXXX -c ClearEventLog --reboot

Supermicro Update Manager User’s Guide 87
5.6 CMM Management for a Single System (OOB Only)
5.6.1 Receiving CMM Firmware Image Information
Use the command GetCmmInfo to receive the CMM firmware image information from the managed
system as well as the CMM firmware image.
Syntax:
sum [-i <IP or host name> -u <username> -p <password>] -c GetCmmInfo [--file
<filename>]
Example:
[SUM_HOME]# ./sum -i 192.168.34.56 -u ADMIN -p XXXXXX –c GetCmmInfo --file
SMCI_CMM.rom
The console output contains the following information.
Managed system...........192.168.34.56
CMM type.............MicroCMM
CMM version..........09.01
Local CMM image file.....SMCI_CMM.rom
CMM type.............MicroCMM
CMM version..........09.10
5.6.2 Updating the CMM Firmware Image
Use the command UpdateCmm with the CMM firmware image SMCI_CMM.rom to update the managed
system.
Notes:
CMM will be reset after updating.
CMM configurations will be reset to default values after updating unless the --
overwrite_cfg option is used.
DO NOT flash BIOS and BMC firmware images at the same time.
For OOB UpdateCmm usage, please use SUM version 1.6.2 or later.
The --overwrite_cfg option overwrites the current CMM configurations, including
network settings using factory default values in the given CMM firmware image. This

Supermicro Update Manager User’s Guide 88
might cause the IPMI connection to be lost.
If the CMM FW web server becomes unreachable after CMM FW is updated, use the
ipmitool to troubleshoot. Follow these steps:
a. Reset CMM.
$ ipmitool -H ${CMM_IP} -U {CMM_USER} -P {CMM_PASSWD} raw 0x30 0x34 0x05
b. Wait for 3 minutes, and then check if the CMM web is reachable. If it is reachable,
the troubleshooting is done.
c. If the CMM web is still unreachable, load the CMM factory defaults.
(Note: All CMM settings except LAN/FRU will be LOST. )
$ ipmitool -H ${CMM_IP} -U {CMM_USER} -P {CMM_PASSWD} raw 0x30 0x33 0x14
d. Wait for 3 minutes and check the CMM web again.
Syntax:
sum [-i <IP or host name> -u <username> -p <password>] -c UpdateCmm --file
<filename> [--overwrite_cfg]
Example:
[SUM_HOME]# ./sum -i 192.168.34.56 -u ADMIN -p XXXXXX -c UpdateCmm --file
SMCI_CMM.rom
5.6.3 Receiving CMM Settings
Use the command GetCmmCfg to execute SUM to get the current CMM settings from the managed system
and save them in the CMMCfg.xml file.
Note: Received tables/elements might not be identical between two managed systems. Only
tables/elements supported for the managed system will be received.
Syntax:
sum [-i <IP or host name> -u <username> -p <password>] -c GetCmmCfg --file
<CMMCfg.xml> [--overwrite]
Example:
[SUM_HOME]# ./sum -i 192.168.34.56 -u ADMIN -p XXXXXX -c GetCmmCfg --file
CMMCfg.xml --overwrite

Supermicro Update Manager User’s Guide 89
5.6.4 Updating CMM Settings
1. Follow the steps in 5.6.3 Receiving CMM settings.
2. Edit the configurable element values in the CMM configuration file CMMCfg.xml to the desired values
as illustrated in 4.6 Format of CMM Configuration Text File.
3. Set the Action attribute as “None” to skip the unchanged tables in the text file. Note that this step is
optional.
4. Remove unchanged tables/elements in the text file. Note that this step is optional.
5. Use the command ChangeCmmCfg with the updated CMMCfg.xml file to run SUM to update the CMM
configuration.
Syntax:
sum [-i <IP or host name> -u <username> -p <password>] -c ChangeCmmCfg --file
<CMMCfg.xml>
Example:
[SUM_HOME]# ./sum -i 192.168.34.56 -u ADMIN -p XXXXXX -c ChangeCmmCfg --file
CMMCfg.xml
Note: The connection might be lost if the LAN configuration is changed.

Supermicro Update Manager User’s Guide 90
5.7 Applications for a Single System (OOB Only)
5.7.1 Providing TPM Module Capabilities
Use the command TpmProvision to execute SUM to enable TPM module capabilities for the managed
system. Before executing the command, the TPM module should be installed on the managed system.
Syntax:
sum -i <IP or host name> -u <username> -p <password> -c TpmProvision --image_url
<URL> --reboot -–lock <yes> [--id <id for URL> --pw <password for URL>]
Example:
[SUM_HOME]# ./sum -i 192.168.34.56 -u ADMIN -p ADMIN -c TpmProvision --image_url
'smb://192.168.35.1/MySharedPoint/MyFolder' --id smbid --pw smbpasswd --reboot -
–lock yes
[SUM_HOME]# ./sum -i 192.168.34.56 -u ADMIN -p ADMIN -c TpmProvision --image_url
'http://192.168.35.1/MySharedPoint/MyFolder' --id smbid --pw smbpasswd --reboot
-–lock yes
[SUM_HOME]# ./sum -i 192.168.34.56 -u ADMIN -p ADMIN -c TpmProvision --image_url
'\\192.168.35.1\MySharedPoint\MyFolder\' --id smbid --pw smbpasswd --reboot –-
lock yes
Notes:
This command is supported since X10 Grantley platform.
The TPM ISO images are not included in the SUM package. This ISO image can be
acquired from Supermicro. Each SUM release could require different ISO images as
noted in SUM release notes. Please acquire correct TPM_version_YYYYMMDD.zip, unzip
the zip file and get TPM ISO images for usage.
With TPM ISO images, TPM capabilities can be enabled or cleared.
The BIOS will be rebooted several times during provisioning.
To clear TPM capability, see 5.7.2 Clearing TPM Module Capabilities.
Space character is prohibited for SAMBA password. SUM will check if TPM module
status on the managed system. If not installed or malfunctioned, exit code 36/37 will be
returned respectively. If the TPM is locked, exit code 37 will be returned.

Supermicro Update Manager User’s Guide 91
The --cleartpm option clears the ownership of the TPM module.
The --lock yes option locks the TPM module.
If CPU or platform does not support TXT, SUM stops TPM provision procedures.
5.7.2 Clearing TPM Module Capabilities
Use the command TpmProvision with options --cleartpm and --reboot to clear TPM module capabilities
from the managed system. For usage of the --image_url option, refer to the Notes in 5.7.1 Providing TPM
Module Capabilities.
Syntax:
sum -i <IP or host name> -u <username> -p <password> -c TpmProvision --image_url
<URL> [--id <id for URL> --pw <password for URL>] --cleartpm --reboot
Example:
[SUM_HOME]# ./sum -i 192.168.34.56 -u ADMIN -p ADMIN -c TpmProvision --image_url
'smb://192.168.35.1/MySharedPoint/MyFolder' --id smbid --pw smbpasswd --cleartpm
--reboot
5.7.3 Providing an ISO Image as a Virtual Media through BMC and File Server
Use the command MountIsoImage to mount ISO image as a virtual media to the managed system through
SAMBA/HTTP server.
Syntax:
sum -i <IP or host name> -u <username> -p <password> -c MountIsoImage --
image_url <URL> [--id <id for URL> --pw <password for URL>]
Example:
[SUM_HOME]# ./sum -i 192.168.34.56 -u ADMIN -p ADMIN -c MountIsoImage --
image_url 'smb://192.168.35.1/MySharedPoint/MyFolder/Image.iso' --id smbid --pw
smbpasswd

Supermicro Update Manager User’s Guide 92
[SUM_HOME]# ./sum -i 192.168.34.56 -u ADMIN -p ADMIN -c MountIsoImage --
image_url 'http://192.168.35.1/MySharedPoint/MyFolder/Image.iso' --id smbid --pw
smbpasswd
[SUM_HOME]# ./sum -i 192.168.34.56 -u ADMIN -p ADMIN -c MountIsoImage --
image_url '\\192.168.35.1\MySharedPoint\MyFolder\Image.iso' --id smbid --pw
smbpasswd
Note: Space character is prohibited for SAMBA password.
5.7.4 Removing ISO Image as a Virtual Media
Use the command UnmountIsoImage to remove ISO image as a virtual media from the managed system.
Syntax:
sum -i <IP or host name> -u <username> -p <password> -c UnmountIsoImage
Example:
[SUM_HOME]# ./sum -i 192.168.34.56 -u ADMIN -p ADMIN -c UnmountIsoImage
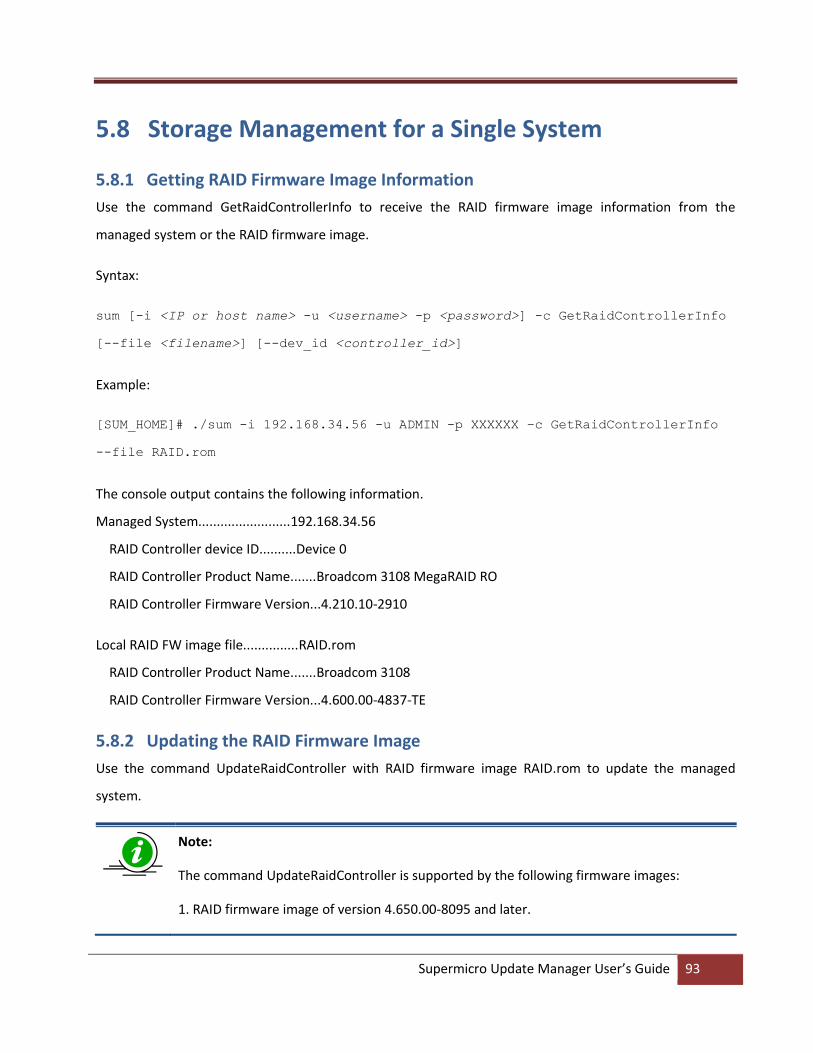
Supermicro Update Manager User’s Guide 93
5.8 Storage Management for a Single System
5.8.1 Getting RAID Firmware Image Information
Use the command GetRaidControllerInfo to receive the RAID firmware image information from the
managed system or the RAID firmware image.
Syntax:
sum [-i <IP or host name> -u <username> -p <password>] -c GetRaidControllerInfo
[--file <filename>] [--dev_id <controller_id>]
Example:
[SUM_HOME]# ./sum -i 192.168.34.56 -u ADMIN -p XXXXXX –c GetRaidControllerInfo
--file RAID.rom
The console output contains the following information.
Managed System.........................192.168.34.56
RAID Controller device ID..........Device 0
RAID Controller Product Name.......Broadcom 3108 MegaRAID RO
RAID Controller Firmware Version...4.210.10-2910
Local RAID FW image file...............RAID.rom
RAID Controller Product Name.......Broadcom 3108
RAID Controller Firmware Version...4.600.00-4837-TE
5.8.2 Updating the RAID Firmware Image
Use the command UpdateRaidController with RAID firmware image RAID.rom to update the managed
system.
Note:
The command UpdateRaidController is supported by the following firmware images:
1. RAID firmware image of version 4.650.00-8095 and later.

Supermicro Update Manager User’s Guide 94
2. For Grantley platform, BMC firmware images of version REDFISH 3.52 and later.
3. For Greenlow platform, BMC firmware images of version ATEN X11 1.33 and later.
4. For Purley platform, BMC firmware images of version ATEN X11DP 1.10 and later.
Syntax:
sum [-i <IP or host name> -u <username> -p <password>] -c UpdateRaidController
--file <filename> --dev_id <RAID controller device ID> [--reboot]
Example:
[SUM_HOME]# ./sum -i 192.168.34.56 -u ADMIN -p XXXXXX -c UpdateRaidController --
file RAID.rom --reboot
5.8.3 Receiving RAID Settings
Use the command GetRaidCfg to execute SUM to get the current RAID settings from the managed system
and save it in the RAIDCfg.xml file.
Note: The received tables/elements between the two managed systems might not be
identical. Only the supported tables/elements for the managed system will be received.
Syntax:
sum [-i <IP or host name> -u <username> -p <password>] -c GetRaidCfg --file
<RAIDCfg.xml> [--overwrite]
Example:
[SUM_HOME]# ./sum -i 192.168.34.56 -u ADMIN -p XXXXXX -c GetRaidCfg --file
RAIDCfg.xml --overwrite
5.8.4 Updating RAID Settings
1. Follow the steps in 5.8.3 Receiving RAID Settings.
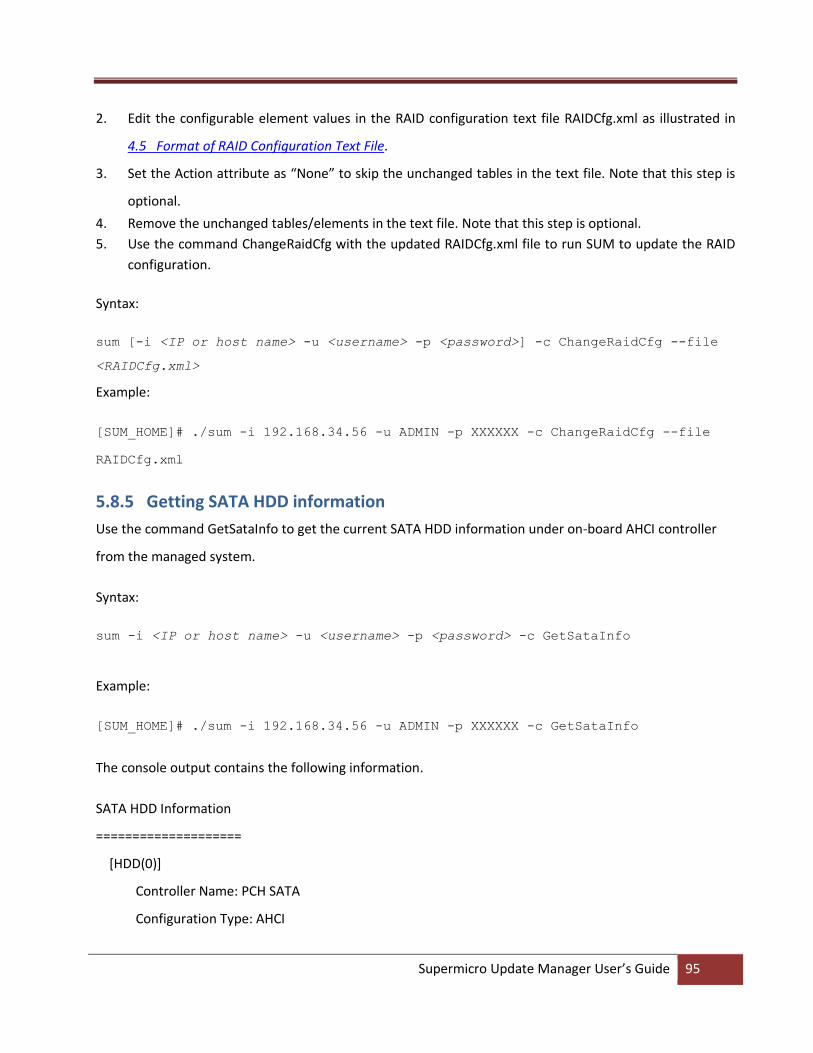
Supermicro Update Manager User’s Guide 95
2. Edit the configurable element values in the RAID configuration text file RAIDCfg.xml as illustrated in
4.5 Format of RAID Configuration Text File.
3. Set the Action attribute as “None” to skip the unchanged tables in the text file. Note that this step is
optional.
4. Remove the unchanged tables/elements in the text file. Note that this step is optional.
5. Use the command ChangeRaidCfg with the updated RAIDCfg.xml file to run SUM to update the RAID
configuration.
Syntax:
sum [-i <IP or host name> -u <username> -p <password>] -c ChangeRaidCfg --file
<RAIDCfg.xml>
Example:
[SUM_HOME]# ./sum -i 192.168.34.56 -u ADMIN -p XXXXXX -c ChangeRaidCfg --file
RAIDCfg.xml
5.8.5 Getting SATA HDD information
Use the command GetSataInfo to get the current SATA HDD information under on-board AHCI controller
from the managed system.
Syntax:
sum -i <IP or host name> -u <username> -p <password> -c GetSataInfo
Example:
[SUM_HOME]# ./sum -i 192.168.34.56 -u ADMIN -p XXXXXX -c GetSataInfo
The console output contains the following information.
SATA HDD Information
====================
[HDD(0)]
Controller Name: PCH SATA
Configuration Type: AHCI

Supermicro Update Manager User’s Guide 96
Slot ID: 0
Slot Populated: Yes
Model Name: INTEL SSDSC2BB120G4
Serial Number: PHWL542502J2120LGN
HDD Firmware Version: D201037
S.M.A.R.T. Supported: Yes
5.8.6 Getting NVMe information
Use the command GetNvmeInfo to get the current NVMe information from the managed system.
Syntax:
sum -i <IP or host name> -u <username> -p <password> -c GetNvmeInfo [--dev_id
<device_id> ]
Example:
[SUM_HOME]# ./sum -i 192.168.34.56 -u ADMIN -p XXXXXX -c GetNvmeInfo –dev_id 0
The console output contains the following information.
NVMe Device information
=======================
[NVMe Controller(1)]
[Group(1)]
Group ID: 0
[NVMe SSD(1)]
Slot: 0
Temperature: 37 degree C
Device Class: Mass storage controller
Device SubClass: Non-Volatile memory controller
Device Program Interface: NVM express
Vendor Name: Samsung Electronics Co., Ltd.
Serial Number: S1NONYAF800079

Supermicro Update Manager User’s Guide 97
Model Number: MZWEI400HAGM-0003
Port 0 Max Link Speed: 8 GT/s
Port 0 Max Link Width: x4
Port 1 Max Link Speed: N/A
Port 1 Max Link Width: N/A
Initial Power Requirement: 10 Watts
Max Power Requirement: 25 Watts
Located Status: Not Located
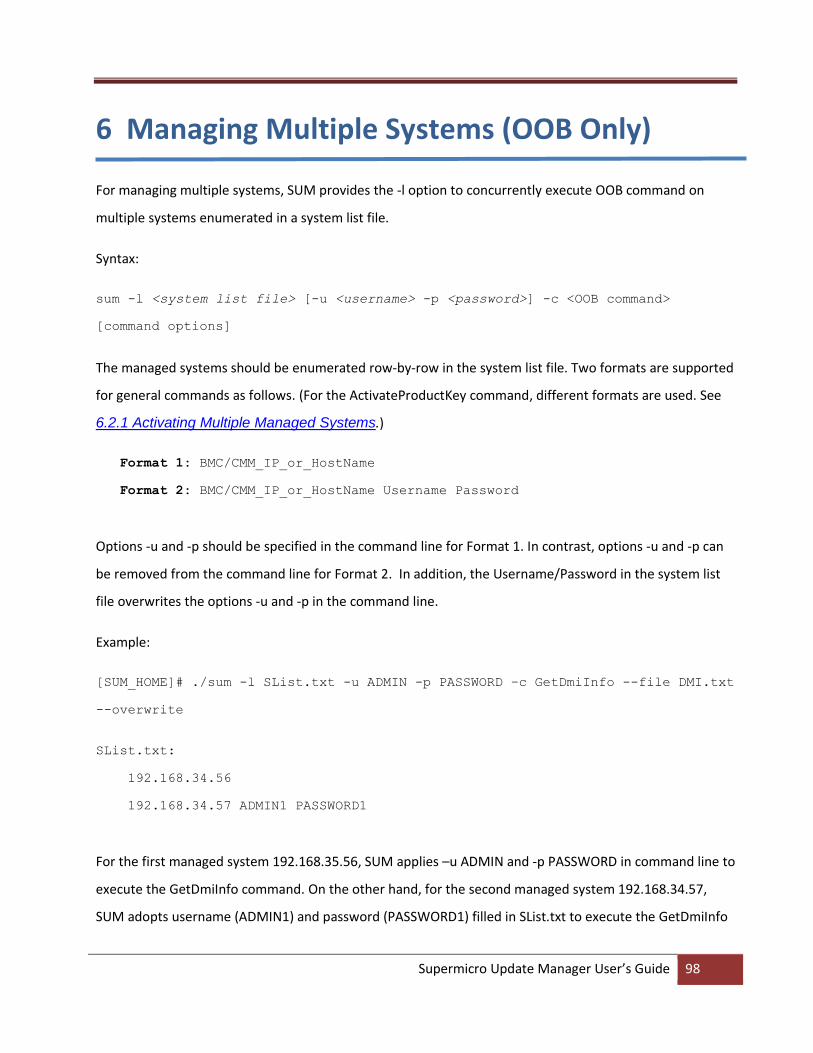
Supermicro Update Manager User’s Guide 98
6 Managing Multiple Systems (OOB Only)
For managing multiple systems, SUM provides the -l option to concurrently execute OOB command on
multiple systems enumerated in a system list file.
Syntax:
sum -l <system list file> [-u <username> -p <password>] -c <OOB command>
[command options]
The managed systems should be enumerated row-by-row in the system list file. Two formats are supported
for general commands as follows. (For the ActivateProductKey command, different formats are used. See
6.2.1 Activating Multiple Managed Systems.)
Format 1: BMC/CMM_IP_or_HostName
Format 2: BMC/CMM_IP_or_HostName Username Password
Options -u and -p should be specified in the command line for Format 1. In contrast, options -u and -p can
be removed from the command line for Format 2. In addition, the Username/Password in the system list
file overwrites the options -u and -p in the command line.
Example:
[SUM_HOME]# ./sum -l SList.txt -u ADMIN -p PASSWORD –c GetDmiInfo --file DMI.txt
--overwrite
SList.txt:
192.168.34.56
192.168.34.57 ADMIN1 PASSWORD1
For the first managed system 192.168.35.56, SUM applies –u ADMIN and -p PASSWORD in command line to
execute the GetDmiInfo command. On the other hand, for the second managed system 192.168.34.57,
SUM adopts username (ADMIN1) and password (PASSWORD1) filled in SList.txt to execute the GetDmiInfo
Supermicro Update Manager User’s Guide 99
command. Two executions are run concurrently and the execution status/results can be referenced in
6.1.2 File Output, 6.1.3 Screen Output and 6.1.4 Log Output.
For the usage of commands that take input files as arguments such as the UpdateBios command, see 6.1.1
File Input for its usage.
Note: Repeated managed system IPs or names in system list file are not allowed.

Supermicro Update Manager User’s Guide 100
6.1 Input Output Controls for Multiple Systems
6.1.1 File Input
SUM uses the input file specified in the command line (through --file option) to manage multiple systems.
Example:
[SUM_HOME]# ./sum -l SList.txt -u ADMIN -p PASSWORD –c UpdateBios --file
SMCI_BIOS.rom
SList.txt:
192.168.34.56
192.168.34.57
In this example, SUM uses the input file SMCI_BIOS.rom specified in the command line to concurrently
update BIOS for both managed systems 192.168.34.56 and 192.168.34.57 enumerated in the SList.txt file.
Note: SUM only supports single input files for managed systems in one command.
6.1.2 File Output
When SUM outputs files for managed systems, each managed system has one individual output file. The
individual output file names are those specified in the command line (through --file option) appended by “.”
and the “BMC/CMM_IP_or_Hostname”, which is obtained from the system list file.
Example:
[SUM_HOME]# ./sum -l SList.txt -u ADMIN -p PASSWORD –c GetDmiInfo --file DMI.txt
SList.txt:
192.168.34.56
192.168.34.57
In this example, DMI information from the managed systems 192.168.34.56 and 192.168.34.57 is written to
files “DMI.txt.192.168.34.56” and “DMI.txt.192.168.34.57”, respectively.
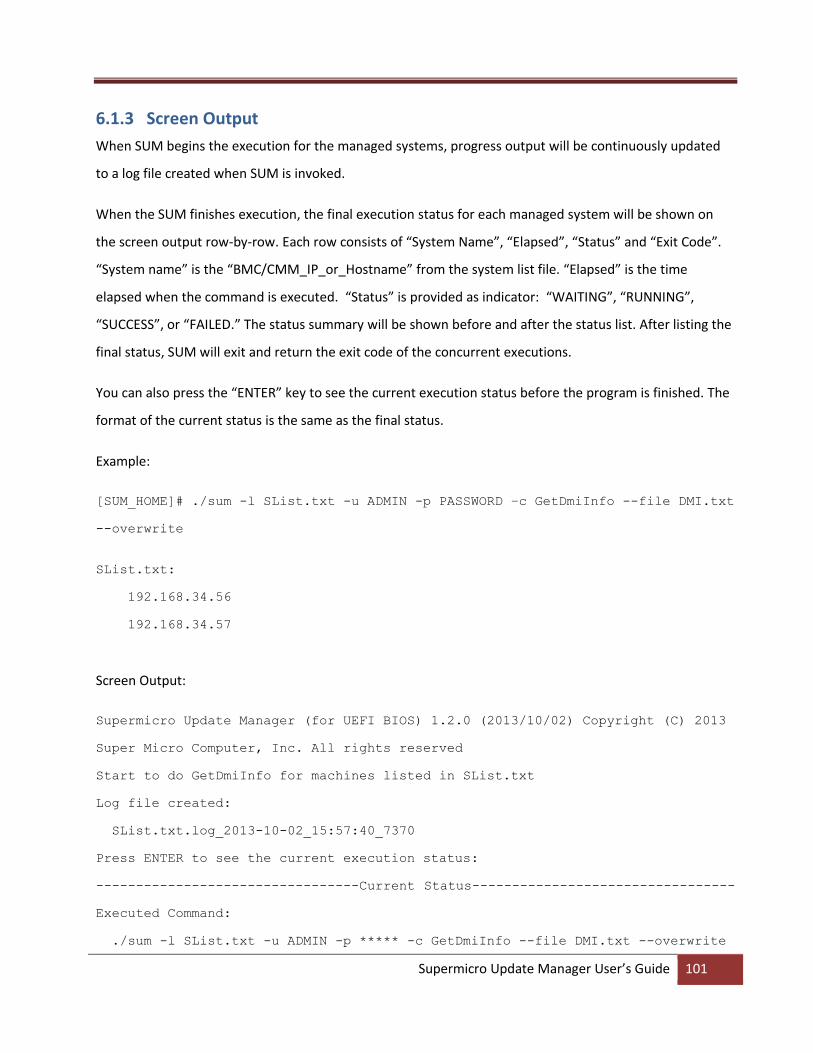
Supermicro Update Manager User’s Guide 101
6.1.3 Screen Output
When SUM begins the execution for the managed systems, progress output will be continuously updated
to a log file created when SUM is invoked.
When the SUM finishes execution, the final execution status for each managed system will be shown on
the screen output row-by-row. Each row consists of “System Name”, “Elapsed”, “Status” and “Exit Code”.
“System name” is the “BMC/CMM_IP_or_Hostname” from the system list file. “Elapsed” is the time
elapsed when the command is executed. “Status” is provided as indicator: “WAITING”, “RUNNING”,
“SUCCESS”, or “FAILED.” The status summary will be shown before and after the status list. After listing the
final status, SUM will exit and return the exit code of the concurrent executions.
You can also press the “ENTER” key to see the current execution status before the program is finished. The
format of the current status is the same as the final status.
Example:
[SUM_HOME]# ./sum -l SList.txt -u ADMIN -p PASSWORD –c GetDmiInfo --file DMI.txt
--overwrite
SList.txt:
192.168.34.56
192.168.34.57
Screen Output:
Supermicro Update Manager (for UEFI BIOS) 1.2.0 (2013/10/02) Copyright (C) 2013
Super Micro Computer, Inc. All rights reserved
Start to do GetDmiInfo for machines listed in SList.txt
Log file created:
SList.txt.log_2013-10-02_15:57:40_7370
Press ENTER to see the current execution status:
---------------------------------Current Status---------------------------------
Executed Command:
./sum -l SList.txt -u ADMIN -p ***** -c GetDmiInfo --file DMI.txt --overwrite
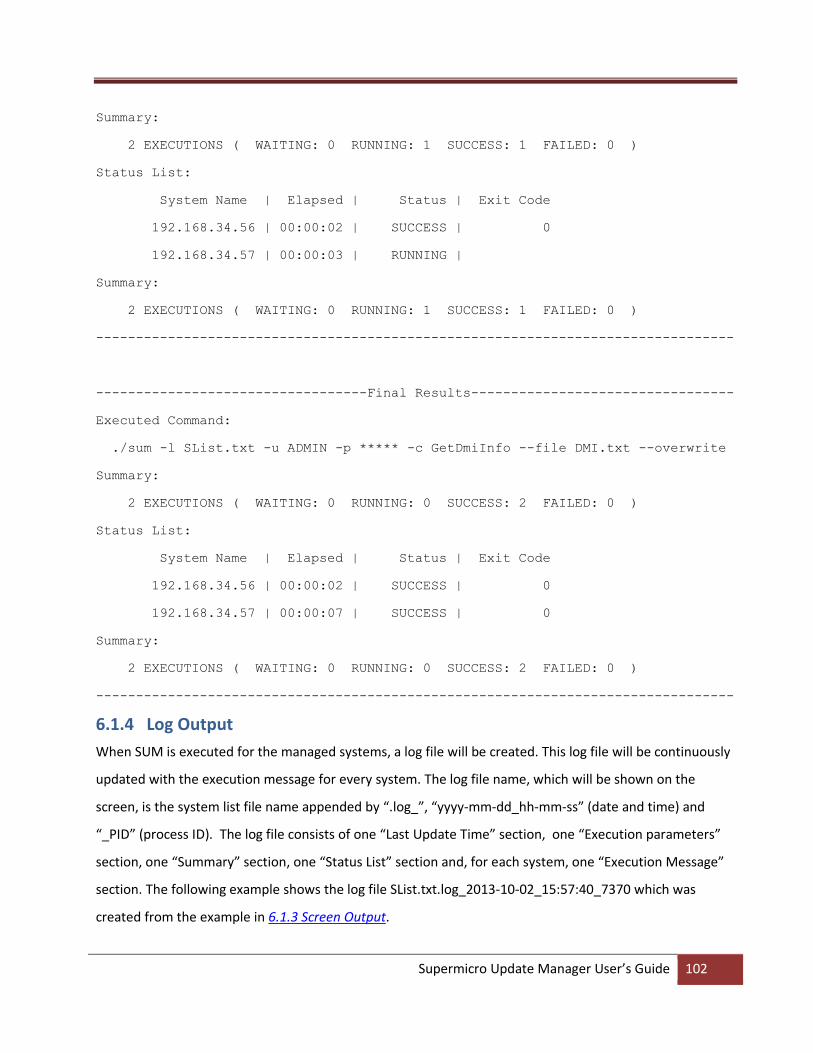
Supermicro Update Manager User’s Guide 102
Summary:
2 EXECUTIONS ( WAITING: 0 RUNNING: 1 SUCCESS: 1 FAILED: 0 )
Status List:
System Name | Elapsed | Status | Exit Code
192.168.34.56 | 00:00:02 | SUCCESS | 0
192.168.34.57 | 00:00:03 | RUNNING |
Summary:
2 EXECUTIONS ( WAITING: 0 RUNNING: 1 SUCCESS: 1 FAILED: 0 )
--------------------------------------------------------------------------------
----------------------------------Final Results---------------------------------
Executed Command:
./sum -l SList.txt -u ADMIN -p ***** -c GetDmiInfo --file DMI.txt --overwrite
Summary:
2 EXECUTIONS ( WAITING: 0 RUNNING: 0 SUCCESS: 2 FAILED: 0 )
Status List:
System Name | Elapsed | Status | Exit Code
192.168.34.56 | 00:00:02 | SUCCESS | 0
192.168.34.57 | 00:00:07 | SUCCESS | 0
Summary:
2 EXECUTIONS ( WAITING: 0 RUNNING: 0 SUCCESS: 2 FAILED: 0 )
--------------------------------------------------------------------------------
6.1.4 Log Output
When SUM is executed for the managed systems, a log file will be created. This log file will be continuously
updated with the execution message for every system. The log file name, which will be shown on the
screen, is the system list file name appended by “.log_”, “yyyy-mm-dd_hh-mm-ss” (date and time) and
“_PID” (process ID). The log file consists of one “Last Update Time” section, one “Execution parameters”
section, one “Summary” section, one “Status List” section and, for each system, one “Execution Message”
section. The following example shows the log file SList.txt.log_2013-10-02_15:57:40_7370 which was
created from the example in 6.1.3 Screen Output.
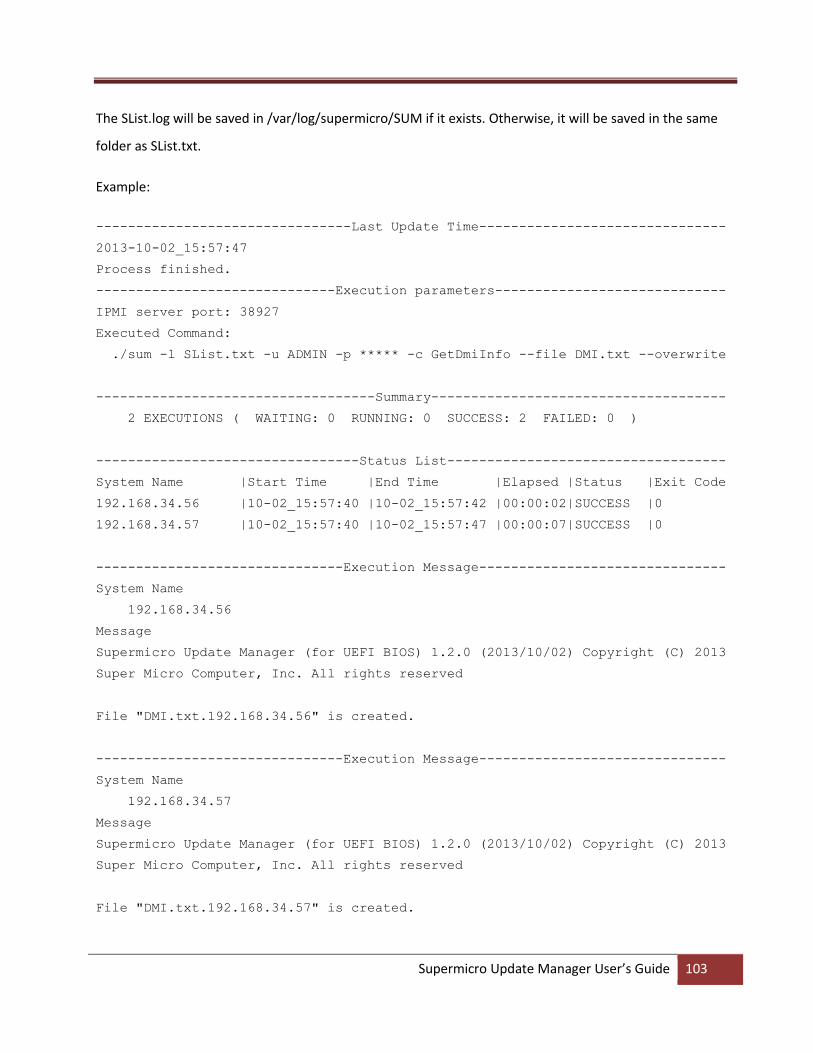
Supermicro Update Manager User’s Guide 103
The SList.log will be saved in /var/log/supermicro/SUM if it exists. Otherwise, it will be saved in the same
folder as SList.txt.
Example:
--------------------------------Last Update Time-------------------------------
2013-10-02_15:57:47
Process finished.
------------------------------Execution parameters-----------------------------
IPMI server port: 38927
Executed Command:
./sum -l SList.txt -u ADMIN -p ***** -c GetDmiInfo --file DMI.txt --overwrite
-----------------------------------Summary-------------------------------------
2 EXECUTIONS ( WAITING: 0 RUNNING: 0 SUCCESS: 2 FAILED: 0 )
---------------------------------Status List-----------------------------------
System Name |Start Time |End Time |Elapsed |Status |Exit Code
192.168.34.56 |10-02_15:57:40 |10-02_15:57:42 |00:00:02|SUCCESS |0
192.168.34.57 |10-02_15:57:40 |10-02_15:57:47 |00:00:07|SUCCESS |0
-------------------------------Execution Message-------------------------------
System Name
192.168.34.56
Message
Supermicro Update Manager (for UEFI BIOS) 1.2.0 (2013/10/02) Copyright (C) 2013
Super Micro Computer, Inc. All rights reserved
File "DMI.txt.192.168.34.56" is created.
-------------------------------Execution Message-------------------------------
System Name
192.168.34.57
Message
Supermicro Update Manager (for UEFI BIOS) 1.2.0 (2013/10/02) Copyright (C) 2013
Super Micro Computer, Inc. All rights reserved
File "DMI.txt.192.168.34.57" is created.
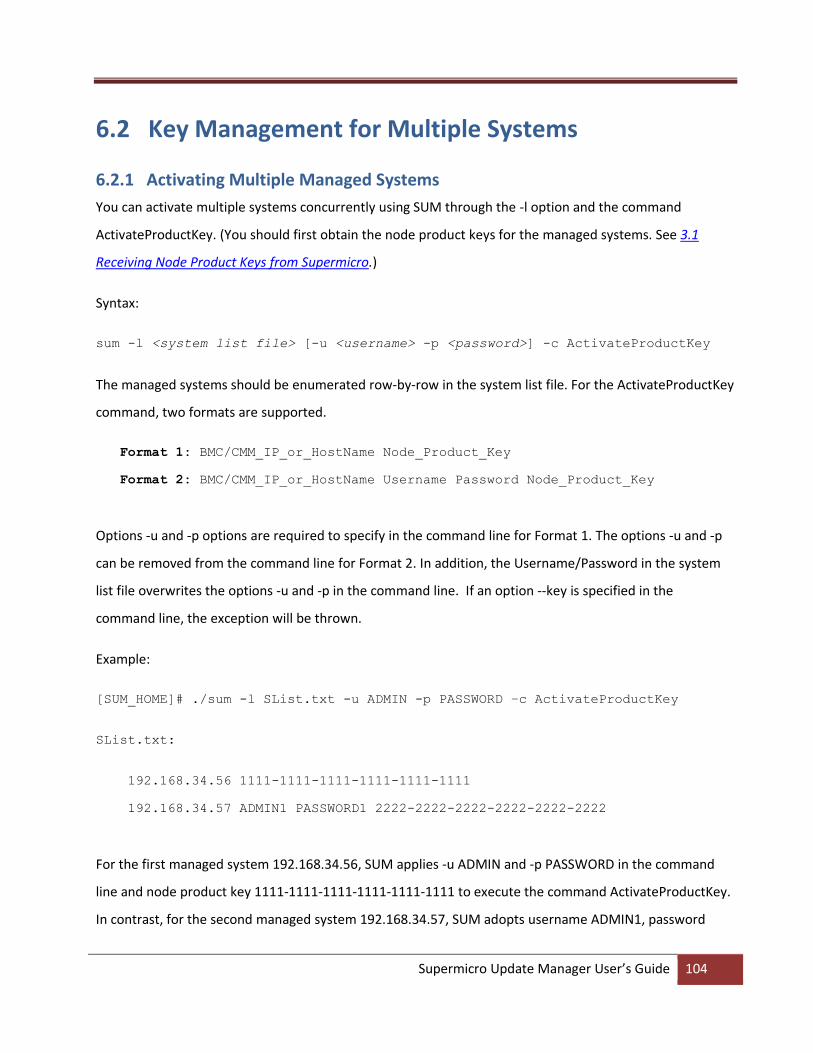
Supermicro Update Manager User’s Guide 104
6.2 Key Management for Multiple Systems
6.2.1 Activating Multiple Managed Systems
You can activate multiple systems concurrently using SUM through the -l option and the command
ActivateProductKey. (You should first obtain the node product keys for the managed systems. See 3.1
Receiving Node Product Keys from Supermicro.)
Syntax:
sum -l <system list file> [-u <username> -p <password>] -c ActivateProductKey
The managed systems should be enumerated row-by-row in the system list file. For the ActivateProductKey
command, two formats are supported.
Format 1: BMC/CMM_IP_or_HostName Node_Product_Key
Format 2: BMC/CMM_IP_or_HostName Username Password Node_Product_Key
Options -u and -p options are required to specify in the command line for Format 1. The options -u and -p
can be removed from the command line for Format 2. In addition, the Username/Password in the system
list file overwrites the options -u and -p in the command line. If an option --key is specified in the
command line, the exception will be thrown.
Example:
[SUM_HOME]# ./sum -l SList.txt -u ADMIN -p PASSWORD –c ActivateProductKey
SList.txt:
192.168.34.56 1111-1111-1111-1111-1111-1111
192.168.34.57 ADMIN1 PASSWORD1 2222-2222-2222-2222-2222-2222
For the first managed system 192.168.34.56, SUM applies -u ADMIN and -p PASSWORD in the command
line and node product key 1111-1111-1111-1111-1111-1111 to execute the command ActivateProductKey.
In contrast, for the second managed system 192.168.34.57, SUM adopts username ADMIN1, password

Supermicro Update Manager User’s Guide 105
PASSWORD1 and node product key 2222-2222-2222-2222-2222-2222 to execute the command
ActivateProductKey. These two managed systems will be activated concurrently. The presentation of
execution status and results will be similar to 6.1.3 Screen Output and 6.1.4 Log Output.
6.2.2 Querying Node Product Key
To query the node product keys activated in the managed systems, use the command QueryProductKey.
Syntax:
sum -l < system list file > [-u <username> -p <password>] -c QueryProductKey
Example:
[SUM_HOME]# ./sum -l SList.txt -u ADMIN -p PASSWORD –c QueryProductKey
SList.txt:
192.168.34.56
192.168.34.57
If the execution “Status” field of a managed system is SUCCESS, the node product keys activated in the
managed system will be shown in the “Execution Message” section in the created log file.
6.2.3 Clearing Node Product Keys
To clear the node product keys activated in the managed systems, use the command ClearProductKey.
However, before executing the command ClearProductKey, query the existing NodeProductKeyName and
NodeProductKeyIndex values from the output of the command “QueryProductKey” (see 6.2.2 Querying
Node Product Key).
Syntax:
sum -l < system list file > [-u <username> -p <password>] -c ClearProductKey --
key_name <NodeProductKeyName>
sum -l < system list file > [-u <username> -p <password>] -c ClearProductKey --
key_index <NodeProductKeyIndex>
Example:
[SUM_HOME]# ./sum -l SList.txt -u ADMIN -p PASSWORD –c ClearProductKey --
key_name SUM

Supermicro Update Manager User’s Guide 106
[SUM_HOME]# ./sum -l SList.txt -u ADMIN -p PASSWORD –c ClearProductKey --
key_index 1
SList.txt:
192.168.34.56
192.168.34.57
If the execution “Status” field for a managed system is SUCCESS, for the --key_name example the SUM key
is cleared from these two managed systems. For the --key_index example, the key with index 1 is cleared in
these two managed systems.
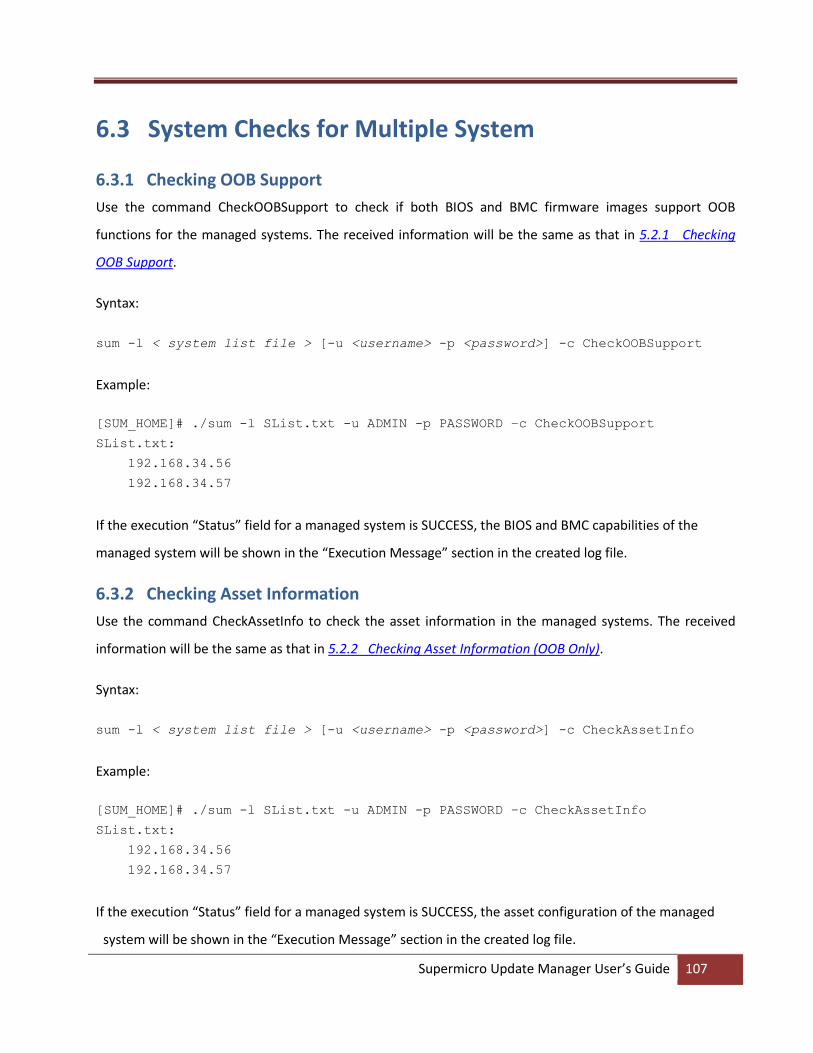
Supermicro Update Manager User’s Guide 107
6.3 System Checks for Multiple System
6.3.1 Checking OOB Support
Use the command CheckOOBSupport to check if both BIOS and BMC firmware images support OOB
functions for the managed systems. The received information will be the same as that in 5.2.1 Checking
OOB Support.
Syntax:
sum -l < system list file > [-u <username> -p <password>] -c CheckOOBSupport
Example:
[SUM_HOME]# ./sum -l SList.txt -u ADMIN -p PASSWORD –c CheckOOBSupport
SList.txt:
192.168.34.56
192.168.34.57
If the execution “Status” field for a managed system is SUCCESS, the BIOS and BMC capabilities of the
managed system will be shown in the “Execution Message” section in the created log file.
6.3.2 Checking Asset Information
Use the command CheckAssetInfo to check the asset information in the managed systems. The received
information will be the same as that in 5.2.2 Checking Asset Information (OOB Only).
Syntax:
sum -l < system list file > [-u <username> -p <password>] -c CheckAssetInfo
Example:
[SUM_HOME]# ./sum -l SList.txt -u ADMIN -p PASSWORD –c CheckAssetInfo
SList.txt:
192.168.34.56
192.168.34.57
If the execution “Status” field for a managed system is SUCCESS, the asset configuration of the managed
system will be shown in the “Execution Message” section in the created log file.
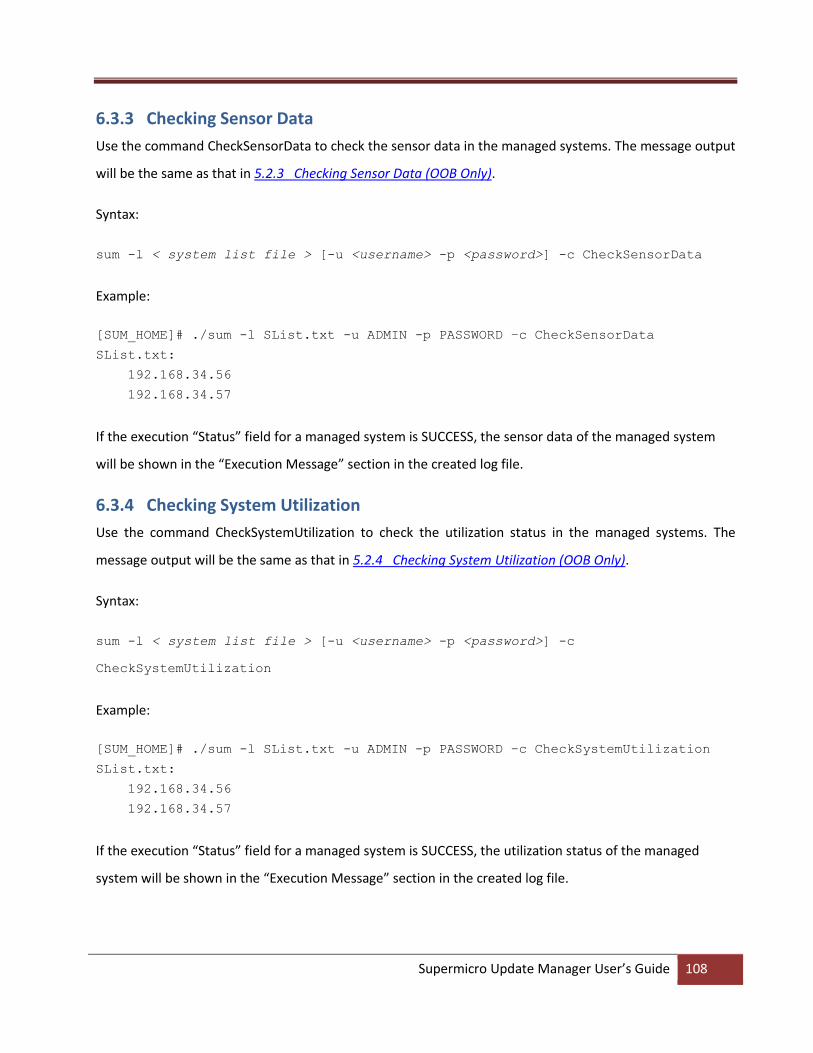
Supermicro Update Manager User’s Guide 108
6.3.3 Checking Sensor Data
Use the command CheckSensorData to check the sensor data in the managed systems. The message output
will be the same as that in 5.2.3 Checking Sensor Data (OOB Only).
Syntax:
sum -l < system list file > [-u <username> -p <password>] -c CheckSensorData
Example:
[SUM_HOME]# ./sum -l SList.txt -u ADMIN -p PASSWORD –c CheckSensorData
SList.txt:
192.168.34.56
192.168.34.57
If the execution “Status” field for a managed system is SUCCESS, the sensor data of the managed system
will be shown in the “Execution Message” section in the created log file.
6.3.4 Checking System Utilization
Use the command CheckSystemUtilization to check the utilization status in the managed systems. The
message output will be the same as that in 5.2.4 Checking System Utilization (OOB Only).
Syntax:
sum -l < system list file > [-u <username> -p <password>] -c
CheckSystemUtilization
Example:
[SUM_HOME]# ./sum -l SList.txt -u ADMIN -p PASSWORD –c CheckSystemUtilization
SList.txt:
192.168.34.56
192.168.34.57
If the execution “Status” field for a managed system is SUCCESS, the utilization status of the managed
system will be shown in the “Execution Message” section in the created log file.

Supermicro Update Manager User’s Guide 109
6.4 BIOS Management for Multiple Systems
6.4.1 Getting BIOS Firmware Image Information
Use the command GetBiosInfo to receive the BIOS firmware image information from the managed systems
as well as the input BIOS firmware image. The message output will be the same as that in 5.3.1 Getting
BIOS Image Information
Syntax:
sum -l <system list file> [-u <username> -p <password>] -c GetBiosInfo [--file
<filename>]
Example:
[SUM_HOME]# ./sum -l SList.txt -u ADMIN -p PASSWORD –c GetBiosInfo --file
SMCI_BIOS.rom
SList.txt:
192.168.34.56
192.168.34.57
Note: If the execution “Status” field of a managed system is SUCCESS, the BIOS information
of the managed system will be shown in its “Execution Message” section in the created log
file.
6.4.2 Updating the BIOS Firmware Image
Use the command UpdateBios with the BIOS firmware image SMCI_BIOS.rom to update managed systems.
For detailed usage notes of the UpdateBios command, see the usage notes in 5.3.2 Updating the BIOS
Image.
Syntax:
sum -l <system list file> [-u <username> -p <password>] -c UpdateBios --file
<filename> [options…]
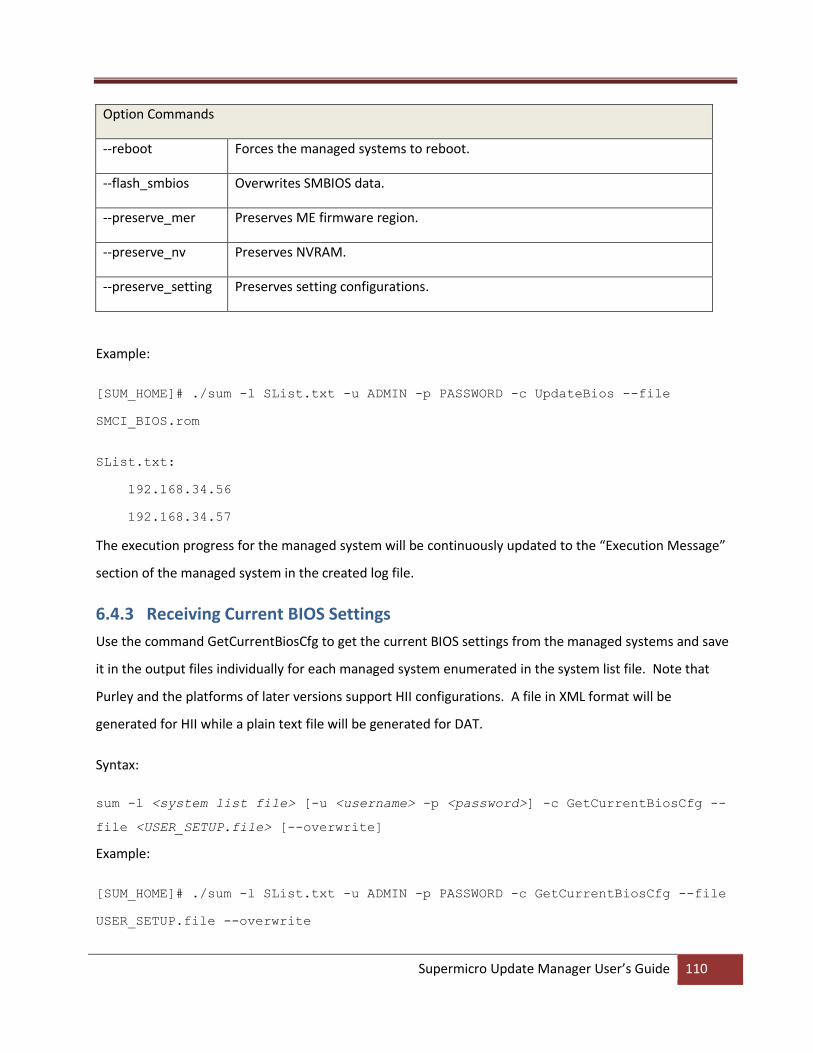
Supermicro Update Manager User’s Guide 110
Option Commands
--reboot Forces the managed systems to reboot.
--flash_smbios Overwrites SMBIOS data.
--preserve_mer Preserves ME firmware region.
--preserve_nv Preserves NVRAM.
--preserve_setting Preserves setting configurations.
Example:
[SUM_HOME]# ./sum -l SList.txt -u ADMIN -p PASSWORD -c UpdateBios --file
SMCI_BIOS.rom
SList.txt:
192.168.34.56
192.168.34.57
The execution progress for the managed system will be continuously updated to the “Execution Message”
section of the managed system in the created log file.
6.4.3 Receiving Current BIOS Settings
Use the command GetCurrentBiosCfg to get the current BIOS settings from the managed systems and save
it in the output files individually for each managed system enumerated in the system list file. Note that
Purley and the platforms of later versions support HII configurations. A file in XML format will be
generated for HII while a plain text file will be generated for DAT.
Syntax:
sum -l <system list file> [-u <username> -p <password>] -c GetCurrentBiosCfg --
file <USER_SETUP.file> [--overwrite]
Example:
[SUM_HOME]# ./sum -l SList.txt -u ADMIN -p PASSWORD -c GetCurrentBiosCfg --file
USER_SETUP.file --overwrite

Supermicro Update Manager User’s Guide 111
SList.txt:
192.168.34.56
192.168.34.57
If the execution “Status” field for a managed system (e.g. 192.168.34.56) is SUCCESS, its current settings
are stored in its output file, e.g. USER_SETUP.file.192.168.34.56. The option --overwrite is used to force
overwrite the existing file, e.g. USER_SETUP.file.192.168.34.56, if the output file already exists.
Notes:
Purley and the platforms of later versions support HII. The current BIOS settings will be
generated as a file in XML format and plain text file for HII and DAT, respectively.
BIOS configuration XML file contains extended ASC-II characters. Please use ISO 8859-1
encoding to view BIOS configuration XML file.
6.4.4 Updating BIOS Settings Based on a Current Sample Settings
1. Select one managed system as the golden sample for current BIOS settings.
2. Follow the steps in 5.3.3 Receiving Current BIOS Settings for that system.
3. Edit the item/variable values in the user setup file USER_SETUP.file to the desired values as illustrated
in 4.1 Format of BIOS Settings Text File (for DAT) or 4.2 Format of BIOS Settings XML File (for HII).
4. Remove unchanged items/variables in the text file. Note that this step is optional.
5. Use the command ChangeBiosCfg with the modified USER_SETUP.file to update the BIOS
configurations for managed systems.
Notes:
The uploaded configurations will only take effect after the managed systems reboot or
power up.
For HII, when the new BIOS firmware image is flashed, there may be conflicts between
the XML files of new and old BIOS settings. The XML file of current BIOS settings should
be re-downloaded, re-modified and then updated.
BIOS configuration XML file contains extended ASC-II characters. Please use ISO 8859-
1 encoding to view and save BIOS configuration XML file.
Syntax:
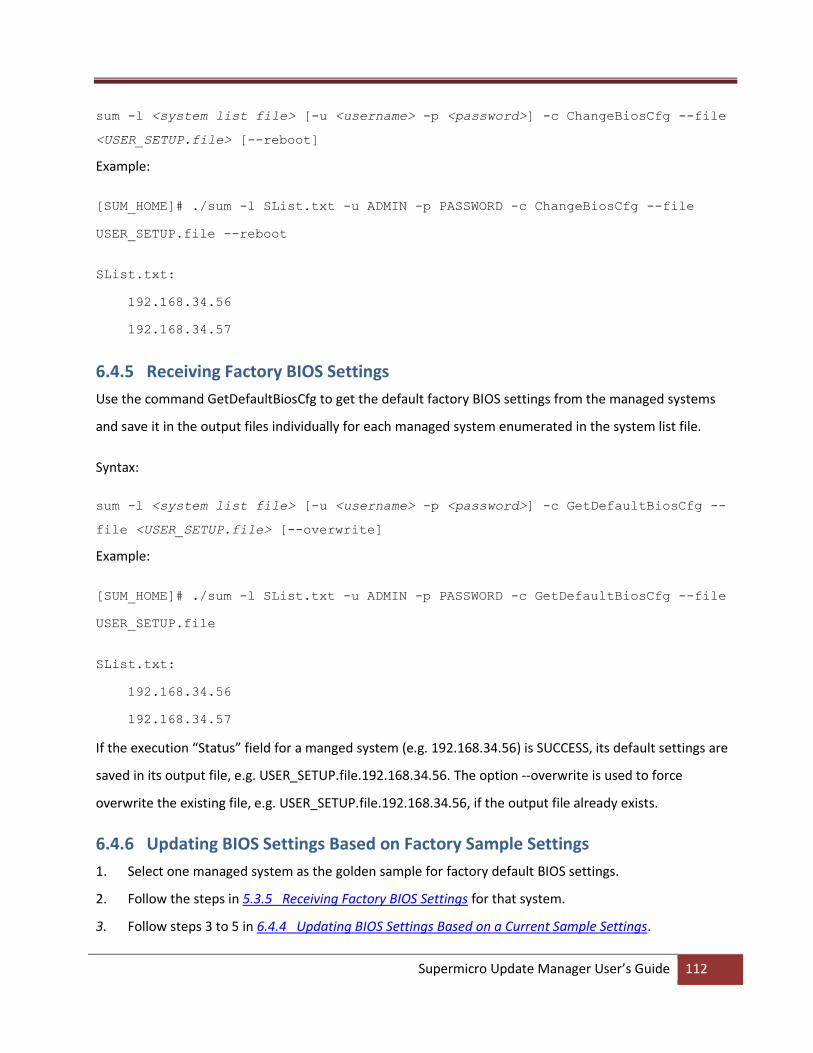
Supermicro Update Manager User’s Guide 112
sum -l <system list file> [-u <username> -p <password>] -c ChangeBiosCfg --file
<USER_SETUP.file> [--reboot]
Example:
[SUM_HOME]# ./sum -l SList.txt -u ADMIN -p PASSWORD -c ChangeBiosCfg --file
USER_SETUP.file --reboot
SList.txt:
192.168.34.56
192.168.34.57
6.4.5 Receiving Factory BIOS Settings
Use the command GetDefaultBiosCfg to get the default factory BIOS settings from the managed systems
and save it in the output files individually for each managed system enumerated in the system list file.
Syntax:
sum -l <system list file> [-u <username> -p <password>] -c GetDefaultBiosCfg --
file <USER_SETUP.file> [--overwrite]
Example:
[SUM_HOME]# ./sum -l SList.txt -u ADMIN -p PASSWORD -c GetDefaultBiosCfg --file
USER_SETUP.file
SList.txt:
192.168.34.56
192.168.34.57
If the execution “Status” field for a manged system (e.g. 192.168.34.56) is SUCCESS, its default settings are
saved in its output file, e.g. USER_SETUP.file.192.168.34.56. The option --overwrite is used to force
overwrite the existing file, e.g. USER_SETUP.file.192.168.34.56, if the output file already exists.
6.4.6 Updating BIOS Settings Based on Factory Sample Settings
1. Select one managed system as the golden sample for factory default BIOS settings.
2. Follow the steps in 5.3.5 Receiving Factory BIOS Settings for that system.
3. Follow steps 3 to 5 in 6.4.4 Updating BIOS Settings Based on a Current Sample Settings.

Supermicro Update Manager User’s Guide 113
6.4.7 Loading Factory BIOS Settings
Use the command LoadDefaultBiosCfg to reset the BIOS settings of the managed systems to the factory
default settings.
Note: The uploaded configurations will only take effect after the managed systems reboot
or power up.
Syntax:
sum -l <system list file> [-u <username> -p <password>] -c LoadDefaultBiosCfg [-
-reboot]
Example:
[SUM_HOME]# ./sum -l SList.txt -u ADMIN -p PASSWORD -c LoadDefaultBiosCfg --
reboot
SList.txt:
192.168.34.56
192.168.34.57
6.4.8 Receiving DMI Information
Use the command GetDmiInfo to get the current supported editable DMI information from the managed
systems and save it in the output files individually for each managed system enumerated in the system list
file. For detailed usage notes of the command GetDmiInfo, see 5.3.8 Receiving DMI Information
Syntax:
sum -l <system list file> [-u <username> -p <password>] -c GetDmiInfo --file
<DMI.txt> [--overwrite]
Example:
[SUM_HOME]# ./sum -l SList.txt -u ADMIN -p PASSWORD -c GetDmiInfo --file DMI.txt
--overwrite
SList.txt:
192.168.34.56
192.168.34.57
Supermicro Update Manager User’s Guide 114
If the execution “Status” field for a managed system (e.g. 192.168.34.56) is SUCCESS, its DMI settings are
saved in its output file, e.g. DMI.txt.192.168.34.56. The option --overwrite is used to force overwrite its
existing file, e.g.DMI.txt.192.168.34.56, if the output file already exists.
6.4.9 Editing DMI Information
Use the command EditDmiInfo to edit the editable DMI items. For details on the EditDmiInfo command,
refer to 5.3.9 Editing DMI Information.
Syntax:
sum -l <system list file> [-u <username> -p <password>] -c EditDmiInfo --file
<DMI.txt> --item_type <Item Type> --item_name <Item Name> --value <Item Value>
sum -l <system list file> [-u <username> -p <password>] -c EditDmiInfo --file
<DMI.txt> --shn <Item Short Name> --value <Item Value>
sum -l <system list file> [-u <username> -p <password>] -c EditDmiInfo --file
<DMI.txt> --shn <Item Short Name> --default
Example:
[SUM_HOME]# ./sum -l SList.txt -u ADMIN -p PASSWORD -c EditDmiInfo --file
DMI.txt --item_type "System" --item_name "Version" --value "1.01"
[SUM_HOME]# ./sum -l SList.txt -u ADMIN -p PASSWORD -c EditDmiInfo --file
DMI.txt --shn SYVS --value "1.01"
[SUM_HOME]# ./sum -l SList.txt -u ADMIN -p PASSWORD -c EditDmiInfo --file
DMI.txt --shn SYVS --default
SList.txt:
192.168.34.56
192.168.34.57
If the execution “Status” field for a managed system (e.g. 192.168.34.56) is “SUCCESS”, its edited DMI
information are updated in its output file, e.g. DMI.txt.192.168.34.56.
6.4.10 Updating DMI Information Based on a Sample DMI Information
1. Select one managed system as the golden sample for DMI information.
Supermicro Update Manager User’s Guide 115
2. Follow the steps in 5.3.9 Editing DMI Information to prepare the edited DMI.txt file for updating DMI
information.
3. Use the command ChangeDmiInfo with the edited DMI.txt file to update the DMI information for the
managed systems.
Notes:
The uploaded information will only take effect after the managed systems reboot or
power up.
For detailed usage notes of the command ChangeDmiInfo, see 5.3.10 Updating DMI
Information.
Syntax:
sum -l <system list file> [-u <username> -p <password>] -c ChangeDmiInfo --file
<DMI.txt> [--reboot]
Example:
[SUM_HOME]# ./sum -l SList.txt -u ADMIN -p PASSWORD -c ChangeDmiInfo --file
DMI.txt --reboot
SList.txt:
192.168.34.56
192.168.34.57
6.4.11 Set BIOS Action
Use the command SetBiosAction to show/hide BBS priority related settings.
Note: The uploaded configurations will only take effect after the managed systems reboot
or power up.
Syntax:
sum -l <system list file> [-u <username> -p <password>] -c SetBiosAction -–BBS
<yes/no> [--reboot]
Example:
[SUM_HOME]# ./sum -l SList.txt -u ADMIN -p PASSWORD -c SetBiosAction –-BBS
<yes/no> --reboot

Supermicro Update Manager User’s Guide 116
SList.txt:
192.168.34.56
192.168.34.57
Supermicro Update Manager User’s Guide 117
6.5 BMC Management for Multiple Systems
6.5.1 Getting BMC Firmware Image Information
Use the command GetBmcInfo to receive the BMC firmware image information from the managed systems
as well as the input BMC firmware image. The information will be the same as that in 5.4.1 Getting BMC
Image Information.
Syntax:
sum -l <system list file> [-u <username> -p <password>] -c GetBmcInfo [--file
<filename>]
Example:
[SUM_HOME]# ./sum -l SList.txt -u ADMIN -p PASSWORD –c GetBmcInfo --file
SMCI_BMC.rom
SList.txt:
192.168.34.56
192.168.34.57
If the execution ”Status” field for a managed system is SUCCESS, the BMC information of the managed
system will be shown in the “Execution Message” section of the managed system in the created log file.
6.5.2 Updating the BMC Firmware Image
Use the command UpdateBmc with BMC firmware image SMCI_BMC.rom to update managed systems. For
detailed usage notes of the UpdateBmc command, see the usage notes in 5.4.2 Updating the BMC Image.
Syntax:
sum -l <system list file> [-u <username> -p <password>] -c UpdateBmc --file
<filename> [--overwrite_cfg] [--overwrite_sdr]
Example:
[SUM_HOME]# ./sum -l SList.txt -u ADMIN -p PASSWORD -c UpdateBmc --file
SMCI_BMC.rom
Supermicro Update Manager User’s Guide 118
SList.txt:
192.168.34.56
192.168.34.57
The execution progress for the managed system will be continuously updated to the “Execution Message”
section of the manged system in the created log file.
6.5.3 Receiving BMC Settings
Use the command GetBmcCfg to get the current BMC settings from the managed systems and save it in the
output files individually for each managed system enumerated in the system list file. For detailed usage
notes of the GetBmcCfg command, see the usage notes in 5.4.3 Receiving BMC Settings.
Syntax:
sum -l <system list file> [-u <username> -p <password>] -c GetBmcCfg --file <
BMCCfg.xml > [--overwrite]
Example:
[SUM_HOME]# ./sum -l SList.txt -u ADMIN -p PASSWORD -c GetBmcCfg --file
BMCCfg.xml --overwrite
SList.txt:
192.168.34.56
192.168.34.57
If the execution ”Status” field for a managed system (e.g. 192.168.34.56) is SUCCESS, its current settings
will be stored in its output file, e.g. BMCCfg.xml.192.168.34.56. The option --overwrite is used to force
overwrite its existing file, e.g. BMCCfg.xml.192.168.34.56, if the output file already exists.
6.5.4 Updating BMC Settings
1. Select one managed system as the golden sample for current BMC settings.
2. Follow the steps in 5.4.3 Receiving BMC Settings for the managed system.
3. Edit the configurable element values in the BMC configuration text file BMCCfg.xml to the desired
values as illustrated in 4.4 Format of BMC Configuration Text File.
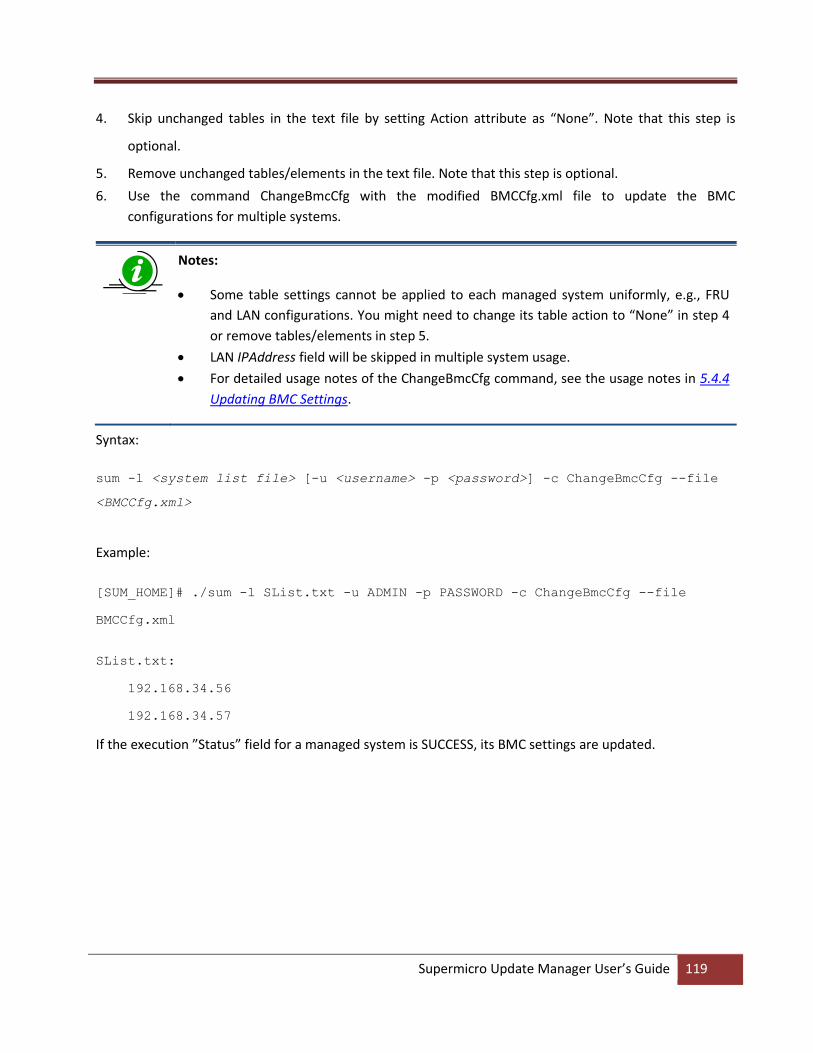
Supermicro Update Manager User’s Guide 119
4. Skip unchanged tables in the text file by setting Action attribute as “None”. Note that this step is
optional.
5. Remove unchanged tables/elements in the text file. Note that this step is optional.
6. Use the command ChangeBmcCfg with the modified BMCCfg.xml file to update the BMC
configurations for multiple systems.
Notes:
Some table settings cannot be applied to each managed system uniformly, e.g., FRU
and LAN configurations. You might need to change its table action to “None” in step 4
or remove tables/elements in step 5.
LAN IPAddress field will be skipped in multiple system usage.
For detailed usage notes of the ChangeBmcCfg command, see the usage notes in 5.4.4
Updating BMC Settings.
Syntax:
sum -l <system list file> [-u <username> -p <password>] -c ChangeBmcCfg --file
<BMCCfg.xml>
Example:
[SUM_HOME]# ./sum -l SList.txt -u ADMIN -p PASSWORD -c ChangeBmcCfg --file
BMCCfg.xml
SList.txt:
192.168.34.56
192.168.34.57
If the execution ”Status” field for a managed system is SUCCESS, its BMC settings are updated.
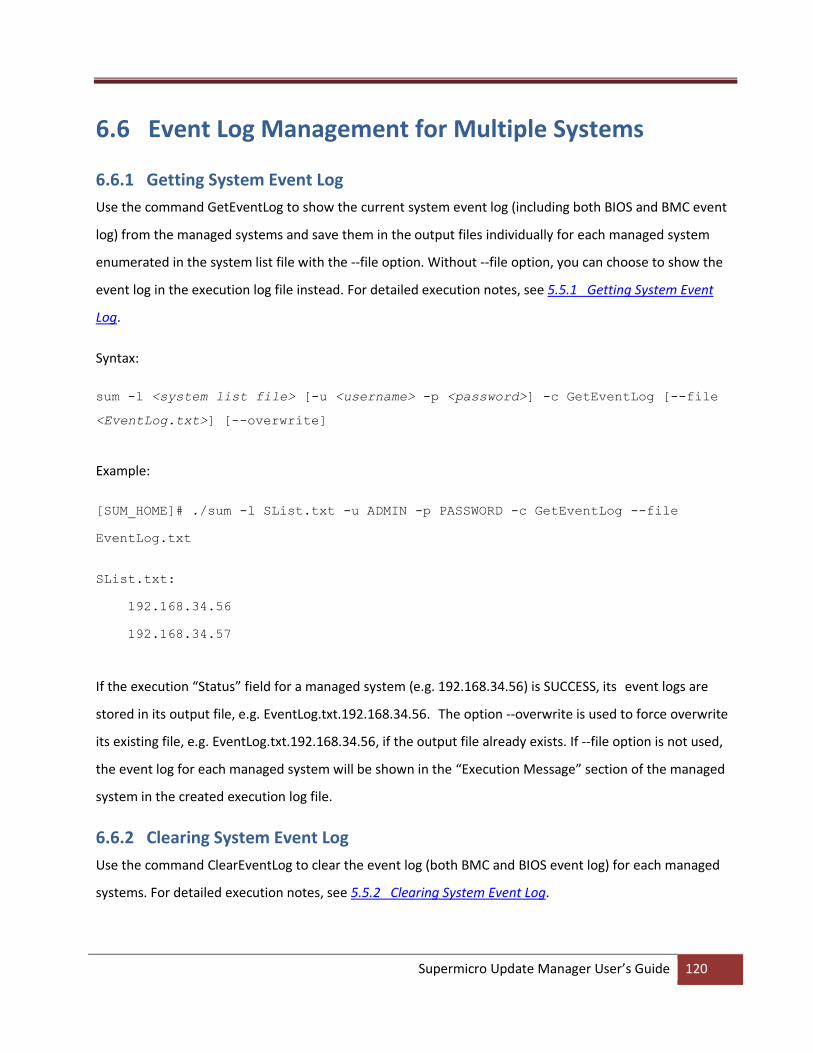
Supermicro Update Manager User’s Guide 120
6.6 Event Log Management for Multiple Systems
6.6.1 Getting System Event Log
Use the command GetEventLog to show the current system event log (including both BIOS and BMC event
log) from the managed systems and save them in the output files individually for each managed system
enumerated in the system list file with the --file option. Without --file option, you can choose to show the
event log in the execution log file instead. For detailed execution notes, see 5.5.1 Getting System Event
Log.
Syntax:
sum -l <system list file> [-u <username> -p <password>] -c GetEventLog [--file
<EventLog.txt>] [--overwrite]
Example:
[SUM_HOME]# ./sum -l SList.txt -u ADMIN -p PASSWORD -c GetEventLog --file
EventLog.txt
SList.txt:
192.168.34.56
192.168.34.57
If the execution “Status” field for a managed system (e.g. 192.168.34.56) is SUCCESS, its event logs are
stored in its output file, e.g. EventLog.txt.192.168.34.56. The option --overwrite is used to force overwrite
its existing file, e.g. EventLog.txt.192.168.34.56, if the output file already exists. If --file option is not used,
the event log for each managed system will be shown in the “Execution Message” section of the managed
system in the created execution log file.
6.6.2 Clearing System Event Log
Use the command ClearEventLog to clear the event log (both BMC and BIOS event log) for each managed
systems. For detailed execution notes, see 5.5.2 Clearing System Event Log.
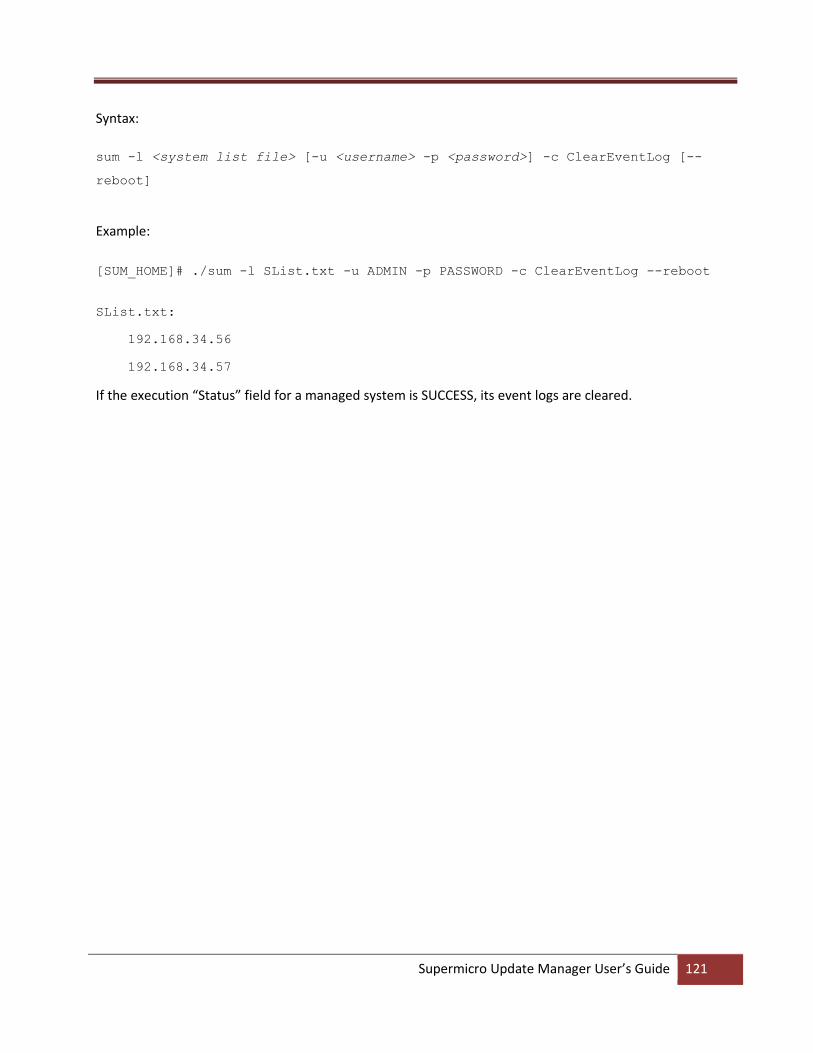
Supermicro Update Manager User’s Guide 121
Syntax:
sum -l <system list file> [-u <username> -p <password>] -c ClearEventLog [--
reboot]
Example:
[SUM_HOME]# ./sum -l SList.txt -u ADMIN -p PASSWORD -c ClearEventLog --reboot
SList.txt:
192.168.34.56
192.168.34.57
If the execution “Status” field for a managed system is SUCCESS, its event logs are cleared.

Supermicro Update Manager User’s Guide 122
6.7 CMM Management for Multiple Systems
6.7.1 Receiving CMM Image Information
Use the command GetCmmInfo to receive the CMM firmware image from the managed systems as well as
the input CMM firmware image. The information will be the same as that in 5.6.1 Getting CMM Image
Information.
Syntax:
sum -l <system list file> [-u <username> -p <password>] -c GetCmmInfo [--file
<filename>]
Example:
[SUM_HOME]# ./sum -l SList.txt -u ADMIN -p PASSWORD –c GetCmmInfo --file
SMCI_CMM.rom
SList.txt:
192.168.34.56
192.168.34.57
If the Status field for a managed system shows “SUCCESS”, the CMM information of the managed system
will be shown in the “Execution Message” section of the managed system in the created log file.
6.7.2 Updating the CMM Firmware Image
Use the command UpdateCmm with the CMM firmware image SMCI_CMM.rom to update managed
systems. For details on the UpdateCmm command, see the notes in 5.6.2 Updating the CMM Image.
Syntax:
sum -l <system list file> [-u <username> -p <password>] -c UpdateCmm --file
<filename> [--overwrite_cfg]
Example:
[SUM_HOME]# ./sum -l SList.txt -u ADMIN -p PASSWORD -c UpdateCmm --file
SMCI_CMM.rom

Supermicro Update Manager User’s Guide 123
SList.txt:
192.168.34.56
192.168.34.57
The execution progress of the system will be continuously updated in the “Execution Message” section of
the managed system in the created log file.
6.7.3 Receiving CMM Settings
Use the command GetCmmCfg to get the current CMM settings from managed systems and save it in the
output files individually for each managed system enumerated in the system list file. For details on the
GetCmmCfg command, see the notes in 5.6.3 Receiving CMM Settings.
Syntax:
sum -l <system list file> [-u <username> -p <password>] -c GetCmmCfg --file <
CMMCfg.xml > [--overwrite]
Example:
[SUM_HOME]# ./sum -l SList.txt -u ADMIN -p PASSWORD -c GetCmmCfg --file
CMMCfg.xml --overwrite
SList.txt:
192.168.34.56
192.168.34.57
If the Status field of the managed system (e.g. 192.168.34.56) shows SUCCESS, its current settings are
stored in its output file, e.g. CMMCfg.xml.192.168.34.56. The option --overwrite is used to force overwrite
its existing file, e.g. CMMCfg.xml.192.168.34.56, if the output file already exists.
6.7.4 Updating CMM Settings
1. Select one managed system as the golden sample for the current CMM settings.
2. Follow the steps in 5.6.3 Receiving CMM settings.
3. Edit the configurable element values in the CMM configuration text file CMMCfg.xml to the desired
values as illustrated in 4.6 Format of CMM Configuration Text File.
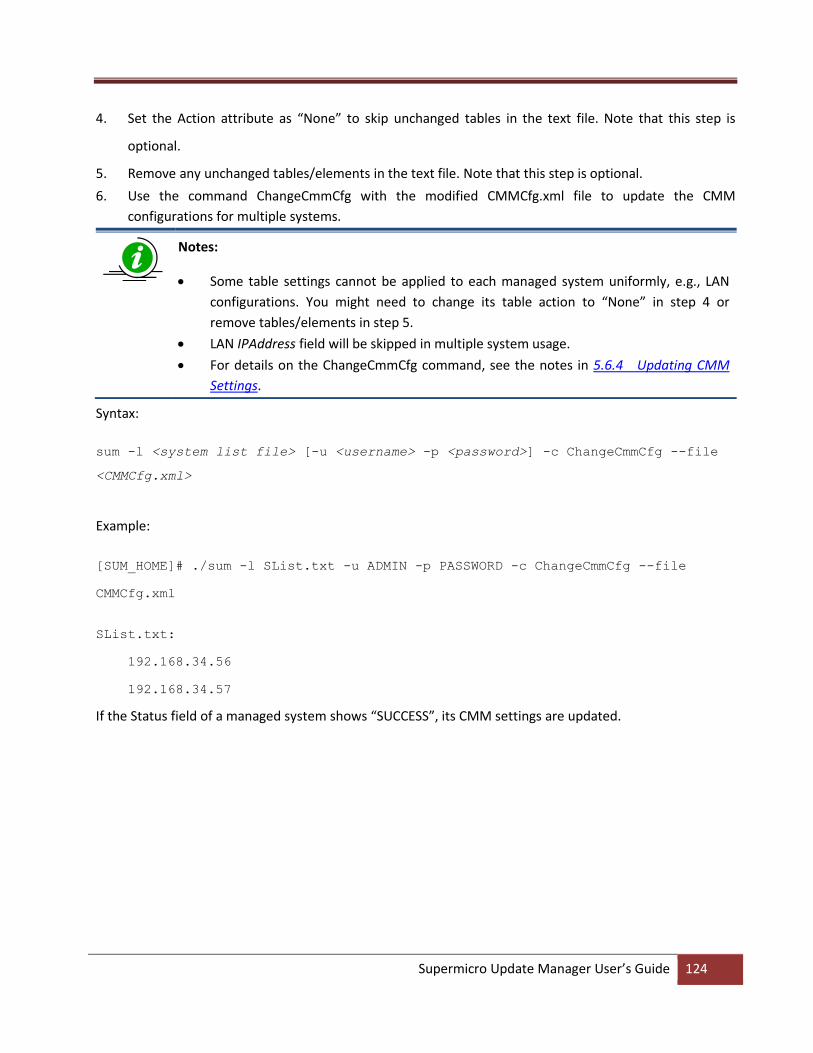
Supermicro Update Manager User’s Guide 124
4. Set the Action attribute as “None” to skip unchanged tables in the text file. Note that this step is
optional.
5. Remove any unchanged tables/elements in the text file. Note that this step is optional.
6. Use the command ChangeCmmCfg with the modified CMMCfg.xml file to update the CMM
configurations for multiple systems.
Notes:
Some table settings cannot be applied to each managed system uniformly, e.g., LAN
configurations. You might need to change its table action to “None” in step 4 or
remove tables/elements in step 5.
LAN IPAddress field will be skipped in multiple system usage.
For details on the ChangeCmmCfg command, see the notes in 5.6.4 Updating CMM
Settings.
Syntax:
sum -l <system list file> [-u <username> -p <password>] -c ChangeCmmCfg --file
<CMMCfg.xml>
Example:
[SUM_HOME]# ./sum -l SList.txt -u ADMIN -p PASSWORD -c ChangeCmmCfg --file
CMMCfg.xml
SList.txt:
192.168.34.56
192.168.34.57
If the Status field of a managed system shows “SUCCESS”, its CMM settings are updated.
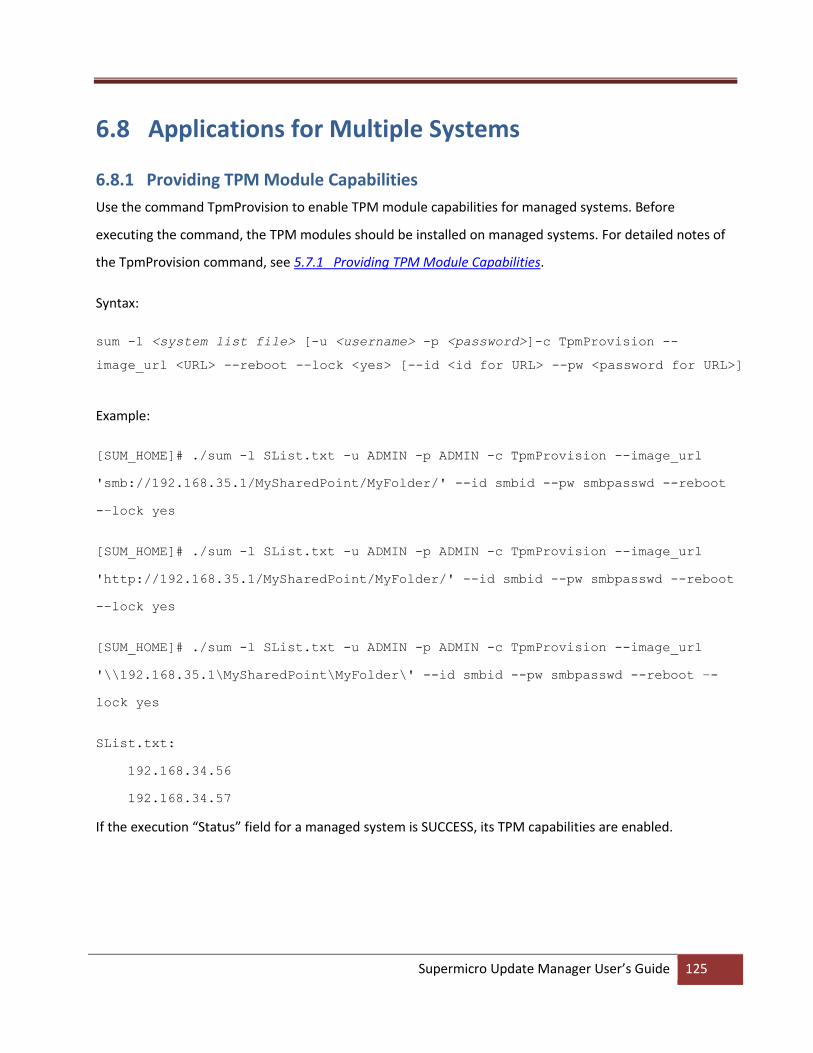
Supermicro Update Manager User’s Guide 125
6.8 Applications for Multiple Systems
6.8.1 Providing TPM Module Capabilities
Use the command TpmProvision to enable TPM module capabilities for managed systems. Before
executing the command, the TPM modules should be installed on managed systems. For detailed notes of
the TpmProvision command, see 5.7.1 Providing TPM Module Capabilities.
Syntax:
sum -l <system list file> [-u <username> -p <password>]-c TpmProvision --
image_url <URL> --reboot -–lock <yes> [--id <id for URL> --pw <password for URL>]
Example:
[SUM_HOME]# ./sum -l SList.txt -u ADMIN -p ADMIN -c TpmProvision --image_url
'smb://192.168.35.1/MySharedPoint/MyFolder/' --id smbid --pw smbpasswd --reboot
-–lock yes
[SUM_HOME]# ./sum -l SList.txt -u ADMIN -p ADMIN -c TpmProvision --image_url
'http://192.168.35.1/MySharedPoint/MyFolder/' --id smbid --pw smbpasswd --reboot
-–lock yes
[SUM_HOME]# ./sum -l SList.txt -u ADMIN -p ADMIN -c TpmProvision --image_url
'\\192.168.35.1\MySharedPoint\MyFolder\' --id smbid --pw smbpasswd --reboot –-
lock yes
SList.txt:
192.168.34.56
192.168.34.57
If the execution “Status” field for a managed system is SUCCESS, its TPM capabilities are enabled.
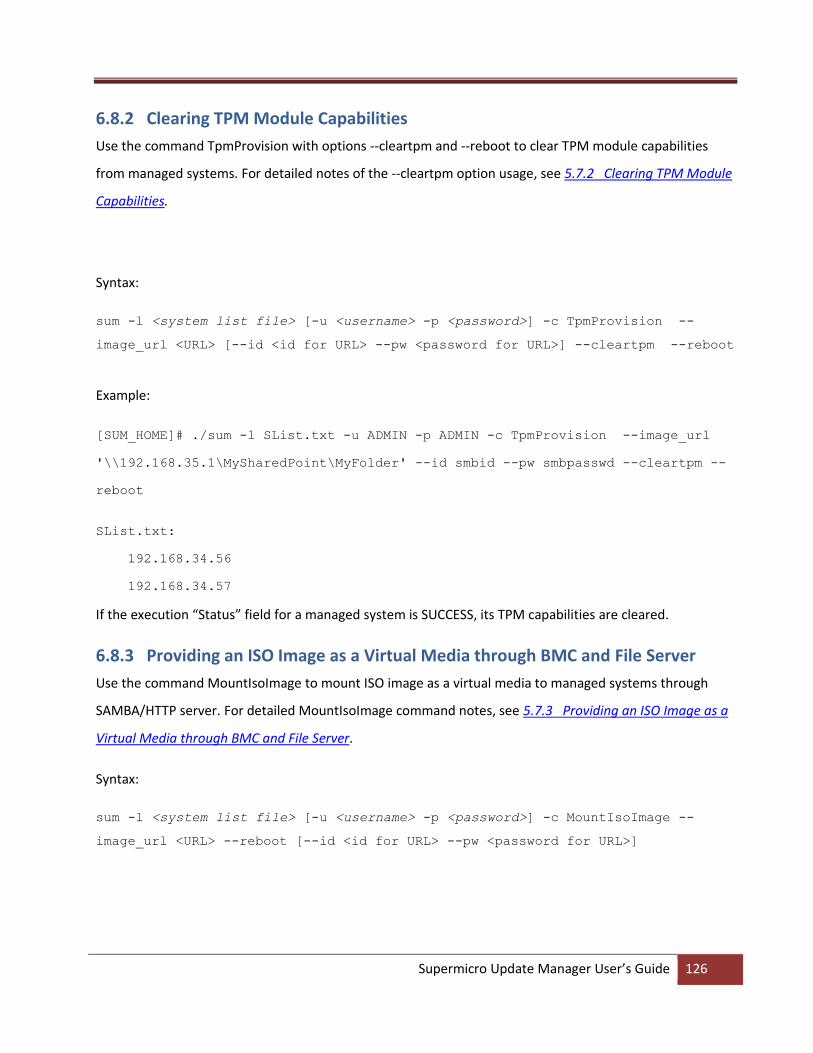
Supermicro Update Manager User’s Guide 126
6.8.2 Clearing TPM Module Capabilities
Use the command TpmProvision with options --cleartpm and --reboot to clear TPM module capabilities
from managed systems. For detailed notes of the --cleartpm option usage, see 5.7.2 Clearing TPM Module
Capabilities.
Syntax:
sum -l <system list file> [-u <username> -p <password>] -c TpmProvision --
image_url <URL> [--id <id for URL> --pw <password for URL>] --cleartpm --reboot
Example:
[SUM_HOME]# ./sum -l SList.txt -u ADMIN -p ADMIN -c TpmProvision --image_url
'\\192.168.35.1\MySharedPoint\MyFolder' --id smbid --pw smbpasswd --cleartpm --
reboot
SList.txt:
192.168.34.56
192.168.34.57
If the execution “Status” field for a managed system is SUCCESS, its TPM capabilities are cleared.
6.8.3 Providing an ISO Image as a Virtual Media through BMC and File Server
Use the command MountIsoImage to mount ISO image as a virtual media to managed systems through
SAMBA/HTTP server. For detailed MountIsoImage command notes, see 5.7.3 Providing an ISO Image as a
Virtual Media through BMC and File Server.
Syntax:
sum -l <system list file> [-u <username> -p <password>] -c MountIsoImage --
image_url <URL> --reboot [--id <id for URL> --pw <password for URL>]

Supermicro Update Manager User’s Guide 127
Example:
[SUM_HOME]# ./sum -l SList.txt -u ADMIN -p ADMIN -c MountIsoImage --image_url
'smb://192.168.35.1/MySharedPoint/MyFolder/Image.iso' --id smbid --pw smbpasswd
[SUM_HOME]# ./sum -l SList.txt -u ADMIN -p ADMIN -c MountIsoImage --image_url
'http://192.168.35.1/MySharedPoint/MyFolder/Image.iso' --id smbid --pw smbpasswd
[SUM_HOME]# ./sum -l SList.txt -u ADMIN -p ADMIN -c MountIsoImage --image_url
'\\192.168.35.1\MySharedPoint\MyFolder\Image.iso' --id smbid --pw smbpasswd
SList.txt:
192.168.34.56
192.168.34.57
If the execution “Status” field for a managed system is SUCCESS, the Image.iso is mounted as a virtual
media to the managed system.
6.8.4 Removing ISO Image as a Virtual Media
Use the command UnmountIsoImage to unmount ISO image as a virtual media from managed system.
Syntax:
sum -l <system list file> [-u <username> -p <password>] -c UnmountIsoImage
Example:
[SUM_HOME]# ./sum -l SList.txt -u ADMIN -p ADMIN -c UnmountIsoImage
SList.txt:
192.168.34.56
192.168.34.57
If the execution “Status” field for a managed system is SUCCESS, the mounted virtual media will be
removed from the managed system.
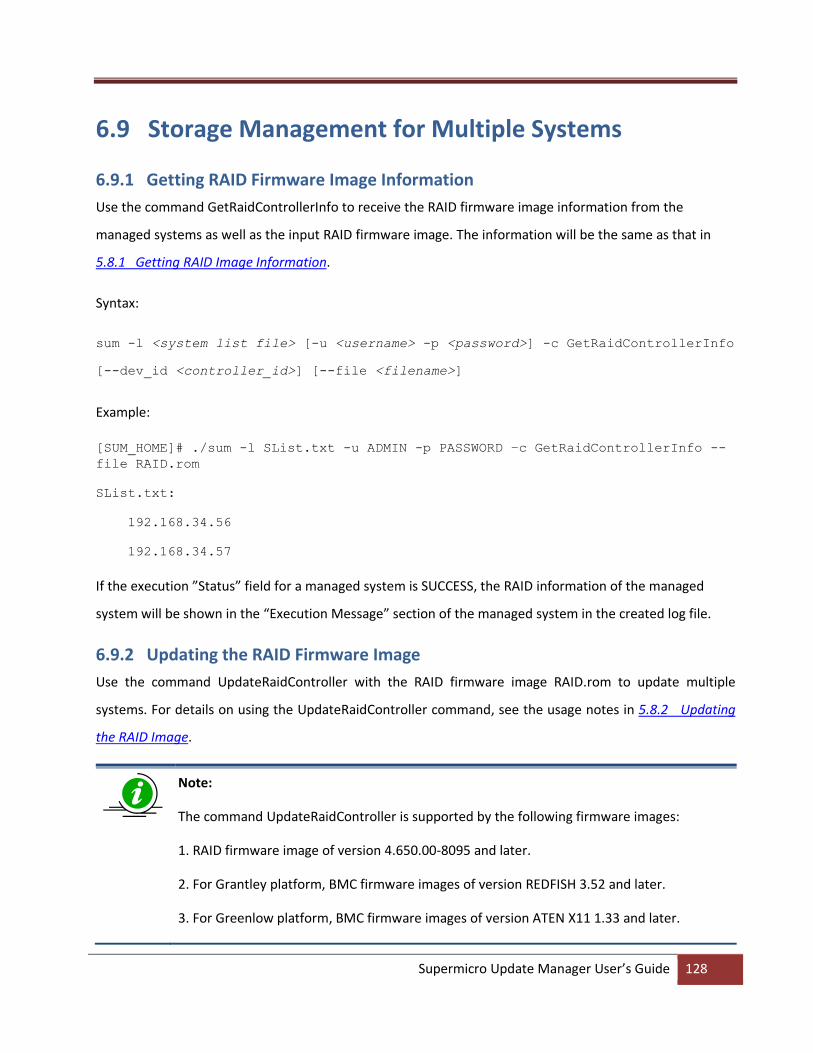
Supermicro Update Manager User’s Guide 128
6.9 Storage Management for Multiple Systems
6.9.1 Getting RAID Firmware Image Information
Use the command GetRaidControllerInfo to receive the RAID firmware image information from the
managed systems as well as the input RAID firmware image. The information will be the same as that in
5.8.1 Getting RAID Image Information.
Syntax:
sum -l <system list file> [-u <username> -p <password>] -c GetRaidControllerInfo
[--dev_id <controller_id>] [--file <filename>]
Example:
[SUM_HOME]# ./sum -l SList.txt -u ADMIN -p PASSWORD –c GetRaidControllerInfo --
file RAID.rom
SList.txt:
192.168.34.56
192.168.34.57
If the execution ”Status” field for a managed system is SUCCESS, the RAID information of the managed
system will be shown in the “Execution Message” section of the managed system in the created log file.
6.9.2 Updating the RAID Firmware Image
Use the command UpdateRaidController with the RAID firmware image RAID.rom to update multiple
systems. For details on using the UpdateRaidController command, see the usage notes in 5.8.2 Updating
the RAID Image.
Note:
The command UpdateRaidController is supported by the following firmware images:
1. RAID firmware image of version 4.650.00-8095 and later.
2. For Grantley platform, BMC firmware images of version REDFISH 3.52 and later.
3. For Greenlow platform, BMC firmware images of version ATEN X11 1.33 and later.
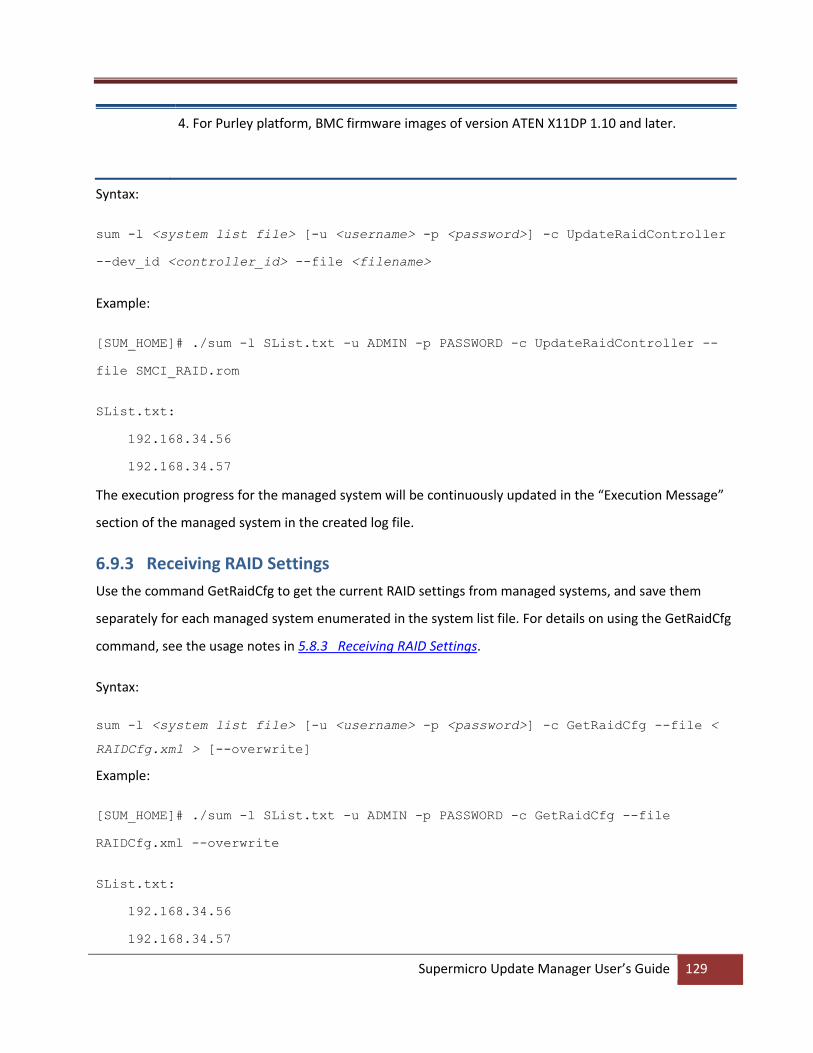
Supermicro Update Manager User’s Guide 129
4. For Purley platform, BMC firmware images of version ATEN X11DP 1.10 and later.
Syntax:
sum -l <system list file> [-u <username> -p <password>] -c UpdateRaidController
--dev_id <controller_id> --file <filename>
Example:
[SUM_HOME]# ./sum -l SList.txt -u ADMIN -p PASSWORD -c UpdateRaidController --
file SMCI_RAID.rom
SList.txt:
192.168.34.56
192.168.34.57
The execution progress for the managed system will be continuously updated in the “Execution Message”
section of the managed system in the created log file.
6.9.3 Receiving RAID Settings
Use the command GetRaidCfg to get the current RAID settings from managed systems, and save them
separately for each managed system enumerated in the system list file. For details on using the GetRaidCfg
command, see the usage notes in 5.8.3 Receiving RAID Settings.
Syntax:
sum -l <system list file> [-u <username> -p <password>] -c GetRaidCfg --file <
RAIDCfg.xml > [--overwrite]
Example:
[SUM_HOME]# ./sum -l SList.txt -u ADMIN -p PASSWORD -c GetRaidCfg --file
RAIDCfg.xml --overwrite
SList.txt:
192.168.34.56
192.168.34.57

Supermicro Update Manager User’s Guide 130
If the execution “Status” field for a managed system (e.g. 192.168.34.56) is SUCCESS, its current settings
are stored in its output file, e.g. RAIDCfg.xml.192.168.34.56. The option --overwrite is used to force
overwrite its existing file, e.g. RAIDCfg.xml.192.168.34.56, if the output file already exists.
6.9.4 Updating RAID Settings
1. Select one managed system as the golden sample for current RAID settings.
2. Follow the steps in 5.8.3 Receiving RAID Settings.
3. Edit the configurable element values in the RAID configuration text file RAIDCfg.xml as illustrated in
4.5 Format of the RAID Configuration Text File.
4. Set Action attribute as “None” to skip the unchanged tables in the text file. Note that this step is
optional.
5. Remove the unchanged tables/elements in the text file. Note that this step is optional.
6. Use the command ChangeRaidCfg with the modified RAIDCfg.xml file to update the RAID
configurations for multiple systems.
Notes:
Some table settings cannot be uniformly applied to each managed system. You might
need to change its table action to “None” in step 4 or remove the tables/elements in
step 5.
For details on the ChangeRaidCfg command, see the usage notes in 5.8.4 Updating
RAID Settings.
Syntax:
sum -l <system list file> [-u <username> -p <password>] -c ChangeRaidCfg --file
<RAIDCfg.xml>
Example:
[SUM_HOME]# ./sum -l SList.txt -u ADMIN -p PASSWORD -c ChangeRaidCfg --file
RAIDCfg.xml
SList.txt:
192.168.34.56
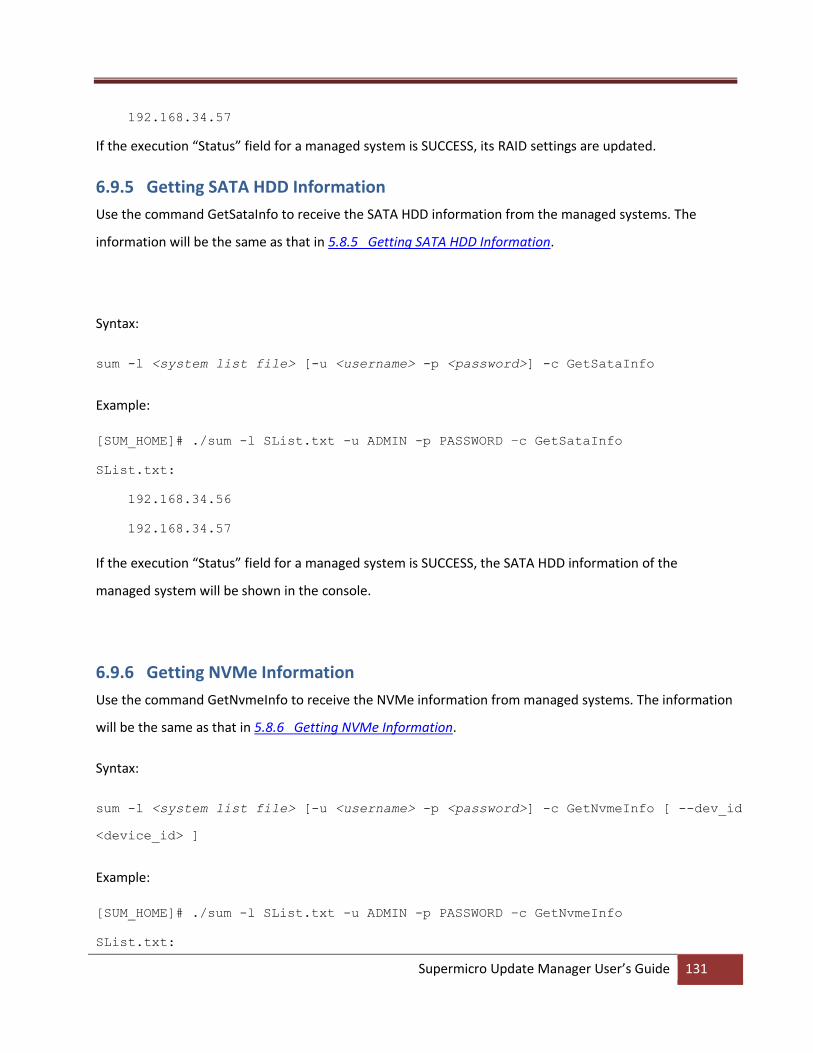
Supermicro Update Manager User’s Guide 131
192.168.34.57
If the execution “Status” field for a managed system is SUCCESS, its RAID settings are updated.
6.9.5 Getting SATA HDD Information
Use the command GetSataInfo to receive the SATA HDD information from the managed systems. The
information will be the same as that in 5.8.5 Getting SATA HDD Information.
Syntax:
sum -l <system list file> [-u <username> -p <password>] -c GetSataInfo
Example:
[SUM_HOME]# ./sum -l SList.txt -u ADMIN -p PASSWORD –c GetSataInfo
SList.txt:
192.168.34.56
192.168.34.57
If the execution “Status” field for a managed system is SUCCESS, the SATA HDD information of the
managed system will be shown in the console.
6.9.6 Getting NVMe Information
Use the command GetNvmeInfo to receive the NVMe information from managed systems. The information
will be the same as that in 5.8.6 Getting NVMe Information.
Syntax:
sum -l <system list file> [-u <username> -p <password>] -c GetNvmeInfo [ --dev_id
<device_id> ]
Example:
[SUM_HOME]# ./sum -l SList.txt -u ADMIN -p PASSWORD –c GetNvmeInfo
SList.txt:

Supermicro Update Manager User’s Guide 132
192.168.34.56
192.168.34.57
If the execution “Status” field for a managed system is SUCCESS, the NVMe information of the managed
system will be shown on the console.
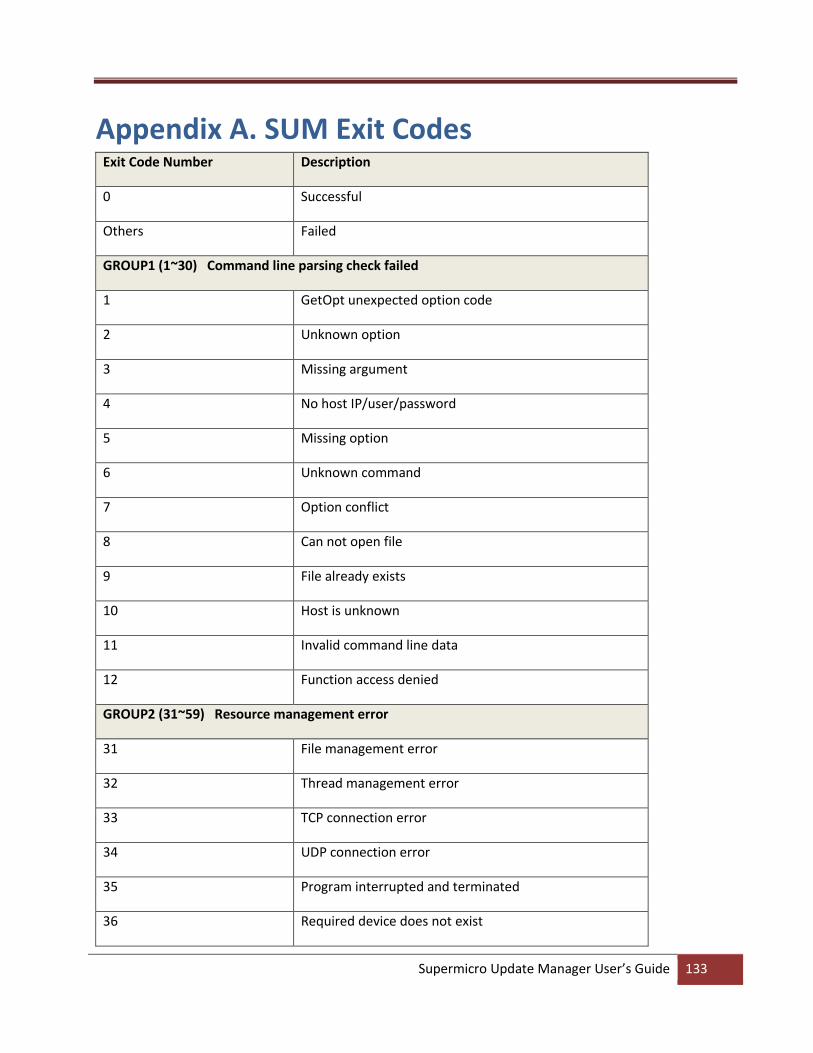
Supermicro Update Manager User’s Guide 133
Appendix A. SUM Exit Codes Exit Code Number Description
0 Successful
Others Failed
GROUP1 (1~30) Command line parsing check failed
1 GetOpt unexpected option code
2 Unknown option
3 Missing argument
4 No host IP/user/password
5 Missing option
6 Unknown command
7 Option conflict
8 Can not open file
9 File already exists
10 Host is unknown
11 Invalid command line data
12 Function access denied
GROUP2 (31~59) Resource management error
31 File management error
32 Thread management error
33 TCP connection error
34 UDP connection error
35 Program interrupted and terminated
36 Required device does not exist

Supermicro Update Manager User’s Guide 134
37 Required device does not work
38 Function is not supported
GROUP3 (60~79) File parsing errors
60 Invalid BIOS configuration file
61 Utility internal error
62 Invalid firmware image file
63 Invalid firmware flash ROM
64 Invalid DMI information from BIOS
65 Invalid DMI information text file
66 Invalid DMI command line format
67 Invalid system list file
68 Invalid BMC configuration text file
69 Invalid asset information
70 Invalid CMM configuration text file
71 Invalid RAID configuration file
72 Invalid PCH asset information file format
73 Invalid full SMBIOS file format
74 Invalid VPD file format
75 Invalid BIOS internal file
GROUP4 (80~99) IPMI operation errors
80 Node Product key is not activated
81 Internal communication error
82 Board information mismatch
83 Does not support OOB
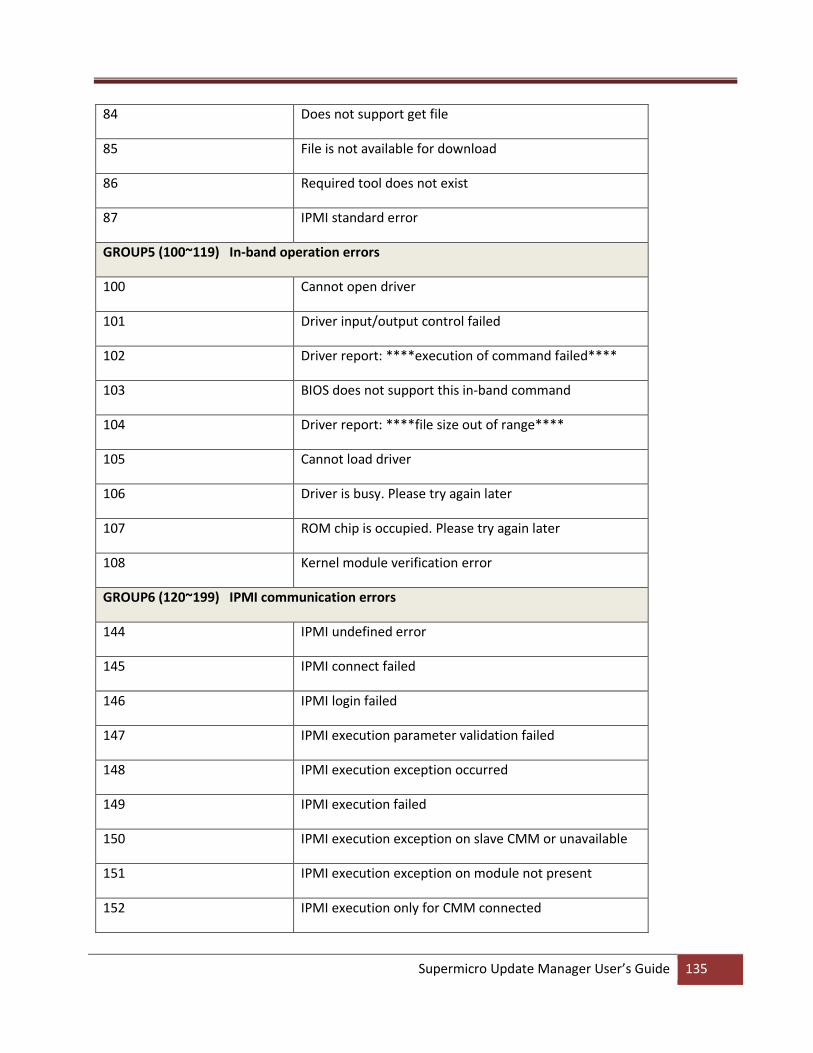
Supermicro Update Manager User’s Guide 135
84 Does not support get file
85 File is not available for download
86 Required tool does not exist
87 IPMI standard error
GROUP5 (100~119) In-band operation errors
100 Cannot open driver
101 Driver input/output control failed
102 Driver report: ****execution of command failed****
103 BIOS does not support this in-band command
104 Driver report: ****file size out of range****
105 Cannot load driver
106 Driver is busy. Please try again later
107 ROM chip is occupied. Please try again later 108 Kernel module verification error
GROUP6 (120~199) IPMI communication errors
144 IPMI undefined error
145 IPMI connect failed
146 IPMI login failed
147 IPMI execution parameter validation failed
148 IPMI execution exception occurred
149 IPMI execution failed
150 IPMI execution exception on slave CMM or unavailable
151 IPMI execution exception on module not present
152 IPMI execution only for CMM connected
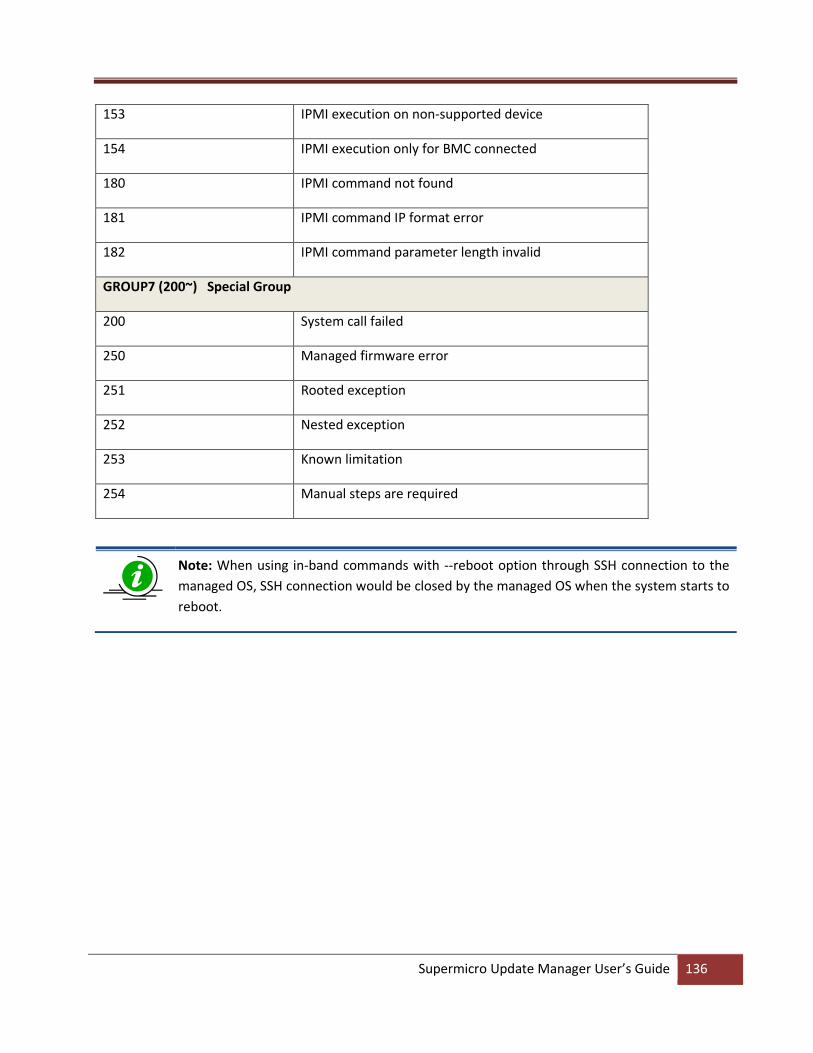
Supermicro Update Manager User’s Guide 136
153 IPMI execution on non-supported device
154 IPMI execution only for BMC connected
180 IPMI command not found
181 IPMI command IP format error
182 IPMI command parameter length invalid
GROUP7 (200~) Special Group
200 System call failed
250 Managed firmware error
251 Rooted exception
252 Nested exception
253 Known limitation
254 Manual steps are required
Note: When using in-band commands with --reboot option through SSH connection to the
managed OS, SSH connection would be closed by the managed OS when the system starts to
reboot.
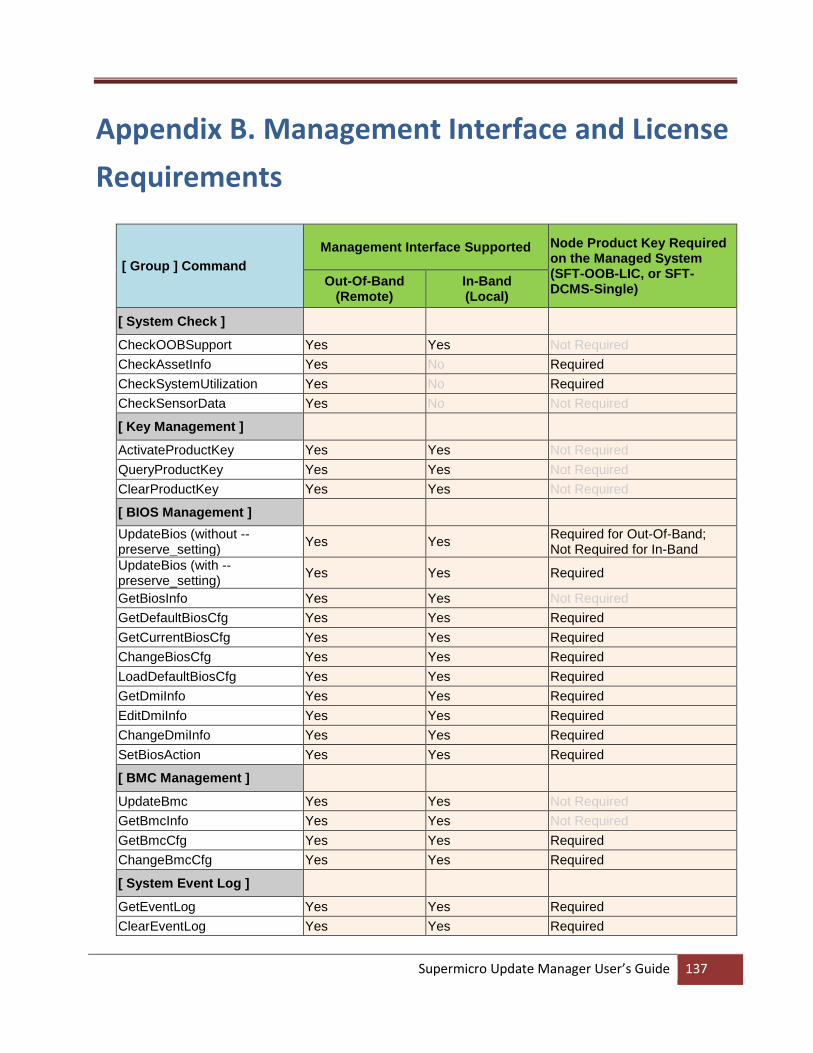
Supermicro Update Manager User’s Guide 137
Appendix B. Management Interface and License
Requirements
[ Group ] Command
Management Interface Supported Node Product Key Required on the Managed System (SFT-OOB-LIC, or SFT-DCMS-Single)
Out-Of-Band (Remote)
In-Band (Local)
[ System Check ]
CheckOOBSupport Yes Yes Not Required
CheckAssetInfo Yes No Required
CheckSystemUtilization Yes No Required
CheckSensorData Yes No Not Required
[ Key Management ]
ActivateProductKey Yes Yes Not Required
QueryProductKey Yes Yes Not Required
ClearProductKey Yes Yes Not Required
[ BIOS Management ]
UpdateBios (without --preserve_setting)
Yes Yes Required for Out-Of-Band; Not Required for In-Band
UpdateBios (with --preserve_setting)
Yes Yes Required
GetBiosInfo Yes Yes Not Required
GetDefaultBiosCfg Yes Yes Required
GetCurrentBiosCfg Yes Yes Required
ChangeBiosCfg Yes Yes Required
LoadDefaultBiosCfg Yes Yes Required
GetDmiInfo Yes Yes Required
EditDmiInfo Yes Yes Required
ChangeDmiInfo Yes Yes Required
SetBiosAction Yes Yes Required
[ BMC Management ]
UpdateBmc Yes Yes Not Required
GetBmcInfo Yes Yes Not Required
GetBmcCfg Yes Yes Required
ChangeBmcCfg Yes Yes Required
[ System Event Log ]
GetEventLog Yes Yes Required
ClearEventLog Yes Yes Required

Supermicro Update Manager User’s Guide 138
[ CMM Management ]
UpdateCmm Yes No Not Required
GetCmmInfo Yes No Not Required
GetCmmCfg Yes No Required
ChangeCmmCfg Yes No Required
[ Storage Management ]
GetRaidControllerInfo Yes Yes SFT-DCMS-Single only
UpdateRaidController Yes No SFT-DCMS-Single only
GetRaidCfg Yes Yes SFT-DCMS-Single only
ChangeRaidCfg Yes Yes SFT-DCMS-Single only
GetSataInfo Yes No Required
GetNvmeInfo Yes No Required
[ Applications ]
TpmProvision Yes No Required
MountIsoImage Yes No Required
UnmountIsoImage Yes No Required
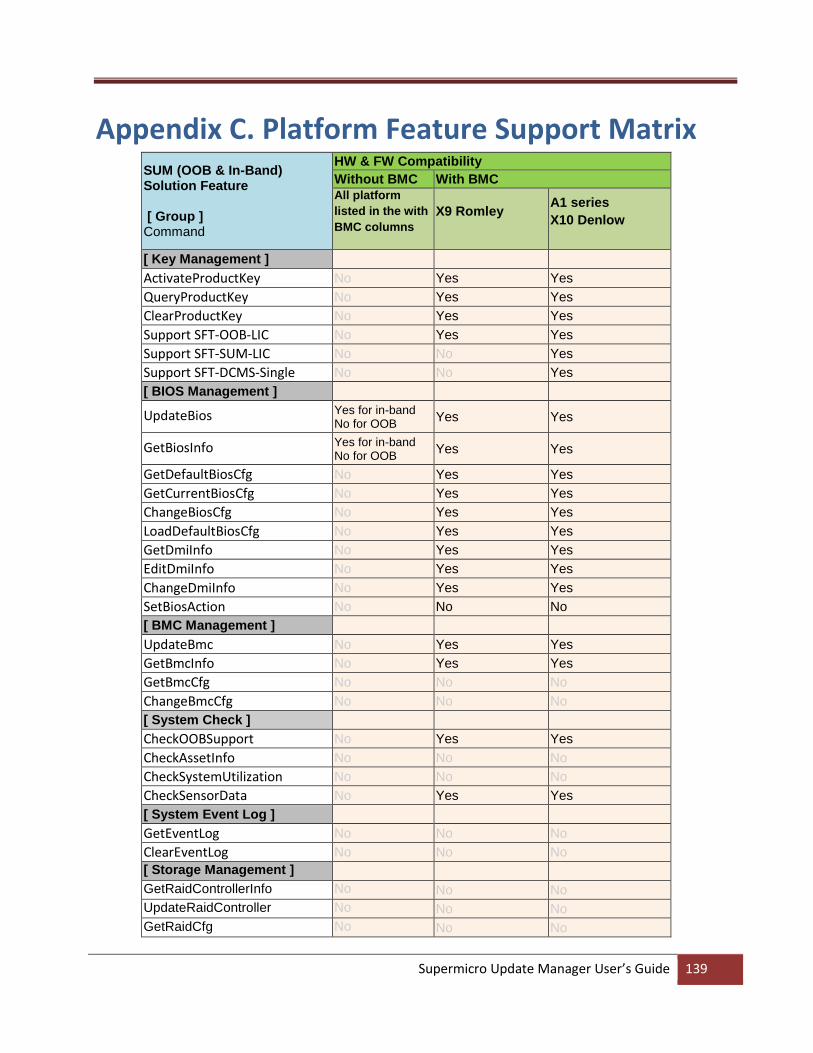
Supermicro Update Manager User’s Guide 139
Appendix C. Platform Feature Support Matrix SUM (OOB & In-Band) Solution Feature [ Group ] Command
HW & FW Compatibility
Without BMC With BMC
All platform
listed in the with
BMC columns X9 Romley
A1 series
X10 Denlow
[ Key Management ]
ActivateProductKey No Yes Yes
QueryProductKey No Yes Yes
ClearProductKey No Yes Yes
Support SFT-OOB-LIC No Yes Yes
Support SFT-SUM-LIC No No Yes
Support SFT-DCMS-Single No No Yes
[ BIOS Management ]
UpdateBios Yes for in-band No for OOB
Yes Yes
GetBiosInfo Yes for in-band No for OOB
Yes Yes
GetDefaultBiosCfg No Yes Yes
GetCurrentBiosCfg No Yes Yes
ChangeBiosCfg No Yes Yes
LoadDefaultBiosCfg No Yes Yes
GetDmiInfo No Yes Yes
EditDmiInfo No Yes Yes
ChangeDmiInfo No Yes Yes
SetBiosAction No No No
[ BMC Management ]
UpdateBmc No Yes Yes
GetBmcInfo No Yes Yes
GetBmcCfg No No No
ChangeBmcCfg No No No
[ System Check ]
CheckOOBSupport No Yes Yes
CheckAssetInfo No No No
CheckSystemUtilization No No No
CheckSensorData No Yes Yes
[ System Event Log ]
GetEventLog No No No
ClearEventLog No No No
[ Storage Management ]
GetRaidControllerInfo No No No
UpdateRaidController No No No
GetRaidCfg No No No

Supermicro Update Manager User’s Guide 140
ChangeRaidCfg No No No
GetSataInfo No No No
GetNvmeInfo No No No
[ Application ]
TpmProvision No No No
MountIsoImage No Yes Yes
UnMountIsoImage No Yes Yes

Supermicro Update Manager User’s Guide 141
SUM (OOB & In-Band) Solution Feature
HW & FW Compatibility
With BMC
X10/B1/B2/B
10/MicroBla
de Grantley/
X11 K1 C7 Denverton
[ Key Management ]
ActivateProductKey Yes Yes Yes Yes Yes
QueryProductKey Yes Yes Yes Yes Yes
ClearProductKey Yes Yes Yes Yes Yes
Support SFT-OOB-LIC Yes Yes Yes Yes Yes
Support SFT-SUM-LIC Yes Yes Yes Yes Yes
Support SFT-DCMS-Single Yes Yes Yes Yes Yes
[ BIOS Management ]
UpdateBios Yes Yes Yes Yes Yes
GetBiosInfo Yes Yes Yes Yes Yes
GetDefaultBiosCfgFile Yes Yes Yes Yes Yes
GetCurrentBiosCfgFile Yes Yes Yes Yes Yes
ChangeBiosCfg Yes Yes Yes Yes Yes
LoadDefaultBiosCfg Yes Yes Yes Yes Yes
GetDmiInfo Yes Yes Yes Yes Yes
EditDmiInfo Yes Yes Yes Yes Yes
ChangeDmiInfo Yes Yes Yes Yes Yes
SetBiosAction Yes Yes Yes Yes Yes
[ BMC Management ]
UpdateBmc Yes Yes Yes Yes Yes
GetBmcInfo Yes Yes Yes Yes Yes
GetBmcCfg Yes Yes Yes Yes Yes
ChangeBmcCfg Yes Yes Yes Yes Yes
[ System Check ]
CheckOOBSupport Yes Yes Yes Yes Yes
CheckAssetInfo Yes Yes Yes Yes Yes
CheckSystemUtilization Yes Yes Yes Yes Yes
CheckSensorData Yes Yes Yes Yes Yes
[ System Event Log ]
GetEventLog Yes Yes Yes No Yes
ClearEventLog Yes Yes Yes No Yes
[ Storage Management]
GetRaidControllerInfo Yes Yes Yes No No
UpdateRaidController Yes Yes Yes No No
GetRaidCfg Yes Yes Yes No No
ChangeRaidCfg Yes Yes Yes No No
GetSataInfo No Yes Yes No Yes
GetNvmeInfo Yes Yes Yes No Yes
[ Application ]

Supermicro Update Manager User’s Guide 142
TpmProvision Yes Yes No No No
MountIsoImage Yes Yes Yes Yes Yes
UnMountIsoImage Yes Yes Yes Yes Yes
SUM CMM OOB Commands Solution Feature
HW & FW Compatibility
Without CMM With CMM
All platforms B1 series B10 MicroBlade
[ CMM Management ]
UpdateCmm No Yes Yes Yes
GetCmminfo No Yes Yes Yes
GetCmmCfg No Yes Yes Yes
ChangeCmmCfg No Yes Yes Yes
Notes:
In-band UpdateBmc command does not support AMI BMC firmware image.
OOB UpdateBios command does not support for MBs that implemented client ME
such as X11SAE-F, X11SAT-F, X11SSZ-(Q)F/LN4F and X11SBA-(LN4)F. Besides, it does not
support C7-series platform as well.
DMI information related functions does not work for X9DRL-iF/3F MB

Supermicro Update Manager User’s Guide 143
Appendix D. Third-Party Software The following open source libraries are used in SUM package:
Program Library License
sum simpleopt MIT
sum pugixml MIT
sum Libcurl MIT
sum openssl OpenSSL
sum CryptoPP Boost 1.0
sum EDK2
Compress/Decompress
BSD
sum Jsoncpp MIT
phymem.sys/pmdll.dll phymem CPOL
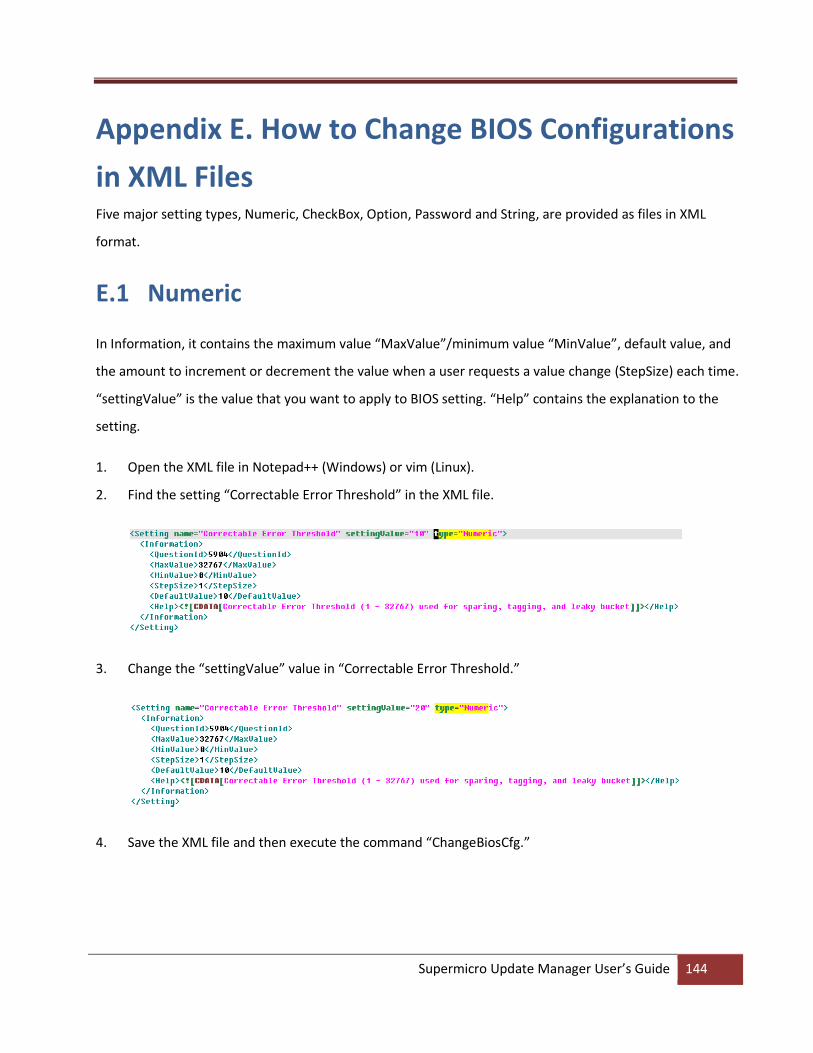
Supermicro Update Manager User’s Guide 144
Appendix E. How to Change BIOS Configurations
in XML Files Five major setting types, Numeric, CheckBox, Option, Password and String, are provided as files in XML
format.
E.1 Numeric
In Information, it contains the maximum value “MaxValue”/minimum value “MinValue”, default value, and
the amount to increment or decrement the value when a user requests a value change (StepSize) each time.
“settingValue” is the value that you want to apply to BIOS setting. “Help” contains the explanation to the
setting.
1. Open the XML file in Notepad++ (Windows) or vim (Linux).
2. Find the setting “Correctable Error Threshold” in the XML file.
3. Change the “settingValue” value in “Correctable Error Threshold.”
4. Save the XML file and then execute the command “ChangeBiosCfg.”
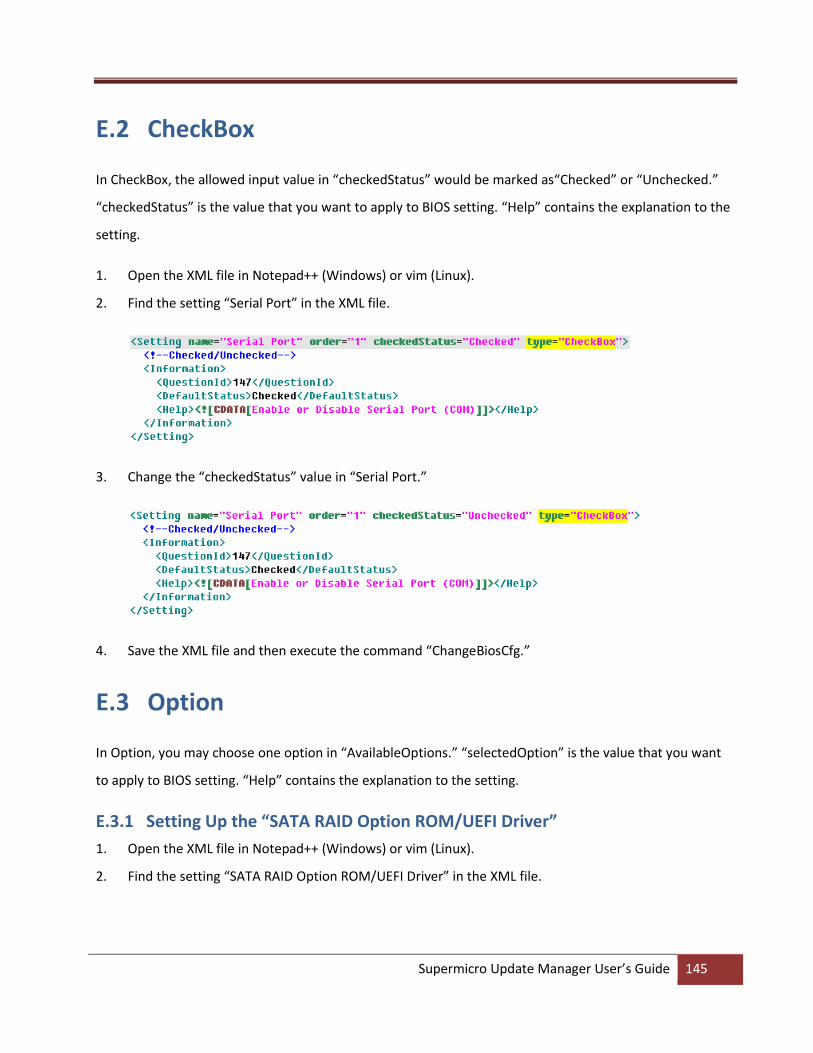
Supermicro Update Manager User’s Guide 145
E.2 CheckBox
In CheckBox, the allowed input value in “checkedStatus” would be marked as“Checked” or “Unchecked.”
“checkedStatus” is the value that you want to apply to BIOS setting. “Help” contains the explanation to the
setting.
1. Open the XML file in Notepad++ (Windows) or vim (Linux).
2. Find the setting “Serial Port” in the XML file.
3. Change the “checkedStatus” value in “Serial Port.”
4. Save the XML file and then execute the command “ChangeBiosCfg.”
E.3 Option
In Option, you may choose one option in “AvailableOptions.” “selectedOption” is the value that you want
to apply to BIOS setting. “Help” contains the explanation to the setting.
E.3.1 Setting Up the “SATA RAID Option ROM/UEFI Driver”
1. Open the XML file in Notepad++ (Windows) or vim (Linux).
2. Find the setting “SATA RAID Option ROM/UEFI Driver” in the XML file.
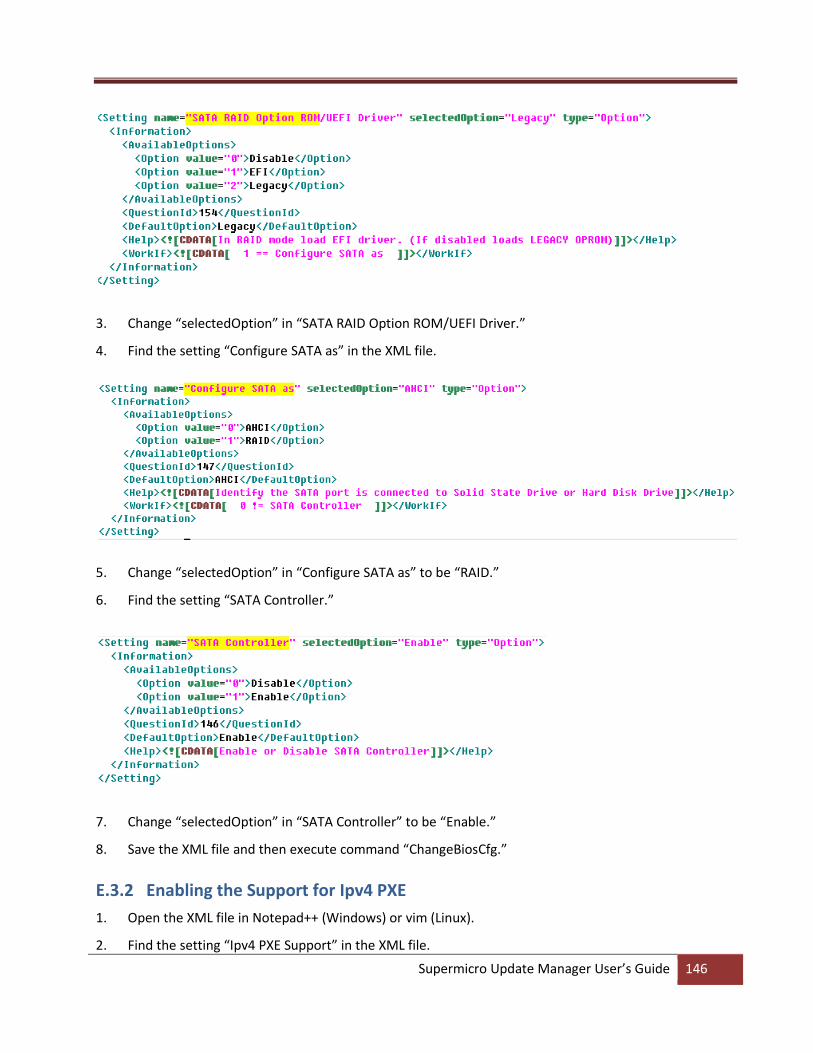
Supermicro Update Manager User’s Guide 146
3. Change “selectedOption” in “SATA RAID Option ROM/UEFI Driver.”
4. Find the setting “Configure SATA as” in the XML file.
5. Change “selectedOption” in “Configure SATA as” to be “RAID.”
6. Find the setting “SATA Controller.”
7. Change “selectedOption” in “SATA Controller” to be “Enable.”
8. Save the XML file and then execute command “ChangeBiosCfg.”
E.3.2 Enabling the Support for Ipv4 PXE
1. Open the XML file in Notepad++ (Windows) or vim (Linux).
2. Find the setting “Ipv4 PXE Support” in the XML file.

Supermicro Update Manager User’s Guide 147
3. Change the “selectedOption” in “Ipv4 PXE Support” to be “Enabled.”
4. Find the setting "Network Stack" in the XML file.
5. Change the “selectedOption” in “Network Stack” to be “Enabled.”
6. Save the XML file and then execute command “ChangeBiosCfg.”
E.3.3 Selecting the Link Speed
1. Open the XML file in Notepad++ (Windows) or vim (Linux).
2. Find the setting “Link Speed” in the XML file.
3. Change “selectedOption” in “Link Speed.”
4. Save the XML file and then execute the command “ChangeBiosCfg.”

Supermicro Update Manager User’s Guide 148
E.4 Password
In Password, you have to set “NewPassword” and “ConfirmNewPassword” the same so that the new
password is in effect. The password length is limited, as “MinSize” represents the minimum length and
MaxSize represents the maximum length. At first, “HasPassword” is false by default. “Help” contains the
explanation to the setting.
1. Open the XML file in Notepad++ (Windows) or vim (Linux).
2. Find the setting “User Password” in the XML file.
3. Change “NewPassword” and “ConfirmNewPassword” in “User Password.”
4. Save the XML file, and execute command “ChangeBiosCfg.”
5. If you want to change the password again, use the command “GetCurrentBiosCfg” to download the
XML file again.
After the password is set, “HasPassword” turned to be “True”.
E.4.1 Changing a New Password
You have to input the “CurrentPassword” consistent with the old password to change a new password.
1. Find the setting “User Password” in the XML file.
2. Change “NewPassword” and “ConfirmNewPassword” in “User Password.” You have to input the old
password in “CurrentPassword.”
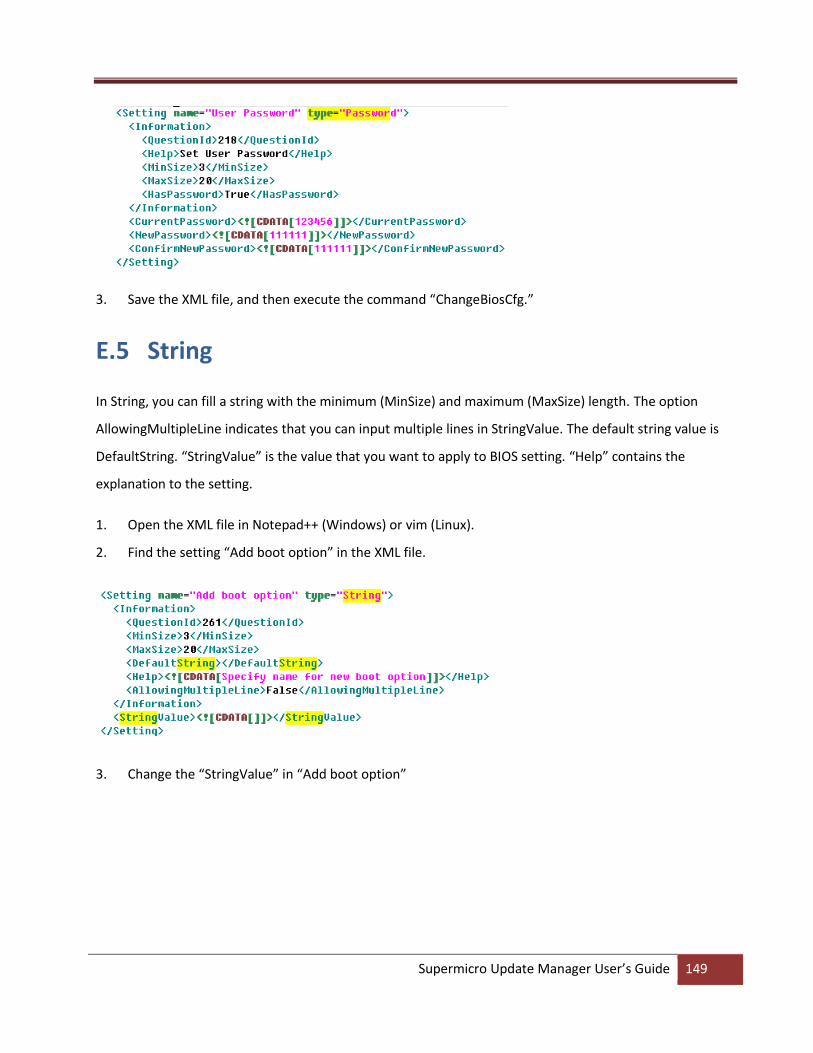
Supermicro Update Manager User’s Guide 149
3. Save the XML file, and then execute the command “ChangeBiosCfg.”
E.5 String
In String, you can fill a string with the minimum (MinSize) and maximum (MaxSize) length. The option
AllowingMultipleLine indicates that you can input multiple lines in StringValue. The default string value is
DefaultString. “StringValue” is the value that you want to apply to BIOS setting. “Help” contains the
explanation to the setting.
1. Open the XML file in Notepad++ (Windows) or vim (Linux).
2. Find the setting “Add boot option” in the XML file.
3. Change the “StringValue” in “Add boot option”
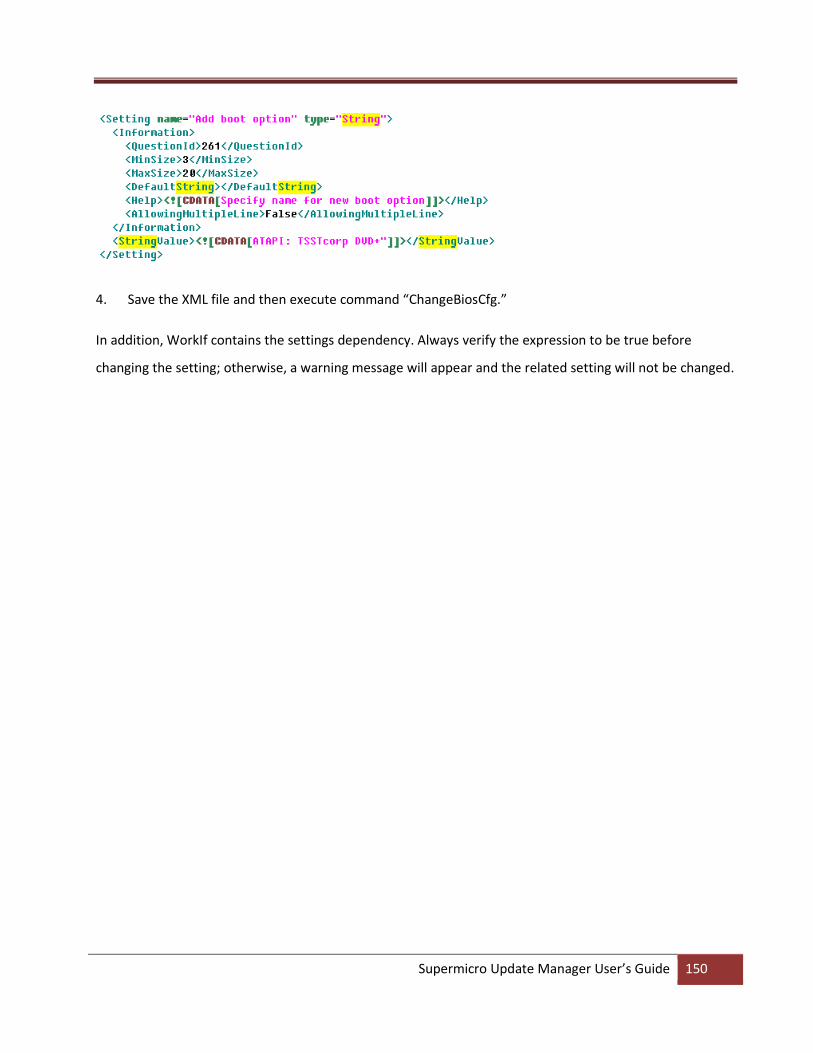
Supermicro Update Manager User’s Guide 150
4. Save the XML file and then execute command “ChangeBiosCfg.”
In addition, WorkIf contains the settings dependency. Always verify the expression to be true before
changing the setting; otherwise, a warning message will appear and the related setting will not be changed.

Supermicro Update Manager User’s Guide 151
Appendix F. Using the Command Line Tool
(XMLStarlet) to Edit XML Files
F.1 Introduction
XMLStarlet is a set of command line utilities (tools) which can be used to transform, query, validate, and
edit XML files. Two examples are in the following sections.
F.2 Getting/Setting a XML Value (XML Element)
To get a value (SUPERMICRO) from an element from
a xpath(/BmcCfg/StdCfg/FRU/Configuration/BoardMfgName) and a filename(BMCCfg.xml),
run the command
[shell]# xmlstarlet select --template -v "/BmcCfg/StdCfg/FRU/Configuration/BoardMfgName"
BMCCfg.xml
To set a value (SUPERMICRO) to an element from
a xpath(/BmcCfg/StdCfg/FRU/Configuration/BoardMfgName) and a filename(BMCCfg.xml),
run the command
[shell]# xmlstarlet edit --inplace --update "/BmcCfg/StdCfg/FRU/Configuration/BoardMfgName" --
value SUPERMICRO BMCCfg.xml

Supermicro Update Manager User’s Guide 152
F.3 Getting/Setting a XML Value (XML Attribute)
To get the value (None) from an attribute
a xpath(/BmcCfg/StdCfg/FRU/@Action) and a filename(BMCCfg.xml),
run the command
[shell]# xmlstarlet sel -t -v /BmcCfg/StdCfg/FRU/@Action BMCCfg.xml
To set the value (None) to an attribute
a xpath(/BmcCfg/StdCfg/FRU/@Action) and a filename(BMCCfg.xml),
run the command
[shell]# xmlstarlet ed -L -P -u /BmcCfg/StdCfg/FRU/@Action -v None BMCCfg.xml

Supermicro Update Manager User’s Guide 153
Contacting Supermicro Headquarters
Address: Super Micro Computer, Inc.
980 Rock Ave.
San Jose, CA 95131 U.S.A.
Tel: +1 (408) 503-8000
Fax: +1 (408) 503-8008
Email: [email protected] (General Information)
[email protected] (Technical Support)
Website: www.supermicro.com
Europe
Address: Super Micro Computer B.V.
Het Sterrenbeeld 28, 5215 ML
's-Hertogenbosch, The Netherlands
Tel: +31 (0) 73-6400390
Fax: +31 (0) 73-6416525
Email: [email protected] (General Information)
[email protected] (Technical Support)
[email protected] (Customer Support)
Website: www.supermicro.nl
Asia-Pacific
Address: Super Micro Computer, Inc.
3F, No. 150, Jian 1st Rd.
Zhonghe Dist., New Taipei City 235
Taiwan (R.O.C.)
Tel: +886-(2) 8226-3990
Fax: +886-(2) 8226-3992
Email: [email protected]
Website: www.supermicro.com.tw