Embed Size (px)
Citation preview

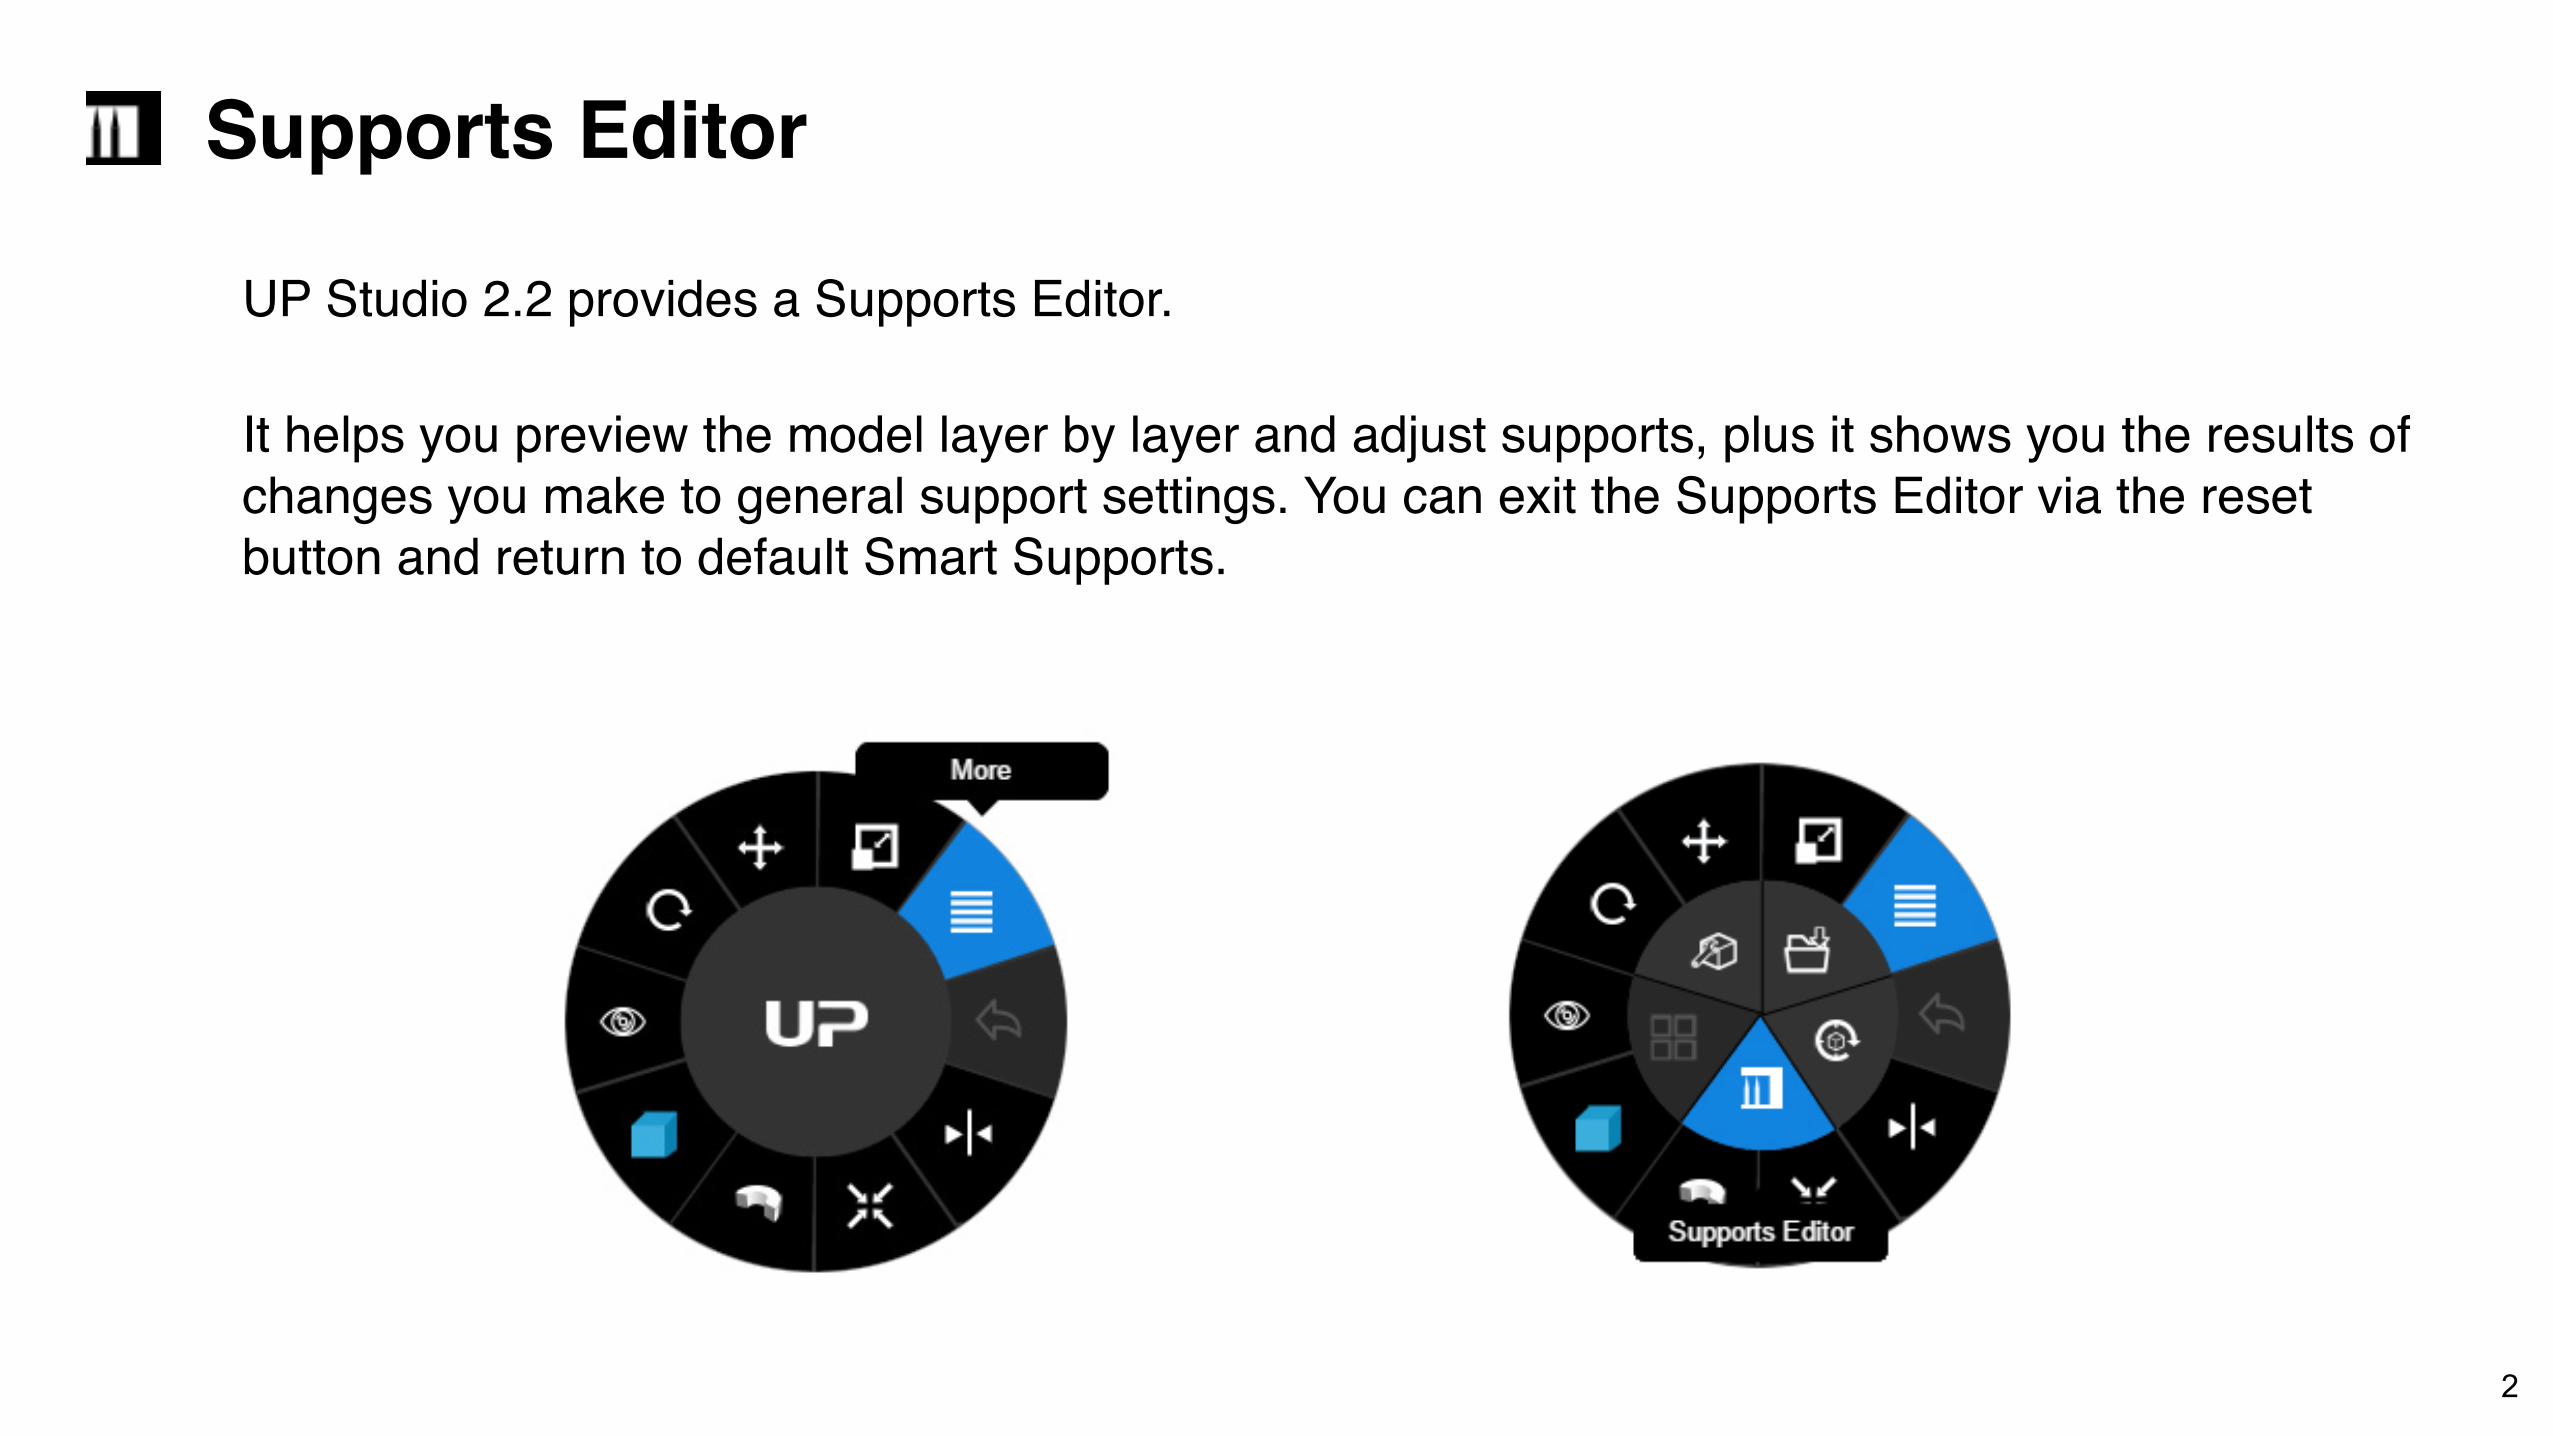
Supports Editor
Supports Editor
UP Studio 2.2 provides a Supports Editor. It helps you preview the model layer by layer and adjust supports, plus it shows you the results of changes you make to general support settings. You can exit the Supports Editor via the reset button and return to default Smart Supports.
2
Support Overhang
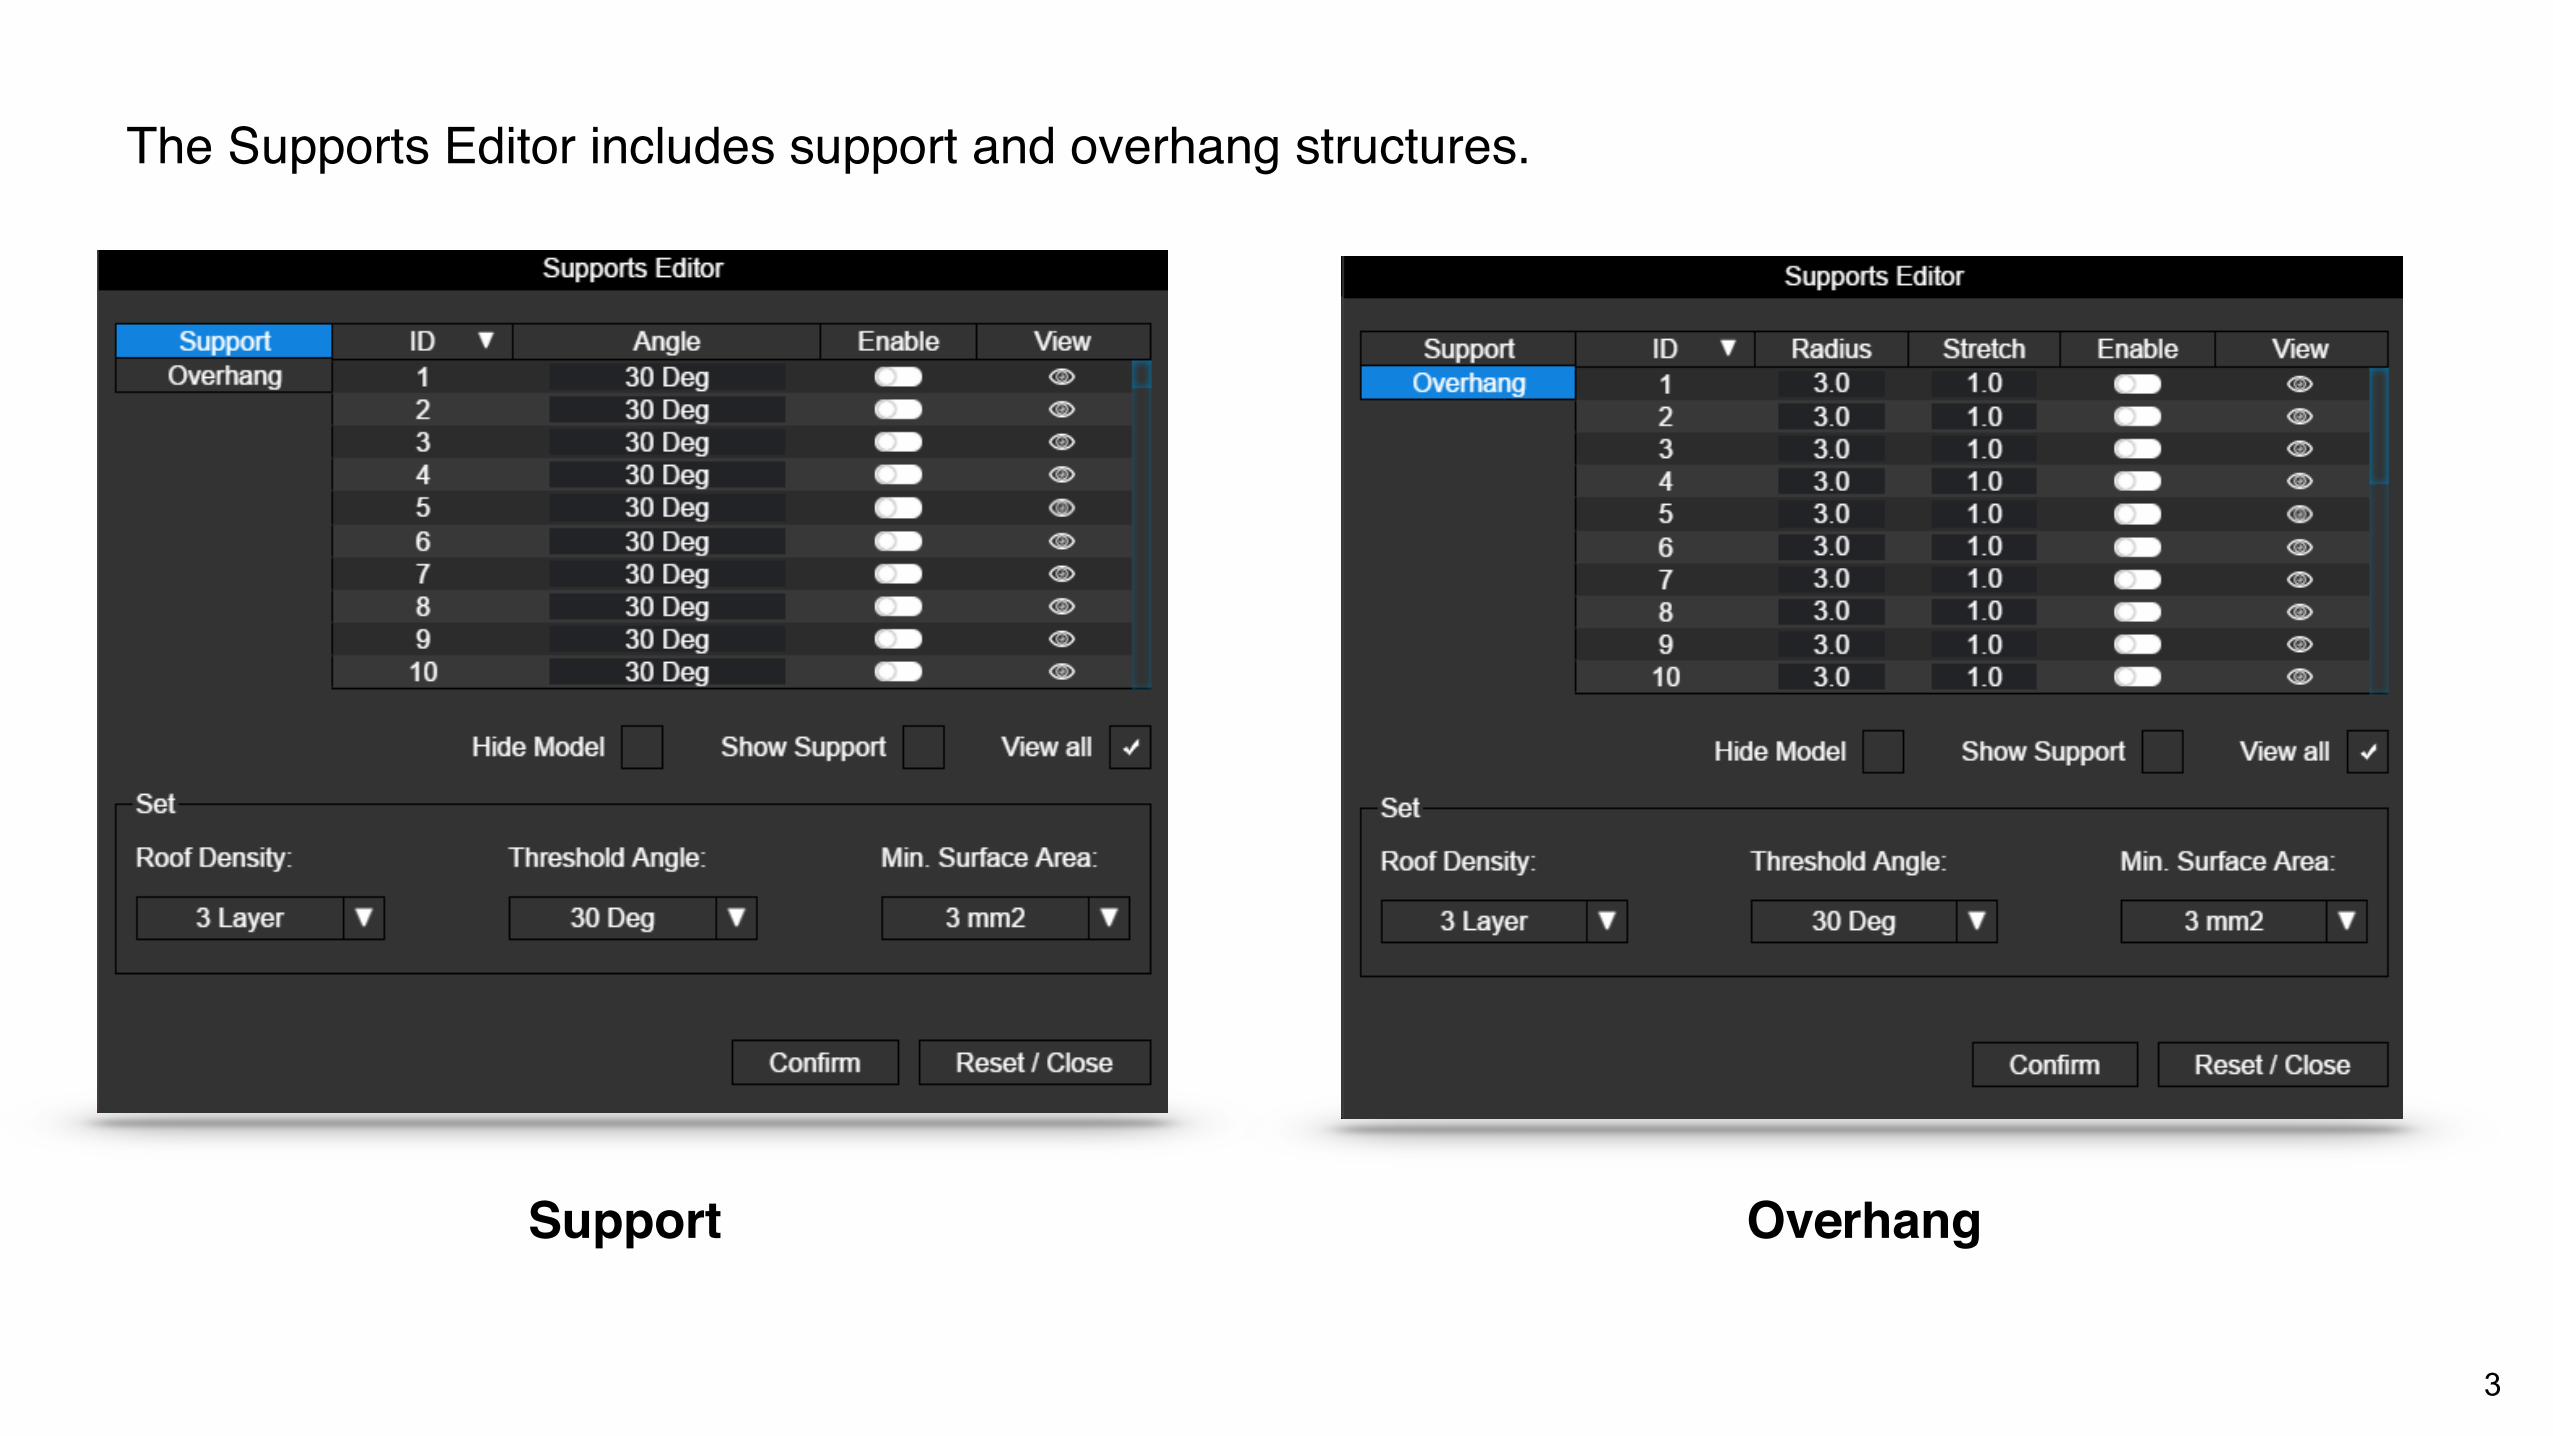
The Supports Editor includes support and overhang structures.
3

Support areas
The support areas are the areas requiring support.
Please note – the support areas depict default support structures.
Clip View
4
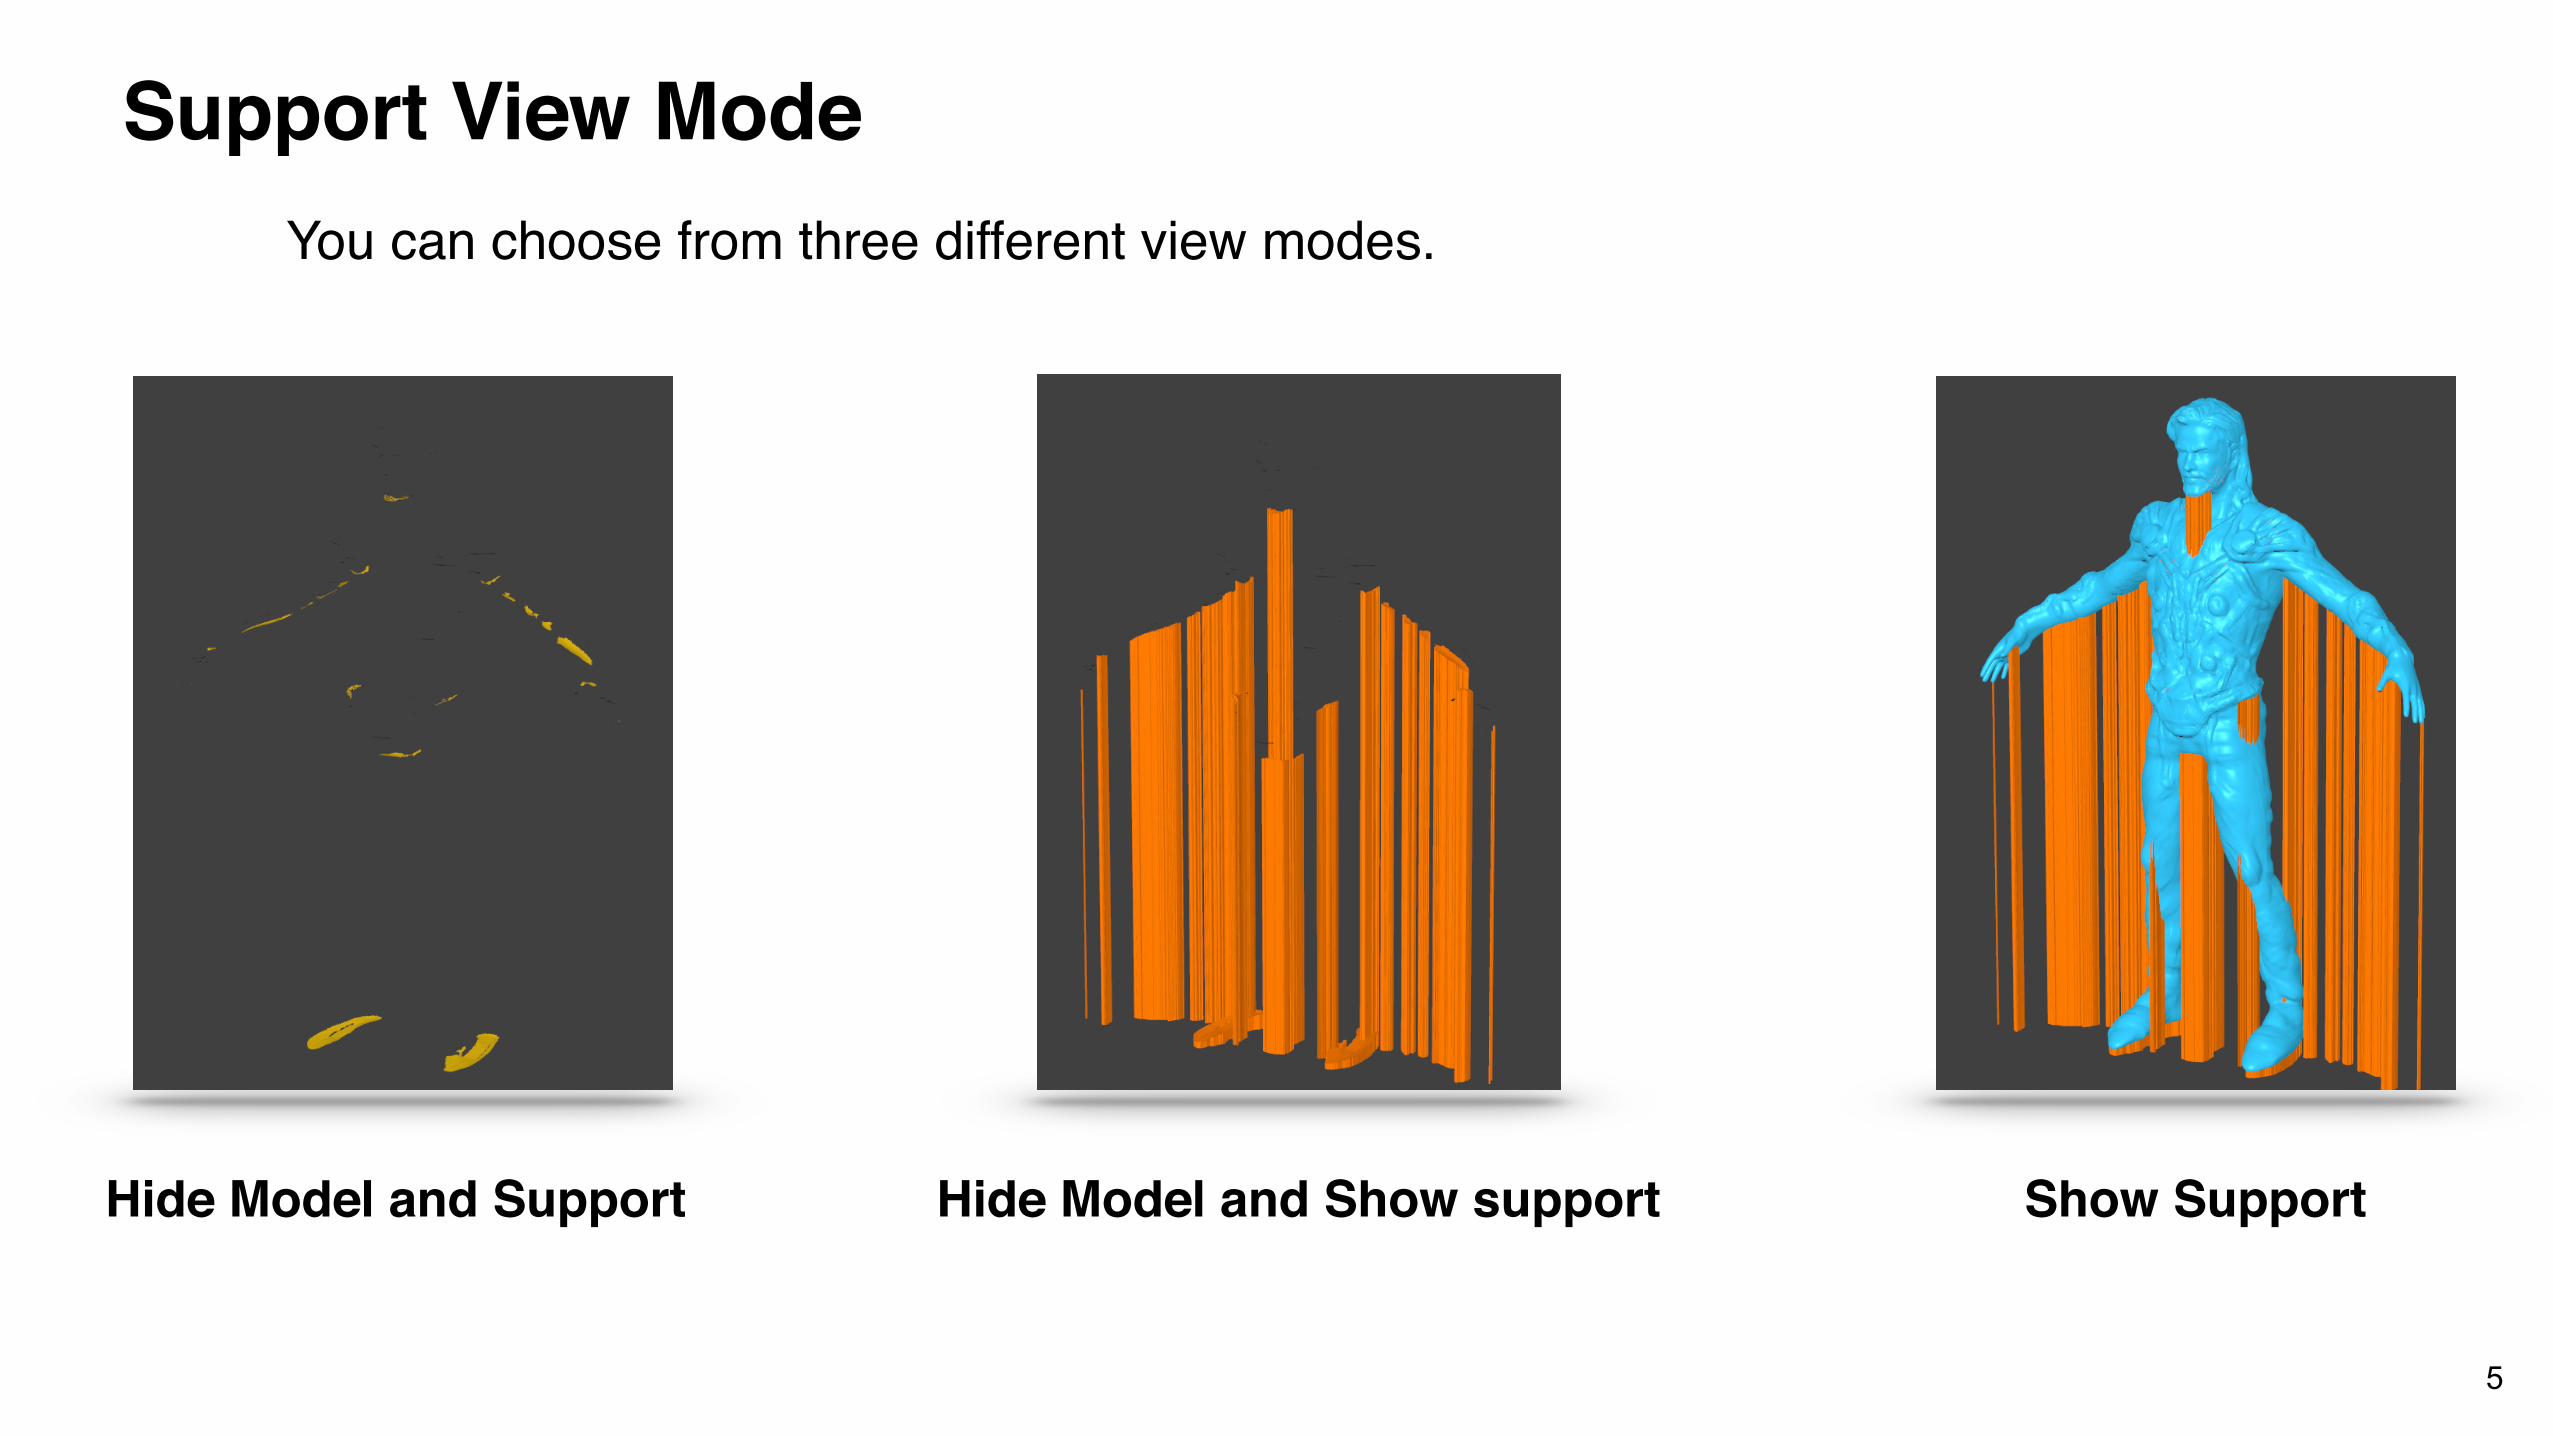
Hide Model and Support Hide Model and Show support Show Support
You can choose from three different view modes.
Support View Mode
5
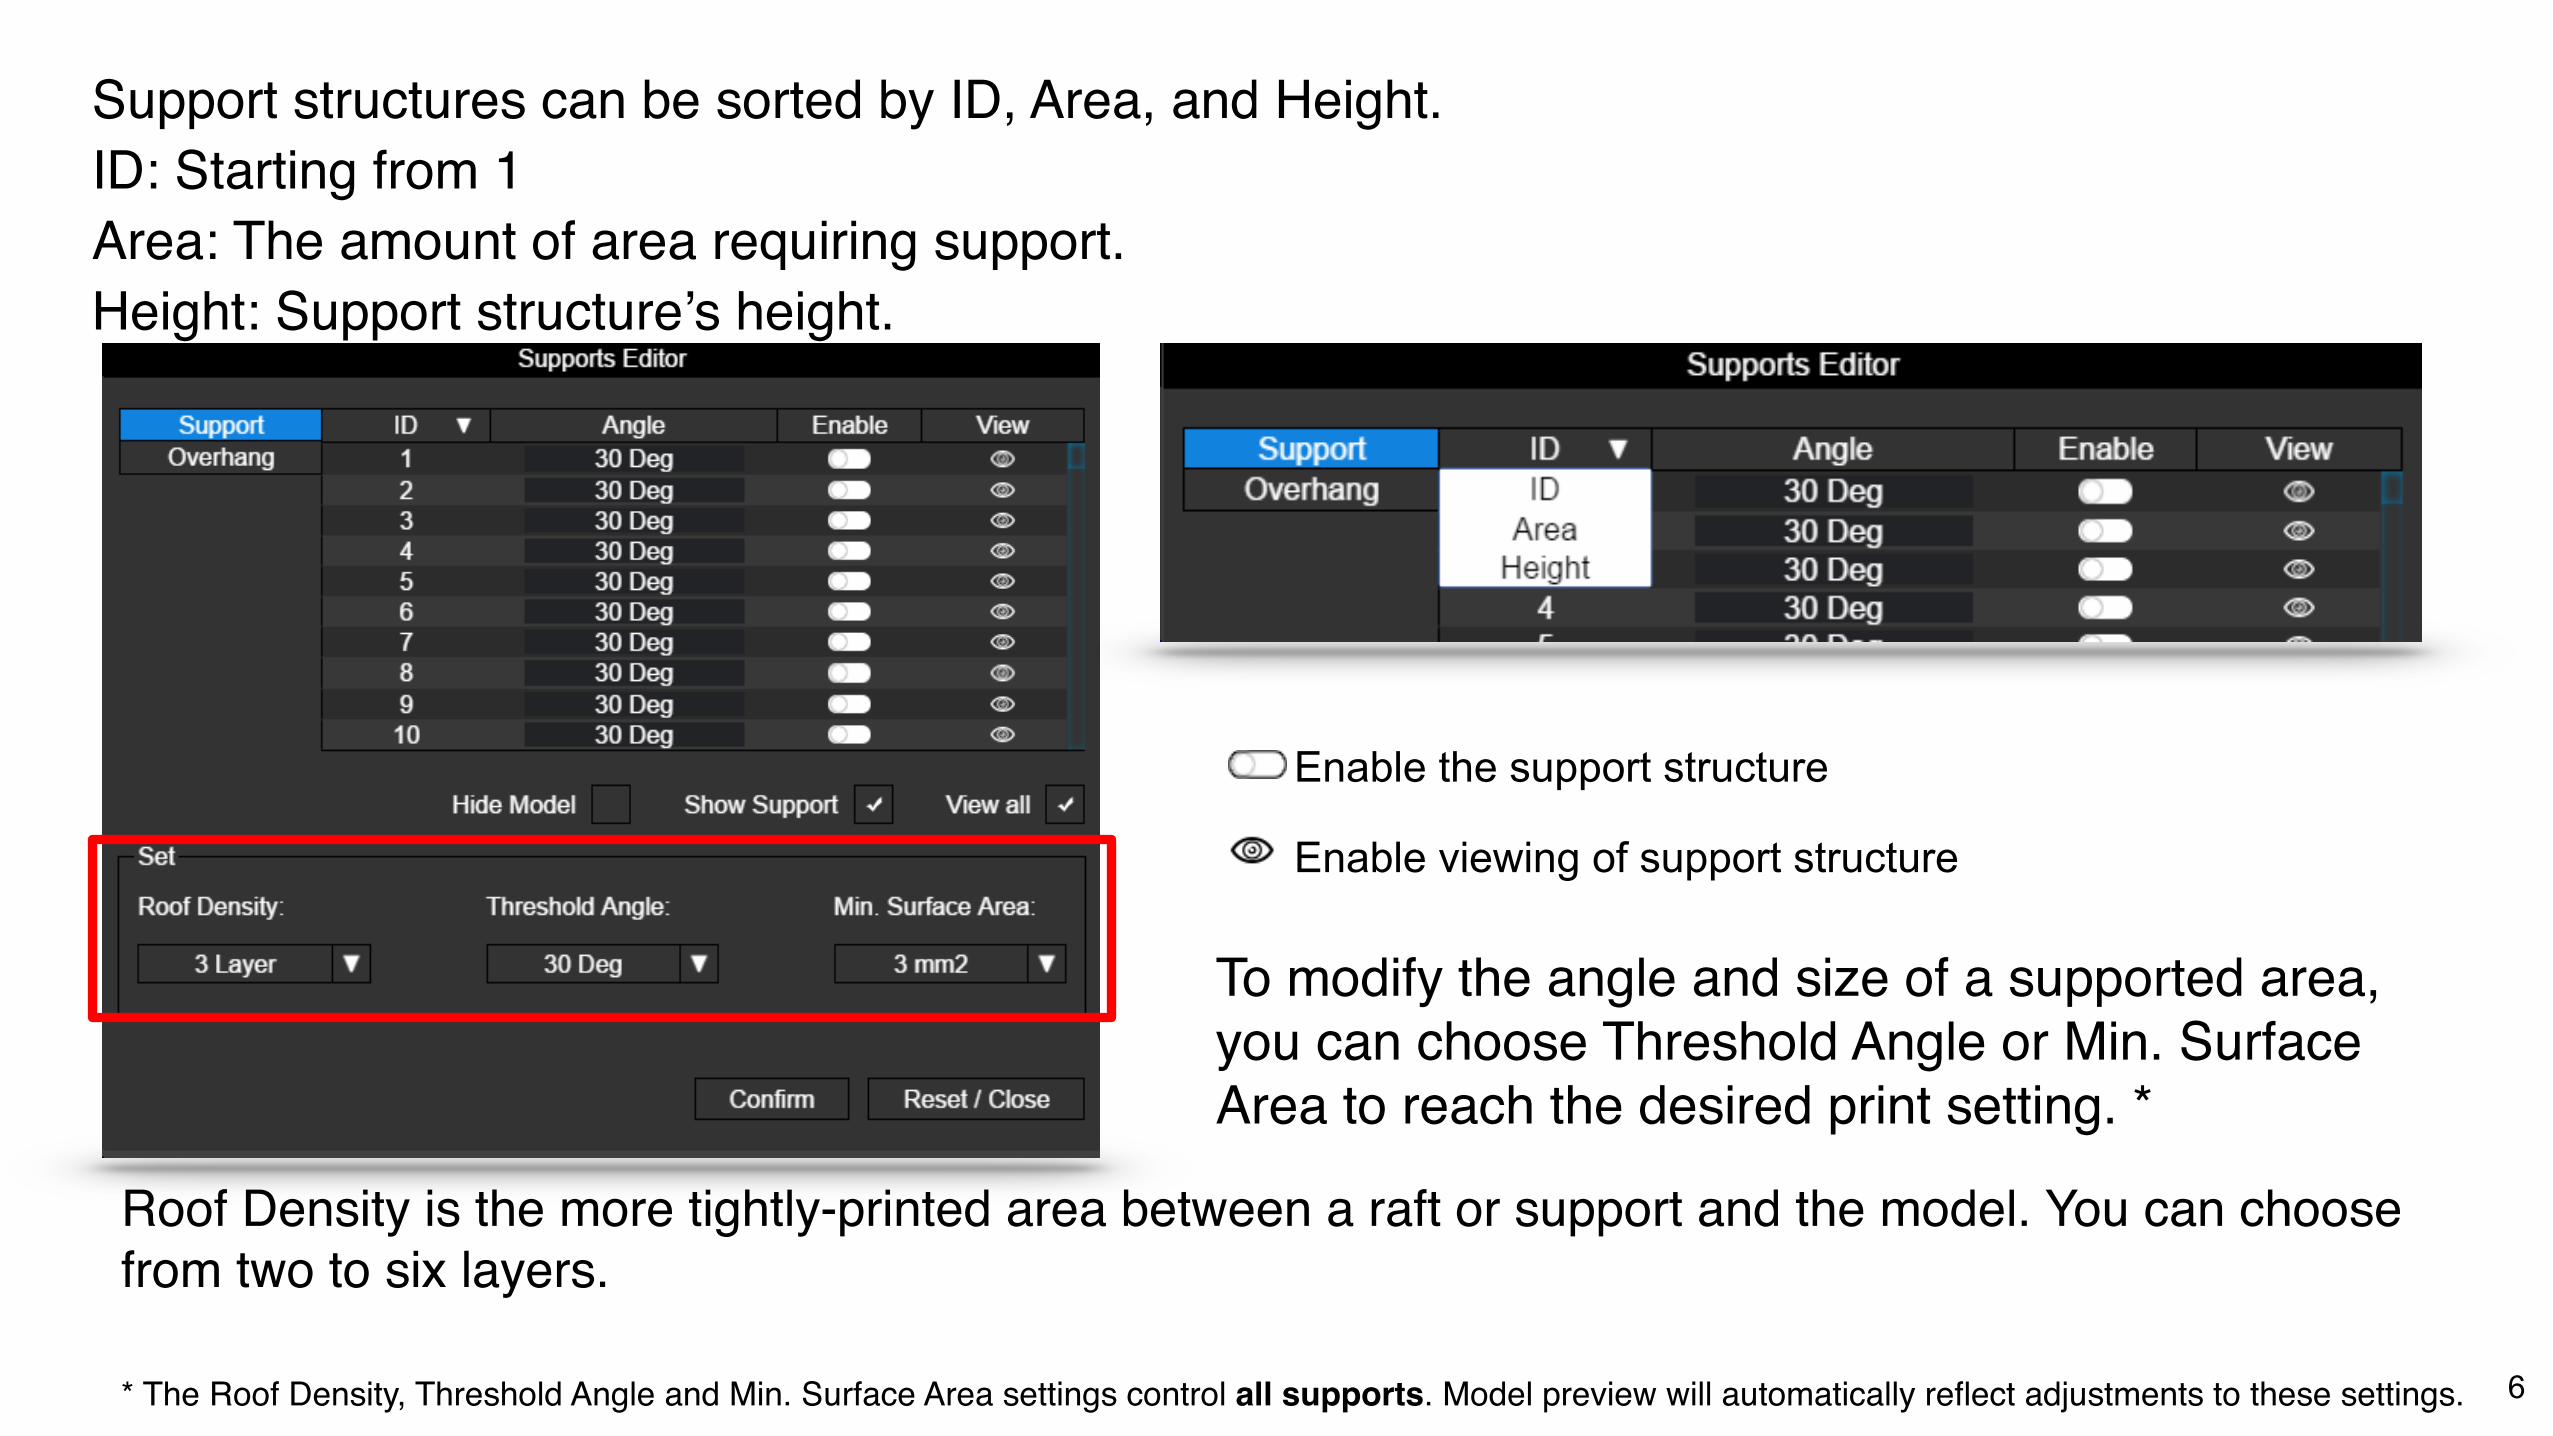
Support structures can be sorted by ID, Area, and Height.ID: Starting from 1 Area: The amount of area requiring support. Height: Support structure’s height.
Enable the support structure
Enable viewing of support structure
To modify the angle and size of a supported area, you can choose Threshold Angle or Min. Surface Area to reach the desired print setting. *
Roof Density is the more tightly-printed area between a raft or support and the model. You can choose from two to six layers.
* The Roof Density, Threshold Angle and Min. Surface Area settings control all supports. Model preview will automatically reflect adjustments to these settings. 6
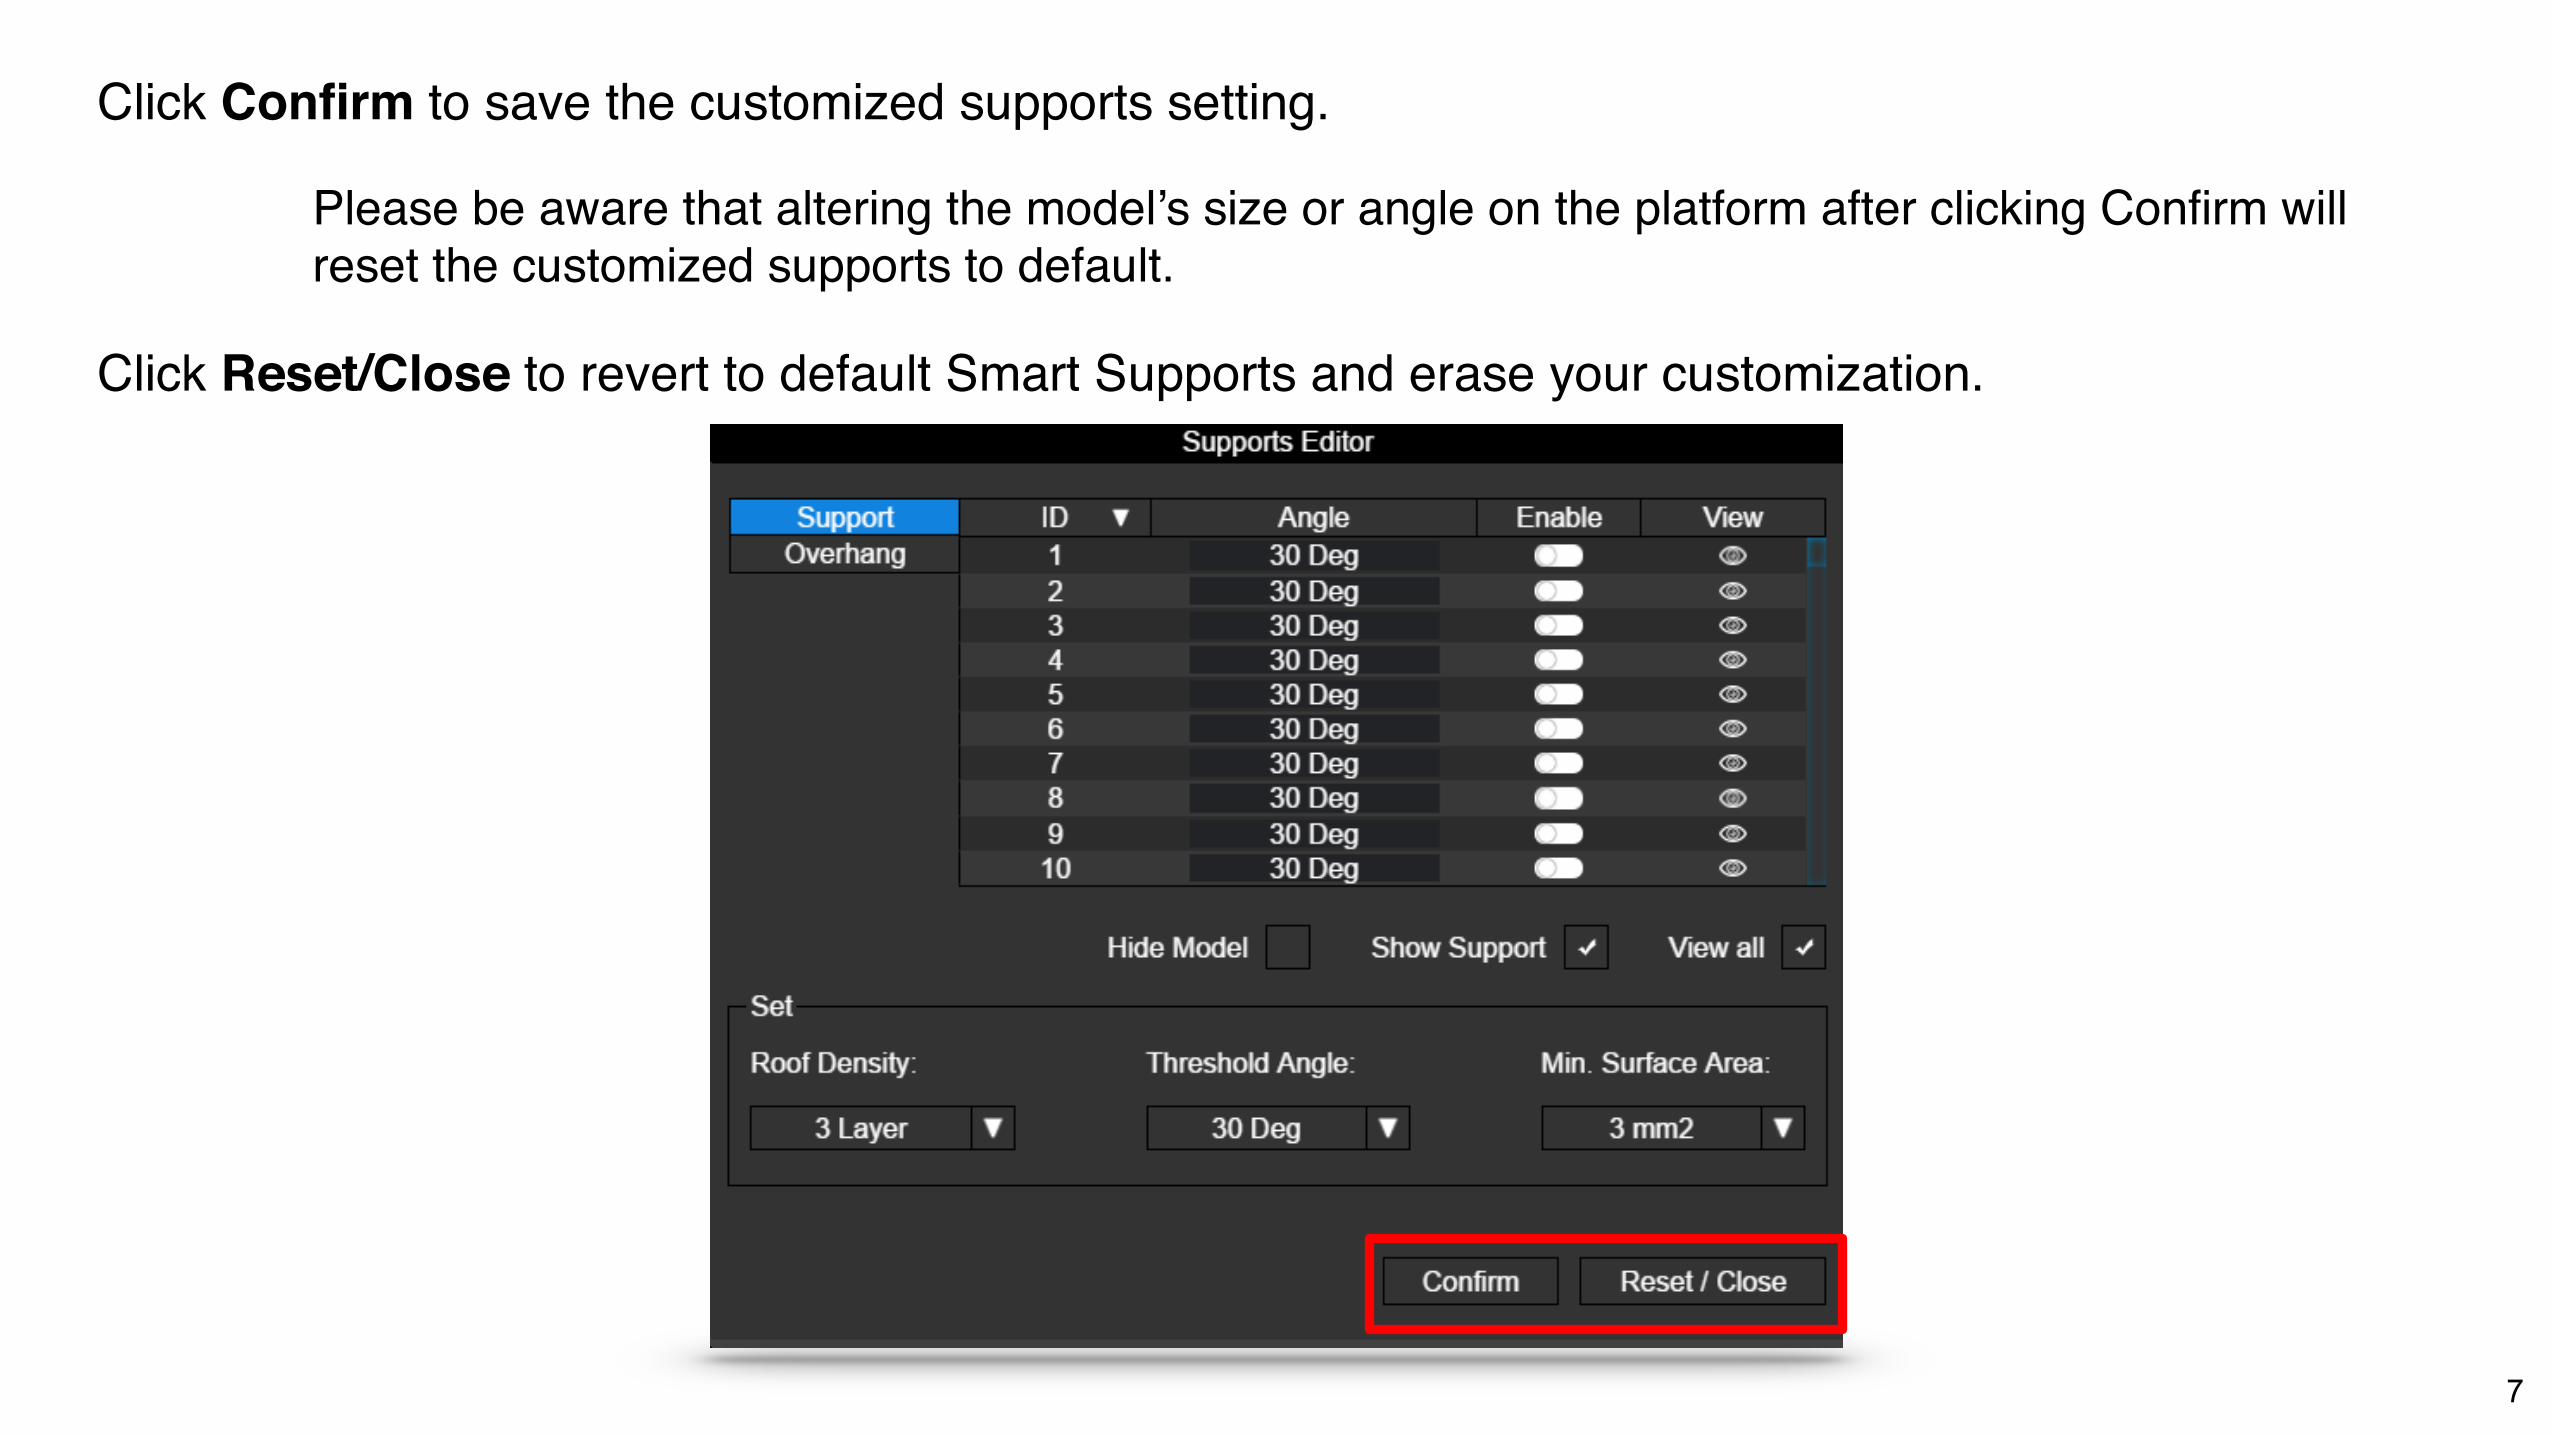
Click Confirm to save the customized supports setting.
Click Reset/Close to revert to default Smart Supports and erase your customization.
Please be aware that altering the model’s size or angle on the platform after clicking Confirm will reset the customized supports to default.
7
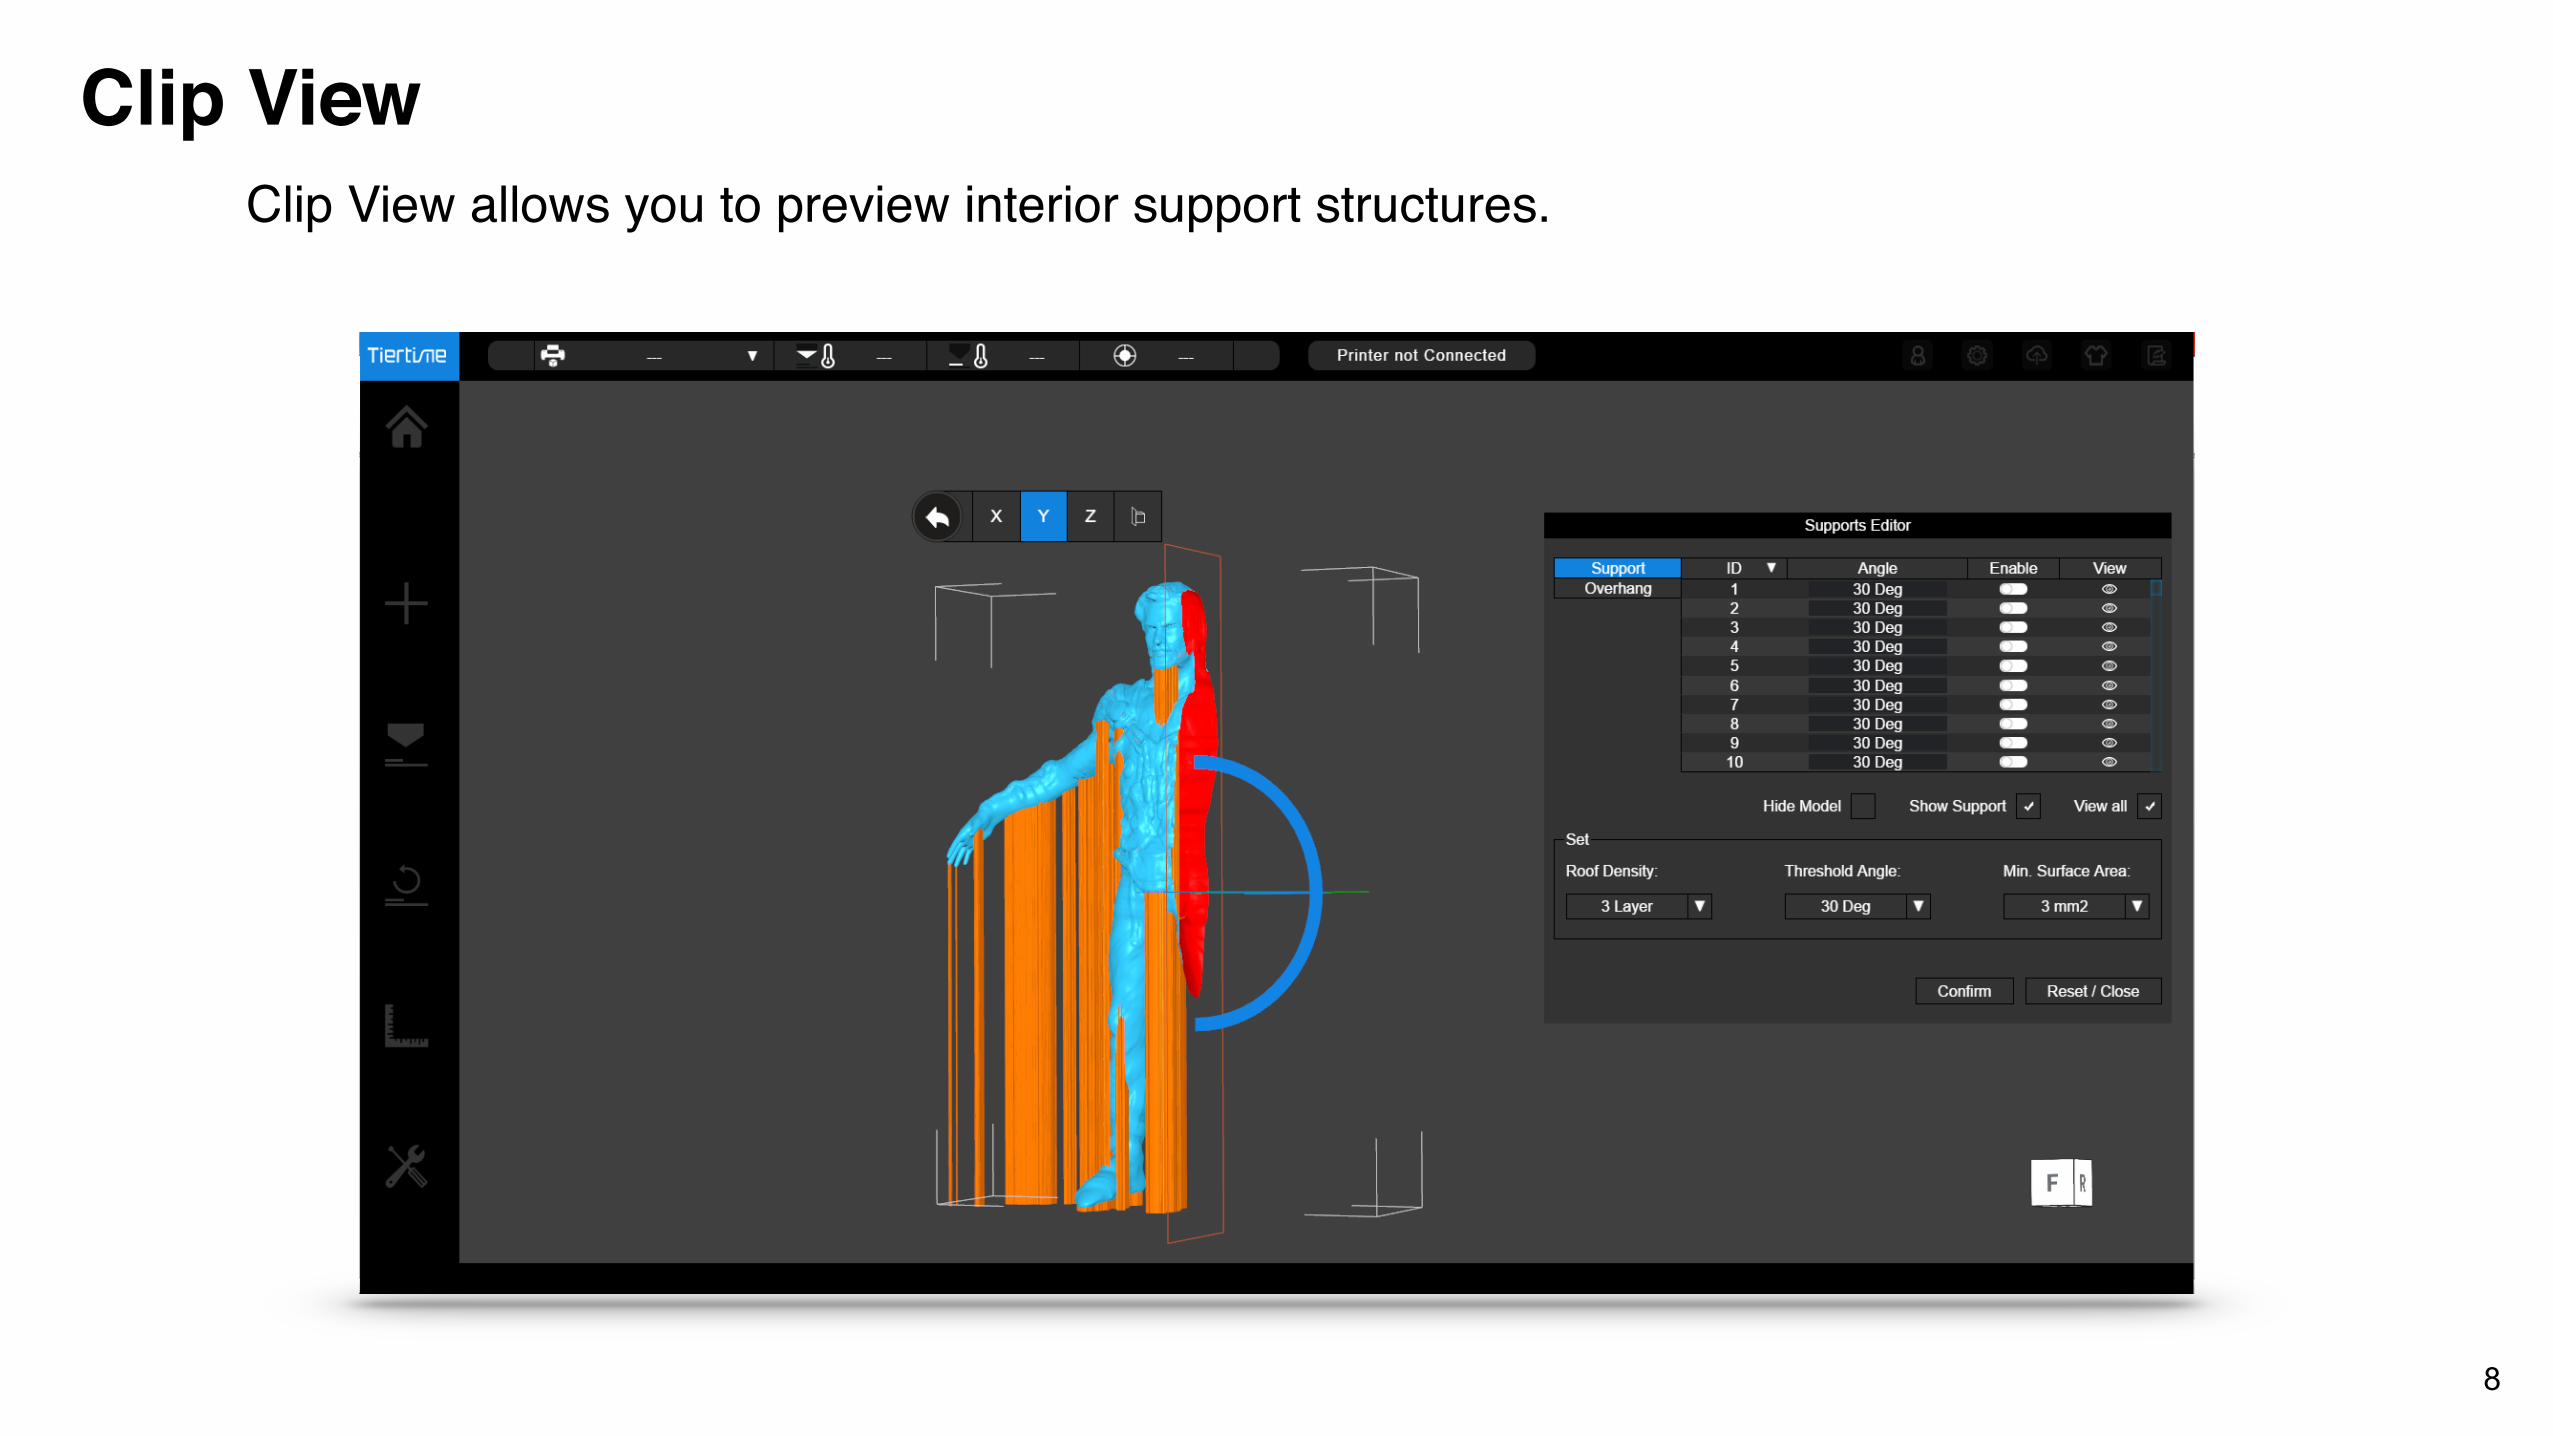
Clip View allows you to preview interior support structures.
Clip View
8

Supports EditorOverhang
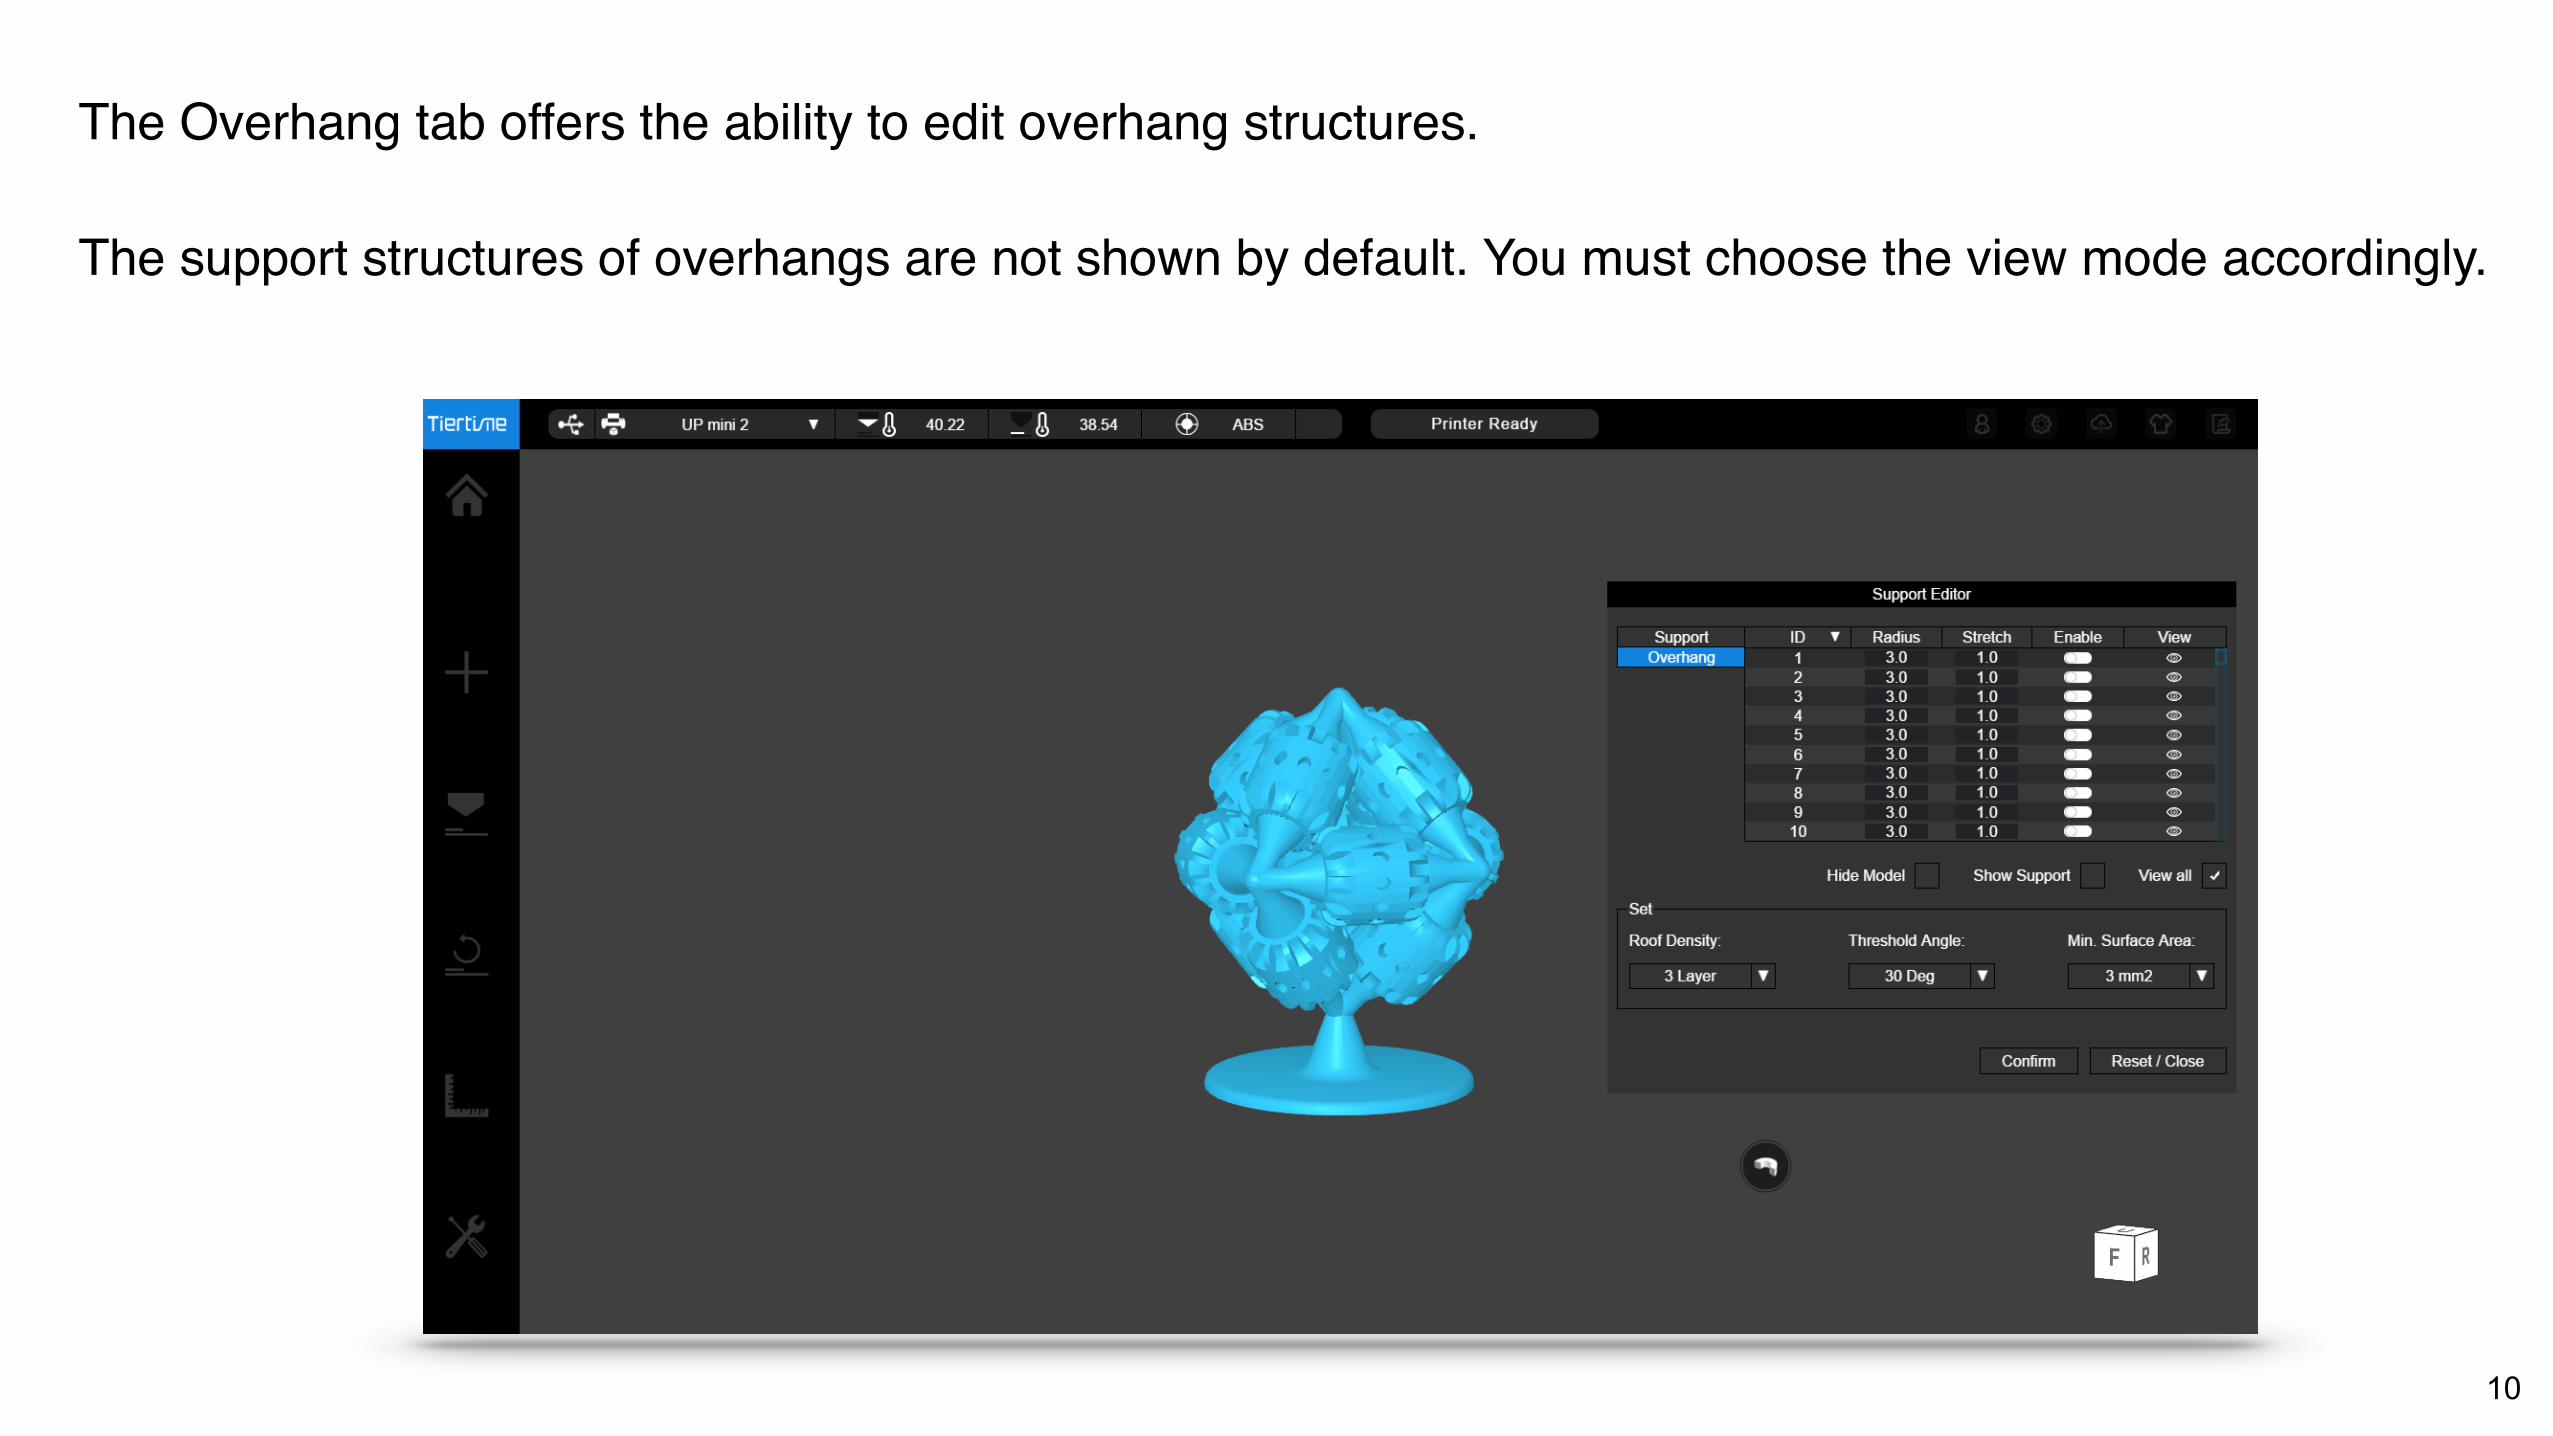
The Overhang tab offers the ability to edit overhang structures.
The support structures of overhangs are not shown by default. You must choose the view mode accordingly.
10

Clip ViewClip View can also display interior support structures when working in overhang mode.
11

Hide Model and Support Hide Model and Show support Show Support
Overhang View mode
12
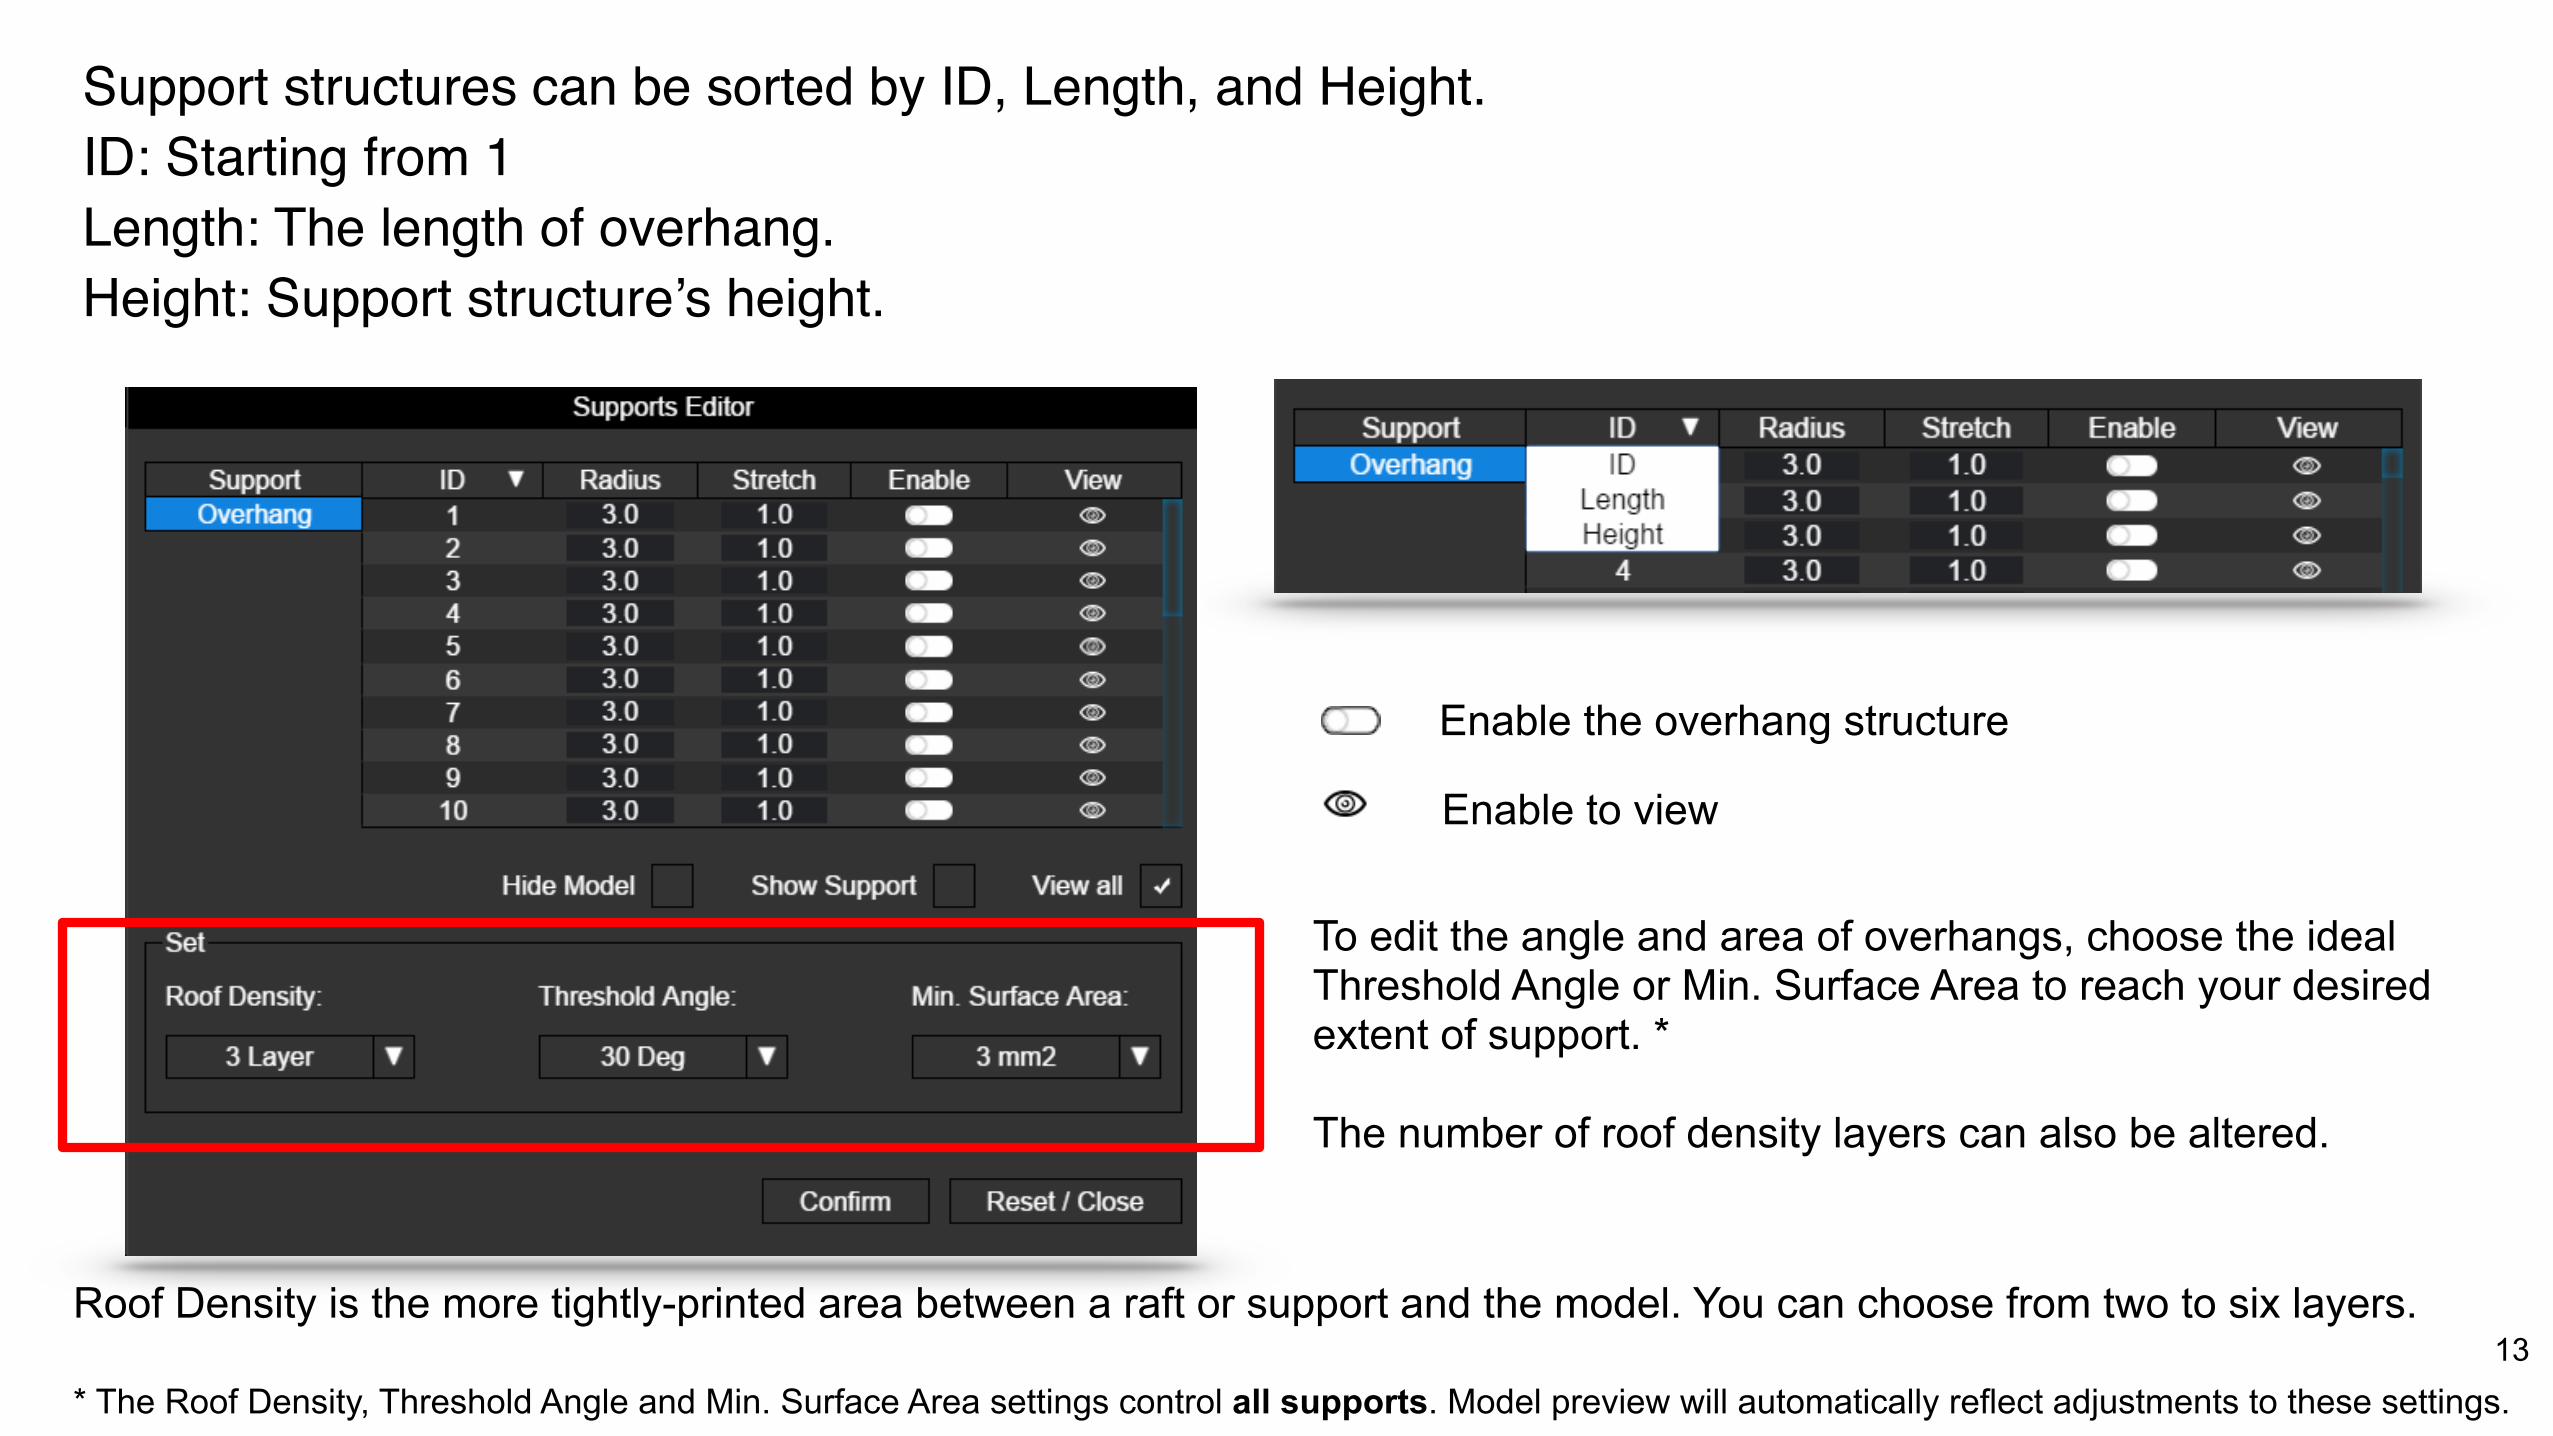
Enable the overhang structure
Enable to view
To edit the angle and area of overhangs, choose the ideal Threshold Angle or Min. Surface Area to reach your desired extent of support. *
The number of roof density layers can also be altered.
Roof Density is the more tightly-printed area between a raft or support and the model. You can choose from two to six layers.
* The Roof Density, Threshold Angle and Min. Surface Area settings control all supports. Model preview will automatically reflect adjustments to these settings.
Support structures can be sorted by ID, Length, and Height.ID: Starting from 1 Length: The length of overhang. Height: Support structure’s height.
13
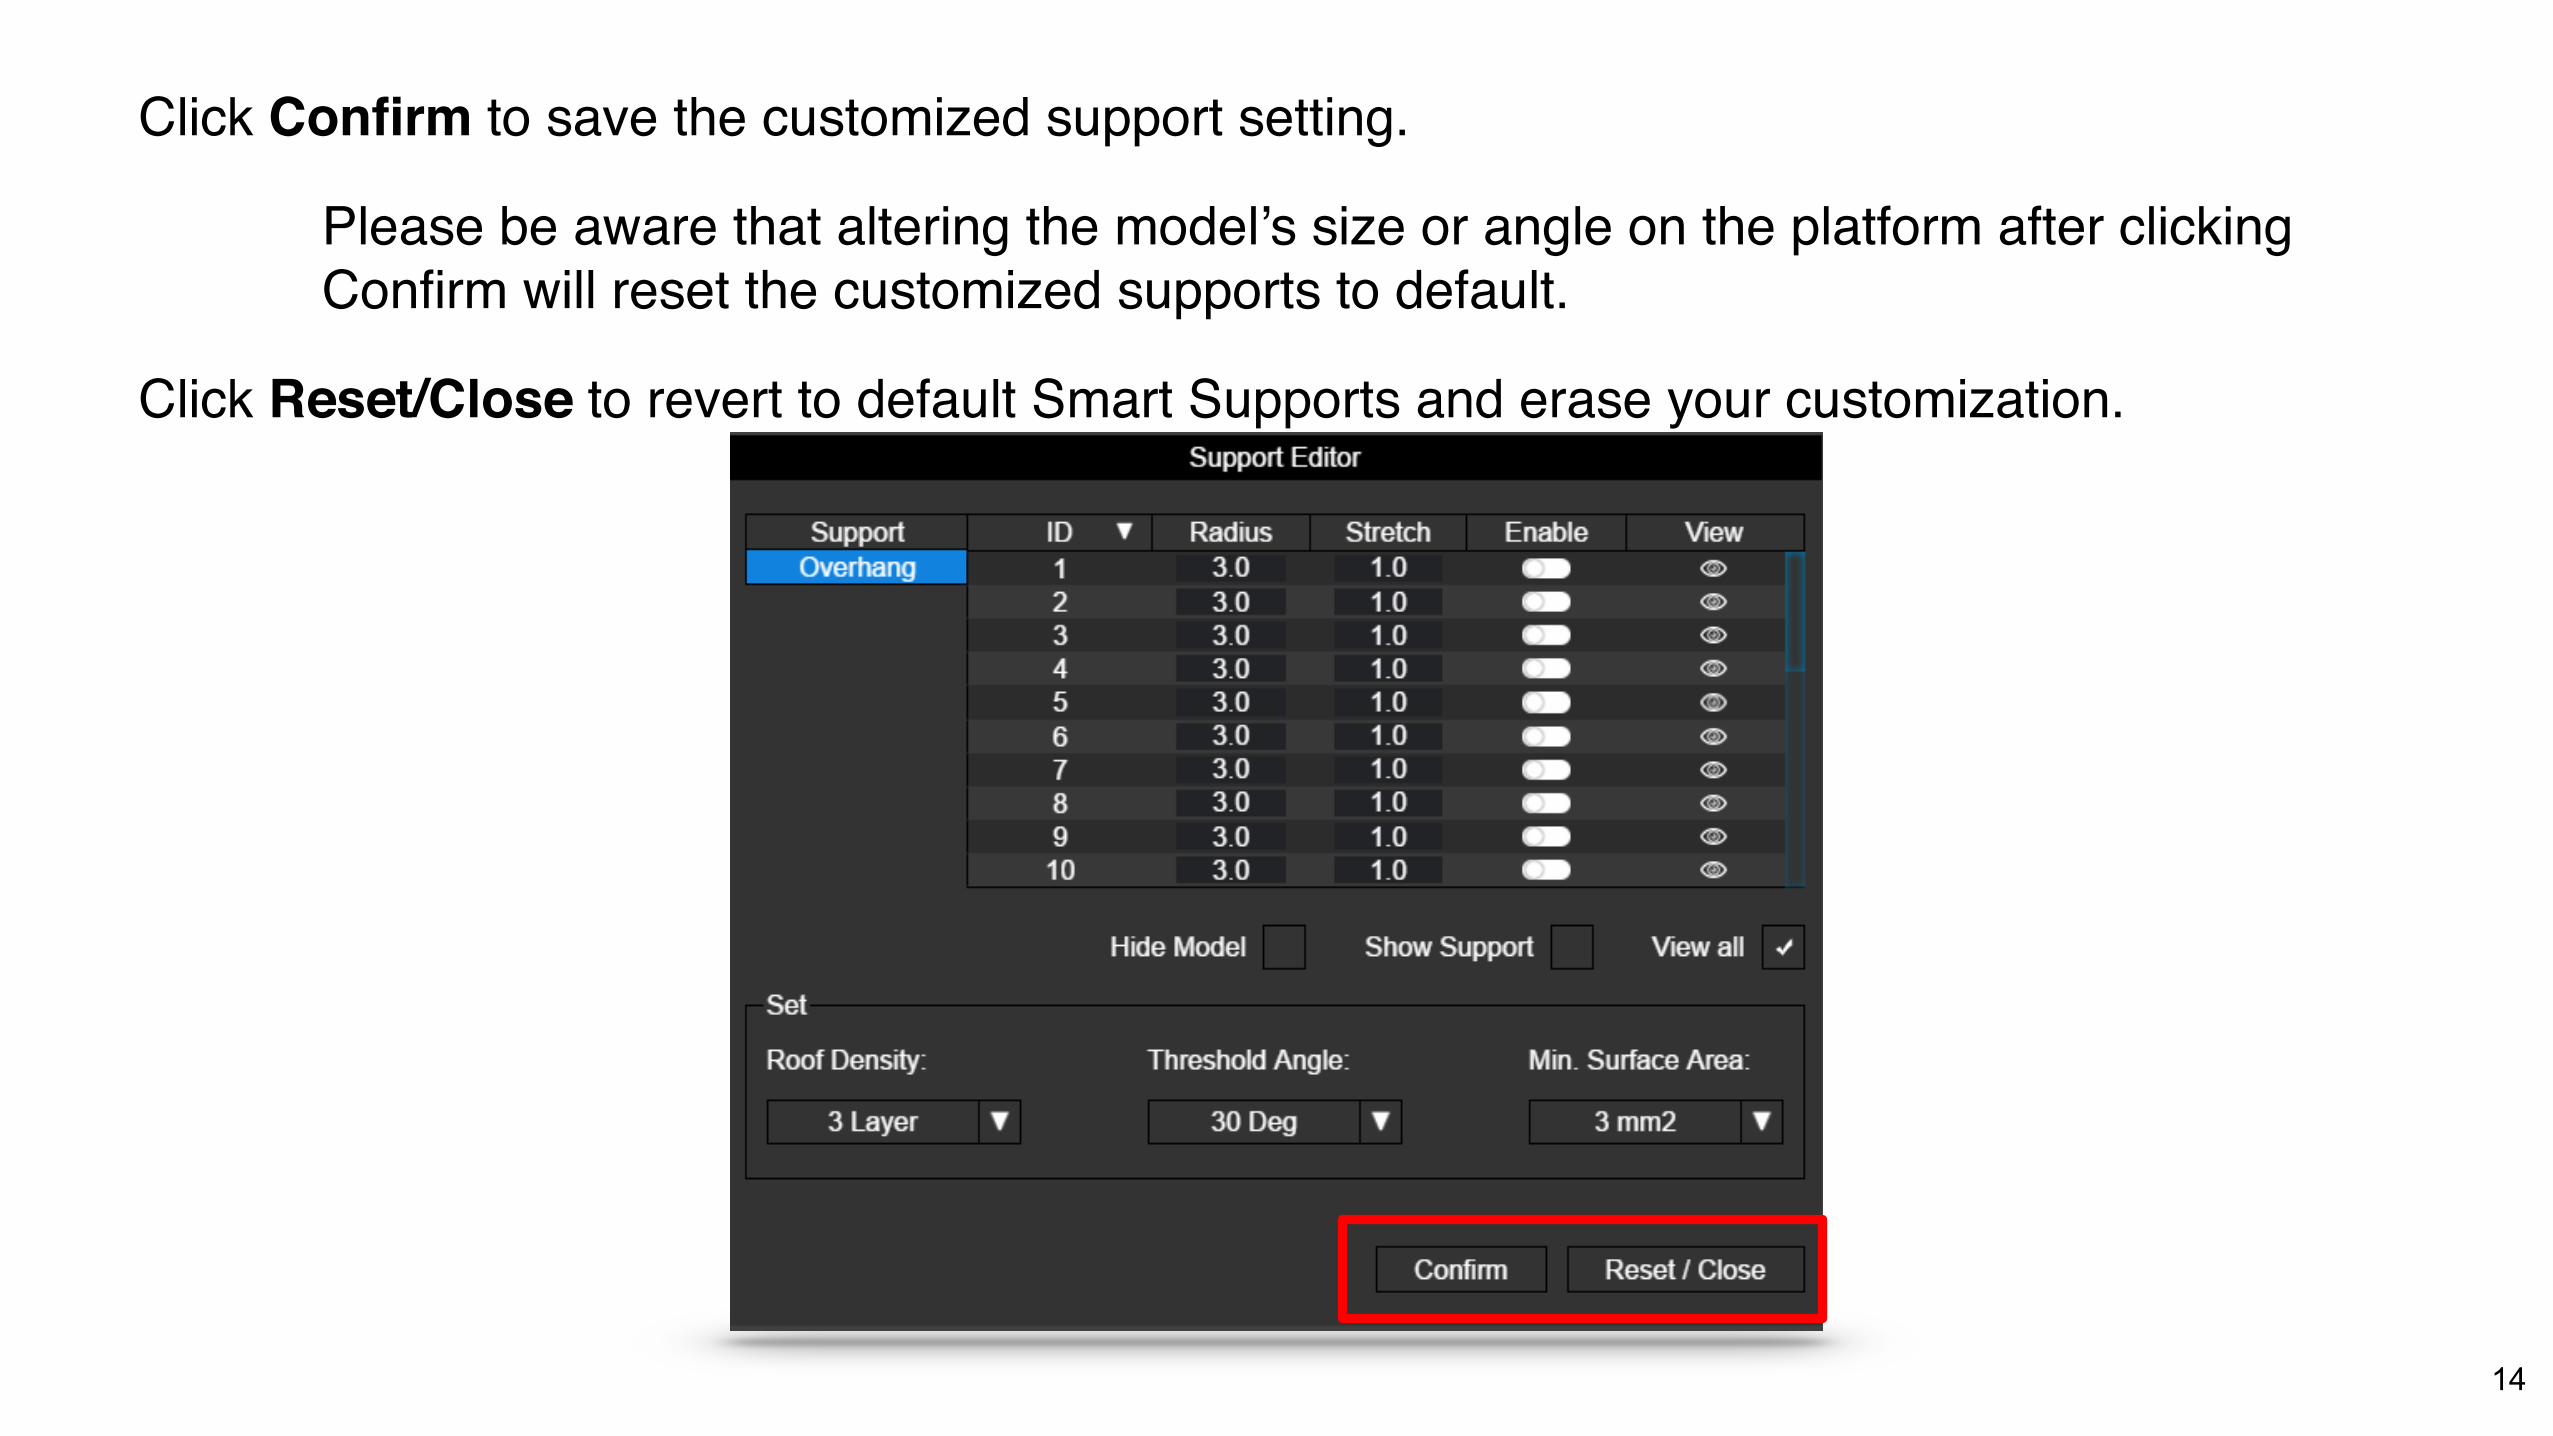
Click Confirm to save the customized support setting.
Click Reset/Close to revert to default Smart Supports and erase your customization.
Please be aware that altering the model’s size or angle on the platform after clicking Confirm will reset the customized supports to default.
14
Print SettingsPreview
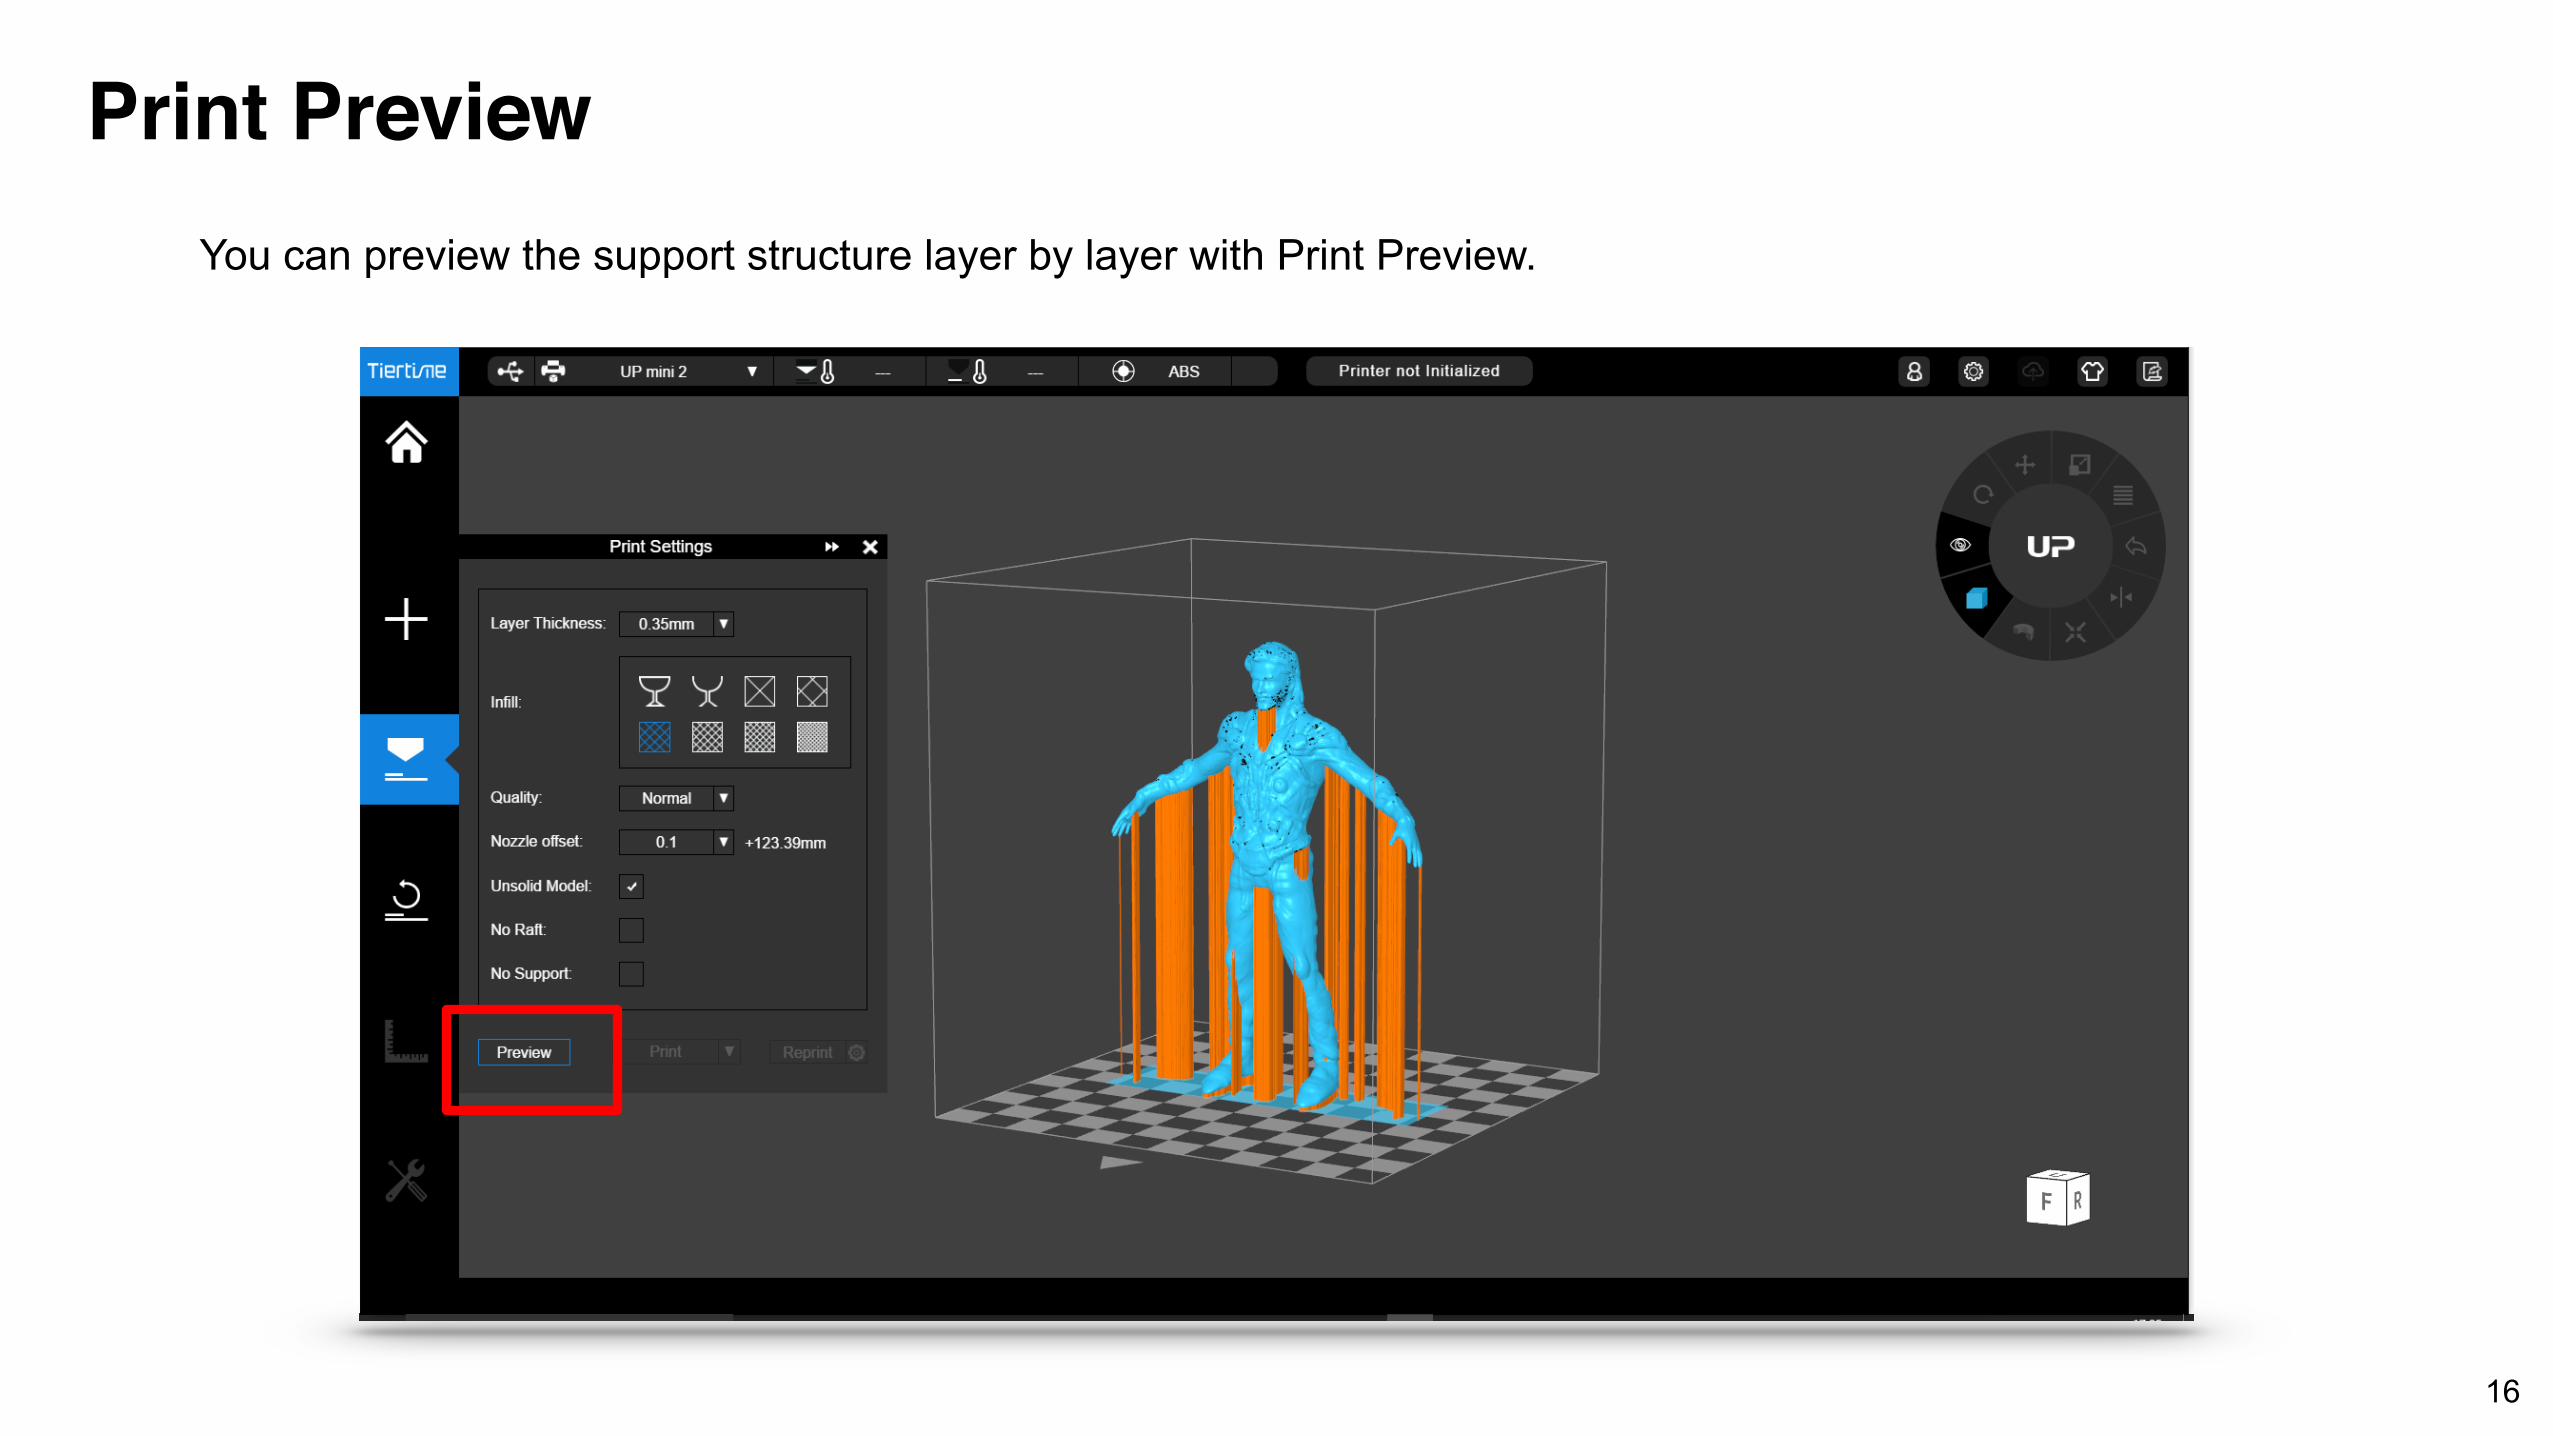
Print Preview You can preview the support structure layer by layer with Print Preview.
16
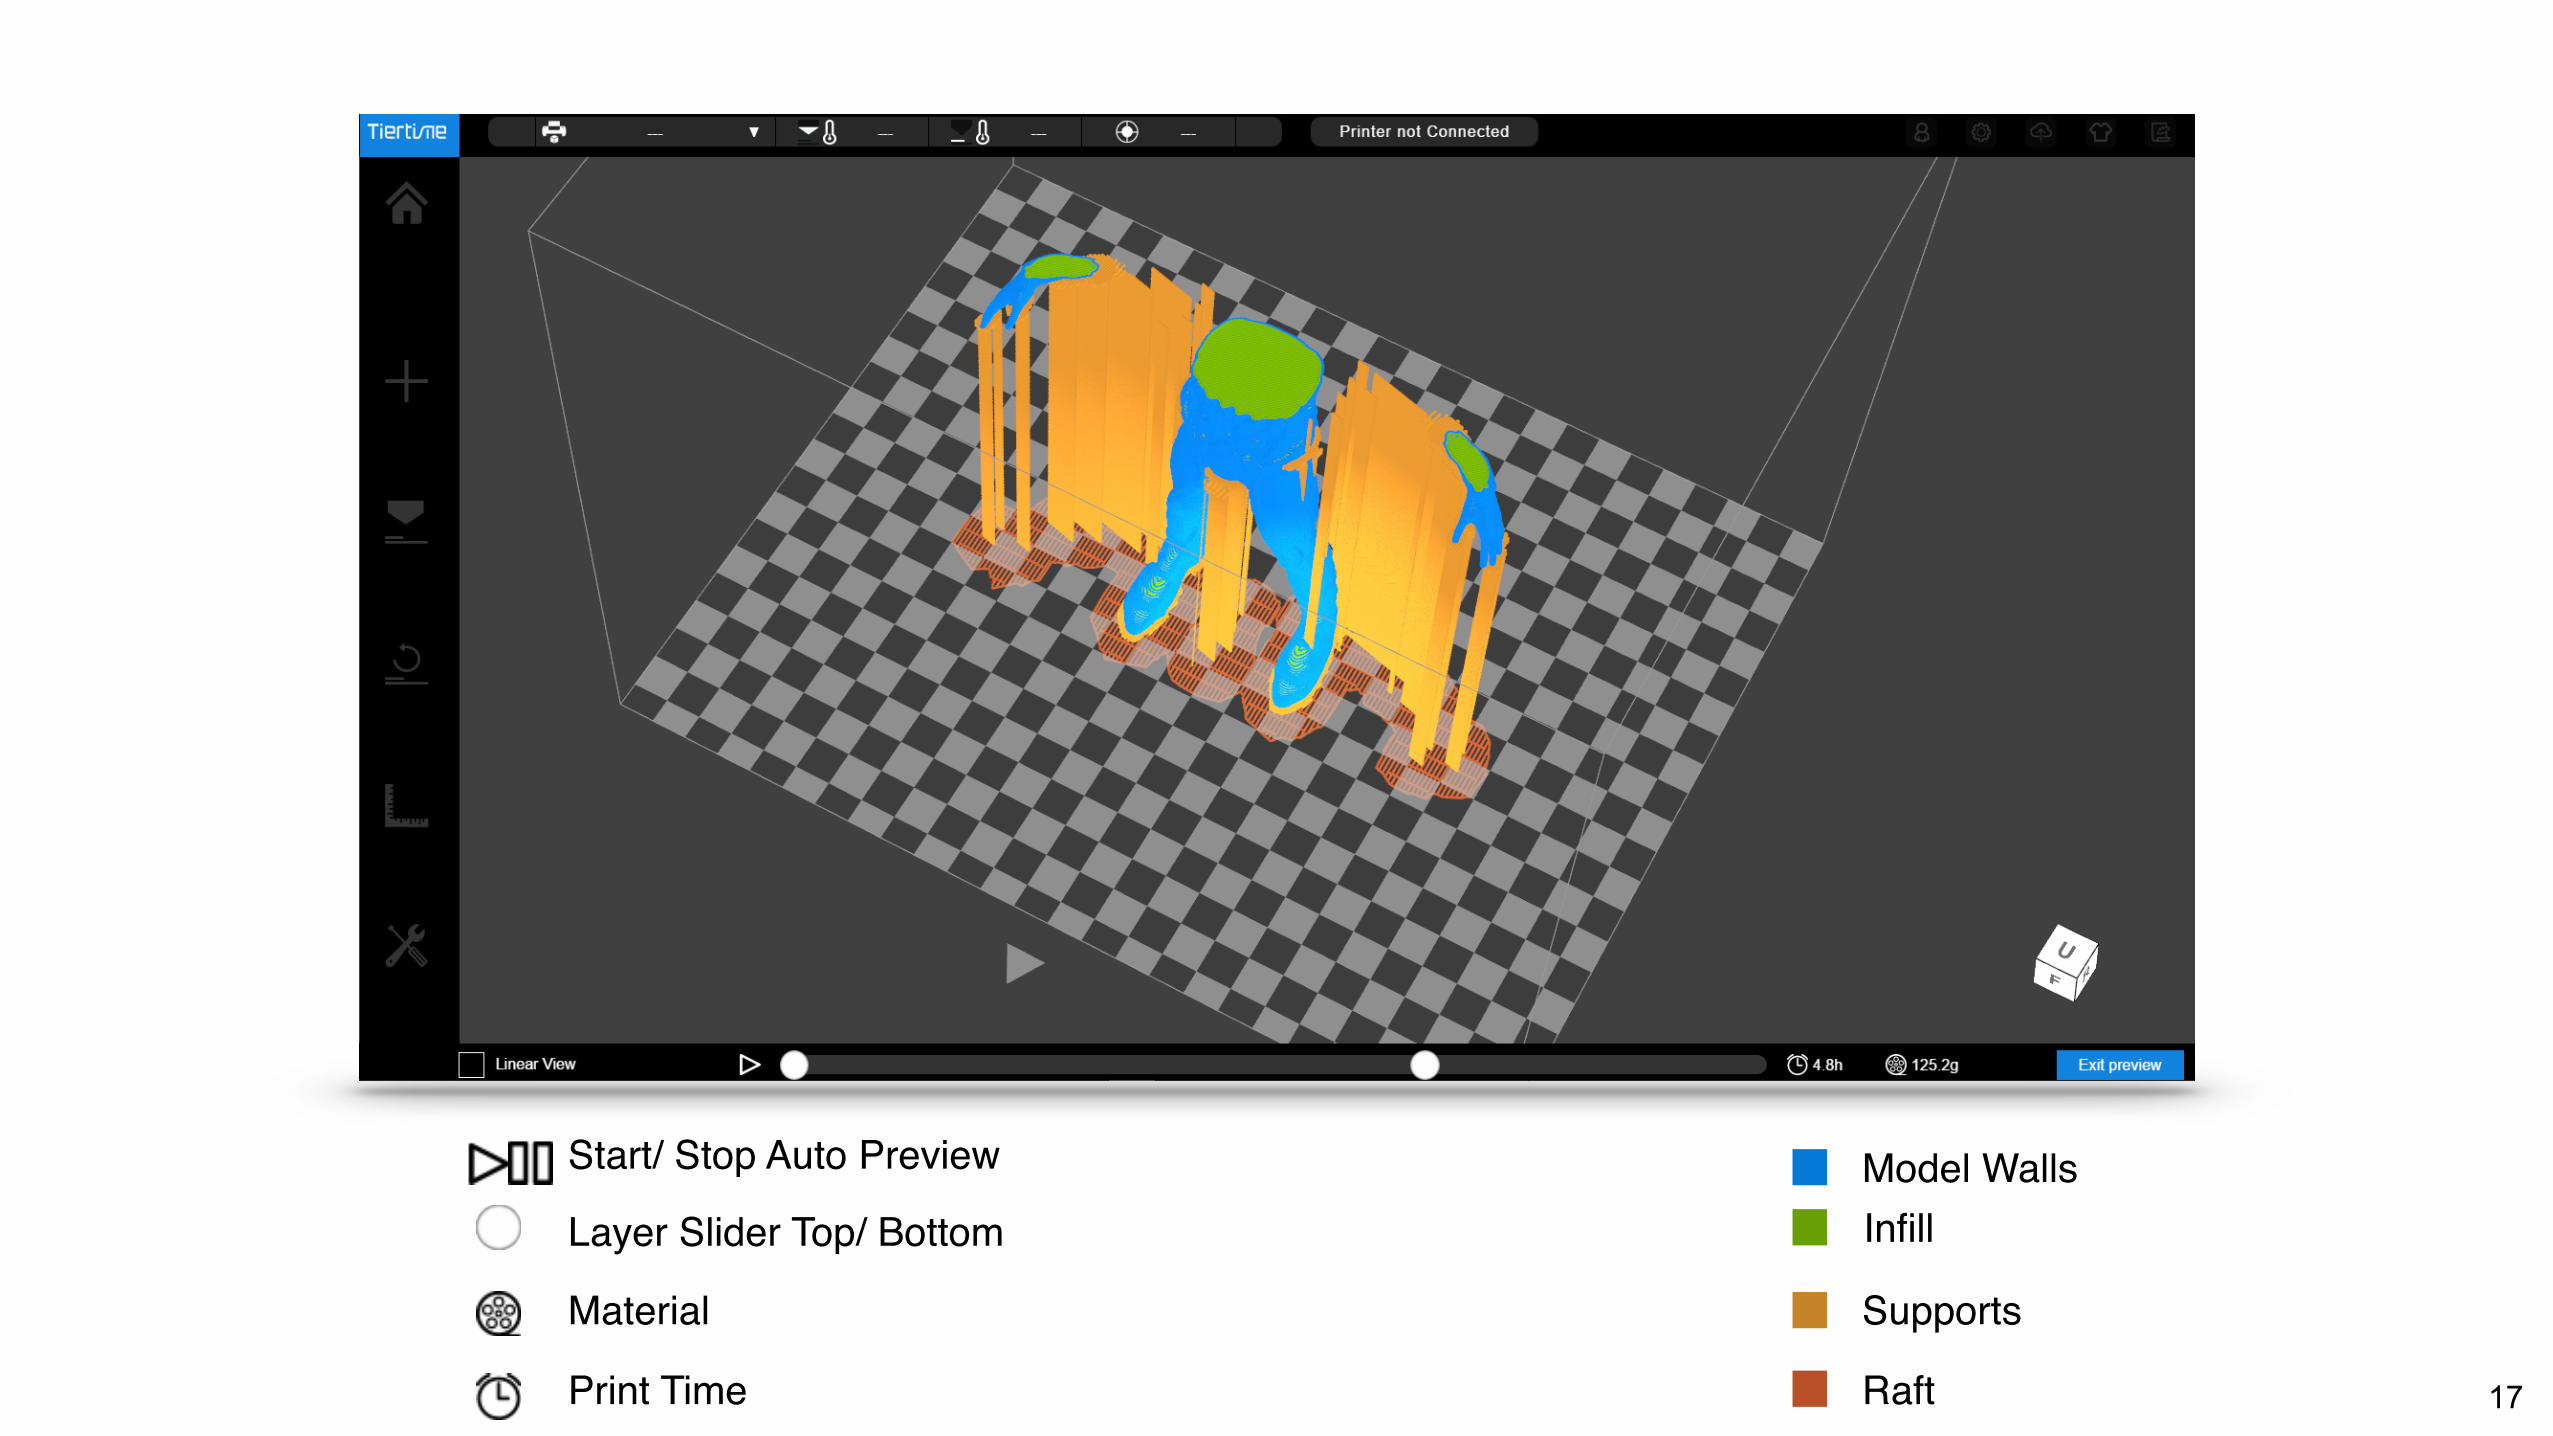
Model WallsInfill
Supports
Raft
Start/ Stop Auto Preview
Layer Slider Top/ Bottom
Print Time
Material
17
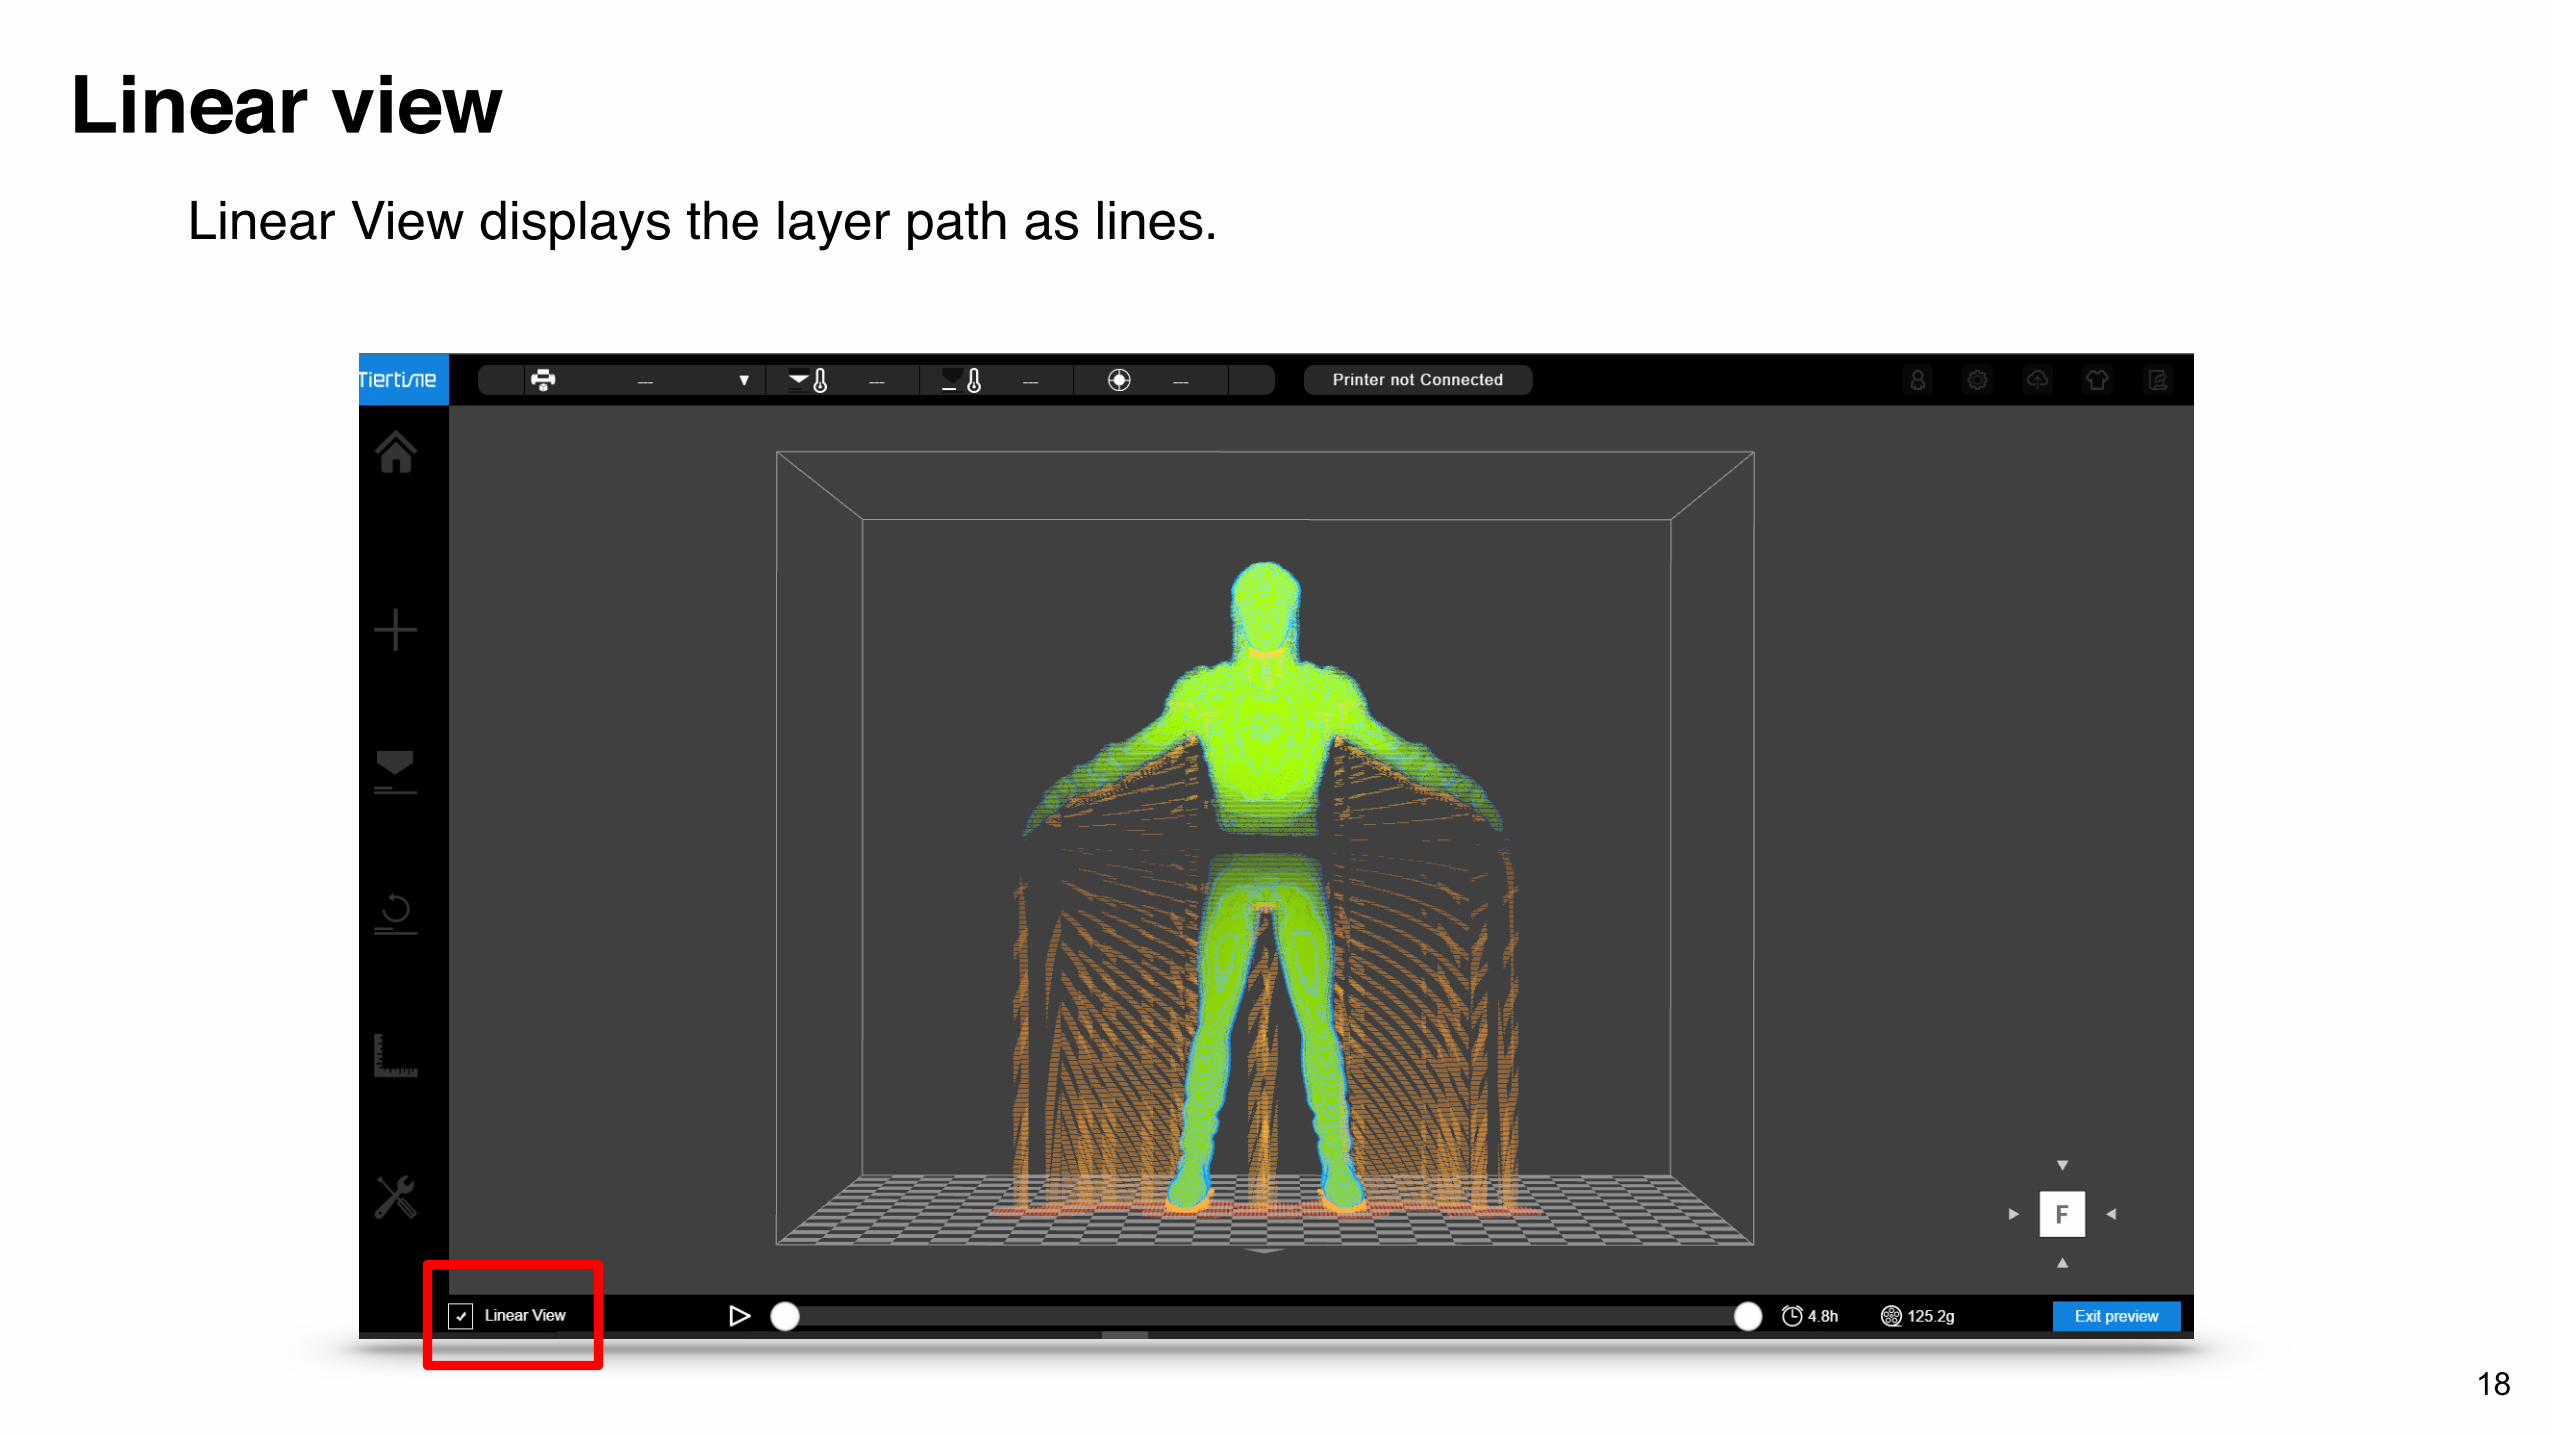
Linear View displays the layer path as lines.
Linear view
18


![Flair Geometry Editor Part II - FLUKA€¦ · Flair Geometry Editor – Part II . Listbox - Objects ... Geometry Layers [1/6] Custom Layers can be specified in the “Configure Layer](https://img.pdfslide.net/doc/110x75/5fa3ea4d3e0e98379f54557d/flair-geometry-editor-part-ii-fluka-flair-geometry-editor-a-part-ii-listbox.jpg)


![[MS-TLSP]: Transport Layer Security (TLS) Profile... · Secure Sockets Layer (SSL): A security protocol that supports confidentiality and integrity of messages in client and server](https://img.pdfslide.net/doc/110x75/5f0acdc87e708231d42d6bf2/ms-tlsp-transport-layer-security-tls-profile-secure-sockets-layer-ssl.jpg)