Embed Size (px)
Citation preview

Sybase Control Center for Replication
3.1

DOCUMENT ID: DC01677-01-0310-02LAST REVISED: October 2011Copyright © 2011 by Sybase, Inc. All rights reserved.This publication pertains to Sybase software and to any subsequent release until otherwise indicated in new editions ortechnical notes. Information in this document is subject to change without notice. The software described herein is furnishedunder a license agreement, and it may be used or copied only in accordance with the terms of that agreement.To order additional documents, U.S. and Canadian customers should call Customer Fulfillment at (800) 685-8225, fax (617)229-9845.Customers in other countries with a U.S. license agreement may contact Customer Fulfillment via the above fax number. Allother international customers should contact their Sybase subsidiary or local distributor. Upgrades are provided only atregularly scheduled software release dates. No part of this publication may be reproduced, transmitted, or translated in anyform or by any means, electronic, mechanical, manual, optical, or otherwise, without the prior written permission of Sybase,Inc.Sybase trademarks can be viewed at the Sybase trademarks page at http://www.sybase.com/detail?id=1011207. Sybase andthe marks listed are trademarks of Sybase, Inc. ® indicates registration in the United States of America.SAP and other SAP products and services mentioned herein as well as their respective logos are trademarks or registeredtrademarks of SAP AG in Germany and in several other countries all over the world.Java and all Java-based marks are trademarks or registered trademarks of Sun Microsystems, Inc. in the U.S. and othercountries.Unicode and the Unicode Logo are registered trademarks of Unicode, Inc.All other company and product names mentioned may be trademarks of the respective companies with which they areassociated.Use, duplication, or disclosure by the government is subject to the restrictions set forth in subparagraph (c)(1)(ii) of DFARS52.227-7013 for the DOD and as set forth in FAR 52.227-19(a)-(d) for civilian agencies.Sybase, Inc., One Sybase Drive, Dublin, CA 94568.

Contents
About Sybase Control Center for Replication .....................1New Features in Sybase Control Center for
Replication ..................................................................1Replication Environment .................................................3Compatibility Matrix ........................................................4User Interface Overview .................................................5Toolbar Icons ..................................................................6Status Icons ....................................................................6Common Display Options ...............................................7Style and Syntax Conventions ......................................10Accessibility Features ...................................................11Sybase Control Center Accessibility Information ..........12
Get Started ...........................................................................13Quick Start for an Evaluation ........................................13Get Started in a Production Environment .....................20Launching Sybase Control Center ................................50
Registering the ODBC Driver in Windows ...........51Starting and Stopping Sybase Control Center in
Windows ..........................................................51Starting and Stopping Sybase Control Center in
UNIX ................................................................53Configuring Memory Usage .................................56scc Command ......................................................59
Logging in to Sybase Control Center ............................62Logging out of Sybase Control Center ..........................63Setting Up Security .......................................................63
Security ................................................................64Configuring Authentication for Windows ..............65Configuring a Pluggable Authentication Module
(PAM) for UNIX ................................................66Configuring an LDAP Authentication Module .......67
Sybase Control Center for Replication iii

Mapping Sybase Control Center Roles to LDAPor OS Groups ..................................................76
Encrypting a Password ........................................77Configuring Ports .................................................77
Configuring the E-mail Server ......................................79Configuring the Automatic Logout Timer ......................80User Authorization ........................................................81
Assigning a Role to a Login or a Group ...............81Removing a Role from a Login or a Group ..........82Adding a Group ....................................................83Removing a Group ...............................................83Adding a Login Account to a Group .....................84Removing a Login Account from a Group ............84Adding a Login Account to the System ................85Removing a Login Account from the System .......86Modifying a User Profile .......................................86Logins, Roles, and Groups ..................................87
Configure ..............................................................................89Registering a Replication Server, Replication Agent,
or Mirror Replication Agent .......................................90Importing Resources for Batch Registration .................91Creating a Perspective ..................................................93Adding a Resource to a Perspective .............................93Configuring a Login Account to Monitor Replication .....93
Roles or Permissions to Set Up ReplicationMonitoring Accounts ........................................94
Authenticating a Login Account for a ManagedResource ..................................................................94
Setting Up the Latency Monitoring Process ..................95Latency Monitoring Process ................................96
Setting Up Statistics Collection .....................................97About Statistics ....................................................98Replication Data Collections ................................99Key Performance Indicators and Key
Performance Areas for Replication ................100
Contents
iv

Setting Replication Parameters ..................................117Configuring Replication Server and Replication
Agent Parameters ..........................................117Configuring Connection Parameters for
Replication Server .........................................118Configuring Logical Connection Parameters for
Replication Server .........................................118Configuring Route Parameters for Replication
Server ............................................................119Configuring Adaptive Server RepAgent Thread
Parameters ....................................................120Configuring Replication Server to Gather Zero
Values for Counters .......................................120Creating an Alert .........................................................121
Replication Alerts ...............................................124Alert Types, Severities, and States for
Replication .....................................................129Alert-Triggered Scripts .......................................132Substitution Parameters for Scripts ...................132
Optional Configuration Steps ......................................134Manage and Monitor ..........................................................137
Heat Chart ..................................................................137Displaying Resource Availability ........................137
Historical Performance Monitoring ..............................138Graphing Performance Counters .......................138
Manage Sybase Control Center .................................139Administration Console ......................................140Job Scheduling ..................................................140Alerts .................................................................145Resources ..........................................................153Perspectives ......................................................156Views .................................................................157Repository .........................................................158Logging ..............................................................164Sybase Control Center Console ........................169
Contents
Sybase Control Center for Replication v

Manage and Monitor the Replication Environment .....172Availability Monitoring ........................................172Replication Latency ...........................................187
Troubleshoot Sybase Control Center for Replication ....191Collection Job for Adaptive Server Fails .....................191Data on Dashboards or Charts Is Missing ..................191No Data Is Returned for Performance Counters
Collection Job .........................................................191Same Data Is Displayed for Two or More Adaptive
Server Collection Job Executions ...........................192Servers Are Missing in the Topology View ..................192Servers, Routes, or Connections Display an Unknown
Status .....................................................................192Some Connector Lines Do Not Display a Status Icon
................................................................................192Topology Display Is Incorrect When Two Replication
Servers With the Same Name Are Registered .......193Topology View Displays Blank Canvas .......................193Topology View Takes a Long Time to Display .............193Unable to Retrieve Topology Relationship Data or
Server Objects ........................................................193Problems with Basic Sybase Control Center
Functionality ...........................................................194Cannot Log In ....................................................194Sybase Control Center Fails to Start .................194Browser Refresh (F5) Causes Logout ...............194Alerts Are Not Generated ..................................195Performance Statistics Do Not Cover Enough
Time ..............................................................195Resetting the Online Help ..................................195Data Collections Fail to Complete ......................196Memory Warnings at Startup .............................196OutOfMemory Errors .........................................196
Glossary: Sybase Control Center for Replication ..........199Index ................................................................................203
Contents
vi

About Sybase Control Center for Replication
Sybase® Control Center for Replication is a Web-based solution that replaces ReplicationMonitoring Services (RMS), a middle-tier server, in monitoring the status and availability ofservers in a replication environment.
Sybase Control Center for Replication allows you to monitor and manage large, complex, andgeographically dispersed replication environments. It lets you search, sort, and filter serversand component objects to support a larger environment than what the current ReplicationManager and Replication Monitoring Services can handle.
Sybase Control Center for Replication provides status information at a glance, using servermonitors and a heat chart for displaying the availability or status of a specific server. Theserver monitors display high-level information, such as server version and platform. Theserver monitors also display critical performance counters to aid you in troubleshootingreplication performance.
To help you control the flow of data and configure replication parameters to improve serverperformance, Sybase Control Center for Replication provides a quick administration tool thatyou can easily access through every replication monitor.
In addition to the monitors, Sybase Control Center for Replication provides a topology viewthat graphically displays the servers, the connections between servers, data flow in theenvironment, and replication path's sources and targets. Graphs and charts are also availablefor monitoring performance counters.
You can set user roles to limit access to different features and servers in your environment,therefore providing better data security.
New Features in Sybase Control Center for ReplicationA brief description for each new and enhanced feature, and links to associated topics.
Table 1. New and enhanced Sybase Control Center for Replication features
Feature Topics
Administration Console – manage existing resourcesand create new ones. Column-based filtering lets youdisplay only the objects you are interested in.
Various topics, including:
Browsing and Managing Resources onpage 140Common Display Options on page 7
About Sybase Control Center for Replication
Sybase Control Center for Replication 1

Feature Topics
Testing scripts – test the execution of alert-triggeredscripts to make sure they work as expected.
Creating an Alert on page 121
Testing an Alert-triggered Script on page148
Automatic logout – a Sybase Control Center admin-istrator can configure the logout timer to end users’login sessions after a specified period of idleness.
Configuring the Automatic Logout Timer onpage 80
Logging out of Sybase Control Center onpage 63
Multiple object selection – in the Perspective Resour-ces view, Resource Explorer, and AdministrationConsole, you can select and perform operations onseveral objects simultaneously.
Various topics, including Unregistering aResource on page 154
Memory management – use environment variables tocontrol Sybase Control Center’s memory use. A newconsole command, info -m, displays memory usagedata.
Configuring Memory Usage on page 56
info Command on page 170
Configure alerts on child objects (such as routes andpaths) that are components of managed resources.
Creating an Alert on page 121
Determine the source, target, and the path of the dataflow anywhere in the replication environment throughreplication tracing.
Replication Tracing on page 173
Control data flow and configure replication parame-ters to resolve performance issues using the QuickAdmin tool.
Data Flow Control on page 176
Setting Replication Parameters on page117
Set up the latency monitoring process to monitor theperformance of the replication environment.
Setting Up the Latency Monitoring Processon page 95
Hide connection thread status in a warm standby en-vironment and in an environment with a non-AdaptiveServer primary database to avoid providing mislead-ing information.
Hiding Connection Thread Status on page180
Monitor the RepAgent thread in an Adaptive Server,either single instance or shared disk cluster.
Displaying RepAgent Thread Status inAdaptive Server on page 185
View Sybase IQ servers in the replication topology aspart of the replication environment.
Note: Sybase Control Center for Replication supportsSybase IQ only as a replicate database.
Replication Topology on page 173
Monitor additional Replication Server statistics forqueues and Data Server Interface (DSI) thread.
Graphing Performance Counters on page138
About Sybase Control Center for Replication
2

Feature Topics
View information about logical connections associ-ated with a Replication Server.
Displaying Logical Connection Status onpage 178
Check the status bar for information of what is cur-rently happening in the monitoring view, as well aswarning and error messages. Launch the Sybase Con-trol Center log viewer through the button in the leftside of the status bar.
Replication Monitors on page 175
Maximize or minimize a chart view in a replicationmonitor view.
Replication Monitors on page 175
Replication EnvironmentA replication environment is a set of servers—including Replication Servers, data servers, andReplication Agents—that participate in replication.
A replication environment does not need to contain all the server types in a replication systemdomain. It can be a subset of the replication domain identified by the ID Server. In thereplication system, one Replication Server® serves as the ID Server. The ID Server assignsunique ID numbers to every Replication Server and database in the system. The ID Server alsomaintains version information for the system.
These are the servers that you can monitor in your Sybase Control Center replicationenvironment:
• Data Server– a database within a data server may act as the source (primary database) oftransaction data or may be the destination (replicate or standby database) of transactiondata.
• Replication Agent™ for Adaptive Server® Enterprise (ASE) – is embedded within anAdaptive Server Enterprise and is called RepAgent Thread. The RepAgent Thread readsthe transaction data from the primary database transaction log and sends it to ReplicationServer for distribution to the replicate databases.
• Replication Server – receives the replicated transaction data from a replication agent oranother Replication Server, converts it into SQL, and applies the SQL to the replicate orstandby databases. Replication Server delivers operational data across complex andbroadly distributed data-infrastructures in near real-time. The primary and replicatedatabases can be Sybase or non-Sybase data servers.
• Replication Agent – reads the primary database transactions from database transactionlogs, then sends those transactions to Replication Server for distribution to the replicatedatabases. Replication Agents allow non-Sybase data servers to act as the primary dataservers in a replication system based on Sybase replication technology.
• Mirror Replication Agent – a component in a Mirror Activator disaster recoveryenvironment and, in conjunction with a storage replication system, reads the primary
About Sybase Control Center for Replication
Sybase Control Center for Replication 3

database transactions from mirror log devices, then sends those transactions to ReplicationServer for distribution to the standby databases. The Mirror Activator provides anintegrated disaster recovery solution with:• Standby databases protected from disk corruption (by logical, not literal, replication).• Synchronous replication, with zero data loss and guaranteed data integrity (transaction
consistency).• Complete coverage for databases, as well as non-database systems.
• Sybase IQ – a highly optimized analytics server that works with diverse data, includingunstructured data and different data sources. It serves as a replicate database in thereplication environment.
The replication environment also includes:
• Components – are objects in a server in a replication environment. Examples ofcomponents in a Replication Server are connections, routes, and queues.
• Replication path – is the set of servers through which transactions pass when movingfrom the primary to the replicate database.
See also• Data Flow Control on page 176
• Replication Servers on page 177
• Replication Agents on page 184
• Replication Paths on page 187
• Compatibility Matrix on page 4
Compatibility MatrixKnow the version of the replication environment servers that are compatible with SybaseControl Center.
Server Version
Replication Server 12.6 or later
Replication Agent 15.0 or later
Mirror Replication Agent 15.0 or later
About Sybase Control Center for Replication
4

Server Version
Adaptive Server Enterprise 15.0.2 or later for Sybase Control Center for Adaptive Server,which offers full monitoring capabilities.
15.0.3 or later for Adaptive Server Cluster Edition monitoring.
12.5.4 or later for Sybase Control Center for Replication, whichmonitors only the RepAgent threads in the registered AdaptiveServer.
Sybase IQ monitoring: 15.1 ESD #2.1 and later
administration: 15.3 and later
See also• Replication Environment on page 3• Data Flow Control on page 176• Replication Servers on page 177• Replication Agents on page 184• Replication Paths on page 187• Resources on page 153• Registering a Replication Server, Replication Agent, or Mirror Replication Agent on page90
User Interface OverviewThis illustration labels important elements of the Sybase Control Center user interface so youcan identify them when they appear in other help topics.
Figure 1: Sybase Control Center User Interface
About Sybase Control Center for Replication
Sybase Control Center for Replication 5

Toolbar IconsDescribes the icons in the Sybase Control Center toolbar for launching and managing views.
Table 2. Toolbar icons
Icon Name Description
Show/Hide Perspective ResourcesView
Displays or minimizes the Perspective Resour-ces view, which lists registered resources in thisperspective.
Launch Resource Explorer Opens the resource explorer, which lists reach-able resources (both registered and unregis-tered).
Launch Heat Chart Opens the perspective heat chart, which gives astatus overview of the registered resources inthis perspective.
Close All Open Views Closes all open and minimized views.
Minimize All Views Minimizes all open views.
Restore All Minimized Views Returns all minimized views to their originalsize.
Cascade All Open Views Arranges open views to overlap each other.
Tile All Open Views Vertically Arranges open views in a vertical manner.
Tile All Open Views Horizontally Arranges open views in a horizontal manner.
Status IconsSybase Control Center uses icons to indicate the status of resources and key performanceindicators (KPIs).
Resource status icons indicate the condition of each resource in the heat chart. In addition, theyare used as badges (small overlays) on server icons in both the heat chart and the PerspectiveResources view. The Perspective Resources view also has a Status column that displays thesame status as the badge in English text.
About Sybase Control Center for Replication
6

Table 3. Resource status icons: Perspective Resources view and heat chart
Icon Status Description
Running Resource is up and running
Pending State is changing—check again
Stopped Resource has been shut down
Warning Resource has encountered a potentially harmful situation
Error Resource has encountered a serious problem
Unknown Resource is unreachable—state cannot be determined
The heat chart uses KPI status icons to indicate the health of the KPIs it displays.
Table 4. KPI status icons: heat chart
Icon Status Description
Normal Value of performance indicator is within the normal range
Warning Value of performance indicator is in the warning range
Critical Value of performance indicator is in the critical range
Common Display OptionsUse data display features to view resource status and to sort, search by resource name and type,and rearrange status information.
Column OptionsThe Administration Console, Perspective Resources view, Resource Explorer, Alert Monitor,heat chart, and other views in Sybase Control Center—including those in product modules—use a tabular grid format to display information about managed resources. You can useoptions provided by the grid format to sort and organize displayed data.
About Sybase Control Center for Replication
Sybase Control Center for Replication 7

Table 5. Column Sorting Options
Sorting Option Description
Simple column-based sorting Click a column name to sort the table based on that column inascending or descending order. The arrow in the column’s sortingtab (to the right of the column name) points up when data is sortedin ascending order or down when data is sorted in descendingorder.
Reversing the order of a column-based sort
Click a column’s sorting tab to reverse its sort from ascending todescending order or vice versa.
Nested sorting based on multiplecolumns
Click the column name for the primary sort. For subsidiary sorts,click the column’s sorting tab. Choose the columns for subsidiarysorts in the order you want to apply them. After you click a sortingtab, it displays its sorting level (1 for the primary sort, 2 for thesecondary sort, and so on).
Rearranging columns Move columns by dragging and dropping them.
The figure below shows a table of servers sorted first by resource type; within type by softwareversion; and within version by server name. The Type and Name columns sort in ascendingorder and the Version column sorts in descending order.
Figure 2: Resources sorted by type, version, and name
About Sybase Control Center for Replication
8

Filter by ColumnThe Administration Console provides a filtering field at the top of each column. Enter afiltering term to narrow the range of objects displayed. For example:
• Enter the name of a server at the top of the Name column to display only that server,database, group, or other named object. The display changes as you enter each character,so you might not need to enter the entire name.
• Enter a version number at the top of the Version column to display only servers runningthat software version.
You can filter on multiple columns; for example, in a listing of servers, use the Status columnto display only running servers, then use the Version column to display running servers usingthe desired software version. Delete the filtering terms to return to the original display.
Full Screen ModeTo increase the screen area available in Sybase Control Center for views and perspectives,
click the icon at the upper-right corner of the perspective area. Click the icon again to returnto the original screen configuration.
Tip: To increase the screen area available to SCC, press F11 to switch Internet Explorer orFirefox to full screen mode. Press F11 again to return to the original browser configuration.
Maximize a Section of a View
Some areas within views have a square minimize/maximize icon ( ) in the upper-rightcorner. Click the icon to expand that area to fill the entire view. Click the icon again to restorethe area to its former size.
View MenuThe Perspective Resources view, the Resource Explorer, the Alert Monitor, and the heat charteach have a View menu. From the View menu, you can:
• Display the filtering tool for searches. (In the heat chart, the Filter option also displays thecolumn selection tool.)
• Toggle between an icon view and a detail view of your resources (Perspective Resourcesview only)
• Refresh the display (Resource Explorer only)
Note: For these tasks, use the View menu in the view window, not the application-level Viewmenu.
See also• Resources on page 153• Registering a Replication Server, Replication Agent, or Mirror Replication Agent on page90
About Sybase Control Center for Replication
Sybase Control Center for Replication 9

Style and Syntax ConventionsA reference to the fonts and special characters used to express command syntax and torepresent elements of system output and user input.
Table 6. Style Conventions
Key Definition
monospaced(fixed-width)
• SQL and program code
• Commands to be entered exactly as shown
• File names
• Directory names
italic monospaced In SQL or program code snippets, placeholders for user-specifiedvalues (see example below).
italic • File and variable names
• Cross-references to other topics or documents
• In text, placeholders for user-specified values (see example be-low)
• Glossary terms in text
bold sans serif • Command, function, stored procedure, utility, class, and meth-od names
• Glossary entries (in the Glossary)
• Menu option paths
• In numbered task or procedure steps, user-interface (UI) ele-ments that you click, such as buttons, check boxes, icons, and soon
A placeholder represents a system- or environment-specific value that you supply. Forexample:installation directory\start.bat
where installation directory is where the application is installed.
About Sybase Control Center for Replication
10

Table 7. Syntax Conventions
Key Definition
{ } Curly braces indicate that you must choose at least one of the enclosed options. Donot type the braces when you enter the command.
[ ] Brackets mean that choosing one or more of the enclosed options is optional. Donot type the brackets when you enter the command.
( ) Parentheses are to be typed as part of the command.
| The vertical bar means you can select only one of the options shown.
, The comma means you can choose as many of the options shown as you like,separating your choices with commas that you type as part of the command.
... An ellipsis (three dots) means you may repeat the last unit as many times as youneed. Do not include ellipses in the command.
Accessibility FeaturesAccessibility ensures access to electronic information for all users, including those withdisabilities.
Documentation for Sybase products is available in an HTML version that is designed foraccessibility.
Vision impaired users can navigate through the online document with an adaptive technologysuch as a screen reader, or view it with a screen enlarger.
Sybase HTML documentation has been tested for compliance with accessibility requirementsof Section 508 of the U.S Rehabilitation Act. Documents that comply with Section 508generally also meet non-U.S. accessibility guidelines, such as the World Wide WebConsortium (W3C) guidelines for Web sites.
Note: You may need to configure your accessibility tool for optimal use. Some screen readerspronounce text based on its case; for example, they pronounce ALL UPPERCASE TEXT asinitials, and MixedCase Text as words. You might find it helpful to configure your tool toannounce syntax conventions. Consult the documentation for your tool.
For information about how Sybase supports accessibility, see the Sybase Accessibility site: http://www.sybase.com/products/accessibility. The site includes links to information aboutSection 508 and W3C standards.
You may find additional information about accessibility features in the productdocumentation.
About Sybase Control Center for Replication
Sybase Control Center for Replication 11

Sybase Control Center Accessibility InformationSybase Control Center uses the Adobe Flex application.
For the most current information about Adobe Flex keyboard shortcuts, see http://livedocs.adobe.com/flex/3/html/help.html?content=accessible_5.html.
Note: To use Sybase Control Center with JAWS for Windows screen reading softwareeffectively, download and install the appropriate Adobe scripts. See www.adobe.com.
About Sybase Control Center for Replication
12

Get Started
Set up Sybase Control Center.
Quick Start for an Evaluation(Optional) Get started using Sybase Control Center quickly if you do not need the full set ofsecurity features. This simplified process is suitable for a small-scale, temporary evaluation orproof-of-concept project, or for checking your installation.
PrerequisitesInstall Sybase Control Center.
Task
Use these tasks to start Sybase Control Center, log in, register and authenticate a server, andmonitor that server.
Note: After completing the tasks below and confirming that SCC is working, set up SCC for aproduction environment if you intend to continue using it.
1. Registering the ODBC Driver in Windows
In Windows, run scc.bat with administrative privileges to register the ODBC driver.
2. Launching Sybase Control Center
Use the scc command to start Sybase Control Center.
3. Getting Started After Installing
Perform postinstallation testing and configuration.
4. Registering a Replication Server, Replication Agent, or Mirror Replication Agent
Register a resource (for example, a server that can be monitored) to make Sybase ControlCenter aware of it and its connection information.
5. Configuring a Login Account to Monitor Replication
Use the security configuration options to add one or more roles to a Sybase Control Centerlogin account or to a group. Roles enable users to perform tasks such as monitoring serversor administering Sybase Control Center.
6. Authenticating a Login Account for a Managed Resource
Specify the login account Sybase Control Center will use when it connects to your serveror agent to collect monitoring data or manage the resource.
7. Displaying Resource Availability
Get Started
Sybase Control Center for Replication 13

Use the heat chart to view availability information on the servers in the current perspective.
8. Displaying Replication Server Status
View the most recent Replication Server statistics. Sybase Control Center automaticallyupdates the page when new status and statistical values are collected.
9. Displaying Replication Agent Status
Review high-level server availability by viewing the Replication Agent or MirrorReplication Agent status.
See also• Get Started in a Production Environment on page 20
Registering the ODBC Driver in WindowsIn Windows, run scc.bat with administrative privileges to register the ODBC driver.
When Sybase Control Center starts for the first time on a Windows machine, it registers itsODBC driver. Because the automatic registration of the ODBC driver edits the registrysettings, you must execute scc.bat using elevated administrative privileges. If you launch forthe first time without adequate privileges, Sybase Control Center generates an error and failsto start.
In Windows Vista, Windows 2008, and Windows 7, you must use the Run as administratorsetting to launch Sybase Control Center even if you already have administrative privileges.This process is described below.
In other versions of Windows, you must be logged in as an administrator to start SybaseControl Center for the first time. You need not follow the steps below.
1. In Windows Vista, Windows 2008, or Windows 7, open the command prompt windowwith administrative privileges:
• Select Start > All Programs > Accessories. Right-click Command Prompt andselect Run as administrator.
• Alternatively, enter cmd in the Start Menu search box and press Shift+Ctrl+Enter.
2. Run scc.bat.
Launching Sybase Control CenterUse the scc command to start Sybase Control Center.
Prerequisites
Install Adobe Flash Player in the browser you will use for Sybase Control Center.
Get Started
14

Task
1. Start Sybase Control Center.
• Windows – navigate to <install_location>\SCC-3_2\bin and double-click scc.bat.
• UNIX – execute scc.sh.
Messages on the progress of the launch appear in a command window. When SybaseControl Center is running, the command window becomes the Sybase Control Centerconsole; you can issue commands to get status information on SCC and its ports, plug-ins,and services.
2. Open a Web browser and enter https://<hostname>:8283/scc.
Getting Started After InstallingPerform postinstallation testing and configuration.
PrerequisitesStart Sybase Control Center.
Task
1. Install Adobe Flash Player 10.1 or later in the Web browser you will use to connect toSybase Control Center.
Flash Player is a free plug-in. You can download the latest version from http://get.adobe.com/flashplayer/.
If Flash Player is already installed but you are not sure which version you have, go to theAdobe test site at http://adobe.com/shockwave/welcome. Click the link that says Testyour Adobe Flash Player installation. The version information box on the next page thatappears displays your Flash Player version.
2. To connect to Sybase Control Center, direct your browser to:
https://<scc_server_hostname>:8283/scc
Note: If you changed the default HTTPS port during installation, use the new port numberinstead of 8283.
3. If you see an error about the security certificate, add Sybase Control Center to yourbrowser’s trusted sites zone (Internet Explorer) or add a security exception (Firefox).
4. Log in. Sybase Control Center has two default login accounts:
• sccadmin – for initial configuration and setting up permanent authentication.• sccuser – for testing.
Neither of these accounts requires a password.
Get Started
Sybase Control Center for Replication 15

Note: The sccadmin and sccuser accounts and the simple login module on which they arebased are not intended for use in a production environment. Sybase recommends that youpass authentication responsibility to your operating system or to LDAP, as described in theSybase Control Center > Get Started > Setting Up Security section of the online help.
Sybase further recommends that you disable sccadmin and sccuser as soon as you have setup and tested authentication, and that you set passwords on the accounts if you do not planto set up and test authentication right away.
5. (Optional) Configure passwords or disable sccadmin and sccuser—see the Sybase ControlCenter Installation Guide for instructions.
Registering a Replication Server, Replication Agent, or MirrorReplication Agent
Register a resource (for example, a server that can be monitored) to make Sybase ControlCenter aware of it and its connection information.
1. In the Resource Explorer, select Resources > Register.
2. Specify:
Table 8. New resource type details
Field Description
Resource Name (Required) Name of the resource to register. Enter the actualname of the server, using uppercase and lowercase letters. If thename registered in Sybase Control Center does not exactlymatch the server name, some monitoring functions, includingthe topology view, do not work.
Resource Type Select a resource type:• ASE Server, Replication Only (12.5.0.0) – monitor only the
RepAgent threads for an Adaptive Server that is older thanversion 15.0.2.0. Choose this type for an Adaptive Serverthat is part of a replication environment.
• Replication Agent (15.5.0.0) – monitor Replication Agent.• Replication Server (15.5.0.0) – monitor Replication Server.
Description A brief description to help you identify the resource.
3. Click Next.
4. Specify the connection information for your resource:
Get Started
16
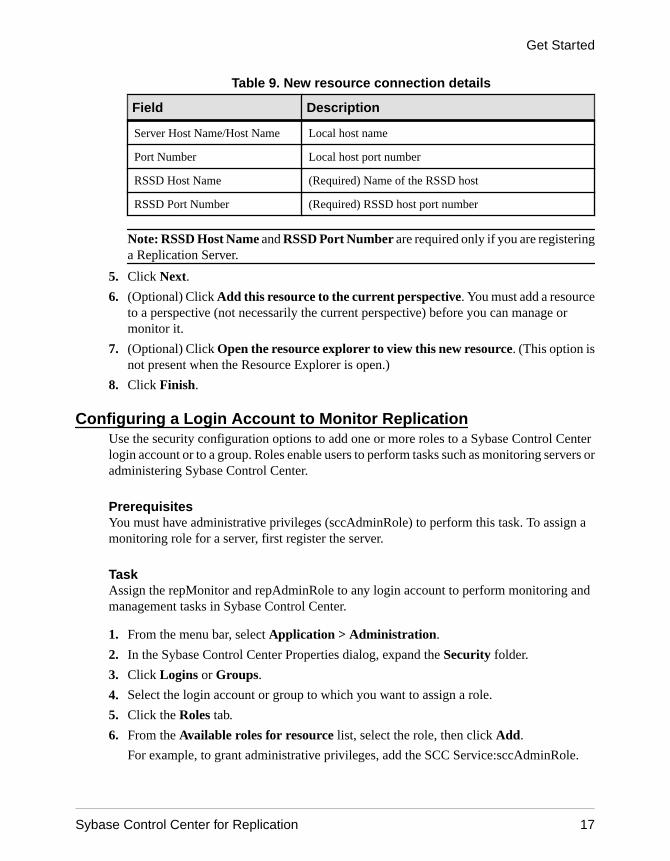
Table 9. New resource connection details
Field Description
Server Host Name/Host Name Local host name
Port Number Local host port number
RSSD Host Name (Required) Name of the RSSD host
RSSD Port Number (Required) RSSD host port number
Note: RSSD Host Name and RSSD Port Number are required only if you are registeringa Replication Server.
5. Click Next.
6. (Optional) Click Add this resource to the current perspective. You must add a resourceto a perspective (not necessarily the current perspective) before you can manage ormonitor it.
7. (Optional) Click Open the resource explorer to view this new resource. (This option isnot present when the Resource Explorer is open.)
8. Click Finish.
Configuring a Login Account to Monitor ReplicationUse the security configuration options to add one or more roles to a Sybase Control Centerlogin account or to a group. Roles enable users to perform tasks such as monitoring servers oradministering Sybase Control Center.
PrerequisitesYou must have administrative privileges (sccAdminRole) to perform this task. To assign amonitoring role for a server, first register the server.
TaskAssign the repMonitor and repAdminRole to any login account to perform monitoring andmanagement tasks in Sybase Control Center.
1. From the menu bar, select Application > Administration.
2. In the Sybase Control Center Properties dialog, expand the Security folder.
3. Click Logins or Groups.
4. Select the login account or group to which you want to assign a role.
5. Click the Roles tab.
6. From the Available roles for resource list, select the role, then click Add.
For example, to grant administrative privileges, add the SCC Service:sccAdminRole.
Get Started
Sybase Control Center for Replication 17

If a role appears in the Has following roles list, it means the account or group has alreadybeen configured with that role.
7. Click OK.
Authenticating a Login Account for a Managed ResourceSpecify the login account Sybase Control Center will use when it connects to your server oragent to collect monitoring data or manage the resource.
Perform this task for each resource registered with Sybase Control Center.
Note: You can also authenticate a server during administrative tasks like creating an alert or acollection job.
1. Connect a browser to Sybase Control Center and log in.
2. If the Perspective Resources view is not open, click the Show/Hide PerspectiveResources View icon in the toolbar.
3. In the Perspective Resources view, select your resource and select Resource >Authenticate from the view menu.
4. Select Use my current SCC login or Specify different credentials.
5. If you chose Specify different credentials, enter the login and password for SybaseControl Center to use to connect to your resource.
6. If the selected server is a Replication Server, also enter the RSSD user name and password.
7. Click OK to save and exit the dialog.
Displaying Resource AvailabilityUse the heat chart to view availability information on the servers in the current perspective.
1. From the application menu bar, select View > Open > Heat Chart.
2. (Optional) To display tools for filtering (narrowing the list of resources in the heat chart) orchanging the columns, select View > Filter from the Perspective Heat Chart menu bar.The Filter and Column tools appear in the left pane.
3. (Optional) To use filtering, select View > Filter from the view’s menu bar and enter asearch term in the Filter string field.
The search term can be any string that appears in the tabular portion of the heat chart, suchas the name, or part of the name, of a server or a resource type (ASE Server, for example).
4. (Optional) Select a filtering setting:
• Match case – search for resources whose displayed data includes the search term,including uppercase and lowercase letters; or
• Exact match – search for resources whose displayed data includes an item identical tothe search term.
Get Started
18

5. (Optional) Select a column from the Filter on list to restrict your search to that column.
6. (Optional) Click Columns to customize your heat chart.
7. (Optional) Unselect any column that should not appear in your heat chart.
8. (Optional) Click the sorting arrow in the column headers to sort the column values in eitherascending or descending order.
9. (Optional) Click the resource’s row and pull down the menu to the right of the resourcename to view options for the selected resource.
10. (Optional) To resize the Filter and Columns tools pane, move your mouse over the borderbetween the tools pane and the resource table. When the mouse cursor changes to a resizeicon, click and drag the border to the left or the right.
11. (Optional) To hide the Filter and Columns tools, unselect View > Filter.
Displaying Replication Server StatusView the most recent Replication Server statistics. Sybase Control Center automaticallyupdates the page when new status and statistical values are collected.
PrerequisitesRegister and add all the servers to be monitored to the Perspective Resources view,authenticate them, and verify that you have permission to perform this task.
Task
1. From the Perspective Resources view, select a Replication Server and click Resource >Monitor .The Replication Server monitor view appears, with the Overview as the default display.
2. (Optional) To maximize or minimize a window within the monitor view, click themaximize or restore window icon in its right corner.
Note: You can also view the server status through the status badges on the server icons in thePerspective Resources, Perspective Heat Chart, Resource Explorer, and Replication Topologyviews.
Displaying Replication Agent StatusReview high-level server availability by viewing the Replication Agent or Mirror ReplicationAgent status.
PrerequisitesRegister and add all the servers to be monitored to the Perspective Resources view,authenticate them, and verify that you have permission to perform this task.
Get Started
Sybase Control Center for Replication 19

Task
1. From the Perspective Resources view, select a Replication Agent and click Resource >Monitor .
The monitor view appears displaying high-level information, which includes the status ofthe selected Replication Agent.
2. (Optional) To maximize or minimize a window within the monitor view, click themaximize or restore window icon in its right corner.
Get Started in a Production EnvironmentPerform a complete set-up of Sybase Control Center, including configuration of userauthentication and other one-time set-up tasks.
1. Starting and Stopping Sybase Control Center in Windows
There are several ways to start and stop Sybase Control Center or the SCC agent. You canstart manually, which is useful for testing and troubleshooting, or set the service to startautomatically and to restart in case of failure.
2. Starting and Stopping Sybase Control Center in UNIX
You can start Sybase Control Center or the SCC agent manually, which is useful for testingand troubleshooting, or you can set up a service to start automatically and to restart in caseof failure.
3. Configuring Memory Usage
(Optional) Determine whether you need to configure how much memory Sybase ControlCenter uses, and if so which configuration method to use.
4. Logging in to Sybase Control Center
Enter the Sybase Control Center Web console.
5. Setting Up Security
Configure login authentication and map roles.
6. Configuring the E-mail Server
(Optional) Specify the e-mail server for Sybase Control Center to use to send e-mail alertnotifications.
7. Configuring the Automatic Logout Timer
(Optional) Set Sybase Control Center to end login sessions when users are inactive for toolong.
8. User Authorization
The authorization mechanism in Sybase Control Center employs login accounts and task-based roles.
Get Started
20

9. Configure
Configure login accounts, statistics collection, and other replication monitoring options.
Starting and Stopping Sybase Control Center in WindowsThere are several ways to start and stop Sybase Control Center or the SCC agent. You can startmanually, which is useful for testing and troubleshooting, or set the service to startautomatically and to restart in case of failure.
This topic applies to both Sybase Control Center (the server) and the Sybase Control Centeragent that runs on each product server managed by SCC.
If you run Sybase Control Center or the SCC agent manually, you must issue a command everytime you start or shut down. If you run as a service (which is recommended), you can configureWindows to automatically start and restart Sybase Control Center or the SCC agent. These arethe options:
• Use the scc.bat command to start Sybase Control Center or the SCC agent manually. Thecommand gives you access to the Sybase Control Center console, which you can use toshut down and to display information about services, ports, system properties, andenvironment variables. You can also use scc.bat to change the logging level fortroubleshooting purposes. Using scc.bat prevents you from taking advantage of theautomatic start and restart features available to services.
• Use the Services list under the Windows Control Panel to start, stop, and configure theSybase Control Center service.
• Use the net start and net stop commands. This is another way to run Sybase ControlCenter or the SCC agent as a service.
Note: To start or stop Sybase Control Center as a service, you must have selected Yes in theinstaller to install Sybase Control Center as a service.
The installer attempts to start Sybase Control Center or the SCC agent as a service andconfigures the service to restart automatically. Before starting, check the Windows Serviceslist for a Sybase Control Center service.
Here are the steps for each option:
• Start Sybase Control Center or the SCC agent:
a) (Skip this step for the SCC agent.) If you are starting Sybase Control Center for the firsttime in Windows Vista, Windows 2008, or Windows 7, set the Run as Administratoroption on the command prompt so that Sybase Control Center can register its ODBCdriver. (This is necessary even if you are logged in as an administrator.)
b) Enter:
%SYBASE%\SCC-3_2\bin\scc.bat
• Stop Sybase Control Center or the SCC agent:
Get Started
Sybase Control Center for Replication 21

a) Enter:
%SYBASE%\SCC-3_2\bin\scc.bat --stop
Note: You can also enter shutdown at the scc-console> prompt.
• Start or stop from the Windows Control Panel; configure automatic start andrestart:a) Open the Windows Control Panel.b) Select Administrative Tools > Services.c) Locate Sybase Control Center 3.2. If the service is running, the status column displays
“Started.”d) To start or stop the service, right-click Sybase Control Center 3.2 and choose Start or
Stop.e) To configure automatic starting, double-click the service.f) To set the service to automatically start when the machine starts, change the Startup
type to Automatic.g) To restart the service in case of failure, choose the Recovery tab and change the First,
Second, and Subsequent failures to Restart Service.h) Click Apply to save the modifications and close the dialog.
• Start or stop the Sybase Control Center service (controlling either Sybase ControlCenter or the SCC agent) from the Windows command line:a) To start the service, enter:
net start "sybase control center 3.2"
The Sybase Control Center 3.2 service is starting......The Sybase Control Center 3.2 service was started successfully.
b) To stop the service, enter:
net stop "sybase control center 3.2"
The Sybase Control Center 3.2 service is stopping.....The Sybase Control Center 3.2 service was stopped successfully.
Starting and Stopping Sybase Control Center in UNIXYou can start Sybase Control Center or the SCC agent manually, which is useful for testing andtroubleshooting, or you can set up a service to start automatically and to restart in case offailure.
This topic applies to both Sybase Control Center (the server) and the Sybase Control Centeragent that runs on each product server managed by SCC.
If you start Sybase Control Center or the SCC agent on a managed server manually, you mustissue a command every time you want to start or stop it. If you run Sybase Control Center or the
Get Started
22

SCC agent as a service (which is recommended), you can configure the service to start andrestart automatically. These are the options:
• Use the scc.sh script to start Sybase Control Center or the SCC agent manually. You cando this in two ways:• Run scc.sh in the foreground to get access to the Sybase Control Center console,
which you can use to shut down and to display information about services, ports,system properties, and environment variables.
• Run scc.sh in the background to suppress the console.You can use scc.sh to run Sybase Control Center at a nondefault logging level fortroubleshooting. When you start manually with scc.sh, you cannot take advantage of theautomatic start and restart features available to services.
• Use the sccd script to configure a service that starts Sybase Control Center or the SCCagent automatically.
Here are the steps for each option:
• Before you start Sybase Control Center or the SCC agent for the first time, setenvironment variables. Do this only once.
a) Change to the Sybase directory (the parent of the Sybase Control Center installationdirectory).
b) Execute one of the following to set environment variables.
Bourne shell:
. SYBASE.sh
C shell:
source SYBASE.csh
• Run Sybase Control Center or the SCC agent in the foreground.
Running in the foreground is a method of manually starting; you must issue comands tostop and restart Sybase Control Center or the SCC agent when you use this method.
a) To start Sybase Control Center or the SCC agent and drop into the console when thestart-up sequence is finished, enter:
$SYBASE/SCC-3_2/bin/scc.sh
• Run Sybase Control Center or the SCC agent in the background.
You can use nohup, &, and > to run Sybase Control Center or the SCC agent in thebackground, redirect output and system error to a file, and suppress the SCC console.Sybase recommends that you do this from the Sybase Control Center bin directory.Running in the background is a method of manually starting; you must issue comands tostop and restart Sybase Control Center or the SCC agent when you use this method.
a) Execute a command similar to the sample below that matches your shell. Both samplecommands direct output to the file scc-console.out. If the output file alreadyexists, you might need to use additional shell operators to append to or truncate thefile.
Get Started
Sybase Control Center for Replication 23

For Bourne shell (sh) or Bash:cd <SCC-install-dir>/bin; nohup ./scc.sh 2>&1 > scc-console.out &
For C shell:cd <SCC-install-dir>/bin; nohup ./scc.sh >& scc-console.out &
• Shut down Sybase Control Center or the SCC agent.
a) To shut down from the scc-console> prompt, enter:
shutdown
Warning! Do not enter shutdown at a UNIX prompt; it shuts down the operatingsystem.
To shut down from the UNIX command line, enter:
$SYBASE/SCC-3_2/bin/scc.sh --stop
• Configure Sybase Control Center or the SCC agent to run as a service.
A UNIX service is a daemon process that starts automatically after the machine is startedand runs in the background. UNIX installations of Sybase Control Center include a shellscript, sccd, which you can use to configure the Sybase Control Center service. (SomeUNIX platforms supply tools that make service configuration easier; Linux chkconfig isan example.)
Note: Sybase recommends that if you are not familiar with the process of setting upservices in UNIX, you delegate this task to a system administrator or consult the systemadministration documentation for your UNIX platform.
a) Copy $SYBASE/SCC-3_2/bin/sccd into this directory:
• AIX (SCC agent only): /etc/rc.d/init.d
• HP-UX (SCC agent only): /sbin/init.d
• All other platforms: /etc/init.d
b) Open sccd and edit the line that sets the SYBASE variable. Set it to the location ofyour Sybase installation (that is, the parent of SCC-3_2, the Sybase Control Centerinstallation directory).
c) In Linux, execute these commands to configure the service to run in run levels 2, 3, 4,and 5:
/usr/sbin/chkconfig --add sccd/usr/sbin/chkconfig --level 2345 sccd
You can test the sccd script with /usr/sbin/service sccd status. (Theservice command accepts these options: start | stop | status | restart.)
d) On non-Linux platforms, locate this directory:
• AIX (SCC agent only): /etc/rc.d/rc<X>.d
• HP-UX (SCC agent only): /sbin/rc<X>.d
Get Started
24

• Solaris: /etc/rc<X>.d
Where <X> is the run level (for example, 3). Make two soft links in the directory foryour platform and set the links to point to:
• AIX (SCC agent only): /etc/rc.d/init.d/sccd: S90sccd and /etc/rc.d/init.d/sccd: K10sccd
• HP-UX (SCC agent only): /sbin/init.d/sccd: S90sccd and /sbin/init.d/sccd: K10sccd
• Solaris: /etc/init.d/sccd: S90sccd and /etc/init.d/sccd:K10sccd
The S90sccd link starts the service and the K10sccd link stops the service. Thetwo-digit numbers in the links indicate the start and stop priorities of the service.
e) Use the S90sccd and K10sccd links to test starting and stopping the service. Thelinks are called automatically when the machine is started or shut down.
Configuring Memory Usage(Optional) Determine whether you need to configure how much memory Sybase ControlCenter uses, and if so which configuration method to use.
It is not usually necessary to configure memory usage for Sybase Control Center. This tablelists memory options you can set and circumstances under which you should considerchanging them.
Modify this value When Guidelines
Maximum memory
• SCC_MEM_MAX – ifyou are starting SCCfrom the command lineor running it as a UNIXservice
• jvmopt=-Xmx – if
you are running SCC asa Windows service
• You need to prevent Sybase Con-trol Center from using more than agiven amount of memory
• An OutOfMemory error saysSybase Control Center is out ofheap space
• A warning message about systemmemory appears during the startprocess
• The machine where Sybase Con-trol Center is installed has lessthan 2GB of memory. (StartingSCC on a machine with less than2GB of memory triggers the start-up warning message about systemmemory.)
On machines with less than 2GB ofmemory, set maximum memory to256MB or more.
Default value: none. (On machineswith 2GB or more of memory, maxi-mum memory is set dynamically andis effectively limited only by theamount of system memory available.)
Get Started
Sybase Control Center for Replication 25

Modify this value When Guidelines
Permanent memory
• SCC_MEM_PERM –if you are starting SCCfrom the command lineor running it as a UNIXservice
• jvmopt=-XX:MaxPerm-Size – if you are run-
ning SCC as a Win-dows service
An OutOfMemory error says SybaseControl Center is out of permanentgeneration space
Increase by 32MB increments. If youreach a value equal to twice the de-fault and still see the OutOfMemoryerror, contact Sybase technical sup-port.
Default value: 128MB
You can change memory options in two ways:
• For Sybase Control Center started from the command line – execute commands to set oneor more environment variables before executing the scc command to start Sybase ControlCenter. When you use this method, your changes to the memory options last only as long asthe current login session. This method is useful for testing new option values.
• For the Sybase Control Center service – modify a file used by the Sybase Control Centerservice. (Windows and UNIX services use different files.) When you use this method, yourchanges to the memory options persist—Sybase Control Center uses them every time itstarts as a service.
See also• Logging in to Sybase Control Center on page 28
Changing a Memory Option on the Command LineBefore you start Sybase Control Center from the command line, you can issue a command tochange the value of a memory option temporarily.
Changes made using this method last only as long as the current login session. This method isuseful for testing new option values.
1. If Sybase Control Center is running, shut it down.
2. Set the environment variable using a command appropriate for your operating system.Specify a size in megabytes but do not indicate the units in the command.
Windows example:> set SCC_MEM_MAX=512
UNIX example:bash$ export SCC_MEM_MAX=512
Get Started
26

3. Use the scc command to start Sybase Control Center.
See also• Changing a Memory Option for an SCC Windows Service on page 27
• Changing a Memory Option for an SCC UNIX Service on page 27
Changing a Memory Option for an SCC Windows ServiceAdd a jvmopt command to the scc.properties file to change a memory option (-Xmx or-XX:MaxPermSize) for a Sybase Control Center Windows service.
When you use this method to set memory options, your changes are permanent—SybaseControl Center uses them every time it starts as a service.
1. If Sybase Control Center is running, shut it down.
2. Open the SCC properties file:
<SCC-install-directory>\SCC-3_2\bin\scc.properties
3. Add (or modify, if it already exists) a jvmopt line specifying the memory size in Javaformat. Use m for megabytes or g for gigabytes.
For example:jvmopt=-Xmx512m
4. Save the file and start the Sybase Control Center Windows service.
See also• Changing a Memory Option on the Command Line on page 26
• Changing a Memory Option for an SCC UNIX Service on page 27
Changing a Memory Option for an SCC UNIX ServiceTo change a memory setting for a Sybase Control Center UNIX service, add the appropriateenvironment variable (SCC_MEM_MAX or SCC_MEM_PERM) to the sccd script.
When you use this method to set memory options, your changes are permanent—SybaseControl Center uses them every time it starts as a service.
1. If Sybase Control Center is running, shut it down.
2. Open the sccd file: /etc/init.d/sccd
3. Add the environment variable at the top of the file (after the comments). Specify a size inmegabytes but do not indicate the units in the command.
For example:SCC_MEM_MAX=512
4. Save the file and start the Sybase Control Center UNIX service.
Get Started
Sybase Control Center for Replication 27

See also• Changing a Memory Option on the Command Line on page 26
• Changing a Memory Option for an SCC Windows Service on page 27
Logging in to Sybase Control CenterEnter the Sybase Control Center Web console.
PrerequisitesInstall Adobe Flash Player in the browser you will use for SCC. See the Sybase Control CenterInstallation Guide.
TaskSybase Control Center typically authenticates users through the operating system or an LDAPdirectory service. Consult your SCC administrator if you are not sure which login account touse for SCC.
Note: When logging in to a newly installed Sybase Control Center for which secureauthentication has not been configured, use the sccadmin account (with no password, bydefault). For more information, see the Sybase Control Center Installation Guide.
1. Connect to the Sybase Control Center server. In your Web browser, enter: https://scc-hostname:8283/scc.
2. Enter your user name and password, and click Login.
Tip: If you use a Windows account to log in to SCC, enter your user name in the formatusername@domain. Omit top-level domain extensions such as .com or .net—for example,enter fred@sybase, not [email protected].
See also• Configuring Memory Usage on page 25
Setting Up SecurityConfigure login authentication and map roles.
Read about security and follow these procedures before you configure Sybase Control Centerproduct modules.
Note: These security topics are intended for use in a production environment. If you areevaluating or testing SCC, see the Installation Guide for instructions on getting startedquickly.
1. Security
Get Started
28

Sybase Control Center can authenticate user logins through an LDAP server, through theoperating system, or both.
2. Configuring Authentication for WindowsAuthentication through the Windows operating system is enabled by default, but itrequires some configuration. First, set Sybase Control Center to create an account when aWindows user logs in to Sybase Control Center.
3. Configuring a Pluggable Authentication Module (PAM) for UNIXSet up Sybase Control Center to support username and password login using accounts onthe UNIX operating system. Optionally, have Sybase Control Center create an accountwhen a UNIX user first logs in to Sybase Control Center.
4. Configuring an LDAP Authentication ModuleConfigure an LDAP authentication module for Sybase Control Center by editing thesecurity properties file to point to the correct LDAP server.
5. Mapping Sybase Control Center Roles to LDAP or OS GroupsTo grant Sybase Control Center privileges to users who are authenticated through LDAP orthe operating system, associate roles used in Sybase Control Center with groups in LDAPor the operating system.
6. Encrypting a PasswordUse the passencrypt utility to encrypt passwords and other values that must be kept securewhile stored in text files.
7. Configuring Ports(Optional) Use the scc -port command to assign Sybase Control Center services to newports.
See also• Configuring the E-mail Server on page 44
SecuritySybase Control Center can authenticate user logins through an LDAP server, through theoperating system, or both.
• Sybase Control Center can be configured to authenticate through any LDAP server thatsupports the inetOrgPerson (RFC 2798) schema.
• When Sybase Control Center authenticates through the operating system, it uses theoperating system of the Sybase Control Center server machine (not the client).
Although you can create native user accounts in Sybase Control Center, Sybase does notrecommend this approach to authentication. It is simpler and safer to configure SybaseControl Center to authenticate using existing LDAP, Windows, or UNIX login accounts.
Sybase strongly recommends that you use a common authentication provider for all Sybaseproducts, including Sybase Control Center. A common authentication provider ensures thatsingle sign-on works for users of Sybase Control Center and its managed servers.
Get Started
Sybase Control Center for Replication 29

Sybase Control Center requires each authenticated login account to have a predefined role.When a login is authenticated, roles for the login are retrieved by the security module and aremapped to Sybase Control Center predefined roles. Authorization is resolved through themappings between the security module native roles and Sybase Control Center roles. You canenable mappings by creating a "sybase" group in your operating system or LDAP server andadding all Sybase Control Center users, or by modifying the Sybase Control Center roles-map.xml file to configure the mapping of native roles to Sybase Control Center roles. Thesecurity module authenticates the logins and authorizes access to managed resources.
Sybase Control Center provides a set of predefined login modules for authentication. All loginmodules are defined in the <install_location>/SCC-3_2/conf/csi.properties file. The syntax is defined by the Sybase Common SecurityInfrastructure (CSI) framework. You can configure the different login modules to customizesecurity strength. The login modules are:
• Simple Login – defines a user name, password, and a list of roles. The default user name is“sccadmin” with a blank password and a native role of “sccAdminRole”. You can createadditional accounts by adding simple login modules to csi.properties. However,Sybase does not recommend the use of simple login modules for authentication inproduction environments.
Note: Add a password for the sccadmin account as soon as possible after you installSybase Control Center. See the Sybase Control Center Installation Guide for instructions.
• NT Proxy Login – delegates authentication to the underlying Windows operating system.When you log in to Sybase Control Center through an NT Proxy Login module, enter youruser name in the format username@nt-domain-name. For example, [email protected] authentication is enabled by default, but it requires some configuration.
• UNIX Proxy Login – delegates authentication to the underlying UNIX or Linux operatingsystem using Pluggable Authentication Modules (PAM). When you log in to SybaseControl Center through a UNIX PAM, enter only your user name. UNIX authentication isenabled by default, but it requires some configuration.
• LDAP Login – delegates authentication to an LDAP server you specify. When you log in toSybase Control Center through an LDAP server, enter only your user name. LDAPauthentication is not enabled by default; you must configure the login module.
Configuring Authentication for WindowsAuthentication through the Windows operating system is enabled by default, but it requiressome configuration. First, set Sybase Control Center to create an account when a Windowsuser logs in to Sybase Control Center.
This task is optional. However, if you choose not to create Sybase Control Center accountsautomatically as described here, you must enter them manually. Sybase Control Center needsthe accounts for purposes of setting authorization (user privileges).
Get Started
30

1. Log in to Sybase Control Center using an account with administrative privileges. (Thelogin account or its group must have sccAdminRole.)
2. Select Application > Administration > Security.
3. Check the box labeled Automatically add SCC login records for authenticatedlogins.
4. Check the box labeled Automatically grant sccUserRole to newly created logins.
5. Click OK to close the Security dialog.
Next
There are two next steps:
• If you opted not to automatically create Sybase Control Center login accounts, enter eachaccount into Sybase Control Center manually.
• Whether you add accounts automatically or manually, you must grant privileges to anylogin accounts that require more than basic user access. You can grant privileges byassigning Sybase Control Center roles directly to the login accounts, or by assigning thelogin accounts to groups and mapping Sybase Control Center roles to the groups. Thegroup approach is generally more efficient.
Configuring a Pluggable Authentication Module (PAM) for UNIXSet up Sybase Control Center to support username and password login using accounts on theUNIX operating system. Optionally, have Sybase Control Center create an account when aUNIX user first logs in to Sybase Control Center.
1. Using a login account with root privileges, configure the pluggable authentication modulefor your platform:
Platform Action
Solaris Append the contents of the <SCC-install-dir>/utility/su-nos/pam.conf file (provided with Sybase Control Center) to the /etc/pam.conf file on your Solaris platform.
Linux Copy the <SCC-install-dir>/utility/linux/sybase-uafile (provided with Sybase Control Center) to the /etc/pam.d directory onyour Linux platform.
Note: The sybase-ua file provided with Sybase Control Center is not com-patible with the most recent SUSE Linux versions. For SUSE 11 and later, seethe example at the end of this topic.
Note: In the table above, the portion of the path that indicates the operating system mightdiffer slightly from what is shown.
Get Started
Sybase Control Center for Replication 31

2. (Skip if you configured a PAM before starting Sybase Control Center) Restart SybaseControl Center.
3. (Optional) If you want Sybase Control Center to create an account when a UNIX user logsin to Sybase Control Center, execute these steps. If you choose not to create SybaseControl Center accounts automatically, you must enter them manually. Sybase ControlCenter needs the accounts for purposes of setting authorization (user privileges).
a) Log in to Sybase Control Center using an account with administrative privileges(sccAdminRole).
b) Select Application > Administration > Security.c) Check the box labeled Automatically add SCC login records for authenticated
logins.d) Click OK to close the Security dialog.
Example: PAM for SUSE Linux 11 and later
For SUSE 11 and later, do not use the sybase-ua file provided with Sybase Control Center.Instead, in your /etc/pam.d directory, create a sybase-ua file that contains:
# sybase-ua PAM Configuration (SUSE style)auth include common-authaccount include common-accountpassword include common-passwordsession include common-session
Next
There are two next steps:
• If you opted not to automatically create Sybase Control Center login accounts, enter eachaccount into Sybase Control Center manually.
• Whether you add accounts automatically or manually, you must also grant privileges to thelogin accounts. You can grant privileges by assigning Sybase Control Center roles directlyto the login accounts, or by assigning the login accounts to groups and mapping SybaseControl Center roles to the groups. The group approach is generally more efficient.
Configuring an LDAP Authentication ModuleConfigure an LDAP authentication module for Sybase Control Center by editing the securityproperties file to point to the correct LDAP server.
1. Open the <SCC-install-dir>\conf\csi.properties file.
2. Uncomment the LDAP module in the properties file by removing the # symbol at thebeginning of each line (or, if necessary, add an LDAP module to the file). The samplemodule below specifies the LDAP server that will provide user authentication.
The sample module shows the properties used for an OpenDS LDAP server. See theexample at the end for values that work for ActiveDirectory. Configuration properties youcan use in the LDAP module are described in a subtopic.
Get Started
32

Each line of the LDAP server module of the properties file must begin with"CSI.loginModule." followed by a module number. (The module number in this sample is7.) The module number you assign must be unique in the properties file, and you must usethe same module number in every line of the module.CSI.loginModule.7.options.AuthenticationSearchBase=ou=users,dc=example,dc=comCSI.loginModule.7.options.BindDN=cn=Directory ManagerCSI.loginModule.7.options.BindPassword=secretCSI.loginModule.7.options.DefaultSearchBase=dc=example,dc=comCSI.loginModule.7.options.ProviderURL=ldap://localhost:10389CSI.loginModule.7.options.RoleSearchBase=ou=groups,dc=example,dc=comCSI.loginModule.7.options.ServerType=openldapCSI.loginModule.7.options.moduleName=LDAP Login ModuleCSI.loginModule.7.controlFlag=sufficientCSI.loginModule.7.provider=com.sybase.ua.services.security.ldap.LDAPLoginModule
Note: Change the values of bolded lines only.
3. Save the file.
4. If your LDAP server’s SSL certificate is signed by a nonstandard certificate authority (forexample, if it is a self-signed certificate), use the keytool utility to configure your JVM orJDK to trust the certificate. Execute a command similar to this:
keytool -import -keystore <sybase-dir>/shared/JRE-6_0_6/bin/keytool/lib/security/cacerts -file <your cert file and path> -alias ldapcert -storepass changeit
LDAP configuration values for ActiveDirectory
For an ActiveDirectory server, use these values for configuration properties in your LDAPlogin module: ServerType: msad2KDefaultSearchBase: dc=<domainname>,dc=<tld> or o=<company name>,c=<country code> E.g. dc=sybase,dc=com or o=Sybase,c=usProviderUrl: ldaps://<hostname>:<port> E.g.: ldaps://myserver:636AuthenticationFilter: (&(userPrincipalName={uid}) (objectclass=user))BindDN: <User with read capability for all users>BindPassword: <Password for BindDN user>RoleFilter: (|(objectclass=groupofnames) (objectclass=group))controlFlag: sufficient
NextThere are two additional steps:
• Set up roles and passwords for LDAP
Get Started
Sybase Control Center for Replication 33

• Map Sybase Control Center role to LDAP groups
See also• Mapping Sybase Control Center Roles to LDAP or OS Groups on page 41
Setting Up Roles and PasswordsSet the initial user roles and passwords required for Sybase Control Center to authenticatethrough an LDAP server.
PrerequisitesConfigure an LDAP authentication module.
Task
1. Open the <SCC-install-dir>\conf\roles-map.xml file and add an LDAPlogin module.
Insert an LDAP login module similar to this at the end of the security-modules portion ofthe file, just before </security-modules>:
<module name="LDAP Login Module"> <role-mapping modRole="sybase" uafRole="uaAnonymous,uaPluginAdmin,sccUserRole" /> <role-mapping modRole="administrators" uafRole="uaAnonymous,sccAdminRole" /> </module>
2. Ensure that the roles defined in the LDAP repository match the roles defined in roles-map.xml.
3. In the <SCC-install-dir>\conf\csi.properties file, set the BindPasswordand ProviderURL properties with values used in your deployment.
Sybase recommends that you encrypt sensitive values before saving them incsi.properties.
NextMap Sybase Control Center roles to LDAP groups.
See also• LDAP Configuration Properties on page 35
Get Started
34

LDAP Configuration PropertiesUse these properties in your csi.properties file to control your LDAP service.
Property Default Value Description
ServerType None Optional. The type of LDAP server you are con-necting to:
• sunone5 -- SunOne 5.x OR iPlanet 5.x
• msad2k -- Microsoft ActiveDirectory, Win-
dows 2000
• nsds4 -- Netscape Directory Server 4.x
• openldap -- OpenLDAP Directory Server
2.x
The value you choose establishes default valuesfor these other authentication properties:
• RoleFilter
• UserRoleMembership
• RoleMemberAttributes
• AuthenticationFilter
• DigestMD5Authentication
• UseUserAccountControl
ProviderURL ldap://local-host:389
The URL used to connect to the LDAP server. Usethe default value if the server is:
• Located on the same machine as your productthat is enabled with the common security in-frastructure.
• Configured to use the default port (389).
Otherwise, use this syntax for setting the value:
ldap://<hostname>:<port>
Get Started
Sybase Control Center for Replication 35

Property Default Value Description
DefaultSearchBase None The LDAP search base that is used if no othersearch base is specified for authentication, roles,attribution and self registration:
1. dc=<domainname>,dc=<tld>
For example, a machine in sybase.com do-main would have a search base of dc=syb-ase,dc=com.
2. o=<company name>,c=<countrycode>
For example, this might be o=Sybase,c=us fora machine within the Sybase organization.
SecurityProtocol None The protocol to be used when connecting to theLDAP server.
To use an encrypted protocol, use "ssl" instead"ldaps" in the url.
Note: ActiveDirectory requires the SSL protocolwhen setting the value for the password attribute.This occurs when creating a user or updating thepassword of an existing user.
AuthenticationMethod simple The authentication method to use for all authen-tication requests into LDAP. Legal values aregenerally the same as those of the java.naming.se-curity.authentication JNDI property. Choose oneof:
• simple — For clear-text password authenti-cation.
• DIGEST-MD5 — For more secure hashedpassword authentication. This method re-quires that the server use plain text passwordstorage and only works with JRE 1.4 or later.
Get Started
36

Property Default Value Description
AuthenticationFilter For most LDAP servers:(&(uid={uid})(object-class=person))
or
For Active Directoryemail lookups:(&(userPrinci-palName={uid})(object-class=user))[ActiveDirec-tory]
For Active DirectoryWindows usernamelookups: (&(sAMAc-count-Name={uid})(object-class=user))
The filter to use when looking up the user.
When performing a username based lookup, thisfilter is used to determine the LDAP entry thatmatches the supplied username.
The string "{uid}" in the filter is replaced with thesupplied username.
AuthenticationScope onelevel The authentication search scope. The supportedvalues for this are:
• onelevel
• subtree
If you do not specify a value or if you specify aninvalid value, the default value is used.
AuthenticationSearchBase none The search base used to authenticate users. If thisvalue is not specified, the LDAP DefaultSearch-Base is used.
Get Started
Sybase Control Center for Replication 37

Property Default Value Description
BindDN none The user DN to bind against when building theinitial LDAP connection.
In many cases, this user may need read permis-sions on all user records. If you do not set a value,anonymous binding is used. Anonymous bindingworks on most servers without additional config-uration.
However, the LDAP attributer may also use thisDN to create the users in the LDAP server. Whenthe self-registration feature is used, this user mayalso need the requisite permissions to create a userrecord. This behavior can occur if you do not setuseUserCredentialsToBind to true. In this case,
the LDAP attributer uses this DN to update theuser attributes.
BindPassword none BindPassword is the password for BindDN,which is used to authenticate any user. BindDNand BindPassword are used to separate the LDAPconnection into units.
The AuthenticationMethod property determinesthe bind method used for this initial connection.
If you use an encrypted the password using theCSI encryption utility, append .e to the propertyname. For example:
CSI.loginModule.7.options.BindPassword.e=1-AAAAEgQQOLL+LpXJO8fO9T4SrQYRC9lRT1w5ePfdczQTDsP8iACk9mDAbm3F3p5a1wXWKK8+NdJuknc7w2nw5aGJlyG3xQ==
RoleSearchBase none The search base used to retrieve lists of roles. Ifthis value is not specified, the LDAP Default-SearchBase is used.
Get Started
38

Property Default Value Description
RoleFilter For SunONE/iPlanet:(&(object-class=ldapsu-bentry) (ob-jectclass=nsro-ledefinition))
For Netscape DirectoryServer: (object-class=groupof-names) (object-class=groupofu-niquenames))
For ActiveDirectory:(object-class=groupof-names) (object-class=group))
The role search filter. This filter should, whencombined with the role search base and role scope,return a complete list of roles within the LDAPserver. There are several default values dependingon the chosen server type. If the server type is notchosen or this property is not initialized, no rolesare available.
RoleMemberAttributes For Netscape DirectoryServer: member,unique-member
The role's member attributes defines a comma-delimited list of attributes that roles may have thatdefine a list of DN's of people who are in the role.
These values are cross referenced with the activeuser to determine the user's role list. One exampleof the use of this property is when using LDAPgroups as placeholders for roles. This propertyonly has a default value when the Netscape servertype is chosen.
RoleNameAttribute cn The attribute for retrieved roles that is the com-mon name of the role. If this value is "dn" it isinterpreted specially as the entire dn of the role asthe role name.
RoleScope onelevel The role search scope. The supported values forthis are:
• onelevel
• subtree
If you do not specify a value or if you specify aninvalid value, the default value is used.
Get Started
Sybase Control Center for Replication 39

Property Default Value Description
UserRoleMembershipAt-tributes
For iPlanet/SunONE:nsRoleDN
For ActiveDirectory:memberOf
For all others: none
The user's role membership attributes property isused to define an attribute that a user has thatcontains the DN's of all of the roles as user is amember of.
These comma-delimited values are then cross-referenced with the roles retrieved in the rolesearch base and search filter to come up with a listof user's roles.
UserFreeformRoleMem-bershipAttributes
None The "freeform" role membership attribute list.Users who have attributes in this comma-delimi-ted list are automatically granted access to roleswhose names are equal to the attribute value. Forexample, if the value of this property is "depart-ment" and user's LDAP record has the followingvalues for the department attribute, { "sales","consulting" }, then the user will be granted roleswhose names are "sales" and "consulting".
Referral ignore The behavior when a referral is encountered. Thevalid values are those dictated by LdapContext,for example, "follow", "ignore", "throw".
DigestMD5Authentication-Format
DN
For OpenLDAP: User-name
The DIGEST-MD5 bind authentication identityformat.
UseUserAccountContro-lAttribute
For most LDAP servers:false
For ActiveDirectory:true
The UserAccountControl attribute to be used fordetecting disabled user accounts, account expira-tions, password expirations and so on. ActiveDir-ectory also uses this attribute to store the aboveinformation.
controlFlag optional Indicates whether authentication with this loginmodule is sufficient to allow the user to log in, orwhether the user must also be authenticated withanother login module. Rarely set to anything otherthan "sufficient" for any login module.
Note: controlFlag is a generic login module op-tion rather than an LDAP configuration property.
See also• Setting Up Roles and Passwords on page 34
Get Started
40

Mapping Sybase Control Center Roles to LDAP or OS GroupsTo grant Sybase Control Center privileges to users who are authenticated through LDAP or theoperating system, associate roles used in Sybase Control Center with groups in LDAP or theoperating system.
You can configure Sybase Control Center to enable users to authenticate through their localoperating system or through an LDAP server. To make this type of authentication work,Sybase Control Center roles must be mapped to groups that exist in the system providingauthentication (LDAP or the operating system) or in the login module.
By default, Sybase Control Center assumes there is a “sybase” group in the authenticatingsystem and maps the LDAP or OS “sybase” group to Sybase Control Center roles to providebasic privileges. The table lists additional default mappings of LDAP and OS groups to SybaseControl Center roles.
Login module OS group Sybase Control Center roles
UNIX Proxy root uaAnonymous, uaAgentAdmin, uaOSAdmin
sybase uaAnonymous, uaPluginAdmin, sccUserRole
user uaAnonymous, uaUser
guest uaAnonymous, uaGuest
NT Proxy Administrators uaAnonymous, uaAgentAdmin, uaOSAdmin
sybase uaAnonymous, uaPluginAdmin, sccUserRole
Users uaAnonymous, uaUser
Guests uaAnonymous, uaGuest
LDAP sybase uaAnonymous, uaPluginAdmin, sccUserRole
There are two ways to accomplish the mapping:
• (Recommended) Add a “sybase” group to the operating system or LDAP server SybaseControl Center is using to authenticate users, and add all users who need to access SybaseControl Center to the “sybase” group.
• Configure Sybase Control Center to use an existing group in LDAP or the operatingsystem by editing the roles-map.xml file. This option is described here.
1. If Sybase Control Center is running, shut it down.
2. In a text editor, open:
<SCC-install-directory>/conf/roles-map.xml
3. Locate the appropriate login module (UNIX or NT (for Windows)).
Get Started
Sybase Control Center for Replication 41

4. Copy the line that maps the “sybase” group and paste it into the module just above theoriginal sybase line.
5. Change “sybase” to the name of the group in your operating system to which SybaseControl Center users belong.
For example, if the group is SCCusers, the new line should look like this:<role-mapping modRole="SCCusers" uafRole="uaAnonymous,uaPluginAdmin,sccUserRole" />
6. Save the file and exit.
7. Start Sybase Control Center.
See also• Configuring an LDAP Authentication Module on page 32
Encrypting a PasswordUse the passencrypt utility to encrypt passwords and other values that must be kept securewhile stored in text files.
You can safely store an encrypted password in a properties file. Enter the password in clear text(unencrypted) when you execute passencrypt and when you use the password to log in.
passencrypt, which is located in the Sybase Control Center bin directory, uses the DESencryption algorithm.
1. Open a command window and change to the bin directory:
Windows: cd <SCC-install-directory>\bin
UNIX: cd <SCC-install-directory>/bin
2. To encrypt a password, enter passencrypt. Enter your new password at the resultingprompt.The passencrypt utility encrypts the password you enter and displays the password inencrypted form.
3. Copy the encrypted password.
4. Paste the encrypted password where needed.
Configuring Ports(Optional) Use the scc -port command to assign Sybase Control Center services to new ports.
PrerequisitesCheck for port conflicts between Sybase Control Center and other software running on thesame host.
Get Started
42

Task
Sybase Control Center cannot function properly if other services use its ports. If you discovera conflict with any port listed in the right column below, you can either reconfigure the otherservice’s port or reconfigure Sybase Control Center as described here.
Shortportname
Description Service names Property names Defaultportnumber
db Database port SccSADataserver
Messaging
Alert
Scheduler
com.sybase.asa.server.port
messaging.db.port
alert.database.port
org.quartz.data-Source.ASA.URL
3638
http Web HTTP port EmbeddedWebCon-tainer
http.port 8282
https Web HTTPS (se-cure HTTP) port
EmbeddedWebCon-tainer
https.port 8283
jiniHttp JINI HTTP server Jini httpPort 9092
jiniRmid JINI Remote Meth-od Invocation dae-mon
Jini rmidPort 9095
msg Messaging port Messaging messaging.port 2000
rmi RMI port RMI port 9999
tds Tabular DataStream™ port (usedto communicatewith other Sybaseproducts)
Tds tdsPort 9998
1. Shut down Sybase Control Center.
2. Execute scc --info ports to display a list of Sybase Control Center services, theirproperties, and their assigned ports.
3. To reassign a port, enter a command in one of these formats:
scc --port port-name=port-number
scc --port service-name:property-name=port-number
Get Started
Sybase Control Center for Replication 43

Use the first, simpler format unless you want to configure the database services to usedifferent ports. (By default, they all use the same port.)
4. Start Sybase Control Center.
5. Execute scc --info ports again to confirm that the port has been reassigned.
Examples
Set all four database services (data server, messaging, database alert, and scheduler) to thesame port, 3639. (The database is SQL Anywhere, used by the Sybase Control Center internalrepository.)
scc --port db=3639
Set only the database messaging service to port 3639.
scc --port Messaging:messaging.db.port=3639
Set the HTTP port to 9292.
scc --port http=9292
Set the Jini RMI daemon to port 9696.
scc --port jiniRmid=9696
Set the main Sybase Control Center messaging service to port 2001.
scc --port msg=2001
Set the RMI port to 9991.
scc --port rmi=9991
Set the Tabular Data Stream port to 9997.
scc --port tds=9997
Note: scc commands that include a port-setting option (-p or --port, for example) do not startSybase Control Center. To start SCC, execute a separate scc command.
Configuring the E-mail Server(Optional) Specify the e-mail server for Sybase Control Center to use to send e-mail alertnotifications.
PrerequisitesLaunch Sybase Control Center and log in using an account with administrative privileges.(The login account or its group must have sccAdminRole.)
Task
1. From the menu bar, select Application > Administration.
2. Select General Settings.
Get Started
44

3. Click the E-mail tab.
4. Enter the name of the e-mail server through which Sybase Control Center will send alertnotifications.
5. Change the default e-mail server port only in consultation with your e-mail administrator.
6. (Optional) Enter an e-mail address and click Send to dispatch a test message.If the test e-mail is received, you have properly configured the server for e-mail alertnotifications.
7. Click OK (to apply the change and close the properties dialog) or Apply (to apply thechange and leave the dialog open).
Next(Optional) Configure automatic logout.
See also• Setting Up Security on page 28
Configuring the Automatic Logout Timer(Optional) Set Sybase Control Center to end login sessions when users are inactive for toolong.
PrerequisitesLaunch Sybase Control Center and log in using an account with administrative privileges.(The login account or its group must have sccAdminRole.)
Task
1. From the menu bar, select Application > Administration.
2. Select General Settings.
3. Click the Auto-Logout tab.
4. Enter the number of minutes after which an idle user will be automatically logged out.
Enter 0 or leave the box empty to disable automatic logout.
5. Click OK (to apply the change and close the properties dialog) or Apply (to apply thechange and leave the dialog open).
User AuthorizationThe authorization mechanism in Sybase Control Center employs login accounts and task-based roles.
Access to Sybase Control Center is controlled by login accounts. You grant permissions to alogin account by assigning predefined roles that control tasks the user can perform in SybaseControl Center, such as administration and monitoring of particular types of Sybase servers.The roles can be assigned directly to login accounts or to groups; a login account inherits the
Get Started
Sybase Control Center for Replication 45

roles of any group to which it belongs. Component product modules assign some rolesautomatically.
Sybase Control Center classifies roles as follows:
• System roles – define how a user can interact with Sybase Control Center.• Product roles – define how a user can interact with a particular managed resource in Sybase
Control Center, for example the Replication Server named RepBoston01.
Note: The tools described here are for managing SCC-enabled login accounts; you cannot usethem to manage accounts and groups that are native to your managed resource.
See also• Configure on page 49
Assigning a Role to a Login or a GroupUse the security configuration options to add one or more roles to a Sybase Control Centerlogin account or to a group. Roles enable users to perform tasks such as monitoring servers oradministering Sybase Control Center.
PrerequisitesYou must have administrative privileges (sccAdminRole) to perform this task. To assign amonitoring role for a server, first register the server.
TaskAssign the sccAdminRole to any login account that will perform administrative tasks inSybase Control Center.
1. From the application menu bar, select Application > Administration.
2. In the Sybase Control Center Properties dialog, expand the Security folder.
3. Click Logins or Groups.
4. In the table, select the login account or group to which you want to assign a role.
5. Click the Roles tab.
6. In the Available roles for resource list, select the role, then click Add. For example, togrant administrative privileges, add the SCC Service:sccAdminRole. To grant monitoringprivileges, add the MonitorRole for the desired server and server type.
Note: Sybase Control Center product modules assign certain roles automatically, so youmight not need to add a MonitorRole.
If a role appears in the Has following roles list, this account or group has already beenconfigured with that role.
7. Click OK.
Get Started
46
See also• Adding a Group on page 47
• Adding a Login Account to a Group on page 47
• Logins, Roles, and Groups on page 48
Adding a GroupUse the security configuration options to create a new group.
PrerequisitesYou must have administrative privileges (sccAdminRole) to perform this task.
TaskGroups can make roles easier to manage. Rather than assigning roles to individual users,assign roles to groups and add users to the groups or remove them as needed.
1. From the main menu bar, select Application > Administration.
2. In the Sybase Control Center Properties dialog, expand the Security folder.
3. Select Groups.
4. Click Create Group.
5. Enter a group name and a description.
6. Click Finish.
See also• Assigning a Role to a Login or a Group on page 46
• Adding a Login Account to a Group on page 47
• Logins, Roles, and Groups on page 48
Adding a Login Account to a GroupUse the security configuration options to add one or more login accounts to a group.
PrerequisitesYou must have administrative privileges (sccAdminRole) to perform this task.
Task
1. From the main menu bar, select Application > Administration.
2. In the Sybase Control Center Properties dialog, expand the Security folder.
3. Click Groups.
4. Select the group to which you want to assign an account.
5. Click the Membership tab.
Get Started
Sybase Control Center for Replication 47

6. Select the account, then click Add.
7. Click OK.
See also• Assigning a Role to a Login or a Group on page 46
• Adding a Group on page 47
• Logins, Roles, and Groups on page 48
Logins, Roles, and GroupsSybase Control Center includes predefined login accounts and roles.
In Sybase Control Center, a login account identifies a user who can connect to the application.An account may have roles that specify the tasks the user is allowed to perform.
Sybase Control Center is designed to delegate user authentication to the operating system or toan LDAP directory service. Delegation requires some configuration, however, so SybaseControl Center comes with two predefined login accounts. Sybase recommends using thepredefined accounts only for installing and setting up Sybase Control Center. These accountsare not intended for use in a production environment.
Table 10. Predefined accounts
Login name Description
sccadmin Can use all the administration features in Sybase Control Center
sccuser Test account with no special privileges
A role is a predefined profile that can be assigned to a login account or a group. Roles controlthe access rights for login accounts. Sybase Contol Center comes with predefined roles thatare intended for use in production environments.
Table 11. Predefined roles
Role Description
sccUserRole Provides nonadministrative access to Sybase Control Center. Requiredfor every user.
sccAdminRole Provides administrative privileges for managing Sybase Control Center.
aseMonitorRole* Provides privileges to monitor the Adaptive Server environment.
iqMonitorRole* Provides privileges to monitor the Sybase IQ environment.
repMonitorRole Provides privileges to monitor the replication environment.
Get Started
48

Role Description
repAdminRole Provides administrative privileges for managing the replication environ-ment.
*These monitoring roles are assigned to users automatically by Sybase Control Centerproduct modules; it is generally not necessary to assign them manually.
A group is made up of one or more login accounts; all the accounts in a group have the rolesgranted to the group. In Sybase Control Center you can create groups to suit your businessrequirements.
See also• Assigning a Role to a Login or a Group on page 46
• Adding a Group on page 47
• Adding a Login Account to a Group on page 47
ConfigureConfigure login accounts, statistics collection, and other replication monitoring options.
1. Registering a Replication Server, Replication Agent, or Mirror Replication Agent
Register a resource (for example, a server that can be monitored) to make Sybase ControlCenter aware of it and its connection information.
2. Importing Resources for Batch Registration
(Optional) Import and register multiple servers from an interfaces or sql.ini file.
3. Creating a Perspective
Create a perspective in which you can add and manage resources.
4. Adding a Resource to a Perspective
Add one or more resources to the current perspective.
5. Configuring a Login Account to Monitor Replication
Use the security configuration options to add one or more roles to a Sybase Control Centerlogin account or to a group. Roles enable users to perform tasks such as monitoring serversor administering Sybase Control Center.
6. Authenticating a Login Account for a Managed Resource
Specify the login account Sybase Control Center will use when it connects to your serveror agent to collect monitoring data or manage the resource.
7. Setting Up the Latency Monitoring Process
Start the latency monitoring process for replication paths in the replication environment.
8. Setting Up Statistics Collection
Get Started
Sybase Control Center for Replication 49

Use the Properties view of your managed resource to create a data collection job and add aschedule to the job.
9. Setting Replication Parameters
Configure replication parameters to improve server performance. Sybase Control Centerfor Replication allows you to configure the parameters for Replication Server, ReplicationAgent, connection and logical connection, route, and Adaptive Server RepAgent thread.
10. Creating an Alert
Use the Add Alert wizard to create an alert instance for your resource.
11. Optional Configuration Steps
Perform additional configuration, including user authorization, alerts, data collectionscheduling, backups, and setting purging options for the repository.
See also• User Authorization on page 45• Logins, Roles, and Groups on page 87• Setting Up Security on page 63• Assigning a Role to a Login or a Group on page 81
Launching Sybase Control CenterUse the scc command to start Sybase Control Center.
Prerequisites
Install Adobe Flash Player in the browser you will use for Sybase Control Center.
Task
1. Start Sybase Control Center.
• Windows – navigate to <install_location>\SCC-3_2\bin and double-click scc.bat.
• UNIX – execute scc.sh.
Messages on the progress of the launch appear in a command window. When SybaseControl Center is running, the command window becomes the Sybase Control Centerconsole; you can issue commands to get status information on SCC and its ports, plug-ins,and services.
2. Open a Web browser and enter https://<hostname>:8283/scc.
See also• Sybase Control Center Console on page 169
Get Started
50

Registering the ODBC Driver in WindowsIn Windows, run scc.bat with administrative privileges to register the ODBC driver.
When Sybase Control Center starts for the first time on a Windows machine, it registers itsODBC driver. Because the automatic registration of the ODBC driver edits the registrysettings, you must execute scc.bat using elevated administrative privileges. If you launch forthe first time without adequate privileges, Sybase Control Center generates an error and failsto start.
In Windows Vista, Windows 2008, and Windows 7, you must use the Run as administratorsetting to launch Sybase Control Center even if you already have administrative privileges.This process is described below.
In other versions of Windows, you must be logged in as an administrator to start SybaseControl Center for the first time. You need not follow the steps below.
1. In Windows Vista, Windows 2008, or Windows 7, open the command prompt windowwith administrative privileges:
• Select Start > All Programs > Accessories. Right-click Command Prompt andselect Run as administrator.
• Alternatively, enter cmd in the Start Menu search box and press Shift+Ctrl+Enter.
2. Run scc.bat.
See also• Starting and Stopping Sybase Control Center in Windows on page 51• Starting and Stopping Sybase Control Center in UNIX on page 53• Configuring Memory Usage on page 56• scc Command on page 59
Starting and Stopping Sybase Control Center in WindowsThere are several ways to start and stop Sybase Control Center or the SCC agent. You can startmanually, which is useful for testing and troubleshooting, or set the service to startautomatically and to restart in case of failure.
This topic applies to both Sybase Control Center (the server) and the Sybase Control Centeragent that runs on each product server managed by SCC.
If you run Sybase Control Center or the SCC agent manually, you must issue a command everytime you start or shut down. If you run as a service (which is recommended), you can configureWindows to automatically start and restart Sybase Control Center or the SCC agent. These arethe options:
• Use the scc.bat command to start Sybase Control Center or the SCC agent manually. Thecommand gives you access to the Sybase Control Center console, which you can use toshut down and to display information about services, ports, system properties, and
Get Started
Sybase Control Center for Replication 51

environment variables. You can also use scc.bat to change the logging level fortroubleshooting purposes. Using scc.bat prevents you from taking advantage of theautomatic start and restart features available to services.
• Use the Services list under the Windows Control Panel to start, stop, and configure theSybase Control Center service.
• Use the net start and net stop commands. This is another way to run Sybase ControlCenter or the SCC agent as a service.
Note: To start or stop Sybase Control Center as a service, you must have selected Yes in theinstaller to install Sybase Control Center as a service.
The installer attempts to start Sybase Control Center or the SCC agent as a service andconfigures the service to restart automatically. Before starting, check the Windows Serviceslist for a Sybase Control Center service.
Here are the steps for each option:
• Start Sybase Control Center or the SCC agent:
a) (Skip this step for the SCC agent.) If you are starting Sybase Control Center for the firsttime in Windows Vista, Windows 2008, or Windows 7, set the Run as Administratoroption on the command prompt so that Sybase Control Center can register its ODBCdriver. (This is necessary even if you are logged in as an administrator.)
b) Enter:
%SYBASE%\SCC-3_2\bin\scc.bat
• Stop Sybase Control Center or the SCC agent:
a) Enter:
%SYBASE%\SCC-3_2\bin\scc.bat --stop
Note: You can also enter shutdown at the scc-console> prompt.
• Start or stop from the Windows Control Panel; configure automatic start andrestart:
a) Open the Windows Control Panel.b) Select Administrative Tools > Services.c) Locate Sybase Control Center 3.2. If the service is running, the status column displays
“Started.”d) To start or stop the service, right-click Sybase Control Center 3.2 and choose Start or
Stop.e) To configure automatic starting, double-click the service.f) To set the service to automatically start when the machine starts, change the Startup
type to Automatic.
Get Started
52

g) To restart the service in case of failure, choose the Recovery tab and change the First,Second, and Subsequent failures to Restart Service.
h) Click Apply to save the modifications and close the dialog.• Start or stop the Sybase Control Center service (controlling either Sybase Control
Center or the SCC agent) from the Windows command line:
a) To start the service, enter:
net start "sybase control center 3.2"
The Sybase Control Center 3.2 service is starting......The Sybase Control Center 3.2 service was started successfully.
b) To stop the service, enter:
net stop "sybase control center 3.2"
The Sybase Control Center 3.2 service is stopping.....The Sybase Control Center 3.2 service was stopped successfully.
See also• Registering the ODBC Driver in Windows on page 51
• Starting and Stopping Sybase Control Center in UNIX on page 53
• Configuring Memory Usage on page 56
• scc Command on page 59
Starting and Stopping Sybase Control Center in UNIXYou can start Sybase Control Center or the SCC agent manually, which is useful for testing andtroubleshooting, or you can set up a service to start automatically and to restart in case offailure.
This topic applies to both Sybase Control Center (the server) and the Sybase Control Centeragent that runs on each product server managed by SCC.
If you start Sybase Control Center or the SCC agent on a managed server manually, you mustissue a command every time you want to start or stop it. If you run Sybase Control Center or theSCC agent as a service (which is recommended), you can configure the service to start andrestart automatically. These are the options:
• Use the scc.sh script to start Sybase Control Center or the SCC agent manually. You cando this in two ways:• Run scc.sh in the foreground to get access to the Sybase Control Center console,
which you can use to shut down and to display information about services, ports,system properties, and environment variables.
• Run scc.sh in the background to suppress the console.
Get Started
Sybase Control Center for Replication 53

You can use scc.sh to run Sybase Control Center at a nondefault logging level fortroubleshooting. When you start manually with scc.sh, you cannot take advantage of theautomatic start and restart features available to services.
• Use the sccd script to configure a service that starts Sybase Control Center or the SCCagent automatically.
Here are the steps for each option:
• Before you start Sybase Control Center or the SCC agent for the first time, setenvironment variables. Do this only once.
a) Change to the Sybase directory (the parent of the Sybase Control Center installationdirectory).
b) Execute one of the following to set environment variables.
Bourne shell:
. SYBASE.sh
C shell:
source SYBASE.csh
• Run Sybase Control Center or the SCC agent in the foreground.
Running in the foreground is a method of manually starting; you must issue comands tostop and restart Sybase Control Center or the SCC agent when you use this method.
a) To start Sybase Control Center or the SCC agent and drop into the console when thestart-up sequence is finished, enter:
$SYBASE/SCC-3_2/bin/scc.sh
• Run Sybase Control Center or the SCC agent in the background.
You can use nohup, &, and > to run Sybase Control Center or the SCC agent in thebackground, redirect output and system error to a file, and suppress the SCC console.Sybase recommends that you do this from the Sybase Control Center bin directory.Running in the background is a method of manually starting; you must issue comands tostop and restart Sybase Control Center or the SCC agent when you use this method.
a) Execute a command similar to the sample below that matches your shell. Both samplecommands direct output to the file scc-console.out. If the output file alreadyexists, you might need to use additional shell operators to append to or truncate thefile.
For Bourne shell (sh) or Bash:cd <SCC-install-dir>/bin; nohup ./scc.sh 2>&1 > scc-console.out &
For C shell:cd <SCC-install-dir>/bin; nohup ./scc.sh >& scc-console.out &
• Shut down Sybase Control Center or the SCC agent.
a) To shut down from the scc-console> prompt, enter:
Get Started
54

shutdown
Warning! Do not enter shutdown at a UNIX prompt; it shuts down the operatingsystem.
To shut down from the UNIX command line, enter:
$SYBASE/SCC-3_2/bin/scc.sh --stop
• Configure Sybase Control Center or the SCC agent to run as a service.
A UNIX service is a daemon process that starts automatically after the machine is startedand runs in the background. UNIX installations of Sybase Control Center include a shellscript, sccd, which you can use to configure the Sybase Control Center service. (SomeUNIX platforms supply tools that make service configuration easier; Linux chkconfig isan example.)
Note: Sybase recommends that if you are not familiar with the process of setting upservices in UNIX, you delegate this task to a system administrator or consult the systemadministration documentation for your UNIX platform.
a) Copy $SYBASE/SCC-3_2/bin/sccd into this directory:
• AIX (SCC agent only): /etc/rc.d/init.d
• HP-UX (SCC agent only): /sbin/init.d
• All other platforms: /etc/init.d
b) Open sccd and edit the line that sets the SYBASE variable. Set it to the location ofyour Sybase installation (that is, the parent of SCC-3_2, the Sybase Control Centerinstallation directory).
c) In Linux, execute these commands to configure the service to run in run levels 2, 3, 4,and 5:
/usr/sbin/chkconfig --add sccd/usr/sbin/chkconfig --level 2345 sccd
You can test the sccd script with /usr/sbin/service sccd status. (Theservice command accepts these options: start | stop | status | restart.)
d) On non-Linux platforms, locate this directory:
• AIX (SCC agent only): /etc/rc.d/rc<X>.d
• HP-UX (SCC agent only): /sbin/rc<X>.d
• Solaris: /etc/rc<X>.d
Where <X> is the run level (for example, 3). Make two soft links in the directory foryour platform and set the links to point to:
• AIX (SCC agent only): /etc/rc.d/init.d/sccd: S90sccd and /etc/rc.d/init.d/sccd: K10sccd
• HP-UX (SCC agent only): /sbin/init.d/sccd: S90sccd and /sbin/init.d/sccd: K10sccd
Get Started
Sybase Control Center for Replication 55

• Solaris: /etc/init.d/sccd: S90sccd and /etc/init.d/sccd:K10sccd
The S90sccd link starts the service and the K10sccd link stops the service. Thetwo-digit numbers in the links indicate the start and stop priorities of the service.
e) Use the S90sccd and K10sccd links to test starting and stopping the service. Thelinks are called automatically when the machine is started or shut down.
See also• Registering the ODBC Driver in Windows on page 51
• Starting and Stopping Sybase Control Center in Windows on page 51
• Configuring Memory Usage on page 56
• scc Command on page 59
Configuring Memory Usage(Optional) Determine whether you need to configure how much memory Sybase ControlCenter uses, and if so which configuration method to use.
It is not usually necessary to configure memory usage for Sybase Control Center. This tablelists memory options you can set and circumstances under which you should considerchanging them.
Modify this value When Guidelines
Maximum memory
• SCC_MEM_MAX – ifyou are starting SCCfrom the command lineor running it as a UNIXservice
• jvmopt=-Xmx – if
you are running SCC asa Windows service
• You need to prevent Sybase Con-trol Center from using more than agiven amount of memory
• An OutOfMemory error saysSybase Control Center is out ofheap space
• A warning message about systemmemory appears during the startprocess
• The machine where Sybase Con-trol Center is installed has lessthan 2GB of memory. (StartingSCC on a machine with less than2GB of memory triggers the start-up warning message about systemmemory.)
On machines with less than 2GB ofmemory, set maximum memory to256MB or more.
Default value: none. (On machineswith 2GB or more of memory, maxi-mum memory is set dynamically andis effectively limited only by theamount of system memory available.)
Get Started
56

Modify this value When Guidelines
Permanent memory
• SCC_MEM_PERM –if you are starting SCCfrom the command lineor running it as a UNIXservice
• jvmopt=-XX:MaxPerm-Size – if you are run-
ning SCC as a Win-dows service
An OutOfMemory error says SybaseControl Center is out of permanentgeneration space
Increase by 32MB increments. If youreach a value equal to twice the de-fault and still see the OutOfMemoryerror, contact Sybase technical sup-port.
Default value: 128MB
You can change memory options in two ways:
• For Sybase Control Center started from the command line – execute commands to set oneor more environment variables before executing the scc command to start Sybase ControlCenter. When you use this method, your changes to the memory options last only as long asthe current login session. This method is useful for testing new option values.
• For the Sybase Control Center service – modify a file used by the Sybase Control Centerservice. (Windows and UNIX services use different files.) When you use this method, yourchanges to the memory options persist—Sybase Control Center uses them every time itstarts as a service.
See also• Registering the ODBC Driver in Windows on page 51• Starting and Stopping Sybase Control Center in Windows on page 51• Starting and Stopping Sybase Control Center in UNIX on page 53• scc Command on page 59
Changing a Memory Option on the Command LineBefore you start Sybase Control Center from the command line, you can issue a command tochange the value of a memory option temporarily.
Changes made using this method last only as long as the current login session. This method isuseful for testing new option values.
1. If Sybase Control Center is running, shut it down.
2. Set the environment variable using a command appropriate for your operating system.Specify a size in megabytes but do not indicate the units in the command.
Windows example:> set SCC_MEM_MAX=512
Get Started
Sybase Control Center for Replication 57

UNIX example:bash$ export SCC_MEM_MAX=512
3. Use the scc command to start Sybase Control Center.
See also• Changing a Memory Option for an SCC Windows Service on page 58
• Changing a Memory Option for an SCC UNIX Service on page 58
• Starting and Stopping Sybase Control Center in Windows on page 51
• Starting and Stopping Sybase Control Center in UNIX on page 53
• scc Command on page 59
Changing a Memory Option for an SCC Windows ServiceAdd a jvmopt command to the scc.properties file to change a memory option (-Xmx or-XX:MaxPermSize) for a Sybase Control Center Windows service.
When you use this method to set memory options, your changes are permanent—SybaseControl Center uses them every time it starts as a service.
1. If Sybase Control Center is running, shut it down.
2. Open the SCC properties file:
<SCC-install-directory>\SCC-3_2\bin\scc.properties
3. Add (or modify, if it already exists) a jvmopt line specifying the memory size in Javaformat. Use m for megabytes or g for gigabytes.
For example:jvmopt=-Xmx512m
4. Save the file and start the Sybase Control Center Windows service.
See also• Changing a Memory Option on the Command Line on page 57
• Changing a Memory Option for an SCC UNIX Service on page 58
• Starting and Stopping Sybase Control Center in Windows on page 51
Changing a Memory Option for an SCC UNIX ServiceTo change a memory setting for a Sybase Control Center UNIX service, add the appropriateenvironment variable (SCC_MEM_MAX or SCC_MEM_PERM) to the sccd script.
When you use this method to set memory options, your changes are permanent—SybaseControl Center uses them every time it starts as a service.
1. If Sybase Control Center is running, shut it down.
2. Open the sccd file: /etc/init.d/sccd
Get Started
58

3. Add the environment variable at the top of the file (after the comments). Specify a size inmegabytes but do not indicate the units in the command.
For example:SCC_MEM_MAX=512
4. Save the file and start the Sybase Control Center UNIX service.
See also• Changing a Memory Option on the Command Line on page 57• Changing a Memory Option for an SCC Windows Service on page 58• Starting and Stopping Sybase Control Center in UNIX on page 53
scc CommandUse scc.bat (Windows) or scc.sh (UNIX) to start and stop Sybase Control Center and toperform administrative tasks like configuring ports, enabling, and disabling services.
Syntaxscc[.bat | .sh] [-a | --address RMI-service-address] [-b | --bitwidth] [--dbpassword][-disable | --disable service-names] [-enable | --enable service-names][-h | --help] [-I | --info [information-category]] [-m | --message message-level] [-password | --password password] [-p | -port | -ports | --port | --ports {port-name=port-number | service-name:property-name=port-number}][{-start | --start} | {-stop | --stop}] [-status | --status] [-user | --user login-name] [-version | --version]
Parameters
• -a | --address RMI-service-address – the address for the RMI service to use; must be an IPaddress on this machine or the name of this machine (which is the default).
• -b | --bitwidth – returns a string identifying the bit width (32 or 64) of the underlyingplatform; Sybase Control Center uses this option to determine which libraries to use for itsinternal database. If you use this option, the scc command does not start Sybase ControlCenter.
• --dbpassword – changes the password of the default dba account provided for therepository database. It prompts you for the new password, validates it, and starts theSybase Control Center server. This option does not work if you start Sybase ControlCenter in the background—the server fails to start if there is no console.
• -disable | --disable service-names – disable the specified Sybase Control Center services.This option does not work while Sybase Control Center is running or as part of a command
Get Started
Sybase Control Center for Replication 59

that starts SCC. To use it, shut down SCC, execute scc --disable, then restart.Separate each service from the next with a comma.
• -enable | --enable service-names – enable the specified Sybase Control Center services.Separate each service from the next with a comma. When you use this option, scc does notstart Sybase Control Center—use a separate command to start SCC.
• -h | --help – display help and usage information for the scc command. If you use thisoption, scc does not start Sybase Control Center.
• -I | --info [information-category] – display the specified categories of information aboutSybase Control Center. Separate each category from the next with a comma. Theinformation categories are:
• all – returns all the information provided by the sys, ports, and services categories.Default option.
• sys – returns general information about this instance of Sybase Control Center,including the version, the home (installation) directory, the host machine’s name andIP address, the RMI port number, the messaging level, and details about the platformand Java installation.
• ports – lists all the ports on which the Sybase Control Center agent and its serviceslisten, indicates whether each port is in use, and shows the service running on eachport.
• services – lists all the services known to the Sybase Control Center agent, indicateswhether each service is enabled, and lists other services on which each servicedepends.
• sysprop – lists all the Java system properties known the Java VM and their values.• env – lists the complete Java VM process environment.
• -m | --message message-level – set the amount of detail recorded in system logs; alsoknown as the logging level. Valid values are OFF, FATAL, ERROR, WARN, INFO,DEBUG, and ALL. WARN is the default.
• -password | --password – specify the password of the user account Sybase Control Centerwill use to stop servers or query them for status. Use this option with --user. When youenter a command with --user but without --password, the console prompts you to enter apassword.
• -p | -port | -ports | --port | --ports {port-name=port-number | service-name:property-name=port-number} – configure the specified service to run on the specified port.Changing ports is useful if you discover a port conflict between Sybase Control Center andother software on the same system. When you use this option, scc does not start SybaseControl Center—use a separate command to start SCC.
Valid port names, service names and property names are:
Get Started
60

Shortportname
Description Service names Property names Defaultportnumber
db Database port SccSADataserver
Messaging
Alert
Scheduler
com.sybase.asa.server.port
messaging.db.port
alert.database.port
org.quartz.data-Source.ASA.URL
3638
http Web HTTP port EmbeddedWebCon-tainer
http.port 8282
https Web HTTPS (se-cure HTTP) port
EmbeddedWebCon-tainer
https.port 8283
jiniHttp JINI HTTP server Jini httpPort 9092
jiniRmid JINI Remote Meth-od Invocation dae-mon
Jini rmidPort 9095
msg Messaging port Messaging messaging.port 2000
rmi RMI port RMI port 9999
tds Tabular DataStream™ port (usedto communicatewith other Sybaseproducts)
Tds tdsPort 9998
You can also execute scc --info ports to display service names and associatedproperty names; they appear in the first two columns of the output.
• -start | --start – start the Sybase Control Center server. This is the default option—if youexecute scc with no options, it starts SCC. This option cannot be combined in the samecommand with options that set ports or enable or disable services; use a separate scccommand to start SCC.
• -status | --status – display a status message indicating whether the Sybase Control Centerserver is running.
• -stop | --stop – shut down the Sybase Control Center server if it is running.• -user | --user [login-name] – specify the user account Sybase Control Center will use to
stop managed servers or query them for status. Use this option with --password. If you donot enter a login name, the console prompts you to enter one.
• -version | --version – display the version of Sybase Control Center software running onthis server. If you use this option, scc does not start Sybase Control Center.
Get Started
Sybase Control Center for Replication 61

Examples
• Set the RMI port – each of these commands sets the RMI port to 9999 (the default). Thefirst command illustrates the port name syntax; the second illustrates the servicename:property name syntax.
scc --port rmi=9999scc --port RMI:port=9999
• Set the RMI port and start SCC – these commands set the RMI port to 9996, then startSCC. Two commands (separated by a semicolon here) are needed because scc does notstart Sybase Control Center when it includes any of the port-setting options.
scc -p rmi=9996; scc
• Set all database ports – this command sets all four of the SQL Anywhere database ports(data server, messaging, database alert, and scheduler) to 3638. (SQL Anywhere is theSybase Control Center internal repository.)
scc -port db=3638
• Set the TDS port – this command sets the TDS port to 9998 (the default):
scc --ports Tds:tdsPort=9998
• Enable a service and start SCC – these commands enable the TDS service, then startSCC. Two commands (separated by a semicolon here) are needed because scc does notstart Sybase Control Center when it includes the -enable option.
scc -enable Tds; scc
Permissions
scc permission defaults to all users. No permission is required to use it.
See also• Registering the ODBC Driver in Windows on page 51• Starting and Stopping Sybase Control Center in Windows on page 51• Starting and Stopping Sybase Control Center in UNIX on page 53• Configuring Memory Usage on page 56• Configuring Ports on page 77• Logging or Message Levels on page 167
Logging in to Sybase Control CenterEnter the Sybase Control Center Web console.
PrerequisitesInstall Adobe Flash Player in the browser you will use for SCC. See the Sybase Control CenterInstallation Guide.
Get Started
62

TaskSybase Control Center typically authenticates users through the operating system or an LDAPdirectory service. Consult your SCC administrator if you are not sure which login account touse for SCC.
Note: When logging in to a newly installed Sybase Control Center for which secureauthentication has not been configured, use the sccadmin account (with no password, bydefault). For more information, see the Sybase Control Center Installation Guide.
1. Connect to the Sybase Control Center server. In your Web browser, enter: https://scc-hostname:8283/scc.
2. Enter your user name and password, and click Login.
Tip: If you use a Windows account to log in to SCC, enter your user name in the formatusername@domain. Omit top-level domain extensions such as .com or .net—for example,enter fred@sybase, not [email protected].
Logging out of Sybase Control CenterWhen you finish working in Sybase Control Center, end your login session.
From the main menu bar, select Application > Logout.
Alternatively, click Logout in the upper-right corner of the window.
Note: If an administrator has configured the automatic logout feature, Sybase Control Centerlogs you out if your session is idle (no typing or mouse movement) for longer than the timeoutperiod, which is set by the administrator.
Setting Up SecurityConfigure login authentication and map roles.
Read about security and follow these procedures before you configure Sybase Control Centerproduct modules.
Note: These security topics are intended for use in a production environment. If you areevaluating or testing SCC, see the Installation Guide for instructions on getting startedquickly.
1. Security
Sybase Control Center can authenticate user logins through an LDAP server, through theoperating system, or both.
2. Configuring Authentication for Windows
Get Started
Sybase Control Center for Replication 63

Authentication through the Windows operating system is enabled by default, but itrequires some configuration. First, set Sybase Control Center to create an account when aWindows user logs in to Sybase Control Center.
3. Configuring a Pluggable Authentication Module (PAM) for UNIXSet up Sybase Control Center to support username and password login using accounts onthe UNIX operating system. Optionally, have Sybase Control Center create an accountwhen a UNIX user first logs in to Sybase Control Center.
4. Configuring an LDAP Authentication ModuleConfigure an LDAP authentication module for Sybase Control Center by editing thesecurity properties file to point to the correct LDAP server.
5. Mapping Sybase Control Center Roles to LDAP or OS GroupsTo grant Sybase Control Center privileges to users who are authenticated through LDAP orthe operating system, associate roles used in Sybase Control Center with groups in LDAPor the operating system.
6. Encrypting a PasswordUse the passencrypt utility to encrypt passwords and other values that must be kept securewhile stored in text files.
7. Configuring Ports(Optional) Use the scc -port command to assign Sybase Control Center services to newports.
SecuritySybase Control Center can authenticate user logins through an LDAP server, through theoperating system, or both.
• Sybase Control Center can be configured to authenticate through any LDAP server thatsupports the inetOrgPerson (RFC 2798) schema.
• When Sybase Control Center authenticates through the operating system, it uses theoperating system of the Sybase Control Center server machine (not the client).
Although you can create native user accounts in Sybase Control Center, Sybase does notrecommend this approach to authentication. It is simpler and safer to configure SybaseControl Center to authenticate using existing LDAP, Windows, or UNIX login accounts.
Sybase strongly recommends that you use a common authentication provider for all Sybaseproducts, including Sybase Control Center. A common authentication provider ensures thatsingle sign-on works for users of Sybase Control Center and its managed servers.
Sybase Control Center requires each authenticated login account to have a predefined role.When a login is authenticated, roles for the login are retrieved by the security module and aremapped to Sybase Control Center predefined roles. Authorization is resolved through themappings between the security module native roles and Sybase Control Center roles. You canenable mappings by creating a "sybase" group in your operating system or LDAP server andadding all Sybase Control Center users, or by modifying the Sybase Control Center roles-
Get Started
64
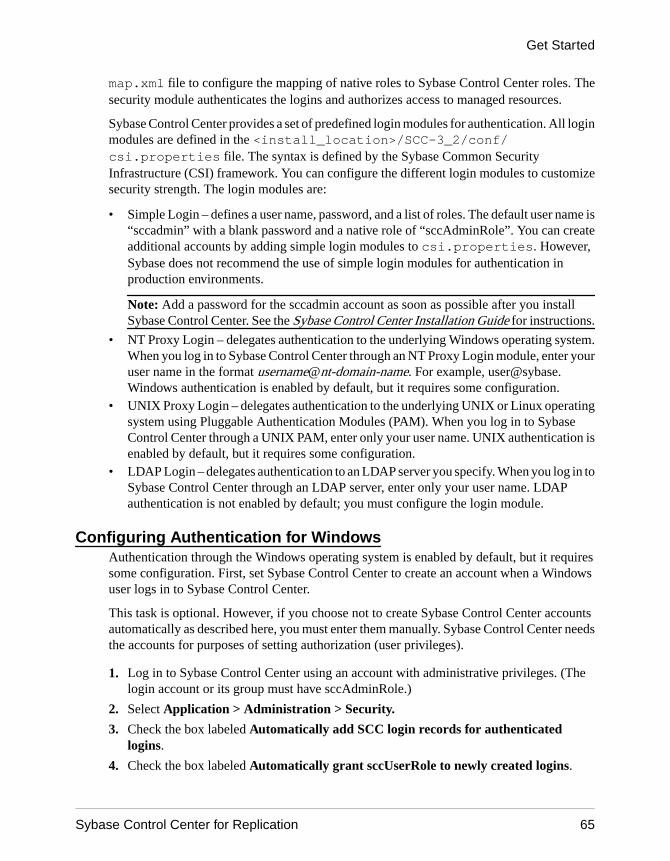
map.xml file to configure the mapping of native roles to Sybase Control Center roles. Thesecurity module authenticates the logins and authorizes access to managed resources.
Sybase Control Center provides a set of predefined login modules for authentication. All loginmodules are defined in the <install_location>/SCC-3_2/conf/csi.properties file. The syntax is defined by the Sybase Common SecurityInfrastructure (CSI) framework. You can configure the different login modules to customizesecurity strength. The login modules are:
• Simple Login – defines a user name, password, and a list of roles. The default user name is“sccadmin” with a blank password and a native role of “sccAdminRole”. You can createadditional accounts by adding simple login modules to csi.properties. However,Sybase does not recommend the use of simple login modules for authentication inproduction environments.
Note: Add a password for the sccadmin account as soon as possible after you installSybase Control Center. See the Sybase Control Center Installation Guide for instructions.
• NT Proxy Login – delegates authentication to the underlying Windows operating system.When you log in to Sybase Control Center through an NT Proxy Login module, enter youruser name in the format username@nt-domain-name. For example, [email protected] authentication is enabled by default, but it requires some configuration.
• UNIX Proxy Login – delegates authentication to the underlying UNIX or Linux operatingsystem using Pluggable Authentication Modules (PAM). When you log in to SybaseControl Center through a UNIX PAM, enter only your user name. UNIX authentication isenabled by default, but it requires some configuration.
• LDAP Login – delegates authentication to an LDAP server you specify. When you log in toSybase Control Center through an LDAP server, enter only your user name. LDAPauthentication is not enabled by default; you must configure the login module.
Configuring Authentication for WindowsAuthentication through the Windows operating system is enabled by default, but it requiressome configuration. First, set Sybase Control Center to create an account when a Windowsuser logs in to Sybase Control Center.
This task is optional. However, if you choose not to create Sybase Control Center accountsautomatically as described here, you must enter them manually. Sybase Control Center needsthe accounts for purposes of setting authorization (user privileges).
1. Log in to Sybase Control Center using an account with administrative privileges. (Thelogin account or its group must have sccAdminRole.)
2. Select Application > Administration > Security.
3. Check the box labeled Automatically add SCC login records for authenticatedlogins.
4. Check the box labeled Automatically grant sccUserRole to newly created logins.
Get Started
Sybase Control Center for Replication 65

5. Click OK to close the Security dialog.
Next
There are two next steps:
• If you opted not to automatically create Sybase Control Center login accounts, enter eachaccount into Sybase Control Center manually.
• Whether you add accounts automatically or manually, you must grant privileges to anylogin accounts that require more than basic user access. You can grant privileges byassigning Sybase Control Center roles directly to the login accounts, or by assigning thelogin accounts to groups and mapping Sybase Control Center roles to the groups. Thegroup approach is generally more efficient.
See also• Mapping Sybase Control Center Roles to LDAP or OS Groups on page 76• Adding a Login Account to the System on page 85
Configuring a Pluggable Authentication Module (PAM) for UNIXSet up Sybase Control Center to support username and password login using accounts on theUNIX operating system. Optionally, have Sybase Control Center create an account when aUNIX user first logs in to Sybase Control Center.
1. Using a login account with root privileges, configure the pluggable authentication modulefor your platform:
Platform Action
Solaris Append the contents of the <SCC-install-dir>/utility/su-nos/pam.conf file (provided with Sybase Control Center) to the /etc/pam.conf file on your Solaris platform.
Linux Copy the <SCC-install-dir>/utility/linux/sybase-uafile (provided with Sybase Control Center) to the /etc/pam.d directory onyour Linux platform.
Note: The sybase-ua file provided with Sybase Control Center is not com-patible with the most recent SUSE Linux versions. For SUSE 11 and later, seethe example at the end of this topic.
Note: In the table above, the portion of the path that indicates the operating system mightdiffer slightly from what is shown.
2. (Skip if you configured a PAM before starting Sybase Control Center) Restart SybaseControl Center.
3. (Optional) If you want Sybase Control Center to create an account when a UNIX user logsin to Sybase Control Center, execute these steps. If you choose not to create Sybase
Get Started
66
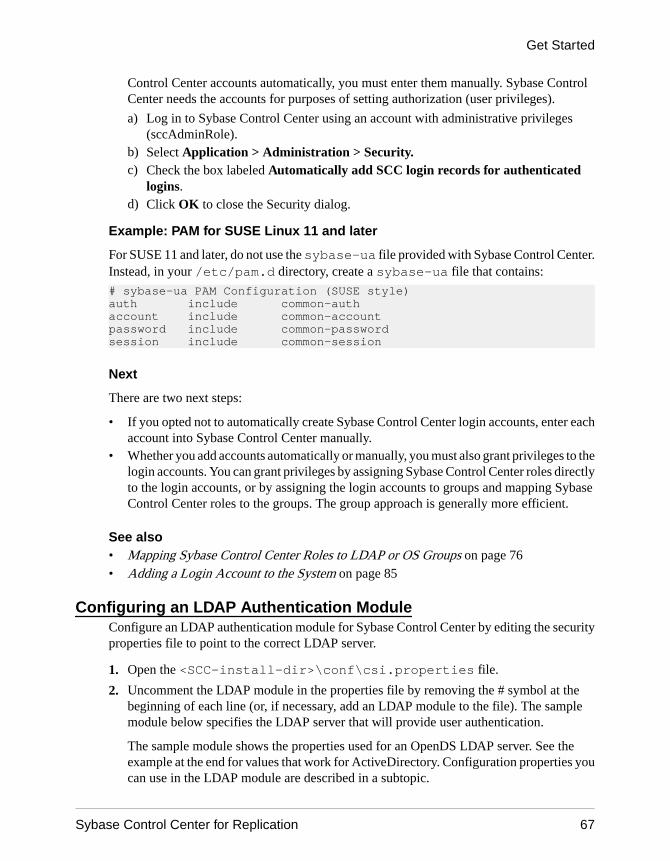
Control Center accounts automatically, you must enter them manually. Sybase ControlCenter needs the accounts for purposes of setting authorization (user privileges).
a) Log in to Sybase Control Center using an account with administrative privileges(sccAdminRole).
b) Select Application > Administration > Security.c) Check the box labeled Automatically add SCC login records for authenticated
logins.d) Click OK to close the Security dialog.
Example: PAM for SUSE Linux 11 and later
For SUSE 11 and later, do not use the sybase-ua file provided with Sybase Control Center.Instead, in your /etc/pam.d directory, create a sybase-ua file that contains:
# sybase-ua PAM Configuration (SUSE style)auth include common-authaccount include common-accountpassword include common-passwordsession include common-session
Next
There are two next steps:
• If you opted not to automatically create Sybase Control Center login accounts, enter eachaccount into Sybase Control Center manually.
• Whether you add accounts automatically or manually, you must also grant privileges to thelogin accounts. You can grant privileges by assigning Sybase Control Center roles directlyto the login accounts, or by assigning the login accounts to groups and mapping SybaseControl Center roles to the groups. The group approach is generally more efficient.
See also• Mapping Sybase Control Center Roles to LDAP or OS Groups on page 76• Adding a Login Account to the System on page 85
Configuring an LDAP Authentication ModuleConfigure an LDAP authentication module for Sybase Control Center by editing the securityproperties file to point to the correct LDAP server.
1. Open the <SCC-install-dir>\conf\csi.properties file.
2. Uncomment the LDAP module in the properties file by removing the # symbol at thebeginning of each line (or, if necessary, add an LDAP module to the file). The samplemodule below specifies the LDAP server that will provide user authentication.
The sample module shows the properties used for an OpenDS LDAP server. See theexample at the end for values that work for ActiveDirectory. Configuration properties youcan use in the LDAP module are described in a subtopic.
Get Started
Sybase Control Center for Replication 67

Each line of the LDAP server module of the properties file must begin with"CSI.loginModule." followed by a module number. (The module number in this sample is7.) The module number you assign must be unique in the properties file, and you must usethe same module number in every line of the module.CSI.loginModule.7.options.AuthenticationSearchBase=ou=users,dc=example,dc=comCSI.loginModule.7.options.BindDN=cn=Directory ManagerCSI.loginModule.7.options.BindPassword=secretCSI.loginModule.7.options.DefaultSearchBase=dc=example,dc=comCSI.loginModule.7.options.ProviderURL=ldap://localhost:10389CSI.loginModule.7.options.RoleSearchBase=ou=groups,dc=example,dc=comCSI.loginModule.7.options.ServerType=openldapCSI.loginModule.7.options.moduleName=LDAP Login ModuleCSI.loginModule.7.controlFlag=sufficientCSI.loginModule.7.provider=com.sybase.ua.services.security.ldap.LDAPLoginModule
Note: Change the values of bolded lines only.
3. Save the file.
4. If your LDAP server’s SSL certificate is signed by a nonstandard certificate authority (forexample, if it is a self-signed certificate), use the keytool utility to configure your JVM orJDK to trust the certificate. Execute a command similar to this:
keytool -import -keystore <sybase-dir>/shared/JRE-6_0_6/bin/keytool/lib/security/cacerts -file <your cert file and path> -alias ldapcert -storepass changeit
LDAP configuration values for ActiveDirectory
For an ActiveDirectory server, use these values for configuration properties in your LDAPlogin module: ServerType: msad2KDefaultSearchBase: dc=<domainname>,dc=<tld> or o=<company name>,c=<country code> E.g. dc=sybase,dc=com or o=Sybase,c=usProviderUrl: ldaps://<hostname>:<port> E.g.: ldaps://myserver:636AuthenticationFilter: (&(userPrincipalName={uid}) (objectclass=user))BindDN: <User with read capability for all users>BindPassword: <Password for BindDN user>RoleFilter: (|(objectclass=groupofnames) (objectclass=group))controlFlag: sufficient
NextThere are two additional steps:
• Set up roles and passwords for LDAP
Get Started
68

• Map Sybase Control Center role to LDAP groups
See also• Mapping Sybase Control Center Roles to LDAP or OS Groups on page 76
Setting Up Roles and PasswordsSet the initial user roles and passwords required for Sybase Control Center to authenticatethrough an LDAP server.
PrerequisitesConfigure an LDAP authentication module.
Task
1. Open the <SCC-install-dir>\conf\roles-map.xml file and add an LDAPlogin module.
Insert an LDAP login module similar to this at the end of the security-modules portion ofthe file, just before </security-modules>:
<module name="LDAP Login Module"> <role-mapping modRole="sybase" uafRole="uaAnonymous,uaPluginAdmin,sccUserRole" /> <role-mapping modRole="administrators" uafRole="uaAnonymous,sccAdminRole" /> </module>
2. Ensure that the roles defined in the LDAP repository match the roles defined in roles-map.xml.
3. In the <SCC-install-dir>\conf\csi.properties file, set the BindPasswordand ProviderURL properties with values used in your deployment.
Sybase recommends that you encrypt sensitive values before saving them incsi.properties.
NextMap Sybase Control Center roles to LDAP groups.
See also• LDAP Configuration Properties on page 70
• Encrypting a Password on page 77
Get Started
Sybase Control Center for Replication 69

LDAP Configuration PropertiesUse these properties in your csi.properties file to control your LDAP service.
Property Default Value Description
ServerType None Optional. The type of LDAP server you are con-necting to:
• sunone5 -- SunOne 5.x OR iPlanet 5.x
• msad2k -- Microsoft ActiveDirectory, Win-
dows 2000
• nsds4 -- Netscape Directory Server 4.x
• openldap -- OpenLDAP Directory Server
2.x
The value you choose establishes default valuesfor these other authentication properties:
• RoleFilter
• UserRoleMembership
• RoleMemberAttributes
• AuthenticationFilter
• DigestMD5Authentication
• UseUserAccountControl
ProviderURL ldap://local-host:389
The URL used to connect to the LDAP server. Usethe default value if the server is:
• Located on the same machine as your productthat is enabled with the common security in-frastructure.
• Configured to use the default port (389).
Otherwise, use this syntax for setting the value:
ldap://<hostname>:<port>
Get Started
70

Property Default Value Description
DefaultSearchBase None The LDAP search base that is used if no othersearch base is specified for authentication, roles,attribution and self registration:
1. dc=<domainname>,dc=<tld>
For example, a machine in sybase.com do-main would have a search base of dc=syb-ase,dc=com.
2. o=<company name>,c=<countrycode>
For example, this might be o=Sybase,c=us fora machine within the Sybase organization.
SecurityProtocol None The protocol to be used when connecting to theLDAP server.
To use an encrypted protocol, use "ssl" instead"ldaps" in the url.
Note: ActiveDirectory requires the SSL protocolwhen setting the value for the password attribute.This occurs when creating a user or updating thepassword of an existing user.
AuthenticationMethod simple The authentication method to use for all authen-tication requests into LDAP. Legal values aregenerally the same as those of the java.naming.se-curity.authentication JNDI property. Choose oneof:
• simple — For clear-text password authenti-cation.
• DIGEST-MD5 — For more secure hashedpassword authentication. This method re-quires that the server use plain text passwordstorage and only works with JRE 1.4 or later.
Get Started
Sybase Control Center for Replication 71

Property Default Value Description
AuthenticationFilter For most LDAP servers:(&(uid={uid})(object-class=person))
or
For Active Directoryemail lookups:(&(userPrinci-palName={uid})(object-class=user))[ActiveDirec-tory]
For Active DirectoryWindows usernamelookups: (&(sAMAc-count-Name={uid})(object-class=user))
The filter to use when looking up the user.
When performing a username based lookup, thisfilter is used to determine the LDAP entry thatmatches the supplied username.
The string "{uid}" in the filter is replaced with thesupplied username.
AuthenticationScope onelevel The authentication search scope. The supportedvalues for this are:
• onelevel
• subtree
If you do not specify a value or if you specify aninvalid value, the default value is used.
AuthenticationSearchBase none The search base used to authenticate users. If thisvalue is not specified, the LDAP DefaultSearch-Base is used.
Get Started
72

Property Default Value Description
BindDN none The user DN to bind against when building theinitial LDAP connection.
In many cases, this user may need read permis-sions on all user records. If you do not set a value,anonymous binding is used. Anonymous bindingworks on most servers without additional config-uration.
However, the LDAP attributer may also use thisDN to create the users in the LDAP server. Whenthe self-registration feature is used, this user mayalso need the requisite permissions to create a userrecord. This behavior can occur if you do not setuseUserCredentialsToBind to true. In this case,
the LDAP attributer uses this DN to update theuser attributes.
BindPassword none BindPassword is the password for BindDN,which is used to authenticate any user. BindDNand BindPassword are used to separate the LDAPconnection into units.
The AuthenticationMethod property determinesthe bind method used for this initial connection.
If you use an encrypted the password using theCSI encryption utility, append .e to the propertyname. For example:
CSI.loginModule.7.options.BindPassword.e=1-AAAAEgQQOLL+LpXJO8fO9T4SrQYRC9lRT1w5ePfdczQTDsP8iACk9mDAbm3F3p5a1wXWKK8+NdJuknc7w2nw5aGJlyG3xQ==
RoleSearchBase none The search base used to retrieve lists of roles. Ifthis value is not specified, the LDAP Default-SearchBase is used.
Get Started
Sybase Control Center for Replication 73

Property Default Value Description
RoleFilter For SunONE/iPlanet:(&(object-class=ldapsu-bentry) (ob-jectclass=nsro-ledefinition))
For Netscape DirectoryServer: (object-class=groupof-names) (object-class=groupofu-niquenames))
For ActiveDirectory:(object-class=groupof-names) (object-class=group))
The role search filter. This filter should, whencombined with the role search base and role scope,return a complete list of roles within the LDAPserver. There are several default values dependingon the chosen server type. If the server type is notchosen or this property is not initialized, no rolesare available.
RoleMemberAttributes For Netscape DirectoryServer: member,unique-member
The role's member attributes defines a comma-delimited list of attributes that roles may have thatdefine a list of DN's of people who are in the role.
These values are cross referenced with the activeuser to determine the user's role list. One exampleof the use of this property is when using LDAPgroups as placeholders for roles. This propertyonly has a default value when the Netscape servertype is chosen.
RoleNameAttribute cn The attribute for retrieved roles that is the com-mon name of the role. If this value is "dn" it isinterpreted specially as the entire dn of the role asthe role name.
RoleScope onelevel The role search scope. The supported values forthis are:
• onelevel
• subtree
If you do not specify a value or if you specify aninvalid value, the default value is used.
Get Started
74

Property Default Value Description
UserRoleMembershipAt-tributes
For iPlanet/SunONE:nsRoleDN
For ActiveDirectory:memberOf
For all others: none
The user's role membership attributes property isused to define an attribute that a user has thatcontains the DN's of all of the roles as user is amember of.
These comma-delimited values are then cross-referenced with the roles retrieved in the rolesearch base and search filter to come up with a listof user's roles.
UserFreeformRoleMem-bershipAttributes
None The "freeform" role membership attribute list.Users who have attributes in this comma-delimi-ted list are automatically granted access to roleswhose names are equal to the attribute value. Forexample, if the value of this property is "depart-ment" and user's LDAP record has the followingvalues for the department attribute, { "sales","consulting" }, then the user will be granted roleswhose names are "sales" and "consulting".
Referral ignore The behavior when a referral is encountered. Thevalid values are those dictated by LdapContext,for example, "follow", "ignore", "throw".
DigestMD5Authentication-Format
DN
For OpenLDAP: User-name
The DIGEST-MD5 bind authentication identityformat.
UseUserAccountContro-lAttribute
For most LDAP servers:false
For ActiveDirectory:true
The UserAccountControl attribute to be used fordetecting disabled user accounts, account expira-tions, password expirations and so on. ActiveDir-ectory also uses this attribute to store the aboveinformation.
controlFlag optional Indicates whether authentication with this loginmodule is sufficient to allow the user to log in, orwhether the user must also be authenticated withanother login module. Rarely set to anything otherthan "sufficient" for any login module.
Note: controlFlag is a generic login module op-tion rather than an LDAP configuration property.
See also• Setting Up Roles and Passwords on page 69
Get Started
Sybase Control Center for Replication 75

Mapping Sybase Control Center Roles to LDAP or OS GroupsTo grant Sybase Control Center privileges to users who are authenticated through LDAP or theoperating system, associate roles used in Sybase Control Center with groups in LDAP or theoperating system.
You can configure Sybase Control Center to enable users to authenticate through their localoperating system or through an LDAP server. To make this type of authentication work,Sybase Control Center roles must be mapped to groups that exist in the system providingauthentication (LDAP or the operating system) or in the login module.
By default, Sybase Control Center assumes there is a “sybase” group in the authenticatingsystem and maps the LDAP or OS “sybase” group to Sybase Control Center roles to providebasic privileges. The table lists additional default mappings of LDAP and OS groups to SybaseControl Center roles.
Login module OS group Sybase Control Center roles
UNIX Proxy root uaAnonymous, uaAgentAdmin, uaOSAdmin
sybase uaAnonymous, uaPluginAdmin, sccUserRole
user uaAnonymous, uaUser
guest uaAnonymous, uaGuest
NT Proxy Administrators uaAnonymous, uaAgentAdmin, uaOSAdmin
sybase uaAnonymous, uaPluginAdmin, sccUserRole
Users uaAnonymous, uaUser
Guests uaAnonymous, uaGuest
LDAP sybase uaAnonymous, uaPluginAdmin, sccUserRole
There are two ways to accomplish the mapping:
• (Recommended) Add a “sybase” group to the operating system or LDAP server SybaseControl Center is using to authenticate users, and add all users who need to access SybaseControl Center to the “sybase” group.
• Configure Sybase Control Center to use an existing group in LDAP or the operatingsystem by editing the roles-map.xml file. This option is described here.
1. If Sybase Control Center is running, shut it down.
2. In a text editor, open:
<SCC-install-directory>/conf/roles-map.xml
3. Locate the appropriate login module (UNIX or NT (for Windows)).
Get Started
76

4. Copy the line that maps the “sybase” group and paste it into the module just above theoriginal sybase line.
5. Change “sybase” to the name of the group in your operating system to which SybaseControl Center users belong.
For example, if the group is SCCusers, the new line should look like this:<role-mapping modRole="SCCusers" uafRole="uaAnonymous,uaPluginAdmin,sccUserRole" />
6. Save the file and exit.
7. Start Sybase Control Center.
See also• Configuring an LDAP Authentication Module on page 67
Encrypting a PasswordUse the passencrypt utility to encrypt passwords and other values that must be kept securewhile stored in text files.
You can safely store an encrypted password in a properties file. Enter the password in clear text(unencrypted) when you execute passencrypt and when you use the password to log in.
passencrypt, which is located in the Sybase Control Center bin directory, uses the DESencryption algorithm.
1. Open a command window and change to the bin directory:
Windows: cd <SCC-install-directory>\bin
UNIX: cd <SCC-install-directory>/bin
2. To encrypt a password, enter passencrypt. Enter your new password at the resultingprompt.The passencrypt utility encrypts the password you enter and displays the password inencrypted form.
3. Copy the encrypted password.
4. Paste the encrypted password where needed.
See also• Setting Up Roles and Passwords on page 69
Configuring Ports(Optional) Use the scc -port command to assign Sybase Control Center services to new ports.
PrerequisitesCheck for port conflicts between Sybase Control Center and other software running on thesame host.
Get Started
Sybase Control Center for Replication 77

Task
Sybase Control Center cannot function properly if other services use its ports. If you discovera conflict with any port listed in the right column below, you can either reconfigure the otherservice’s port or reconfigure Sybase Control Center as described here.
Shortportname
Description Service names Property names Defaultportnumber
db Database port SccSADataserver
Messaging
Alert
Scheduler
com.sybase.asa.server.port
messaging.db.port
alert.database.port
org.quartz.data-Source.ASA.URL
3638
http Web HTTP port EmbeddedWebCon-tainer
http.port 8282
https Web HTTPS (se-cure HTTP) port
EmbeddedWebCon-tainer
https.port 8283
jiniHttp JINI HTTP server Jini httpPort 9092
jiniRmid JINI Remote Meth-od Invocation dae-mon
Jini rmidPort 9095
msg Messaging port Messaging messaging.port 2000
rmi RMI port RMI port 9999
tds Tabular DataStream™ port (usedto communicatewith other Sybaseproducts)
Tds tdsPort 9998
1. Shut down Sybase Control Center.
2. Execute scc --info ports to display a list of Sybase Control Center services, theirproperties, and their assigned ports.
3. To reassign a port, enter a command in one of these formats:
scc --port port-name=port-number
scc --port service-name:property-name=port-number
Get Started
78

Use the first, simpler format unless you want to configure the database services to usedifferent ports. (By default, they all use the same port.)
4. Start Sybase Control Center.
5. Execute scc --info ports again to confirm that the port has been reassigned.
Examples
Set all four database services (data server, messaging, database alert, and scheduler) to thesame port, 3639. (The database is SQL Anywhere, used by the Sybase Control Center internalrepository.)
scc --port db=3639
Set only the database messaging service to port 3639.
scc --port Messaging:messaging.db.port=3639
Set the HTTP port to 9292.
scc --port http=9292
Set the Jini RMI daemon to port 9696.
scc --port jiniRmid=9696
Set the main Sybase Control Center messaging service to port 2001.
scc --port msg=2001
Set the RMI port to 9991.
scc --port rmi=9991
Set the Tabular Data Stream port to 9997.
scc --port tds=9997
Note: scc commands that include a port-setting option (-p or --port, for example) do not startSybase Control Center. To start SCC, execute a separate scc command.
See also• scc Command on page 59
Configuring the E-mail Server(Optional) Specify the e-mail server for Sybase Control Center to use to send e-mail alertnotifications.
PrerequisitesLaunch Sybase Control Center and log in using an account with administrative privileges.(The login account or its group must have sccAdminRole.)
Get Started
Sybase Control Center for Replication 79

Task
1. From the menu bar, select Application > Administration.
2. Select General Settings.
3. Click the E-mail tab.
4. Enter the name of the e-mail server through which Sybase Control Center will send alertnotifications.
5. Change the default e-mail server port only in consultation with your e-mail administrator.
6. (Optional) Enter an e-mail address and click Send to dispatch a test message.If the test e-mail is received, you have properly configured the server for e-mail alertnotifications.
7. Click OK (to apply the change and close the properties dialog) or Apply (to apply thechange and leave the dialog open).
Next(Optional) Configure automatic logout.
See also• Alerts on page 145
• Replication Data Collections on page 99
• Key Performance Indicators and Key Performance Areas for Replication on page 100
• Launching Sybase Control Center on page 50
• Logging in to Sybase Control Center on page 62
Configuring the Automatic Logout Timer(Optional) Set Sybase Control Center to end login sessions when users are inactive for toolong.
PrerequisitesLaunch Sybase Control Center and log in using an account with administrative privileges.(The login account or its group must have sccAdminRole.)
Task
1. From the menu bar, select Application > Administration.
2. Select General Settings.
3. Click the Auto-Logout tab.
4. Enter the number of minutes after which an idle user will be automatically logged out.
Get Started
80

Enter 0 or leave the box empty to disable automatic logout.
5. Click OK (to apply the change and close the properties dialog) or Apply (to apply thechange and leave the dialog open).
See also• Launching Sybase Control Center on page 50
• Logging in to Sybase Control Center on page 62
User AuthorizationThe authorization mechanism in Sybase Control Center employs login accounts and task-based roles.
Access to Sybase Control Center is controlled by login accounts. You grant permissions to alogin account by assigning predefined roles that control tasks the user can perform in SybaseControl Center, such as administration and monitoring of particular types of Sybase servers.The roles can be assigned directly to login accounts or to groups; a login account inherits theroles of any group to which it belongs. Component product modules assign some rolesautomatically.
Sybase Control Center classifies roles as follows:
• System roles – define how a user can interact with Sybase Control Center.• Product roles – define how a user can interact with a particular managed resource in Sybase
Control Center, for example the Replication Server named RepBoston01.
Note: The tools described here are for managing SCC-enabled login accounts; you cannot usethem to manage accounts and groups that are native to your managed resource.
See also• Configuring a Login Account to Monitor Replication on page 93
• Authenticating a Login Account for a Managed Resource on page 94
Assigning a Role to a Login or a GroupUse the security configuration options to add one or more roles to a Sybase Control Centerlogin account or to a group. Roles enable users to perform tasks such as monitoring servers oradministering Sybase Control Center.
PrerequisitesYou must have administrative privileges (sccAdminRole) to perform this task. To assign amonitoring role for a server, first register the server.
Get Started
Sybase Control Center for Replication 81

TaskAssign the sccAdminRole to any login account that will perform administrative tasks inSybase Control Center.
1. From the application menu bar, select Application > Administration.
2. In the Sybase Control Center Properties dialog, expand the Security folder.
3. Click Logins or Groups.
4. In the table, select the login account or group to which you want to assign a role.
5. Click the Roles tab.
6. In the Available roles for resource list, select the role, then click Add. For example, togrant administrative privileges, add the SCC Service:sccAdminRole. To grant monitoringprivileges, add the MonitorRole for the desired server and server type.
Note: Sybase Control Center product modules assign certain roles automatically, so youmight not need to add a MonitorRole.
If a role appears in the Has following roles list, this account or group has already beenconfigured with that role.
7. Click OK.
See also• Alerts on page 145
• Replication Data Collections on page 99
• Key Performance Indicators and Key Performance Areas for Replication on page 100
• Removing a Role from a Login or a Group on page 82
Removing a Role from a Login or a GroupUse the security configuration options to remove one or more roles from a Sybase ControlCenter login acount or from a group.
PrerequisitesYou must have administrative privileges to perform this task.
Task
1. From the menu bar, select Application > Administration.
2. In the Sybase Control Center Properties dialog, expand the Security folder.
3. Click Logins or Groups.
4. Select the login account or group from which you want to remove a role.
5. Click the Roles tab.
6. Select the role, then click Remove.
Get Started
82

7. Click OK.
See also• Assigning a Role to a Login or a Group on page 81
Adding a GroupUse the security configuration options to create a new group.
PrerequisitesYou must have administrative privileges (sccAdminRole) to perform this task.
TaskGroups can make roles easier to manage. Rather than assigning roles to individual users,assign roles to groups and add users to the groups or remove them as needed.
1. From the main menu bar, select Application > Administration.
2. In the Sybase Control Center Properties dialog, expand the Security folder.
3. Select Groups.
4. Click Create Group.
5. Enter a group name and a description.
6. Click Finish.
See also• Removing a Group on page 83
• Adding a Login Account to a Group on page 84
• Removing a Login Account from a Group on page 84
Removing a GroupUse the security configuration options to remove a group.
PrerequisitesYou must have administrative privileges (sccAdminRole) to perform this task.
Task
1. From the main menu bar, select Application > Administration.
2. In the Sybase Control Center Properties dialog, expand the Security folder.
3. Select Groups.
4. Select the group to remove.
Get Started
Sybase Control Center for Replication 83

5. Click Delete.
6. Click OK to confirm the deletion.
See also• Adding a Group on page 83
• Adding a Login Account to a Group on page 84
• Removing a Login Account from a Group on page 84
Adding a Login Account to a GroupUse the security configuration options to add one or more login accounts to a group.
PrerequisitesYou must have administrative privileges (sccAdminRole) to perform this task.
Task
1. From the main menu bar, select Application > Administration.
2. In the Sybase Control Center Properties dialog, expand the Security folder.
3. Click Groups.
4. Select the group to which you want to assign an account.
5. Click the Membership tab.
6. Select the account, then click Add.
7. Click OK.
See also• Adding a Group on page 83
• Removing a Group on page 83
• Removing a Login Account from a Group on page 84
Removing a Login Account from a GroupUse the security configuration options to remove one or more login accounts from a group.
PrerequisitesYou must have administrative privileges (sccAdminRole) to perform this task.
Task
1. From the main menu bar, select Application > Administration.
2. In the Sybase Control Center Properties, expand the Security folder.
Get Started
84

3. Select Groups.
4. Select the group from which to remove members.
5. Click the Membership tab.
6. Select the login, then click Remove.
7. Click OK.
See also• Adding a Group on page 83
• Removing a Group on page 83
• Adding a Login Account to a Group on page 84
Adding a Login Account to the SystemUse the security configuration options to create a native login account in Sybase ControlCenter.
Prerequisites
• You must have administrative privileges (sccAdminRole) to perform this task.• If you intend to use Windows, UNIX, or LDAP to authenticate users, configure the
appropriate authentication module.
Task
Note: Sybase does not recommend that you create a native login account for every SybaseControl Center user. It is more efficient to configure Sybase Control Center to authenticateusers through their Windows, UNIX, or LDAP accounts.
1. From the main menu bar, select Application > Administration.
2. In the Sybase Control Center Properties dialog, expand the Security folder.
3. Select Logins.
4. Click Create Login.
5. Enter a login name and expiration for the new account. Expiration is optional.
6. Click Next.
7. Select Specify new user information.
8. Enter details about the user:
• Title• First name*• M.I. (middle initial)• Last name*• Suffix
Get Started
Sybase Control Center for Replication 85

• E-mail address*• Phone• Ext.• Fax• Mobile• Supports text messaging (checkbox)
*You must fill in the First Name, Last Name, and E-mail Address fields.
9. Click Finish.
Note: If you are using the predefined Simple Login module for authentication, the defaultlogin accounts, “sccadmin” and “sccuser,” come with blank passwords. To change ormodify the passwords, configure the csi.properties file as described in theInstallation Guide.
NextGrant privileges to the new login account. You can grant privileges by assigning SybaseControl Center roles directly to the login accounts, or by assigning the login accounts togroups and mapping Sybase Control Center roles to the groups. The group approach isgenerally more efficient.
Removing a Login Account from the SystemUse the security configuration options to delete a Sybase Control Center login account.
PrerequisitesYou must have administrative privileges (sccAdminRole) to perform this task.
Task
1. From the main menu bar, select Application > Administration.
2. In the Sybase Control Center Properties dialog, expand the Security folder.
3. Select Logins.
4. Select the login to delete.
5. Click Delete.
6. Click OK to confirm the deletion.
Modifying a User ProfileUse the security configuration options to suspend a login account, impose an expiration date,or modify the account’s user information.
PrerequisitesYou must have administrative privileges (sccAdminRole) to perform this task.
Get Started
86

Task
1. From the main menu bar, select Application > Administration.
2. In the Sybase Control Center Properties dialog, expand the Security folder.
3. Select Logins.
4. Select the login account to modify.
5. Click the General tab.
6. To suspend this account, click Login disabled.
7. To set the date on which this account will stop working, click the calendar icon next to theExpiration field and select a data.
8. Click Apply.
9. Click the User Info tab.
10. Edit the user information.
When this user configures e-mail alert subscriptions, Sybase Control Center automaticallypopulates the subscription dialog with the e-mail address you enter here.
11. Click Apply.
Logins, Roles, and GroupsSybase Control Center includes predefined login accounts and roles.
In Sybase Control Center, a login account identifies a user who can connect to the application.An account may have roles that specify the tasks the user is allowed to perform.
Sybase Control Center is designed to delegate user authentication to the operating system or toan LDAP directory service. Delegation requires some configuration, however, so SybaseControl Center comes with two predefined login accounts. Sybase recommends using thepredefined accounts only for installing and setting up Sybase Control Center. These accountsare not intended for use in a production environment.
Table 12. Predefined accounts
Login name Description
sccadmin Can use all the administration features in Sybase Control Center
sccuser Test account with no special privileges
A role is a predefined profile that can be assigned to a login account or a group. Roles controlthe access rights for login accounts. Sybase Contol Center comes with predefined roles thatare intended for use in production environments.
Get Started
Sybase Control Center for Replication 87

Table 13. Predefined roles
Role Description
sccUserRole Provides nonadministrative access to Sybase Control Center. Requiredfor every user.
sccAdminRole Provides administrative privileges for managing Sybase Control Center.
aseMonitorRole* Provides privileges to monitor the Adaptive Server environment.
iqMonitorRole* Provides privileges to monitor the Sybase IQ environment.
repMonitorRole Provides privileges to monitor the replication environment.
repAdminRole Provides administrative privileges for managing the replication environ-ment.
*These monitoring roles are assigned to users automatically by Sybase Control Centerproduct modules; it is generally not necessary to assign them manually.
A group is made up of one or more login accounts; all the accounts in a group have the rolesgranted to the group. In Sybase Control Center you can create groups to suit your businessrequirements.
Get Started
88

Configure
Configure login accounts, statistics collection, and other replication monitoring options.
1. Registering a Replication Server, Replication Agent, or Mirror Replication AgentRegister a resource (for example, a server that can be monitored) to make Sybase ControlCenter aware of it and its connection information.
2. Importing Resources for Batch Registration(Optional) Import and register multiple servers from an interfaces or sql.ini file.
3. Creating a PerspectiveCreate a perspective in which you can add and manage resources.
4. Adding a Resource to a PerspectiveAdd one or more resources to the current perspective.
5. Configuring a Login Account to Monitor ReplicationUse the security configuration options to add one or more roles to a Sybase Control Centerlogin account or to a group. Roles enable users to perform tasks such as monitoring serversor administering Sybase Control Center.
6. Authenticating a Login Account for a Managed ResourceSpecify the login account Sybase Control Center will use when it connects to your serveror agent to collect monitoring data or manage the resource.
7. Setting Up the Latency Monitoring ProcessStart the latency monitoring process for replication paths in the replication environment.
8. Setting Up Statistics CollectionUse the Properties view of your managed resource to create a data collection job and add aschedule to the job.
9. Setting Replication ParametersConfigure replication parameters to improve server performance. Sybase Control Centerfor Replication allows you to configure the parameters for Replication Server, ReplicationAgent, connection and logical connection, route, and Adaptive Server RepAgent thread.
10. Creating an AlertUse the Add Alert wizard to create an alert instance for your resource.
11. Optional Configuration StepsPerform additional configuration, including user authorization, alerts, data collectionscheduling, backups, and setting purging options for the repository.
See also• User Authorization on page 45
Configure
Sybase Control Center for Replication 89

• Logins, Roles, and Groups on page 87
• Setting Up Security on page 63
• Assigning a Role to a Login or a Group on page 81
Registering a Replication Server, Replication Agent, orMirror Replication Agent
Register a resource (for example, a server that can be monitored) to make Sybase ControlCenter aware of it and its connection information.
1. In the Resource Explorer, select Resources > Register.
2. Specify:
Table 14. New resource type details
Field Description
Resource Name (Required) Name of the resource to register. Enter the actualname of the server, using uppercase and lowercase letters. If thename registered in Sybase Control Center does not exactlymatch the server name, some monitoring functions, includingthe topology view, do not work.
Resource Type Select a resource type:• ASE Server, Replication Only (12.5.0.0) – monitor only the
RepAgent threads for an Adaptive Server that is older thanversion 15.0.2.0. Choose this type for an Adaptive Serverthat is part of a replication environment.
• Replication Agent (15.5.0.0) – monitor Replication Agent.• Replication Server (15.5.0.0) – monitor Replication Server.
Description A brief description to help you identify the resource.
3. Click Next.
4. Specify the connection information for your resource:
Table 15. New resource connection details
Field Description
Server Host Name/Host Name Local host name
Port Number Local host port number
RSSD Host Name (Required) Name of the RSSD host
RSSD Port Number (Required) RSSD host port number
Configure
90

Note: RSSD Host Name and RSSD Port Number are required only if you are registeringa Replication Server.
5. Click Next.
6. (Optional) Click Add this resource to the current perspective. You must add a resourceto a perspective (not necessarily the current perspective) before you can manage ormonitor it.
7. (Optional) Click Open the resource explorer to view this new resource. (This option isnot present when the Resource Explorer is open.)
8. Click Finish.
See also• Resources on page 153• Compatibility Matrix on page 4• Common Display Options on page 7• Unregistering a Resource on page 154
Importing Resources for Batch Registration(Optional) Import and register multiple servers from an interfaces or sql.ini file.
PrerequisitesCopy the interfaces or sql.ini file to a location on or accessible from the machine thathosts your Web browser.
Task
An interfaces (UNIX) or sql.ini file (Windows) is a list of Sybase servers and theirports; it may contain other connection information as well. The file is created during theinstallation of a Sybase server:
• Windows: %SYBASE%\ini\sql.ini
• Unix: $SYBASE/interfaces
For more information on interfaces files, see the appendix on configuration files inConfiguration Guide Open Client and Open Server 15.0 for UNIX.
For more information on sql.ini files, see the chapter on network communications usingsql.ini in the Adaptive Server Enterprise 15.0 Configuration Guide for Windows.
Note: The Import Resources wizard imports servers in batches of a single type (AdaptiveServer, Sybase IQ, or Replication Server, for example). If your interfaces or sql.inifile includes resources of more than one type, you must perform this procedure for eachresource type.
Configure
Sybase Control Center for Replication 91

1. In the application menu, select View > Open > Resource Explorer.
2. In the Resource Explorer, select Resources > Import.The Import Resources wizard opens; Interfaces file is already selected.
3. Click Next.The Directory Service Connection page appears.
4. Click Browse and navigate to the interfaces file you want to import from.
You cannot type in the File name field.
5. Click Next.
6. On the Import Resource Type page, select the type of server you want to import.
7. On the Resource Selection page, click to select the servers you want to import.
Select only servers of the type you chose on the Import Resource Type page. If you importservers with incorrect types, Sybase Control Center will not be able to monitor or managethem properly.
8. Resources of your chosen type may require connection parameters in addition to thosepresent in the file—RSSD host name and port for Replication Server, for example, orcharacter set and language for Adaptive Server. Enter any required connection parameters.
9. Click Next.
10. (Optional) Click Add these resources to the current perspective. You must add aresource to a perspective (not necessarily the current perspective) before you can manageor monitor it.
11. Click Next.The Confirmation page displays a list of the resources you have selected.
12. Click Finish if you are ready to import, or click Back to return to the previous screens andchange your selections.When you click Finish, Sybase Control Center imports and registers the resources anddisplays a summary page.
13. Click Close to finish the wizard.
The newly imported resources appear in the Resource Explorer. If you elected to add them tothe current perspective, the resources also appear in the Perspective Resources view.
See also• Resources on page 153
• Unregistering a Resource on page 154
Configure
92

Creating a PerspectiveCreate a perspective in which you can add and manage resources.
1. From the application menu bar, select Perspective > Create.
2. Enter a name for your perspective. The name can contain up to 255 characters.
3. Click OK.
Adding a Resource to a PerspectiveAdd one or more resources to the current perspective.
Add servers or other resources to a perspective so you can monitor and manage them alongwith other resources in the same perspective.
1. From the Sybase Control Center toolbar, click the Launch Resource Explorer icon.
2. Select the resources to add to your perspective. Use Shift-click or Control-click to selectmultiple resources.
3. Perform one of these actions:
• Select Resources > Add Resources to Perspective.• Drag and drop resources from the Resource Explorer onto the Perspective Resources
view. You can select and drag multiple resources.
See also• Removing a Resource from a Perspective on page 155
Configuring a Login Account to Monitor ReplicationUse the security configuration options to add one or more roles to a Sybase Control Centerlogin account or to a group. Roles enable users to perform tasks such as monitoring servers oradministering Sybase Control Center.
PrerequisitesYou must have administrative privileges (sccAdminRole) to perform this task. To assign amonitoring role for a server, first register the server.
TaskAssign the repMonitor and repAdminRole to any login account to perform monitoring andmanagement tasks in Sybase Control Center.
Configure
Sybase Control Center for Replication 93

1. From the menu bar, select Application > Administration.
2. In the Sybase Control Center Properties dialog, expand the Security folder.
3. Click Logins or Groups.
4. Select the login account or group to which you want to assign a role.
5. Click the Roles tab.
6. From the Available roles for resource list, select the role, then click Add.
For example, to grant administrative privileges, add the SCC Service:sccAdminRole.
If a role appears in the Has following roles list, it means the account or group has alreadybeen configured with that role.
7. Click OK.
See also• Authenticating a Login Account for a Managed Resource on page 94
• User Authorization on page 81
Roles or Permissions to Set Up Replication Monitoring AccountsSybase Control Center uses the user name and password account that you provide when youauthenticate a server to retrieve monitoring information.
The user account you have specified must have these roles or permissions:
• Replication Server – a 'create object' or 'sa' permission.• Replication Server System Database (RSSD) database – read privilege on all tables and
create and execute privileges on stored procedures in the RSSD database. It isrecommended to use the account created by rs_init for the RSSD.
• Replication Agent or Mirror Replication Agent – an administrative account. There is onlyone administrative account in a Replication Agent.
• Adaptive Server for RepAgent threads – a system administrator role. Sybase ControlCenter uses the dbcc monitor command to retrieve statistics.
Note: 'sa' or 'dbo' permission are required for setting parameters and controlling data flow.
Authenticating a Login Account for a Managed ResourceSpecify the login account Sybase Control Center will use when it connects to your server oragent to collect monitoring data or manage the resource.
Perform this task for each resource registered with Sybase Control Center.
Note: You can also authenticate a server during administrative tasks like creating an alert or acollection job.
Configure
94

1. Connect a browser to Sybase Control Center and log in.
2. If the Perspective Resources view is not open, click the Show/Hide PerspectiveResources View icon in the toolbar.
3. In the Perspective Resources view, select your resource and select Resource >Authenticate from the view menu.
4. Select Use my current SCC login or Specify different credentials.
5. If you chose Specify different credentials, enter the login and password for SybaseControl Center to use to connect to your resource.
6. If the selected server is a Replication Server, also enter the RSSD user name and password.
7. Click OK to save and exit the dialog.
See also• Configuring a Login Account to Monitor Replication on page 93
• User Authorization on page 81
Setting Up the Latency Monitoring ProcessStart the latency monitoring process for replication paths in the replication environment.
Prerequisites
• Install and configure all the servers to be monitored. Verify that these servers have beenregistered and added to the Perspective Resources, and that you have the permission toperform this task.
• To use rs_ticket in a replication environment to measure the latency of non-Sybasereplicate databases, you must install JDBC drivers to enable Sybase Control Center forReplication. See "Installing the JDBC Drivers for Non-Sybase Replicate Databases" in theSybase Control Center Installation Guide.
Task
1. From the Perspective Resources view, select a Replication Server and click Resource >Monitor .
2. Click Paths.
3. Select a path from the list.
Note: When selecting or highlighting a path, click outside the Path Name column.Clicking the path name opens the path dashboard.
4. Click Quick Admin to display the latency monitoring process administration view for theselected path.
Configure
Sybase Control Center for Replication 95

Note: The selected path's primary and replicate Replication Server versions must be 15.1or later, otherwise the Quick Admin option is disabled. For a non-Sybase primarydatabase, the Replication Agent must also be version 15.1 or later.
All replicate databases to which the selected path replicates data are listed in theadministration view. For Adaptive Server databases, all parameters are populatedautomatically. For non-Sybase databases, you need to provide the parameters manually inthe administration view.
5. Specify the replicate database information, start and end dates, and the repeat intervaltime.
6. For non-Sybase databases, click Test Connection to verify that the connectioninformation is valid.
Note: Repeat this step for all the listed replicate databases.
7. Click Start.
You can click the bar graph icon in the upper-right corner of the Latency window in theReplication Server Monitor's Paths view or in the Replication Path Dashboard to see thedetailed latency history.
See also• Setting Up Statistics Collection on page 97• Stopping the Latency Monitoring Process on page 188• Displaying Latency on page 188• Latency Chart Details on page 189• Replication Latency on page 187• Data on Dashboards or Charts Is Missing on page 191
Latency Monitoring ProcessLatency monitoring means executing the rs_ticket command at the primary database,retrieving the latency data from the replicate database, and storing the results in the SybaseControl Center repository.
rs_ticket gathers time information at various points in the replication path as it flows from theprimary database to the replicate database. You can then use this latency information toidentify bottlenecks in the replication path. Latency information helps ensure that data isflowing efficiently between the primary and replicate databases.
The latency monitoring process collects data on a specified schedule for each replicateReplication Server and for the primary Replication Server for the path you configured. Theprimary collection executes the rs_ticket command in the primary database. Each replicatecollection performs a collection in all its paths. When a path collection occurs, the results ofthe rs_ticket command are retrieved from the replicate database, stored in the repository, anddisplayed in the latency history chart in the Replication Server Monitor's Paths view or in theReplication Path Dashboard for server performance monitoring.
Configure
96

Each collection repeats until the end date or until you manually stop the latency monitoringprocess. Once the process is stopped, all collections are deleted from the scheduler.
See also• Displaying Replication Path Status on page 187
• Displaying Latency on page 188
• Stopping the Latency Monitoring Process on page 188
Setting Up Statistics CollectionUse the Properties view of your managed resource to create a data collection job and add aschedule to the job.
For best performance, Sybase recommends these guidelines for scheduling data collectionjobs:
• Schedule only one collection job for each collection.• Set the collection interval to 60 seconds/one minute or more. (The default is 5 minutes.)
Data collections for a managed resource do not run until the resource is authenticated.
1. In the Perspective Resources view, select a resource and select Resource > Properties.
2. Select Collection Jobs.
3. Click Create Job.
4. If this resource has not yet been authenticated, you see the Authentication page. Enter auser name and password that Sybase Control Center can use to log in to the resource. ClickAuthenticate to allow Sybase Control Center to verify your credentials. Because datacollections can run only on an authenticated resource, you cannot proceed withoutauthenticating.
5. On the Collection Information page, select the data collection that this job will run andclick Next.
6. (Optional) If you do not want to create a schedule yet, unselect Create a schedule for thisjob.
7. Specify details for the new schedule:
Table 16. New schedule details
Field Description
Name A name for this schedule
Description A description of this schedule
Start date The day when the schedule will take effect
Configure
Sybase Control Center for Replication 97

Field Description
Time The time when the schedule will take effect
Note: Enter dates and times using your local time. Sybase Control Center converts yourtimes for remote time zones if necessary.
8. Specify the duration of this schedule:
• Run once• Repeat until
For Repeat until, specify these details:
Field Description
Repeat interval Time period (in seconds, minutes, hours, or days) between jobexecutions
Repeat until Date the job should stop running
Time Time the job should stop running
• Repeat indefinitelyFor Repeat indefinitely, specify these details:
Field Description
Repeat interval Time period (in seconds, minutes, hours, or days) between jobexecutions
9. Click Finish.
See also• Setting Up the Latency Monitoring Process on page 95• Setting Replication Parameters on page 117• Job Scheduling on page 140
About StatisticsUnderstand availability and performance statistics in Sybase Control Center.
The statistics you work with in Sybase Control Center can be divided into two types:
• Availability statistics are concerned with present conditions; they help you determinewhether a resource you are monitoring (a server or an agent, for example) is running andfunctioning properly.
• Performance statistics are concerned with behavior of the same resources over time. Theydescribe the flow of data through your environment. You can use performance statistics tospot trends, identify problems like resource bottlenecks, and make plans.
Sybase Control Center includes predefined key performance indicators (KPIs) for eachproduct module; these KPIs are grouped into collections. KPIs such as server status, which
Configure
98

serves as an availability statistic when it is fresh, have long-term value as historicalperformance statistics.
Availability statistics appear on the heat chart and on resource monitoring screens in eachproduct module.
Performance statistics appear on the statistics chart and on resource monitoring screens ineach product module.
Some KPIs are included in the default collection for each product module. To make other KPIsavailable to the heat chart, statistics chart, and resource monitoring views, you must set upcollection jobs in the scheduler. See the data collections help topic for information on datacollections and the KPIs contained in them.
Several configuration options affect the collection and display of data in Sybase ControlCenter:
• Collection repeat interval—The frequency of data collection. Set this on the collection jobin the scheduler.
• Screen refresh interval—The period between screen refreshes. Refreshing the screenredraws it with the newest available data. Set the screen refresh interval in the productmodule. (May not be settable in all product modules.)
• Chart trend period—The period over which data is displayed in historical charts. Set thetrend period in the product module. (May not be settable in all product modules.)
See also• Replication Data Collections on page 99
• Key Performance Indicators and Key Performance Areas for Replication on page 100
Replication Data CollectionsLists and describes predefined data collections you can use to create jobs for Replication.
Table 17. Replication data collection
Replication Ob-jects
Replication Data Collection Description
Replication Server Monitoring Statistics
(default collection*)
Note: This collection must be scheduled toenable alerts.
Collects the availability met-rics displayed in the Replica-tion Server Monitor and heatchart.
Configure
Sybase Control Center for Replication 99

Replication Ob-jects
Replication Data Collection Description
Performance Counters A diagnostic tool that collectshistorical performance met-rics that you can later graph inthe statistics chart.
ASE Server, Repli-cation Only
RepAgent Statistics
(default collection*)
Note: This collection must be manually star-ted if the Adaptive Server is registered as anASE Server type. "collection_ase_rat" is thename of the RepAgent Statistics collection inan ASE Server registered Adaptive Server.
Collects availability metricsfor RepAgent thread.
Replication Agent RA Monitoring Statistics
(default collection*)
Collects availability metricsdisplayed in the ReplicationAgent Monitor and heat chart.
Performance Counters Collects historical perform-ance metrics that you can latergraph in the statistics chart.
*Default collections are automatically created upon authentication and are set to repeat indefinitely ata 60-second interval.
See also• About Statistics on page 98
• Alerts on page 145
• Creating an Alert on page 121
• Assigning a Role to a Login or a Group on page 81
• Configuring the E-mail Server on page 79
• Job Scheduling on page 140
Key Performance Indicators and Key Performance Areas forReplication
Lists and describes the key performance indicators (KPIs) and key performance areas (KPAs)that provide the statistics displayed on Replication screens and charts in Sybase ControlCenter.
Each Replication KPA includes a subset of the KPIs.
Configure
100

Table 18. Key performance indicators
KPI Description
Managed Object States
Primary State Managed object primary state.
Secondary State Managed object seconday state.
Replication Server Performance Statistics
Insert commands Insert command on active object.
Update commands total Update command on active object.
Delete commands total Delete command on active object.
Writetext commands total Writetext command on active object.
Execute commands total Execute command on active object.
AIO collect time total Amount of time that the Asynchronous I/O Daemon spent incollecting async I/O requests in which Daemon is obliged to polluntil notified of their completion.
AIO after poll total Number of pending asynchronous I/O requests just after theAsync I/O Daemon finishes polling for their completion.
AIO before poll total Number of pending asynchronous I/O requests just before theAsync I/O Daemon goes off to poll for their completion.
AIO poll time total Amount of time that the Asynchronous I/O Daemon spent inpolling I/O completions. This includes the time taken to notifyAIO clients of their I/O requests completion.
AIO read retry total The number of times an async read is made and the OpSys tellsthe client that it must try again.
AIO write retry total The number of times an async write is made and the OpSys tellsthe client that it must try again.
Alarm milliseconds spent total Number of milliseconds actually spent before the alarm wasexpired.
Alarm cancel total Number of alarms cancelled.
Alarm examined total Number of examined alarms to determine whether they are ex-pired or not.
Alarm expired cancelled total Number of alarms that were found canceled upon each 'handleexpiration' execution.
Configure
Sybase Control Center for Replication 101

KPI Description
Alarm expired total Number of alarms that have expired upon each 'handle expira-tion' execution.
Alarm milliseconds expired inter-val total
Number of milliseconds until the next alarm expiration.
Alarm expired time total Amount of time elapsed while handling expired alarms.
Alarm milliseconds requested total Number of milliseconds originally requested for the alarm whenit was set.
Alarm set total Number of alarms set.
Thread start total Total number of started threads.
Thread stop total Number of threads stopped.
Begins total Begin Tran statements sent to Replication Server System Data-base (RSSD).
Deletes total Delete statements sent to RSSD.
Inserts total Insert statements sent to RSSD.
Selects total Select statements sent to RSSD.
Cache exceed total Number of time System Table Services (STS) cached was ex-ceeded.
Updates total Update statements sent to RSSD.
Replication Server
Replication Server State The state of the Replication Server.
% Memory usage The percent of the current memory used by the server.
Maximum Latency The highest latency of any replication path in the server.
% Partition Usage The percent full of all partitions in the Replication Server.
Path
Path Status The state of the replication path between a primary and a rep-licate database.
Path Latency The time between when a transaction is committed at the pri-mary database and when it is committed at the replicate data-base.
Configure
102

KPI Description
Change in Path Activity The number of commands sent to the replicate database by theData Server Interface (DSI) thread since the last monitoringcycle.
Path Data Loss Indicates possible data loss between the primary and replicatedatabases.
rs_ticket Count The ticket's unique sequence number.
Primary Database Start Time The time, in milliseconds, the rs_ticket was executed at theprimary database.
Executor Thread Latency The number of milliseconds from the start, to the time the ticketpasses through the executor thread.
Distributor Thread Latency The number of milliseconds from the primary Replication Serv-er time, to the time the ticket passes through the distributorthread.
Replication Server Interface La-tency
The number of milliseconds from the distributor (DIST) threadtime, to the time the ticket passes through the Replication ServerInterface (RSI) thread.
Data Server Interface Thread The number of milliseconds from the RSI thread time, to thetime the ticket passes through the DSI thread.
Path RDB Latency The number of milliseconds from the DSI thread time, to thetime the ticket arrived at the replicate database.
Connection
Time closing an OB fadeout total The amount of time spent closing a connection marked to befaded out.
Time waiting on OB fadeout total The amount of time spent waiting for a connection marked to befaded out.
Commands read total Commands read from an inbound queue by a DIST thread.
Resolved delete statements total Delete commands encountered by a DIST thread and resolvedby subscription resolution engine (SRE).
Unresolved statements total DIST commands with no subscription resolution that a DISTthread discarded. This implies either there is no subscription orthe 'where' clause associated with the subscription does not re-sult in row qualification.
Configure
Sybase Control Center for Replication 103

KPI Description
Resolved insert statements total Insert commands that a DIST thread encountered, which SREresolved.
Resolved update statements total Update commands that a DIST thread encountered, which SREresolved.
TD Begins total Begin transaction commands that a DIST thread propagated.
TD Commits or Rollbacks total Commit or Rollback commands that a DIST thread processed.
Transactions processed total Transactions read by DIST thread from an inbound queue.
All large threads used total This counter is incremented each time a Large Parallel Trans-action must wait because there are no available parallel DSIthreads.
All threads used total This counter is incremented each time a Parallel Transactionmust wait because there are no available parallel DSI threads.
Commands applied successfullytotal
Commands that a DSI successfully applied to the target data-base.
Time dispatching large groups to-tal
Time spent by the Data Server Interface, scheduler thread (DSI/S) dispatching a large transaction group to a DSI/E. This in-cludes the time spent finding a large group to dispatch.
Time dispatching regular groupstotal
Time that the DSI/S spent dispatching a regular transactiongroup to a DSI/E.
Time finding regular groups total Time that the DSI/S spent finding a group to dispatch.
Time loading SQT cache total Time that the DSI/S spent loading Stable Queue Transaction(SQT) cache.
Time executing special group total Time that the DSI/S spent determining if a transaction is special,and executing it if it is.
DSI/E in sleep mode total Number of DSI/E threads that the DSI/S put to sleep prior toloading SQT cache. These DSI/E threads have just completedtheir transaction.
Time putting DSI/E in sleep modetotal
Time that the DSI/S spent putting free DSI/E threads to sleep.
Transaction groups read total Transaction groups that the DSI read. If grouping is disabled,grouped and ungrouped transaction counts are the same.
Configure
104

KPI Description
Ungrouped transactions read total Ungrouped transactions that the DSI read. If grouping is disa-bled, grouped and ungrouped transaction counts are the same.
Transaction groups committed to-tal
Transactions that a DSI thread successfully committed.
Transaction groups sent total Transaction groups that the DSI thread sent to the target data-base. A transaction group can contain at mostdsi_max_xacts_in_group transactions. This counter is incre-mented each time a 'begin' for a grouped transaction is executed.
Transaction groups success total Transaction groups that a DSI thread successfully applied to atarget database. This includes transactions that were success-fully committed or rolled back according to their final disposi-tion.
Transaction groups committed to-tal
Transactions in groups sent by a DSI thread that committedsuccessfully.
Transaction groups sent total Transactions contained in transaction groups that a DSI threadsent.
Closed groups maximum bytes to-tal
Transaction groups that a DSI thread closed due to the nexttransaction that caused the dsi_xact_group_size to exceed.
Closed groups next new origin to-tal
Transaction groups that a DSI closed due to no open group fromthe origin of the next transaction. For example, there is a neworigin in the next transaction, or the schedule forced a flush ofthe current group from the origin leaving no open group fromthat origin.
Closed groups partitioning total Transaction groups that a DSI thread closed because of a Trans-action Partitioning rule.
Closed groups maximum log trans-action total
Transaction groups that a DSI thread closed due to the nexttransaction that caused the dsi_max_xacts_in_group to exceed.
Groups wait partitioning total Transaction groups forced to wait for another group to complete(processed serially based on Transaction Partitioning rule).
True return ofrs_dsi_check_thread_lock total
Number of rs_dsi_check_thread_lock invocations returningtrue. The function determined the calling thread holds locksrequired by other threads. A rollback and retry occurred.
Delete statements read total rs_delete commands that a DSI executor (DSIEXEC) threadprocessed.
Configure
Sybase Control Center for Replication 105

KPI Description
Batch size total Size, in bytes, of commands batches, which a DSI submitted.
Batch time total Time, in milliseconds, to process command batches, which aDSI submitted.
Bytes succeed total Bytes that a DSI/E successfully applied to the target database.
Commands read total Commands read from an outbound queue by a DSIEXECthread.
Commands succeed total Commands that a DSI/E successfully applied to the target da-tabase.
Function string mapping time total Time, in milliseconds, to perform function string mapping oncommands.
Input command count total Number of input commands in command batches that a DSIsubmitted.
Output command count total Number of output commands in command batches that a DSIsubmitted.
Result time total Time, in milliseconds, to process the results of commandsbatches that a DSI submitted.
Sequencing check on commandbatches time total
Time, in milliseconds, to check the sequencing on commandbatches, which required some kind of synchronization such aswait_for_commit.
Sequencing check on commitstime total
Time, in milliseconds, to check the sequencing on commits.
Transaction time total Time, in milliseconds, for a DSI/E thread to process transac-tions. This includes function string mapping, sending and pro-cessing results. A transaction may span command batches.
Errors deadlock total Times that a DSI thread failed to apply a transaction due todeadlocks in the target database (ASE Error 1205).
Errors out of lock total Times that a DSI thread failed to apply a transaction due to nolocks available in the target database (ASE Error 1204).
Writetext total rs_writetext commands that a DSIEXEC thread processed.
Insert total rs_insert commands that a DSIEXEC thread processed.
MemUsed group total Memory that a DSI/S thread consumed for transaction groups.
Send RPC time total Time, in milliseconds, spent in sending RPCs to the RDS.
Configure
106

KPI Description
Send time total Time, in milliseconds, spent in sending command buffers to theRDS.
System transaction read total Internal system transactions that a DSIEXEC thread processed.
Transaction groups scheduled total Transactions groups scheduled to a DSIEXEC thread.
Ungrouped transactions scheduledtotal
Transactions in transaction groups scheduled to a DSIEXECthread.
Updates read total rs_update commands that a DSIEXEC thread processed.
Bytes received total Bytes that a RepAgent thread received. This size includes theTDS header size when in 'passthru' mode.
Mini abort total mini-abort commands (in Adaptive Server, SAVEXACT re-cords) that a RepAgent thread processed. mini-abort instructsReplication Server to rollback commands to a specific OQIQvalue.
Commands received total Commands that a RepAgent thread received.
Write wait time total The amount of time the RepAgent spent waiting for the StableQueue Manager (SQM) Writer thread to drain the number ofoutstanding write requests to get the number of outstandingbytes to be written under the threshold.
Yield time total The amount of time the RepAgent spent yielding the processorwhile handling Log Transfer Language (LTL) commands eachtime the processor was yielded.
Execution time total The amount of time, in milliseconds, RepAgent user thread isscheduled by Open Client/Server (OCS).
Receive time total The amount of time, in milliseconds, spent receiving networkpackets or language commands.
Update rs_locator total Updates to RSSD. rs_locater where type = 'e' executed by aRepAgent thread.
Replication Agent Thread State The state of the Replication Agent thread in the ReplicationServer that is associated with the connection.
DSI State The state of the DSI thread in the Replication Server that isassociated with the connection.
DSI Activity The number of commands that the DSI thread sent to the repli-cate database.
Configure
Sybase Control Center for Replication 107

KPI Description
DSI Activity per Second The number of commands that the DSI thread sent to the repli-cate database per second.
Transaction Ignored The number of transactions that were ignored.
Transaction Skipped The number of transactions that were skipped.
Transaction Succeeded The number of transactions that were successfully committed tothe replicate database.
Transaction Failed The number of transactions that were failed.
Transaction Retried The number of transactions that were retried.
DSI SQT Cache Percent Used The percent of DSI SQT cache size used.
Transactions removed per second The number of transactions removed from the DSI SQT cacheper second.
SQT cache low boundry The smallest size to which DSI SQT cache is configured beforetransactions start being removed from the cache.
Transactions read per second The number of transactions that the DSI read per second.
Commands per Transaction The number of commands per transaction.
Transactions per Group The number of transactions per group.
Commands per Batch The number of commands per batch.
Logical Connection
Operation in Progress State The state of the operation in progress.
Route
Route State The state of the route at both the origin and destination Repli-cation Servers.
Route Activity The number of bytes sent to the destination Replication Server.
Route Activity per Second The number of bytes sent to the destination Replication Serverper second.
Alarm time spent total Number of milliseconds actually spent before an alarm expired.
Time spent cancelling alarms total Amount of time elapsed while canceling an alarm.
Expired alarms to be cancelled to-tal
Number of alarms that were found to have been expired whileattempting to cancel them.
Configure
108

KPI Description
Alarm required time total Number of milliseconds originally requested for the alarm whenit was set.
Alarm set total Amount of time elapsed while setting an alarm.
Connection active time total Amount of time elapsed while a thread makes a connectionactive.
Connection charset time total Amount of time elapsed while checking a connection's characterset.
Connection fadeout freetime total Amount of time elapsed while this thread's free connections aremarked for fadeout. Note that this thread is probably *not* thethread doing the work. Most likely it is the Alarm Handler doingthe work.
Connection fadeout time total Amount of time elapsed while this thread's assigned connec-tions are marked for fadeout. Note that this thread is probably*not* the thread doing the work. Most likely it is the AlarmHandler doing the work.
Connection give-up total Number of times the thread gave up a connection.
Connection give-up time total Amount of time elapsed while a thread gives up a connection.
Connection idle time total Amount of time elapsed while a thread makes a connection idle.
Connection open total Number of times the thread made a connection request andreceived one that had to be opened.
Connection request total Number of times the thread made a connection request andreceived one that was already open.
Connection sort order time total Amount of time elapsed while checking a connection's sort or-der.
Connection time total Amount of time elapsed while a thread obtains a connection.
Message queue get time total Number of centiseconds spent getting a message from an inter-nal message queue.
Message queue put time total Number of centiseconds spent putting a message on an internalmessage queue.
Sleep time total Amount of time elapsed after a thread puts itself to sleep.
Yield time total Amount of time elapsed after a thread yields the CPU.
Configure
Sybase Control Center for Replication 109

KPI Description
Blocks read total Number of blocking (SQM_WAIT_C) reads that an RSI threadperformed against SQM thread that manages a RSI queue.
Bytes sent total Bytes that an RSI sender thread delivered.
Messages sent total RSI messages that an RSI thread sent. These messages containthe distribute command.
Packets sent total Packets that an RSI sender thread sent.
Send packet time total Time, in milliseconds, spent in sending packets of data to theRRS.
Bytes received total Bytes that an RSI user thread received. This size includes theTDS header size when in 'passthru' mode.
Command length total Length of an RSI command.
Commands received total Commands that an RSI user thread received. Includes RSI mes-sage, get truncation requests, etc.
Execution time total The amount of time, in milliseconds, RSI User thread is sched-uled by OCS.
Receive packet time total The amount of time, in milliseconds, spent receiving networkpackets.
GetTrunc send time total The amount of time, in milliseconds, spent responding to 'gettruncation' requests.
SetTrunc send time total The amount of time, in milliseconds, spent responding to 'settruncation' requests.
Queue
Queue Writes The number of commands written to the queue in the Replica-tion Server.
Queue Writes per Second The number of commands written to the queue in the Replica-tion Server per second.
Queue Reads The number of commands read from the queue in the Replica-tion Server.
Queue Reads per Second The number of commands read from the queue in the Replica-tion Server per second.
Queue Bytes The number of bytes written to the queue in the ReplicationServer.
Configure
110

KPI Description
Queue Bytes per Second The number of bytes written to the queue in the ReplicationServer per second.
Queue Size The size of the queue in the Replication Server.
Queue SQT Cache Percent Used The percent of SQT cache size used for inbound queue.
Duplicates Transaction duringmonitoring interval
The number of duplicate commands detected and ignored by theSQM.
Transactions removed per second The number of transactions removed from the SQT cache persecond.
SQT cache low boundry The smallest size to which SQT cache would be configuredbefore transactions start being removed from cache.
Commands processed by DIST persecond
The number of commands that the distributor thread processedfor an inbound queue per second.
Commands processed without repdef per second
The number of commands that did not have an associated rep-lication definition, which the distributor thread processed for aninbound queue per second.
Percent of blocks that were fullwhen written to the queue
The percentage of blocks that were full when written to thequeue.
Percent of reads that came directlyfrom the cache
The percentage of reads that came directly from the cache.
Blocks full write total Number of full blocks that an SQM thread wrote. Individualblocks can be written due either to block full state or to sysadmincommand slow_queue (only one message per block).
Blocks written total Number of 16K blocks that an SQM thread wrote to a stablequeue.
Bytes written total Bytes that an SQM thread wrote to a stable queue.
Commands written total Commands that an SQM thread wrote to a stable queue.
Command size total Command size written to a stable queue.
Segments active total Active segments of an SQM queue: the number of rows inrs_segments for the given queue where used_flag = 1.
Queue segments allocated total Segments allocated to a queue during the current statistical pe-riod.
Configure
Sybase Control Center for Replication 111

KPI Description
Queue segments deallocated total Segments deallocated from a queue during the current statisticalperiod.
Time new segments allocated total The elapsed time, in milliseconds, to allocate a new segment.Timer starts when a segment is allocated. Timer stops when thenext segment is allocated.
Updates to rs_oqid total Updates to the RSSD. rs_oqid table by an SQM thread. Eachnew segment allocation may result in an update of rs_oqid valuestored in rs_oqid for recovery purposes.
Write requests total Message writes that an SQM client requested.
Write timer pop total SQM writer thread initiated a write request due to timer expi-ration.
Blocks read total Number of 16 blocks that an SQM Reader (SQMR) thread readfrom a stable queue.
Blocks read cached total Number of 16K blocks that an SQMR thread read from a cache.
Commands read total Commands that an SQMR thread read from a stable queue.
Time waiting for queue write total The amount of time SQMR wait for a queue write.
Unread blocks total The number of blocks within a partially read segment that areyet to be read.
Unread segments total The number of segments yet to be read.
Read time total The amount of time taken for SQMR to read a block.
Memory used total SQT thread memory use. Each command structure allocated byan SQT thread is freed when its transaction context is removed.For this reason, if no transactions are active in SQT, SQT cacheusage is zero.
Transactions added closed total Transactions added to the Closed queue.
Transactions removed closed total Transactions removed from the Closed queue.
Commands read total Commands read from SQM. Commands include XREC_BEGIN,XREC_COMMIT, XREC_CHECKPT.
Commands in tran total Commands in transactions completely scanned by an SQTthread.
Transactions added total Transactions added to the Open queue.
Configure
112

KPI Description
Transactions removed total Transactions removed from the Open queue.
Transactions added Read Q total Transactions added to the Read queue.
Transactions removed Read Queuetotal
Transactions removed from the Read queue.
Cache lower bound size total The smallest size to which SQT cache can be configured beforetransactions start being removed from cache.
Closed transactions total Current closed transaction count.
Open transactions total Current open transaction count.
Read transactions total Current read transaction count.
Truncation queue transaction total Current truncation queue transaction count.
Transactions removed total Transactions whose constituent messages have been removedfrom memory. Removal of transactions is most commonlycaused by a single transaction exceeding the available cache.
Truncation queue transactionsadded total
Transactions added to the Truncation queue.
Truncation queue transactions re-moved total
Transactions removed from the Truncation queue
Partition
Partition State The state of the partition in the Replication Server.
Partition Usage The percent of the partition in the Replication Server that iscurrently in use.
RepAgent
Replication Agent State The state of the Replication Agent.
RepAgent VM
VM maximum memory Maximum memory (in bytes) available to the Java Virtual Ma-chine (VM).
VM total memory allocated Total memory (in bytes) allocated to the Java VM at start-up.
VM free memory Memory (in bytes) allocated but not used by the Java VM.
VM memory usage Memory (in bytes) allocated and in use by the Java VM.
Configure
Sybase Control Center for Replication 113

KPI Description
VM % max memory used Percentage of the the maximum memory available to the JavaVM, currently in use by the Java VM.
RepAgent LTI Statistics
Number of LTL commands sent Total number of LTL commands sent to Replication Server.
LTL Commands Sent per Second LTL commands sent to Replication Server per second.
Avg LTL command size Average size (in bytes) of each LTL command sent to Replica-tion Server.
Avg LTL commands/sec Average number of LTL commands sent per second to Repli-cation Server.
Total bytes sent Number of bytes sent to Replication Server.
Avg Bytes/second during trans-mission
Average bytes per second sent over connection to ReplicationServer.
Avg LTL buffer cache time Average time (in milliseconds) it takes between placing the LTLcommands into the LTL buffer to the time it is actually sent to theReplication Server.
Avg Rep Server turnaround time Average time (in milliseconds) it takes Replication Server toacknowledge each LTL command buffer sent.
Avg data arrival time Average time (in milliseconds) log transfer interface (LTI) waitsbetween receiving change sets from Log Reader.
Avg time to create distributes Average time (in milliseconds) LTI takes to convert a change-setinto LTL.
Avg LTL buffer size Average size (in bytes) of each LTL buffer sent to ReplicationServer
Avg LTM buffer utilization (%) Average utilization (in percentage of LTL buffer size) of eachLTL buffer sent to Replication Server.
Avg LTL commands/buffer Average number of LTL commands per buffer sent to Replica-tion Server.
LTI encoded column name cachesize
Encoded column name cache size.
LTI input queue size Number of change sets in the LTI input queue
LTI output queue size Current number of LTL commands in the LTI output queue.
Configure
114

KPI Description
RepAgent Log Reader Statistics
Total operations scanned Number of operations read from the database transaction log.
Operations Scanned per Second Number of operations read from the database transaction log persecond.
Total operations processed Number of operations processed from the database transactionlog.
Operations Processed per Second Number of operations process from the database transaction logper second.
Total operations skipped Number of operations read from the database transaction logand skipped for any reason.
Operations Skipped per Second Number of operations read from the database transaction logand skipped for any reason per second.
Current operation queue size Current size (in bytes) of the Log Reader input queue.
Current scan buffer size Current size (in bytes) of the Log Reader scan buffer.
Total maintenance user operationsfiltered
Number of maintenance-user operations read from the databasetransaction log and skipped.
Total Maintenance User Opera-tions Filtered per Second
Number of maintenance-user operations read from databasetransaction log and skipped per second.
RepAgent LTM Statistics
Items held in Global LRU Cache Number of object references in the internal Least Recently Usedcache.
Adaptive Server RepAgent Thread
ASE Replication Agent ThreadStatus
The status of the Adaptive Server RepAgent thread in the dataserver.
ASE Replication Agent ThreadLog
The difference between the current marker and the end of thelog.
ASE Replication Agent ThreadOperations Scanned
The number of operations scanned from the Adaptive Servertransaction log since the last monitoring cycle.
ASE Replication Agent ThreadCommands Processed
The number of commands processed and sent to the ReplicationServer since the last monitoring cycle.
Configure
Sybase Control Center for Replication 115
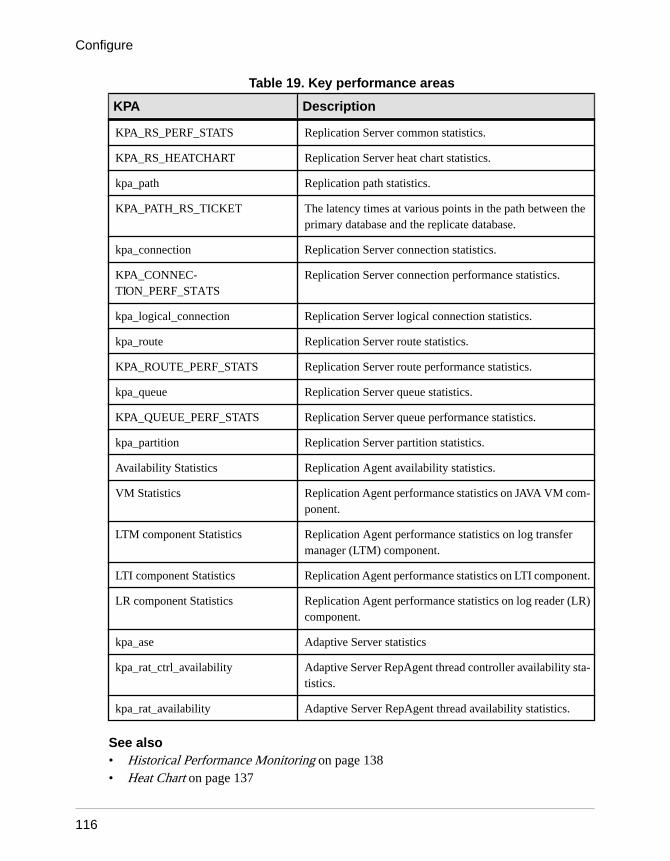
Table 19. Key performance areas
KPA Description
KPA_RS_PERF_STATS Replication Server common statistics.
KPA_RS_HEATCHART Replication Server heat chart statistics.
kpa_path Replication path statistics.
KPA_PATH_RS_TICKET The latency times at various points in the path between theprimary database and the replicate database.
kpa_connection Replication Server connection statistics.
KPA_CONNEC-TION_PERF_STATS
Replication Server connection performance statistics.
kpa_logical_connection Replication Server logical connection statistics.
kpa_route Replication Server route statistics.
KPA_ROUTE_PERF_STATS Replication Server route performance statistics.
kpa_queue Replication Server queue statistics.
KPA_QUEUE_PERF_STATS Replication Server queue performance statistics.
kpa_partition Replication Server partition statistics.
Availability Statistics Replication Agent availability statistics.
VM Statistics Replication Agent performance statistics on JAVA VM com-ponent.
LTM component Statistics Replication Agent performance statistics on log transfermanager (LTM) component.
LTI component Statistics Replication Agent performance statistics on LTI component.
LR component Statistics Replication Agent performance statistics on log reader (LR)component.
kpa_ase Adaptive Server statistics
kpa_rat_ctrl_availability Adaptive Server RepAgent thread controller availability sta-tistics.
kpa_rat_availability Adaptive Server RepAgent thread availability statistics.
See also• Historical Performance Monitoring on page 138• Heat Chart on page 137
Configure
116

• Replication Latency on page 187
• Availability Monitoring on page 172
• About Statistics on page 98
• Alerts on page 145
• Creating an Alert on page 121
• Assigning a Role to a Login or a Group on page 81
• Configuring the E-mail Server on page 79
Setting Replication ParametersConfigure replication parameters to improve server performance. Sybase Control Center forReplication allows you to configure the parameters for Replication Server, Replication Agent,connection and logical connection, route, and Adaptive Server RepAgent thread.
See also• Setting Up Statistics Collection on page 97
• Creating an Alert on page 121
Configuring Replication Server and Replication Agent ParametersConfigure Replication Server and Replication Agent parameters.
PrerequisitesAdd all the servers to be monitored to the Perspective Resources view, authenticate them, andverify that you have the permission to perform this task.
Task
1. From the Perspective Resources view, select a server and click Resource > Monitor.
2. Click Quick Admin.
3. In the Configure tab, modify the current value of the server parameter in the Run Valuecolumn.
Note: Use the filter text box and check box options to search for the parameter you want tomodify.
4. Click Apply All.
5. (Optional) Click Reset All to undo modifications that have not been applied.
Note: Not all of Replication Server and Replication Agent parameters can be configured.If a parameter cannot be configured, the text box in the administration view is greyed out.
Configure
Sybase Control Center for Replication 117

Configuring Connection Parameters for Replication ServerConfigure connection parameters that affect database connections originating from theReplication Server.
PrerequisitesAdd all the servers to be monitored to the Perspective Resources view, authenticate them, andverify that you have the permission to perform this task.
Task
1. From the Perspective Resources view, select a Replication Server and click Resource >Monitor.
2. Click Connections.
3. Select a connection and click Quick Admin.
4. In the Configure tab, modify the current value of the connection parameter in the RunValue column.
Note: Use the filter text box and check box options to search for the parameter you want tomodify.
5. Click Apply All.
6. (Optional) Select Recycle connection before you click Apply All to allow ReplicationServer to suspend, then resume connection.
Note: This option allows the new parameters to be applied to the connection. If you clickApply All without selecting Recycle connection, the parameters are not applied to theconnection until the connection is restarted.
7. (Optional) Click Reset All to undo modifications that have not been applied.
Configuring Logical Connection Parameters for Replication ServerConfigure Replication Server parameters that apply to logical connections for warm standbyapplications.
PrerequisitesAdd all the servers to be monitored to the Perspective Resources view, authenticate them, andverify that you have the permission to perform this task.
Task
1. From the Perspective Resources view, select a Replication Server and click Resource >Monitor.
2. Click Logical Connection.
Configure
118

3. Select a logical connection and click Quick Admin.
4. In the Configure tab, modify the current value of the logical connection parameter in theRun Value column.
Note: Use the filter text box and check box options to search for the parameter you want tomodify.
5. Click Apply All.
6. (Optional) Click Reset All to undo modifications that have not been applied.
Configuring Route Parameters for Replication ServerConfigure parameters that affect routes from the current Replication Server to otherReplication Servers.
PrerequisitesAdd all the servers to be monitored to the Perspective Resources view, authenticate them, andverify that you have the permission to perform this task.
Task
1. From the Perspective Resources view, select a Replication Server and click Resource >Monitor.
2. Click Routes.
3. Select a route and click Quick Admin.
4. In the Configure tab, modify the current value of the route parameter in the Run Valuecolumn.
Note: Use the filter text box and check box options to search for the parameter you want tomodify.
5. Click Apply All.
6. (Optional) Select Recycle route before you click Apply All to allow Replication Server tosuspend, then resume the route.
Note: This option allows the new parameters to be applied to the route. If you click ApplyAll without selecting Recycle route, the parameters are not applied to the route until theroute is restarted.
7. (Optional) Click Reset All to undo modifications that have not been applied.
Configure
Sybase Control Center for Replication 119

Configuring Adaptive Server RepAgent Thread ParametersConfigure Adaptive Server RepAgent thread parameters that affect replication performance.
PrerequisitesAdd all the servers to be monitored to the Perspective Resources view, authenticate them, andverify that you have the permission to perform this task.
Task
1. From the Perspective Resources view, select an Adaptive Server and click Resource >Monitor.
2. Select a RepAgent thread.
3. Click Quick Admin.
4. In the Configure tab, modify the current value of the RepAgent thread parameter in theRun Value column.
Note: Use the filter text box and check box options to search for the parameter that youwant to modify.
5. Click Apply All.
6. (Optional) Click Reset All to undo modifications that have not been applied.
Note: Not all of Adaptive Server RepAgent thread parameters can be configured. If aparameter cannot be configured, the text box in the administration view is greyed out.
Configuring Replication Server to Gather Zero Values for CountersSet the Replication Server parameter to gather zero values for performance counters when yourun a collection job.
PrerequisitesAdd all the servers to be monitored in the Perspective Resources, and verify that you havepermission to perform this task.
TaskIf you want zero values to be gathered for performance counters, run this command in theReplication Server:
configure replication server set stats_show_zero_counters to"on"
Configure
120

Creating an AlertUse the Add Alert wizard to create an alert instance for your resource.
Prerequisites
• You must have administrative privileges (sccAdminRole) to perform this task.• Specify an e-mail server for Sybase Control Center to use for alerts. You cannot create e-
mail subscriptions to alerts without an e-mail server.• Schedule data collections. Alerts for each product module are based on one or more data
collections. If the correct collection or collections are not scheduled to run, the alert systemcannot function and no alerts are generated. See the data collections topic for your productmodule for information on which collections you need to schedule to enable alerts.
• (Optional) If you want this alert to trigger the execution of a shell script, copy the script to alocation on or accessible from the machine that hosts your Sybase Control Center server.Set permissions to make the script executable.
Warning! Use caution in writing scripts. A poorly designed script can cause a blockingsituation, creating a deadlock in your Sybase Control Center server.
Task
1. In the Perspective Resources view, click the server or other resource and select Resource >Properties in the view’s menu bar.
2. Select Alerts in the left pane and click Add.The Add Alert Wizard opens. If the selected resource supports child alerts, the wizardopens to the Resource page. If the resource does not support child alerts, the wizard opensto the Type page—in that case, skip to step 5.
3. On the Resource page of the wizard, select the object on which to set the alert. Expand thefolder representing the server or agent to select lower-level child objects.
4. Click Next.
5. On the Type page, select the alert type and click Next.
For this step and the next one, see the topic on key performance indicators for informationon what this alert monitors and how it is triggered. (Each alert is based on a KPI.)
6. Based on the type of alert you selected, do one of the following:
• For a state-based alert – select a severity level for each alert state.
Note: You can associate only one severity level with each state.
• For a threshold-based alert – review and if necessary adjust the range of values thatdefines each severity.
Configure
Sybase Control Center for Replication 121

7. Click Next.
8. (Optional) Enter the storm suppression period. Storm suppression blocks redundant alertnotifications and script executions resulting from the same condition for the specifiedperiod of time. Enter this value in seconds, minutes, or hours and click Next.
9. (Optional) To configure this alert to trigger the execution of a script:
a) Alert Severity specifies the severity level that triggers the script. Select Critical,Warning, or both.
Critical is typically more serious than Warning.b) Browse to the location of the script.
Note: In UNIX, make sure the script is executable. You cannot select a script unless ithas execute permission.
c) If the script requires parameter values, click Select Parameters to enter them in theExecution Parameters box.
You can include a number of predefined substitution parameters, which are replaced byvalues from the alert. The parameter values are passed on the command line to thescript. See the example (below) and the substitution parameters topic (linked below)for more information.
Note: When you test a script, Sybase Control Center supplies values for the %Severity% and %Source_Application% parameters. Any test values you supply for theseparameters are discarded.
d) (Optional) Click Test to perform a test execution of your script.
If your script takes parameters, the test may fail if parameter values are missing orincorrect.
e) Click Next.
If the selected resource has sibling resources (databases or devices of the same type, forexample) that support this alert type, you see the Duplicates page. If the selected resourcehas no identical siblings, you see the Subscription page.
10. (Optional) On the Duplicates page, select any resources that should use this alert definitionas a template for their own alerts. Click the box at the top of the list to select all theresources listed. Then click Next.
This step saves time when you need to configure similar alerts for several resources of thesame type.
11. (Optional) On the Subscription page, specify e-mail addresses if you want this alert toissue e-mail notifications when it fires.
The e-mail addresses default to the address in your user profile, but you can override thedefaults.
For both critical and warning alerts:
Configure
122

Table 20. Alert subscription details
Option Description
E-mail To send an e-mail notification when this alert fires, click the E-mailMessage box and enter the e-mail address of one user or list.
Escalation E-mail To escalate this alert (by sending another e-mail notification if this alerthas not been responded to after a specified period of time), click theEscalation E-mail box and enter the e-mail address of one user or list.You cannot enter an escalation address unless you enter an address forprimary notification first.
Time Period Specify how long to wait, following the initial alert notification, beforeSybase Control Center sends an e-mail notification to the escalationaddress. (The same notification is sent again to the original notificationaddress.) Select a time unit (hours, minutes, or seconds) and enter anumber.
12. Click Finish.If you are creating duplicate or child alerts, the Cancel button is activated; click it tointerrupt the creation of further alerts. (The primary alert, at a minimum, is always createdbefore the operation can be cancelled.) If you do not want to keep the duplicate or childalerts (if any) created before you cancelled the operation, drop them manually.
Note: Click Cancel to stop the creation of duplicate alerts.
Examples: Alert-triggered scriptsThis sample script is a Windows .bat file. It outputs the parameter values you pass to it to atext file. Windows batch files support only nine arguments. (Arg0, the name of the script, is notcounted.)@echo off@echo. >> stest.txt@echo %date% %time% >> stest.txt@echo arg0: %0 >> stest.txt@echo arg1: %1 >> stest.txt@echo arg2: %2 >> stest.txt@echo arg3: %3 >> stest.txt@echo arg4: %4 >> stest.txt@echo arg5: %5 >> stest.txt@echo arg6: %6 >> stest.txt@echo arg7: %7 >> stest.txt@echo arg8: %8 >> stest.txt@echo arg9: %9 >> stest.txt@echo. >> stest.txt
This is a sample execution parameter string for the script above:Time:%Time% Severity:%Severity%
Configure
Sybase Control Center for Replication 123

Resource:%Resource% Server:%Top_resource% KPI:%KPI% State:%Current_state% URL:%SCC_URL%
The script’s ouput might look like this:Tue 12/15/2009 14:54:45.58 arg0: C:\project\sccmain\script-test.bat arg1: Time:"Mon Dec 21 21:30:04 2009" arg2: Severity:CRITICAL arg3: Resource:"SCC Tester 1" arg4: Server:"SCC Tester 1" arg5: KPI:kpi_scc_mostate_primary arg6: State:ERROR arg7: HYPERLINK "http://ik-scc.sybase.com:8282/scc"URL:http://ik-scc.sybase.com:8282/scc arg8: arg9:
This is a UNIX script. It also outputs the parameter values you pass to it to a text file.#!bin/shoutfile=c:/testing/latest/scriptTest.outecho> $outfileecho `date` >> $outfilecount=1while [ "$1" ]do echo arg$count: $1 >> $outfile shift count=`expr $count + 1`doneecho --- DONE --- >> $outfile
See also• Setting Replication Parameters on page 117
• Optional Configuration Steps on page 134
• Alerts on page 145
• Replication Data Collections on page 99
• Key Performance Indicators and Key Performance Areas for Replication on page 100
• Testing an Alert-Triggered Script on page 148
Replication AlertsLists and describes alerts you can use to create alert instances for Replication.
Alerts are based on the same key performance indicators (KPIs) that are collected for theperformance and availability monitor displays, and for the Statistics Chart.
Configure
124

Replication Ob-jects
Alerts Description AlertType
Replication Server State Change The alert to send when a ReplicationServer state changes.
State
Memory Usage The alert to send when a ReplicationServer memory usage is above theconfigured threshold.
Threshold
Partition Usage The alert to send when a ReplicationServer partition's usage is above theconfigured threshold.
Threshold
Paths Path State Change The alert to send when a replicationpath's state changes.
State
Change in Path Ac-tivity
The alert to send when the numbers ofoperations sent on a replication path isabove the configured threshold.
Threshold
Connections Connection StateChange
The alert to send when a ReplicationServer connection for the primary da-tabase changes state.
State
DSI Activitiy The alert to send when the numbers ofoperations sent on a Replication Serv-er DSI connection is above the con-figured threshold.
Threshold
DSI Activity perSecond
The alert to send when the numbers ofoperations sent on a Replication Serv-er DSI connection per second is abovethe configured threshold.
Threshold
Logical Connections Logical ConnectionState Change
The alert to send when a ReplicationServer logical connection changesstate.
State
Routes Route State Change The alert to send when a ReplicationServer route's state changes.
State
Route Activity The alert to send when the change innumber of bytes sent through a Repli-cation Server route is above the con-figured threshold.
Threshold
Configure
Sybase Control Center for Replication 125

Replication Ob-jects
Alerts Description AlertType
Route Activity perSecond
The alert to send when the number ofbytes sent through a Replication Serv-er route per second is above the con-figured threshold.
Threshold
Queues Number of Com-mands Written
The alert to send when the number ofcommands written to a ReplicationServer queue is above the configuredthreshold.
Threshold
Number of Com-mands Written perSecond
The alert to send when the number ofcommands written to a ReplicationServer queue per second is above theconfigured threshold.
Threshold
Number of Com-mands Read
The alert to send when the number ofcommands read from a ReplicationServer queue is above the configuredthreshold.
Threshold
Number of Com-mands Read per Sec-ond
The alert to send when the number ofcommands read from a ReplicationServer queue per second is above theconfigured threshold.
Threshold
Size of CommandsWritten
The alert to send when the number ofcommands bytes written to a Replica-tion Server queue is above the config-ured threshold.
Threshold
Size of CommandsWritten per Second
The alert to send when the number ofbytes written to a Replication Serverqueue is above the configured thresh-old.
Threshold
Queue Size The alert to send when the size of aReplication Server queue is above theconfigured threshold.
Threshold
Partitions Partition Usage The alert to send when a ReplicationServer partition's usage is above theconfigured threshold.
Threshold
Configure
126

Replication Ob-jects
Alerts Description AlertType
Replication Agentand Mirror Replica-tion Agent
State Change The alert to send when a ReplicationAgent state changes.
State
Memory Usage The alert to send when a ReplicationAgent memory usage is above theconfigured threshold.
Threshold
LTI Input QueueSize
The alert to send when the number ofchange sets in a Replication AgentLog Transfer Interface (LTI) inputqueue is above the configured thresh-old.
Threshold
LTI Output QueueSize
The alert to send when the number ofchange sets in a Replication Agent LTIoutput queue is above the configuredthreshold.
Threshold
Number of LTLCommands Sent
The alert to send when the number ofReplication Agent Log Transfer Lan-guage (LTL) commands sent to Rep-lication Server is above the configuredthreshold.
Threshold
Number of LTLCommands Sent perSecond
The alert to send when the number ofReplication Agent LTL commandssent to Replication Server per secondis above the configured threshold.
Threshold
Number of Opera-tions Scanned
The alert to send when the number ofoperations scanned by a ReplicationAgent Log Reader is above the con-figured threshold.
Threshold
Number of Opera-tions Scanned perSecond
The alert to send when the number ofoperations scanned by a ReplicationAgent Log Reader per second is abovethe configured threshold.
Threshold
Number of Opera-tions Processed
The alert to send when the number ofoperations processed by a ReplicationAgent Log Reader is above the con-figured threshold.
Threshold
Configure
Sybase Control Center for Replication 127
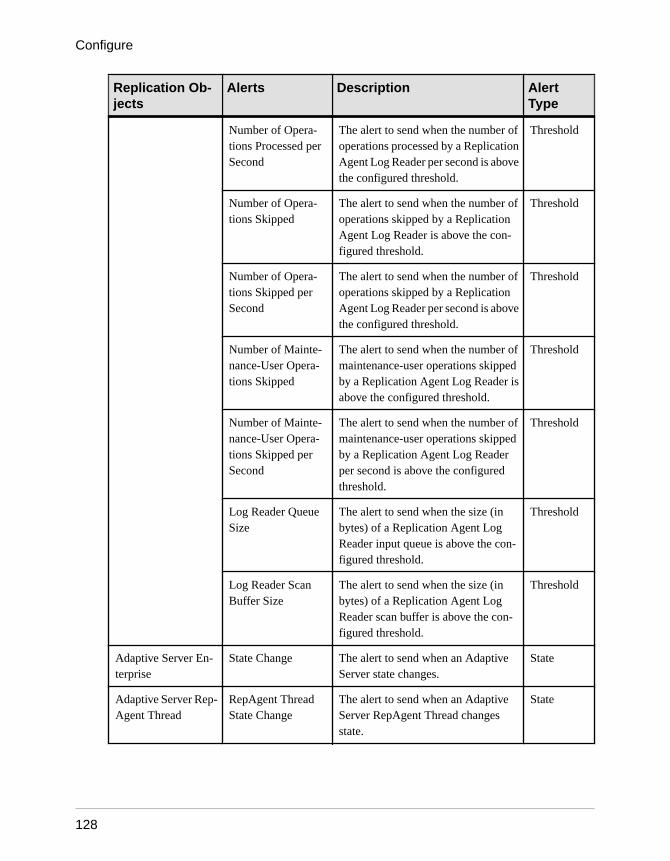
Replication Ob-jects
Alerts Description AlertType
Number of Opera-tions Processed perSecond
The alert to send when the number ofoperations processed by a ReplicationAgent Log Reader per second is abovethe configured threshold.
Threshold
Number of Opera-tions Skipped
The alert to send when the number ofoperations skipped by a ReplicationAgent Log Reader is above the con-figured threshold.
Threshold
Number of Opera-tions Skipped perSecond
The alert to send when the number ofoperations skipped by a ReplicationAgent Log Reader per second is abovethe configured threshold.
Threshold
Number of Mainte-nance-User Opera-tions Skipped
The alert to send when the number ofmaintenance-user operations skippedby a Replication Agent Log Reader isabove the configured threshold.
Threshold
Number of Mainte-nance-User Opera-tions Skipped perSecond
The alert to send when the number ofmaintenance-user operations skippedby a Replication Agent Log Readerper second is above the configuredthreshold.
Threshold
Log Reader QueueSize
The alert to send when the size (inbytes) of a Replication Agent LogReader input queue is above the con-figured threshold.
Threshold
Log Reader ScanBuffer Size
The alert to send when the size (inbytes) of a Replication Agent LogReader scan buffer is above the con-figured threshold.
Threshold
Adaptive Server En-terprise
State Change The alert to send when an AdaptiveServer state changes.
State
Adaptive Server Rep-Agent Thread
RepAgent ThreadState Change
The alert to send when an AdaptiveServer RepAgent Thread changesstate.
State
Configure
128

Replication Ob-jects
Alerts Description AlertType
Transaction LogSize
The alert to send when the size of anAdaptive Server RepAgent Thread'stransaction log is above the configuredthreshold.
Threshold
Number of Log Op-erations Scanned perSecond
The alert to send when the number oflog operations scanned per second byan Adaptive Server RepAgent Threadis above the configured threshold
Threshold
Number of Log Op-erations Processedper Second
The alert to send when the number oflog operations processed per secondby an Adaptive Server RepAgentThread is above the configured thresh-old.
Threshold
See also• Alert Types, Severities, and States for Replication on page 129
• Substitution Parameters for Scripts on page 132
• Alert-Triggered Scripts on page 132
Alert Types, Severities, and States for ReplicationLearn about the properties that define and control alerts.
An alert’s type determines what causes it to fire.
Table 21. Alert types
Type Description
State A state alert fires when the metric on which it is based changes to a particular state.The possible states are running, pending, stopped, warning, error, and unknown.
Threshold A threshold alert fires when the metric on which it is based passes a preset level.
Alert severities control when an alert is issued. You can configure the states or threshold valuesfor each alert.
Table 22. Alert severities
Severity Description
Normal No alert is issued.
Configure
Sybase Control Center for Replication 129

Severity Description
Warning A problem has given cause for concern. An alert is issued; you can subscribe toalerts that fire at the Warning level.
Critical A serious problem exists. An alert is issued; you can subscribe to alerts that fire atthe Critical level.
States are used on the dashboards, heat chart, and topology icon decorators.
Table 23. Replication States
Replication Ob-ject
State Description
Replication Server Running Replication Server is in Active or Quiesce state.
Warning Replication Server is in Suspect state.
Stopped Replication Server is in Rebuilding, Hibernating,Recovering, and Standalone state.
Error Replication Server is in Down state.
Unknown The state of the Replication Server cannot be de-termined.
Replication ServerConnection
Running Replication Server connection is in Active orHidden state.
Stopped Replication Server connection is in Suspendedstate.
Unknown The state of the Replication Server connectioncannot be determined.
Replication ServerLogical Connection
Running Replication Server logical connection is in Activestate.
Stopped Replication Server logical connection is in Sus-pended state.
Unknown The state of the Replication Server logical con-nection cannot be determined.
Replication ServerRoute
Running Replication Server route is in Active state.
Stopped Replication Server route is in Suspended state.
Configure
130

Replication Ob-ject
State Description
Unknown The state of the Replication Server route cannotbe determined.
Replication Path Running Replication path is in Active state.
Stopped Replication path is in Suspended state.
Unknown The state of the Replication path cannot be deter-mined.
Replication Agent Running Replication Agent is in Replicating state.
Stopped Replication Agent is in Admin state.
Error Replication Agent is in Down state.
Unknown The state of the Replication Agent cannot be de-termined.
Adaptive ServerReplication AgentThread
Running Adaptive Server Replication Agent thread is inActive state.
Stopped Adaptive Server Replication Agent thread is inSuspended state.
Error Adaptive Server Replication Agent thread is inDown state.
Replication-OnlyAdaptive Server
Running Replication-only Adaptive Server is in Activestate.
Error Replication-only Adaptive Server is in Downstate.
Unknown The state of the Replication-only Adaptive Servercannot be determined.
See also• Replication Alerts on page 124
• Substitution Parameters for Scripts on page 132
• Alert-Triggered Scripts on page 132
Configure
Sybase Control Center for Replication 131

Alert-Triggered ScriptsYou can write a shell script and configure an alert to execute the script.
Use scripts to help manage and respond to alerts. A script might trigger a visual alarm in acontrol center or send an e-mail message about the alert to a list of addresses (a way ofsupplementing the alert subscription feature, which accepts a single address).
When you configure an alert to execute a script, you:
• Specify the states or thresholds that set off the alert• Specify the severity level that triggers execution of the script• Supply an execution parameter string to be passed to the script
Scripts are executed under the login account used to start Sybase Control Center. Make surethat account has permissions that allow it to perform the actions contained in all scripts.
When a script executes, Sybase Control Center logs the start time, end time, and status and exitcodes to the alert services log at <SCC-installation-dir>\SCC-3_2\services\Alert\log\alert-server.log.
Warning! Use caution in writing scripts. A poorly designed script can cause a blockingsituation, creating a deadlock in your Sybase Control Center server.
See also• Replication Alerts on page 124
• Alert Types, Severities, and States for Replication on page 129
• Substitution Parameters for Scripts on page 132
• Testing an Alert-Triggered Script on page 148
• Alerts on page 145
Substitution Parameters for ScriptsIn the execution parameter string you supply to be passed to your shell script, you can includesubstitution parameters that are replaced at execution time with values from the alert thattriggers the script.
Substitution parameters are available for both state-based and threshold-based alerts.
Table 24. Substitution Parameters for State-Based Alerts
Parameter Description
%Alert% A three-part name supplied by the alert system. The parts are thename of this alert, the name of the resource, and the name of thekey performance indicator (KPI) on which this alert is based.
Configure
132

Parameter Description
%Current_state% The current state of the resource on which this alert is config-ured.
%KPI% The name of the KPI on which this alert is based.
%Resource% The name of the resource with which this alert is associated.
%SCC_URL% A link to Sybase Control Center, where more information aboutthe alert may be available.
%Severity% The severity of this alert: critical or warning.
%Source_application% The SCC product module that generated this alert.
%Time% The date and time at which the alert fired, in this format:
Tue Sep 15 10:10:51 2009
%Server% The name of the alerted resource’s top-level parent resource—usually the server. This is valuable when the alerted resource is acomponent of a larger system (a database in a server, for exam-ple). If the alerted resource has no parent, %Server% and %Re-source% have the same value.
Table 25. Substitution Parameters for Threshold-Based Alerts
Parameter Description
%Alert% A three-part name supplied by the alert system. The parts are thename of this alert, the name of the resource, and the name of thekey performance indicator (KPI) on which this alert is based.
%Datapoint% The current value, on the alerted resource, of the KPI on whichthis alert is based.
%KPI% The name of the KPI on which this alert is based.
%Resource% The name of the resource with which this alert is associated.
%SCC_URL% A link to Sybase Control Center, where more information aboutthe alert may be available.
%Severity% The severity of this alert: critical or warning. (Critical is moreserious.)
%Source_application% The SCC product module that generated this alert.
%Threshold% The threshold value at which this alert fires.
Configure
Sybase Control Center for Replication 133

Parameter Description
%Time% The date and time at which the alert fired, in this format:
Tue Sep 15 10:10:51 2009
%Server% The name of the alerted resource’s top-level parent resource.This is valuable when the alerted resource is a component of alarger system (a database in a server, for example). If the alertedresource has no parent, %Server% and %Resource% have thesame value.
See also• Replication Alerts on page 124
• Alert Types, Severities, and States for Replication on page 129
• Alert-Triggered Scripts on page 132
• Testing an Alert-Triggered Script on page 148
• Modifying an Alert on page 147
Optional Configuration StepsPerform additional configuration, including user authorization, alerts, data collectionscheduling, backups, and setting purging options for the repository.
Table 26. Configuration areas
Configuration area Description Topic
User authorization Set up groups of users or assign roles.Make sure there are users with adminis-trative privileges (sccAdminRole).
User Authorization on page81
Authentication Add authentication modules to allowWindows, UNIX, and LDAP users to login to Sybase Control Center.
Setting up Security on page63
Alerts Modify alert thresholds and subscriptionsand delete alerts.
Alerts on page 145
Data collection Modify collection intervals and sched-ules, suspend and resume the schedule,and delete collection jobs.
Job Scheduling on page 140
Resources Unregister resources, add them to per-spectives, or remove them.
Resources on page 153
Configure
134

Configuration area Description Topic
Perspectives Create, remove, and rename perspectives. Perspectives on page 156
Repository Set purging options and schedule backupsof the repository database.
Repository on page 158
See also• Creating an Alert on page 121
Configure
Sybase Control Center for Replication 135

Configure
136

Manage and Monitor
Manage and Monitor the servers and their components in the replication environment.
Heat ChartThe heat chart displays status and availability statistics for managed resources in the currentperspective.
The heat chart displays the state of resources in your perspective—whether the resources arerunning, suspended, or down. In addition, the heat chart lists the type of each resource andprovides statistical data, including the start time of the last data collection.
In the Perspective Heat Chart view, you can filter the resources that you want to see and searchand sort the results by column. You can also select a resource and pull down its context menu tosee monitoring and administrative options that vary based on the resource type.
Heat chart data is collected directly from managed servers, tagged with the date and time whenit was collected, and stored in the Sybase Control Center repository.
See also• Historical Performance Monitoring on page 138
• Replication Latency on page 187
• Availability Monitoring on page 172
• Key Performance Indicators and Key Performance Areas for Replication on page 100
Displaying Resource AvailabilityUse the heat chart to view availability information on the servers in the current perspective.
1. From the application menu bar, select View > Open > Heat Chart.
2. (Optional) To display tools for filtering (narrowing the list of resources in the heat chart) orchanging the columns, select View > Filter from the Perspective Heat Chart menu bar.The Filter and Column tools appear in the left pane.
3. (Optional) To use filtering, select View > Filter from the view’s menu bar and enter asearch term in the Filter string field.
The search term can be any string that appears in the tabular portion of the heat chart, suchas the name, or part of the name, of a server or a resource type (ASE Server, for example).
4. (Optional) Select a filtering setting:
Manage and Monitor
Sybase Control Center for Replication 137

• Match case – search for resources whose displayed data includes the search term,including uppercase and lowercase letters; or
• Exact match – search for resources whose displayed data includes an item identical tothe search term.
5. (Optional) Select a column from the Filter on list to restrict your search to that column.
6. (Optional) Click Columns to customize your heat chart.
7. (Optional) Unselect any column that should not appear in your heat chart.
8. (Optional) Click the sorting arrow in the column headers to sort the column values in eitherascending or descending order.
9. (Optional) Click the resource’s row and pull down the menu to the right of the resourcename to view options for the selected resource.
10. (Optional) To resize the Filter and Columns tools pane, move your mouse over the borderbetween the tools pane and the resource table. When the mouse cursor changes to a resizeicon, click and drag the border to the left or the right.
11. (Optional) To hide the Filter and Columns tools, unselect View > Filter.
See also• Graphing Performance Counters on page 138
• Configuring Repository Purging on page 163
Historical Performance MonitoringMonitor performance data to determine whether your environment is working efficiently.
Obtain detailed information about the status of the resources in your environment. You cancreate performance graphs that illustrate resource performance over a specified period oftime.
See also• Heat Chart on page 137
• Replication Latency on page 187
• Availability Monitoring on page 172
• Key Performance Indicators and Key Performance Areas for Replication on page 100
Graphing Performance CountersTo show performance trends, generate a graph for any set of performance counters.
PrerequisitesVerify that statistical data to be graphed has been collected. To verify data collection, go to theCollection Jobs page of the Resource Properties view and check the History tab for a
Manage and Monitor
138

collection job. You can also look at the resource monitor: if data appears there, data is beingcollected.
Task
Tip: Data collections start running when a resource is authenticated. A recently authenticatedresource might not have accumulated enough data to make a useful graph.
1. In the Perspective Resources view, click a resource and select Resource > LaunchStatistics Chart in the view menu bar.
2. Expand the folders in the Statistics tab and select the key performance indicator (KPI) youwant to graph.
3. Click Graph Statistic or drag the KPI onto the Chart tab.The Chart tab displays the graphed data, while the KPI with its corresponding value andthe date and time it was collected appear in the Data tab.
4. (Optional) Repeat to add KPIs to the graph.
5. (Optional) Use the slider at the bottom of the Chart tab to control the amount of timecovered by the graph, ranging from a minute to a year.
6. (Optional) Use <<, <, >, and >> to move the displayed graph to an earlier or later time,depending on how the slider is set.
Tip: The statistics chart displays data covering a fixed period of time, and that period doesnot change automatically. If you are viewing the most recent statistics and want to keep thegraph current, adjust the displayed time period as new statistics are collected.
7. (Optional) You can click the date/time labels that appear above the slider. Use these tochange the start and end time and the chart time span.
8. (Optional) Click Clear Graph to remove all the graphed statistics and start anew.
Note: You can graph a maximum of five statistics with no more than two distinct units ofmeasure. By default, only 24 hours of statistics are available; change the repository purgeoptions to save statistics for a longer period.
See also• Configuring Repository Purging on page 163
• Displaying Resource Availability on page 137
Manage Sybase Control CenterManage and monitor Sybase Control Center for Replication through performance statisticsand component activity logs.
Manage and Monitor
Sybase Control Center for Replication 139

Administration ConsoleUse the Administration Console to browse and manage the selected resources in a perspective.
Browsing and Managing ResourcesCreate new resources or browse and manage existing resources.
PrerequisitesIf you want to view or manage existing resources, register at least one resource and add it to aperspective.
Task
The Administration Console enables you to view and manage both servers and resourcesbelow the server level, such as processes, databases, and devices.
1. To launch the Administration Console, select (from the application menu) View > Open >Administration Console.
2. Expand the objects in the left pane to explore the hierarchy of resource types.
3. Select a high-level resource type (a logical server, for example) in the hierarchy.
The Administration Console displays a list of resources of that type. You can use theFolder menu to create another server of the same type, or to refresh the view.
4. Select various objects in the hierarchy.Information about each selected object appears in the table in the right pane.
5. In either the right or the left pane, select an object.A dropdown arrow appears to the right of the name. If the selected object is in the rightpane, the Resource menu becomes active.
6. Click the dropdown arrow to display a menu of actions you can perform on that object. Ifthe selected object is in the right pane, use the Resource menu to display the same actions.
Note: Some managed objects have no actions.
Job SchedulingA schedule defines a data collection job and specifies how often the job executes in yoursystem.
In Sybase Control Center, collection jobs provide the data that appears on monitoring screensand charts. A collection is a set of key performance indicators (KPIs). When the scheduler runsa collection job, it gathers the value of each KPI in the collection and tags the data with the dateand time it was gathered. The data is stored in the repository and displayed. Each productmodule has predefined collections that you can schedule.
You can define schedules as one-time or repeating. You can modify the schedule for a jobbased on a number of attributes such as:
Manage and Monitor
140

• Repeat interval• Date• Time
The job history displays the status of jobs executed each day.
See also• Setting Up Statistics Collection on page 97
• Replication Data Collections on page 99
Executing and Stopping a Data Collection JobUse the Properties view to execute or stop a data collection job.
Most of the time, data collection jobs should run on a schedule; you should rarely need to startor stop a job manually.
1. In the Perspective Resources view, select the resource associated with the job and selectResource > Properties.
2. Select Collection Jobs.
3. Select the job and:
• To execute a job immediately, click Execute.
• To stop a job, click Stop, then click Yes to confirm.
See also• Deleting a Data Collection Job on page 141
• Resuming and Suspending a Data Collection Job on page 142
• Adding a New Schedule to a Job on page 142
• Modifying the Data Collection Interval for a Job on page 143
• Resuming and Suspending the Scheduler on page 144
• Viewing the Job Execution History on page 145
Deleting a Data Collection JobUse the Properties view for a resource to delete one or more data collection jobs.
1. In the Perspective Resources view, select the resource associated with the job and selectResource > Properties.
2. Select Collection Jobs.
3. Select the job and click Delete.
4. Click OK to confirm the deletion.
Manage and Monitor
Sybase Control Center for Replication 141

See also• Executing and Stopping a Data Collection Job on page 141
• Resuming and Suspending a Data Collection Job on page 142
• Adding a New Schedule to a Job on page 142
• Modifying the Data Collection Interval for a Job on page 143
• Resuming and Suspending the Scheduler on page 144
• Viewing the Job Execution History on page 145
Resuming and Suspending a Data Collection JobUse the Properties view for a resource to resume or suspend a data collection job.
1. In the Perspective Resources view, select the resource associated with the job and selectResource > Properties.
2. Select Collection Jobs.
3. Select the job and:
• To resume a job, click Resume.• To suspend a job, click Suspend, then click Yes to confirm the suspension.
See also• Executing and Stopping a Data Collection Job on page 141
• Deleting a Data Collection Job on page 141
• Adding a New Schedule to a Job on page 142
• Modifying the Data Collection Interval for a Job on page 143
• Resuming and Suspending the Scheduler on page 144
• Viewing the Job Execution History on page 145
Adding a New Schedule to a JobUse the Properties view for a resource to add more than one schedule to a job.
1. In the Perspective Resources view, select the resource associated with the job and selectResource > Properties.
2. Select Collection Jobs.
3. Select the job.
4. Click Add Schedule.
5. Specify details for the new schedule:
Table 27. New schedule details
Field Description
Name A name for this schedule
Manage and Monitor
142

Field Description
Description A description of this schedule
Start date The day when the schedule will take effect
Time The time when the schedule will take effect
Note: Enter dates and times using your local time. Sybase Control Center converts yourtimes for remote time zones if necessary.
6. Specify the duration of this schedule:
• Run once• Repeat until
For Repeat until, specify these details:
Field Description
Repeat interval Time period (in seconds, minutes, hours, or days) between jobexecutions
Repeat until Date the job should stop running
Time Time the job should stop running
• Repeat indefinitelyFor Repeat indefinitely, specify these details:
Field Description
Repeat interval Time period (in seconds, minutes, hours, or days) between jobexecutions
7. Click Apply.
See also• Executing and Stopping a Data Collection Job on page 141
• Deleting a Data Collection Job on page 141
• Resuming and Suspending a Data Collection Job on page 142
• Modifying the Data Collection Interval for a Job on page 143
• Resuming and Suspending the Scheduler on page 144
• Viewing the Job Execution History on page 145
Modifying the Data Collection Interval for a JobUse the Properties view for a managed resource to modify the data collection schedule.
1. In the Perspective Resources view, select a server (or other resource).
2. In the view’s menu bar, select Resource > Properties.
Manage and Monitor
Sybase Control Center for Replication 143

3. Select Collection Jobs.
4. Expand a collection folder and select a job.
5. On the Schedule tab, modify the Repeat interval field.
6. Click Apply.
See also• Executing and Stopping a Data Collection Job on page 141
• Deleting a Data Collection Job on page 141
• Resuming and Suspending a Data Collection Job on page 142
• Adding a New Schedule to a Job on page 142
• Resuming and Suspending the Scheduler on page 144
• Viewing the Job Execution History on page 145
Resuming and Suspending the SchedulerUse the scheduler settings to resume or suspend all scheduled jobs.
PrerequisitesYou must have administrative privileges (sccAdminRole) to perform this task.
Task
1. From the main menu bar, select Application > Administration.
2. In the Sybase Control Center Properties dialog, select Scheduler.
3. Do one of the following:
• To resume the scheduler, click Resume.• To suspend the scheduler, click Suspend.
4. Click OK.
See also• Executing and Stopping a Data Collection Job on page 141
• Deleting a Data Collection Job on page 141
• Resuming and Suspending a Data Collection Job on page 142
• Adding a New Schedule to a Job on page 142
• Modifying the Data Collection Interval for a Job on page 143
• Viewing the Job Execution History on page 145
Manage and Monitor
144

Viewing the Job Execution HistoryUse the Properties view to display a data collection job’s execution history.
1. In the Perspective Resources view, select the resource associated with the job and selectResource > Properties.
2. Select Collection Jobs.
3. Select a job.
4. Click the History tab.
See also• Executing and Stopping a Data Collection Job on page 141• Deleting a Data Collection Job on page 141• Resuming and Suspending a Data Collection Job on page 142• Adding a New Schedule to a Job on page 142• Modifying the Data Collection Interval for a Job on page 143• Resuming and Suspending the Scheduler on page 144
AlertsYou can configure Sybase Control Center to notify you when a resource requires attention.
You do this by setting up a predefined alert that is triggered when a performance counter entersa particular state or passes a threshold value that you set. When the alert goes off, it generatesan alert notification.
An alert notification takes the form of a visual indicator in the Alert Monitor and, optionally,an e-mail message. The Alert Monitor displays information about the alert, including theresource name, alert severity, value, and date. You can resolve the alert or allow it to escalate.
Configure, monitor, and control alerts for managed resources by:
• Enabling and disabling alert subscriptions for resources• Configuring shell scripts to run when alerts fire• Setting alert state or threshold triggers• Responding to an alert by resolving it, adding notes if desired• Modifying or deleting alerts• Viewing alert history
See also• Replication Data Collections on page 99• Key Performance Indicators and Key Performance Areas for Replication on page 100• Creating an Alert on page 121• Assigning a Role to a Login or a Group on page 81
Manage and Monitor
Sybase Control Center for Replication 145

• Configuring the E-mail Server on page 79• Alert-Triggered Scripts on page 132
Types, Severities, and StatesLearn about the properties that define and control alerts.
An alert’s type determines what causes it to fire.
Table 28. Alert types
Type Description
State A state alert fires when the metric on which it is based changes to a particular state.The possible states are running, pending, stopped, warning, error, and unknown.
Threshold A threshold alert fires when the metric on which it is based passes a specifiedlevel.
Alert severities control when an alert is issued. You can configure the states or threshold valuesfor each alert.
Table 29. Alert severities
Severity Description
Normal No alert is issued.
Warning A problem has given cause for concern. An alert is issued; you can choose whetherto subscribe to alerts that fire at the Warning level.
Critical A serious problem exists. An alert is issued; you can choose whether to subscribeto alerts that fire at the Critical level.
State-based alerts use these states:
• Running• Pending• Unknown• Warning• Stopped• Error
The definitions of these states vary by component and sometimes by alert. See the component-specific topics for details.
See also• Viewing Alerts on page 147• Modifying an Alert on page 147
Manage and Monitor
146
• Testing an Alert-Triggered Script on page 148
• Deleting an Alert on page 149
• Alert Subscriptions on page 149
• Alert Notifications on page 152
Viewing AlertsDisplay alert notifications and alerts that have been configured for a given resource.
• To display generated alerts (notifications):
a) Select View > Open > Alert Monitor from the application menu bar.For a given alert, the Alert Monitor displays only the most recent unresolvednotifications at each severity level. That is, if an alert fires five times at the warninglevel, only the notification of the fifth firing is listed—even if the previous four alertsremain unresolved.
b) To display information about a generated alert, select the alert in the Alert Monitor andclick Properties.
• To display configured alerts:
a) In the Perspective Resources view, select a resource and select Resource >Properties.
b) Click Alerts to view configured alerts for the selected resource.
(This is a different route to the information displayed in the second step, above.)
See also• Types, Severities, and States on page 146
• Modifying an Alert on page 147
• Testing an Alert-Triggered Script on page 148
• Deleting an Alert on page 149
• Alert Subscriptions on page 149
• Alert Notifications on page 152
Modifying an AlertUse the Properties view of your managed resource to modify an alert.
1. In the Perspective Resources view, select a resource and select Resource > Properties.
2. Select Alerts.
3. Select the alert to modify.
4. On the Thresholds tab, modify the threshold values. Click OK to save your changes.
5. On the Script tab, click Modify to change the alert severity at which script execution istriggered, the path to the script, the execution parameters, or the test values. Click Finish tosave your changes.
Manage and Monitor
Sybase Control Center for Replication 147

6. On the Subscriptions tab, select a subscription and click Modify to change its e-mailaddress or escalation address. Click Finish to save your changes.
7. On the Storm Supression tab, pull down the menu to change the units and enter a value forthe storm suppression period.
8. Click OK (to apply the changes and close the properties dialog) or Apply (to apply thechanges and leave the dialog open).
See also• Types, Severities, and States on page 146
• Viewing Alerts on page 147
• Testing an Alert-Triggered Script on page 148
• Deleting an Alert on page 149
• Alert Subscriptions on page 149
• Alert Notifications on page 152
Testing an Alert-Triggered ScriptExecute a script to make sure it works properly.
PrerequisitesConfigure an alert with a script.
Task
1. In the Perspective Resources view, select a resource and select Resource > Properties.
2. Select Alerts.
3. Select the alert to test.
4. On the Script tab, click Modify.
5. If the script requires parameter values, click Select Parameters to enter them in theExecution Parameters box.
You can include a number of predefined substitution parameters, which are replaced byvalues from the alert. The parameter values are passed on the command line to the script.For the test execution, use values that test all the parameters used by the script. See thesubstitution parameters topic (linked below) for more information.
Note: When you test a script, Sybase Control Center supplies values for the %Severity%and %Source_Application% parameters. Any test values you supply for these parametersare discarded.
6. Click Test to perform a test execution of your script.
If your script takes parameters, the test may fail if parameter values are missing orincorrect.
Manage and Monitor
148

See also• Types, Severities, and States on page 146
• Viewing Alerts on page 147
• Modifying an Alert on page 147
• Deleting an Alert on page 149
• Alert Subscriptions on page 149
• Alert Notifications on page 152
• Alert-Triggered Scripts on page 132
• Substitution Parameters for Scripts on page 132
• Creating an Alert on page 121
Deleting an AlertUse the Properties view of your resource to delete an alert.
1. In the Perspective Resources view, select a resource and select Resource > Properties.
2. Select Alerts.
3. Select an alert and click Drop.
4. Click Yes to confirm the deletion.
See also• Types, Severities, and States on page 146
• Viewing Alerts on page 147
• Modifying an Alert on page 147
• Testing an Alert-Triggered Script on page 148
• Alert Subscriptions on page 149
• Alert Notifications on page 152
Alert SubscriptionsWhen an alert subscription is configured, the alert notifies the specified user or group of usersby e-mail message when the alert fires.
You can configure an alert subscription to send e-mail notifications when the alert reaches aseverity of warning, a severity of critical, or both.
You can also configure an alert subscription to escalate after a period of time that you specify.If the alert is not resolved within the escalation period, Sybase Control Center e-mails anescalation message to the user or group whose address you provide for escalations, as well asto the primary subscriber. The escalation message is identical to the primary notificationmessage. Sybase recommends that if you configure alert subscriptions to escalate, you do soonly for the most urgent alerts, those with a severity of critical.
Manage and Monitor
Sybase Control Center for Replication 149
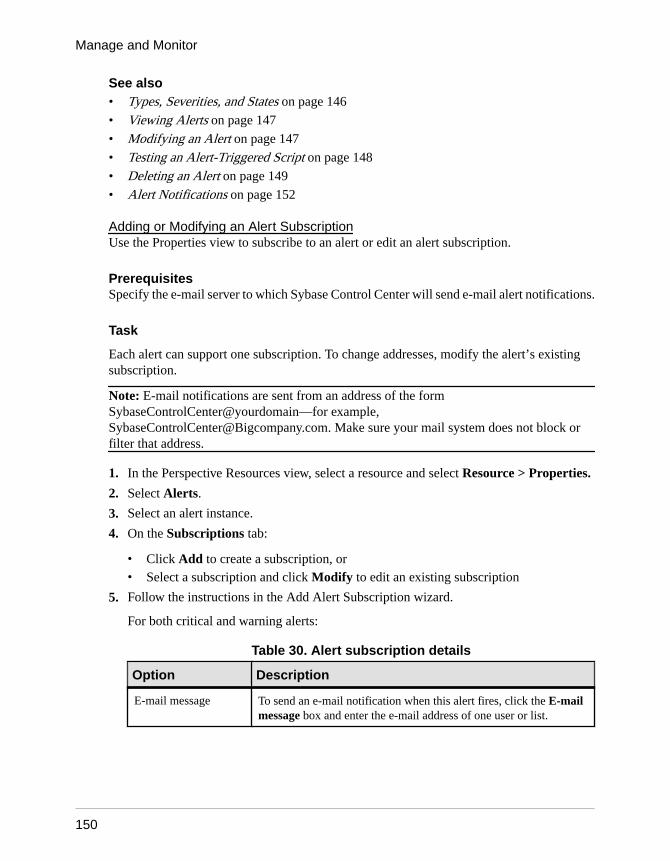
See also• Types, Severities, and States on page 146
• Viewing Alerts on page 147
• Modifying an Alert on page 147
• Testing an Alert-Triggered Script on page 148
• Deleting an Alert on page 149
• Alert Notifications on page 152
Adding or Modifying an Alert SubscriptionUse the Properties view to subscribe to an alert or edit an alert subscription.
PrerequisitesSpecify the e-mail server to which Sybase Control Center will send e-mail alert notifications.
Task
Each alert can support one subscription. To change addresses, modify the alert’s existingsubscription.
Note: E-mail notifications are sent from an address of the formSybaseControlCenter@yourdomain—for example,[email protected]. Make sure your mail system does not block orfilter that address.
1. In the Perspective Resources view, select a resource and select Resource > Properties.
2. Select Alerts.
3. Select an alert instance.
4. On the Subscriptions tab:
• Click Add to create a subscription, or• Select a subscription and click Modify to edit an existing subscription
5. Follow the instructions in the Add Alert Subscription wizard.
For both critical and warning alerts:
Table 30. Alert subscription details
Option Description
E-mail message To send an e-mail notification when this alert fires, click the E-mailmessage box and enter the e-mail address of one user or list.
Manage and Monitor
150

Option Description
Escalation e-mail To escalate this alert (by sending an e-mail notification to anotheraddress when this alert has not been responded to after a specifiedperiod of time), click the Escalation e-mail box and enter the e-mailaddress of one user or list.
Time period Enter the amount of time to wait, following the initial alert notification,before Sybase Control Center sends an e-mail notification to the esca-lation address.
6. Click Finish.
See also• Unsubscribing from an Alert on page 151
• Enabling and Disabling Alert Subscription on page 151
Unsubscribing from an AlertUse the Properties view to unsubscribe from an alert.
1. In the Perspective Resources view, select a resource and select Resource > Properties.
2. Select Alerts.
3. Select an alert instance.
4. In the Subscriptions tab, select the alert subscription and click Drop.When you drop a regular subscription, any escalation subscription is also dropped.However, dropping an escalation does not affect the regular subscription.
5. Click Yes to confirm the deletion.
See also• Adding or Modifying an Alert Subscription on page 150
• Enabling and Disabling Alert Subscription on page 151
Enabling and Disabling Alert SubscriptionUse the Properties view to enable and disable alert subscription.
1. In the Perspective Resources view, select a resource and select Resource > Properties.
2. Select Alerts.
3. Select an alert instance.
4. In the Subscriptions tab, select an alert subscription and:
• To enable subscription, click Enable.• To disable subscription, click Disable, then click Yes to confirm.
Manage and Monitor
Sybase Control Center for Replication 151

See also• Adding or Modifying an Alert Subscription on page 150• Unsubscribing from an Alert on page 151
Alert NotificationsAn alert notification indicates that an alert has been generated.
Alert notifications are produced when alerts fire. An alert fires if the performance indicator onwhich it is based passes the threshold or state specified for the severity level of warning. If theperformance indicator passes the threshold or state specified for the severity level of critical,the alert fires again and another notification is generated.
Detailed alert notifications appear in the Alert Monitor view. In addition, alerts appear asyellow ! symbols in the heat chart. You can set an alert to also send an e-mail message when itfires.
See also• Types, Severities, and States on page 146• Viewing Alerts on page 147• Modifying an Alert on page 147• Testing an Alert-Triggered Script on page 148• Deleting an Alert on page 149• Alert Subscriptions on page 149
Displaying Alert History and ResolutionsUse the Properties view to see historical information about resolved and unresolved alerts.
The History tab on the Alerts page of the Resource Properties view displays information aboutevery time this alert has fired. Each row of the table represents a single notification generatedby the selected alert.
The Resolutions tab displays information about alerts that have been resolved (closed) by aSybase Control Center administrator.
The History and Resolutions tabs display the 100 most recent alerts or alerts for the last 24hours, whichever is reached first.
1. In the Perspective Resources view, select a resource and select Resource > Properties.
2. Select Alerts.
3. Select the alert instance.
4. Click the History tab.
5. (Optional) Click the Resolutions tab.
See also• Resolving Alerts on page 153
Manage and Monitor
152

Resolving AlertsAfter you address the cause of an alert, resolve it to remove it from the list of active alerts in theAlert Monitor.
PrerequisitesYou must be logged in as a user with Sybase Control Center administrative privileges(sccAdminRole) to resolve alerts.
Task
1. In the Perspective Resources view, select a resource and select Resource > Properties.
2. In the left pane, select Alerts.
3. Select an alert instance in the top table.
4. Click Resolve.
5. Enter an explanation of how you resolved the alert.
6. Click Submit.The state of the alert (shown in the State column) changes to Normal. Notifications on thisalert disappear from the Alert Monitor.
Note: See the Resolutions tab for details on resolved alerts.
See also• Displaying Alert History and Resolutions on page 152
ResourcesIn Sybase Control Center, a resource is a unique Sybase product component or subcomponent.A server is the most common managed resource.
Sybase products comprise many components, including servers, agents, databases, devices,and processes. A managed resource is a product component or subcomponent that SybaseControl Center lets you monitor and administer. Two important tools for resourcemanagement are the Resource Explorer and the Perspective Resources view.
• The Resource Explorer lists resources that are registered with Sybase Control Center. Thelist may include resources that you have not yet added to a perspective. Registrationenables Sybase Control Center to connect to the resource, log in, retrieve monitoring data,and issue commands. Resources are registered at the server or agent level, and registering aserver or agent also makes Sybase Control Center aware of any subcomponents. You canregister resources individually or register several at once by importing them in a batch.
• The Perspective Resources view lists registered resources that you have added to thecurrent perspective. You must add a resource to a perspective to manage and monitor itsavailability and performance.
Manage and Monitor
Sybase Control Center for Replication 153

See also• Compatibility Matrix on page 4
• Common Display Options on page 7
• Registering a Replication Server, Replication Agent, or Mirror Replication Agent on page90
• Importing Resources for Batch Registration on page 91
Unregistering a ResourceRemove one or more servers or other resources from Sybase Control Center.
1. From the Sybase Control Center toolbar, click the Launch Resource Explorer icon.
2. In the Resource Explorer, select the resources you want to unregister. Use Shift+click orControl+click to select multiple resources.
3. Select Resources > Unregister.
4. Click Yes to confirm the removal.
See also• Adding a Resource to a Perspective on page 154
• Removing a Resource from a Perspective on page 155
• Searching for Resources in the Resource Explorer on page 155
• Registering a Replication Server, Replication Agent, or Mirror Replication Agent on page90
• Importing Resources for Batch Registration on page 91
Adding a Resource to a PerspectiveAdd one or more resources to the current perspective.
Add servers or other resources to a perspective so you can monitor and manage them alongwith other resources in the same perspective.
1. From the Sybase Control Center toolbar, click the Launch Resource Explorer icon.
2. Select the resources to add to your perspective. Use Shift-click or Control-click to selectmultiple resources.
3. Perform one of these actions:
• Select Resources > Add Resources to Perspective.• Drag and drop resources from the Resource Explorer onto the Perspective Resources
view. You can select and drag multiple resources.
See also• Unregistering a Resource on page 154
• Removing a Resource from a Perspective on page 155
Manage and Monitor
154
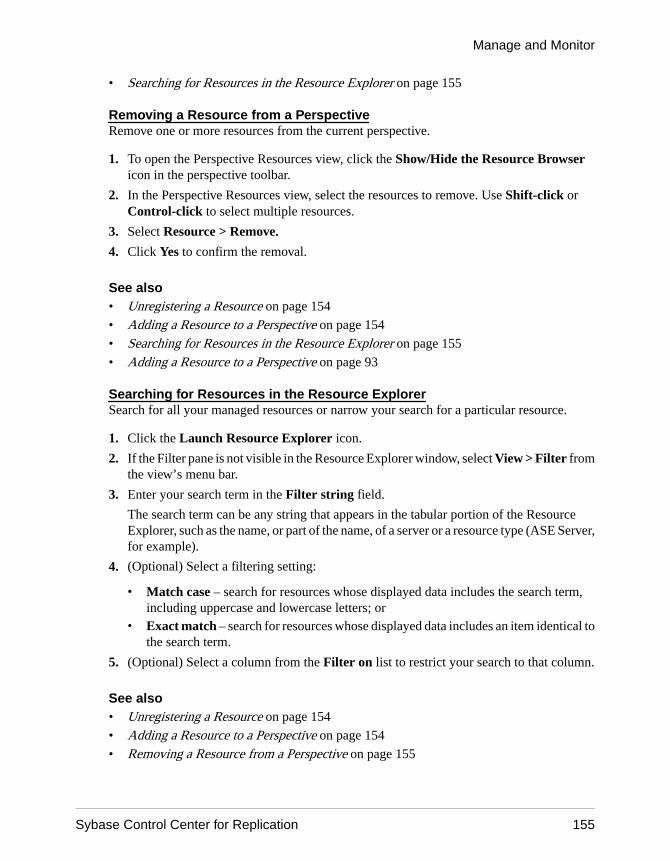
• Searching for Resources in the Resource Explorer on page 155
Removing a Resource from a PerspectiveRemove one or more resources from the current perspective.
1. To open the Perspective Resources view, click the Show/Hide the Resource Browsericon in the perspective toolbar.
2. In the Perspective Resources view, select the resources to remove. Use Shift-click orControl-click to select multiple resources.
3. Select Resource > Remove.
4. Click Yes to confirm the removal.
See also• Unregistering a Resource on page 154
• Adding a Resource to a Perspective on page 154
• Searching for Resources in the Resource Explorer on page 155
• Adding a Resource to a Perspective on page 93
Searching for Resources in the Resource ExplorerSearch for all your managed resources or narrow your search for a particular resource.
1. Click the Launch Resource Explorer icon.
2. If the Filter pane is not visible in the Resource Explorer window, select View > Filter fromthe view’s menu bar.
3. Enter your search term in the Filter string field.
The search term can be any string that appears in the tabular portion of the ResourceExplorer, such as the name, or part of the name, of a server or a resource type (ASE Server,for example).
4. (Optional) Select a filtering setting:
• Match case – search for resources whose displayed data includes the search term,including uppercase and lowercase letters; or
• Exact match – search for resources whose displayed data includes an item identical tothe search term.
5. (Optional) Select a column from the Filter on list to restrict your search to that column.
See also• Unregistering a Resource on page 154
• Adding a Resource to a Perspective on page 154
• Removing a Resource from a Perspective on page 155
Manage and Monitor
Sybase Control Center for Replication 155

PerspectivesA perspective is a named container for a set of one or more managed resources. You cancustomize perspectives to provide the information you need about your environment.
As the main workspaces in the Sybase Control Center window, perspectives let you organizemanaged resources. You might assign resources to perspectives based on where the resourcesare located (continents, states, or time zones, for example), what they are used for, whichgroup owns them, or which administrator manages them. Perspectives appear as tabs in themain window.
Every perspective includes a Perspective Resources view, which lists the resources in thatperspective and provides high-level status and descriptive information. Use the View menu toswitch from detail view to icon view and back.
You can open additional views—the heat chart, statistics chart, or alert monitor, for example—as needed to manage the perspective’s resources. The views in a perspective displayinformation only about resources in that perspective.
One resource can appear in many perspectives.
Creating a PerspectiveCreate a perspective in which you can add and manage resources.
1. From the application menu bar, select Perspective > Create.
2. Enter a name for your perspective. The name can contain up to 255 characters.
3. Click OK.
See also• Removing a Perspective on page 156
• Renaming a Perspective on page 157
Removing a PerspectiveDelete a perspective window.
1. Select the perspective tab you want to delete.
2. In the main menu bar, select Perspective > Delete.The selected perspective disappears. If there are other perspectives, Sybase Control Centerdisplays one.
See also• Creating a Perspective on page 156
• Renaming a Perspective on page 157
Manage and Monitor
156

Renaming a PerspectiveChange the name of your perspective.
1. Select the perspective tab you want to rename.
2. From the main menu bar, select Perspective > Rename..
3. Enter the new name for your perspective.
4. Click OK.
See also• Creating a Perspective on page 156
• Removing a Perspective on page 156
ViewsUse views to manage one or more resources within a perspective.
In Sybase Control Center, views are the windows you use to monitor and manage aperspective’s resources. You can re-arrange, tile, cascade, minimize, maximize, and generallycontrol the display of the views in your persective.
Each perspective includes these views:
• Perspective Resources• Administration Console• Heat chart• Alert monitor• Component log viewer• Views that exist for each managed resource. These vary by resource type, but typically
include the statistics chart, the properties view, and a monitoring view.
Managing a ViewOpen, close, minimize, maximize, or restore a view in the current perspective.
You can:
Task Action
Open a view Do one of the following:
• In the Perspective Resources view, click a resource, pull down itsmenu using the handle to the right of the resource name, and select theview to open.
• In the application menu bar, select View > Open and choose a view.
Manage and Monitor
Sybase Control Center for Replication 157

Task Action
Close a view Select the view to close. In the application menu bar, select View > Close.You can also click the X in the view’s upper right corner.
Maximize a view Click the box in the view’s upper right corner. The view enlarges to fill theentire perspective window. Click the box again to return the view to itsformer size.
Minimize a view Click the _ in the view’s upper right corner. The view shrinks to a smalltab at the bottom of the perspective window.
Minimize all views In the application menu bar, select View > Minimize All Views.
Restore a view Click the box on the minimized tab to maximize the view. Click the boxagain to return the view to its former (smaller) size so you can see otherviews at the same time.
Bring a view to the front In the application menu bar, select View > Select and choose the view youwant from the submenu.
See also• Arranging View Layout in a Perspective on page 158
Arranging View Layout in a PerspectiveUse the view layout options to manage your perspective space.
Click one of these icons from the Sybase Control Center toolbar:
• Cascade all open views• Tile all open views vertically• Tile all open views horizontally
In a cascade, views overlap; in tiling arrangements, they do not.
Alternatively, you can arrange view layouts from the Sybase Control Center menu bar. Fromthe menu bar, select Perspective > Arrange and select your view layout.
See also• Managing a View on page 157
RepositoryThe Sybase Control Center embedded repository stores information related to managedresources, as well as user preference data, operational data, and statistics.
You can back up the repository database on demand, schedule automatic backups, restore therepository from backups, and configure repository purging options. Full and incremental
Manage and Monitor
158

backups are available. A full backup copies the entire repository. An incremental backupcopies the transaction log, capturing any changes since the last full or incremental backup.
By default, Sybase Control Center saves backups as follows:
• Each full backup is stored in its own subdirectory in <SCC-install-directory>/backup.
• Each incremental backup is stored in a file in <SCC-install-directory>/backup/incremental.
Sybase recommends that you periodically move backup files to a secondary storage locationto prevent the installation directory from becoming too large.
Scheduling Backups of the RepositoryConfigure full and incremental backups of the repository to occur automatically.
PrerequisitesDetermine your backup strategy, including when to perform full backups and incrementalbackups. For example, you might schedule incremental backups every day and a full backupevery Saturday.
You must have administrative privileges (sccAdminRole) to perform this task.
Task
A full backup copies the entire repository. An incremental backup copies the transaction log,capturing any changes since the last full or incremental backup.
1. From the main menu, select Application > Administration.
2. In the left pane, select Repository.
3. Click the Full Backup tab.
4. (Optional) To change the directory in which backups will be stored, click Browse andnavigate to the desired directory.
5. Select Schedule a Regular Backup.
6. Specify the day you want scheduled backups to begin. Enter a Start date or click thecalendar and select a date.
7. (Optional) Use the Time and AM/PM controls to specify the time at which backups occur.
8. Specify how often backups occur by setting the Repeat interval and selecting hours, days,or weeks.
9. (Optional) To purge the repository after each backup, select Run a repository purge afterthe backup completes.
10. If you include purging in the backup schedule, go to the Size Management tab andunselect Automatically purge the repository periodically to disable automatic purging.
Manage and Monitor
Sybase Control Center for Replication 159

11. Click Apply to save the schedule.
12. Click the Incremental Backup tab and repeat the steps above to schedule incrementalbackups to occur between full backups.
NextSet purging options on the Size Management tab.
See also• Modifying the Backup Schedule on page 160
• Forcing an Immediate Backup on page 161
• Restoring the Repository from Backups on page 161
• Configuring Repository Purging on page 163
Modifying the Backup ScheduleSuspend or resume repository backups or change the backup schedule.
PrerequisitesYou must have administrative privileges (sccAdminRole) to perform this task.
Task
1. From the main menu, select Application > Administration.
2. In the left pane, select Repository.
3. Choose the type of backup to modify:
• Click the Full Backup tab, or• Click the Incremental Backup tab.
4. (Optional) To suspend or resume the backup schedule, select or unselect Schedule aRegular Backup.When you unselect (uncheck) this option, the scheduling area is grayed out and scheduledbackups no longer occur. However, the schedule is preserved and you can reinstate it at anytime.
5. To change the backup schedule, edit the Start date, Time, Repeat interval, or units. Youcan also select or unselect Run a repository purge after the backup completes.
6. Click Apply to save the schedule.
See also• Scheduling Backups of the Repository on page 159
• Forcing an Immediate Backup on page 161
• Restoring the Repository from Backups on page 161
• Configuring Repository Purging on page 163
Manage and Monitor
160

Forcing an Immediate BackupPerform an unscheduled full or incremental backup of the repository.
PrerequisitesYou must have administrative privileges (sccAdminRole) to perform this task.
Task
1. From the main menu, select Application > Administration.
2. In the left pane, select Repository.
3. Choose the type of backup to run:
• Click the Full Backup tab, or• Click the Incremental Backup tab.
4. Click Back up Now.
Sybase Control Center saves the backup to the directory shown in the Location field.
See also• Scheduling Backups of the Repository on page 159
• Modifying the Backup Schedule on page 160
• Restoring the Repository from Backups on page 161
• Configuring Repository Purging on page 163
Restoring the Repository from BackupsLoad backup files into the repository database to revert undesirable changes or to recover froma catastrophic failure.
If you configured Sybase Control Center to store backups somewhere other than the defaultlocation, change the source directory in the copy commands in this procedure.
1. Shut down Sybase Control Center.
2. Copy the most recent full backup from <SCC-install-directory>/backup/<generated_directory_name> to <SCC-install-directory>/services/Repository. For example:
Windows:copy C:\sybase\SCC-3_2\backup\repository.270110161105\scc_repository.db C:\sybase\SCC-3_2\services\Repository
UNIX:
Manage and Monitor
Sybase Control Center for Replication 161

cp <SCC-install-directory>/backup/repository.270110161105/scc_repository.db <SCC-install-directory>/services/Repository
3. If you have no incremental backups to load,
a) Also copy the log file from <SCC-install-directory>/backup/<generated_directory_name> to <SCC-install-directory>/services/Repository. For example:
Windows:copy C:\sybase\SCC-3_2\backup\repository.270110161105\scc_repository.log C:\sybase\SCC-3_2\services\Repository
UNIX:cp <SCC-install-directory>/backup/repository.270110161105/scc_repository.log <SCC-install-directory>/services/Repository
b) Skip to step 5 on page 162.
4. Start the repository database using the -ad option, which directs it to load transaction logs(incremental backups) from the incremental directory. (The database loads fullbackups automatically.) For example:
Windows:cd <SCC-install-directory>\services\Repository
..\SccSaDataserver\sa\bin_<platform>\dbsrv11.exe scc_repository -ad <SCC-install-directory>\backup\incremental
UNIX:cd <SCC-install-directory>/services/Repository
../SccSaDataserver/sa/bin_<platform>/dbsrv11 scc_repository -ad <SCC-install-directory>/backup/incremental
The repository database loads the full backup and any subsequent incremental backupspresent in the incremental directory. Incremental backups are loaded in date order.After loading and saving, the database shuts down.
5. Start Sybase Control Center.If you just loaded incremental backups, Sybase Control Center starts normally (that is, nofurther recovery occurs). If you copied a full backup to the Repository directory, thedatabase recovers the repository from the full backup.
Example: Loading incremental backups into the repository database
These commands start SQL Anywhere on a 32-bit Windows machine:
% cd C:\sybase\SCC-3_2\services\Repository
% ..\SccSaDataserver\sa\bin_windows32\dbsrv11.exe scc_repository -ad C:\sybase\SCC-3_2\backup\incremental
Manage and Monitor
162

These commands start SQL Anywhere on a 64-bit machine running AIX:
$ cd /opt/sybase/SCC-3_2/services/Repository$ ../SccSaDataserver/sa/bin_aix64/dbsrv11 scc_repository -ad /opt/sybase/SCC-3_2/backup/incremental
See also• Scheduling Backups of the Repository on page 159
• Modifying the Backup Schedule on page 160
• Forcing an Immediate Backup on page 161
• Configuring Repository Purging on page 163
Configuring Repository PurgingChange repository purging options.
PrerequisitesYou must have administrative privileges (sccAdminRole) to perform this task.
Task
As you decide how to purge your repository, consider that:
• Purging keeps the repository from absorbing too much disk space.• By default, purging is enabled. It occurs once a day and purges data older than one day.• Statistics and alert history can help you detect trends in server performance and user
behavior. The Sybase Control Center statistics chart can graph performance data over aperiod of a year or more if the data is available. If you have enough disk space, considersaving data for a longer period of time or disabling the purging of statistics or alert history.
• Changing the purge frequency and other options might affect Sybase Control Centerperformance.
Note: If you configure purging as part of a scheduled backup of the repository, disableautomatic purging on the Size Management tab.
1. From the main menu bar, select Application > Administration.
2. Select Repository.
3. Click the Size Management tab.
4. To turn automatic purging on or off, click Automatically purge the repositoryperiodically.
Turn this option off if purging is configured as part of your scheduled full or incrementalbackups.
5. Click purge options to turn them on or off:
• Purge statistics
Manage and Monitor
Sybase Control Center for Replication 163

• Purge alert history
6. In Purge data older than, enter the number of days after which to purge repository data.
7. Click Apply, then OK.
See also• Scheduling Backups of the Repository on page 159
• Modifying the Backup Schedule on page 160
• Forcing an Immediate Backup on page 161
• Restoring the Repository from Backups on page 161
• Graphing Performance Counters on page 138
• Displaying Resource Availability on page 137
LoggingA log is a record of events related to a server or a client.
In Sybase Control Center, logging helps system administrators identify errors and othersystem events by recording messages about the events in log files. Sybase Control Centermaintains these logs:
• The client log – captures messages about activities in the browser-based clientcomponents. These messages are generated by the component product modules to displayinformation that is pertinent to the user but not critical enough to warrant a pop-up. Sybasealso uses the client log to trace client browser operations.
• Server logs – capture messages about activities during the initialization sequence, such asstarting services; auditing messages recording logins and logouts; errors such as missedscheduled events; and other events on the server. Server logs include:• Component logs, which record only events concerning individual product modules• The SCC agent log, which is a composite log that records events in all product modules
and in the Sybase Control Center framework• The repository log – captures information about inserts and updates that have occurred in
the Sybase Control Center repository, a SQL Anywhere database. This log is in <SCC-installation-dir>\SCC-3_2\services\Repository\log.
• The alert services log – captures information about execution of alert-triggered scripts,including the start time, end time, and status and exit codes. This log is in <SCC-installation-dir>\SCC-3_2\services\Alert\log\alert-server.log.
Viewing the Replication Component LogLaunch the Sybase Control Center Log Viewer to display replication activity log.
PrerequisitesVerify the you are in a replication monitoring view.
Manage and Monitor
164

TaskFrom any replication monitoring view, click the notebook icon in the left corner of the statusbar. The status bar is at the bottom of a monitoring view.
See also• Viewing Sybase Control Center Server Logs on page 165
• Viewing the Sybase Control Center Client Log on page 165
• Changing the Logging Level on page 166
• Logging or Message Levels on page 167
• Changing Logging Configuration on page 167
Viewing Sybase Control Center Server LogsView event logs for the Sybase Control Center server.
Sybase Control Center logs events to several places:
• The console from which Sybase Control Center is launched.• The Sybase Control Center agent log: <SCC-install-directory>/log/
agent.log
• The repository log: <SCC-install-directory>/log/repository.log
• The component log for each installed Sybase Control Center product module. The path tothe component log takes this form: <SCC-install-directory>/plugins/<component>/log/<component>.log
1. Display one of the log files using a log viewer or a method of your choice.
2. Look for entries of interest such as login attempts or the failure of a service to start.
On the console and in the Sybase Control Center agent log file, some components prependthe component name to log entries.
See also• Viewing the Replication Component Log on page 164
• Viewing the Sybase Control Center Client Log on page 165
• Changing the Logging Level on page 166
• Logging or Message Levels on page 167
• Changing Logging Configuration on page 167
Viewing the Sybase Control Center Client LogDisplay the event log for the current session of your Sybase Control Center browser client.
In the perspective tab window (the main window), do either of the following to display theclient log:
• Enter Ctrl+Alt+L.
Manage and Monitor
Sybase Control Center for Replication 165

• Select View > Open > Log Window.
Note: The client log reader displays the 100 most recent log messages for the current loginsession.
See also• Viewing the Replication Component Log on page 164• Viewing Sybase Control Center Server Logs on page 165• Changing the Logging Level on page 166• Logging or Message Levels on page 167• Changing Logging Configuration on page 167
Changing the Logging LevelAdjust the logging level that determines which events Sybase Control Center records in theserver logs. This task requires you to restart Sybase Control Center.
If you are having a problem with Sybase Control Center, you might be able to discover thecause of the problem by changing the server logging level so that more events are recorded.
1. Shut down Sybase Control Center.
2. Restart Sybase Control Center using the -m option to change the logging level. In <SCC-installation-dir>/bin, enter:
scc -m <logging-level>
The logging levels are OFF (logs nothing), FATAL (logs only the most severe events),ERROR, WARN, INFO, DEBUG, and ALL (logs everything).
3. Examine the server log for clues about what might be causing the problem.
4. When you have resolved the problem, set the logging level back to WARN, the default.Your log may become unmanageably large if you leave it at the DEBUG or ALL level.
Example
These commands, which must be executed in the installation directory, start Sybase ControlCenter with the logging level set to debug:
Windows: bin\scc -m DEBUGUNIX: bin/scc -m DEBUG
See also• Viewing the Replication Component Log on page 164• Viewing Sybase Control Center Server Logs on page 165• Viewing the Sybase Control Center Client Log on page 165• Logging or Message Levels on page 167• Changing Logging Configuration on page 167• Starting and Stopping Sybase Control Center in Windows on page 51
Manage and Monitor
166

• Starting and Stopping Sybase Control Center in UNIX on page 53
Logging or Message LevelsDescribes values you can use to control the types of events that are logged by Sybase ControlCenter.
These are the logging levels, from highest to lowest. The higher the level, the more serious anevent must be to be logged. Each level includes all the levels above it—for example, if you setthe logging level to WARN, you log events for the WARN, ERROR, and FATAL levels.
OFF Nothing is logged. This is the highest level.
FATAL Logs only very severe error events that lead the server to abort. This is thehighest level at which events are logged.
ERROR Logs error events that might allow the server to continue running.
WARN Logs potentially harmful situations. WARN is the default logging levelduring normal operation (that is, after system initialization).
INFO Logs informational messages that track the progress of the server in a coarse-grained fashion. INFO is the default logging level during the system initi-alization process.
DEBUG Logs a larger set of events that provides a finer-grained picture of how theserver is operating. This level is recommended for troubleshooting.
ALL Logs all loggable events. This is the lowest level.
See also• Viewing the Replication Component Log on page 164• Viewing Sybase Control Center Server Logs on page 165• Viewing the Sybase Control Center Client Log on page 165• Changing the Logging Level on page 166• Changing Logging Configuration on page 167• scc Command on page 59
Changing Logging ConfigurationEdit the logging configuration file, log4j.properties, to modify Sybase Control Centerlogging.
You can change the names, locations, or maximum size of the log files as well as the number oflog files backed up.
Options for the scc command let you change the overall Sybase Control Center log messagelevel when you start SCC, but if you choose the DEBUG level, the large volume of logmessages generated may be inconvenient. Editing the log properties file gives you finercontrol; you can set logging levels for each Sybase Control Center component separately.
Manage and Monitor
Sybase Control Center for Replication 167

Sybase recommends making such changes only if you are familiar with log4j and you areworking with Sybase technical support; DEBUG-level log messages are not likely to bemeaningful to you. (If you have not used log4j before, a good place to start is http://logging.apache.org/log4j/1.2/manual.html.)
1. Shut down Sybase Control Center.
2. Make a backup copy of the log4j.properties file located in <SCC-installation-directory>/conf.
3. Open the log4j.properties file for editing.
4. Change values in the file to suit your needs. For example:
To Modify
Change the name or location of alog file
• Agent log – log4j.appender.agent.File• Repository log – log4j.appender.repository.File• Collection statistics log – log4j.appender.collection-
stats.File• Alert server log – log4j.appender.alert.File• Gateway log – log4j.appender.gateway.File
Change the maximum size that alog file can reach before SybaseControl Center creates a new file
• Agent log – log4j.appender.agent.MaxFileSize• Repository log – log4j.appender.repository.MaxFileSize• Collection statistics log – log4j.appender.collection-
stats.MaxFileSize• Alert server log – log4j.appender.alert.MaxFileSize• Gateway log – log4j.appender.gateway.MaxFileSize
Change the number of log filesSybase Control Center backs upbefore deleting the oldest file
• Agent log – log4j.appender.agent.MaxBackupIndex• Repository log – log4j.appender.repository.MaxBacku-
pIndex• Collection statistics log – log4j.appender.collection-
stats.MaxBackupIndex• Alert server log – log4j.appender.alert.MaxBackupIndex• Gateway log – log4j.appender.gateway.MaxBackupIndex
5. Save and exit the file.
6. Start Sybase Control Center to make the logging changes take effect.
See also• Viewing the Replication Component Log on page 164• Viewing Sybase Control Center Server Logs on page 165• Viewing the Sybase Control Center Client Log on page 165• Changing the Logging Level on page 166• Logging or Message Levels on page 167• Starting and Stopping Sybase Control Center in Windows on page 51
Manage and Monitor
168

• Starting and Stopping Sybase Control Center in UNIX on page 53
Sybase Control Center ConsoleThe console is a command-line interface for displaying details about the status of the SybaseControl Center server and its subsystems.
When you use the scc command to start Sybase Control Center, it displays start-up messagesand then displays the console prompt.
Note: The console prompt does not appear if you start Sybase Control Center as a service, ifyou direct the output of scc to a file, or if you start Sybase Control Center in the background.
See also• Launching Sybase Control Center on page 50
Console CommandsUse the Sybase Control Center console to get status information on Sybase Control Center andits ports, plug-ins, and services.
help CommandDisplay syntax information for one or more Sybase Control Center console commands.
Syntaxhelp [command_name]
Parameters
• command_name – optional. status, info, or shutdown. If you omit command_name, helpreturns information on all the console commands.
Examples
• Example 1 – returns information on the status command:
help status
Permissions
help permission defaults to all users. No permission is required to use it.
See also• info Command on page 170
• shutdown command on page 171
• status Command on page 171
Manage and Monitor
Sybase Control Center for Replication 169

info CommandDisplay information about specified parts of the Sybase Control Center server.
If you enter info with no parameters, it returns information for every parameter.
Syntaxinfo [-a | --sys] [-D | --sysprop [system-property]] [-e | --env [environment-variable]][-h | --help][-m | --mem][-p | --ports][-s | --services]
Parameters
• -a | --sys – optional. List all the services known to Sybase Control Center, indicate whethereach service is enabled, and list other services on which each service depends.
• -D | --sysprop [system-property] – optional. Display information about the specified Javasystem property. Omit the system-property argument to return a list of all Java systemproperties and their values.
• -e | --env [environment-variable] – optional. List all the environment variables in theSybase Control Center Java VM process environment. Omit the environment-variableargument to return a list of environment variables and their values.
• -h | --help – optional. Display information about the info command.• -m | --mem – optional. Display information about the server’s memory resources.• -p | --ports – optional. List all the ports on which the Sybase Control Center agent and its
services listen, indicate whether each port is in use, and show the service running on eachport.
• -s | --services – optional. List all Sybase Control Center services, indicate whether eachservice is enabled, and list other services on which each service depends.
Examples
• Example 1 – displays information about ports on this Sybase Control Center server:
info -p
Permissions
info permission defaults to all users. No permission is required to use it.
See also• help Command on page 169
Manage and Monitor
170

• shutdown command on page 171
• status Command on page 171
shutdown commandStop the Sybase Control Center server if it is running.
Syntaxshutdown
Examples
• Example 1 – shuts down Sybase Control Center:
shutdown
Permissions
shutdown permission defaults to all users. No permission is required to use it.
See also• help Command on page 169
• info Command on page 170
• status Command on page 171
status CommandDisplay the status of the SCC agent, plug-in, or service components of Sybase Control Center.
Syntaxstatus [-a | --agent] [-h | --help] [-p | --plugin [plugin-name]] [-s | --service [service-name]]
Parameters
• -a | --agent – display the status of the Sybase Control Center agent component.• -h | --help – display information about the info command.• -p | --plugin [plugin-name] – display the status of the specified Sybase Control Center
plug-in (for example, ASEMap, the Adaptive Server management module). Omit theplugin-name argument to return a list of plug-ins.
• -s | --service [service-name] – display the status of the specified Sybase Control Centerservice (for example, the Alert service or the Messaging service). Omit the service-nameargument to return a list of services.
Manage and Monitor
Sybase Control Center for Replication 171

Examples
• Example 1 – displays status information on the Repository service:
status --service Repository
Permissions
status permission defaults to all users. No permission is required to use it.
See also• help Command on page 169
• info Command on page 170
• shutdown command on page 171
Manage and Monitor the Replication EnvironmentMonitor the availability of the servers in the replication environment, control the flow of dataand configure replication parameters to improve server performance.
Availability MonitoringThe statistics allow you to monitor the availability of each server and the state of thecomponents, such as connections and routes, in a replication environment.
The status of a server is determined by its availability, whether it is up or down, and the state ofthe components within the server. The status of the server is a roll-up of the status of all thecomponents within it.
Availability monitoring provides you with the information to determine not only theavailability of the servers but also their effectiveness in the replication environment. There area number of availability monitoring statistics that are gathered for replication. The process ofgathering these statistics is turned on by default with the default interval time.
See also• Historical Performance Monitoring on page 138
• Heat Chart on page 137
• Replication Latency on page 187
• Key Performance Indicators and Key Performance Areas for Replication on page 100
Manage and Monitor
172

Replication TopologyReplication topology is a graphical representation of how the servers in a replicationenvironment are connected to each other. A topology or network diagram illustrates how datamoves in a replication environment.
It provides a visual map of the availability of the replication environment. The lines on atopology diagram represent the servers, connections, and routes from the source to the targetdata server.
See also• Replication Latency on page 187
• Replication Monitors on page 175
Replication TracingReplication tracing provides the information you need to determine the source, target, and thepath of the data flow anywhere in the replication environment.
Replication tracing supports large, complex, and geographically dispersed networks and thesecomponent types:
• Sources – these are servers, databases, tables, stored procedures, and all components towhich Replication Agents provide access.
• Targets – these are servers, databases, tables, and stored procedures.• Replication Paths – these are connections, routes, and intermediate Replication Servers.
Displaying Replication Tracing from Target to SourceSelect a database server and show the data flow path.
PrerequisitesAdd all the servers to be monitored to the Perspective Resources view, and verify that you havethe permission to perform this task.
Task
1. From the Perspective Resources view, select a Replication Server and click Resource >View Replication Topology .
2. Right-click a target database server and select Trace Replication Sources.The traced servers, connections, and routes are highlighted in the topology view. The list ofservers that participate in the trace are displayed in the Replication Tracing tab.
Note: There can be more than one source, depending on the replication environment.
3. (Optional) To remove the replication tracing, right-click a server and select ClearReplication Tracing.
Manage and Monitor
Sybase Control Center for Replication 173

See also• Displaying Replication Tracing from Source to Target on page 174
• Displaying Replication Tracing for a Replication Server on page 174
Displaying Replication Tracing from Source to TargetSelect a database server and show the data flow path, which includes the final targetdestination.
PrerequisitesAdd all the servers to be monitored to the Perspective Resources view, and verify that you havethe permission to perform this task.
Task
1. From the Perspective Resources view, select a Replication Server and click Resource >View Replication Topology.
2. Right-click a source database server and select Trace Replication Targets.The traced servers, connections, and routes are highlighted in the topology view. The list ofservers that participate in the trace are displayed in the Replication Tracing tab.
Note: There can be more than one target, depending on the replication environment.
3. (Optional) To remove the replication tracing, right-click a server and select ClearReplication Tracing.
See also• Displaying Replication Tracing from Target to Source on page 173
• Displaying Replication Tracing for a Replication Server on page 174
Displaying Replication Tracing for a Replication ServerSelect a Replication Server and display all the data flow paths through the replicationenvironment, including other Replication Servers, Replication Agents, and database servers.
PrerequisitesAdd all the servers to be monitored to the Perspective Resources view, authenticate theseservers, and verify that you have the permission to perform this task.
Task
1. From the Perspective Resources view, select a Replication Server and click Resource >View Replication Topology .
2. Right-click a Replication Server and select Trace Replication Server.
Manage and Monitor
174

3. (Optional) To change the layout type and orientation of the topology, use the ViewControls tab on the left. You can also use the additional options that control the way thetopology appears.
4. (Optional) To view the list of nodes and edges included in the current topology, select theDetails tab on the left.
To retain any changes you have made to the default layout settings of the replication topology,close Sybase Control Center without closing the Replication Topology view.
See also• Displaying Replication Tracing from Target to Source on page 173
• Displaying Replication Tracing from Source to Target on page 174
Replication MonitorsReplication monitors display the availability and critical performance statistics of a particularcomponent in the replication environment.
The replication monitors provide the status of Replication Servers, Replication Agents, andreplication paths. Each monitor also provides a Quick Admin view to allow you to control theflow of data and configure replication parameters, a list of replication paths, and a status barfor each view.
The Replication Server Monitor includes these views:
• Overview – displays high-level information, such as the server name, version, and itsstatus. It also displays the memory usage graph, and a bar chart for partitions and the Top10 queues by size.
• Paths – displays a table of Replication Server paths, including its state, activity, latency,and latency monitoring status information. It also displays the latency history chart of aReplication Server.
• Connections – displays the information for Replication Server connections, whichinclude the name, Replication Agent (RA) status, and Data Server Interface (DSI) status. Italso shows these graphs for the selected connection:• DSI activity and Stable Queue Transaction (SQT) cache• Transactions removed from SQT• Transaction activity• Transaction success rate• Group and batch size
• Logical Connections – displays the Replication Server logical connection information ina warm-standby environment.
• Routes – displays the Replication Server route information, which includes the name,route status, and the route's activity graph.
• Queues – displays Replication Server queues information, which includes the name andtype. It also shows these graphs for the selected queue :
Manage and Monitor
Sybase Control Center for Replication 175

• Queue reads and writes• Queue bytes and cache• SQT cache (only for inbound queues)• Backlog• Duplicates detected• Transactions Removed from SQT (only for inbound queues)• Distributor activity (only for inbound queues)
The Replication Agent Monitor includes this view:
• Overview – displays high-level information, which includes the status, name, versionnumber of the server, primary connection, primary host, Replication Server connection,and the information on when it was last started. It displays a list of paths, which you canclick to open a path dashboard. It also displays these graphs:• Java Virtual Machine (JVM) memory usage• LTI activity and queue sizes• Log Reader activity, queue sizes, and scan buffer
The Adaptive Server Replication Agent Thread Monitor has this view:
• Overview – displays high-level information, such as the name, status, and controllingReplication Server. It also displays the log and activity details in a graph format.
The Replication Path Dashboard has this view:
• Overview – displays a detailed information of a particular path, which includes its name,status, data loss detection result, and these graphs:• Adaptive Server RepAgent thread commands sent per second• Inbound queue activity for the primary database• Outbound queue activity for the replicate database• Database Server Interface (DSI) commands sent per second• Latency• Latency history
See also• Replication Latency on page 187
• Replication Topology on page 173
Data Flow ControlControlling data flow comprises one part of troubleshooting in your replication environment.
The other part is tuning servers and components. You use either or both of the methods basedon the problems in the environment.
Manage and Monitor
176

See also• Replication Environment on page 3
• Replication Servers on page 177
• Replication Agents on page 184
• Replication Paths on page 187
• Compatibility Matrix on page 4
• Quiescing or Resuming Replication Server on page 181
• Suspending or Resuming a Connection's Replication Agent on page 182
• Suspending or Resuming a Connection on page 183
• Suspending or Resuming a Route on page 183
• Starting or Stopping an Adaptive Server RepAgent Thread on page 186
Replication ServersReplication Server maintains replicated data in multiple databases while ensuring the integrityand consistency of the data.
Replication Server provides clients using databases in the replication system with local dataaccess, thereby reducing load on the network and centralized computer systems.
See also• Replication Environment on page 3
• Data Flow Control on page 176
• Replication Agents on page 184
• Replication Paths on page 187
• Compatibility Matrix on page 4
Displaying Replication Server StatusView the most recent Replication Server statistics. Sybase Control Center automaticallyupdates the page when new status and statistical values are collected.
PrerequisitesRegister and add all the servers to be monitored to the Perspective Resources view,authenticate them, and verify that you have permission to perform this task.
Task
1. From the Perspective Resources view, select a Replication Server and click Resource >Monitor .The Replication Server monitor view appears, with the Overview as the default display.
2. (Optional) To maximize or minimize a window within the monitor view, click themaximize or restore window icon in its right corner.
Manage and Monitor
Sybase Control Center for Replication 177

Note: You can also view the server status through the status badges on the server icons in thePerspective Resources, Perspective Heat Chart, Resource Explorer, and Replication Topologyviews.
See also• Displaying Logical Connection Status on page 178
• Hiding Connection Thread Status on page 180
• Displaying Queue Status on page 180
• Displaying Route Status on page 181
• Logical Connection View Details on page 179
Displaying Logical Connection StatusView the information of all logical connections of a Replication Server in a warm standbyreplication environment.
PrerequisitesVerify that the replication environment has been configured, and all servers have beenregistered and authenticated, and that the monitoring collection has been running.
Task
1. From the Perspective Resources view, select a Replication Server and click Resource >Monitor.
2. Click Logical Connections.A list of all logical connection names along with their state information, active and standbyconnection names, their respective state information, and the inbound queue informationfor each logical connection appears in a table.
3. (Optional) Click the active or standby connection in the list to go to the Connections view,and see the status information of the physical connections that are associated with thelogical connections.
4. (Optional) Click the inbound queue under its corresponding column to go to the Queuesview.
See also• Displaying Replication Server Status on page 177
• Hiding Connection Thread Status on page 180
• Displaying Queue Status on page 180
• Displaying Route Status on page 181
• Logical Connection View Details on page 179
Manage and Monitor
178
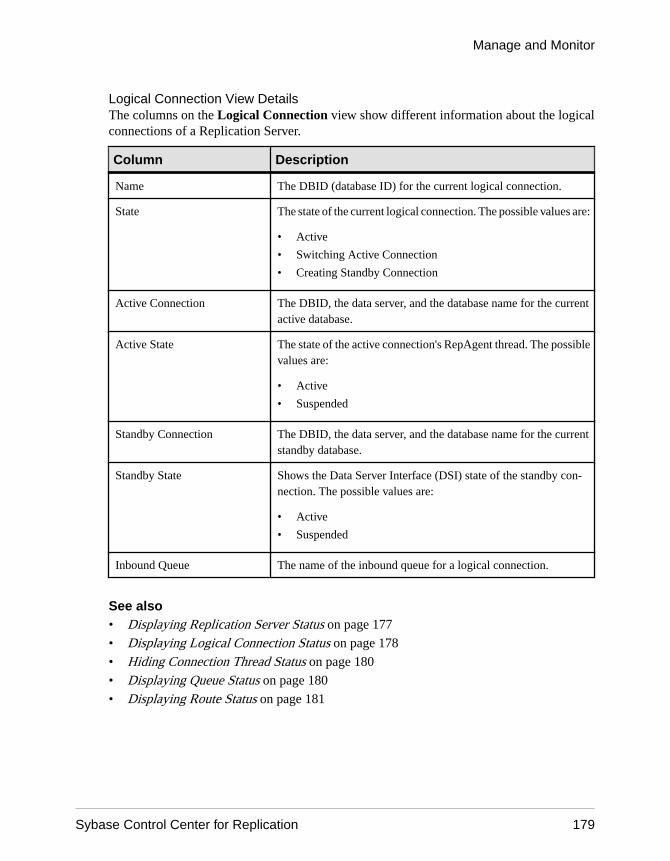
Logical Connection View DetailsThe columns on the Logical Connection view show different information about the logicalconnections of a Replication Server.
Column Description
Name The DBID (database ID) for the current logical connection.
State The state of the current logical connection. The possible values are:
• Active
• Switching Active Connection
• Creating Standby Connection
Active Connection The DBID, the data server, and the database name for the currentactive database.
Active State The state of the active connection's RepAgent thread. The possiblevalues are:
• Active
• Suspended
Standby Connection The DBID, the data server, and the database name for the currentstandby database.
Standby State Shows the Data Server Interface (DSI) state of the standby con-nection. The possible values are:
• Active
• Suspended
Inbound Queue The name of the inbound queue for a logical connection.
See also• Displaying Replication Server Status on page 177
• Displaying Logical Connection Status on page 178
• Hiding Connection Thread Status on page 180
• Displaying Queue Status on page 180
• Displaying Route Status on page 181
Manage and Monitor
Sybase Control Center for Replication 179

Hiding Connection Thread StatusHide the connection status of a Replication Agent or Data Server Interface (DSI) thread.
PrerequisitesVerify that the replication environment has been configured and that all servers have beenregistered, authenticated, and replicating data correctly.
Task
1. From the Perspective Resources view, select a Replication Server and click Resource >Monitor.
2. Click Connections.
3. Select a Replication Server connection.
4. Click Quick Admin.
5. In the Hide Connection Status section of the Control tab, click either Hide RepAgentStatus or Hide DSI Status to override the connection's current configuration.
6. Click Apply.
See also• Displaying Replication Server Status on page 177
• Displaying Logical Connection Status on page 178
• Displaying Queue Status on page 180
• Displaying Route Status on page 181
• Logical Connection View Details on page 179
Displaying Queue StatusView the status information of Replication Server queues in a replication environment.
PrerequisitesVerify that the replication environment has been configured, all servers have been registeredand authenticated, and that monitoring collection has been running.
Task
1. From the Perspective Resources view, select a Replication Server and click Resource >Monitor.
2. Click Queues.
3. Select a queue from the table to view its corresponding activity graphs.
Manage and Monitor
180

4. (Optional) To maximize or minimize a window within the monitor view, click themaximize or restore window icon in its right corner.
See also• Displaying Replication Server Status on page 177• Displaying Logical Connection Status on page 178• Hiding Connection Thread Status on page 180• Displaying Route Status on page 181• Logical Connection View Details on page 179
Displaying Route StatusView the status information of Replication Server routes in a replication environment.
PrerequisitesVerify that the replication environment has been configured, all servers have been registeredand authenticated, and that monitoring collection has been running.
Task
1. From the Perspective Resources view, select a Replication Server and click Resource >Monitor.
2. Click Routes.You can see a route's status in the Replication Server Routes table.
3. Select a route from the table to view its corresponding activity graph.
4. (Optional) To maximize or minimize a window within the monitor view, click themaximize or restore window icon in its right corner.
See also• Displaying Replication Server Status on page 177• Displaying Logical Connection Status on page 178• Hiding Connection Thread Status on page 180• Displaying Queue Status on page 180• Logical Connection View Details on page 179
Quiescing or Resuming Replication ServerShut down data flow from all sources and quiesce the current Replication Server or resumedata flow from the up-stream replication path. You may need to quiesce all ReplicationServers in your environment to recover databases, alter routes, and troubleshoot the system.
PrerequisitesRegister and add all the servers to be monitored to the Perspective Resources view, verify thatthe default collection is running, and that you have permission to perform this task.
Manage and Monitor
Sybase Control Center for Replication 181

Task
1. From the Perspective Resources view, select a Replication Server and click Resource >Monitor.
2. Click Quick Admin.
3. In the Control tab, click Quiesce or Resume All.
See also• Suspending or Resuming a Connection's Replication Agent on page 182
• Suspending or Resuming a Connection on page 183
• Suspending or Resuming a Route on page 183
• Starting or Stopping an Adaptive Server RepAgent Thread on page 186
• Data Flow Control on page 176
Suspending or Resuming a Connection's Replication AgentSuspend or resume a connection's Replication Agent that is associated with a ReplicationServer.
PrerequisitesRegister and add all the servers to be monitored to the Perspective Resources view, verify thatthe default collection is running, and that you have permission to perform this task.
Task
1. From the Perspective Resources view, select a Replication Server and click Resource >Monitor.
2. Click Connections.
3. Select a connection.
4. Click Quick Admin.
5. In the Replication Agent section of the Control tab, click Supend or Resume.
See also• Quiescing or Resuming Replication Server on page 181
• Suspending or Resuming a Connection on page 183
• Suspending or Resuming a Route on page 183
• Starting or Stopping an Adaptive Server RepAgent Thread on page 186
• Data Flow Control on page 176
Manage and Monitor
182

Suspending or Resuming a ConnectionSuspend or resume a Replication Server connection.
PrerequisitesRegister and add all the servers to be monitored to the Perspective Resources view, verify thatthe default collection is running, and that you have permission to perform this task.
Task
1. From the Perspective Resources view, select a Replication Server and click Resource >Monitor.
2. Click Connections.
3. Select a connection.
4. Click Quick Admin.
5. In the Data Server Interface section of the Control tab, click Suspend or Resume.
6. (Optional) Click Suspended Immediately.
7. (Optional) Select one of these options when resuming a connection:
• Skip the first transaction. This option is available only for versions of ReplicationServer 15.0 or earlier.
• Resume after skipping transactions. Provide the number of transactions to skip. Thisoption is available only for versions of Replication Server 15.1 and later.
• Execute sytem transaction.
See also• Quiescing or Resuming Replication Server on page 181
• Suspending or Resuming a Connection's Replication Agent on page 182
• Suspending or Resuming a Route on page 183
• Starting or Stopping an Adaptive Server RepAgent Thread on page 186
• Data Flow Control on page 176
Suspending or Resuming a RouteSuspend or resume a route associated to a Replication Server.
PrerequisitesRegister and add all the servers to be monitored to the Perspective Resources view, verify thatthe default collection is running, and that you have permission to perform this task.
Manage and Monitor
Sybase Control Center for Replication 183

Task
1. From the Perspective Resources view, select a Replication Server and click Resource >Monitor.
2. Click Routes.
3. Select a route.
4. Click Quick Admin.
5. In the Control tab, click Suspend or Resume.
6. (Optional) Click Skip transaction with large message when resuming a route.
Note: This option applies only to direct routes where the site version at the replicate site is12.1 or earlier.
See also• Quiescing or Resuming Replication Server on page 181
• Suspending or Resuming a Connection's Replication Agent on page 182
• Suspending or Resuming a Connection on page 183
• Starting or Stopping an Adaptive Server RepAgent Thread on page 186
• Data Flow Control on page 176
Replication AgentsReplication Agents enable the movement and sharing of data where and when it is needed -into data warehouses, data marts, OLTP applications and mobile workforce.
Replication Agents allows heterogeneous data servers to act as primary data servers in areplication system based on Sybase replication technology.
See also• Replication Environment on page 3
• Data Flow Control on page 176
• Replication Servers on page 177
• Replication Paths on page 187
• Compatibility Matrix on page 4
Displaying Replication Agent StatusReview high-level server availability by viewing the Replication Agent or Mirror ReplicationAgent status.
PrerequisitesRegister and add all the servers to be monitored to the Perspective Resources view,authenticate them, and verify that you have permission to perform this task.
Manage and Monitor
184

Task
1. From the Perspective Resources view, select a Replication Agent and click Resource >Monitor .
The monitor view appears displaying high-level information, which includes the status ofthe selected Replication Agent.
2. (Optional) To maximize or minimize a window within the monitor view, click themaximize or restore window icon in its right corner.
See also• Displaying RepAgent Thread Status in Adaptive Server on page 185
• Suspending or Resuming a Replication Agent or Mirror Replication Agent on page186
• Starting or Stopping an Adaptive Server RepAgent Thread on page 186
Displaying RepAgent Thread Status in Adaptive ServerView the RepAgent thread status in an Adaptive Server, either single instance or shared diskcluster, for replication.
PrerequisitesRegister and add all the servers to be monitored to the Perspective Resources view,authenticate them, and verify that you have permission to perform this task.
Task
1. From the Perspective Resources view, select an Adaptive Server and click Resource >Monitor .The Replication Agent Thread Monitor appears. You can view the status of an AdaptiveServer RepAgent thread in the displayed table with its name and the controllingReplication Server information.
2. (Optional) To maximize or minimize a window within the monitor view, click themaximize or restore window icon in its right corner.
See also• Displaying Replication Agent Status on page 184
• Suspending or Resuming a Replication Agent or Mirror Replication Agent on page186
• Starting or Stopping an Adaptive Server RepAgent Thread on page 186
Manage and Monitor
Sybase Control Center for Replication 185

Suspending or Resuming a Replication Agent or Mirror Replication AgentSuspend or resume a Replication Agent or a Mirror Replication Agent in a replicationenvironment.
PrerequisitesRegister and add all the servers to be monitored to the Perspective Resources view, verify thatthe default collection is running, and that you have permission to perform this task.
Task
1. From the Perspective Resources view, select a Replication Agent or a Mirror ReplicationAgent and click Resource > Monitor.
2. Click Quick Admin.
3. In the Control tab, click Suspend or Resume.
See also• Displaying Replication Agent Status on page 184• Displaying RepAgent Thread Status in Adaptive Server on page 185• Starting or Stopping an Adaptive Server RepAgent Thread on page 186
Starting or Stopping an Adaptive Server RepAgent ThreadStart or stop a RepAgent thread of an Adaptive Server.
1. From the Perspective Resources view, select an Adaptive Server and click Resource >Monitor.
2. Select a RepAgent thread (ASE Server, Replication Only) or click Replication Agent inthe left pane, then select a RepAgent thread (ASE Server).
3. Click Quick Admin.
4. In the Control tab, click Start or Stop.
5. (Optional) Click Stop immediately before clicking Stop.
See also• Quiescing or Resuming Replication Server on page 181• Suspending or Resuming a Connection's Replication Agent on page 182• Suspending or Resuming a Connection on page 183• Suspending or Resuming a Route on page 183• Data Flow Control on page 176• Displaying Replication Agent Status on page 184• Displaying RepAgent Thread Status in Adaptive Server on page 185• Suspending or Resuming a Replication Agent or Mirror Replication Agent on page 186
Manage and Monitor
186

Replication PathsA replication path is the set of all servers and internal components that transactions travelthrough when moving from the primary to the replicate database.
See also• Replication Environment on page 3
• Data Flow Control on page 176
• Replication Servers on page 177
• Replication Agents on page 184
• Compatibility Matrix on page 4
Displaying Replication Path StatusView the status of the servers, connections, routes, and queues that make up a replicationpath.
PrerequisitesRegister and add all the servers to be monitored to the Perspective Resources view,authenticate them, and verify that you have permission to perform this task.
Task
1. From the Perspective Resources view, select a Replication Server or a Replication Agentand click Resource > Monitor.
2. Click a replication path.The Replication Path Dashboard for the selected replication path appears.
3. (Optional) To maximize or minimize a window within the monitor view, click themaximize or restore window icon in its right corner.
If new statistics are collected while the replication path dashboard is displayed, SybaseControl Center automatically updates the information on the current page.
See also• Displaying Latency on page 188
• Latency Monitoring Process on page 96
Replication LatencyReplication latency is the amount of time it takes for a transaction that occurs in the primarydatabase to be applied to the replicate database.
The time includes Replication Agent processing, Replication Server processing, and networkusage. Replication latency appears on the path dashboard.
Manage and Monitor
Sybase Control Center for Replication 187

See also• Historical Performance Monitoring on page 138• Heat Chart on page 137• Availability Monitoring on page 172• Key Performance Indicators and Key Performance Areas for Replication on page 100• Setting Up the Latency Monitoring Process on page 95• Replication Topology on page 173• Replication Monitors on page 175
Displaying LatencyView latency information to determine the amount of time it takes for a transaction to beapplied from the primary database to the replicate database.
PrerequisitesAdd all the servers to be monitored in the Perspective Resources view. Verify that you havepermission to perform this task and that the latency monitoring process has already beenstarted.
Task
1. From the Perspective Resources view, select a server and click Resource > Monitor.
2. Click Paths.
3. Select or click a path from the path list.When you select a path, its latency information appears below the path list. When you clicka selected path, its dashboard opens, displaying the latency history graph.
4. (Optional) Click the bar graph icon in the top right corner of the Latency window to togglebetween the overall latency and the latency monitoring history of the path.
See also• Setting Up the Latency Monitoring Process on page 95• Stopping the Latency Monitoring Process on page 188• Latency Chart Details on page 189• Displaying Replication Path Status on page 187• Latency Monitoring Process on page 96
Stopping the Latency Monitoring ProcessStop the latency monitoring process.
PrerequisitesVerify that all servers to be monitored have been registered, authenticated, and added to thePerspective Resources, that latency monitoring process is running, and that you have thepermission to perform this task.
Manage and Monitor
188

Task
1. From the Perspective Resources view, select a Replication Server and click Resource >Monitor.
2. Click Paths.
3. Select a path where the "Monitoring" value is true.
4. Click Quick Admin to display the latency monitoring process administration view for theselected path.
5. Click Stop.
See also• Setting Up the Latency Monitoring Process on page 95
• Displaying Latency on page 188
• Latency Chart Details on page 189
• Latency Monitoring Process on page 96
Latency Chart DetailsLearn about the threads that represent the latency chart in the path dashboard.
Table 31. Latency threads
Latency thread Description
Replication Executor Thread(EXEC)
The number of seconds from the start, to time the ticket passesthrough the EXEC thread.
Distribution (DIST) Thread The number of seconds from the primary Replication Server timeto the time the ticket passes through the DIST thread. For eachprimary database managed by a Replication Server, there is a DIST,which in turn uses Stable Queue Transaction (SQT) to read fromthe inbound queue, and Stable Queue Manager (SQM) threads towrite transactions to the outbound queue.
Replication Server Interface(RSI) Thread
The number of seconds from the DIST thread time to the time theticket passes through the RSI thread. RSI threads send messagesfrom one Replication Server to another. There is one RSI thread foreach destination Replication Server.
Manage and Monitor
Sybase Control Center for Replication 189

Latency thread Description
Data Server Interface (DSI)Thread
The number of seconds from the RSI thread time to the time theticket passes through the DSI thread. The DSI thread translates thetransaction modifications into remote procedure calls (RPC) or thelanguage as specified by the function strings in the function-stringclass assigned to the destination database. Replication Server startsthe DSI threads to submit transactions to a replicate database towhich it has a connection.
Replicate Database The number of seconds from the DSI thread time to the time theticket arrived at the replicate database.
Total Latency The number of seconds between the time at origin and destinationfor the transaction committed.
See also• Setting Up the Latency Monitoring Process on page 95
• Stopping the Latency Monitoring Process on page 188
• Displaying Latency on page 188
Manage and Monitor
190

Troubleshoot Sybase Control Center forReplication
Troubleshoot problems that occur in Sybase Control Center for Replication.
Collection Job for Adaptive Server FailsProblem: A collection job for Adaptive Server may fail when the number of open databasesis too low.
Solution: Modify the value of number of open databases by using either the ServerConfiguration screen of the Adaptive Server monitor, or these steps:
1. Log in to the Adaptive Server.isql -S<server_name> -U<sa user name> -P<sa password>
2. Run this command to display the current configuration value:sp_configure 'number of open databases'
3. Run this command to change the current configuration value:sp_configure 'number of open databases', <number>
Add 10 to the current configuration value and substitute this number for <number>.
Data on Dashboards or Charts Is MissingProblem: There is no data displayed on the dashboards or on the charts.
Solution: Create collection jobs for Replication Server statistics collections.
See also• Setting Up the Latency Monitoring Process on page 95
No Data Is Returned for Performance Counters CollectionJob
Problem: No data is returned for the Performance Counters collection job after completing itsexecution.
Solution: Let the job execution complete for three cycles. The Replication ServerPerformance Counters collection job returns data in the Statistics Chart only after it completesexecution of approximately three cycles.
Troubleshoot Sybase Control Center for Replication
Sybase Control Center for Replication 191

Same Data Is Displayed for Two or More Adaptive ServerCollection Job Executions
Problem: If the interval time of the Adaptive Server RepAgent thread collection job is set toless than 60 seconds, Sybase Control Center still works but you may get the same data for twoor more continuous executions of the job.
Solution: Do not set the interval time for the Adaptive Server RepAgent thread collection jobto less than 60 seconds. This is because the collection data are updated only once during 60seconds for better performance.
Servers Are Missing in the Topology ViewProblem: There are servers missing when you display the topology view.
Solution: Verify that all the servers have been added to the current perspective because thetopology view can only display servers from current perspective.
Servers, Routes, or Connections Display an UnknownStatus
Problem: "Unknown" status is displayed for servers, routes, or connections.
Solution: Verify that a collection job is scheduled and running to display the correct status inthe Replication Topology view.
Some Connector Lines Do Not Display a Status IconProblem: Some connector lines do not display a status icon.
Solution: Not all connector lines are associated with a managed object. Those associated witha managed object are the only ones that display a status icon. Currently, status icons aredisplayed only on Replication connections and routes.
Troubleshoot Sybase Control Center for Replication
192

Topology Display Is Incorrect When Two ReplicationServers With the Same Name Are Registered
Problem: When you register two Replication Servers with the same name in a givenreplication environment, the replication topology view is displayed incorrectly.
Solution: Do not use the same name for two replication resources. The servers in a replicationenvironment must have unique names.
Topology View Displays Blank CanvasProblem: The Replication Topology view displays blank canvas.
Solution: From the Replication Topology view, click Reset to restore the default layout. Thisproblem is usually due to a layout that is actually displayed off-screen.
Topology View Takes a Long Time to DisplayProblem: The Replication Topology view takes a long time to display.
Solution: The Replication Topology view requires data from each server to be displayed. Forlarge environments, this may take 10 to 15 seconds.
Unable to Retrieve Topology Relationship Data or ServerObjects
Problem: An error message "Unable to retrieve topology relationship data" or "Unable toretrieve topology server objects" is displayed.
Solution: These errors are displayed for a number of reasons. Perform these:
• Verify that you have the repMonitorRole for each server in the topology assigned to yourlogin.
• Verify that each server in the topology has been authenticated.• The server relationship data cannot be retrieved from the Replication Management plug-in
or one or more servers cannot be retrieved from the Sybase Control Center.Check the plug-in and the Unified Agent Framework (UAF) agent log files for errors:For Windows• %SYBASE%\SCC-3_1\plugins\RMAP\log\rmap.log
• %SYBASE%\SCC-3_1\log\agent.log
For UNIX
Troubleshoot Sybase Control Center for Replication
Sybase Control Center for Replication 193

• $SYBASE/SCC-3_1/plugins/RMAP/log/rmap.log
• $SYBASE/SCC-3_1/log/agent.log
Problems with Basic Sybase Control Center FunctionalityTroubleshoot problems that involve basic features like starting and stopping, authentication,alerts, and scheduling.
Cannot Log InProblem: Cannot log in to Sybase Control Center Web console.
Solution: Make sure that Sybase Control Center has been configured:
• To allow logins through the operating system• To grant appropriate roles to your login account
Ask the Sybase Control Center administrator to help you check.
See also• User Authorization on page 81• Setting Up Security on page 63
Sybase Control Center Fails to StartProblem: The Sybase Control Center server does not start.
Solution: There might be a port conflict with another server. To check for port conflicts:
1. Execute this command:scc --info ports
The command lists all the ports on which Sybase Control Center and its services listen,indicates whether each port is in use, and shows the service running on each port. If SybaseControl Center is not running, any port shown to be in use represents a conflict.
2. If you discover a conflict, use scc --port to change the port used by the Sybase ControlCenter service.
See also• Configuring Ports on page 77
Browser Refresh (F5) Causes LogoutProblem: Pressing the F5 key to refresh your browser logs you out of Sybase Control Center.
Solution: Do not use F5 when you are logged in to Sybase Control Center. Browser refreshdoes not refresh data inside Sybase Control Center, but refreshes the loaded application or
Troubleshoot Sybase Control Center for Replication
194

pages in the browser—in this case, the Adobe Flash on which Sybase Control Center is built.Consequently, pressing F5 logs you out of any servers you are currently logged in to, includingSybase Control Center.
Alerts Are Not GeneratedProblem: Alerts are not being generated in Sybase Control Center.
Solution: Schedule a job to run the data collection that supports your alerts. See the datacollections topic for your Sybase Control Center product module for information on whichcollections must be scheduled.
See also• Setting Up Statistics Collection on page 97
Performance Statistics Do Not Cover Enough TimeProblem: I want to graph performance counters over a long period of time but the statisticschart displays only very recent data.
Solution: Ask your Sybase Control Center administrator to change the repository purgingoptions to keep statistical data available for as long as you need it. By default, statistics arepurged frequently to conserve disk space.
See also• Configuring Repository Purging on page 163• Graphing Performance Counters on page 138
Resetting the Online HelpProblem: Sybase Control Center online help is corrupted or cannot be found (404 error).
Solution: Clear online help files to force SCC to build new ones.
1. Shut down Sybase Control Center.2. Remove this directory:
<SCC-installation-directory>\SCC-3_2\services\EmbeddedWebContainer\container\Jetty-6.1.22\work\Jetty_0_0_0_0_8282_help.war__help__.smpe97
Tip: In Windows, you might see a deletion error. Regardless of what the errors says, itmight be caused by the length of the path. If deletion fails, rename theJetty_0_0_0_0_8282_help.war__help__.smpe97 folder to something veryshort, such as J. Then delete the renamed folder.
3. Remove these files:<SCC-installation-directory>\SCC-3_2\services\EmbeddedWebContainer\container\Jetty-6.1.22\contexts\_help.xml
Troubleshoot Sybase Control Center for Replication
Sybase Control Center for Replication 195
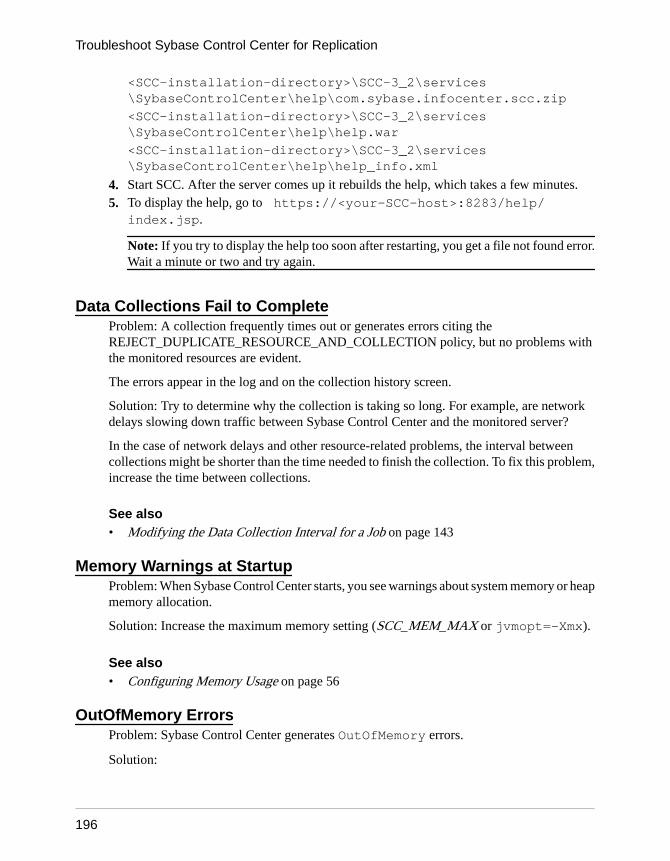
<SCC-installation-directory>\SCC-3_2\services\SybaseControlCenter\help\com.sybase.infocenter.scc.zip
<SCC-installation-directory>\SCC-3_2\services\SybaseControlCenter\help\help.war
<SCC-installation-directory>\SCC-3_2\services\SybaseControlCenter\help\help_info.xml
4. Start SCC. After the server comes up it rebuilds the help, which takes a few minutes.5. To display the help, go to https://<your-SCC-host>:8283/help/
index.jsp.
Note: If you try to display the help too soon after restarting, you get a file not found error.Wait a minute or two and try again.
Data Collections Fail to CompleteProblem: A collection frequently times out or generates errors citing theREJECT_DUPLICATE_RESOURCE_AND_COLLECTION policy, but no problems withthe monitored resources are evident.
The errors appear in the log and on the collection history screen.
Solution: Try to determine why the collection is taking so long. For example, are networkdelays slowing down traffic between Sybase Control Center and the monitored server?
In the case of network delays and other resource-related problems, the interval betweencollections might be shorter than the time needed to finish the collection. To fix this problem,increase the time between collections.
See also• Modifying the Data Collection Interval for a Job on page 143
Memory Warnings at StartupProblem: When Sybase Control Center starts, you see warnings about system memory or heapmemory allocation.
Solution: Increase the maximum memory setting (SCC_MEM_MAX or jvmopt=-Xmx).
See also• Configuring Memory Usage on page 56
OutOfMemory ErrorsProblem: Sybase Control Center generates OutOfMemory errors.
Solution:
Troubleshoot Sybase Control Center for Replication
196

• If the OutOfMemory error says that Sybase Control Center is out of heap space, increasethe maximum memory setting (SCC_MEM_MAX or jvmopt=-Xmx).
• If the OutOfMemory error says that Sybase Control Center is out of permanentgeneration space, increase the permanent memory setting (SCC_MEM_PERM orjvmopt=-XX:MaxPermSize).
• Repeated OutOfMemory errors may indicate a memory leak. OutOfMemory errorsgenerate heap dumps:• When Sybase Control Center runs as a service in Windows:
C:/windows/system32
• When Sybase Control Center runs as a service in UNIX:<SCC-install-directory>/SCC-3_2/bin
Send the heap dump files to Sybase technical support for analysis.
See also• Configuring Memory Usage on page 56
Troubleshoot Sybase Control Center for Replication
Sybase Control Center for Replication 197

Troubleshoot Sybase Control Center for Replication
198

Glossary: Sybase Control Center forReplication
Definitions of Sybase Control Center terms related to Replication.
alert – a mechanism for notifying administrators when a managed resource experiences astatus change, or when a performance metric passes a user-specified threshold.
alert instance – a copy of an alert type that has been configured to generate a particular kindof alert for a specific managed resource.
alert notification – an indication that an alert has fired. Alert notifications appear in the AlertMonitor view. If e-mail notification is enabled, alert notifications are also delivered to thespecified e-mail address.
alert target – the destination for an alert notification and source of an alert response.
alert type – (1) A template that defines the resource type and the key performance indicator(KPI) associated with an alert instance. (2) The basis on which an alert fires: state or threshold.Some alerts are triggered by the state of their key performance indicator (for example, runningor stopped), while other alerts are triggered when their KPI’s numerical value passes aspecified threshold.
alert storm – the result of issuing many redundant alerts associated with a common or rootoccurrence. See also alert storm suppression.
alert storm suppression – a Sybase Control Center feature that can be configured to preventalert storms by suppressing repeat alert notifications for a specified period of time.
availability – indicates whether a resource is accessible and responsive.
collection – a named, predefined set of key performance indicators for which values arecollected from monitored servers at the same time. Collections supply the performance andavailability data shown on Sybase Control Center screens and charts. Use the scheduler toview a list of collections and to control which collections run, how often they run, and thelength of time for which they run.
component – A server object in a replication environment. Examples of components areconnections, routes, and Replication Agent threads.
connection – A connection from a Replication Server to a database.
database – A set of related data tables and other objects that are organized and presented toserve a specific purpose.
data server – A server that provides the functionality necessary to maintain the physicalrepresentation of a replicated table in a database. An example of a data server is SybaseAdaptive Server.
Glossary: Sybase Control Center for Replication
Sybase Control Center for Replication 199

Data Server Interface (DSI) – Replication Server threads corresponding to a connectionbetween a Replication Server and replicate database. DSI threads submit transactions from theDSI outbound queue to a replicate database. They consist of a scheduler thread and one ormore executor threads. The scheduler thread groups the transactions by commit order anddispatches them to the executor threads. The executor threads map functions to functionstrings and execute the transactions in the replicate database. DSI threads use an Open Clientconnection to a database. See also connection.
edge – A topology object representing a relationship between two nodes, displayed in theform of a line that connects the topology node icons. Edges are usually defined with adirection.
Enterprise Connect Data Access (ECDA) – An Open-Server-based software gateway thatsupports DB-Library and CT-Library application program interfaces and Open DatabaseConnectivity (ODBC) protocols. It serves as a fundamental building block for databasemiddleware applications that provides access to non-Sybase databases.
environment – A set of servers that interact to perform replication. It can be a subset of thereplication domain identified by the ID server.
event – an activity in the system, such as a user logging in, a service starting or stopping, or acondition changing. Use the alerts feature to detect and notify you about system events.
heat chart – a graphical view of resource availability and selected performance and statusmetrics for all the registered resources in the current perspective.
ID Server – A Replication Server in a replication system. It assigns unique ID numbers toevery Replication Server and database in the system and maintains the version information forthe system.
job – a task performed by the scheduler in Sybase Control Center.
key performance indicator (KPI) – a single metric used to evaluate the status orperformance of a monitored resource. A KPI value can be a state (such as running, error, orstopped) or a numerical value. KPIs are grouped into collections (and also, for some productmodules, into key performance areas, or KPAs). KPI values are collected by scheduledcollection jobs and appear on monitoring screens and in the statistics and heat charts.Examples of KPIs are Server Availability and Number of Blocked Processes.
latency – The measure of the time it takes to distribute a data modification operation from aprimary database to a replicate database. The time includes Replication Agent processing,possibly ECDA processing—if the replicate database is non-Sybase—Replication Serverprocessing, and network overhead.
Mirror Activator – Provides an integrated, zero-loss disaster recovery solution when used inconjunction with a storage replication system. Replication Server, Mirror Replication Agent,and Enterprise Connect Data Access (ECDA) are the components of Mirror Activator.
Glossary: Sybase Control Center for Replication
200

Mirror Replication Agent – A component of a Mirror Activator disaster recovery systemthat reads the mirror transaction log of the primary database and sends transaction data as LTLcommands for replicated tables and replicated stored procedures to the primary ReplicationServer, which converts the LTL commands into SQL and applies the SQL to the replicatedatabase.
node – A topology object representing a server or other entity type, displayed visually in theform of an icon.
partition – A raw disk partition or operating system file that a Replication Server uses forstable queue storage. See also stable queue.
perspective – a named tab in Sybase Control Center that displays information related to acollection of managed resources (such as servers) and a set of views associated with thoseresources. The views in a perspective are chosen by users of the perspective. You can create asmany perspectives as you need, and customize them to monitor and manage your resources.Perspectives allow you to group resources in ways that make sense in your environment—forexample by location, department, or project.
RepAgent thread – The Replication Agent for a primary Adaptive Server. It reads thetransaction log and sends the transaction data as LTL commands for replicated tables andreplicated stored procedures to the primary Replication server, which converts the LTLcommands into SQL and applies the SQL to the replicate database.
replication – A process by which the changes to the data in one database—including creation,updating, and deletion of records—are also applied to the corresponding records in anotherdatabase.
Replication Agent – Reads the transaction log of a primary, non-Sybase database, and sendstransaction data as LTL commands for replicated tables and replicated stored procedures tothe primary Replication Server, which converts the LTL commands into SQL and applies theSQL to the replicate database.
replication path – The set of all servers and internal components, such as threads and queues,that transactions travel through when moving from the primary to the replicate database.
repository – a database in Sybase Control Center that stores information related to managedresources, along with user preference data, operational data, and performance statistics.
resource – a unique Sybase product component (such as a server) or a subcomponent.
route – A one-way message stream from a source Replication Server to a destinationReplication Server. Routes carry data modification commands (including those for RSSDs)and replicated functions or stored procedures between Replication Servers.
SCC-enabled login account – a user account that has been granted privileges in SybaseControl Center by mapping appropriate Sybase Control Center roles. (Roles are typicallymapped to a group to which the account belongs rather than to the account itself.) The useraccount and group can be native to Sybase Control Center or created in the operating system or
Glossary: Sybase Control Center for Replication
Sybase Control Center for Replication 201

the LDAP directory service to which Sybase Control Center authentication is delegated. Youmust use an SCC-enabled account to log in to Sybase Control Center.
SCC agent – a Sybase Control Center agent that runs on a managed server and enables SybaseControl Center to manage it. The SCC agent is installed automatically as part of the Sybaseserver.
schedule – the definition of a task (such as the collection of a set of statistics) and the timeinterval at which Sybase Control Center executes the task.
stable queue manager (SQM) – A thread within Replication Server that manages the stablequeues. Replication Server uses one SQM thread for each stable queue, whether inbound oroutbound.
stable queue – A store-and-forward queue where Replication Server stores messagesdestined for a route or database connection. Replication Server builds stable queues using itsdisk partitions.
topology – A graphical representation of how the servers in a replication environment areconnected to each other. It is a network diagram that provides a visual map of the availability ofthe replication environment.
view – a window in a perspective that displays information about one or more managedresources. Some views also let you interact with managed resources or with Sybase ControlCenter itself. For example, the Perspective Resources view lists all the resources managed bythe current perspective. Other views allow you to configure alerts, view the topology of areplication environment, and graph performance statistics.
Glossary: Sybase Control Center for Replication
202

Index-Xmx maximum memory option 27, 58-XX:MaxPermSize permanent memory option 27,
58
Aaccessibility 12Adaptive Server collection job
same data collected for Replication,troubleshooting 192
Adaptive Server shared disk clusterRepAgent thread status 185
Administration Consoledisplay options 7using 140
Administration Console in SCCcolumn filtering 9
Adobe Flex 12alert instances 199alert notifications 199alert storm 199alert storm suppression 199alert subscriptions
disable 151enable 151
alert targets 199alert type 199alert-triggered scripts
example 123alerts 199
about 145configured, deleting 149configured, modifying 147configured, viewing 147configuring duplicate alerts 122configuring e-mail server 44, 79configuring escalations 122configuring storm suppression 122configuring subscriptions 122configuring to execute scripts 122creating 121displaying history 152displaying resolutions 152effects of repository purging on history 163escalations 149
log 132modifying subscriptions 150monitoring 147not being generated 195notifications, about 152notifications, viewing 147Replication 124resolving 153scripts executed by 132setting triggering states and thresholds 121subscribing to 150subscriptions 149substitution parameters for scripts 132testing 148triggering scripts, about 132types, states, and severities 146unsubscribing from 151
alerts, Replicationtypes, states, and severities 129
ALL logging level 167aseMonitorRole 48, 87authenticating
SCC 18, 94authentication
about 29, 64configuring for LDAP 32, 67configuring for UNIX 31, 66configuring for Windows 30, 65
authorization 45, 81availability 199availability, Replication
monitoring 172
B
background, running SCC or SCC agent in 22, 53backups
about 158changing the schedule 160forcing 161restoring from 161scheduling 159suspending and resuming 160
badges, status 6
Index
Sybase Control Center for Replication 203

Ccharts, Replication
missing data, troubleshooting 191client log, viewing 165collection job
for Adaptive Server in Replication,troubleshooting 191, 192
Replication Performance Counters,troubleshooting 191
collections 199column filtering in SCC 9columns
sorting by 7compatibility, Replication
server version 4component log
replication 164components 199configuration
optional 134configuration parameters, Replication
configuring 117setting up 117
configuringlogical connection parameters 118RepAgent thread parameters 120replication parameters 117Replication Server parameter 120
connectionconfiguring parameters 118resuming 183suspending 183
connections 199connections, Replication
unknown status, troubleshooting 192connector lines
do not display a status icon for Replication,troubleshooting 192
consoleabout 169commands 169
conventions, style and syntax 10
Ddashboards, Replication
missing data, troubleshooting 191data collection jobs
adding 97
adding schedules 142creating 97deleting 141displaying history 145executing 141resuming 142stopping 141suspending 142
data collection schedulesadding 97modifying 143
data collectionsreplication 99troubleshooting timeouts 196
data server 199data server interface 200databases, Replication 199DEBUG logging level 167defined 199–202display options in Sybase Control Center 7displaying
queue status 180replication log 164replication topology view, troubleshooting
193route status 181
displaying statusreplication path 187
displaying, Replicationlatency 188Replication Agent status 19, 184server status 19, 177topology 174
driversODBC, registering 14, 51
DSIhiding connection status 180
Ee-mail server, configuring for alerts 44, 79edges 200Enterprise Connect Data Access 200environment 200environment variables
SCC_MEM_MAX 25–27, 56–58SCC_MEM_PERM 25–27, 56–58
ERROR logging level 167errors
OutOfMemory 196
Index
204

REJECT_DUPLICATE_RESOURCE_AND_COLLECTION policy 196
timeouts for data collections 196evaluation
quick start instructions 13events 200expiration dates for login accounts 86
F
F11 (browser full screen mode toggle) 9F5 (browser refresh)
logging out of Sybase Control Center 194FATAL logging level 167Flash Player 15foreground, running SCC or SCC agent in 22, 53full backups 159full screen mode 9
G
getting started after installing 15glossaries
Replication terms 199graphing statistics 138grid format, using 7groups 48, 87
adding login accounts 47, 84assigning monitoring and administration roles
46, 81assigning Replication roles 17, 93creating 47, 83in LDAP, mapping to SCC roles 41, 76in OS, mapping to SCC roles 41, 76remove login 84removing 83removing roles 82
H
heartbeat processmonitoring 96
heat chart 137, 200customizing columns 18, 137display options 7displaying 18, 137filtering resources displayed 18, 137icons 6launch icon 6
help command (console) 169hiding
RepAgent connection status 180historical performance monitoring 138history displays for alerts 152
I
iconsfor server status 6in SCC toolbar 6minimize/maximize sections of a view 9
ID Server 200incremental backups 159info command (console) 170INFO logging level 167interfaces files, importing resources from 91iqMonitorRole 48, 87
J
Java system propertiesdisplaying information about 170
jobs 200modifying collection intervals 143resuming 144suspending 144
jvmopt memory options for Windows services 25,27, 56, 58
K
key performance areasReplication 100
key performance indicators 200Replication 100, 124
keyboard shortcuts for Adobe Flex 12KPIs 200
L
latency 200chart details 189displaying 188monitoring 96replication 187stop monitoring 188viewing 188
Index
Sybase Control Center for Replication 205

latency monitoringsetting up 95stopping 188
LDAPconfiguration properties 35, 70configuring authentication 32, 67configuring to authenticate SCC logins 29, 64setting up roles 34, 69
log4j.properties file 167logging in to Sybase Control Center 28, 62
troubleshooting 194logging in to Sybase Control Center - first user 15logging levels 167logging out of Sybase Control Center 63
unintentionally, using F5 browser refresh 194logical connection
configuring parameters 118details 179displaying 178viewing 178
login accountsassigning monitoring and administration roles
46, 81assigning Replication roles 17, 93authenticating 18, 94creating automatically (UNIX) 31, 66creating automatically (Windows) 30, 65expiration date, imposing 86granting privileges with roles and groups 41,
76modifying 86native SCC, adding 85predefined 48, 87removing 86removing roles 82suspending 86
login accounts, defaultabout 15
login modules 29, 64login session timeout 63
setting 45, 80logs
agent log, viewing 165alert services 132alert services log, about 164changing the logging level 166client log, about 164client log, viewing 165component logs, about 164
configuring 167repository log, about 164repository log, viewing 165SCC agent log, about 164script execution log, about 164server logs, about 164server logs, viewing 165
M
managed resources 153managing
replication environment 172memory
configuring 25, 56displaying information about 170warnings at startup 196
memory leak 196message levels 167minimize/maximize icon 9Mirror Activator 200Mirror Replication Agent 201monitoring
heartbeat process 96latency 96performance 138replication environment 172
monitoring, Replication 1roles or permissions to set up 94server availability 172server status 172
monitorsconnections 175logical connections 175overview 175paths 175queues 175RepAgent thread 175Replication Agent 175Replication Server 175route 175
N
new featuresSybase Control Center for Replication 1
nodes 201
Index
206

OODBC drivers
registering 14, 51online help
resetting 195operating system
configuring to authenticate SCC logins 29, 64OutOfMemory errors 196
Pparameters
configuring logical connection 118routes, configuring 119
parameters for scripts 132parameters, Replication
configuring 117connection 118
partitions 201passencrypt utility 42, 77passwords
encrypting 42, 77for repository database dba account, changing
59path
replication 187performance counters, Replication
no data, troubleshooting 191permissions
Replication, configuring monitoring accounts94
Perspective Heat Chart view 137Perspective Resources view
about 153, 156display options 7icons 6show/hide icon 6
perspectives 201about 156adding resources 93, 154creating 93, 156removing 156removing a resource 155renaming 157
pluggable authentication modules for UNIXauthentication 31, 66
port conflicts 194ports
changing 59
configuring 42, 77default 59displaying information about 170
postinstallation tasks 15production environment, setting up SCC in 20
Q
queuesdisplaying status 180
quick start instructions 13quiescing
Replication Server 181
R
registrationabout 153
REJECT_DUPLICATE_RESOURCE_AND_COLLECTION policy errors 196
repAdminRole 48, 87RepAgent
hiding connection status 180RepAgent connection status
hiding 180RepAgent thread
configuring parameters 120status in Adaptive Server shared disk cluster
185RepAgent thread, Replication
displaying status 185starting 186stopping 186
RepAgent threads 201replication 201
data collections 99heartbeat 187latency 187rs_ticket 187servers 3topology 173tracing 173
Replication Agentabout 184configuring parameters 117resuming 182, 186suspending 182, 186
Replication Agents 201
Index
Sybase Control Center for Replication 207
Replication Agents, Replicationdisplaying status 19, 184
replication environmentmanaging 172monitoring 172
replication parametersconfiguring 117setting up 117
replication path 187, 201displaying status 187
Replication Serverconfiguring parameters 117displaying status 19, 177quiescing 181register, troubleshooting 193resuming 181viewing status 19, 177
Replication Serversabout 177
replication sourcesdisplaying 173tracing 173viewing 173
replication targetsdisplaying 174tracing 174viewing 174
replication topology 173displaying 174viewing 174
repMonitorRole 48, 87repository 158, 201
backing up 161changing backup schedule 160changing database dba password 59configuring purging 163restoring from backup 161scheduling backups 159
resource explorerlaunch icon 6
Resource Explorerabout 153display options 7searching in 155
resources 201about 153adding to a perspective 93, 154authenticating 18, 94browsing and managing 140
displaying availability 18, 137importing in batch 91modifying data collection schedules 143registering with Sybase Control Center 16, 90removing from a perspective 155searching for 155unregistering 154
restarts, configuring in UNIX 22, 53restarts, configuring in Windows 21, 51resuming
connection 183Replication Server 181route 183
rolesassigning to users and groups 46, 81mapping SCC roles to LDAP or OS groups 41,
76predefined 48, 87product level 45, 81removing 82Replication, configuring monitoring accounts
94system level 45, 81
roles, Replicationassigning to users and groups 17, 93
routeresuming 183suspending 183
routesconfiguring parameters 119displaying status 181viewing status 181
routes, Replication 201unknown status, troubleshooting 192
RSSD user name, using to authenticate 18, 94
SSCC agent 202
starting in UNIX 22, 53starting in UNIX as a service 22, 53starting in Windows 21, 51starting in Windows as a service 21, 51stopping in UNIX 22, 53stopping in Windows 21, 51
scc command 59using to launch Sybase Control Center 14, 50
SCC_MEM_MAX 25–27, 56–58, 196SCC_MEM_PERM 25–27, 56–58SCC-enabled login account 201
Index
208

scc.bat 14, 21, 51scc.sh 22, 53sccadmin account
about 15sccAdminRole 48, 87sccd shell script 22, 53sccuser account
about 15sccUserRole 48, 87scheduler
resuming 144suspending 144
schedules 140, 202adding to a job 142creating for a data collection job 97
screensmaximizing 9maximizing and minimizing sections of a view
9scripts
example 123substitution parameters 132triggered by alerts 132
security 29, 64configuring 28, 63
security providersconfiguring 29, 64
server logs, viewing 165server status, Replication
monitoring availability 172server version, Replication
compatibility 4servers
authenticating 18, 94displaying availability 18, 137importing in batch 91modifying data collection schedules 143registering with Sybase Control Center 16, 90replication environment 3searching for 155unregistering 154
servers, Replicationmissing in topology view, troubleshooting
192unknown status, troubleshooting 192
servicesenabling and disabling 59listing 170
services, UNIXconfiguring SCC memory options for 27, 58running SCC or SCC agent as 22, 53
services, Windowsconfiguring SCC memory options for 27, 58running SCC or SCC agent as 21, 51
setting uplatency monitoring 95replication parameters 117
severities for alerts 146severities for alerts, Replication 129shutdown command (console) 171sorting by column 7sql.ini files, importing resources from 91stable queue manager 202stable queues 202start up, automatic, configuring in UNIX 22, 53start up, automatic, configuring in Windows 21, 51starting Sybase Control Center 14, 50states, Replication 129statistics
about 98availability 98performance 98
statistics chartdisplaying data for a longer period 195effects of repository purging on 163graphing performance counters 138troubleshooting 195
stats_show_zero_counters, Replication 120status command (console) 171status icons and badges for resources 6storm suppression for alerts 122substitution parameters for scripts 132suspending
connection 183route 183
Sybase Control Centeraccessibility 12connecting a browser to 15console commands 169display options 7failure to start 194log files 165logging in 28, 62logging out 63logging out unintentionally with F5 194starting 14, 50starting in UNIX 22, 53
Index
Sybase Control Center for Replication 209

starting in UNIX as a service 22, 53starting in Windows 21, 51starting in Windows as a service 21, 51stopping in UNIX 22, 53stopping in Windows 21, 51
Sybase Control Center for Replicationenhancements 1new features 1
Sybase Control Center, ReplicationAbout 1managing 139monitoring 139
system propertiesdisplaying information about 170
system-wide featuresconfiguring 28, 63
Tterms
Replication 199text conventions 10timeout
errors on data collections 196setting for login sessions 45, 80
toolbar icons 6topology 202
displaying 174replication 173server 173viewing 174
topology dataunable to retrieve for Replication 193
topology view, Replicationblank canvas, troubleshooting 193incorrect display, troubleshooting 193
tracingreplication path 173replication source 173replication target 173
troubleshootingcontrolling data flow 176Replication 191
types of alerts 146types of alerts, Replication 129
UUNIX
configuring authentication 31, 66
running SCC or SCC agent in the background22, 53
running SCC or SCC agent in the foreground22, 53
starting, stopping SCC or SCC agent 22, 53user accounts
native SCC, adding 85native SCC, not using 29, 64
user informationmodifying 86
user interface, about 5
V
view layoutscascade 158horizontal tiling 158vertical tiling 158
View menu 9viewing
logical connection status 178queue status 180replication log 164route status 181
viewing, Replicationlatency 188Replication Agent status 19, 184server status 19, 177topology 174
views 202about 157bringing to front of perspective 157closing 157icons for managing 6maximizing 157maximizing and minimizing sections 9minimizing 157opening 157restoring 157
W
WARN logging level 167Windows
configuring authentication 30, 65starting, stopping Sybase Control Center or
SCC agent 21, 51
Index
210