Embed Size (px)
Citation preview
Symantec™ Managed PKI®
Integrating Secure Email Gateway Certificates with Clearswift SECURE Email Gateway

ii
Symantec™ Managed PKI® Integrating Secure Email Gateway Certificates with Clearswift SECURE Email Gateway
The software described in this book is furnished under a license agreement and may be used only in accordance
with the terms of the agreement.
Last updated November 26, 2013
Legal Notice
Copyright © 2013 Symantec Corporation. All rights reserved
Symantec, the Symantec Logo, and the Checkmark Logo are trademarks or registered trademarks of Symantec
Corporation or its affiliates in the U.S. and other countries. VeriSign, VeriSign Trust, and other related marks
are the trademarks or registered trademarks of VeriSign, Inc. or its affiliates or subsidiaries in the U.S. and
other countries and licensed to Symantec Corporation. Other names may be trademarks of their respective
owners. The product described in this document is distributed under licenses restricting its use, copying,
distribution, and decompilation/reverse engineering. No part of this document may be reproduced in any form
by any means without prior written authorization of Symantec Corporation and its licensors, if any.
THE DOCUMENTATION IS PROVIDED “AS IS” AND ALL EXPRESS OR IMPLIED CONDITIONS,
REPRESENTATIONS AND WARRANTIES, INCLUDING ANY IMPLIED WARRANTY OF MERCHANTABILITY,
FITNESS FOR A PARTICULAR PURPOSE OR NON-INFRINGEMENT, ARE DISCLAIMED, EXCEPT TO THE
EXTENT THAT SUCH DISCLAIMERS ARE HELD TO BE LEGALLY INVALID. SYMANTEC CORPORATION SHALL
NOT BE LIABLE FOR INCIDENTAL OR CONSEQUENTIAL DAMAGES IN CONNECTION WITH THE
FURNISHING, PERFORMANCE, OR USE OF THIS DOCUMENTATION. THE INFORMATION CONTAINED IN
THIS DOCUMENTATION IS SUBJECT TO CHANGE WITHOUT NOTICE.
The Licensed Software and Documentation are deemed to be commercial computer software as defined in FAR
12.212 and subject to restricted rights as defined in FAR Section 52.227-19 "Commercial Computer Software -
Restricted Rights" and DFARS 227.7202, et seq. “Commercial Computer Software and Commercial Computer
Software Documentation”, as applicable, and any successor regulations. Any use, modification, reproduction
release, performance, display or disclosure of the Licensed Software and Documentation by the U.S.
Government shall be solely in accordance with the terms of this Agreement. This document may describe
features and/or functionality not present in your software or your service agreement. Contact your account
representative to learn more about what is available with this Symantec® product.
Symantec Corporation
350 Ellis Street Mountain View, CA 94043
http://www.symantec.com
http://www.symauth.com/support/index.html

Contents
Chapter 1 Integrating Secure Email Gateway Certificates with Clearswift SECURE Email Gateway........................................................................................1Partner Information ........................................................................................................................ 1
How the Secure Email Gateway Certificate Works .................................................................... 2
Integration Workflow ..................................................................................................................... 3
Generate CSR .................................................................................................................................... 5
PKI Manager approval .................................................................................................................... 7
Pick up the certificate ............................................................................................................... 8
Chapter 2 Configuring Clearswift SECURE Email Gateway....................................9Configuring Clearswift SECURE Email Gateway for Encryption ............................................. 9
Apply the Configuration ........................................................................................................ 11
Manage the Corporate Certificate Store .............................................................................. 11
Create an Address List ............................................................................................................ 12
Create Mail Policy Routes ...................................................................................................... 13
Manage Mail Encryption Endpoint ...................................................................................... 14
Configuring decryption policy routes .................................................................................. 16
Configuring the email client .................................................................................................. 16

iv Contents

Chapter
1Integrating Secure Email Gateway Certificates with Clearswift SECURE Email Gateway
The enterprise workplace has moved beyond the walls of the organization into a global, mobile
environment. To maintain productivity, your end users need to access company resources using a mobile
platform. However, you need to be able to trust the end users accessing your systems, and the mobile
devices they use, whether you provide their devices or they bring their own.
Symantec’s Managed PKI digital certificates can provide that trust without the burden of user names,
passwords, or additional hardware tokens. Managed PKI is scalable from several to thousands of devices,
providing an in-the-cloud solution for quick deployment and easy management. It also incorporates
features from Symantec's other leading security products.
Symantec’s digital certificates for Secure Email allow you to digitally sign and encrypt your digital
communications using a certificate. By digitally signing and encrypting an email message, you apply your
unique digital mark to the message and ensure privacy by converting readable plain text into scrambled
cipher text.
When you want to secure your email communication at an organization or a department gateway level, you
would need Secure Email Gateway certificate which you can configure on an email gateway. You (user/
department/organization) can use this certificate to send and receive encrypted and/or signed email
through the gateway.
This document describes how to configure Secure Email Gateway certificates with Clearswift SECURE
Email Gateway to digitally sign and encrypt digital communication.
Partner InformationThese procedures have been tested on the following platforms:
Table 1-1 Partner Information
Partner Name Clearswift
Product Name and
Version
Clearswift SECURE Email Gateway 3.5

2 Integrating Secure Email Gateway Certificates with Clearswift SECURE Email GatewayHow the Secure Email Gateway Certificate Works
How the Secure Email Gateway Certificate WorksThe following diagram describes how Managed PKI certificates support Secure Email certificate and
integrates with Clearswift SECURE Email Gateway to digitally sign and encrypt emails.
1 Organization A digitally signs an email message using Secure/Multipurpose Internet Mail Extensions
(S/MIME) and sends to Organization B.
2 Organization B receives the email message and authenticate using Organization A’s public key and
decrypts it using Organization B’s private key.
Figure 1-1 Secure Email Gateway integration with Clearswift

3Integrating Secure Email Gateway Certificates with Clearswift SECURE Email GatewayIntegration Workflow
Integration WorkflowThe following diagram describes the general steps required to set up a Symantec Managed PKI account and
integrate Managed PKI certificates with Clearswift SECURE Email Gateway.
Task 1. Set up your Managed PKI 8.9 account
Contact your Symantec Sales representative to set up your Managed PKI account. Your representative will
provide you with the necessary information to begin configuring your account and your certificate profile.
You will need to complete and return the following documents. Your Symantec representative will assist
you in obtaining and completing these forms.
Master Service Agreement
Issuing Authority Naming Application (also known as the CA Naming Document)
Symantec Services Order Form
Purchase Order, credit card, or reference number
To access your Managed PKI account, you will need your initial Managed PKI administrator ID. Your
Symantec representative will assist you with obtaining your Managed PKI administrator ID to log into PKI
Manager, configure your Managed PKI account, and obtain your RA certificate. For more information on
configuring Managed PKI, refer to PKI Manager and its online help.
Task 2. Create a certificate profile
Managed PKI uses a certificate profile to define issued certificates. Complete the following steps to create
your Managed PKI Secure Email certificate profile:
1 Log on to Managed PKI’s PKI Manager using your administrator certificate. You will be prompted for
your PKI Client PIN.
Figure 1-2 Managed PKI Integration Workflow
4 Integrating Secure Email Gateway Certificates with Clearswift SECURE Email GatewayIntegration Workflow
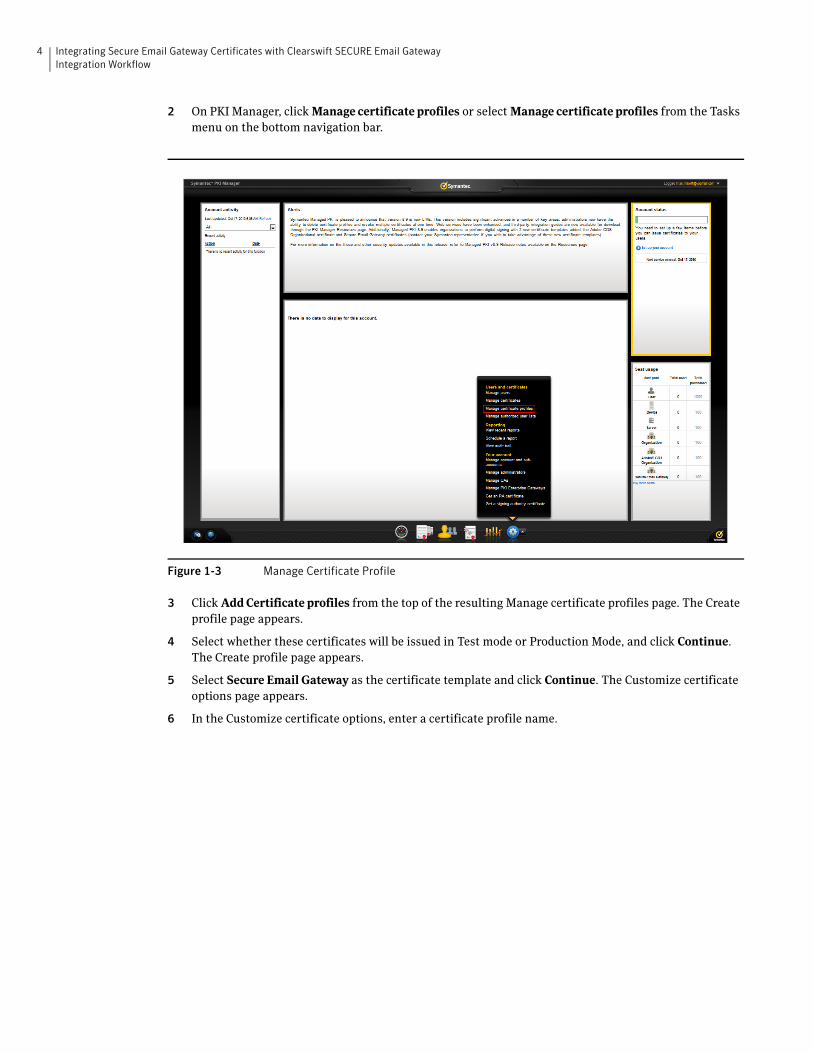
2 On PKI Manager, click Manage certificate profiles or select Manage certificate profiles from the Tasks
menu on the bottom navigation bar.
3 Click Add Certificate profiles from the top of the resulting Manage certificate profiles page. The Create
profile page appears.
4 Select whether these certificates will be issued in Test mode or Production Mode, and click Continue.
The Create profile page appears.
5 Select Secure Email Gateway as the certificate template and click Continue. The Customize certificate
options page appears.
6 In the Customize certificate options, enter a certificate profile name.
Figure 1-3 Manage Certificate Profile
5Integrating Secure Email Gateway Certificates with Clearswift SECURE Email GatewayGenerate CSR
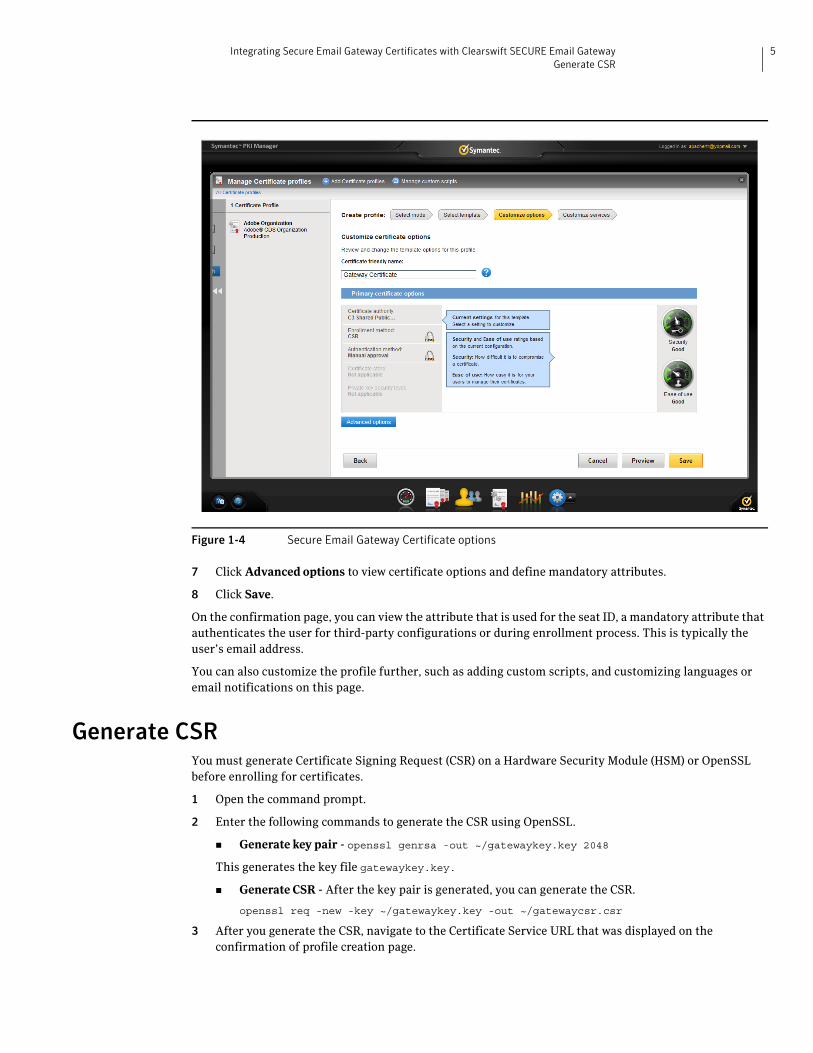
7 Click Advanced options to view certificate options and define mandatory attributes.
8 Click Save.
On the confirmation page, you can view the attribute that is used for the seat ID, a mandatory attribute that
authenticates the user for third-party configurations or during enrollment process. This is typically the
user’s email address.
You can also customize the profile further, such as adding custom scripts, and customizing languages or
email notifications on this page.
Generate CSRYou must generate Certificate Signing Request (CSR) on a Hardware Security Module (HSM) or OpenSSL
before enrolling for certificates.
1 Open the command prompt.
2 Enter the following commands to generate the CSR using OpenSSL.
Generate key pair - openssl genrsa -out ~/gatewaykey.key 2048
This generates the key file gatewaykey.key.
Generate CSR - After the key pair is generated, you can generate the CSR.
openssl req -new -key ~/gatewaykey.key -out ~/gatewaycsr.csr
3 After you generate the CSR, navigate to the Certificate Service URL that was displayed on the
confirmation of profile creation page.
Figure 1-4 Secure Email Gateway Certificate options

6 Integrating Secure Email Gateway Certificates with Clearswift SECURE Email GatewayGenerate CSR
4 Enter the required details and paste the CSR that was generated on the OpenSSL.
Figure 1-5 PKI Certificate Service URL

7Integrating Secure Email Gateway Certificates with Clearswift SECURE Email GatewayPKI Manager approval
5 Click Continue. The request is submitted for approval.
PKI Manager approval1 Log on to PKI Manager using your administrator certificate.
2 Click Manage Users or select Managed Users from the Tasks menu on the bottom navigation bar.
3 Select the pending approval request for Gateway Certificate.
4 Click Manage this request.
5 Select Approved and click Save.
6 Certificate is issued and sent to the registered email ID.
Figure 1-6 Paste CSR
8 Integrating Secure Email Gateway Certificates with Clearswift SECURE Email GatewayPKI Manager approval
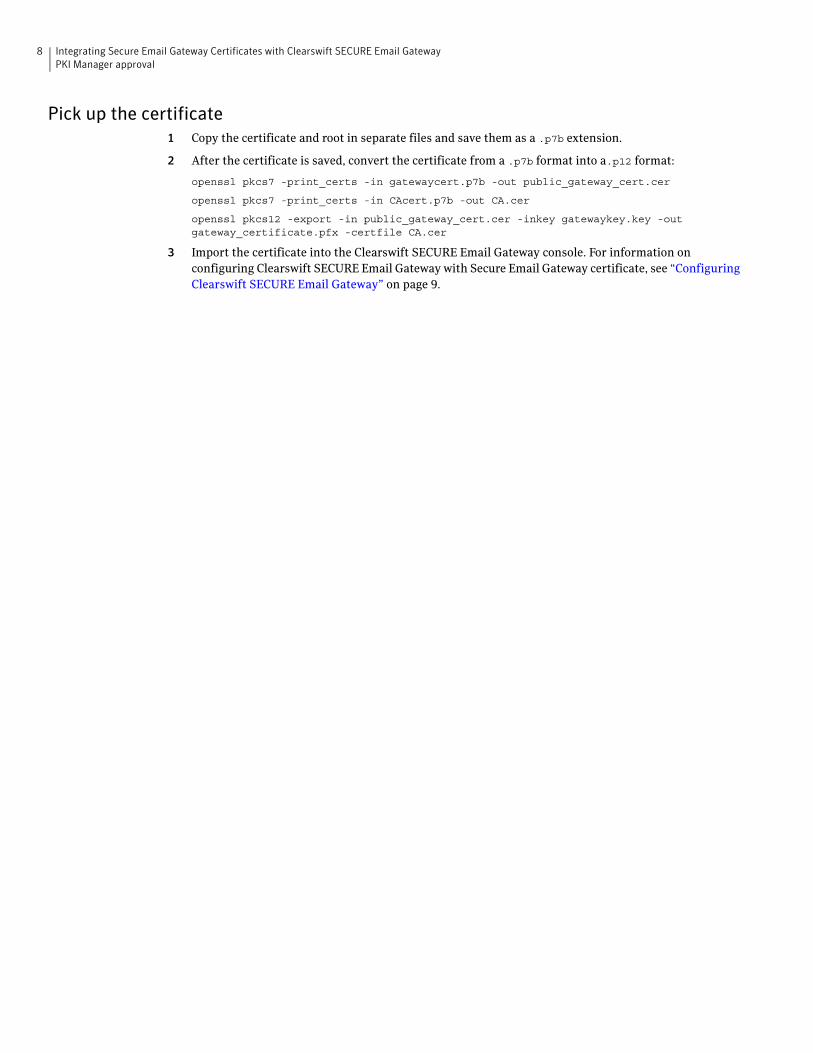
Pick up the certificate1 Copy the certificate and root in separate files and save them as a .p7b extension.
2 After the certificate is saved, convert the certificate from a .p7b format into a.p12 format:
openssl pkcs7 -print_certs -in gatewaycert.p7b -out public_gateway_cert.cer
openssl pkcs7 -print_certs -in CAcert.p7b -out CA.cer
openssl pkcs12 -export -in public_gateway_cert.cer -inkey gatewaykey.key -out gateway_certificate.pfx -certfile CA.cer
3 Import the certificate into the Clearswift SECURE Email Gateway console. For information on
configuring Clearswift SECURE Email Gateway with Secure Email Gateway certificate, see “Configuring
Clearswift SECURE Email Gateway” on page 9.

Chapter
2Configuring Clearswift SECURE Email Gateway
This chapter describes how to configure Clearswift SECURE Email Gateway and digitally sign and encrypt
email messages using Managed PKI certificates.
Configuring Clearswift SECURE Email Gateway for EncryptionThe following are the steps to configure Clearswift SECURE Email Gateway for encryption:
1 Log on to the Clearswift Secure Email Gateway portal using the credentials provided during
installation. The Clearswift Secure Email Gateway page is displayed.
2 Click System Center Home page and select Encryption. The Encryption page with all the message
encryption settings for your gateway is displayed.
3 Click Certificate Store. The Certificate Store page is displayed.
Figure 2-1 Certificate Store

10 Configuring Clearswift SECURE Email GatewayConfiguring Clearswift SECURE Email Gateway for Encryption
4 Click Generate certificate/key.
5 Enter the values in the Generate New Certificate or Key dialog as listed in Table 2-1 and click Generate.
Figure 2-2 Generate certificate/key
Table 2-1 Generate New Certificate or Key
Field Name Description
Type Specify the type of certificate from the drop-down list.
Name Enter a name for the certificate.
Email Enter an email address for the certificate.
Company Enter the company name.
Department Enter the department name.
Location Enter the location name.
Country Select the country from the drop-down list.
Days Valid Enter the number of days the certificate is valid.
Sign With Select the signature from the drop-down list.
Note: The values in the Sign With field are populated with a certificate authority key that
was generated previously. If you have not done it before, you can generate now.
Key Strength Specify the key strength from the drop-down list.
Password Enter a password.
Confirm Confirm the password.

11Configuring Clearswift SECURE Email GatewayConfiguring Clearswift SECURE Email Gateway for Encryption
Apply the ConfigurationIf there are any changes made in the System Center or settings within the System Center, you must apply
these changes to Clearswift Gateway in order for the changes to take effect.
1 Click System Center Home page and select Encryption.
2 Click Apply Configuration from the page where you can view the Changes Made task pane.
3 In the Apply Configuration Now page, enter the reason for the change.
a Select the reason for the change.
b Select an option to indicate if the change was planned.
4 Click Apply Now. Clearswift SECURE Email Gateway restarts and configuration changes are applied.
Manage the Corporate Certificate StoreThe following steps describe how to import the Managed PKI Secure Email Gateway Certificate to
Clearswift Secure Email Gateway console.
1 Click System Center Home page and select Encryption.
2 Click Certificate Store. The Certificate Store page is displayed.
Options If you generate S/MIME certificate, select the Certificate Authority and Limit to email
check box.
Table 2-1 Generate New Certificate or Key
Field Name Description
Figure 2-3 Certificate Store change

12 Configuring Clearswift SECURE Email GatewayConfiguring Clearswift SECURE Email Gateway for Encryption
3 Click Import corporate certificate/key.
4 In the Upload Certificate or Key dialog, click Browse and select the certificate that was converted from
.p7 format to .p12 in “Pick up the certificate” on page 8. Enter a password, if required.
5 Click Import. The certificate is imported into the Corporate Store. You can create encryption policy
using this key/certificate.
Create an Address ListYou can manage the address lists used by the Clearswift Gateway.
1 Click Policy Center Home page and select Policy References.
2 Click Email Addresses. The Manage Email Address Lists page is displayed.
3 Click New. In the Choose Address List Type, you can either select LDAP Synchronized Address List or
Static Address List and click Create.
Figure 2-4 Import corporate certificate/key

13Configuring Clearswift SECURE Email GatewayConfiguring Clearswift SECURE Email Gateway for Encryption
4 Click New address to add an email address to the Static Address List.
5 Enter an email address and click Add.
Create Mail Policy RoutesYou must define the mail policy routes to describe relationship between sender and receiver. The Clearswift
Gateway process the message based on the policy specified in the first matching policy route.
1 Click Policy Center Home page and select Policy References.
2 Click Manage Mail Policy Routes. The Manage Policy Routes page is displayed.
3 Click New to add a new policy route or select an existing policy to modify. The Modify Policy Route page
is displayed.
Figure 2-5 Manage Email Address lists

14 Configuring Clearswift SECURE Email GatewayConfiguring Clearswift SECURE Email Gateway for Encryption
4 In the Overview area, select the Click here to change these settings to edit information as required.
a Edit the name of the rule.
b Enter any notes.
c Click Save.
5 In the For Mail Sent area, select the Click here to change these settings to edit information as required.
a In the From section, select an existing Address List or select the option to create a new address.
b In the To section, select an existing Address List or select the option to create a new address.
c Click Save.
6 In the Do NOT Decrypt or Apply Encryption Endpoints area, select the Click here to change these
settings to edit information as required.
a Select the By default do NOT apply encryption endpoint delivery policy.
b Click Save.
7 Select the Click here to change these settings in By Default Perform This Disposal Action area and
specify the default disposal options.
8 Select Unless One of These Content Rules Triggers area to apply content rules to a policy route.
Manage Mail Encryption Endpoint You can define the encryption endpoints for messages that you want to deliver securely.
1 Click System Center Home page and select Encryption.
2 Click Mail Encryption Endpoints. The Mail Encryption Endpoints page is displayed.
Figure 2-6 Modify Policy Route

15Configuring Clearswift SECURE Email GatewayConfiguring Clearswift SECURE Email Gateway for Encryption
3 Click New to add a new encryption endpoint or select an existing encryption endpoint to modify.
4 In the Overview area, select the Click here to change these settings to edit information as required.
a Edit the name of the rule.
b Enter any notes.
c Click Save.
5 In the For mail sent area, select the Click here to change these settings to edit information as required.
a Enter an email address.
b Enter a domain.
c Select one or more addresses from the Address List.
d Click Save.
6 In the Messages will be encrypted area, select the Click here to change these settings to select the
certificate that was imported for encrypting and signing.
a Select a value from the Encrypt the message using drop-down list.
b Select a value from the Sign the messages using drop-down list.
c Click Save.
7 Click Save. This configuration ensures that all emails to the selected domains are encrypted or signed
with the selected certificate/key.
Figure 2-7 Mail Encryption Endpoint settings

16 Configuring Clearswift SECURE Email GatewayConfiguring Clearswift SECURE Email Gateway for Encryption
Configuring decryption policy routes1 Click Policy Center Home page and select Policy References.
2 Click Manage Mail Policy Routes. The Manage Policy Routes page is displayed.
3 Select a policy and click Edit. The Modify Policy Route page is displayed.
4 In the Do NOT Decrypt or Apply Encryption Endpoints area, select the Click here to change these
settings to edit information as required.
a Select the Decrypt and apply content rules to PGP and S/MIME messages.
b Click Save.
The gateway settings are applied for all the email that are sent and received for the selected domain.
Configuring the email clientYou must configure the email client to establish a connection with gateway before the gateway can pick up
and relay it to the outgoing email server.
1 Launch your email client.
2 Enter the IP address for the email gateway server for the email client.
3 Click OK.
After you configure your email client, you can send and receive emails to external organization.
Figure 2-8 Email Client