Embed Size (px)
Citation preview
1
CHAPTER 1
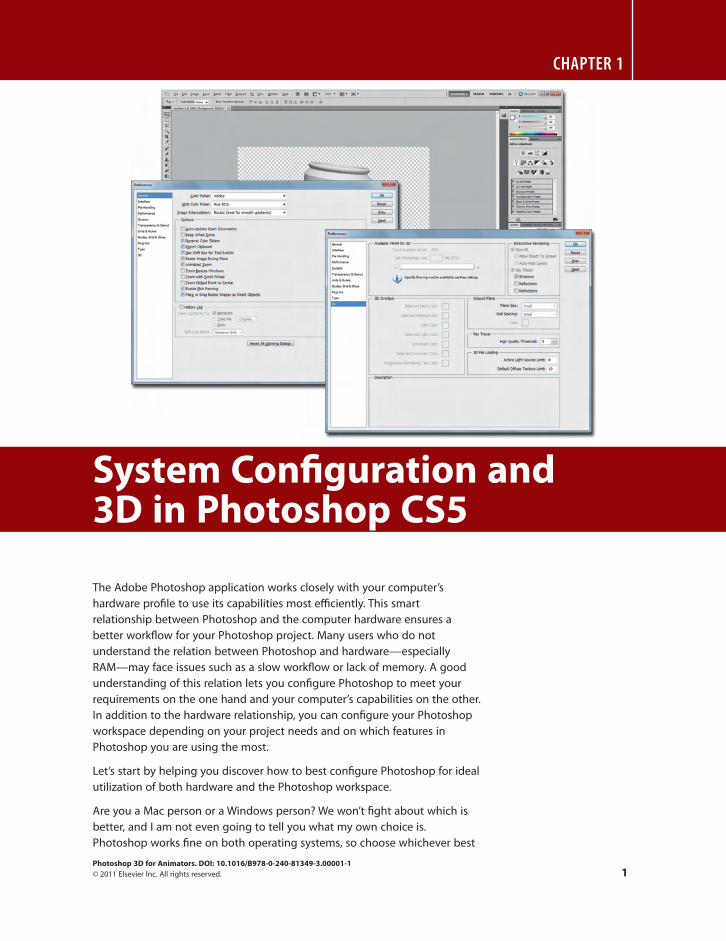
System Confi guration and 3D in Photoshop CS5
Photoshop 3D for Animators. DOI: 10.1016/B978-0-240-81349-3.00001-1© 2011 Elsevier Inc. All rights reserved.
The Adobe Photoshop application works closely with your computer ’ s hardware profi le to use its capabilities most effi ciently. This smart relationship between Photoshop and the computer hardware ensures a better workfl ow for your Photoshop project. Many users who do not understand the relation between Photoshop and hardware — especially RAM — may face issues such as a slow workfl ow or lack of memory. A good understanding of this relation lets you confi gure Photoshop to meet your requirements on the one hand and your computer ’ s capabilities on the other. In addition to the hardware relationship, you can confi gure your Photoshop workspace depending on your project needs and on which features in Photoshop you are using the most.
Let ’ s start by helping you discover how to best confi gure Photoshop for ideal utilization of both hardware and the Photoshop workspace.
Are you a Mac person or a Windows person? We won ’ t fi ght about which is better, and I am not even going to tell you what my own choice is. Photoshop works fi ne on both operating systems, so choose whichever best
Photoshop 3D for Animators
2
Note: The main diff erence between both operating system shortcuts is between two keys on your keyboard. The Command (CMD) key on the Mac is the same as the Control (CTRL) key in Windows, and the Option key on the Mac is the same as the ALT key in Windows. I will mention both shortcuts in tutorials and examples to avoid any confusion.
fi ts your needs. Photoshop deals with both operating systems in the same way, so the only diff erence that you will notice is changes in shortcuts between keyboards for each operating system.
When I fi rst learned Photoshop, I did not pay any attention to the hardware requirements, because my computer specifi cations are very robust. But I soon realized that I could get the best performance out of Photoshop by being a little bit smarter.
Actually, Photoshop is too smart when dealing with your hardware, and it works in a diff erent way than other Adobe products do, so you have to really understand what your computer needs to work in the optimum way with Photoshop (especially the 3D features). In the Preferences dialog box, you will see a variety of options to specify how Photoshop deals with your system resources such as memory and storage.
But the following questions remain: What are the resources that you have to take into consideration when installing Photoshop? Which resources can be managed, and which ones require a hardware upgrade? You ’ ll fi nd the answers in this book.
Hardware Resources Utilization There are resources in your computer to consider regardless of your type of Photoshop project, such as RAM, processing power, and hard drive storage space, and special consideration should be given to the graphics card, which will enable you to handle 3D content and render 3D projects in Photoshop. Along with other features such as Canvas Rotation, Scrubby Zoom, and so on — that is, GPU features, and there are a lot of them — the Painting feature also relies a bit on your graphics card. But before digging more into resources that you need to consider while working with Photoshop and how to optimize it for the best Photoshop 3D performance possible, I will mention the general system requirement to install Photoshop for both Mac and Windows.
Processor Although Photoshop does not require a multiprocessor computer, having one will help many of Photoshop tools, fi lters, and 3D features work much faster than they do on a single-processor computer.
System Confi guration and 3D in Photoshop CS5
3
RAM One of the resources that Photoshop loves and that aff ects your work in the application is the amount of RAM ( random-access memory ) on your machine. Although the recommended RAM to run Photoshop is 1 GB for both Windows and Mac, the amount of RAM necessary when working with Photoshop depends on your project. Photoshop ’ s RAM usage heavily depends on the size of the fi les that you open in Photoshop, because each fi le you open in Photoshop uses RAM equal to about four times its size.
The more RAM your system is fueled by, the larger the fi les you will be able to handle in Photoshop. For example, if you are working with website images and images in low resolution, you will not feel that much pain when working with only a little RAM memory. But if you are working with fi les that must be printed, or 3D content or animation fi les with a lot of layers, you will defi nitely need a lot of RAM to be able to work easily.
The current Windows version, Vista, can load a maximum of 4 GB RAM, and Mac OS X can hold up to 8 GB RAM. So I always recommend buying as much RAM as you can aff ord, because RAM is the thin line between working in joy or pain in Photoshop.
Photoshop is a really smart application when dealing with memory: when you open Photoshop, it loads some of its fi les into the RAM, such as the fonts, presets, and others. Then it starts to use parts of the RAM for opening and working on your fi les. After using up the allocated RAM amount for Photoshop, it starts to take from the scratch disk. The scratch disk is a part of the hard disk that Photoshop uses as a virtual memory when it reaches the limit of the allocated fi les in the RAM. Let ’ s focus on the RAM memory now, and dig deeper into the topic of scratch disk memory after.
Because it is smart, Photoshop enables you to customize how it deals with RAM and to set a limit for it to use from the memory and memory allocation; these settings are located in this Photoshop Preferences dialog box. I remember a very funny mistake of mine when I was learning Photoshop. I allocated all the memory to Photoshop — which left nothing for my operating system and other applications! Actually, it is a common mistake, but it will kill your computer, and you will never be able to work with other products properly, so be careful when setting the memory usage limit.
The default Photoshop RAM memory allocation depends on your operating system and the amount of RAM you have in your machine. Also, it depends on whether you run a 32-bit or 64-bit operating system. For example, if you are running Mac OS 10.4.11 or later, Photoshop will use up to 3.5 GB of the available RAM. In Windows, the Photoshop 32-bit version can use up to 1.7 GB in the 32-bit Windows version and 3.2 GB in 64-bit Windows, and the Photoshop 64-bit version, which runs only on 64-bit Windows, can get as much as your computer can aff ord. And Photoshop is supported by Windows
Photoshop 3D for Animators
4
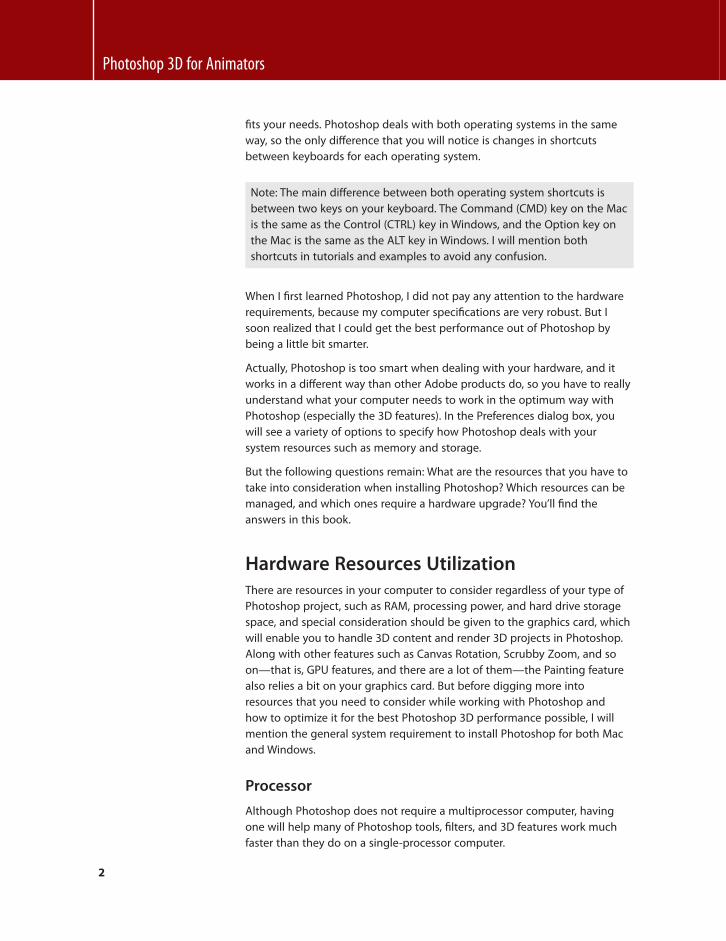
Figure 1.1 Performance options in the Preferences panel.
Shortcut: To open the Preferences panel, press CMD + K in Mac and CTRL + K in Windows.
Note: The Preferences changes you make will not take eff ect until you restart Photoshop.
PX with Service Pack 3, Windows Vista with Service Pack 1 or 2, and Windows 7.
The Photoshop performance settings are controlled through the Performance section in the Preference dialog box. You can fi nd the Preferences dialog box via the menus Photoshop > Preferences (Mac OS) and Edit > Preferences (Windows). However, the Preference dialog box includes a separate section for the 3D settings, which provides full control over the 3D options in Photoshop. The 3D section lets you assign virtual RAM (VRAM) for the 3D projects. Also, you can set the properties of the Open GL, 3D resources guides colors, 3D ground plane, Ray Tracer options, and the loading 3D fi les option.
In the Performance dialog box, notice that Photoshop shows the available RAM that you can assign to Photoshop and the ideal range of RAM that Photoshop can use. You can set the RAM allocated to Photoshop using the input text box, or move the slider to the left or right or click the plus icon in the right of the slide bar or the minus icon in the right of the slide bar.
Scratch Disks Another clever method to handle computer resources to get the most out of Photoshop performance process is the scratch disk, as mentioned previously. The scratch disk is actually virtual memory — Photoshop takes part of your hard disk and uses it as virtual memory to maximize the amount of memory
System Confi guration and 3D in Photoshop CS5
5
to handle fi les and tools, especially large fi les and memory-intensive Photoshop features, such as some of the fi lter and 3D tools. When your system is out of RAM allocated for Photoshop, it starts to use the assigned space on the hard disk as memory.
Photoshop requires 2 GB of hard disk space, but it appreciates more space for better performance and the ability to handle larger fi les. Therefore, the selected hard disk or disk volume that Photoshop will rely on as virtual memory should have plenty of space.
Because the memory is used to save your current work in Photoshop, it should be fast and able to handle Photoshop processes. This guideline applies to the scratch disk as well, so the scratch disk you rely on as virtual memory should be fast, well-defragged, and separate from the primary operating system disk or volume that is used for the operating system ’ s virtual memory and paging. External hard disks and network hard disks are not recommended, because they will not be as fast as virtual memory.
Photoshop allows you to specify the volume that will be used as a scratch disk, with a total maximum space of 64 exabytes (1 exabyte equals 64 billion gigabytes). In the Performance dialog box, choose which volume to use as the scratch disk and arrange the volumes in order of your preferred usage sequence.
In the Scratch Disk preferences section, Photoshop lists the volumes that can be used as scratch disks. Check the box next to the volume that you would like to use as a scratch disk. You can change the order of the scratch disks by moving the selected Scratch Disk up and down in the list.
“ Out of RAM ” Errors Because we are going to work with tools that consume a lot of operating system resources, especially virtual memory, you should know about an error message that may occur when you try to use a tool or a fi lter when its memory requirements exceed the available memory limit. Memory is consumed by other operations, tools, and fi lters that you use while working in your project, and at some point you may run out of free memory to execute the next process.
The solution to solve this problem is to free up some memory by closing the unwanted fi les and clear your history or limit the saved history steps. One of the most helpful things to do in order to free up Photoshop memory and therefore speed up your work is to purge the clipboard, undo list, and histories. Selecting Edit > Purge clears the various steps that Photoshop saves in memory, such as clipboard items, undo and history steps; this frees memory, which speeds up your work and gives you the ability to work with additional tools and fi lters — especially the memory-consuming tools.
Note: Adobe Photoshop creates a temporary fi le on the scratch disk to save the current operations and history steps of the current fi le or fi les.
Photoshop 3D for Animators
6
When you open Purge from the Edit menu, you will have the option to delete the clipboard, the undo steps, the history steps, or all of them together. Keep in mind, however, that this will limit your ability to go back in your history to undo you work. You may want to save a copy of your working fi le at a particular state before you purge your history, just to be sure that you could get back to that version of the fi le if necessary.
As we ’ re talking about memory and disk space, here are some facts about the fi le size and dimension limitations in Photoshop. The maximum fi le size for the PSD document is 2 GB, the TIFF maximum fi le size is 4 GB, and the maximum fi le size for the PDF document is 10 GB. When the PSD fi les cannot store large data fi les, you can save it using the PSB fi le format.
The fi le dimension limitations are 300,000 × 300,000 pixels for native PSD fi les and 30,000 × 30,000 pixels and 200 × 200 inches for PDF fi les. Keep in mind that large fi les may cause problems if you try to open them in an older version of Photoshop, such as version 7.
Getting the Most Out of the Photoshop Workspace As I mentioned before, Photoshop is widely used in various types of tasks and professions, which means that it includes many panels, menus, and features to cover each fi eld of interest ’ s needs and requirements. Thus, some Photoshop users use specifi c panels or features more than others, depending on what they need to do and the nature of their Photoshop projects.
In old Photoshop versions, I was forced to keep many panels open and suff ered as all these panels covered the actual work. The only working solution was to keep moving the panels around to reveal the design fi le under it. Another option was to open the panels when I needed them and then close them again, and to keep doing this every time I needed the panel. This approach was frustrating and time-consuming, especially with a large Photoshop project with many tasks.
Also, opening all the panels at the same time may be confusing and take up a lot of space, because some panels are used more than others or may not be used at all, even after implementing the docking panels layout. For example, if you are a photographer, you will need the panels that can help you edit photos and manage colors more than you will need panels like the 3D or animation panels.
The solution is to use the Photoshop workspace options to set the Photoshop panels ’ layout to meet your needs or even to create your personal favorite arrangement for the workspace. This makes life so much easier! In Photoshop, you can either choose from the default workspace options or create your own workspace and save it for further
System Confi guration and 3D in Photoshop CS5
7
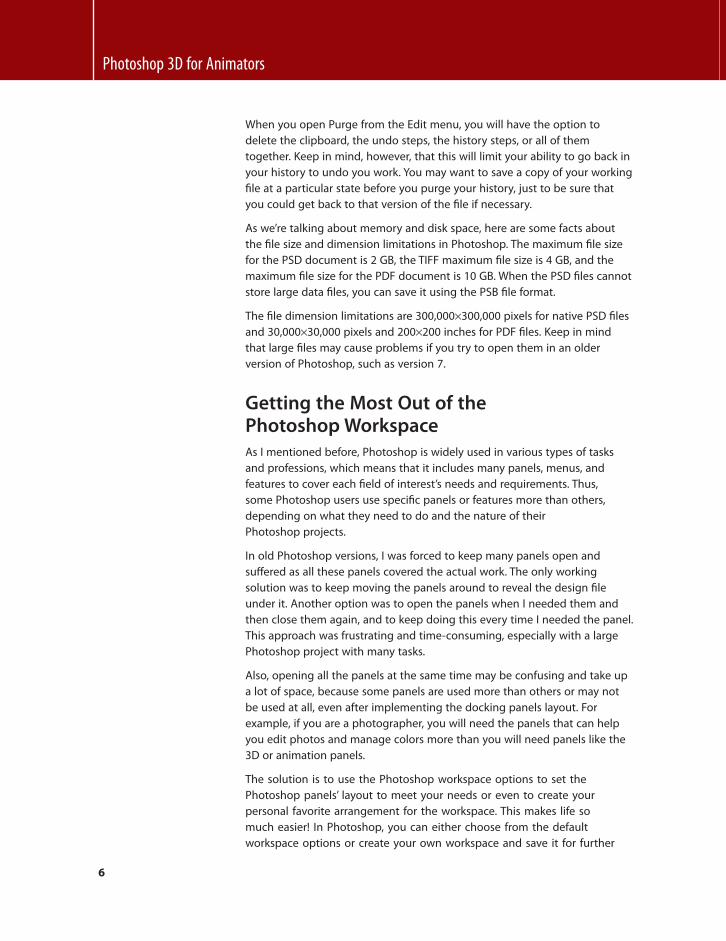
Figure 1.2 Notice the Photoshop workspace in Photoshop 7 and Photoshop CS5 and how the docking panels help free space and arrange panels in a way that makes your work easier and faster.
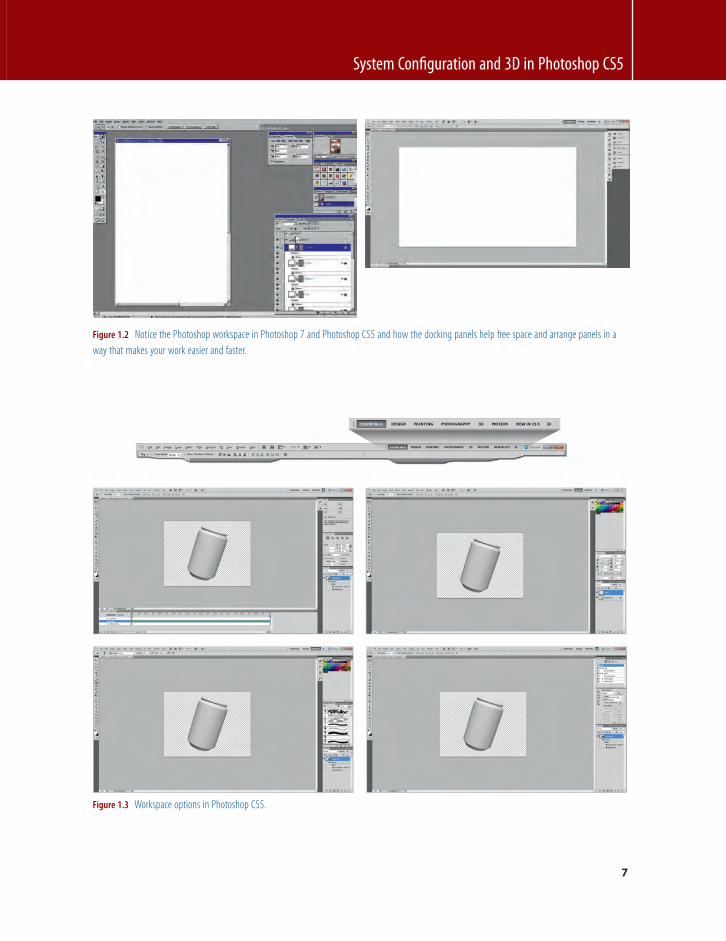
Figure 1.3 Workspace options in Photoshop CS5.
Photoshop 3D for Animators
8
use. One of the new features in the Photoshop CS5 is the new appearance of the workspace option at the top right of the Photoshop working environment.
The workspaces that already exist when you fi rst install it are:
• Essentials: This workspace option displays some of the essential panels that are commonly used by most of us, such as the Layers panel, Color panels, and Adjustments panel.
• Design: This workspace option shows the design-related panels, such as the Swatches panel, Styles panel, History panel, Character and Layer panel.
• Painting: This option activates the Brush and Color panels that are important when using Photoshop as a painting application, especially when using the new brushes and enhanced painting techniques.
• Photography: This option prepares the workspace for photographers who would like to edit photos in Photoshop. However, panels such as Histogram and Adjustments are activated in this mode.
• 3D: The 3D workspace activates the 3D panel, which is frequently used to edit the 3D scene or models. Also, the Layers panel becomes active so you can use it to navigate between 2D and 3D layers.
• Motion: This option sets the workspace to be ready for animation and video projects, which mainly activates one panel that allows you to animate both 2D and 3D objects: the Animation panel.
• New in CS5, this workspace displays the new features and panels in Photoshop CS5, such as the Mini Bridge, new brushes, 3D enhancements, Access CS Live, news, and the CS Review panel.
Create Your Own Workspace You still have the option to create your own custom workspace to suit your project needs and display the panels used in your project. By default, not all the panels are displayed when you fi rst install Photoshop. So you can choose from the workspace presets or create your own workspace. To display a panel, select it from the Window menu; you can arrange the panels in the workspace at either the right, left, or bottom of the workspace.
If you would like to keep some panels fl oating, no problem: just undock the panel by dragging it anywhere in the middle of the workspace, so you can keep the panel fl oating without putting it in a fi xed place, in case you like to move the panel while working.
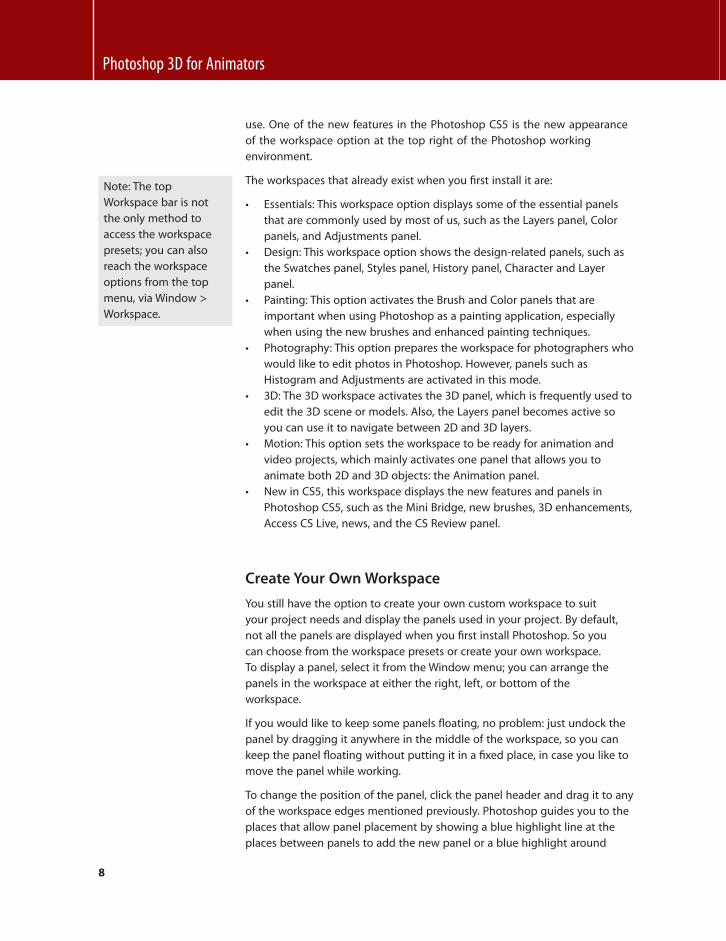
To change the position of the panel, click the panel header and drag it to any of the workspace edges mentioned previously. Photoshop guides you to the places that allow panel placement by showing a blue highlight line at the places between panels to add the new panel or a blue highlight around
Note: The top Workspace bar is not the only method to access the workspace presets; you can also reach the workspace options from the top menu, via Window > Workspace.
System Confi guration and 3D in Photoshop CS5
9
the panel to group the new panel within existing panel groups ( Figure 1.4 ). When you group a panel with other panel groups, it appears as a tab in the panel group.
The docking panels give you more space, but this may not be enough, so you still can free some more space by collapsing panels into icons. When you click on these icons, the panel appears. To collapse a panel, click the top right arrow, and then click the arrow again to expand it. When you need to collapse the whole panel sidebar, click the topmost right arrow and the whole panel will be displayed as icons, with the name of each panel next to it.
Move your mouse cursor over the sidebar ’ s left edge, and it will turn to a double-sided arrow to indicate that you can resize the collapsed panel to hide the panels ’ names and show only the icons.
Save Workspace After you ’ ve rearranged the panels and created your own Photoshop workspace, it is time to save this workspace and add it to the workspace list. To save the workspace, follow these steps:
1. Open the New Workspace dialog box via Window > Workspace. 2. In New Workspace dialog box, give your new workspace a name. 3. In the Capture area, you can opt to save the keyboard shortcuts and the
menus modifi cations as well. 4. Click OK to save this customized workspace.
Delete Workspace Adobe Photoshop allows you to delete the custom workspace. To delete a workspace, follow these steps:
1. Make sure that you are not currently using the workspace you would like to delete.
2. Select Window > Workspace > Delete Workspace. 3. Choose the Workspace you would like to delete from the drop-down
menu and click OK.
Figure 1.4 Change panel placements in the Photoshop workspace.
Note: Adobe Photoshop provides auto saving for the changes you apply to the workspace without the need to save it again. This option lets you easily customize your own workspace and update it.
Photoshop 3D for Animators
10
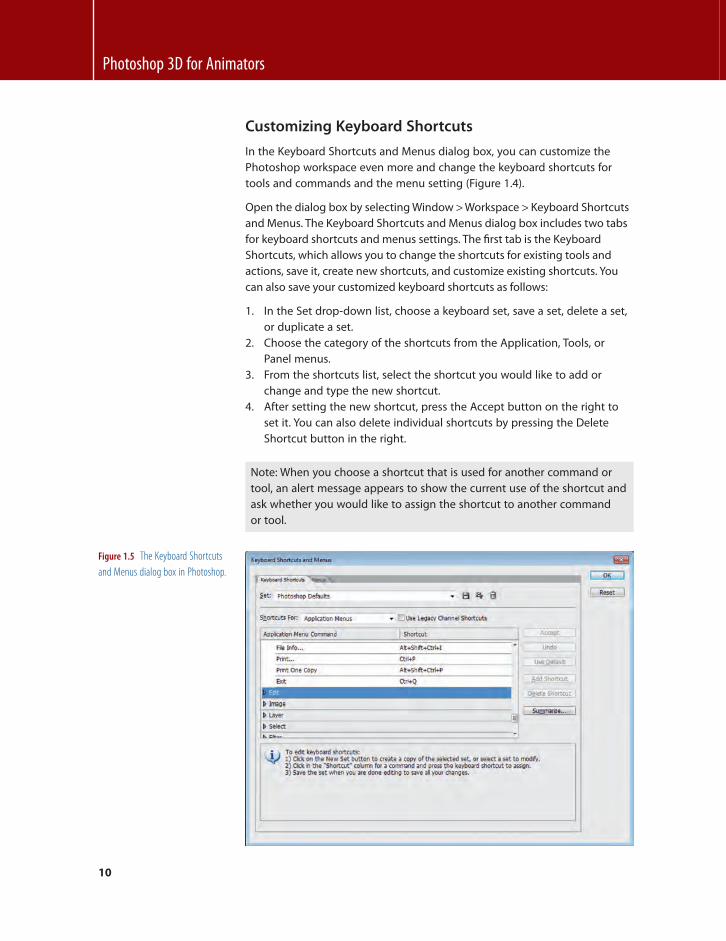
Customizing Keyboard Shortcuts In the Keyboard Shortcuts and Menus dialog box, you can customize the Photoshop workspace even more and change the keyboard shortcuts for tools and commands and the menu setting ( Figure 1.4 ).
Open the dialog box by selecting Window > Workspace > Keyboard Shortcuts and Menus. The Keyboard Shortcuts and Menus dialog box includes two tabs for keyboard shortcuts and menus settings. The fi rst tab is the Keyboard Shortcuts, which allows you to change the shortcuts for existing tools and actions, save it, create new shortcuts, and customize existing shortcuts. You can also save your customized keyboard shortcuts as follows:
1. In the Set drop-down list, choose a keyboard set, save a set, delete a set, or duplicate a set.
2. Choose the category of the shortcuts from the Application, Tools, or Panel menus.
3. From the shortcuts list, select the shortcut you would like to add or change and type the new shortcut.
4. After setting the new shortcut, press the Accept button on the right to set it. You can also delete individual shortcuts by pressing the Delete Shortcut button in the right.
Note: When you choose a shortcut that is used for another command or tool, an alert message appears to show the current use of the shortcut and ask whether you would like to assign the shortcut to another command or tool.
Figure 1.5 The Keyboard Shortcuts and Menus dialog box in Photoshop.
System Confi guration and 3D in Photoshop CS5
11
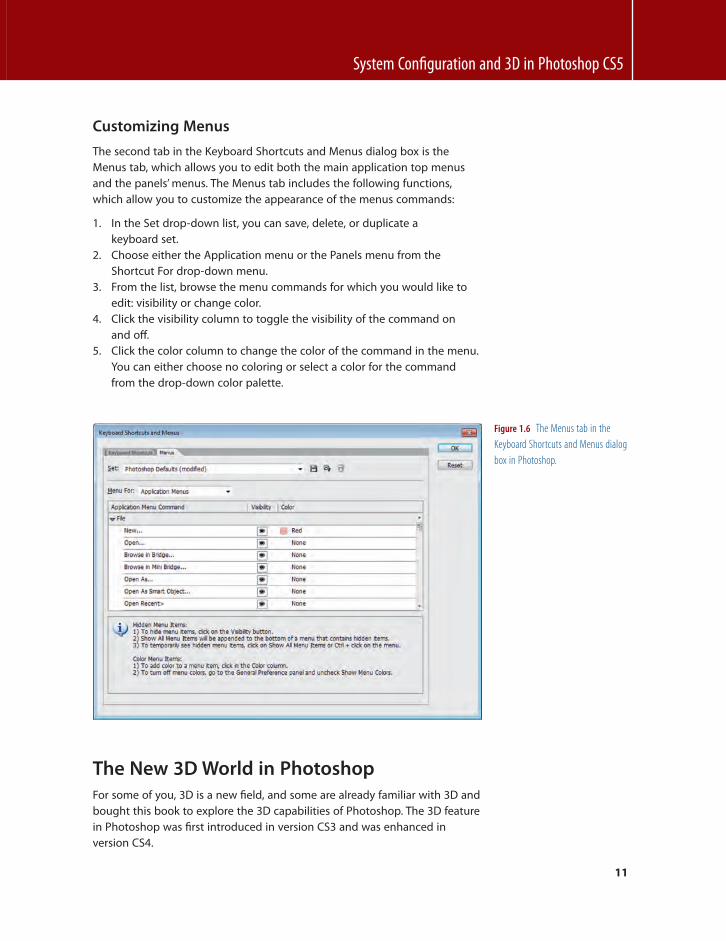
Customizing Menus The second tab in the Keyboard Shortcuts and Menus dialog box is the Menus tab, which allows you to edit both the main application top menus and the panels ’ menus. The Menus tab includes the following functions, which allow you to customize the appearance of the menus commands:
1. In the Set drop-down list, you can save, delete, or duplicate a keyboard set.
2. Choose either the Application menu or the Panels menu from the Shortcut For drop-down menu.
3. From the list, browse the menu commands for which you would like to edit: visibility or change color.
4. Click the visibility column to toggle the visibility of the command on and off .
5. Click the color column to change the color of the command in the menu. You can either choose no coloring or select a color for the command from the drop-down color palette.
Figure 1.6 The Menus tab in the Keyboard Shortcuts and Menus dialog box in Photoshop.
The New 3D World in Photoshop For some of you, 3D is a new fi eld, and some are already familiar with 3D and bought this book to explore the 3D capabilities of Photoshop. The 3D feature in Photoshop was fi rst introduced in version CS3 and was enhanced in version CS4.
Photoshop 3D for Animators
12
I will introduce to you the 3D features in Photoshop, which are actually the points that I will talk about in detail in later chapters. If you fi nd it diffi cult to understand some of the 3D terms at this stage, do not worry: I will focus on basic 3D terms and concepts later.
Because Adobe Photoshop CS5 includes some brand-new features and enhancements, I will mention these new features while talking about the other features.
Opening and Getting 3D Files into Photoshop Adobe Photoshop supports the ability to import a wide range of 3D fi le extensions, which are .U3D, 3DS, .KMS, .OBJ, and Collada DAE fi les. These extensions are widely used in 3D programs such as Adobe Acrobat 3D, 3D Studio Max, Maya, and Google Earth.
You can also create 3D content from scratch in Photoshop by using the ready 3D models collection or by converting 2D layers into 3D content by applying 3D features such as the postcard eff ect or Repouss é .
You will see also how to integrate Photoshop with third-party applications to enhance the 3D process in Photoshop and improve your ability to work with 3D models.
Although I will cover all the details about working with 3D content and imported content in Chapters 4, 6, and 7 , here we will discuss working with objects from third-party applications.
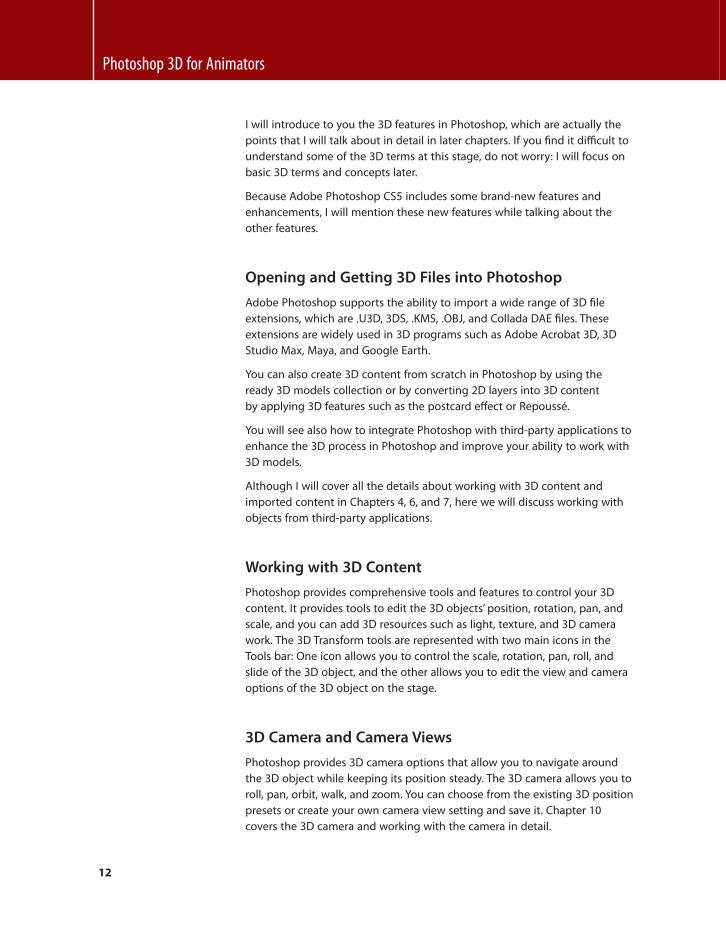
Working with 3D Content Photoshop provides comprehensive tools and features to control your 3D content. It provides tools to edit the 3D objects ’ position, rotation, pan, and scale, and you can add 3D resources such as light, texture, and 3D camera work. The 3D Transform tools are represented with two main icons in the Tools bar: One icon allows you to control the scale, rotation, pan, roll, and slide of the 3D object, and the other allows you to edit the view and camera options of the 3D object on the stage.
3D Camera and Camera Views Photoshop provides 3D camera options that allow you to navigate around the 3D object while keeping its position steady. The 3D camera allows you to roll, pan, orbit, walk, and zoom. You can choose from the existing 3D position presets or create your own camera view setting and save it. Chapter 10 covers the 3D camera and working with the camera in detail.
System Confi guration and 3D in Photoshop CS5
13
Figure 1.7 Adobe Photoshop provides comprehensive tools to control your 3D objects, such as transformation, rotation, panning, zooming, and sliding.
3D Lighting Eff ects You can change the lighting eff ects of the 3D object through the unique light feature in the 3D panel that allows you to create light, delete light, or edit an existing light eff ect on the object. You can also choose the default light eff ect or import a light setting from an external fi le. And we will cover light and working with light in Photoshop in Chapter 9 .
Materials Photoshop allows you to use and edit object materials; you also have the ability to fully customize the materials inserted into the object and to edit its details and the relation between the object and its natural light and environment around it.
Photoshop CS5 includes a new material browser that lets you easily choose and apply materials with a mouse click. Furthermore, it has improved working with materials, for example, saving new custom materials — as you will see in Chapter 8 .
3D Animation Although the timeline in Photoshop is still simple, it can extend your capabilities by animating 3D objects, in both 2D and 3D space. When you animate a 3D layer in Photoshop, the Layer 3D properties appear to allow you to work with it and animate it.
3D Painting Another amazing feature covered in this book is the ability to paint over 3D models using the Photoshop brushes: Photoshop senses the 3D object edges and paints over these edges in the 3D space. This feature was always on the wish list of digital painters and digital artists: the ability to paint over 3D models and smooth out artistic digital painting.
Photoshop 3D for Animators
14
Wrapping 2D Layers over 3D Objects You can also use 2D layers to wrap over 3D objects, such as labeling a 3D bottle with a 2D image, as you will learn about in Chapter 6 . You can also turn 2D layers into a 3D object ’ s texture or apply it as a map to a 3D plane; this way, you can rotate and edit the layer ’ s properties in the 3D space.
Built-in 3D Shapes Photoshop includes simple 3D shapes that can help you create simple 3D objects. Although this is a not real modeling tool, it provides you with a few objects to use in your 3D project in Photoshop. However, building your model using a 3D modeling application gives you more capabilities. You can export your model as a Collada DAE fi le and import it to Photoshop.
Rendering 3D Content The rendering process is the last step in the 3D production to turn the 3D project fi le or animation into a fi nal product that the user can see, such as a still image or animated video content. General users are not able to view the 3D fi les, such as the 3DS or the DAE fi les. However, this step calculates the 3D fi le ’ s light, camera, and objects to produce a fi nal product such as a JPG image or AVI video. Although the default rendering method in Photoshop is the solid render, Photoshop provides comprehensive rending options that fi t your rendering output requirements and artwork options.
The 3D render in Photoshop provides you with the following rendering options that allow you to visualize your 3D object in diff erent ways:
• Bounding box: Renders each part in the model as boxes around the edges of each component.
• Transparent: Allows you to display the model with transparency. • Line illustration: Renders the model as a solid color with an outline. • Solid outline: Renders the model as a simple outline. • Wireframe/shaded wireframe: Displays the wireframes of the object with
grayscale shades. • Hidden wireframe: Displays the 3D object as a solid color without
displaying wireframes.
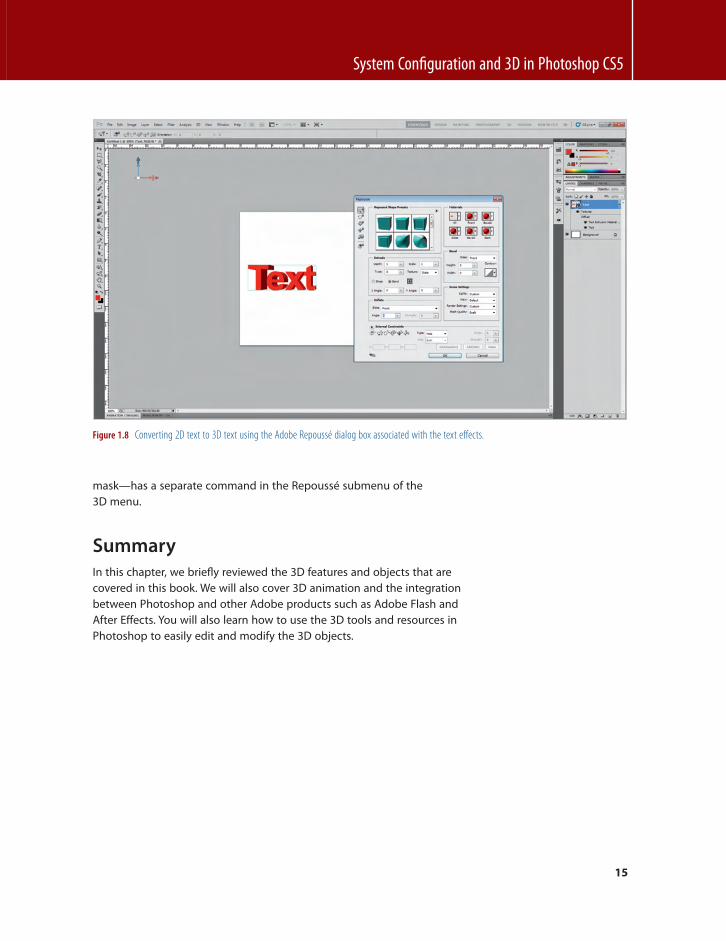
Adobe Repouss é Adobe Repouss é is an amazing new 3D tool in Photoshop CS5 that allows you to convert 2D objects such as text, paths, selections, and masks into 3D meshes with an extended ability to edit settings through the Repouss é dialog box. Each 2D object — such as the text layer, selection, path, and
System Confi guration and 3D in Photoshop CS5
15
Figure 1.8 Converting 2D text to 3D text using the Adobe Repouss é dialog box associated with the text eff ects.
mask — has a separate command in the Repouss é submenu of the 3D menu.
Summary In this chapter, we briefl y reviewed the 3D features and objects that are covered in this book. We will also cover 3D animation and the integration between Photoshop and other Adobe products such as Adobe Flash and After Eff ects. You will also learn how to use the 3D tools and resources in Photoshop to easily edit and modify the 3D objects.