Embed Size (px)
Citation preview

System Utility Visual AS/AP™
AS/AP Apparel Software Phone 770/993-4141 · Fax 770/993-2868
Email [email protected] · Web Site www.visualasap.com

DISCLAIMER Computer software programs cannot replace sound business judgment or make decisions for you. You, therefore, assume complete responsibility for any decisions made or actions taken based on information obtained using ASAP of Georgia, Inc. software programs and instructional materi-als. ASAP of Georgia, Inc. software and accompanying instructional material are sold "AS IS," without warranty as to their performance. You assume the entire risk as to quality and performance of the software programs and instructional material. You assume the responsibility of testing everything given to you by AS/AP entirely before relying on any data, processes or reports. ASAP of Georgia, Inc. makes no representations or warranties with respect to the contents or use of this manual, and specifically disclaims any express or implied warranties of merchantability or fitness for any particular purpose. Further, ASAP of Georgia, Inc. reserves the right to revise these publications and to make changes to their content, at any time, without obligation to notify any person or entity of such revisions or changes. ASAP of Georgia, Inc. makes no representations or warranties with respect to any AS/AP™ software, and specifically disclaims any express or implied warranties of merchantability or fitness for any particular purpose. ASAP of Georgia, Inc. reserves the right to make changes to any and all functions and/or specifications of AS/AP™ software, at any time, without obligation to notify any person or entity of such changes.
TRADEMARKS 3Com EtherLink, 3Com, and EtherLink Plus are trademarks of 3Com Corporation. Adobe Acrobat is a trademark of Adobe Systems, Inc. AS/AP is a trademark of ASAP of Georgia, Inc. dBase II, dBase III, dBase III Plus, dBase IV are trademarks of Borland. dBXL, NetworkerPlus, and Quicksilver are trademarks of WordTech Systems, Inc. MS-DOS, Windows, Word, Excel, Works, C++, Visual C, FoxBase+, FoxPro, and Visual FoxPro are trademarks of Microsoft, Inc. Gateway, G/Net, and G/Ethernet are trademarks of Gateway Communications, Inc. IBM, IBM PC Network, PC-DOS, and PS/2 are trademarks of International Business Machines. LaserJet, LaserJet Plus, and LaserJet Series II are trademarks of Hewlett-Packard. NEC is a trademark of NEC Corporation. NetWare, Advanced Netware, Novell ELS, Novell, QuattroPro, Word Perfect and Novell are trademarks of Novell, Inc. PKZIP is a trademark of PKWARE, Inc. Seagate is a trademark of Seagate Technology. UPS, UPS Worldship, UPS World Ease are registered trademarks and system marks of the United Parcel Service of America, Inc. West Wind Web Connection is a trademark of West Wind Technologies. WinZip is a trademark of WinZip Computing, Inc.
INTRODUCTION
AS/AP™ SYSTEM UTILITY
REV. 0512 3
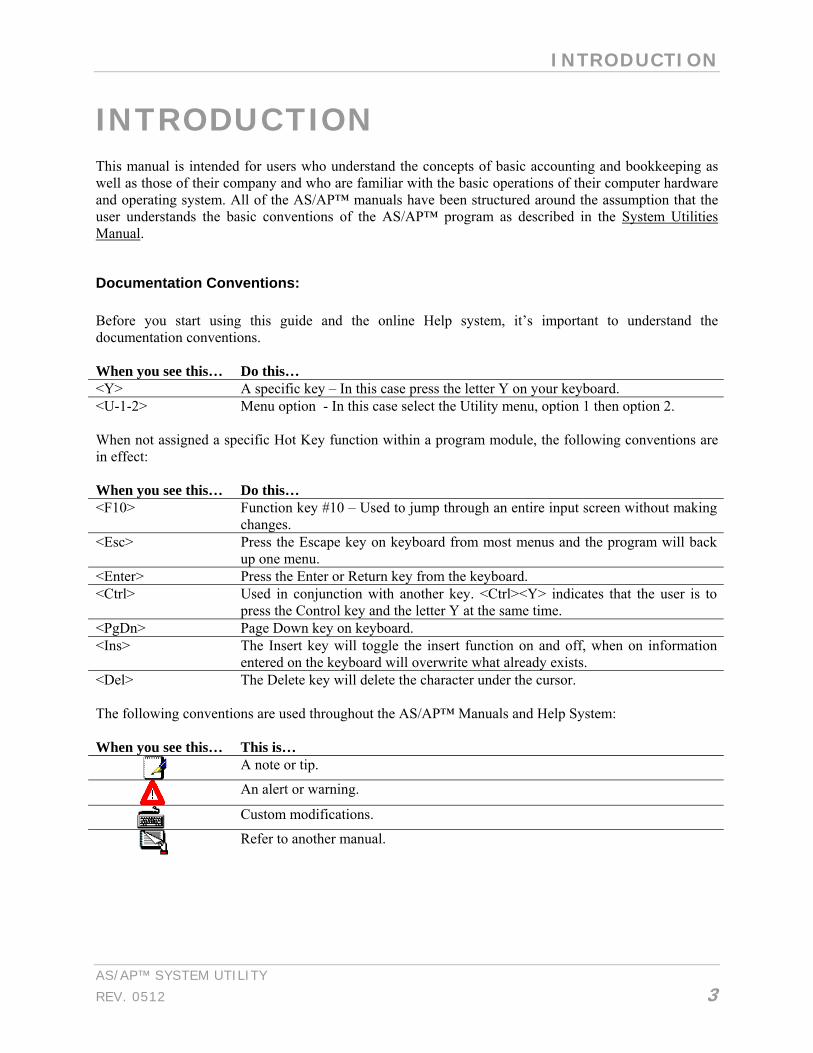
INTRODUCTION This manual is intended for users who understand the concepts of basic accounting and bookkeeping as well as those of their company and who are familiar with the basic operations of their computer hardware and operating system. All of the AS/AP™ manuals have been structured around the assumption that the user understands the basic conventions of the AS/AP™ program as described in the System Utilities Manual.
Documentation Conventions: Before you start using this guide and the online Help system, it’s important to understand the documentation conventions. When you see this… Do this… <Y> A specific key – In this case press the letter Y on your keyboard. <U-1-2> Menu option - In this case select the Utility menu, option 1 then option 2. When not assigned a specific Hot Key function within a program module, the following conventions are in effect: When you see this… Do this… <F10> Function key #10 – Used to jump through an entire input screen without making
changes. <Esc> Press the Escape key on keyboard from most menus and the program will back
up one menu. <Enter> Press the Enter or Return key from the keyboard. <Ctrl> Used in conjunction with another key. <Ctrl><Y> indicates that the user is to
press the Control key and the letter Y at the same time. <PgDn> Page Down key on keyboard. <Ins> The Insert key will toggle the insert function on and off, when on information
entered on the keyboard will overwrite what already exists. <Del> The Delete key will delete the character under the cursor. The following conventions are used throughout the AS/AP™ Manuals and Help System: When you see this… This is…
A note or tip.
An alert or warning.
Custom modifications.
Refer to another manual.

INTRODUCTION
AS/AP APPAREL SOFTWARE
4 REV. 0512
Printer Interface: The Printer Dialog Box that appears when the user approaches a printer-controlled function can be seen below:
From here you can change the printer name, the default font, font size, lines per page, the file name, as well as sending the data to the printer or the screen. The user can now easily select the font size for the report (or leave the default size which has been selected for the report). The page length can also be easily adjusted to avoid lengthy print jobs or cutting off reports halfway through the page (try different lengths to get the page printed the way your would like). If the user wishes to send the report to the screen they only need to press the Send to Screen button. The screen will then clear and allow the user to select the file location for the report. A default location/path is generally designated allowing the user to simply press the <Enter> key. The report will then be displayed allowing the user to view it without having to print. NOTE: THE PRINT SCREEN OF THE REPORT/FORM IS MERELY A PREVIEW OF WHAT THE USER WOULD RECEIVE FROM THE PRINTER AND THEREFORE IS FORMATTED BASED ON THE SETTINGS FOR THE WORKSTATIONS DEFAULT PRINTER. If a hardcopy of the report is needed the user will press Send to Printer from the Printer Dialog Box in order to print the report. In addition, you may also choose to cancel the report you are about to view in which case you would choose the Cancel Report button.

INTRODUCTION
AS/AP™ SYSTEM UTILITY
REV. 0512 5
Hot Links For your convenience, the most used programs in the AS/AP system have a direct route instead of going through the menus on the toolbar. This ‘Hot Link’ bar underneath the Main Toolbar on the Main AS/AP screen is shown below for your reference:
Each of these links will direct you to the corresponding program. THESE ‘HOT LINKS’ ARE NOT AVAILABLE WHEN THE PROGRAMS ARE OPENED THROUGH THE TOOLBAR.

INTRODUCTION
AS/AP APPAREL SOFTWARE
6 REV. 0512
TABLE OF CONTENTS
AS/AP™ SYSTEM UTILITY
REV. 0512 7
TABLE OF CONTENTS INTRODUCTION....................................................................................................................................... 3
TABLE OF CONTENTS ........................................................................................................................... 7
OVERVIEW.............................................................................................................................................. 11 Program and Manual Conventions..................................................................................................... 11 Master Menus...................................................................................................................................... 12 Context Sensitive Help System ............................................................................................................ 14 Company Name Change ..................................................................................................................... 14
SYSTEM UTILITY MENU ..................................................................................................................... 15
MASTER FILE MAINTENANCE.......................................................................................................... 17 GENERAL DATA ...................................................................................................................................... 17 LEDGER DEFAULTS ................................................................................................................................. 22 PAYROLL DEFAULTS ............................................................................................................................... 25 CONFIGURATION ..................................................................................................................................... 28 MULTI-SHIPPING ..................................................................................................................................... 30 EDI DEFAULTS........................................................................................................................................ 31 SUPER SCREEN ........................................................................................................................................ 32 ACTIVE USERS ........................................................................................................................................ 33 MESSAGES............................................................................................................................................... 34 ENVIRONMENT ........................................................................................................................................ 35
CHANGE OPERATING COMPANIES ................................................................................................ 37
REBUILD INDEX KEYS......................................................................................................................... 39
ADDITIONAL UTILITIES ..................................................................................................................... 41 EDIT COMPANY DEFAULTS ..................................................................................................................... 41
Configuration...................................................................................................................................... 41 Optional Programs ............................................................................................................................. 42 Payroll Setup....................................................................................................................................... 43 Import/Export...................................................................................................................................... 44 Payroll Fields...................................................................................................................................... 45 Inventory Fields .................................................................................................................................. 46 File Location....................................................................................................................................... 47 UPC/UPS ............................................................................................................................................ 48 Contact MGT ...................................................................................................................................... 49 Forecasting ......................................................................................................................................... 50 Control Numbers................................................................................................................................. 51 E-mail Message Text........................................................................................................................... 52
CHANGE WORKING DATE ....................................................................................................................... 53 ADMINISTRATIVE OPTIONS..................................................................................................................... 54
Load AS/AP ™ Data and Program Updates ...................................................................................... 54 File Recovery Process......................................................................................................................... 55 Advance Expiration Date .................................................................................................................... 55
TABLE OF CONTENTS
AS/AP APPAREL SOFTWARE
8 REV. 0512
Verify Module Date/Time.................................................................................................................... 55 Repair/Modify File Structure .............................................................................................................. 55 System Conversion Program............................................................................................................... 55 Interactive File Maintenance .............................................................................................................. 55 Recalculate Data Files........................................................................................................................ 56 Load New ZIP CODE Table ............................................................................................................... 57 Default Report Printer ........................................................................................................................ 57 Make New Files................................................................................................................................... 58 Error Report........................................................................................................................................ 58 Version Update Fix ............................................................................................................................. 58 User Logs - Reset ................................................................................................................................ 58 Pack and Reindex Operating Files ..................................................................................................... 59 Code For The Day .............................................................................................................................. 60 Fixed Damaged FOXPRO Structure................................................................................................... 61 Import Shared Data ............................................................................................................................ 61 View Report Structure......................................................................................................................... 61 Audit Trails ......................................................................................................................................... 62 Reset InProcess Flag .......................................................................................................................... 62
CHANGE DISPLAY COLORS ..................................................................................................................... 62 PRINTER INTERFACE FILE ....................................................................................................................... 62
Printer Initialization Sequence ........................................................................................................... 63 Install Printer Control Codes ............................................................................................................. 64 Install Character Pitch Codes............................................................................................................. 67 Select Printer ...................................................................................................................................... 68 Windows Printer Fonts ....................................................................................................................... 68
SECURITY SYSTEM .................................................................................................................................. 68 Adding a User ..................................................................................................................................... 68
CODE AND LOOKUP TABLES................................................................................................................... 71 Accounts Receivable ........................................................................................................................... 72 Inventory Control................................................................................................................................ 81 Accounts Payable................................................................................................................................ 99 Piece Work Payroll ........................................................................................................................... 100 System Files ...................................................................................................................................... 101
USER INTERFACE................................................................................................................................... 108 CLOSING DATES .................................................................................................................................... 109
QUERY MAKER SYSTEM .................................................................................................................. 111
APPENDIX A: DOZEN AS A UNIT OF MEASURE ......................................................................... 113
APPENDIX B: HOURS AS A UNIT OF MEASURE ......................................................................... 115
APPENDIX C: POUNDS AS UNIT OF MEASURE........................................................................... 117
APPENDIX D: FINANCIAL PERIODS VS. MONTHS..................................................................... 119
APPENDIX E: END-OF-MONTH PROCESSING............................................................................. 121 ACCOUNTS RECEIVABLE....................................................................................................................... 122 ACCOUNTS PAYABLE ............................................................................................................................ 122 GENERAL LEDGER................................................................................................................................. 123 GROSS-TO-NET PAYROLL..................................................................................................................... 123
TABLE OF CONTENTS
AS/AP™ SYSTEM UTILITY
REV. 0512 9
ERROR CORRECTION ............................................................................................................................. 123 APPENDIX F: VERSIONS [RELEASES] ........................................................................................... 125
APPENDIX G: AUTOMATIC USER LOGIN .................................................................................... 127
APPENDIX H: MULTIUSER LOCKOUTS........................................................................................ 129
APPENDIX I: THE AS/AP™ HELP SYSTEM................................................................................... 131 Annotate ............................................................................................................................................ 136 Font ................................................................................................................................................... 136 Keep Help On Topic.......................................................................................................................... 136 Use System Colors ............................................................................................................................ 137 File .................................................................................................................................................... 137 Edit.................................................................................................................................................... 138 Bookmark .......................................................................................................................................... 139 Options.............................................................................................................................................. 139 Help................................................................................................................................................... 140
APPENDIX J: SHUTTING DOWN YOUR SYSTEM........................................................................ 141 Stand Alone PC................................................................................................................................. 141 Novell Advanced Netware 286 2.x or greater [dedicated file server] .............................................. 141 Novell ELS Netware 286 2.x or greater ............................................................................................ 142
APPENDIX K: GLOSSARY ................................................................................................................. 143
APPENDIX L: PRINTER CONTROL................................................................................................. 147 Report Dialog Options:..................................................................................................................... 147 Generic Printer ................................................................................................................................. 148 Forms ................................................................................................................................................ 149 Printer Types and Limitations........................................................................................................... 149 Control Codes ................................................................................................................................... 150 Paper Alignment and Miscellaneous ................................................................................................ 150 Printer Redirection ........................................................................................................................... 152 Ejecting Pages .................................................................................................................................. 153 Setup of Printronix L1524 Printer .................................................................................................... 153 Setup Printer for Custom Forms....................................................................................................... 154
APPENDIX M: SYSTEM MESSAGE CODES ................................................................................... 155
APPENDIX N: END OF YEAR PROCESSING ................................................................................. 159
APPENDIX O: EMBEDDING NON-STANDARD SIZED FORMS................................................. 161 Windows 3.x and Higher................................................................................................................... 161 Procedures ........................................................................................................................................ 161 Windows............................................................................................................................................ 162 Procedure.......................................................................................................................................... 162
APPENDIX P: TEMPORARY FILES ................................................................................................. 165 Deleting Temporary Files ................................................................................................................. 166 ***** IMPORTANT NOTICE REGARDING TEMP FILES ***** ................................................. 167
TABLE OF CONTENTS
AS/AP APPAREL SOFTWARE
10 REV. 0512
APPENDIX Q: USER/SYSTEM CONFIGURATIONS ..................................................................... 169
APPENDIX R: SPECIAL CHARACTERS ......................................................................................... 171
APPENDIX S: EMAIL ALERTS.......................................................................................................... 173
APPENDIX T: UPS WORLDSHIP®.................................................................................................... 175 WORLDSHIP® INTEGRATION SUMMARY.............................................................................................. 175 ASAP IMPORT AND EXPORT TABLE SCHEMAS AND USAGE INFORMATION ......................................... 175
AS/AP → UPS Foxpro Data Table Definition (UPSEXP)................................................................ 175 UPS → AS/AP Foxpro Data Table Definition (UPSIMP)................................................................ 176
NEW INSTALLATION AND UPS ACTIVATION ........................................................................................ 177 Saving and Order for export to UPS WorldShip® from within AS/AP............................................. 177 Running ASAPUPS.EXE ................................................................................................................... 177
UPS WEB TOOLS INTERFACE ............................................................................................................... 178 UPS WORLD EASE INTERFACE ............................................................................................................. 181 WORLD EASE AND AS/AP .................................................................................................................... 182
AS/AP → UPS FoxPro Data Definition (UPSEXP.dbf) ...................................................................182 AS/AP → UPS FoxPro Data Definition (UPSDETL.dbf)................................................................. 183
APPENDIX U: ERROR REPORTING ................................................................................................ 185
APPENDIX V: PW SCANNER RESET AND LOADING PROCESS.............................................. 187 ADDITIONAL BASES .............................................................................................................................. 188 ADDITIONAL SCANNERS ....................................................................................................................... 188
APPENDIX W: SETUP ADDITIONAL COMPANY FOR PAST YEAR INFO. ............................ 189
APPENDIX X: SALES TAX BY ZIP CODE....................................................................................... 191
APPENDIX Y: WEB INTERFACE...................................................................................................... 193 AS/AP SOFTWARE ................................................................................................................................ 193 WEB FILES AND DATA CHANGES......................................................................................................... 193
APPENDIX Z: COPYING TRIM SHEETS......................................................................................... 195
APPENDIX AA: CONTRACT PRICING............................................................................................ 199
APPENDIX BB: CREATING CUSTOM FORM LENGTH IN WINDOWS 98 .............................. 201
APPENDIX CC: SQL SERVER............................................................................................................ 203
APPENDIX DD: COMMITTED RAW MATERIAL ......................................................................... 205 GENERAL SPECIFICATIONS ........................................................................................................... 205 TRIM SHEETS..................................................................................................................................... 205 SALES ORDER PROCESSING .......................................................................................................... 205 CUT ORDER PROCESSING – MANUAL CUT ORDER CREATION............................................. 205
INDEX...................................................................................................................................................... 208

OVERVIEW
AS/AP™ SYSTEM UTILITY
REV. 0512 11
OVERVIEW Once AS/AP™ is loaded the following copyright notice will appear:
Visual AS/AP™
Copyright 1983 - 2007 - ASAP of Georgia, Inc. (AOG)
This software has been provided pursuant to a License Agreement containing restrictions on its use. The software contains valuable trade secrets and proprietary information of AOG and is protected by federal copyright law. This Software may not be copied or distributed in any form or medium,
disclosed to third parties, or used in any manner not provided for in said License Agreement. Applicable License Agreement is identified with the same release number indicated above.
Use of this program without consenting to the terms of the License Agreement for this release is a
violation of that Agreement and will VOID any applicable Warranty provided in said License Agreement.
ASAP of Georgia, Inc.
1000 Abernathy Rd NE Suite 184
Atlanta, GA 30328 (770) 993-4141 (800) 272-7838
By answering with an <A>gree, you are agreeing to the terms of the license agreement. If you have misplaced your copy of the agreement, contact ASAP of Georgia for a replacement. Also please note that the License Agreements are modified from time to time, and are distributed with new releases of the AS/AP™ program. Once you enter an <A>, the screen will clear and permit you to change the working date. It defaults to the current date.
Program and Manual Conventions
Throughout the AS/AP™ program and its documentation, we use particular symbols and terminologies. To computer people these are known as conventions.
Some of our conventions follow:
• When we are referring to a specific key on the keyboard that we want the user to press, it will be
identified as <A> for the letter "A" key.
• The symbol <Enter> is used for the "Return" or "Enter" key or "<─┘". <Enter> stands for carriage return, which is a carry over from the old typewriter days. We chose <Enter> because
OVERVIEW
AS/AP APPAREL SOFTWARE
12 REV. 0512
every brand and model of computer uses a different symbol on the particular key. Since most newer keyboards have the word Enter, most newer sections of the manuals and the programs are referring to this key as <Enter>.
• Another commonly referred to set of keys are known as the Function Keys and are identified as
<F1> for the key marked "F1", which is one of the 10 or 12 function keys. We use <F7> and <F8> for look-ups throughout our system.
• <Ctrl> refers to the "Control" key, which is used in the same manner as the <Shift> key, in
combination with another key. Neither the <Ctrl> nor <Shift> keys send a signal by themselves. Either of these keys must be used in conjunction with another alphanumeric key, in order to send a signal to the program. You will find a further discussion of the <Ctrl> key in the glossary.
• It is sometimes difficult in the manuals to differentiate between the number 0 (zero) and the upper
case letter O (oh). If you study these examples it may be easier. If you have a problem later, just compare it to the above example.
• When asking the operator to enter a date, the manual will represent the prompt as: mm/dd/yy.
This refers to the American method of date entry where the month is first, followed by the day and the year. Therefore, February 5, 1999 is entered as 02/05/99.
HERE ARE TWO RULES YOU NEVER WANT TO BREAK: NEVER USE CELERON PROCESSORS AND NEVER USE WINDOWS ME
Master Menus The Utility Menu is the opening menu of the AS/AP™ Accounting System. The Utility Menu is one of the seven (7) Master Menus of the System. In addition to allowing you to perform many Utility Functions, this, and ALL Master Menus, provides access to the other Installed Operating Modules of the AS/AP™ Accounting System. If you select an Option or Module that is not activated and/or available on your version of the system, you will see one of the following messages:

OVERVIEW
AS/AP™ SYSTEM UTILITY
REV. 0512 13
Pressing <OK> will return you to the menu or program that you were originally on. Although these messages indicate that the program is not currently activated, there can be many reasons for this. Typically, the message indicates a selection that we have left a position for on a particular menu, but have not yet developed or is not active on your system. As a matter of fact, we may never develop the particular selection, and can easily remove the selection from future menus. A second reason for the message is that the selection is not compatible with your data files. If you are working in a standard apparel company and select one of the Screen Printer's selections from the Inventory Menu, you will receive one of the above messages. There are some features that you will not have access to at all. It will be up to your software consultant or ASAP of Georgia to pre-set your systems for these features. Some of these features can be changed after you are up and running, but some cannot. It is most important to discuss any features you think are necessary for your company to operate, prior to the on-line operation of the system. You can make your selection from a Master Menu by moving the light bar up and down with the <Up Arrow> and <Down Arrow> keys. If your <Num Lock> is activated, you will have to press the <Shift> key at the same time that you press the <Up Arrow> or <Down Arrow>. Alternately, you can make your selection by pressing the number that corresponds to the Number of the Function you wish to perform. A Master Menu, like the Utility Menu, also permits you to move to an adjacent Master Menu (e.g. Ledger Menu) by using the <Left Arrow> and/or <Right Arrow> keys. When you exit AS/AP™ through the Utility menu the following prompt will appear:
On a few monochrome monitors, we have noticed that the light bar is not discernible. If you press <Y>es or another <Esc> you will exit the program, and be returned to the Disk Menu. Alternately, you can return to the program menus by pressing <N>o. If you are on a submenu, pressing <Esc> will return you to the previous menu level.

OVERVIEW
AS/AP APPAREL SOFTWARE
14 REV. 0512
THE SYMBOLS ‘ “ ! SHOULD NEVER BE USED IN CODES (CUSTOMER CODE, VENDOR CODE, ORDER NUMBER, ETC.) ALTHOUGH WE DON'T BLOCK THEIR USE IN ORDER INSTANCES, THE QUOTES SHOULD NEVER BE USED IN ANY DATA SITUATION.
Context Sensitive Help System AS/AP™ has an extensive, user expandable context sensitive help system. This help system has several unique, powerful features. Pressing <F1> at any time activates the help system. When <F1> is pressed, the system checks the field that the cursor is resting in. If there is a help topic available for the field the cursor is in, the system displays the help information associated with this field in a window in the left corner of the screen. If help is not available for the field, the Help System opens a window of Help Topics. By moving the cursor to the desired topic and pressing <Enter>, the operator can move to any topic available. There is even a menu selection that permits the company to add their own help topics and further define ours. This Help System is rapidly becoming an on-line manual.
Company Name Change Users requesting a company name change are asked to contact technical support for the code to make such a change. This is a security measure and requires that you let Technical Support know the EXACT name that you wish to change to.

SYSTEM UTILITY MENU
AS/AP™ SYSTEM UTILITY
REV. 0512 15
SYSTEM UTILITY MENU The System Utility Menu is the menu that the system will always begin with. IT IS VERY IMPORTANT TO RUN AS/AP FIRST ALLOWING MEMORY TO BE DISTRIBUTED TO THE PROGRAM PRIOR TO RUNNING OTHER APPLICATIONS, NAMELY EXCEL AND INTERNET EXPLORER. IF INTERNET EXPLORER IS RUNNING AND AS/AP IS OPENED A WARNING WILL APPEAR. THIS IS NOT AN ERROR MESSAGE, IT IS MERELY A WARNING ALLOWING THE USER TO PROCEED AT HIS/HER OWN RISK. Because of the unique design of the AS/AP™ Menu System, you will only have to return to this menu if you need to use these Utilities. Otherwise, you will be able to move between main modules without returning to this menu:
As a standard function, the system will display the nine module names at the top of the screen showing the description of the option selected. At the bottom of the screen a box will show the company name and work date. This serves two purposes. First, you can use the option description to look up additional instructions and information in the manuals. Second, when phoning in for technical support, you can converse more intelligently with the support technicians. If you are running in Windows you will be given the option to 'Quit to Windows'. Otherwise the 'Quit to DOS' or 'Quit to FoxPro' option will appear.

SYSTEM UTILITY MENU
AS/AP APPAREL SOFTWARE
16 REV. 0512

MASTER FILE MAINTENENCE
AS/AP™ SYSTEM UTILITY
REV. 0512 17
MASTER FILE MAINTENANCE The Company Master File stores many of the default values used by the various modules. It is VERY important to make sure these fields are set up with the correct information necessary to run your system the way you want to. When you select function '1', the screen will clear, the following message will then be displayed:
General Data After pressing <OK> you will be presented with a full screen of fields. This first screen of the Company Master File contains 6 field groups (see Figure 1.1). The new Company Master file is the first complete redesign of this group of screens in almost 14 years. Although we have made continuous modifications, this new version afforded us the opportunity to complete rethink this function and to regroup options into more logical clusters. We have also tried to provide insight into the groups with descriptive tab titles.

MASTER FILE MAINTENANCE
AS/AP APPAREL SOFTWARE
18 REV. 0512
Figure 1.1: Master File - General Data Let’s begin with the basic layout of the screen that is similar to that of other screens found throughout the Visual AS/AP™ System. The bar at the bottom of the screen in the center is duplicated below for quick reference (see Figure 1.2). To begin with, if the button is shaded and lacking color it is not currently applicable to the task you are performing; only colored buttons can be selected.
Figure 1.2: Toolbar
Here is an overview of all of the buttons: - For adding new records -For editing existing records -For jumping to the first record -For jumping to the previous record -For jumping to the next record
MASTER FILE MAINTENENCE
AS/AP™ SYSTEM UTILITY
REV. 0512 19
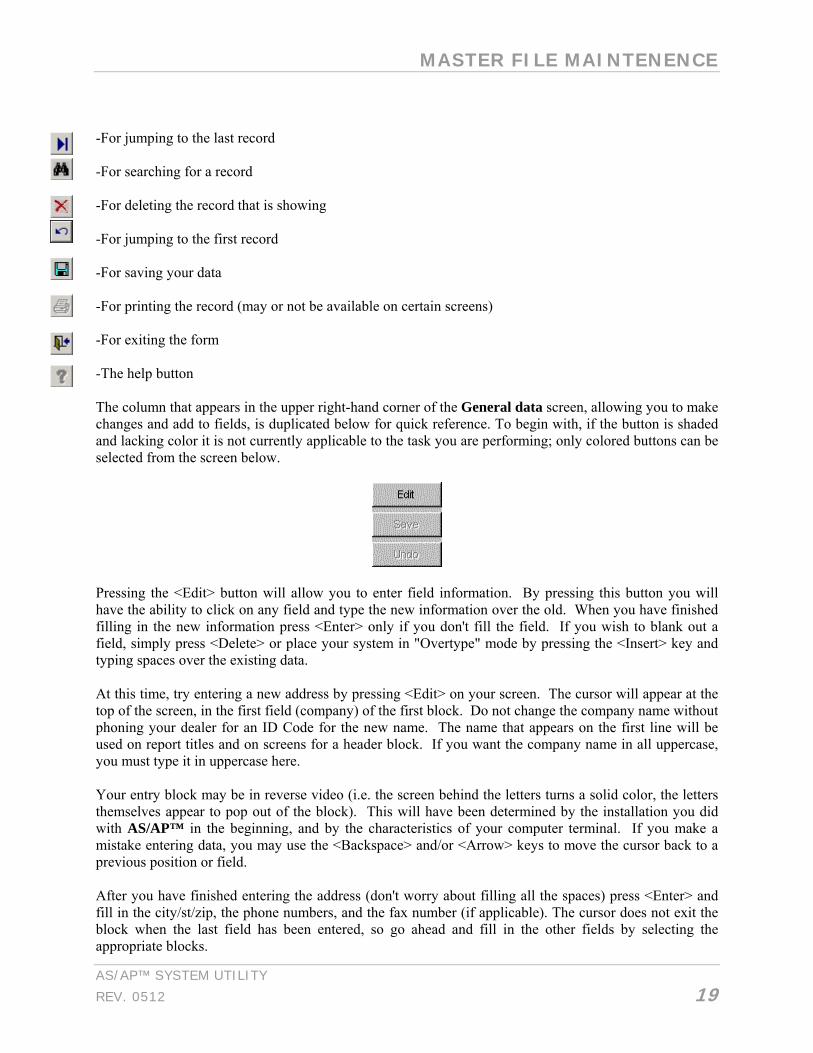
-For jumping to the last record -For searching for a record -For deleting the record that is showing -For jumping to the first record -For saving your data -For printing the record (may or not be available on certain screens) -For exiting the form -The help button The column that appears in the upper right-hand corner of the General data screen, allowing you to make changes and add to fields, is duplicated below for quick reference. To begin with, if the button is shaded and lacking color it is not currently applicable to the task you are performing; only colored buttons can be selected from the screen below.
Pressing the <Edit> button will allow you to enter field information. By pressing this button you will have the ability to click on any field and type the new information over the old. When you have finished filling in the new information press <Enter> only if you don't fill the field. If you wish to blank out a field, simply press <Delete> or place your system in "Overtype" mode by pressing the <Insert> key and typing spaces over the existing data. At this time, try entering a new address by pressing <Edit> on your screen. The cursor will appear at the top of the screen, in the first field (company) of the first block. Do not change the company name without phoning your dealer for an ID Code for the new name. The name that appears on the first line will be used on report titles and on screens for a header block. If you want the company name in all uppercase, you must type it in uppercase here. Your entry block may be in reverse video (i.e. the screen behind the letters turns a solid color, the letters themselves appear to pop out of the block). This will have been determined by the installation you did with AS/AP™ in the beginning, and by the characteristics of your computer terminal. If you make a mistake entering data, you may use the <Backspace> and/or <Arrow> keys to move the cursor back to a previous position or field. After you have finished entering the address (don't worry about filling all the spaces) press <Enter> and fill in the city/st/zip, the phone numbers, and the fax number (if applicable). The cursor does not exit the block when the last field has been entered, so go ahead and fill in the other fields by selecting the appropriate blocks.
MASTER FILE MAINTENANCE
AS/AP APPAREL SOFTWARE
20 REV. 0512
Listed below are the definitions and/or brief descriptions for the fields found under the General Data tab:
The entire Company block is used to enter the name, the address, the phone number and the fax number of your company. The address lines can be used for the actual street address, a post office box or the balance of the shipping address. The address entered here is used as your return address for Invoices, Statements, Picking Slips and Purchase Orders. WHEN POPULATING NAME & ADDRESS FIELDS LEAVING BLANKS MAY CAUSE UNEXPECTED RESULTS (IE: SPACES BEFORE NAMES, FILLING IN 1ST AND 3RD ADDRESS LINES...) PLEASE NOTE THAT CHANGING THE COMPANY NAME IS A SECURITY ISSUE AND CANNOT ONLY BE HANDLED BY CONTACTING TECH SUPPORT WITH THE EXACT NAME, INCLUDING PUNCTUATION. When running Modules in the AS/AP™ program, you have four possible choices. You can run <L>edger, <$> Payroll, <P>ayables and <S>ales, Receivables, Inventory etc. You must tell the program which one(s) of the four modules you are using. If you are using ledger, enter the letter <L>. If you are using payroll, enter the <$> sign. If you are using payables, enter the letter <P>. If you are using Sales, Receivables, and Inventory, enter the letter <S>. The order of these codes does not matter. If you are initially using only certain modules, and later add an additional module, you must return to this field, and add the appropriate code. The Interest Rate percentage is titled the Interest % under the General Data tab. The AS/AP™ system automatically applies a service charge to customers whose invoices are more than 30 days overdue. The program adds up all those overdue invoices for each customer, and then multiplies that total by a Service Charge percentage. This is where you enter the Service Charge rate to be applied to those customers that are past due. If you wish to charge 1 1/2% it would be entered as '1.5'. If you want to charge 2%, then that would be entered as a '2'. Those service charges, by the way, are added to the invoice file as invoices. Each one is given a separate number beginning with the letters 'SC'. In the field, Finance Chg $ the finance charge routine is run. If the finance charge is less than the dollar amount listed here, this amount will be used instead of the percent calculation. You can enter the next service charge number in the Next SC # field. When the finance charge routine is run, the system numbers each service charge applied, just as it would if the customer had been invoiced. In essence, you are invoicing the customer for the service charge. The next section that we come across on the General Data screen is the Department field. This field is either <T>rue or <F>alse. If you want Departments active for your GL Account numbers, enter <T>rue. If you enter <F>alse, you will not be prompted for Departments (although internally, the program will make all account numbers have a department of '000'). The Multiple Companies field indicates whether you ship under more than one name and address. If you reply <T>rue, the Multi-Shipping tab will be available (once you leave the AS/AP™ Accounting System and then return) for additional company names and addresses as well as additional screens throughout the system that will request which company you are billing from. If you reply <F>alse, the system will NOT activate the Multi-Shipping tab and you will never be bothered by the further questions since the system assumes you are billing from the master or parent company.

MASTER FILE MAINTENENCE
AS/AP™ SYSTEM UTILITY
REV. 0512 21
The following Account Periods section, under the General Data tab, controls the Accounting periods used by the system. These periods should be incremented by closing each of the Accounting areas through the appropriate Monthend Closing functions. The operator is ONLY given access in order to setup a new system, or adjust a system that has crashed.
YOU SHOULD NOT MAKE IT A PRACTICE TO INCREMENT THE ACCOUNTING PERIODS THROUGH THESE OPTIONS IN THE COMPANY MASTER FILE. MOVING THE PERIODS THROUGH THIS SCREEN WITHOUT RUNNING THE MONTHEND CLOSING FUNCTIONS WILL BYPASS THE RUNNING OF NUMEROUS MAINTENANCE PROGRAMS THAT'S ARE PART OF THE MONTHEND SELECTIONS. Enter a number between 1 and 12 in the Ledger field, but not exceeding the number of periods per year (above). When any transaction is posted to the ledger, or when the end of month is run, this number is picked up and placed with all the records being filed in the archives. This field is automatically updated during the End-of-Month procedure. If you should ever need to re-construct the activity of a particular accounting period, or transaction, all you need to know is what period it occurred in, and you can use the power of AS/AP™ to recall the information you need. If you have the ledger activated, one of the options available within AS/AP™, to recall all transactions, is the 'All Journals Trial Balance' report. Also, you can use FoxPro, Alpha IV or dBase IV to look directly into various archive files and print reports. If you are not an xBASE programmer or feel uncertain about how to proceed, seek help from your consultant or computer dealer. It is very easy to permanently damage your files, so DO NOT use an Xbase language unless you understand the programs. Also, have complete back-up copies of the data files. The next field entitled Payables is the period for the Accounts Payable posting. The Accounts Payable Period can be on a period greater than the GL Period (above), but not less. Like the AP Period above, the Accounts Receivable Period, called the Receivables, can be set for a greater period than the GL, but not less. This enables sales to continue posting into the current period even though the accounting department is still working on a previous GL period. The Period for the Gross to Net payroll posting is the next field entitled Payroll. The PY period can be greater than the GL, but not less than the GL. The Qtr (Quarter) field is ONLY used by the Piecework Payroll System to record the current payroll quarter. Wk (week) is the next field ONLY used by the Piecework Payroll System to record the week of the year for the current payroll. Listed below are the fields that fall under the Corp. I.D. section of the General Data tab: Enter your Employer's Federal Identification Number in the next field entitled FED. ID. Enter your Employer's State Identification Number in the following field, STATE ID. The FOB field provides the default FOB for Order and Invoice Processing. Next, you can enter your UPS Shipper ID into the UPS field. This is used for COD Tags and the UPS Manifest System (Refer to the Sales Manual).

MASTER FILE MAINTENANCE
AS/AP APPAREL SOFTWARE
22 REV. 0512
In the WPL field, your WPL or RN number for apparel care labels is entered. If you don't know what WPL and RN numbers are, you don't need them. The Duns field is used to fill in your Duns number for printing on your Invoices, if active for your invoice type (see Figure 1.5).
Ledger Defaults After you have finished entering all of the necessary information into the General Data screen you can press the next tab called the Ledger Defaults tab. A screen similar to the one shown below should appear (see Figure 1.3):
Figure 1.3: Master File - Ledger Defaults Beginning with Visual AS/AP™, the data entry routine checks to see if the ledger accounts you are entering are valid accounts. Therefore, it is important to setup your chart of accounts (Refer to the General Ledger Manual) BEFORE changing this screen. Note that during this operation the "filling" routine is NOT activated. If you worked with the chart of accounts you will know that an account number is made up of 4 digits, and that any digits, which are left unfilled, will be filled with 0 (zero). For example, if you wanted account 1000, all you have to do is enter

MASTER FILE MAINTENENCE
AS/AP™ SYSTEM UTILITY
REV. 0512 23
the 1 and the program will fill in the remaining three zeros. In the Company Maintenance program, filling is not active. If you want to enter account 1000, you must type in ALL the digits. Each entry is interactively tested. Therefore, you can enter an account number into one of the fields under the Ledger Defaults tab and then choose the Search Function button (shown left). This will alert you to whether or not the account number you entered is invalid.
If an invalid Account Number is entered, when you push the Search Function button the following window will appear allowing the user to lookup the Account number numerically and/or by description:
It is important to note that the system only displays valid type '2' accounts, since they are the only accounts that can be used at this point.
Now, after clicking on the Ledger Defaults tab, the window for the Ledger Defaults will appear (see Figure 1.3). This window will contain 10 different field groups. The following are brief descriptions of each block and the fields that are contained within each of them. The first field group that appears is called the GL ACCTS field. This is where you will enter your General Ledger Account numbers for the various GL Accounts described below. If you do not have the AS/AP™ Ledger activated, these numbers will be used by various parts of the program to make posting to your manual ledger easier. If you are not sure how to go about setting up these account numbers, consult your accountant. These must be valid type '2' General Ledger Accounts (Refer to the General Ledger Manual). The Cash In Bank field is used to enter the GL Account number for your cash account. Next, the Receivables field is used for entering the GL Account number for your Accounts Receivable account. After that, you can enter the GL Account number for your Accounts Receivable Discount account into the AR Discount field.

MASTER FILE MAINTENANCE
AS/AP APPAREL SOFTWARE
24 REV. 0512
The Net Sales field provides space to enter the GL Account number for your Income from Sales account. This is the Net Sales Account. That means the sales total before shipping, tax, insurance, etc. is added. In the Freight Out field enter the GL Account number for your Shipping account. When the sales invoice totals are posted, the 'shipping' total will be posted to this account number. The Acct Payable field allows you to enter the GL Account number for your Accounts Payable account. Enter the GL Account number for your Accounts Payable Discount account into the AP Discount field. The Inventory Asset field is used to enter the GL Account number of your Inventory (Asset) account. Next, in the Cost Of Inventory field, enter the GL Account number of your Cost of Goods Sold account. The Inventory and Cost of Inventory fields are necessary for the automatic transfer following billing. IF YOUR INCOME STATEMENTS ARE USING THE 'GROSS PROFIT' FIELD AS THE 100% RATIO, THEN YOU HAVE THE BEGINNING ACCOUNT NUMBER FOR THE EXPENSES FIELD INCORRECT. IN ORDER TO HAVE THE 100% RATIO BASED ON THE 'INCOME' FIELD, YOU NEED TO SET THE BEGINNING ACCOUNT NUMBER FOR THE EXPENSES FIELD TO THE FIRST ACCOUNT NUMBER OF YOUR 'COST OF GOODS SOLD' ACCOUNT NUMBERING. Lastly, the Freight In field is provided for you to enter the GL Account number for your incoming Shipping account. When the sales invoice totals are posted, the ‘shipping’ total will be posted to this account number. The Split Receivables and Credit Card fields are designed for the use in custom applications and are not applicable to general systems. These next GL Default accounts under the next field group called Starting Accounts are important to the proper working of the financial statements (reports) part of AS/AP™. The chart of accounts is viewed as beginning with Assets (the lowest numbers), and rising towards Expenses (the highest numbers). These default accounts are the boundaries between the three groups - Capital & Liabilities, Income and Expenses. Thus, these default accounts must have real, accurate account numbers. For Capital and Liability, enter the lowest existing account number in the Capital and Liability group. Similarly, enter the beginning Income account and the beginning Expense Account. You may wish to use the 'master' chart of Accounts to help determine the proper entries. The two fields under the GL Earnings field group are your earnings accounts, and you should enter the Current and the Retained account numbers. If you are not sure what these are, consult your accountant. Please note that Current Earnings MUST be the LAST working (type 2) account in the Capital and Liabilities Group, or the Financial statements will not work properly. The Commission Accounts block contain fields that are only active if the flag for the commission processing system is turned on. There are two fields under the Deposits field group. These fields, called the Receivables and Payables are used by the deposit handling system, if active.

MASTER FILE MAINTENENCE
AS/AP™ SYSTEM UTILITY
REV. 0512 25
The Factored Receivables group field is only available if the Factored Receivables feature is active on your system. The A/R account is used during Sales updates and Cash Receipts in the same manner as the standard A/R Account. The next field, called the Comm. is used to calculate the commissions for the Factor. The % is the following field, where percentages are used to calculate the commissions for the Factor. In the MIN field if the commission calculated is less than the dollar amount listed here, this amount will be used instead of the percent calculation. At the present time, the Insurance field group is not active In the Sales Tax Accounts field enter your State and Federal sales tax rate into the Rate % field and the account number into the Sales Tax field. This should be entered as a %, not as a decimal (4% is 4.00, not .0400). You do not need to enter the decimal if you have a whole number tax % (e.g. 6.00% could be entered as just 6, and the program will supply the '. 00’). The GTS Tax, although not active at the current time, is the Canadian Value Added Tax. System Flag 255-Y activates the GST Tax System, which causes the computer to add the GST tax to each invoice produced. The principle is that you pay GST on all purchases and charge GST on all sales. The company then remits to the government the difference between what was collected and what was paid out in GST. Sounds simple enough. The Next Close field is for entering the next close date for the General Ledger. To know whether to post certain transactions, the program needs to know the exact date of your next period closing. When postings from the temporary journals are made to the ledger, the transaction date will be compared with this date and if it is less than this date, the posting will occur. During the end-of-month routine, you will be shown the period and ending date for the month closing. The next closing date will automatically be pulled from the table you have preset. The Closing Dates are maintained in a Table found under Additional Utilities in the Utility Menu and under General Ledger Maintenance in the General Ledger Menu109 Start of Year - You should make sure that the start of the current fiscal year has been entered into this field. Several programs use this field to determine which data to report on when giving Year to Date totals.
Payroll Defaults Now, lets move on to the next tab. If you click on the tab entitled Payroll Defaults you will activate a screen similar to the one shown below (see Figure 1.4):

MASTER FILE MAINTENANCE
AS/AP APPAREL SOFTWARE
26 REV. 0512
Figure 1.4: Master File – Payroll Defaults
There are four different field groups contained in the Payroll Defaults window. I will describe and define the various fields below: The first field group is the Payroll GL Accts. Enter your General Ledger Account numbers for the various Payroll GL Accounts described below. If you do not have the AS/AP™ Ledger activated, these numbers will be used by various parts of the program to make posting to your manual ledger easier. If you are not sure how to go about setting up these account numbers, consult your accountant. These must be valid type '2' General Ledger Accounts (Refer to the General Ledger Manual). Keep in mind that the system verifies the validity; therefore, the GL Accounts should be setup before this screen is modified. Furthermore, even though you may not want to use all of the accounts, you MUST make sure that each field below has a valid account number. In the Federal Fica field enter the GL Account number for your Federal FICA account.
The Federal With field contains the GL Account number for your Federal Withholding account. Similarly, the State With field contains the GL Account number for your State Withholding account. Enter the GL Account number for your Insurance account into the Insurance field. In the Garnishment field, enter the GL Account number for your Garnishment account. This is used if you need to place a garnish on an employee's wages.

MASTER FILE MAINTENENCE
AS/AP™ SYSTEM UTILITY
REV. 0512 27
In the Misc 1/ Line 1 field, enter the GL Account number for your first Miscellaneous account. This can be used for a variety of items. In the Misc 2 field, enter the GL Account number for your second Miscellaneous account. This also can be used for a variety of items. In the Misc 3 field, enter the GL Account number for your first Miscellaneous account. This can be used for a variety of items. In the Misc 4 field, enter the GL Account number for your second Miscellaneous account. This also can be used for a variety of items. In the Misc 5 field, enter the GL Account number for your first Miscellaneous account. This can be used for a variety of items. The next field is Local Tax. This is where you can enter the GL Account number for your Local Tax account. Some states do not have locality taxes. The 2nd Local Tax field accommodates clients whose employees are eligible for more than one local tax. The Net Pay is for entering the GL Account number for your Net Pay account. This could be the same as your cash-in-bank account or you may keep a separate account from which to pay your payroll from. In the field entitled Employee Fica % one can enter the employee's percentage here. The employer's and employee's FICA percentage are presently the same. However, the system has the ability for them to be different. Enter the number as a decimal (e.g. six and one-half percent would be entered as 6.50, while six percent would be entered as 6.00). Similarly, the Employee Medicare % field can be used to enter the employee's percentage here. The employer and employee's MEDICARE percentage are presently the same. However, the system has the ability for them to be different. Enter the number as a decimal (e.g. one and one-half percent would be entered as 1.50, while one percent would be entered as 1.00). Enter the employer's percentage into the Company Fica % field.
Next enter the employer’s percentage into the Company Medicare % field. The Maximum Fica is the dollar amount, which is the upper limit on which FICA is figured. After an employee reaches this maximum, they no longer have to pay FICA. The Maximum Medicare is the dollar amount, which is the upper limit on which MEDICARE is figured. After an employee reaches this maximum, they no longer have to pay MEDICARE. The next field called the W-2 PRINT field is a <T>rue or <F>alse Logical field. If your firm uses preprinted W-2 forms with your company name, address, etc. already filled in, then answer <F>alse to this question. If you want the computer to print your company information on the W-2 forms, then answer <T>rue. The Overtime field is the default rate used to calculate overtime pay for employees. Time and one-half would be entered as 1.50
MASTER FILE MAINTENANCE
AS/AP APPAREL SOFTWARE
28 REV. 0512
The State Cr field (meaning state credit) is the credit, which the Federal government allows against state unemployment taxes on the 940 (Currently 2.7 % for most states). The Rates field is used for Piece Work Payroll (refer to the Piece Work Payroll manual for a description).
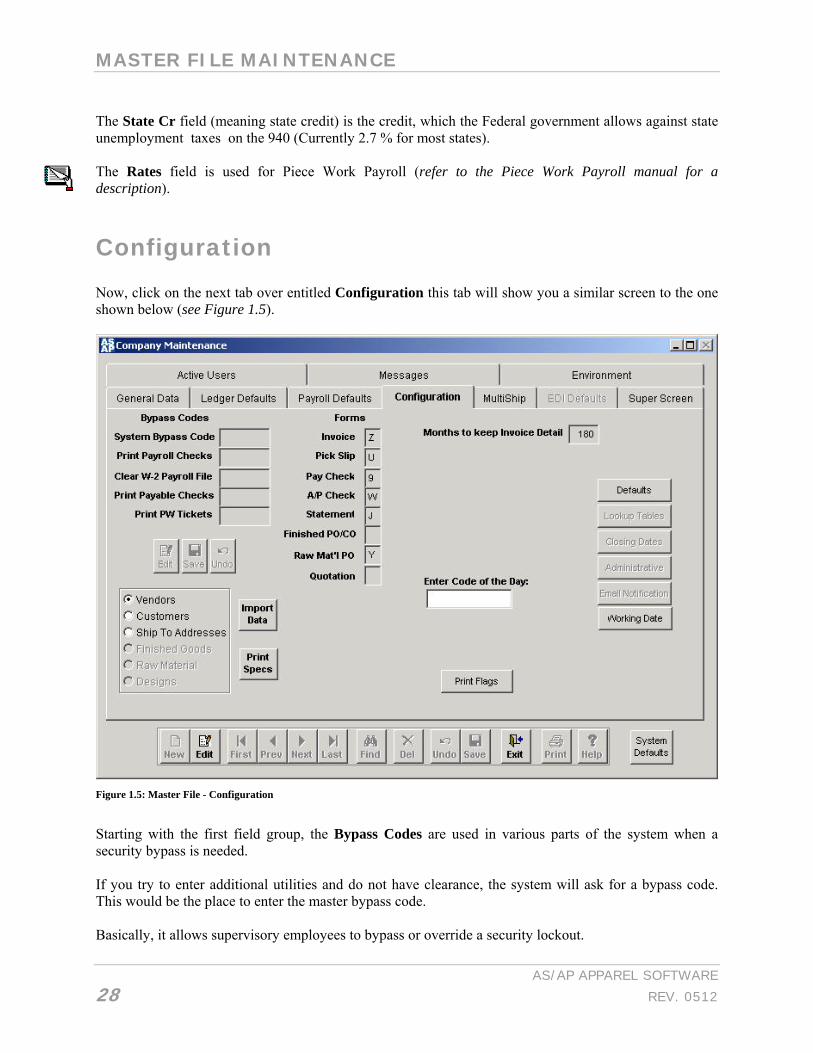
Configuration Now, click on the next tab over entitled Configuration this tab will show you a similar screen to the one shown below (see Figure 1.5).
Figure 1.5: Master File - Configuration Starting with the first field group, the Bypass Codes are used in various parts of the system when a security bypass is needed. If you try to enter additional utilities and do not have clearance, the system will ask for a bypass code. This would be the place to enter the master bypass code. Basically, it allows supervisory employees to bypass or override a security lockout.

MASTER FILE MAINTENENCE
AS/AP™ SYSTEM UTILITY
REV. 0512 29
As for the rest of the codes in the field, all of the codes can be the same or they can be different. This all depends on whether you want the person with access to the payroll checks to also have access to the W2 payroll files or the system bypass code and so on. This is the more simply the Password Screen which controls various functions within the ASAP system. You are able to edit these to keep unauthorized users out of certain secure portions of the system, such as check printing. These passwords are Case Sensitive. That means that 'Money' is NOT THE SAME AS 'money' or 'MONEY'. ONCE YOU EDIT THESE PASSWORDS, IT IS YOUR RESPONSIBILITY TO REMEMBER WHAT THEY ARE CHANGED TO. The next fields, the forms and address fields list some of the different types of forms that are used. AS/AP™ has the capacity to print wide variety of forms. These fields, along with the address column are used to select the format for your forms that you are going to use. The Forms field shows the form type currently set for Invoices, Pick Slips, Pay Checks, A/P Checks, Statements, P.O.'s and Quotations. Consult your software dealer if you require a change to these fields for your custom forms. The Address field indicates whether or not the system is expected to print your company’s' return address on the Invoices, Pick Slips, Pay Checks, A/P Checks Statements, P.O.'s and Quotations, if applicable.
Following that, you will see a prompt at the bottom of the screen that should look like this:
Today’s Code allows you to gain access to system flags as well as form types. You may obtain the code by contacting your support technician.
After entering the code, the following prompt will appear on the screen:
Enter the flag number in the ‘Flag’ field and the letter/number/blank in the ‘Content’ field. Press <edit> to change flags and content. Press <undo> to delete any changes that you made. The Defaults button is outlined for you on key sequence U-4-1, Edit Company Defaults. It is under the additional utilities portion of this manual. Pressing the Email Notifications button will make the following screen appear:

MASTER FILE MAINTENANCE
AS/AP APPAREL SOFTWARE
30 REV. 0512
Figure 1.5B: Master File – E-mail Notification This is where you can set up all of the email accounts that will be required for notifications. You simply enter the email addresses that need to be notified about particular changes and the system will do the rest for you. Read more about Email Notifications at the end of this manual in Appendix S: Email Alerts.
Multi-Shipping Lets move on to Multi-Shipping. Click on the next tab, next to the configuration tab to bring up the Multi-Shipping window (see Figure 1.6). This is not active on all systems.

MASTER FILE MAINTENENCE
AS/AP™ SYSTEM UTILITY
REV. 0512 31
Figure 1.6: Master File - Multi-Shipping IF THIS COMPANY WAS NOT NOTED AS A MUTLI-SHIPPING POINT COMPANY ON THE GENERAL DATA SCREEN (SCREEN 1), THIS TAB WILL NOT BE AVAILABLE FOR SELECTION. Basically, this screen is for companies who have more than one company that they are shipping to. As Company #’s are switched using the arrow buttons at the bottom of the screen the rest of the field group will either clear or bring up the other companies available to ship to (if more than one company has been entered). The edit button can be used to edit the records and delete can be used to delete them.
EDI Defaults Once you have entered the correct code into the Details group, you may go on to the next tab entitled EDI Defaults (see Figure 1.7).

MASTER FILE MAINTENANCE
AS/AP APPAREL SOFTWARE
32 REV. 0512
Figure 1.7: Master File - EDI Defaults In this section there are only 2 field groups that we have to discuss. The first will be the EDI Interface field. The first field under the EDI Interface block is the Next Ucc128 field. The second field is the EDI sender. Both of these fields contain EDI Support Data and Set-up records that should have been explained initially, in training, or you can refer to an EDI manual. This also applies to the EDI File Location block. Please refer to your EDI manual if you have any further questions.
Super Screen
After the EDI screen you will see a tab for Super Screen. When you click on Super Screen the following window will appear (see Figure 1.8).

MASTER FILE MAINTENENCE
AS/AP™ SYSTEM UTILITY
REV. 0512 33
Figure 1.8: Master File - Super Screen
This screen is very self-explanatory. Press the ‘Re-Calculate’ button on the Super Screen window and notice that AS/AP™ re-calculates the numbers. Basically, this is provided as a quick tally of various Accounts Receivable, Accounts Payable, General Ledger and Sales information. More information will be provided on the ‘Dash Board’ and ‘Event Log’ buttons.
Active Users The next tab that you see on the row above the on we have been working on is the Active Users screen. (see Figure 1.9)
MASTER FILE MAINTENANCE
AS/AP APPAREL SOFTWARE
34 REV. 0512
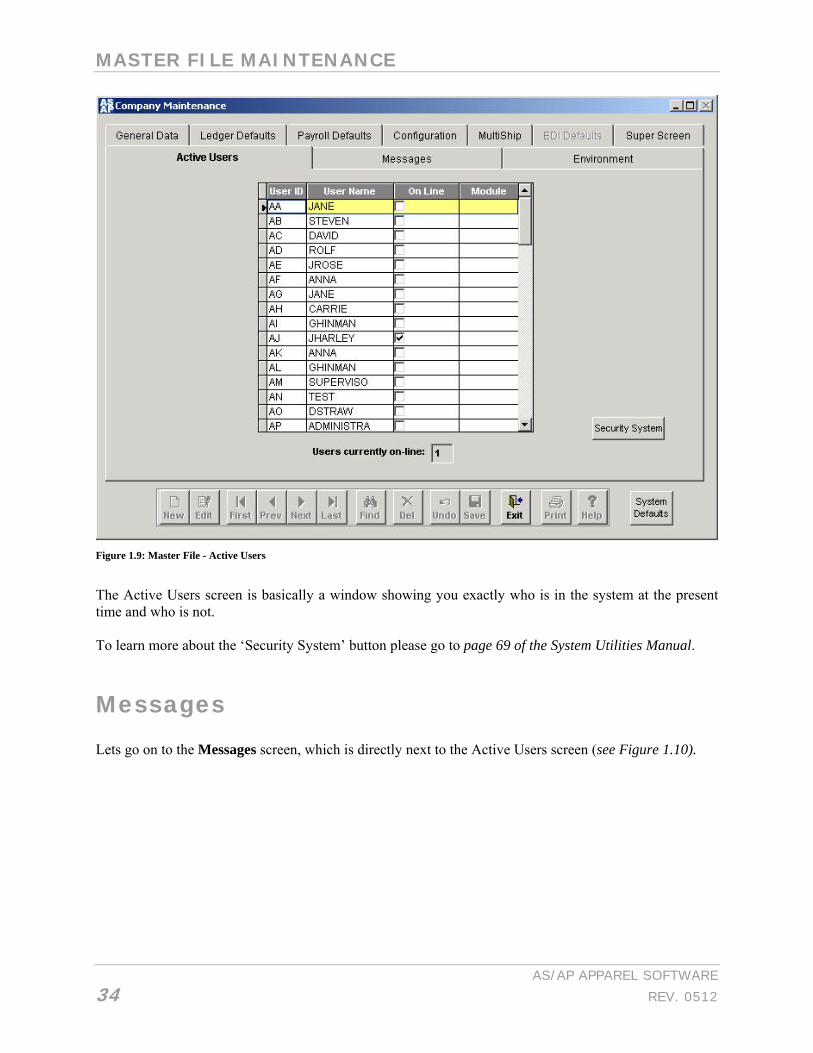
Figure 1.9: Master File - Active Users The Active Users screen is basically a window showing you exactly who is in the system at the present time and who is not. To learn more about the ‘Security System’ button please go to page 69 of the System Utilities Manual.
Messages Lets go on to the Messages screen, which is directly next to the Active Users screen (see Figure 1.10).

MASTER FILE MAINTENENCE
AS/AP™ SYSTEM UTILITY
REV. 0512 35
Figure 1.10: Master File - Messages
The Messages file allows you to setup up to 99 messages, which can be printed on Invoices, Statements, Orders, etc. simply by choosing that number.
This toolbar shown above allows you to move around the messages screen. Go to figure 1.2 for a brief description of these buttons.
Environment Next, click on the Environment tab and I will explain briefly what this window is for (see Figure 1.11).
MASTER FILE MAINTENANCE
AS/AP APPAREL SOFTWARE
36 REV. 0512
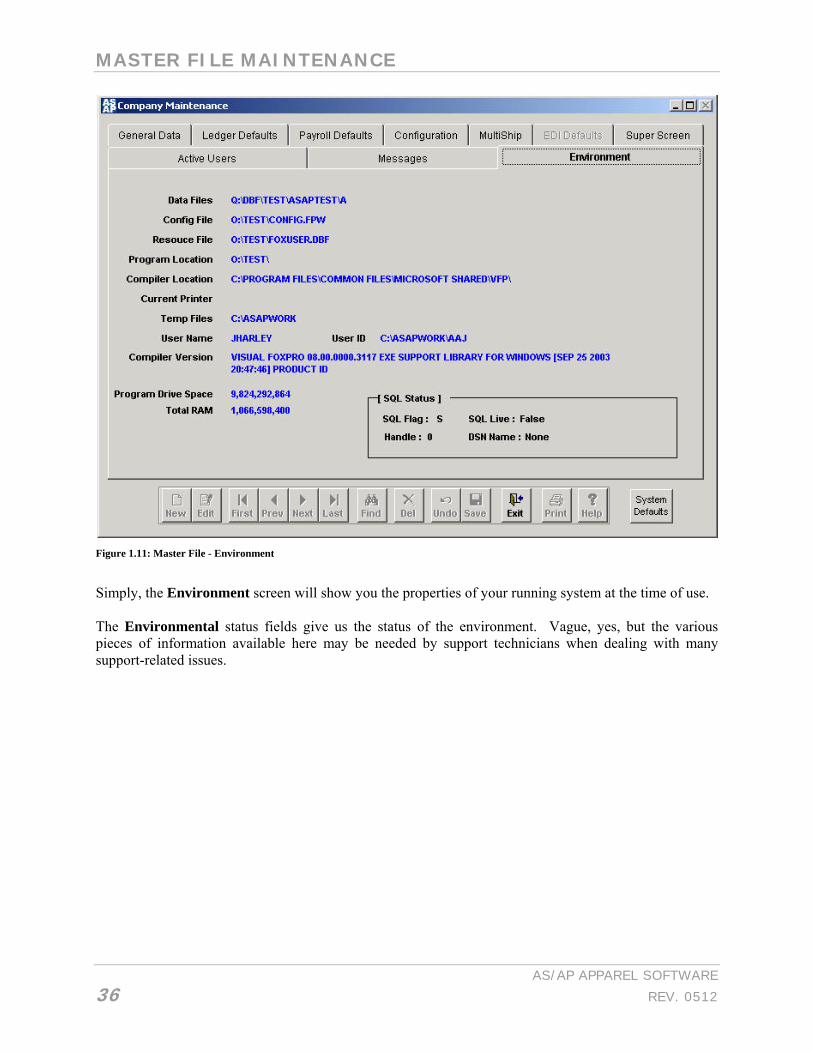
Figure 1.11: Master File - Environment Simply, the Environment screen will show you the properties of your running system at the time of use. The Environmental status fields give us the status of the environment. Vague, yes, but the various pieces of information available here may be needed by support technicians when dealing with many support-related issues.

CHANGE OPERATING COMPANIES
AS/AP™ SYSTEM UTILITY
REV. 0512 37
CHANGE OPERATING COMPANIES At the main menu, select the option Change Operating Companies
When you select this function, '2' from the Main Utility Menu, the screen will clear, and display the following screen along with the prompt:
Highlight the company you want, or click the company you want to use with your mouse, and press <Enter> or press <Esc> to Quit. After selecting a valid company, the Main Utility menu will reappear after a few moments, and the company you selected will be active. If the new company you selected to change to was originally set up with a password (single user systems only), the company will not be activated until you answer the prompt: Enter Password If you enter the password incorrectly, you will be returned to the operating system. If this is a Networked System or Single User System with security active you will see the LOGIN system operating.

CHANGE OPERATING COMPANIES
AS/AP APPAREL SOFTWARE
38 REV. 0512

REBUILD INDEX KEYS
AS/AP™ SYSTEM UTILITY
REV. 0512 39
REBUILD INDEX KEYS Function '3' allows you to rebuild the index keys of any files that have either lost their index or had an index damaged. The following FoxPro Error Codes are the most common indications that a database has lost its index or the index is damaged. A complete list of codes can be found beginning on page 155.
1 - File does not exist 4 - End of file encountered 5 - Record is out of range 19 - Index file does not match database 20 - Record is not in index 26 - Database is not ordered 38 - Beginning of file encountered 114 - Index does not match database file. Recreate Index ??? - You may not get a specific error message, but, you should reindex when you get any report
that looks a little strange, the records do not appear to be in the order normally expected, or records that you are certain were entered are not appearing in the report.
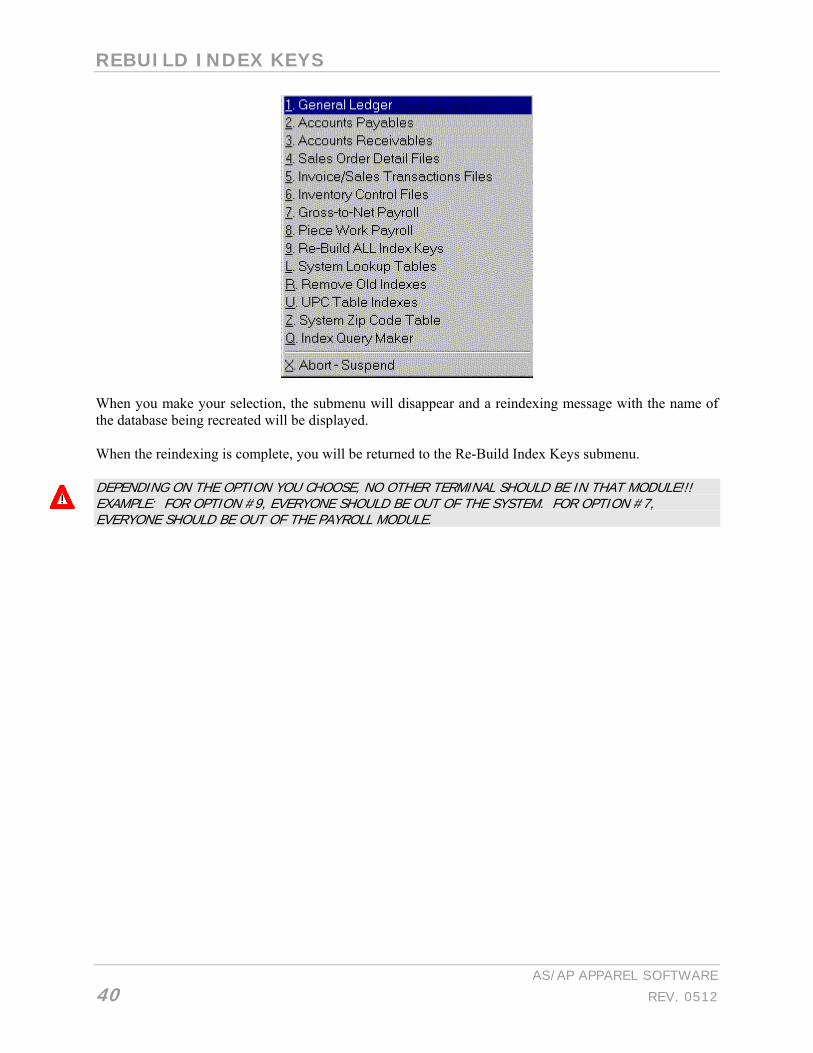
Even if rebuilding the indexes clears up your problems, you should report the System Messages to Software Support if the problem persists. This function is intended to re-build the index keys in the event that one or more becomes damaged. It permits the operator to re-build all of the indexes throughout the system. In addition, we have provided more specific re-index functions attached to most menu systems, which are designed to index only the files required by that system. An index is actually a type of data file that stores information on the location of specific data, from the database to which it is associated. An example of the purpose and affect of an index is easy to understand. You have a Customer Master file with 10,000 customers. If you use the xBase command 'LOCATE' to sequentially search for a Customer Code, the further down the file the Code occurs, the longer it will take to find. This means that you can expect anywhere from 1 second to several minutes or more for your search, EVERY TIME YOU SEARCH. Obviously, the average is many, many seconds. However, if you create and index using the Customer Code as the 'key', the system records the location of each Customer Code in the index file. Creating this index takes a few seconds initially, but, only milliseconds to update when codes are added or changed. Some real numbers for creating indexes, for those who are interested, were run on an 80386 SX/20 with 4 Mb RAM, a 19 ms 88 Mb SyQuest Cartridge, 10,000 records were indexed in 3 to 5 seconds. On an 80486 SX/25 Compaq ProLinea with 8 MB RAM, 10,000 records were indexed in .9 to 1.36 seconds for a simple index and 1.59 to 2.27 seconds for a compound index. After selecting function '3' from the main utility menu, the following submenu will be displayed:
REBUILD INDEX KEYS
AS/AP APPAREL SOFTWARE
40 REV. 0512
When you make your selection, the submenu will disappear and a reindexing message with the name of the database being recreated will be displayed. When the reindexing is complete, you will be returned to the Re-Build Index Keys submenu. DEPENDING ON THE OPTION YOU CHOOSE, NO OTHER TERMINAL SHOULD BE IN THAT MODULE!!! EXAMPLE: FOR OPTION #9, EVERYONE SHOULD BE OUT OF THE SYSTEM. FOR OPTION #7, EVERYONE SHOULD BE OUT OF THE PAYROLL MODULE.
ADDITIONAL UTILITIES
AS/AP™ SYSTEM UTILITY
REV. 0512 41
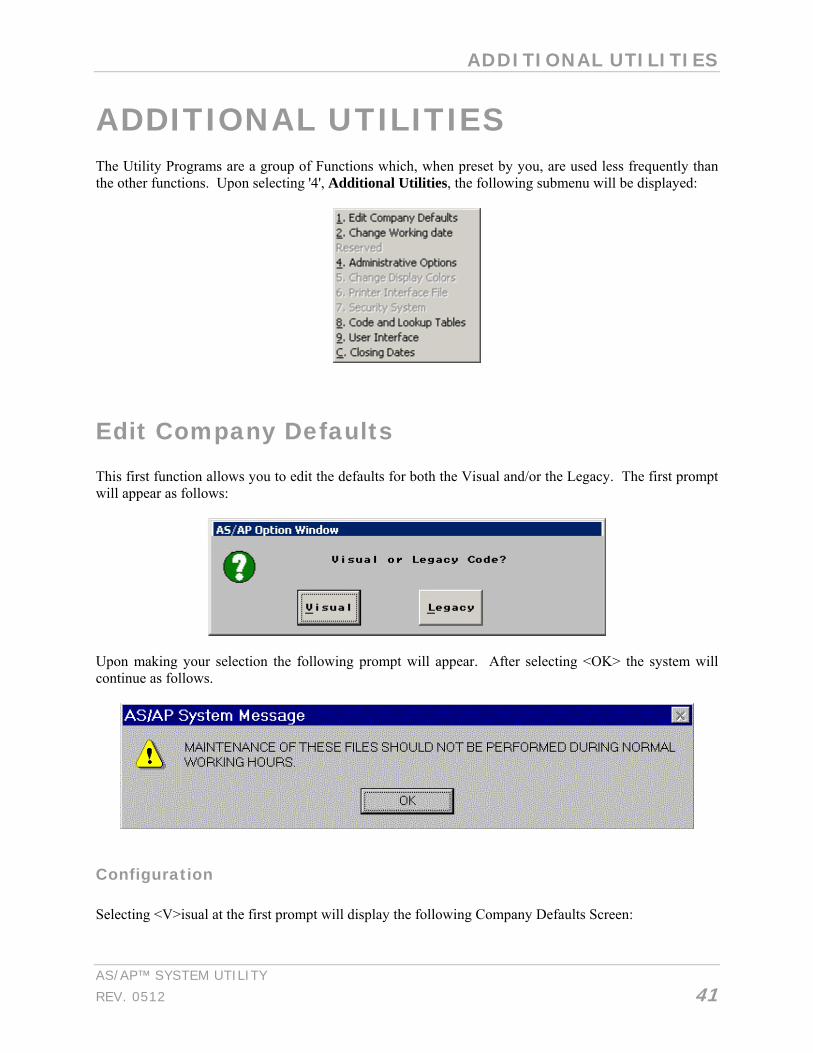
ADDITIONAL UTILITIES The Utility Programs are a group of Functions which, when preset by you, are used less frequently than the other functions. Upon selecting '4', Additional Utilities, the following submenu will be displayed:
Edit Company Defaults This first function allows you to edit the defaults for both the Visual and/or the Legacy. The first prompt will appear as follows:
Upon making your selection the following prompt will appear. After selecting <OK> the system will continue as follows.
Configuration Selecting <V>isual at the first prompt will display the following Company Defaults Screen:

ADDITIONAL UTILITIES
AS/AP APPAREL SOFTWARE
42 REV. 0512
Figure 2.1: Company Defaults-Configuration
The following are valid codes used to populate the ‘Start/Cancel Code’ field above: A= 7 DAYS B= 14 DAYS C= 21 DAYS D= 28 DAYS E= 35 DAYS F= 42 DAYS G= 49 DAYS H= 56 DAYS M= 1 DAY N= 2 DAYS P= 3 DAYS Q= 4 DAYS R= 5 DAYS FOR MORE INFORMATION ABOUT THIS SCREEN AND ADDITIONAL FIELDS, PLEASE CONTACT YOUR SOFTWARE PROVIDER.
Optional Programs When you move to the next tab over, the Optional Programs tab, the following screen appears:

ADDITIONAL UTILITIES
AS/AP™ SYSTEM UTILITY
REV. 0512 43
Figure 2.2: Company Defaults-Optional Programs
FOR MORE INFORMATION ABOUT THIS SCREEN, PLEASE CONTACT YOUR SOFTWARE PROVIDER.
Payroll Setup The next screen is displayed below for reference:

ADDITIONAL UTILITIES
AS/AP APPAREL SOFTWARE
44 REV. 0512
Figure 2.3: Company Defaults-Payroll
Enter the required data and press Save when complete. When you select the ADP Payroll Data field a Tool Tip (hold you pointer over the field and a message will appear) will instruct you to enter the path to output to (i.e. C:\PAYROLL\). The Minimum field is the federal or company minimum (only used with Flag 606). Finally, the default frequencies are <W>henever, <M>onthly, or <Y>early.
Import/Export The Import/Export tab displays the following screen for your convenience:

ADDITIONAL UTILITIES
AS/AP™ SYSTEM UTILITY
REV. 0512 45
Figure 2.4: Company Defaults-Import/Export
FOR MORE INFORMATION ABOUT THIS SCREEN, PLEASE CONTACT YOUR SOFTWARE PROVIDER.
Payroll Fields The next tab in order is the Payroll Fields tab. When you select this tab the following screen appears:

ADDITIONAL UTILITIES
AS/AP APPAREL SOFTWARE
46 REV. 0512
Figure 2.5: Company Defaults-Payroll Fields
FOR MORE INFORMATION ABOUT THIS SCREEN, PLEASE CONTACT YOUR SOFTWARE PROVIDER.
Inventory Fields Next, the Inventory Fields tab is displayed below:

ADDITIONAL UTILITIES
AS/AP™ SYSTEM UTILITY
REV. 0512 47
Figure 2.6: Company Defaults-Inventory Fields
FOR MORE INFORMATION ABOUT THIS SCREEN, PLEASE CONTACT YOUR SOFTWARE PROVIDER.
File Location The first tab in the next set of tab is referenced below for your convenience:

ADDITIONAL UTILITIES
AS/AP APPAREL SOFTWARE
48 REV. 0512
Figure 2.7: Company Defaults-File Locations
After entering the correct file names, locations, and path names press the Save button and you may exit the form, returning you to the previous menu.
UPC/UPS The second tab on the bottom is now the System tab. It is shown below:

ADDITIONAL UTILITIES
AS/AP™ SYSTEM UTILITY
REV. 0512 49
Figure 2.8: Company Defaults-Systems
FOR MORE INFORMATION ABOUT THIS SCREEN, PLEASE CONTACT YOUR SOFTWARE PROVIDER.
Contact MGT Below is the Lead Tracking screen. It appears when the next tab is selected:

ADDITIONAL UTILITIES
AS/AP APPAREL SOFTWARE
50 REV. 0512
Figure 2.9: Company Defaults-Lead Tracking
FOR MORE INFORMATION ABOUT THIS SCREEN, PLEASE CONTACT YOUR SOFTWARE PROVIDER.
Forecasting The next field is Forecasting. This screen is shown below for your convenience:

ADDITIONAL UTILITIES
AS/AP™ SYSTEM UTILITY
REV. 0512 51
Figure 2.10: Company Defaults-Forecasting
This is a forecast of an inventory production plan. This tab gives you an idea of what you will need to produce each year. Some companies only work 50 weeks out of the year. This would be the Number of Weeks in Projection for the year. The number of Basic Stock Weeks is how much stock on hand at a given time will be needed. The next two fields are basically the beginning of last years and current years start dates. On the Color Tab of the Style Master File, please refer to your Finished Goods manual, there is a row to input projection quantities for the style, color, dimension, and warehouse.
Control Numbers The next tab is called the Control Numbers tab. It is shown below for your convenience:

ADDITIONAL UTILITIES
AS/AP APPAREL SOFTWARE
52 REV. 0512
Figure 2.11: Company Defaults-Control Numbers
FOR MORE INFORMATION ABOUT THIS SCREEN, PLEASE CONTACT YOUR SOFTWARE PROVIDER.
E-mail Message Text The last tab is shown below:

ADDITIONAL UTILITIES
AS/AP™ SYSTEM UTILITY
REV. 0512 53
Figure 2.12: Company Defaults-E-mail Message Text
The Order Confirmation field is where you enter the text message that you want to print in the body of the email for order confirmations. Similarly, the Shipment Notification field is where you enter the text message that you want to print in the body of the email for shipment notifications. Save your information after making changes and exit the form.
Change Working Date Function '2' allows you to change the system date. Upon selecting this option, the prompt will default in with the current date:
Enter a new date or press <Enter> to keep the date the same. Then you will be returned to the Additional Utilities submenu. This option appears in different locations throughout AS/APTM. A few of them are: <AP-P-8>, <AR-R-6-D>, and <SA-S-U-9>.

ADDITIONAL UTILITIES
AS/AP APPAREL SOFTWARE
54 REV. 0512
Administrative Options Function '4' is used to load any program or file update disks you may receive from AS/AP™. Upon selecting '4', the following submenu will be displayed:
Load AS/AP ™ Data and Program Updates Function '1' is a special function, which will be run ONLY when your computer dealer instructs you to do so. Through this menu selection, we are able to update programs or restructure specific files, which have been modified by the programmers since the installation of your system. In this manner you will always have the latest, most advanced copy of AS/AP™ that is available. The only clients who must be extremely careful in using this module are those running multiple companies with different data file configurations. Simply follow along with the prompts displayed on your screen. The first prompt that you will receive is: FOR MULTI-USER SYSTEMS, ALL USERS MUST BE OUT OF THE AS/AP™ SYSTEM AND DOWN TO THE DISK MENU! ALSO, DO NOT RUN THIS OPTION FROM THE CENTRAL SERVER!!!

ADDITIONAL UTILITIES
AS/AP™ SYSTEM UTILITY
REV. 0512 55
After pressing another key you will be prompt to enter a drive:
Entering a drive or pressing <Esc> will return you to the previous sub-menu.
File Recovery Process
Function '2' is a special function, which will be run ONLY when your computer dealer instructs you to do so!
Advance Expiration Date
This function is designed for telephone support use only. In the event you need it, a technician will walk you through this function over the telephone.
Verify Module Date/Time
Function '4' is a special function, which will be run ONLY when your computer dealer instructs you to do so! This is to help software support determine what version of a specific program you are running.
Repair/Modify File Structure Function '5' is a special function, which will be run ONLY when your computer dealer instructs you to do so! This is to help software support/technicians make corrections to your current file structures. IF A MESSAGE APPEARS IN AS/AP STATING “CUSTOMER IS CURRENTLY BEING WORKED ON AT ANOTHER TERMINAL” THEN ENTER ‘REPAIR.MODIFY FILE STRUCTURE’ TO CLEAR.
System Conversion Program This function is designed for telephone support use only. In the event you need it, a technician will walk you through this function over the telephone.
Interactive File Maintenance Upon selecting option '7' from the AS/AP™ Administrative Options submenu the following additional submenu will appear:

ADDITIONAL UTILITIES
AS/AP APPAREL SOFTWARE
56 REV. 0512
All five of the above choices will prompt for a file name.
Recalculate Data Files This option may not be active on your system. For further information about this option please contact technical support. This is a maintenance file. In the event that you need it, a technician will walk you through this function over the phone. Once you select this option the following submenu will appear:
Open Purchase Orders Option '1' on the Recalculate Data Files submenu will flash an 'Updating Purchase Orders...' message, like the one below, on the screen and then return you to the submenu.
Open Sa les Orders Option ‘2’ prompts the following:
This means simply that this option is not currently available to you.

ADDITIONAL UTILITIES
AS/AP™ SYSTEM UTILITY
REV. 0512 57
Open Cut t ing Orders When you select option '3' from the Recalculate Data Files submenu you will receive an 'Updating Cutting Orders...' message, which looks like the following prompt and then be returned to the submenu.
Load New ZIP CODE Table Upon selecting option ‘9' from the Administrative Options submenu the screen will clear and the following prompt will appear:
Once a valid drive has been selected the system will display the following, defaulting in with the specified drive:
Selecting the option of <N>o will allow you to reenter the drive. A <Y>es will further prompt for you to place the update disk in the appropriate drive and press any key to continue. At this point you once again have the option of terminating this function. However, responding with a <Y>es will update the Zip Code Table and return you to the AS/AP™ Administrative Options submenu.
Default Report Printer The first prompt that you will receive upon selecting option 'P' from the AS/AP™ Administrative Options submenu is:
Enter the form/report name that you wish to work with. Make any corrections that are necessary. Once complete you will be asked to save changes. You will then be returned to the above prompt. Once complete, press <Esc> and you will be returned to the Additional Utilities submenu.

ADDITIONAL UTILITIES
AS/AP APPAREL SOFTWARE
58 REV. 0512
Make New Files Upon selecting option ‘M’ on the AS/AP™ Administrative Options submenu the following prompt will appear:
After entering the information it asks for, you will be returned to the submenu.
Error Report CONTACT TECHNICAL SUPPORT FOR ADDITIONAL INFORMATION.
Version Update Fix On the AS/AP™ Administrative Options submenu, choosing the next option, ‘V’, will bring up the following prompt:
A <N>o will automatically return you to the submenu you started from. A <Y>es will first update your version before sending you back to the submenu.
User Logs - Reset After choosing option ‘U’ the following menu will appear:

ADDITIONAL UTILITIES
AS/AP™ SYSTEM UTILITY
REV. 0512 59
Produc t ion P lann ing Upon selecting the only available option, ‘1’, the following prompt will appear:
This means that this option is currently not implemented for use. By choosing <ok> you will be return to the submenu that you came from previously.
Pack and Reindex Operating Files When choosing option ‘R’ the following prompt will occur:
By pressing <OK> the following Pack and Reindex menu will appear:

ADDITIONAL UTILITIES
AS/AP APPAREL SOFTWARE
60 REV. 0512
Al l Opera t ing F i les By choosing option ‘1’ on this Pack and Reindex submenu you will receive the following prompt
By choosing <N>o, you will instantly be brought back to the AS/AP™ Pack and Reindex Operating Files submenu. By choosing <Y>es, you will receive a prompt telling you that the system is packing and reindexing itself, and then you will be brought back to the submenu. All of the other options on the AS/AP™ Pack and Reindex Operating Files submenu will Pack and Reindex whatever you are asking it to and then immediately send you back to the previous submenu. The only other option that you will be prompted at is ‘E’, the Client Files.
Cl ien t F i les By choosing option ‘E’ the following prompt will appear:
Code For The Day CONTACT TECHNICAL SUPPORT FOR ADDITIONAL INFORMATION.

ADDITIONAL UTILITIES
AS/AP™ SYSTEM UTILITY
REV. 0512 61
Fixed Damaged FOXPRO Structure By choosing option ‘F’ the following prompt will appear:
No matter which of these options that you push, the following prompt will appear:
This is just a precaution that the AS/AP™ system takes to ensure that you are aware that everyone has to be out of FoxPro in order for this scan to occur. Pressing <Y>es will allow the system to continue with its scan and then bring you back to the main menu.
Import Shared Data By choosing option ‘I’, Import Shared Data, the following message will appear:
By pressing <ok> you will be brought back to the previous submenu.
View Report Structure When option ‘V’ is chosen the following prompt will appear:

ADDITIONAL UTILITIES
AS/AP APPAREL SOFTWARE
62 REV. 0512
After choosing a report number to view, that particular report will be available from you to view. By pressing <Esc> you will be brought back to the main sub menu.
Audit Trails Option ‘A’ provides reports allowing you to view any actions in particular areas. This area allows you to view things such as who has been in to certain areas and things that were changed.
Reset InProcess Flag Option ‘S’ gives the user the ability to add order or pick ticket numbers. You will also have the ability to view a list of what happens with these orders. When Option ‘S’ is selected, the following menu appears:
From key sequence <U-4-4-S-1> you are able to clear the message “Customer is currently being worked on at another terminal”. Within Option ‘S’ you may clear several different areas for in process setting messages.
Change Display Colors Function ‘5’ allows you to change the colors/shades on your monitor. This program will be available on both color and monochrome systems. The results obtained from this installation will depend on your monitor board and monitor combination; the better the hardware, the finer results you will obtain.
Printer Interface File Selecting function '6' on the submenu will display another submenu:

ADDITIONAL UTILITIES
AS/AP™ SYSTEM UTILITY
REV. 0512 63
IF SOMETHING DOES NOT PRINT CORRECTLY THERE ARE THREE POSSIBLE PROBLEMS: THE PRINTER, THE PROGRAM, OR THE PRINTER CODES. IF CHECKS PRINT CORRECTLY FROM ONE STATION OR PRINTER AND ARE NOT LINED UP PROPERLY FROM ANOTHER STATION, IT IS LUDICROUS TO TRY TO BLAME THIS ON THE SOFTWARE. THE PRINTER OR PRINTER CODES HAVE TO BE THE PROBLEM. IF THE CODES CHECK OUT, IT’S THE PRINTER. IF YOU REALLY WANT A SOLUTION, CHECK THE PRINTER AND THE PRINTER CODE TABLES, BEFORE CALLING FOR HELP.
Printer Initialization Sequence Function '1' is only accessible if the multiple printer feature is activated. Consult with your software dealer to have this feature activated. If you do have this option, the following screen will appear once it is selected:
Edi t Da ta Selecting <E> will allow you to edit the data that appears on the screen for the printer shown. The ‘TYPE’ specifies whether the printer is a Laser<J>et, <W>ide Dot Matrix, Narrow <D>ot Matrix, or <F>ax. The Description field is the actual description of the printer. IF YOUR SYSTEM IS RUNNING IN DOS IT IS NOT AS IMPORTANT THAT THE DESCRIPTION BE EXACT; JUST ENTER THE NAME OF THE PRINTER. IF YOU ARE RUNNING IN WINDOWS 3.11, IT IS IMPORTANT THAT THE PRINTER NAME ENTERED IN THIS FIELD BE EXACTLY AS THE SYSTEM KNOWS IT, THEREFORE, YOU HAVE A COUPLE OF OPTIONS. YOU CAN EITHER GO INTO THE WIN.INI FILE AND RECORD THE NAME OF THE PRINTER(S) OR YOU CAN GO TO OPTION ‘4’ (SELECT PRINTER) AND RECORD THE NAMES OF THE PRINTERS THAT APPEAR IN THE PRINTER SELECTION WINDOW AND THEN TYPE THEM EXACTLY AS THEY ARE. IF YOU ARE RUNNING IN WINDOWS 95 GO TO THE PRINTER CONTROL PANEL AND RETRIEVE THE NAME OF THE PRINTER FROM THERE.

ADDITIONAL UTILITIES
AS/AP APPAREL SOFTWARE
64 REV. 0512
The next line, Redirection, is the location of that printer (i.e. LPT1). A printer redirection code is ONLY necessary on systems that have multiple printers. The redirection code tells the system how to switch between printers and spoolers. A few typical Novell redirection codes follow:
Q=Q1 NB NFF This code will direct the printing to print queue Q1 With No Banner and No Form Feed.
ENDCAP (NetWare 2.x, 3.x) CAPTURE ENDCAP (NetWare 4.x)
This code will redirect printing to the local station printer (LPT1, etc.) rather than the print spooler. The local station printers have a command line that reads: AENDCAP nul.@ This Novell command closes the spooler and redirects printing back to the local, station printer. By directing the output to nul it prevents strange messages from bleeding through to the Operator’s screen. If, instead of the standard DOS device ‘NUL’, you use ‘NUL’, you will notice a file will be created on your disk named ‘NUL’. (no extension is used). If you happen to see this file name appear, then you should look to your redirection commands. DOS uses this as an output device, which does not actually exist, so it tends to act like a ‘Black Hole’. By directing the output to ‘NUL’, instead of displaying it to the screen, it is thrown away without disrupting the screen.
Add Pr in te r Use the <A>dd Printer option when adding additional printers. AS/APTM can redirect as many as 9 different types and locations. To add a printer when there are multiple printers, simply press <N>ext until you arrive at a blank printer form, then press <A>dd Printer.
Install Printer Control Codes Function '2' provides the user with the ability to modify the printer codes that were pre-set during the system installation. When selected the following prompt will appear on your screen.
These codes control various printer functions, such as, compressed printing, form lengths, line spacing, and printer initialization. You may want to note that all printer codes are NOT located here. We decided to split the data into areas of interest. In other words, the codes required for Garment Care Labels are located in that program module, as are the codes for Piece Work Tickets, which are located in the Piece Work Program. Based on your requirements, you can even leave selected codes blank in order to eliminate the effect of certain codes on your system. For instance, if you do not like compressed reports, and always remember to keep wide paper in you printer, you can leave this code blank.
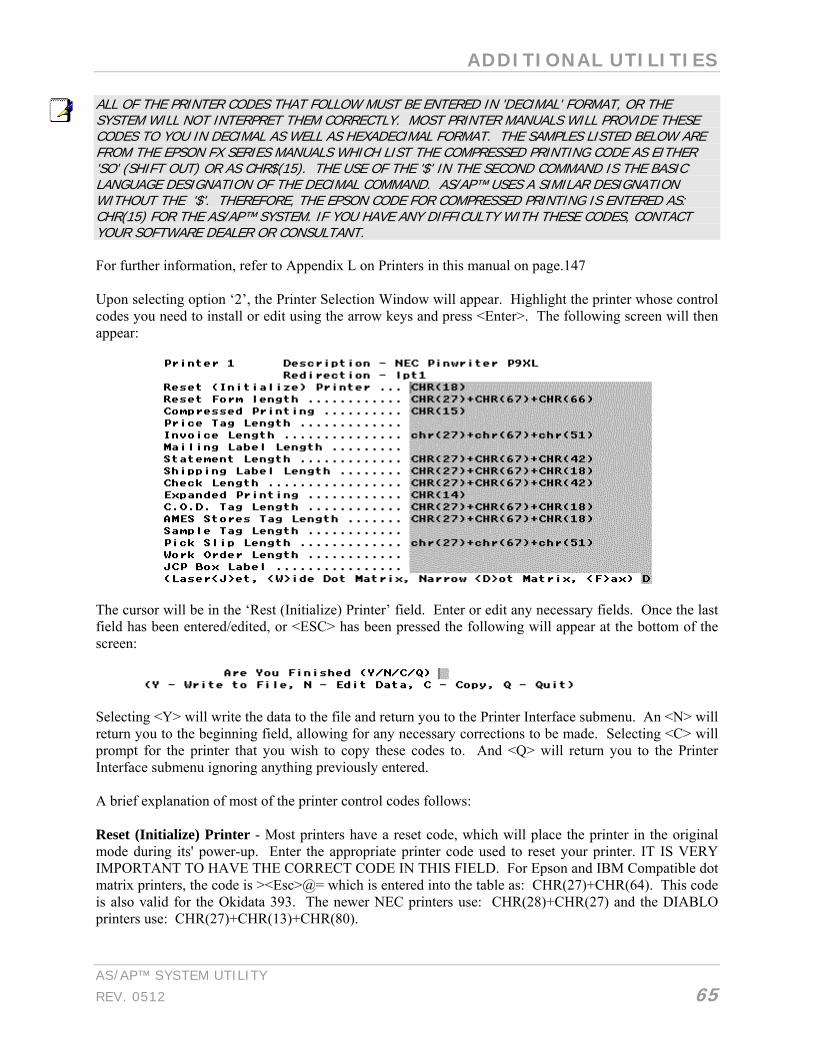
ADDITIONAL UTILITIES
AS/AP™ SYSTEM UTILITY
REV. 0512 65
ALL OF THE PRINTER CODES THAT FOLLOW MUST BE ENTERED IN 'DECIMAL' FORMAT, OR THE SYSTEM WILL NOT INTERPRET THEM CORRECTLY. MOST PRINTER MANUALS WILL PROVIDE THESE CODES TO YOU IN DECIMAL AS WELL AS HEXADECIMAL FORMAT. THE SAMPLES LISTED BELOW ARE FROM THE EPSON FX SERIES MANUALS WHICH LIST THE COMPRESSED PRINTING CODE AS EITHER 'SO' (SHIFT OUT) OR AS CHR$(15). THE USE OF THE '$' IN THE SECOND COMMAND IS THE BASIC LANGUAGE DESIGNATION OF THE DECIMAL COMMAND. AS/AP™ USES A SIMILAR DESIGNATION WITHOUT THE '$'. THEREFORE, THE EPSON CODE FOR COMPRESSED PRINTING IS ENTERED AS: CHR(15) FOR THE AS/AP™ SYSTEM. IF YOU HAVE ANY DIFFICULTY WITH THESE CODES, CONTACT YOUR SOFTWARE DEALER OR CONSULTANT. For further information, refer to Appendix L on Printers in this manual on page.147 Upon selecting option ‘2’, the Printer Selection Window will appear. Highlight the printer whose control codes you need to install or edit using the arrow keys and press <Enter>. The following screen will then appear:
The cursor will be in the ‘Rest (Initialize) Printer’ field. Enter or edit any necessary fields. Once the last field has been entered/edited, or <ESC> has been pressed the following will appear at the bottom of the screen:
Selecting <Y> will write the data to the file and return you to the Printer Interface submenu. An <N> will return you to the beginning field, allowing for any necessary corrections to be made. Selecting <C> will prompt for the printer that you wish to copy these codes to. And <Q> will return you to the Printer Interface submenu ignoring anything previously entered. A brief explanation of most of the printer control codes follows:
Reset (Initialize) Printer - Most printers have a reset code, which will place the printer in the original mode during its' power-up. Enter the appropriate printer code used to reset your printer. IT IS VERY IMPORTANT TO HAVE THE CORRECT CODE IN THIS FIELD. For Epson and IBM Compatible dot matrix printers, the code is ><Esc>@= which is entered into the table as: CHR(27)+CHR(64). This code is also valid for the Okidata 393. The newer NEC printers use: CHR(28)+CHR(27) and the DIABLO printers use: CHR(27)+CHR(13)+CHR(80).

ADDITIONAL UTILITIES
AS/AP APPAREL SOFTWARE
66 REV. 0512
Reset Form Length - This code represents the standard length of forms used in your printer. Enter the appropriate printer code for the length of the standard paper you use. Compressed Printing - Enter the appropriate printer code for printing in compressed form. Some reports require compressed printing to fit on 8-1/2" paper. If you want to use the 14" paper for those reports, skip this field. All the manuals, in the appropriate sections, will tell you which reports require 132 print positions. If you are not sure of the correct printer code, contact your software dealer or consultant. Price Tag Length - Although these tags are no longer in use, we have left the following commentary to assist you in understanding printer setups in general.
Enter the appropriate printer code for the length of your price tag forms. The program is designed to use a label 7/16" high by 3-1/2" wide and one across (i.e.-the labels follow each other one after the other, and not two or more beside each other). These labels are commonly available through your local office supplier or computer retailer. They come on continuous perforated sheets to allow the printer to feed them with the tractor. The program assumes a default page length of 11" (i.e. the distance from the top of one sheet of paper to the top of the next). This is because the most common printing size is 8-1/2" x 11". The distance from the top of one label to the top of the next is only 4 lines of print. The program assumes that the printer is printing at 6 lines per inch. Therefore, after the program prints one line in the middle of a tag, the printer will have to advance 3 more lines to be in the middle of the next tag. Since the default of 11" is a little much, the printer form length needs to be changed to three lines. On an Epson printer, the code, in decimal format, would be: CHR(27)+CHR(67)+CHR(4). Invoice Length Enter the appropriate printer code for the length of your invoice forms. The standard invoice format sets the printer form length to 7 inches. On an Epson printer, the code, in decimal format, would be: CHR(27)+CHR(67)+CHR(42). The last number, '42', is derived from the fact of having 6 lines per inch, and a form of 7 inches (i.e. 6x7=42). If you should wish to modify the program to use non-standard forms, these form lengths will have to be changed. If you use our optional full length invoices, you have two choices. You can leave this field blank or you can enter a code '66' in place of the '42' code from above: CHR(27)+CHR(67)+CHR(66). By entering the '66' code you can protect yourself from the printer remembering a shorter form, such as checks or statements. Mailing Label Length This option is for future use; contact software support if further information is needed now. Statement Length Enter the appropriate printer code for the length of your statement forms. The standard statement format sets the printer form length to 7 inches. On an Epson printer, the code, in decimal format, would be: CHR(27)+CHR(67)+CHR(42). Shipping Label Length Enter the appropriate printer code for the length of your shipping labels. The program is designed to use a label 2-7/8" high by 3-7/8" wide and one across (i.e.-the labels follow each other one after the other, and not two or more beside each other). On an Epson printer, the code, in decimal format, would be: CHR(27)+CHR(67)+CHR(18). Check Length Enter the appropriate printer code for the length of your check forms. The standard check format sets the printer form length to 7 inches. On an Epson printer, the code, in decimal format, would

ADDITIONAL UTILITIES
AS/AP™ SYSTEM UTILITY
REV. 0512 67
be: CHR(27)+CHR(67)+CHR(42). The last number, '42' is derived from the fact of having 6 lines per inch, and a form of 7 inches (i.e. 6x7=42). If you should wish to modify the program to use non-standard forms, these form lengths will have to be changed. However, both the A/P and Payroll checks must be the same length.
Expanded Printing Enter the appropriate printer code for printing in expanded form. If you are not sure of the correct printer code, contact your software dealer or consultant. C.O.D. Tag Length Enter the appropriate printer code for the length of the standard UPS COD Tags. If you are not sure of the correct printer code, contact your software dealer or consultant. AMES Stores Tag Length This option is for future use; contact software support if further information is needed now. Sample Tag Length This option is for future use; contact software support if further information is needed now. Pick Slip Length This option is for future use; contact software support if further information is needed now. Work Order Length This option is for future use; contact software support if further information is needed now. JCP Box Label This option is for future use; contact software support if further information is needed now.
Install Character Pitch Codes The first prompt that will appear on your screen after you selection this option will look like this:
After selecting a printer number pressing <F10> will cause the following prompt to appear:

ADDITIONAL UTILITIES
AS/AP APPAREL SOFTWARE
68 REV. 0512
After these fields are filled with the appropriate information the system will automatically bring up the following prompt when the very last field is finished:
A <N>o will allow you to continue working on the previous prompt, while a <Y>es will take you back to the ‘Printer Interface File’ submenu.
Select Printer On systems with multiple printers, this function allows you to direct your printing to the system printer or one of the local printers. This option, ‘4’, is only used under the DOS shell. Therefore many flag settings will not allow you to use this option.
Windows Printer Fonts CONTACT TECHNICAL SUPPORT FOR ADDITIONAL INFORMATION.
Security System The Security System is documented in a very general manner to lessen the possibility of individuals obtaining a copy of this booklet, and bypassing the system. Initially, the only user in this system is the original installer.
Adding a User Log on as an Administrative user in order to add new users. Click on the Company Master U-1 or toolbar and click on the Active User tab located in the upper left hand corner. Click on the Security System button in the lower right hand corner. Locate a user with similar permissions/access to the user you wish to create and take note of their User Id. Click on the ‘First Blank’ button, next click on ‘Copy User’ button and place the noted user id above in the provided form. Finally, click ‘Edit’ and enter the user name you wish to create (in most cases this user name should be the same as the Windows log in). Adjust any permission/access rights as needed. For user flags see below
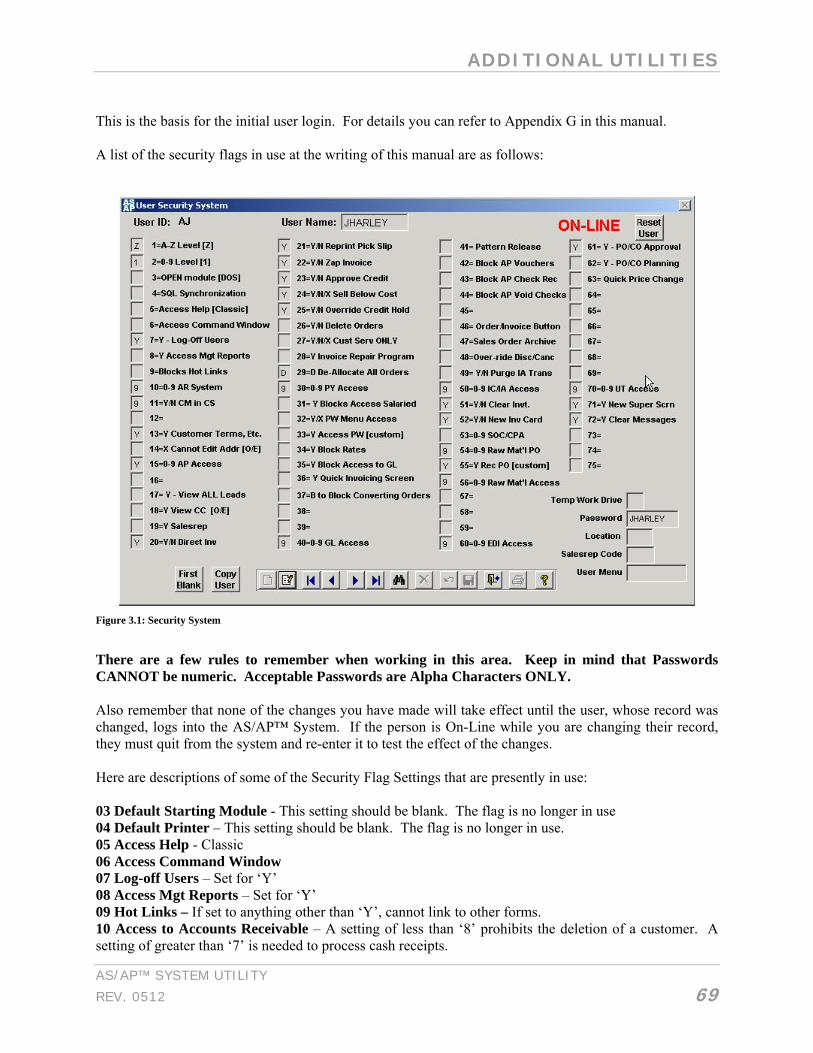
ADDITIONAL UTILITIES
AS/AP™ SYSTEM UTILITY
REV. 0512 69
This is the basis for the initial user login. For details you can refer to Appendix G in this manual. A list of the security flags in use at the writing of this manual are as follows:
Figure 3.1: Security System
There are a few rules to remember when working in this area. Keep in mind that Passwords CANNOT be numeric. Acceptable Passwords are Alpha Characters ONLY. Also remember that none of the changes you have made will take effect until the user, whose record was changed, logs into the AS/AP™ System. If the person is On-Line while you are changing their record, they must quit from the system and re-enter it to test the effect of the changes. Here are descriptions of some of the Security Flag Settings that are presently in use: 03 Default Starting Module - This setting should be blank. The flag is no longer in use 04 Default Printer – This setting should be blank. The flag is no longer in use. 05 Access Help - Classic 06 Access Command Window 07 Log-off Users – Set for ‘Y’ 08 Access Mgt Reports – Set for ‘Y’ 09 Hot Links – If set to anything other than ‘Y’, cannot link to other forms. 10 Access to Accounts Receivable – A setting of less than ‘8’ prohibits the deletion of a customer. A setting of greater than ‘7’ is needed to process cash receipts.

ADDITIONAL UTILITIES
AS/AP APPAREL SOFTWARE
70 REV. 0512
11 Access to Customer Master and Status in Customer Service 13 Edit of Customer Master – A setting of ‘Y’ allows you to change terms, credit limits, super customer status, ytdsls, balance, and lastyr fields on the Customer Master Form. 14 Order Entry – A setting of ‘x’ blocks the changing of ‘Bill to/Ship to’ during order entry. 15 Access to Accounts Payable – Although the choices are from 0-9, the only effect is when the flag setting is less than ‘3’. If the flag is less than ‘3’ than the user is denied access to the accounts payable module. 17 View All Leads – A setting of ‘Y’ allows users in Lead Tracking to switch between a single user and all users leads. 18 View Credit Card Information in Order Entry – Requires system flag 670 also to be active. 19 Salesrep 20 Y/N Direct Inv 21 Reprint Pick Slips – When the system is setup to allow the reprinting of pick slips you can use this setting to block the user from being allowed to reprint pick slips. If it has a ‘Y’ then the user can reprint anything else, but blocks the reprinting of pick slips. 22 Ability to ZAP Invoices – A setting of ‘Y’ will allow users to delete the invoice from the system as if it had never been created. There will be no audit trail of its existence, and there will be a missing invoice number. 23 Approve Credit - Y/N 24 Ability to Sell Below Cost – A ‘Y’ in this field blocks the ability to sell below cost. An ‘X’ in this field blocks the ‘Terms’ and ‘Price’ change during order entry, which is also blocked from the Price Table in Customer Service. 25 Credit Hold Override – A setting of ‘Y’ or ‘O’ will allow the override of credit hold status, and automatic credit approval. 26 Ability to Delete Orders – An ‘X’ allows the canceling of a sales order, but will not allow you to delete a sales order. A ‘Y’ allows the deletion of sales orders. 27 Customer Service Only 28 Invoice Repair Program – ‘Y’ 29 De-allocate Sales Orders – A setting of ‘D’ allows sales orders to be de-allocated. 30 Access to Payroll – A setting of less than ‘9’ forces you to enter a password to get into the payroll system. A setting of less than’7’ blocks access to salaried employees. A setting of less than ‘5’ denies access to the payroll system. 31 Access to Salaried Payroll – A setting of ‘Y’ blocks access to salaried payroll information. A setting of ‘D’ provides the ability to test the breakdown integrity of piecework information. 32 PW Menu Access - Y/N 33 Access PW (custom) - Y 34 Block Rates - Y 35 Block Access to GL - Y
40 Access to General Ledger – A setting of greater than ‘0’ will allow you access to the General Ledger system. 41 Pattern Release – Allows to enter the date the pattern was approved if the option is available 42 Block AP Vouchers – Can’t enter AP Invoices 43 Block AP Check Rec – Blocks Access to Check Reconciliation 44 Block AP Void Checks – Clocks user from voiding checks in AP 46 Direct Invoicing – A setting of ‘D’ will allow Direct Invoicing only for the store. 47 Sales Order Archive 48 Over-ride Disc/Canc 49 Y/N Purge IA Trans 50 Access to Apparel Inventory – A setting of less than ‘8’ denies the ability for the user to edit costs associated with either Raw Materials or Finished Goods. A setting of less than ‘6’ denies the ability for the user to edit cost or quantity. A setting of ‘1’ allows the viewing of records only.

ADDITIONAL UTILITIES
AS/AP™ SYSTEM UTILITY
REV. 0512 71
51 Clear Inventory – Y/N 52 New Inventory Card – Y/N 53 Critical Path – A setting of less than ‘9’ blocks access to critical path processes. 54 Raw Material Purchase Order Processing – A setting of less than ‘7’ blocks the user from deleting POs. A setting of ‘9’ is required to approve Raw Material POs. 55 Custom Receiving of Purchase Orders – A setting of ‘Y’ allows access to custom PO receiving process. 56 Raw Material Access – A setting of ‘8’ or greater provides full access. A setting of less than ‘8’ does not allow cost to be edited, deleting of item, adding items, editing of dye lots, adding item during purchase order entry. A setting of ‘1’ is view only. 60 EDI Access - 0-9 61 PO/CO Approval - Y 62 PO/CO Planning - Y 63 Quick Price Change 70 Utility Access – A setting of ‘9’ gives the user maximum access to the Utility menu. A setting of less than ‘7’ denies you access to the Super Screen located at U-1-SS. A setting of less than ‘5’ denies access to the Company Defaults (U-4-1). A setting of less than ‘3’ denies access to the Company Query (U-1). A setting of greater than ‘0’ allows access to Indexing (U-3). A setting of greater than ‘5’ gives access to Company Defaults at U-4-1. Finally, a setting of greater than ‘7’ gives access to the Super Screen at U-1-SS. 71 New Super Screen - Y 72 Clear Messages - Y Most of the items listed above have a ‘BYPASS’ code that can be entered to allow the continuation of the process even though user flags are set to block the process. Those that are suppose to know the bypass codes know how to find them. To change the Terms and Credit Limit on the customer master, the user's security flag 13 needs to be a Y on the User Security Screen. To do this, follow these steps: Go to the Utility Menu and go to menu option 4 (Additional Utilities) then menu option 7 (Security System). Use the page down button to select the user that you want to change then press the <Insert> key to edit the user's security. Once you are on the line that has the permissions (the long line with 9's and Y's and N's), go to position 13 (the one with a 1 on the top line and a 3 on the bottom line). Change or add a ‘Y’ into this field. If the entire line shifts please be sure to hit the delete key once. Exit by pressing <enter> and answering "Yes" to the update question. The user will need to log out of AS/AP and back in for the new security to be in effect.
Code And Lookup Tables This Function is comprised of a series of Code files and corresponding Descriptions. Upon selecting '8', you will receive the following submenu:

ADDITIONAL UTILITIES
AS/AP APPAREL SOFTWARE
72 REV. 0512
IN ORDER TO REDUCE ISSUES ASSOCIATED WITH SIMILARLY NAMED CODES PLEASE CHOOSE A SET FIELD LENGTH FOR THE VARIOUS AREAS THROUGHOUT THE SYSTEM. IN OTHER WORDS, IF THE CUSTOMER CODE IS 6 DIGITS THEN ALL CUSTOMER CODES SHOULD BE 6 DIGITS, SOME SHOULD NOT BE 6 WHILE OTHERS ARE 5.
Accounts Receivable Selection ‘1’ will display another submenu (of which some of the options may not be implemented on your system).
Customer Type The Customer Type code is used for sorting various Customer Lists and Labels. After selecting '1', you will receive a prompt alerting you that this option is not implemented on your system currently.
Invo ice Terms This selection shows the Accounts Receivable terms codes included with each new system as of the time of the printing of this manual. The Receivable and Payable terms start out the same. However, since they are maintained in two separate tables they can be changed independently of each other.

ADDITIONAL UTILITIES
AS/AP™ SYSTEM UTILITY
REV. 0512 73
The Accounts Receivable system includes 7 special codes, which should not be changed by the operator. These are described in the following section. After selecting '2', you will be prompted:
This gives you the option to simply print the information in the Invoice Terms table or to view the information on the screen for corrections/additions to be made. Selecting <P>rinter will prompt for you to turn on your printer and press any key to begin printing. Once complete, you will be returned to the AR Codes submenu. If <S>creen was selected, the screen will clear and the following will appear (shown below with sample data):
This sample illustrates how the Terms codes will be listed, as well as your options. Prior to making any changes, refer to the terms code list and special codes displayed on the following pages. Although the user can modify the terms codes and their details, the following codes, '0' - '1' - '2' - '9' - 'P' - 'S' and 'X' have special meanings and should never be changed. Any attempt to change the title or calculation of these particular codes may cause unexpected results in other modules. It should not be difficult for you to avoid these codes if they are not important to your system, since there are 29 additional codes that you can add, delete or change to meet your needs. To edit press the ‘edit record’ button below the ‘Data Entry’ screen, seen above, and then use the arrow
ADDITIONAL UTILITIES
AS/AP APPAREL SOFTWARE
74 REV. 0512
buttons to help you move around the codes move around the codes more easily. If you select to insert a new code, press the ‘add new record’ button and you will be prompted to enter a 1 character terms code and up to an 18 character description, along with a discount percent, discount days, due date and if specified as EOM, the number of days and the cut off date. After adding a new record, the computer will re-display the list with the new code inserted in the proper alphabetical order. In order to clean up your screen, it is acceptable to delete those codes not used for your company, along with 5 of the 7 special codes that are not necessary for your company. You MUST NOT delete 'P' or 'X'!! Proceed with caution!!! If you select to delete a code (except for 'P' and 'X' - which should NOT be DELETED!), use the up or down arrows to 'point' to the Terms code and press the ’X’ button at the bottom of the Data Entry screen. The code and description will be displayed, along with the following: After deleting the code, the computer will redisplay the list in the proper alphabetical order without the deleted code. When you have completed making your additions, deletions, or changes to the Terms code file, pressing <Esc> or the ‘exit’ button will return you to the Code Verification submenu. Although the operator has complete control over the code system, a few of these codes trigger special processing features and should NOT be changed. They are as follows:
0 This code indicates "CASH" terms and carries a special significance for the Point-of-Sale system.
1 Indicates 'COD' and triggers the printing of UPS - COD tags.
2 When you select this term during order entry and invoicing, the system will ask if there is
a special due date. The purpose for this Special Due Date is used when the company offers a customer a net date no matter when the order is shipped. Let's say that to encourage your customer to place an order in October, you offer net April 1, terms. This way the customer may place his order and the invoice is not due until April.
9 This is a special term, which provides for credit card like terms which are activated during invoicing and/or statement printing. This term only functions on systems that have this feature activated. The operator can delete this term from the system, but the code should not be used for any other term.
P This code is used internally by some special, custom programs.
S This code indicates "COD - Cash Only" and triggers the printing of UPS - COD tags.
X This code indicates that there are no terms established at the point of entry of the cus-tomer or order. You will NOT be permitted to convert an order to an invoice, or enter a

ADDITIONAL UTILITIES
AS/AP™ SYSTEM UTILITY
REV. 0512 75
direct invoice with "X" as the terms. IT IS IMPERATIVE FOR THE END USER TO CHECK THAT ANY TERMS USED BY YOUR COMPANY ARE TESTED TO ASSURE THAT THE RESULTS ARE IN KEEPING WITH THE CHART ABOVE, AND YOUR EXPECTATIONS. THE TERMS CHART ABOVE REPRESENTS OUR INTENTIONS AT THE TIME OF THIS REVISION OF THE MANUAL. DUE TO THE POSSIBILITY OF A PROGRAMMING ERROR OR DIFFERENCE IN TECHNIQUE, IT IS IMPORTANT THE END USER CHECK THE DUE DATE, DISCOUNT DATE, AND DISCOUNT AMOUNT, TO INSURE THAT YOUR RESULTS ARE CORRECT.
Ter r i to ry The Customer Territory code is used for sorting various Customer Lists and Labels and a few new sales reports. After selecting '3', you will be prompted:
Sales rep The Salesman's code is used in many areas of the program. Not only does the system use this file to validate the code you are entering, but we can also lookup the Salesman's full name to print on Statements, Invoices or Pick Slips. Of course, these are options, but they can provide a degree of personal feeling rather than just printing the salesman's code. After selecting '4', you will be prompted:
This gives you the option to simply print the information in the Salesman's table or to view the information on the screen for corrections/additions to be made. Selecting <P>rinter will prompt for you to turn on your printer and press any key to begin printing. Once complete, you will be returned to the AR Codes submenu. If <S>creen was selected, the screen will clear and the following will appear (shown below with sample data):
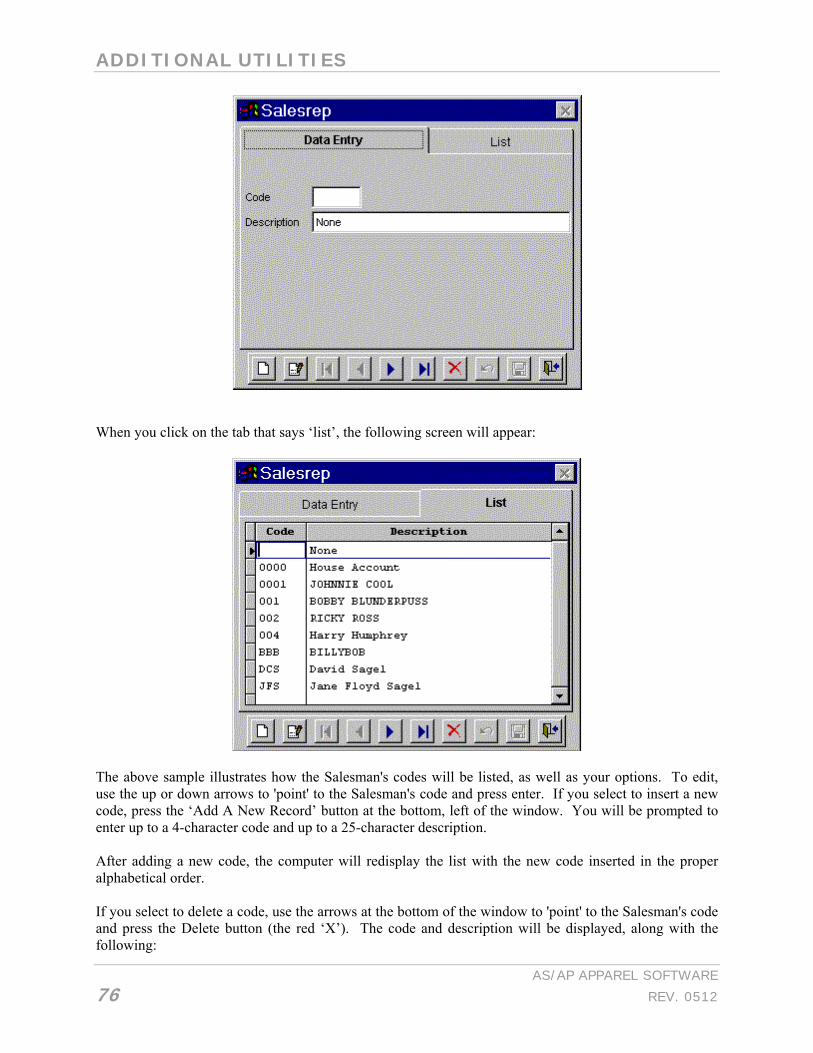
ADDITIONAL UTILITIES
AS/AP APPAREL SOFTWARE
76 REV. 0512
When you click on the tab that says ‘list’, the following screen will appear:
The above sample illustrates how the Salesman's codes will be listed, as well as your options. To edit, use the up or down arrows to 'point' to the Salesman's code and press enter. If you select to insert a new code, press the ‘Add A New Record’ button at the bottom, left of the window. You will be prompted to enter up to a 4-character code and up to a 25-character description. After adding a new code, the computer will redisplay the list with the new code inserted in the proper alphabetical order. If you select to delete a code, use the arrows at the bottom of the window to 'point' to the Salesman's code and press the Delete button (the red ‘X’). The code and description will be displayed, along with the following:

ADDITIONAL UTILITIES
AS/AP™ SYSTEM UTILITY
REV. 0512 77
After pressing <Y>es and deleting the code, the computer will redisplay the list in the proper alphabetical order without the deleted code. When you have completed making your additions, deletions, or changes to the Salesman's code file, pressing the ‘Exit’ button at the very bottom right of the window or the <Esc> will return you to the Code Verification submenu.
Source Of Cus tomer The Source of Customer code is used for sorting various Customer Lists and Labels. After selecting '5', you will be prompted to alert you that this option is not implemented at this time. You must contact your software provider for more information.
Cred i t Ra t ing The Credit Rating code is used to categorize your customers into different credit levels. After selecting '6', you will be prompted that this option is currently not implemented. You must contact your software provider for more information.
Account Pr io r i t y The Customer Priority is a 2-character field that is intended to indicate the priority the particular customer has. The Priority is passed to the Sales Order as it is created. Once the Order is added to the system, any change in priority is made on the individual order. At this writing, the priority is only being used for the daily booking report and hang tag selection. Custom applications using the priority are endless in scope. Contact your dealer if you can use this area expanded. The first prompt that you will receive upon selecting option '7' is:

ADDITIONAL UTILITIES
AS/AP APPAREL SOFTWARE
78 REV. 0512
This gives you the option to simply print the information in the Account Priority table or to view the information on the screen for corrections/additions to be made. Selecting <P>rinter will prompt for you to turn on your printer and press any key to begin printing. Once complete, you will be returned to the AR Codes submenu. If <S>creen was selected, the screen will clear and the following will appear (shown below with sample data):
If you press on the tab marked ‘List’ a similar window listing the Account Codes/Priority will appear looking like the following:
To edit, press the ‘Edit Code’ button at the bottom of the window. If you select to insert a new code, press the ‘Add A New Record’ button and you will be prompted to enter a 2 character code and up to a 25 character description. After adding a new code, the computer will redisplay the list with the new code inserted in the proper

ADDITIONAL UTILITIES
AS/AP™ SYSTEM UTILITY
REV. 0512 79
alphabetical order. If you select to delete a code, use the arrows to 'point' to the Priority Code and press the <Del>ete key or the red ‘X’. The code and description will be displayed, along with the following:
After deleting the code, the computer will redisplay the list in the proper alphabetical order without the deleted code. When you have completed making your additions, deletions, or changes to the Priority Code file, pressing the ‘Exit’ button at the very bottom right of the window or the <Esc> will return you to the Code Verification submenu.
Sales Order Type After selecting '8', you will be prompted:
This gives you the option to simply print the information in the Sales Order Type Table or to view the information on the screen for corrections/additions to be made. Selecting <P>rinter will prompt for you to turn on your printer and press any key to begin printing. Once complete, you will be returned to the AR Codes submenu. If <S>creen was selected, the screen will clear and the following will appear (shown below with sample data):

ADDITIONAL UTILITIES
AS/AP APPAREL SOFTWARE
80 REV. 0512
If you click on the ‘List’ tab the sample illustrates how the Order Type codes will be listed (see below), as well as your options. To edit, press the ‘Edit Code’ button at the bottom of the window. If you select to insert a new code, press the ‘Add A New Record’ button and you will be prompted to enter a 2 character code and up to a 25 character description.
After adding a new code, the computer will redisplay the list with the new code inserted in the proper alphabetical order. If you select to use the delete button, use the arrows to 'point' to the Order code and press the ‘X’ button to delete. The code and description will be displayed, along with the following:

ADDITIONAL UTILITIES
AS/AP™ SYSTEM UTILITY
REV. 0512 81
After deleting the code, the computer will redisplay the list in the proper alphabetical order without the deleted code. When you have completed making your additions, deletions, or changes to the Order Type file, pressing the ‘Exit’ button at the very bottom right of the window or the <Esc> will return you to the Code Verification submenu.
Ship V ia This option is not currently implemented. You will be alerted of this when you try to enter this option. For more information please contact your software provider.
Reason For Cred i t This option is not currently implemented. You will be alerted of this when you try to enter this option. For more information please contact your software provider.
Inventory Control Selection '2' will display another submenu (of which some of the options may not be implemented on your system):
Inven to ry C lass The Inventory Class code is used for sorting various Inventory Reports.
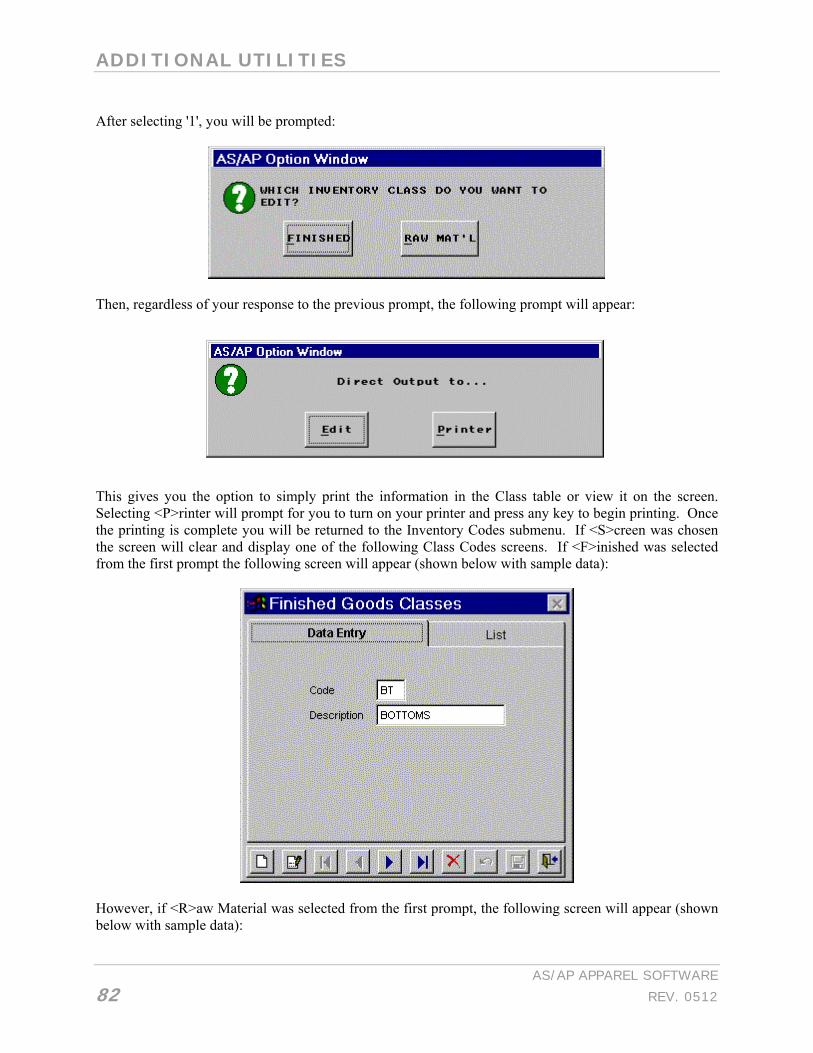
ADDITIONAL UTILITIES
AS/AP APPAREL SOFTWARE
82 REV. 0512
After selecting '1', you will be prompted:
Then, regardless of your response to the previous prompt, the following prompt will appear:
This gives you the option to simply print the information in the Class table or view it on the screen. Selecting <P>rinter will prompt for you to turn on your printer and press any key to begin printing. Once the printing is complete you will be returned to the Inventory Codes submenu. If <S>creen was chosen the screen will clear and display one of the following Class Codes screens. If <F>inished was selected from the first prompt the following screen will appear (shown below with sample data):
However, if <R>aw Material was selected from the first prompt, the following screen will appear (shown below with sample data):

ADDITIONAL UTILITIES
AS/AP™ SYSTEM UTILITY
REV. 0512 83
The above samples illustrate how the Class codes will be listed, as well as your options. To edit, press the ‘Edit Code’ button at the bottom of the window. If you select to insert a new code, press the ‘Add A New Record’ button and you will be prompted to enter a 2 character code and up to a 25 character description. After adding a new code, the computer will redisplay the list with the new code inserted in the proper alphabetical order. If you select to delete a code, use the arrows to 'point' to the Class code and press the ‘X’ key. The code and description will be displayed, along with the following:
After deleting the code, the computer will redisplay the list in the proper alphabetical order without the deleted code. When you have completed making your additions, deletions, or changes to the Class code file, pressing the ‘Exit’ button at the very bottom right of the window or the <Esc> will return you to the Code Verification submenu.
Uni t O f Measure The Inventory Unit of Measure code is used for sorting various Inventory Reports. Refer to Appendix A on page 113, B on page 115, and C on page 117 for the restrictions on Apparel and Non-apparel Unit of Measure codes. After selecting '2', you will be prompted:

ADDITIONAL UTILITIES
AS/AP APPAREL SOFTWARE
84 REV. 0512
This gives you the option to simply print the information in the Unit of Measure table or view it on the screen. Selecting <P>rinter will prompt for you to turn on your printer and press any key to begin printing. Once the printing is complete, you will be returned to the Inventory Codes submenu. Selecting <S>creen will display the following Unit of Measure code screen (shown below with sample data):
This sample illustrates how the Unit of Measure codes will be listed, as well as your options. To edit, use the up or down arrows to 'point' to the Unit of Measure code and press the ‘Edit Code’ button at the bottom of the window. If you select to insert a new code, press the ‘Add A New Record’ button and you will be prompted to enter up to a 3-character code and up to a 25-character description. When you click on the list tab the following screen will open and appear:

ADDITIONAL UTILITIES
AS/AP™ SYSTEM UTILITY
REV. 0512 85
After adding a new code, the computer will redisplay the list with the new code inserted in the proper alphabetical order. If you select to delete a code, use the arrows to 'point' to the Unit of Measure code and press the delete button (the ‘X’). The code and description will be displayed, along with the following:
After deleting the code, the computer will redisplay the list in the proper alphabetical order without the deleted code. When you have completed making your additions, deletions, or changes to the Unit of Measure code file, pressing the ‘Exit’ button at the very bottom right of the window or the <Esc> will return you to the Code Verification submenu.
Colo r De f in i t i ons After selecting '3', you will be prompted:

ADDITIONAL UTILITIES
AS/AP APPAREL SOFTWARE
86 REV. 0512
This gives you the option to simply print the information in the Color Definition table or view it on the screen. Selecting <P>rinter will prompt for you to turn on your printer and press any key to begin printing. Once the printing is complete, you will be returned to the Inventory Codes submenu. Selecting <S>creen will display the following Color Definition code screen (shown below with sample data):
Pressing the list tab will open the following window:

ADDITIONAL UTILITIES
AS/AP™ SYSTEM UTILITY
REV. 0512 87
This sample illustrates how the Color codes will be listed, as well as your options. To edit, use the arrows to 'point' to the Color code and press the ‘Edit Code’ button at the bottom of the window. If you select to insert a new code, press the ‘Add a New Record’ and you will be prompted to enter up to a 3-character code and up to a 12-character description. After adding a new code, the computer will redisplay the list with the new code inserted in the proper alphabetical order. If you select to delete a code, use the up or down arrows to 'point' to the Color code and press the delete button. The code and description will be displayed, along with the following:
After deleting the code, the computer will redisplay the list in the proper alphabetical order without the deleted code. When you have completed making your additions, deletions, or changes to the Color Definition code file, pressing the ‘Exit’ button at the very bottom right of the window or the <Esc> will return you to the Code Verification submenu.
Season Descr ip t ions The Season Codes are used for sorting various Inventory Reports. The code is a 3-character code with a 15-character description field.

ADDITIONAL UTILITIES
AS/AP APPAREL SOFTWARE
88 REV. 0512
The first prompt that you will receive upon selecting this option, '4', is:
This gives you the option to simply print the information in the Season Full Name table or view it on the screen. Selecting <P>rinter will prompt for you to turn on your printer and press any key to begin printing. Once the printing is complete, you will be returned to the Inventory Codes submenu. Selecting <S>creen will display the following Season Full Name code screen (shown below with sample data):
Pressing the ‘List’ tab will open the following window:

ADDITIONAL UTILITIES
AS/AP™ SYSTEM UTILITY
REV. 0512 89
This sample illustrates how the Season codes will be listed, as well as your options. To edit, use the arrows to 'point' to the Season code and press the ‘Edit Record’ button. If you select to insert a new code, press the ‘Add a New Record’ button and you will be prompted to enter a 3-character code and up to a 15-character description. After adding a new code, the computer will redisplay the list with the new code inserted in the proper alphabetical order. If you select to delete a code, use the arrows to 'point' to the Season code and press the ‘X’, or delete button. The code and description will be displayed, along with the following:
After deleting the code, the computer will redisplay the list in the proper alphabetical order without the deleted code. When you have completed making your additions, deletions, or changes to the Season Description code file, pressing the ‘Exit’ button at the very bottom right of the window or the <Esc> will return you to the Code Verification submenu.
Embro idery Opt ions When you first open this option you will receive the following prompt:

ADDITIONAL UTILITIES
AS/AP APPAREL SOFTWARE
90 REV. 0512
This gives you the option to simply print the information in the Embroidery Options table or view it on the screen. Selecting <P>rinter will prompt for you to turn on your printer and press any key to begin printing. Once the printing is complete, you will be returned to the Inventory Codes submenu. Selecting <S>creen will display the following Embroidery Options code screen (shown below with sample data):
Clicking the ‘List’ tab will open the following window:
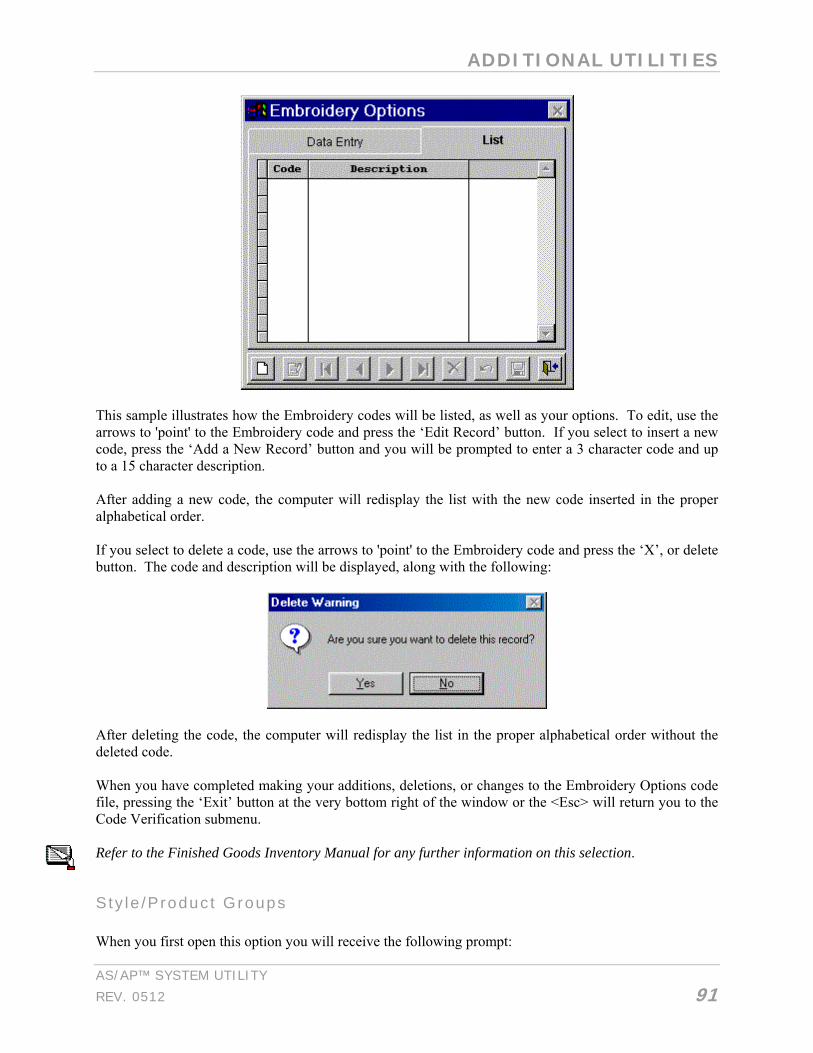
ADDITIONAL UTILITIES
AS/AP™ SYSTEM UTILITY
REV. 0512 91
This sample illustrates how the Embroidery codes will be listed, as well as your options. To edit, use the arrows to 'point' to the Embroidery code and press the ‘Edit Record’ button. If you select to insert a new code, press the ‘Add a New Record’ button and you will be prompted to enter a 3 character code and up to a 15 character description. After adding a new code, the computer will redisplay the list with the new code inserted in the proper alphabetical order. If you select to delete a code, use the arrows to 'point' to the Embroidery code and press the ‘X’, or delete button. The code and description will be displayed, along with the following:
After deleting the code, the computer will redisplay the list in the proper alphabetical order without the deleted code. When you have completed making your additions, deletions, or changes to the Embroidery Options code file, pressing the ‘Exit’ button at the very bottom right of the window or the <Esc> will return you to the Code Verification submenu. Refer to the Finished Goods Inventory Manual for any further information on this selection.
Sty le /Produc t Groups When you first open this option you will receive the following prompt:

ADDITIONAL UTILITIES
AS/AP APPAREL SOFTWARE
92 REV. 0512
This gives you the option to simply print the information in the Style/Product Groups table or view it on the screen. Selecting <P>rinter will prompt for you to turn on your printer and press any key to begin printing. Once the printing is complete, you will be returned to the Inventory Codes submenu. Selecting <S>creen will display the following Style/Product Groups code screen (shown below with sample data):
Clicking the ‘List’ tab will open the following window:

ADDITIONAL UTILITIES
AS/AP™ SYSTEM UTILITY
REV. 0512 93
This sample illustrates how the Style/Product Groups codes will be listed, as well as your options. To edit, use the arrows to 'point' to the Style/Product Groups code and press the ‘Edit Record’ button. If you select to insert a new code, press the ‘Add a New Record’ button and you will be prompted to enter a 3-character code and up to a 15-character description. After adding a new code, the computer will redisplay the list with the new code inserted in the proper alphabetical order. If you select to delete a code, use the arrows to 'point' to the Style/Product Groups code and press the ‘X’, or delete button. The code and description will be displayed, along with the following:
After deleting the code, the computer will redisplay the list in the proper alphabetical order without the deleted code. When you have completed making your additions, deletions, or changes to the Style/Product Groups Options code file, pressing the ‘Exit’ button at the very bottom right of the window or the <Esc> will return you to the Code Verification submenu. This option should be discussed with your software vendor if you are interested in expanding this feature any further.

ADDITIONAL UTILITIES
AS/AP APPAREL SOFTWARE
94 REV. 0512
Manufac tu r ing Processes This is used for the manufacturing order. It is not applicable on some systems. Contact your software dealer for more information. If however your system is implemented with the Manufacturing Processes option then the first window you will receive is:
This gives you the option to simply print the information in the Manufacturing Processes Groups table or view it on the screen. Selecting <P>rinter will prompt for you to turn on your printer and press any key to begin printing. Once the printing is complete, you will be returned to the Inventory Codes submenu. Selecting <S>creen will display the following Manufacturing Processes Groups code screen (shown below with sample data):
Clicking the ‘List’ tab will open the following window:

ADDITIONAL UTILITIES
AS/AP™ SYSTEM UTILITY
REV. 0512 95
This sample illustrates how the Manufacturing Processes Groups codes will be listed, as well as your options. To edit, use the arrows to 'point' to the Manufacturing Processes code and press the ‘Edit Record’ button. If you select to insert a new code, press the ‘Add a New Record’ button and you will be prompted to enter a 3 character code and up to a 15 character description. After adding a new code, the computer will redisplay the list with the new code inserted in the proper alphabetical order. If you select to delete a code, use the arrows to 'point' to the Manufacturing Processes code and press the ‘X’, or delete button. The code and description will be displayed, along with the following:
After deleting the code, the computer will redisplay the list in the proper alphabetical order without the deleted code. When you have completed making your additions, deletions, or changes to the Manufacturing Processes Options code file, pressing the ‘Exit’ button at the very bottom right of the window or the <Esc> will return you to the Code Verification submenu.
Embro idery Thread When you click on option ‘9’ the first window you will receive is:

ADDITIONAL UTILITIES
AS/AP APPAREL SOFTWARE
96 REV. 0512
This gives you the option to simply print the information in the Embroidery Thread Groups table or view it on the screen. Selecting <P>rinter will prompt for you to turn on your printer and press any key to begin printing. Once the printing is complete, you will be returned to the Inventory Codes submenu. Selecting <S>creen will display the following Embroidery Thread Groups code screen (shown below with sample data):
Clicking the ‘List’ tab will open the following window:
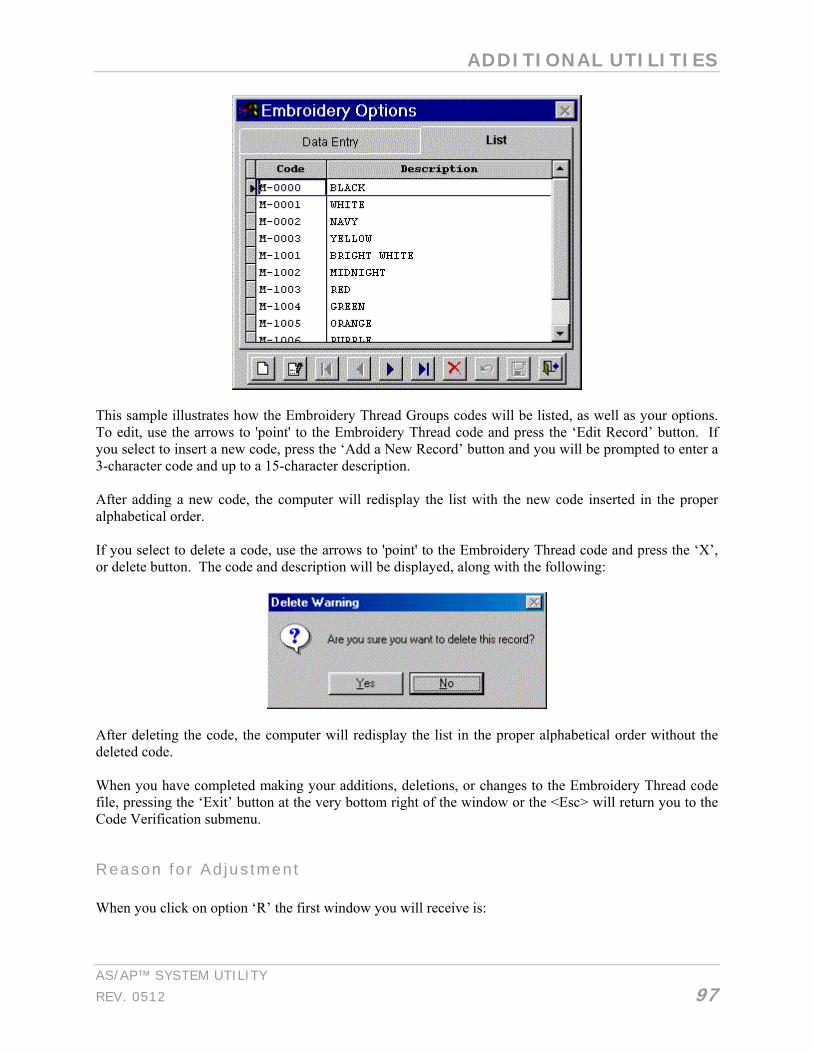
ADDITIONAL UTILITIES
AS/AP™ SYSTEM UTILITY
REV. 0512 97
This sample illustrates how the Embroidery Thread Groups codes will be listed, as well as your options. To edit, use the arrows to 'point' to the Embroidery Thread code and press the ‘Edit Record’ button. If you select to insert a new code, press the ‘Add a New Record’ button and you will be prompted to enter a 3-character code and up to a 15-character description. After adding a new code, the computer will redisplay the list with the new code inserted in the proper alphabetical order. If you select to delete a code, use the arrows to 'point' to the Embroidery Thread code and press the ‘X’, or delete button. The code and description will be displayed, along with the following:
After deleting the code, the computer will redisplay the list in the proper alphabetical order without the deleted code. When you have completed making your additions, deletions, or changes to the Embroidery Thread code file, pressing the ‘Exit’ button at the very bottom right of the window or the <Esc> will return you to the Code Verification submenu.
Reason fo r Ad jus tment When you click on option ‘R’ the first window you will receive is:
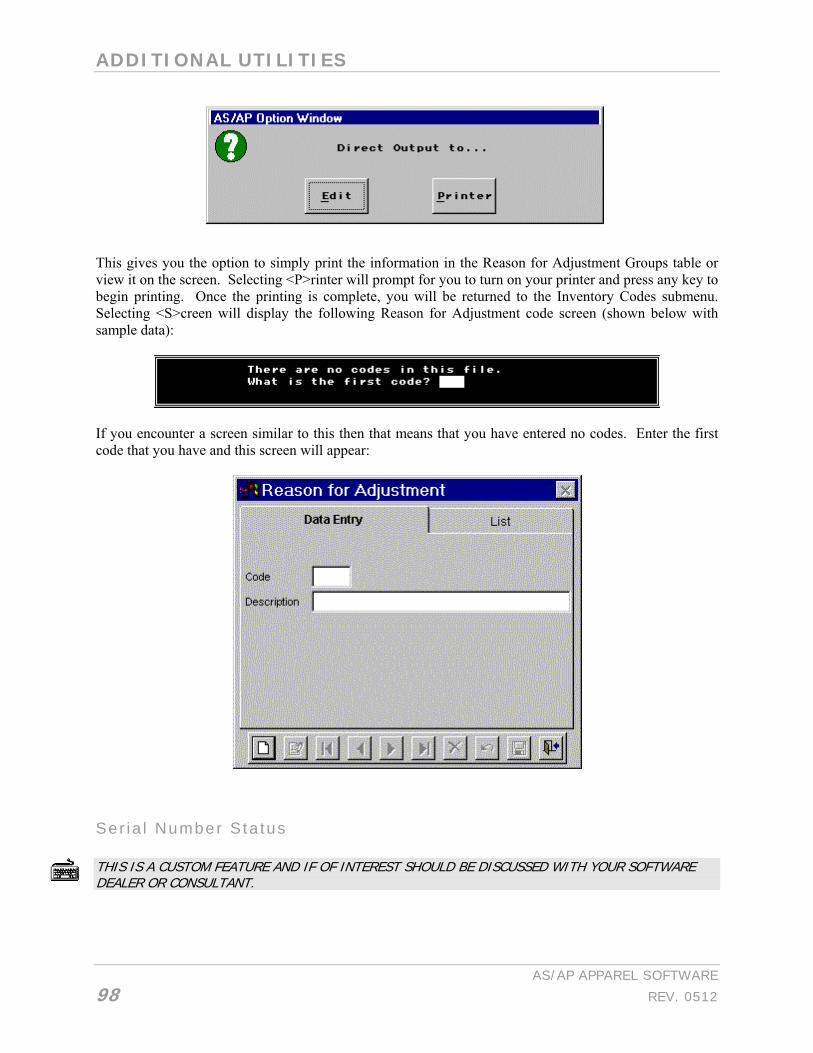
ADDITIONAL UTILITIES
AS/AP APPAREL SOFTWARE
98 REV. 0512
This gives you the option to simply print the information in the Reason for Adjustment Groups table or view it on the screen. Selecting <P>rinter will prompt for you to turn on your printer and press any key to begin printing. Once the printing is complete, you will be returned to the Inventory Codes submenu. Selecting <S>creen will display the following Reason for Adjustment code screen (shown below with sample data):
If you encounter a screen similar to this then that means that you have entered no codes. Enter the first code that you have and this screen will appear:
Ser ia l Number S ta tus THIS IS A CUSTOM FEATURE AND IF OF INTEREST SHOULD BE DISCUSSED WITH YOUR SOFTWARE DEALER OR CONSULTANT.

ADDITIONAL UTILITIES
AS/AP™ SYSTEM UTILITY
REV. 0512 99
Accounts Payable Selection '3' contains the Accounts Payable terms codes included with each new system as of the time of the printing of this manual. The Accounts Payable Terms are identical in operation to the Accounts Receivable Terms; however, they can be freely modified with no restrictions. Refer to the section on the Accounts Receivable Terms for further detail beyond the following. When you first enter option ‘3’ you will receive the following prompt:
This gives you the option to simply print the information in the Accounts Payable table or view it on the screen. Selecting <P>rinter will prompt for you to turn on your printer and press any key to begin printing. Once the printing is complete, you will be returned to the Inventory Codes submenu. Selecting <S>creen will display the following Accounts Payable code screen (shown below with sample data):
Clicking the ‘List’ tab will open the following window:
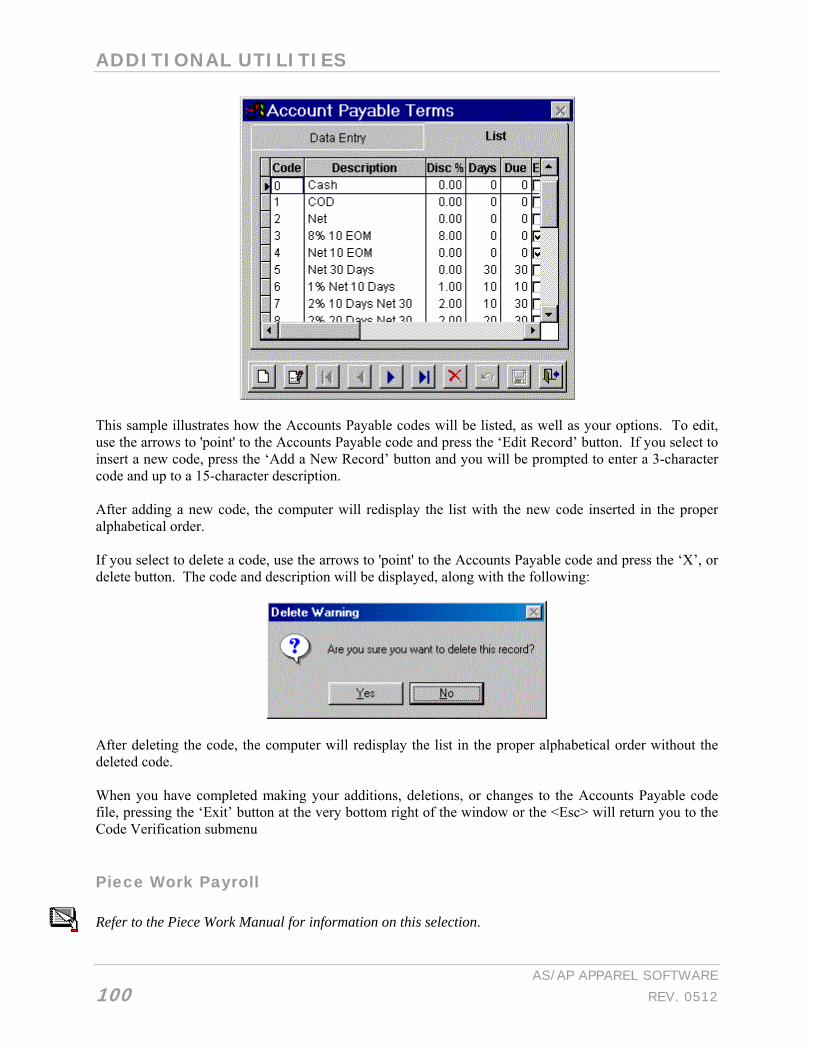
ADDITIONAL UTILITIES
AS/AP APPAREL SOFTWARE
100 REV. 0512
This sample illustrates how the Accounts Payable codes will be listed, as well as your options. To edit, use the arrows to 'point' to the Accounts Payable code and press the ‘Edit Record’ button. If you select to insert a new code, press the ‘Add a New Record’ button and you will be prompted to enter a 3-character code and up to a 15-character description. After adding a new code, the computer will redisplay the list with the new code inserted in the proper alphabetical order. If you select to delete a code, use the arrows to 'point' to the Accounts Payable code and press the ‘X’, or delete button. The code and description will be displayed, along with the following:
After deleting the code, the computer will redisplay the list in the proper alphabetical order without the deleted code. When you have completed making your additions, deletions, or changes to the Accounts Payable code file, pressing the ‘Exit’ button at the very bottom right of the window or the <Esc> will return you to the Code Verification submenu
Piece Work Payroll Refer to the Piece Work Manual for information on this selection.

ADDITIONAL UTILITIES
AS/AP™ SYSTEM UTILITY
REV. 0512 101
System Files Selection '5' will display another submenu (of which some of the options may not be implemented on your system):
Sta tes And Count r ies The AS/AP™ Accounting System has an optional file, controlled by the system FLAG, that verifies State and Provincial Abbreviations as they are entered into the Customer, Ship To, and Vendor Data File. Upon selecting option '1' from the System Code Tables submenu you will be prompted the following:
Selecting <P>rinter will print the following State Code/Name table while <S>creen will display the table:

ADDITIONAL UTILITIES
AS/AP APPAREL SOFTWARE
102 REV. 0512
Clicking the ‘List’ tab will open the following window:
This sample illustrates how the State Code/Name codes will be listed, as well as your options. To edit, use the arrows to 'point' to the State Code/Name code and press the ‘Edit Record’ button. If you select to insert a new code, press the ‘Add a New Record’ button and you will be prompted to enter a 3-character code and up to a 15-character description. After adding a new code, the computer will redisplay the list with the new code inserted in the proper alphabetical order. If you select to delete a code, use the arrows to 'point' to the State Code/Name code and press the ‘X’, or delete button. The code and description will be displayed, along with the following:

ADDITIONAL UTILITIES
AS/AP™ SYSTEM UTILITY
REV. 0512 103
After deleting the code, the computer will redisplay the list in the proper alphabetical order without the deleted code. When you have completed making your additions, deletions, or changes, to the State Code/Name file , pressing the ‘Exit’ button at the very bottom right of the window or the <Esc> key will return you to the Code Verification submenu after prompting you to print the list or not.
Moneta ry Convers ions THIS IS A CUSTOM FEATURE AND IF OF INTEREST SHOULD BE DISCUSSED WITH YOUR SOFTWARE DEALER OR CONSULTANT.
County Re fe rences The County Code field is an optional, 5 space, alphanumeric field that is intended to verify the County for Sales Tax purposes. The program includes the provision for the code to be entered in the Customer Master file as well as with the Bill to/Ship to addresses. As these codes are entered, they are validated against the data contained in the County Code Table. If the code is not in the Table, the operator will not be permitted to enter the code in the Customer Master or Bill to/Ship to files. The valid codes are then passed, automatically, to the Order and Invoice records. A System Flag activates this option. If the flag is off, the county field does not appear on the data entry screen. If necessary, we can custom design systems that will tie into our Zip Code Verification System. THIS IS A CUSTOM FEATURE AND IF OF INTEREST SHOULD BE DISCUSSED WITH YOUR SOFTWARE DEALER OR CONSULTANT.
Count ry Re fe rences The Country Code field is also an optional alphanumeric field that is intended to verify the Country for Sales Tax purposes. The program includes the provision for the code to be entered in the Customer Master file as well as with the Bill to/Ship to addresses. As these codes are entered, they are validated against the data contained in the Country Code Table. If the code is not in the Table, the operator will not be permitted to enter the code in the Customer Master or Bill to/Ship to files. The valid codes are then passed, automatically, to the Order and Invoice records.

ADDITIONAL UTILITIES
AS/AP APPAREL SOFTWARE
104 REV. 0512
A System Flag activates this option. If the flag is off, the county field does not appear on the data entry screen. If necessary, we can custom design systems that will tie into our Zip Code Verification System. THIS OPTION IS AVAILABLE BY SPECIAL ORDER...
Zip Code Tab le This program requires that the zip code and state/county code verifications be active in order to run. The Zip and Postal Code Verification Tables interactively compare the 5 digit Zip Code (or 6 character Canadian Postal Code) to the City and State/Province entered by the operator. If the program detects a mismatch in the City and/or State/Province, a window opens and displays the correct data. The operator pressing <Esc> can bypass this message. The operator can accept the computer's suggested City and State/Province by pressing <Enter> or any other key, when the message is displayed, or override the computer by pressing <Esc>.
BYPASS The Zip/Postal Code Table is bypassed entirely if the City, State, and Zip/Postal Code are ALL left blank.
COUNTRY CODES ACTIVE If your system has the provision to enter COUNTRY codes with the billing and shipping addresses, the Zip/Postal code verification system is bypassed when the STATE (PROVINCE) and ZIP (POSTAL) CODE fields are left blank. This leaves your system vulnerable to an Operator Error in the event that the Operator inadvertently leaves the STATE/PROVINCE blank and then also forgets the ZIP/POSTAL CODE.
OVERRIDE The most important thing to remember about overriding the Zip/Postal Code system is the <Esc> key. By pressing the <Esc> key for the City, State/Prov, or Zip/Postal Code, the system will accept the operator's entry.
ZIP LOOKUP If the operator enters a City and State, but, leaves the Zip Code BLANK, the system Looks Up the correct Zip Code, and displays it, if found. This is NOT available for the Canadian Postal Codes since they are tied into the actual street address.
However, it is important to remember that computer's are good, but, NOT infallible. Many City and State combinations have multiple Zip Codes and some Zip Codes have multiple Cities. If the operator enters the City and State, the computer will respond with the FIRST Zip Code found in the table. It is much safer to enter the Zip Code and allow the computer to Look Up the City and State. The US zip codes are tested against a table of over 44,000 records compiled by a vendor in Washington, D.C. Since the Post Office makes monthly changes in the Zip Code system, updated lists are available quarterly from your dealer by subscription. FOR THOSE CLIENTS WHO USE ZIP+4, WE CAN OFFER CUSTOM DESIGNED ZIP+4 VERIFICATION SYSTEMS BY SPECIAL ORDER.

ADDITIONAL UTILITIES
AS/AP™ SYSTEM UTILITY
REV. 0512 105
SIC Tab le
Div is ion Tab le Upon selecting option '7' from the System Code Tables submenu you will be prompted the following:
Selecting <P>rinter will print the following Division table while <S>creen will display the table (shown below with sample data):
Clicking the ‘List’ tab will open the following window:

ADDITIONAL UTILITIES
AS/AP APPAREL SOFTWARE
106 REV. 0512
This sample illustrates how the Division codes will be listed, as well as your options. To edit, use the arrows to 'point' to the Division code and press the ‘Edit Record’ button. If you select to insert a new code, press the ‘Add a New Record’ button and you will be prompted to enter a 3-character code and up to a 15-character description. After adding a new code, the computer will redisplay the list with the new code inserted in the proper alphabetical order. If you select to delete a code, use the arrows to 'point' to the Division code and press the ‘X’, or delete button. The code and description will be displayed, along with the following:
After deleting the code, the computer will redisplay the list in the proper alphabetical order without the deleted code. When you have completed making your additions, deletions, or changes, to the Division file , pressing the ‘Exit’ button at the very bottom right of the window or the <Esc> key will return you to the Code Verification submenu after prompting you to print the list or not.
SCAC Sh ipper Code The first prompt that you will receive after selecting option ‘8’ is:
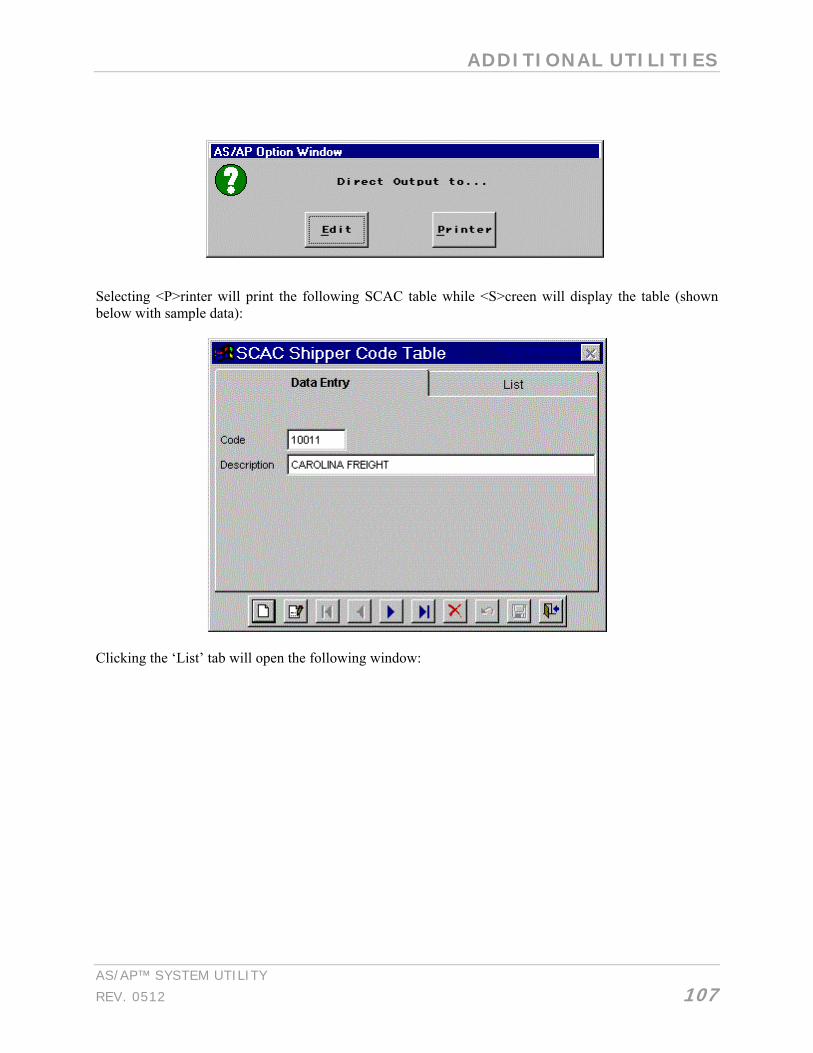
ADDITIONAL UTILITIES
AS/AP™ SYSTEM UTILITY
REV. 0512 107
Selecting <P>rinter will print the following SCAC table while <S>creen will display the table (shown below with sample data):
Clicking the ‘List’ tab will open the following window:

ADDITIONAL UTILITIES
AS/AP APPAREL SOFTWARE
108 REV. 0512
This sample illustrates how the SCAC codes will be listed, as well as your options. To edit, use the arrows to 'point' to the SCAC code and press the ‘Edit Record’ button. If you select to insert a new code, press the ‘Add a New Record’ button and you will be prompted to enter a code and a description. After adding a new code, the computer will redisplay the list with the new code inserted in the proper alphabetical order. If you select to delete a code, use the arrows to 'point' to the SCAC code and press the ‘X’, or delete button. The code and description will be displayed, along with the following:
After deleting the code, the computer will redisplay the list in the proper alphabetical order without the deleted code. When you have completed making your additions, deletions, or changes, to the SCAC file , pressing the ‘Exit’ button at the very bottom right of the window or the <Esc> key will return you to the Code Verification submenu after prompting you to print the list or not.
User Interface User Interface, as of now, is not implemented on new systems. In order to add your own program you can simply add a menu system named ALTMENU.prg. However, it is vitally important that you do not

ADDITIONAL UTILITIES
AS/AP™ SYSTEM UTILITY
REV. 0512 109
changed any of the system memory variables or this will cause untold problem upon returning to the AS/AP™ menu system. Contact you Software Dealer if you have any further questions about this option.
Closing Dates The closing dates are maintained in a database file. This option enables the operator to adjust those dates, for the current year, as necessary.
After editing the closing dates and pressing <Enter> after date '12' the following prompt will appear:
Selecting <C>ancel will return you to the Additional Utilities submenu. A <N>o will return you to closing date '1' and allow for any corrections to be made. And <Y>es will update the file with the adjusted closing dates and return you to the Additional Utilities submenu.

ADDITIONAL UTILITIES
AS/AP APPAREL SOFTWARE
110 REV. 0512

QUERY MAKER SYSTEM
AS/AP™ SYSTEM UTILITY
REV. 0512 111
QUERY MAKER SYSTEM The Query Maker System, which is available through the Utility Menu, and which is sold as a sub system, permits the operator to create user-defined queries from a variety of system files. The results of these queries can be BROWSED on the screen or sent to a file in one of many user defined file formats. Presently, the operator generates Printed Reports through a 2-step process. First, a query should be generated to a Database File format. The operator can then call FoxPro or any compatible report generator and generate a report form based on the database file created by the query system. The following is the submenu that will appear if you have the Query Maker System active on your system:
There is a separate manual detailing some of the Query Maker functions. If you did not receive a copy of the Query Maker manual feel free to contact us or visit our website at www.asapofga.com and access you support area for online versions of the AS/AP™ manuals.
QUERY MAKER SYSTEM
AS/AP APPAREL SOFTWARE
112 REV. 0512

DOZEN AS UNIT OF MEASURE
AS/AP™ SYSTEM UTILITY
REV. 0512 113
APPENDIX A: DOZEN AS A UNIT OF MEASURE The Finished Goods Inventory of the AS/AP™ Apparel Systems are preinstalled to operate in either pieces (PCS) or dozens (DOZ). Therefore, the only time you will be asked to enter a Unit of Measure will be while selling a Non-Stock [MISC] item or Raw Material. The Raw Material Unit of Measure is defined by the Company and the Operator and can be any 3-character (alphanumeric) code. If the company wants to maintain consistency in the codes used, a FLAG can be set to limit the choices to a list of codes. The Raw Material Inventory permits the operator to define a Unit of Measure for every SKU entered. If System Flag 99 is activated, the Unit of Measure is validated against a lookup table. In addition to the verification table, the codes M, KG, and DZ will be handled with 3 decimal places. DOZ is used by the Finished Goods system and will have no special effect if used in the Raw Material portion of the system. The codes HR, YDS, LBS, and GRS are handled with 2 decimal places. All other Units of Measure will be handled as whole numbers with NO decimal places. A unit of measure of DOZ will be available to handle in twelfths, where .01 equals 1 PCS or 1/12 DOZ.

DOZEN AS UNIT OF MEASURE
AS/AP APPAREL SOFTWARE
114 REV. 0512

HOURS AS UNIT OF MEASURE
AS/AP™ SYSTEM UTILITY
REV. 0512 115
APPENDIX B: HOURS AS A UNIT OF MEASURE Any time that 'HR' is used to indicate a unit of measure in inventory control, this will trigger certain changes in all modules of inventory and sales order processing in the Standard AS/AP™ accounting system. Specifically, all orders processed and all invoices written for inventory items whose units of measure are hours 'HR' will be formatted permitting the entry of a two place decimal, i.e. 3.25. The computer will assume that the cost you have indicated in inventory control and the selling price are per hour amounts, and will handle all mathematical functions accordingly. Therefore an entry of 3.25 hours at $10.00 per hour will be billed at $32.50. ONCE AN ITEM IS DESIGNATED WITH 'HR' AS A UNIT OF MEASURE, IT IS EXTREMELY IMPORTANT THAT IT NEVER BE CHANGED. THE CHANGE IN AN ITEM DESIGNATED 'HR' AS A UNIT OF MEASURE, WILL CAUSE ALL SUBSEQUENT REPORTS TO COME UP WITH INVALID PRICE EXTENSIONS, IF ANY QUANTITY HAS BEEN ENTERED INTO INVENTORY PRIOR TO THE CHANGE. When printing invoices, picking tickets, order confirmation/packing slips, etc., your software consultant will be able to provide you with virtually any type of formatted output, including a professional billing format if this is desirable. A standard invoicing form, when it encounters an item sold with 'HR' as a unit of measure, will not show the quantity ordered or quantity backordered on the invoice. It will only show a quantity shipped or delivered. If you have any further questions concerning 'HR' as a unit of measure, please contact AS/AP™ software support or your local consultant.

HOURS AS UNIT OF MEASURE
AS/AP APPAREL SOFTWARE
116 REV. 0512

POUNDS AS UNIT OF MEASURE
AS/AP™ SYSTEM UTILITY
REV. 0512 117
APPENDIX C: POUNDS AS UNIT OF MEASURE If you wish to use pounds with a two place decimal fractional unit of measure, you have to indicate the unit as 'LBS'. When the system sees 'LBS' it will accept two place decimal entry for all inventory related functions which is the input of inventory in year to date figures, the input of orders and the printing of invoices. It is assumed that any cost and selling price calculations related to an item having a unit of measure of 'LBS' will be based on price and cost per pound. THE USE OF 'LBS' AS A UNIT OF MEASURE IS ALMOST IDENTICAL TO THE USE OF EITHER 'HR' [HOURS] OR 'YDS' [YARDS]. YOU MAY REFER TO THOSE SECTIONS FOR ADDITIONAL INFORMATION. The only limitation is that your cost cannot accurately be calculated to more than three decimal places and your selling price cannot be more that two decimal places in accuracy. For example: On the standard accounting system you could have a cost per unit of 66.67 cents. When using pounds 'LBS' it would have to be 66.7 cents as a cost. Selling prices in the standard accounting system could be $1.255. When using pounds 'LBS' as a unit of measure, your selling price would have to be rounded to $1.25 or $1.26. Maximum quantity sold Y-T-D is limited to 999,999 pounds. The maximum quantity in inventory, On-Order or In-Process is 999,999 pounds. Maximum quantity sold in any single transaction is limited 9999.99 pounds. It is extremely important that once an item is designated to be sold in pounds that you do not change the unit of measure. In the event you change the unit of measure every figure in the computer using that particular item will be affected. The system will continue to function, but you may cause numeric overflows and invalid data. Therefore, you must decide at the time an item is entered into the system, whether it is to be carried as pounds 'LBS' or another stock keeping unit.
POUNDS AS UNIT OF MEASURE
AS/AP APPAREL SOFTWARE
118 REV. 0512

FINANCIAL PERIOD VS. MONTHS
AS/AP™ SYSTEM UTILITY
REV. 0512 119
APPENDIX D: FINANCIAL PERIODS VS. MONTHS There has been considerable confusion among system users concerning Financial Periods as they relate to calendar dates and months. Financial Periods are the span during which accounting data was collected. Unfortunately, this time span is usually 30 days, which coincidentally is the span of many calendar months. This is where the confusion develops. The first problem is that your company's fiscal year may not begin January 1st. If, for instance, your fiscal year begins July 1st, July is your first Financial Period and concomitantly, January is your 7th Period. In this example, the calendar month and Financial Period have even less of a relationship. To complicate matters even further, Financial Periods are often established in such a manner as to always close on a given day, such as a Friday. If this is the case, some periods will close on the 28th of the month while others will close on the 5th. This type of Fiscal Calendar is developed by assigning two four (4) week Periods and one five (5) week Period to each Fiscal Quarter. That's 13 weeks per Quarter, 52 weeks per Year. The computer complicates this already tenuous situation by not forgiving what are otherwise minor indiscretions. The computer ends one Financial Period and begins the next based on the operator Closing the Month (Refer to the section on Month-End Closing). If there has been activity, which crossed the line between two Calendar Months, either before or after the Month-End Closing, your reports can become confusing if you attempt to cross-reference them. The simplest example of this problem can be seen in invoicing. Suppose that you are late closing your November Fiscal Period. The closing is finally performed on December 5th. If you print an invoice register for the 11th Period it would contain invoices from November 1st through December 5th. This total should match the total of the Batch runs for this same Period. However, if you print an invoice register for November 1st through the 30th, the figures will not agree. The next question is 'Which figure is correct?' The answer -Both. It is merely a matter of which way you wish to look at the figures. The most important point is to remember what the computer and program are doing internally. With this information, the user must stay aware of the date of the month-end closing and whether or not certain activity occurs before or after closing.

FINANCIAL PERIODS VS. MONTHS
AS/AP APPAREL SOFTWARE
120 REV. 0512
END OF MONTH PROCESSING
AS/AP™ SYSTEM UTILITY
REV. 0512 121
APPENDIX E: END-OF-MONTH PROCESSING This section is intended as a discussion of month-end reports and procedures. It represents the author's opinion, and is NOT intended as the final word on the subject. This APPENDIX has only been included to pacify critics who think that we should tell them every report that they will need, when the truth is that we have NO IDEA WHAT YOUR COMPANY REQUIRES IN THE FORM OF BACKUP AND PAPER TRAILS. WE MUST ASSUME (AND STRONGLY RECOMMEND IF YOU DO NOT) THAT YOU ARE SAVING A COPY OF EVERY PIECE OF PAPER PRINTED BY THE SYSTEM INCLUDING, BUT NOT LIMITED TO:
Sales Invoices End-Of-Day Sales Invoice Journals AP Invoice Journals AP Check Registers Payroll Check Registers AR Cash Receipts Registers GL Transaction Postings Purchase Journals
The following list notes the generating module in brackets. If your company does not use a particular module, simply skip those reports. We assume you have completed all work for the current period and are ready to run the month-end closing in the particular module. First run the following:
Finance/Service Charges [AR] End-of-Day Process for above charges [SO] Accounts Receivable Customer Statements [AR] Inventory On Hand [IC] All Open Orders by Order Number [SO] Summary Invoice Register - a detailed register runs during the End-of-Month Closing [SO] Customer Master List [AR] Accounts Receivable Aging [AR] Accounts Payable Aging [AP] Vendor Master List [AP] Working Trial Balance [GL] All Journals Trial Detailed Balance [GL] Summary Trial Balance Balance Sheet [GL] Income Statement [GL]
If this seems like a lot of paper, it probably is. Does the fact that it takes too much time and paper justify skipping the report? That's not our decision. We can only tell you what we think is right. If you choose not to print the report and need it in the future, at least we warned you.

END OF MONTH PROCESSING
AS/AP APPAREL SOFTWARE
122 REV. 0512
There are 4 End of Month Processes that have to be run if the modules that they close are active on your system. Although, it does not provide a complete closing process, the Period counter can be incremented through the Company Master file.
Accounts Receivable It is typical for AR to close promptly at the end of each month. Therefore, on virtually all systems, Sales and Accounts Receivable close first. During the AR End of Month process the Current Month Cash Receipts file is archived to the YTD Cash Receipts file, the Invoice Detail markers are reset, Paid Commission records are purged, and Customer Accounts that have a zero balance are balanced. The 'reference' entered by the system for the items which are automatically purged is "EOM CR". This process can be defeated [bypassed] by setting System Flag 196 to "Y"." Refer to the "End of Day Processing" for a discussion of various possibilities in making the computer work for YOU instead of you working for the computer. Just keep in mind that the terminology 'End of Day' has been used for lack of a better term. We can just as easily call this process the 'Ledger/Receivables Update', because that's what it is. Furthermore, no rule says it has to be run every day or even once a day. We have one client who updates (end of day) after EVERY data entry session, several times a day to maintain data as current as possible, while another, VERY LARGE client, updates once a month. Additional Reports And Functions Accounts Receivables, unlike other modules, requires the printing of several additional reports and the running of additional processes. These include:
• Finance Charges • Auto Billing [option] • AR Aging Report • Customer Statements
For those of you who are interested, this is also the order in which we recommend running the AR functions. Although, it will require quitting a lot of pages, it is also a good idea to run a detailed Customer List, in order to protect yourself against a complete system failure.
Accounts Payable Accounts Payable is usually kept open until the bills from the prior month have been received and posted. Most companies try to close the AP section by the 10 to 15th of the following month.

END OF MONTH PROCESSING
AS/AP™ SYSTEM UTILITY
REV. 0512 123
As with AR, we recommend running the AP Aging prior to closing the month. For those who own a paper mill, we also suggest the protection of running the detailed Vendor Master List.
General Ledger The General Ledger really follows no predetermined rules. Each company closes GL at it's own time and place. The interesting thing about AS/AP™ is that Ledger can really be closed immediately after the Payables and still receive postings to any prior period until the year is closed. The Ledger, on the other hand, cannot be closed AHEAD of the other modules. If the operator attempts to close the GL, the computer will explain the process. However, we do recommend printing the Work Trial Balance and possibly a Summary Trail Balance PRIOR to closing the month or year. As with other modules, in the event of a complete system failure, you should have an All Journals Trial Balance.
Gross-To-Net Payroll All formal payroll reports are based on the calendar date a payroll is paid. In order to maintain the proper GL fiscal period, the operator is expected to increment the PY period counter by selecting the Month End Closing option from the Payroll Menu or directly through the Company Master file.
Error Correction The most common AR error reported by clients is that someone accidentally posts additional invoices to the Ledger and Receivables before the Month End closing is run. This really causes only two problems that will leave a telltale record of the error. The GL Batch will be posted to the wrong period and the 'Detailed Sales Register' [automatically printed during the closing process will include the invoices from the next month. The bright side is that a Journal Transaction will quickly correct the error in the Ledger, the posting to the Receivables really has no lasting effect, and a replacement Detailed Sales Register can be printed for selected dates.
END OF MONTH PROCESSING
AS/AP APPAREL SOFTWARE
124 REV. 0512
VERSIONS
AS/AP™ SYSTEM UTILITY
REV. 0512 125
APPENDIX F: VERSIONS [RELEASES] System V Release 2.00 represented a major evolution in program development. With this release the AS/AP™ Accounting System is delivered compiled with the FoxPro 2.00. With the release of System V, Release 2.50 and greater it is required that all systems running it have at least 4 Mb RAM. However, Microsoft is now recommending that all workstations have from 8 to 16 Mb of RAM. We recommend that all new system be purchased with at least 8 Mb although the system will still run with less. Since the release of version 2.0 we no longer recommend G/Net or Arc/Net network interfaces. Furthermore, although they will run we DO NOT recommend 80286 CPUs. The ideal single user computer is at least an 80486 - 25 MHz with 8 Mb of RAM, while the absolute minimum work stations is a 386SX - 16 MHz with 2 Mb RAM. File servers should be upgraded to 486/66 or faster with 16 Mb RAM or more. IT IS POSSIBLE THAT A WORK STATION WITH 2MB OF RAM WILL NOT BE ABLE TO PERFORM ALL TASKS. ORDER ENTRY IN PARTICULAR REQUIRES MORE RAM. IF YOU ARE ABLE TO RUN WITH 2MB, YOU MAY HAVE TO OCCASIONALLY QUIT THE PROGRAM IN ORDER TO REFRESH THE AVAILABLE RAM. This system is not for users interested in cutting corners. This is a serious business system and should be operated on serious equipment. The only disadvantage with these newer releases (and System IV, release 1.xx) of the AS/AP™ Accounting System is that some data files are no longer dBase compatible. Any databases with memo fields will require FoxPro to access them. Since the balance of the databases are still dBase compatible, an operator wishing to use dBase need only rebuild the index or use the FoxPro interpreter instead of dBase. Loading Program Disks In the following general instructions the '�' character is used to indicate a space. If you are not comfortable doing this yourself, call for help. Single User Systems Free Standing Computers with the program files stored on the "C" drive are loaded by first changing directories as follows:
CD�\ASAP5<Enter> Place the floppy disk in the A: drive and type:
COPY�A:*.FXP�C:�/V When the system is finished it will reply:
nn File(s) Copied

VERSIONS
AS/AP APPAREL SOFTWARE
126 REV. 0512
You then repeat this process for each program disk that we sent to you. The 'nn' above represents the number of files. This number is different for each client, program, and disk. After the last disk is copied, you can try to get your menu back by typing one of the following:
CHOICES DISKMENU MENU
The method to get back to your menu varies greatly. The above options are ways that we setup systems. Networked Systems Standard Network Computers with the program files loaded on the "F" drive are loaded by first changing directories as follows:
CD�\ASAP5<Enter> Place the floppy disk in the A: drive and type:
COPY�A:*.FXP�F: When the system is finished it will reply:
nn File(s) Copied Repeat this process until all program disks are copied. Then type one of the following:
CHOICES DISKMENU MENU MENU�DISK
The first two methods have been used on newer systems in order to free memory and eliminate the Novell Menu system (the last option). Zipped Updates If we inform you that the update is ZIPPED, the disks are copied by simply substituting '.zip' for the '.fxp' in the previous instructions. Generally it is best to follow the instructions sent with each update. However, most zipped updates can be unzipped by typing:
PKUNZIP -O UPDATE This will unzip the files and overwrite any previous files that were in the same directory. If you omit the '-O' from the command line, the system will prompt before overwriting each file.
AUTOMATIC USER LOGIN
AS/AP™ SYSTEM UTILITY
REV. 0512 127
APPENDIX G: AUTOMATIC USER LOGIN The Automatic User Login is active on ALL networks and on select Single User systems that require this level of security. This system eliminates individual passwords to enter the AS/AP™ program. However, it is possible to deactivate this system. Simply phone Software Support or your dealer for assistance. If the Automatic system is not active, you will be asked for your ID and then your Password. As you enter the AS/AP™ Accounting System and after selecting the working company, a box will open and display your user ID, if one is available in the operating system. If the user is NOT operating from another terminal and the ID is valid, the window will close and continue to the system menu. If, on the other hand, the user is not valid, or the user is already logged on another terminal, a message explaining the situation will display, and you will be denied access to the system. Clear User Logs THIS PROGRAM IS DESIGNED TO BE USED AFTER A SYSTEM CRASH. IT SHOULD ONLY BE NEEDED OCCASIONALLY. IF IT IS NEEDED MORE OFTEN, THERE IS SOMETHING WRONG! BY NO MEANS SHOULD IT BE NEEDED DAILY. WEEKLY USE WOULD CAUSE RAISED EYEBROWS AMONG OUR SUPPORT STAFF. MONTHLY USE COULD POSSIBLY BE EXPECTED. AND THE NORM IS LESS THAN ONCE A MONTH. At this point, you will want to do the following in order to clear the logs. But, first you will want to establish if you can clear only the user log of the person affected (SYONE), or if you have to clear all logs (SYFOX). To determine this you need to determine if you have a variable established in the network login identifying you as a user or not. In order to determine this simply remember if the AS/APTM system prompts you for a user name and password when entering the system. If the answer is ‘No’ (you are not prompted for a name/password) then a variable is established for you and you can use SYONE, remember, this is only for your User ID! If the answer is ‘Yes’ (you are prompted for a name/password) then a variable is not established for you and you will need to ensure that everyone is logged out of the system and then use SYFOX. The process for performing this task is as follows:
1- Go to the MS-DOS prompt. 2- Once there, enter the drive specification of the ASAP Program (Ex. F:\apps\asap\asap5). 3- Once directed to the appropriate drive, enter the words FOXR (space) SYONE (or
SYFOX) and press <Enter>. 4- Once complete, the cursor will return to the MS-DOS prompt.
CLEARING A SINGLE USER CAN BE DONE BY CREATING A TEXT FILE CALLED ‘XP.TXT’. PLACE THE FILE IN THE Y:\ASAPV DIRECTORY. WHEN THAT FILE EXISTS YOU WILL BE REQUIRED TO TYPE IN A USER NAME IN ORDER TO CLEAR A SINGLE USER USING SYONE.EXE.

AUTOMATIC USER LOGIN
AS/AP APPAREL SOFTWARE
128 REV. 0512

MULTIUSER LOCKOUTS
AS/AP™ SYSTEM UTILITY
REV. 0512 129
APPENDIX H: MULTIUSER LOCKOUTS In order to maintain system integrity AS/AP™ will occasionally, intentionally, and automatically Lock users out of conflicting functions and procedures. For example, how can anyone justify adding Invoices while the system is running the Invoice update to Accounts Receivable and General Ledger? And yet, we have had clients attempt this. The NEW lockout system provides a tactful way of saying that we are attempting to protect you from yourself. The status of all operators on the system can be viewed from the Company Master File - Screen <SU> (User Screen). This is found under <U-1-SU>. User Status Active users will be displayed with one of the following three basic status groups.
• Off-Line - The user is registered in the User file, but is currently not logged into the system.
• On-Line - Indicates that the user is logged into the system, but is working in a module
that is not tracked through the status system.
• Other - The balance of the notations indicate specific modules that the system currently polices.
AP Month End Account Payable - End of Month Processing. If this is running, it will prevent another operator from entering GL End of Month. AR Cash Cash receipts can only be posted by one operator at a time. In addition, GL and AR End of Month Processes and End of Day Updates should not be run while cash is being posted. AR Month End Receivables End of Month will prevent GL End of Month, Cash Receipts, and End of Day Updates from running. Converting Orders to Invoices interlocks with End of Day Updates and AR End of Month. End Of Day The End of Day Update will lock people out of Invoicing, Order Conversion, Cash Receipts, AR and GL End of Months. GL Month End The GL End of Month will lock operators out of End of Day Updates and, AR and AP End of Months.

MULTIUSER LOCKOUTS
AS/AP APPAREL SOFTWARE
130 REV. 0512
Invoicing Although we shouldn't have to mention this, End of Day Updates cannot be run while any operators are Invoicing and operators won't be allowed to begin Invoicing while End of Day is running. This list is constantly being revised and expanded. It is a good idea to check the list after each new update for additional activations.

AS/AP™ HELP SYSTEM
AS/AP™ SYSTEM UTILITY
REV. 0512 131
APPENDIX I: THE AS/AP™ HELP SYSTEM The AS/AP™ Help System is intended as a guide to the operation of the AS/AP™ Accounting System. Our desire is to assist you in finding the location of programs, reports, and routines, and to explain what the expected contents of selected data entry fields should be. Help can be obtained at any time by pressing the <F1> key. You can also search and/or print the Help System for Key Words through a new option under various Utility Menus. We cannot hope to teach anyone Accounting or Industrial Engineering through several hundred help screens and a little less than 1 million characters, and we make no attempt to do so. We also try NOT to over simplify our explanations, because that, too, would not be fair to the people who are seeking detailed, accurate instructions and are capable of following and absorbing such instructions. If you are not able to follow the explanations in some of the more technically oriented areas, either we have failed to explain ourselves adequately or you are in a subject for which you are not qualified. One way or another it is important to recognize that you have a problem and either seek further advice and training, or the assistance of someone who does understand. Now lets go through the AS/AP™ Help System. This explanation of the help system will be brief, but will give you a basis to understand the system as well. You can access the AS/AP™ Help System by pressing <F1>. When you do this, the following menu will appear:

AS/AP™ HELP SYSTEM
AS/AP APPAREL SOFTWARE
132 REV. 0512
This menu help to displays help topics organized by category. Double-click a book icon to see what topics are in that category. If you find a topic that you are interested in then highlight it and press the display button for more information on that topic. You can close the book by double-clicking on the book again or by clicking the book once and then pressing <C>lose The next tab, the Index tab will display the help index:

AS/AP™ HELP SYSTEM
AS/AP™ SYSTEM UTILITY
REV. 0512 133
This menu displays the Help index. Fill in the first blank field with the topic you want to receive more information about, or scroll through the list of index entries looking for key words. Click the index entry you want and then click display. Next is the Find menu. This displays the titles of the Help topics that contain the word or phrase that you specified. Click the topic you want and then click <D>isplay.

AS/AP™ HELP SYSTEM
AS/AP APPAREL SOFTWARE
134 REV. 0512
If you search is set up for similarity searches, you can select the check box next to the title of a topic to mark it as relevant. Then you can click Find Similar to find topics that are similar to the topics you marked as relevant. Now, while you have the Find menu up, press the About The Help System button. You will open a window that looks like this one:

AS/AP™ HELP SYSTEM
AS/AP™ SYSTEM UTILITY
REV. 0512 135
The Contents, Index, and Find buttons have already been explained, but now lets keep going down that row. Next you come to the Print option. That option will give you the opportunity to print the page that you have opened for more information. Next, when you click the Options tab you will receive a menu like this one:
The following pages with consist of a brief explanation of each of the items on the options menu.

AS/AP™ HELP SYSTEM
AS/AP APPAREL SOFTWARE
136 REV. 0512
Annotate When you push Annotate, the first option, you will receive the following:
This area provides a space for you to type any additional information associated with this topic. When a topic is annotated, a paper-clip icon appears at the top of the topic. Click the paper clip to display this dialog box and the annotation text you typed. Copy and Print are basically self explanatory. You can Copy text in order to transfer it to another location. You can also Print the text topic and description so that you have a physical copy of the topic for reference.
Font Next is the Font menu that you see below:
This is simply allowing you to decide what size you would like your font displayed in.
Keep Help On Topic
If you were to choose On Top then as you worked through the AS/AP™ System the Help System would stay above your work for quick reference.

AS/AP™ HELP SYSTEM
AS/AP™ SYSTEM UTILITY
REV. 0512 137
Choosing Not On Top would mean that as you worked in the AS/AP™ system, the Help System would hide itself behind your work waiting for you to re-access it. The Default setting that is chosen is Not On Top so that the Help System is not in your way as you work through the program.
Use System Colors When you enter this option you will be prompted with the following message:
This option and message prompt can be disregarded because AS/AP™ has its own colors implemented into the system. Therefore, this option is not active to this system. Next, we will go on to the options that appear at the very top of the About The Help System window. They appear at the top of your screen and resemble the following
File When you click on this first option, the following menu will appear:
Open When you chose the first option, Open, you will receive the following window simply asking you what file exactly you would like to open:

AS/AP™ HELP SYSTEM
AS/AP APPAREL SOFTWARE
138 REV. 0512
Choosing a file in this window and then clicking open will allow you to access whichever file you are looking for.
Pr in t Top ic Next, if you press the Print Topic button you will receive a printing prompt allowing you to print a physical copy of the topic you are interested in for quick reference.
Edit Next, clicking on the Edit button will prompt the following menu:
Copy Simply, you can copy information in order to transfer it to other places for reference.
Annota te Annotate was explained above under the Annotate section, for more information please refer to page136.
AS/AP™ HELP SYSTEM
AS/AP™ SYSTEM UTILITY
REV. 0512 139
Bookmark Next is Bookmark, which will prompt the following:
Def ine When you click Define the following menu will appear:
This window provides a space for you to type the name of a bookmark you can use to return quickly to this topic. The name appears in Bookmark.
Options When you click on the next button, the Options button the following will appear on your screen:
All of these options have been explained above except for the Display History Window… option.
Disp lay H is to ry Window… When you click on this option the following window appears:

AS/AP™ HELP SYSTEM
AS/AP APPAREL SOFTWARE
140 REV. 0512
This is a window that will log everything that you have accessed in the AS/AP™ Help System. This can be used for a quick reference back to information that you have already be looking at.
Help There is only one option under the Help button, Version. When you click on Help, the following menu will appear:
Vers ion When you click on the tab Version, you will receive the following information:
This is basically just giving you a little bit of information and background of the Help System that is being used.

SHUTTING DOWN SYSTEM
AS/AP™ SYSTEM UTILITY
REV. 0512 141
APPENDIX J: SHUTTING DOWN YOUR SYSTEM It is difficult to provide a section as Hardware dependent as this information, because of the wide variety of hardware that the AS/AP™ Accounting System will operate on. We have tried to describe the equipment groups as thoroughly as possible in order to prevent you from making an error. IT IS THE END USERS (YOUR) RESPONSIBILITY TO DETERMINE THAT YOU ARE WORKING IN THE SAME ENVIRONMENT THAT WE ARE DESCRIBING. WE ARE MERELY PROVIDING THIS DATA FOR INFORMATIONAL PURPOSES.
Stand Alone PC This is both the easiest to identify and the easiest to turn off. This machine is a Free Standing single computer, with NO terminals attached. When the system is turned on, you should see a prompt indicating the disk drive designation, unless your dealer has provided a special prompt. At the disk prompt you can turn off the power at any time that you may choose.
Novell Advanced Netware 286 2.x or greater [dedicated file server] When the system is ready for you to enter the Accounting Program, you will be on a menu titled "Network Menu" or at least you will see the Novell copyright along the upper portion of the main menu. You must return to this menu before turning off the system. From the Novell Disk Menu, you will press the <Esc> key. A window will open prompting you to exit the program. If you are not ready to quit, press <N>o. If you are quitting, press <Y>es. The screen will then display an operating system prompt. Unfortunately, there are dozens of different prompts that can appear. All of them are functional equivalents. A few of the different prompts are:
F:\ F:PUBLIC> F:\ASAP4 Enter Selection (or turn off power)
If your system does not have another provision for login out, at the disk prompt (above) type:
LOGOUT<Enter>
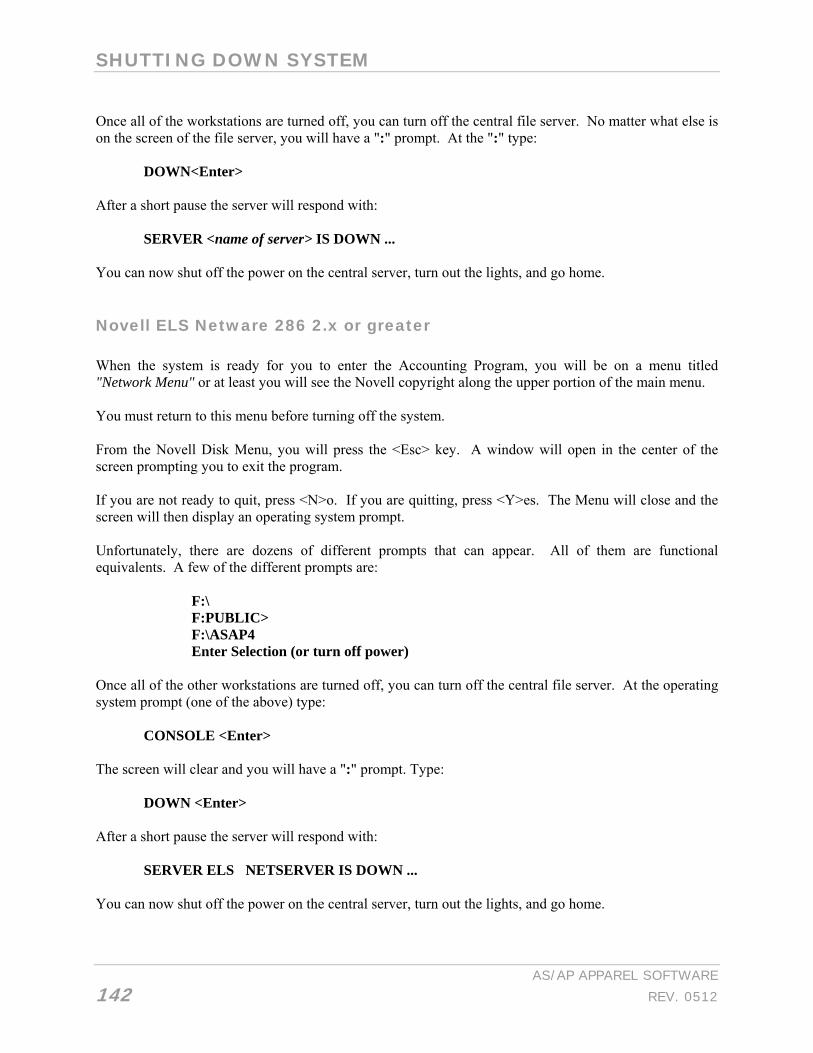
SHUTTING DOWN SYSTEM
AS/AP APPAREL SOFTWARE
142 REV. 0512
Once all of the workstations are turned off, you can turn off the central file server. No matter what else is on the screen of the file server, you will have a ":" prompt. At the ":" type:
DOWN<Enter> After a short pause the server will respond with:
SERVER <name of server> IS DOWN ... You can now shut off the power on the central server, turn out the lights, and go home.
Novell ELS Netware 286 2.x or greater When the system is ready for you to enter the Accounting Program, you will be on a menu titled "Network Menu" or at least you will see the Novell copyright along the upper portion of the main menu. You must return to this menu before turning off the system. From the Novell Disk Menu, you will press the <Esc> key. A window will open in the center of the screen prompting you to exit the program. If you are not ready to quit, press <N>o. If you are quitting, press <Y>es. The Menu will close and the screen will then display an operating system prompt. Unfortunately, there are dozens of different prompts that can appear. All of them are functional equivalents. A few of the different prompts are:
F:\ F:PUBLIC> F:\ASAP4 Enter Selection (or turn off power)
Once all of the other workstations are turned off, you can turn off the central file server. At the operating system prompt (one of the above) type:
CONSOLE <Enter> The screen will clear and you will have a ":" prompt. Type:
DOWN <Enter> After a short pause the server will respond with:
SERVER ELS�NETSERVER IS DOWN ... You can now shut off the power on the central server, turn out the lights, and go home.
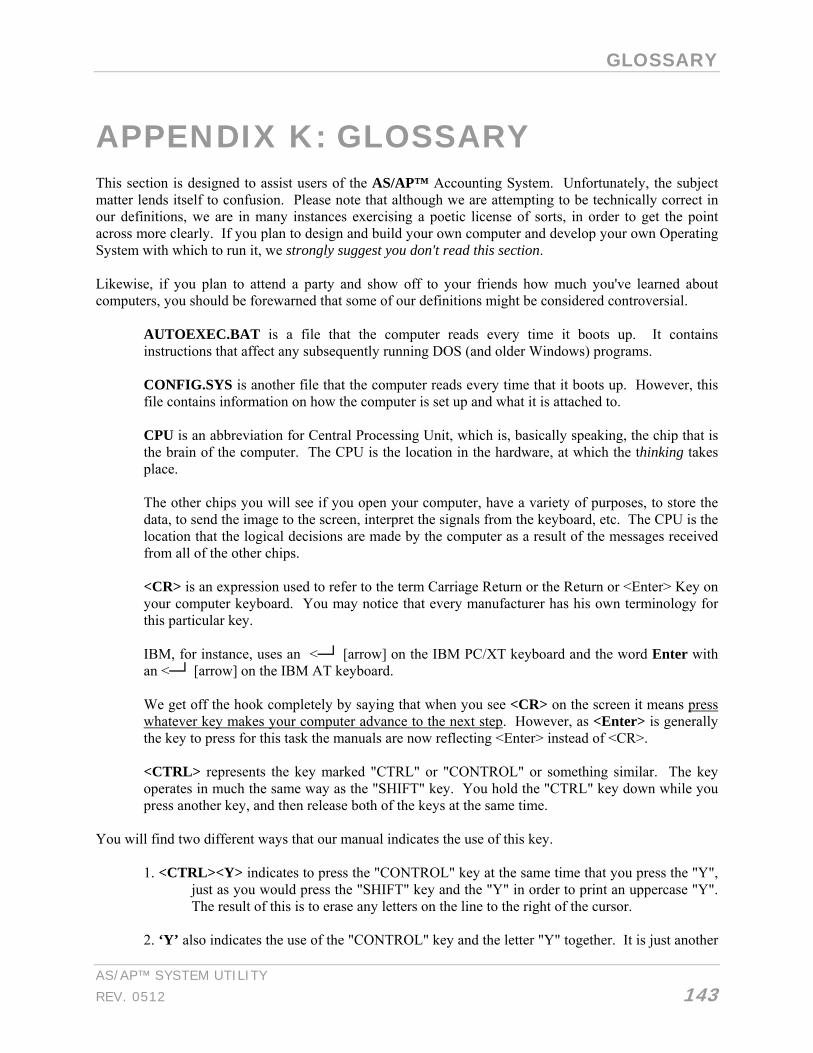
GLOSSARY
AS/AP™ SYSTEM UTILITY
REV. 0512 143
APPENDIX K: GLOSSARY This section is designed to assist users of the AS/AP™ Accounting System. Unfortunately, the subject matter lends itself to confusion. Please note that although we are attempting to be technically correct in our definitions, we are in many instances exercising a poetic license of sorts, in order to get the point across more clearly. If you plan to design and build your own computer and develop your own Operating System with which to run it, we strongly suggest you don't read this section. Likewise, if you plan to attend a party and show off to your friends how much you've learned about computers, you should be forewarned that some of our definitions might be considered controversial.
AUTOEXEC.BAT is a file that the computer reads every time it boots up. It contains instructions that affect any subsequently running DOS (and older Windows) programs.
CONFIG.SYS is another file that the computer reads every time that it boots up. However, this file contains information on how the computer is set up and what it is attached to.
CPU is an abbreviation for Central Processing Unit, which is, basically speaking, the chip that is the brain of the computer. The CPU is the location in the hardware, at which the thinking takes place.
The other chips you will see if you open your computer, have a variety of purposes, to store the data, to send the image to the screen, interpret the signals from the keyboard, etc. The CPU is the location that the logical decisions are made by the computer as a result of the messages received from all of the other chips.
<CR> is an expression used to refer to the term Carriage Return or the Return or <Enter> Key on your computer keyboard. You may notice that every manufacturer has his own terminology for this particular key.
IBM, for instance, uses an <─┘ [arrow] on the IBM PC/XT keyboard and the word Enter with an <─┘ [arrow] on the IBM AT keyboard.
We get off the hook completely by saying that when you see <CR> on the screen it means press whatever key makes your computer advance to the next step. However, as <Enter> is generally the key to press for this task the manuals are now reflecting <Enter> instead of <CR>.
<CTRL> represents the key marked "CTRL" or "CONTROL" or something similar. The key operates in much the same way as the "SHIFT" key. You hold the "CTRL" key down while you press another key, and then release both of the keys at the same time.
You will find two different ways that our manual indicates the use of this key.
1. <CTRL><Y> indicates to press the "CONTROL" key at the same time that you press the "Y", just as you would press the "SHIFT" key and the "Y" in order to print an uppercase "Y". The result of this is to erase any letters on the line to the right of the cursor.
2. ‘Y’ also indicates the use of the "CONTROL" key and the letter "Y" together. It is just another
GLOSSARY
AS/AP APPAREL SOFTWARE
144 REV. 0512
way of writing the same command. The following are some interesting and possibly helpful key combinations:
<CTRL><Q> cause the cursor to EXIT the current READ statement by aborting, ignoring, the read. In many cases it performs like the <Esc> key. <CTRL><W> jumps the cursor to the bottom of a page, indicating you are finished with the data entry. This combination also EXITS the READ, like <CTRL><Q>, but saves the data entered. The same effect can be derived from <F10>. <CTRL><Y> deletes the balance of the line to the right of the cursor position. This is also the ONLY way to blank a date field. We have programmed the <F12> to perform the same function.
CURSOR is the flashing prompt, or position on the screen at which the next letters entered from the keyboard, will be displayed. Unfortunately the cursor may appear differently on different machines. In some situations the cursor is a flashing dash or underline character. On other machines, the cursor can be a block, which appears in reverse video (black letters on white background). Also see PROMPT DISK - There are basically three types of disks available for microcomputers:
1) FLOPPY disks are the removable, flexible disks that are used primarily for backup of the Internal Hard Disk, or to run small programs. Floppy Disks are available in 8", 5 1/4" or 3 1/2" diameter soft packages, which contain a round plastic type platter or sheet coated with magnetic recording material, much like Video or Audio Cassette Tape. 2) HARD disks (also known as FIXED disks) are a sealed unit, containing several firm platters coated with magnetic recording material. Because they are sealed, firm, and non-removable, Hard Disks can be manufactured to much more exacting specifications and can therefore operate at much higher speeds than FLOPPY Disks. 3) DISK PACKS are removable versions of the Hard Disk. They are removable like the Floppy Disk but as fast or faster than the Hard Disk, and therefore more expensive than either. Since they are removable, they are more susceptible to damage.
DOS stands for Disk Operating System. This is the interface between the computer hardware and the program (referred to as software). There are a variety of DOS' available for microcomputers as follows:
1) CP/M was developed by Digital Research for small desktop computers, microcomputers. This has now evolved to DR DOS and is owned by Novell. 2) MS DOS was developed by Microsoft for use on 8088 CPU machines similar to the IBM PC. We would consider this to be the second generation of Operating Systems, CP/M being the first of the widespread microcomputer systems.
MS DOS represented an improvement in ease of operation, clarity of commands, and flexibility, over CP/M.
GLOSSARY
AS/AP™ SYSTEM UTILITY
REV. 0512 145
3) PC DOS is the IBM version of MS DOS.
AS/AP™ has been setup in such a manner as to obviate the need for learning about the Operating System of your particular Computer. However, we would definitely encourage those who are interested, to read further documentation concerning the Operating System of your particular Hardware. Of particular interest are environmental commands, which enable you to move selected files to a floppy disk (COPY, XCOPY or BACKUP), check the condition of your disk (CHKDSK or STAT) and prepare disks to receive data (FORMAT).
DOT MATRIX PRINTERS are computer-printing devices that form the letters being printed on the page through a Matrix of Dots. Since the letters are formed from tiny dots, this form of printing does not usually look as good as the Letter Quality printer. However, Dot Matrix printers operate 2 to 10 times faster than the Letter Quality printers, with less maintenance required.
The clarity of the printing varies greatly, depending on the number of dots forming the Matrix and the size of those dots. The Okidata 83A for instance forms it's letters from a matrix of 9x9, while the Epson FX-80 and FX-100 use a matrix of 11x9. The NEC P5 uses 17x9 for draft mode and 17x32 dots for near letter quality. This can be compared to the LaserJet, which produces approximately 20x40 dots in all modes. Speeds of Dot Matrix printers can also vary greatly from the Okidata 83 which prints at 120 Characters Per Second (CPS), to the Epson FX-100 at 160 CPS, and the NEC P9 at 400 CPS. The LaserJet produces about 600 CPS.
Also see Letter Quality and LaserJet Printers
<ESC> represents the Escape key. On newer keyboards the <Esc> is located in the upper left corner. This key does note produce a printable character. FORMAT is an Operating System (see DOS) command, which runs a process that prepares a new disk to receive data for the first time. It is only necessary to run FORMAT once on a particular disk, unless you are having trouble with the disk. The Formatting process sets up a table called the FAT or File Allocation Table (somehow this relates to the directory), which tells the computer where to find the files as they are saved on the disk. Although FORMAT can be run on Floppy or Hard disks, you should never run FORMAT on the hard disk, unless you know what you are doing. This process ERASES everything on the disk. LASERJET is the trademark for Hewlett Packard's Laser printer. A laser printer is a cross between a Plain Paper Copier and a Dot Matrix Printer. The speeds are extraordinary compared to letter quality printers, and yet the laser provides as good or better quality as the letter quality printer.
The speed of printing is rated as fast or faster than the fastest dot matrix printers in comparable price ranges.

GLOSSARY
AS/AP APPAREL SOFTWARE
146 REV. 0512
Another tremendous advantage of the laser is the fact that it uses plain copier grade paper, which costs less than half the price of tractor feed paper. The AS/AP™ System can interface to the Hewlett Packard LaserJet Plus or Series II and III laser printers.
LETTER QUALITY PRINTERS are also known as Formed Character printers because the letters are printed with actual type on a daisy wheel or thimble. Although the quality of these printers is excellent, there are two drawbacks.
First they are very slow. By slow we mean SLOW. They range in speed from 10 to 55 characters per second. The second problem is the printing element (daisy wheel or thimble). You can only print characters that are on the particular element that is mounted in the printer. If you are printing in 10 pitch (pica) and you want to switch to 12-pitch (elite) type, you must change printing elements.
Although it has no real effect on business applications, the letter quality printers have limited, if any, graphic ability.
MICRO COMPUTER is the term usually used in relating to small, desktop, business computers, such as the IBM PC. Technically the term is used to describe a computer with a single Central Processor [CPU] on a single mother board. However, this definition has gone by the wayside since some of the latest Mini Computers (the next larger type of computer) now have a single motherboard. However, when a Micro Computer is connected into a network, such as, Novell Ethernet with Novell 386 3.11 Software, the characteristics and description are similar to that of a Mini Computer. This typical configuration provides an 80486 CPU for hard disk control and general I/O tasks, an 80386 or 80486 processor for the workstation and to run the application software. MINI COMPUTER is the term used to describe a computer with multiple processors and the capability of running multi terminals, multi tasking, and multi user. However, Microcomputers are capable of filling the definition above. Therefore, the easiest way to determine the difference between Micro’s and Mini’s today is Mini Computers are costlier than Micro Computers. They cost more to buy and more to maintain. OPERATING SYSTEM is the System that enables the Computer to Operate. It is, essentially the software that controls how a computer performs its most basic tasks. Also see DOS
PRINTERS - See Letter Quality Printers, Dot Matrix Printers, and LaserJet Printers. PROMPT is the position on the screen at which the next character typed on the keyboard, will appear on the screen. Prompt can also refer to the actual asking of a question, to which the computer expects some kind of answer. Also see CURSOR.
PRINTER CONTROL
AS/AP™ SYSTEM UTILITY
REV. 0512 147
APPENDIX L: PRINTER CONTROL Unlike prior versions of AS/AP™, Release 10 allows the user to select from the printers installed on their individual work stations, including shared and network printers, without the need to install or identify those printers in the AS/AP™ printer file. The printer interface for the Windows versions of Release 10/11 has been completely redesigned to use the internal Windows printer dialog box. The following images were taken from the Windows 95, FoxPro 2.6 for Windows version of AS/AP™. The printer dialog box will vary slightly between Windows 3.11, Windows 95 and 98, and Windows NT 3.51 and 4.0, but, the data and options available are generally the same. The new printer interface requires system flag 499 to contain V (since 10.00.00). In addition, the eject after printing is controlled by system flag 531. To stop the eject place S in this flag (since 10.00.00). To continue ejecting the last page, but, to eliminate the two symbols from appearing on the last page, place E in flag 531 (since 10.00.50). The first screen indicates that the system is getting ready to send information to the printer. If the report is 80 columns, the system will prompt the user with the default FONT SIZE for standard 8 ½ by 11 output which is generally installed as 7 while the default FONT SIZE for 132 column reports is 11. The user can continue with the report by pressing <F10>, send the report to the screen by pressing S, or change the output FONT SIZE before continuing. To change the FONT SIZE, the user can use the left mouse button to click on the spinner, TAB to the spinner, or merely press <Enter> to advance the cursor to the SIZE spinner. The spinner (up and down arrows) allows selections of FONT SIZES from 6 to 16. We have left the option open for the user to manually enter any size wanted. However, It is the user’s responsibility to select the correct SIZE if they decide to change the default computer selection. The FONT has been preinstalled as COURIER NEW because this is a standard Windows TrueType Font, available on all versions of Windows and most important, it is a fixed Font rather than proportional.
Report Dialog Options:
1. When a report does not allow the user to quit, <Esc> is not displayed as an option. 2. When reports cannot be sent to the screen, <S> is not offered as an option. 3. Reports that are printed in 132 columns will prompt the user with the default compressed FONT
SIZE of 7. 4. Reports which output in 80 columns use the default draft FONT SIZE of 11.
If the user elects to continue and print, the report the next prompt confirms the printer selected. This dialog box will vary based on the Windows version you are running. It is important to remember that the following dialog boxes are running directly from Windows and reflect the printers installed on the workstation from which you are running. We can offer very little assistance for these dialog boxes beyond telling you that if the printers are installed properly the printer selection runs perfectly. The user can press <Enter> or click <Ok> to continue and accept the printer listed or left click on the <Setup> button to change printers.

PRINTER CONTROL
AS/AP APPAREL SOFTWARE
148 REV. 0512
Note that the <Cancel> button is also taken to indicate that the user merely wishes to continue with the selected (default) printer. THIS <CANCEL> BUTTON WILL NOT CANCEL THE PRINTING. IT MERELY CANCELS THE SELECTION OF A DIFFERENT PRINTER. Of course, there are exceptions to every rule. AS we progress with the development of Visual AS/AP™ we have found that reports created with the Visual FoxPro report generator CAN be canceled using this cancel button. The best rule we can encourage you to follow is to quit the report from the first report prompt. Selecting <Print to file> does just that and will place the data into a file as indicated by the user. It is then the user’s responsibility to use that file as desired. Selecting more than 1 copy, will only work on certain printers. In general, if Windows allows the user to change the number of copies, the printer is capable of handling multiple copies. If the user clicks the <Setup> button a print setup screen will appear. This screen shows the default printer as well as the selected printer. If the user wishes to change the printer, they must left click on the little arrow to the right of the <Specific printer> line prompt. Options available for the selected printer are available by clicking on the <Options> button. Connections to queues can be adjusted by clicking on the <Network> button. Although the user is allowed a great many options, such as Landscape printing, different paper sizes, user defined font sizes, and even color, it is ultimately the user’s responsibility to select combinations that will provide usable results. In general, the defaults will put the report on paper in a readable manner. It may be dull, but it works. The field group listed under specific printer shows the printer selection box (Windows95) after the user clicked the <Down Arrow> to select a different printer. Note that the printers displayed here are on LPT1, LPT2, and LPT3. This is no longer a requirement of Release 10. The printers can be ports, queues, shared, not shared, or any other valid Windows option. Note also that the last printer on the list is WinFax. If selected, the report will be faxed directly to the phone number selected from the WinFax address book. THE USE OF LPTN OUTPUT IS FOR EASE OF USE WITH THE DOS VERSION OF RELEASE 10, WHICH STILL REQUIRES THE LPT PORTS FOR REDIRECTION DUE TO THE LIMITATIONS OF FOXPRO 2.6A FOR DOS TO RECOGNIZE NETWORK PRINTER QUEUES. IN A TYPICAL INSTALLATION DOS IS ONLY USED TO PRINT SPECIALIZED FORMS SUCH AS PIECE WORK TICKETS. THESE SHOULD ALWAYS BE PRINTED TO A LOCAL PRINTER (IE LPT1). THEREFORE, THE REMAINING PRINTERS CAN BE DESIGNATED AS NOVELL PRINT QUEUES OR WINDOWS SHARED PRINTERS.
Generic Printer A special bonus to many of us is the ability to address dot matrix printers installed as GENERIC printers. By definition, a generic printer is a dot matrix of unknown origin. Windows doesn’t know what codes to send to this printer to send it into a graphic mode, so no codes are sent. This means that the printer will always print at full speed. Of course, you will have a problem with narrow printers because Visual AS/AP™ cannot control the
PRINTER CONTROL
AS/AP™ SYSTEM UTILITY
REV. 0512 149
printer any better than Windows. This means no compressed printing, special form lengths, or reset commands. But, there is still quite a bit of capacity in this setup. We use it almost exclusively with our dot matrix printers. The AS/AP™ Accounting System is designed to operate with virtually any printer. The program can be pre-installed for Dot Matrix, Letter Quality, or Laser Printers. THE REMAINDER OF THIS APPENDIX CONCERNING PRINTERS IS ONLY APPLICABLE IF YOU ARE OPERATING THE AS/AP™ SYSTEM UNDER THE DOS SHELL. IF YOU ARE NOT OPERATING UNDER THE DOS SHELL CONTINUE TO THE NEXT APPENDIX.
Forms Both The Letter Quality and Dot Matrix Printer installations will permit the user to utilize either preprinted or computer generated forms. However, since the Laser Printers are more difficult to operate with manufactured forms, and since using manufactured forms defeats much of the advantage of the Laser Printer, the Laser Printer installation will generate it's own Invoice forms, Monthly Customer Statement, Order Forms, etc. at this writing, a LaserJet has not yet been utilized for check printing. Note that the Piece Work and Care Label Codes are edited in the respective areas.
Printer Types and Limitations Dot Matrix [80 Column] - This group of printers is perfectly acceptable. All 80-column reports can be printed in standard sized 10 characters per inch [cpi]. Wide reports will offer the ability to compress the typeface to 17 cpi. There is only one (1) report at the current time, which cannot be printed. That is the Accounts Receivable Aging for 120 days. This reports requires the use of 17 cpi on the wide [132 column] printers. Dot Matrix [132 Column] - This is the printer that ALL reports are designed to run on and all form alignments are tested and approved for. This is also the most common printer used in Accounting and General Business operation. LaserJet Printer - The Hewlett Packard LaserJet installation will set the printer to Landscape Orientation, 8.5 points, 16.6 cpi, Light Line Print font, for all reports. When forms are printed (statements, invoices, etc.) the printer is automatically changed to Portrait Orientation, Medium Courier Font, 10 cpi, 12 pitch. During the printing of the form the IBM Graphic Set 1 characters are generated and some use is made of Bold Courier for emphasis. However, these changes are transparent to the user or operator and are accomplished under program control. ALL Laser output is designed to fit 8 1/2 by 11 inch Copier or Laser paper. Letter Quality Printer [80 column] - This printer is almost unusable for accounting, since there is no compressed mode. The only possible way to operate is for the operator to change the Thimble or Daisy Wheel to a 15 pitch. Even at that, there is no guarantee that all forms will be printable. This printer is

PRINTER CONTROL
AS/AP APPAREL SOFTWARE
150 REV. 0512
almost certain to cause headaches. Letter Quality Printer [132 Column] - The only restriction that this printer will experience is the 120 day Accounts Receivable Aging. However, the user can switch thimbles (or Daisy Wheels) and possibly print this report.
Control Codes The printer control codes instruct the dot matrix printers which pitch to use, set the length of labels and other manufactured forms (both letter quality and dot matrix printers), and reset the printer after printing is complete (all printers). The various codes that you will need can be found in your printer manual. The AS/AP™ program requires the decimal version of the codes, which are indicated in most manuals as such. It is difficult for this manual to accurately list codes, since manufacturers change them from time to time. Instead we have provided examples, which should assist you in determining the correct codes for your printer. The best examples of the code confusion, even from one manufacturer, are the NEC printers, which we have charted below. The following codes are the reset (initialization) codes for the particular printers.
Model(s) ASCII Code AS/APTM _____________________ ___________ ________________ APC-H16 (8023,27) ESC,] CHR(27)+CHR(93) NEC P2 (P3) ESC,@ CHR(27)+CHR(64) NEC P5 (P6, P7,P9) FS,@ CHR(28)+CHR(64) If you are having problems with form length, characters compressing, or resetting after printing, the problem is probably in the codes that you have installed. However, it is possible for the problem to be the printer cable or very rarely, but, occasionally the printer. As if the subject isn't already complex enough, during the preparation of this update of the Utility Manual, we were informed of a new code problem. If you own a Hewlett Packard Rugged Writer, the CHR (27) + CHR (64) reset code also initializes a printer self-test sequences. One of our clients struggled for months before HP gave them the correct command.
Paper Alignment and Miscellaneous If the first page of a report prints properly, but, the second page begins in the middle of the third piece of paper, you are the victim of TOP OF FORMITUS. THERE IS NOTHING WRONG WITH THE PROGRAM, COMPUTER, OR PRINTER. Although some printers have a button for the user to press to establish the Top-Of-Form, most do not. The proper and safe way to align the top of a page or form is to:
PRINTER CONTROL
AS/AP™ SYSTEM UTILITY
REV. 0512 151
• Wait until the program prompts you to place the paper in the printer • Turn OFF the power on the printer • Turn the hand wheel until the top of the paper is aligned to the TOP EDGE of the printer's print
head (or whatever mark you have predetermined to be appropriate for the form in use). • Turn the power back ON • FOLLOW THE INSTRUCTIONS ON THE SCREEN
Concomitantly there are some simple rules to follow to avoid printer problems.
• Try NOT to turn the printer hand wheel while the printer power is ON. It causes TOP OF FORMITUS and can even DAMAGE THE PRINTER if done continuously over a long period.
• NEVER turn the printer off after you have begun an alignment for preprinted forms such as short invoice forms, checks and statements. IF YOU TURN OFF THE PRINTER, YOU WILL LOOSE ANY PRINTER CONTROL CODES THAT HAVE BEEN SENT TO THE PRINTER BY THE PROGRAM.
• Use the FORM FEED and LINE FEED buttons on the printer to advance the paper, or to remove the last page that was printed.
• If your printer is equipped with a form length dial DO NOT USE IT! The AS/AP™ program sends the proper length of each form to the printer. We have found that clients who also set the form length dial have had difficulty aligning forms.
• Be VERY cautious when using pressure sensitive labels. They are three to four times thicker than standard 20# computer paper. If you do not set the print head gap for the thicker labels, you can easily damage the print head (try $300 +/-).
The labels can also peel off VERY easily if you turn the hand wheel backwards. The last time that happened the printer had to be completely disassembled at a repair cost of $120. The most important thing to remember when you have alignment and compressed print problems is that AS/AP™ has been aligning forms and compressing and uncompressing reports for hundred of computer operators since 1983. Of course, anyone can make a mistake, and it is possible that a new program or a new update has a problem. However, in more than 10 years we have logged hundreds of calls and only found two or three program related problems. To save yourself and our Tech Support time and trouble, before you call with printer problems check the following:
• Check the printer codes in YOUR printer control file. • Make certain that the printer cable is attached firmly to the back of the computer and printer. • Check that the SELECT or ON LINE light is lit on your printer control panel. • Verify that your printer is NOT trying to warn you of an internal problem. [most newer printers
have flashing LEDs or numeric LED codes that inform you of internal problems.] • Check that the printer cable has not been pinched or twisted. • Some printers can be placed into various configuration through an internal menu accessed via the
front panel. Please check your printer manual. For example, some Okidata printers can be set in IBM emulation, or in Native Okidata mode. The control codes for these 2
• modes are very different, and if ASAP is expecting IBM emulation, but your printer is set to Okidata Native mode, your results would be very unpredictable.

PRINTER CONTROL
AS/AP APPAREL SOFTWARE
152 REV. 0512
Once you get the hang of it, the printer will be the least of your problems, or it should be. The most important point to remember is to be patient and check for possible physical causes for your printer problems. Only 1 in 500 reported printing problems has been program oriented. This means the odds are very greatly in our favor. AS/AP™ will work with virtually any printer and gives the operator the most options if and when something goes wrong. If you think you have a problem, look at it from our side. We hear constant complaints from some stubborn people who just cannot align a form or get the compressed printing to work. The annoying part is that we rarely get a call of apology from certain people when they finally find out that it really was their lack of patience and stubborn streak. It is also annoying when a client insists that the problem is with our software, when the same programs are running at many other sites without any problem. It works if you want it to. If you call and tell us it's our program or that the printer is defective, we know the real cause. If YOU’RE going to tell US what the problem is, don't bother calling. If you're calling for help, describe the problem to us, then listen to our solution and follow our advice. It will help speed things up if you have the printer's manual available. Also, please make notes on any strange behavior leading up to the problem; note any error messages (either on the screen, or on the front panel of the printer). We can assure you that the problem will be solved unbelievably fast.
Printer Redirection With the advent of more and more clients using multiple platforms to operate the ASAP software, we designed a new method of controlling the printer re-direction. This is controlled by system flag 426 ="Y". If you are using multiple printers, include the following two lines in your network login script.
#capture queue=queuename1 nt nb nff ti=10 L=2 #capture queue=queuename2 nt nb nff ti=10 L=3
The first line assigns queuename1 to LPT2. The second line assigns queuename2 to LPT3. This leaves LPT1 free as your local printer.
LPT1 = Local Printer. LPT2 = Network printer serviced by queuename1. LPT3 = Network printer serviced by queuename2.
In the printer redirection line of the printer setup file:
Description Re-direction Local Printer Narrow LPT1 Local Printer Wide LPT1 System Laser LPT2 System Printer LPT3
We have found this arrangement to work much better and more consistently than the older system of including the capture command on the Redirection Line.

PRINTER CONTROL
AS/AP™ SYSTEM UTILITY
REV. 0512 153
Beginning with Netware 4.x, Novell allows you to set up to 9 LPT captures. That is, you can set the queue to capture and redirect LPT1 up to LPT9. This is most convenient if you have several network printers available. However, to get past LPT3, you have to modify your NET.CFG file in each workstation. Under the "NetWare DOS Requester" section, you need to add the line: NETWORK PRINTERS = x where x is a number from 0 to 9. If you have 6 different network printers, then you can set up different queues using LPT1 thru LPT6. The users could then decide which printer to redirect to by choosing the appropriate LPT port. The redirection command for each printer port could be setup in the net login script, so the assignments are defined when the user logs into the network. If the user has their own local printer, in addition to the 6 network printers, you would increase the number in NET.CFG to 7, and make the redirection commands go to LPT2 thru LPT7.
Ejecting Pages If you do not wish for your printer to eject an additional page at the end of a sequence you can suppress this option (or attempt to). In order to do this you would need to change Flag 531 to ‘S’. BECAUSE OF THE WAY THAT MICROSOFT WINDOWS HANDLES THIS OPTION, IF YOU ARE PRINTING TO A LASERJET OR INKJET THIS OPTION MAY NOT WORK. AT TIMES IT MAY HOLD THE LAST PAGE OF THE PRINTOUT IN THE PRINTER MEMORY UNTIL ANOTHER PRINT JOB IS SENT OR YOU WALK OVER TO THE PRINTER AND USE FORM FEED. THE BEST WAY TO SAY IT IS THAT THROUGH OUR TESTING OF THIS PROCEDURE...SOMETIMES IT WORKS...AND SOMETIMES IT DOESN’T WORK.
Setup of Printronix L1524 Printer To create a configuration for a Printronix L1524 printer to print AS/AP piecework tickets, follow the steps below. Change the Active Emulation to IGP/VGL & LP+. 1.In LinePrinter+ Mode: • Under CPI/LPI select change a. Select DPI to 12.0 CPI b. Minimum CPI to 12.0 CPI • Under Page Format change a. Form Length – Absolute Length to 03.0 inches b. Form Length – Function of LPI to 24 lines c. Form Width – Absolute Width to 08.2 inches d. Form Width – Function of CPI to 98 characters 2. In IGP/VGL Mode:
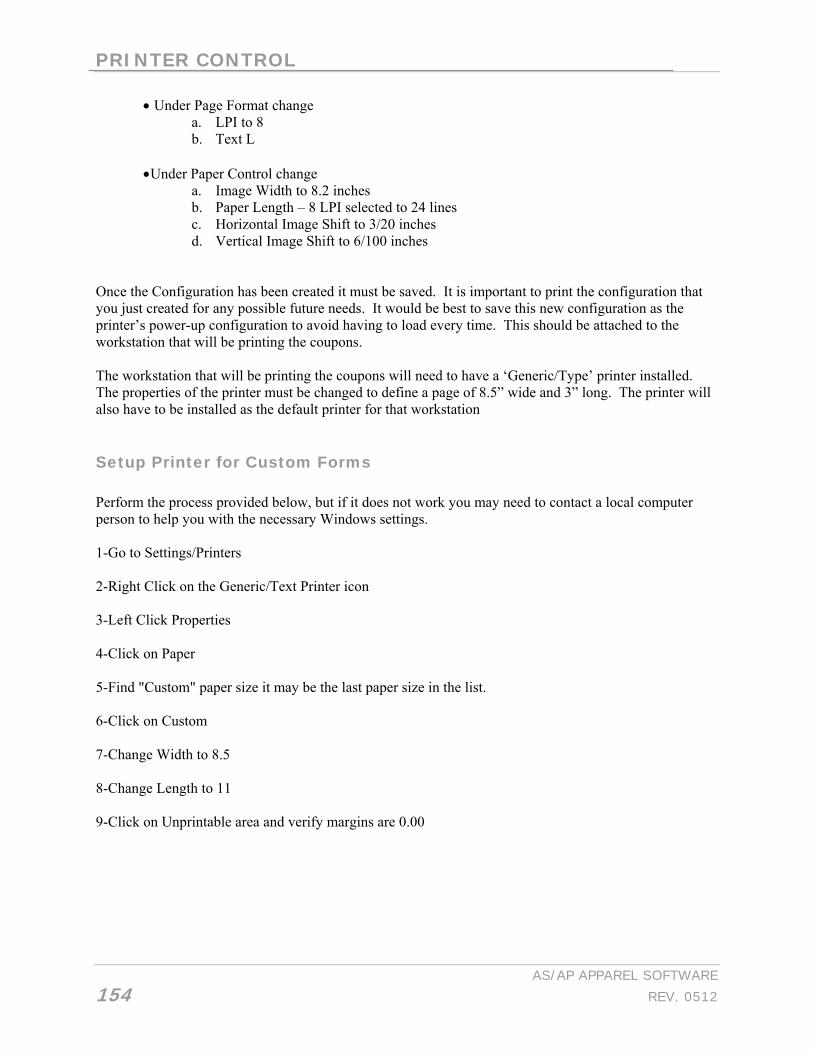
PRINTER CONTROL
AS/AP APPAREL SOFTWARE
154 REV. 0512
• Under Page Format change a. LPI to 8 b. Text L
•Under Paper Control change
a. Image Width to 8.2 inches b. Paper Length – 8 LPI selected to 24 lines c. Horizontal Image Shift to 3/20 inches d. Vertical Image Shift to 6/100 inches
Once the Configuration has been created it must be saved. It is important to print the configuration that you just created for any possible future needs. It would be best to save this new configuration as the printer’s power-up configuration to avoid having to load every time. This should be attached to the workstation that will be printing the coupons.
The workstation that will be printing the coupons will need to have a ‘Generic/Type’ printer installed. The properties of the printer must be changed to define a page of 8.5” wide and 3” long. The printer will also have to be installed as the default printer for that workstation
Setup Printer for Custom Forms Perform the process provided below, but if it does not work you may need to contact a local computer person to help you with the necessary Windows settings. 1-Go to Settings/Printers 2-Right Click on the Generic/Text Printer icon 3-Left Click Properties 4-Click on Paper 5-Find "Custom" paper size it may be the last paper size in the list. 6-Click on Custom 7-Change Width to 8.5 8-Change Length to 11 9-Click on Unprintable area and verify margins are 0.00

SYSTEM MESSAGE CODES
AS/AP™ SYSTEM UTILITY
REV. 0512 155
APPENDIX M: SYSTEM MESSAGE CODES
The first rule concerning the system message codes is to CALL OR FAX SOFTWARE SUPPORT if a problem persists. If you do not inform Software Support of a problem, it may never be resolved. However, some codes can be the result of your errors, not ours, and many can be easily reconciled. It is also very important to document the circumstances surrounding the occurrence. In fact, it is helpful for you to re-boot your computer and check to see if the problem occurs again. CODE CAUSE ACTION ----------------------------------------------------------------------- 1 File Missing This can be either an index or a data file. The first thing to do is re-index
your system. If this does not solve the problem, phone Software Support. 2 Internal Problem PHONE SOFTWARE SUPPORT 3 File In Use This is a network-locking problem. 4-5 Error Positioning This can indicate a damaged index or file. The first thing to do is re-
index your system. If this does not solve the problem, phone Software Support.
6-11 Internal Problem PHONE SOFTWARE SUPPORT 12 Variable Not Found This could be a program error, a field missing from the database, or a
computer RAM error. Report the details to Software Support and they will let you know how to proceed.
14 Internal Problem PHONE SOFTWARE SUPPORT 15 Not a Database If this message is true, you have a severely damaged file. If accurate, this
is fatal. Now you will find out why you make backups. You do have a backup, don't you? Phone Software Support.
16-18 Internal Problem PHONE SOFTWARE SUPPORT 19-20 Error Positioning This can indicate a damaged index or file. The first thing to do is rebuild
your indexes. If this does not solve the problem or if the problem persists, phone Software Support.
21-25 Internal Problem PHONE SOFTWARE SUPPORT 26 Missing CDX Index A CDX (compound) index is missing or damaged and must be recreated. 27-40 Internal Problem PHONE SOFTWARE SUPPORT 41 Memo File Problem Missing or damaged memo file. At this writing, the only files the have a
memo field are the Help System, Customer, Vendor, Inventory and Employee Master files, and some specialty files.
42 Internal Problem PHONE SOFTWARE SUPPORT 43 Insufficient Memory You may have one or more TSR programs loaded which are using up
your memory. Exit the AS/APTM program, turn off your system or workstation and then re-boot. If the problem happens again, phone

SYSTEM MESSAGE CODES
AS/AP APPAREL SOFTWARE
156 REV. 0512
Software Support. 44-55 Internal Problem PHONE SOFTWARE SUPPORT 56 Out of Disk Space If true, you may have a problem. However, your space may just be taken
up with backup and/or temporary files. If you and the other terminals exit the AS/APTM program, the temporary files and indexes will be cleared. This may free enough space. We were recently told be Microsoft that this problem can also come from a damaged index of FoxPro temporary working file. If you have plenty of disk space, reboot the workstation, delete any lingering FoxPro temporary files, and reindex.
57-124 Internal Problem PHONE SOFTWARE SUPPORT 125 Printer Error Either Printer not connected or not turned on. On many newer versions
of the program, you will not get this error code, the message will flash "Printer Not Ready" until you turn on the printer, solve the problem or press <Esc> to quit.
126-1103 Internal Problem PHONE SOFTWARE SUPPORT 1104-1105 Disk Error These codes indicate that the AS/APTM program had difficulty either
reading from or writing to your Hard Disk. You may wish to have this checked out by your hardware dealer or merely retry whatever you were doing when the error occurred. Pssst, time to locate those backup disks or tapes. You do have backups, don't you? If not, a clean double edge razor blade will suffice.
1106-1111 Internal Problem PHONE SOFTWARE SUPPORT 1112-1113 Disk Error These codes indicate that the AS/APTM program had difficulty either
opening or closing a file on your Hard Disk. You may wish to have this checked out by your hardware dealer or merely retry whatever you were doing when the error occurred. This may indicate a serious problem.
1114-1404 Internal Problem PHONE SOFTWARE SUPPORT 1405 RUN Command Failed This indicates an error attempting to RUN an external program. Since the
standard configuration of AS/APTM provides for enough 'headroom' to run the printer redirection programs and the routine to load new program updates from a standard workstation, if this message appears, there is something wrong with your computer. The file server may be short of RAM under some circumstances and configurations. This would not surprise us for the message to be issued on the server. Try turning off your workstation and re-booting it. If this doesn't work, make a note of the circumstances surrounding the error and PHONE SOFTWARE SUPPORT.
1406-1906 Internal Problem PHONE SOFTWARE SUPPORT 1907 Drive Id. If you have been playing in DOS or Network System files, you may have
incorrectly mapped a disk drive. 1999-9999 Internal Problem PHONE SOFTWARE SUPPORT The following codes are NOT ERRORS. They are Network Locking Codes. We will display these code numbers on the screen in order to indicate the type of lock that we are attempting to perform. CODE CAUSE ACTION ----------------------------------------------------------------------- 108 File Lock File in use by someone else, the system will keep trying to gain access. 109 Record Lock Record is locked at another terminal.

SYSTEM MESSAGE CODES
AS/AP™ SYSTEM UTILITY
REV. 0512 157
130 Record Lock An attempt was made to REPLACE a record without first locking it. 110 File Lock FATAL ERROR. The operation required prior exclusive use of the File.
Report this one to SOFTWARE SUPPORT. IT IS VERY IMPORTANT THAT YOU UNDERSTAND THAT WHEN THE SCREEN FLASHES FILE IN USE... THAT SOMEONE ELSE IS USING IT. THIS IS NOT AN ERROR!!!
SYSTEM MESSAGE CODES
AS/AP APPAREL SOFTWARE
158 REV. 0512

END OF YEAR PROCESSING
AS/AP™ SYSTEM UTILITY
REV. 0512 159
APPENDIX N: END OF YEAR PROCESSING Although the Yearend is handled relatively automatically by AS/AP™ in the normal course of processing of most modules, this is a critical operation and should be treated with both caution and respect. Consideration must also be given to the differences between fiscal and calendar years, since they will potentially cause confusion between the yearend closing of the accounting books as apposed to the closing of the payroll. There are a few issues of special considerations.
• Payroll must close on a fiscal year basis regardless of the Accounting cycle used by the company. • Payroll W2 forms should be checked and printed before the Payroll Year is closed. • AP 1099s should be checked and printed before the close of the AP system. • EXTREME care should be taken to backup the system prior to the end of year. This includes the
possibility of making 2 or even 3 duplicate backups of the files. YOU CANNOT BE TOO SAFE.
• The Year-to-Date Accounts Receivable Cash Receipts file is closed and purged. • The Year-to-Date Accounts Payable Cash Disbursements file is closed and purged. • The General Ledger files are archived and labeled under the fiscal year. These include:
♦aGLCA Master GL Account File - which includes the Account Numbers and Beginning Balances.
♦aGLDB Transaction Database containing the entire posting for the year. ♦aCOMP Company Master File - that contains the default accounts as they were assigned for the particular year.
♦aCLOS Closing Date File - contains the Closing Dates for the year. With these GL files archived, the system is able to accept Journal Transactions and print any of the Trial Balances offered on the Standard Menu. Although the data exists to reprint Financial Statements, there has been no interest in this feature. However, it would be available as a custom project. The reports printed are dependent on your company's requirements. In general, we would recommend printing the following reports, but it is ultimately up to you as the end user.
Accounts Receivable Aging Customer Master List Accounts Payable Aging Vendor Master List Inventory On Hand Report [Finished Goods and Raw Material] Inventory Work Sheet [Finished Goods and Raw Material] General Ledger Account Listing [All Accounts] GL All Journals Trial Balance Payroll Query [All Employees] Employee Master Listing
13th Period [12 period systems] - When the Gross Payroll [PY], Accounts Receivable [AR], and

END OF YEAR PROCESSING
AS/AP APPAREL SOFTWARE
160 REV. 0512
Accounts Payable [AP] are closed for the 12th period, each of the periods is incremented to the Period 13. If the GL is closed before any more transactions are entered on the AR and AP, the 13th Period is never actually used. Typically, AR and PY close immediately, but, the company will operate AP for 2 to 3 weeks before closing the Payables and then the GL may operate for another week or two before closing the year. During this time, the AR, AP, and PY postings are made to period 13 (any module which continues to post) so that they will not be confused with the period 1 posting from the previous fiscal year. When the GL is finally closed, all period counters are moved to period 1. The detail for periods 1 through 12 is archived to the prior year databases with a two-digit code indicating the fiscal year (i.e. 96, 97, 98, etc.) The postings against period 13 left in the current year file and revised to read period 1 and the Batch Numbers originally issued are reissued with sequential numbers for the new year (starting with batch 1). In order to assist in the adjustment of the batch numbers, a list is printed showing the original batch number (last year) and the newly issued number. 13th Period Systems- As an option, AS/AP™ can be installed to use 13 accounting periods. If this is the case on your system, period 14 is used for the new year postings until the year is closed. As described above, the new year postings will be made into period 14 until the General Ledger is closed, at which time the period 14 postings are changed to period 1 of the new year and the batches are renumbered. The most important factors to remember are that you cannot have too much information. You cannot have too many backup disks (or tapes). You cannot have too many reports. In subsequent years, the company may decide they don't need all of the reports, but, the worst, situation is needing a report that doesn't exist.

NON-STANDARD SIZED FORMS
AS/AP™ SYSTEM UTILITY
REV. 0512 161
APPENDIX O: EMBEDDING NON-STANDARD SIZED FORMS
Windows 3.x and Higher Non-standard sized forms, i.e. Payroll checks that will print in the Windows environment need to undergo a special procedure to ensure proper printing. The procedure will embed the printer settings into the form. After the procedure is complete, the printer settings will be automatically established whenever the user initiates the printing of the particular form embedded. THE EMBEDDING PROCEDURE MUST BE PERFORMED FOR ALL USERS WHO PRINT NON-STANDARD SIZED FORMS. IN ADDITION, ASAP RECOMMENDS THAT A LOCAL PRINTER BE USED FOR PRINTING. Below is an example of embedding a payroll check, which has a length of 7 inches and a width of 82. However, before you perform this procedure, you must determine:
A. The users PC who will be printing the form.
B. The printer that will be used AND it must be installed.
C. The NAME of the form. Please contact ASAP if you do not know the name of the form.
Procedures
1. In Windows 3.x, go to Control Panel / Printers and select the printer you will use for this form. Make sure that the box <Use Print Manager> is NOT marked. Select <Setup>. Under <Paper Size>, pull down the list and select <User Defined Size>. Under <Unit>, select <0.01 inch>. Set Width and Length as appropriate for this form.
YOU MAY ONLY HAVE ONE USER DEFINED FORM FOR EACH PRINTER TYPE IN WINDOWS. IF YOU HAVE 2 DIFFERENT NON-STANDARD FORMS, THEY WILL EITHER HAVE TO BE PRINTED ON 2 DIFFERENT TYPES OF PRINTERS FROM THE SAME WORKSTATION, OR THEY WILL HAVE TO BE PRINTED FROM 2 DIFFERENT WORKSTATIONS. FOR EXAMPLE, YOU HAVE THE CHECK AS DESCRIBED ABOVE, PLUS YOU HAVE A SHORT STATEMENT, WHICH IS 8 INCHES LONG. FURTHER, ALL OF YOUR DOT MATRIX PRINTERS ARE PANASONIC KX- 1180, THEN YOU WOULD HAVE TO SETUP EACH FORM ON A DIFFERENT COMPUTER.
2. Launch FoxPro for Windows. From the Main FoxPro Menu, choose <File><Printer Setup>. Make sure that the DEFAULT printer button is checked, and that the default page size (8 2 x 11 in) is checked. Select <OK>.
3. Open the report form from the COMMAND WINDOW. This is done by typing MODIFY
REPORT. Under <Report><Page Layout>, select <Print Setup>. Select <Specific

NON-STANDARD SIZED FORMS
AS/AP APPAREL SOFTWARE
162 REV. 0512
Printer>, and select the printer for this form. Select <Paper><Size> and choose <User Defined Size>.
4. Select <OK> until you get back to the form, then Save the form with <Ctrl><W>.
Windows Non-standard sized forms, i.e. Payroll checks that will print in the Windows environment need to undergo a special procedure to ensure proper printing. The procedure will embed the printer settings into the form. After the procedure is complete, the printer settings will be automatically established whenever the user initiates the printing of the particular form embedded. THE EMBEDDING PROCEDURE MUST BE PERFORMED FOR ALL USERS WHO PRINT NON-STANDARD SIZED FORMS. IN ADDITION, ASAP RECOMMENDS THAT A LOCAL PRINTER BE SELECTED FOR PRINTING. Below is an example of embedding a payroll check, which has a length of 7 inches and a width of 82. However, before you perform this procedure, you must determine:
A. The users PC who will be printing the form. B. The printer that will be used AND it must be installed. C. The NAME of the form. Please contact ASAP if you do not know the name of the form.
Procedure
1. Left click on <Start>, select <Settings> then <Printers>. Double-click on the printer you wish to embed. Left click on <Printer>, then select <Properties>. Left click on the tab marked <Paper>. Scroll to the right until your screen looks like this:
2. Double click on <Custom>. Next set the <Unit> to 0.01 inch. Then set the <Width> and <Length> to the length of the particular form. In this example, our Payroll Check is 8.5 by 7.
YOU MAY ONLY HAVE ONE USER DEFINED FORM FOR EACH PRINTER TYPE IN WINDOWS. IF YOU HAVE 2 DIFFERENT NON-STANDARD FORMS, THEY WILL EITHER HAVE TO BE PRINTED ON 2 DIFFERENT TYPES OF PRINTERS FROM THE SAME WORKSTATION, OR THEY WILL HAVE TO BE PRINTED FROM 2 DIFFERENT WORKSTATIONS. FOR EXAMPLE, YOU HAVE THE CHECK AS DESCRIBED ABOVE, PLUS YOU HAVE A SHORT STATEMENT, WHICH IS 8 INCHES LONG. FURTHER, ALL OF YOUR DOT MATRIX PRINTERS ARE PANASONIC KX-1180, THEN YOU WOULD HAVE TO SETUP EACH FORM ON A DIFFERENT COMPUTER.
2. Launch FoxPro for Windows. From the Main FoxPro Menu, choose <File><Printer Setup>. Make sure that the DEFAULT printer button is checked, and that the default page size (8 2 x 11 in) is checked. Select <OK>.

NON-STANDARD SIZED FORMS
AS/AP™ SYSTEM UTILITY
REV. 0512 163
3. Open the report form from the COMMAND WINDOW. This is done by typing MODIFY REPORT {FORM NAME}. Under <Report><Page Layout>, select <Print Setup>. Select <Specific Printer>, and select the printer for this form. Select <Paper><Size> and choose <User Defined Size>.
4. Select <OK> until you get back to the form, then Save the form with <Ctrl><W>.

NON-STANDARD SIZED FORMS
AS/AP APPAREL SOFTWARE
164 REV. 0512

TEMP FILES
AS/AP™ SYSTEM UTILITY
REV. 0512 165
APPENDIX P: TEMPORARY FILES THERE HAVE BEEN RECENT CHANGES TO THE TEMP FILE PROCEDURES IN AS/AP. SEE PAGE 167 FOR AN IMPORTANT MESSAGE REGARDING TEMP FILES. Yes, it’s finally time to discuss the dreaded TMP files. FoxPro creates temporary work files, which are named with an 8-digit random number and a .tmp extension (i.e. 41408320.TMP and 41413346.TMP). There are several issues of importance related to these TMP files, however. First, it is critical that the files created by each user be hidden from the other users. Until recently we accomplished this by installing systems so that each user’s TMP files were directed to the user’s subdirectory, usually F:\USERS\username. Although this worked, there were maintenance issues, and a new directory had to be added when users were added. Recently, we began recommending that the TMP files be directed to the C:\TEMP directory. This way you only have to confirm that each workstation has a C:\TEMP directory. The second critical issue related to these TMP files, is that under normal circumstances FoxPro deletes the files as you quit AS/APTM. However, if you crash out of AS/APTM, or FoxPro fails to delete these files, they accumulate in the default directory (wherever) it is. This potential has the same effect as FoxPro seeing other users files. According to Microsoft, for whatever reason, if FoxPro can see the old TMP files or current TMP files from other users, FoxPro will inadvertently use them and get confused. This means that it is important that old files be deleted and new (current) files be separated. This is also the main reason we activated the new function of testing the program directory for TMP files before running the AS/AP program. This is the comment that you see in the top right corner of your screen when you log onto the system. Unfortunately, we found that FoxPro drops the TMP files in the program directory if it can’t find the default TMP directory. We feel that the few seconds involved are well worth the improved data security. There is a down side, however. Due to the lack of response to clearing the TMP files we have had to resort to a new routine. This is as follows. Upon entering the AS/APTM system the program will display a prompt alerting the user that there are unresolved temp files. You must clear your temp files before entering. Once the system has successfully tested the TMP files and none have been found you will be admitted into the system. If, however, TMP files were discovered a prompt would appear stating that there are Old TMP Files in the Temporary Directory and that you cannot proceed until that is corrected. Selecting <OK> will not permit you into the system. At this point, go to the location of the TMP files (designated in the prompt) and delete the TMP files that are found there. It is VERY important that you go to the exact drive and path that is specified in the prompt! Once the .tmp files have been deleted, return to the system. You will again see the Testing TMP Files... prompt appear, however, afterwards you will not (if the deletion was performed correctly) receive the prompt shown above.

TEMP FILES
AS/AP APPAREL SOFTWARE
166 REV. 0512
The third important issue relating to temp files is only a concern if you are running Windows XP in the DOS Shell. Temp file can be created as a result of Windows XP. You will need to create a routine that deletes these temp files from the ASAP-DBF directory on a regular basis. If too many files are created, and not deleted from the directory, there may come a time where you are not able to run a DOS based program at all. Please call Technical support if this is an issue. We are constantly working on better ways to clear data from the FoxPro and AS/APTM Temporary Files. However, when it comes to FoxPro, it is not an easy task. This is due to the fact that so much is based on your network environment. If a workstation is not setup with a temporary directory that matches the config.fpw file, the temp files will by default go into: C:\Documents and Settings\“username”\Local Settings\temp The Local Settings directory is a hidden directory, which you will need to show in order to delete files. Once the c:\temp directory is setup, the AS/AP program will no longer use the local setting path for temp files. If a user does not have a folder called ‘temp’ in the C: drive on their workstation then their temp files will be created in F:\ASAP5. Check that directory for files ending with .tmp and delete the ones you find. Also, you can delete the files that start with WARN and end with .doc. For example, WARN01.DOC. Be extremely careful not to delete the wrong files. Also, have someone check each workstation that is running ASAP and make sure that a TEMP folder exists on those workstations.
Deleting Temporary Files In any AS/AP™ application and data directories you can clear FoxPro temporary files by locating the appropriate directory and typing the following:
DEL *.TMP<Enter> This should work because we do not create the files with the ATMP extension, so there is no danger of deleting our files. However, be cautious, because other programs DO NOT USE THIS EXTENSION and important files can be deleted. For this reason it is extremely important that you are in the correct directory for the location of your temp files. This location can be found in Screen 3 of the Company Master File under Setup Parameters. If you find yourself being asked to clear your temp files every time you log on then the following directions will save you some of that hassle. The bottom line is, everyone needs to create their temporary files in their own unique directory somewhere. No two users can create temporary files in the same place. If the "U" drive is unique to each user, then the following line in the tsconfig.fpw file will work: TEMPFILES = “U”:\foxpro\temp\ There are two things you need to be sure of: 1. Every time ASAPVFP.EXE is run, it is run with the -c switch pointing to the tsconfig.fpw file, ie: ASAPVFP.EXE -c f:\apps\asap\asapv\tsconfig.fpw

TEMP FILES
AS/AP™ SYSTEM UTILITY
REV. 0512 167
2. Every user has a "U" drive and it contains a \foxpro\temp directory. Once you configure the users this way, you can get online right away and reset the files to allow you back into AS/AP™.
***** IMPORTANT NOTICE REGARDING TEMP FILES ***** With the release of version 11.38.18, AS/AP has discontinued using the Windows TEMP folder as the location the system uses to create temporary work files. The following message will now appear when entering AS/AP if the following steps have not been taken:
The new folder is named ASAPWORK and a new folder will need to be created on each workstations Local Disk (C:) drive. This will also require editing the system configuration file for this change to take effect. IT IS IMPERATIVE THAT THE FOLLOWING STEPS BE PERFORMED IN THE ORDER LISTED! Update each Workstation:
• Open Windows Explorer and create a new folder on the Local Drive (C:). • Name the new folder ASAPWORK.
Update the Server:
• Open Windows Explorer and create a new folder on the Local Drive (C:). • Name the new folder ASAPWORK. • Start AS/AP™, open the Company Master File, select the tab Environment and note the path of
Config File. • Go back to Windows Explorer and locate the config.fpw file. • Right click on config.fpw and select Open With. Uncheck the box “Always use this program to
open these files”. Select Notepad and click OK. • Change the lines shown in bold italics from C:\TEMP to C:\ASAPWORK. • When completed, select File-Save-Exit.
Below is a sample before and after change to the config.fpw file.

TEMP FILES
AS/AP APPAREL SOFTWARE
168 REV. 0512
BEFORE CHANGE AFTER CHANGE RESOURCE = OFF RESOURCE = OFF KEYCOMP = DOS KEYCOMP = DOS mvcount=1024 mvcount=1024 EDITWORK = C:\TEMP EDITWORK = C:\ASAPWORK PROGWORK = C:\TEMP PROGWORK = C:\ASAPWORK SORTWORK = C:\TEMP SORTWORK = C:\ASAPWORK TMPFILES = C:\TEMP TMPFILES = C:\ASAPWORK CATMAN=OFF CATMAN=OFF MEMLIMIT=85,16384,32768 MEMLIMIT=85,16384,32768

USER/SYSTEM CONFIGURATIONS
AS/AP™ SYSTEM UTILITY
REV. 0512 169
APPENDIX Q: USER/SYSTEM CONFIGURATIONS A quick note on this topic should be made. If, while running the system you receive a Too Many Files Open error the first step that should be performed is to check and see how the user’s CONFIG.SYS is setup for FILES and BUFFERS. Files should be set to not less than 100 and the Buffers should be set to not more than 22. However, if you’ve been running AS/APTM for any extended length of time, it’s probably an issue of memory, in which case, you should try a cold boot, meaning that you should log out of everything and turn the computer off. Then turn it back on and proceed as you were before the error occurred.
USER/SYSTEM CONFIGURATIONS
AS/AP APPAREL SOFTWARE
170 REV. 0512

SPECIAL CHARACTERS
AS/AP™ SYSTEM UTILITY
REV. 0512 171
APPENDIX R: SPECIAL CHARACTERS
Special characters or symbols should not be used in any field throughout the system other than the memo and/or notepad to prevent any possible issues arising out of Visual FoxPro’s use of such characters.
If you choose to use such characters in fields throughout the system you are taking the chance that the system could reject the information in the field.
The special characters that should be avoided are the following:
~ ` ! @ # $ % ^ & * ‘ “
( ) [ ] { }
The following message may be displayed if an unacceptable character is used:
This message may not always appear so in order to ensure the field will be accepted use only alphanumeric characters. If there are any other questions concerning this refer to the AS/AP™ Help System or contact tech support.

SPECIAL CHARACTERS
AS/AP APPAREL SOFTWARE
172 REV. 0512

EMAIL ALERTS
AS/AP™ SYSTEM UTILITY
REV. 0512 173
APPENDIX S: EMAIL ALERTS ASAP has incorporated several email alerts that, based on the system configuration, may or may not be active. These are standard alerts and are controlled by a master table found at key sequence <U-1>. When you enter the Company Master File there will be a button labeled “Email Notification”. The alerts are as follows:
• Reorder Point – This alert will take place immediately upon saving a ‘direct invoice’ or at the end of the sales order conversion process during invoicing time. The program will look at the Styles that have been invoiced and then compare the current on-hand quantities against the Styles Inventory Reorder point’s amounts. If the quantity falls below the reorder point, the system will send an email alert warning to the specified person(s). The body of the email will look similar to the following:
• When a Purchase Order is saved, it checks the CANC DATE and the EST DATE to see if there have been any changes. If there are changes, a file is updated for all of the adjustments on a line-by-line basis until you exit the Finished Goods PO Entry form. Once you leave the form an email alert will be sent to everyone designated to receive an alert. The body of the email will look similar to the following:
• Cut Order – When a Cut Order is saved it checks the DEL DATE and REQ DATE for each line on the order to see if the dates have changed. If there are changes, a file is updated for all of the changes on a line-by-line basis until you exit the Cut Order Entry form. Once you leave the form an email alert will be sent to everyone designated to receive. The body of the email will look similar to the following:
The Items listed below have fallen below the SUGGESTED MINIMUM STOCK LEVELS ON ONE OR MORE SIZES: Style: JA1000 Color: Red WHS: 000Style: JA1000 Color: WHT WHS: 000Style: JA1000 Color: BLU WHS: 000Style: JA1290 Color: Red WHS: 000Style: JA1290 Color: WHT WHS: 000Style: JA1290 Color: BLU WHS: 000
The Purchase Orders listed below have had Delivery Dates Pushed Back. P.O.: 000007 from vendor AAA has had the Complete Date changes from 02/20/2002 to04/02/2002
The Cut Orders listed below have had Delivery Dates Pushed Back. C.O.: 001006 - from vendor AAA has had the Complete Date changed from 09/05/2002 to09/06/2002 C.O.: 001006 - from vendor AAA has had the Complete Date changed from 09/06/2002 to09/07/2002
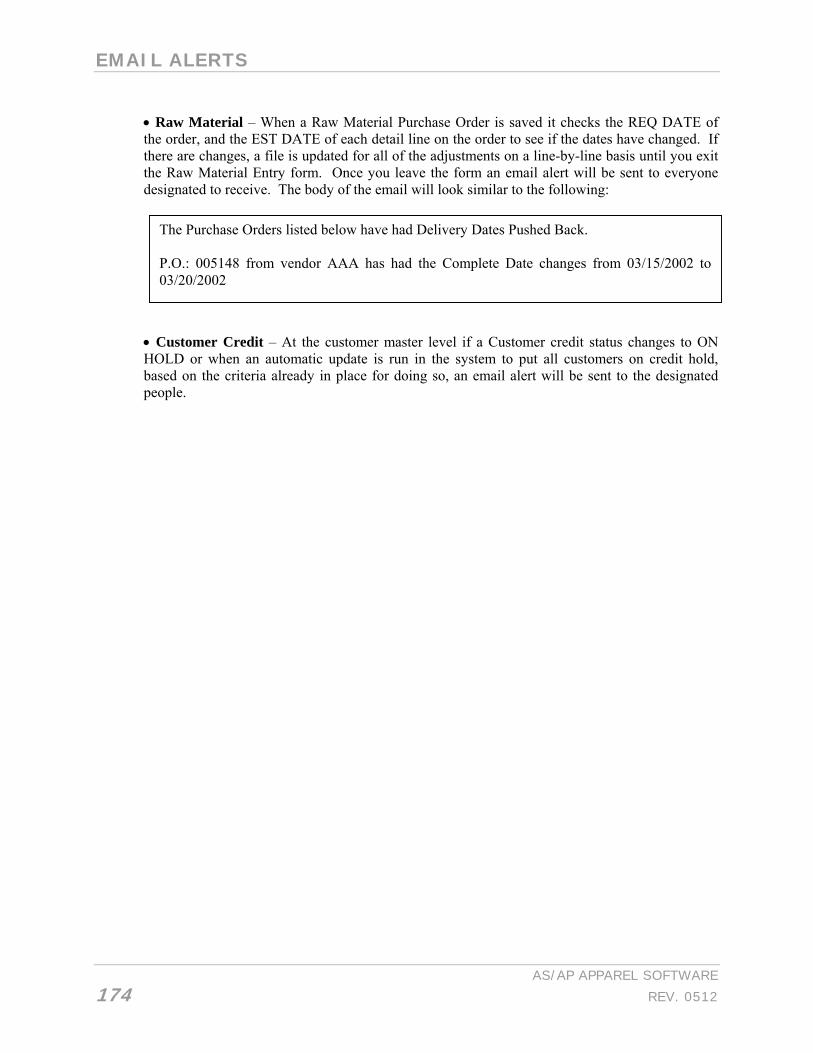
EMAIL ALERTS
AS/AP APPAREL SOFTWARE
174 REV. 0512
• Raw Material – When a Raw Material Purchase Order is saved it checks the REQ DATE of the order, and the EST DATE of each detail line on the order to see if the dates have changed. If there are changes, a file is updated for all of the adjustments on a line-by-line basis until you exit the Raw Material Entry form. Once you leave the form an email alert will be sent to everyone designated to receive. The body of the email will look similar to the following:
• Customer Credit – At the customer master level if a Customer credit status changes to ON HOLD or when an automatic update is run in the system to put all customers on credit hold, based on the criteria already in place for doing so, an email alert will be sent to the designated people.
The Purchase Orders listed below have had Delivery Dates Pushed Back. P.O.: 005148 from vendor AAA has had the Complete Date changes from 03/15/2002 to03/20/2002

UPS WORLDSHIP
AS/AP™ SYSTEM UTILITY
REV. 0512 175
APPENDIX T: UPS WORLDSHIP®
WorldShip® Integration Summary The ASAP UPS interface interacts with the WorldShip® program from UPS by writing data to a defined export file (UPSEXP.DBF) and then importing UPS shipping information from the WorldShip® program via the defined import file (UPSIMP.DBF). WorldShip® communicates with the ASAP import and export tables via ODBC. You will need to contact your UPS representative to set up the ODBC link with ASAP. The UPS system was designed to pull in shipping amounts and tracking numbers based on the sales order number. We write the data to UPSEXP. Worldship® then, using the "Keyed Input" field, imports the data into its system for shipping address information. When the <F10> key is pressed (in WorldShip®) to process the order, Tracking #, Shipping Amount, and Sales Order # are written to our UPSIMP file. The ASAPUPS.EXE program continually polls the UPSIMP file for new records. When found, it writes them into the final file that AS/AP uses during the Invoicing process (SYUPSIMP), and at the same time deletes those records from the UPSIMP file. You then invoice by Unique Pick Slip # and the invoicing program looks to the SYUPSIMP file to see if there is a record for that Sales Order # and, if found, pulls in the total shipping amounts from all records that have that Sales Order number. It then removes those records from the SYUPSIMP file. This means that if you had multiple shipments packaged during the day for a single Sales Order number, the system will total all those records for the shipping amount and use it for the invoice. It will also use only the first record found to determine the UPS tracking number. Once done, if you were to invoice the second pick ticket there would be no records in the file (SYUPSIMP) and the UPS shipping charges would be empty and the tracking number would not exist.
ASAP Import and Export Table Schemas and usage information The default table schemas are defined below.
AS/AP → UPS Foxpro Data Table Definition (UPSEXP) Field # Name Type Width Dec 1 ORDNUM Character 6 2 SCOMPANY Character 30 3 SADDRESS1 Character 30 4 SADDRESS2 Character 30 5 SADDRESS3 Character 30 6 SCITY Character 18 7 SSTATE Character 2 8 SZIP Character 10

UPS WORLDSHIP
AS/AP APPAREL SOFTWARE
176 REV. 0512
UPS → AS/AP Foxpro Data Table Definition (UPSIMP) Field # Name Type Width Dec 1 ORDNUM Character 6 2 TRACKINGNO Character 30 3 WEIGHT Numeric 5 4 AMOUNT Numeric 9 2 5 Vstat Character 1 THE ABOVE STRUCTURES MAY DIFFER BASED ON CUSTOM CODE AND FLAG CONFIGURATIONS. The ‘ASAPUPS.EXE’ program is designed to run continuously in the background on the server transferring information from UPS to AS/AP. The ‘ASAPUPS.EXE’ program moves the data from the data file populated by UPS (UPSIMP.dbf) into the ASAP system (SYUPSIMP.dbf), which makes UPS records with a VSTAT of ‘0’ available for processing during AS/AP Order Conversion (Invoicing). When saving an invoice that was created by converting an open Sales Order at key sequence <S-4-4>, <S-4-7-1>, or the <Convert Order> button on the Sales Order form, AS/AP looks at the Import file (SYUPSIMP.dbf) that contains the UPS Tracking Numbers by Sales Order number with the AS/AP function ‘READ_UPS_DATA’. Once AS/AP finds the Order Number with a VSTAT of ‘0’, AS/AP updates the End of Day file with the appropriate information. The standard End of Day process takes the UPS information captured during Invoicing and populates into database tables for viewing in our Customer Service Module. We have expanded the table UPSIMP that holds the data from UPS to include an additional field for VSTAT. VSTAT holds the status indicator of whether a UPS shipment has been voided. We then pass the indicator over to SYUPSIMP that is used to actually update the End of Day file with the tracking information during Order Invoicing time at <S-4-4> (Order Conversion) and <S-4-7-1> Invoice Allocated Orders. We needed the field due to the problems with UPS creating duplicate records to the table they export to for AS/AP to pick up tracking numbers, number of boxes, and weights. VSTAT should be set to 1 for void and ‘0’ for good transactions. UPS needs to set indicators in order for the status to be changed to use ‘0’ or ‘1’. THE VSTAT IS TO BE SET TO ‘0’ FOR ‘NOT VOID’ AND ‘1’ IF ‘VOID’. THE SHIP VIA FOR THE ORDER MUST ALSO START WITH ‘UPS’ AND IT MUST BE CAPITALIZED. ASAPUPS is a Standalone Windows executable program which takes data from the UPS Worldship® ‘ASAP’ Interface file, writes it to the SYUPSIMP master file (used by AS/AP to update the End-of-Day file with UPS Tracking Numbers), and deletes it from UPS Worldship® ‘ASAP’ Interface file. The program MUST reside in the AS/AP Program directory. The server on which it resides must have drive mappings to any remote AS/AP data contained on the AS/AP the server or workstations. To create a Windows shortcut for the program, use Windows Explorer. Change to the AS/AP Program directory, look for the entry ASAPUPS.EXE, and use the right mouse button menu to create a shortcut. You should then copy this shortcut and place it in the desired location in which to launch it.

UPS WORLDSHIP
AS/AP™ SYSTEM UTILITY
REV. 0512 177
New Installation and UPS Activation Activation of this module requires special flag settings and custom database files that may or may not have been included with your default installation media. If this module has been purchased after your original purchase of AS/AP you may need to have a technical specialist confirm that your system has all necessary files and settings before proceeding. Once all databases and flags have been set you must run the steps below to initialize the UPS databases and configure AS/AP for running the UPS module. 1. Make sure you have fully activated any flag changes communicated to you for this module. If you have not logged out of AS/AP since making your last flag changes, you should do so before continuing. 2. Define the database locations for both the Worldship Export and Worlship Import in the UPC/UPS tab of the Company Defaults screen (U-4-1). These MUST be full paths to the database files without the .dbf extension and are generally the located in the same directory as the AS/AP program files. 3. Go to U-4-4-6 and type UPS. This interface updates necessary file structures, creates indexes, and creates new data files to be used for the UPS Import into AS/AP process. 4. Click “Yes” to the prompt for expanding the UPS files. ASAPUPS.EXE must not be running. 5. Rebuild the World Ship Indexes (U-3-W).
If this menu sequence is not available to you, make sure you have enabled the correct company flags. Once flags are confirmed correct, log out of AS/AP and then log back in to activate the flag changes.
Saving and Order for export to UPS WorldShip® from within AS/AP When a Sales Order is saved and the Ship Via field of the Sales Order Header contains “UPS” in the text, AS/AP writes the record to the export file for UPS WorldShip® to utilize. UPS reads the file when the Sales Order number is entered into the ID field in UPS system. In order for UPS to use our table for picking up the ‘Ship To’ information they create a ‘keyed field’ that looks back at our data file. STANDARD SETTINGS UTILIZE THE “SHIP VIA” FIELD AS STATED ABOVE, BUT YOUR CUSTOM FLAGS AND CODE MAY BE SET TO INTERACT DIFFERENTLY WITH THIS MODULE.
Running ASAPUPS.EXE When the program begins, it displays a ‘Company Selection’ dialog. Select the company for which you wish to transfer UPS data. Next, you will be prompted with a File Packing dialog:

UPS WORLDSHIP
AS/AP APPAREL SOFTWARE
178 REV. 0512
Click <Yes> to pack the files, then load the executable, click <No> to load the executable. When the executable is loaded, the following message will appear in its window:
To cancel the activity, at any time during the day, activate its window and press <ESC>. IF YOU MINIMIZE THE WINDOW DURING THE DAY, WHEN IT IS RE-OPENED, THE PROMPT WILL NOT DISPLAY. THE <ESC> KEY WILL STILL CAUSE THE FUNCTION TO STOP. After pressing <ESC> to exit, the system will prompt with the File Packing dialog (see above). PACKING THE FILES AT EXECUTABLE STARTUP OR TERMINATION IS ADVISABLE, AS NOT DOING SO MAY DEGRADE SYSTEM PERFORMANCE DURING THE COURSE OF THE DAY. Once End of Day has been run then the Tracking Number will now be available in Customer Service for both the Open Invoice and Archive Invoice pages. AS/AP ALLOCATION BY UNIQUE PICK TICKET NUMBERS AND UPS CANNOT BE ACTIVE AT THE SAME TIME. IF BOTH ARE ACTIVE THE FOLLOWING RESULTS MAY OCCUR.
UPS Web Tools Interface AS/AP has a user interface to UPS Online Tools for tracking packages. The process requires that you have a Tools User ID and password, developer key, and an XML Access Key. The ID and Keys can be obtained from UPS. Contact your local representative for more information. In order to make use of the online tools you will need to go to the company defaults page within AS/AP and key in required information into the UPS Web Tool fields (shown below).

UPS WORLDSHIP
AS/AP™ SYSTEM UTILITY
REV. 0512 179
If the specified fields are not populated you will encounter a message on the Customer Service area warning that you have not entered required information. The password field is encoded not to display the actual password on the form; this is done as a security feature. After the UPS Web Tools information is entered correctly then a new feature on the Customer Service form on the Open Invoices page will be available. The new button is labeled ‘UPS Tracking’, as seen in the sample below.

UPS WORLDSHIP
AS/AP APPAREL SOFTWARE
180 REV. 0512
If you press the button on a line that does not have a tracking number then you will receive the message shown below. Also, if you press the button on a line that has an invalid Tracking Number then you will receive the following message:
If you attempt to find the status of a specific tracking number and you have not entered the User ID, Password, or XML Access Code the following message will appear:
If everything has been entered correctly and you have selected a valid tracking number then you will receive a screen similar to the following sample:
The above information is the result of an XML search and return for the specific tracking number that is displayed at the top of the browse window. The information is displayed in descending chronological order (i.e., the newest information is displayed at the top of the window and the oldest information is displayed at the bottom).

UPS WORLDSHIP
AS/AP™ SYSTEM UTILITY
REV. 0512 181
You may use the windows PrtScrn (Print Screen) function to print a hard copy of the information. Contact AS/AP if you would like us to develop another method for producing a hard-copy report.
UPS World Ease Interface
UPS World Ease presently interfaces through the AS/AP order allocation option. The UPS World Ease interface is an expanded version of WorldShip® interface for the consolidation of International Orders. The user should be familiar with the AS/AP WorldShip® files and usage before setting up the World Ease interface. A major difference in the World Ease interface is the fact that the process is based on the actual items and quantities included in the shipment. Using menu selection S-4-7-6 (Invoice Allocated Order(s)) the user will finalize individual pick number at which point AS/AP will export the order header information as well as the order line detail. Once UPS processes the order the user can continue with invoicing on the AS/AP system. Additional information needed from AS/AP for use with World Ease is the Commodity Code, Item (Style) being shipped, Item Description, Quantity being shipped, and Landed Dollar Value for the line item being shipped. ASAP will write this information to a separate file for use by UPS in the consolidation process. This file is referred to as the Item Detail File. To setup the World Ease file locations, go to key sequence <U-4-1> and select the UPC/UPS tab. When using AS/AP World Ease process there will be three directories and names that must be entered. Populate them with directories where UPS WorldShip® Software can access the tables. Next, populate the WorldShip® file locations with the directory path and filename you wish to use. (See Sample Below) DO NOT INCLUDE FILE EXTENSIONS

UPS WORLDSHIP
AS/AP APPAREL SOFTWARE
182 REV. 0512
Next, go to key sequence <U-4-4-6> and type in UPS and then INVT on the screen. This will update the required file structures and create new files if needed.
World Ease and AS/AP There are several additional fields updated in the UPSEXP.dbf file for use by World Ease as well as an Item Detail file necessary to process the International invoicing requirements. Some fields will be passed from either the customer master or shipto file into the sales order file. Other fields will be taken directly from the customer master or master inventory files.
AS/AP → UPS FoxPro Data Definition (UPSEXP.dbf) The following fields must be populated in Customer Master and Shipto files to allow the system to pass the necessary information to UPS: SHIP VIA (Sales Order) COUNTRY (Ship to) PHONE CONTACT EMAIL ADDRESS

UPS WORLDSHIP
AS/AP™ SYSTEM UTILITY
REV. 0512 183
The expanded UPSEXP.dbf file contains the following fields (refer to page Error! Bookmark not defined. for more information about the original UPSEXP.dbf file): Field # Name Type Width Dec 1 ORDNUM Character 6 2 SCOMPANY Character 30 3 SADDRESS1 Character 30 4 SADDRESS2 Character 30 5 SADDRESS3 Character 30 6 SCITY Character 18 7 SSTATE Character 2 8 SZIP Character 10 9 VIA Character 18 10 COUNTRY Character 8 11 PHONE Character 17 12 CONTACT Character 20 13 EMAIL Character 50 14 EMAIL_IND Character 1
AS/AP → UPS FoxPro Data Definition (UPSDETL.dbf) The following fields must be populated in Master Inventory file: Landed Cost (Cost Sheet tab) Commodity Code (Add’l Data tab) The UPSDETL will contain the following fields: Field # Name Type Width Dec 1 COMMCODE Character 10 2 STYLE Character 12 3 DESCRIP Character 25 4 QTYSHIP Number 9 3 5 LANDCOST Number 9 3 6 LOCATION Character 10 UPS will use the SHIP VIA field to determine the delivery method and charges for the goods being shipped. (I.e. Ground, Red, COD, etc…) As allocated orders are invoiced within the AS/AP software the system will pause on those orders that contain ‘UPS’ in the Ship Via field. The following message will appear indicating that the user should now process the order within the UPS WorldShip software.

UPS WORLDSHIP
AS/AP APPAREL SOFTWARE
184 REV. 0512
In the background, AS/AP has just written information to two separate files. The file labeled ‘Worldship Export’ which holds the Address information and the ‘Expanded Export’ file that will hold the Style Detail information that comprises the shipment being created. MORE DETAILS ON THIS PROCESS ARE AVAILABLE IN THE WORLDSHIP SECTION OF THE UTILITY MANUAL. The order number field will contain the actual “pick ticket” number passed to World Ease and the “sales order” number for WorldShip. Once the UPS shipping process has completed within the WorldShip software, the user can press the ‘OK’ button to continue the invoicing from within AS/AP. The user will then see the ship via, shipping amount, weight and quantity that were passed back to AS/AP from UPS.
At this point the UPS World Ease process from within AS/AP is complete and invoicing can be continued.

ERROR REPORTING
AS/AP™ SYSTEM UTILITY
REV. 0512 185
APPENDIX U: ERROR REPORTING Some issues that you come across can be resolved quicker by following some basic procedures. These procedures will help you in dealing with any problems you may encounter: 1) Make sure the error is repeatable. Exit AS/AP™ and try the same key sequence again. If the error still occurs, reboot the computer, and try again. Finally, try it on another terminal and see if the same thing occurs. 2) If you can repeat the problem report it to us by emailing or faxing a completed Issue Submission Form. Including any key sequences, machine/user name, print screens, reports, and any other documents related to the issue is very important in fixing your error quickly and efficiently 3) Print the last page of your error log located at menu option U-4-4-E and send it with the above information. Following the above steps will help you filter out the "non-issues" and help us resolve anything you may run into in a timely manner. Since it requires much more time and effort to log the issues at ASAP, there is a limit to the number of "non-issues" we can research and record at no charge. If the above steps are not followed and issues are reported that turn out to be the result of hardware, network, user error, or anything other than an error in an unmodified program, you will be charged for the time spent to research and log the issue. If the procedures above are followed, we will all benefit from faster solutions to the situations you may run into.

ERROR REPORTING
AS/AP APPAREL SOFTWARE
186 REV. 0512

PW SCANNER RESET AND LOADING PROCESS
AS/AP™ SYSTEM UTILITY
REV. 0512 187
APPENDIX V: PW SCANNER RESET AND LOADING PROCESS
Below are the steps to make the scanner operational:
• Connect scanner base to workstation o The scanner had a solid green light before and after connecting o Plugged battery pack into unit without the Reebok Barcode label
• Scanner may not produce a red light when the trigger is pressed. If it does not press FN/BK/Enter to bring up scanner menu on hand held
• Press ‘1’ and then ‘5’ to select no script • Press ‘5’ and left the menu • Scan barcode to disassociate scanner from base (Page 1-6) • Scan barcode to associate scanner to base (Scanner Base) • Scan barcode to establish an RS-232 interface (Page 2-2) • Scan barcode for ‘Factory Default Settings: All Application Groups’ barcode (Page 2-17) • Scan ‘Program Terminal Interface’ (Page 2-5 • Scan barcode for ‘Programming Chart’ on (2nd to last page of System Manual)
o Scan the 0 three times and then scan the SAVE. • Scan barcode ‘Default Auxiliary Port Protocol’ barcode (Page 3-11) • Scan barcode for baud rate ‘19200’ (Page 3-11) • Scan barcode for ‘ON’ for hardware flow control selection (Page 3-13) • Start HHP IQ Apploader on workstation or server wherever it resides. • Select File/Open and chose directory where PWSCAN2.VC resides and open • Click on Compile and Write script to base
o Press NEXT after compile, process said “SUCCESS” o Click on Work Group 0
Delete contents of Work Group 0 and 1 by clicking on ‘Delete’ o After Work Groups show no information in the NAME and SIZE columns, I click NEXT. o Writing Application said “SUCCESS” and a single beep came from the scanner indicating it
had been updated. o Click Finish
• Click File/Exit • Pick up scanner and pressed FN/BK/ENTER then press 1/4 to select CUSTOM SCRIPT
o The scanner started searching for base and found the base. • Start AS/AP from workstation. • Click Payroll/9. Piece Work Payroll/1. Enter Daily Gross Pay Data/6. Multi Scanner Data Entry • Click the ON button title changed to Scanner ON and the button changed to OFF
o Do the next two steps only if MENU FUNCTION does not appear on scanner screen. Click OFF button Click ON button
• Menu Function should now appear on scanner
PW SCANNER RESET AND LOADING PROCESS
AS/AP APPAREL SOFTWARE
188 REV. 0512
Additional Bases
• Each additional base with new scanners needs to go through the complete steps as outlined above.
Additional Scanners
• Each additional scanner should associate to an existing base, and then load the script as above starting with the HHP IQ Apploader

ADD’L COMPANY
AS/AP™ SYSTEM UTILITY
REV. 0512 189
APPENDIX W: SETUP ADDITIONAL COMPANY FOR PAST YEAR INFO. 1. Copy the files starting with ‘A’ in the ASAP-DBF directory to ‘1’ This can be done from the DOS Prompt by using the command: COPY A*.* to 1*.* (NOTE: After the above has been done you will have a complete set of your data files copied over to a company that would be accessed from the Company Selection menu using a code of ‘1’.) 2. The next step requires either knowledge of FOXPRO or for AS/AP™ to logon to your network and edit the ACLIENT file with the appropriate information. If you know how to use FOXPRO and edit data files then continue to step 3. If not then contact AS/AP™ to go online and complete the rest of the process for you. 3. Start FoxPro and then open the ACLIENT file, which is found in the ASAPV directory. In the row that has the ‘1’ for it's CODE enter the COMPANY NAME as you want it to Appear in the company selection menu and then complete the rest of the line with the information exactly as it is found in the record for CODE ‘A’. The ‘A’ record is typically the first record in the ACLIENT file. (NOTE: The ‘A’ row equates to the ‘A’ COMPANY when first going into the AS/AP™ Software.) 4. Close the ACLIENT file and then start AS/AP™ to see if you now have access to the 2nd company. The second company (Company 1) will have the same name as Company 'A' at this point. If you would like to change the name of the second company you will need to contact AS/AP™ and provide them the new name so they can provide a 'CHECK SUM' to allow the editing of the company name.
ADD’L COMPANY
AS/AP APPAREL SOFTWARE
190 REV. 0512

SALES TAX
AS/AP™ SYSTEM UTILITY
REV. 0512 191
APPENDIX X: SALES TAX BY ZIP CODE Configuration flag 200 must be changed to ‘Z’ and Configuration flag 244 must be changed to ‘Z’. You will be able to manually add and edit each of the City, State, and Sales Tax percentages in the table. However, You will not be able to change the actual zip code once it has been saved. The path and file name that is entered in ‘Company Master’, <Configuration> tab, ‘Defaults’ button, <File Location> tab, in the ‘Zip/Postal Code File’ field, will be used for new files downloaded off our web site for updating the ASAP Zip Code table. The process of loading new zip codes from the web site will be as follows:
-Download the Zip Code table file into the path assigned at key sequence U-1-Configuration-Defaults-File Locations. -Go to U-4-8-5-5, and press the button under the ‘Zip Code’ box. The button has a Tool tip description ‘Update/Load new zip code tables’. -Once the button is pressed, it scans through the current table, and compares the new table downloaded to the current table to see if there are any additions that need to be made.
New additions are made as appropriate, and these new additions do not have the sales tax percentage populated. The sales tax percentage will need to be added manually. Once the zip code table has been updated appropriately, the information will pass over to the Customer files located at AR-1-1 Customer Master. When new customers are added, once the user enters in the zip code the system will automatically fill in the sales tax percentage based on the City and Zip Code entered, if the Sales Tax ID field is left empty. If The Sales Tax ID field is not left empty, the system will not will automatically fill in the sales tax percentage based on the City and Zip Code entered. During the editing of the Customer file you can Tab through the Zip Code field or press the button next to the Sales Tax percentage field to check the Zip Code file for any changes for the Zip Code assigned. When adding new Ship-to’s for a customer the same process used for creating, and editing new customers is used for creating and editing new Ship-to’s. Please follow the instructions above for updating the sales tax percentage for each Ship-to added or edited. During Sales Order Entry the system will pick up the default, tax rate from the Customer Master file based on the Ship-to entered on the ‘Billing/Shipping’ page of order entry.
SALES TAX
AS/AP APPAREL SOFTWARE
192 REV. 0512

WEB INTERFACE
AS/AP™ SYSTEM UTILITY
REV. 0512 193
APPENDIX Y: WEB INTERFACE Following are the steps needed to setup the Web Matrix Interface to work with your data.
AS/AP Software The first thing that must be done is to change flag 807 to ‘W’. Next, contact ASAP for the Code of the Day. Once the flag has been changed you will need to exit AS/AP and go back in to activate the new settings. There are several areas that must be updated with data in order for the Web Matrix Interface to work correctly and display the correct data. They are as follows: <U-4-8-2-S> Sales Codes - This menu selection has now been activated based on the flag above. The ‘Code’ field must be the same as the ‘Class’ setup in Finished Goods Inventory. The ‘description’ will be what is displayed when selecting the ‘Hyperlink’ to view the ‘Subcategories’ of Inventory. The ‘Sales Class’ field will be populated on the Style Master in the ‘Pattern’ field. The ‘Pattern’ field ‘Class’ combination will be how the web page will understand the list of Styles to be displayed and worked with. <F-1-1> Style Master - You will need to populate as desired the ‘Pattern’ field to create a list of Styles to be displayed on the web. As long as the ‘Class’ from the Style Master matches the ‘Code’ from the Sales Code table and the ‘Pattern’ from the Style Master matches the ‘Sales Class’ field from the Sales Code table you should be able to see those styles on various web pages. In addition, on the ‘Add'l Data’ page there is a web description to be built.
WEB Files and Data Changes The server application must be started at the server. You will need to double-click the desktop icon labeled "ASAPSERVER.EXE" to start the process. Once started, the URL for accessing the WEB site is will be assigned to you. The website is currently directed back to your test data directories for purposes of testing. Once the testing is complete you may go into the C:\WCONNECT\MATRIX.INI file on your server and change the following items: SYSTEMPATH = X:\APPS\ASAP\ASAPV\ASAP-DBF\A (You must leave the letter "A" at the end of the path as shown.) SYSFILES = X:\APPS\ASAP\ASAPV\

WEB INTERFACE
AS/AP APPAREL SOFTWARE
194 REV. 0512

COPYING TRIM SHEETS
AS/AP™ SYSTEM UTILITY
REV. 0512 195
APPENDIX Z: COPYING TRIM SHEETS The process of copying trim sheets from one style to another requires the styles being worked with have colors assigned. In addition, it also requires the style you are copying from have a trim sheet built for at least one color. For purposes of this explanation, we will use the following examples:
• Master Style 1090
o Colors: RED (RED) • New style 1090SHEART
o Colors: BLU (BLUE), RED (RED), WHT (WHITE) Both styles will have been created with all of their respective colors and for purposes of this document the color RED for style 1090 has an existing trim sheet. You can verify that the style/color combination that you are copying from has a trim sheet by selecting 1090 as your style number in the Style Master form, clicking on the trim sheet button, and then enter the color you are attempting to confirm. After entering the color press the Load Trim button. If the grid populates with default trim information the trim sheet has been built for the style/color combination and is available for copying to other styles. See sample print screen below.

COPYING TRIM SHEETS
AS/AP APPAREL SOFTWARE
196 REV. 0512
If the grid does not populate, then the style/color combination does not have a trim sheet and you will not be able to copy to another color or style using the color entered. Once a style color combination is populated with trim sheet information it is available. At that point you may click on the ‘Copy’ button. When the copy button has been clicked, you will be given the ability to enter the Color, Dimension, and Warehouse to copy from. In our case, since we know that Style 1090 Color RED Warehouse 000 has trim sheet data. So you would select style 1090, click on Trim Sheet button, click copy and we would enter:
• Color to Copy from: RED • Dimension to Copy from: {empty} • Warehouse to Copy from: 000
Then press the <F10> key as indicated on the bar at the top of the current form.

COPYING TRIM SHEETS
AS/AP™ SYSTEM UTILITY
REV. 0512 197
After the <F10> key has been pressed, you will be provided with the screen below.
NOTE: IF THE STYLE/COLOR COMBINATION ENTERED DID NOT HAVE A TRIM SHEET BUILT YOU WILL RECEIVE THIS MESSAGE.
Once you have entered a Style/Color combination that exists you will then be given the opportunity to populate the information based on our example as follows: Style to Copy to: 1090SHEART
• Color to Copy to: RED • Dimension to Copy to: {empty} • Warehouse to Copy to: 000
If the style/color combination does not exist for the style you are trying to copy to you will receive the following message.

COPYING TRIM SHEETS
AS/AP APPAREL SOFTWARE
198 REV. 0512
If the Style/Color combination exists, but already has a trim sheet created, you will be given the message below.
If you select a Style/Color combination that exists and does not have a trim sheet already created the system will create a trim sheet for the combination selected.

CONTRACT PRICING
AS/AP™ SYSTEM UTILITY
REV. 0512 199
APPENDIX AA: CONTRACT PRICING Contract Pricing is used to provide an alternate (BASE) selling price. There are a number of different contract price table designs, most of which have been designed around specific client requests, and may require modifications to activate for new clients. Our default price table found on the ‘Pricing Info’ page has three fields. They are Style, Price, and Commission percent. Currently, although the commission percent is entered it is not currently used. We can expand the system at any time to pick up the commission percent on a line-by-line basis in order entry. In addition, as new lines are added we currently do not validate the prior existence of the style line in the contract price table. This means that a second line for the same style can be added to the table. However, only the first line found in the table will be used for pricing purposes; all other lines will be ignored. NOTE: WE STRONGLY URGE THAT NO DUPLICATE LINES EXIST IN THE TABLE. The AS/AP system is designed to initially use the selling price for a Style from the Style Master. The selling price is entered and maintained on the ‘Cost Sheet’ page of the Inventory Style Master form. If contract pricing is active, the system will first look at the ‘Pricing Info’ page, on the Customer Master form, for the customer entered during sales order entry to see if a contract price exists for the Customer and Style combination entered. If one exists then the base price is picked up from the contract price table instead of the Inventory Style Master. If the Customer and Style combination does not exist then the default price from the Inventory Style Master is used.
CONTRACT PRICING
AS/AP APPAREL SOFTWARE
200 REV. 0512
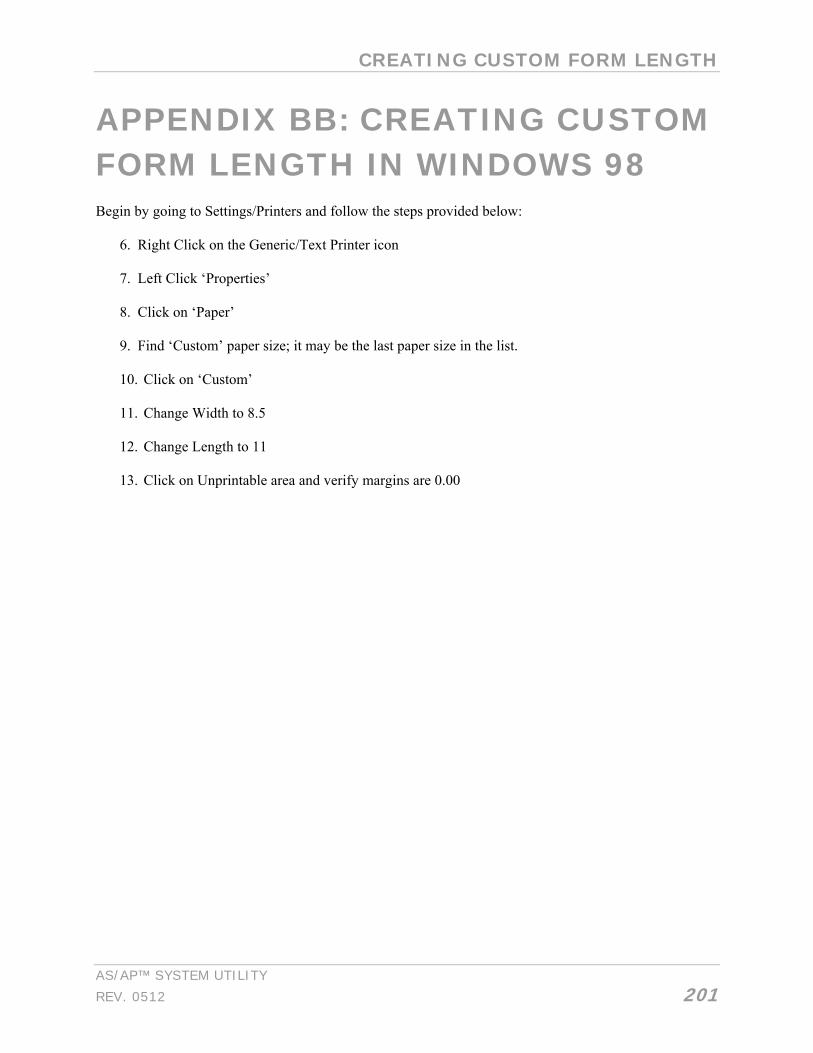
CREATING CUSTOM FORM LENGTH
AS/AP™ SYSTEM UTILITY
REV. 0512 201
APPENDIX BB: CREATING CUSTOM FORM LENGTH IN WINDOWS 98 Begin by going to Settings/Printers and follow the steps provided below:
6. Right Click on the Generic/Text Printer icon 7. Left Click ‘Properties’
8. Click on ‘Paper’
9. Find ‘Custom’ paper size; it may be the last paper size in the list.
10. Click on ‘Custom’
11. Change Width to 8.5
12. Change Length to 11
13. Click on Unprintable area and verify margins are 0.00

CREATING CUSTOM FORM LENGTH
AS/AP APPAREL SOFTWARE
202 REV. 0512

SQL SERVER
AS/AP™ SYSTEM UTILITY
REV. 0512 203
APPENDIX CC: SQL SERVER The following message regarding SQL Server may be received when entering AS/AP regarding SQL Server:
The user will still be allowed access to the AS/AP system, however they will not be connected to the SQL server. Therefore, it will be necessary to exit AS/AP prior to the system administrator continuing with the steps below. THESE ACTIONS SHOULD BE PERFORMED BY YOUR SYSTEM ADMINISTRATOR, IF AT ANY POINT THE INSTRUCTIONS ARE NOT CLEAR, PLEASE STOP IMMEDIATELY AND CALL YOUR SYSTEM ADMINISTRATOR.
• Go to your Windows Control Panel • Click on the ‘Administrator Tools’ icon • Select the icon entitled ‘Data Sources (ODBC)’ • Select the ‘User DSN’ tab • Select the driver entitled SQL Server and press ‘Add’ • The following window will appear:

SQL SERVER
AS/AP APPAREL SOFTWARE
204 REV. 0512
• The field titled ‘Name’ is the most important to Fox. Please contact your system administrator for what should be placed in this field.
• The ‘Description’ field is not a required field, but can be populated with a brief description if desired.
• When populating the ‘Server’ field from the drop-down menu, please contact your system administrator.
Once these fields have been entered, press the ‘Next’ button. The final screens of this procedure are based more on the server and DSN setup of the company and the System Administrator should instruct as to which options need to be selected to ensure proper configuration. Make sure to ‘Test the Data Source’ when prompted to ensure proper setup, however this does not mean that everything is properly configured. If SQL messages are received when operating the AS/AP system please confirm setup with your System Administrator prior to contacting AS/AP for technical support.
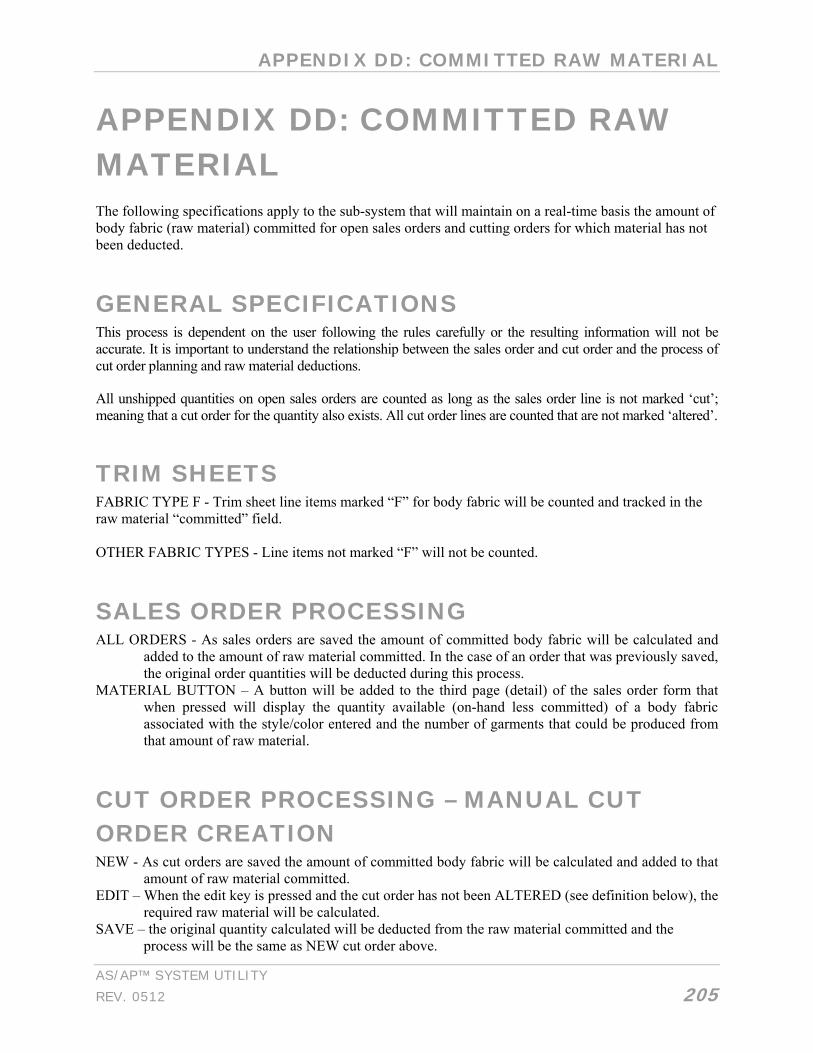
APPENDIX DD: COMMITTED RAW MATERIAL
AS/AP™ SYSTEM UTILITY
REV. 0512 205
APPENDIX DD: COMMITTED RAW MATERIAL The following specifications apply to the sub-system that will maintain on a real-time basis the amount of body fabric (raw material) committed for open sales orders and cutting orders for which material has not been deducted.
GENERAL SPECIFICATIONS This process is dependent on the user following the rules carefully or the resulting information will not be accurate. It is important to understand the relationship between the sales order and cut order and the process of cut order planning and raw material deductions.
All unshipped quantities on open sales orders are counted as long as the sales order line is not marked ‘cut’; meaning that a cut order for the quantity also exists. All cut order lines are counted that are not marked ‘altered’.
TRIM SHEETS FABRIC TYPE F - Trim sheet line items marked “F” for body fabric will be counted and tracked in the raw material “committed” field. OTHER FABRIC TYPES - Line items not marked “F” will not be counted.
SALES ORDER PROCESSING ALL ORDERS - As sales orders are saved the amount of committed body fabric will be calculated and
added to the amount of raw material committed. In the case of an order that was previously saved, the original order quantities will be deducted during this process.
MATERIAL BUTTON – A button will be added to the third page (detail) of the sales order form that when pressed will display the quantity available (on-hand less committed) of a body fabric associated with the style/color entered and the number of garments that could be produced from that amount of raw material.
CUT ORDER PROCESSING – MANUAL CUT ORDER CREATION NEW - As cut orders are saved the amount of committed body fabric will be calculated and added to that
amount of raw material committed. EDIT – When the edit key is pressed and the cut order has not been ALTERED (see definition below), the
required raw material will be calculated. SAVE – the original quantity calculated will be deducted from the raw material committed and the
process will be the same as NEW cut order above.
APPENDIX DD: COMMITTED RAW MATERIAL
AS/AP APPAREL SOFTWARE
206 REV. 0512
UNDO – the original quantity committed will be unchanged. DELETE – If the cut order has not been marked ALTERED, when a cut order is deleted or canceled the
original quantity calculated will be removed from the record of the raw material committed. CUT ORDER PLANNING (automatic cut order creation) – As cut orders are automatically created from sales orders, the CUT field of the sales order is marked. The process will add to the amount of raw material committed, based on the sales order and add the raw material required by the newly created cut order to the raw material committed field. After this process is run the sales order will no longer be counted as committed unless the sales order line is unmarked by the cut order planning menu selection designed for that purpose. This same menu selection can be used to mark sales order lines as CUT (and adjust raw material committed accordingly) when necessary. CUT ORDER DEDUCTION – The raw material committed is adjusted when the actual raw material usage is processed. At this point the cut order is marked ALTERED and will no longer apply against raw material committed. The quantity previously committed will be removed from committed in the raw material file. RECALCULATION – Menu option [F-4-2-R] will allow the user to reset the system recalculate the quantity committed for all applicable sales orders and cut orders. This same function can be run through menu option [R-2-6].

INDEX
AS/AP™ SYSTEM UTILITY
REV. 0512 207

NON-STANDARD SIZED FORMS
AS/AP™ SYSTEM UTILITIES REV. 0003 208
INDEX 1099s, 159 13th Period, 159 13th Period, 160 Account
Codes/Priority, 78 Periods, 20 Priority, 77, 78 Priority Table, 78
Accounts Payable, 70, 99, 122 Account, 24 Code, 99, 100 Discount, 24 Table, 99 Term Codes, 99
Accounts Receivable, 69, 72, 122 Account, 23, 25 Discounts, 23 Period, 21 Term Codes, 72
aCLOS, 159 aCOMP, 159 Active Users, 33 Add New User, 68 Add Printer, 64 Additional
Company, 189 Data, 183 Reports and Functions, 122 Utilities, 41, 53, 57
Additional Utilities submenu, 109
Address Information, 184 Administrative Options, 54, 57 ADP Payroll field, 44 Advance Expiration Date, 55 aGLCA, 159 aGLDB, 159 AMES Stores Tag Length, 67 Annotate, 136, 138 AP Month End, 129 Apparel Inventory, 70 AR
Cash, 129 Codes, 73, 75, 78, 79 Month End, 129
Archive General Ledger, 159
ASAPWORK, 167
Audit Trails, 62 Automatic User Login, 127 Backups, 159 Billto/Shipto Files, 103 Bookmark, 139 Buffers, 169 Bypass, 104
Codes, 28 C.O.D. Tag Length, 67 Capital and Liability, 24 Cash Disbursements, 159 Cash In Bank, 23 Cash Receipts, 159 Celeron Processors, 12 Change
Display Colors, 62 Operating Companies, 37 Working Date, 53
Characters Special, 171
Charges, 183 Check Length, 66 Checks
Payroll, 162 Class Codes, 82 Clear User Logs, 127 Clearing
Messages, 55 Single User, 127
Clearing Messages, 62 Client Files, 60 Closing Dates, 25, 109 Closing the Month, 119 COD
Cash Only, 74 Tags, 21
Code And Lookup Tables, 71 Code For The Day, 60 Code Verification, 97
Menu, 77, 81, 83, 89, 108 Codes
Special Characters, 171 use of symbols, 14
Color Definition, 85 Table, 86
Commission Accounts, 24 Committed Raw Material, 205 Commodity Code, 181

INDEX
AS/AP™ SYSTEM UTILITY
REV. 0512 209
Company, 20 Additional, 189 Maintenence, 22 Master File, 17, 123 Medicare %, 27
Company Defaults, 182 Control Numbers, 51 File Locations, 47 Import/Export, 44 Inventory Fields, 46 Lead Tracking, 49 Optional Programs, 42 Payroll, 43 Payroll Fields, 45 System, 48
Company Name Change, 14 Compressed Printing, 66 CONFIG.SYS, 143 Configuration, 28, 41 Consolidation Process, 181 CONTACT, 182 Contract Pricing, 199 Control
Codes, 150 Conventions, 11
Control Key, 12 Enter, 11 Function Keys, 12
Copying Trim Sheets, 195 Cost Of Inventory, 24 Cost Sheet, 183 Country
Codes Active, 104 References, 103
COUNTRY, 182 County References, 103 CPU, 143 Creating Custom Form Length, 201 Credit Card Information, 70 Credit Hold
Override, 70 Credit Limit
Change, 71 Credit Rating
Code, 77 Critical Path, 71 Current Month Cash Receipts, 122 Cursor, 144 Custom Form Length, 201 Custom Receiving PO, 71 Customer
Lists And Labels, 77 Master, 103 Territory Code, 75 Type, 72
Customer currently on another terminal message Clearing, 62
Customer Master, 70 Customer Service, 70 Data
Definition, 175 Default, 29
Report Printer, 57 Default Printer, 69 Delivery Method, 183 Description, 181
Field, 63 'Detailed Sales Register, 123 Direct Invoicing, 70 Disk, 144 Division
Codes, 106 Table, 105
Dollar Value, 181 Dot Matrix, 149
Printers, 145 Dozen As A Unit Of Measure, 113 Duns number, 22 EDI Defaults, 31 Edit
Company Defaults, 41 Data, 63
Ejecting Pages, 153 EMAIL ADDRESS, 183 Email Alert System, 30 Email Messages, 52
Order Confirmation, 53 Shipment Notification, 53
Email Notifications, 30, 52 Embedding Non-Standard Sized Forms in
Windows, 161 Embroidery
Options, 89 Thread, 95, 97 Thread Groups, 96, 97
Employee Fica, 27 Medicare %, 27
End Of Day, 129 Processing, 122 Updates, 129
End Of Year Processing, 159
INDEX
AS/AP APPAREL SOFTWARE
210 REV. 0512
End-of-Month Processing, 121 Environment, 35 Error
Correction, 123 Report, 58 Reporting, 185
Expanded Export File, 184 Printing, 67
Expense Account, 24 Export
UPS Worldship, 175 Extensions, 181 Factored Receivables, 24 Federal
FICA Account, 26 Identification Number, 21 Withholding Account, 26
Fields Comm Code, 183 CONTACT, 182 COUNTRY, 182 EMAIL ADDRESS, 183 Inventory, 183 Landed Cost, 183 Master Inventory, 183 Order Number, 184 PHONE, 182 Pick Ticket, 184 SHIP VIA, 182, 183
File Extensions, 181 Locations, 47, 182 Recovery Process, 55
Files Address Information, 184 Expanded Export, 184 Style Detail Information, 184 Temporary, 165 TMP, 165 Worldship Export, 184
Finance Charge, 20 Financial Periods vs. Months, 119 Finished Goods Inventory, 91, 113 Fiscal Year, 159 Fixed Damaged FOXPRO Structure, 61 Flag Setting
Accounts Payable, 70 Accounts Receivable, 69 Apparel Inventory, 70 Credit Card Information, 70
Credit Hold Override, 70 Critical Path, 71 Custom Receiving PO, 71 Customer Master, 70 Customer Service, 70 Default Printer, 69 Deleting Invoices, 70 Direct Invoicing, 70 General Ledger, 70 Hot Links, 69 Lead Tracking, 70 Order Entry, 70 Payroll, 70 Pick Slip Reprint, 70 Raw Material, 71 Raw Material PO, 71 Salaried Payroll, 70 Sales Order De-allocation, 70 Salesrep, 70 Sell Below Cost, 70 Starting Module, 69
FOB, 21 Forecasting, 50 Forms, 149
Non-Standard, 162 Foxpro
Data Definition, 175 Error Codes, 39
Freight In, 24 Out, 24
Garnishment account, 26 General
Data, 17, 19, 20, 22 General Data, 20 General Ledger, 70, 123
Account Numbers, 23 Accounts, 26 Archive, 159 Earnings, 24
GL Month End, 129 Glossary, 143 Gross-To-Net Payroll, 123 GST Tax System, 25 Help System, 14, 131, 134 History Window, 139 Hot Links, 69 Hours As A Unit Of Measure, 115 Import
Shared Data, 61 UPS Worldship, 176

INDEX
AS/AP™ SYSTEM UTILITY
REV. 0512 211
Import/Export, 44 Income Account, 24 Information Needed, 181 Install
Character Pitch Codes, 67 Printer Control Codes, 64
Insurance account, 26 Interactive File Maintenance, 55 Interest %, 20 Interface
Web Matrix, 193 Invalid Tracking Number
UPS, 180 Inventory
(Asset) Account, 24 Additional Data, 183 Cost Sheet, 183 Fields, 46 Fields, 183 Reports, 87
Inventory Class Code, 81
Inventory Codes, 94, 98 Menu, 86, 88
Inventory Unit of Measure Code, 83
Invoice Terms, 72 Terms Table, 73
Invoices Deleting, 70
Invoicing, 130 International, 182
Item Description, 181 Dollar Value, 181 Quantity Shipped, 181 Shipped, 181
JCP Box Label, 67 Journal Transaction, 123 LaserJet Printer, 149 Lead Tracking, 70 Ledger Defaults, 22, 23 Letter Quality Printer, 146, 149 Load
AS/AP Data And Program Updates, 54 New Zip Code Table, 57 Program Disks, 125
Local Tax Account, 27 Mailing Label Length, 66 Make New Files, 58
Manufacturing Processes, 94 Processes Groups, 94 Processes Options, 95
Master File Maintenence, 17 Menu, 13
Master Inventory Fields, 183
Master Menu, 12 Matrix
Web Interface, 193 Messages, 34
Clearing, 55 Micro Computer, 146 Mini Computer, 146 Modules, 20 Monetary Conversions, 103 Month End Closing, 25, 119, 123 Multi
Shipping, 30 user Lockouts, 129 User Systems, 54
Multiple Companies, 20 Multi-Shipping, 20 Name Change, 14 Net
Pay Account, 27 Sales Account, 23
Network Printers, 153 Systems, 126
Next Closing Date, 25 Service Charge #, 20
Non-Standard Forms, 162 ODBC
UPS Worldship, 177 Open
Cutting Orders, 57 Purchase Orders, 56 Sales Orders, 56
Operating Files, 60 System, 146
Optional Program, 42 Order
Confirmation, 53 Number, 184
Order Entry, 70 Forecast, 50

INDEX
AS/AP APPAREL SOFTWARE
212 REV. 0512
Override, 104 Overview, 11 Pack and Reindex, 60
Operating Files, 59 Page
Eject, 147 Paper Alignment, 150 Payables, 21 Payroll, 21, 43, 70
Defaults, 25 Fields, 45 GL Accounts, 26 Quarter, 21 Salaried, 70
Payroll Checks, 162 PHONE, 182 Pick Slip Length, 67 Pick Slips
Reprint, 70 Pick Ticket, 184 Piece Work
Payroll, 100 Scanner, 187 Tickets, 64
Point-of-Sale, 74 Pounds As Unit Of Measure, 117 Price Tag Length, 66 Print
End of Year, 159 Non-Standard Sized Forms, 162
Printer, 146 Add, 64 Control, 147 Default, 147, 148 Dialog Box, 147 Generic, 148 Initialization Sequencing, 63 Interface File, 62, 68 Local, 162 Network, 153 Redirection, 152 Selection, 147, 148 Setup of Printronix, 153 Type, 161 Types and Limitations, 149
Printer Selection, 148 Printers
Windows, 162 Printing
Payroll Checks, 162 Printronix L1524 Printer
Setup, 153 Priority
Account, 77 Procedures, 161 Process, 181
Packages, 183 Production Planning, 59 Program and Manual Conventions, 11 Program Disks
Load, 125 Prompt, 146 Quantity Shipped, 181 Query Maker System, 111 Raw Material, 71
Committed, 205 Raw Material PO, 71 Raw Material Sub-System, 205 Raw Material Unit of Measure, 113 Reason For
Adjustment, 97 Adjustment Groups, 98 Credit, 81
Rebuild Index Keys, 39 Recalculate Data Files, 56, 57 Redirection, 64 Repair/Modify File Structure, 55 Reports and Functions, 122 Reset
(Initialize) Printer, 65 Form Length, 66
Reset InProcess Flag, 62 RN number, 21 Sales Order
Number, 184 Type Table, 79
Sales Order De-allocation, 70 Sales Register, 123 Sales Tax, 191 Salesman's
Code, 75, 76 Table, 75
Salesrep, 70 Sample Tag Length, 67 SCAC
Code, 108 Shipper Code, 106 Table, 107
Scanner Adding Additional, 188 Loading, 187 Reseting, 187
INDEX
AS/AP™ SYSTEM UTILITY
REV. 0512 213
Search Function, 23 Season
Codes, 89 Description Code, 89 Descriptions, 87 Full Name Table, 88
Security Flag 13, 71 Flags, 69 System, 68 System Terms & Credit Limit, 71
Select Printer, 68 Serial Number Status, 98 Setup of Printronix, 153 Ship Via, 81 SHIP VIA, 182, 183 Shipment Notification, 53 Shipping Label Length, 66 Shutting Down Your System, 141 SIC Table, 105 Single User
Clearing, 127 System, 125
Source Of Customer, 77 Special
Characters, 171 Due Date, 74
Split Receivables, 24 SQL Server, 203 Start/Cancel Codes, 42 State
Credit, 28 Federal sales tax, 25 Identification Number, 21 Withholding Account, 26
State Code Name Codes, 102 Name Table, 101
Statement Length, 66 States And Countries, 101 Style Detail Information, 184 Style/Product Groups, 91, 93 Super Screen, 32 SYFOX, 127 Symbols, 11, 14 SYONE, 127 System
Code Tables, 101 Colors, 137 Conversion Program, 55 Files, 101
Message Codes, 155 Utility Menu, 15
System Flags 499 - New Printer Interface, 147 531 - Page Eject, 147
Temporary Files, 165 ASAPWORK, 167 Deleteing, 166 Windows XP - DOS, 166 Workstation Setup, 166
Terminal Message Clearing, 55
Terminologies, 11 Terms Codes, 73 Terms Limit
Change, 71 Territory, 75
Code, 75 TMP files, 165 Toolbar, 18 Tracking
UPS, 180 Trim Sheets
Copying, 195 Unit of Measure, 83
Codes, 84 UPC Defaults, 182 Updates
File Structures, 182 Zipped, 126
UPS COD Tags, 67, 74 Detail File, 181 Shipper ID, 21 Tracking Information, 180 World Ease, 182
UPS Web Tools, 178 Company Defaults, 182 Company Defaults Page, 178 Defaults UPC/UPS, 182 Encoded Password, 179 File Extensions, 181 File Locations, 182 Invalid Tracking Number, 180 Password Field, 179 Tracking Information, 180 Update File Structures, 182 XML Access Code, 180 XML Access Key, 178
UPS World Ease, 182 Address Field, 183

INDEX
AS/AP APPAREL SOFTWARE
214 REV. 0512
City Field, 183 Commodity Code, 183 Company Field, 183 CONTACT, 182 Contact Field, 183 Cost Sheet, 183 COUNTRY, 182 Country Field, 183 Defaults, 182 Description Field, 183 EMAIL ADDRESS, 183 File Locations, 182 Information Needed, 181 International Invoicing, 182 Inventory Master Field, 183 Land Cost Field, 183 Location Field, 183 Order Number Field, 183 PHONE, 182 Phone Field, 183 Pick Ticket, 184 Process, 181 Process Packages, 183 Quantity Shipped, 183 Ship Via, 183 SHIP VIA, 182 State Field, 183 Style Field, 183 UPSEXP, 182 VIA Field, 183 Worldship Export, 184 Zip Field, 183
UPS Worldship ’Keyed Input’ Field, 175 Archive Invoice Page, 178 Company Selection, 177 Converting Sales Order, 176 Customer Service, 176 Data Definition, 175 Drive Mappings, 176 Duplicate Records, 176 End of Day, 176 Export, 175 Export File, 184 File Packing, 177 Files, 175 ID Field, 177 Import, 176 Minimizing Windows, 178 ODBC, 177 Open Invoice Page, 178
Order Conversion, 176 Residing, 176 Sales Order Numbers, 175 Saving an Invoice, 176 Status of Voided Shipment, 176 System Performance, 178 Tracking Numbers, 176 Unique Pick Slip, 175 UPSEXP, 175 UPSIMP, 176 vstat, 176
UPSEXP, 182 Address1, 175 Address2, 175 Address3, 175 City, 175 Company, 175 Order Number, 175 State, 175 Zip, 175
UPSIMP Amount, 176 Order Number, 176 Tracking Number, 176 Weight, 176
User Add New, 68 Interface, 108 Logs Clearing, 127 Logs Reseting, 58 Status, 129 System Configurations, 169
Vendor Master List, 123 Verify Module Date/Time, 55 Version
Releases, 125 Update Fix, 58
View Report Structure, 61 W-2 forms, 27 W2 Forms, 159 Web Interface, 193 Web Tools, 178 Windows
3.x and Higher, 161 ME, 12 Printer Fonts, 68
Work Order Length, 67 World Ease, 182 WPL, 21 Year
Fiscal, 159

INDEX
AS/AP™ SYSTEM UTILITY
REV. 0512 215
Year to Date, 25 Zip Code
Lookup, 104 Postal Code Verification, 104
Sales Tax, 191 Table, 191 Table, 104
Zipped Updates, 126