Embed Size (px)
Citation preview

Page 1 of 53
T4 MODERATOR Training Updated 15 May 2019
Table of Contents
OVERVIEW ................................................................................................................................... 3
T4 User roles ............................................................................................................................................................................................................. 3
T4 access and training ........................................................................................................................................................................................ 3
How to login ............................................................................................................................................................................................................ 3
CONTENT TYPES .....................................................................................................................4 - 38
Content type naming ......................................................................................................................................................................................... 4
How to add Content Types .................................................................................................................................................................... 5 - 38 Heading and button (Content Type) ..................................................................................................................................................... 5 WYSIWYG editor (Content Type) ............................................................................................................................................................. 6
Add content (WYSIWYG editor) ..................................................................................................................................................... . 6 Create email address (mailto:) and telephone links (tel:) (WYSIWYG editor) ..................................................................... 7 Add an external link (WYSIWYG editor) ............................................................................................................................................................ 8 Add a section link in the WYSIWYG editor ...................................................................................................................................................... 9 Add a table (WYSIWYG editor) ................................................................................................................................................................................ 9
Document (Content Type) ............................................................................................................................................... 12 YouTube video (Content Type) ....................................................................................................................................... 13
Staff Profile (Content Type) ..................................................................................................................................... 14 - 25
Content Block, Content Block – Media, Content Block - Video (Content Type) .......................................... 26 - 33 Image (Content Type) ..................................................................................................................................................... 34
Map (Content Type) ......................................................................................................................................................... 36
Map point of interest (Content Type) ............................................................................................................................ 37

Page 2 of 53
MANAGE CONTENT .................................................................................................................... 39
Modify content ................................................................................................................................................................................................... 39
Move content ...................................................................................................................................................................................................... 39
Re-order content ............................................................................................................................................................................................... 40
Mirror content ...................................................................................................................................................................................................... 41
Duplicate content ............................................................................................................................................................................................. 41
History and versions ......................................................................................................................................................................................... 41
Delete content .................................................................................................................................................................................................... 42
Expiring content ................................................................................................................................................................................................. 43
MANAGE THE MEDIA LIBRARY .................................................................................................... 44
Upload New Images to the Media Library ............................................................................................................................................ 44
Upload New Document to the Media Library ....................................................................................................................................... 45
Add Media (images/documents) in the Media Library ................................................................................................................... 47
APPROVE/PUBLISH CONTENT ...................................................................................................... 48
MANAGE SECTIONS .................................................................................................................... 49
Add a section ...................................................................................................................................................................................................... 49
Hide a section from the navigation .......................................................................................................................................................... 49
Move and re-order sections ......................................................................................................................................................................... 50
Add a link section ............................................................................................................................................................................................. 50
Modify a section ................................................................................................................................................................................................ 51
Duplicate/Mirror a section ............................................................................................................................................................................ 51
Preview a section .............................................................................................................................................................................................. 52
Delete a section ................................................................................................................................................................................................. 52
THANK YOU! .............................................................................................................................. 53

Page 3 of 53
Overview The TERMINALFOUR Site Manager (T4) is the new content management system staff use to
update and publish web content.
T4 User roles There are three types of user roles in T4, each offering a different level of permissions and
features. They are
1. Contributors can Add/Edit Content Contributors can add/edit/modify/move/mirror/duplicate/delete content in T4 but
CANNOT approve or publish content and cannot create/edit sections. Contributors
can also add images and documents to the Media Library.
2. Moderators can Add/Edit/Approve Content + Sections Moderators are able to do everything a Contributor can do with the addition of
• Add/edit/modify/move/reorder/mirror/duplicate/preview/delete/approve/publis
h sections/folders
• Approve content
They can also review content created/edited by contributors and either
a) Approve it and make it live on the website
b) Edit the content and make it live or
c) Reject the changes to the content
3. Administrator (Web Team only)
T4 access and training To gain access to T4 as a Contributor or a Moderator, staff must have approval from their
HOD/Manger AND completed WCMS training. Email [email protected] to
request for access and training.
How to login 1) Open Google Chrome
(DO NOT use Internet Explorer, it is not recommended due to compatibility issues)
2) Copy and paste this URL into the address bar (this is for training only):
http://ucwcmsapp1t.canterbury.ac.nz/terminalfour/SiteManager

Page 4 of 53
3) Enter Mod1 for your Username, mod123 for your Password and click Advanced. Then
select Site Manager [Local Login] from the Login Type dropdown and click Login
Please note: The above login is for training purposes only. To edit your real site after training, click the below link and log into the live server with your own username and password and select your given Login Type. https://wcmsedit.canterbury.ac.nz/terminalfour/SiteManager?ctfn=hierarchy Email mailto:[email protected] to request for access after training
Content types Content types are building blocks that make up your webpages. They are added to sections in T4.
Content type naming Copy and paste the content type (eg, WYSIWYG editor) in the title of your content in brackets. It will be easier to recognize each content block of the webpage when editing it at a later date.

Page 5 of 53
Heading and button (Content Type) You can add a heading with a button, for example, as a call to action that tells the user what you want them to do and make it as easy as possible for them to do it.
How to add a heading with button
1. Mouse over the Yellow Dropdown menu beside the section/folder you are editing
and select Add Content.
2. Select the content type Heading and button.
3. In the Name field, enter this text “Explore Tours and Events”. This will appear as the button
text.
4. In the Heading field, enter this text “Postgraduate Welcome”. This will appear as a
heading on the page.
5. Click Select beside Link. The site structure will display so you can select the section to link
the button to. Link your button to the Events > Campus tours and future student events
section.
6. Click Preview to see what your Heading and Button look like. The first time you use T4 to
preview a page, you will have to deactivate the pop-up-blocker icon, often in the top
right of your browser.
7. Click Add to save.
This is what your Heading and Button should look like on the web:

Page 6 of 53
WYSIWYG editor (Content type) WYSIWYG stands for ‘What you see is what you get’. The WYSIWYG editor allows you to enter content exactly as you will see it on the website, as opposed to adding HTML code. Use this content type to add paragraph text, lists, headings, links and tables.
How to add content with a WYSIWYG editor
1. Mouse over the Yellow Dropdown menu beside the section you are editing and
select Add Content
2. Select the WYSIWYG editor content type.
3. In the Name field, enter this text “Postgraduate Orientation (WYSIWYG editor)”. This does
not display on the web.
4. In the Rich Content field, enter this text “Orientation sessions to welcome domestic and
international postgraduate students to UC and Christchurch.” - Select this text, from the
Styles dropdown, select lead to give your paragraph text a grey colour and bigger font
size.
5. Click Preview to make sure you are happy with the result.
6. Click Add to save.
TIPS:
• If you are copying text you have created in a document (eg, Word), select the text
then press the Paste as Plain Text button in the WYSIWYG, a dialogue box with the
message “Paste is now in plain text mode. Click again to toggle back to regular
paste mode” will pop up, click the Ok button, then CRTL + V to paste. Otherwise,
simply type your text into the text box.

Page 7 of 53
• Hit enter between each heading and paragraph, or the heading styles you apply in
the next step will continue onto the next line.
• Make sure to format the content by using suitable headings and subheadings from
the Format dropdown box
-
Heading 1 at the top, followed by any number of Heading 2s and Heading 3s etc.
How to create email address (mailto:) and telephone links (tel:) in the WYSIWIG editor
1. Mouse over the Yellow Dropdown menu beside the section/folder you are editing
and select Add Content
2. Select the WYSIWYG editor content type.
3. In the Name field, enter this text “Contact details (WYSIWYG editor)”. This does not
display on the web.
4. In the Rich Content area, add the below text
“Postgraduate Office enquiries
Level 2 - Matariki (Registry)
Phone: 0064 3 364 2987
Mobile: 027 5030 168
Email: [email protected]”
5. Select the text “Postgraduate Office enquiries”, from the Format dropdown menu, select
Heading 2 (CTRL+2)
6. Highlight “0064 3 364 2987” then select the Insert/Edit Link icon in the WYSIWYG
editor. The Insert/Edit Link window opens.
7. In the Link URL field add “tel:006433642987”.
8. From the Target dropdown menu, select Open in New Window (_blank).
9. Select Insert to save the link.
10. Highlight “027 5030 168” then select the Insert/Edit Link icon. The Insert/Edit Link
window opens.
11. In the Link URL field, add “tel:0064275030168”.
12. From the Target dropdown menu, select Open in New Window (_blank).
13. Select Insert to save the link.

Page 8 of 53
14. Highlight the email “[email protected]” then select the
Insert/Edit Link icon. The Insert/Edit Link window opens.
15. In the Link URL field, add “mailto:[email protected]”.
Again, the tag only works if you do not put a space after the colon.
16. From the Target dropdown menu, select Open in New Window (_blank).
17. Select Insert to save the link.
18. Preview your changes.
19. Click Add to save.
TIPS:
• Replace the 03 (regional code) with 0064 (international country code for NZ) and
drop the zero from the 03.
• Make sure there is no space between the colon and the number
How to add an external link (in the WYSIWIG editor)
An external link is any link outside of T4. This may be an external website, such as Studylink, a
link to a UC webpage outside of T4, an email address or a phone number.
1. Mouse over the Yellow Dropdown menu beside the section you are editing and
select Add Content
2. Select the WYSIWYG editor content type.
3. In the Name field, enter this text “Other events (WYSIWYG editor)”. This does not display
on the web.
4. In the Rich Content area of your WYSIWYG content type, add the text “UCSA events”,
make this a heading 2 by selecting Heading 2 from the Format dropdown menu or
(CTRL+2)
5. On a new line, add the text “UCSA Events Calendar” – Highlight this text and then click
on the Insert/Edit Link icon.
6. The Insert/Edit Link Window opens.
7. In Link URL enter http://www.ucsa.org.nz/events/events-calendar/
8. In the Target field, choose Open in new window (_blank).
9. Select Insert to save the link.
10. Preview your changes.

Page 9 of 53
11. Click Add to save.
How to add a section link (in the WYSIWIG editor)
A section link is a link to a section/folder within T4. It links to the ID of the section, which
means that if the section is moved the link will stay active and any changes, such as name
and location, will be updated.
1. Beside the content “Other events (WYSIWYG editor)”, mouse over the Yellow
Dropdown menu and select Modify
12. In the Rich Content area, add the text “UC Events”. Make this a heading 2 by selecting
Heading 2 from the Format dropdown menu
2. On the next line, add the text “UC Postgraduate Events” - highlight this text, right-click
and select the Insert Section Link OR click on this icon.
3. A window will pop up displaying the Site Structure. Navigate to Events > Campus tours
and future students events. The Section Link will be added.
4. Preview your changes.
5. Click Update to save.
TIPs:
• Place links in body copy. To search engines, these are more valuable than links in headers, lists or navigation.
• Good link text describes the page that will load so the user can decide whether to click or not. Write the sentence as you normally would, and place the link anchor on the keyword or phrase that best describes the additional content you are linking to.
• Bad link text, such as non-descriptive 'click here' links force the user to follow the link to learn its destination.
• Never use a link with no link text. Do not just insert a link without link text for example: http://www.arts.canterbury.ac.nz/ The link text should always be the “College of Arts”.
How to add a table (in the WYSIWYG editor)
Tables are sometimes used to arrange information to make it easier to read.

Page 10 of 53
1. In the Rich Content area of your WYSIWYG editor content type, click the Insert a new
table icon. The Insert/Edit Table window pops up.
2. Complete the details as required for the following fields
• Cols: Enter the number of columns required for the table.
• Rows: Enter the number of rows required for the table.
• Class: You must select the class table. This will ensure that you have a responsive
table with the styled effects, hover etc.
• Make first row a header: As determined by the requirements of your data.
• Make first column a header: As determined by the requirements of your data.
3. Leave all of the other fields blank as these are determined by the CSS and changing
them will make your table format incorrectly.

Page 11 of 53
4. Click the Advanced tab.
5. Enter a Summary to describe the primary purpose of the table and its overall structure.
Most screen readers will read the summary first to provide the user with information to
help them interpret and use the table. With more complex tables, the summary
becomes increasingly important.
6. Click Insert button to insert the table.
7. Once the table is created you will notice that more options are available to you in the
tool bar. Mouse over each to see their description pop up.
8. Fill data into the table and merge the necessary cells for the title and description.
9. Preview your content.
10. Click Add or Save as Draft when complete to save your table to the WYSIWYG content
type.
TIPS:
• Please do not specify any width for your table. On small screen devices such as a tablet or mobile, it will have horizontal scroll activated if a width is specified for your table.
• Do not specify any background colours for cell, except special cases which need to get approval from the web team.
Consider alternatives such as
• Bulleted lists – these can be created using the Unordered list icon within the WYSIWYG editor

Page 12 of 53
• Numbered list – these can be created using the Ordered list icon within the WYSIWYG editor
• Accordion, or tabs – email the Web Team for assistance with more complex content types, [email protected].
With the table class selected, your table should look similar to the screenshot below. In preview mode, mouse over the rows to see the hover effect:
Document (Content type) Use the document content type when you want to add a document with a thumbnail
image. T4 automatically creates the thumbnail image, but you can also upload one. The
thumbnail must be resized before you upload it so it is 100px wide otherwise it will display
incorrectly.
You can use the document content type across most document file types, for example PDF,
DOC and XLS. File size is created and applied automatically.
You can use any document that is already in the media library. If a document that you
want to use is not already in the media library, you will need to add it to as described
in Manage the media library.
TIPS: Save any Word documents as a PDF before uploading them so users can’t change the
document.
How to add a document content type
1. If your document isn’t in the Media Library, see the section Upload New Document to the
Media Library in this training document.
2. After adding the document to media library, beside the section you are editing mouse
over the Yellow Dropdown menu and select Add Content.

Page 13 of 53
3. Select the Document content type.
4. In the Name field, enter a name for the document. This WILL be displayed on the
published page.
5. To choose a file to add from the Media Library, click on alongside File. You will
need to add the document to the Media Library if it is not already there.
6. Add the Number of pages the document has so users have an idea of how large the
document is.
7. Preview to make sure you are happy with the result.
8. Click Add to save.
YouTube video (Content type) Use the YouTube video content type when you want to add a video to your page.
1. Mouse over the Yellow Dropdown menu beside the section you are editing and
select Add Content
2. Select the YouTube video content type.
3. Enter a Name for the video, copy and paste the content type in brackets, eg, (YouTube
video). This will be not displayed on the published page.
4. Add the YouTube ID - this is an 11 character number that is in the YouTube URL. This is
after the = and before the &.
5. Preview to make sure you are happy with the result.
6. Click Add to save.

Page 14 of 53
Staff Profile (Content type) The Staff Profile content type is used to create Staff Profiles on People or Contact us pages.
Information for Staff Profiles are imported from other systems and are created automatically.
Some are editable by department in T4 (Name, Position titles, Profile Image) after import,
others need to be updated from source (AD or SPARK).
Each site in T4 has its own Staff Profile section (where all your department staff profiles are
kept), this section can be found inside the Contact us section. The individual Staff Profiles are
added to T4 by site Moderators or Contributors.
Add Staff Profiles to your site (for a person who is a UC staff member) In order to add a Staff Profile to your site, you need the person’s user name (can be
searched in Outlook) OR Employee ID (can be found on the staff ID card).
1. Login as a Contributor or Moderator
2. Locate the Contact us section and look for the Staff Profiles section for your
department/college, for example, Science Staff Profiles or Web Team Staff Profiles
section
3. From the Yellow Dropdown menu beside this section, select Add Content
4. Select Staff Profile from the Choose a Content Type screen

Page 15 of 53
5. Enter the staff name in the Name* field (eg, Aron Carter). This field helps identify your
content in T4 and does not display on the web.
Enter Staff Username (eg, abc13) OR Employee ID (eg, 12345) - you only need one or the
other, not both. Click Add
6. Check your email for a notification that the profile has been imported to T4. This will take
30 seconds or less.
7. Locate the newly created Staff Profile (eg, Aron Carter). You can now Modify/Edit the
profile and make any necessary changes. Name, Position Titles, and Profile Image are
now editable in T4 as detailed below:
a. Default Staff Name and Default Position Title come from HR People Soft and are
automatically pulled to T4 to display on the web. This can be changed if you have
a preferred name or preferred position title that you want to use. To change the
Default Staff Name or Default Position Title, enter a preferred name in the Preferred
Staff Name field or preferred position title in the Preferred Position Title field. If
these are left blank, the Default Staff Name and Default Position Title from HR
People Soft will display on the web.
b. Default Profile Image comes from SPARK and is automatically pulled to T4 to
display on the web. This can be changed in T4 using the Preferred Profile Image
field, this will overwrite the SPARK profile image. If your Staff Profile photo is exactly
the same as your SPARK profile photo, update the data directly from the original
source which is SPARK. Email [email protected] from the Research
Office, and he will get your photo updated in SPARK for you.

Page 16 of 53
c. If you want to modify/add details that came from other systems, modify the data
directly from the original source, for example – Research Interests from SPARK.
(See Data Sources section on page 28 for details)
8. Check and Preview your changes.
9. Publish (Update & Approve) if you are happy with the result
Add a manual Staff Profile (for a person who is NOT a UC staff member, eg,
external lecturers, adjuncts, casuals, and visitors) If the person you want to add ISN’T a UC staff member, doesn't have a UC username or
Employee ID, they can be added manually. All fields have to be entered manually in T4 as
their information do not already exist in other UC systems, therefore are not automatically
pulled through to T4.
1. Login as a Contributor or a Moderator.
2. Locate the Contact us section and look for the Staff Profiles section for your
department/college, for example, Science Staff Profiles or Web Team Staff Profiles
3. Mouse over the Yellow Dropdown menu beside this section and select Add Content.
4. Select the Staff Profile content type
5. Enter the appropriate staff member details:
a. Enter their name in the Preferred Staff Name field
b. Enter their position title in the Preferred Position Title field
c. Enter their email address in the Additional Email field
d. In the Preferred Profile Image field, either click Select (the photo must already be
in the Media Library) or Upload to add a photo. The photo should be 900x1000 px
e. Enter other relevant information if available
6. ‘Preview’ to make sure you are happy with the result.
7. Click Update to save or Update & Approve to publish.

Page 17 of 53
Create Staff Profiles listing using Staff Profile Contact Card
content type
To create a listing of Staff Profiles on the people or contact us pages, we use the Staff Profile
Contact Card (steps 1a-l below) and Related Contents (steps 2a-h below) content types:
1. You need to create a new section for the Staff Profile Contact Card content types to live
in:
a) Mouse over the Yellow dropdown menu beside the Contact us section in your site
and select Add Section
b) On the General tab, give this new section an appropriate name such as Academic
Staff or Technical Staff and untick the show in navigation? tick box, the section/folder
will now look grey.
c) Click the Add button
d) Add the Staff Profile Contact Cards to this section by hovering over the Yellow
dropdown menu of your new section and select Add Content

Page 18 of 53
e) Select the Staff Profile Contact Card content type
f) In the Name field, enter the staff member name.
g) In the Staff Profile field, click the Select button.
h) The Staff Profile Lookup window will appear. Search for the staff member by entering
a name in the search box and select a Location (department where the staff
member belongs). Click the Search button, then select the staff member from the list
of search results
i) The name of the person now appears in the Staff Profile field
j) Optional step: You can overwrite the details from the original source by entering the
details on the form. Leave as blank if you want to use the original value. The data will
only appear on the contact card layout and NOT on the full staff profile.
k) Preview to make sure you are happy with the result
l) Click Add to save
2. Create a Related Contents content type in the main section (Contact us) to display the
Staff Profile Contact Cards (step 1 above):

Page 19 of 53
a) Mouse over the Yellow Dropdown menu beside the Contact us section within your site
an select Add Content
b) Select the Related Contents content type
c) Add a name in the Name field, eg, Academic Staff (Related Contents) to help
identify your content – this does not display on the web.
d) In the H2 Heading field, add a meaningful heading, eg, Academic Staff. This will
appear above your Staff Profile Contact Cards/listing
e) From the Content Type dropdown, select Staff Profile Contact Cards (if you want to
display their additional position title and additional email only) or select Staff Profile
Research Cards if you want to display their fields of Research
Contact Cards examples:
1. Staff Profile Contact Card displays their position title and contact details:
2. Staff Profile Research Card displays their fields of Research only if the Fields of

Page 20 of 53
Research is available. Otherwise, the Staff Profile Contact Card will be displayed:
f) In the Child Section field, click Select to browse and select the new section that you
created in step 1 above.
g) Preview to make sure you are happy with the result.
h) Click Add to save.
Examples of Staff Profile pages as they appear on the web:
• Full staff profile / personal page
http://www.canterbury.ac.nz/arts/contact-us/people/aaron-beehre.html
• Staff listing using contact cards
http://www.canterbury.ac.nz/science/schools-and-departments/biological-
sciences/contact-us/
Modify a Staff Profile Contact Card 1. Locate the section where the content type Staff Profile Contact Cards are kept inside
your site, they are usually inside the Contact us section
2. Locate the section you want to edit, for example Academic Staff, mouse over the Yellow
dropdown menu beside the section and select Modify Section
3. On the Content tab, locate the name of the person you want to edit, mouse over the
Yellow Dropdown menu beside name and select Modify

Page 21 of 53
4. The details for the person will display, modify/add to the existing details as appropriate, for
example, Additional Position Title
5. Click Preview to make sure you are happy with the result.
6. Click Update to save.
Note: The changes will only appear on the Staff Profile Contact Card NOT on the Staff Profiles
Remove a Staff Profile Contact card If, for some reason, the content needs to be kept for later use, set an Expiry Date instead of
Delete.
1. Locate the section where the content type Staff Profile Contact Cards are kept inside
your site, it is usually inside the Contact us section
2. Locate the section you want to edit, for example Academic Staff, mouse over the Yellow
dropdown menu beside the section and select Modify Section

Page 22 of 53
3. On the Content tab, locate the name of the person you want to expire, mouse over the
Yellow Dropdown menu beside name and select Modify
4. Click on the Options tab, click on the Expiry Date field, the date pop up will appear,
select a date and set the time from the date pop up.
5. Click Update to save
Modify a full Staff Profile Staff profiles are imported from other systems and are created automatically.
1. Locate your Department/College Staff Profiles section (eg, Arts Staff Profiles) where the
content types Staff Profile are kept for your site, it is usually inside the Contact us section

Page 23 of 53
Please note: Staff Profile can also be edited by clicking on the Blue Person Icon inside the
‘Staff Profile Contact Card’
2. Mouse over the Yellow dropdown menu beside this Department/College Staff Profiles
section (eg, Arts Staff Profiles) and select Modify Section
3. On the Content Tab, locate the name of the person you want to edit. Mouse over the
Yellow Dropdown menu beside the person’s name, and select Modify
4. The details for the person will display, modify/add to the existing details as appropriate.
Note: If you would like the salutation to appear before the name – the T4 Display Salutation
field must be set to “Yes”. Staff profiles are automatically imported from other systems and
regularly updated every night. With the exception of Name, Position Title and Profile Image,
you can only modify/add fields that are not imported from other systems. If you want to
modify/add details that came from other systems, modify the data directly from the original
source, for example – Research Interests from SPARK. (See Data Sources section on page 28
for details)
5. Click Preview to make sure you are happy with the result
6. Click Update to save
Remove a Staff Profile from your site 1. Locate your Department/College Staff Profiles section (eg, Arts Staff Profiles) where the
content type Staff Profile are kept for your site, it is usually inside the Contact us section
2. Mouse over the Yellow dropdown menu beside this Department/College Staff Profiles
section (eg, Arts Staff Profiles) and select Modify Section
3. On the Content Tab, locate the name of the person you want to remove. From the
Yellow Dropdown menu beside the content name, select Delete

Page 24 of 53
4. This message will appear
Click OK to confirm
5. The staff profile Status will change from Approved to Inactive
Add contact us index links To create the index links on the Contact us pages, we need to create a Contact us index
content type, this displays the Related Contents that are in the section. The name of the
Related Contents will be displayed as the index links, for example:
1. Locate the Contact us section within your site, mouse over the Yellow dropdown menu
beside the section and select Add Content
2. Select the Contact us index content type
3. In the Name field, enter this text “Contact us index”
4. Click Preview to check the index on the page. Make sure this appears on the top of your
Contacts page above the Staff Profiles Contact Cards

Page 25 of 53
5. Click Add to save.
Data sources for Staff Profiles Field names Source Explanation
Name * Manual in T4 Helps identify your content in T4 and does not display
on the web.
Default Staff Name HR People Soft Display name by default – from HR.
Displays if the Preferred Staff Name field is blank
Preferred Staff Name Manual in T4 Overwrites Default Staff Name field
Staff Username Manual in T4 Can be found in Outlook
Employee ID Manual in T4 Can be found on your staff card or contact HR
Display Salutation Select Yes or No Display the salutation from HR
Salutation HR Displays if Display Salutation is selected Yes
Default Profile Image SPARK Display image by default – from SPARK.
Displays if the Preferred Profile Image is blank.
Research Office contact [email protected]
Preferred Profile Image Manual in T4 Overwrites the Default Profile Image field
Default Position Title HR People Soft Displays if the Preferred Position Title field is blank
Preferred Position Title Manual in T4 Overwrites the Default Position Title field
Additional Position Title Manual in T4 Shows an additional Position Title
Iwi Manual in T4 Updates by departments
Te reo Manual in T4 Updates by departments
Email Active Directory Contact IT for updates, create an Assyst Ticket
Additional Email Manual in T4 Shows an additional email address
Physical Address Active Directory Contact IT for updates, create an Assyst Ticket
Phone Active Directory Contact IT for updates, create an Assyst Ticket
Internal Phone Active Directory Contact IT for updates, create an Assyst Ticket
Mobile Manual in T4 Updates by department
Linkedin Profile URL SPARK Update in SPARK
Courses CIS Link courses to the CIS. Update in Course Maintenance
Profile Quote SPARK Update in SPARK
Qualifications SPARK Update in SPARK
Memberships SPARK Update in SPARK
Other Information Manual in T4 Updates by department
Awards SPARK Update in SPARK
Awards display Manual in T4 To overwrite the Awards field
Profile Link Manual in T4 Link to external personal page
Research Interests SPARK Update in SPARK
Field of Research SPARK Update in SPARK
Research, Scholarly or Creative
Works
SPARK Update in SPARK
Additional Image Manual in T4 To display in content blocks
Display Full Profile SPARK
Myscheduler ID Manual in T4 To make an appointment
Researcher Id SPARK

Page 26 of 53
Content Block (Content type) Content blocks are images, headings and text with links. Use these on landing pages.
There are three types of Content Blocks
• Content Block: Block with Image, Heading, Text and links to a T4 section
• Content Block – Media: Block with Image, Heading, Text and links to PDF or WORD
documents from the Media Library
• Content Block – Video: Youtube Video Block with thumb, play button, optional title and
text. Opens up an overlay with the player
As a general rule, there should be a minimum of 3 content blocks across a page and max of 9 on a single page.
For visual esthetics and consistency, H1 headings should have a maximum of 2 lines and the body text should have a maximum of 4-5 lines.
The content blocks should be arranged so that they have similar lines of texts across, avoid having too little text on one content block and too much text on another, having varied lengths of texts will cause the inconsistent white gaps issue on the content blocks and can make your page look messy and unsightly.
Preview your content blocks in T4 to make sure the white space for each is similar and consistent across all content blocks on the page.
How to add a Content Block
1. To add the first content block on the page, locate the archived section where your
content blocks are kept eg. Content Block 1. Mouse over the Yellow Dropdown
menu beside the section and select Add Content
2. Select the Content block content type.
3. In the Name field, enter this text “Study Abroad Programme (Content Block)”. This will not
be displayed on the published page.

Page 27 of 53
4. In the H1 heading field, add this text “Study Abroad Programme” as the heading for the
first content block. This will appear as the red heading on the web. Keep this text short
and concise, max two lines as appears on the web.
5. In Body, add this text: “The Study Abroad programme is for students wanting to study at
UC for one or more semesters as part of an overseas degree”. Keep the text short and
concise, max 4-6 lines.
6. If an Image that you want to use IS already in the Media Library, click to
choose the image you want to use from the Media Library
7. OR if an Image that you want to use IS NOT already in the Media Library, click to
upload and crop an image you want to use.
a. The Cropper window will appear
b. Click the Import Image button, browse to and select the image you want to use
from your computer. The image will load and display in the Cropper window.
c. Select the appropriate Aspect Ratio (By default, 3:2 is selected, mouse over the
different aspect ratios to help you decide which to choose).
d. Move and resize the Crop Area as needed. The Preview window on the right
shows the cropped area only. The Width and Height text box shows the dimension
of the cropped area. Please make sure that the Width is NOT less than 1050px.

Page 28 of 53
e. Add a Name. It should provide information about the image, be relevant, short,
catchy and concise. This is important as the name is also used for alt text to
provide information about images to users with visual impairments, people using
screen readers and those who have low-bandwidth connections.
f. Add a Description. The description element is used to store copyright and
licensing information for media files.
i. Images sourced externally: for example from stock image libraries, you
should check the copyright notice instructions on their website to make
sure you are using the correct format, for example, ©
Depositphotos.com/Name or Nickname of the contributor.
ii. Internal images created by UC: On images created by staff or images
created by photographers or agencies that the University has paid for use
© Restricted/University of Canterbury.
g. Add Keywords. Add synonyms, for example, both sofa and couch, or boy, male
child, child, childhood and kid. Make sure that you are precisely describing the
picture. Adding keywords to images makes it easy to find a particular image in
the future and increases search engine optimisation.
h. Select the image Location. This is where your image will be saved in the Media
Library.
i. Click the Upload to Media Library button.
j. A thumbnail of your image will be displayed beside the Upload button.
8. Add a link to the relevant Section.
9. Preview to make sure you don’t exceed the maximum number of lines for the headings
and texts.
10. Click Add to save.

Page 29 of 53
How to add a Content Block - Media 1. Mouse over the Yellow Dropdown menu beside Content Block 1 section and
select Add Content
2. Select the Content block - Media content type.
3. In the Name field, enter this text “Accommodation Guide (Content Block)”. This will not
be displayed on the published page.
4. In the H1 heading field, add this text “Accommodation Guide (PDF, 2MB)” as the
heading. This will appear as the red heading on the web. Keep this text short and
concise, max two lines as appears on the web.
5. In Body, add this text: “Download the Accommodation Guide for an overview of all
options for accommodation at UC”. Keep the text short and concise, max 4-6 lines.
6. If an Image that you want to use IS already in the Media Library, click to
choose the image you want to use from the Media Library

Page 30 of 53
7. OR if an Image that you want to use IS NOT already in the Media Library, click to
upload and crop an image you want to use.
a. The Cropper window will appear
b. Click the Import Image button, browse to and select the image you want to use
from your computer. The image will load and display in the Cropper window.
c. Select the appropriate Aspect Ratio (By default, 3:2 is selected, mouse over the
different aspect ratios to help you decide which to choose).
d. Move and resize the Crop Area as needed. The Preview window on the right
shows the cropped area only. The Width and Height text box shows the dimension
of the cropped area. Please make sure that the Width is NOT less than 1050px.
e. Add a Name. It should provide information about the image, be relevant, short,
catchy and concise. This is important as the name is also used for alt text to
provide information about images to users with visual impairments, people using
screen readers and those who have low-bandwidth connections.
f. Add a Description. The description element is used to store copyright and
licensing information for media files.
i. Images sourced externally: for example from stock image libraries, you
should check the copyright notice instructions on their website to make
sure you are using the correct format, for example, ©
Depositphotos.com/Name or Nickname of the contributor.
ii. Internal images created by UC: On images created by staff or images
created by photographers or agencies that the University has paid for use
© Restricted/University of Canterbury.
g. Add Keywords. Add synonyms, for example, both sofa and couch, or boy, male
child, child, childhood and kid. Make sure that you are precisely describing the
picture. Adding keywords to images makes it easy to find a particular image in
the future and increases search engine optimisation.
h. Select the image Location. This is where your image will be saved in the Media
Library.

Page 31 of 53
i. Click the Upload to Media Library button.
j. A thumbnail of your image will be displayed beside the Upload button.
8. Add a link to the relevant PDF or WORD doc from the Media Library. If your document
isn’t in the Media Library, see the section Upload New Document to the Media Library in
this training document.
9. Preview to make sure you don’t exceed the maximum number of lines for the headings
and texts.
10. Click Add to save.
How to add a Content Block - Video 1. Mouse over the Yellow Dropdown menu beside Content Block 1 section and
select Add Content
2. Select the Content block - Video content type.
3. In the Name field, enter this text “Why Christchurch (Content block - Video)”. This will not
be displayed on the published page.
4. In the YouTube video ID* field, copy and paste this video ID “LqoTxbIANQ0”
5. In the Title field, copy and paste this text “Christchurch as a study destination”

Page 32 of 53
6. In Body, add this text: “Christchurch is truly the best place to experience the Kiwi dream!”
7. If an Image that you want to use IS already in the Media Library, click to
choose the image from the Media Library
8. OR if an Image that you want to use IS NOT already in the Media Library, click to
upload and crop an image you want to use.
a. The Cropper window will appear
b. Click the Import Image button, browse to and select the image you want to use
from your computer. The image will load and display in the Cropper window.
c. Select the appropriate Aspect Ratio (By default, 3:2 is selected, mouse over the
different aspect ratios to help you decide which to choose).
d. Move and resize the Crop Area as needed. The Preview window on the right
shows the cropped area only. The Width and Height text box shows the dimension
of the cropped area. Please make sure that the Width is NOT less than 1050px.
e. Add a Name. It should provide information about the image, be relevant, short,
catchy and concise. This is important as the name is also used for alt text to
provide information about images to users with visual impairments, people using
screen readers and those who have low-bandwidth connections.
f. Add a Description. The description element is used to store copyright and
licensing information for media files.

Page 33 of 53
i. Images sourced externally: for example from stock image libraries, you
should check the copyright notice instructions on their website to make
sure you are using the correct format, for example, ©
Depositphotos.com/Name or Nickname of the contributor.
ii. Internal images created by UC: On images created by staff or images
created by photographers or agencies that the University has paid for use
© Restricted/University of Canterbury.
g. Add Keywords. Add synonyms, for example, both sofa and couch, or boy, male
child, child, childhood and kid. Make sure that you are precisely describing the
picture. Adding keywords to images makes it easy to find a particular image in
the future and increases search engine optimisation.
h. Select the image Location. This is where your image will be saved in the Media
Library.
i. Click the Upload to Media Library button.
j. A thumbnail of your image will be displayed beside the Upload button.
9. Select Black or White for the Play button
10. Preview to make sure you don’t exceed the maximum number of lines for the headings
and texts.
11. Click Add to save.
Your finished content blocks should look like this on the web:

Page 34 of 53
Image (Content type) Use images when they give useful additional context or information. Don’t use them just to fill up space. Remember that bandwidth for mobile devices is generally more expensive, and images may take longer to download.
Images should relate directly to the page and its contents. For example, a picture of a computer keyboard on a page about online services is probably not useful. Whereas a picture of a new state-of-the-art learning space when it is opened is probably useful to users.
You can use any image that is already in the Media Library. If an image that you want to use is not already in the Media Library, you will need to add it, as described in the Upload New Images to the Media Library section.
How to add an image content type
1. Mouse over the Yellow Dropdown menu beside the section you are editing and
select Add Content
2. Select the Image content type
3. In the Name field, enter a name for the image, copy and paste the content type in
brackets eg, (Image). This will not be displayed on the published page.
4. If an Image that you want to use IS already in the Media Library, click to
choose the image you want to use from the Media Library

Page 35 of 53
5. OR if an Image that you want to use IS NOT already in the Media Library, click to
upload and crop an image you want to use.
a. The Cropper window will appear
b. Click the Import Image button, browse to and select the image you want to use
from your computer. The image will load and display in the Cropper window.
c. Select the appropriate Aspect Ratio (By default, 3:2 is selected, mouse over the
different aspect ratios to help you decide which to choose).
d. Move and resize the Crop Area as needed. The Preview window on the right
shows the cropped area only. The Width and Height text box shows the dimension
of the cropped area. Please make sure that the Width is NOT less than 1050px.
e. Add a Name. It should provide information about the image, be relevant, short,
catchy and concise. This is important as the name is also used for alt text to
provide information about images to users with visual impairments, people using
screen readers and those who have low-bandwidth connections.
f. Add a Description. The description element is used to store copyright and
licensing information for media files.
i. Images sourced externally: for example from stock image libraries, you
should check the copyright notice instructions on their website to make
sure you are using the correct format, for example, ©
Depositphotos.com/Name or Nickname of the contributor.
ii. Internal images created by UC: On images created by staff or images
created by photographers or agencies that the University has paid for use
© Restricted/University of Canterbury.
g. Add Keywords. Add synonyms, for example, both sofa and couch, or boy, male
child, child, childhood and kid. Make sure that you are precisely describing the
picture. Adding keywords to images makes it easy to find a particular image in
the future and increases search engine optimisation.
h. Select the image Location. This is where your image will be saved in the Media
Library.

Page 36 of 53
i. Click the Upload to Media Library button.
j. A thumbnail of your image will be displayed beside the Upload button.
6. Preview to make sure you are happy with the result.
7. Click Update to save.
Map (Content type) How to add a map
1. Mouse over the Yellow Dropdown menu beside the section you are editing and
select Add Section (Moderator only)
2. In the Name field, enter “Contact us”
3. Click the Add button
4. Mouse over the Yellow Dropdown menu beside the newly created section “Contact
us” and select Add Content
5. Select the Map content type
6. Enter a Name for the Map: “Postgraduate Office (Map)”. This will not be displayed on
the published page.
7. Enter the Map centre latitude. This value sets the latitude (horizontal) position of the map.
This can be identified by searching for the address or location using google maps.

Page 37 of 53
8. Enter the Map centre longitude. This value sets the longitude (vertical) position of the
map. This can be identified by searching for the address or location using google maps.
9. Enter the Zoom level. Zoom level defines the resolution of the current view. Zoom levels
can be set between 0 (the lowest zoom level, in which the entire world can be seen on
one map) and 21 (down to streets and individual buildings) are possible within the
default roadmap view. Building outlines, where available, appear on the map around
zoom level 17. Each succeeding zoom level doubles the precision in both horizontal and
vertical dimensions.
10. Select the UC Styled Map type. Most of the time the UC styled map will be most
appropriate.
11. Preview to make sure you are happy with the result.
12. Click the Add button to save.
Map point of interest (content type) Use this content type to add a point of interest pin to a map. This displays a map pin and any relevant information, such as the name of the place, address and contact details.
How to add a new map point of interest
1. Mouse over the Yellow Dropdown menu beside the section “Contact us” and select
Add Section (Moderator only)
2. On the General tab, in the Name field, enter the text “Map Pins”
3. Untick Show in navigation?

Page 38 of 53
The section folder will display as grey instead of yellow, to show that it is hidden from the
navigation.
4. Click the Add button to save
5. If there are other subsections, move the Map pins section to the bottom by going to the Subsections tab and using the Move arrows.
6. Mouse over the Yellow Dropdown menu beside the new section “Map Pins” and
select Add Content
7. Select the Map – Point of interest content type
8. In the Name field, enter “Postgraduate Office”. This WILL BE DISPLAYED on the published
page as the title of the map pin.
9. Add a Description. Limited additional information that will fit on a map bubble. Usually
this will be the address, contact information and a relevant website link.
10. Add the Location. You can add this by moving the map pin to the right location, entering
the GPS coordinates or adding an address.
11. If relevant add an Image from the Media Library in landscape format only.
12. Preview to make sure you are happy with the result.
13. Click Add to save.

Page 39 of 53
Manage content Modify content Modifying content is a very common task when using T4. This is where you can make changes to existing content in the system.
To modify an existing piece of content: 1. Hover over the Yellow Dropdown arrow beside the Section you wish to modify.
2. Select Modify Content.
3. A list of Content that exists in that Section appears. (If the content is in an accordion,
tabs, or a content block, each will be in its own section. Expand the section then
select Modify Content from the Yellow Dropdown menu beside the section for the
accordion, tab, or content block you want to modify.)
4. Click on the content's title to open it or select Modify from the Yellow Dropdown
menu beside the piece of content.
5. Make changes to the content.
6. Preview your changes.
7. Click Update to save.
Move content to another section Contents can easily be moved, and the order in which they appear in navigation will
change to reflect this. Use either automatic ordering or move them manually.
1. Select Modify Content from the Yellow Dropdown menu beside the Section
containing the content you want to move.
2. Select Move from the Yellow Dropdown menu beside the Content.
3. The Site Structure opens. Click on the Section you want to move the content to.

Page 40 of 53
Re-order content To reorder contents 1. Click the T4 icon if you are not already on the Site Structure screen.
2. Hover over the Yellow Dropdown menu beside the section you want to reorder your
content types and select Modify Content.
3. A list of content for the section appears on the Content tab.
4. To apply Automatic Ordering, tick the checkbox Enabled and select Alphabetical (A-Z)
from the dropdown as a Method.
By default, all sections are locked. Unlock the sections you want to apply Automatic
Ordering. To do this, click the Lock/Unlock All buttons:
or tick/untick the individual items:
5. If you want to manually re-order the content, use the Move arrows to move the content
types up and down.
6. Click Save Changes before navigating away from this screen, as the changes will
otherwise not be saved.

Page 41 of 53
Mirror content Individual pieces of content can be mirrored. When content is mirrored, updates from either location will affect the content from all locations. This is useful when you want to re-use content across different sections and want it to be consistent.
1. Select Modify Content from the Yellow Dropdown menu beside the Section
containing the content you wish to mirror or duplicate.
2. Select Mirror from the Yellow Dropdown menu beside the Content.
3. The Site Structure opens. Click on the section you want the mirrored content to appear
in.
4. A snowflake * appears beside the mirrored content. Hover your mouse over it to see the
various locations of the content.
Duplicate content Individual pieces of content can be duplicated. When content is duplicated, you create an independent piece of content. You would duplicate content when you want to use another piece of content as a starting point so you don't have to create it from scratch.
1. Select Modify Content from the Yellow Dropdown Menu beside the section
containing the content you wish to mirror or duplicate.
2. Select Duplicate or from the Yellow Dropdown Menu beside the content.
3. The Site Structure opens. Click on the section you want the duplicated content to
appear in.
4. The content will appear as new content in the section you have duplicated it to.
History and versions T4 allows you to see all changes made to content, compare different versions and set previous versions of the content live. To see how this works, modify a piece of content, then compare the two versions of the content. History can also be accessed from the Approve Content screen. 1. Select Modify Content from the Yellow Dropdown Menu beside the section
containing the content.
2. Click on the content’s name to open it.
3. Make changes to the content and click Update.
4. Select History from the Yellow Dropdown Menu beside the content.

Page 42 of 53
5. Check Compare for two versions you wish to compare, then click either Content
Comparison or Visual Comparison.
6. Close the window and click Set Active beside the original version (assuming you wish to
revert to a previous version of the content).
Content Comparison: A side-by-side comparison of your content. This can be displayed in Text or HTML view. Deleted content is highlighted in red, added content is highlighted in green, and changed content is highlighted in amber. Visual Comparison: A preview of your content. Deleted content is highlighted in red and added content is highlighted in green.
Delete content To delete content:
1. Select Modify Content from the Yellow Dropdown Menu beside the section
containing the content you want to delete.
2. Select Delete from the Yellow Dropdown Menu beside the content.
3. A pop up window appears to confirm you want to delete the content. Click OK to
confirm.
4. The content will be marked as Inactive and will no longer be published. It will stay
inactive for 30 days and then will be deleted automatically. Within the 30 day period,
you can reset the content to Pending or Approved. Inactive content can be recycled
(permanently deleted) by Web Team.
TIPS:
m) Inactive content can be permanently deleted at any moment. If, for some reason, the content needs to be kept for later use, set an Expiry Date instead of Delete.
n) If you are drafting a page, the inactive content won’t show in your preview.
o) Take appropriate steps to make sure that remaining or new content and links make
sense without the now inactive content.

Page 43 of 53
Expire Content
If, for some reason, the content needs to be kept for later use, set an Expiry Date instead of Delete. 1. Select Modify from the Yellow Dropdown Menu beside the content you want to
expire.
2. Click on the Options tab, click on the Expiry Date field, select a date and set the time
from the date pop up.

Page 44 of 53
Manage the Media Library
Upload New Image to the Media Library 1. Before you add your image to the Media Library you will need to make sure you are
using the correct image quality, size, and aspect ratio and file type.
2. In the Content dropdown select Upload New Image.
3. A form will appear where you complete the details of the image. In the Name field,
enter a name for your image. It should provide information about the image, be
relevant, short, catchy and concise. This is important as the name is also used for alt text
to provide information about images to users with visual impairments, people using
screen readers and those who have low-bandwidth connections. Do not include “Image
of” or “Graphic of” in the name field.
4. Add a Description. The description element is used to store copyright and licensing
information for media files.
a. On images sourced externally: for example from stock image libraries, you should check the copyright notice instructions on their website to make sure you are using the correct format, for example © Depositphotos.com/Name or Nickname of the contributor
b. Internal images created by UC: On images created by staff or images created by photographers or agencies that the University has paid for use © Restricted/University of Canterbury
5. Add Keywords. Add synonyms, for example both sofa and couch, or boy, male child,
child, childhood and kid. Make sure that you are precisely describing the
picture. Adding keywords to images makes it easy to find a particular image in the
future and increases search engine optimisation.
6. Select a Category for your image, this is where your image will be saved.
7. Select an Image to upload from your computer.

Page 45 of 53
8. Click Submit to save the image file.
Upload New Document to the Media Library
When uploading a new document to the Media Library (PDF, Word document, Powerpoint
or anything that isn’t an image), the file type and file size needs to be added in brackets
after the file name. For example, when uploading a PDF named “Authorising agreement for
Proxy Borrower” to the Media Library, the name in the Media Library for the PDF would be
“Authorising agreement for Proxy Borrower (PDF 433KB)”. See screenshot below:
The name will display as red link text on the web as “Authorising agreement for Proxy
Borrower (PDF 433KB)”:
For accessibility, the file size and file type: (PDF 433KB) must be part of the link text, screen
readers will read this text as part of the link. In order for it to appear as part of the link text,
the name of the file must be edited in the Media Library to include the file type and file size
in brackets as described above.
TIPS:
If you plan to upload several images, it is helpful to open the media library in a separate tab. That way, you can easily jump back and forth between content and media library.

Page 46 of 53
Some common file types and their abbreviations: Adobe Portable Document (PDF, size in KB or MB) Microsoft Word Document (Word, size in KB or MB) PowerPoint Presentation (PPT, size in KB or MB)
Add a DOC, PDF, XLS, or PPT document to the Media Library.
1. Before you upload the document into the media library, rename it according to the
naming convention SectionName_document_description.pdf. Section name refers to
sections sitting at the first level under Canterbury.ac.nz in T4 eg, Future Students,
International, Postgraduate. This step is important because you cannot rename the PDF
once it is in the media library, and Google indexes the original filename rather than
the Name in T4. The filename gives search engines clues about the subject matter of the
document. Use hyphens instead of spaces or underscores (search engines see hyphens
as spaces whereas underscores are invisible and join words together). Always maintain
the file type at the end of the file name.
2. From the Content drop down, select Upload New Document.
3. A form will appear where you complete the details of the document. In the Name field,
enter a name for your document, add the file type and file size in brackets after the file
name, for example, "Authorising agreement for Proxy Borrower (PDF 433KB)". It should
provide information about the document, be relevant, short, catchy and concise.
4. Add a Description.
5. Add Keywords. Adding keywords makes it easy to find a particular documents in the
future and increases search engine optimisation.
6. Select a Category for your document, this is where your image will be saved.
7. Select a Document to upload from your computer.
8. Click Submit to save the document.

Page 47 of 53
Add Media (images/documents) in the Media Library Note: Only Moderators can do this
1. In the Content dropdown select Media Library.
2. Open the Images or Documents folder on the left and navigate to the appropriate
section folder for your image, eg. Future Students if you are Future Students Moderator.
You will only have access to folders that are relevant to your department
3. The Add Media, Move Media and Delete Media buttons will appear on the Browse tab
for the sections you’ve got access to
4. Click on the Add Media button
5. A form will appear where you complete the details of the document. Complete steps 3
to 8 above in the Upload New Image to the Media Library section OR Upload New
document to the Media Library section.

Page 48 of 53
Approve/Publish content When content is added to the site, it will have to be approved before it can be published
and go live. Only Moderators and Administrators can approve content.
1. To approve content, go to Content and select Approve Content.
2. The Pending tab will contain a list of content you can approve.
3. Click the name to check the details of the content.
4. Hover your mouse over the Section details to see the exact path to the content.
5. You can sort by name, priority or last modified.
6. Select your content items to approve and click the Approve button
7. Once content has been approved, it will disappear from the main list.
8. In the site structure, the approved content appears in the green column under the traffic
lights.
As a Moderator, the dropdown arrow next to Update gives you two options – Update and
Save as Draft
• Update saves the content and it can be previewed as part of a section. The content
has to be approved separately to be published.
• Save as draft saves the content as Draft you can go back to and edit later. This
cannot be previewed as part of the section, only as an individual item. This does not
get published as it will not appear in the approval queue.
Page 49 of 53
Manage Sections In addition to the rights of Contributors, Moderators have the additional ability to manage the site structure/sections and to approve content.
A section can be described as a page with pieces of content that make up a section. Content can be mirrored to appear within other Sections throughout the UC site.
Add a section
1. Hover over the Yellow Dropdown Menu beside the section you are editing and
select Add Section.
2. Enter a Name for the section.
3. Enter Output URI to create a friendly URL or a shorter URL. If left blank, the section’s Name
is used when publishing.
4. Leave Show in navigation? checkbox as ticked.
5. Click Add to save.
Note: By default, the new section will appear as the last item in the section above. To move
it up, go to the Subsections tab and use the Move arrows to move it up the hierarchy.
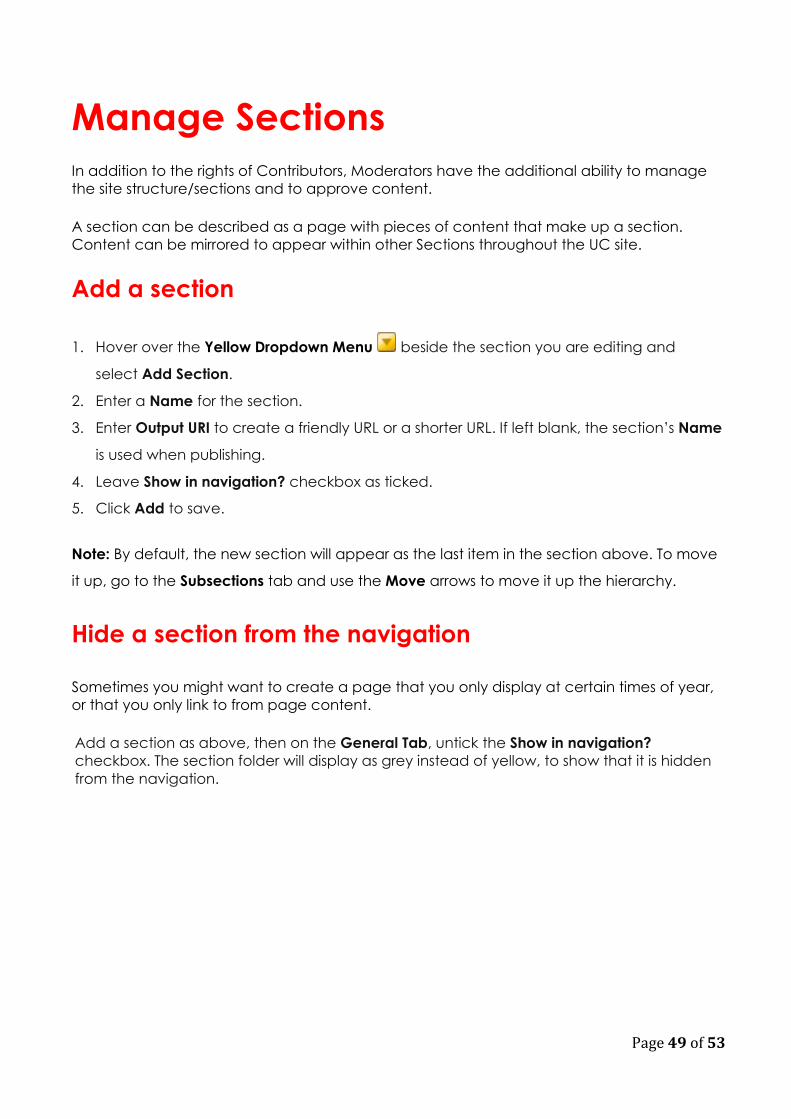
Hide a section from the navigation
Sometimes you might want to create a page that you only display at certain times of year, or that you only link to from page content.
Add a section as above, then on the General Tab, untick the Show in navigation? checkbox. The section folder will display as grey instead of yellow, to show that it is hidden from the navigation.
Page 50 of 53
Move and re-order sections
Sections can easily be moved, and the order in which they appear in navigation will change to reflect this. Use either automatic ordering or move them manually.
To move a section
1. From the Yellow Dropdown menu beside the section you want to move, select Move
Section.
2. The Site Structure appears, click on the name of the destination section.
To reorder a section
1. Click the T4 icon if you are not already on the Site Structure screen.
2. Select Modify Section from the Yellow Dropdown Menu beside the section you are
editing.
3. Select the Subsections tab.
4. If you want to use Automatic Ordering, check the box Enabled and select a Method. By
default, all sections are locked. Unlock the sections you want to apply Automatic
Ordering. To do this, use the Lock/Unlock All button or check the individual items.
5. If you want to manually move the sections, use the Move arrows to move sections up
and down.
6. Click Save Changes before navigating away from this screen, as the changes will
otherwise not be saved.
Add a link section
Link sections do not contain any content. They redirect the user to another section within T4 or to an external URL.
1. Hover over the Yellow Dropdown Menu beside the section you are editing and
select Add Section.
2. Under the General tab, in the Name field, enter a name for your link section.
3. Untick the checkbox Show in Navigation?
4. Tick the checkbox Make this a link section?

Page 51 of 53
5. Click on the Details tab.
6. Select whether this section will link to another section in T4 OR to an external URL
a. To link to another section in T4, click on the Section radio button. Then click on
alongside Link Section to choose a section to link to. OR
b. To link to an external URL, click on the External URL radio button. Then enter a link
in the Link URL field.
7. Select Add to save your changes and create a link section.
Modify a section
• Hover over the Yellow Dropdown menu beside the Section you wish to modify and
select Modify Section.
• Click on the Content tab, a list of Content that exists in that Section appears.
• Click on the content's title to open it or select Modify from the Yellow Dropdown
menu beside the piece of content.
• Make the necessary changes to the content.
• Preview your changes.
• Click Update to save.
Duplicate/Mirror a section
When you want to reuse the same content in another place, you can either duplicate it or mirror it. Duplicating creates a copy that is separate from the original, so if you change the duplicate, the original content remains the same. Mirroring creates a copy that is linked to the original, so if you change the mirrored content, the original content changes too. Use mirroring where you want your content to update itself each time the original is updated. Take care not to change mirrored content if you are not the owner of the original.
1. Hover over the Yellow Dropdown menu beside the section you are duplicating and
select Duplicate branch.
2. The Duplicate branch window appears
3. Under Content Options, select Ignore content to duplicate the structure but not the
content, Duplicate content, or Mirror content.

Page 52 of 53
4. Under Duplicate Options - Section to Copy Into. Click Select.
5. The Site Structure will appear, click on the name of the destination section, expanding
the section first if required.
Preview a section
1. Hover over the Yellow Dropdown menu beside the section want to preview and
select Preview section.
Note: The first time you use T4 to preview a page, you will have to deactivate the pop-
up-blocker icon, often in the top right of your browser.
2. The section and content will appear as it would if published.
3. Close the window to return to T4.
Delete a section
4. Hover over the Yellow Dropdown menu beside the section you are deleting and
select Delete section.
5. A pop-up window appears to confirm. Select Ok or Cancel.
6. If you select Ok the deleted section will be highlighted in red and no longer published. It
can be recycled by an Administrator.
TIPS:
• If the section is approved and published, deleting it will remove it from the live site
and break any links to it. Any deleted section will change from status 'pending' or
'approved' to 'inactive'.
• It will stay inactive for 30 days and then be deleted automatically. If you are drafting
a page, the inactive section won’t show in your preview.
• Make sure that remaining content (and links) make sense without the inactive
section.
• Within the 30 day period, you can reset the section to 'pending' or 'approved'.

Page 53 of 53
Thank you!
Thanks so much for paying attention to the training and doing the exercises.
You have now an understanding of the most important functions and features of T4 and we
hope you continue to learn more with your daily work and help the University in creating a
great experience for the visitors of our website.
Practice what you learnt
• Use the system as often as possible
• Think of the user who will read your content
• Useful online resources http://www.canterbury.ac.nz/webguide/
Resources
• UC Web Guide- http://www.canterbury.ac.nz/webguide
• Communications and Media Policy
http://www.canterbury.ac.nz/ucpolicy/GetPolicy.aspx?file=Communications-And-
Media-Policy.pdf
• Social Media Guidelines
http://www.canterbury.ac.nz/webguide/uc-style-guide/social-media-guidelines/
If you have any questions, please email the web team