Embed Size (px)
Citation preview
Lab A (Module 10)Implement Folder-Level Security
This document is provided “as-is”. Information and views expressed in this document, including URL and other Internet Web site references, may change without notice. You bear the risk of using it.
This document does not provide you with any legal rights to any intellectual property in any Microsoft product. You may copy and use this document for your internal, reference purposes.
© 2011 Microsoft. All rights reserved.
SharePoint Enterprise Content Management Implementers' Course
ContentsTask 1: Create the SharePoint Groups.........................................................................................................3
Task 2: Create the Project Documents Library.............................................................................................5
Task 3: Enable Developer Dashboard and Review the Execution Time.......................................................7
Task 4: Break Inheritance on the Project Folders........................................................................................8
Task 5: View Content Using Test User Accounts........................................................................................13
Task 6: Review the Execution Time with Unique Permissions...................................................................14
In this exercise, you create three SharePoint groups and assign a user to each group. These groups are used to secure the content at a folder level. You use the Developer Dashboard to review the effect of unique permissions on performance.
Task 1: Create the SharePoint GroupsIn this task, you create three SharePoint groups and a user to each group.
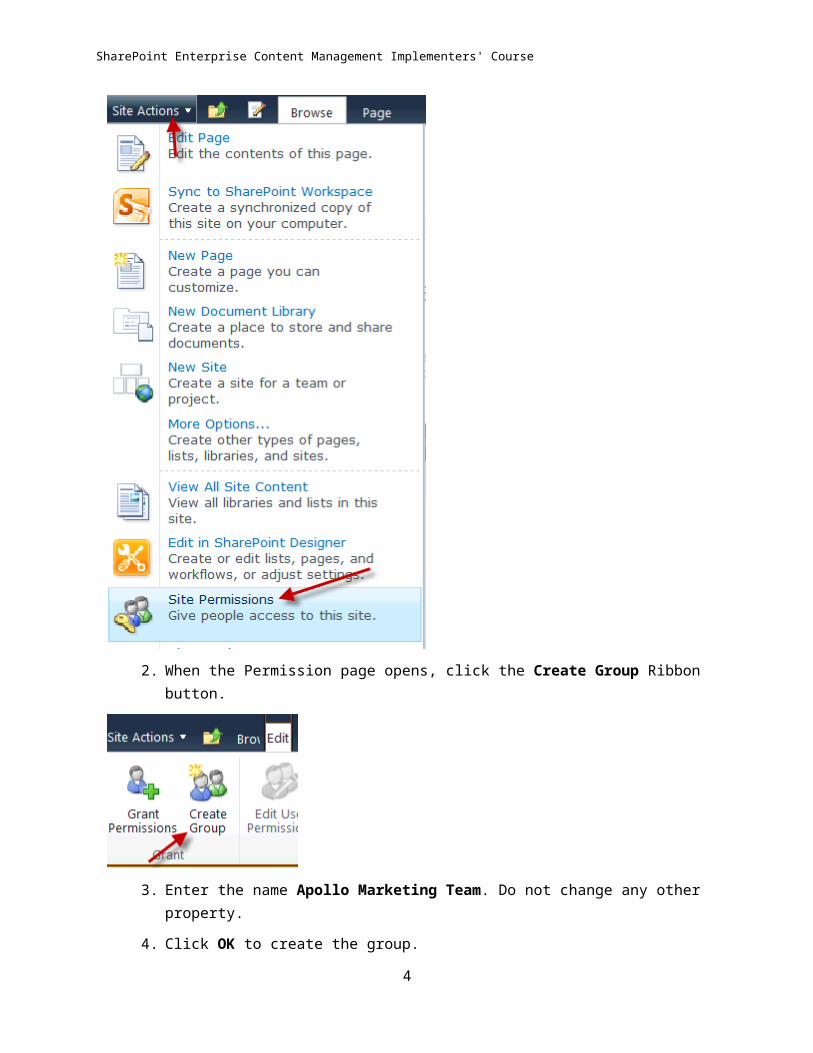
1. In the Contoso Marketing site, open http://intranet.contoso.com/sites/ECMForTheMassesV3 if the site isn’t open in your browser), click Site Actions | Site Permissions.
3
SharePoint Enterprise Content Management Implementers' Course
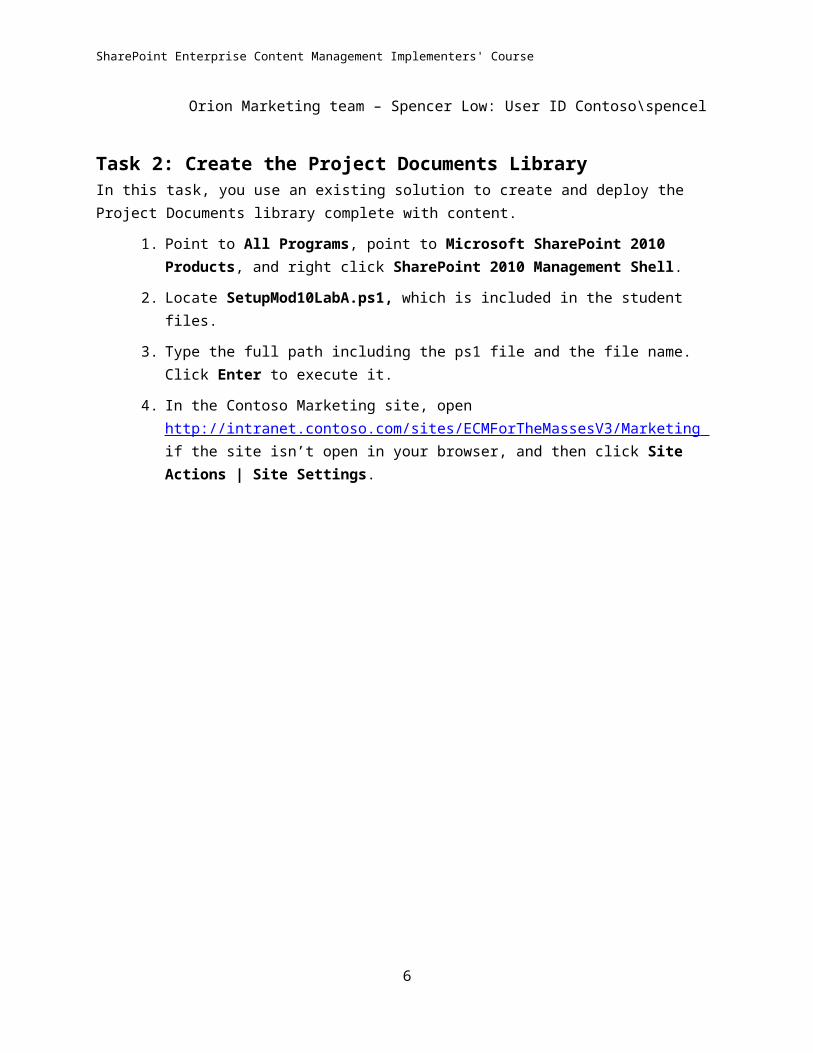
2. When the Permission page opens, click the Create Group Ribbon button.
3. Enter the name Apollo Marketing Team. Do not change any other property.
4. Click OK to create the group.
5. When the Apollo Marketing Group page opens, click New | Add Users from the menu.
4

SharePoint Enterprise Content Management Implementers' Course
6. Enter cotnoso\markh in the User/Groups text box and click the Check Names icon to verify the account.
7. Uncheck the Send welcome e-mail to the new users checkbox.
8. Select OK to add Mark Hanson to the group.
9. Repeat steps 1-6 for the Gemini Marketing Team and the Orion Marketing Team using the following users:
Gemini Marketing Team – Renee Lo: User ID Contoso\reneel
Orion Marketing team – Spencer Low: User ID Contoso\spencel
5
SharePoint Enterprise Content Management Implementers' Course
Task 2: Create the Project Documents LibraryIn this task, you use an existing solution to create and deploy the Project Documents library complete with content.
1. Point to All Programs, point to Microsoft SharePoint 2010 Products, and right click SharePoint 2010 Management Shell.
2. Locate SetupMod10LabA.ps1, which is included in the student files.
3. Type the full path including the ps1 file and the file name. Click Enter to execute it.
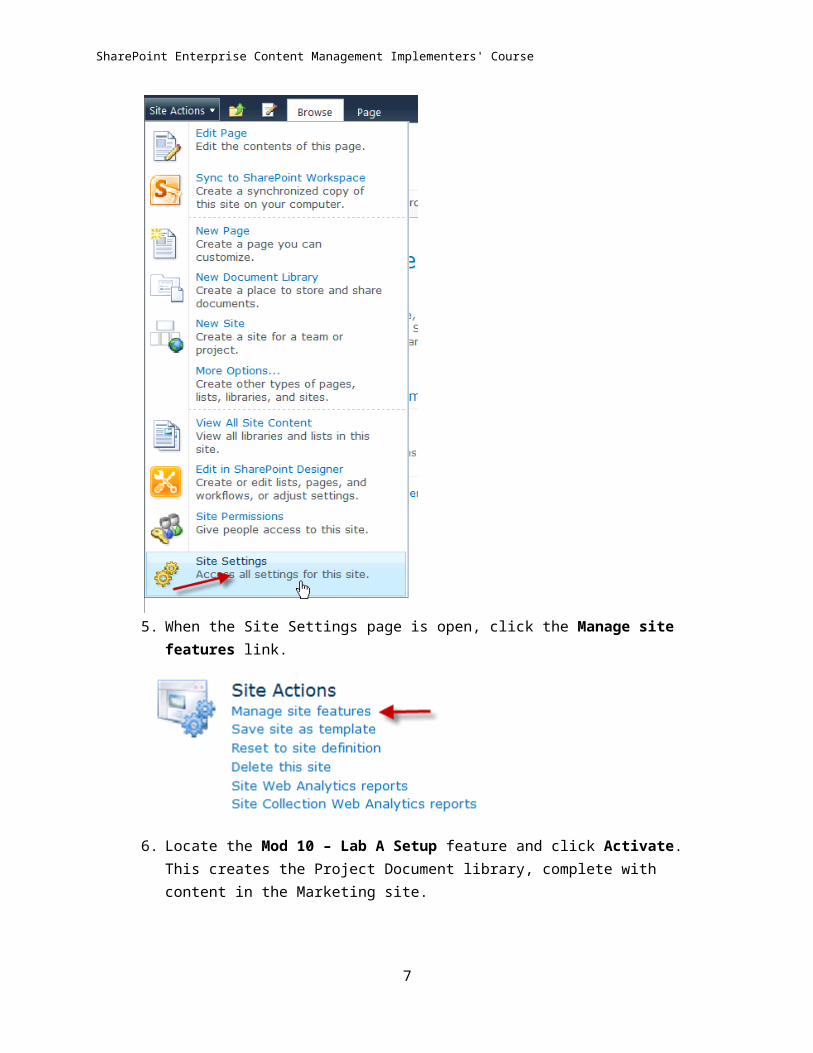
4. In the Contoso Marketing site, open http://intranet.contoso.com/sites/ECMForTheMassesV3/Marketing if the site isn’t open in your browser, and then click Site Actions | Site Settings.
5. When the Site Settings page is open, click the Manage site features link.
6
SharePoint Enterprise Content Management Implementers' Course
6. Locate the Mod 10 – Lab A Setup feature and click Activate. This creates the Project Document library, complete with content in the Marketing site.
7. Open the Contoso Marketing site located at http://intranet.contoso.com/sites/ECMForTheMassesV3/ Marketing.
8. Verify the Project Documents library link displays in the Quick Launch control located in the left column.
Task 3: Enable Developer Dashboard and Review the Execution TimeIn this task, you use PowerShell and enable the Developer Dashboard. You use the Developer Dashboard to review the time to execute the page.
1. Point to All Programs, point to Microsoft SharePoint 2010 Products, and right click SharePoint 2010 Management Shell.
2. Locate EnableDeveloperDashboard.ps1, which is located in the student files.
3. Type the full path (the ps1 file and the file name). Click Enter to execute it.
4. In the Contoso Marketing site, open http://intranet.contoso.com/sites/ECMForTheMassesV3/Marketing Marketing if the site isn’t open in your browser.
7

SharePoint Enterprise Content Management Implementers' Course
5. Click Project Documents located in the Quick Launch control.
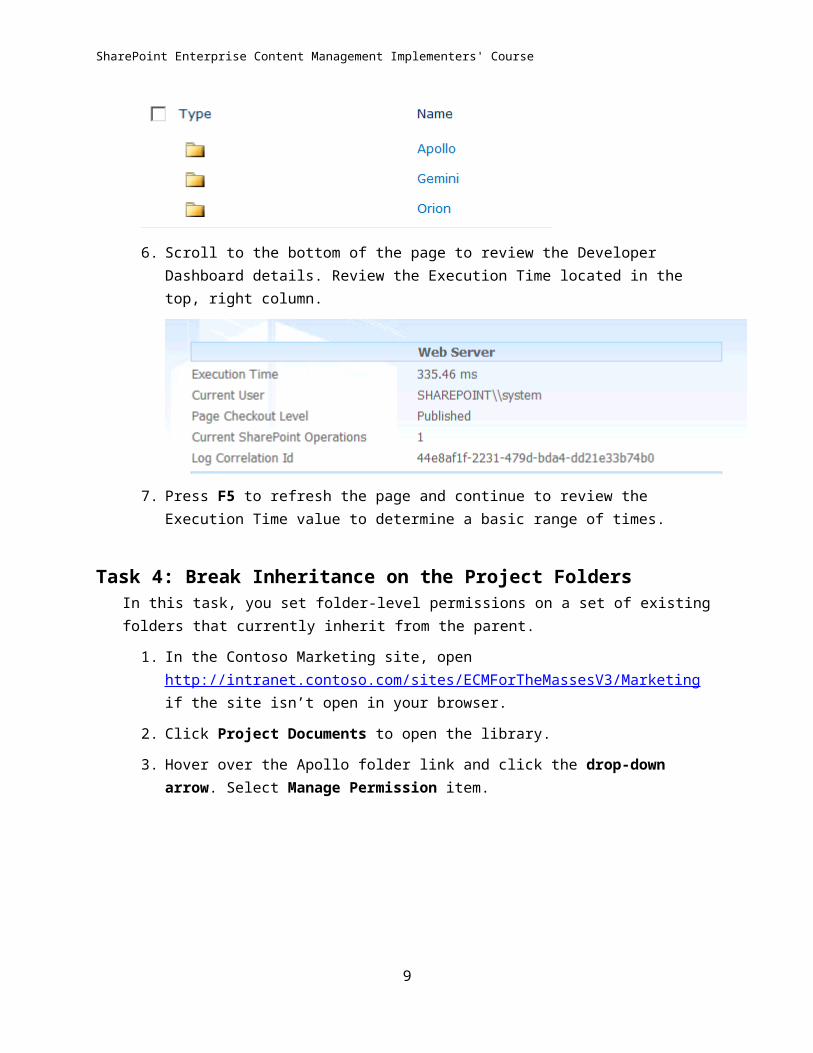
6. Scroll to the bottom of the page to review the Developer Dashboard details. Review the Execution Time located in the top, right column.
7. Press F5 to refresh the page and continue to review the Execution Time value to determine a basic range of times.
Task 4: Break Inheritance on the Project FoldersIn this task, you set folder-level permissions on a set of existing folders that currently inherit from the parent.
1. In the Contoso Marketing site, open http://intranet.contoso.com/sites/ECMForTheMassesV3/Marketing if the site isn’t open in your browser.
2. Click Project Documents to open the library.
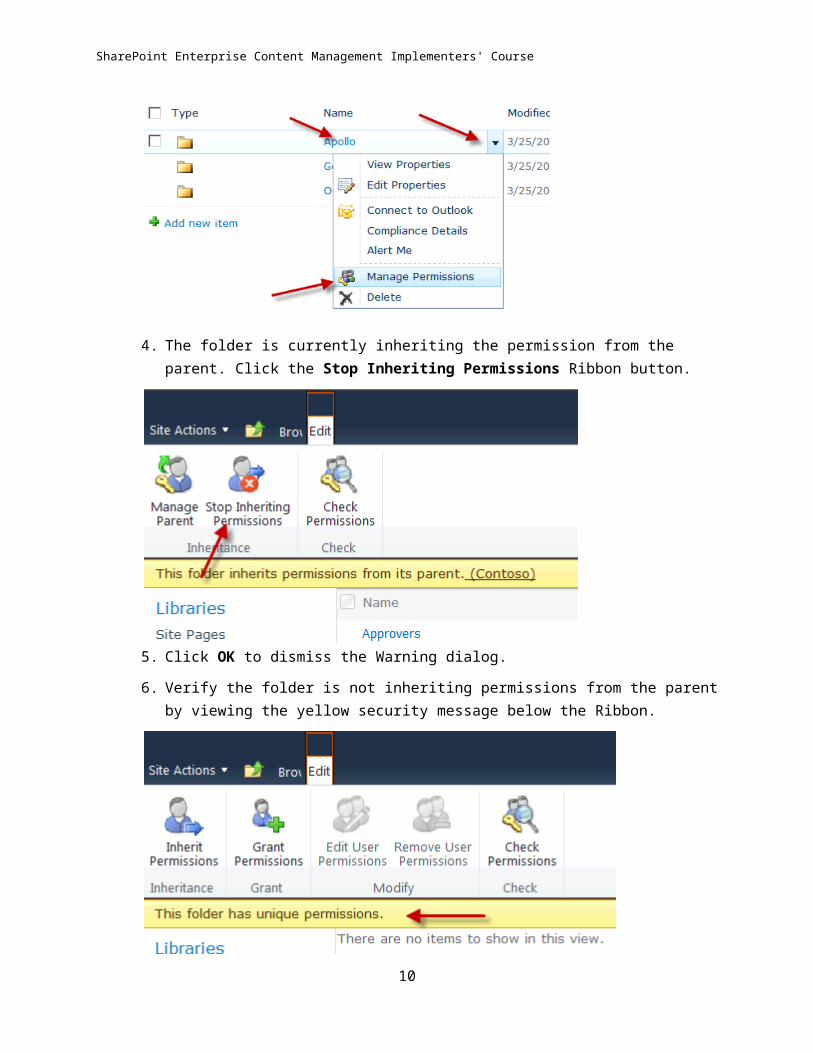
3. Hover over the Apollo folder link and click the drop-down arrow. Select Manage Permission item.
8
SharePoint Enterprise Content Management Implementers' Course
4. The folder is currently inheriting the permission from the parent. Click the Stop Inheriting Permissions Ribbon button.
5. Click OK to dismiss the Warning dialog.
6. Verify the folder is not inheriting permissions from the parent by viewing the yellow security message below the Ribbon.
9
SharePoint Enterprise Content Management Implementers' Course
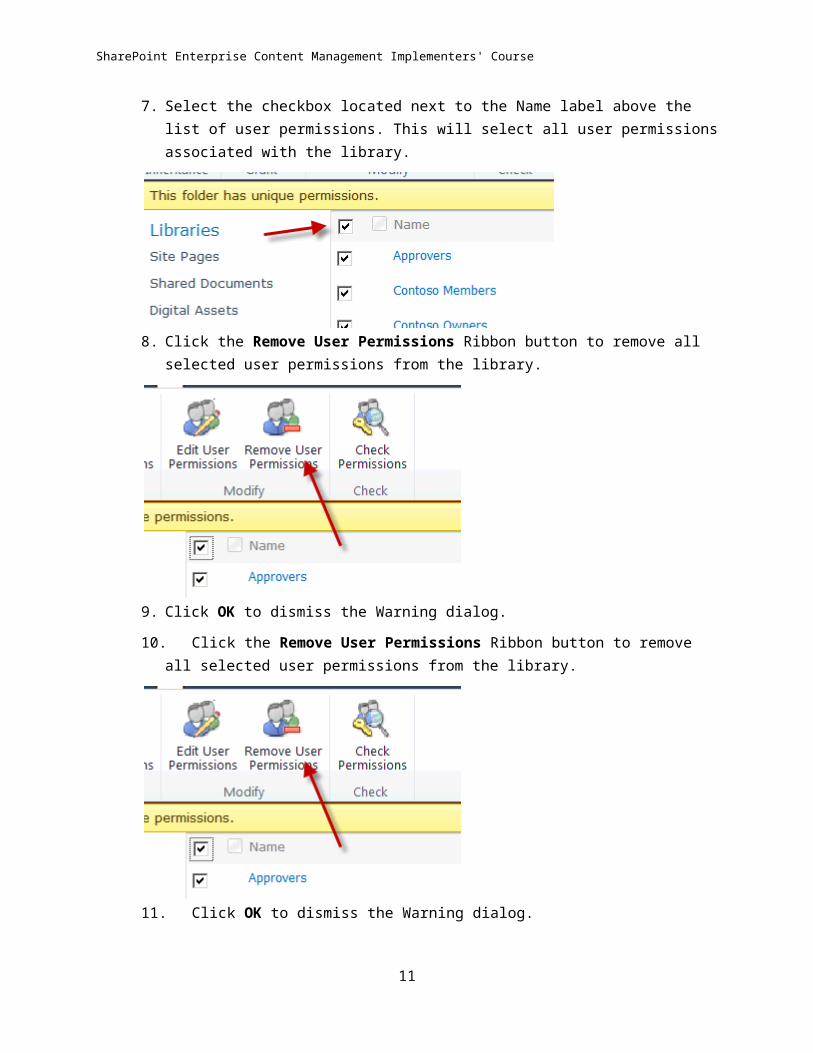
7. Select the checkbox located next to the Name label above the list of user permissions. This will select all user permissions associated with the library.
8. Click the Remove User Permissions Ribbon button to remove all selected user permissions from the library.
9. Click OK to dismiss the Warning dialog.
10. Click the Remove User Permissions Ribbon button to remove all selected user permissions from the library.
11. Click OK to dismiss the Warning dialog.
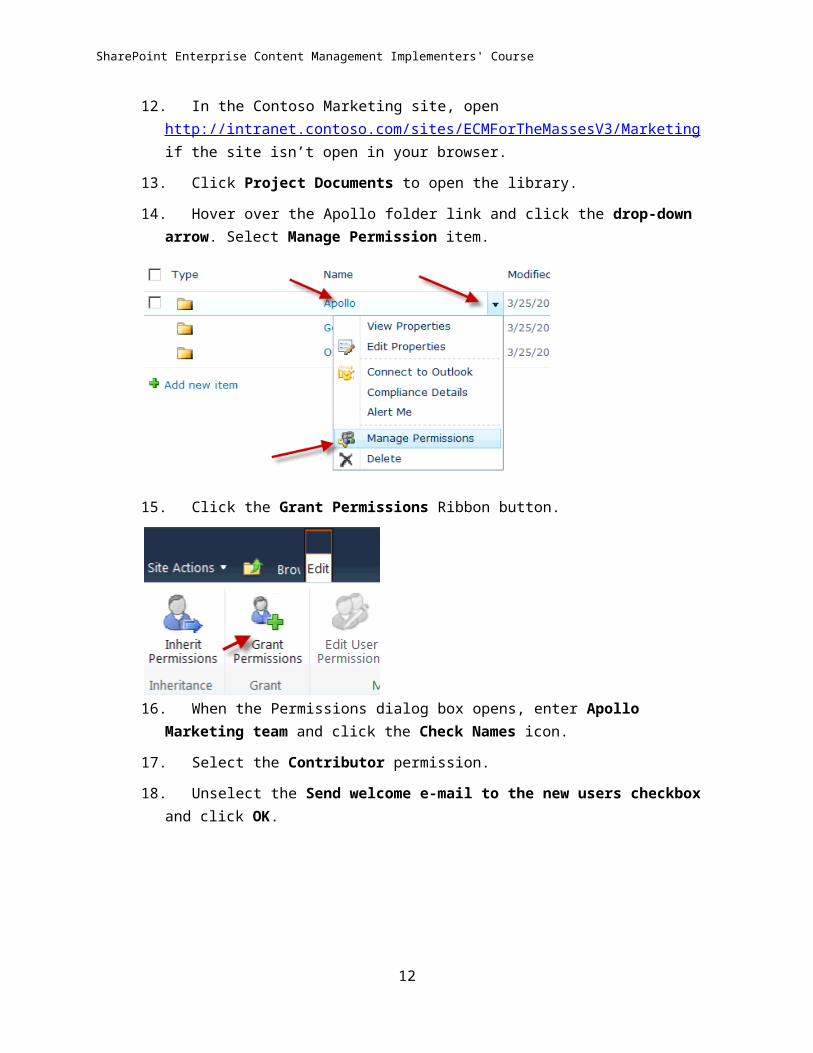
12. In the Contoso Marketing site, open http://intranet.contoso.com/sites/ECMForTheMassesV3/ Marketing if the site isn’t open in your browser.
10
SharePoint Enterprise Content Management Implementers' Course
13. Click Project Documents to open the library.
14. Hover over the Apollo folder link and click the drop-down arrow. Select Manage Permission item.
15. Click the Grant Permissions Ribbon button.
16. When the Permissions dialog box opens, enter Apollo Marketing team and click the Check Names icon.
17. Select the Contributor permission.
18. Unselect the Send welcome e-mail to the new users checkbox and click OK.
11
SharePoint Enterprise Content Management Implementers' Course
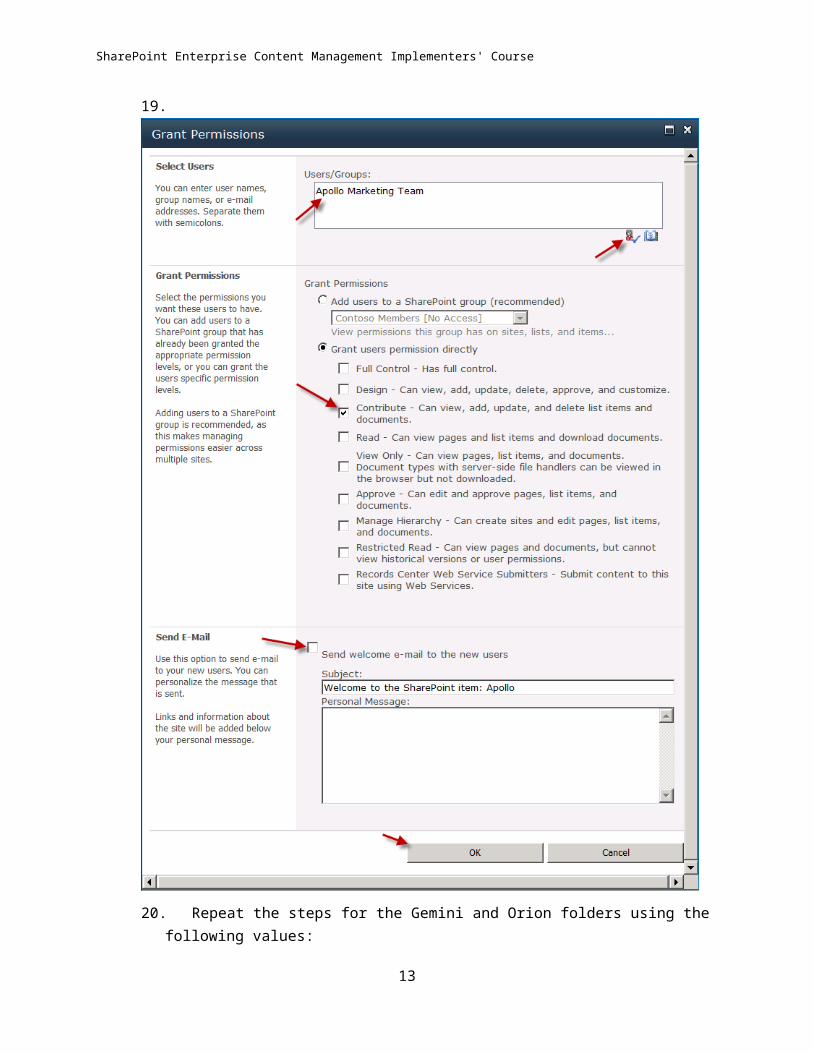
19.
20. Repeat the steps for the Gemini and Orion folders using the following values:
Gemini – Gemini Marketing team
12
SharePoint Enterprise Content Management Implementers' Course
Orion – Orion Marketing team
21. Open Apollo folder. Navigate down to the Folder named Break by clicking the following folders: 3/A/1/D/5/E/8.
22. Repeat the steps to assign the Apollo Marketing team to the Break folder.
Task 5: View Content Using Test User AccountsIn this task, you verify the folder-level permissions to ensure they are set correctly.
1. In the Contoso Marketing site, open http://intranet.contoso.com/sites/ECMForTheMassesV3/ Marketing if the site isn’t open in your browser.
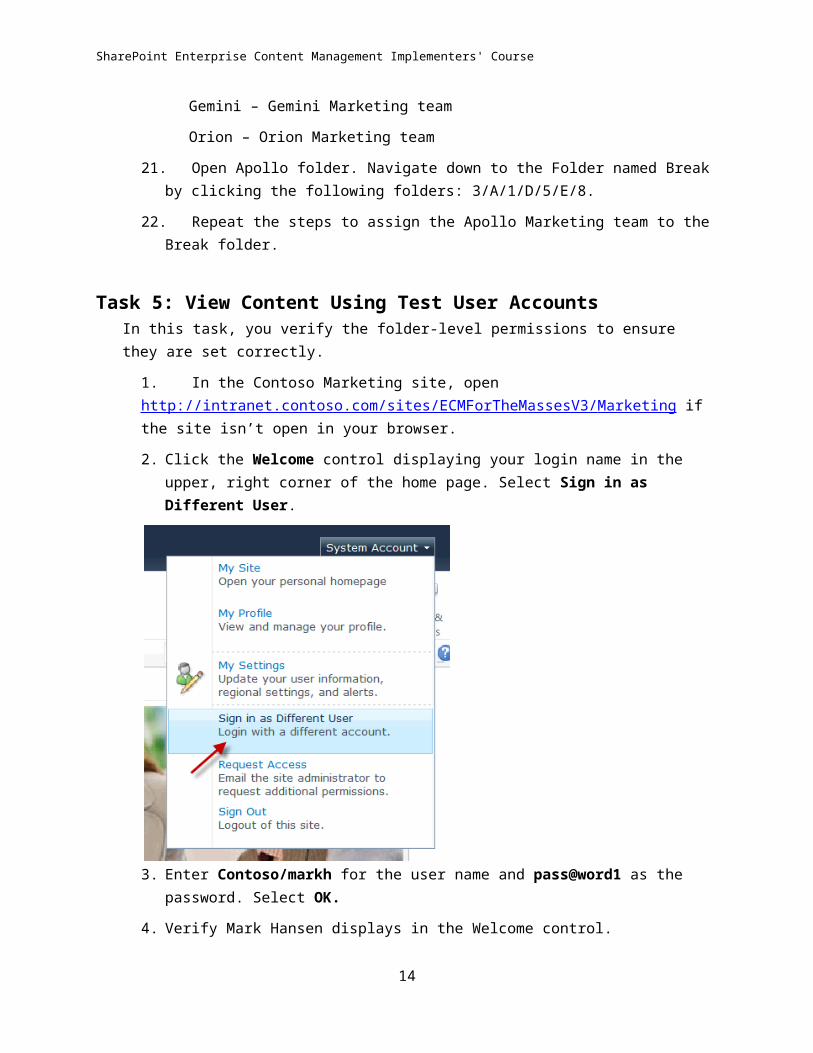
2. Click the Welcome control displaying your login name in the upper, right corner of the home page. Select Sign in as Different User.
3. Enter Contoso/markh for the user name and pass@word1 as the password. Select OK.
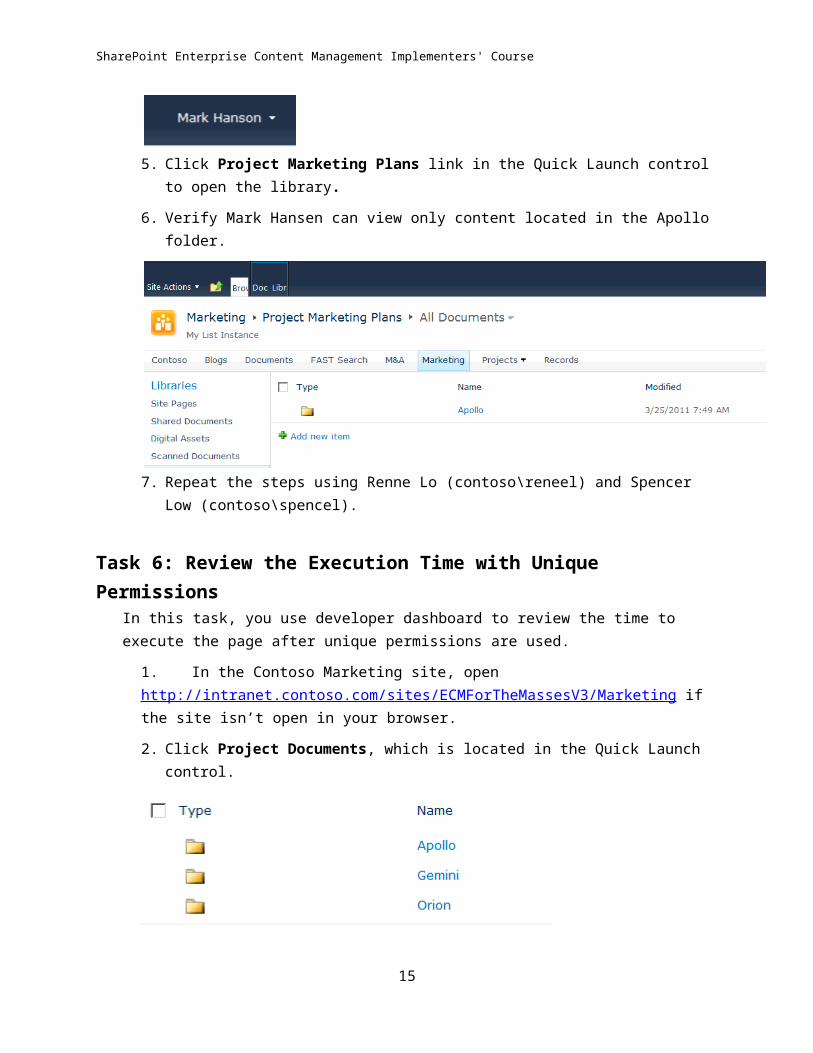
4. Verify Mark Hansen displays in the Welcome control.
5. Click Project Marketing Plans link in the Quick Launch control to open the library.
6. Verify Mark Hansen can view only content located in the Apollo folder.
13
SharePoint Enterprise Content Management Implementers' Course
7. Repeat the steps using Renne Lo (contoso\reneel) and Spencer Low (contoso\spencel).
Task 6: Review the Execution Time with Unique PermissionsIn this task, you use developer dashboard to review the time to execute the page after unique permissions are used.
1. In the Contoso Marketing site, open http://intranet.contoso.com/sites/ECMForTheMassesV3/ Marketing if the site isn’t open in your browser.
2. Click Project Documents, which is located in the Quick Launch control.
3. Scroll to the bottom of the page to review the Developer Dashboard details. Review the Execution Time located in the top-right column.
4. Press F5 to refresh the page and continue to review the Execution Time value to determine a basic range of times.
5. Compare the range from Task 3 to Task 5.
14
SharePoint Enterprise Content Management Implementers' Course
6. Point to All Programs, point to Microsoft SharePoint 2010 Products, and then right-click SharePoint 2010 Management Shell.
7. Locate DisableDeveloperDashboard.ps1 in the student files.
8. Type the full path including to the ps1 file including the file name. Click Enter to execute it.
15


![09 Locate[1]](https://img.pdfslide.net/doc/110x75/577cd0571a28ab9e7891fe3f/09-locate1.jpg)