Embed Size (px)
Citation preview

Tatum Bone Tatum Bone Expansion Expansion
IllustrationsIllustrations
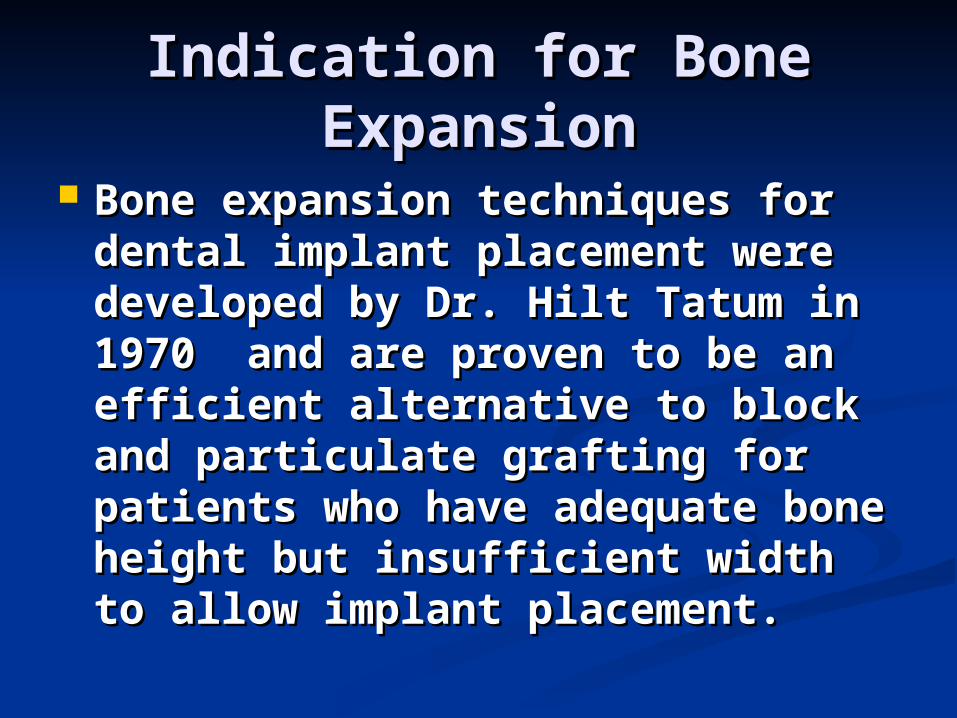
Indication for Bone Indication for Bone ExpansionExpansion
Bone expansion techniques for dental Bone expansion techniques for dental implant placement were developed by implant placement were developed by Dr. Hilt Tatum in 1970 and are proven Dr. Hilt Tatum in 1970 and are proven to be an efficient alternative to block to be an efficient alternative to block and particulate grafting for patients and particulate grafting for patients who have adequate bone height but who have adequate bone height but insufficient width to allow implant insufficient width to allow implant placement.placement.
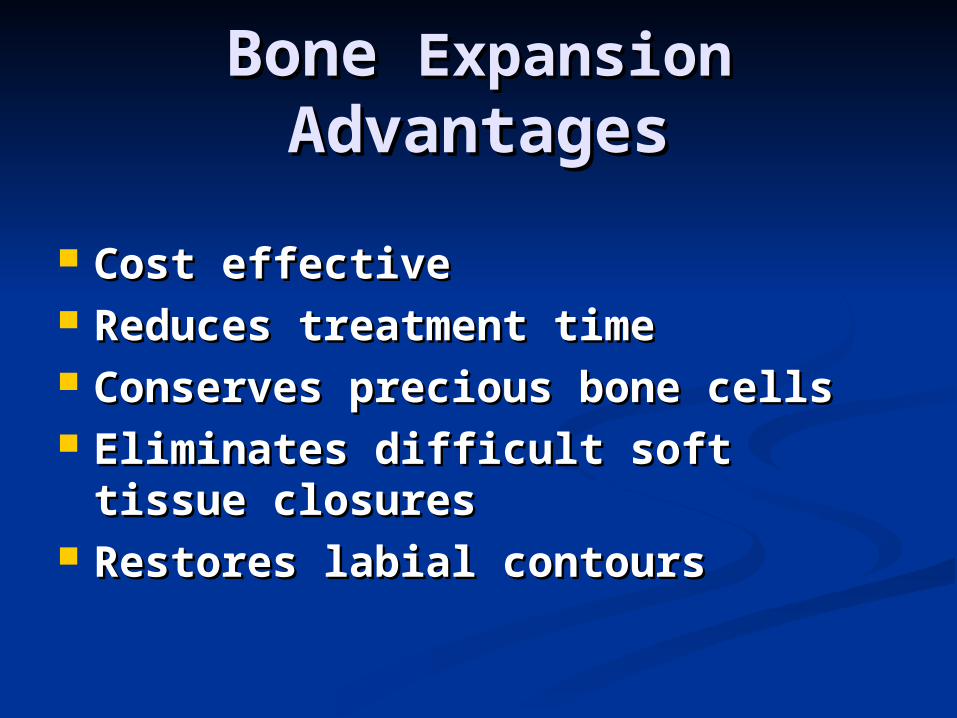
Bone Bone ExpansionExpansion AdvantagesAdvantages
Cost effectiveCost effective Reduces treatment timeReduces treatment time Conserves precious bone cellsConserves precious bone cells Eliminates difficult soft tissue closuresEliminates difficult soft tissue closures Restores labial contoursRestores labial contours

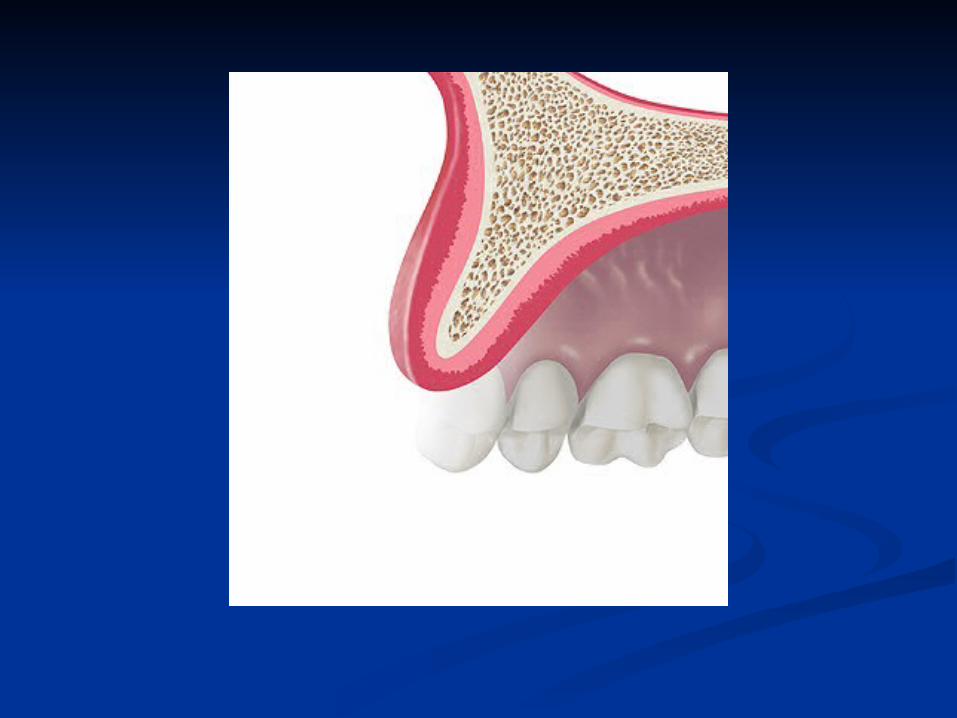
The frontal view of the The frontal view of the edentulous segment of the edentulous segment of the
maxillae demonstrates maxillae demonstrates bone of adequate height bone of adequate height
and unknown widthand unknown width

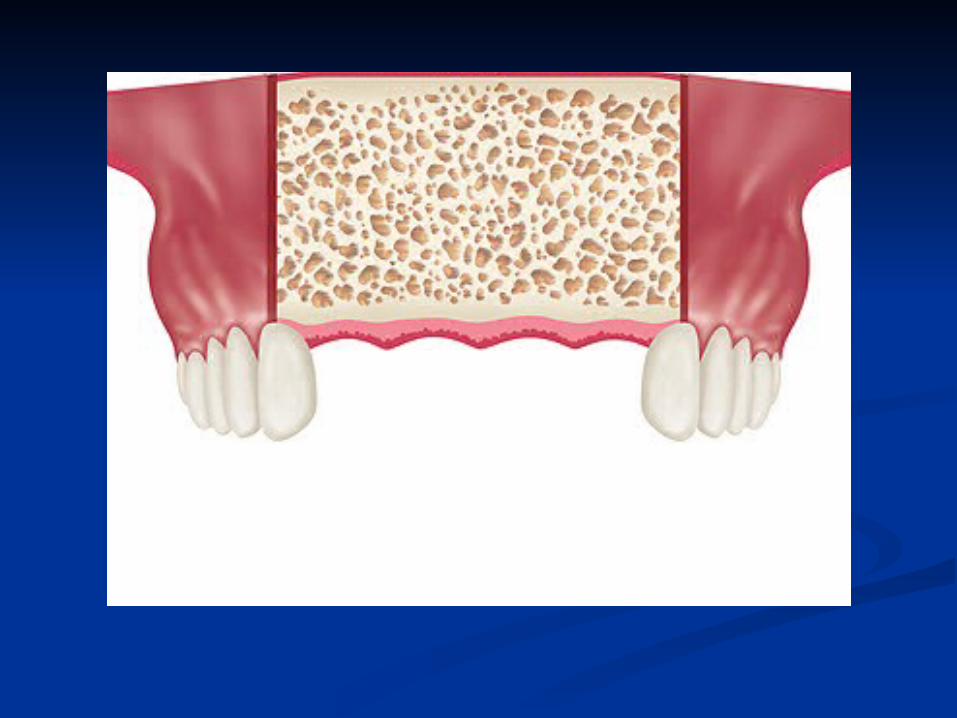
The sagittal view of the The sagittal view of the edentulous segment of the edentulous segment of the
maxillae demonstrates maxillae demonstrates bone of inadequate bone of inadequate thickness to allow thickness to allow
conventional rotary cutting conventional rotary cutting instruments to be usedinstruments to be used
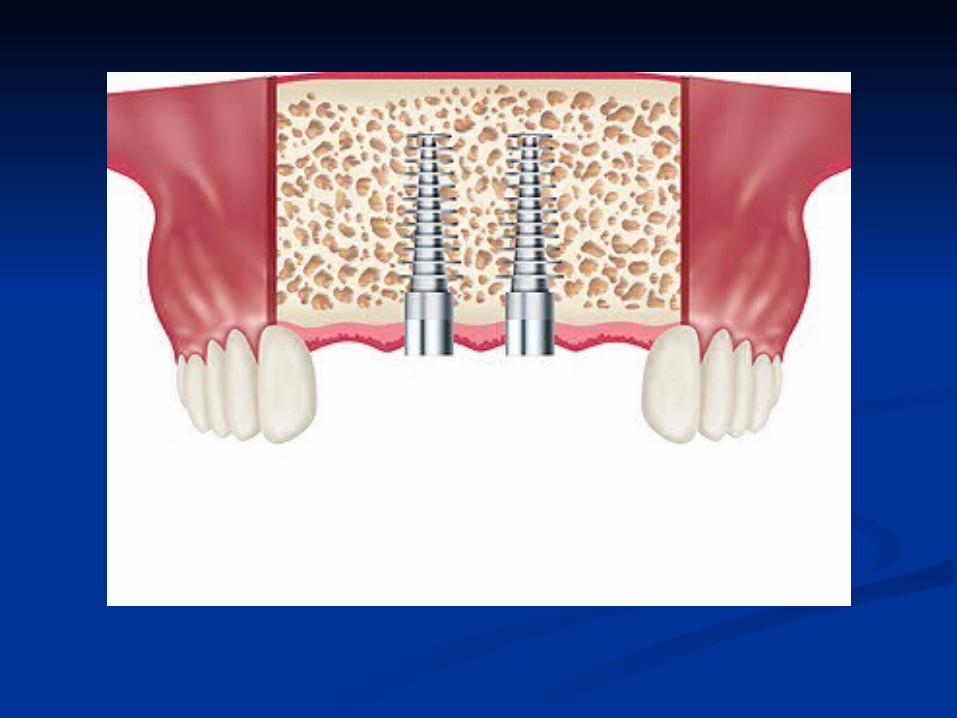
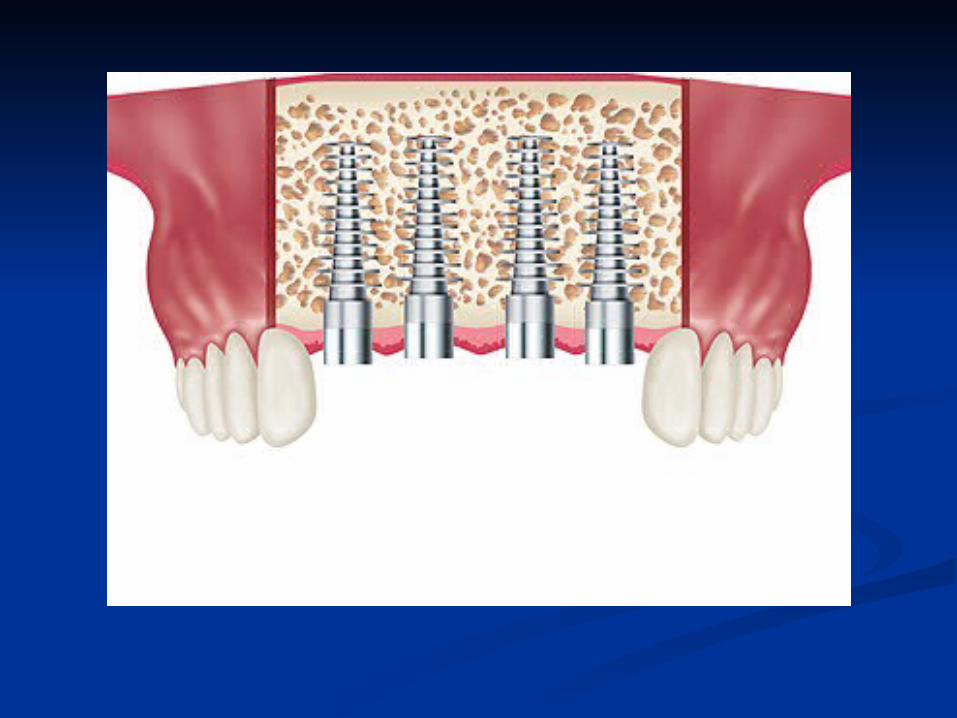
Bone Expansion for the Bone Expansion for the Maxillary Anterior SegmentMaxillary Anterior Segment The median palatine suture is a The median palatine suture is a
factorfactor Implants may be placed in the Implants may be placed in the
central incisor positions only at the central incisor positions only at the initial surgeryinitial surgery
Implants may be added to the Implants may be added to the lateral incisor positions 6wks lateral incisor positions 6wks following the initial placementsfollowing the initial placements
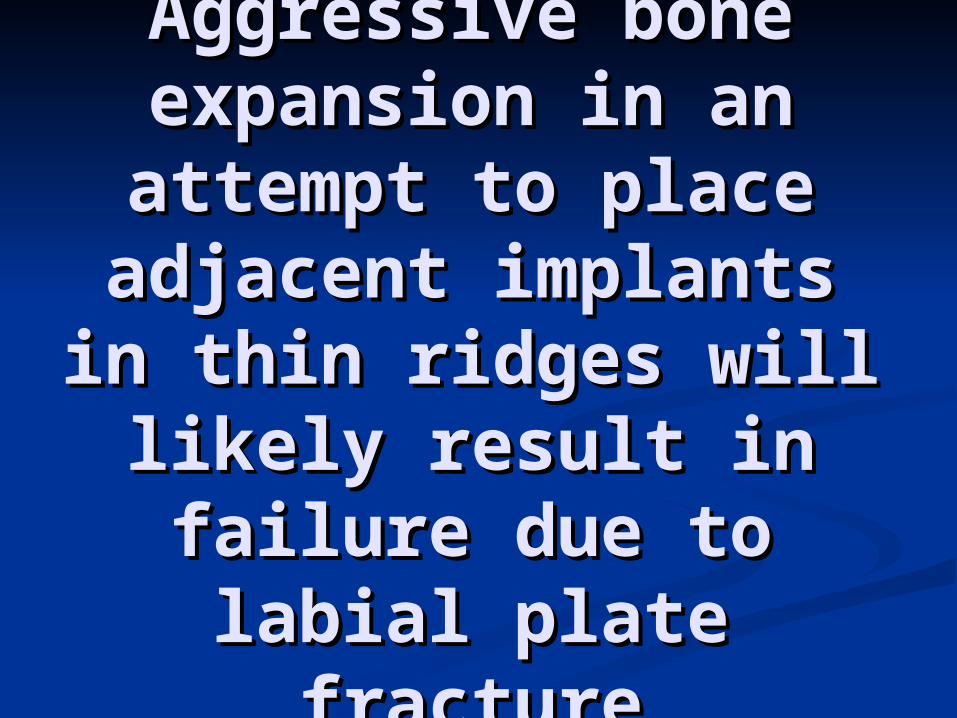
Aggressive bone Aggressive bone expansion in an attempt expansion in an attempt
to place adjacent to place adjacent implants in thin ridges implants in thin ridges
will likely result in will likely result in failure due to labial plate failure due to labial plate
fracturefracture
Implants are generally Implants are generally allowed to heal for 6 allowed to heal for 6
months in the maxillae and months in the maxillae and 4 months in the mandible 4 months in the mandible
prior to loading when prior to loading when utilizing bone expansion utilizing bone expansion
techniquestechniques
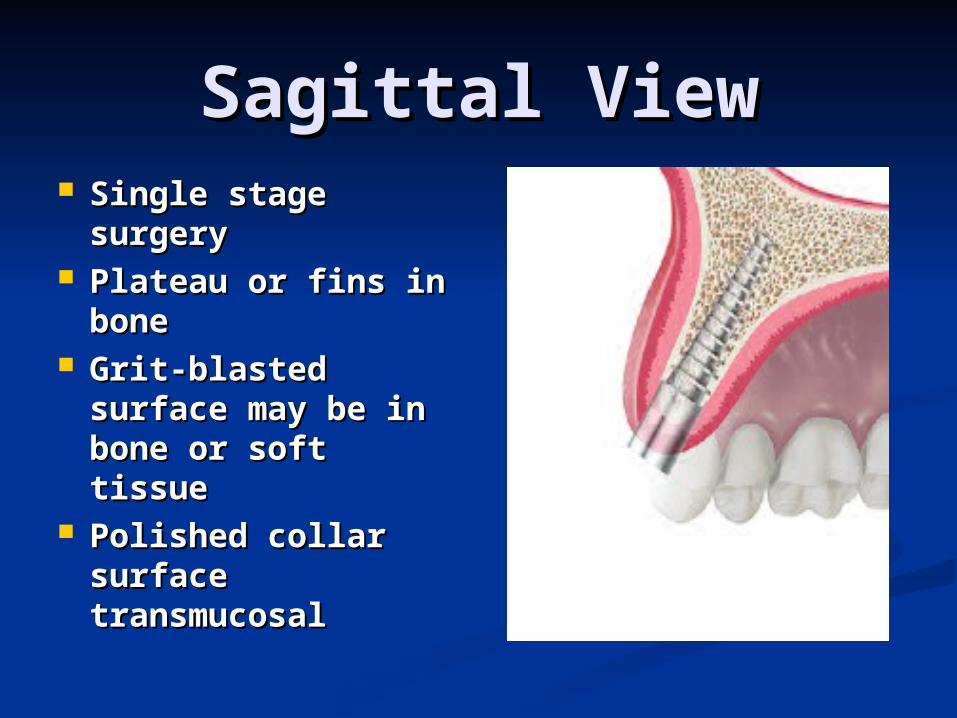
Sagittal ViewSagittal View Single stage surgerySingle stage surgery Plateau or fins in Plateau or fins in
bonebone Grit-blasted surface Grit-blasted surface
may be in bone or may be in bone or soft tissuesoft tissue
Polished collar Polished collar surface surface transmucosaltransmucosal

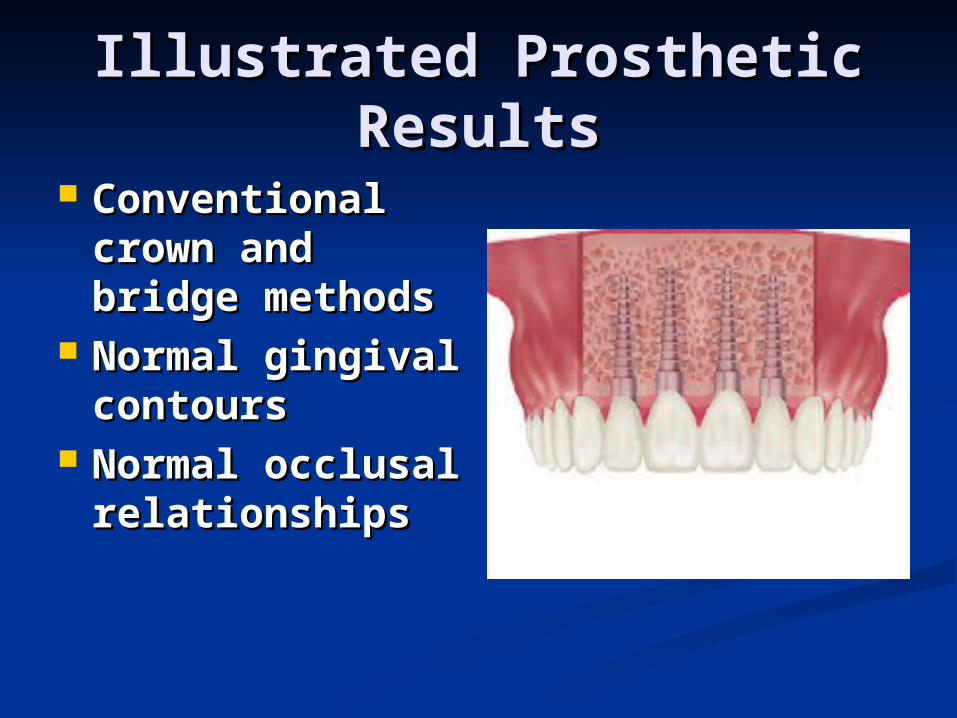
Illustrated Prosthetic ResultsIllustrated Prosthetic Results
Conventional Conventional crown and bridge crown and bridge methodsmethods
Normal gingival Normal gingival contourscontours
Normal occlusal Normal occlusal relationshipsrelationships

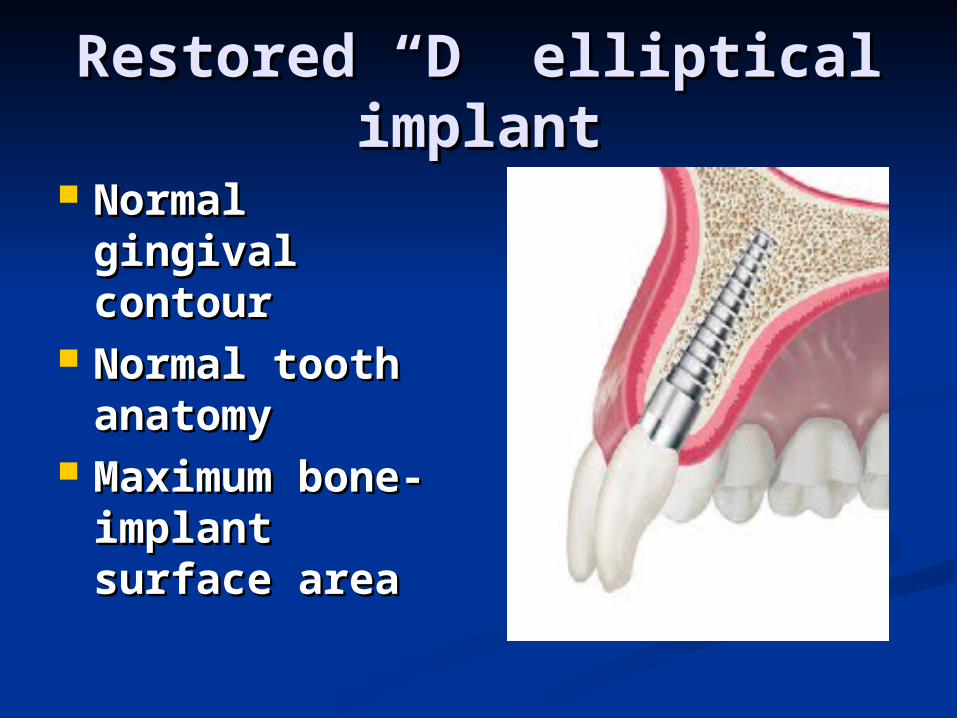
Restored “D” elliptical Restored “D” elliptical implantimplant
Normal gingival Normal gingival contourcontour
Normal tooth Normal tooth anatomyanatomy
Maximum bone-Maximum bone-implant surface implant surface areaarea
The following diagrams and The following diagrams and text describe basic bone text describe basic bone
expansion technique.expansion technique.
Contact Tatum Surgical Contact Tatum Surgical @1-888-360-5550 for @1-888-360-5550 for
educational workshops with educational workshops with hands on traininghands on training
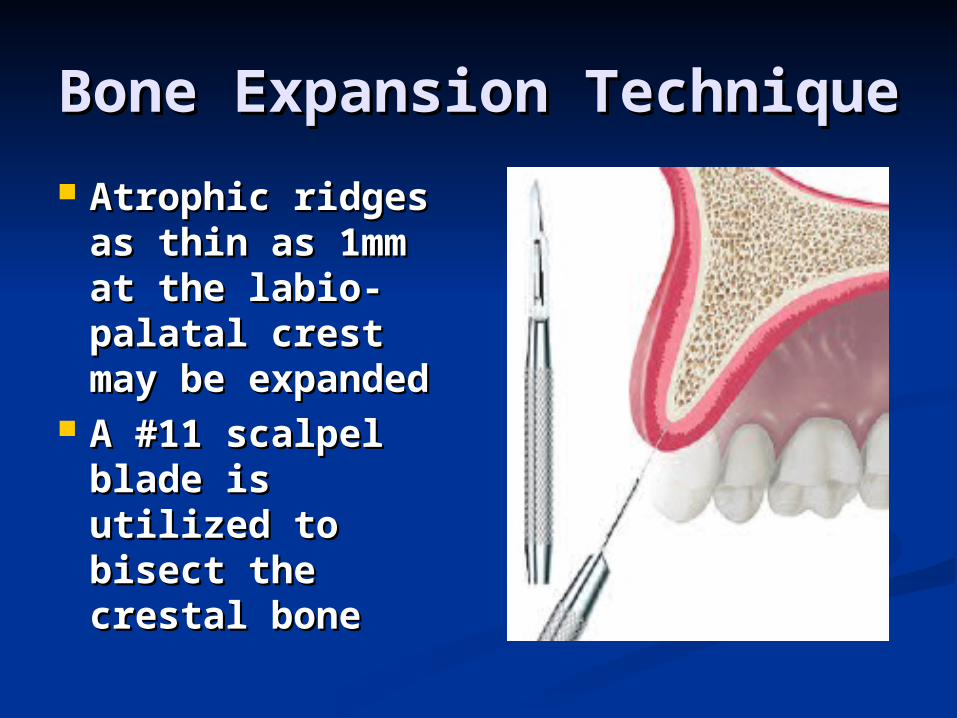
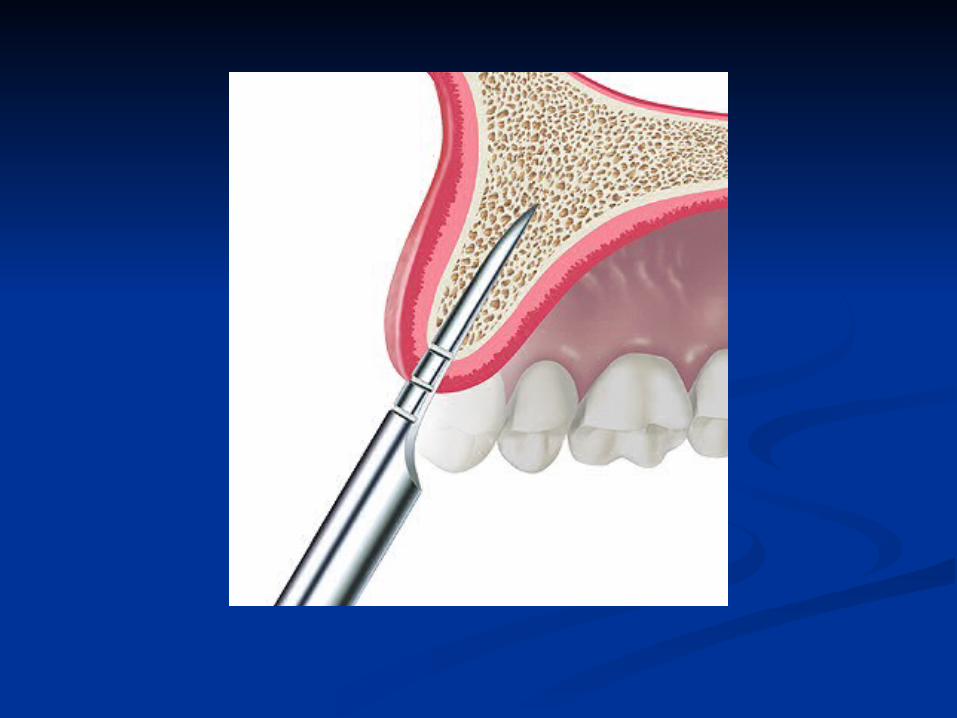
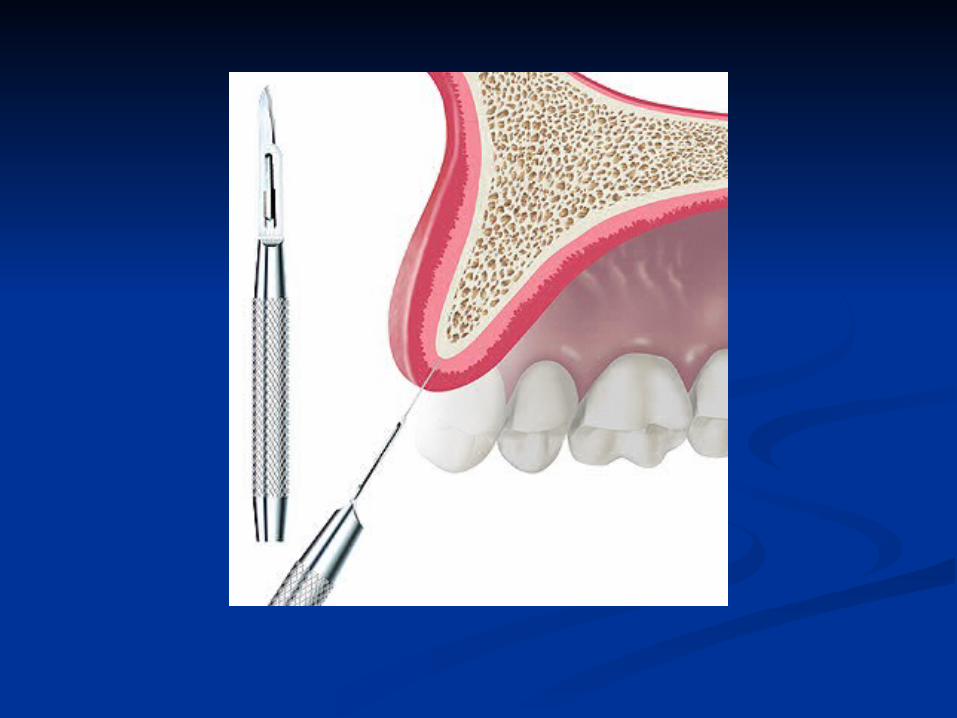
Bone Expansion TechniqueBone Expansion Technique
Atrophic ridges Atrophic ridges as thin as 1mm at as thin as 1mm at the labio-palatal the labio-palatal crest may be crest may be expandedexpanded
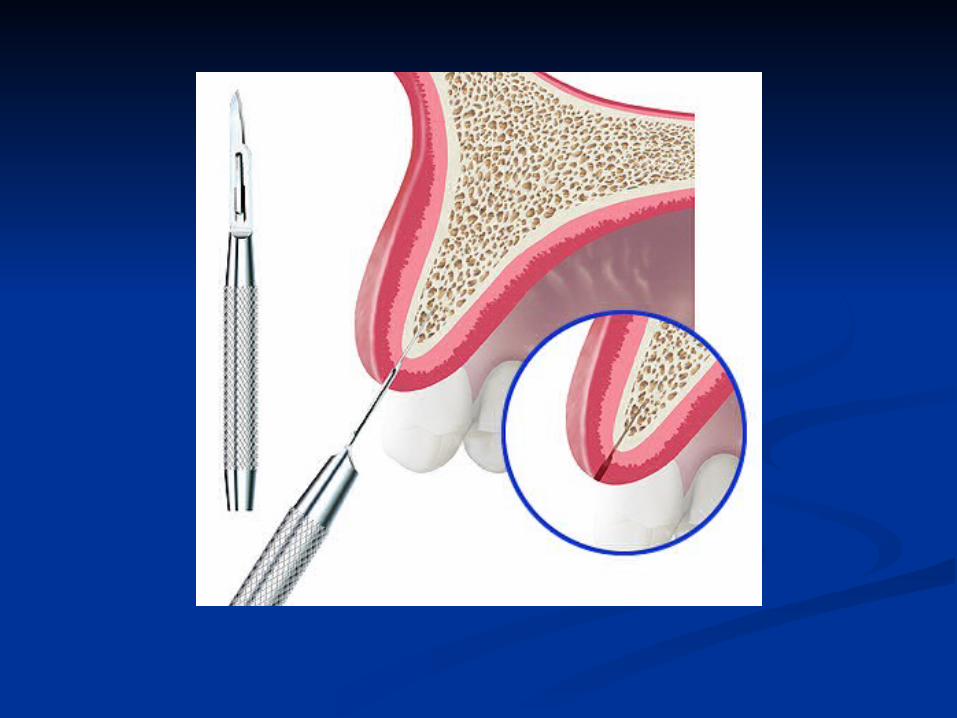
A #11 scalpel A #11 scalpel blade is utilized blade is utilized to bisect the to bisect the crestal bonecrestal bone
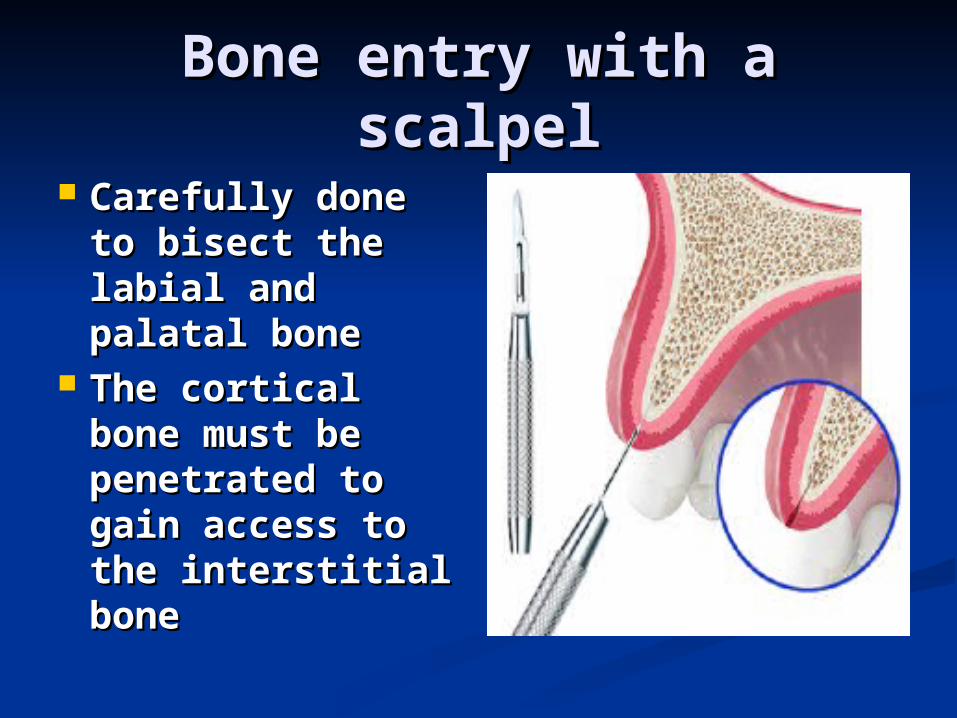
Bone entry with a scalpelBone entry with a scalpel
Carefully done to Carefully done to bisect the labial bisect the labial and palatal boneand palatal bone
The cortical bone The cortical bone must be must be penetrated to penetrated to gain access to gain access to the interstitial the interstitial bonebone
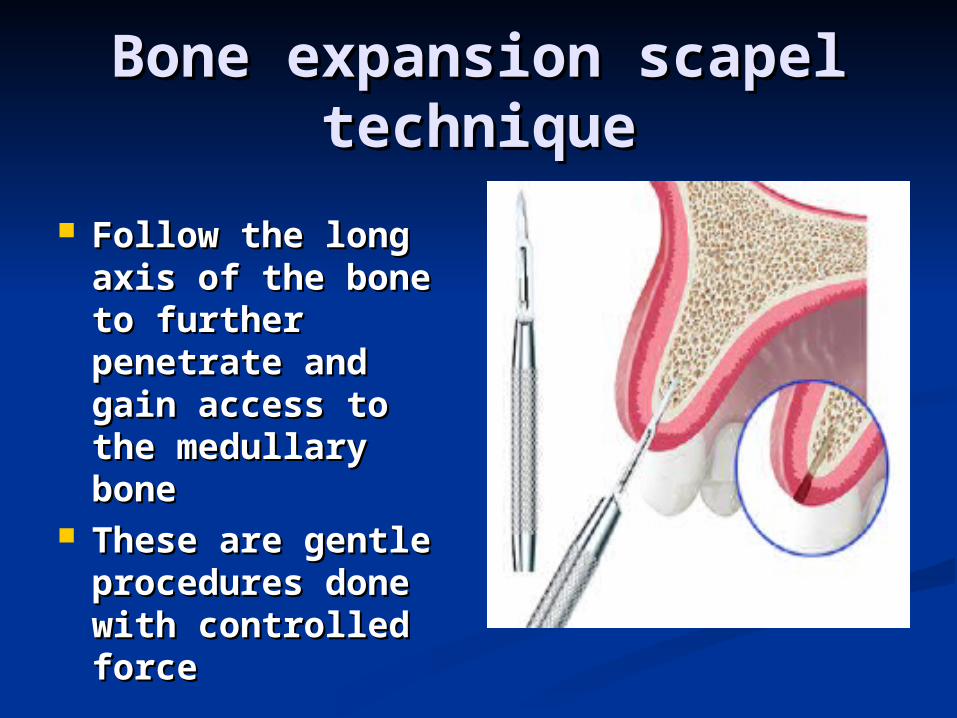
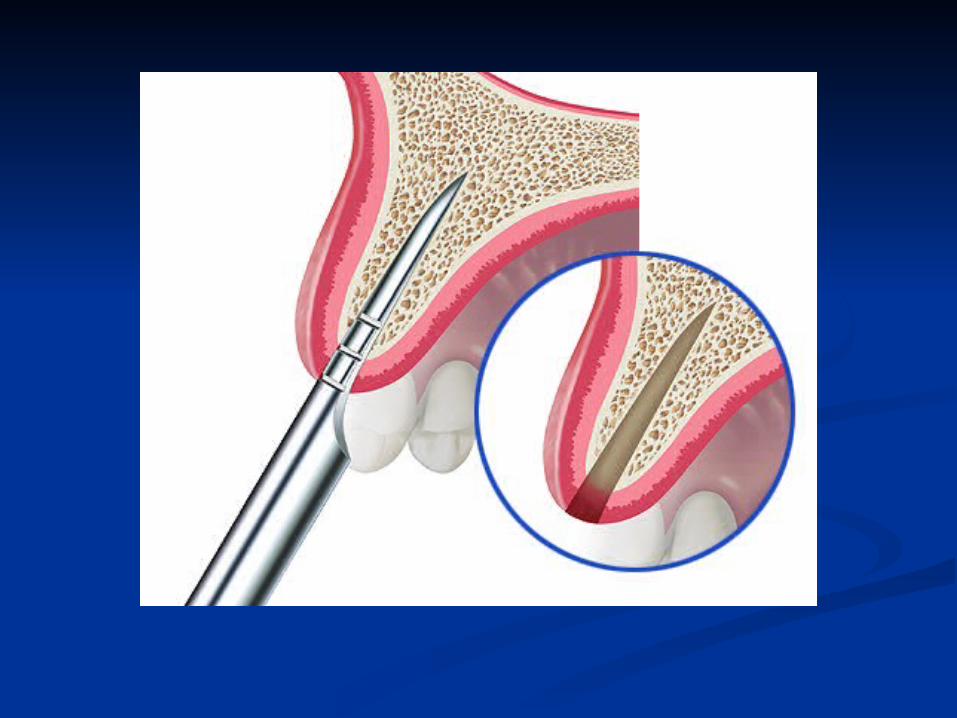
Bone expansion scapel Bone expansion scapel techniquetechnique
Follow the long axis Follow the long axis of the bone to of the bone to further penetrate further penetrate and gain access to and gain access to the medullary bonethe medullary bone
These are gentle These are gentle procedures done procedures done with controlled forcewith controlled force
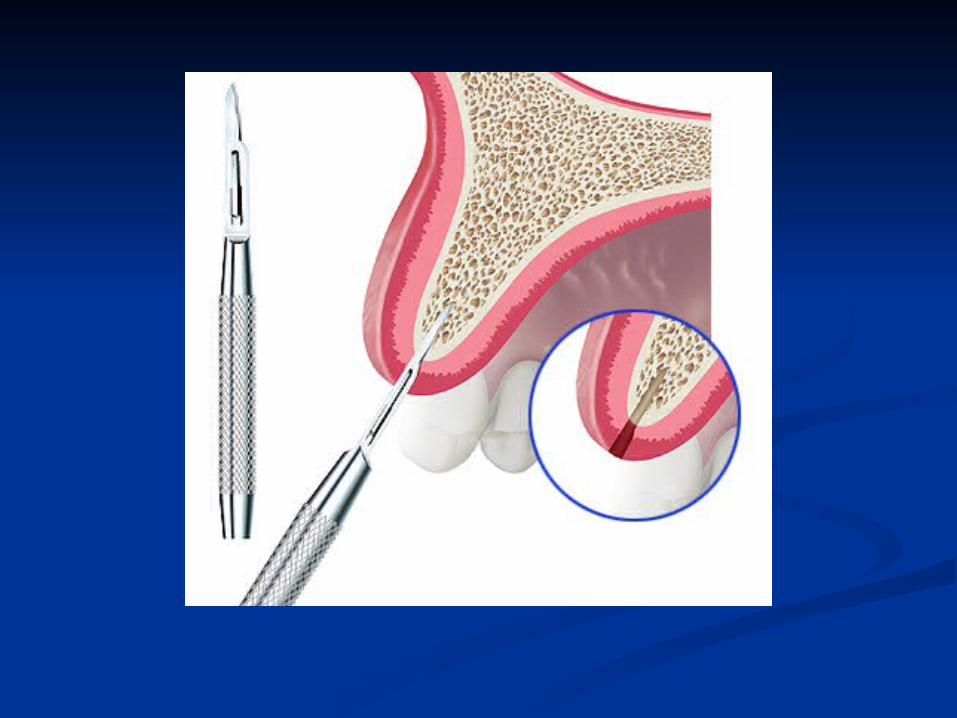
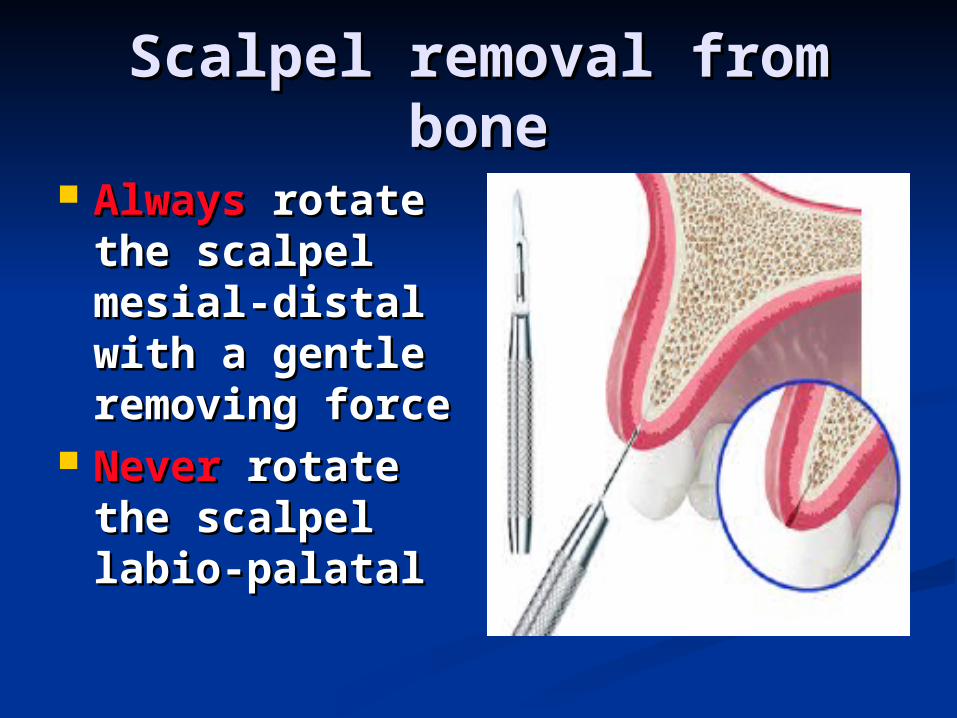
Scalpel removal from boneScalpel removal from bone
AlwaysAlways rotate the rotate the scalpel mesial-scalpel mesial-distal with a distal with a gentle removing gentle removing forceforce
NeverNever rotate the rotate the scalpel labio-scalpel labio-palatalpalatal
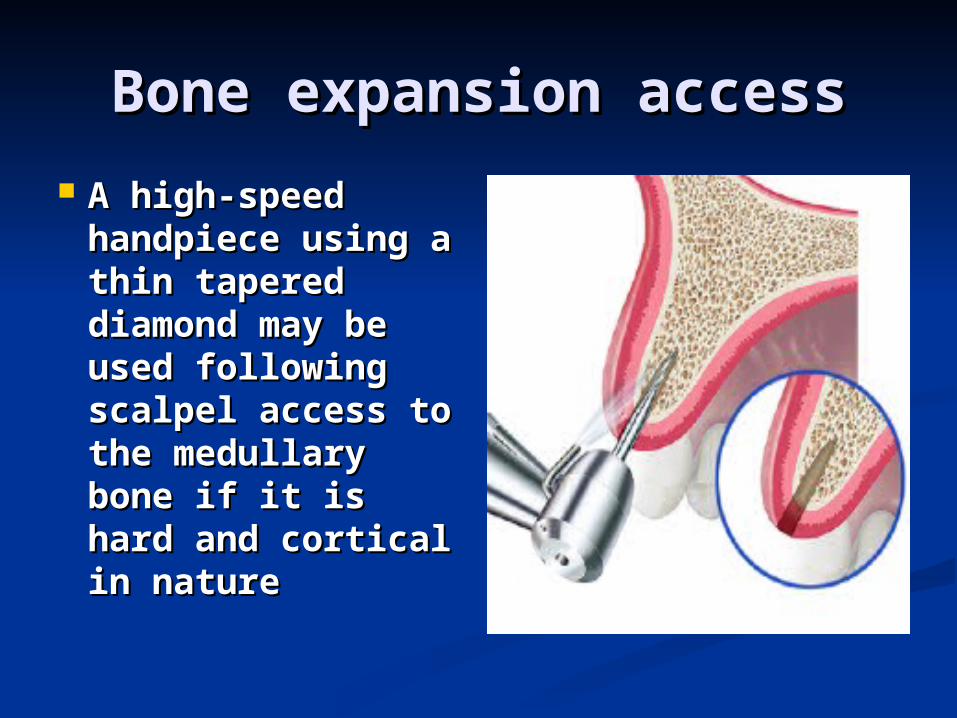
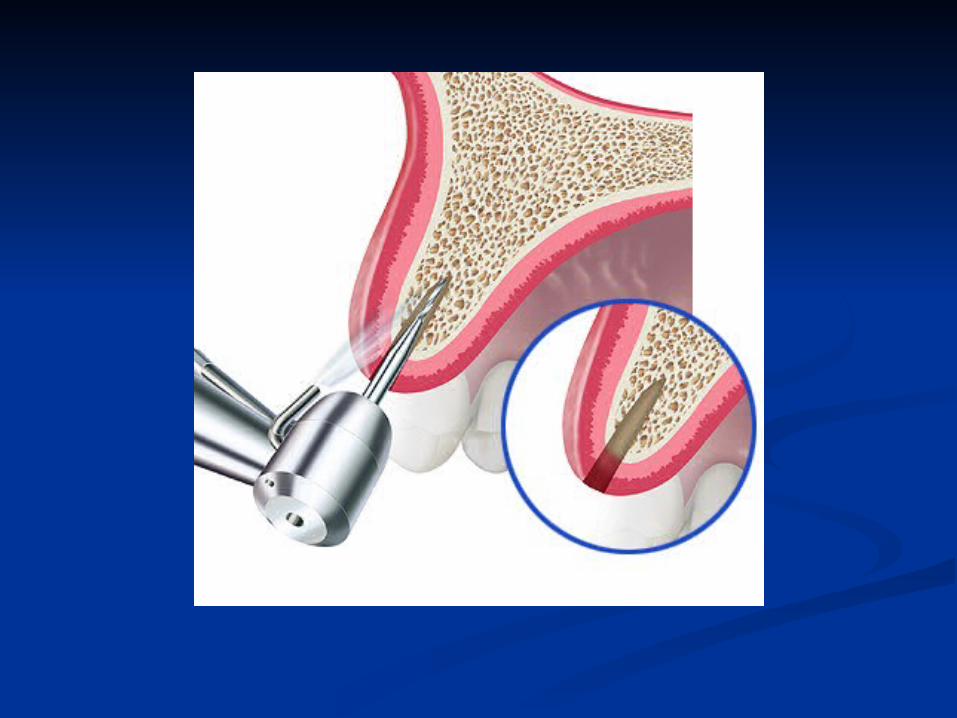
Bone expansion accessBone expansion access
A high-speed A high-speed handpiece using a handpiece using a thin tapered thin tapered diamond may be diamond may be used following used following scalpel access to scalpel access to the medullary bone the medullary bone if it is hard and if it is hard and cortical in naturecortical in nature
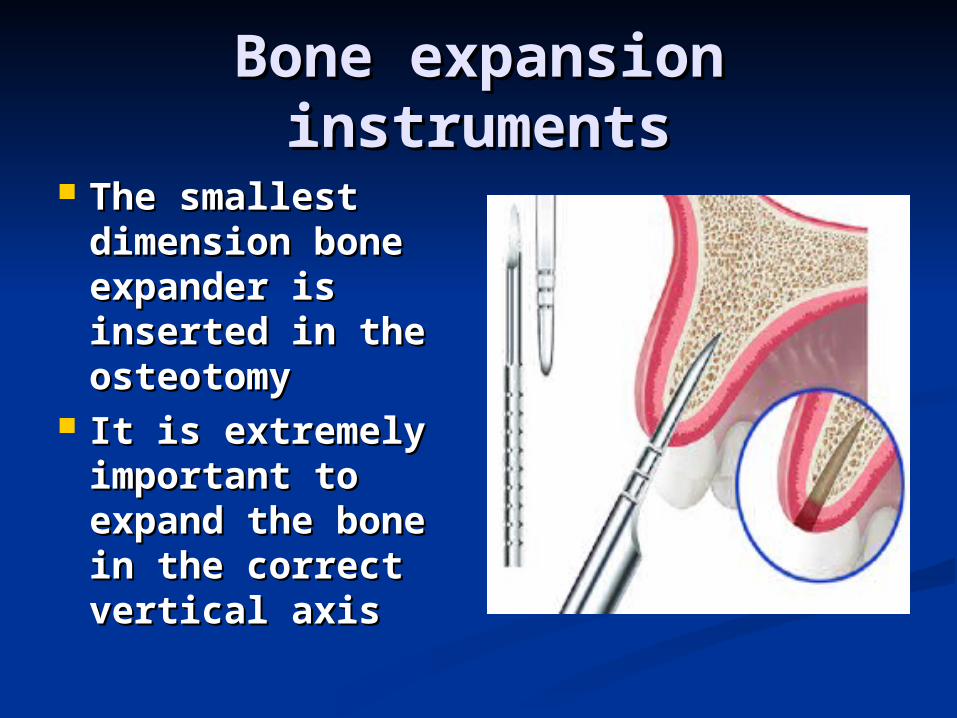
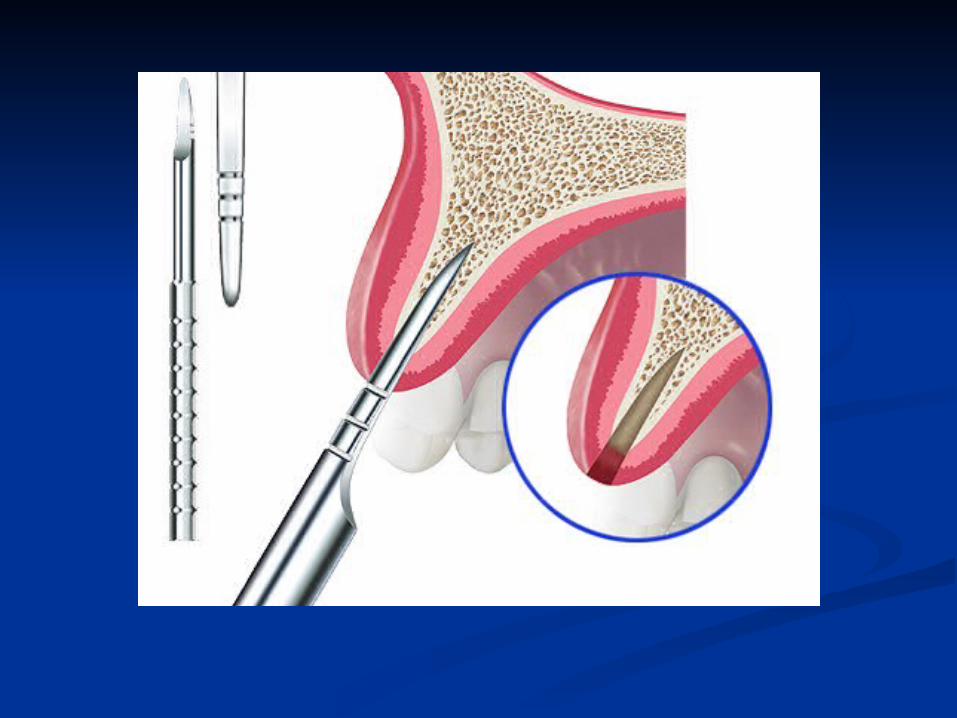
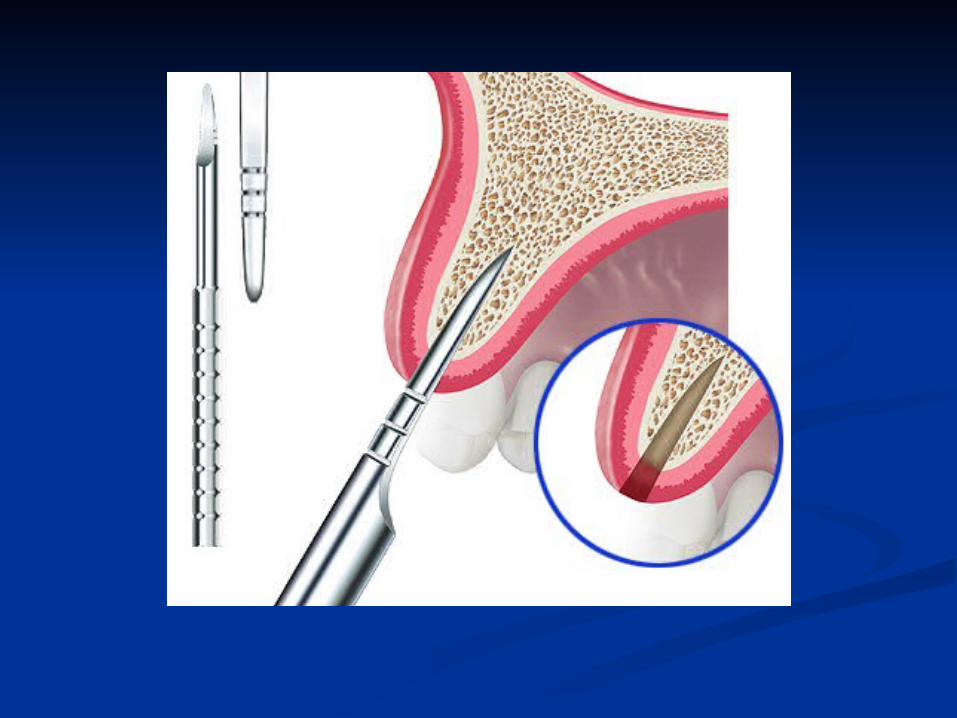
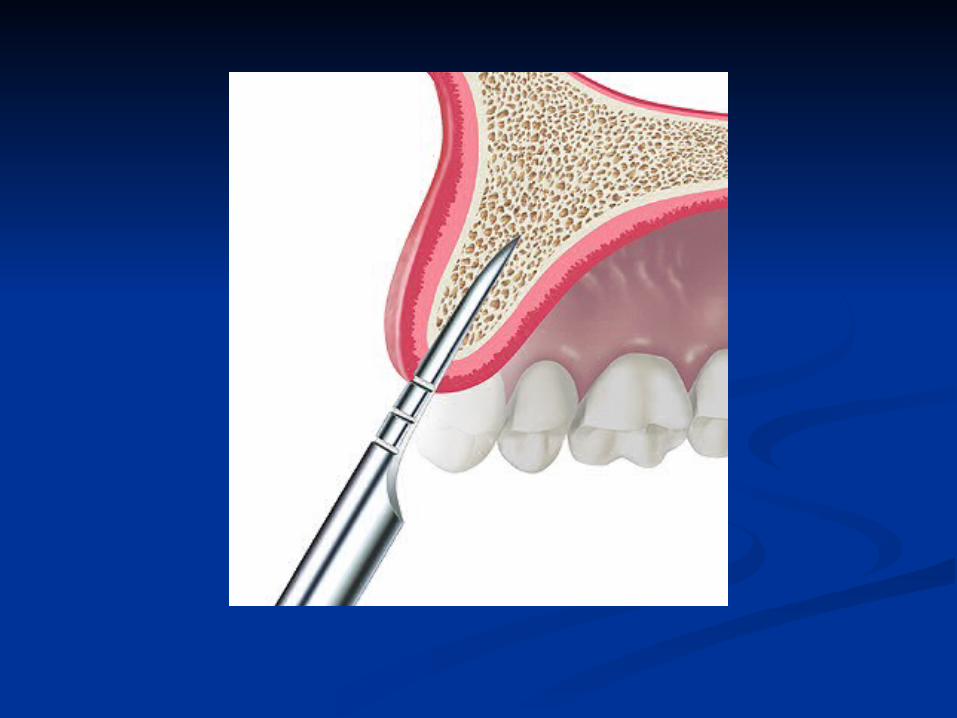
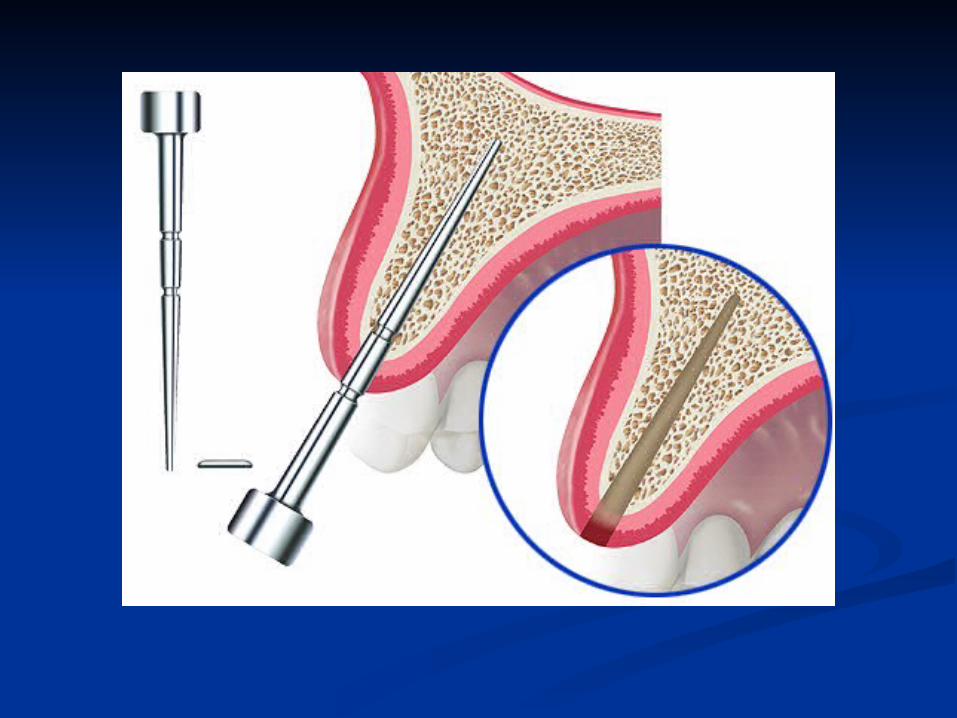
Bone expansion instrumentsBone expansion instruments
The smallest The smallest dimension bone dimension bone expander is expander is inserted in the inserted in the osteotomyosteotomy
It is extremely It is extremely important to important to expand the bone in expand the bone in the correct vertical the correct vertical axisaxis
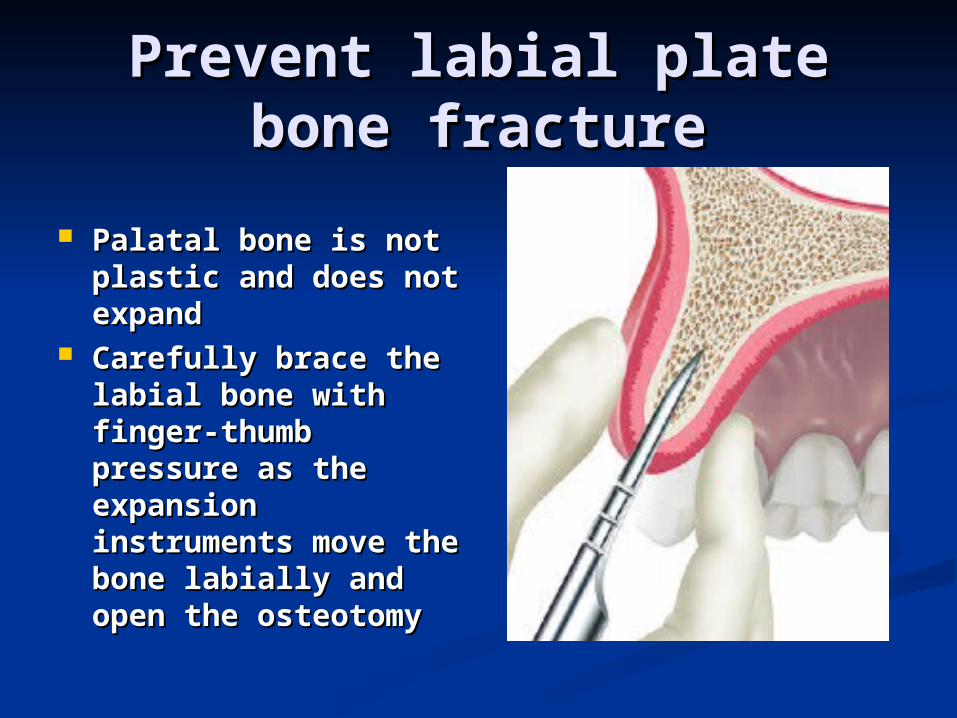
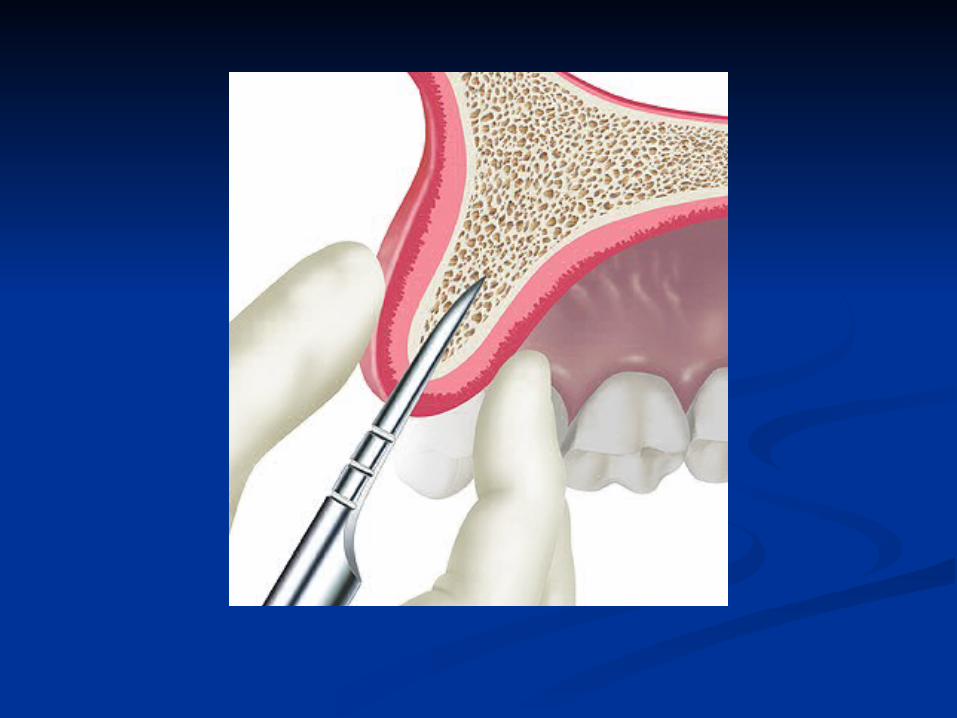
Prevent labial plate bone Prevent labial plate bone fracturefracture
Palatal bone is not Palatal bone is not plastic and does not plastic and does not expandexpand
Carefully brace the Carefully brace the labial bone with finger-labial bone with finger-thumb pressure as the thumb pressure as the expansion instruments expansion instruments move the bone labially move the bone labially and open the and open the osteotomy osteotomy

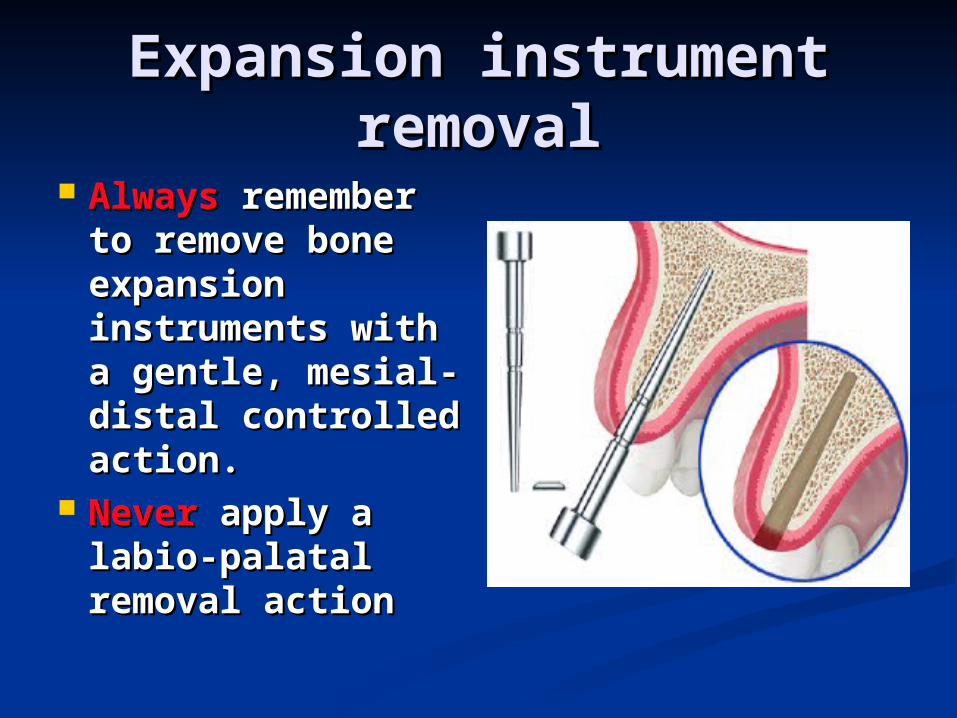
Expansion instrument Expansion instrument removalremoval
AlwaysAlways remember remember to remove bone to remove bone expansion expansion instruments with a instruments with a gentle, mesial-gentle, mesial-distal controlled distal controlled action.action.
NeverNever apply a labio- apply a labio-palatal removal palatal removal actionaction
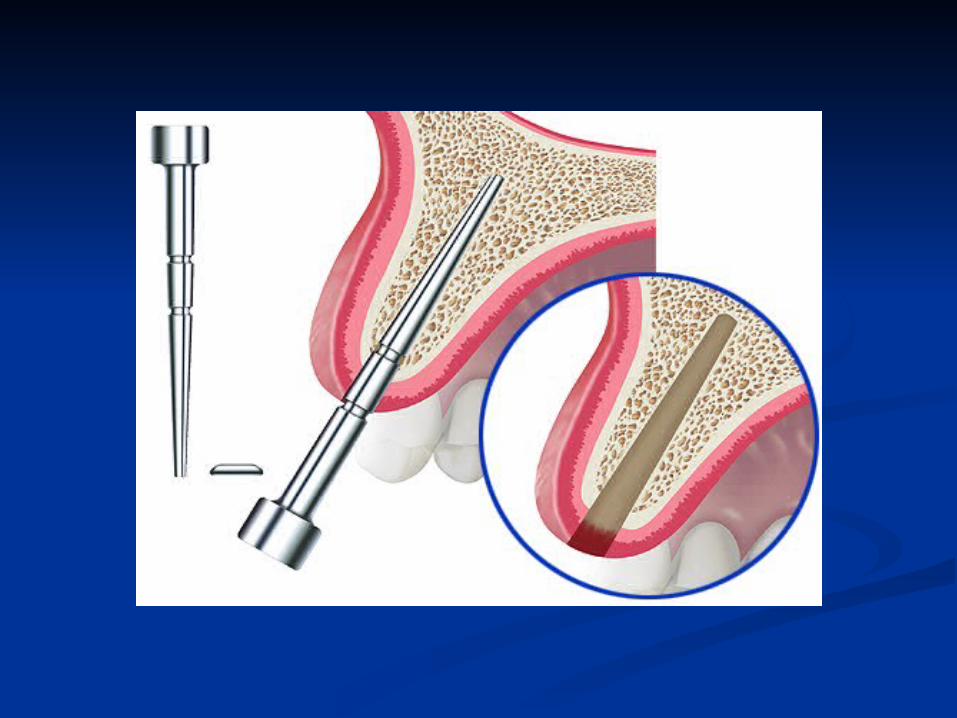
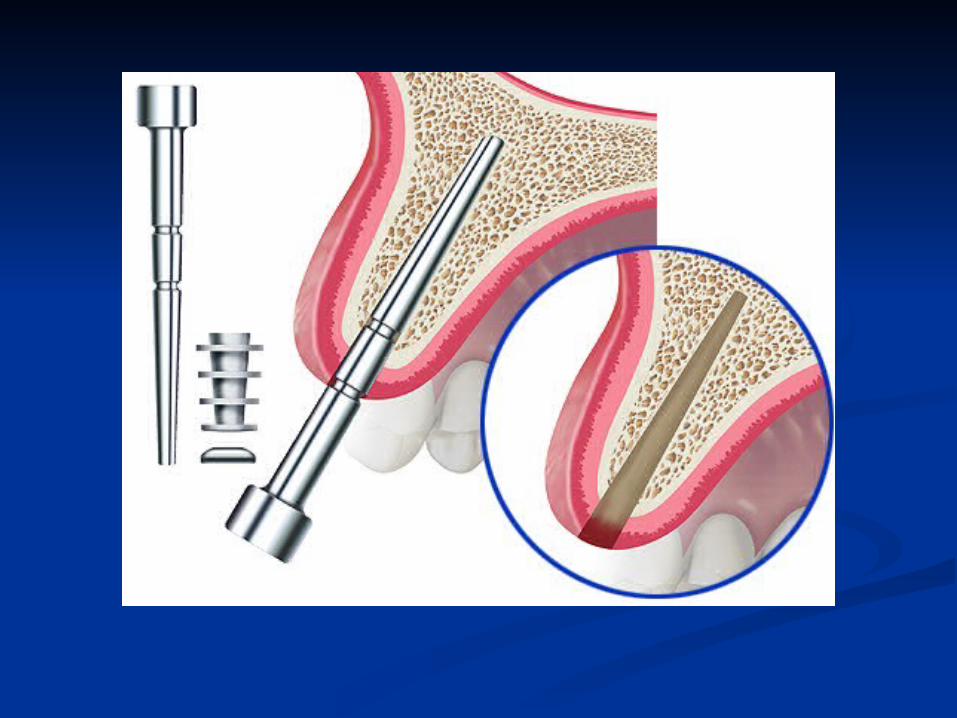
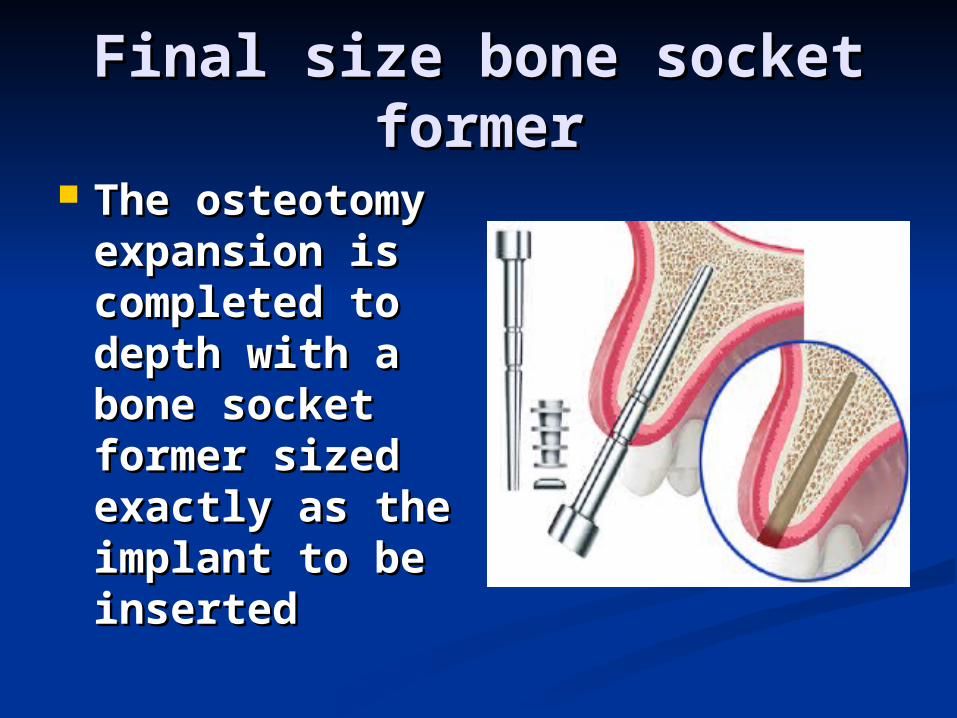
Final size bone socket formerFinal size bone socket former
The osteotomy The osteotomy expansion is expansion is completed to completed to depth with a bone depth with a bone socket former socket former sized exactly as sized exactly as the implant to be the implant to be insertedinserted
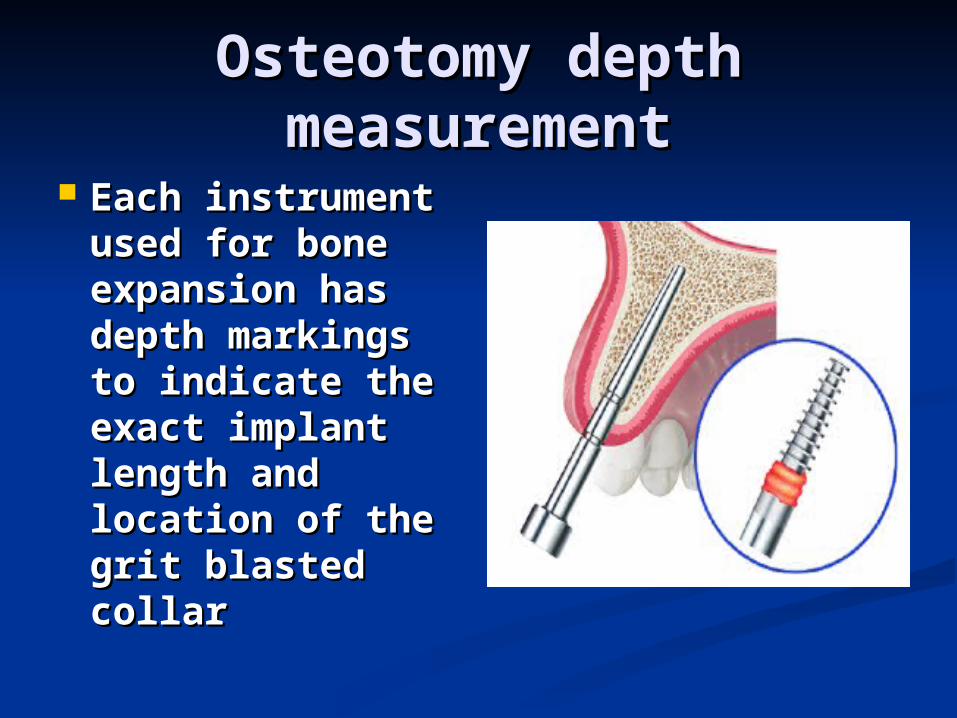
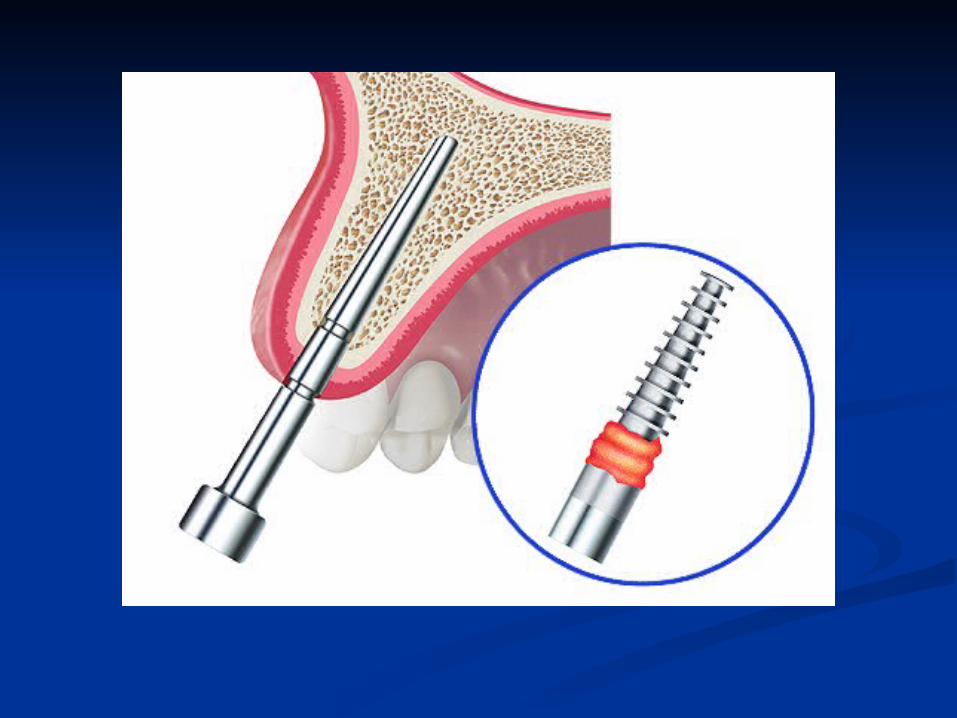
Osteotomy depth Osteotomy depth measurementmeasurement
Each instrument Each instrument used for bone used for bone expansion has expansion has depth markings depth markings to indicate the to indicate the exact implant exact implant length and length and location of the location of the grit blasted collargrit blasted collar
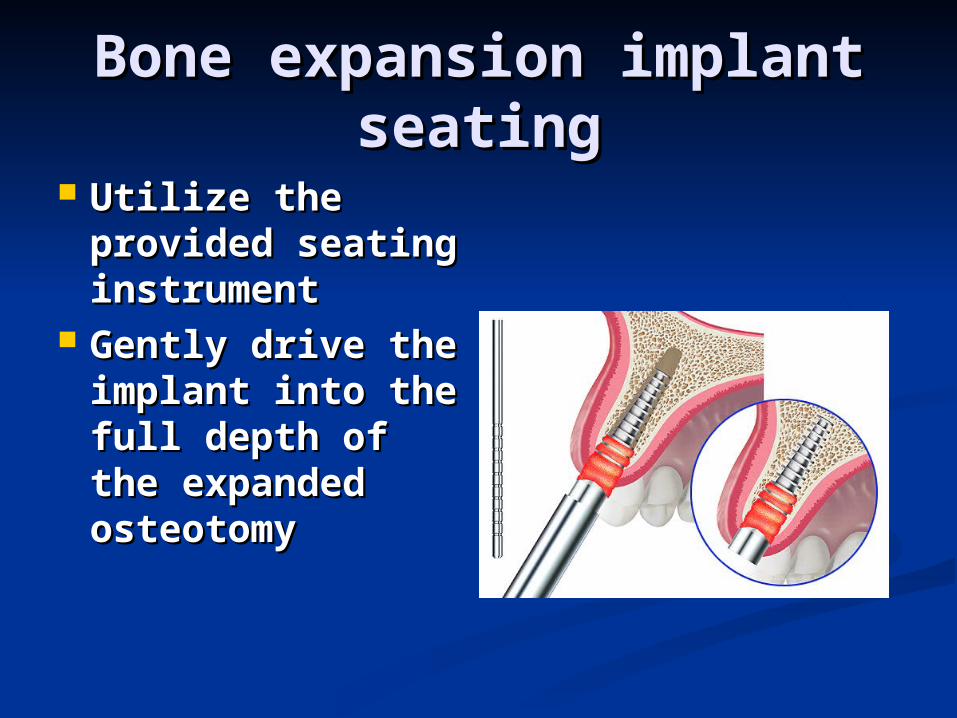
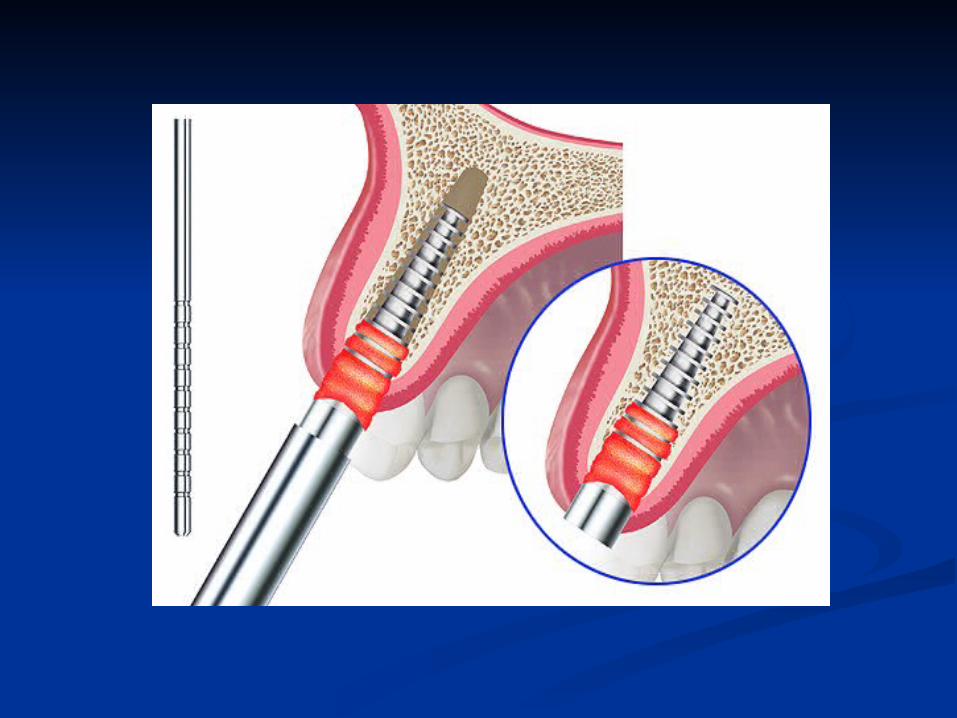
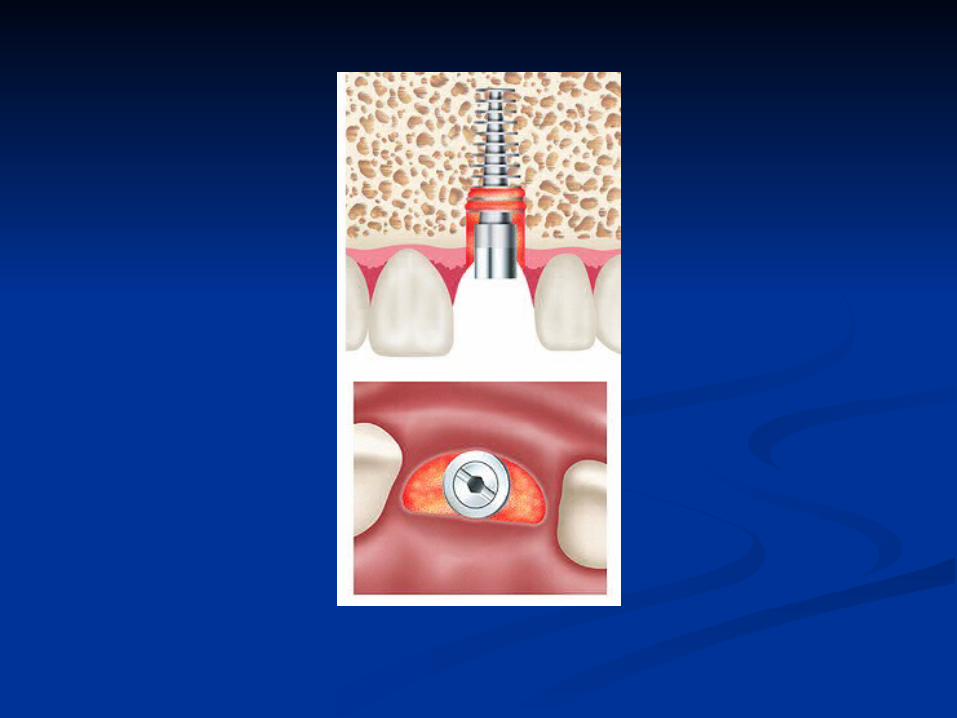
Bone expansion implant Bone expansion implant seatingseating
Utilize the Utilize the provided seating provided seating instrumentinstrument
Gently drive the Gently drive the implant into the implant into the full depth of the full depth of the expanded expanded osteotomyosteotomy
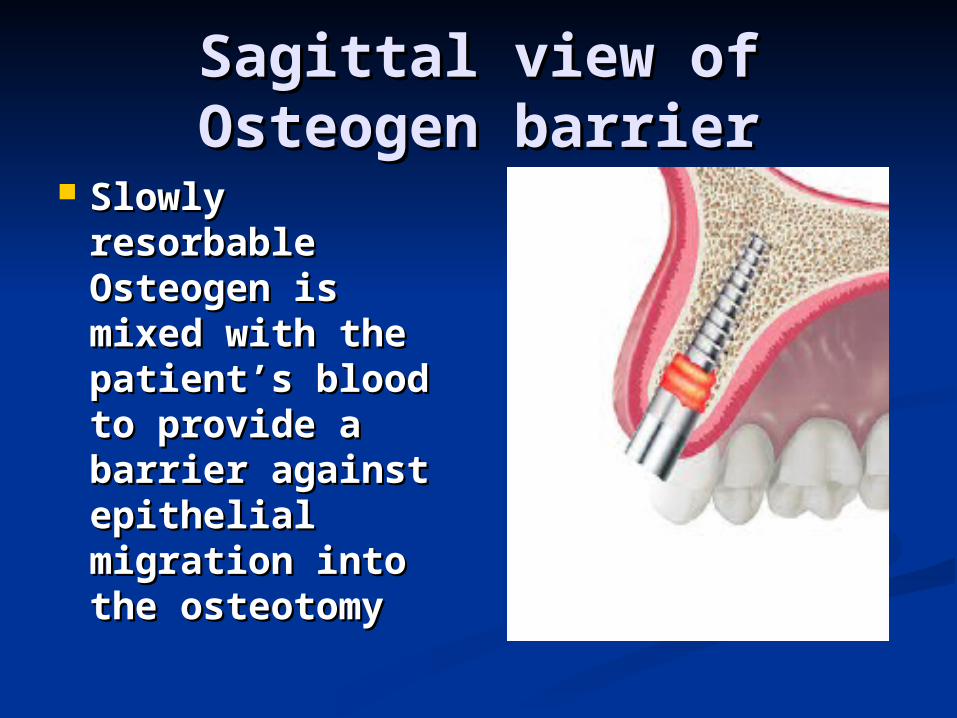
Sagittal view of Osteogen Sagittal view of Osteogen barrierbarrier
Slowly resorbable Slowly resorbable Osteogen is Osteogen is mixed with the mixed with the patient’s blood to patient’s blood to provide a barrier provide a barrier against epithelial against epithelial migration into the migration into the osteotomy osteotomy

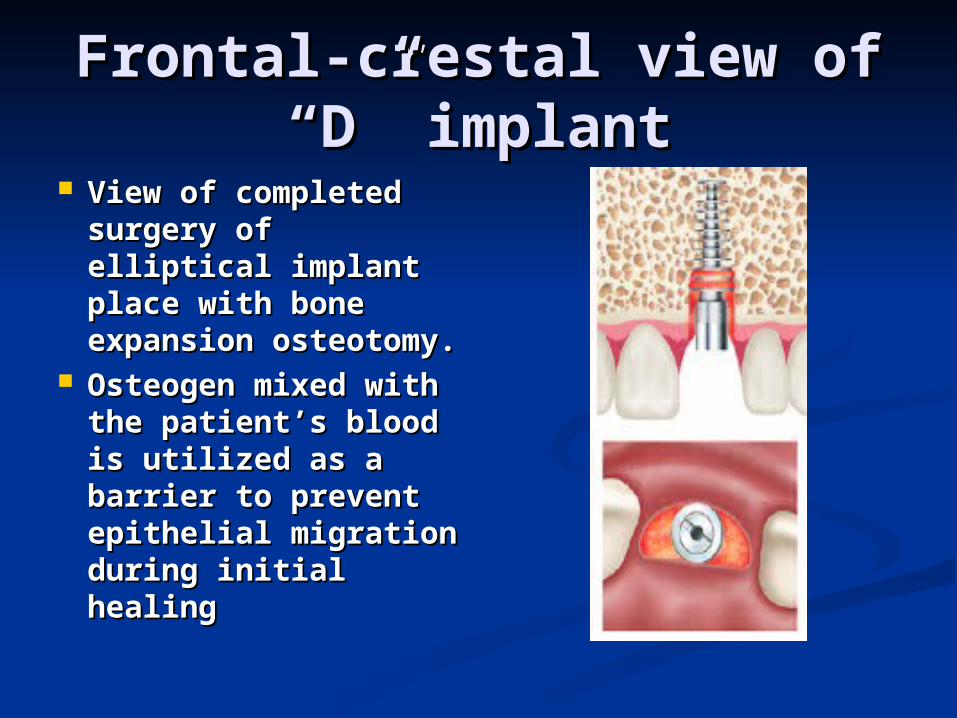
Frontal-crestal view of “D” Frontal-crestal view of “D” implantimplant
View of completed View of completed surgery of elliptical surgery of elliptical implant place with implant place with bone expansion bone expansion osteotomy.osteotomy.
Osteogen mixed with Osteogen mixed with the patient’s blood is the patient’s blood is utilized as a barrier utilized as a barrier to prevent epithelial to prevent epithelial migration during migration during initial healinginitial healing
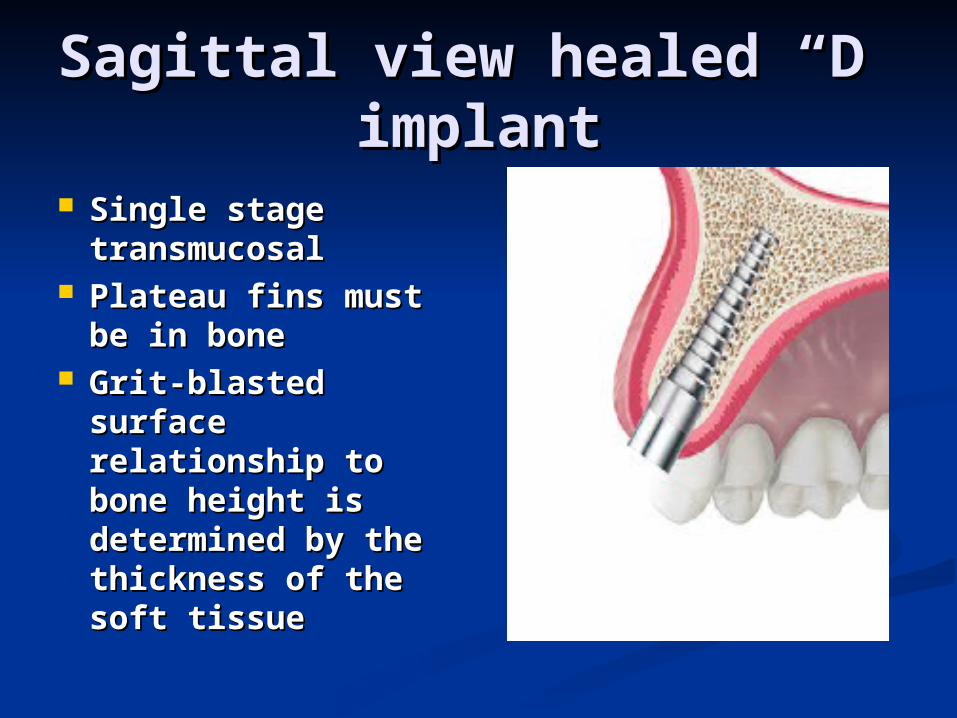
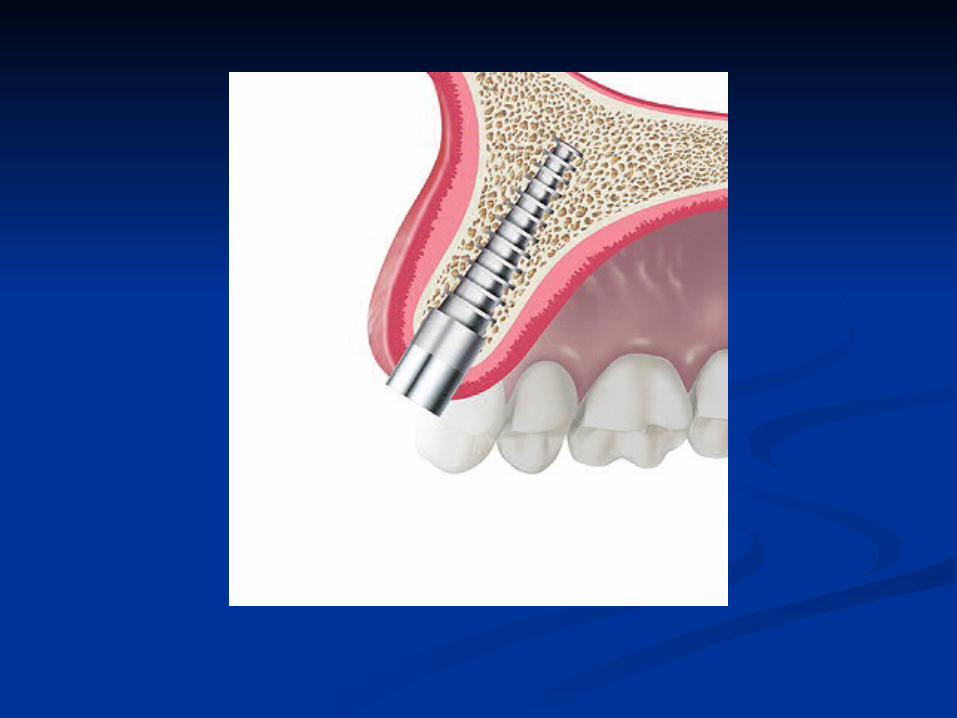
Sagittal view healed “D” Sagittal view healed “D” implantimplant
Single stage Single stage transmucosaltransmucosal
Plateau fins must be Plateau fins must be in bonein bone
Grit-blasted surface Grit-blasted surface relationship to bone relationship to bone height is determined height is determined by the thickness of by the thickness of the soft tissuethe soft tissue
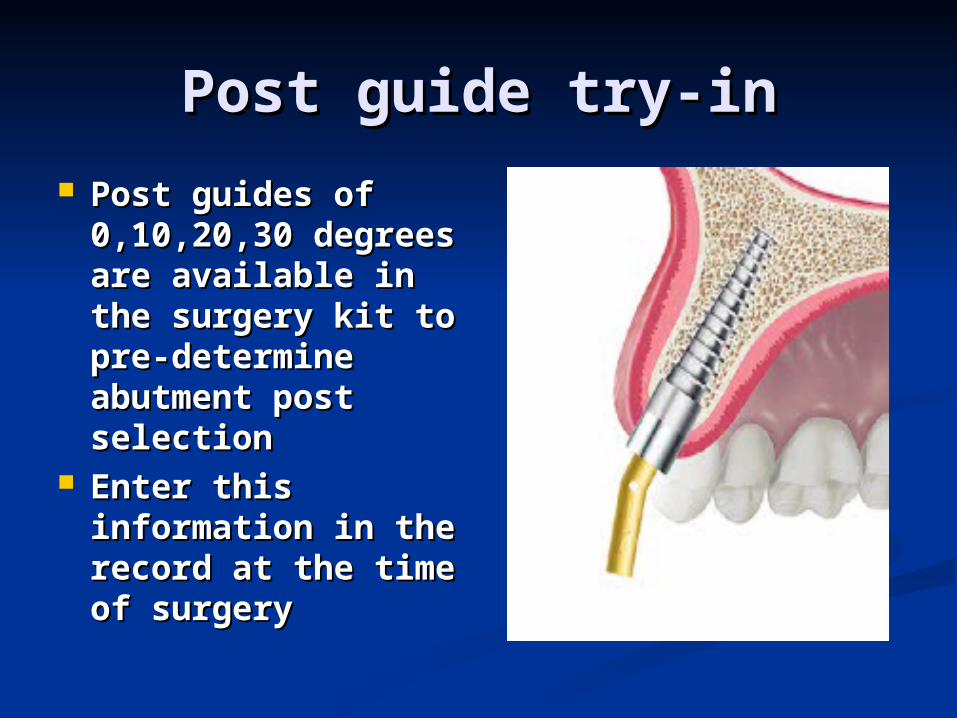
Post guide try-inPost guide try-in
Post guides of Post guides of 0,10,20,30 degrees 0,10,20,30 degrees are available in the are available in the surgery kit to pre-surgery kit to pre-determine abutment determine abutment post selectionpost selection
Enter this Enter this information in the information in the record at the time of record at the time of surgerysurgery

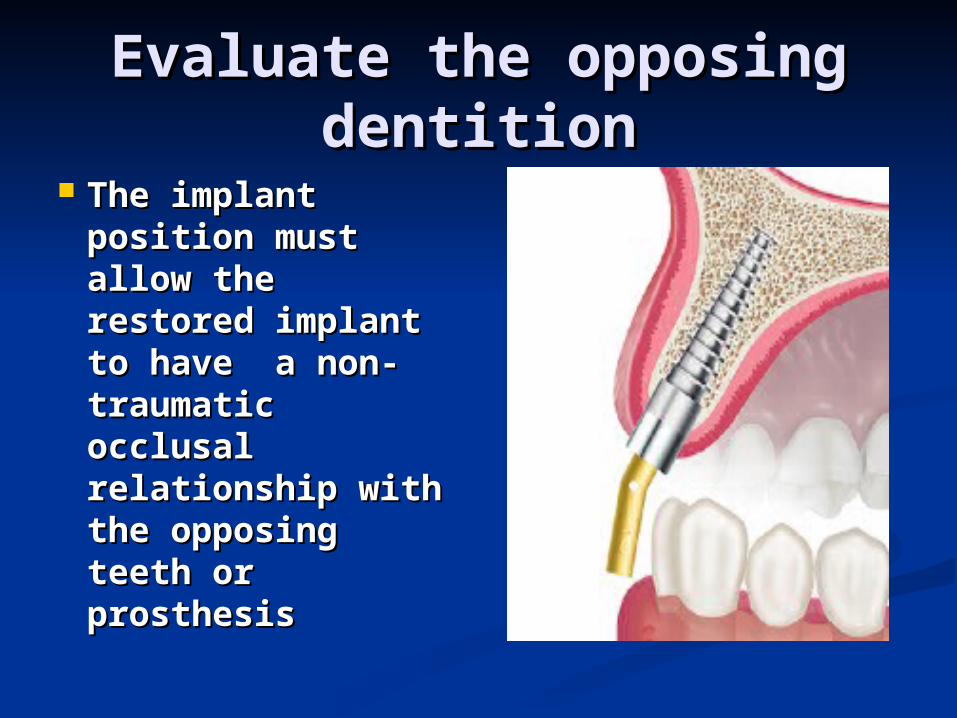
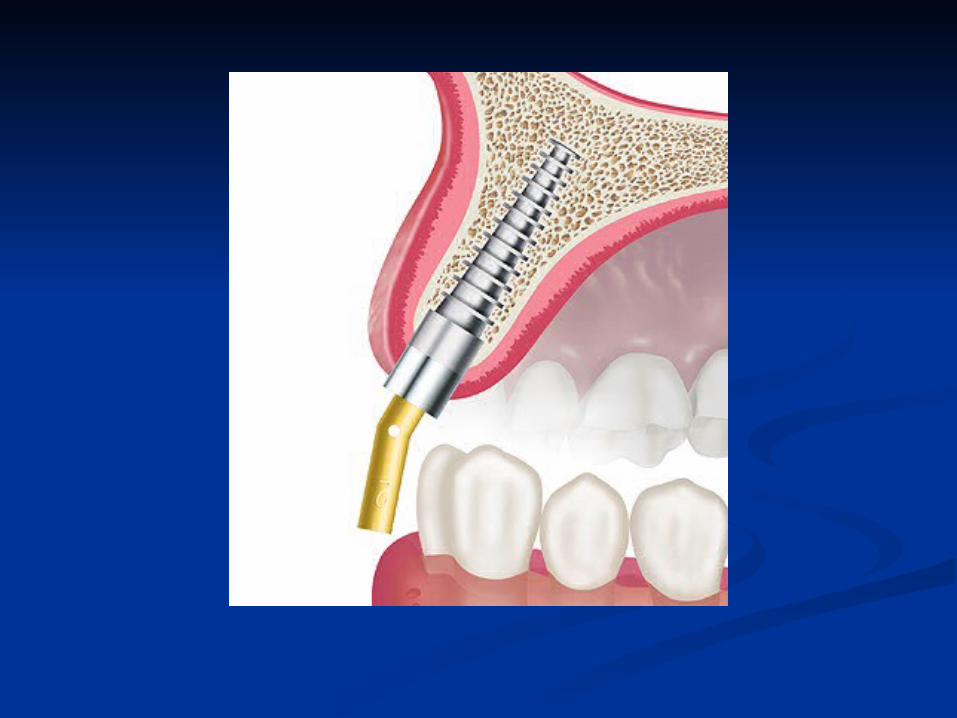
Evaluate the opposing Evaluate the opposing dentitiondentition
The implant The implant position must position must allow the restored allow the restored implant to have a implant to have a non-traumatic non-traumatic occlusal occlusal relationship with relationship with the opposing teeth the opposing teeth or prosthesisor prosthesis
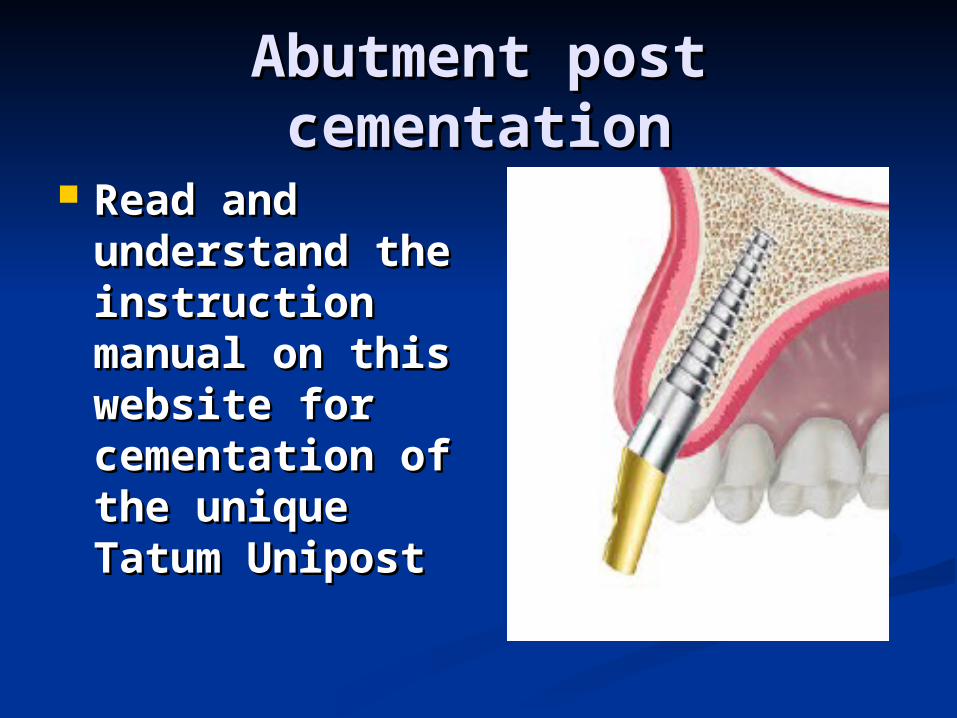
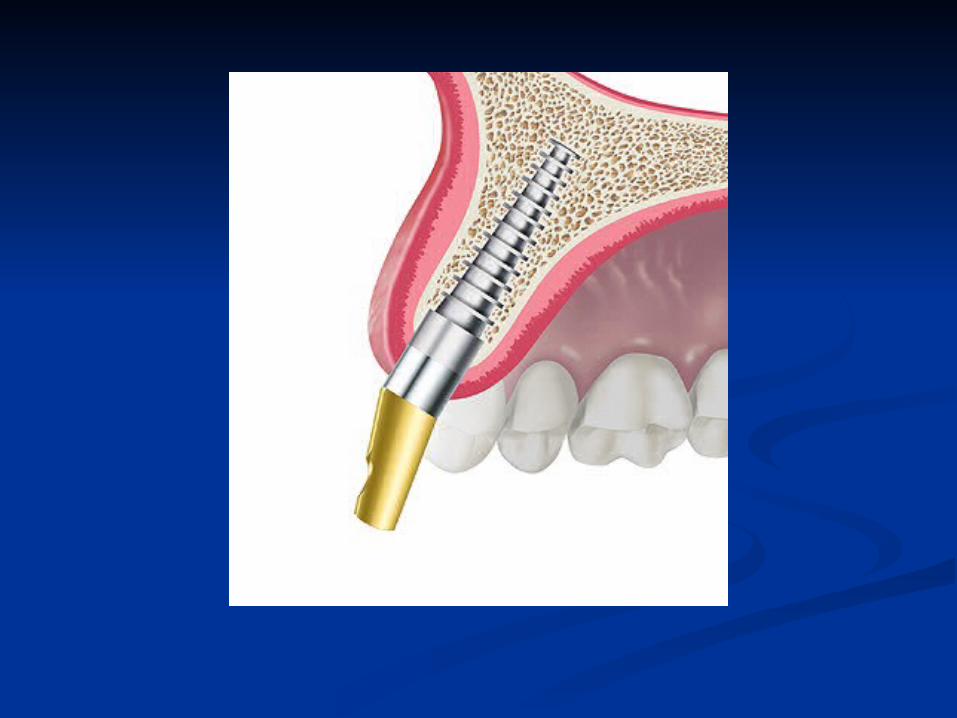
Abutment post cementationAbutment post cementation
Read and Read and understand the understand the instruction instruction manual on this manual on this website for website for cementation of cementation of the unique Tatum the unique Tatum UnipostUnipost
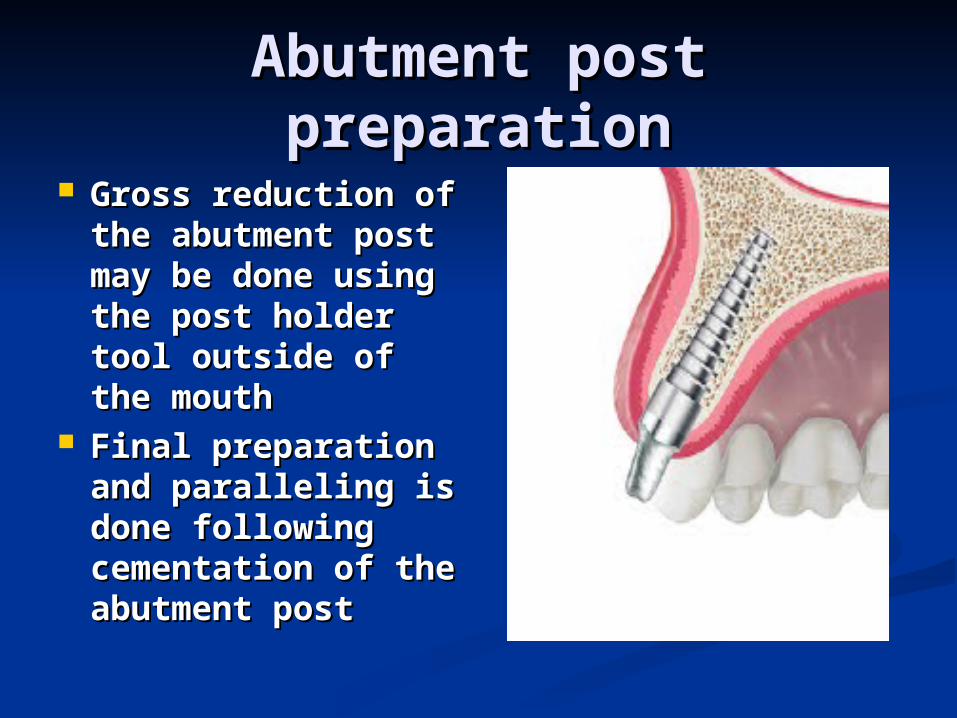
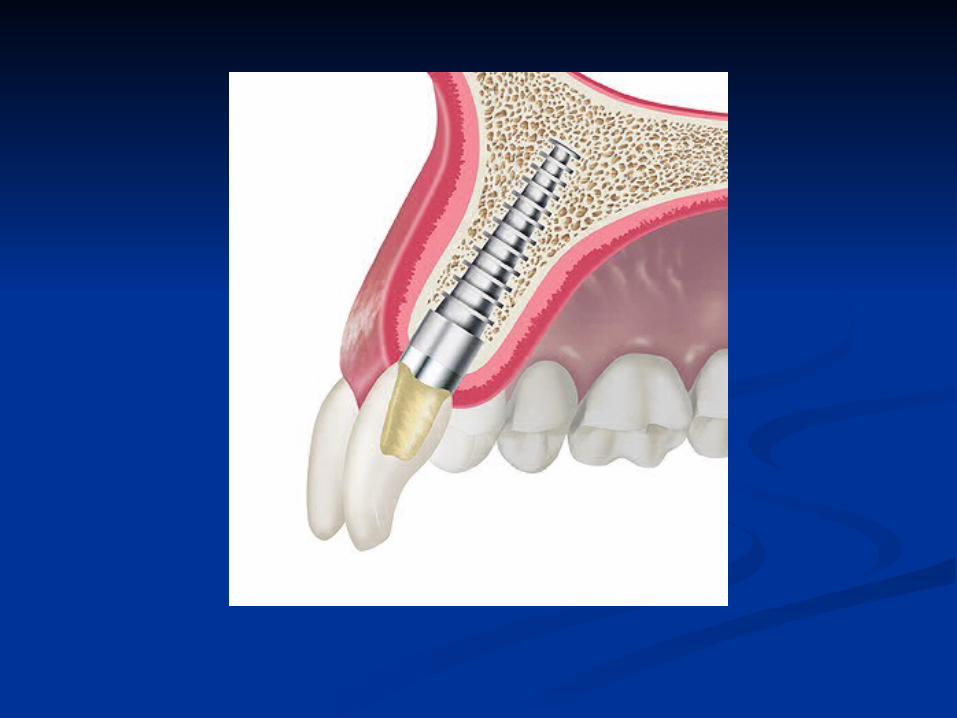
Abutment post preparationAbutment post preparation
Gross reduction of Gross reduction of the abutment post the abutment post may be done using may be done using the post holder tool the post holder tool outside of the mouthoutside of the mouth
Final preparation Final preparation and paralleling is and paralleling is done following done following cementation of the cementation of the abutment postabutment post

Preparation requirementsPreparation requirements
The margin of the preparation The margin of the preparation Must Must extend onto the body of the implant extend onto the body of the implant
A small anti-rotational grove is A small anti-rotational grove is extended onto the body of the implantextended onto the body of the implant
Margin placement is determined by the Margin placement is determined by the soft tissue contour and the planned soft tissue contour and the planned emergence profile of the final emergence profile of the final restorationrestoration
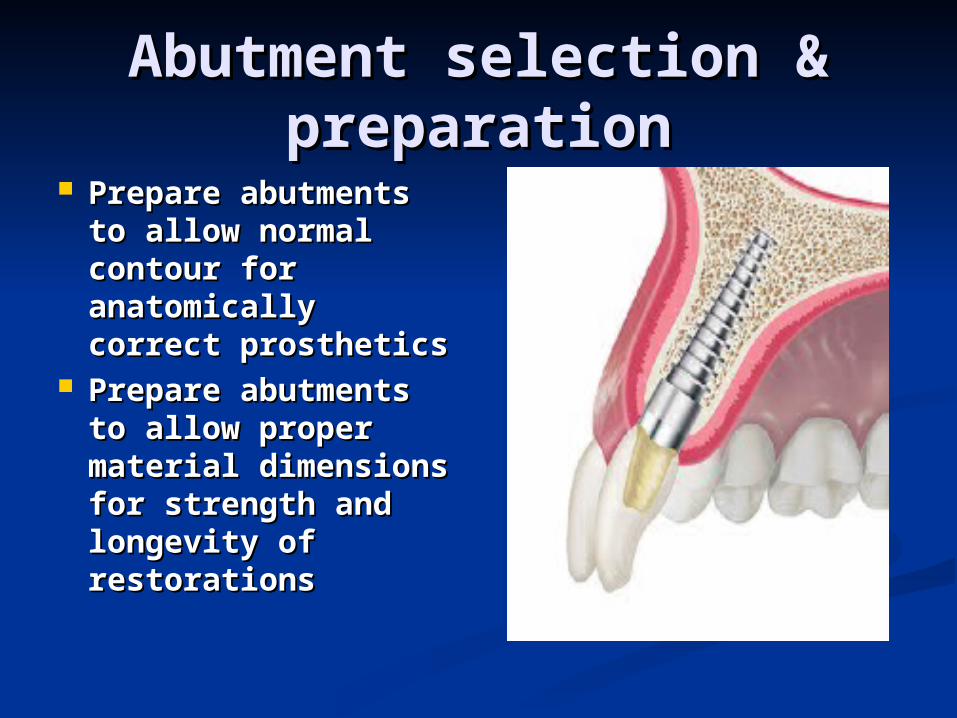
Abutment selection & Abutment selection & preparationpreparation
Prepare abutments to Prepare abutments to allow normal contour allow normal contour for anatomically for anatomically correct prostheticscorrect prosthetics
Prepare abutments to Prepare abutments to allow proper material allow proper material dimensions for dimensions for strength and strength and longevity of longevity of restorationsrestorations
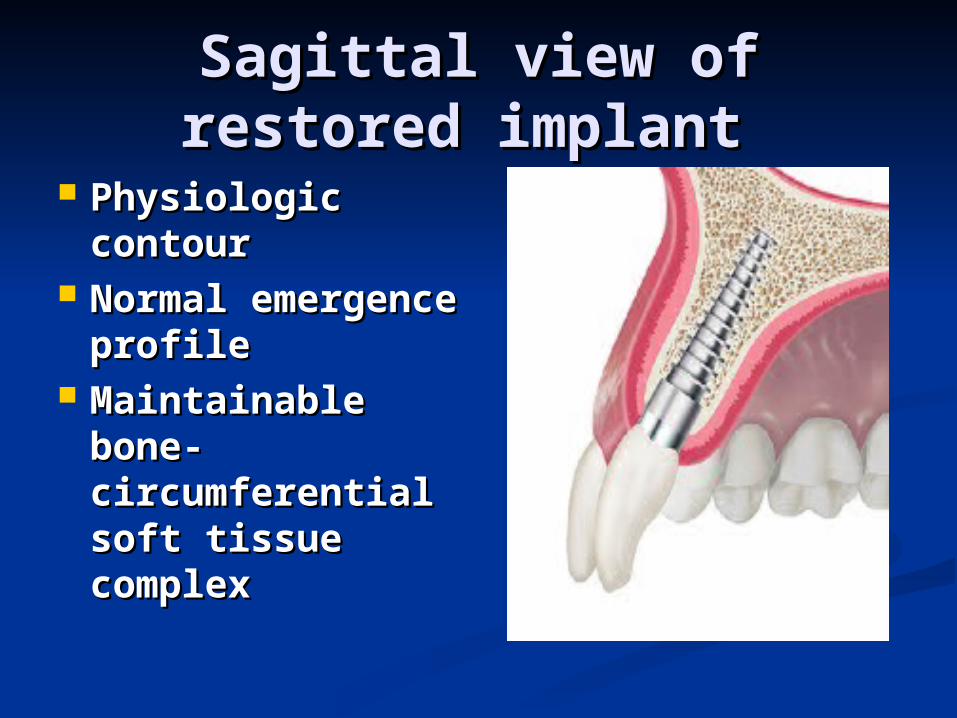
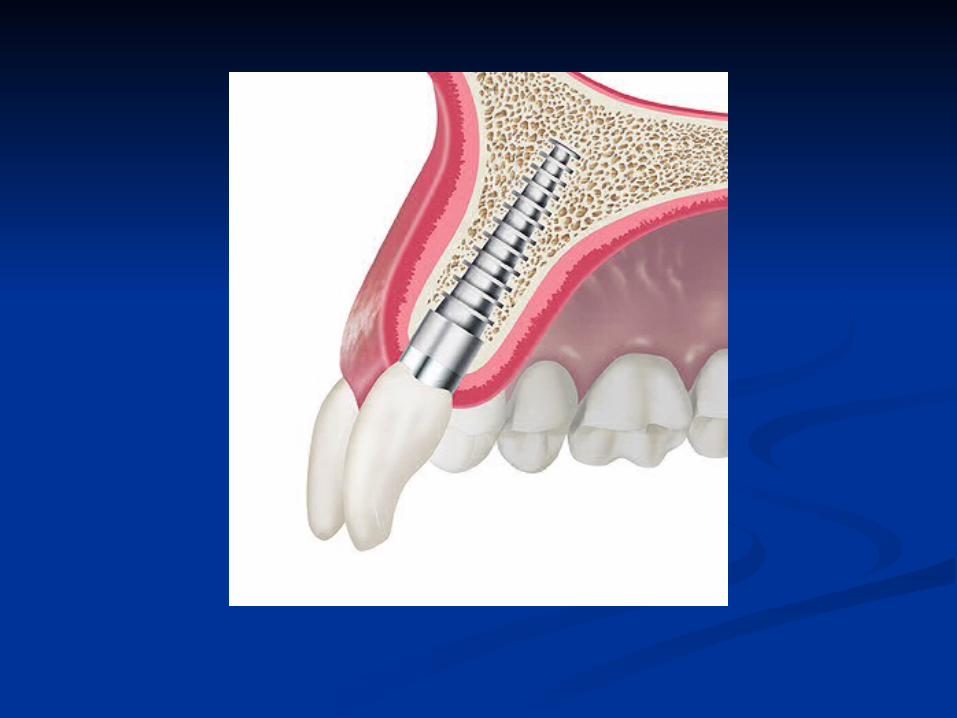
Sagittal view of restored Sagittal view of restored implant implant
Physiologic Physiologic contourcontour
Normal Normal emergence profileemergence profile
Maintainable Maintainable bone-bone-circumferential circumferential soft tissue soft tissue complexcomplex
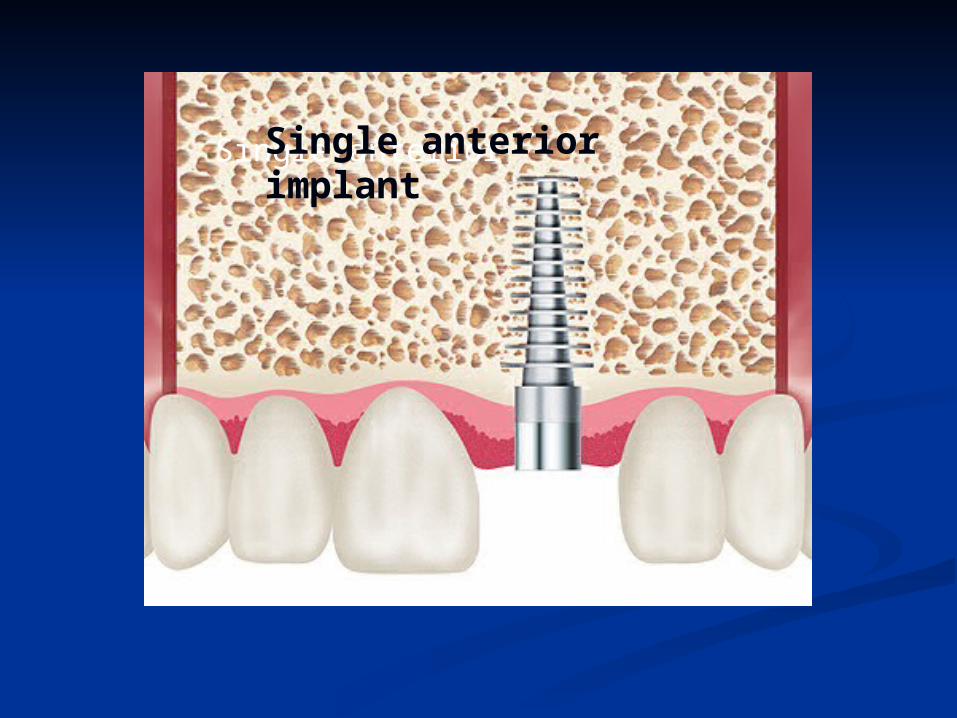
Single anteriorSingle anterior implant
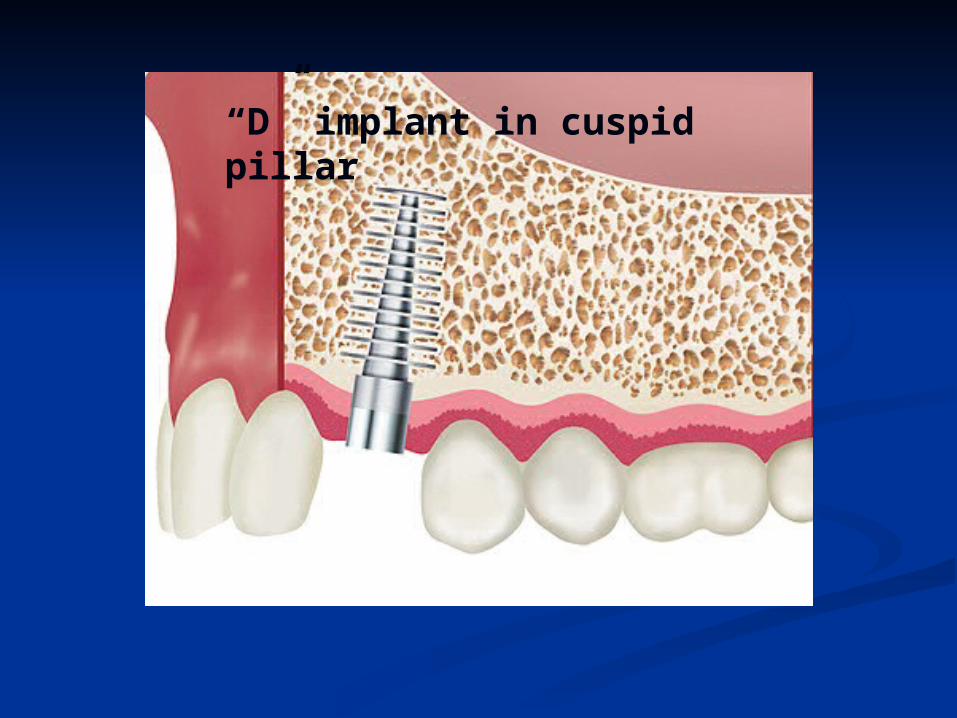
“D” implant in cuspid pillar
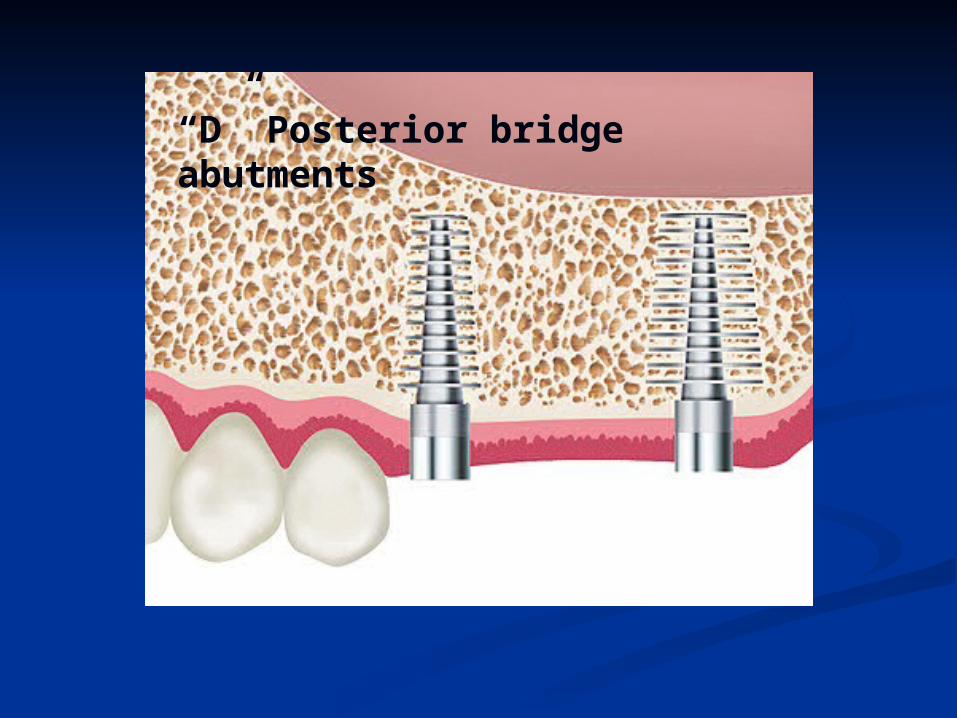
“D” Posterior bridge abutments