Embed Size (px)
Citation preview

8/7/2019 TERMINAL SERVER AND CONFIGURING LOAD BALANCING
http://slidepdf.com/reader/full/terminal-server-and-configuring-load-balancing 1/14
Task: TERMINAL SERVER
Object: Implementation of terminal server for the users who are in UNIX &SUN Platform.
Network Load balancing technique is used to avoid the bottle neck in
the usage of Terminal services where the users are more.
Configurations & Platform Details
Terminal Server 1:
Terminal Server 2:
NLB
Cluster IP: 172.21.133.9
Physical IP - 1: 172.21.133.11 –Internet name: adicluster.ad.adichn.eu.alcatel.com
Physical IP - 1: 172.21.133.11 –Internet name: windowsts.ad.adichn.eu.alcatel.com
Host Name: inccistw0005
IP Address: 172.21.133.11
OS: WINDOWS 2003 – Enterprise edition
Host Name: inccistw0006
IP Address: 172.21.133.12
OS: WINDOWS 2003 – Enterprise edition

8/7/2019 TERMINAL SERVER AND CONFIGURING LOAD BALANCING
http://slidepdf.com/reader/full/terminal-server-and-configuring-load-balancing 2/14
INSTALLING A TERMINAL SERVER AND CONFIGURING LOADBALANCING.
System Specifications
Procedure for installing Terminal Server
Step 1: Since we are to configure load balancing, its advised to install the server withWindows 2003 enterprise edition.
Step 2: Here we don’t see the procedures for installing the operating system
Step 3: We directly move to the installation of Terminal Services.
Step 4: At the run prompt type “appwiz.cpl”

8/7/2019 TERMINAL SERVER AND CONFIGURING LOAD BALANCING
http://slidepdf.com/reader/full/terminal-server-and-configuring-load-balancing 3/14
Step 5: It will open the “Add or Remove Programs” wizard.
Step 6: Click on “Add Remove Windows Component”
Step 7: A new window will open, on that, check on “Terminal Server” and “TerminalServer Licensing”
8/7/2019 TERMINAL SERVER AND CONFIGURING LOAD BALANCING
http://slidepdf.com/reader/full/terminal-server-and-configuring-load-balancing 4/14
Step 8: Click on the “next “ button in the following screens.

8/7/2019 TERMINAL SERVER AND CONFIGURING LOAD BALANCING
http://slidepdf.com/reader/full/terminal-server-and-configuring-load-balancing 5/14
Step 8: When it prompts for security method, check on “Full Security”.
Step 9 : When it prompts for licensing, Check on “ I will specify a license server with120 days”
Step 10: Make sure you apply the license within 120 days.

8/7/2019 TERMINAL SERVER AND CONFIGURING LOAD BALANCING
http://slidepdf.com/reader/full/terminal-server-and-configuring-load-balancing 6/14
Step 11: When it prompts for licensing mode, check on “ Per Device”
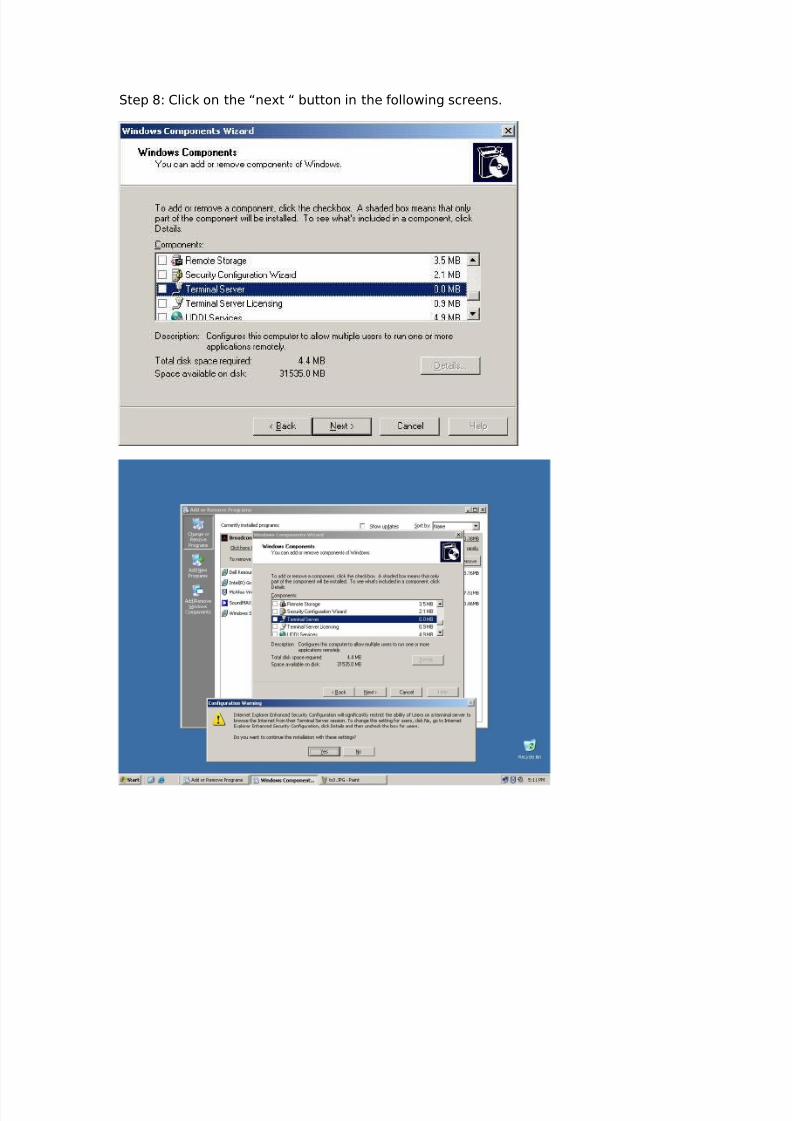
Step 12: Make the license server available for your entire enterprise.
8/7/2019 TERMINAL SERVER AND CONFIGURING LOAD BALANCING
http://slidepdf.com/reader/full/terminal-server-and-configuring-load-balancing 7/14
Step 13: Restart the machine for successful installation.
Step 14 : After restarting, Click on administrative tools in Program Menu and seewhether Terminal Services has been installed.

8/7/2019 TERMINAL SERVER AND CONFIGURING LOAD BALANCING
http://slidepdf.com/reader/full/terminal-server-and-configuring-load-balancing 8/14
Step 15 : Not all users can log into Terminal Server
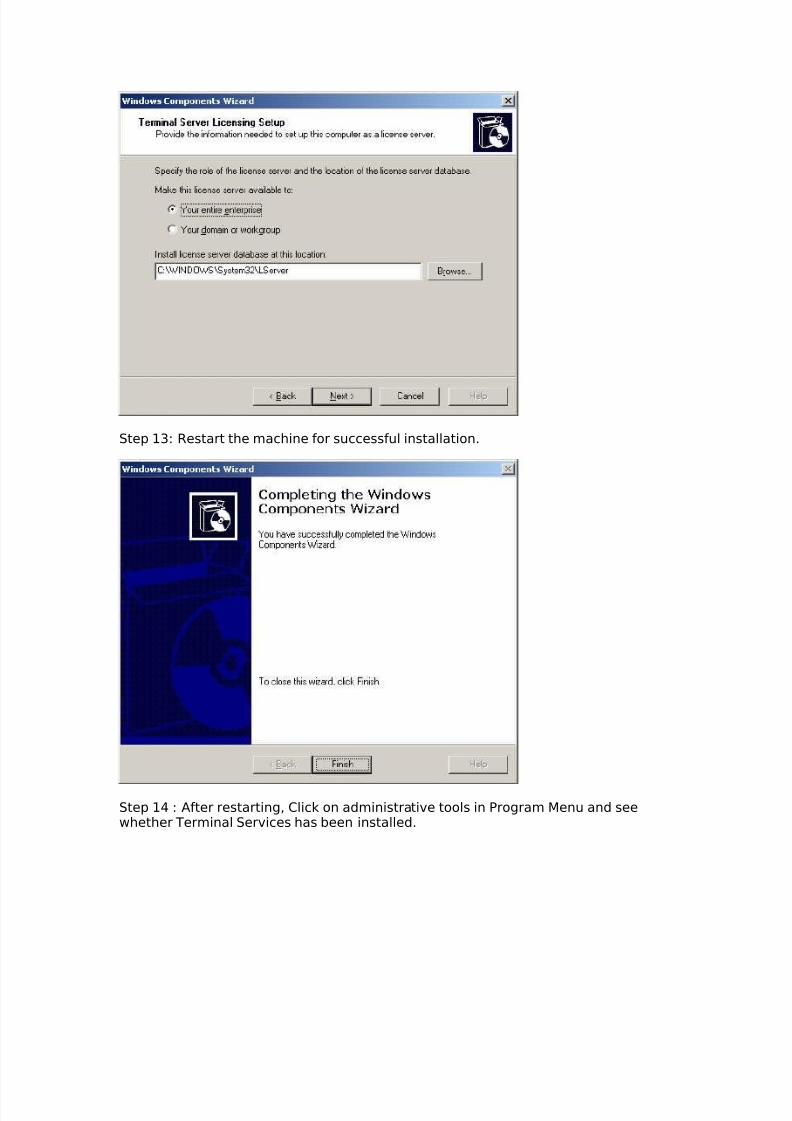
Step 16: The users who need Terminal Server access should be added into RemoteDesktop Users Group.
Step 17: Select the Remote Desktop Users and in the next screen click on “ADD” toadd users.
8/7/2019 TERMINAL SERVER AND CONFIGURING LOAD BALANCING
http://slidepdf.com/reader/full/terminal-server-and-configuring-load-balancing 9/14
Step 18: That’s it Terminal Server is successfully installed and users added toremote desktop group.
Configuring Load balancing on Terminal Servers.
Before configuring load balancing, make sure that you have installed two TerminalServers, which has to be in same VLAN.
Step 1: Click on Start – Programs – Administrative Tools – Network Load Balancing.

8/7/2019 TERMINAL SERVER AND CONFIGURING LOAD BALANCING
http://slidepdf.com/reader/full/terminal-server-and-configuring-load-balancing 10/14
Step 2: Click on Cluster – New Cluster
Step 4: In the cluster parameters, give the new virtual IP address

8/7/2019 TERMINAL SERVER AND CONFIGURING LOAD BALANCING
http://slidepdf.com/reader/full/terminal-server-and-configuring-load-balancing 11/14
Step 5:Give a FQDN for the clusterStep 6: Select Multicast if you are using a single Network AdapterStep 7: Specify a password for Remote Control (Not Mandatory)
Step 8: In the next screen, specify on which ip address cluster should work.

8/7/2019 TERMINAL SERVER AND CONFIGURING LOAD BALANCING
http://slidepdf.com/reader/full/terminal-server-and-configuring-load-balancing 12/14
Step 9: Specify the port details, you needn’t make any changes in this.

8/7/2019 TERMINAL SERVER AND CONFIGURING LOAD BALANCING
http://slidepdf.com/reader/full/terminal-server-and-configuring-load-balancing 13/14
Step 10 : In the next screen, add the second systems host name to this cluster.
8/7/2019 TERMINAL SERVER AND CONFIGURING LOAD BALANCING
http://slidepdf.com/reader/full/terminal-server-and-configuring-load-balancing 14/14
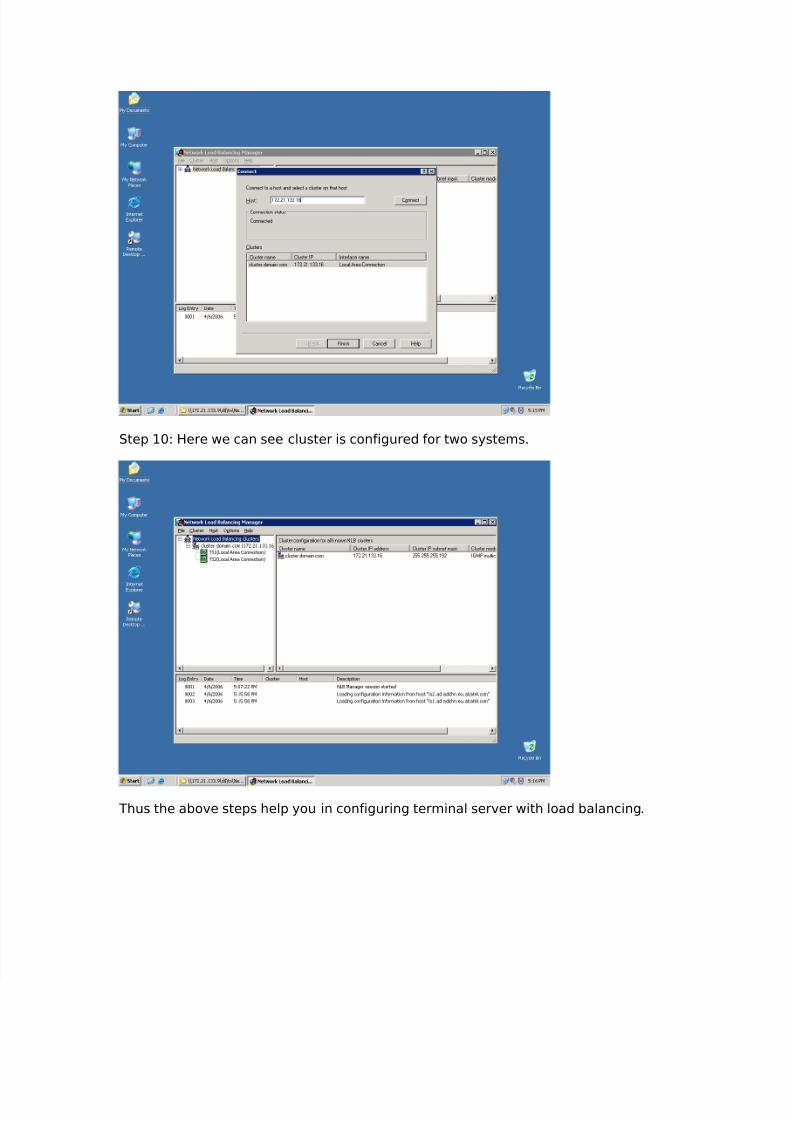
Step 10: Here we can see cluster is configured for two systems.
Thus the above steps help you in configuring terminal server with load balancing.