Embed Size (px)
Citation preview
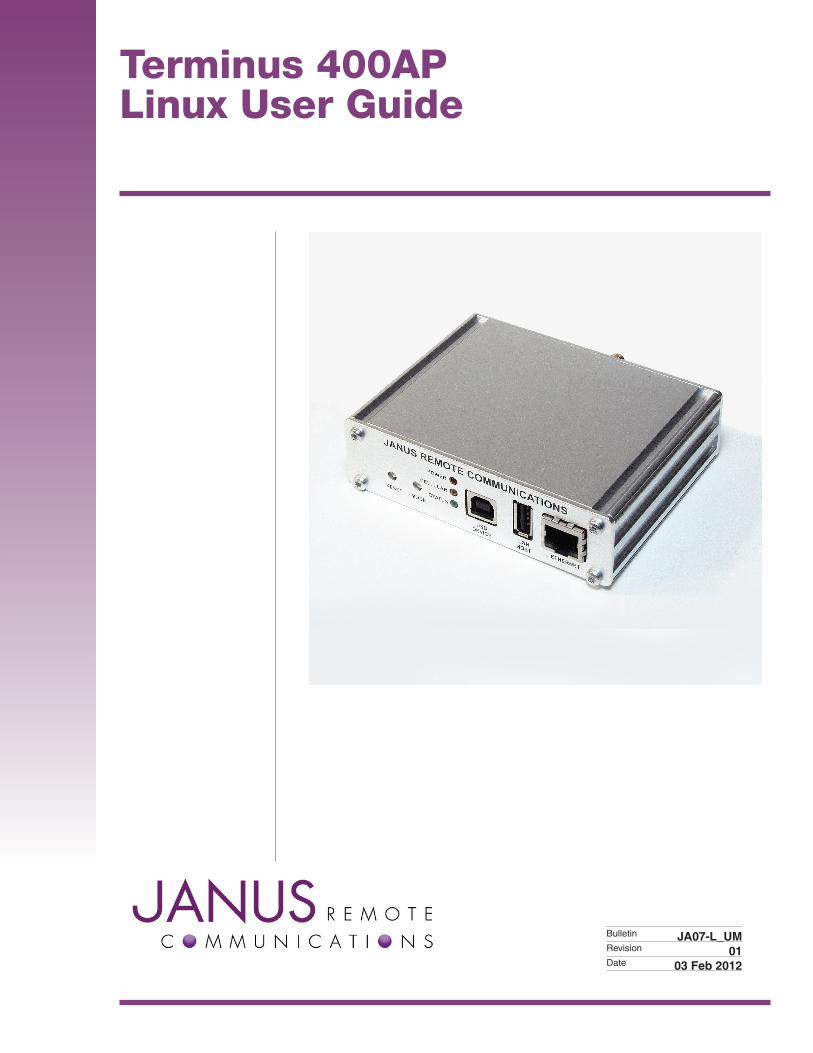
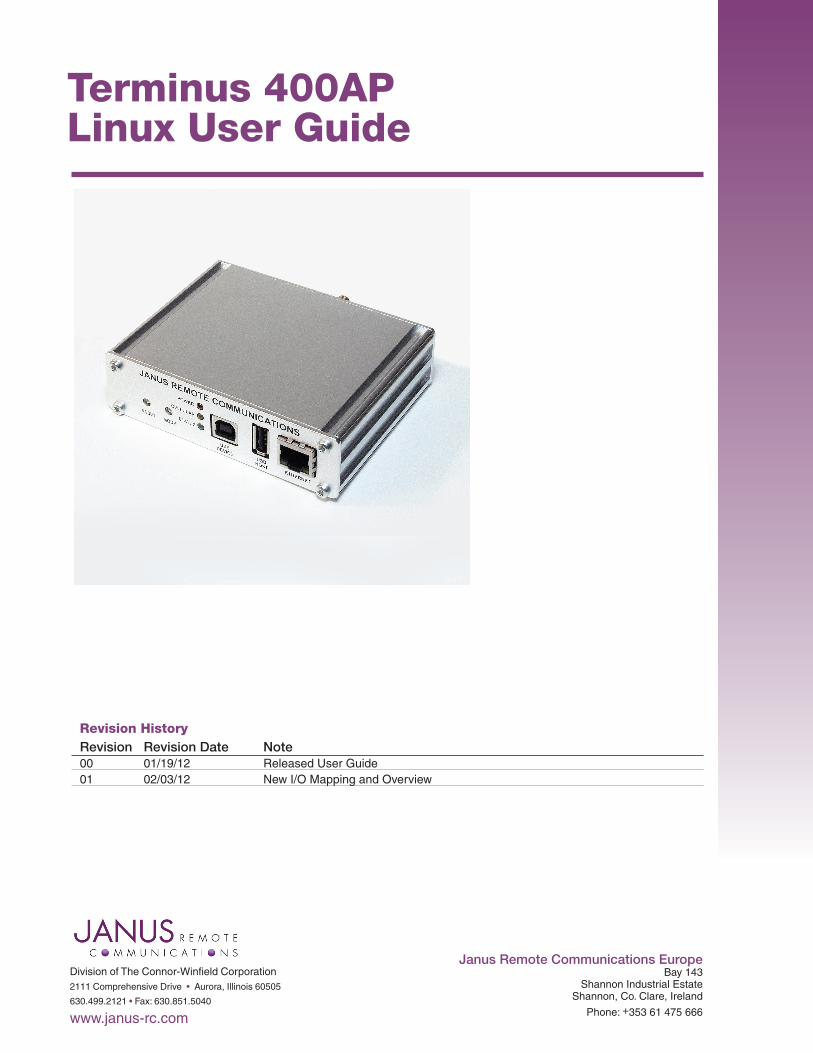
Terminus 400AP Linux User Guide
Bulletin JA07-L_UMRevision 01Date 03 Feb 2012
Terminus 400AP Linux User Guide JA07-L_UM Page 2 Rev: 01 Date: 02/03/12© Copyright 2012 Janus Remote Communications All Rights Reserved Specifications subject to change without notice
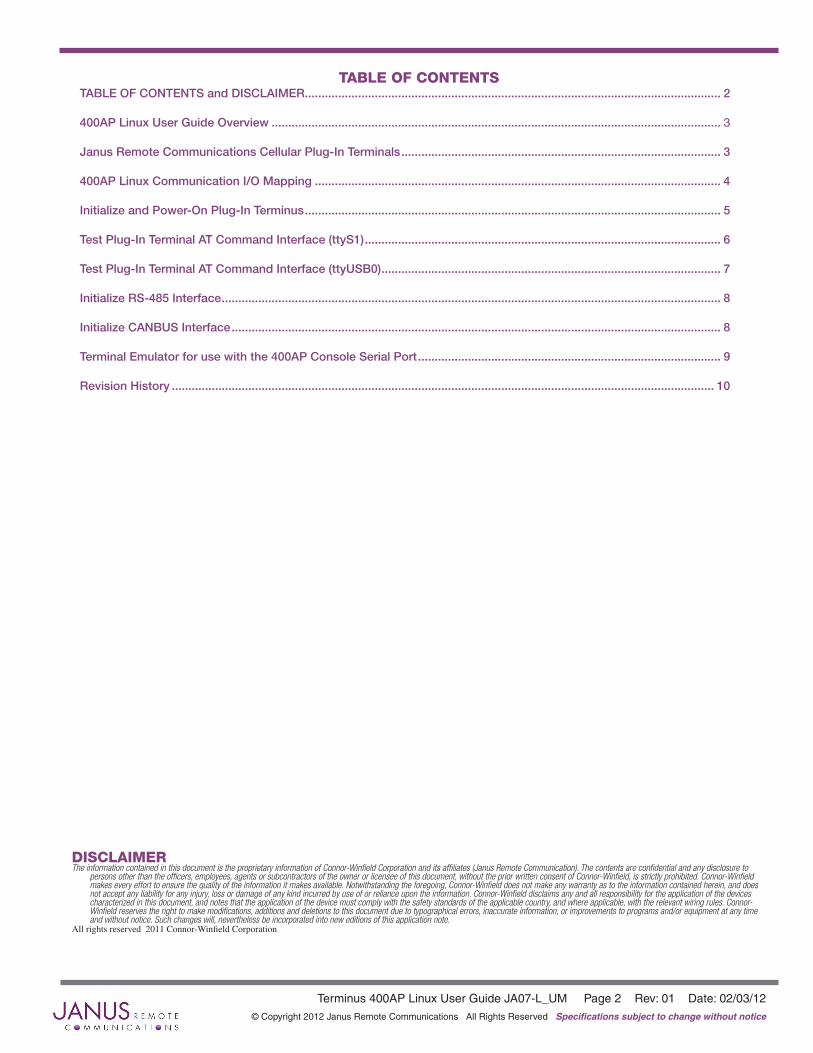
TABLE OF CONTENTSTABLE OF CONTENTS and DISCLAIMER ............................................................................................................................. 2
400AP Linux User Guide Overview ....................................................................................................................................... 3
Janus Remote Communications Cellular Plug-In Terminals ................................................................................................ 3
400AP Linux Communication I/O Mapping .......................................................................................................................... 4
Initialize and Power-On Plug-In Terminus ............................................................................................................................. 5
Test Plug-In Terminal AT Command Interface (ttyS1) ........................................................................................................... 6
Test Plug-In Terminal AT Command Interface (ttyUSB0) ...................................................................................................... 7
Initialize RS-485 Interface ...................................................................................................................................................... 8
Initialize CANBUS Interface ................................................................................................................................................... 8
Terminal Emulator for use with the 400AP Console Serial Port ........................................................................................... 9
Revision History ................................................................................................................................................................... 10
DISCLAIMERThe information contained in this document is the proprietary information of Connor-Winfield Corporation and its affiliates (Janus Remote Communication). The contents are confidential and any disclosure to
persons other than the officers, employees, agents or subcontractors of the owner or licensee of this document, without the prior written consent of Connor-Winfield, is strictly prohibited. Connor-Winfield makes every effort to ensure the quality of the information it makes available. Notwithstanding the foregoing, Connor-Winfield does not make any warranty as to the information contained herein, and does not accept any liability for any injury, loss or damage of any kind incurred by use of or reliance upon the information. Connor-Winfield disclaims any and all responsibility for the application of the devices characterized in this document, and notes that the application of the device must comply with the safety standards of the applicable country, and where applicable, with the relevant wiring rules. Connor-Winfield reserves the right to make modifications, additions and deletions to this document due to typographical errors, inaccurate information, or improvements to programs and/or equipment at any time and without notice. Such changes will, nevertheless be incorporated into new editions of this application note.
All rights reserved 2011 Connor-Winfield Corporation
Terminus 400AP Linux User Guide JA07-L_UM Page 3 Rev: 01 Date: 02/03/12© Copyright 2012 Janus Remote Communications All Rights Reserved Specifications subject to change without notice
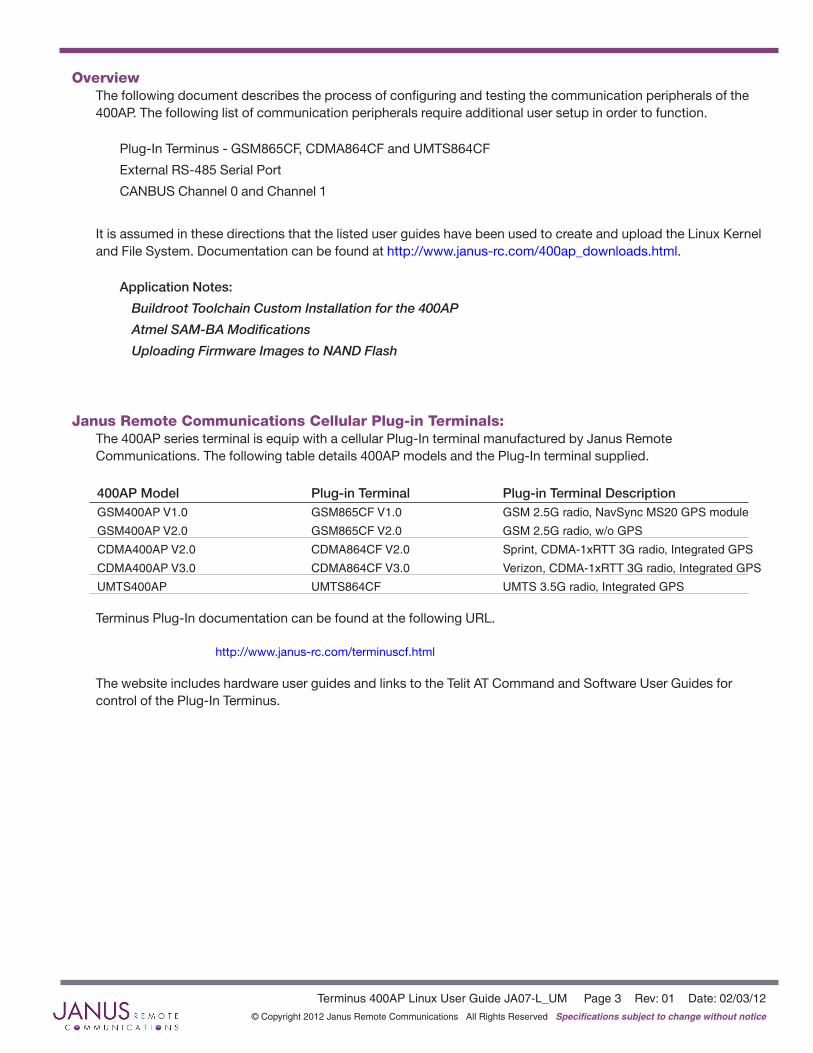
OverviewThe following document describes the process of configuring and testing the communication peripherals of the 400AP. The following list of communication peripherals require additional user setup in order to function.
Plug-In Terminus - GSM865CF, CDMA864CF and UMTS864CF
External RS-485 Serial Port
CANBUS Channel 0 and Channel 1
It is assumed in these directions that the listed user guides have been used to create and upload the Linux Kernel and File System. Documentation can be found at http://www.janus-rc.com/400ap_downloads.html.
Application Notes:
Buildroot Toolchain Custom Installation for the 400AP
Atmel SAM-BA Modifications
Uploading Firmware Images to NAND Flash
Janus Remote Communications Cellular Plug-in Terminals:The 400AP series terminal is equip with a cellular Plug-In terminal manufactured by Janus Remote Communications. The following table details 400AP models and the Plug-In terminal supplied.
400AP Model Plug-in Terminal Plug-in Terminal Description GSM400AP V1.0 GSM865CF V1.0 GSM 2.5G radio, NavSync MS20 GPS module
GSM400AP V2.0 GSM865CF V2.0 GSM 2.5G radio, w/o GPS
CDMA400AP V2.0 CDMA864CF V2.0 Sprint, CDMA-1xRTT 3G radio, Integrated GPS
CDMA400AP V3.0 CDMA864CF V3.0 Verizon, CDMA-1xRTT 3G radio, Integrated GPS
UMTS400AP UMTS864CF UMTS 3.5G radio, Integrated GPS
Terminus Plug-In documentation can be found at the following URL.
http://www.janus-rc.com/terminuscf.html
The website includes hardware user guides and links to the Telit AT Command and Software User Guides for control of the Plug-In Terminus.
Terminus 400AP Linux User Guide JA07-L_UM Page 4 Rev: 01 Date: 02/03/12© Copyright 2012 Janus Remote Communications All Rights Reserved Specifications subject to change without notice
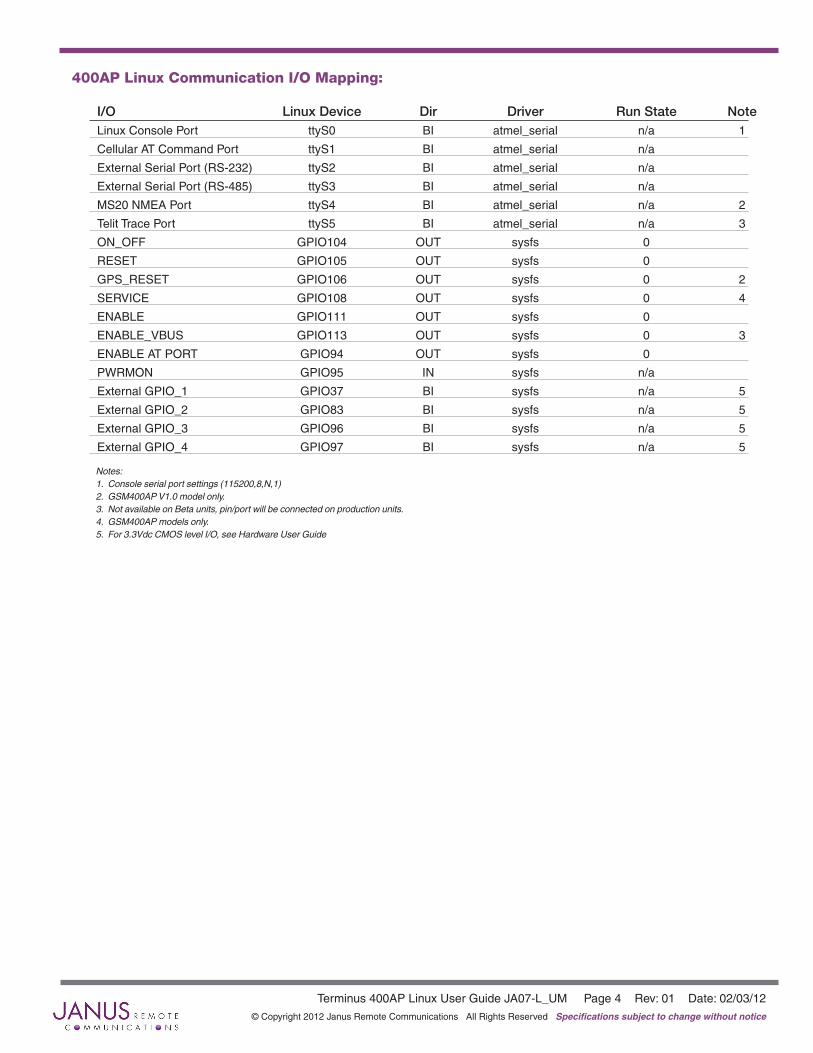
400AP Linux Communication I/O Mapping:
I/O Linux Device Dir Driver Run State Note Linux Console Port ttyS0 BI atmel_serial n/a 1
Cellular AT Command Port ttyS1 BI atmel_serial n/a
External Serial Port (RS-232) ttyS2 BI atmel_serial n/a
External Serial Port (RS-485) ttyS3 BI atmel_serial n/a
MS20 NMEA Port ttyS4 BI atmel_serial n/a 2
Telit Trace Port ttyS5 BI atmel_serial n/a 3
ON_OFF GPIO104 OUT sysfs 0
RESET GPIO105 OUT sysfs 0
GPS_RESET GPIO106 OUT sysfs 0 2
SERVICE GPIO108 OUT sysfs 0 4
ENABLE GPIO111 OUT sysfs 0
ENABLE_VBUS GPIO113 OUT sysfs 0 3
ENABLE AT PORT GPIO94 OUT sysfs 0
PWRMON GPIO95 IN sysfs n/a
External GPIO_1 GPIO37 BI sysfs n/a 5
External GPIO_2 GPIO83 BI sysfs n/a 5
External GPIO_3 GPIO96 BI sysfs n/a 5
External GPIO_4 GPIO97 BI sysfs n/a 5
Notes:1. Consoleserialportsettings(115200,8,N,1)2. GSM400APV1.0modelonly.3. NotavailableonBetaunits,pin/portwillbeconnectedonproductionunits.4. GSM400APmodelsonly.5. For3.3VdcCMOSlevelI/O,seeHardwareUserGuide
Terminus 400AP Linux User Guide JA07-L_UM Page 5 Rev: 01 Date: 02/03/12© Copyright 2012 Janus Remote Communications All Rights Reserved Specifications subject to change without notice
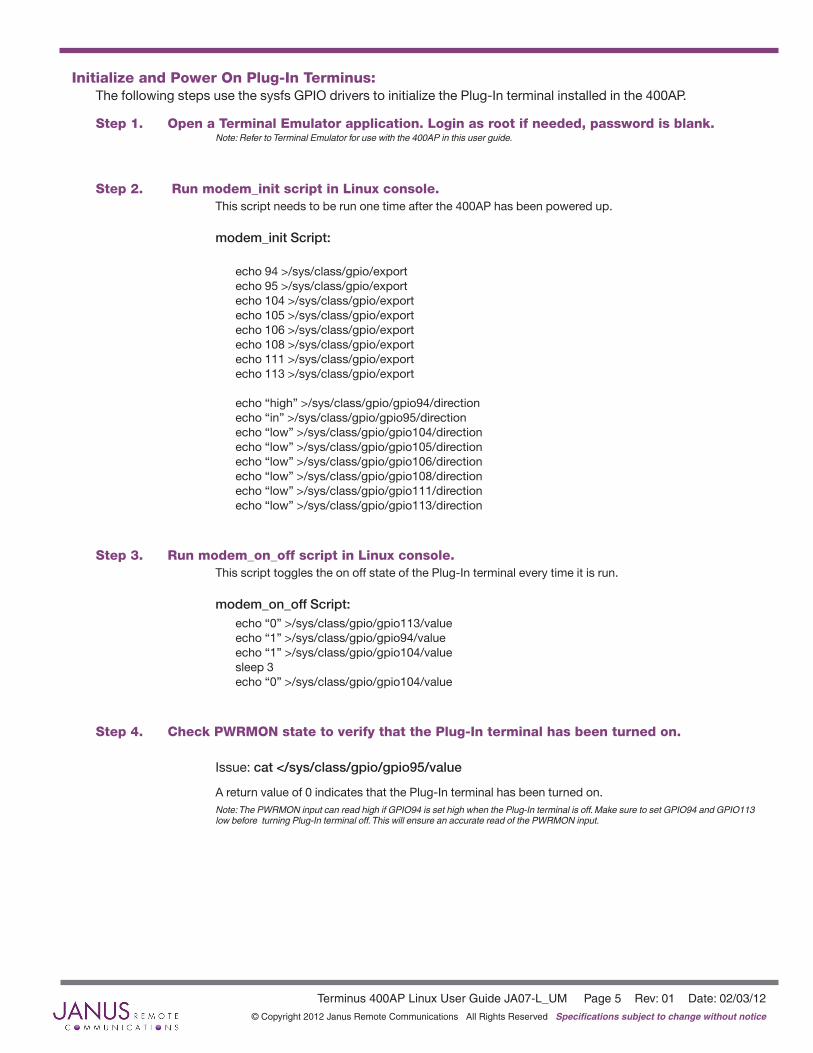
Initialize and Power On Plug-In Terminus:The following steps use the sysfs GPIO drivers to initialize the Plug-In terminal installed in the 400AP.
Step 1. Open a Terminal Emulator application. Login as root if needed, password is blank. Note:RefertoTerminalEmulatorforusewiththe400APinthisuserguide.
Step 2. Run modem_init script in Linux console. This script needs to be run one time after the 400AP has been powered up.
modem_init Script:
echo 94 >/sys/class/gpio/exportecho 95 >/sys/class/gpio/exportecho 104 >/sys/class/gpio/exportecho 105 >/sys/class/gpio/exportecho 106 >/sys/class/gpio/exportecho 108 >/sys/class/gpio/exportecho 111 >/sys/class/gpio/exportecho 113 >/sys/class/gpio/export
echo “high” >/sys/class/gpio/gpio94/directionecho “in” >/sys/class/gpio/gpio95/directionecho “low” >/sys/class/gpio/gpio104/directionecho “low” >/sys/class/gpio/gpio105/directionecho “low” >/sys/class/gpio/gpio106/directionecho “low” >/sys/class/gpio/gpio108/directionecho “low” >/sys/class/gpio/gpio111/directionecho “low” >/sys/class/gpio/gpio113/direction
Step 3. Run modem_on_off script in Linux console. This script toggles the on off state of the Plug-In terminal every time it is run.
modem_on_off Script: echo “0” >/sys/class/gpio/gpio113/valueecho “1” >/sys/class/gpio/gpio94/valueecho “1” >/sys/class/gpio/gpio104/valuesleep 3echo “0” >/sys/class/gpio/gpio104/value
Step 4. Check PWRMON state to verify that the Plug-In terminal has been turned on.
Issue: cat </sys/class/gpio/gpio95/value
A return value of 0 indicates that the Plug-In terminal has been turned on. Note:ThePWRMONinputcanreadhighifGPIO94issethighwhenthePlug-Interminalisoff.MakesuretosetGPIO94andGPIO113
lowbeforeturningPlug-Interminaloff.ThiswillensureanaccuratereadofthePWRMONinput.
Terminus 400AP Linux User Guide JA07-L_UM Page 6 Rev: 01 Date: 02/03/12© Copyright 2012 Janus Remote Communications All Rights Reserved Specifications subject to change without notice
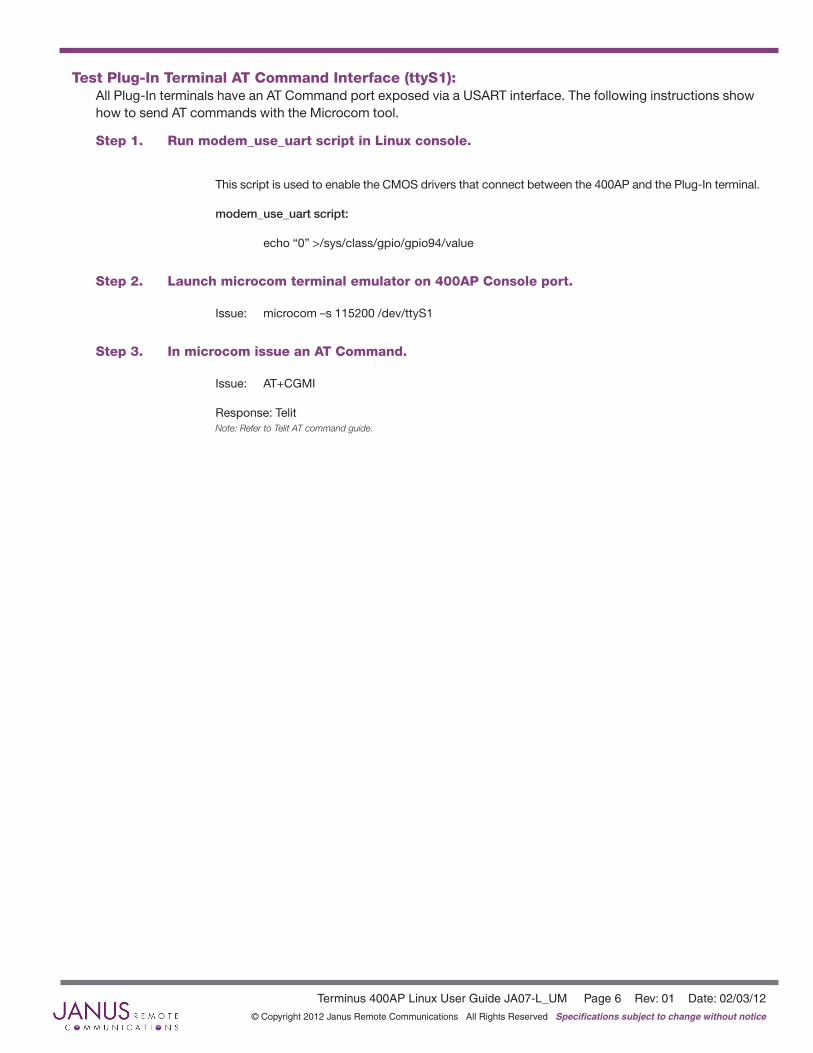
Test Plug-In Terminal AT Command Interface (ttyS1):All Plug-In terminals have an AT Command port exposed via a USART interface. The following instructions show how to send AT commands with the Microcom tool.
Step 1. Run modem_use_uart script in Linux console.
This script is used to enable the CMOS drivers that connect between the 400AP and the Plug-In terminal.
modem_use_uart script:
echo “0” >/sys/class/gpio/gpio94/value
Step 2. Launch microcom terminal emulator on 400AP Console port.
Issue: microcom –s 115200 /dev/ttyS1
Step 3. In microcom issue an AT Command. Issue: AT+CGMI
Response: Telit Note:RefertoTelitATcommandguide.
Terminus 400AP Linux User Guide JA07-L_UM Page 7 Rev: 01 Date: 02/03/12© Copyright 2012 Janus Remote Communications All Rights Reserved Specifications subject to change without notice
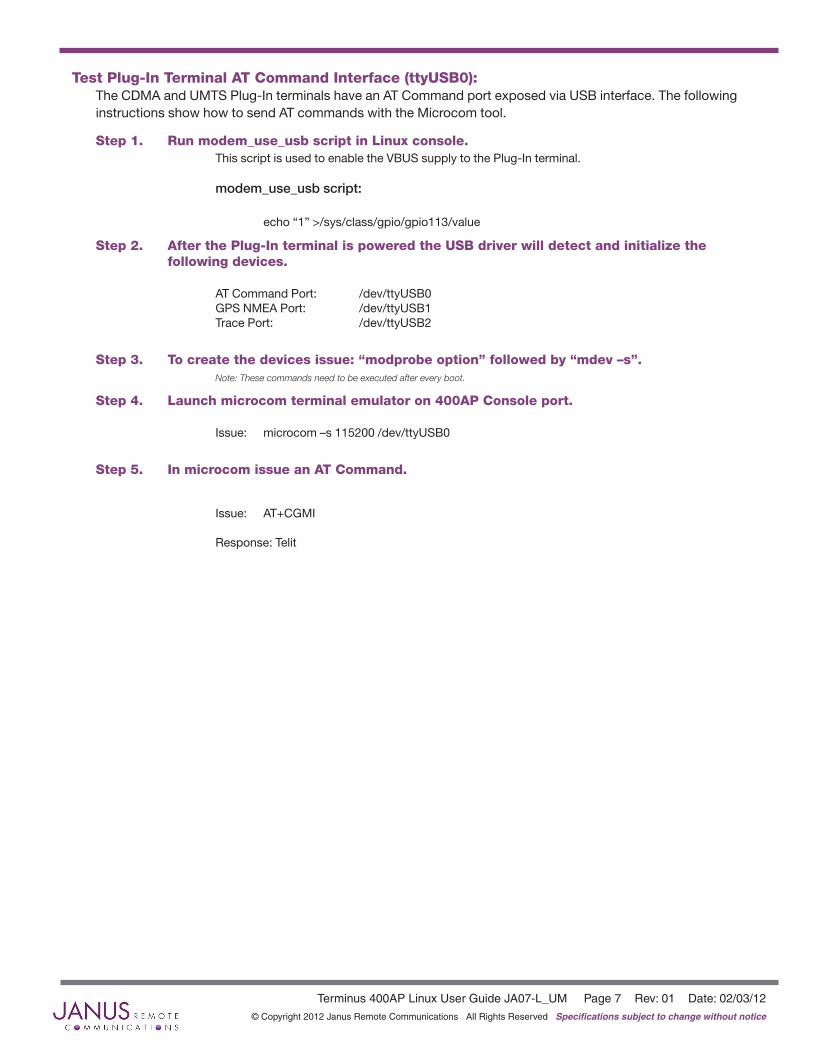
Test Plug-In Terminal AT Command Interface (ttyUSB0):The CDMA and UMTS Plug-In terminals have an AT Command port exposed via USB interface. The following instructions show how to send AT commands with the Microcom tool.
Step 1. Run modem_use_usb script in Linux console. This script is used to enable the VBUS supply to the Plug-In terminal.
modem_use_usb script:
echo “1” >/sys/class/gpio/gpio113/value
Step 2. After the Plug-In terminal is powered the USB driver will detect and initialize the following devices.
AT Command Port: /dev/ttyUSB0 GPS NMEA Port: /dev/ttyUSB1 Trace Port: /dev/ttyUSB2
Step 3. To create the devices issue: “modprobe option” followed by “mdev –s”. Note:Thesecommandsneedtobeexecutedaftereveryboot.
Step 4. Launch microcom terminal emulator on 400AP Console port.
Issue: microcom –s 115200 /dev/ttyUSB0
Step 5. In microcom issue an AT Command.
Issue: AT+CGMI
Response: Telit
Terminus 400AP Linux User Guide JA07-L_UM Page 8 Rev: 01 Date: 02/03/12© Copyright 2012 Janus Remote Communications All Rights Reserved Specifications subject to change without notice
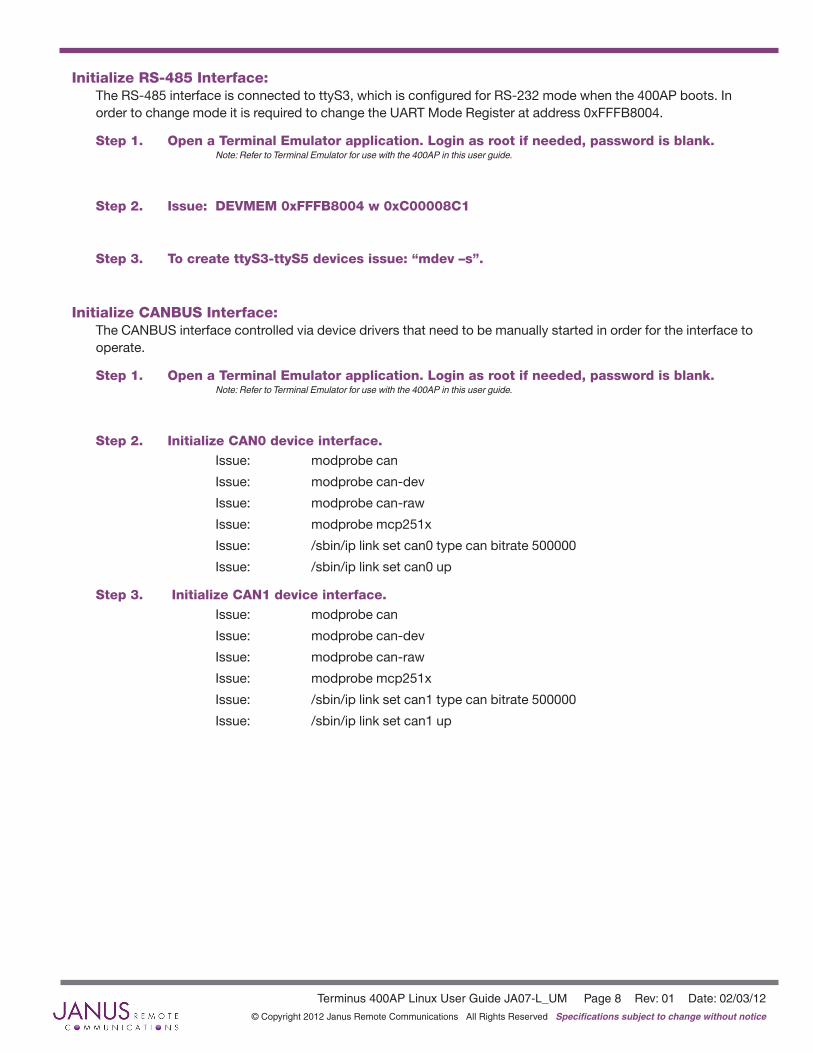
Initialize RS-485 Interface:The RS-485 interface is connected to ttyS3, which is configured for RS-232 mode when the 400AP boots. In order to change mode it is required to change the UART Mode Register at address 0xFFFB8004.
Step 1. Open a Terminal Emulator application. Login as root if needed, password is blank. Note:RefertoTerminalEmulatorforusewiththe400APinthisuserguide.
Step 2. Issue: DEVMEM 0xFFFB8004 w 0xC00008C1
Step 3. To create ttyS3-ttyS5 devices issue: “mdev –s”.
Initialize CANBUS Interface:The CANBUS interface controlled via device drivers that need to be manually started in order for the interface to operate.
Step 1. Open a Terminal Emulator application. Login as root if needed, password is blank. Note:RefertoTerminalEmulatorforusewiththe400APinthisuserguide.
Step 2. Initialize CAN0 device interface. Issue: modprobe can
Issue: modprobe can-dev
Issue: modprobe can-raw
Issue: modprobe mcp251x
Issue: /sbin/ip link set can0 type can bitrate 500000
Issue: /sbin/ip link set can0 up
Step 3. Initialize CAN1 device interface. Issue: modprobe can
Issue: modprobe can-dev
Issue: modprobe can-raw
Issue: modprobe mcp251x
Issue: /sbin/ip link set can1 type can bitrate 500000
Issue: /sbin/ip link set can1 up
Terminus 400AP Linux User Guide JA07-L_UM Page 9 Rev: 01 Date: 02/03/12© Copyright 2012 Janus Remote Communications All Rights Reserved Specifications subject to change without notice
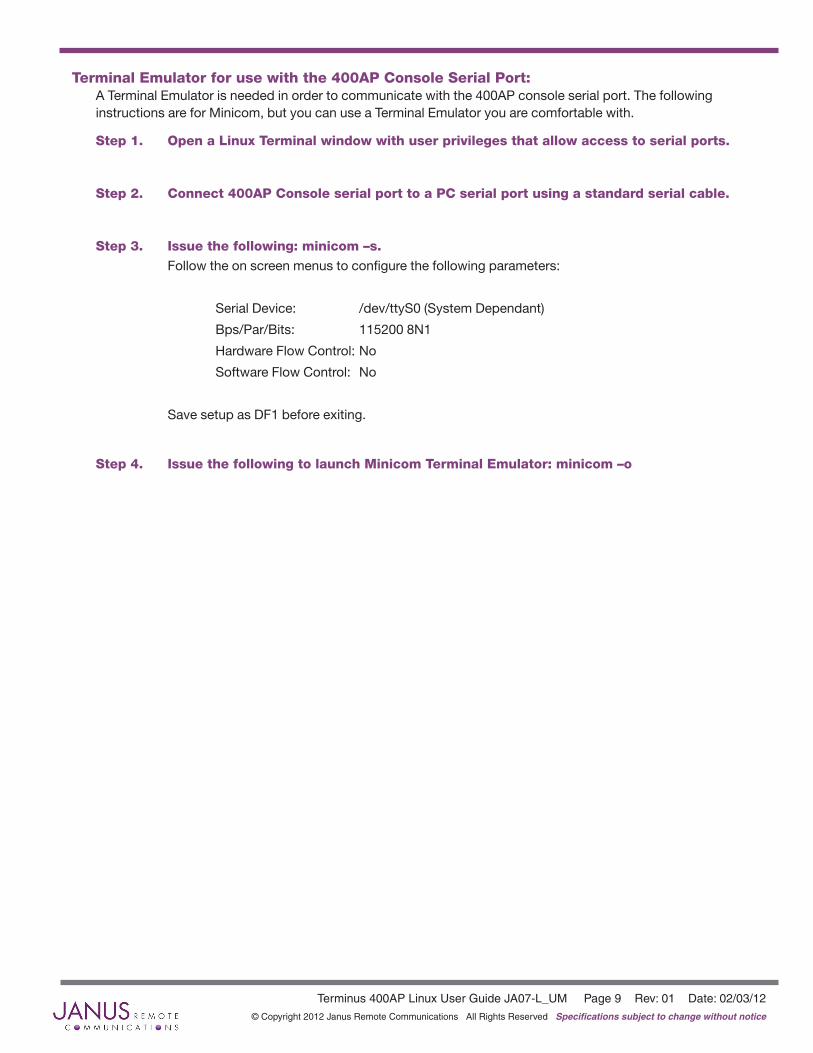
Terminal Emulator for use with the 400AP Console Serial Port:A Terminal Emulator is needed in order to communicate with the 400AP console serial port. The following instructions are for Minicom, but you can use a Terminal Emulator you are comfortable with.
Step 1. Open a Linux Terminal window with user privileges that allow access to serial ports.
Step 2. Connect 400AP Console serial port to a PC serial port using a standard serial cable.
Step 3. Issue the following: minicom –s. Follow the on screen menus to configure the following parameters:
Serial Device: /dev/ttyS0 (System Dependant)
Bps/Par/Bits: 115200 8N1
Hardware Flow Control: No
Software Flow Control: No
Save setup as DF1 before exiting.
Step 4. Issue the following to launch Minicom Terminal Emulator: minicom –o
Revision History Revision Revision Date Note00 01/19/12 Released User Guide01 02/03/12 New I/O Mapping and Overview
Janus Remote Communications Europe Bay 143
Shannon Industrial Estate Shannon, Co. Clare, Ireland
Phone: +353 61 475 666
Division of The Connor-Winfield Corporation2111 Comprehensive Drive • Aurora, Illinois 60505
630.499.2121 • Fax: 630.851.5040
www.janus-rc.com
Terminus 400AP Linux User Guide