Embed Size (px)
Citation preview
SEWING SUPPLIESMedium blue cotton fabric
2/3 yard of 42” wide (60 x 115 cm) for center and narrow flange border
White tone-on-tone cotton fabric14”x14” (35.5x35.5 cm) for appliqué
Turquoise cotton fabric1/3 yard of 42” wide (30x115 cm) for first border and triangles
Orange dot cotton fabric¼ yard of 42” wide (25x115 cm) for triangles
Multi-color floral cotton fabric½ yard of 42” wide (45x115 cm) for large triangles
Floral batik cotton fabric¾ yard of 42” wide (70x115 cm) for border
Orange Floral cotton fabric1 yard of 42” wide (90x115 cm) for border
Light blue cotton fabric2/3 yard of 42” wide (60x115 cm) for corner square and binding
Blue dot on orange cotton fabric2/3 yard of 42” wide (60x115 cm) for outer border
Blue cotton fabric65”x65” (165x165 cm) for backing
65”x65” (165x165 cm) cotton batting
14”x14” (35.5x35.5 cm) fusible webbing
Sewing thread, 40 wt Rayon thread, Bobbin thread
INSPIRA® Tear-A-Way stabilizer
Fusible webbing
45mm Rotary Cutter
Ruler 6”x24”
Cutting mat
Fabric marker
Safety Pins for “basting” the Quilt
1
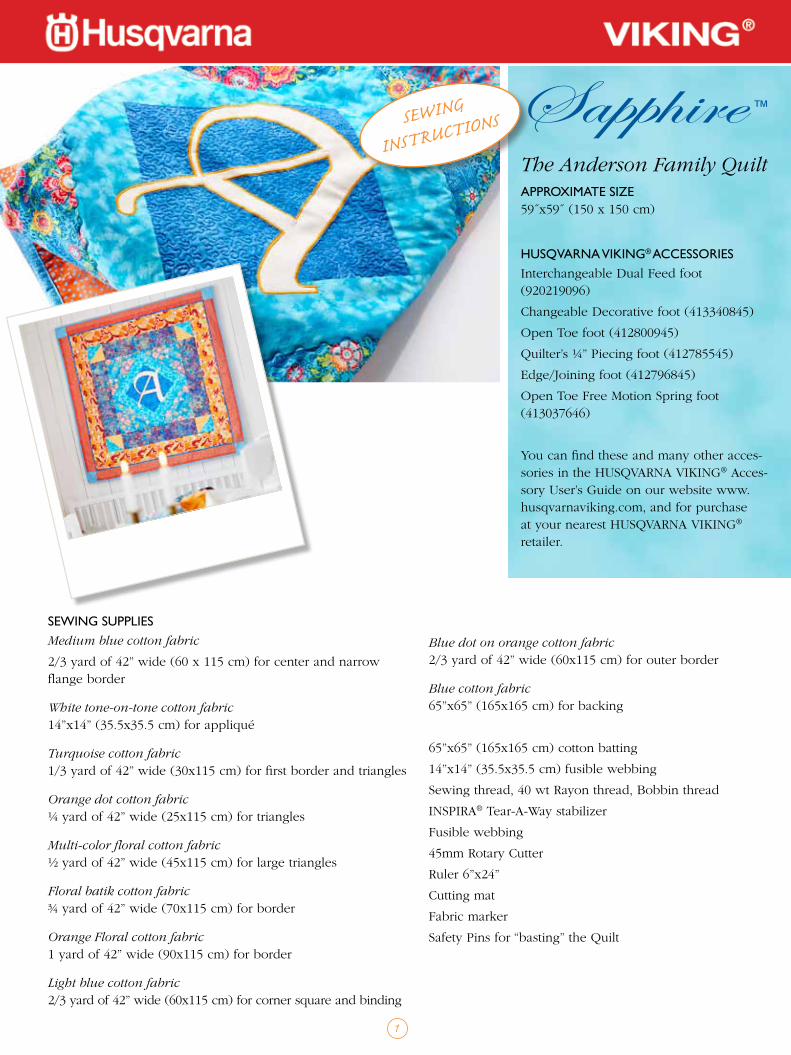
The Anderson Family QuiltAPPROXIMATE SIZE59˝x59˝ (150 x 150 cm)
Sewing
inStructionS
HUSQVARNA VIKING® AccESSORIESInterchangeable Dual Feed foot (920219096)
Changeable Decorative foot (413340845)
Open Toe foot (412800945)
Quilter’s ¼” Piecing foot (412785545)
Edge/Joining foot (412796845)
Open Toe Free Motion Spring foot (413037646)
You can find these and many other acces-sories in the HuSQvARNA vIkINg® Acces-sory user’s guide on our website www.husqvarnaviking.com, and for purchase at your nearest HuSQvARNA vIkINg® retailer.
2
cUTTING INSTRUcTIONS
Note: ¼” (6mm) seam allowance is included in all meas-urements.
Medium blue cotton fabric
• One–12”x12”(31x31cm)quiltcenter
• Five–1½”x42”(4x115cm)narrowflangeborder
White tone-on-tone cotton fabric
• One–14”x14”(35.5x35.5cm)appliqué
Turquoise cotton fabric
• Two–4¼”x12”(11x31cm)border
• Two–4¼”x19”(11x48.5cm)border
• Two–7”x7”(18x18cm)halfsquaretriangles
Orange dot cotton fabric
• Two–7”x7”(18x18cm)halfsquaretriangles
Multi-color floral cotton fabric
• Two–14”x14”(35.5x35.5cm)cutinhalfonthedi-agonal to make large triangles
Floral Batik cotton fabric
• Four–6½”x26½”(16.5x67.5cm)border
Orange Floral cotton fabric
• Five–6½”x42”(16.5x115cm)border
Light blue cotton fabric
• Four–4½”x4½”(11.5x11.5cm)cornersquares
• Six–2½”x42”(6.5x115cm)binding
Blue dot on orange cotton fabric
• Five–4½”x42”(11.5x115cm)outerborder
Blue cotton fabric for backing
• 65”x65”(165x165cm)
Cotton Batting
• 65”x65”(165x165cm)
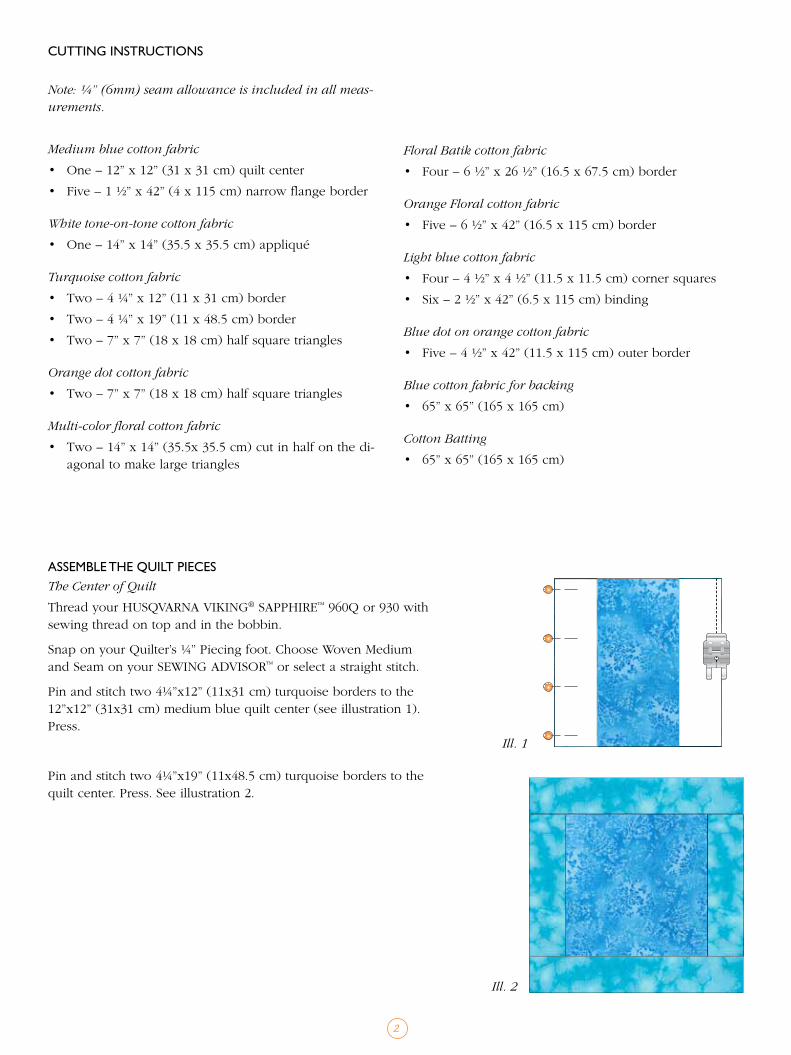
ASSEMBLE THE QUILT PIEcESThe Center of Quilt
Thread your HuSQvARNA vIkINg® SAPPHIRE™ 960Q or 930 with sewing thread on top and in the bobbin.
Snap on your Quilter’s ¼” Piecing foot. Choose Woven Medium and Seam on your SEWINg ADvISOR™ or select a straight stitch.
Pin and stitch two 4¼”x12” (11x31 cm) turquoise borders to the 12”x12” (31x31 cm) medium blue quilt center (see illustration 1). Press.
Pin and stitch two 4¼”x19” (11x48.5 cm) turquoise borders to the quilt center. Press. See illustration 2.
Ill. 1
Ill. 2
3
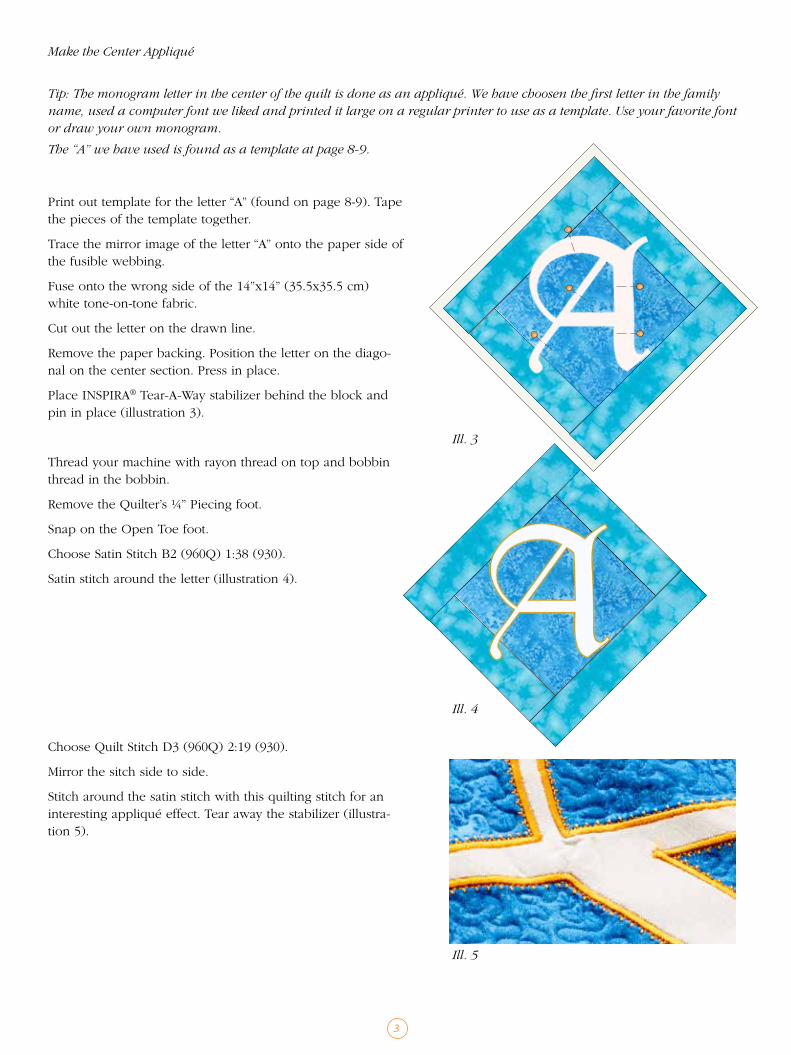
Make the Center Appliqué
Tip: The monogram letter in the center of the quilt is done as an appliqué. We have choosen the first letter in the family name, used a computer font we liked and printed it large on a regular printer to use as a template. Use your favorite font or draw your own monogram.
The “A” we have used is found as a template at page 8-9.
Ill. 4
Ill. 3
Print out template for the letter “A” (found on page 8-9). Tape the pieces of the template together.
Trace the mirror image of the letter “A” onto the paper side of the fusible webbing.
Fuse onto the wrong side of the 14”x14” (35.5x35.5 cm) white tone-on-tone fabric.
Cut out the letter on the drawn line.
Remove the paper backing. Position the letter on the diago-nal on the center section. Press in place.
Place INSPIRA® Tear-A-Way stabilizer behind the block and pin in place (illustration 3).
Thread your machine with rayon thread on top and bobbin thread in the bobbin.
Remove the Quilter’s ¼” Piecing foot.
Snap on the Open Toe foot.
Choose Satin Stitch B2 (960Q) 1:38 (930).
Satin stitch around the letter (illustration 4).
Choose Quilt Stitch D3 (960Q) 2:19 (930).
Mirror the sitch side to side.
Stitch around the satin stitch with this quilting stitch for an interesting appliqué effect. Tear away the stabilizer (illustra-tion 5).
Ill. 5
4
Piecing the different Fabric Pieces
Thread with sewing thread on top and in the bobbin.
Remove the Open Toe foot. Snap on the Quilter’s ¼” Piecing foot.
Choose Woven Medium and Seam on your Sewing Advisor or select a straight stitch.
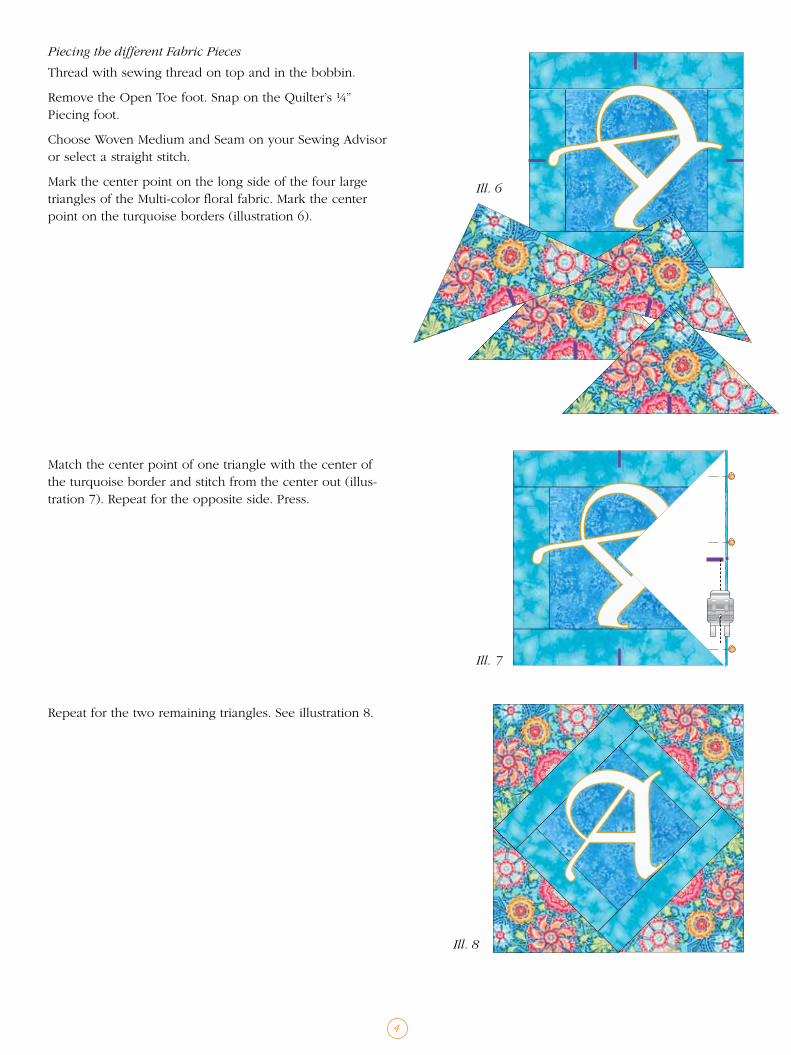
Mark the center point on the long side of the four large triangles of the Multi-color floral fabric. Mark the center point on the turquoise borders (illustration 6).
Match the center point of one triangle with the center of the turquoise border and stitch from the center out (illus-tration 7). Repeat for the opposite side. Press.
Repeat for the two remaining triangles. See illustration 8.
Ill. 6
Ill. 7
Ill. 8
5
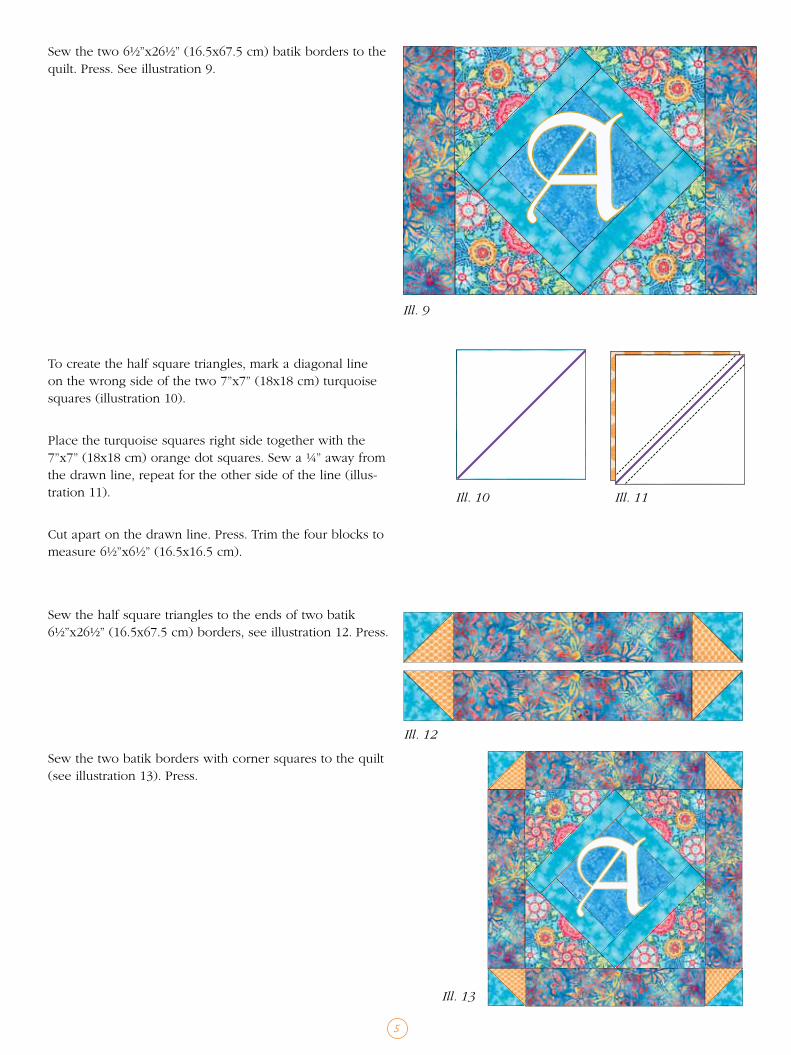
Sew the two 6½”x26½” (16.5x67.5 cm) batik borders to the quilt. Press. See illustration 9.
To create the half square triangles, mark a diagonal line on the wrong side of the two 7”x7” (18x18 cm) turquoise squares (illustration 10).
Place the turquoise squares right side together with the 7”x7” (18x18 cm) orange dot squares. Sew a ¼” away from the drawn line, repeat for the other side of the line (illus-tration 11).
Cut apart on the drawn line. Press. Trim the four blocks to measure 6½”x6½” (16.5x16.5 cm).
Sew the half square triangles to the ends of two batik 6½”x26½” (16.5x67.5 cm) borders, see illustration 12. Press.
Sew the two batik borders with corner squares to the quilt (see illustration 13). Press.
Ill. 9
Ill. 10 Ill. 11
Ill. 12
Ill. 13
6
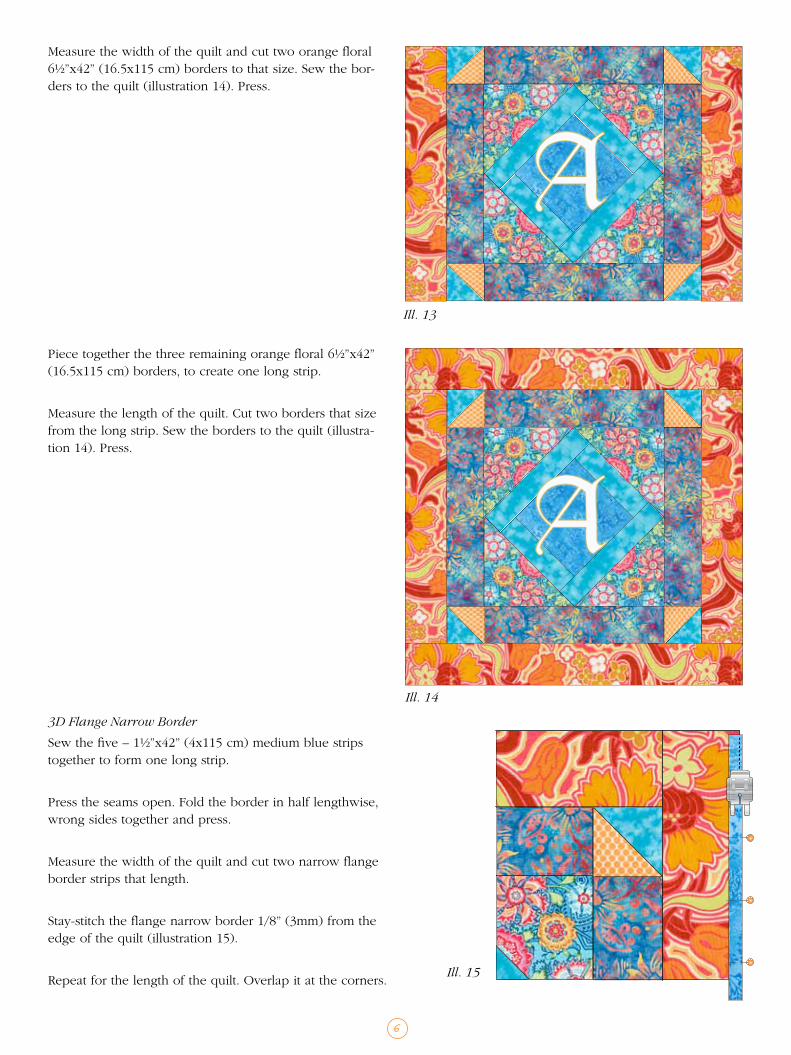
Measure the width of the quilt and cut two orange floral 6½”x42” (16.5x115 cm) borders to that size. Sew the bor-ders to the quilt (illustration 14). Press.
Piece together the three remaining orange floral 6½”x42” (16.5x115 cm) borders, to create one long strip.
Measure the length of the quilt. Cut two borders that size from the long strip. Sew the borders to the quilt (illustra-tion 14). Press.
3D Flange Narrow Border
Sewthefive–1½”x42”(4x115cm)mediumbluestripstogether to form one long strip.
Press the seams open. Fold the border in half lengthwise, wrong sides together and press.
Measure the width of the quilt and cut two narrow flange border strips that length.
Stay-stitch the flange narrow border 1/8” (3mm) from the edge of the quilt (illustration 15).
Repeat for the length of the quilt. Overlap it at the corners.
Ill. 13
Ill. 14
Ill. 15
7
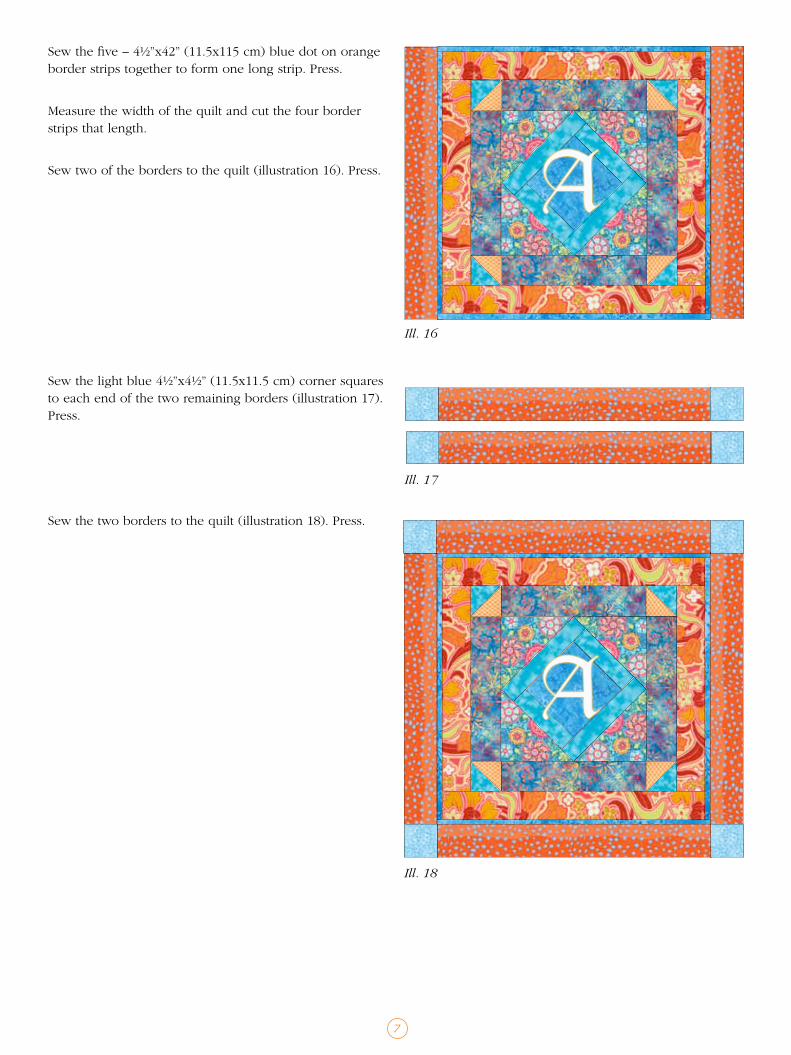
Sewthefive–4½”x42”(11.5x115cm)bluedotonorangeborder strips together to form one long strip. Press.
Measure the width of the quilt and cut the four border strips that length.
Sew two of the borders to the quilt (illustration 16). Press.
Sew the light blue 4½”x4½” (11.5x11.5 cm) corner squares to each end of the two remaining borders (illustration 17). Press.
Sew the two borders to the quilt (illustration 18). Press.
Ill. 16
Ill. 17
Ill. 18
8
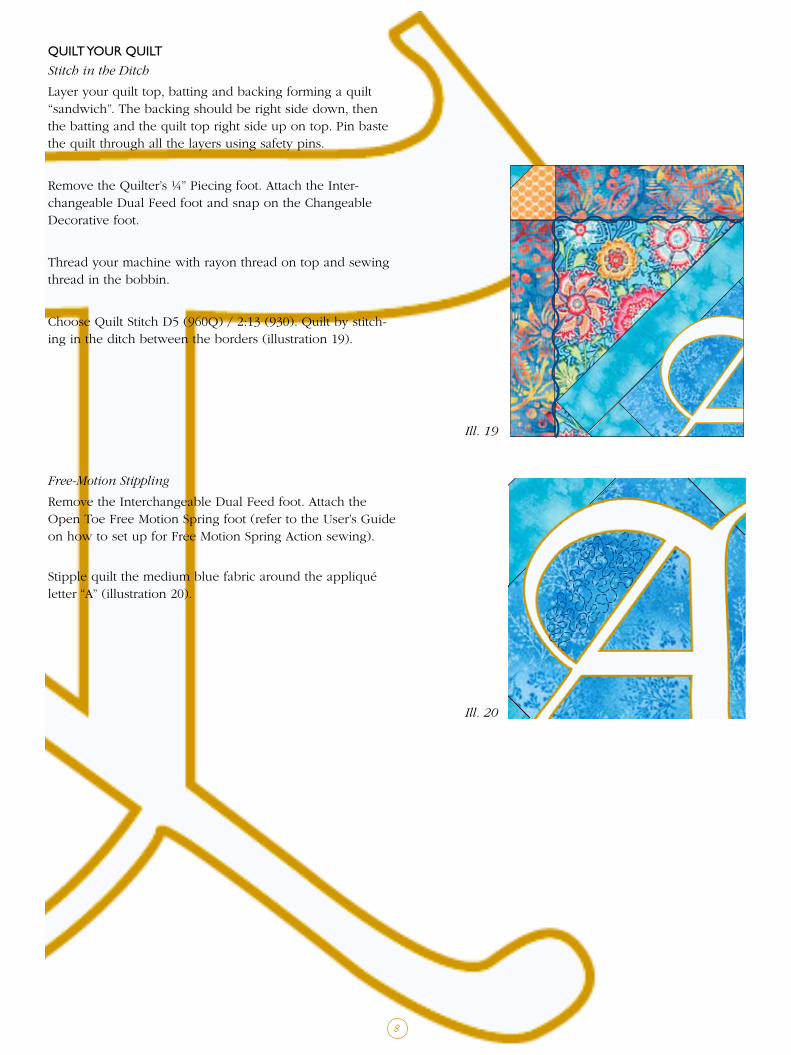
QUILT YOUR QUILTStitch in the Ditch
Layer your quilt top, batting and backing forming a quilt “sandwich”. The backing should be right side down, then the batting and the quilt top right side up on top. Pin baste the quilt through all the layers using safety pins.
Remove the Quilter’s ¼” Piecing foot. Attach the Inter-changeable Dual Feed foot and snap on the Changeable Decorative foot.
Thread your machine with rayon thread on top and sewing thread in the bobbin.
Choose Quilt Stitch D5 (960Q) / 2:13 (930). Quilt by stitch-ing in the ditch between the borders (illustration 19).
Free-Motion Stippling
Remove the Interchangeable Dual Feed foot. Attach the Open Toe Free Motion Spring foot (refer to the user’s guide on how to set up for Free Motion Spring Action sewing).
Stipple quilt the medium blue fabric around the appliqué letter “A” (illustration 20).
Ill. 19
Ill. 20
9
BINd ANd FINISH THE QUILTRemove the Open Toe Free Motion Spring foot. Snap on the B foot. Select a 3-Step Zig Zag and stitch around the edge of the quilt top.
Trim the excess backing and batting even with the edge of the quilt top.
Binding
Remove utility Foot B. Snap on the Quilter’s ¼” Piecing Foot.
Sew the binding strips together into one long strip. Press the seams open. Fold the binding in half lengthwise, wrong sides together, and press.
Place the binding on the right side of the quilt with the raw edges even. Stitch the binding in place around the quilt.
Remove the Quilter’s ¼” Piecing foot and snap on the Edge/Joining Foot.
Fold the folded edge of the binding to the wrong side of the quilt. Stitch from the right side, letting the flange from the Edge/Joining Foot ride in the ditch between the binding and the quilt.
© 2013 KSIN Luxembourg II, S.ar.l. All rights reserved. VIKING, INSPIRA and SAPPHIRE are trademarks of KSIN Luxembourg II, S.ar.l. HUSQVARNA and the ”crowned H-mark” are trademarks of Husqvarna AB. All trademarks are used under license by VSM Group AB.