Embed Size (px)
Citation preview
bismarck seaMarch 1943
The Battle of the

Air Power Development CentreOffice of Air Force History
Gregory P. Gilbert
bismarck seaMarch 1943
The Battle of the
© Commonwealth of Australia 2013
This work is copyright. Apart from any use as permitted under the Copyright Act 1968, no part may be reproduced by any process without prior written permission. Inquiries should be made to the publisher.
Disclaimer
The views expressed in this work are those of the author and do not necessarily reflect the official policy or position of the Department of Defence, the Royal Australian Air Force or the Government of Australia. The Commonwealth of Australia will not be legally responsible in contract, tort or otherwise, for any statements made in this document.
Edited by Adam Braakman.
Layout and Design by Graeme Smith.
Cover Painting is ‘Sweeping the Decks’ by Robert Honisett. Winner of the 1991 RAAF Heritage Prize for Art. (c) Royal Australian Air Force.
National Library of Australia Cataloguing-in-Publication entry
Author: Gilbert, Gregory P. (Gregory Phillip), author.
Title: The Battle of the Bismarck Sea, March 1943 / Dr. Gregory Gilbert
Publisher: The Air Power Development Centre
ISBN: 9781920800772 (pkb.)
Subjects: Bismarck Sea, Battle of the, 1943.
World War, 1943-1945--Campaigns--Pacific Ocean.
Naval convoys--Japan--History--20th Century.
World War, 1939-1945--Naval Operations.
World War, 1939-1945--Aerial Operations.
Dewey Number: 940.5426
Air Power Development CentreF3, Ground FloorDefence Establishment Fairbairn26-28 Fairbairn AvenueCANBERRA ACT 2600AUSTRALIA
Telephone: + 61 2 6128 7041Facsimile: + 61 2 6128 7053E-mail: [email protected]: www.airforce.gov.au/airpower
v
Preface
Any historical case-study of World War II starts with the many historians who have trawled through the sources and prepared works that provide a solid foundation for all subsequent historical research. In the case of the Battle of the Bismarck Sea, the works by George Odgers, Wesley F. Craven, James L. Cate, Samuel E. Morison, Lex McAulay, Gary Null and most recently Bruce Gamble were invaluable. A large number of archival sources were re-examined and a number of interesting documents brought to the surface during the research for this book, and this largely accounts for any differences in interpretation that have been included. The RAAF Office of Air Force History’s (OAFH) research collection was of considerable value, as were the National Archives of Australia (NAA) and the Australian War Memorial (AWM). Wherever possible, I have used the words of those who were there. There are too many to list individually but I do acknowledge the works by Generals Douglas MacArthur and George C. Kenney. Although their recollections do not always line up with the known historical facts, their views remain important for the development of perspective at the operational and strategic levels of command.
My thanks also go to the Air Power Development Centre (APDC) and the OAFH for the opportunity to write this study of such an important battle. I particularly wish to thank Dr Chris Clark for his on-going support. Dr Russell Parkin gathered considerable research material, which was of inestimable value during the preparation of this work. They have in many ways enhanced the text by suggesting useful images and vignettes. I also wish to recognise the excellent work of the APDC publication cell, particularly Adam Braakman and Graeme Smith, who prepared this book for publication.
I thank the staff of the collections areas of the OAFH, the AWM and the NAA. They have helped me to access a large amount of original material, much of which underpins the condensed version of the battle presented in this book. Inevitably this book has also drawn upon detailed studies completed by other historians particularly those identified in the

vi
The Battle of the Bismarck Sea
recommended reading list. When dealing with the history of World War II so much has been written that very little material is ever really all that new. In the case of the South-West Pacific however, there is still much material that lies forgotten or hidden which should be of great values to modern service men and women.
Hopefully this book will inspire others to study, research, evaluate and perhaps write more on the air and sea battles fought in the northern approaches to Australia during World War II.
Gregory P. Gilbert Canberra February 2013
About the Author
Dr Gregory P. Gilbert is an historian with the Office of Air Force History. He worked for the Royal Australian Navy’s Sea Power Centre prior to his move to Air Force in 2010. He has published numerous books and articles on military history, including several papers on RAAF history. This is his first book published through the Air Power Development Centre.
vii
Contents
Preface . . . . . . . . . . . . . . . . . . . . . . . . . . . . . . . . . . . . . . . . . . . . . . . . . vAbbreviations . . . . . . . . . . . . . . . . . . . . . . . . . . . . . . . . . . . . . . . . . . . ix
Chapter 1 The South-West Pacific Area 1942-1943
The Strategic Setting . . . . . . . . . . . . . . . . . . . . . . . . . . . . . . . . . . . . . .3
Chapter 2 Plans and Preparation
Japanese Operation 81 Planning . . . . . . . . . . . . . . . . . . . . . . . . . . . . .9Japanese Command and Organisation. . . . . . . . . . . . . . . . . . . . . . . .11Japanese Technology, Doctrine and Training . . . . . . . . . . . . . . . . . . .13Allied Planning . . . . . . . . . . . . . . . . . . . . . . . . . . . . . . . . . . . . . . . . .19Allied Command and Organisation. . . . . . . . . . . . . . . . . . . . . . . . . .23Allied Technology, Doctrine and Training . . . . . . . . . . . . . . . . . . . . .26Allied Intelligence . . . . . . . . . . . . . . . . . . . . . . . . . . . . . . . . . . . . . . .30
Chapter 3 First Contact 2 March 1943
Advance Warning . . . . . . . . . . . . . . . . . . . . . . . . . . . . . . . . . . . . . . .33Enemy Convoy Sighted. . . . . . . . . . . . . . . . . . . . . . . . . . . . . . . . . . .34The Heavies Strike. . . . . . . . . . . . . . . . . . . . . . . . . . . . . . . . . . . . . . .36A Catalina’s Reconnaissance . . . . . . . . . . . . . . . . . . . . . . . . . . . . . . .38
Chapter 4 The Convoy Destroyed 3 March 1943
Orders to Attack . . . . . . . . . . . . . . . . . . . . . . . . . . . . . . . . . . . . . . . .41The Beauforts Engage . . . . . . . . . . . . . . . . . . . . . . . . . . . . . . . . . . . .44The Coordinated Air Attack . . . . . . . . . . . . . . . . . . . . . . . . . . . . . . .45
viii
The Afternoon Attacks . . . . . . . . . . . . . . . . . . . . . . . . . . . . . . . . . . .55Night Action. . . . . . . . . . . . . . . . . . . . . . . . . . . . . . . . . . . . . . . . . . .58
Chapter 5 Aftermath 4-8 March 1943
Death in the Water . . . . . . . . . . . . . . . . . . . . . . . . . . . . . . . . . . . . . .61Actions of 4 March 1943 . . . . . . . . . . . . . . . . . . . . . . . . . . . . . . . . .63Retribution, 5-8 March 1943 . . . . . . . . . . . . . . . . . . . . . . . . . . . . . .65
Chapter 6 Outcomes and Lessons
Comparing the Losses . . . . . . . . . . . . . . . . . . . . . . . . . . . . . . . . . . . .69The Lessons Learned . . . . . . . . . . . . . . . . . . . . . . . . . . . . . . . . . . . . .70The Allied Victory. . . . . . . . . . . . . . . . . . . . . . . . . . . . . . . . . . . . . . .71The Effect on Japanese Strategy . . . . . . . . . . . . . . . . . . . . . . . . . . . . .73Air Power in a Joint Campaign . . . . . . . . . . . . . . . . . . . . . . . . . . . . .75
Appendix 1 Sources and Reading . . . . . . . . . . . . . . . . . . . . . . . . . . . . . . . . . . . . . . .77
ix
Abbreviations
AA anti-aircraft
ATAIU Allied Technical Air Intelligence Unit
CAP Combat Air Patrol
IJA Imperial Japanese Army
IJN Imperial Japanese Navy
nm nautical miles
PT Motor Torpedo Boat
RAAF Royal Australian Air Force
SNLP Special Naval Landing Party
SWPA South-West Pacific Area
US United States
USAAF United States Army Air Forces
USN United States Navy

The S
outh
-Wes
t Pac
ific A
rea.
1
Chapter 1
The South-West Pacific Area
1942-1943
… the Battle of Bismarck Sea … was the decisive aerial engagement in this theatre of war [the SWPA] .
General Douglas McArthur, US Army
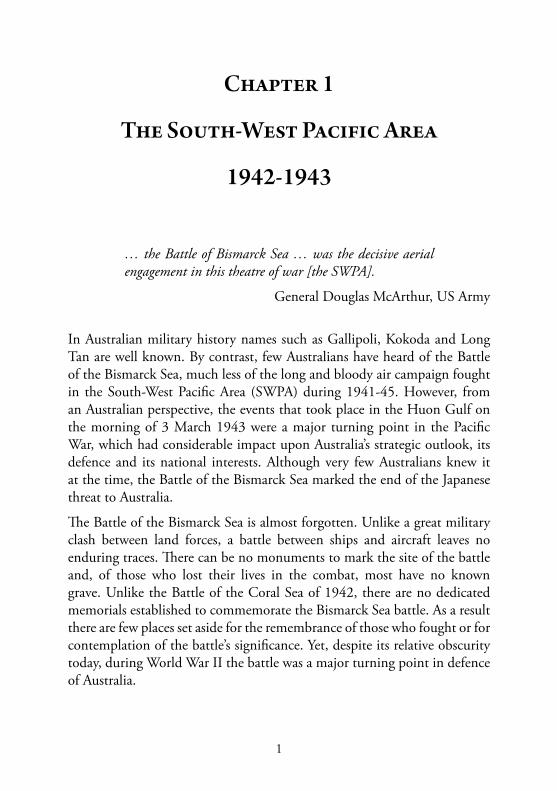
In Australian military history names such as Gallipoli, Kokoda and Long Tan are well known. By contrast, few Australians have heard of the Battle of the Bismarck Sea, much less of the long and bloody air campaign fought in the South-West Pacific Area (SWPA) during 1941-45. However, from an Australian perspective, the events that took place in the Huon Gulf on the morning of 3 March 1943 were a major turning point in the Pacific War, which had considerable impact upon Australia’s strategic outlook, its defence and its national interests. Although very few Australians knew it at the time, the Battle of the Bismarck Sea marked the end of the Japanese threat to Australia.
The Battle of the Bismarck Sea is almost forgotten. Unlike a great military clash between land forces, a battle between ships and aircraft leaves no enduring traces. There can be no monuments to mark the site of the battle and, of those who lost their lives in the combat, most have no known grave. Unlike the Battle of the Coral Sea of 1942, there are no dedicated memorials established to commemorate the Bismarck Sea battle. As a result there are few places set aside for the remembrance of those who fought or for contemplation of the battle’s significance. Yet, despite its relative obscurity today, during World War II the battle was a major turning point in defence of Australia.
2
The Battle of the Bismarck Sea
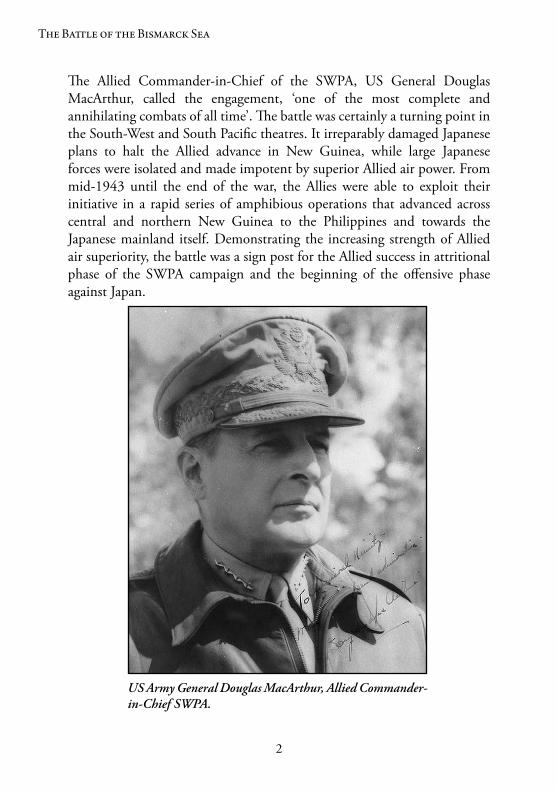
The Allied Commander-in-Chief of the SWPA, US General Douglas MacArthur, called the engagement, ‘one of the most complete and annihilating combats of all time’. The battle was certainly a turning point in the South-West and South Pacific theatres. It irreparably damaged Japanese plans to halt the Allied advance in New Guinea, while large Japanese forces were isolated and made impotent by superior Allied air power. From mid-1943 until the end of the war, the Allies were able to exploit their initiative in a rapid series of amphibious operations that advanced across central and northern New Guinea to the Philippines and towards the Japanese mainland itself. Demonstrating the increasing strength of Allied air superiority, the battle was a sign post for the Allied success in attritional phase of the SWPA campaign and the beginning of the offensive phase against Japan.
US Army General Douglas MacArthur, Allied Commander-in-Chief SWPA.
3
Chapter 1 – The South-West Pacific Area 1942-43
This book is a concise historical case-study on the Battle of the Bismarck Sea, fought mostly between 2 and 8 March, 1943, although the critical action occurred over just 15 minutes—between 1000 and 1015 hours on the morning of 3 March 1943. The intention of this work is to provide an overview of the strategic and operational level considerations that affected the battle, with an emphasis on the planning, execution and lessons of activities at the operational level of war. After providing an overview of the strategic setting, the book discusses the operational plans, command, organisation, technology, doctrine and training undertaken by both the Japanese and the Allied forces. The battle itself is then described, with a particular focus on the various air power roles, such as reconnaissance, strike and control of the air, as well as the coordinated actions of various air and maritime elements. A number of important command decisions are raised to highlight the importance of leadership to the outcome of the battle. The reader is encouraged to put themselves in the place of the commanders described to consider what they would do under the circumstances. The tactical level is also discussed when it influenced decisions and events at the operational and strategic levels. The outcomes and lessons arising from the Battle of the Bismarck Sea are then discussed. Such observations are intended to develop one’s understanding of the air power perspective. They are not intended as a template for future conflicts—they are a guide for the application of air power in certain situations and for the development of leadership skills for those who may be called upon to command air power in future.
The Strategic Setting
The Allied strategy in the South-West Pacific involved attaining air superiority and then using air power to deny the Japanese the use of the sea. Under this invisible ‘umbrella’, MacArthur could manoeuvre joint and combined forces great distances in wide offensive sweeps that out-thought and out-fought the Japanese by hitting them where they weren’t. As one Japanese officer stated after the war:
This was the type of strategy we hated most . The Americans, with minimum losses, attacked and seized a relatively weak area, constructed airfields and then proceeded to cut
4
The Battle of the Bismarck Sea
the supply lines to troops in that area . Without engaging in a large-scale operation, our strongpoints were gradually starved out . The Japanese Army preferred direct assault, after the German fashion, but the Americans flowed into our weaker points and submerged us, just as water seeks the weakest entry to sink a ship . We respected this type of strategy for its brilliance because it gained the most while losing the least .
Colonel Matsuichi Juio, 8th Area Army staffImperial Japanese Army
MacArthur was understandably proud of the achievement of his airmen, both American and Australian. They overcame immense difficulties imposed by the region’s climate and geography to deliver a series of blows against the enemy that were each a triumph of planning, coordination and airmanship. While the Battle of the Bismarck Sea was a notable achievement for air power, it also clearly demonstrated the interdependence of land, sea and air forces that was the key to victory in the SWPA.
The SWPA campaign, 1941-45, was unique for its time. It was a maritime campaign in which air power was the key force in the application of military power, and where sea and land power were largely used in support. The prerequisite for Allied offensive operations against the Japanese in the SWPA was air and sea control.

5
Chapter 1 – The South-West Pacific Area 1942-43
As 1943 began, Lieutenant-General George C. Kenney, the Commander of Allied Air Forces in the SWPA, was determined to use all available American and Australian aircraft in offensive counter air and interdiction missions over New Guinea, in an effort to seize air superiority from the Japanese. Day after day, whenever the weather permitted, Allied aircraft flew on missions against the Japanese airbases spread along the Huon Peninsula. The Japanese airbase at Lae was the scene of almost continuous air battles. While fighters fought each other in aerial combat above the airfield, Allied aircraft bombed and strafed Japanese aircraft on the ground—the fight for control of the air over New Guinea was intensifying.
The inland airfield at Wau, only 40 kilometres away from the Japanese bases at Lae and Salamaua, was defended by a small unit of Australians known as ‘Kanga Force’. The Japanese Imperial General Headquarters decided that they needed to advance and occupy Wau in order to protect their base at Lae. Realising that the Japanese base troops could not undertake offensive operations against the Australians, they decided to reinforce the Lae and Salamaua area with both men and supplies.
On 6 January 1943, a convoy carrying a Japanese infantry regiment departed Rabaul for Lae. These 4000 Imperial Japanese Army (IJA) troops formed part of the veteran 51st Division, which was redeployed from the Kwantung Army in China to New Guinea. Before long, the convoy of five transports, escorted by a light cruiser and four destroyers, was sighted by Catalina aircraft from No 11 Squadron RAAF, and after dark one of these Catalinas bombed and managed to sink one of the transports, the Nichiryu Maru. At dawn, an air battle commenced over the convoy as it edged towards Lae at the head of the Huon Gulf. Over the next few days, intermittent air strikes by Allied aircraft severely damaged another transport, the Myoko Maru, which caught fire and was beached off Lae to prevent it sinking. While A6M Zekes (Zeros) and Ki-43 Oscars fought with P-40 Kittyhawks/Warhawks and P-38 Lightnings over the convoy, a series of separate, uncoordinated attacks by Beaufighters, Beauforts, Hudsons, A-20 Bostons, B-25 Mitchells, B-26 Marauders and B-17 Flying Fortresses could not prevent the convoy from delivering most of its troops and goods. Despite suffering the loss of two transports, most of the soldiers made it ashore with their equipment. In the air however, the situation had changed. Although many did not realise it at the time, the Allies had lost 10 heavy and 11 medium bombers over the
6
The Battle of the Bismarck Sea
three day period (6-8 January), but they claimed that 69 Japanese aircraft were destroyed, 28 had probably been destroyed, and 40 were damaged. The days when Japanese Zeros were able to out-fight their opponents in the air had come to an abrupt end.
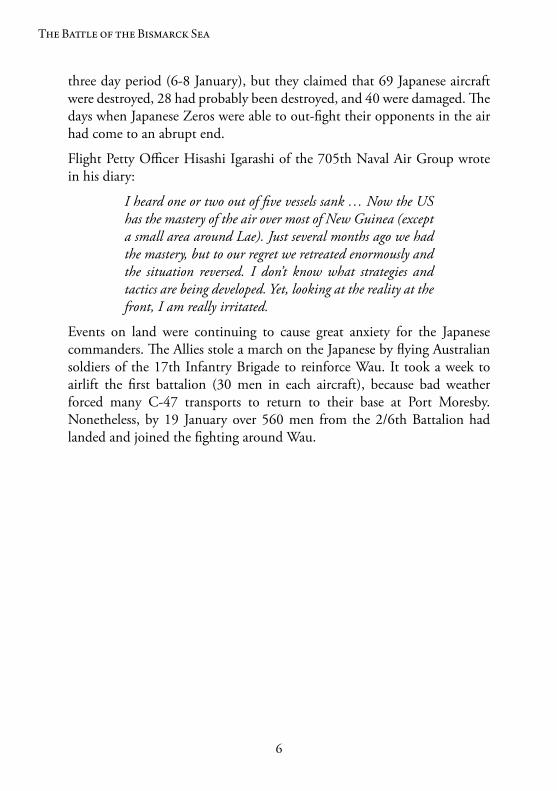
Flight Petty Officer Hisashi Igarashi of the 705th Naval Air Group wrote in his diary:
I heard one or two out of five vessels sank … Now the US has the mastery of the air over most of New Guinea (except a small area around Lae) . Just several months ago we had the mastery, but to our regret we retreated enormously and the situation reversed . I don’t know what strategies and tactics are being developed . Yet, looking at the reality at the front, I am really irritated .
Events on land were continuing to cause great anxiety for the Japanese commanders. The Allies stole a march on the Japanese by flying Australian soldiers of the 17th Infantry Brigade to reinforce Wau. It took a week to airlift the first battalion (30 men in each aircraft), because bad weather forced many C-47 transports to return to their base at Port Moresby. Nonetheless, by 19 January over 560 men from the 2/6th Battalion had landed and joined the fighting around Wau.
7
Chapter 1 – The South-West Pacific Area 1942-43
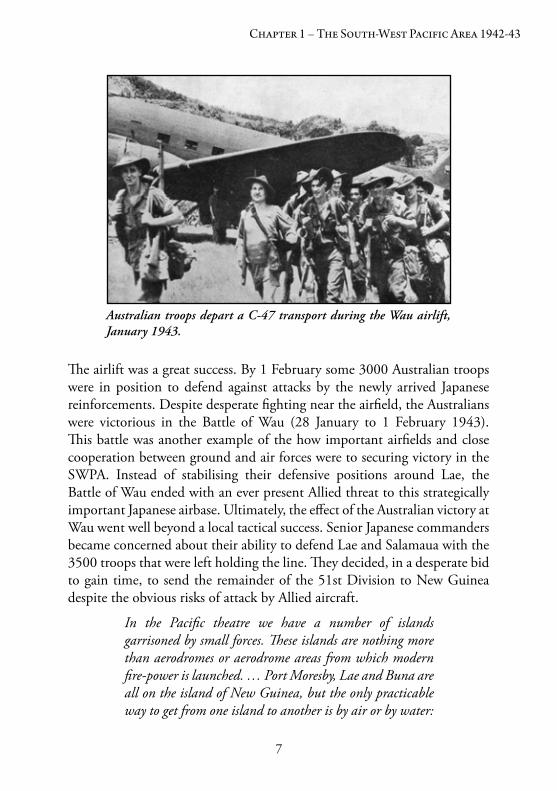
The airlift was a great success. By 1 February some 3000 Australian troops were in position to defend against attacks by the newly arrived Japanese reinforcements. Despite desperate fighting near the airfield, the Australians were victorious in the Battle of Wau (28 January to 1 February 1943). This battle was another example of the how important airfields and close cooperation between ground and air forces were to securing victory in the SWPA. Instead of stabilising their defensive positions around Lae, the Battle of Wau ended with an ever present Allied threat to this strategically important Japanese airbase. Ultimately, the effect of the Australian victory at Wau went well beyond a local tactical success. Senior Japanese commanders became concerned about their ability to defend Lae and Salamaua with the 3500 troops that were left holding the line. They decided, in a desperate bid to gain time, to send the remainder of the 51st Division to New Guinea despite the obvious risks of attack by Allied aircraft.
In the Pacific theatre we have a number of islands garrisoned by small forces . These islands are nothing more than aerodromes or aerodrome areas from which modern fire-power is launched . … Port Moresby, Lae and Buna are all on the island of New Guinea, but the only practicable way to get from one island to another is by air or by water:
Australian troops depart a C-47 transport during the Wau airlift, January 1943.
8
The Battle of the Bismarck Sea
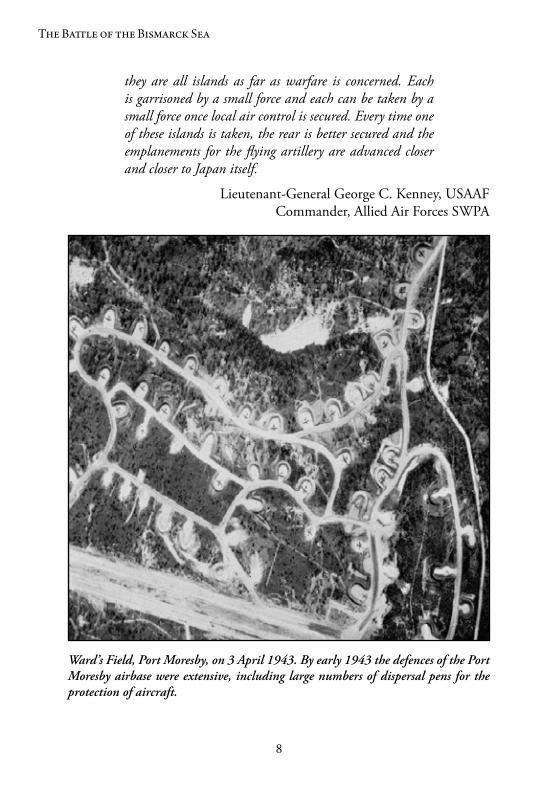
they are all islands as far as warfare is concerned . Each is garrisoned by a small force and each can be taken by a small force once local air control is secured . Every time one of these islands is taken, the rear is better secured and the emplanements for the flying artillery are advanced closer and closer to Japan itself .
Lieutenant-General George C. Kenney, USAAFCommander, Allied Air Forces SWPA
Ward’s Field, Port Moresby, on 3 April 1943. By early 1943 the defences of the Port Moresby airbase were extensive, including large numbers of dispersal pens for the protection of aircraft.
9
Chapter 2
Plans and Preparation
Japanese Operation 81 Planning
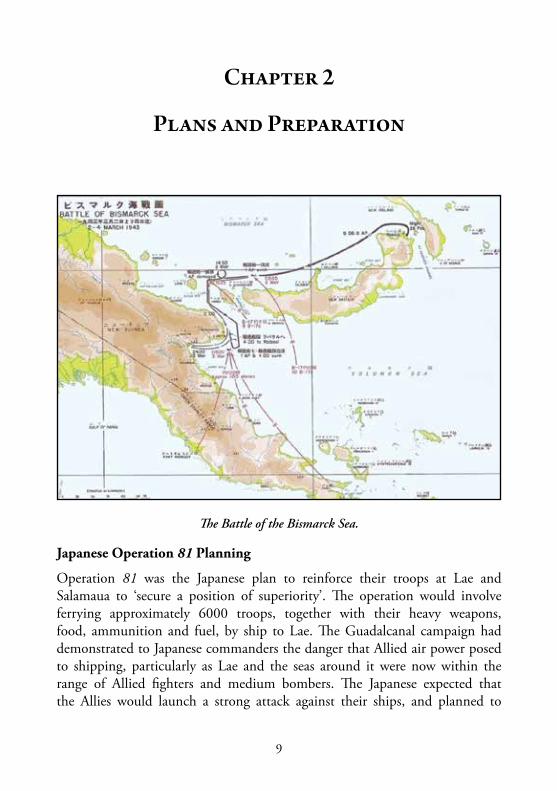
Operation 81 was the Japanese plan to reinforce their troops at Lae and Salamaua to ‘secure a position of superiority’. The operation would involve ferrying approximately 6000 troops, together with their heavy weapons, food, ammunition and fuel, by ship to Lae. The Guadalcanal campaign had demonstrated to Japanese commanders the danger that Allied air power posed to shipping, particularly as Lae and the seas around it were now within the range of Allied fighters and medium bombers. The Japanese expected that the Allies would launch a strong attack against their ships, and planned to
The Battle of the Bismarck Sea.
10
The Battle of the Bismarck Sea
provide the ‘Lae Resupply Convoy’ with powerful air and naval defences. Eight destroyers would act as escorts for the transport ships and around 100 fighter aircraft, based at airfields along the route, would guard the ships during daylight hours. Planning for the air protection of the convoy involved detailed arrangements between the Japanese naval and army air staff which included a formal agreement for cooperation—each service signing up to provide specific capabilities to meet joint objectives. Anti-submarine patrols undertaken by Japanese floatplanes and submarines would clear the route prior to the convoy’s departure. Port Moresby and Milne Bay would also be attacked from the air to forestall Allied air attacks. Even with these preparations, the planning staff in Rabaul estimated that the convoy might lose between 40 and 50 per cent of its strength before it reached Lae.
At Rabaul, naval staff were extremely pessimistic regarding the transportation to Lae, however they examined the Army’s proposals regarding the transportation and reluctantly agreed to provide naval cooperation for Operation 81. The Army proposed landing five battalions of the 51st Division at Lae from destroyers in late February. Subsequently, three months of supplies and military munitions were to be sent by ship to Lae in early March. Plans also included direct air support over the convoy with about 40 IJA and 60-70 Imperial Japanese Navy (IJN) aircraft to be allocated.
Earlier convoys had followed the southern coast of New Britain as it was close to airfields along the route, however for Operation 81 the northern coast of New Britain was chosen in an effort to deceive the enemy and convince them that the convoy was making for Madang or Wewak in northern New Guinea. In the event of an attack by enemy aircraft they would first have to pass the Japanese observation posts in the area. The plan called for Japanese medium and light bombers to conduct offensive counter air strikes against Allied airbases at Port Moresby, Milne Bay, Dobodura and Wau. In practice, difficult weather, limited availability of aircraft and other problems on the ground meant that these strike missions did not materialise.
11
Chapter 2 – Plans and Preparation
Japanese Command and Organisation
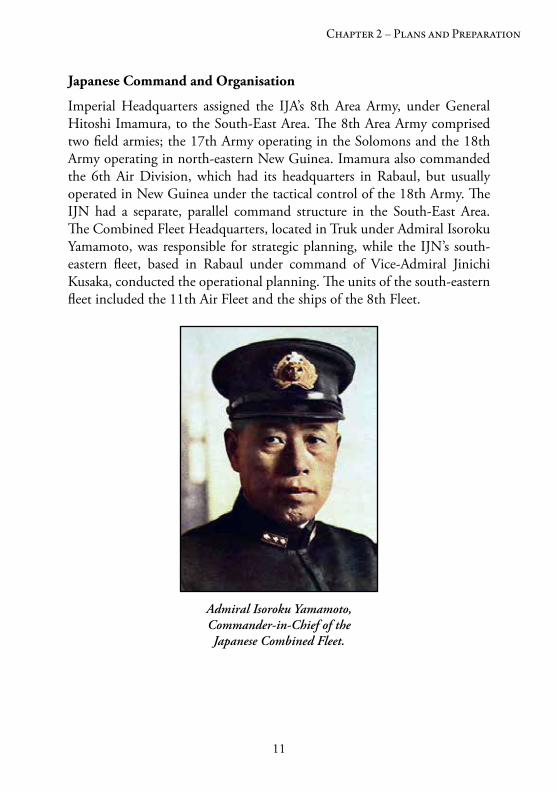
Imperial Headquarters assigned the IJA’s 8th Area Army, under General Hitoshi Imamura, to the South-East Area. The 8th Area Army comprised two field armies; the 17th Army operating in the Solomons and the 18th Army operating in north-eastern New Guinea. Imamura also commanded the 6th Air Division, which had its headquarters in Rabaul, but usually operated in New Guinea under the tactical control of the 18th Army. The IJN had a separate, parallel command structure in the South-East Area. The Combined Fleet Headquarters, located in Truk under Admiral Isoroku Yamamoto, was responsible for strategic planning, while the IJN’s south-eastern fleet, based in Rabaul under command of Vice-Admiral Jinichi Kusaka, conducted the operational planning. The units of the south-eastern fleet included the 11th Air Fleet and the ships of the 8th Fleet.
Admiral Isoroku Yamamoto, Commander-in-Chief of the Japanese Combined Fleet.
12
The Battle of the Bismarck Sea
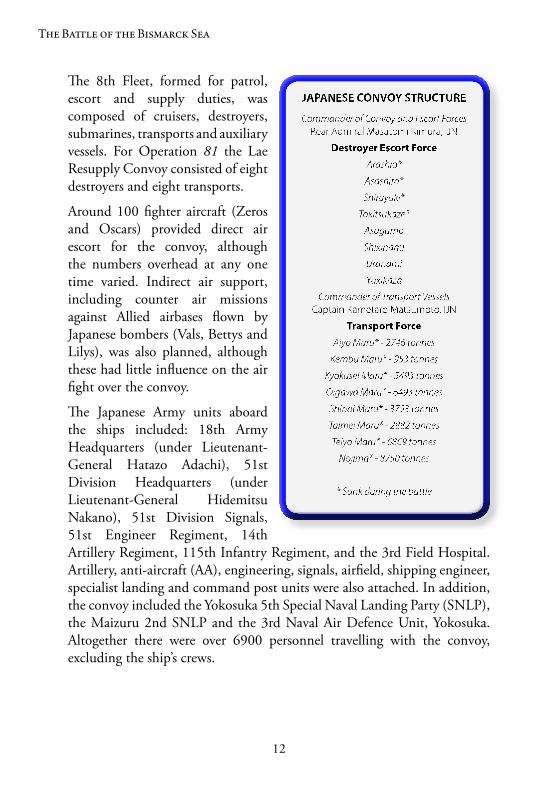
The 8th Fleet, formed for patrol, escort and supply duties, was composed of cruisers, destroyers, submarines, transports and auxiliary vessels. For Operation 81 the Lae Resupply Convoy consisted of eight destroyers and eight transports.
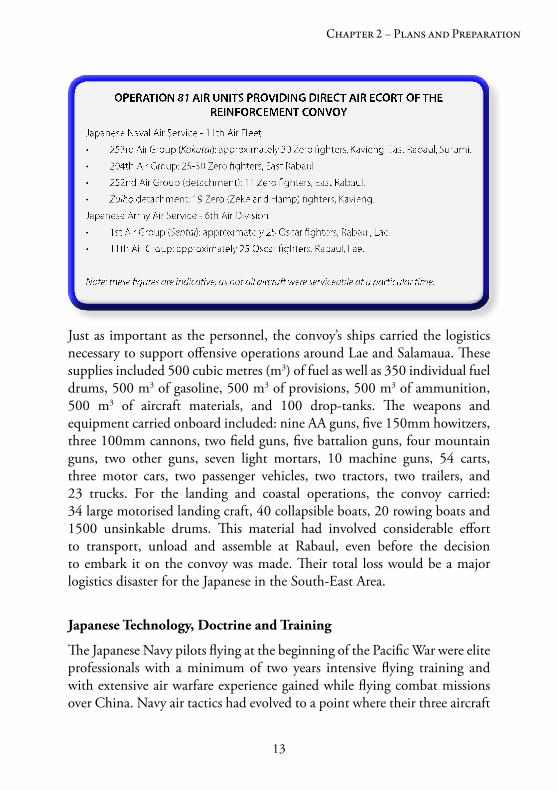
Around 100 fighter aircraft (Zeros and Oscars) provided direct air escort for the convoy, although the numbers overhead at any one time varied. Indirect air support, including counter air missions against Allied airbases flown by Japanese bombers (Vals, Bettys and Lilys), was also planned, although these had little influence on the air fight over the convoy.
The Japanese Army units aboard the ships included: 18th Army Headquarters (under Lieutenant-General Hatazo Adachi), 51st Division Headquarters (under Lieutenant-General Hidemitsu Nakano), 51st Division Signals, 51st Engineer Regiment, 14th Artillery Regiment, 115th Infantry Regiment, and the 3rd Field Hospital. Artillery, anti-aircraft (AA), engineering, signals, airfield, shipping engineer, specialist landing and command post units were also attached. In addition, the convoy included the Yokosuka 5th Special Naval Landing Party (SNLP), the Maizuru 2nd SNLP and the 3rd Naval Air Defence Unit, Yokosuka. Altogether there were over 6900 personnel travelling with the convoy, excluding the ship’s crews.
13
Chapter 2 – Plans and Preparation
Just as important as the personnel, the convoy’s ships carried the logistics necessary to support offensive operations around Lae and Salamaua. These supplies included 500 cubic metres (m3) of fuel as well as 350 individual fuel drums, 500 m3 of gasoline, 500 m3 of provisions, 500 m3 of ammunition, 500 m3 of aircraft materials, and 100 drop-tanks. The weapons and equipment carried onboard included: nine AA guns, five 150mm howitzers, three 100mm cannons, two field guns, five battalion guns, four mountain guns, two other guns, seven light mortars, 10 machine guns, 54 carts, three motor cars, two passenger vehicles, two tractors, two trailers, and 23 trucks. For the landing and coastal operations, the convoy carried: 34 large motorised landing craft, 40 collapsible boats, 20 rowing boats and 1500 unsinkable drums. This material had involved considerable effort to transport, unload and assemble at Rabaul, even before the decision to embark it on the convoy was made. Their total loss would be a major logistics disaster for the Japanese in the South-East Area.
Japanese Technology, Doctrine and Training
The Japanese Navy pilots flying at the beginning of the Pacific War were elite professionals with a minimum of two years intensive flying training and with extensive air warfare experience gained while flying combat missions over China. Navy air tactics had evolved to a point where their three aircraft
14
The Battle of the Bismarck Sea
formation (Shotai), composed of a leader and two wingmen, could be maintained in the midst of the most violent aerial acrobatics. Unit cohesion was developed to a point that some airmen referred to a ‘sixth sense’ linking individual pilots within a formation. The Japanese Army pilots had their own training systems that paralleled those of the navy—they too were at their peak in December 1941. Unfortunately, for the Japanese, their aviation units lost a large number of aircrew throughout their early offensives and the Allied counterattacks of 1942. By March 1943 the Japanese air units in the South-East Area had lost many of their most experienced fighter pilots, and the difference was being made up with rapidly trained replacement pilots (completing a six month course) with little or no warfighting experience.
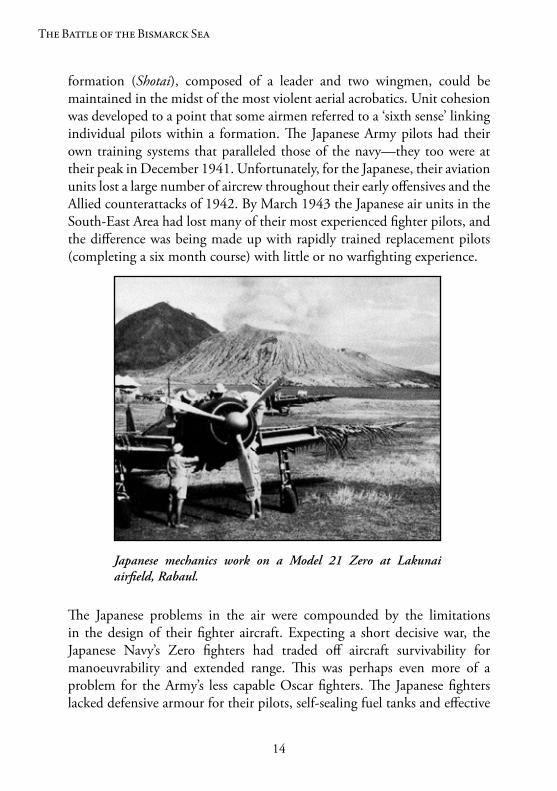
The Japanese problems in the air were compounded by the limitations in the design of their fighter aircraft. Expecting a short decisive war, the Japanese Navy’s Zero fighters had traded off aircraft survivability for manoeuvrability and extended range. This was perhaps even more of a problem for the Army’s less capable Oscar fighters. The Japanese fighters lacked defensive armour for their pilots, self-sealing fuel tanks and effective
Japanese mechanics work on a Model 21 Zero at Lakunai airfield, Rabaul.
15
Chapter 2 – Plans and Preparation
communications. This meant that they performed best when they engaged the enemy in low altitude dog-fights where they could use rapid manoeuvres to avoid being hit. Whereas most Allied fighter pilots could use their radio telephones to communicate in action, the Japanese radio telegrams were useless in tactical situations. The Japanese had to rely upon hand signals and flags to communicate between aircraft in action. In practice, this meant that Japanese fighter pilots tended to break away from their larger formations to try and engage their opponents in dog-fights. As one of the Japanese pilots observed after the war:
In the air battles of World War II, however, individual skill was not enough to insure continued survival . . . . Our greatest failing in aerial combat lay in the fact that we lacked teamwork, a skill, unfortunately, which the Americans developed so thoroughly as the war went on .
Saburo Sakai, Japan’s leading fighter pilot of World War II
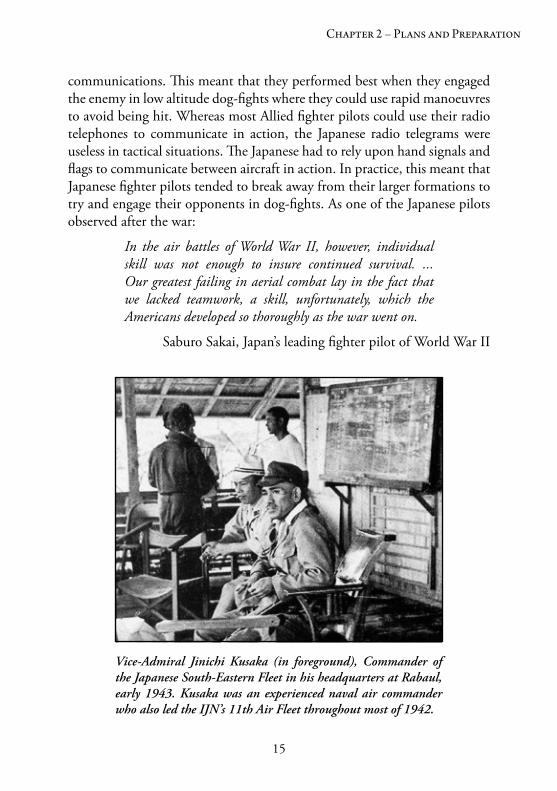
Vice-Admiral Jinichi Kusaka (in foreground), Commander of the Japanese South-Eastern Fleet in his headquarters at Rabaul, early 1943. Kusaka was an experienced naval air commander who also led the IJN’s 11th Air Fleet throughout most of 1942.
16
The Battle of the Bismarck Sea
During the inter-war period, Japanese naval doctrine had developed dramatically in the area of air offensive operations; for instance, it was the Japanese naval air units that led the bombing offensive against Chinese cities from 1939. On the other hand, the IJN tended to neglect fleet air defence. They initially assumed that aircraft would be unable to do significant damage to warships underway and protected by light AA fire; however, after 1939, even when their own air attack tactics were demonstrating conclusively the considerable effects of torpedo, dive-bombing, and skip-bombing attacks upon warships, they continued to ignore the need for integrated air-sea defences. Given the limited communications of the Japanese fighters at the time, a lack of ship-borne early warning radar, and the absence of any air-defence control facilities - like the Command Information Centre on Allied warships – the Japanese did not have the capacity to control defensive aircraft or to vector them onto approaching waves of attacking aircraft. In essence, they had to rely upon maintaining a standing combat air patrol (CAP) over their fleet units: a difficult evolution with carrier aircraft above their own fleet but considerably more difficult with land-based aircraft providing CAP above a fleet over 300 nautical miles (nm) away.
Japanese destroyers were provided with dual purpose 5-inch (127mm) guns which could provide an AA barrage high above the ships to deter enemy aircraft from making level bombing attacks. The effectiveness of heavy AA fire was limited due to such tactical considerations as the 5-inch gun’s low rate of fire, the limited rate of traverse and angle of the dual purpose 5-inch gun turrets, and the absence of proximity fuses. Fast moving aircraft attacking at low altitudes were just about impossible to hit with these large guns. The destroyers also had a small number of light AA guns (25mm or 13mm guns), which could produce a large concentration of fire over a short time period, albeit they lacked the punch to cause serious damage to passing aircraft. Both weapons were second-rate and lacked sophisticated fire control systems. By early 1943 the IJN recognised the need to provide a quantum increase in the number of light AA guns on each warship to put up a blanket wall of AA fire against low flying aircraft. Such modifications were only proposed at the time of the Bismarck Sea battle.
The final defence against air attack was for warships to manoeuvre radically in an effort to avoid being hit. The simple measure of turning the ship away or towards a torpedo once it was in the water was often successful,
17
Chapter 2 – Plans and Preparation
although coordinated attacks from two or more torpedo planes from port and starboard could not be countered. Radical manoeuvring was the preferred option for warships hoping to avoid being hit by bombs dropped by aircraft, with results varying greatly with the skills of the aircrew involved, the accuracy of the AA fire, as well as the speed, manoeuvrability, and
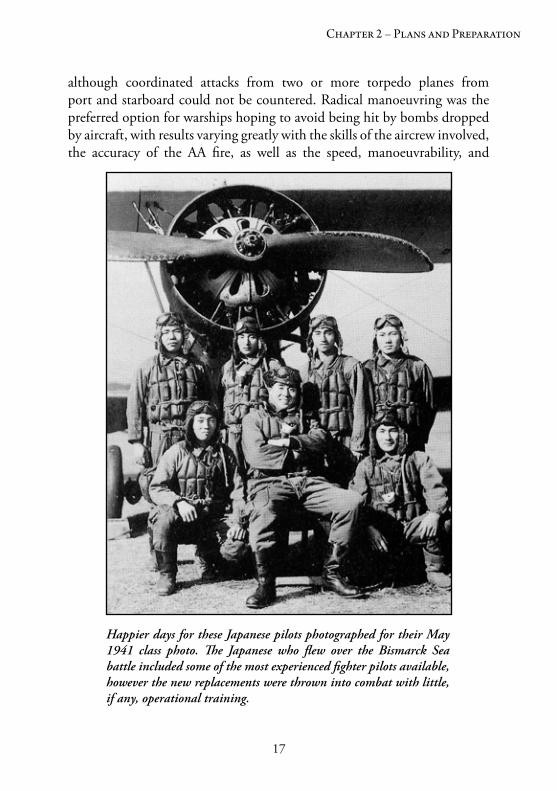
Happier days for these Japanese pilots photographed for their May 1941 class photo. The Japanese who flew over the Bismarck Sea battle included some of the most experienced fighter pilots available, however the new replacements were thrown into combat with little, if any, operational training.
18
The Battle of the Bismarck Sea
experience of the warship’s crew. The destroyers would also lay smoke to prevent aircraft from seeing their targets clearly and hence making bomb aiming more difficult. The IJN destroyers present during the Battle of the Bismarck Sea had extensive experience countering such air attacks, but they were not invincible, and they too had suffered many losses during the first year of the Pacific War.
If Allied aircraft managed to get through these fleet air defences, and if they managed to hit their target shipping, the Japanese discovered yet another technical disadvantage. Unlike many of their Allied counterparts, Japanese warships compromised ship survivability for extra speed, manoeuvre and offensive power. In addition, the ships lacked fire fighting and damage control equipment while most IJN sailors were inadequately trained to fight to save their ship.
Another flaw in the Japanese approach to warfighting was the result of the low priority allocated to intelligence, reconnaissance and surveillance. The IJN and the IJA aviation units were often reluctant to send aircraft on reconnaissance or surveillance missions, as they felt that the absence of such aircraft would reduce their strike capabilities. Their aircraft did report the massive build-up of Allied aviation at Port Moresby, often as an after thought to a strike mission, but they did reconnoitre the Milne Bay airbase regularly and they did not discover the build-up of the Dobodura airbase until it was completed. The Navy and Army maintained their own intelligence cells but again, compared with the Allies, these were relatively ineffective. The Japanese did not successfully engage the populations of New Guinea or the Solomons to support their intelligence gathering operations, and thus they became isolated in Japanese held pockets across the South-East Area.
The Japanese convoy brought together for Operation 81 included destroyers and crews that had extensive wartime experience fighting in the Netherland East Indies, off Guadalcanal, and in northern New Guinea waters. They knew the limitations of their technology and they knew the risks associated with their mission. Their technology, doctrine and training was no longer appropriate for the type of fighting that was to occur, but they were determined to carry out their orders no matter what the cost. As one would imagine, Japanese morale had plummeted.

19
Chapter 2 – Plans and Preparation
Prior to the beginning of 1943, we still had hope and fought fiercely . But now, we fought to uphold our honour . We didn’t want to become cowards … We believed that we were expendable, that we were all going to die . There was no hope of survival—no one cared anymore .
Chief Petty Officer Tetsuzo Iwamoto, a top scoring ace at Rabaul
Allied Planning
The success of the Papuan Campaign opened the way for a drive up the New Guinea coast and laid the groundwork for long-range offensive plans to disrupt Japanese strategy and destroy their ability to wage war in the SWPA. To push back the Japanese by direct attacks against the mass of enemy occupied islands would be a long and costly effort—a clear case of attrition warfare. The Papuan Campaign had exhausted many of the experienced troops and much of the available equipment. General MacArthur’s SWPA remained a low priority within the Allies world-wide war effort and this meant that Allied war materials were allocated to the SWPA at minimum ‘defensive’ levels. MacArthur understood that given these limited resources, the best form of strategic defence was to attack. Lacking the forces necessary to carry out frontal attacks, even if he was so minded, MacArthur adopted a strategy based upon manoeuvre warfare:
My strategic conception for the Pacific Theater, which I outlined after the Papuan Campaign and have since consistently advocated, contemplates massive strokes against only main strategic objectives, utilizing surprise and air-ground striking power supported and assisted by the fleet . This is the very opposite of what is termed ‘island hopping’ which is the gradual pushing back of the enemy by direct frontal pressure with the consequent heavy casualties which will certainly be involved . Key points must of course be taken but a wise choice of such will obviate the need for storming the mass of islands now in enemy possession . ‘Island hopping’ with extravagant losses and slow progress . . . is not my idea of how to end the war as soon and as cheaply as possible . New conditions require for solution
20
The Battle of the Bismarck Sea
and new weapons require for maximum application new and imaginative methods . Wars are never won in the past .
By daring forward strikes, by neutralizing and bypassing enemy centres of strength, and by judicious use of air forces to cover each movement, General MacArthur intended to destroy Japanese military power in New Guinea and adjacent islands and clear the way for a drive to the Philippines.
Later in 1943, General Headquarters SWPA explained the concept for their offensive operations as:
The . . . advance of our bomber line towards Rabaul; first by improvement of presently occupied forward bases; secondly, by the occupation and implementation of air bases which can be secured without committing large forces; and then, by the seizure and implementation of successive hostile airdromes .
At the operational level this strategy was transformed by the Allied Air Forces SWPA into an air campaign where air power was used throughout the area to:
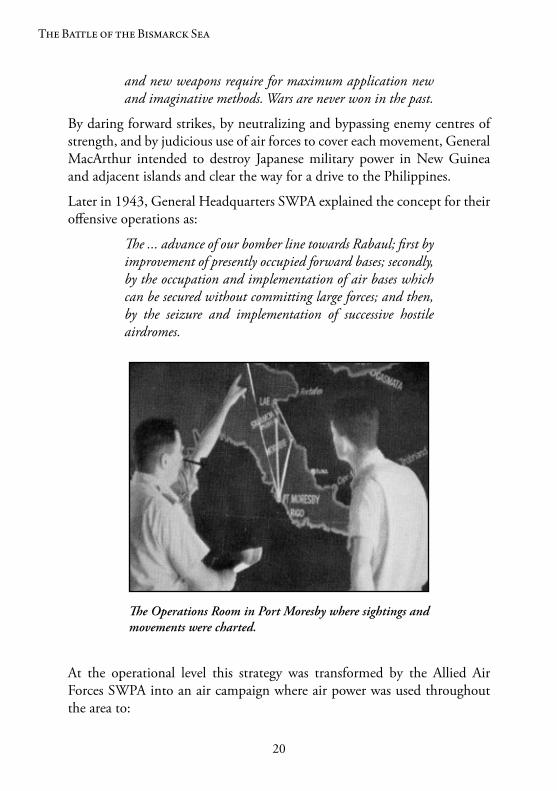
The Operations Room in Port Moresby where sightings and movements were charted.
21
Chapter 2 – Plans and Preparation
• Maintain air superiority over the surface objective area.
• Neutralize the more distant enemy air installations within range.
• Provide general area reconnaissance.
• Isolate Japanese forces from reinforcement by sea.
• Attack military objectives prior to surface advance.
• Provide close battle strike support to surface forces during beach landings and ground movement.
• By air transport operations, provide logistic support to air and ground forces where surface lines of communication could not be used by virtue of terrain or the time element.
• Transport troops, as well as supplies, in airborne and paratroop operations—thus immeasurably increasing the tactical mobility of the surface forces.
• Develop new air bases—to continue extending the air penetration—as each objective area was occupied.
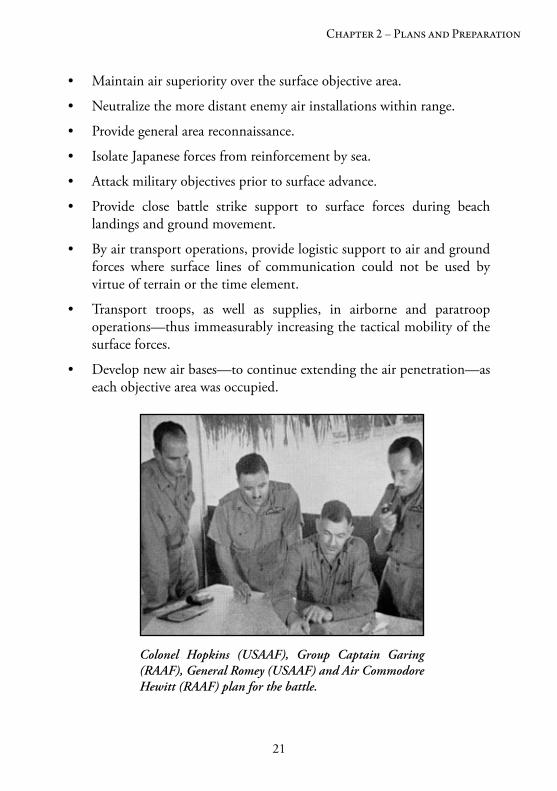
Colonel Hopkins (USAAF), Group Captain Garing (RAAF), General Romey (USAAF) and Air Commodore Hewitt (RAAF) plan for the battle.
22
The Battle of the Bismarck Sea
By early 1943, the United States Army Air Force (USAAF) Fifth Air Force was undertaking many missions in support of this air campaign. The Japanese main base at Rabaul became the primary target for Fifth Air Force counter air operations. After the occupation of Buna, the nearby airbase at Dobodura was being developed on the north side of the Owen Stanley Ranges. Air battles over Lae and Salamaua and the Bismarck Sea area also paid high dividends, while air-land cooperation greatly assisted the Australian Army operations around Wau. While these attacks were underway, Thirteenth Air Force, Navy and Marine aircraft conducted their own land and carrier based air operations in the Solomons, which fatally reduced the number of experienced aircrew flying with the IJN Air Service. In the area of maritime interdiction, however, Lieutenant-General Kenney was somewhat disappointed by the results of the Japanese convoy run to Lae in January. He instigated measures that would ensure that future Japanese convoys would be interdicted and destroyed at sea.
Allied intelligence identified the Japanese build-up in ships and troops at Rabaul. Following the January convoy to Lae and their ground losses at Wau, it was clear to the Allies that the Japanese would try and reinforce New Guinea sometime soon. The question was whether the Japanese would rush reinforcements to Lae directly or prefer to follow the safe option of landing the reinforcement at Wewak in northern New Guinea and march them to Lae overland. While Lae was the most logical disembarkation point, it was in range of Allied medium bombers. The alternative of a convoy to Madang or Wewak was much more secure, being in range of Allied heavy bombers such as the B-17 and the B-24, but the overland trek without a major road would mean a lengthy delay before Lae and Salamaua could be strengthened. To cover all of these possibilities, three plans were developed by staff at the Allied Air Forces Headquarters SWPA. One option relied on the use of only heavy bombers in case the convoy sailed to Wewak. A second option was based on the contingency of the convoy splitting up, and assigned targets to the various types of aircraft based on their operational ranges. The best outcome for the Allies would be if the convoy headed directly for Lae. This option would allow the increasing number of Allied medium bombers to attack the ships once they had passed through the Vitiaz Strait and into the Huon Gulf. It was fortuitous for the Allies that the Japanese command selected this third option.
23
Chapter 2 – Plans and Preparation
Allied Command and Organisation
At the strategic level, the Allied command in the Pacific was split between the SWPA under General MacArthur and the Pacific Ocean Areas under Admiral Chester W. Nimitz. In turn, from late 1942, Admiral William ‘Bill’ F. Halsey, the commander of the South Pacific Area (SOPAC), reported directly to Nimitz and was thus quite independent of MacArthur’s command chain in the SWPA. Despite this, from early 1943 there was considerable cooperation between MacArthur and Halsey who, although they conducted two separate Allied campaigns in adjacent areas (SWPA and SOPAC), recognised that the Japanese commanders of the South-East Area were fighting a single campaign against them. The air operations undertaken within the SWPA and the SOPAC impacted directly upon each other. It was the temporary lapse in SOPAC operations following the Japanese evacuation of Guadalcanal that enabled the Japanese to gather ships and material for Operation 81.
Overall command in the SWPA was both joint (including air, sea and ground forces) and combined (it included Australian and American as well as a few Dutch and British units). In fact, under General MacArthur the services were split into separate combat commands: Allied Land Forces, Allied Sea Forces, and Allied Air Forces—effectively meaning that the ‘operational headquarters’ was joint but the ‘tactical forces’ retained their service command structures. Each nation contributing forces retained responsibility for raising, training and sustaining their own national forces, although operational employment training was generally controlled by the combat forces. Thus a rather complex command organisation was worked out for the SWPA.
General Thomas Blamey, Australian Army, was commander of the Australian Military Forces and Allied Land Forces; Lieutenant-General Walter Krueger, US Army, commanded the Sixth Army and Alamo Force; Vice-Admiral Arthur S. Carpenter, United States Navy (USN), commanded the Allied Naval Forces and the Seventh Fleet; and Lieutenant-General George C. Kenney, USAAF, commanded the Allied Air Forces and the Fifth Air Force.
At the beginning of 1943 the Allied Air Forces included all the operational aircraft allocated to the SWPA. It consisted of two main components: the
24
The Battle of the Bismarck Sea
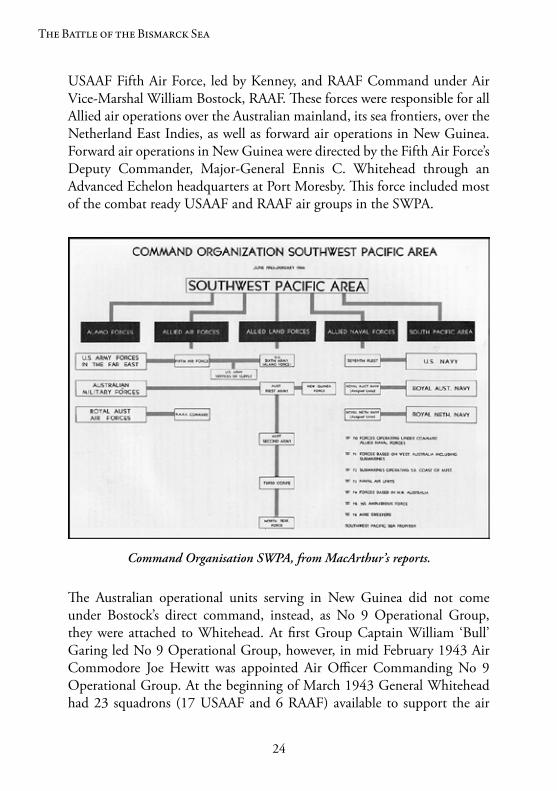
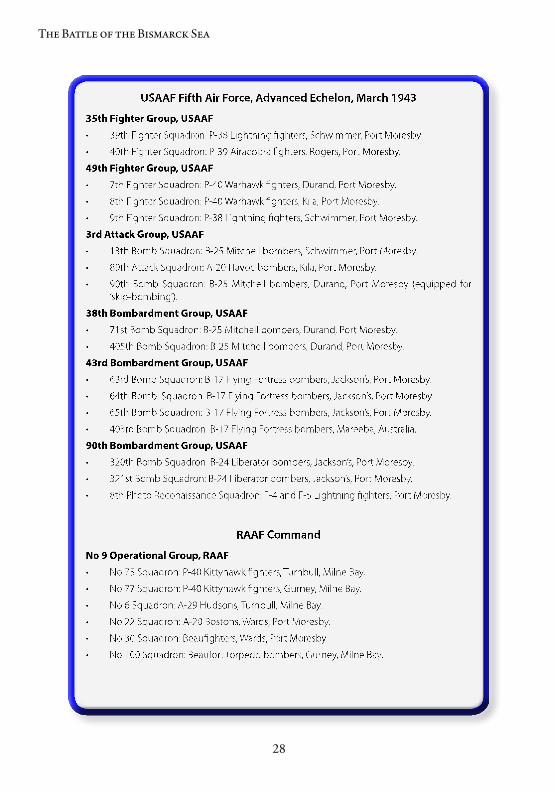
USAAF Fifth Air Force, led by Kenney, and RAAF Command under Air Vice-Marshal William Bostock, RAAF. These forces were responsible for all Allied air operations over the Australian mainland, its sea frontiers, over the Netherland East Indies, as well as forward air operations in New Guinea. Forward air operations in New Guinea were directed by the Fifth Air Force’s Deputy Commander, Major-General Ennis C. Whitehead through an Advanced Echelon headquarters at Port Moresby. This force included most of the combat ready USAAF and RAAF air groups in the SWPA.
The Australian operational units serving in New Guinea did not come under Bostock’s direct command, instead, as No 9 Operational Group, they were attached to Whitehead. At first Group Captain William ‘Bull’ Garing led No 9 Operational Group, however, in mid February 1943 Air Commodore Joe Hewitt was appointed Air Officer Commanding No 9 Operational Group. At the beginning of March 1943 General Whitehead had 23 squadrons (17 USAAF and 6 RAAF) available to support the air
Command Organisation SWPA, from MacArthur’s reports.
25
Chapter 2 – Plans and Preparation
campaign in and around New Guinea. On the day the Japanese convoy departed Rabaul, the Allied Air Forces as a whole had approximately 350 aircraft (154 fighters, 34 light bombers, 41 medium bombers and 39 bombers) ready for action. This includes the reconnaissance aircraft flown from airbases in north Queensland, such as the Catalinas of Nos 11 and 20 Squadrons RAAF at Cairns.
Although most Australians who fought at the Battle of Bismarck Sea served under No 9 Operational Group, a large number of RAAF airmen were also attached to USAAF squadrons to back-fill positions until the American supply of aircrew from training bases could catch up with demand in the SWPA. For example, the 13th and 90th Bomb squadrons of the 3rd Attack Group fought with more than 20 per cent RAAF aircrew, some of whom had previously experienced combat in Europe and/or the Mediterranean. Even so, all USAAF aircraft were flown according to American doctrine and commanded by American pilots. There was little Allied (American-Australian) integration, as such, within the fighting units.
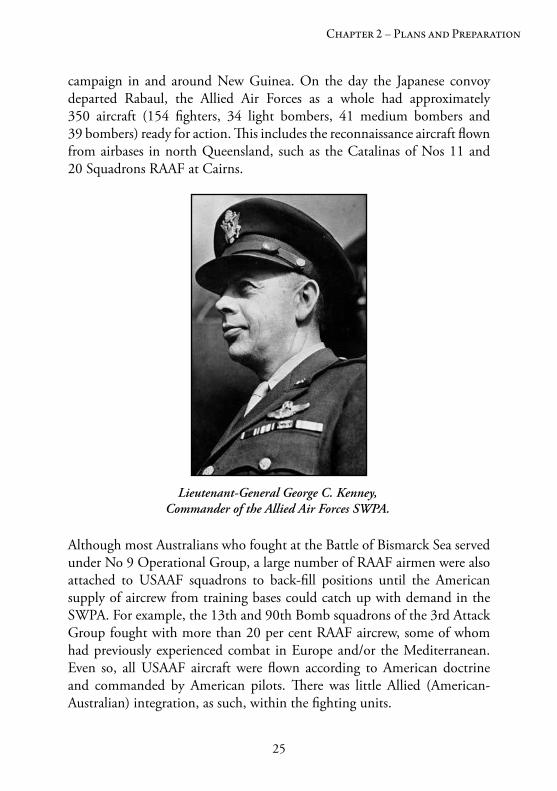
Lieutenant-General George C. Kenney, Commander of the Allied Air Forces SWPA.

26
The Battle of the Bismarck Sea
Allied Technology, Doctrine and Training
The Allies had started the War in the Pacific with many aircraft that were inferior to the Japanese Zero fighter—the F-2 Buffalo, P-39 Aircobra and even the US Navy’s F4F Wildcat come to mind. In the absence of a true fighter aircraft, the RAAF even employed its Wirraway trainer in the fighter role in the defence of Rabaul in February 1942. The P-40 Kittyhawk/Warhawk, which entered the fight in the SWPA in early 1942, was an improvement but still was not superior to the Zero. United States Army and Navy pilots developed tactical doctrine that enabled them to overcome the much more nimble but resilient Japanese fighters. They avoided dog-
fights with Zeros and relied upon high-altitude diving attacks to close with Japanese aircraft. Over time the techniques and morale of the Allied pilots improved and the Zero began to lose its reputation as a superior weapon system. Also, during 1942, the extensive American aeronautics industry stepped up to meet the challenge of war and soon major technological advances in aircraft design and manufacture were evident in the front line air units. By March 1943 the P-38 Lightning fighter was with operational squadrons in the SWPA and the F4U Corsair was flying missions from Guadalcanal in the SOPAC. These aircraft were technologically superior to the Japanese types, which remained largely unchanged due to major shortcomings within Japanese industry and competing priorities between the IJN and the IJA.
Joseph ‘Joe’ E. Hewitt, from February 1943 the Air Officer Commanding 9 OG RAAF. His deputy Bill Garing was responsible for most of the RAAF’s planning for the convoy battle.
27
Chapter 2 – Plans and Preparation
The Allied Air Forces in the SWPA also had some very potent anti-shipping aircraft in its inventory. The USAAF B-17 Flying Fortress and B-24 Liberator were excellent long-range, heavy bombers. The A-20 Boston and B-25 Mitchells were very capable medium bombers. In addition, with Kenney’s support, the 90th Bomb Squadron’s B-25s were specially modified with eight 50-calibre machine guns mounted forward, the B-25C1 variant. The upgrade was the brainchild of USAAF Major Paul ‘Pappy’ Gunn, Kenney’s innovative expert in daredevil, low-level flying. Pappy Gunn turned a poorly armed medium-level bomber into a heavily armed, low-level attack bomber. Designed especially for maritime strike, the B-25C1 was called the ‘commerce destroyer’. The same squadron also adopted the little known technique of ‘skip-bombing’—where aircraft attacked at 100-200 feet, a height where bombs released on water would skip along the water surface until they hit the target ship’s hull or superstructure from the side. The RAAF’s twin engine Beaufighters also had a maritime strike capability. Originally developed as a long-range heavy fighter, the Beaufighter was, for its time, the most heavily armed twin-engine fighter in the world. The RAAF also operated Beaufort aircraft in the maritime strike role. Aircraft from No 100 Squadron, based at Milne Bay, were specially trained
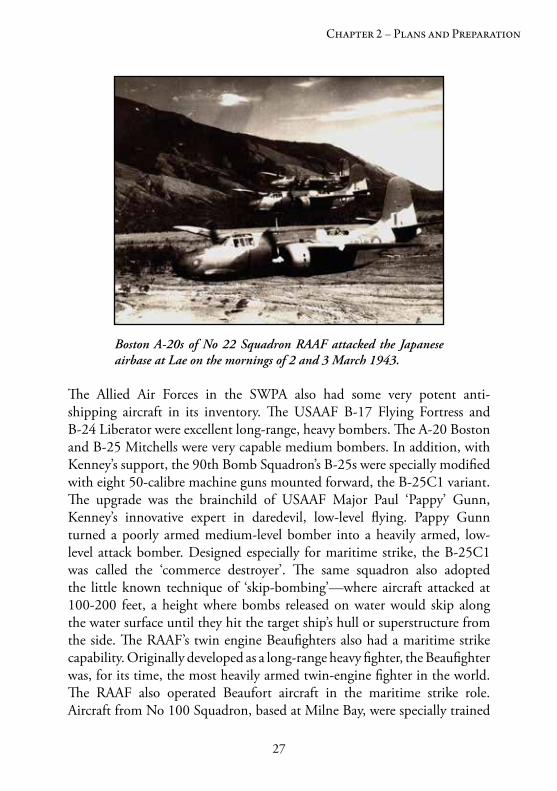
Boston A-20s of No 22 Squadron RAAF attacked the Japanese airbase at Lae on the mornings of 2 and 3 March 1943.
28
The Battle of the Bismarck Sea
29
Chapter 2 – Plans and Preparation
to conduct torpedo attacks. Torpedoes were a particularly effective form of attack against shipping as they were capable of causing considerable damage if just a single weapon struck the target—it was much easier to sink a ship from below than from above. The problem with aerial torpedo bombing, however, was that the torpedo planes had to deliver their charge at low attitudes, flying straight at low speeds, within range of a ship’s concentrated AA fire. By 1943 some commanders believed that torpedo bombing attacks were suicidal, although that did not prevent the Allies from ordering them.
The leaders of the Forward Echelon of the Fifth Air Force realised that they needed new group tactics to defeat the next Japanese convoy off New Guinea. The January 1943 convoy attack clearly showed that scattered attacks by individual squadrons allowed the Japanese defenders to concentrate their CAP and AA fire against small groups of aircraft, one after another. Earlier in the war, Group Captain Bill Garing of No 9 Operational Group, had flown Short Sunderland flying boats with the Royal Air Force’s Coastal Command. Garing was able to persuade Kenney and Whitehead to adopt a method of maritime strike he had seen work very effectively in the European
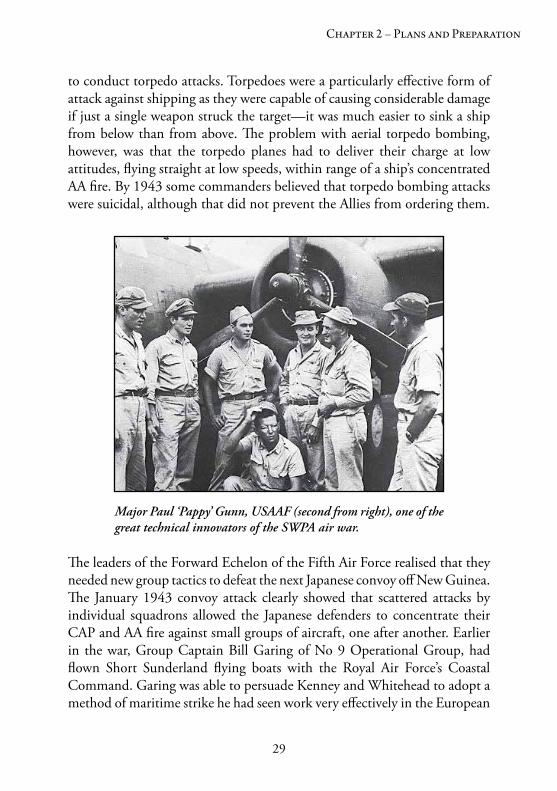
Major Paul ‘Pappy’ Gunn, USAAF (second from right), one of the great technical innovators of the SWPA air war.
30
The Battle of the Bismarck Sea
Theatre. This tactic called for a carefully coordinated attack by a massed concentration of aircraft. It required meticulous planning and execution, but would allow the Allies to deliver a concentrated blow simultaneously against any enemy convoy—in many ways it was an early form of a strike package. The complexity of the scheme also meant that the Allied pilots would need detailed preparation to deal with enemy air cover, suppress AA fire and avoid mid-air collisions while targeting ships from high altitude down to sea level.
In the weeks leading up to the battle, air crews practiced bombing and strafing techniques on a wrecked ship just outside Port Moresby harbour. Each bomber crew dropped 30 to 40 live bombs on the wreck as part of this preparation. But even training attacks on a stationary target could be dangerous, for one aircraft was lost and two more seriously damaged during the low-level runs. A full-scale rehearsal was organised. On 28 February, the air crews were briefed for a rendezvous over Cape Rodney, 140 kilometres south-east of Port Moresby, before returning to attack the wrecked ship in the harbour. This exercise allowed aircrews to critically assess their individual performance and unit cohesion, while general errors in planning and timing were also corrected. The Allied planners, expecting that the battle would take place in the Huon Gulf, selected Cape Ward Hunt, 140 kilometres to the south-east, as the rendezvous point for the anticipated maritime strike. For the plan to succeed, each unit would need to arrive at the rendezvous precisely on time.
Allied Intelligence
In contrast to the Japanese, the Allies in the SWPA were determined to invest time and resources on their intelligence, surveillance and reconnaissance effort. Catalina flying boats from the RAAF based in Australia conducted regular nightly flights over Japanese shipping and submarine routes from Rabaul to Lae and Finschhafen both from the north and along the south of New Britain; these reconnaissance missions became known as the ‘milk run’. Over time these aircraft added harassing night attacks, supply-dropping to coastwatchers, search and rescue of downed aviators, and anti-submarine patrols to their reconnaissance missions. The Australian intelligence effort included coastwatchers who were individuals positioned behind enemy

31
Chapter 2 – Plans and Preparation
lines to observe and record the movements of Japanese troops, ships and aircraft. They often gained the support of the indigenous population around their stations, and thus they effectively had eyes and ears over wide areas occupied by the Japanese.
Perhaps the most important intelligence advantage held by the Allies was due to their very successful signals intelligence organisations - Central Bureau and Fleet Radio Unit Melbourne. Squadron Leader Roy H. Booth, RAAF, was Deputy Director of Central Bureau, a joint and combined intelligence unit under MacArthur’s SWPA Headquarters originally made up of 50 per cent American, 25 percent Australian Army and 25 per cent RAAF personnel. By early 1943 the Allies were able to read enough of the Japanese coded communications to develop accurate information about Japanese operational plans. Codenamed MAGIC, information from this source was vital, but had to be used carefully to make certain that the Japanese did not begin to suspect the security of their codes. To be most effective, intelligence obtained through MAGIC had to be correctly assessed and interpreted alongside the many other forms of intelligence available to the Allied commanders in the SWPA.
32
The Battle of the Bismarck Sea
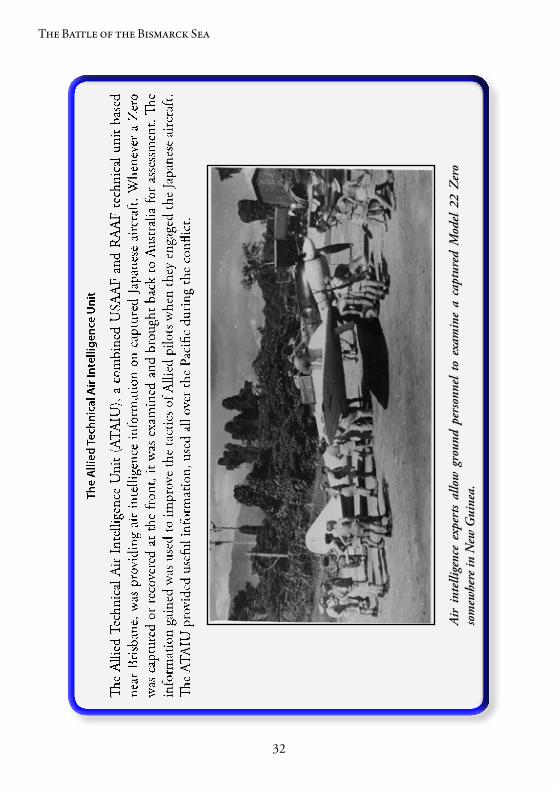
Air
inte
llige
nce
expe
rts
allo
w g
roun
d pe
rson
nel
to e
xam
ine
a ca
ptur
ed M
odel
22
Zer
o so
mew
here
in N
ew G
uine
a.
33
Chapter 3
First Contact
2 March 1943
Advance Warning
During February 1943, signs that a convoy was building had been observed by Allied intelligence. The indicators of increased enemy activity included deployments of Japanese seaplanes searching for Allied submarines, a build-up of aircraft at Japanese airfields along the convoy’s probable route and an intensification of air raids on Allied airfields to disrupt reconnaissance and offensive operations. These indications were supplemented by reports from reconnaissance flights over Rabaul and by signals intelligence obtained
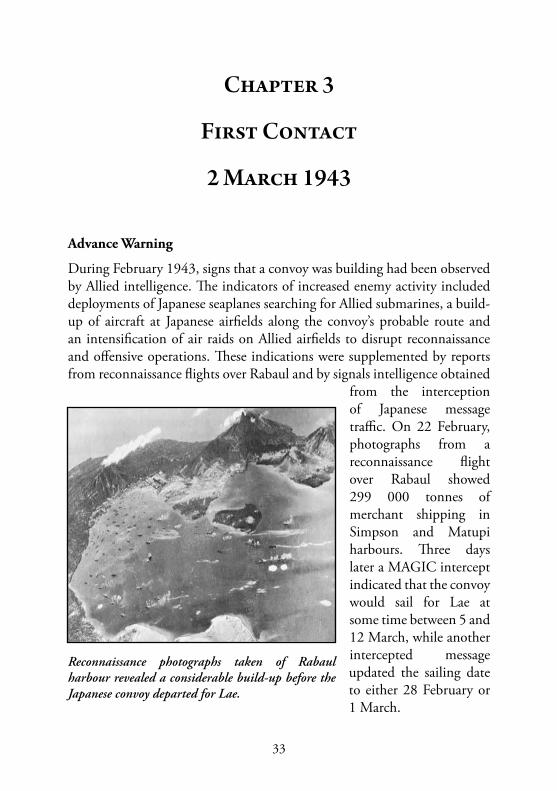
from the interception of Japanese message traffic. On 22 February, photographs from a reconnaissance flight over Rabaul showed 299 000 tonnes of merchant shipping in Simpson and Matupi harbours. Three days later a MAGIC intercept indicated that the convoy would sail for Lae at some time between 5 and 12 March, while another intercepted message updated the sailing date to either 28 February or 1 March.
Reconnaissance photographs taken of Rabaul harbour revealed a considerable build-up before the Japanese convoy departed for Lae.
34
The Battle of the Bismarck Sea
Enemy Convoy Sighted
The Lae Resupply Convoy of 16 ships—eight transports and eight escorting destroyers—departed Rabaul for Lae at midnight 28 February 1943. As the early hours of 1 March passed, the convoy made its way westwards, at 7 knots, along the northern coast of New Britain under cover of darkness intensified by a gale, mist and rain. Shortly after dawn, Japanese Army and Navy fighters arrived to shield the ships from the view of Allied reconnaissance aircraft. Rear Admiral Kimura was confident that his ships would reach Lae, however he underestimated the number of Allied aircraft available, the determination of their experienced aircrews, and the past lessons that had been adopted into Allied doctrine and tactics.
At 1600 hours on 1 March, a patrolling B-24 Liberator of the 321st Squadron USAAF sighted the convoy through a break in the clouds. Over the next few days bad weather made it difficult for reconnaissance flights to judge the exact number of vessels involved in the operation, but this aircraft’s report was one of the most accurate, giving the convoy’s size as six naval and eight transport vessels with an escort of Zero fighters. The Japanese ships intercepted the sighting report and all commanders were informed that their presence was now known. One of the Japanese soldiers remembered: ‘Security and black-out orders were more rigid. All individuals arranged their belongings in order’. The expected attack did not come. A second B-24 flew over the convoy at 2040 hours, dropped its bombs without scoring hits and then reported that the weather was closing in. Meanwhile, eight B-17s of the 63rd Bomb Squadron flew over the reported convoy’s position at around 2140 hours, after attacking the airfield at Gasmata. They, in turn, failed to find the convoy. Meanwhile the Japanese air strikes against the Allied airbases planned for that day were also postponed due to the storms over northern New Guinea and the Solomons.
On 2 March six Bostons of No 22 Squadron RAAF conducted an early morning raid from Wards at Port Moresby against the Japanese airbase at Lae, claiming a number of aircraft hit on the ground. The Australian fighter squadrons at Milne Bay, Nos 75 and 77, were on-call and ready for action; their P-40s were scrambled several times but did not sight any Japanese aircraft. They tried to intercept unidentified aircraft and also flew several CAPs over Allied shipping in the area. For the Hudsons of No 6 Squadron
35
Chapter 3 – First Contact 2 March 1943
RAAF, also based at Port Moresby, the routine remained unchanged. They flew reconnaissance flights over southern Papuan and northern Queensland waters, as well as convoy escorts for shipping coming to and departing from Port Moresby.
Meanwhile, as 2 March dawned over the Japanese, the convoy was sailing along the northern coast of New Britain, with overcast skies, low broken clouds (1000 feet) and intermittent thunderstorms. At 0730 hours a reconnaissance B-17 of 65th Squadron flew over the area where the convoy was believed to be but failed to detect it. Forty five minutes later a B-24 of 320th Squadron sighted seven warships and seven merchantmen making 9 knots about 30 miles north of Cape Gloucester. This aircraft remained in contact circling the convoy while using clouds to avoid aggressive enemy fighters. The Allied long-range strike force was soon on its way.
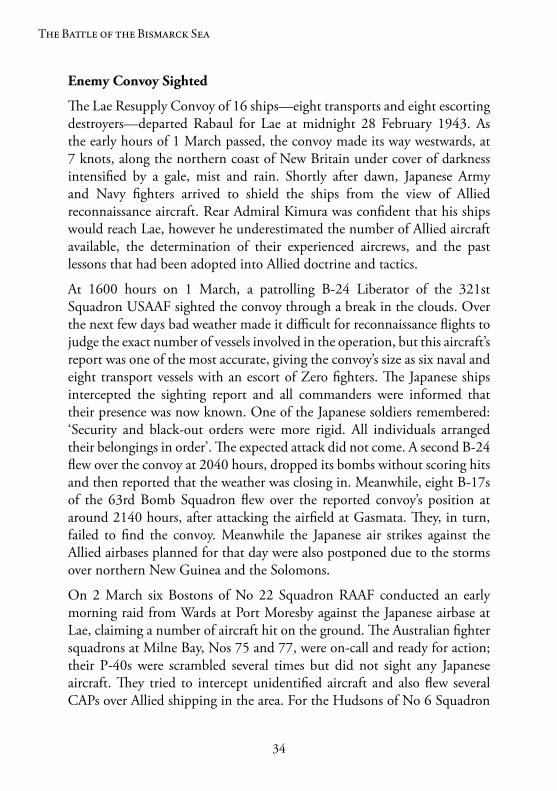
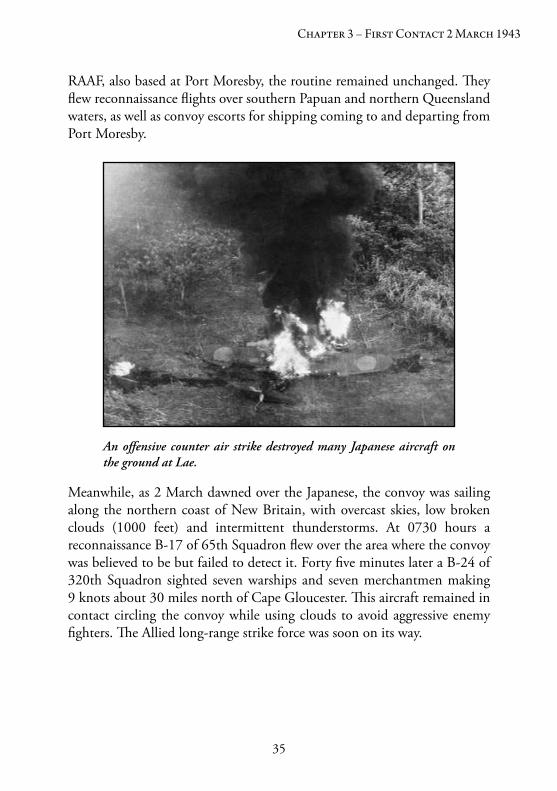
An offensive counter air strike destroyed many Japanese aircraft on the ground at Lae.

36
The Battle of the Bismarck Sea
The Heavies Strike
A strike group of 26 B-17 Flying Fortresses, supported by two B-24 Liberators acted as observation aircraft, took off from Port Moresby on the morning of 2 March heading for the Japanese convoy. Sixteen P-38 Lightning fighter aircraft provided a distant escort for the strike. The long-range Lightnings were the first into action when they swooped upon three Japanese Army Oscars, cutting them down in quick succession. Flying at high altitude, the P-38 pilots did not see the convoy below.
A B-17 Flying Fortress targets one of the Japanese transports on 2 March 1943. This vessel sank shortly after.
37
Chapter 3 – First Contact 2 March 1943
At 0950 hours, seven B-17s of 63rd Squadron approached the convoy at 7000 feet, and ignoring the fighters and AA fire, made horizontal bombing attacks at 5000 feet. They claimed several hits with 1000-pound bombs on the transports. A few minutes later, six B-17s of 65th Squadron and 11 B-17s of 64th Squadron joined in these attacks. They too claimed hits upon the transports. The two B-24s of 320th Squadron dropped 12 bombs at 7000 feet, missing their targets. Fifteen Japanese Navy Zeros tried to interfere with these attacks but were driven away by the P-38s. By noon, the Kyokusei Maru was sunk and both the Teijo Maru and Nojima were damaged.
Another B-24 from 320th Squadron took over reconnaissance duties above the convoy just after 1040 hours and shortly after it was joined by a B-17 from 63rd Squadron. There was a break in the battle for about two and a half hours during which these aircraft observed two Japanese destroyers picking up survivors from the Kyokusei Maru. At around 1820 hours that evening, 10 B-17s of 64th and 403rd squadrons struck the convoy once again claiming numerous hits against the transports. Eighteen Japanese fighters attacked these aircraft while they were over the convoy, causing some damage, a number of casualties and causing errors during the bombing runs. The convoy was last seen at 1845 hours.
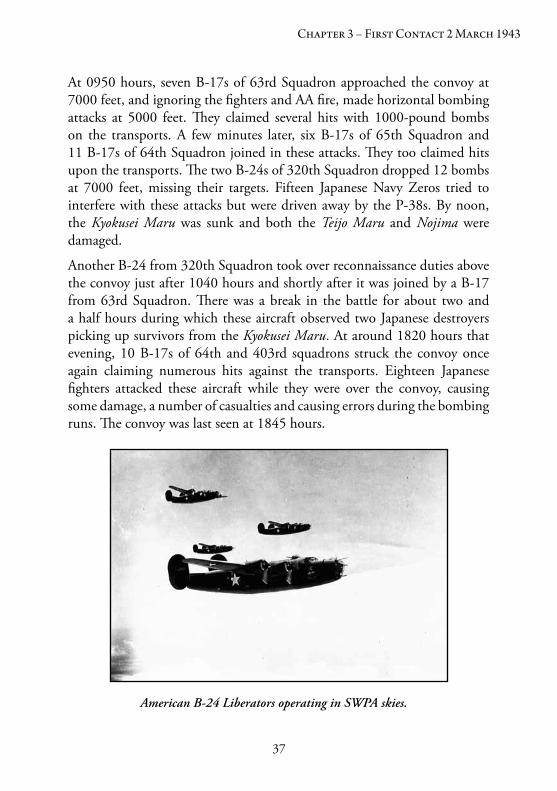
American B-24 Liberators operating in SWPA skies.
38
The Battle of the Bismarck Sea
Japanese destroyers Yukikaze and Asagumo pulled 950 men from the water and proceeded at high speed throughout the night to Lae. They delivered their human cargo, the equipment onboard Kyokusei Maru being totally lost, and returned in time to rejoin the convoy before daybreak the following morning. After a full day of long-range air attacks, the Japanese had suffered several hundred casualties and lost one transport sunk. Two other transports were damaged but still capable of movement with the convoy and thus, although desperate, the Japanese situation was no worse than their previous convoy to Lae had been. If only they could arrive at their destination and unload, under the umbrella of their aircraft based at Lae, before the Allied aircraft could strike again.
The air battle in the skies above the convoy was a decisive one for the Allies. During the afternoon’s attacks the P-38s engaged the enemy, who flew in relatively small groups above the convoy, and managed to demonstrate their superiority over the Zeros and Oscars in air-to-air fighting. Although 100 aircraft had been deployed to provide air cover for the convoy, they were spread out along the route at airbases, including Rabaul, Gasmata and Lae, with the result that there were never more than 30 to 40 enemy planes over the ships at any one time during daylight hours.
A Catalina’s Reconnaissance
On the night of 2-3 March, the convoy was discovered again with difficulty by an RAAF Catalina from No 11 Squadron RAAF, which was based at Cairns. The aircraft, which took off from Milne Bay after refuelling, was piloted by Flight Lieutenant Terry Duigan, who was on his 31st mission in the SWPA. The experienced crew periodically dropped beneath the clouds to mast height to glimpse the enemy ships, releasing flares and bombs to harass the enemy by keeping them worried and awake throughout the night. Their main task, however, was to maintain contact with the ships and provide detailed information on the movements of the convoy to the various Allied Air Forces SWPA headquarters.
Throughout the night, the extremely poor weather conditions continued to favour the Japanese. In the early hours of the morning the ships passed through the Vitiaz Strait and into the Huon Gulf. Observing this change of course, Duigan’s Catalina finally confirmed that the Japanese were
39
Chapter 3 – First Contact 2 March 1943
heading for Lae and not Wewak. The Japanese commanders on the ships below heard the Catalina intelligence report and hence their position was known to the Allies. It was then that the convoy commander, Admiral Kimura, made a fateful decision: he circled in the darkness to wait for morning before setting course for Lae, rather than making a night run for the New Guinea coast. His decision, which may have been based on a desire to use the storm front for maximum cover, the need for friendly air support during daylight hours, or perhaps to give time for his two detached destroyers to return, effectively sealed the fate of the Lae Resupply Convoy.
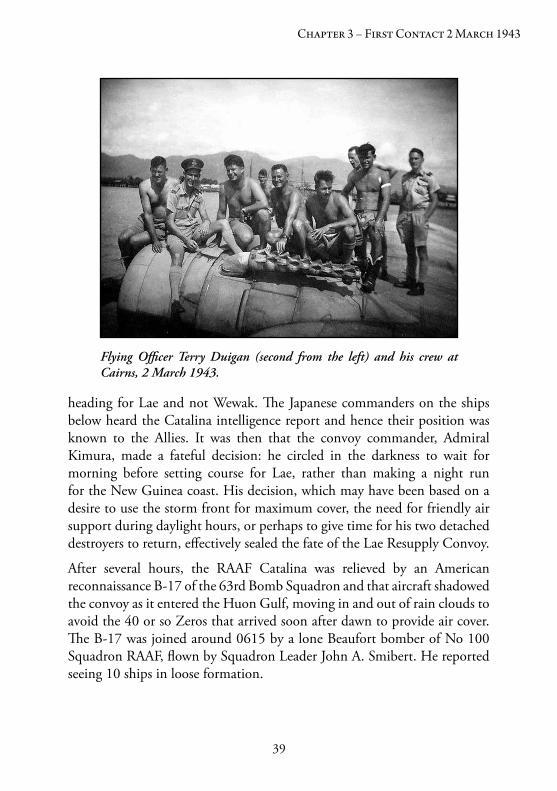
After several hours, the RAAF Catalina was relieved by an American reconnaissance B-17 of the 63rd Bomb Squadron and that aircraft shadowed the convoy as it entered the Huon Gulf, moving in and out of rain clouds to avoid the 40 or so Zeros that arrived soon after dawn to provide air cover. The B-17 was joined around 0615 by a lone Beaufort bomber of No 100 Squadron RAAF, flown by Squadron Leader John A. Smibert. He reported seeing 10 ships in loose formation.
Flying Officer Terry Duigan (second from the left) and his crew at Cairns, 2 March 1943.

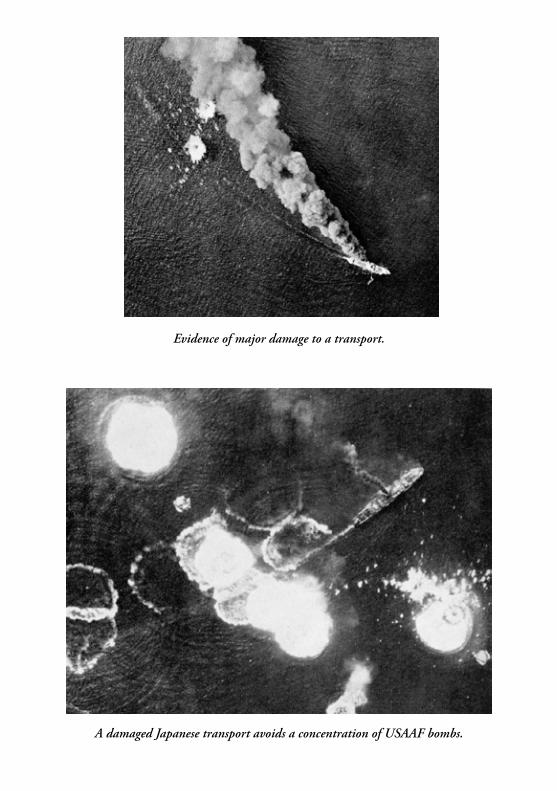
Evidence of major damage to a transport.
A damaged Japanese transport avoids a concentration of USAAF bombs.
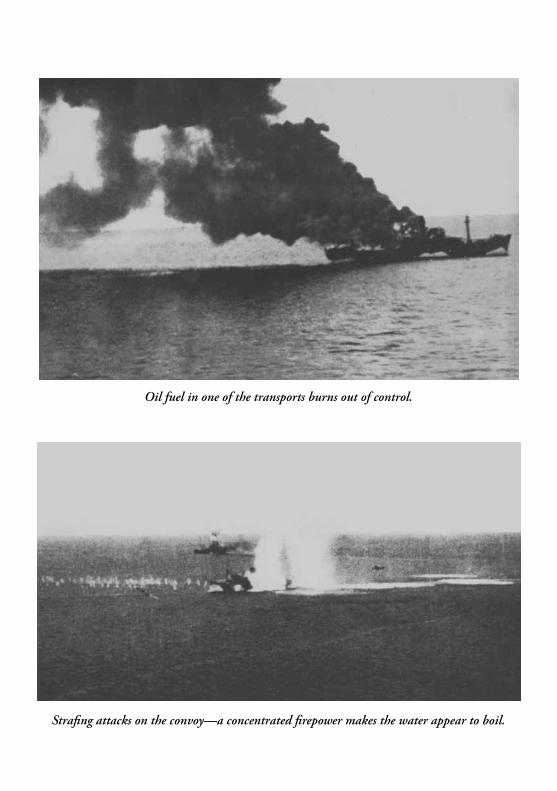
Oil fuel in one of the transports burns out of control.
Strafing attacks on the convoy—a concentrated firepower makes the water appear to boil.
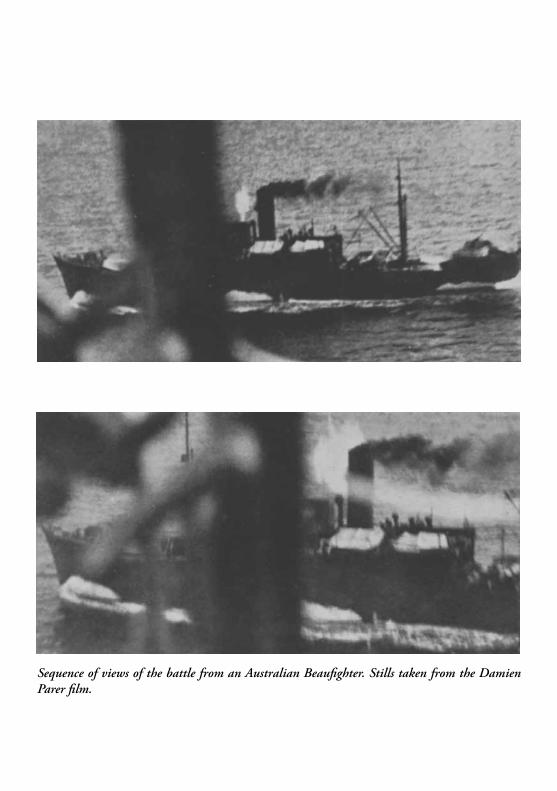
Sequence of views of the battle from an Australian Beaufighter. Stills taken from the Damien Parer film.
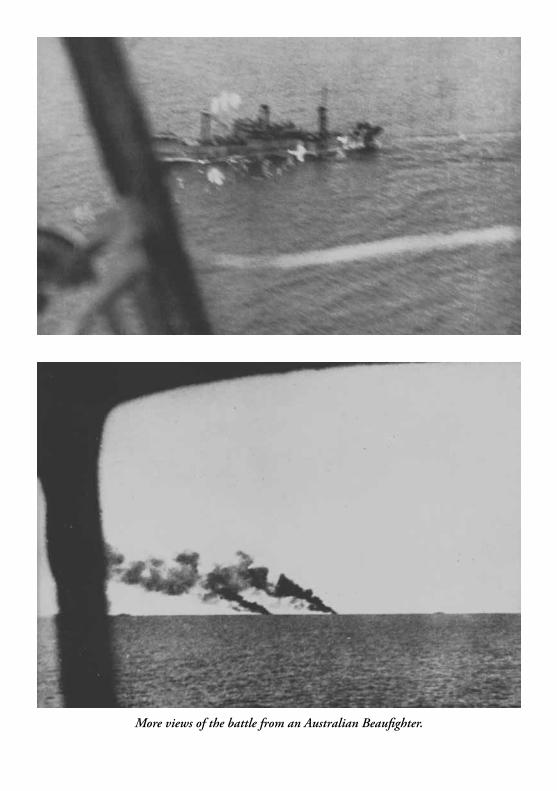
More views of the battle from an Australian Beaufighter.

Two B-25 Mitchells conduct low level attacks against a Japanese transport.

41
Chapter 4
The Convoy Destroyed
3 March 1943
Orders to Attack
In Brisbane, Lieutenant-General Kenney and his Allied Air Forces SWPA headquarters staff had been waiting for information confirming that the Japanese convoy was heading towards Lae. They promptly issued orders for the coordinated maritime strike against the convoy to be executed by all available medium-range aircraft as planned.
At 0803 hours on 3 March, the signal to attack, ‘Mission No. 61’, was transmitted to the Allied squadrons:
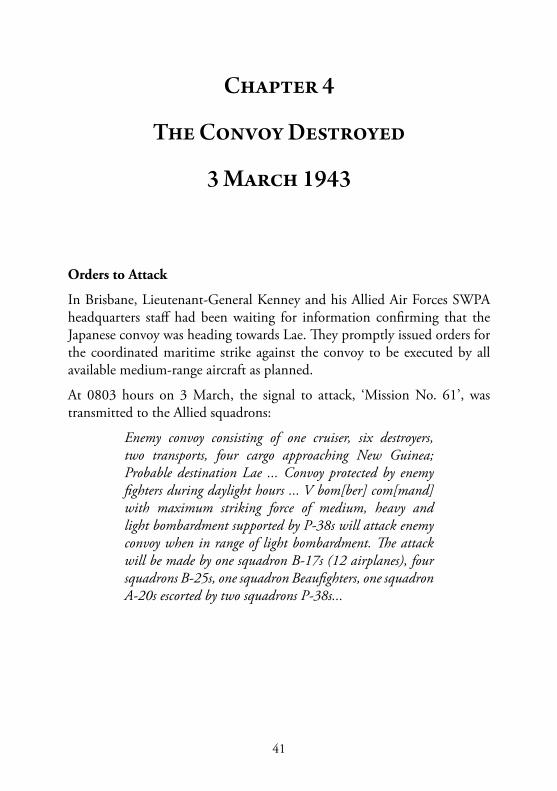
Enemy convoy consisting of one cruiser, six destroyers, two transports, four cargo approaching New Guinea; Probable destination Lae . . . Convoy protected by enemy fighters during daylight hours . . . V bom[ber] com[mand] with maximum striking force of medium, heavy and light bombardment supported by P-38s will attack enemy convoy when in range of light bombardment . The attack will be made by one squadron B-17s (12 airplanes), four squadrons B-25s, one squadron Beaufighters, one squadron A-20s escorted by two squadrons P-38s . . .
42
The Battle of the Bismarck Sea
Page One of the Signal containing orders for Mission No. 61—the USAAF and RAAF coordinated strike planned for 1000 hours on 3 March 1943.
43
Chapter 4 – The Convoy Destroyed 3 March 1943
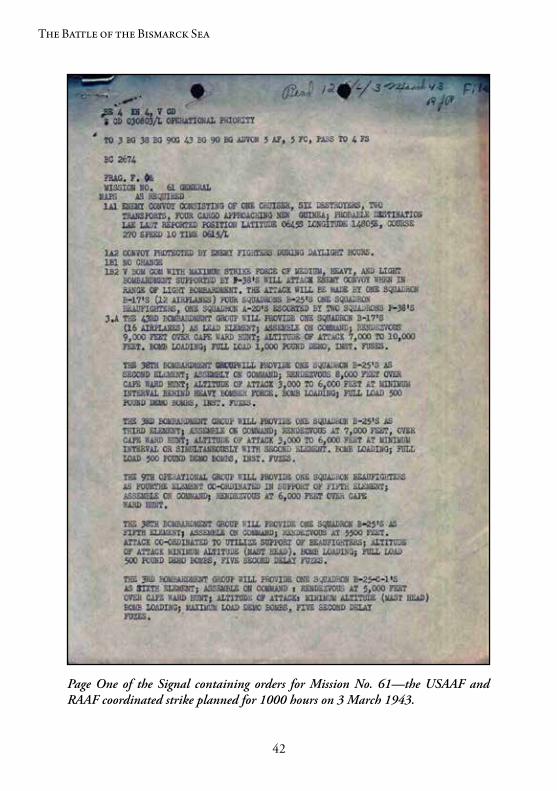
Page Two of the Signal containing orders for Mission No. 61.

44
The Battle of the Bismarck Sea
The 3rd of March is the Doll’s Festival (Hinamatsuri) in Japan, and to celebrate, candy was issued to all Japanese personnel in the convoy. For many soldiers and sailors this bright start to the day was somewhat surreal when they later remembered that many amongst them would have nothing to celebrate later that day.
The Beauforts Engage
Based at Milne Bay, the Beaufort torpedo bombers of No 100 Squadron RAAF were the first formation sent to strike the Japanese convoy on that fateful morning. At 0400 hours on 3 March, seven Beaufort torpedo bombers from No 100 Squadron took off from Milne Bay to attack the Japanese ships in the Bismarck Sea. This squadron operated independently because they were not included within the Allied air plans for the Port Moresby aircraft. The weather front that had protected the Japanese convoy during the night extended down through Buna, Dobodura and towards Milne Bay. Dobodura was closed while operations from Milne Bay were severely limited. The Beauforts managed to take-off only to have three
Beaufort torpedo bombers of No 100 Squadron flew through a storm front to attack the Japanese convoy. Although causing no physical damage their efforts influenced the Japanese defence during the Allied concentrated air attacks a few hours later.
45
Chapter 4 – The Convoy Destroyed 3 March 1943
aircraft return to base due to bad weather, one to return with an unserviceable torpedo, and two to return after they failed to locate the enemy. Only two aircraft made individual attack runs, at 0625 hours and 0655 hours, one missed a Japanese destroyer by about 100 yards while the other aircraft’s torpedo failed to release. In frustration, the crew of the second Beaufort turned their machine gun onto the ships to strafe them, albeit causing little if any damage.
This failed torpedo attack did actually influence the tactics employed by the Japanese ship’s captains in the ensuing fighting, now just a few hours away. The standard tactical response for a warship under attack from aerial torpedoes was to turn their bow into or away from the torpedo. Once set upon a course, the aerial torpedo would run straight for its target, thus turning towards a torpedo enabled a fast moving warship to both increase the angle of attack and to offer a smaller physical target—from straight on a ship’s bow is a much smaller target than the complete side of a ship.
At dawn that same morning, four A-20s of No 22 Squadron RAAF once again bombed and strafed the Japanese airbase at Lae in an effort to distract the fighters that were earmarked to protect the convoy. Over 30 USAAF sorties were also flown against Lae throughout the morning and as a result the Japanese were prevented from sending relief fighters to the convoy in the Huon Gulf. The Australian fighter squadrons at Milne Bay, Nos 75 and 77 also remained on-call in case of Japanese offensive counter air attacks.
The Coordinated Air Attack
The weather conditions in the Huon Gulf area rapidly improved in the early morning of 3 March. Over 90 Allied aircraft took off from their bases at Port Moresby and climbed over the mountains towards their rendezvous at Cape Ward Hunt. At 0930 hours the aircraft of some 16 Allied squadrons assembled into their attack formations and proceeded, as if on an exercise, towards the known enemy position. Thirty minutes later these aircraft struck the Japanese ships in the Bismarck Sea. In accordance with the carefully rehearsed plan, three waves of aircraft attacked the convoy from different altitudes. Each wave was synchronised to strike just seconds apart, delivering a concentration of fire power that would devastate the enemy.

46
The Battle of the Bismarck Sea
The high-level wave, a group of 13 B-17s from the 43rd Bombardment Group were the first to be sighted by the Japanese. Flying at 7000 feet, they immediately attracted the convoy’s heavy AA fire (5-inch) and the attention of the 30 to 40 Japanese Zeros flying CAP. Sixteen P-38s from the 39th Fighter Squadron, flying slightly above the bombers, engaged the Zeros and managed to break up their attacks. The bombs from these B-17s caused no significant damage but managed to break up the Japanese convoy’s defensive formation, as each vessel manoeuvred at speed to avoid being hit.
Painting of a Beaufort torpedo bomber of No 100 Squadron RAAF.

47
Chapter 4 – The Convoy Destroyed 3 March 1943
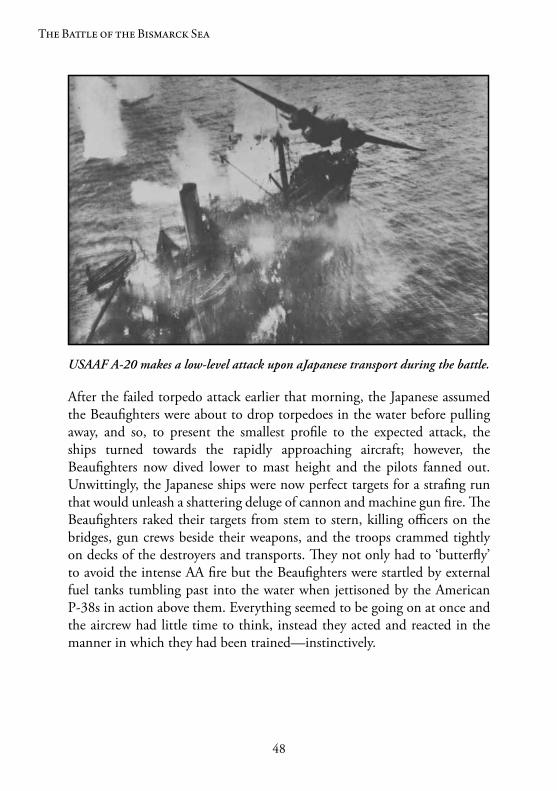
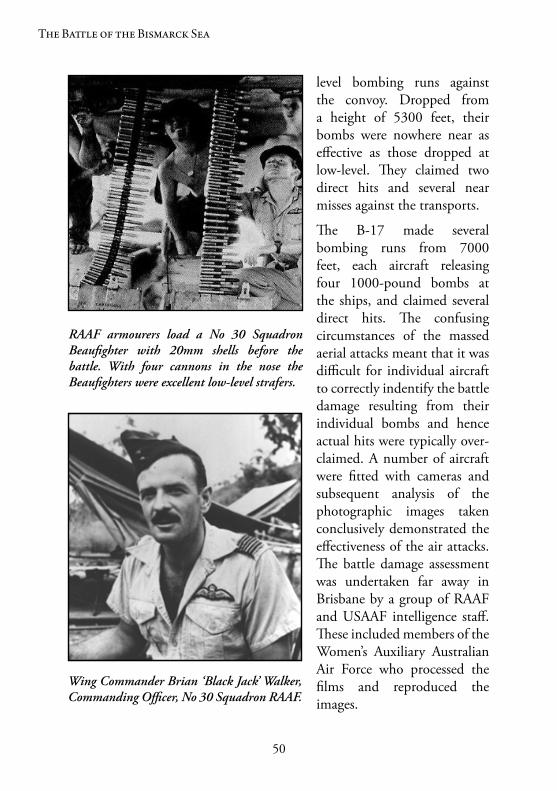
As the ships manoeuvred to avoid the bombs, four Allied squadrons conducted a massed low-level attack at mast height. Twelve of the RAAF’s Beaufighters led approaching the convoy at 220 knots in a line abreast formation. The crews of these Beaufighters, from No 30 Squadron RAAF and each with four 20mm cannon in the nose and six .303-caliber machine guns in the wings, were instructed to make beam on strafing runs against each ship aiming directly at the commanders on their bridge and the crews of the light AA guns. They were to disorganise and suppress the enemy crews so that the American B-25 and A-20 squadrons could conduct their skip-bombing and low-level bombing attacks with little or no opposition. As No 30 Squadron prepared for the attack, its commanding officer, Wing Commander Brian ‘Black Jack’ Walker, discovered that his normal navigator was unfit for operational flying and so he was in danger of missing the action. By the time he grabbed an inexperienced navigator he had missed No 30 Squadron’s departure and so he joined a formation of P-38s instead. Black Jack joined the battle at a high altitude until the P-38s engaged the Zeros providing air cover for the convoy. Not wishing to join the air-to-air fight he dived to join in with the low-level attack. Thus, 13 RAAF Beaufighters were eventually engaged. The actual No 30 Squadron strike was led by Squadron Leader Ross Little.
DD Uranami* DD Asashio*
DD Tokitsukaze*
DD Shikinami*
DD Shirayuki*
DD Asagumo*
DD Arashio* DD Yukikaze*
Shin-ai* Teiyo*
Oigawa* Taimei*
Aiyo* Kembu
Nojima*
* sunk during the attack
48
The Battle of the Bismarck Sea
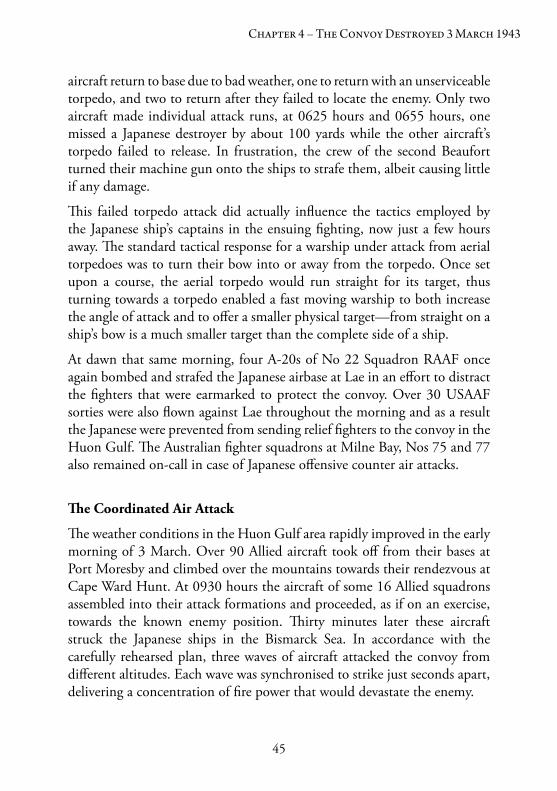
After the failed torpedo attack earlier that morning, the Japanese assumed the Beaufighters were about to drop torpedoes in the water before pulling away, and so, to present the smallest profile to the expected attack, the ships turned towards the rapidly approaching aircraft; however, the Beaufighters now dived lower to mast height and the pilots fanned out. Unwittingly, the Japanese ships were now perfect targets for a strafing run that would unleash a shattering deluge of cannon and machine gun fire. The Beaufighters raked their targets from stem to stern, killing officers on the bridges, gun crews beside their weapons, and the troops crammed tightly on decks of the destroyers and transports. They not only had to ‘butterfly’ to avoid the intense AA fire but the Beaufighters were startled by external fuel tanks tumbling past into the water when jettisoned by the American P-38s in action above them. Everything seemed to be going on at once and the aircrew had little time to think, instead they acted and reacted in the manner in which they had been trained—instinctively.
USAAF A-20 makes a low-level attack upon aJapanese transport during the battle.

49
Chapter 4 – The Convoy Destroyed 3 March 1943
Flight Lieutenant Fred Cassidy, one of the RAAF Beaufighter crew members describes an attack run during the battle:
When attacking ships we liked to come in from the front . It was our goal to put the bridge out of order . You would begin the approach sideways . . . make a big sweeping turn . . . and begin the dive from about 500 feet . The ship would be about 600 yards in front . You’d let go with your cannon at maybe 100 yards . . . aim straight for the bridge . . . and . . . pull up over the mast . In the Bismarck Sea battle we strafed from the front . The ships were careening in all directions . . .You also had to dodge the bomb-splashes . . . because the Liberators and [B-] 17s were dropping from 6000-10 000 feet and they’d make huge splashes when we were about 20 feet off the sea . These splashes were thirty to fifty feet across and followed by a tremendous spout of water . We had to fly through those . The damage done to the Japanese was devastating . . .
Twelve of the solidly constructed B-25s of Major Ed Larner’s 90th Attack Squadron USAAF flew into the attack alongside the Australians. The massed .50-caliber machine guns in the nose of these B-25 aircraft kept the enemy’s heads down while they released their two bombs and watched many of them skip into the sides of their targets. Twenty eight out of the 37 500-pound bombs dropped in the attack hit their target. The low-level air attacks continued with 12 A-20s of the 89th Bomb Squadron claiming 11 hits from twenty 500-pound bombs dropped, and 13 B-25s of the 405th Bomb Squadron making similar claims. The mast height attackers were reluctant to leave the fray while they still had ammunition left, and as their formations increasingly overlapped, many aircraft had to give way to others who were strafing or bombing the transports. Skip-bombing was a major tactical success, against which the Japanese had no effective means of defence.
The low-level attackers hit the convoy hard, leaving many of the ships burning, immobilised or sinking. But they were not alone. A few minutes after the Beaufighters commenced the attack, 13 B-25s of the 71st Bomb Squadron and five B-25s of the 13th Bomb Squadron made medium-
50
The Battle of the Bismarck Sea
level bombing runs against the convoy. Dropped from a height of 5300 feet, their bombs were nowhere near as effective as those dropped at low-level. They claimed two direct hits and several near misses against the transports.
The B-17 made several bombing runs from 7000 feet, each aircraft releasing four 1000-pound bombs at the ships, and claimed several direct hits. The confusing circumstances of the massed aerial attacks meant that it was difficult for individual aircraft to correctly indentify the battle damage resulting from their individual bombs and hence actual hits were typically over-claimed. A number of aircraft were fitted with cameras and subsequent analysis of the photographic images taken conclusively demonstrated the effectiveness of the air attacks. The battle damage assessment was undertaken far away in Brisbane by a group of RAAF and USAAF intelligence staff. These included members of the Women’s Auxiliary Australian Air Force who processed the films and reproduced the images.
RAAF armourers load a No 30 Squadron Beaufighter with 20mm shells before the battle. With four cannons in the nose the Beaufighters were excellent low-level strafers.
Wing Commander Brian ‘Black Jack’ Walker, Commanding Officer, No 30 Squadron RAAF.
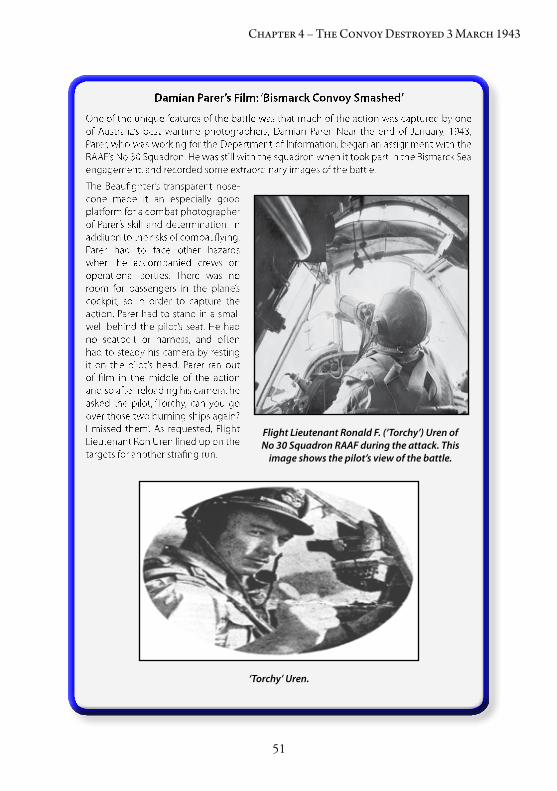
51
Chapter 4 – The Convoy Destroyed 3 March 1943
Flight Lieutenant Ronald F. (‘Torchy’) Uren of No 30 Squadron RAAF during the attack. This
image shows the pilot’s view of the battle.
‘Torchy’ Uren.
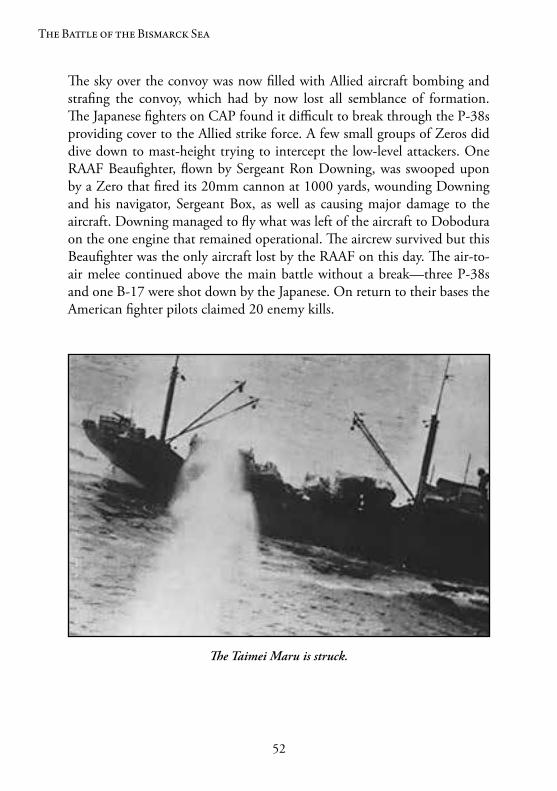
52
The Battle of the Bismarck Sea
The sky over the convoy was now filled with Allied aircraft bombing and strafing the convoy, which had by now lost all semblance of formation. The Japanese fighters on CAP found it difficult to break through the P-38s providing cover to the Allied strike force. A few small groups of Zeros did dive down to mast-height trying to intercept the low-level attackers. One RAAF Beaufighter, flown by Sergeant Ron Downing, was swooped upon by a Zero that fired its 20mm cannon at 1000 yards, wounding Downing and his navigator, Sergeant Box, as well as causing major damage to the aircraft. Downing managed to fly what was left of the aircraft to Dobodura on the one engine that remained operational. The aircrew survived but this Beaufighter was the only aircraft lost by the RAAF on this day. The air-to-air melee continued above the main battle without a break—three P-38s and one B-17 were shot down by the Japanese. On return to their bases the American fighter pilots claimed 20 enemy kills.
The Taimei Maru is struck.
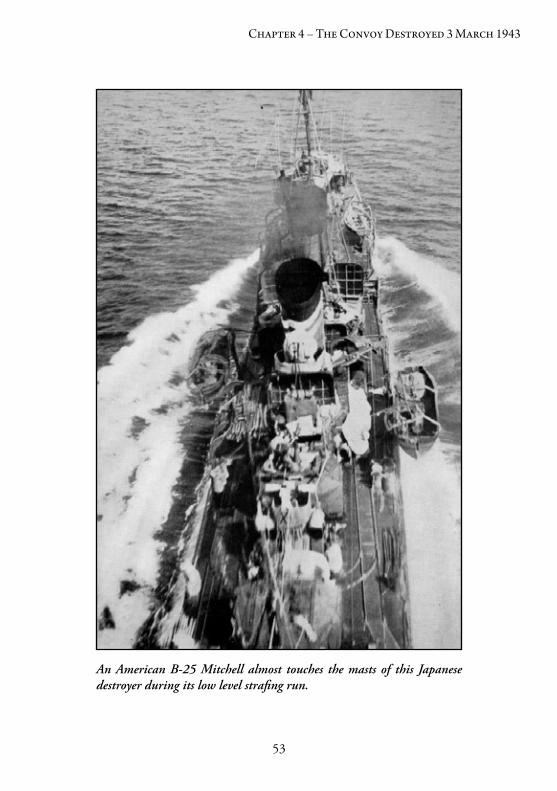
53
Chapter 4 – The Convoy Destroyed 3 March 1943
An American B-25 Mitchell almost touches the masts of this Japanese destroyer during its low level strafing run.
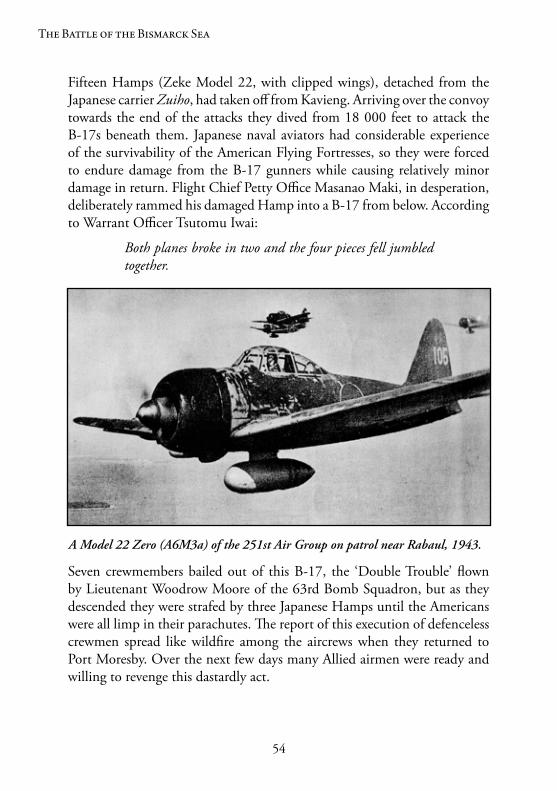
54
The Battle of the Bismarck Sea
Fifteen Hamps (Zeke Model 22, with clipped wings), detached from the Japanese carrier Zuiho, had taken off from Kavieng. Arriving over the convoy towards the end of the attacks they dived from 18 000 feet to attack the B-17s beneath them. Japanese naval aviators had considerable experience of the survivability of the American Flying Fortresses, so they were forced to endure damage from the B-17 gunners while causing relatively minor damage in return. Flight Chief Petty Office Masanao Maki, in desperation, deliberately rammed his damaged Hamp into a B-17 from below. According to Warrant Officer Tsutomu Iwai:
Both planes broke in two and the four pieces fell jumbled together .
Seven crewmembers bailed out of this B-17, the ‘Double Trouble’ flown by Lieutenant Woodrow Moore of the 63rd Bomb Squadron, but as they descended they were strafed by three Japanese Hamps until the Americans were all limp in their parachutes. The report of this execution of defenceless crewmen spread like wildfire among the aircrews when they returned to Port Moresby. Over the next few days many Allied airmen were ready and willing to revenge this dastardly act.
A Model 22 Zero (A6M3a) of the 251st Air Group on patrol near Rabaul, 1943.
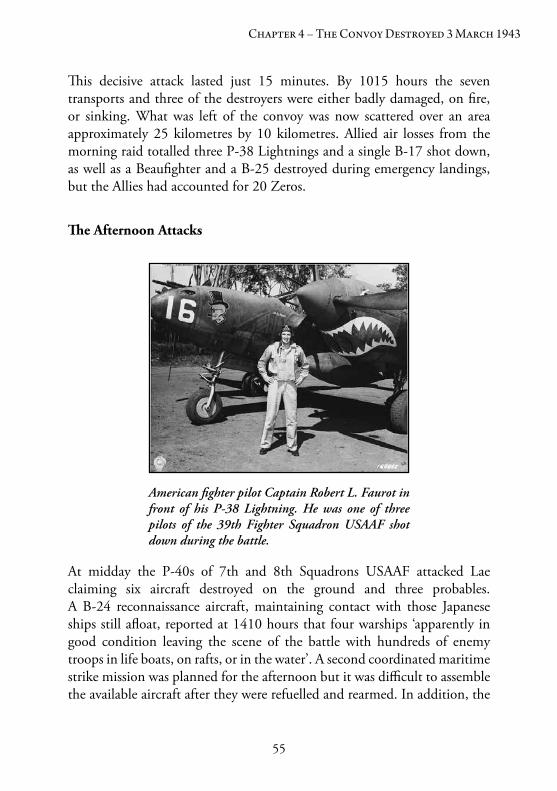
55
Chapter 4 – The Convoy Destroyed 3 March 1943
This decisive attack lasted just 15 minutes. By 1015 hours the seven transports and three of the destroyers were either badly damaged, on fire, or sinking. What was left of the convoy was now scattered over an area approximately 25 kilometres by 10 kilometres. Allied air losses from the morning raid totalled three P-38 Lightnings and a single B-17 shot down, as well as a Beaufighter and a B-25 destroyed during emergency landings, but the Allies had accounted for 20 Zeros.
The Afternoon Attacks
At midday the P-40s of 7th and 8th Squadrons USAAF attacked Lae claiming six aircraft destroyed on the ground and three probables. A B-24 reconnaissance aircraft, maintaining contact with those Japanese ships still afloat, reported at 1410 hours that four warships ‘apparently in good condition leaving the scene of the battle with hundreds of enemy troops in life boats, on rafts, or in the water’. A second coordinated maritime strike mission was planned for the afternoon but it was difficult to assemble the available aircraft after they were refuelled and rearmed. In addition, the
American fighter pilot Captain Robert L. Faurot in front of his P-38 Lightning. He was one of three pilots of the 39th Fighter Squadron USAAF shot down during the battle.
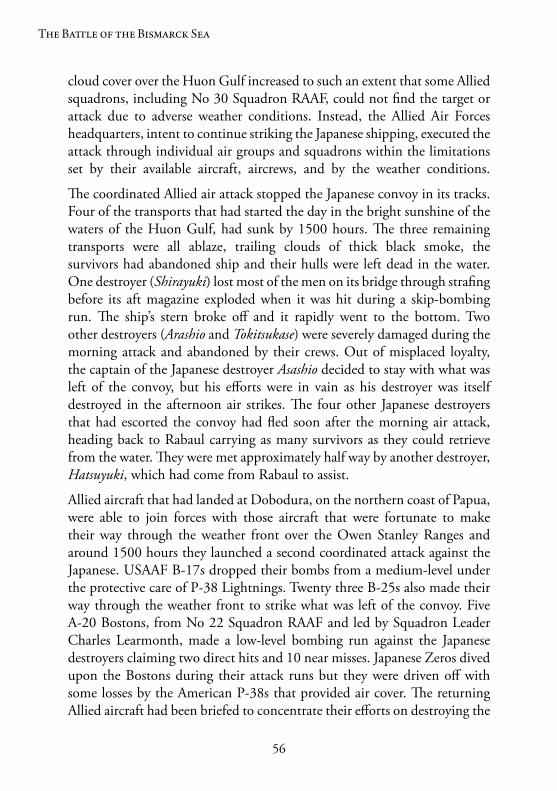
56
The Battle of the Bismarck Sea
cloud cover over the Huon Gulf increased to such an extent that some Allied squadrons, including No 30 Squadron RAAF, could not find the target or attack due to adverse weather conditions. Instead, the Allied Air Forces headquarters, intent to continue striking the Japanese shipping, executed the attack through individual air groups and squadrons within the limitations set by their available aircraft, aircrews, and by the weather conditions.
The coordinated Allied air attack stopped the Japanese convoy in its tracks. Four of the transports that had started the day in the bright sunshine of the waters of the Huon Gulf, had sunk by 1500 hours. The three remaining transports were all ablaze, trailing clouds of thick black smoke, the survivors had abandoned ship and their hulls were left dead in the water. One destroyer (Shirayuki) lost most of the men on its bridge through strafing before its aft magazine exploded when it was hit during a skip-bombing run. The ship’s stern broke off and it rapidly went to the bottom. Two other destroyers (Arashio and Tokitsukase) were severely damaged during the morning attack and abandoned by their crews. Out of misplaced loyalty, the captain of the Japanese destroyer Asashio decided to stay with what was left of the convoy, but his efforts were in vain as his destroyer was itself destroyed in the afternoon air strikes. The four other Japanese destroyers that had escorted the convoy had fled soon after the morning air attack, heading back to Rabaul carrying as many survivors as they could retrieve from the water. They were met approximately half way by another destroyer, Hatsuyuki, which had come from Rabaul to assist.
Allied aircraft that had landed at Dobodura, on the northern coast of Papua, were able to join forces with those aircraft that were fortunate to make their way through the weather front over the Owen Stanley Ranges and around 1500 hours they launched a second coordinated attack against the Japanese. USAAF B-17s dropped their bombs from a medium-level under the protective care of P-38 Lightnings. Twenty three B-25s also made their way through the weather front to strike what was left of the convoy. Five A-20 Bostons, from No 22 Squadron RAAF and led by Squadron Leader Charles Learmonth, made a low-level bombing run against the Japanese destroyers claiming two direct hits and 10 near misses. Japanese Zeros dived upon the Bostons during their attack runs but they were driven off with some losses by the American P-38s that provided air cover. The returning Allied aircraft had been briefed to concentrate their efforts on destroying the

57
Chapter 4 – The Convoy Destroyed 3 March 1943
transport vessels. They sighted the few defenceless transports and destroyers that were still afloat and in a short time two transports and a destroyer were sunk. One transport and two destroyers were left as abandoned hulks—awash, dead in the water and sinking.
Interrogation of No 22 Squadron RAAF personnel, including its Commanding Officer Squadron Leader Charles Learmonth, during the Bismarck Sea battle. Artwork by Roy Hodgkinson.

58
The Battle of the Bismarck Sea
Night Action
The Allied air attacks ceased with nightfall, however there was no respite for the unlucky Japanese. In the late afternoon, 10 US Navy PT Boats, stationed at Tufi and Milne Bay, were despatched northwards to conduct a night sweep of the Huon Gulf. Two boats hit submerged objects (flotsam) and had to return early in the patrol. At 2250 hours the remaining eight PT boats, under Lieutenant Commander Barry K. Atkins, USN, were off Lae heading towards the scene of the earlier attacks, illuminated by fire.They
A US Navy PT Boat on a mission during 1943. Japanese air power kept most PT Boats operations away from the Huon Gulf during daylight, but they were usefully employed
off the New Guinea coast under the cover of darkness.
59
Chapter 4 – The Convoy Destroyed 3 March 1943
torpedoed the derelict transport Oigawa Maru and watched it sink beneath the waves in a flurry of fire and smoke.
The two heavily damaged Japanese destroyers still afloat at nightfall were not seen by any of the PT boats. One destroyer, Tokitsukaze, went down around dawn on the following morning, 4 March, while the other, Asashio survived as a drifting half-sunken hulk until it was finally sunk by Japanese carrier attack aircraft late on the afternoon of 4 March.
At dusk, Allied reconnaissance aircraft reported that the seas of the Huon Gulf were covered by rafts, launches, lifeboats and barges all crammed with Japanese survivors.

60
The Battle of the Bismarck Sea
61
Chapter 5
Aftermath
4-8 March 1943
Death in the Water
When they were given intelligence that hundreds of Japanese soldiers and sailors had survived the air attacks of 3 March, the Allied air commanders ordered the Allied airmen to do everything they could to attack the Japanese. They had to prevent them from getting ashore and reinforcing their forces at Lae. Without thought of rescuing the shipwrecked Japanese sailors and soldiers, the Allies called for their destruction. Some of the Japanese were able to swim to motorized barges or launches, which remained afloat after the transports had sunk, and because these craft could be considered weapons with some military value, they were legitimate military targets. However, the majority of Japanese survivors were using lifeboats, rafts and debris to stay afloat, or just attempting to stay alive by floating or swimming. Rescue from the air was impossible, but even the efforts made to rescue Japanese from the water at night by USN PT boats, invariably resulted in Japanese swimming away from their potential rescuers. For the Japanese it was better to try and make their way ashore, or to die trying, than to become a prisoner of war. Surrender was avoided as they believed that it could only lead to religious, social and cultural disgrace.
Today’s military professionals, imbued with principles governing armed conflict: military necessity, distinction, proportionality, humanity, and chivalry, will find it hard to imagine how members of the armed forces thought during the 1940s. At that time, many Allied airmen, sailors and soldiers fighting against the Japanese in New Guinea believed that it was a military necessity to kill the Japanese soldiers before they had an opportunity to kill an Allied soldier. Some have suggested that there were racial factors
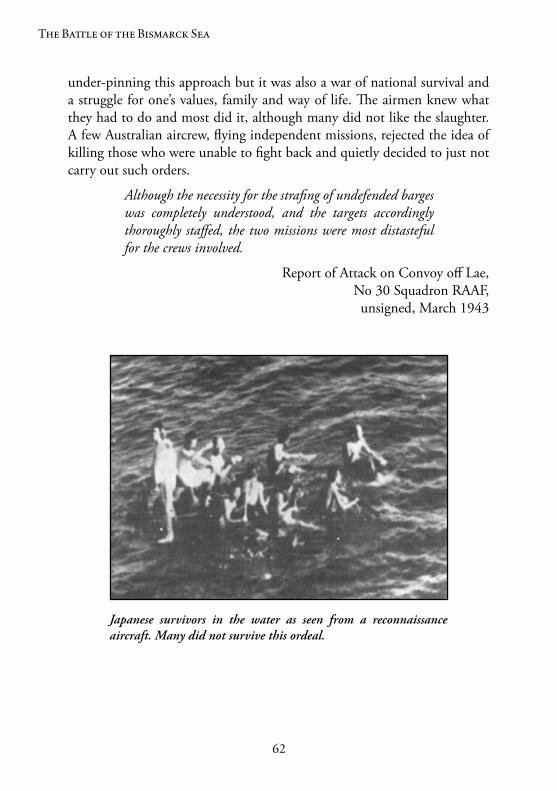
62
The Battle of the Bismarck Sea
under-pinning this approach but it was also a war of national survival and a struggle for one’s values, family and way of life. The airmen knew what they had to do and most did it, although many did not like the slaughter. A few Australian aircrew, flying independent missions, rejected the idea of killing those who were unable to fight back and quietly decided to just not carry out such orders.
Although the necessity for the strafing of undefended barges was completely understood, and the targets accordingly thoroughly staffed, the two missions were most distasteful for the crews involved .
Report of Attack on Convoy off Lae, No 30 Squadron RAAF, unsigned, March 1943
Japanese survivors in the water as seen from a reconnaissance aircraft. Many did not survive this ordeal.
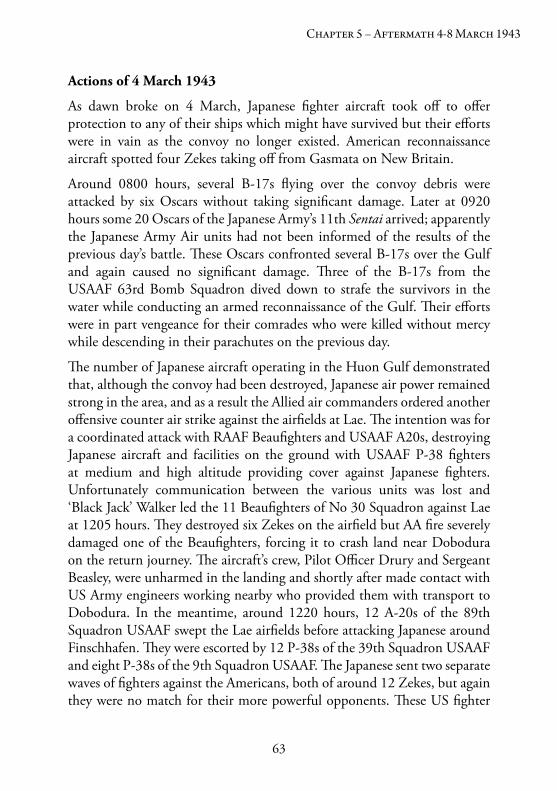
63
Chapter 5 – Aftermath 4-8 March 1943
Actions of 4 March 1943
As dawn broke on 4 March, Japanese fighter aircraft took off to offer protection to any of their ships which might have survived but their efforts were in vain as the convoy no longer existed. American reconnaissance aircraft spotted four Zekes taking off from Gasmata on New Britain.
Around 0800 hours, several B-17s flying over the convoy debris were attacked by six Oscars without taking significant damage. Later at 0920 hours some 20 Oscars of the Japanese Army’s 11th Sentai arrived; apparently the Japanese Army Air units had not been informed of the results of the previous day’s battle. These Oscars confronted several B-17s over the Gulf and again caused no significant damage. Three of the B-17s from the USAAF 63rd Bomb Squadron dived down to strafe the survivors in the water while conducting an armed reconnaissance of the Gulf. Their efforts were in part vengeance for their comrades who were killed without mercy while descending in their parachutes on the previous day.
The number of Japanese aircraft operating in the Huon Gulf demonstrated that, although the convoy had been destroyed, Japanese air power remained strong in the area, and as a result the Allied air commanders ordered another offensive counter air strike against the airfields at Lae. The intention was for a coordinated attack with RAAF Beaufighters and USAAF A20s, destroying Japanese aircraft and facilities on the ground with USAAF P-38 fighters at medium and high altitude providing cover against Japanese fighters. Unfortunately communication between the various units was lost and ‘Black Jack’ Walker led the 11 Beaufighters of No 30 Squadron against Lae at 1205 hours. They destroyed six Zekes on the airfield but AA fire severely damaged one of the Beaufighters, forcing it to crash land near Dobodura on the return journey. The aircraft’s crew, Pilot Officer Drury and Sergeant Beasley, were unharmed in the landing and shortly after made contact with US Army engineers working nearby who provided them with transport to Dobodura. In the meantime, around 1220 hours, 12 A-20s of the 89th Squadron USAAF swept the Lae airfields before attacking Japanese around Finschhafen. They were escorted by 12 P-38s of the 39th Squadron USAAF and eight P-38s of the 9th Squadron USAAF. The Japanese sent two separate waves of fighters against the Americans, both of around 12 Zekes, but again they were no match for their more powerful opponents. These US fighter
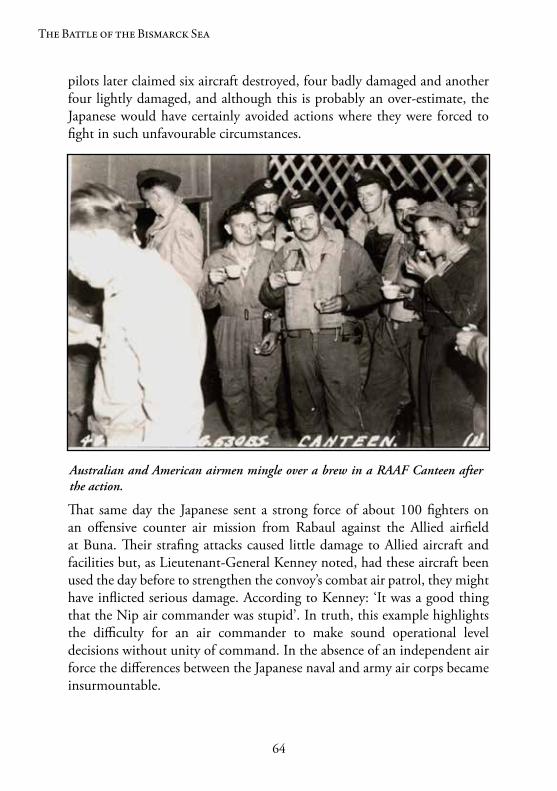
64
The Battle of the Bismarck Sea
pilots later claimed six aircraft destroyed, four badly damaged and another four lightly damaged, and although this is probably an over-estimate, the Japanese would have certainly avoided actions where they were forced to fight in such unfavourable circumstances.
That same day the Japanese sent a strong force of about 100 fighters on an offensive counter air mission from Rabaul against the Allied airfield at Buna. Their strafing attacks caused little damage to Allied aircraft and facilities but, as Lieutenant-General Kenney noted, had these aircraft been used the day before to strengthen the convoy’s combat air patrol, they might have inflicted serious damage. According to Kenney: ‘It was a good thing that the Nip air commander was stupid’. In truth, this example highlights the difficulty for an air commander to make sound operational level decisions without unity of command. In the absence of an independent air force the differences between the Japanese naval and army air corps became insurmountable.
Australian and American airmen mingle over a brew in a RAAF Canteen after the action.
65
Chapter 5 – Aftermath 4-8 March 1943
In the early afternoon, five Bostons from No 22 Squadron RAAF conducted a reconnaissance of the coastline from Cape Ward Hunt to Salamaua, hoping to find a Japanese destroyer or two. Not finding any naval target, these aircraft bombed a number of Japanese held villages in the area. Other Australian aircraft, including a Beaufort from No 100 Squadron and three Hudsons from No 6 Squadron conducted reconnaissance patrols across the Solomon Sea. In addition, one of the RAAF’s No 11 Squadron Catalinas conducted a standard 24-hour reconnaissance patrol across the Lae and Gasmata area with no sightings.
A separate Allied attack involving B-25s of the 90th Bomb Squadron, escorted by 12 P-40s of the 7th Fighter Squadron from Port Moresby, flew low over the convoy’s last known position and began bombing and strafing the survivors. Two 500-pound bombs hit the small vessels, sending them and the survivors onboard to a quick end. The B-25 crews expended around 18 000 rounds of .50-calibre ammunition in the target area, which by now extended over nine square miles. One of the Japanese survivors later remembered, ‘In this attack, most of our comrades were killed’. As the bloodbath continued, Allied pilots flying over the area saw large sharks circling in the area and it was clear that the Japanese survivors also had to cope with the fear of shark attacks. Many rafts and smaller vessels drifted at the will of the wind and tides but a few powered barges and boats attempted to navigate their way ashore. A few of these boats, those that were not destroyed in later air attacks, were blown south and ended up on the shores around Kiriwina Island and Goodenough Island. One barge even is reported to have reached the northern end of Guadalcanal in the southern Solomon Islands.
Retribution, 5-8 March 1943
On the night of the 4-5th March, US Navy PT boats returned to the Huon Gulf looking for downed Allied airmen. At around 0500 hours, two boats (PT-143 and PT-150) encountered the Japanese submarine I-17 on the surface taking onboard survivors from three lifeboats. The Americans attacked with torpedoes but they missed as the submarine crash-dived. The PT boasts were able to strafe the submarine’s conning tower as it submerged before dropping depth charges and sinking the lifeboats. A few Japanese
66
The Battle of the Bismarck Sea
survivors were eventually rescued by I-17 almost five hours later when it finally resurfaced. Over the next few days over 300 Japanese were rescued by submarines (I-17, I-26 and RO-101) and returned safely to Rabaul.
Allied aircraft, including No 6 Squadron Hudsons and American B-17s and B-24s, returned to the Huon Gulf and the New Guinea coast flying reconnaissance patrols in search of Japanese opposition. Apart from a few Japanese aircraft, they saw only an ever widening band of flotsam and jetsam across the entire Bismarck Sea.
Soon after dawn on 5 March, 30 Allied aircraft participated in an air attack against the Japanese airfields at Lae—three Bostons from No 22 Squadron and five Beaufighters from No 30 Squadron formed the RAAF contribution, while six A20s, eight P-40s and eight P-38s formed the USAAF contribution. These aircraft destroyed a few Japanese Zekes on the ground and another three or so in the air. The Americans lost one P-38 in the action, although its pilot survived. After this offensive counter air operation, the Japanese defenders temporarily withdrew their remaining aircraft from their forward positions and left the Allied aircraft with control of the air over the Bismarck Sea for the next week or so. Even so, pilots of the fighter squadrons based in Milne Bay and Port Moresby continued to fly routine covering patrols and were scrambled whenever unidentified aircraft were seen to approach the airfields by the various radar units.
In the meantime, however, the destruction of the Japanese survivors continued. Two groups of five Beaufighters of No 30 Squadron spent their afternoon strafing barges, lifeboats and swimmers. Alf Nelson described the slaughter from the rear of one of the Beaufighters; ‘...a very bloody show.The water in the bottom of the barges was red with blood. You could see the sea was stained all around.’ Over the course of the day approximately 24 barges were attacked and 350 Japanese killed. By the morning of 6 March, very few Japanese boats remained in the vicinity of the earlier battle. Those that had not been killed by the fire from Allied aircraft and PT boats mostly succumbed to exposure, thirst or sharks. Very few Japanese had made their way ashore. Four aircraft from No 22 Squadron did locate and destroy a small group of enemy barges and lifeboats that had drifted south. Four B-24s flying the standard reconnaissance patrols found alternative targets ashore before returning to Port Moresby.
67
Chapter 5 – Aftermath 4-8 March 1943
Japanese survivors lucky enough to have boarded a powered lifeboat or barge when the convoy sank were able to travel considerable distances, but their luck was to run out from 7 March when they found themselves in the vicinity of the D’Entrecasteaux and Trobriand Island Groups. After a group of lifeboats approaching Goodenough Island were spotted by No 100 Squadron aircraft, they were sunk and those in the water were strafed. Small groups of Japanese made it to shore on Goodenough, Islet and Kiriwina Islands, most of whom were killed by aircraft, PT boat crews or Australian soldiers. Very few Japanese were taken prisoner. The RAAF operators of 305 Radar Station at Kiriwina at first thought that their isolated island was being invaded by Japanese, but they soon sent out patrols and with Australian Army troops rounded up the few Japanese that did not die in suicidal attempts to take an Allied life along with their own. Sporadic actions occurred over the next few weeks but the gory aftermath of the Battle of the Bismarck Sea had run its course. The Allies and the Japanese gathered their thoughts and tried to determine what the lasting effects of the recent battle would be.
It was a grisly task, but a military necessity since Japanese soldiers do not surrender and, within swimming distance of shore, they could not be allowed to land and join the Lae garrison .
Samuel E. Morison, Breaking the Bismarcks Barrier, p. 62

68
The Battle of the Bismarck Sea
69
Chapter 6
Outcomes and Lessons
Comparing the Losses
Lieutenant-General Kenney’s intelligence reports stated that the Japanese lost 22 ships sunk, 55 aircraft destroyed and 15 000 men killed during the battle. General MacArthur accepted these claims and reported these figures as facts in his communiqués. These figures were known to be inflated by the usual over-confidence of the airmen involved, however they were compounded by the SWPA intelligence staff who mistakenly believed that there were two separate Japanese convoys, which had combined before they reached the Bismarck Sea:
. . .total ships involved were 22 . . . including 15 cargo/transport vessels .’
When this convoy effectively disappeared on the morning of 4 March, these intelligence officers assumed that all 22 vessels had been sunk.
Shortly after the battle it became clear that the Japanese had, in fact, lost 12 ships (including all eight transports), about 30 aircraft and over 3000 troops. Japanese destroyers and submarines had saved some 2700 men from the water during and after the battle. Allied losses were slight. Thirteen Allied airmen had lost their lives, eight men were wounded, and six Allied aircraft were lost in the battle—a B-17, and three P-38s (USAAF) shot down, one B-25 (USAAF) and a Beaufighter (RAAF) crashed on landing. In addition, four B-17s were badly damaged in action over the convoy.
At the time it was understandable that MacArthur did not release the correct figures, as the inflated extent of the Allied victory in the Bismarck Sea was of great psychological benefit to the American and Australian war effort. When asked about their victory after the war, however, both MacArthur and Kenney refused to correct their obviously outlandish claims. By that
70
The Battle of the Bismarck Sea
stage, it would be fair to say, each commander was more concerned about their own reputations than the truth.
Perhaps it was not really about the actual numbers, for the Battle of the Bismarck Sea was not only a major victory for the Allies, but it marks the strategic transition to the Allied offense phase in the SWPA. For the Japanese it truly was a watershed, although it was difficult to pin-down all the effects at the time.
The Lessons Learned
A number of tactical lessons were learnt during the Battle of the Bismarck Sea. The use of skip-bombing and low-level strafing attacks against shipping came as a tactical surprise, however within a few months the Japanese had modified their tactics to minimise the damage from such attacks. Fighter escort tactics were good, and the technological advantages of the latest Allied fighters were used to their upmost capabilities. The need for well trained, experienced crews, who had conducted realistic, practical, multi-squadron exercises prior to the actual attacks, was also reinforced.
Perhaps the most important lesson for the Allies was that a carefully coordinated attack by a massed concentration of aircraft could indeed achieve decisive results. The attack by 90 Allied aircraft during the Battle of the Bismarck Sea was decisive. Prior to the battle very few Allied air attacks had involved concerted action by more than one or two squadrons. Whereas offensive air operations in Europe almost always involved coordinated massed attacks, to minimise losses from both fighters and AA fire, the Allied air forces in the Pacific theatre did not at first adhere to this principle. Soon after Lieutenant-General Kenney arrived in the SWPA he ordered his operational commanders to husband their aircraft so that they would be available for fewer, better coordinated air attacks. By early 1943, Kenney’s air forces had been reinforced and had matured to a point where coordinated air attacks, such as that launched over the Japanese convoy at 1000 hours on 3 March 1943, were possible. From that time on, Kenney’s Allied Air Forces in the SWPA became more and more powerful. They fought for and gained air superiority over the Japanese Navy and Air Services across their operating area and so they provided the invisible umbrella for the Allied offensives that commenced in June 1943.
71
Chapter 6 – Outcomes and Lessons
The Japanese made a number of obvious mistakes during the battle, however, many of these were systemic to the Japanese way of war during World War II. Their two air services, Navy and Army, were unable to cooperate flexibly together for strategic objectives. Not only did they not conduct any offensive counter air missions on the morning of 3 March, but they were also unable to surge their combat air patrols over the convoy when it was attacked. Lacking radar, the ship AA fire and fighter escort was poorly coordinated, and although individual destroyers used radical manoeuvring to avoid air attack, by doing so they left the transports exposed and vulnerable. Perhaps the most unforgivable mistake was by the convoy commander, Rear Admiral Masatomi Kimura, when he delayed the convoy’s arrival at Lae until late in the morning of the 4th and by doing so sailed between several weather fronts that may have at least helped protect the convoy from a coordinated attack from the air. Strategically the Japanese war machine was unable to keep pace with the American’s rapid technological improvements, or the large number of thoroughly trained aircrew replacements that flowed into the Pacific from 1943 until the end of the war.
At the tactical level, RAAF squadrons gained significant experience and self-confidence. They were at last equal partners fighting in the air alongside their Americans allies. The lessons for the RAAF at the operational and strategic level were much more difficult to act upon. Despite considerable experience, the Australian leadership within RAAF Command and RAAF Headquarters were increasingly unable to influence events in the SWPA due to internal squabbling and political decisions. This does not mean that there weren’t many brave and courageous Australian airmen, as indeed the glorious annals of the RAAF in the Pacific between 1943 and 1945 demonstrate, rather it means that the ability of RAAF leaders to apply air power to achieve our national strategic ends were circumscribed by the strategies of our American commanders and our other Allies.
The Allied Victory
One of the reasons for MacArthur and Kenney making exaggerated claims for the Bismarck Sea victory is that they were under great pressure to make do with very limited resources. From Washington, the war in the SWPA was viewed as a backwater. The Allies had clearly stated that the defeat of
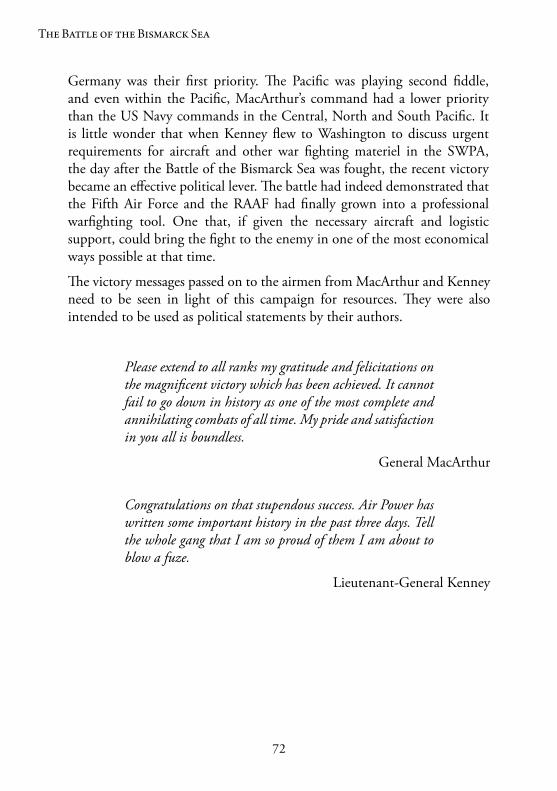
72
The Battle of the Bismarck Sea
Germany was their first priority. The Pacific was playing second fiddle, and even within the Pacific, MacArthur’s command had a lower priority than the US Navy commands in the Central, North and South Pacific. It is little wonder that when Kenney flew to Washington to discuss urgent requirements for aircraft and other war fighting materiel in the SWPA, the day after the Battle of the Bismarck Sea was fought, the recent victory became an effective political lever. The battle had indeed demonstrated that the Fifth Air Force and the RAAF had finally grown into a professional warfighting tool. One that, if given the necessary aircraft and logistic support, could bring the fight to the enemy in one of the most economical ways possible at that time.
The victory messages passed on to the airmen from MacArthur and Kenney need to be seen in light of this campaign for resources. They were also intended to be used as political statements by their authors.
Please extend to all ranks my gratitude and felicitations on the magnificent victory which has been achieved . It cannot fail to go down in history as one of the most complete and annihilating combats of all time . My pride and satisfaction in you all is boundless .
General MacArthur
Congratulations on that stupendous success . Air Power has written some important history in the past three days . Tell the whole gang that I am so proud of them I am about to blow a fuze .
Lieutenant-General Kenney
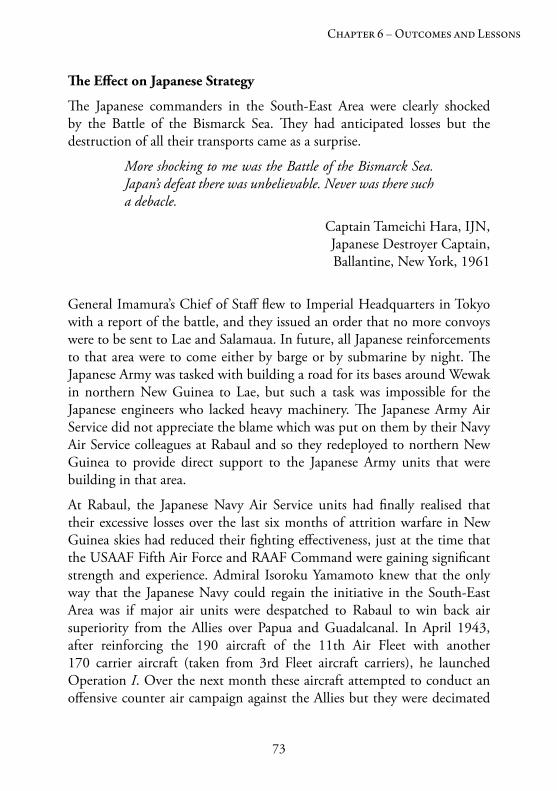
73
Chapter 6 – Outcomes and Lessons
The Effect on Japanese Strategy
The Japanese commanders in the South-East Area were clearly shocked by the Battle of the Bismarck Sea. They had anticipated losses but the destruction of all their transports came as a surprise.
More shocking to me was the Battle of the Bismarck Sea . Japan’s defeat there was unbelievable . Never was there such a debacle .
Captain Tameichi Hara, IJN, Japanese Destroyer Captain, Ballantine, New York, 1961
General Imamura’s Chief of Staff flew to Imperial Headquarters in Tokyo with a report of the battle, and they issued an order that no more convoys were to be sent to Lae and Salamaua. In future, all Japanese reinforcements to that area were to come either by barge or by submarine by night. The Japanese Army was tasked with building a road for its bases around Wewak in northern New Guinea to Lae, but such a task was impossible for the Japanese engineers who lacked heavy machinery. The Japanese Army Air Service did not appreciate the blame which was put on them by their Navy Air Service colleagues at Rabaul and so they redeployed to northern New Guinea to provide direct support to the Japanese Army units that were building in that area.
At Rabaul, the Japanese Navy Air Service units had finally realised that their excessive losses over the last six months of attrition warfare in New Guinea skies had reduced their fighting effectiveness, just at the time that the USAAF Fifth Air Force and RAAF Command were gaining significant strength and experience. Admiral Isoroku Yamamoto knew that the only way that the Japanese Navy could regain the initiative in the South-East Area was if major air units were despatched to Rabaul to win back air superiority from the Allies over Papua and Guadalcanal. In April 1943, after reinforcing the 190 aircraft of the 11th Air Fleet with another 170 carrier aircraft (taken from 3rd Fleet aircraft carriers), he launched Operation I. Over the next month these aircraft attempted to conduct an offensive counter air campaign against the Allies but they were decimated
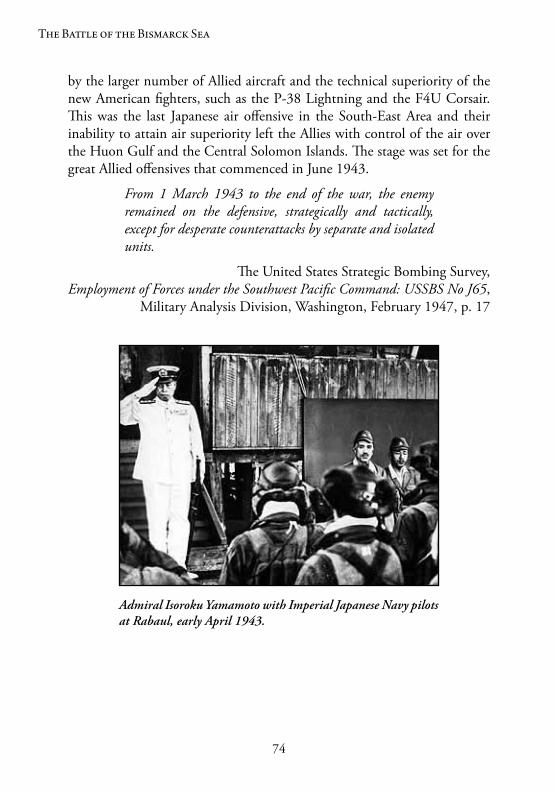
74
The Battle of the Bismarck Sea
by the larger number of Allied aircraft and the technical superiority of the new American fighters, such as the P-38 Lightning and the F4U Corsair. This was the last Japanese air offensive in the South-East Area and their inability to attain air superiority left the Allies with control of the air over the Huon Gulf and the Central Solomon Islands. The stage was set for the great Allied offensives that commenced in June 1943.
From 1 March 1943 to the end of the war, the enemy remained on the defensive, strategically and tactically, except for desperate counterattacks by separate and isolated units .
The United States Strategic Bombing Survey, Employment of Forces under the Southwest Pacific Command: USSBS No J65,
Military Analysis Division, Washington, February 1947, p. 17
Admiral Isoroku Yamamoto with Imperial Japanese Navy pilots at Rabaul, early April 1943.
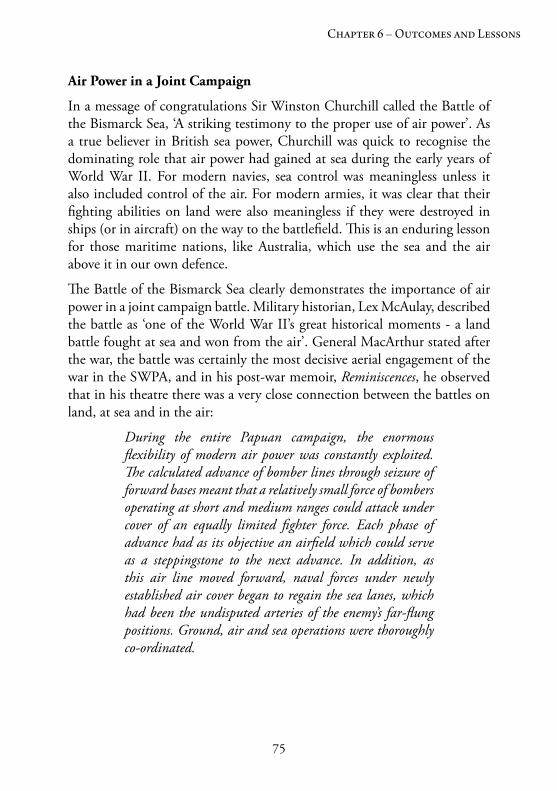
75
Chapter 6 – Outcomes and Lessons
Air Power in a Joint Campaign
In a message of congratulations Sir Winston Churchill called the Battle of the Bismarck Sea, ‘A striking testimony to the proper use of air power’. As a true believer in British sea power, Churchill was quick to recognise the dominating role that air power had gained at sea during the early years of World War II. For modern navies, sea control was meaningless unless it also included control of the air. For modern armies, it was clear that their fighting abilities on land were also meaningless if they were destroyed in ships (or in aircraft) on the way to the battlefield. This is an enduring lesson for those maritime nations, like Australia, which use the sea and the air above it in our own defence.
The Battle of the Bismarck Sea clearly demonstrates the importance of air power in a joint campaign battle. Military historian, Lex McAulay, described the battle as ‘one of the World War II’s great historical moments - a land battle fought at sea and won from the air’. General MacArthur stated after the war, the battle was certainly the most decisive aerial engagement of the war in the SWPA, and in his post-war memoir, Reminiscences, he observed that in his theatre there was a very close connection between the battles on land, at sea and in the air:
During the entire Papuan campaign, the enormous flexibility of modern air power was constantly exploited . The calculated advance of bomber lines through seizure of forward bases meant that a relatively small force of bombers operating at short and medium ranges could attack under cover of an equally limited fighter force . Each phase of advance had as its objective an airfield which could serve as a steppingstone to the next advance . In addition, as this air line moved forward, naval forces under newly established air cover began to regain the sea lanes, which had been the undisputed arteries of the enemy’s far-flung positions . Ground, air and sea operations were thoroughly co-ordinated .
76
The Battle of the Bismarck Sea
Although only a single battle within a campaign stretching across the Pacific, the Battle of the Bismarck Sea stands as a tribute to the skill and determination of the American and Australian airmen involved. The planning and execution of the battle provides ample confirmation of the utility of air power. The battle was one of the many joint victories that to contributed to the Allied strategy that inevitably overthrew Japanese aggression.
77
Appendix 1
Sources and Reading
IMAGES
Photographic and illustrations in this book were especially selected from the following sources: Aerospace Publishing, Australian War Memorial, Duigan Family, Imperial Japanese Navy, MacArthur’s Reports Vols. I and II, Maru Magazine, Takeo Tanimizu via Henry Sakaida, National Archives and Records Administration (United States), United States Army Air Force, United States Navy.
All other images were sourced within the Royal Australian Air Force.
UNPUBLISHED REFERENCES
Office of Air Force History (OAFH), Royal Australian Air Force, Canberra
OAFH Files 459/0439-0571, 460/0122-0397, 460/1034-1083, & 1259/1476-1639: Records on the Battle of the Bismarck Sea.
OAFH Files 7/0249, 23/0163, 30/0131, 51/0185, 53/0074 & 68/0066, RAAF Unit History Records.
Australian War Memorial, Canberra
AWM 54, Written Records, 1939-45 War.
AWM 123, ‘Special Collection II’ Defence Committee Records.
AWM 361, Official Records Microform Collection – Japanese Interrogations.
78
The Battle of the Bismarck Sea
National Archives of Australia, Canberra
B6121, Naval Historical Files, Navy Office [IV], Department of the Navy [II].
A9695, Historical Documents World War II, RAAF Series I.
A989, Correspondence Files, Department of External Affairs [II].
A5954, ‘The Shedden Collection’.
MP1049/5, Correspondence Files (General), Office [IV], Department of the Navy [II].
A8681, Public Relations Bulletins from the Department of Air, Directorate of Public Relations.
Specialist Studies
Angelella, Salvatore A., A Prototype JFACC: General George C . Kenny, United States Air Force Air University, Maxwell Air Force Base, Montgomery AL, 1994.
Gann, Timothy, Fifth Air Force Light and Medium Bomber Operations During 1942 and 1943: Building the Doctrine that Triumphed in the Battle of the Bismarck Sea and the Wewak Raid, United States Air Force Air University, Maxwell Air Force Base, Montgomery AL, 1992.
Holmgren, Jacob, The Battle of the Bismarck Sea: A Case Study in Innovation and Coalition/Joint Air Operations, United States Air Force Air University, Maxwell Air Force Base, Montgomery AL, 2008.
Lynd, William E (ed.), Air Transport Operations: Battle of Wau, Jan . – Feb . 1943, APO-925, Air Evaluation Board, Southwest Pacific Area, Melbourne, 10 June 1945.
Rice, Bert, 22 Squadron RAAF, unpublished history, c. 1990, (copy held by RAAF Office of Air Force History).
Watson, Richard L., Jr., The Fifth Air Force in the Huon Peninsular Campaign, January to October 1943, USAF Historical Study No. 113, History Office, Headquarters Army Air Forces, Washington, DC, 1946.
79
Appendix 1: Sources and Reading
Willoughby, Charles A (ed.), Reports of General MacArthur, Four Volumes, Center of Military History, US Army, Washington, DC, 1966.
United States Army Air Forces, Pacific Counterblow: The 11th Bombardment Group and the 67th Fighter Squadron in the Battle for Guadalcanal, Wings at War series No. 3, New Imprint by the Centre for Air Force History, Washington, DC, 1992.
United States Strategic Bombing Survey (Pacific), Final Reports of the USSBS, Pacific Survey, Military and Naval Analysis Divisions, Washington, DC, 1945-47, (various reports).
United States Strategic Bombing Survey (Pacific), Interrogations of Japanese Officials, (OPNAV-P-03-100), Naval Analysis Divisions, Washington, DC, 1 July 1946, (various reports).
PUBLISHED REFERENCES
Official Histories—Australia
Gill, G. Hermon, Australia in the War of 1939-1945 . Series 2 - Navy, Royal Australian Navy 1942-45, Volume II, Australian War Memorial, Canberra, 1968.
McCarthy, Dudley, Australia in the War of 1939-1945 . Series 1 - Army, South-West Pacific Area -First Year: Kokoda to Wau, Volume V, Australian War Memorial, Canberra, 1959.
Odgers, George, Australia in the War of 1939-1945 . Series 3 - Air, War Against Japan, 1943-1945, Volume II, Australian War Memorial, Canberra, 1968.
Official Histories—United States
Craven, Wesley F., and James L. Cate, The Pacific: Guadalcanal to Saipan, August 1942 to July1944, The Army Air Forces in World War II, Volume Four, University of Chicago Press, Chicago, IL, 1950.
80
The Battle of the Bismarck Sea
Miller, John, The War in the Pacific: Cartwheel: The Reduction of Rabaul, United States Army in World War II, Center of Military History, United States Army, Washington, DC, 1958.
Morison, Samuel E., History of the United States Naval Operations in World War II, Breaking the Bismarcks Barrier 22 July 1942 – 1 May 1944, Little, Brown and Co, Boston, MA., 1950.
Shaw, Henry I. and Douglas T. Kane, History of U .S . Marine Corps Operations in World War II: Isolation of Rabaul, Volume II, Headquarters United States Marine Corps, Washington, DC, 1963.
Official Histories—Japan
Bullard, Steven, Japanese Army Operations in the South Pacific Area: New Britain and Papua Campaigns, 1942–43, Australian War Memorial, Canberra, 2007.
Military History Office, National Defence College, Nihon Kaigun kokushi, Nihon Kaigun Kōkushi Hensan Iinkai hen, Vol. 4, Jiji Tsushinsha, Showa 44-, Tokyo,1969-. [Japanese].
Books
Alcorn, John S., Jolly Rogers: History of the 90th Bomb Group during World War II, Historical Aviation Album, Temple City, CA, 1981.
Bergerud, Eric M., Fire in the Sky: The Air War in the South Pacific, Westview Press, Boulder, CO, 2000.
Birdsall, Steve, Flying Buccaneers: The Illustrated History of Kenney’s Fifth Air Force, Doubleday, New York, 1977.
Bradley, Phillip, To Salamaua, Cambridge University Press, Cambridge, 2010.
81
Appendix 1: Sources and Reading
Brereton, Lewis, The Brereton Diaries: The War in the Air in the Pacific, Middle East and Europe, 3 October 1941—8 May 1945, William Morrow and Company, New York, 1946.
Buckley, Robert, PT Boats in the US Navy, Naval History Division, Washington DC, 1962.
Budiansky, Stephen, Air Power: The Men, Machines, and Ideas that Revolutionized War, from Kitty Hawk to Gulf War II, Viking Press, London, 2003.
Bullard, Steven and Tamura Keiko, From a Hostile Shore: Australia and Japan at War in New Guinea, Australian War Memorial, Canberra, 2004.
Casey, John W., Warriors without Weapons: Triumph of the Tech Reps, Premiere Editions International, Corvallis, OR, 2004.
Cortesi, Lawrence, Grim Reapers: History of the 3rd Bomb Group, 1918-1965, Historical Aviation Album, Temple City, CA, 1985.
Dick, George T., Beaufighters over New Guinea: No . 30 Squadron RAAF, 1942-1943, RAAF Museum, Point Cook, VIC, 1993.
Dower, John, War without Mercy: Race and Power in the Pacific War, Pantheon Books, New York, 1986.
Dull, Paul, A Battle History of the Imperial Japanese Navy, 1941-1945, Naval Institute Press, Annapolis, 1978.
Gamble, Bruce, Fortress Rabaul: The Battle for the Southwest Pacific, January 1942 - April 1943, Zenith Press, Minneapolis, MN, 2010.
Graham, Burton, None Shall Survive, Johnston Publishing, Sydney, 1944.
Griffith, Thomas, MacArthur’s Airman: General George C Kenney and the War in the Southwest Pacific, University Press of Kansas, Lawrence, KA, 1998.
Harries, Meirion and Susie, Soldiers of the Sun: The Rise and Fall of the Imperial Japanese Army, 1868-1945, William Heinemann Ltd, London, 1991.
Hayashi, Saburo and Alvin Coox, Kogun: The Japanese Army in the Pacific War, Marine Corps Association, Quantico, VA, 1959.

82
The Battle of the Bismarck Sea
Henebry, John P., The Grim Reapers at Work in the Pacific Theater: The Third Attack Group of the U .S . Fifth Air Force, Pictorial History Publishing, Missoula, MO, 2002.
Holmes, Tony, Twelve to One: V Fighter Command Aces of the Pacific, Osprey, Oxford, 2004.
Kenney, George, General Kenney Reports: A Personal History of the Pacific War, United States Air Force History and Museums Program, Washington, DC, 1997.
Kenney, George, The Saga of Pappy Gunn, Duell, Sloan and Pearce, New York, 1959.
Kreis, John F (ed.), Piercing the Fog: Intelligence and Army Air Forces Operations in World War II, Air Force History and Museums Program, Washington, DC, 1996.
MacArthur, Douglas, Reminiscences, Da Capo Press, New York, 1964.
McAulay, Lex, Battle of the Bismarck Sea, St Martin’s Press, New York, 1991.
McDonald, Neil, War Cameraman: The Story of Damien Parer, Lothian Books, Port Melbourne, 1994.
Minty, Bill, Black Cats: The Real Story of Australia’s Long Range Catalina Strike Force in the Pacific War, RAAF Museum, Point Cook, VIC, 2001.
Murphy, James T., and A.B. Feuer, Skip Bombing, Praeger, Westport, CT, 1993.
Null, Gary, Weapon of Denial: Air Power and the Battle for New Guinea, US Air Force, Office of Air Force History, 1995.
Parnell, Neville, Beaufighters in the Pacific: A History of the RAAF Beaufighter Squadrons in the South West Pacific Area, 2nd edn, Reed Publications, Sydney, 2005.
Pearson, Ross, Australians at War in the Air, 1939-1945, Kangaroo Press, Kenthurst, NSW, 1995.
Peattie, Mark R., Sunburst: The Rise of Japanese Naval Air Power, 1909-1941, Naval Institute Press, Annapolis, MD, 2001.
83
Appendix 1: Sources and Reading
Rodman, Matthew K., A War of Their Own: Bombers over the Southwest Pacific, Air University Press, Maxwell Air Force Base, Alabama, 2005.
Saburo Sakai, with Martin Caidin, and Fred Saito, Samurai!, Dutton, New York, 1957, (numerous reprints).
Sakaida, Henry, Imperial Japanese Navy Aces 1937-45, Osprey, Oxford, 1998.
Sakaida, Henry, Imperial Japanese Army Air Force Aces 1937-45, Osprey, Oxford, 1997.
Stephens, Alan (ed.), The RAAF in the SWPA, 1942-1945, Proceedings of the Royal Australian Air Force History Conference, Air Power Studies Centre, Canberra, 1993.
Stanaway, John, P-38 Lightning Aces of the Pacific and CBI, Osprey, Oxford, 1997.
Stanaway, John and Bob Rocker, Eight Ballers: Eyes of the Fifth Air Force, Schiffer, Atglen, PA, 1999.
Tameichi Hara, with Fred Saito and Roger Pineau, Japanese Destroyer Captain, Ballantine, New York, 1961.
Tracey, Michael, Jess Isaacs, and Irene Coombes, The Battle of the Bismarck Sea: 50th Anniversary Commemoration, Australian Defence Force Journal, Canberra, 1993.
Walker, Brian, Black Jack: 50 Years as a Pilot; 1935-1985, Banner Books, Canberra, 1994.
Wilson, Stewart, Beaufort, Beaufighter and Mosquito in Australian Service, Aerospace Publications, Weston Creek, ACT, 1993.
Woods, Wiley O., Jr., Legacy of the 90th Bombardment Group: The Jolly Rogers, Turner Publishing, Paducah, KY, 1994.
Selected Articles
Anon., ‘U.S. Victory in the Bismarck Sea’, Life, Vol. 14, No. 12, March 22, 1943, pp. 27-29.
84
The Battle of the Bismarck Sea
Anon, ‘Bismarck Sea Battle’, in RAAF Log, Royal Australian Air Force & Australian War Memorial, Canberra, 1943, pp. 48-50.
Griffith, Thomas E., Jr., ‘Airpower in the Pacific: A Case Study in Innovation’, Joint Force Quarterly, No. 26, Autumn 2000, pp. 32-37.
Mets, David, ‘The Battle of the Bismarck Sea: A Proving Ground for Air Power Theory and Doctrine’, Air Power Review, Vol. 7, No. 3, Autumn 2004, pp. 65-76.
Spinetta, Lawrence J., ‘Sinking Ships’, Air Force Magazine, July 2006, pp. 78-82.
Selected Websites
Joyce, J.,The Story of the RAAF Meteorological Service, Metarch Papers, No. 5 October 1993, Bureau of Meteorology, http://www.austehc.unimelb.edu.au/fam/0285.html, accessed 24 January 2013.
http://www.pacificwrecks.com/ships, accessed 23 January 2013.
http://ajrp.awm.gov.au/, accessed 23 January 2013.
http://www.ibiblio.org/hyperwar, accessed 24 January 2013.
Suggested Reading
The following reading material provides background for those looking for supplementary information on the battle.
Gamble, Bruce, Fortress Rabaul: The Battle for the Southwest Pacific, January 1942 - April 1943, Zenith Press, Minneapolis, MN, 2010.
McAulay, Lex, Battle of the Bismarck Sea, St Martin’s Press, New York, 1991.
Null, Gary, Weapon of Denial: Air Power and the Battle for New Guinea, US Air Force, Office of Air Force History, 1995.
85
Appendix 1: Sources and Reading
Odgers, George, Australia in the War of 1939-1945 . Series 3 - Air, War Against Japan, 1943-1945, Volume II, Australian War Memorial, Canberra, 1968.