Embed Size (px)
Citation preview
THE CUSTOM EDITIONMODEL 1911THE COMPLETE BOOK OF THE
WILSON COMBAT CONTEMPORARY CLASSIC
CENTENNIAL
LES BAER CUSTOM CENTENNIAL
ED BROWN CENTENNIAL
USA/CANADA$8.99DISPLAY UNTIL 11/07/2011
FROM THE PUBLISHERS OF GUNS & AMMO ANNUAL
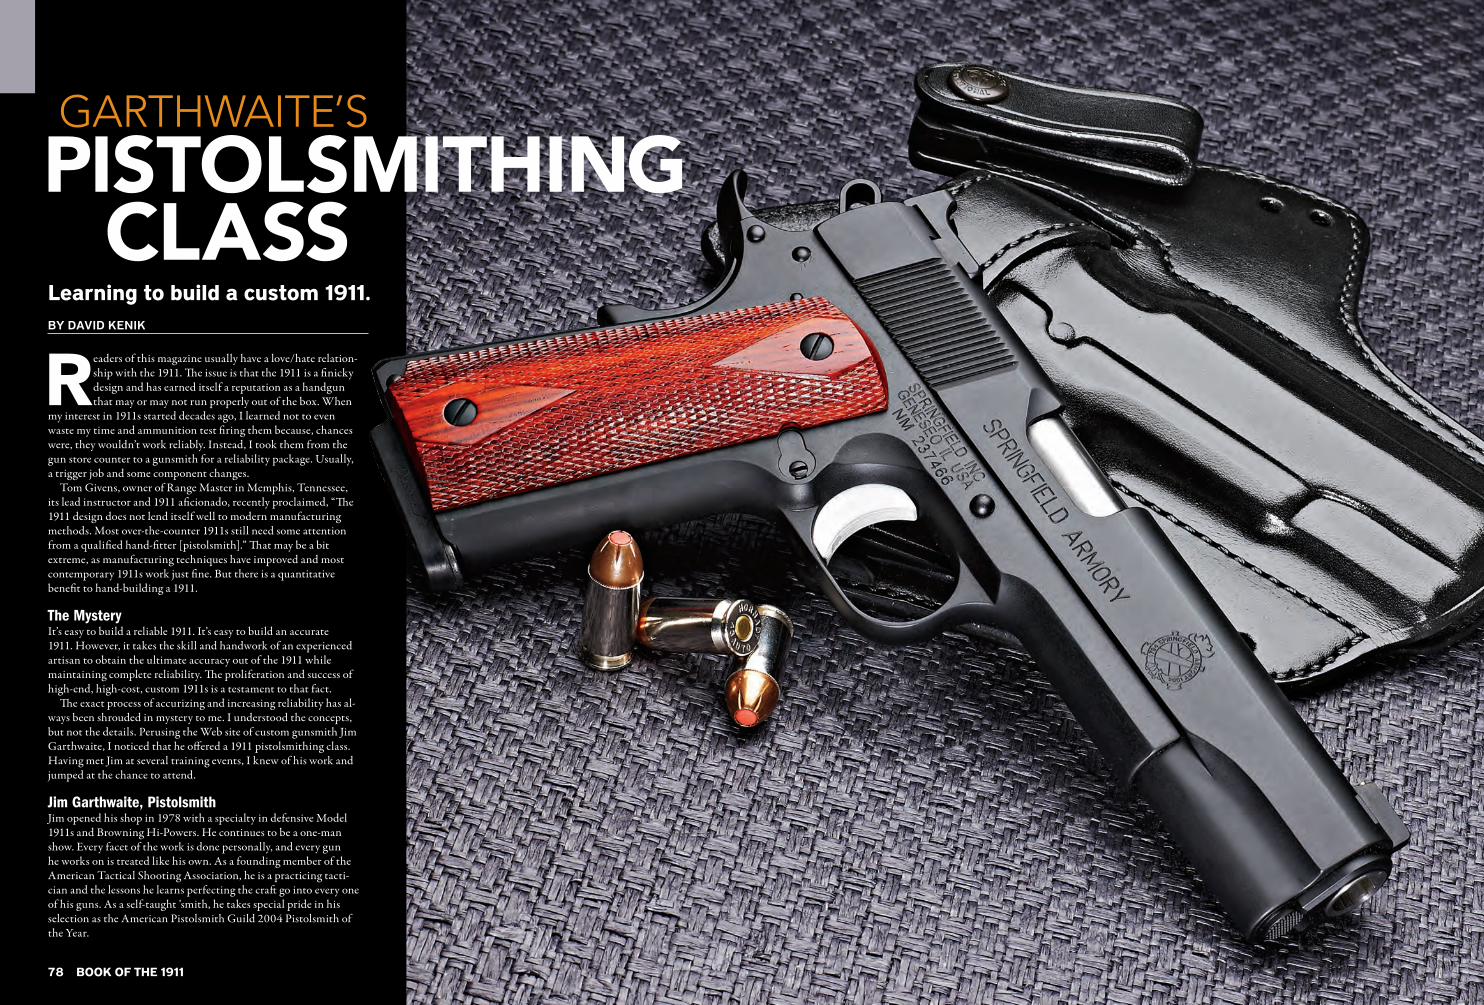
Readers of this magazine usually have a love/hate relation-ship with the 1911. The issue is that the 1911 is a finicky design and has earned itself a reputation as a handgun that may or may not run properly out of the box. When
my interest in 1911s started decades ago, I learned not to even waste my time and ammunition test firing them because, chances were, they wouldn’t work reliably. Instead, I took them from the gun store counter to a gunsmith for a reliability package. Usually, a trigger job and some component changes.
Tom Givens, owner of Range Master in Memphis, Tennessee, its lead instructor and 1911 aficionado, recently proclaimed, “The 1911 design does not lend itself well to modern manufacturing methods. Most over-the-counter 1911s still need some attention from a qualified hand-fitter [pistolsmith].” That may be a bit extreme, as manufacturing techniques have improved and most contemporary 1911s work just fine. But there is a quantitative benefit to hand-building a 1911.
The MysteryIt’s easy to build a reliable 1911. It’s easy to build an accurate 1911. However, it takes the skill and handwork of an experienced artisan to obtain the ultimate accuracy out of the 1911 while maintaining complete reliability. The proliferation and success of high-end, high-cost, custom 1911s is a testament to that fact.
The exact process of accurizing and increasing reliability has al-ways been shrouded in mystery to me. I understood the concepts, but not the details. Perusing the Web site of custom gunsmith Jim Garthwaite, I noticed that he offered a 1911 pistolsmithing class. Having met Jim at several training events, I knew of his work and jumped at the chance to attend.
Jim Garthwaite, PistolsmithJim opened his shop in 1978 with a specialty in defensive Model 1911s and Browning Hi-Powers. He continues to be a one-man show. Every facet of the work is done personally, and every gun he works on is treated like his own. As a founding member of the American Tactical Shooting Association, he is a practicing tacti-cian and the lessons he learns perfecting the craft go into every one of his guns. As a self-taught ’smith, he takes special pride in his selection as the American Pistolsmith Guild 2004 Pistolsmith of the Year.
Learning to build a custom 1911.BY DAVID KENIK
BOOK OF THE 191178
CLASS
GARTHWAITE’SPISTOLSMITHING
GARTHWAITE’S PISTOLSMITHING CLASS
80 BOOK OF THE 1911 BOOK OF THE 1911 81 gunsandammo.comgunsandammo.com
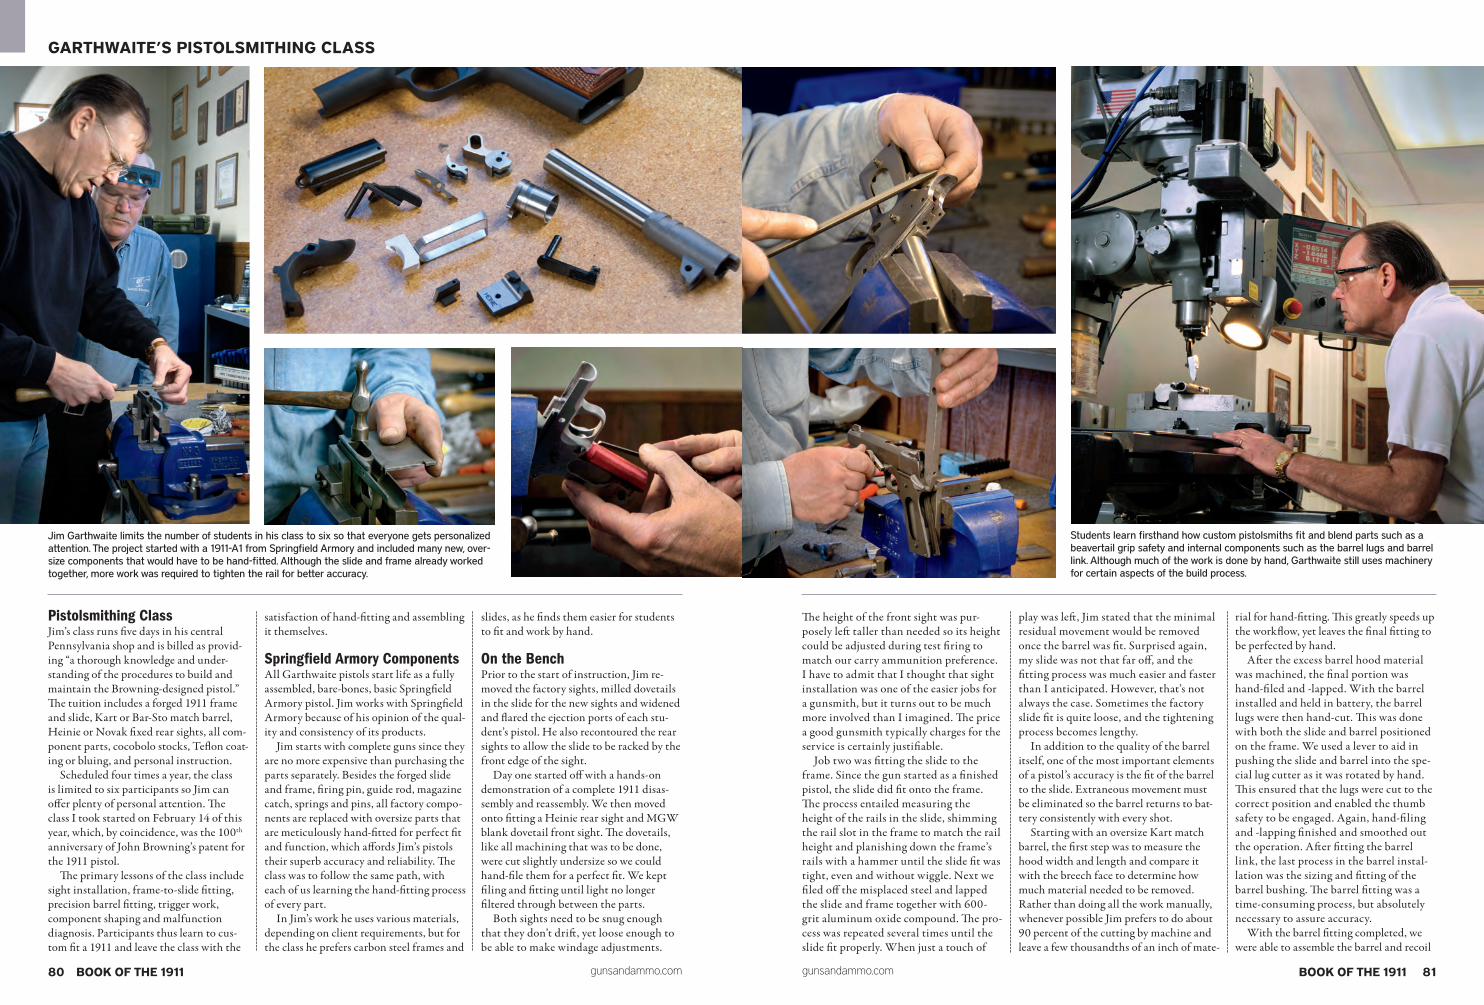
Pistolsmithing ClassJim’s class runs five days in his central Pennsylvania shop and is billed as provid-ing “a thorough knowledge and under-standing of the procedures to build and maintain the Browning-designed pistol.” The tuition includes a forged 1911 frame and slide, Kart or Bar-Sto match barrel, Heinie or Novak fixed rear sights, all com-ponent parts, cocobolo stocks, Teflon coat-ing or bluing, and personal instruction.
Scheduled four times a year, the class is limited to six participants so Jim can offer plenty of personal attention. The class I took started on February 14 of this year, which, by coincidence, was the 100th anniversary of John Browning’s patent for the 1911 pistol.
The primary lessons of the class include sight installation, frame-to-slide fitting, precision barrel fitting, trigger work, component shaping and malfunction diagnosis. Participants thus learn to cus-tom fit a 1911 and leave the class with the
satisfaction of hand-fitting and assembling it themselves.
Springfield Armory ComponentsAll Garthwaite pistols start life as a fully assembled, bare-bones, basic Springfield Armory pistol. Jim works with Springfield Armory because of his opinion of the qual-ity and consistency of its products.
Jim starts with complete guns since they are no more expensive than purchasing the parts separately. Besides the forged slide and frame, firing pin, guide rod, magazine catch, springs and pins, all factory compo-nents are replaced with oversize parts that are meticulously hand-fitted for perfect fit and function, which affords Jim’s pistols their superb accuracy and reliability. The class was to follow the same path, with each of us learning the hand-fitting process of every part.
In Jim’s work he uses various materials, depending on client requirements, but for the class he prefers carbon steel frames and
slides, as he finds them easier for students to fit and work by hand.
On the BenchPrior to the start of instruction, Jim re-moved the factory sights, milled dovetails in the slide for the new sights and widened and flared the ejection ports of each stu-dent’s pistol. He also recontoured the rear sights to allow the slide to be racked by the front edge of the sight.
Day one started off with a hands-on demonstration of a complete 1911 disas-sembly and reassembly. We then moved onto fitting a Heinie rear sight and MGW blank dovetail front sight. The dovetails, like all machining that was to be done, were cut slightly undersize so we could hand-file them for a perfect fit. We kept filing and fitting until light no longer filtered through between the parts.
Both sights need to be snug enough that they don’t drift, yet loose enough to be able to make windage adjustments.
Jim Garthwaite limits the number of students in his class to six so that everyone gets personalized attention. The project started with a 1911-A1 from Springfield Armory and included many new, over-size components that would have to be hand-fitted. Although the slide and frame already worked together, more work was required to tighten the rail for better accuracy.
The height of the front sight was pur-posely left taller than needed so its height could be adjusted during test firing to match our carry ammunition preference. I have to admit that I thought that sight installation was one of the easier jobs for a gunsmith, but it turns out to be much more involved than I imagined. The price a good gunsmith typically charges for the service is certainly justifiable.
Job two was fitting the slide to the frame. Since the gun started as a finished pistol, the slide did fit onto the frame. The process entailed measuring the height of the rails in the slide, shimming the rail slot in the frame to match the rail height and planishing down the frame’s rails with a hammer until the slide fit was tight, even and without wiggle. Next we filed off the misplaced steel and lapped the slide and frame together with 600-grit aluminum oxide compound. The pro-cess was repeated several times until the slide fit properly. When just a touch of
play was left, Jim stated that the minimal residual movement would be removed once the barrel was fit. Surprised again, my slide was not that far off, and the fitting process was much easier and faster than I anticipated. However, that’s not always the case. Sometimes the factory slide fit is quite loose, and the tightening process becomes lengthy.
In addition to the quality of the barrel itself, one of the most important elements of a pistol’s accuracy is the fit of the barrel to the slide. Extraneous movement must be eliminated so the barrel returns to bat-tery consistently with every shot.
Starting with an oversize Kart match barrel, the first step was to measure the hood width and length and compare it with the breech face to determine how much material needed to be removed. Rather than doing all the work manually, whenever possible Jim prefers to do about 90 percent of the cutting by machine and leave a few thousandths of an inch of mate-
rial for hand-fitting. This greatly speeds up the workflow, yet leaves the final fitting to be perfected by hand.
After the excess barrel hood material was machined, the final portion was hand-filed and -lapped. With the barrel installed and held in battery, the barrel lugs were then hand-cut. This was done with both the slide and barrel positioned on the frame. We used a lever to aid in pushing the slide and barrel into the spe-cial lug cutter as it was rotated by hand. This ensured that the lugs were cut to the correct position and enabled the thumb safety to be engaged. Again, hand-filing and -lapping finished and smoothed out the operation. After fitting the barrel link, the last process in the barrel instal-lation was the sizing and fitting of the barrel bushing. The barrel fitting was a time-consuming process, but absolutely necessary to assure accuracy.
With the barrel fitting completed, we were able to assemble the barrel and recoil
Students learn firsthand how custom pistolsmiths fit and blend parts such as a beavertail grip safety and internal components such as the barrel lugs and barrel link. Although much of the work is done by hand, Garthwaite still uses machinery for certain aspects of the build process.

GARTHWAITE’S PISTOLSMITHING CLASS
82 BOOK OF THE 1911 gunsandammo.com
spring within the slide and mate it to the frame to check the function. This step was encouraging, as we saw for the first time that the barrel lowered and returned to battery perfectly with the cycling of the slide. It was also exciting to see that the fi-nal fitting of the barrel tightened the slide fit to the point that there was absolutely no extraneous movement—a hallmark of a well-built pistol.
Checking the head space with go/no-go gauges, we determined that the cham-ber in my barrel needed to be reamed to fit the cartridge properly since we reduced the barrel hood length. We increased the chamber’s depth by hand-reaming it a few thousandths of an inch deeper. To
ensure that we didn’t cut too deeply, we reamed it in multiple steps until the bar-rel locked perfectly with the go gauge in the chamber.
Installing a Wilson Combat grip safety was next on the list. The contour of the grip safety that surrounds the hinge loca-tion was smaller and shaped differently than the frame, so we used a bolt-on jig as a guide and removed most of the excess frame material with a belt sander. The frame and entire length of the grip safety were then reshaped by hand-filing until they melded together perfectly. Though not necessary for reliability or accuracy, a custom-fit grip safety gives the pistol a pro-fessional presentation and greatly affects
how the firearm feels in the hand.With all the hand-filing we did, I
received plenty of experience with a gun-smith’s best friend, Dykem. This colored liquid is applied along parts that need to be fitted together. Quickly drying to a very thin coating, the Dykem is removed where the parts rub together, leaving a visual indication of the exact location where additional filing is required. Difficult-to-fit parts such as the grip safety required numerous applications.
After shaping and fitting the safety, the fire-control parts were installed. We started by cleaning out the frame’s trigger bow slot and fitted an oversize trigger, making sure it functioned with a magazine
Building a custom 1911 in Garthwaite’s pistolsmithing class is more than how to make it aesthetically pleasing. He teaches how to make the pistol function safely, reliably and accurately. Before the class is over, students take their 1911s to the range to fit the sights to a particular load. A sight adjustment tool joins the class on the bench for any necessary windage adjustments.
As part of tuition, students get the choice of finishing their 1911 with a black oxide or black Teflon coating. The author chose black Teflon for its low reflectivity and high lu-bricity. The front sight features a brass bead, and the rear Heinie sight can be used for one-handed slide manipula-tion. Everything down to the fitted Kart .45 National Match barrel suggests that this was built by the hands of a well-trained 1911 pistolsmith.
BOOK OF THE 1911 83 gunsandammo.com
GARTHWAITE’S PISTOLSMITHING CLASS
BOOK OF THE 1911 85 gunsandammo.com
in place. Those that didn’t had their bows adjusted. The hammer, sear and disconnec-tor that we used are specially built for Jim to his exacting specifications. In addition to being used in his custom pistols, they are also available through his Web site.
We first tested the sear engagement to the hammer with the use of jigs that mounted onto the frame for easy inspec-tion of the parts. The jigs inserted into the sear and hammer pin holes so they held the parts outside the frames in the precise relationship they will be in when installed. As it turned out, the sears and hammers needed almost no adjustment due to the outstanding precision of the Electrical Discharge Machining (EDM) used in their manufacture. With the fire-control system in place and the trigger breaking clean at about four pounds, we adjusted the trigger’s takeup and overtravel and
made the final functional adjustments to the safeties.
The mainspring housing needed major reshaping to meld the edges of the hous-ing to the frame so it looks and feels like a single part. Like the grip safety, the housing is not responsible for increasing accuracy or reliability, but it greatly affects how the pistol feels in the hand and its visual appeal.
To reduce the possibility of an ac-cidental discharge of a live round hitting the ejector and eliminate a common snag point, the angle of the ejector was reshaped and the overall length was shortened to allow a cartridge to be ejected with plenty of clearance past the barrel opening and ejection port. Depending on the design, the ejector was then reinstalled with a pin or Loctite. Likewise, the extractor was tuned to ensure that it located itself
properly within the frame and achieved a positive lock on the case edge without being overly tight.
With all the integral components reshaped, fitted and installed, the frame’s slide rails and the rear of the slide, along with the extractor, were filed and reshaped until they were flush fit.
The final part to be fitted was a set of Craig Spegel cocobolo grip panels. We confirmed that the screw holes were sized and located correctly and did a small amount of carving to the left panel to clear the rotation of the safety. Once this was completed, we were finally able to put the fully assembled and fitted product in our hand. I might be biased, but it was the best-fitting 1911 I have ever held. The difference between our handiwork and my other 1911s was clearly the work we put into melding and reshaping the grip safety
SOURCES
HEINIE SPECIALITY PRODUCTS217-228-9500heinie.com
KART PRECISION BARREL CORP.910-754-5212
MGW PRECISION706-793-1770mgwltd.com
PISTOLSMITH570-538-1566garthwaite.com
SPRINGFIELD ARMORY800-680-6866
springfieldarmory.com
WILSON COMBAT800-955-4856
wilsoncombat.com
and mainspring housing to the frame.This was also our first opportunity to
test feeding reliability. Taking the pistols outside where it was safe, we cycled, without firing, FMJ and several types of hollowpoint ammunition to test function. Feeding was without failure. The pistol was finally ready for live-fire testing.
With just an hour left of day four, we finished with a hands-on demonstration of checkering. The thought of doing such pre-cise work by hand initially raised a concern, but I found the process less complicated than I had anticipated. Simply stated, hand-checkering is done with special files cut at the specific line spacing required for it. For the front and rear straps, a 30-lpi file is run back and forth along the grip along a guide to keep it straight to cut approxi-mately 10 30-lpi grooves simultaneously in the frame in a single direction. The file is moved over sideways to cut additional grooves, and the process repeats until the entire grip is cut. Grooves are then cut in the perpendicular direction to form the checkering. While Jim made it look simple, this process is definitely an art and experi-ence is the best teacher.
The morning of the last day of class was the live-fire testing. We started on the bench with a rest to check accuracy and sight alignment with each participant’s choice of carry ammunition. Jim brought along a sight pusher, and we made wind-age adjustments right there at the range. During the fitting process, we purposely left the front sight heights tall so we could adjust them on the range. The process was quite simple, with Jim setting a hand
file onto the front sight and on a spacer that sat atop the rear sight. The use of the spacer formed a slight angle on the front sight so the shooter only sees the front edge of the sight and not the top. The filing was done in several steps, with us stopping to test fire with each increment until the point of impact was exactly where we wanted it. During the accuracy bench tests I found that feeding was an issue with the Cor-Bon DPX ammunition I carry due to its very wide mouth. We tested the pistol off the bench, and it fed flawlessly when handholding. We made note to adjust the barrel ramp slightly when we returned to the shop.
The rest of the range time was primarily devoted to function testing. We shot two-handed and one-handed and purposely shot limp-wristed in an attempt to foul the gun’s function, but the pistols took all we could dish out without hesitation.
Final cleanup of scratches and rough edges was done back at the shop after the range session. After that, all that was left was surface blasting with aluminum oxide to smooth the surfaces, application of the finish, setting a gold bead in the front sight and pinning the sight to the frame. Jim completed these on his own after the class due to time constraints. As part of the tuition, we had a choice of black oxide (bluing) or black Teflon coating, both of which Jim does in-house. I chose black Teflon because of its low reflectivity and high lubricity, which reduces the need for oil and helps keep the pistol running.
There were lots of steps that we per-formed that I did not detail here. If I had,
this article would have turned into a book. The attention to detail required to build a pistol of this quality is astounding. Every component, save for the firing pin and a few springs, was modified, and in most cases several functional modifications were made to each part in addition to reshap-ing. This class has instilled in me a tremen-dous appreciation for the knowledge and skills needed to hand-build a pistol of this quality and forever deepened my respect for John Browning’s design, which has not just survived a century, but continues to serve as a primary gun for our military, police and the armed citizen.
Parting ThoughtsI would be remiss if I did not admit that I was somewhat apprehensive about spending a week behind a bench, but Jim’s teaching and personal attention made it easy and the hours f lew by quickly. Jim not only taught us what we needed to do, but why it was necessary, and he demonstrated how each part worked and interacted with the rest of the system. This information is not only useful in building pistols, but for diag-nosing malfunctions as well. If you own a 1911, you will find this class invalu-able in understanding the function and operation of every component.
In addition to the knowledge and experience gained, I am now the proud owner of a well-built defensive pistol that I painstakingly fit and assembled myself. This will be remembered with each pull of the trigger for years to come.
El Paso Saddlery (EPS) makes classic holsters, cowboy rigs, concealment holsters, duty holsters, military-style
and hunting holsters, and what caught my eye: exotic-skinned holsters for stylish carry. In addition to holsters, EPS offers belts, magazine holders, scabbards, saddle bags, pouches, slings and ammunition car-riers. Each of these categories has numer-ous incarnations to fit just about anyone’s tactical, sport or practical desires. A few clicks on the EPS Web site will take you through a series of drop-down menus and reveal a vast catalog of offerings.
Located in El Paso, Texas, El Paso Saddlery was started in 1889. Not a misprint: 1889. Today it employs the work of 16—the cut-ting, stamping, carving and fitting are all done by hand. All holsters and other products are made to order. It can accommodate just about every model handgun, and its work typically takes about six to eight weeks.
For my custom 1911 project, I ordered a holster, belt and magazine pouch done in the Exotic Crosshairstyle in brown Spanish Bull. Spanish Bull is also available in black. Other exotic-hide offerings include black or brown ostrich; black, cognac or chocolate crocodile; black or chocolate shark; and stingray.
The Exotic Crosshair holsters are leather lined, and both the front and back are cov-ered with the customer’s choice of skin. A user-adjustable tension screw combined with hand-molding securely cradles the gun. The holster is designed with a flat back, which increases comfort for all-day
carry. The matching belt is a tapered, 1¼-inch design and is also leather lined, as is the magazine pouch.
I can’t say that I was surprised when I first held the holster in my hand. I was ex-pecting a gorgeous holster set, and that’s exactly what I received. The skin is incred-ible, the molding and stitching are equally impressive, and the tension is perfect right out of the box. Likewise the belt and magazine carrier. One comment, however, is that the carrier fit a bit looser on the belt than I am accustomed to, but I did not find it to be an issue with use.
The belt, being what the public views, handily belies its true purpose with its col-orful, exotic skin; slender, tapered design; and fancy, silver-toned buckle set. The belt offers the support needed to comfortably carry its charge, yet features an appear-ance of the finest dress design.
All too often a product doesn’t come close to matching its marketing, but I can report that this is not the case with El Paso Saddlery’s holsters. If you are looking to carry in comfort and style, consider El Paso Saddlery. For more information, visit ep-saddlery.com or call 915-544-2233. —DK
BOOK OF THE 191184
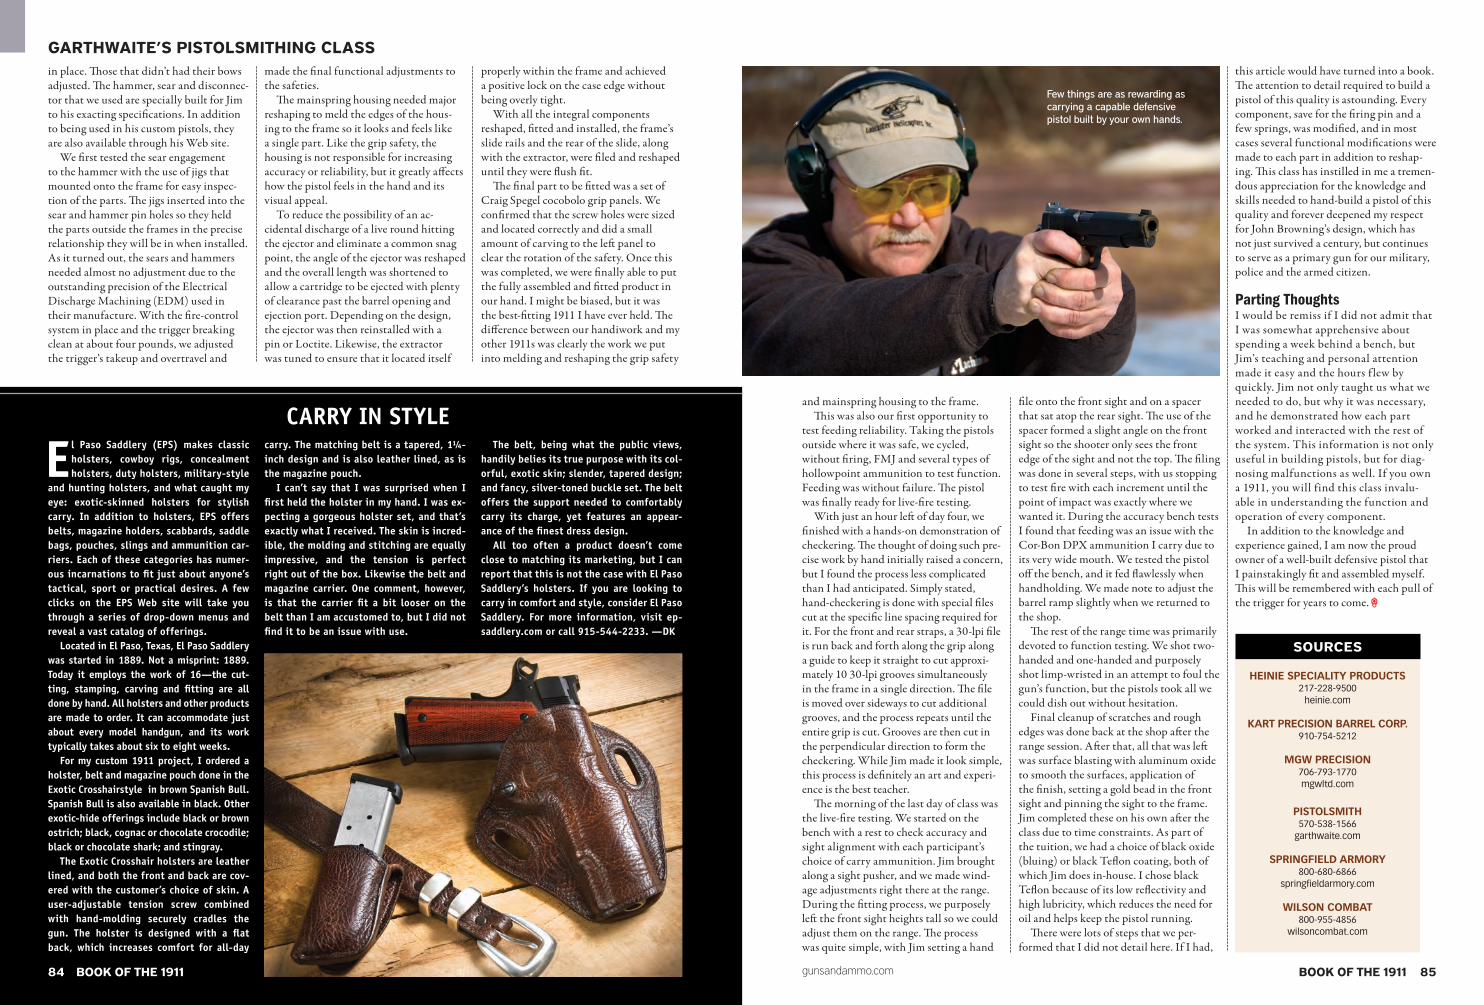
Few things are as rewarding as carrying a capable defensive pistol built by your own hands.
CARRY IN STYLE


![Swing Book Complete]](https://img.pdfslide.net/doc/110x75/552897ff49795912048b4a05/swing-book-complete.jpg)