Embed Size (px)
DESCRIPTION
Another annotated document on my second level design for Unreal Tournament 3. By this time I had a little more experience and threw a fully animated dragon's head into the mix. Sadly the scale of the map was too large so I only released the mod to the community for a few months and decided it would be too much work to correct all the aspects I wasn't happy with. Nonetheless, I am still happy with the event triggers and the dragons head so I use it as one of my better portfolio peices.
Citation preview
Dragon’s Den
The Basic Design and your aims
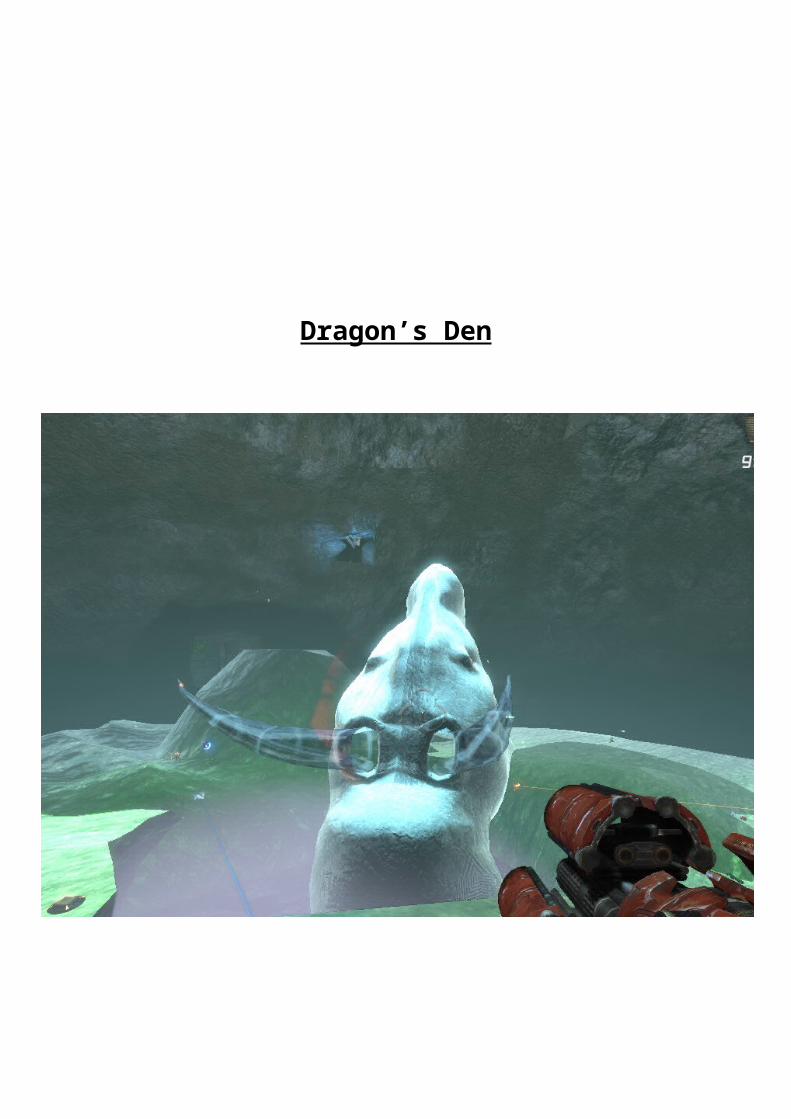
Because I am one of those individuals who think dragons are fantastic I decided to make my second “UT3” map with a dragon as the focal point. Although my design had to change from the initial concept the main principle was to have a central room with the map’s most impressive powerups guarded by a dragon… And this has, most certainly been achieved.
Due to problems with the dragon modelling (I use too many polygons in its creation) I had to change from a dragon walking around on all fours to a dragonhead rotating in a volatile pool. Although this meant a loss of mobility the animations became much easier to incorporate and I was able to make the dragon seem much larger by scaling the head to a more impressive size.
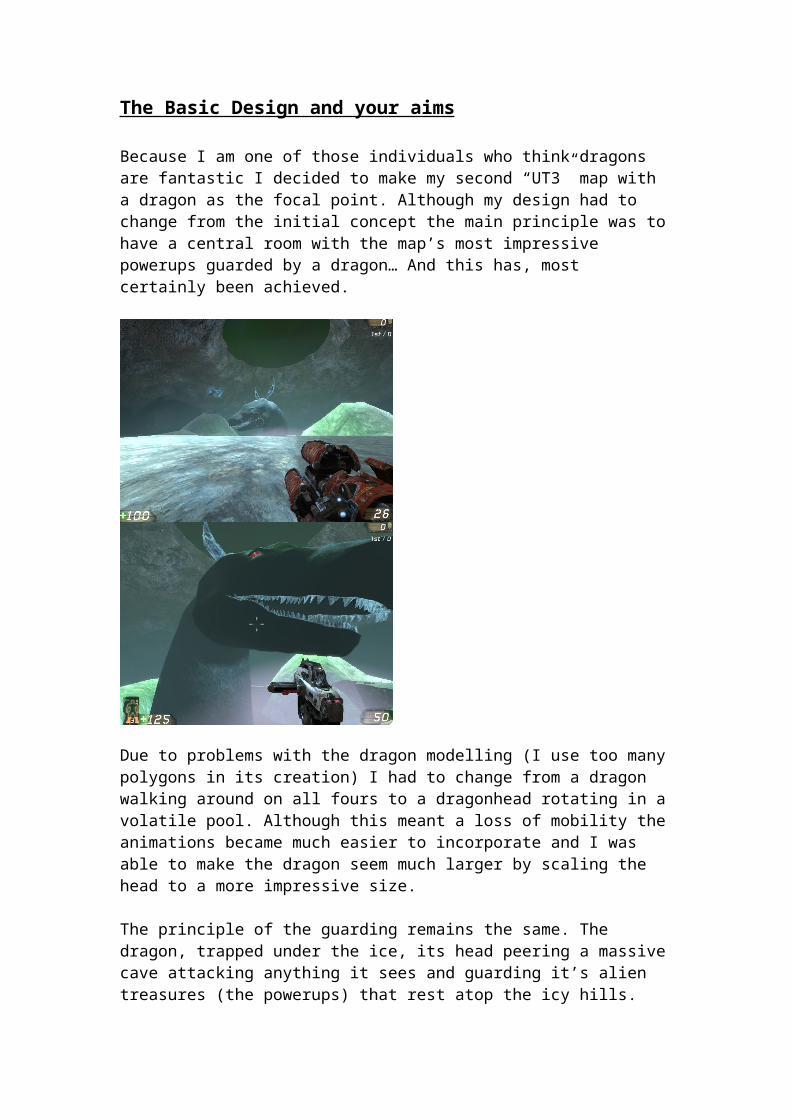
The principle of the guarding remains the same. The dragon, trapped under the ice, its head peering a massive cave attacking anything it sees and guarding it’s alien treasures (the powerups) that rest atop the icy hills.
The Layout
6
7
1
2
3
4
5
Dome
CliffAverage cave with health and weapons
Most powerful items and powerups
Armoury area
= Lit from central pool and ice
= Crystal light colour
= Sky visible (green lit with beam lighting)
- Centre ice light overrides all in paths from centre
- Crystal light overrides moonlight in paths
- Moon light is only dominant in areas without crystals or near centre dome but beam lighting is still applied on top
Very small cave with only a weapon
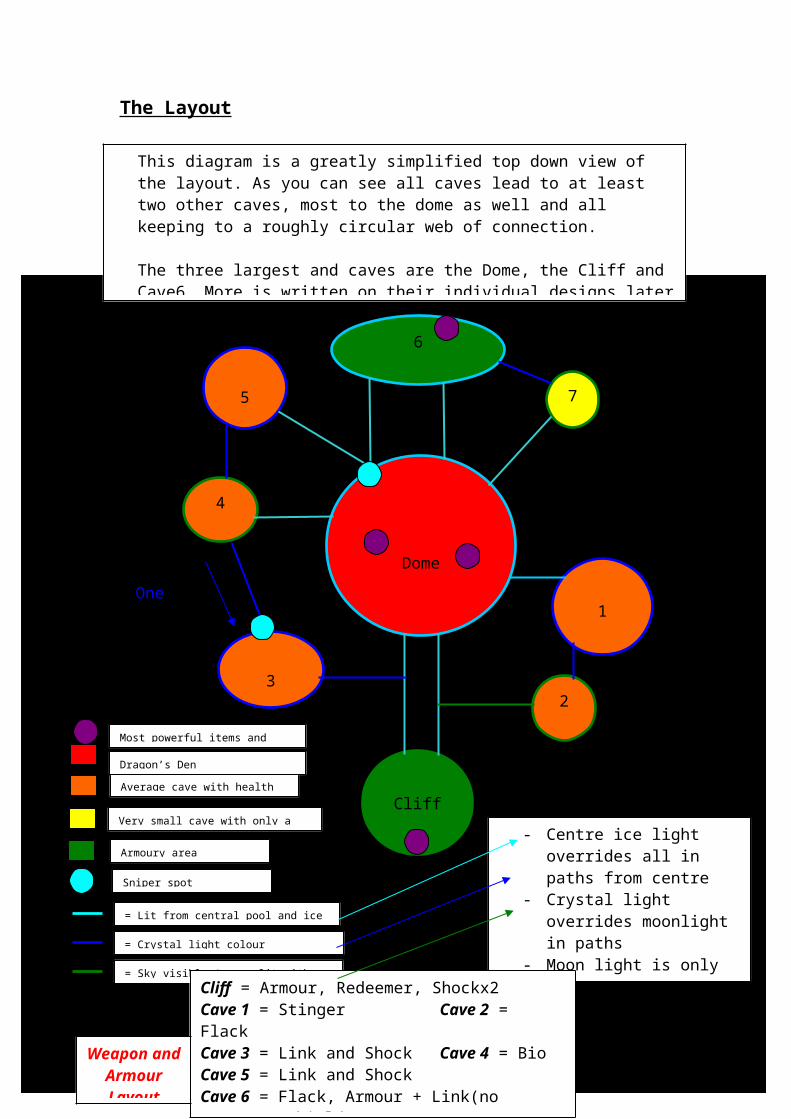
This diagram is a greatly simplified top down view of the layout. As you can see all caves lead to at least two other caves, most to the dome as well and all keeping to a roughly circular web of connection.
The three largest and caves are the Dome, the Cliff and Cave6. More is written on their individual designs later in this document. The other six caves have been designed and lit in such a way that a new player can get confused as to which cave they are in, and thus, where it leads on to.
Sniper spot
Cliff = Armour, Redeemer, Shockx2Cave 1 = Stinger Cave 2 = FlackCave 3 = Link and Shock Cave 4 = BioCave 5 = Link and ShockCave 6 = Flack, Armour + Link(no ammo)x2, ShieldCave 7 = Bio Dome = Stingerx2, Rocketx2, Powerups in pairs
One Way
Dragon’s Den
Weapon and Armour Layout
The Caves of the Network
Dome
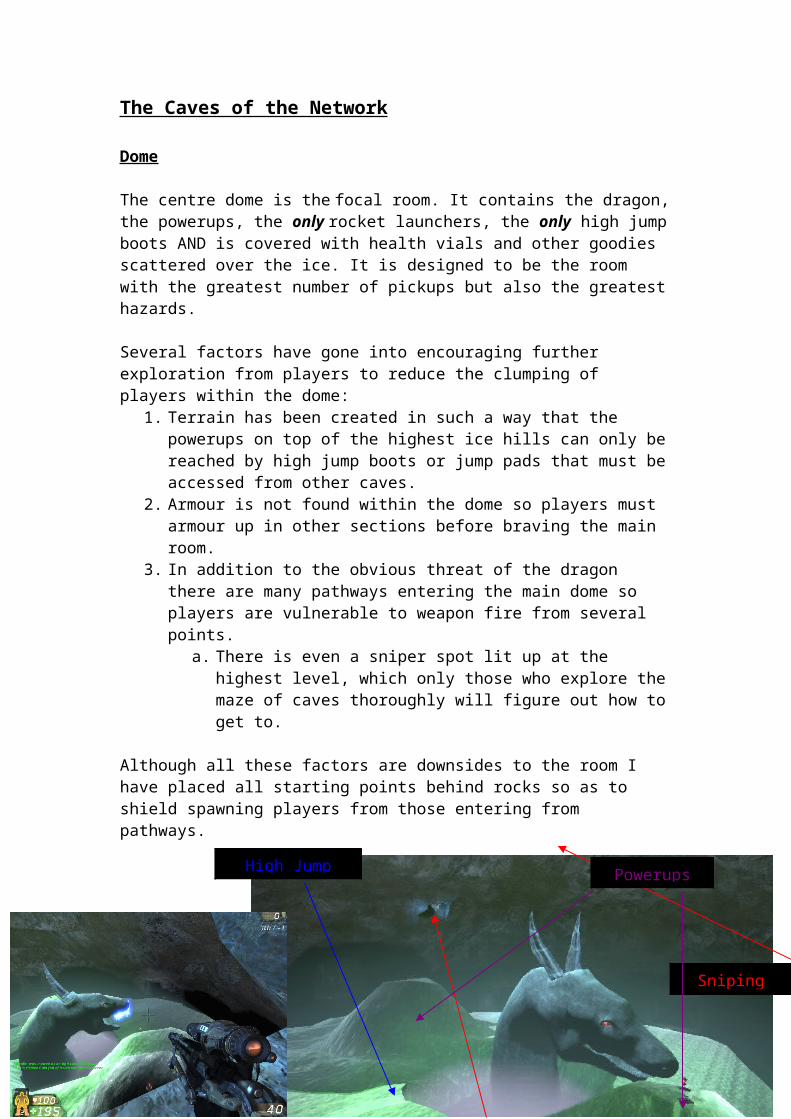
The centre dome is the focal room. It contains the dragon, the powerups, the only rocket launchers, the only high jump boots AND is covered with health vials and other goodies scattered over the ice. It is designed to be the room with the greatest number of pickups but also the greatest hazards.
Several factors have gone into encouraging further exploration from players to reduce the clumping of players within the dome:
1. Terrain has been created in such a way that the powerups on top of the highest ice hills can only be reached by high jump boots or jump pads that must be accessed from other caves.
2. Armour is not found within the dome so players must armour up in other sections before braving the main room.
3. In addition to the obvious threat of the dragon there are many pathways entering the main dome so players are vulnerable to weapon fire from several points.
a. There is even a sniper spot lit up at the highest level, which only those who explore the maze of caves thoroughly will figure out how to get to.
Although all these factors are downsides to the room I have placed all starting points behind rocks so as to shield spawning players from those entering from pathways.
Sniping Spot
High Jump BootsPowerups
Cliff
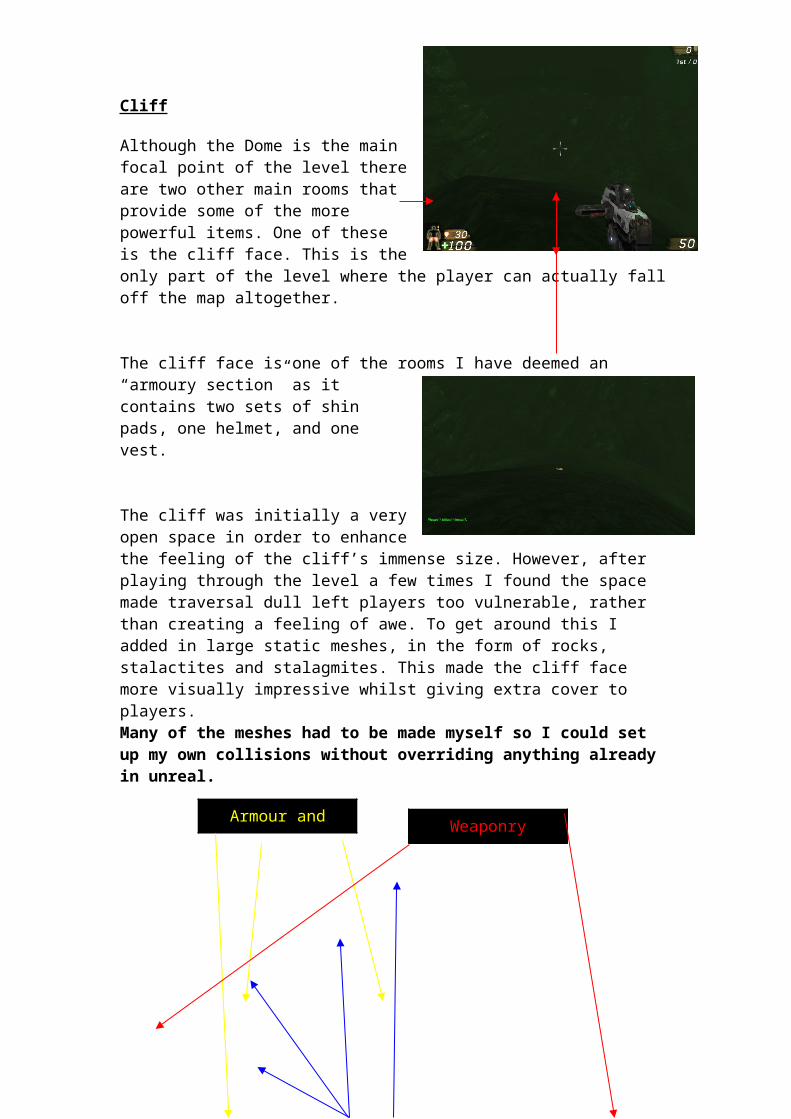
Although the Dome is the main focal point of the level there are two other main rooms that provide some of the more powerful items. One of these is the cliff face. This is the only part of the level where the player can actually fall off the map altogether.
The cliff face is one of the rooms I have deemed an “armoury section” as it contains two sets of shin pads, one helmet, and one vest.
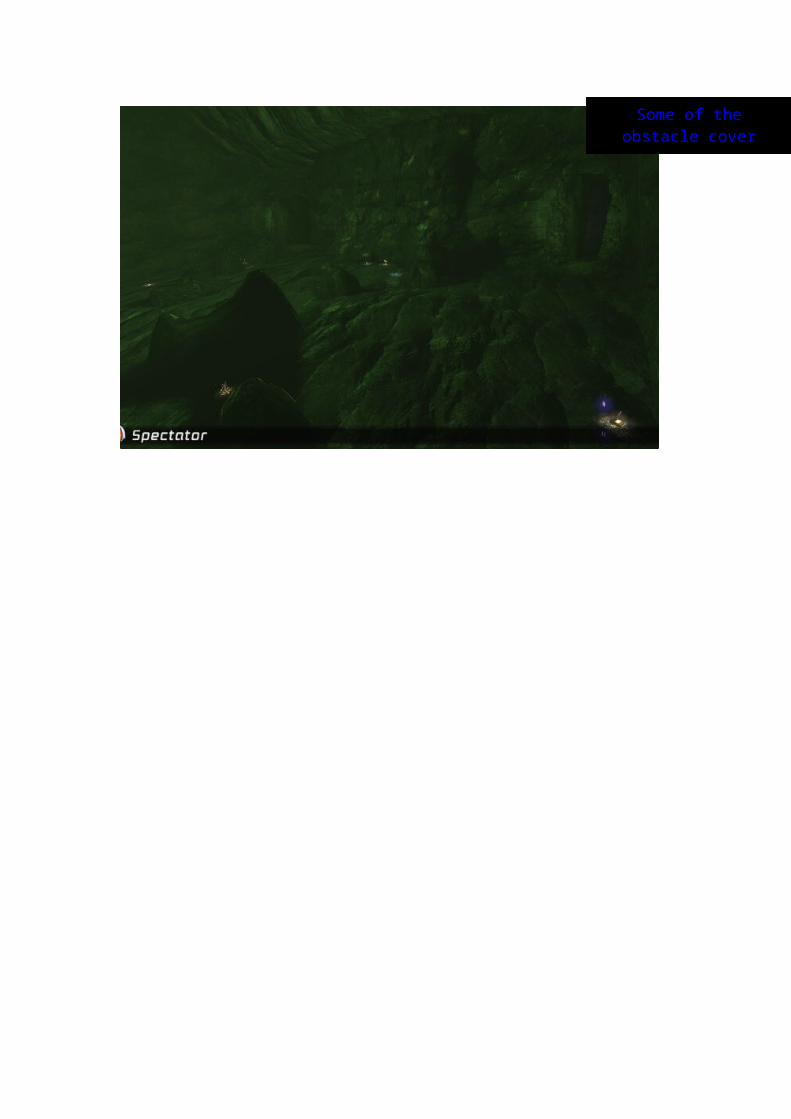
The cliff was initially a very open space in order to enhance the feeling of the cliff’s immense size. However, after playing through the level a few times I found the space made traversal dull left players too vulnerable, rather than creating a feeling of awe. To get around this I added in large static meshes, in the form of rocks, stalactites and stalagmites. This made the cliff face more visually impressive whilst giving extra cover to players. Many of the meshes had to be made myself so I could set up my own collisions without overriding anything already in unreal.
Armour and Health Weaponry
Some of the obstacle cover (created in 3ds Max)
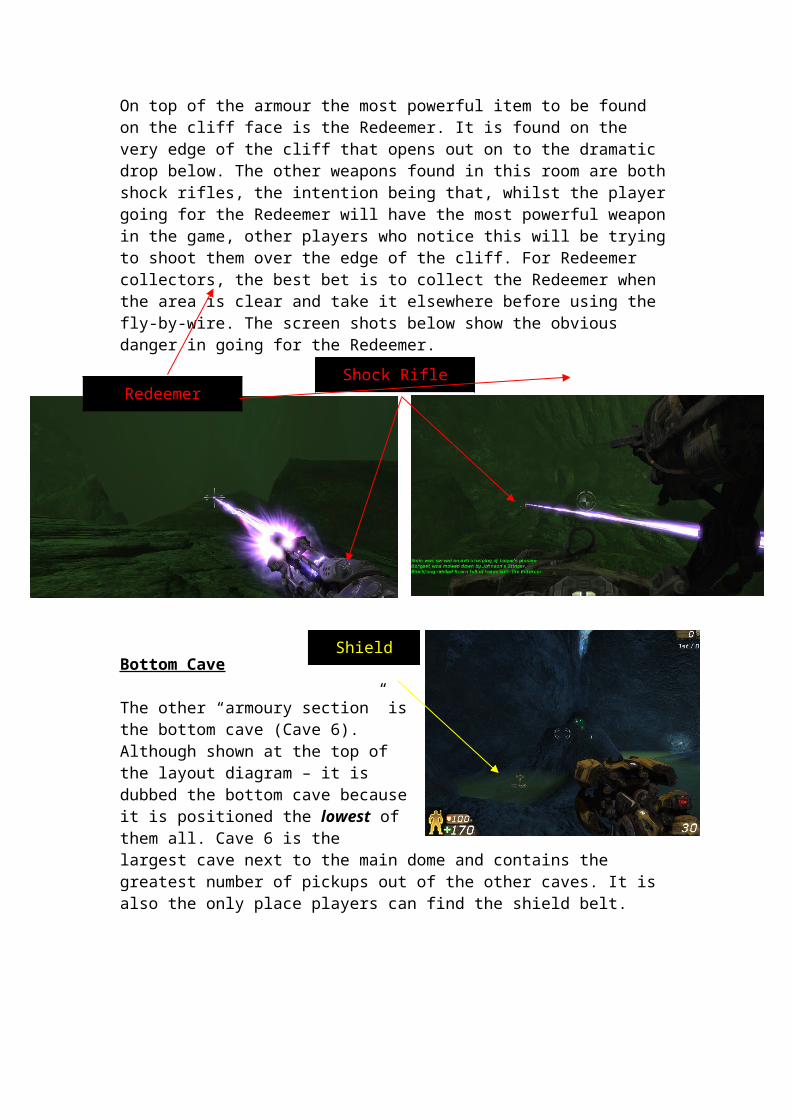
On top of the armour the most powerful item to be found on the cliff face is the Redeemer. It is found on the very edge of the cliff that opens out on to the dramatic drop below. The other weapons found in this room are both shock rifles, the intention being that, whilst the player going for the Redeemer will have the most powerful weapon in the game, other players who notice this will be trying to shoot them over the edge of the cliff. For Redeemer collectors, the best bet is to collect the Redeemer when the area is clear and take it elsewhere before using the fly-by-wire. The screen shots below show the obvious danger in going for the Redeemer.
Bottom Cave
The other “armoury section” is the bottom cave (Cave 6). Although shown at the top of the layout diagram – it is dubbed the bottom cave because it is positioned the lowest of them all. Cave 6 is the largest cave next to the main dome and contains the greatest number of pickups out of the other caves. It is also the only place players can find the shield belt.
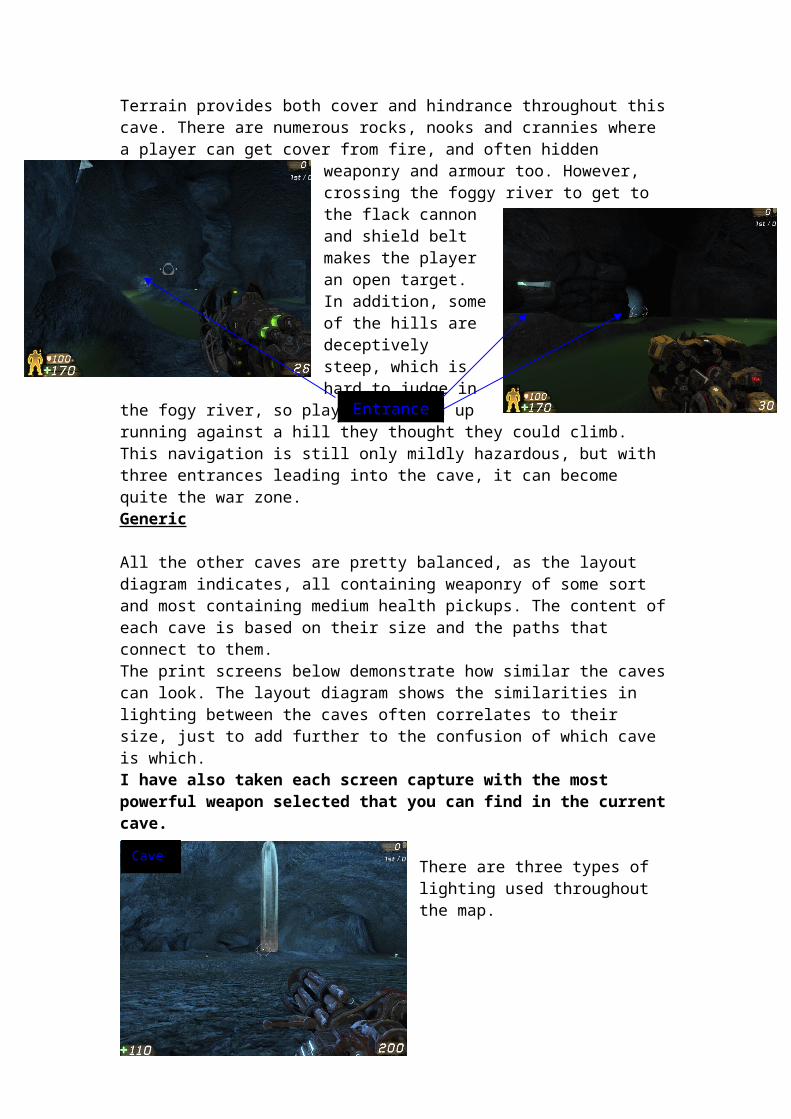
Terrain provides both cover and hindrance throughout this cave. There are numerous rocks, nooks and crannies where a player can get cover from fire, and often hidden weaponry and armour too. However, crossing the foggy river to get to the flack
cannon and shield belt makes the player an open target. In addition, some of the hills are deceptively steep, which is hard to judge in the fogy river, so players may end up running against a hill they thought they could climb. This navigation is still only mildly hazardous, but with three entrances leading into the cave, it can become quite the war zone.
Shock Rifle ShooterRedeemer Position
Shield Belt
Entrances
Generic
All the other caves are pretty balanced, as the layout diagram indicates, all containing weaponry of some sort and most containing medium health pickups. The content of each cave is based on their size and the paths that connect to them.The print screens below demonstrate how similar the caves can look. The layout diagram shows the similarities in lighting between the caves often correlates to their size, just to add further to the confusion of which cave is which. I have also taken each screen capture with the most powerful weapon selected that you can find in the current cave.
There are three types of lighting used throughout the map.
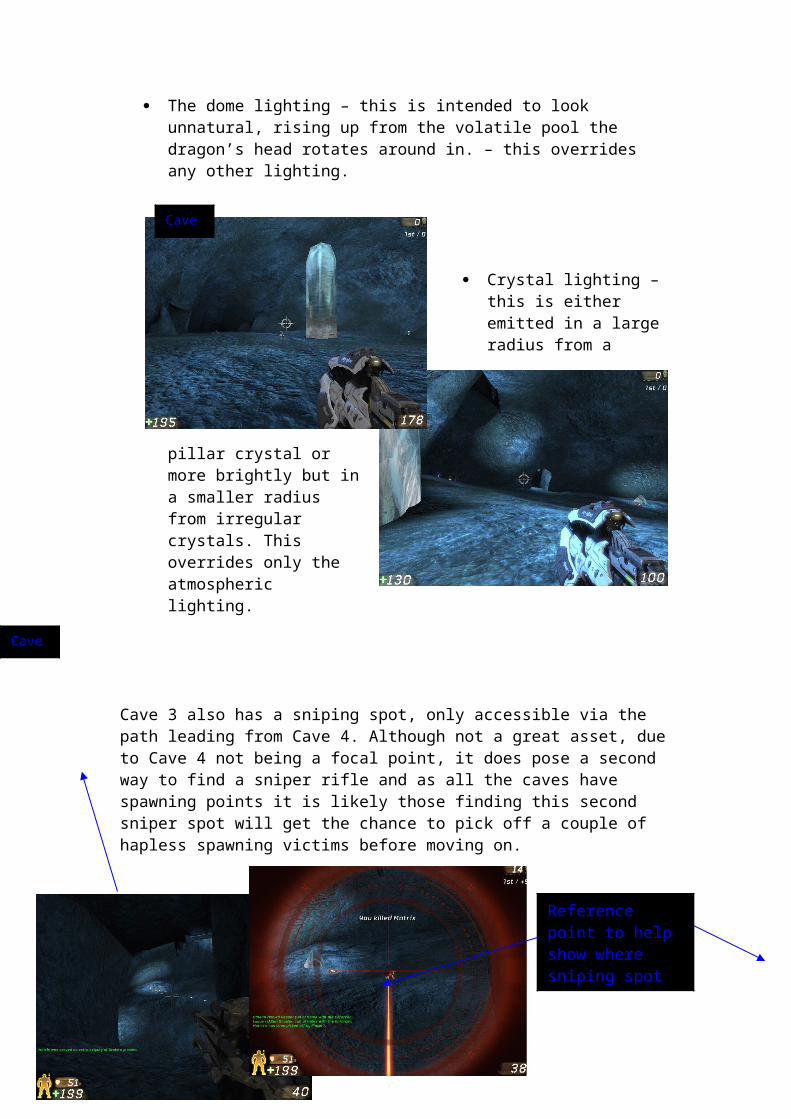
The dome lighting – this is intended to look unnatural, rising up from the volatile pool the dragon’s head rotates around in. – this overrides any other lighting.
Crystal lighting – this is either emitted in a large radius from a pillar crystal or more brightly but in a smaller radius from irregular crystals. This overrides only the atmospheric lighting.
Cave 3 also has a sniping spot, only accessible via the path leading from Cave 4. Although not a great asset, due to Cave 4 not being a focal point, it does pose a second way to find a sniper rifle and as all the caves have spawning points it is likely those finding this second sniper spot will get the chance to pick off a couple of hapless spawning victims before moving on.
Cave 1
Cave 3
Cave 5
Reference point to help show where sniping spot is located
Atmospheric lighting – this is intended to be the foggy green lighting pooling in from outside of the cave network. Only caves that have gaps in them showing through to the outside will be lit by this. I have used radial fog within cylindrical beam shapes to create the fog effect. If players position themselves in such a way as to look through one of these gaps in the angle of the fog beam they should also see the moon from the skydome I have created.
Cave 2
Cave 4
Cave 7
Kismet and Dragon Animations
Being an animated object and the main focus of whole map a lot of work went into triggering the different sequences the dragon performs in.
Fire
Achieved by a trigger that follows the rotation of the dragonhead. When dragon is effectively facing the player, the fire sequence starts. A physics volume attached to the trigger deals damage to any players in range of the fire.
Safe spots found behind the large ice hills or right at the edge of the dome, where only dying flames reach.
Emerge and Roar
Dragon introduction sequence – triggered by level start up. As dragon rises up from the depths a camera shake intensifies – indicating to all players that the dragon is emerging.
When the dragon rises out of the pool a roar sound is triggered, heard by players within the dome due to invisible objects that emanate the sound based on the distance from the dragon. (This method of producing sound is the reason for the messy mass of purple objects linked from multiple locations).
A basic roar is also triggered when players steal the dragon’s treasure (the powerups).
Blast
Achieved by a trigger that follows the rotation of the dragonhead. When dragon is facing the player AND said player is within the area atop one of the ice hills an instant attack is triggered. This is called the blast attack and is much faster than the fire sequence. It also instantly kills the player unless they have picked up invulnerability.
Default (P0)
The default animation when none of the above sequences are triggered, is the Rotate and Twitch sequence. This does just what it says on the tin, and is set to be looping. The twitch is based on a random float variable so as to make the rotating head seem a little less robotic.
Priorities set using float variables:
P1 = Override all instantly
P2 = Override P0 and play if activated at same time or before P3
P3 = Override P0 only
P0 = Default, overridden by all
P2
P1
P3
P1
The Learning Experience
Dragon Problems
As stated at the start of the document the dragon itself was meant to be a rather more mobile dynamic mesh, rather than routed to the spot. Now that the level is made I probably slightly prefer the dragonhead in its simplicity but I have learnt a lesson regarding importing my own models. This lesson is that models should be made simpler at first and tested in the basic levels. This simpler mesh could then be used as a far-viewed LOD (Level Of Detail) model whilst new versions of the mesh could be made more complex for the close ups whilst still being rigged in the same way (using the same main bones [parents] but with fewer minor bones [children]). Map problems
The largest problem with the map is that it is based on subtracting various brushes from a single cube add brush. Due to attempting a certain degree of complexity with my subtracting brushes lots of texture errors and seams are noticeable between brushes and their polygons. Although I have placed many static meshes into the scene to cover up the worst of these errors and lit the caves with duller coloured lights to make these artefacts less noticeable a critical eye may still pick some out.
Having now experimented with creating my own static meshes and taught myself the basics of the terrain editor inside Unreal, should I attempt a similar cave-based level in the future I would try to keep my brushes as simple as possible and use these devices to add any complexity to the environment.