Embed Size (px)
Citation preview
Published on Sew4Home
The Hostess Apron Comeback Series: #5 - Romantic Cottage Style
Editor: Liz JohnsonMonday, 21 November 2011 9:00
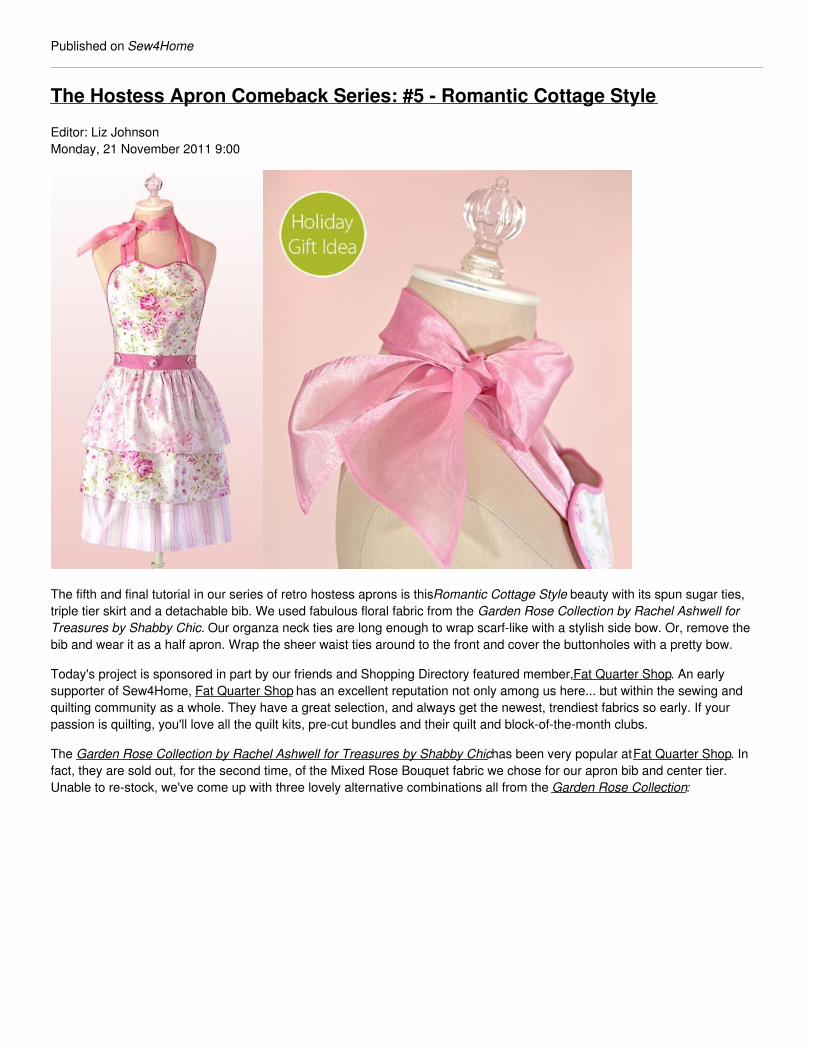
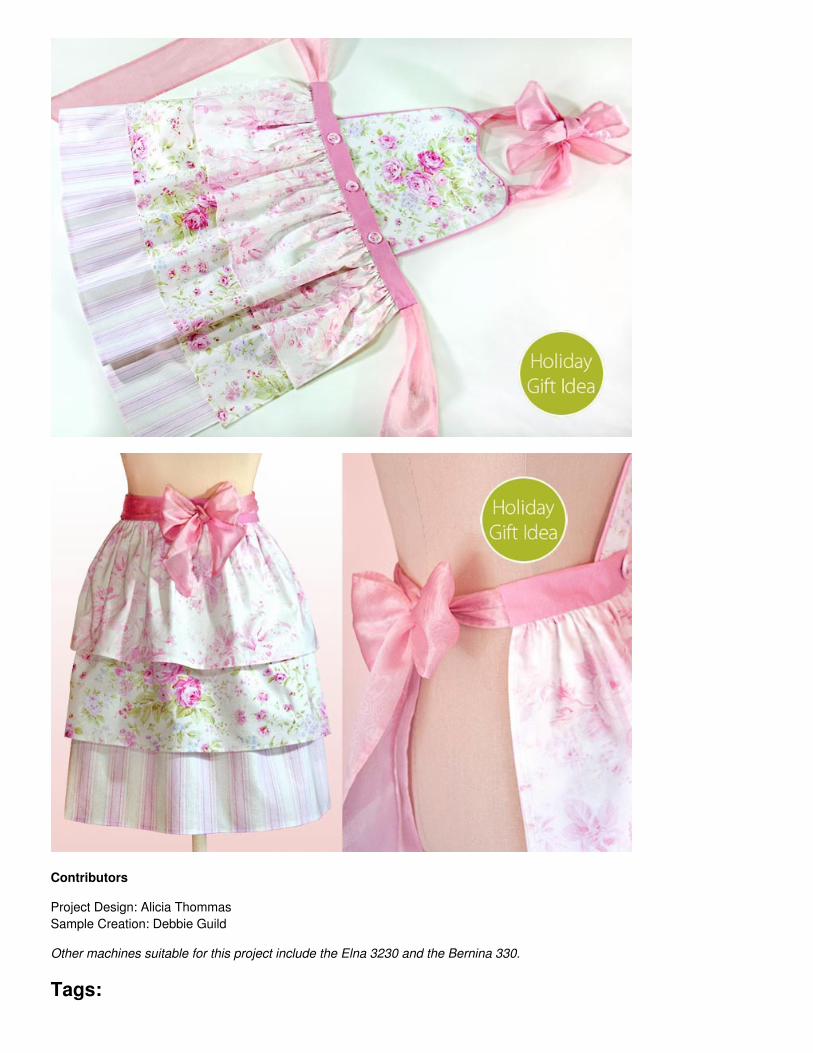
The fifth and final tutorial in our series of retro hostess aprons is this Romantic Cottage Style beauty with its spun sugar ties,triple tier skirt and a detachable bib. We used fabulous floral fabric from the Garden Rose Collection by Rachel Ashwell forTreasures by Shabby Chic. Our organza neck ties are long enough to wrap scarf-like with a stylish side bow. Or, remove thebib and wear it as a half apron. Wrap the sheer waist ties around to the front and cover the buttonholes with a pretty bow.
Today's project is sponsored in part by our friends and Shopping Directory featured member, Fat Quarter Shop. An earlysupporter of Sew4Home, Fat Quarter Shop has an excellent reputation not only among us here... but within the sewing andquilting community as a whole. They have a great selection, and always get the newest, trendiest fabrics so early. If yourpassion is quilting, you'll love all the quilt kits, pre-cut bundles and their quilt and block-of-the-month clubs.
The Garden Rose Collection by Rachel Ashwell for Treasures by Shabby Chic has been very popular at Fat Quarter Shop. Infact, they are sold out, for the second time, of the Mixed Rose Bouquet fabric we chose for our apron bib and center tier.Unable to re-stock, we've come up with three lovely alternative combinations all from the Garden Rose Collection:
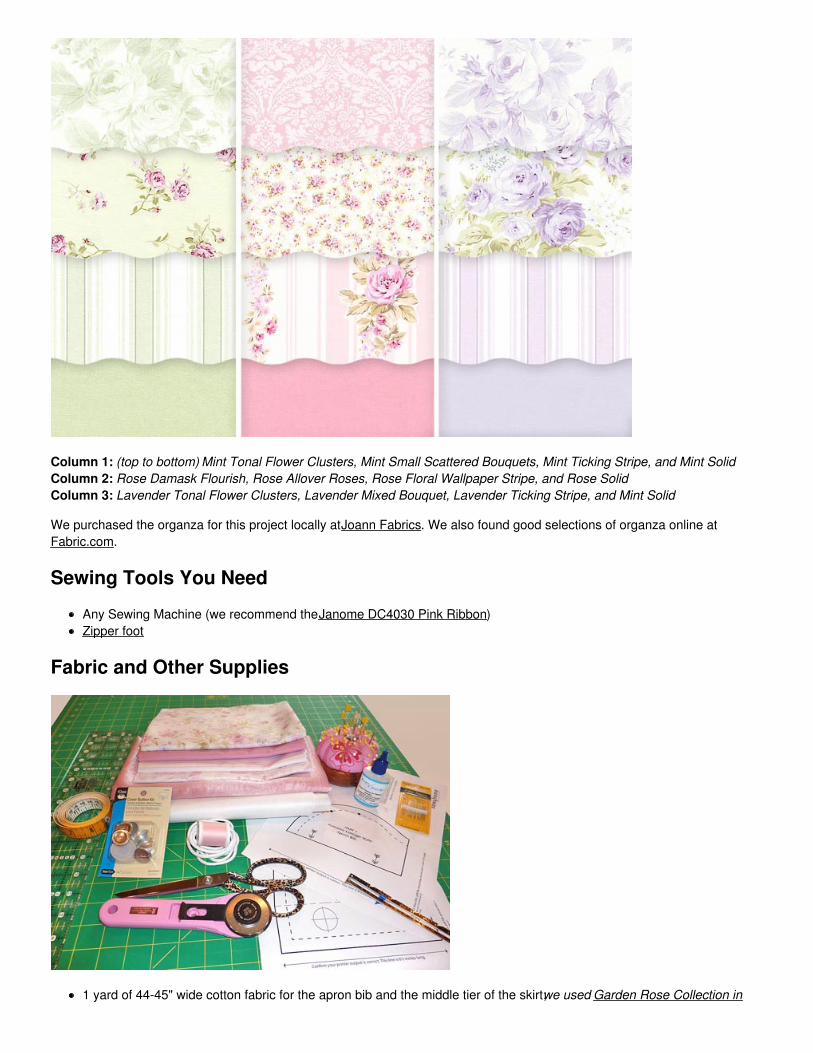
Column 1: (top to bottom) Mint Tonal Flower Clusters, Mint Small Scattered Bouquets, Mint Ticking Stripe, and Mint Solid Column 2: Rose Damask Flourish, Rose Allover Roses, Rose Floral Wallpaper Stripe, and Rose Solid Column 3: Lavender Tonal Flower Clusters, Lavender Mixed Bouquet, Lavender Ticking Stripe, and Mint Solid
We purchased the organza for this project locally at Joann Fabrics. We also found good selections of organza online atFabric.com.
Sewing Tools You Need
Any Sewing Machine (we recommend the Janome DC4030 Pink Ribbon)Zipper foot
Fabric and Other Supplies
1 yard of 44-45" wide cotton fabric for the apron bib and the middle tier of the skirt; we used Garden Rose Collection in

Rose Mixed Bouquet by Rachel Ashwell for Treasures by Shabby Chic from P&B Textiles NOTE: As mentioned, this particular fabric is currently out-of-stock at Fat Quarter Shop. See above for our suggestedalternatives.1 yard of 44-45" wide cotton fabric for the lining of the apron bib and the bottom tier of the skirt; we used Garden RoseCollection in Rose Ticking Stripe by Rachel Ashwell for Treasures by Shabby Chic from P&B Textiles½ yard of 44-45" wide cotton fabric for the top tier of the skirt; we used Garden Rose Collection in Rose Tonal Floral byRachel Ashwell for Treasures by Shabby Chic from P&B Textiles¾ yard of 44-45" wide cotton fabric for the waistband and piping; we used Garden Rose Collection in Rose Solid byRachel Ashwell for Treasures by Shabby Chic from P&B Textiles1¼ yards of 44-45" wide organza for the neck and waist ties: we used pink½ yard of lightweight fusible interfacing1 yard of ¼" piping cordTHREE 1" covered buttons; most packages contain two or more button kitsFray Check or similar seam sealantAll purpose thread to match fabricsSee-through rulerSeam gaugeFabric marker, pen, or tailor's chalk for marking fabricIron and ironing boardScissors or rotary cutter and matStraight pinsHand sewing needle
Getting Started
1. Download and print our TWO 8½" x 11" pattern sheets: Apron Bib Part 1 and Apron Bib Part 2 IMPORTANT: You must print these PDF files at 100%. DO NOT SCALE to fit the page.
2. Cut out the pattern pieces along the solid lines.3. Following the arrows on the patterns, and the diagrams on the printed sheets, butt the two pieces together and tape in
place. Do NOT overlap. You now have one complete bib pattern that will cut on the fold.4. From the fabric for the apron bib and the middle tier of the skirt (Rose Mixed Bouquet in our sample), cut the following:
ONE 15" x 37" rectangle Using the bib pattern on the fold, ONE bib front
5. From the fabric for the lining of the apron bib and the bottom tier of the skirt (Rose Ticking Stripe in our sample), cut thefollowing: ONE 20" x 37" rectangle Using the bib pattern on the fold, ONE bib lining
6. From the fabric for the top tier of the skirt (Rose Tonal Floral in our sample), cut ONE 10" x 37" rectangle.7. From the fabric for the waistband and piping (Rose solid in our sample), cut the following:
ONE 4" x 21" strip for the waistband ONE 1½" strip, on the bias for the piping, it should be about 36" in length
NOTE: Try to cut it all in just one strip, but you can also cut multiple strips and seam them together end-to-end to equal36" in finished length.
8. From the lightweight fusible interfacing, cut the following: ONE 1½" x 20" strip for the waistband Use the pattern to cut ONE bib piece on the fold, as you did above with the fabric
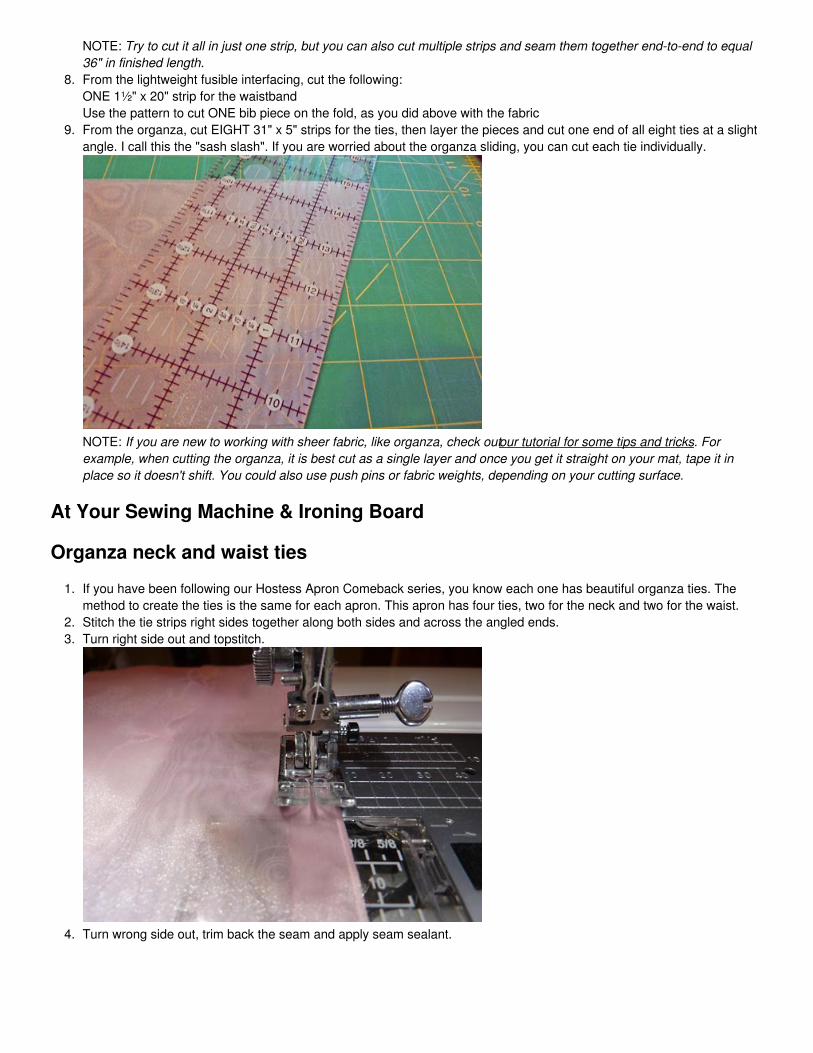
9. From the organza, cut EIGHT 31" x 5" strips for the ties, then layer the pieces and cut one end of all eight ties at a slightangle. I call this the "sash slash". If you are worried about the organza sliding, you can cut each tie individually.
NOTE: If you are new to working with sheer fabric, like organza, check out our tutorial for some tips and tricks. Forexample, when cutting the organza, it is best cut as a single layer and once you get it straight on your mat, tape it inplace so it doesn't shift. You could also use push pins or fabric weights, depending on your cutting surface.
At Your Sewing Machine & Ironing Board
Organza neck and waist ties
1. If you have been following our Hostess Apron Comeback series, you know each one has beautiful organza ties. Themethod to create the ties is the same for each apron. This apron has four ties, two for the neck and two for the waist.
2. Stitch the tie strips right sides together along both sides and across the angled ends.3. Turn right side out and topstitch.
4. Turn wrong side out, trim back the seam and apply seam sealant.
5. Turn right side out again, topstitch and press flat.6. If that went by too fast, check our It's A Graveyard Smash apron tutorial for more detailed step-by-step instructions and
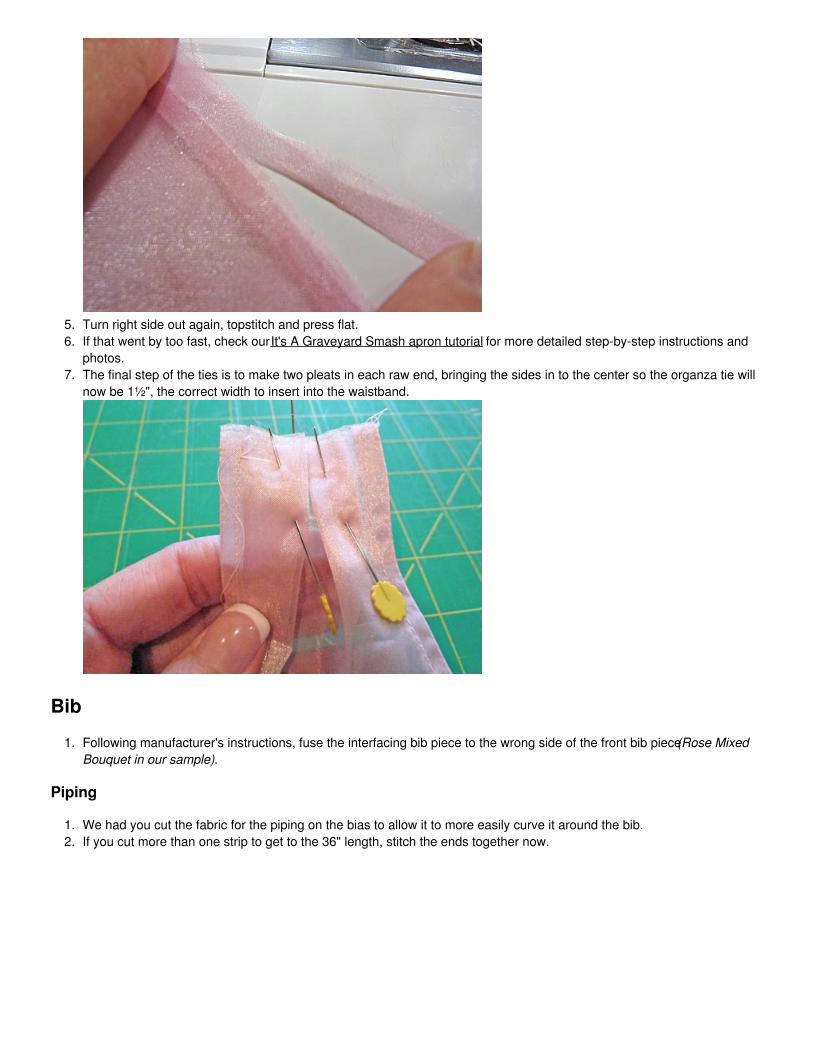
photos.7. The final step of the ties is to make two pleats in each raw end, bringing the sides in to the center so the organza tie will
now be 1½", the correct width to insert into the waistband.
Bib
1. Following manufacturer's instructions, fuse the interfacing bib piece to the wrong side of the front bib piece (Rose MixedBouquet in our sample).
Piping
1. We had you cut the fabric for the piping on the bias to allow it to more easily curve it around the bib.2. If you cut more than one strip to get to the 36" length, stitch the ends together now.
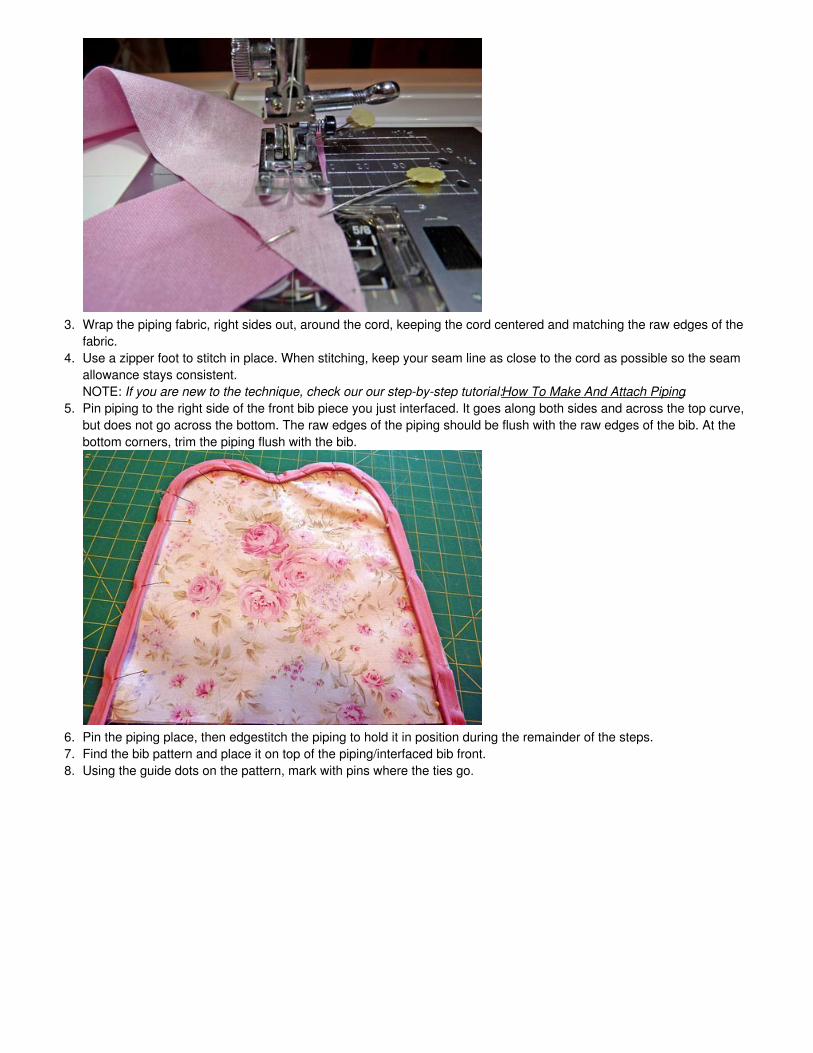
3. Wrap the piping fabric, right sides out, around the cord, keeping the cord centered and matching the raw edges of thefabric.
4. Use a zipper foot to stitch in place. When stitching, keep your seam line as close to the cord as possible so the seamallowance stays consistent. NOTE: If you are new to the technique, check our our step-by-step tutorial: How To Make And Attach Piping.
5. Pin piping to the right side of the front bib piece you just interfaced. It goes along both sides and across the top curve,but does not go across the bottom. The raw edges of the piping should be flush with the raw edges of the bib. At thebottom corners, trim the piping flush with the bib.
6. Pin the piping place, then edgestitch the piping to hold it in position during the remainder of the steps.7. Find the bib pattern and place it on top of the piping/interfaced bib front.8. Using the guide dots on the pattern, mark with pins where the ties go.

9. Pin the ties in place on top of the piping. The bib/piping piece should be right side up and the tie should be pleat downwith the raw edges of both aligned.
10. Pin in place then stitch the ties in place, running the seam in line with the edge of the piping.11. Gather the ends of the ties and pin them to the center of the bib so they don't get caught in the seam.
Assemble the front and back of the bib
1. Find the bib lining (Rose Ticking Stripe in our sample). Place it right sides together with the bib/piping piece, sandwiching
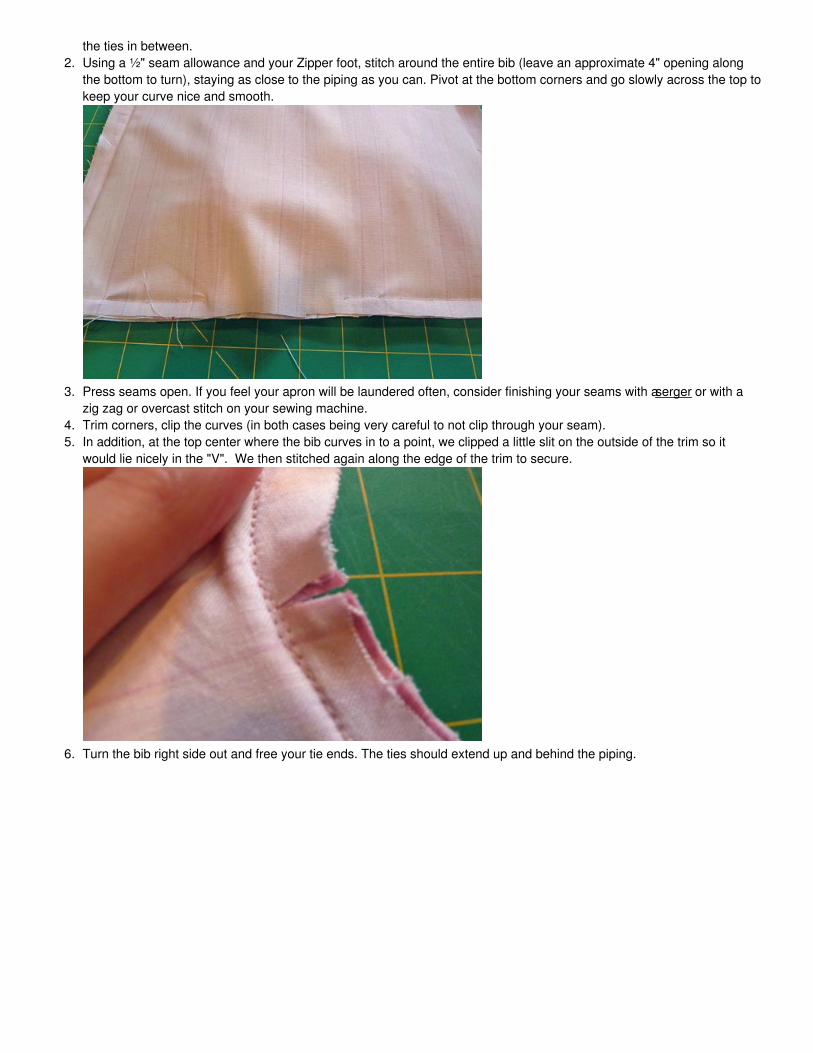
the ties in between.2. Using a ½" seam allowance and your Zipper foot, stitch around the entire bib (leave an approximate 4" opening along
the bottom to turn), staying as close to the piping as you can. Pivot at the bottom corners and go slowly across the top tokeep your curve nice and smooth.
3. Press seams open. If you feel your apron will be laundered often, consider finishing your seams with a serger or with azig zag or overcast stitch on your sewing machine.
4. Trim corners, clip the curves (in both cases being very careful to not clip through your seam).5. In addition, at the top center where the bib curves in to a point, we clipped a little slit on the outside of the trim so it
would lie nicely in the "V". We then stitched again along the edge of the trim to secure.
6. Turn the bib right side out and free your tie ends. The ties should extend up and behind the piping.
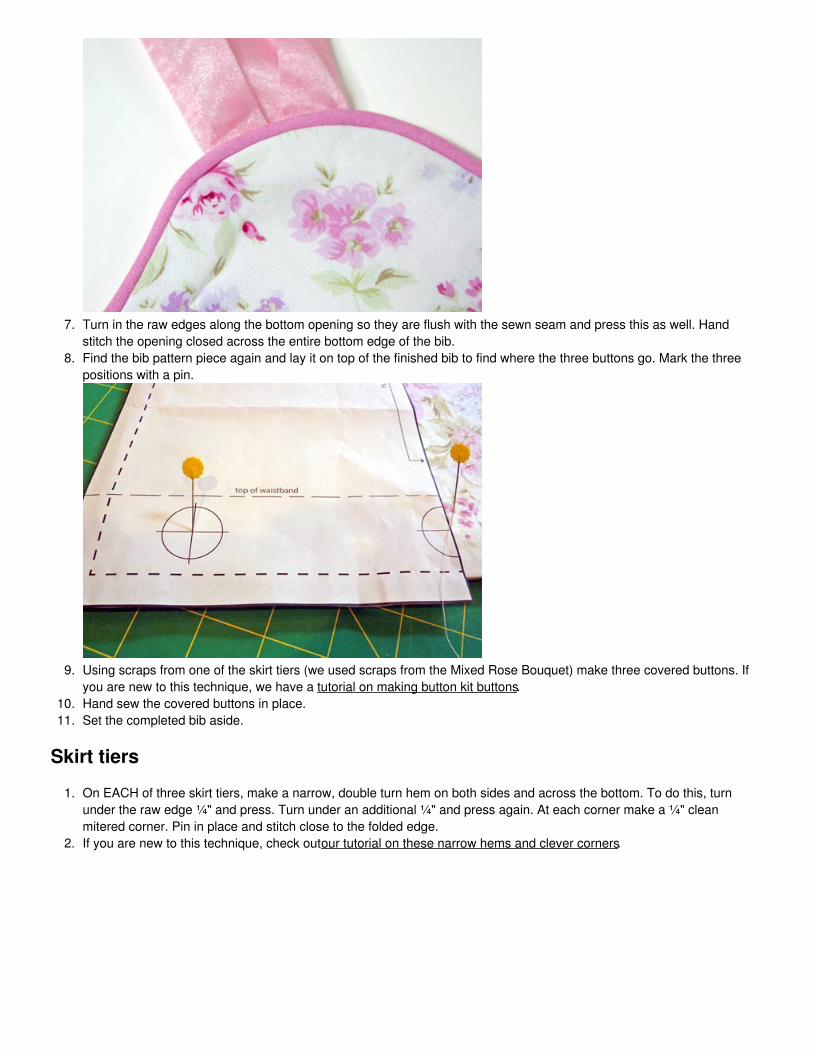
7. Turn in the raw edges along the bottom opening so they are flush with the sewn seam and press this as well. Handstitch the opening closed across the entire bottom edge of the bib.
8. Find the bib pattern piece again and lay it on top of the finished bib to find where the three buttons go. Mark the threepositions with a pin.
9. Using scraps from one of the skirt tiers (we used scraps from the Mixed Rose Bouquet) make three covered buttons. Ifyou are new to this technique, we have a tutorial on making button kit buttons.
10. Hand sew the covered buttons in place.11. Set the completed bib aside.
Skirt tiers
1. On EACH of three skirt tiers, make a narrow, double turn hem on both sides and across the bottom. To do this, turnunder the raw edge ¼" and press. Turn under an additional ¼" and press again. At each corner make a ¼" cleanmitered corner. Pin in place and stitch close to the folded edge.
2. If you are new to this technique, check out our tutorial on these narrow hems and clever corners.

3. Lay the skirt tiers, right side up, on top of one another. The third tier goes down first, then the middle tier, then the toptier. Make sure the hemmed sides and top raw edges are perfectly aligned. Pin the three layers together along the topedge.
4. Using a zig zag stitch on your sewing machine or using a serger, stitch the three layers together and finish the rawedges. We used a serger.
5. Run a gathering stitch along the top of the skirt through all three layers. To do this, stitch one or two lines of machinebasting approximately ⅜" from the top edge.
NOTE: If you are new to gathering, take a look at our tutorial: Gathering & Ruffles Made Easy .
6. Pull the row(s) of machine basting to gather the skirt to approximately 20". Adjust the gathers so they fall evenly.
Waistband
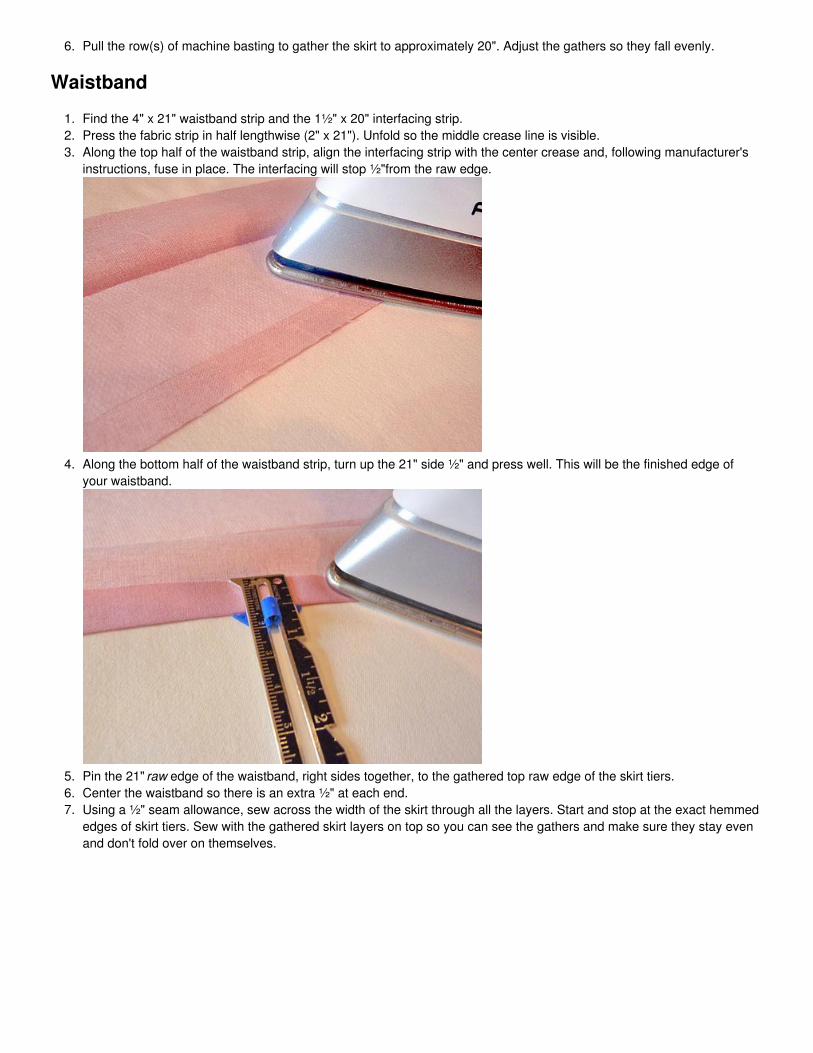
1. Find the 4" x 21" waistband strip and the 1½" x 20" interfacing strip.2. Press the fabric strip in half lengthwise (2" x 21"). Unfold so the middle crease line is visible.3. Along the top half of the waistband strip, align the interfacing strip with the center crease and, following manufacturer's
instructions, fuse in place. The interfacing will stop ½"from the raw edge.
4. Along the bottom half of the waistband strip, turn up the 21" side ½" and press well. This will be the finished edge ofyour waistband.
5. Pin the 21" raw edge of the waistband, right sides together, to the gathered top raw edge of the skirt tiers.6. Center the waistband so there is an extra ½" at each end.7. Using a ½" seam allowance, sew across the width of the skirt through all the layers. Start and stop at the exact hemmed
edges of skirt tiers. Sew with the gathered skirt layers on top so you can see the gathers and make sure they stay evenand don't fold over on themselves.
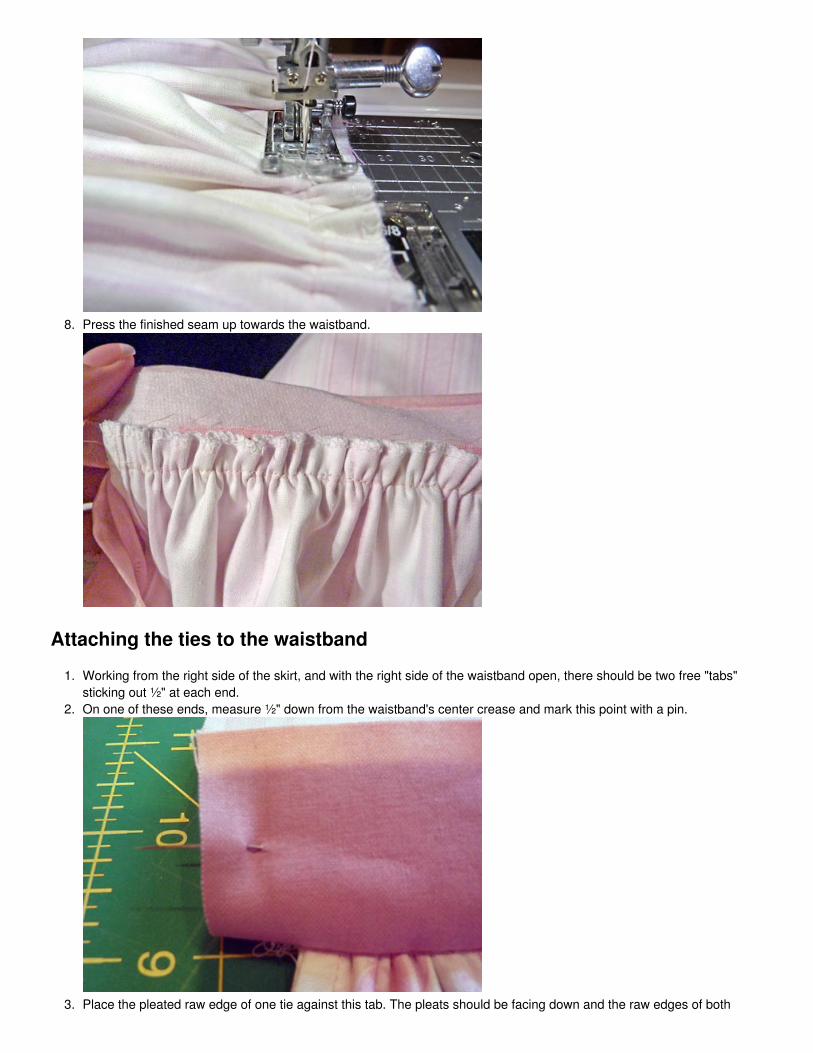
8. Press the finished seam up towards the waistband.
Attaching the ties to the waistband
1. Working from the right side of the skirt, and with the right side of the waistband open, there should be two free "tabs"sticking out ½" at each end.
2. On one of these ends, measure ½" down from the waistband's center crease and mark this point with a pin.
3. Place the pleated raw edge of one tie against this tab. The pleats should be facing down and the raw edges of both

pieces aligned. Pin in place, using the pins to center the tie against the tab.
4. Repeat on the opposite side of the apron. The finished ends of the ties should be facing one another towards the middleof the apron.
5. Fold the waistband down so it is right sides together and the ends are flush - the tie is sandwiched in between. Pin inplace through all the layers (the two layers of the waistband and the pleated end of the tie).
6. Using a ½" seam allowance, stitch across the tab. This seam should flush with the hemmed edges of the skirt tiers.
7. Trim the seam allowance back and put Fray Check or a similar seam sealant on the trimmed edges.8. Turn the waistband right side out. Bring the folded edge of the waistband down so it covers the gathered seam along the
back of the skirt. Each seamed end should now align with the hemmed edges of the skirt tiers. NOTE: You'll notice we serged the inside edge of the single-fold waistband hem. This is optional.
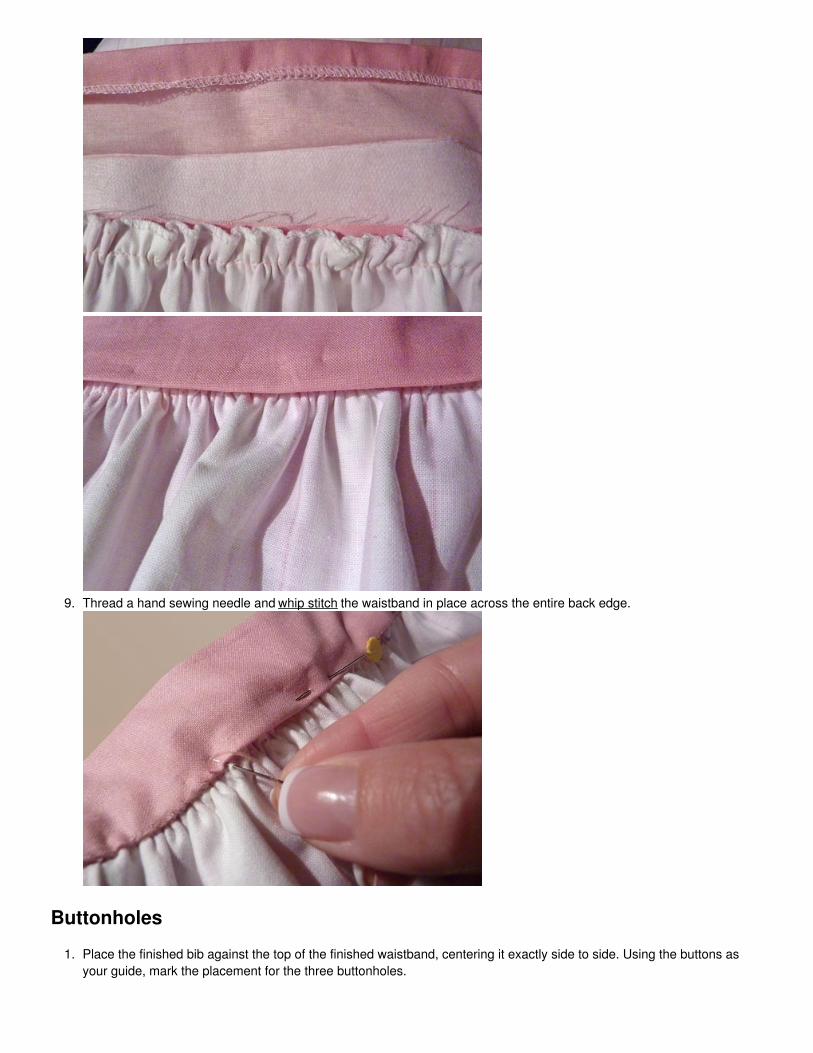
9. Thread a hand sewing needle and whip stitch the waistband in place across the entire back edge.
Buttonholes
1. Place the finished bib against the top of the finished waistband, centering it exactly side to side. Using the buttons asyour guide, mark the placement for the three buttonholes.
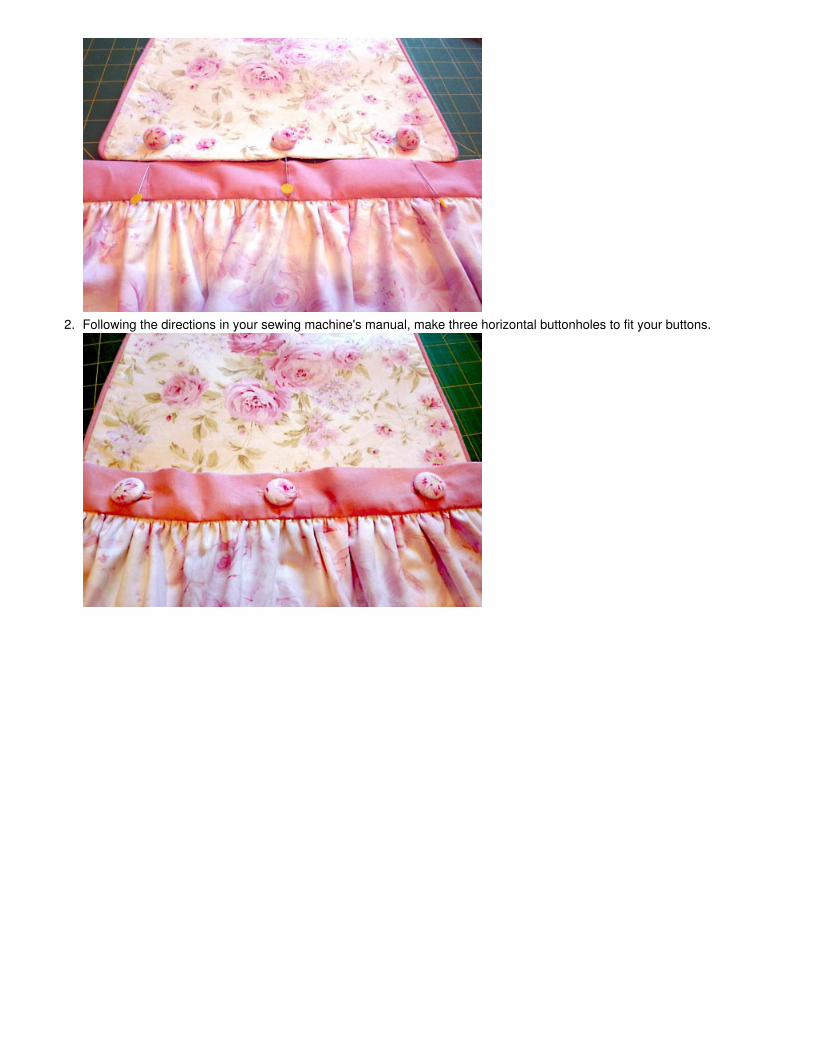
2. Following the directions in your sewing machine's manual, make three horizontal buttonholes to fit your buttons.
Contributors
Project Design: Alicia Thommas Sample Creation: Debbie Guild
Other machines suitable for this project include the Elna 3230 and the Bernina 330.
Tags:

Hostess Apron
Kitchen Linens
Cocktails at Eight Hostess ApronThe Hostess Apron Comeback Series: #4 - Be a Grinch!The Hostess Apron Comeback Series: #3 - Let's Do BrunchThe Hostess Apron Comeback Series: #2 - It's a Graveyard Smash
This project and patterns (if any) may be downloaded for personal use only. No electronic or printed reproduction permittedwithout the prior written consent of Sew4Home LLC.
Copyright 2009-2019 Sew4Home LLC. All Rights Reserved.
Source URL: https://sew4home.com/projects/kitchen-linens/hostess-apron-comeback-series-5-romantic-cottage-style