Embed Size (px)
Citation preview

G-Biosciences ♦ 1-800-628-7730 ♦ 1-314-991-6034 ♦ [email protected]
A Geno Technology, Inc. (USA) brand name
think proteins! think G-Biosciences www.GBiosciences.com
PR078
The rAmylase Project by Ellyn Daugherty
Transformation of E. coli with pAmylase (Lab 8c)
(Cat. # BTNM-8C)
w
Developed in partnership with

The rAmylase Project by Ellyn Daugherty Transformation of E. coli with pAmylase (Lab 8c)
Teacher’s Guide
Page 2 of 16
The following laboratory activity is adapted from “Laboratory 8c: Transformation of E. coli with pAmylase” from Biotechnology: Laboratory Manual by Ellyn Daugherty. For more information about the program, please visit www.emcp.com/biotechnology.
This kit is produced under license from Paradigm Publishing, Inc., a division of New Mountain Learning.
About Ellyn Daugherty: Ellyn Daugherty is a veteran biotechnology educator and recipient of the Biotechnology Institute’s National Biotechnology Teacher-Leader Award. She is the founder of the San Mateo Biotechnology Career Pathway (SMBCP). Started in 1993, SMBCP has instructed more than 7,000 high school and adult students. Annually, 30-40 SMBCP students complete internships with mentors at local biotechnology facilities.
About G-Biosciences: In addition to the Biotechnology by Ellyn Daugherty laboratory kit line and recognizing the significance and challenges of life sciences education, G-Biosciences has initiated the BioScience Excellence™ program. The program features hands-on teaching kits based on inquiry and curiosity that explore the fundamentals of life sciences and relate the techniques to the real world around us. The BioScience Excellence™ teaching tools will capture the imagination of young minds and deepen their understanding of various principles and techniques in biotechnology and improve their understanding of various social and ethical issues.
Permission granted to make unlimited copies for use in any one school building. For educational use only. Not for commercial use or resale.
Copyright 2015 Geno Technology, Inc. All rights reserved.

The rAmylase Project by Ellyn Daugherty Transformation of E. coli with pAmylase (Lab 8c)
Teacher’s Guide
Page 3 of 16
MATERIALS INCLUDED ......................................................................................................................................................... 4
ADDITIONAL EQUIPMENT & MATERIALS REQUIRED ........................................................................................................... 4
SPECIAL HANDLING INSTRUCTIONS ..................................................................................................................................... 5
GENERAL SAFETY PRECAUTIONS ......................................................................................................................................... 5
TEACHER’S PRE-EXPERIMENT SET UP .................................................................................................................................. 6
PREPARATION OF LB AGAR PLATES AND LB AGAR + AMPICILLIN + 2% STARCH PLATES ................................................. 6
PREPARE BACTERIAL CULTURE PLATE AND BROTH CULTURE TUBES .............................................................................. 7
MISCELLANEOUS PREPARATION ...................................................................................................................................... 7
TIME REQUIRED ................................................................................................................................................................... 8
NEXT GENERATION SCIENCE STANDARDS ADDRESSED ....................................................................................................... 8
EXPECTED RESULTS .............................................................................................................................................................. 8
ANSWERS TO ADDITIONAL QUESTIONS .............................................................................................................................. 9
OBJECTIVES ........................................................................................................................................................................ 10
BACKGROUND .................................................................................................................................................................... 10
MATERIALS FOR EACH GROUP........................................................................................................................................... 12
PROCEDURE ....................................................................................................................................................................... 12
I. PREPARING & TRANSFORMING COMPETENT CELLS ................................................................................................... 12
II. PLATING THE BACTERIA ON SELECTION MEDIA ......................................................................................................... 14
III. OBSERVING AND RECORDING YOUR TRANSFORMATION RESULTS .......................................................................... 14
DATA ANALYSIS & CONCLUSION ........................................................................................................................................ 15
ADDITIONAL QUESTIONS ................................................................................................................................................... 15

The rAmylase Project by Ellyn Daugherty Transformation of E. coli with pAmylase (Lab 8c)
Teacher’s Guide
Page 4 of 16
Upon receipt, store the materials as directed in the package literature.
MATERIALS INCLUDED This kit has enough materials and reagents for 8 lab groups (32 students in groups of 4)
• 1 vial E. coli. DH5α agar stab • 18 Petri Dishes (100x15mm) • 30 Sterile Inoculating Loops • 2 bottles of sterile LB Broth (2 x 30ml) • 8 sterile culture tubes • 9 tubes of sterile LB Broth (2ml) • 2 bottles of sterile LB Agar (100ml each) • 2 bottles of LB/2%starch agar (100ml each) • 1 vial Ampicillin • 8 tubes of Competent Buffer (450µl) • 8 tubes of Sterile Water (2ml) • 8 tubes of 0.08µg/µl pAmylase2014 Plasmid (7µl) • 20 Microcentrifuge Tubes (2ml)
ADDITIONAL EQUIPMENT & MATERIALS REQUIRED • Micropipets (P1000 and P100 or P200) and sterile tips • Biohazard bag • Water bath (42°C) • Microcentrifuge for 1.5-2ml microcentrifuge tubes • Disinfectant wipes • Disposal container with 10% bleach • (Shaking) Incubator (37°C) for overnight cultures • Parafilm

The rAmylase Project by Ellyn Daugherty Transformation of E. coli with pAmylase (Lab 8c)
Teacher’s Guide
Page 5 of 16
SPECIAL HANDLING INSTRUCTIONS • Store E. coli. DH5α agar stab at 4°C. This is stable for ~1 month if stored correctly. • Store Ampicillin and pAmylase2014 plasmid frozen until ready to use. • Chill the Competent Buffer tubes before distributing to students. • All other components can be stored at room temperature. • Wipe down the lab tabletop with disinfectant towels before starting broth cultures. • Place all bacteria-contaminated pipets and tips into a 10% bleach solution. Allow contaminated items to soak for
30 minutes before disposing. Autoclave broth and agar cultures in a biohazard bag before disposing.
GENERAL SAFETY PRECAUTIONS • The reagents and components supplied in the The rAmylase Project™ kits are considered non-toxic and are safe
to handle (unless otherwise noted), however good laboratory procedures should be used at all times. This includes wearing lab coats, gloves and safety goggles.
• The teacher should 1) be familiar with safety practices and regulations in his/her school (district and state) and 2) know what needs to be treated as hazardous waste and how to properly dispose of non-hazardous chemicals or biological material.
• Students should know where all emergency equipment (safety shower, eyewash station, fire extinguisher, fire blanket, first aid kit etc.) is located and be versed in general lab safety.
• Remind students to read all instructions including Safety Data Sheets (SDSs) before starting the lab activities. A link for SDSs for chemicals in this kit is posted at www.gbiosciences.com
• At the beginning and the end of the lab procedure, all laboratory bench tops should be wiped down with a 10% bleach solution or disinfectant to ensure cleanliness.
• Place all bacteria-contaminated pipets and tips into a 10% bleach solution. Allow contaminated items to soak for 30 minutes before disposing. Autoclave broth and agar cultures in a biohazard bag before disposing.
• Remind students to wash their hands thoroughly with soap and water before leaving the laboratory.
The rAmylase Project by Ellyn Daugherty Transformation of E. coli with pAmylase (Lab 8c)
Teacher’s Guide
Page 6 of 16
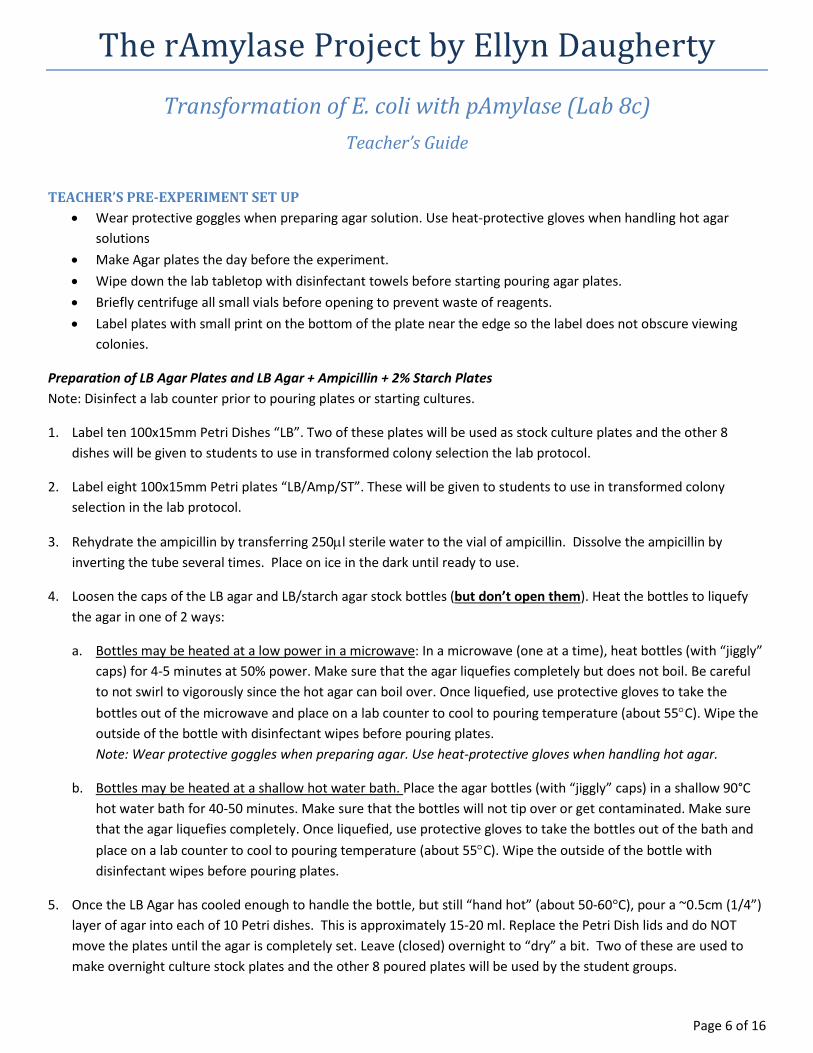
TEACHER’S PRE-EXPERIMENT SET UP • Wear protective goggles when preparing agar solution. Use heat-protective gloves when handling hot agar
solutions • Make Agar plates the day before the experiment. • Wipe down the lab tabletop with disinfectant towels before starting pouring agar plates. • Briefly centrifuge all small vials before opening to prevent waste of reagents. • Label plates with small print on the bottom of the plate near the edge so the label does not obscure viewing
colonies.
Preparation of LB Agar Plates and LB Agar + Ampicillin + 2% Starch Plates Note: Disinfect a lab counter prior to pouring plates or starting cultures.
1. Label ten 100x15mm Petri Dishes “LB”. Two of these plates will be used as stock culture plates and the other 8 dishes will be given to students to use in transformed colony selection the lab protocol.
2. Label eight 100x15mm Petri plates “LB/Amp/ST”. These will be given to students to use in transformed colony selection in the lab protocol.
3. Rehydrate the ampicillin by transferring 250µl sterile water to the vial of ampicillin. Dissolve the ampicillin by inverting the tube several times. Place on ice in the dark until ready to use.
4. Loosen the caps of the LB agar and LB/starch agar stock bottles (but don’t open them). Heat the bottles to liquefy the agar in one of 2 ways:
a. Bottles may be heated at a low power in a microwave: In a microwave (one at a time), heat bottles (with “jiggly” caps) for 4-5 minutes at 50% power. Make sure that the agar liquefies completely but does not boil. Be careful to not swirl to vigorously since the hot agar can boil over. Once liquefied, use protective gloves to take the bottles out of the microwave and place on a lab counter to cool to pouring temperature (about 55°C). Wipe the outside of the bottle with disinfectant wipes before pouring plates. Note: Wear protective goggles when preparing agar. Use heat-protective gloves when handling hot agar.
b. Bottles may be heated at a shallow hot water bath. Place the agar bottles (with “jiggly” caps) in a shallow 90°C hot water bath for 40-50 minutes. Make sure that the bottles will not tip over or get contaminated. Make sure that the agar liquefies completely. Once liquefied, use protective gloves to take the bottles out of the bath and place on a lab counter to cool to pouring temperature (about 55°C). Wipe the outside of the bottle with disinfectant wipes before pouring plates.
5. Once the LB Agar has cooled enough to handle the bottle, but still “hand hot” (about 50-60°C), pour a ~0.5cm (1/4”) layer of agar into each of 10 Petri dishes. This is approximately 15-20 ml. Replace the Petri Dish lids and do NOT move the plates until the agar is completely set. Leave (closed) overnight to “dry” a bit. Two of these are used to make overnight culture stock plates and the other 8 poured plates will be used by the student groups.

The rAmylase Project by Ellyn Daugherty Transformation of E. coli with pAmylase (Lab 8c)
Teacher’s Guide
Page 7 of 16
6. Once the LB/starch agar has cooled enough to handle, but still “hand hot” (about 50-60°C), quickly add 125µl ampicillin solution to each LB/starch agar bottle.
If the agar is too hot, the ampicillin antibiotic will be inactivated. The agar should be below 55°C.
7. Swirl until the LB/starch/amp agar is mixed. Do not allow to bubble or cool. Pour a ~0.5cm/ ¼” layer of LB/starch/amp agar into the 8 labeled Petri dishes. This is approximately 15-20ml. Replace the Petri Dish lids and do NOT move the plates until the agar is completely set. Leave (closed) overnight to “dry” a bit. Cover the plates with aluminum foil to keep them dark. Ampicillin is light-sensitive.
8. Once completely set, use the plates within 24-48 hours. For long-term storage, place in a disinfected plastic bag that can be sealed shut.
Prepare Bacterial Culture Plate and Broth Culture Tubes Note: Disinfect a lab counter prior to pouring plates or starting cultures.
1. The day before experimentation, using a sterile micropipette, transfer 0.8ml LB broth from one of the 2ml LB Broth vials to the bacterial agar stab and incubate at 37°C for 30 minutes.
2. Vigorously shake or vortex for 1-2 minutes, then transfer 0.1ml onto the center of the agar in each plate. Making sweeping motions with an inoculating loop, spread bacteria over the surface of the agar. Cover the entire plate with the sample. Turn the plates upside down and incubate at 37°C for 24 hours. Small round colonies of E. coli DH5α should appear in 12-14 hours. After 24 hours, the colonies should be about 2-3mm in diameter.
3. Label 8 sterile culture tubes “E. coli in LB Broth.” Pour approximately 5ml of sterile LB broth into each sterile tube.
Miscellaneous preparation 1. Prepare iceboxes of crushed ice for each group and a warm water bath at 42°C.
2. Distribute the following items to each lab group:
• One culture tube containing 5ml of sterile LB broth • 2 Microcentrifuge Tubes (2ml) • 3 sterile Inoculating Loops • 1 sterile LB Agar plate (20ml) • 1 sterile LB Agar/amp/2% starch plate (20ml) • 1 tube of Competent Buffer, ice-cold (450µl) • 1 tube of Sterile, Deionized Water (2ml) • 1 tubes of 0.08µg/µl pAmylase2014 Plasmid (7µl) • 1 microcentrifuge tube of sterile LB Broth (2ml)

The rAmylase Project by Ellyn Daugherty Transformation of E. coli with pAmylase (Lab 8c)
Teacher’s Guide
Page 8 of 16
TIME REQUIRED • 1 hour pre-lab (pouring of plates and distribution of reagents) • Two 1 hour lab period (to prepare competent cells and do the transformation and selection) • 1 hour post-lab analysis
NEXT GENERATION SCIENCE STANDARDS ADDRESSED • HS-LS1: From Molecules to Organisms: Structures and Processes • LS1.A: Structure and Function
For more information about Next Generation Science Standards, visit: http://www.nextgenscience.org/
EXPECTED RESULTS
Figure: Transformed bacterial colonies grown on an LB/Starch/Amp plate clearly show the breakdown of starch, due to amylase activity producing a clear background after incubation at 4°C.

The rAmylase Project by Ellyn Daugherty Transformation of E. coli with pAmylase (Lab 8c)
Teacher’s Guide
Page 9 of 16
ANSWERS TO ADDITIONAL QUESTIONS 1. Explain how a D plate could have absolutely nothing growing on it.
Answers will vary, but the easiest way not to have cell growth is “frying” the bacteria with a superheated inoculating looping. Also, if no cells got plasmid, then they would all be sensitive to the agar, and there would be no growth.
2. Sometimes, smaller non-transformed satellite colonies are seen around a central transformed colony. Are there any satellite colonies on your plates? Record the satellite colonies’ morphology (size, shape, and color) compared with the transformed colonies and reasons for any difference. Answer: Satellite colonies are relatively small and only grow around the colony where the amp-digesting enzyme diffuses out and destroys the ampicillin in the agar.
3. Not all the cells in the original culture are transformed. What evidence do you have to support this statement? Determine the transformation efficiency (number of colonies/μg of DNA) of your protocol. Answer: Cells from the transformed broth culture can be plated out as a 1:10, 1:100,1:1000, or 1:10,000 serial dilutions on starch/amp LB agar. The number of colonies per unit volume in the original transformed culture can be calculated by multiplying the number of colonies counted in one of the dilutions by the dilution factor. This will give the μg of DNA. This gives the transformation efficiency. A ratio of 1:10,000 transformed cells (0.01%) is considered a good result. Answers will vary, but transformation efficiencies will vary depending on the number of colonies on the selection plate.

The rAmylase Project by Ellyn Daugherty Transformation of E. coli with pAmylase (Lab 8c)
Student’s Guide
Page 10 of 16
OBJECTIVES To transform E. coli with a "recombinant" pAmy plasmid, which contains a gene for ampicillin resistance and a gene for amylase production.
To demonstrate that the transformation was successful and that the newly inserted genes are being expressed by the transformed E. coli cells.
BACKGROUND In the 1970s, scientists wanted to develop an economical method of producing large quantities of amylase. E. coli is a bacterium with an excellent transformation "track record." While it does not make amylase in nature, E. coli can be transformed in the laboratory to produce amylase.
Transforming E. coli takes several steps. First, the gene of interest (in this case, the amylase gene) must be inserted into a plasmid that contains an additional selection gene. In this activity, a pAmylase plasmid (pAmy) is used. pAmylase contains both the amylase production gene (from Geobacillus stearothermophilus) and the ampicillin resistance gene (AmpR) from pUC18. The AmpR gene produces an enzyme that destroys ampicillin in the media on which the bacteria grow. Ampicillin would normally delay the growth of E. coli cells, but if the cells acquire the AmpR gene, they can survive in its presence.
To transform E. coli cells, researchers first grow them in broth culture and then make them competent, or more likely to take up pieces of foreign DNA. Scientists are not sure what happens when cells are made competent, but it is thought that the competency enlarges channels in the cells' membranes, making it easier for plasmids to get into the cells. Competency may be induced by treatment with divalent cations such as CaCl2 or MgCl2 or electrically using a process called electroporation. Electroporation is not practical for most academic labs due to the cost and special equipment required. In the following protocol, cells are made competent using CaCl2.
The competent cells are mixed with the recombinant pAmylase plasmid. A heat shock, followed by a cold shock, is given to the mixture, and plasmids are drawn in and trapped inside the cells. Next, the cells are grown in recovery broth, which gives them time to repair their damaged membranes and express their new genes. The culture, containing a mix of transformed and non-transformed cells, is plated on selection media containing ampicillin and starch. Only transformed cells will be able to grow on the ampicillin-containing, starch-agar selection media.
Under the best circumstances, transformation efficiency occurs in only about one in 10,000 cells. The transformed cells are deposited on the selection media, where they grow into colonies. Each cell in the colony is a clone of the original cell deposited in that location. All the cells in the clone contain the new DNA (a new genotype), and they will express the new characteristics (new phenotypes), in this case, ampicillin resistance and amylase production. If the transformation is successful, a colony of cells can be grown in broth and scaled-up into larger volumes for manufacturing purposes.

The rAmylase Project by Ellyn Daugherty Transformation of E. coli with pAmylase (Lab 8c)
Student’s Guide
Page 11 of 16
pAmylase2014 Plasmid. pAmylase contains the amylase gene. In cells, the amylase gene is transcribed and amylase is produced. Starch clearing occurs on Luria Bertani (LB) starch agar plates around colonies that are transformed with pAmylase. An AmpR gene is also part of pAmylase. The Amp" gene allows a second way to detect that the plasmid got into cells, since only E. coli cells transformed with the Amp1^ gene will grow on ampicillin agar

The rAmylase Project by Ellyn Daugherty Transformation of E. coli with pAmylase (Lab 8c)
Student’s Guide
Page 12 of 16
MATERIALS FOR EACH GROUP Supply each group with the following components. Several components will be shared by the whole class and should be kept on a communal table.
• One culture tube containing 5ml of sterile LB broth • 2 Microcentrifuge Tubes (2ml) • 3 sterile Inoculating Loops • 1 sterile LB Agar plate (20ml) • 1 sterile LB Agar/amp/2% starch plate (20ml) • 1 tube of Competent Buffer, ice-cold (250µl) • 1 tube of Sterile, Deionized Water (2ml) • 1 tubes of 0.08µg/µl pAmylase2014 Plasmid (7µl) • 1 microcentrifuge tube of sterile LB Broth (2ml)
Several components will be shared by the whole class and should be kept on a communal, disinfected lab table used for starting the broth cultures.
• 2 plates of DH5α bacteria colonies • Disinfectant wipes • Trash container containing 10% bleach • Biohazard bag
PROCEDURE • Use sterile technique throughout the procedure. Use a laminar flow hood, if available. • Keep cells on ice unless otherwise directed. • Dispose of all biohazards appropriately.
I. Preparing & Transforming Competent Cells 1. Being careful to not introduce contamination, use a sterile inoculating loop, to pick up a single colony of DH5α
bacteria, from the shared plate of DH5α bacteria colonies. Swirl the loopful of bacteria directly into sterile LB broth in a culture tube. Cap the tube and finger-flick the broth to distribute the cells. Be sure the bacteria are well suspended. Label the tube with your group’s initials.
2. Incubate the cultures at 37°C for 24 hours in a shaking (250 rpm) hot water bath or shaking incubator.
3. Label two 2ml centrifuge tube with initials and the label one of the tubes with “pAmy” and the other “-C” (for the negative control).
4. Finger-flick the overnight culture tube to resuspend the cells. Using a sterile P-1000 tip, transfer 1.5ml of overnight culture to each of the 2ml centrifuge tubes.

The rAmylase Project by Ellyn Daugherty Transformation of E. coli with pAmylase (Lab 8c)
Student’s Guide
Page 13 of 16
5. Spin the 2 tubes at 5,000rpm for 3 minutes to pellet the bacteria. The cells will pellet at the bottom. Carefully pour off and discard the supernatant into a trash container containing 10% bleach. Save the cell pellet.
6. Using a micropipet and sterile tip, add 100µl of ice cold Competent Buffer to each pellet as a wash. Gently pipette up and down to suspend the pellet completely. Immediately, proceed to step 7.
7. Spin the 2 tubes at 5,000rpm for 3 minutes to pellet the bacteria. Carefully pour off and discard the supernatant into a trash container containing 10% bleach. Save the cell pellet.
8. Using a micropipet and sterile tip, add 100µl of ice cold Competent Buffer to each pellet. Gently pipette up and down to suspend the pellet completely. The Competent Buffer contains a calcium salt that alters the outer walls of bacteria, permitting foreign plasmid DNA to enter the bacteria.
9. Check to make sure that the competent cell mixture is very cloudy with bacteria. Gently finger-flick the tube to ensure that no bacteria are lying on the bottom of the tube. Be gentle with these cells; they are fragile and can burst and die easily.
10. Keep all the tubes on ice and keep very cold through Step 12.
11. Add 5µl of sterile distilled water to Tube “-C”. Mix by finger-flicking. Wrist-flick the sample to pool the reagents. Return Tube “-C” to ice.
12. Add 5µl of 0.08µg/µl pAmylase2014 to the tubes labeled with your name. Pipet the plasmid directly into the cell suspension. Mix by finger-flicking. Wrist-flick the sample to pool the reagents. Return all tubes to ice.
13. Leave the cells on ice for a minimum of 30 minutes.
14. After 30 minutes, move your ice bath containing your tubes and the control tube next to the hot water bath. Make sure the tubes are tightly closed. As quickly as possible, transfer both tubes from the ice to the 42°C water bath for a "heat shock" of exactly 90 sec. Move the tubes as quickly as possible since the more distinct the heat shock, the greater the transformation efficiency.
15. After 90 seconds, quickly return the tubes to the ice bath for 2 minutes. Move the tubes as quickly as possible from the heat to the cold. The more distinct the cold shock, the greater the transformation efficiency.
16. Using a sterile tip, add 250µl of sterile LB broth to each tube. Mix by finger flicking. Wrist-flick the sample to pool the reagents.
17. Incubate the tubes at 37°C for 30 to 45 minutes before plating. NOTE: You may stop at this point and store the tubes in the refrigerator overnight.

The rAmylase Project by Ellyn Daugherty Transformation of E. coli with pAmylase (Lab 8c)
Student’s Guide
Page 14 of 16
II. Plating the Bacteria on Selection Media 1. Disinfect the countertop by cleaning with disinfectant. Disinfect hands by thorough washing with hand soap or by
using a hand disinfectant/sanitizer. Use a laminar flow hood, if available.
2. Obtain one plate of LB/amp/2% starch agar (selection plates) and one plate of LB agar (control). Label the plates with the group’s initials. Draw a line down the center of each plate and label one side “pAmy” and the other side “-C”.
3. Using a sterile pipette tip, pipette 60µl of the pAmy-transformed bacteria onto the “pAmy” section of each plate and spread around the “pAmy” section with a sterile inoculating loop. Discard the loop in the disinfectant waste container.
4. Using a sterile pipette tip, pipette 60µl of the “-C” bacteria onto the “-C” section of each plate and spread around the “-C” section with a sterile inoculating loop. Discard the loop in the disinfectant waste container.
5. Leave the plates, covered, on the countertop, undisturbed, flat, and right side up for 5 minutes so the suspension will be absorbed by the agar.
6. Invert the plates, stack them together, and place them upside down, in a 37°C incubator for 30-36 hours. Then incubate, upside-down at 4°C for 24 hours. For longer storage wrap the plates in parafilm or store in an airtight container or sealed in saranwrap.
7. Disinfect countertop, and wash your hands.
8. In your notebook, record your predictions about where colonies should grow on your plates. Consider which samples were spread on what type of agar. Think about and record the numbers of colonies you expect to see.
III. Observing and Recording Your Transformation Results 1. Retrieve the Petri plates from the incubator or refrigerator. Look very closely for bacterial growth. Hold your plates
up to the light or against a dark background to help visualize the transformed colonies. Look for "halos," areas of clearing around colonies. Halos result when transformed bacteria produce amylase, because the amylase diffuses out and breaks down the starch in the agar around the colony. By placing the Petri plates in the refrigerator overnight, the halos become much more visible.
2. Observe, draw, and label the plates showing all colonies and any halos. Measure so the drawing is accurate.
3. Count the number of colonies (or do sampling and then multiply) on each plate. Record these data.
4. Discard plates into the biohazard bag. Disinfect countertop, and wash your hands.

The rAmylase Project by Ellyn Daugherty Transformation of E. coli with pAmylase (Lab 8c)
Student’s Guide
Page 15 of 16
DATA ANALYSIS & CONCLUSION Was the transformation protocol successful in creating amylase-producing, ampicillin-resistant E. coli cells? Give evidence and explanations about what happened on each selection plate.
Compare your plates with others in the class. What does your transformation efficiency look like compared with that of other groups? Identify three techniques that could have resulted in poor transformation efficiency. If any plate produced any colonies of transformed cells, describe what should be done next with those cells.
ADDITIONAL QUESTIONS 1. Explain how a D plate could have absolutely nothing growing on it.
2. Sometimes, smaller non-transformed satellite colonies are seen around a central transformed colony. Are there any satellite colonies on your plates? Record the satellite colonies’ morphology (size, shape, and color) compared with the transformed colonies and reasons for any difference.
3. Not all the cells in the original culture are transformed. What evidence do you have to support this statement? Determine the transformation efficiency (number of colonies/μg of DNA) of your protocol.
Last saved: 6/19/2017 CMH

www.GBiosciences.com